• Skip to main content

Abbey's Kitchen

Healthy Recipes, Nutrition Myth Busting, Healthy Eating Tips

  • Books
    • HCC™
    • The Mindful Glow Cookbook
    • Recipe eBooks
      • Family
      • Hypothyroidism
      • BLW
      • Vegan Week 1
      • Vegan Week 2
      • Vegan Week 3
      • Keto
      • Gluten Free Week 1
      • Gluten Free Week 2
      • Fitness
      • Paleo
  • Blog
    • Nutrition
    • Recipes
    • Motherhood
    • Life
  • Explore
    • Neue Theory™
    • Bite Back With Abbey Sharp
      • Apple Music
      • Spotify
      • Amazon Music
    • YouTube
  • Abbey
    • About
    • Coaching
    • Contact

Abbey Sharp

Last Updated November 15, 2021. Published April 17, 2015 By Abbey Sharp 1 Comment

Healthy Lemon Ricotta Pancakes for Mother’s Day Brunch

Mother’s Day is around the corner and that means celebrating the special women who have spent the greater parts of their lives ensuring we grow up into happy, healthy men and women. Moms go to great lengths to nourish our bodies, minds and souls, which is why I think it’s nice to treat her to something delicious like lemon ricotta pancakes on her special day. I mean, sure, when it comes to token M-Day gifts, you can pick up a sappy card, buy her a mani-pedi, or grab a box of chocolates from the drug store, but nothing says I Love You like a homemade meal. And since we want to indulge mom, but also keep her strong and healthy for many years to come, I think it’s nice to pick a menu that’s a bit lighter and nutrient-rich.

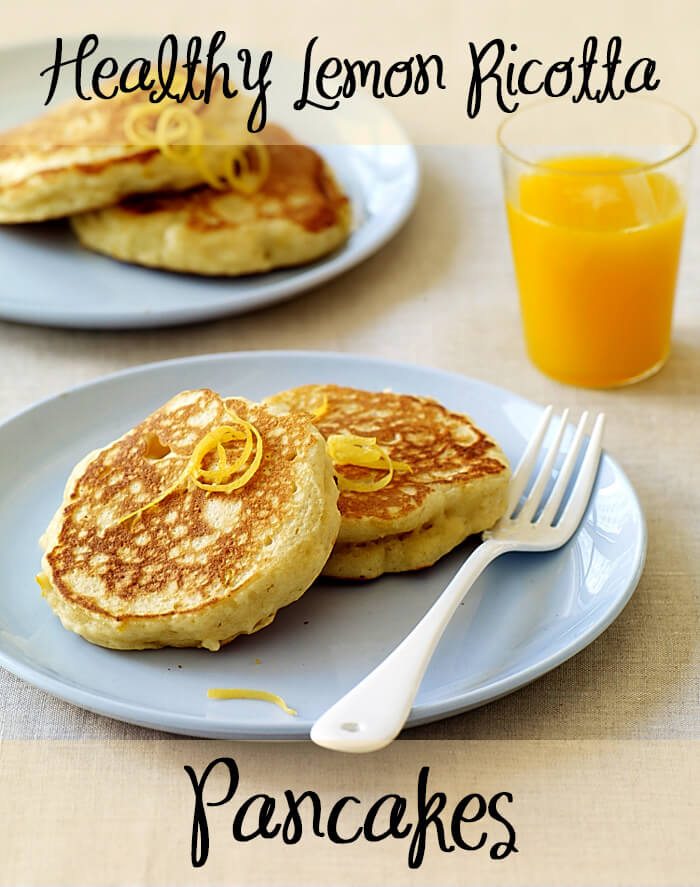
Mom’s Love Healthy Ricotta Pancakes

This incredible Weight Watchers recipe for Fluffy Lemon Ricotta Pancakes is perfect for a spring brunch for mom and the rest of the family. It’s one of my absolute favourite healthy breakfast recipes available to WW members because it feels inherently decadent and nothing like “diet-food,” but only has 5 WW points per serving! Food-loving WW members have access to oodles of unique, crowd-pleasing and inherently nutritious recipes to help them meet and maintain their healthy living goals. That kind of on-going support is definitely one of the huge benefits to becoming and remaining a member over the years as they’re always coming up with new ideas to keep me inspired and on track. To take advantage of Weight Watchers’ massive recipe bank and check out their unique new 24/7 Chat feature which I reviewed about here (insert link), check out their website here.

In the meantime, enjoy these luxuriously light healthy ricotta pancakes with mom and the rest of your family and friends. They have become a Sunday morning staple in my house thanks to their ethereal pillow-like texture, and that subtle citrus flavour from the lemon zest. If you think your favourite pancake recipe is light, moist and fluffy- just wait until you tuck into a stack of these! You can make them even more decadent by candying some lemon zest in simple syrup and sprinkling them lightly with pretty powdered sugar.

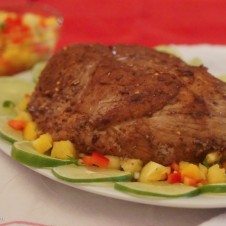
For a perfectly balanced brunch, I would serve these healthy ricotta pancakes with simply poached eggs, a seasonal fruit salad, and lots of French press coffee! You can also make a double batch, wrap them in tin foil and freeze them for a grab and go breakfast for busy mornings.

What are your favourite healthy pancakes recipes? Have you tried making ricotta pancakes? A big happy Mother’s Day to you and the special ladies in your life. I hope these pancakes make it a delicious day! Leave us a comment with your Mother’s Day plans!

A plate of pancakes with text overlay \"Healthy Lemon Ricotta Pancakes.\"

Print Recipe
5 from 4 votes

Healthy Lemon Ricotta Pancakes

This incredible Weight Watchers recipe for Fluffy Lemon Ricotta Pancakes is perfect for a spring brunch for mom and the rest of the family.
Prep Time15 minutes mins
Cook Time6 minutes mins
Total Time21 minutes mins
Course: Breakfast
Cuisine: American
Servings: 6 people
Calories: 310kcal
Author: Abbey Sharp

Ingredients

  • 1 1/2 cups all purpose flour
  • 1 tsp baking soda
  • 1/2 tsp table salt
  • 1 cup low-fat buttermilk
  • 2 large eggs yolks and whites separated
  • 2 tbsp sugar
  • 2 tbsp lemon zest or more to taste
  • 1/2 cup part-skim ricotta cheese
  • 3 sprays non-stick cooking spray

Instructions

  • In a small bowl, whisk together flour, baking soda and salt.
  • In a large bowl, beat together buttermilk, egg yolks, sugar, lemon zest and ricotta cheese by hand.
  • In a clean bowl, using an electric mixer, beat egg whites until soft peaks form.
  • Add dry ingredients to buttermilk mixture until just combined; gently fold in egg whites until they are just incorporated.
  • Coat a large nonstick griddle or pan with cooking spray; heat over medium heat. Spoon batter into pan in batches using 60ml (1/4-cup) batter for each pancake; cook until lightly browned, about 2 to 3 minutes per side. Remove pancakes to a tray in a warm oven and repeat with remaining ingredients (being careful not to spray cooking spray into open flame). Yields 2 pancakes per serving.

Nutrition

Calories: 310kcal
Abbey Sharp

Abbey Sharp is a Registered Dietitian (RD), regulated by the Ontario College of Dietitians. She is a mom, YouTuber, Blogger, award winning cookbook author, media coach specializing in food and nutrition influencers, and a frequent contributor to national publications like Healthline and on national broadcast TV shows.

www.abbeyskitchen.com/about-abbey/

Last Updated April 14, 2015. Published April 14, 2015 By Abbey Sharp 6 Comments

Quinoa Coconut Energy Balls | Post Workout Snack

These quinoa coconut energy balls are the perfect post workout snack or any snack to get you through the day! 
 
With Summer around the corner, and lots of reasons to celebrate (like my big engagement party bash in August), I know it’s time to put a little more effort in at the gym, and make the most nutritious and mindful snacking choices. And that’s why I love making these quinoa coconut energy balls.
 
quinoa_energy_bites_2_of_5.jpg

Energy balls have become my go to fuel for getting me through longer work days and tougher workouts. It’s important to keep lots of nutrient-dense snacks on hand so that I can avoid the workplace candy dish or vending machine. That means looking for snacks that pack a combination of protein, fibre, healthy fats and some carbs for energy. Introducing my new go to snack, my  No-Bake Tropical Quinoa Gluten Free Energy Balls. They may look small, but each moist nutty bite is packed with some serious nutritional powerhouses like quinoa, flax and my go to snack- almonds. Almonds are loaded with heart healthy monounsaturated fats, and have a great balance of fibre and protein to help keep me full longer. They also act as a fantastic low-sugar “glue” to hold all of the other healthy ingredients together so you can avoid having to turn on the oven all together. These gluten free energy balls are such an easy snack.

quinoa_energy_bites_3_of_5.jpg

tips for making these Quinoa coconut energy balls

I generally will make a huge batch of these quinoa coconut energy balls and package enough for the week in little baggies. I then take whatever’s leftover, throw them onto a baking tray, freeze until solid, and transfer to a freezer bag until I’m ready to use them. You can easily pop these babies in your gym bag, purse, brief case or car for a sustaining nourishing snack.

Feel free to get creative and personalize your own family’s energy balls. You can add in whatever dried fruit you like, play with the sugar amount if you want a sweeter after dinner treat or swap the quinoa for another cooked whole grain.


Give these babies a try and let me know what you think by leaving me a comment below. What’s our favourite add ins for energy balls? Happy snacking!

Print Recipe
5 from 3 votes

Gluten Free Energy Balls with Quinoa & Coconut

These gluten free energy balls with quinoa are the perfect post workout snack or any snack to get you through the day! 
Prep Time15 minutes mins
Total Time15 minutes mins
Course: Snack
Cuisine: American
Servings: 32 Pieces
Calories: 78kcal
Author: Abbey Sharp

Ingredients

  • 2 cups cooked quinoa
  • 1/2 cup unsweetened toasted shredded coconut
  • 1/2 cup plus 2 tbsp natural almond butter
  • 2/3 cup flax seeds ground
  • 2 tbsp honey
  • 1/3 cup dried freeze dried mango minced
  • Pinch salt
  • Additional toasted unsweetened shredded coconut for sprinkling (if desired)

Instructions

  • Mix together the quinoa, coconut, almond butter, flax, honey, mango and a pinch of salt.
  • Roll into 32 balls.

Nutrition

Calories: 78kcal | Carbohydrates: 7g | Protein: 2g | Fat: 5g | Saturated Fat: 1g | Sodium: 3mg | Potassium: 85mg | Fiber: 2g | Sugar: 3g | Vitamin A: 259IU | Vitamin C: 1mg | Calcium: 26mg | Iron: 1mg
Abbey Sharp

Abbey Sharp is a Registered Dietitian (RD), regulated by the Ontario College of Dietitians. She is a mom, YouTuber, Blogger, award winning cookbook author, media coach specializing in food and nutrition influencers, and a frequent contributor to national publications like Healthline and on national broadcast TV shows.

www.abbeyskitchen.com/about-abbey/

Last Updated October 23, 2020. Published April 9, 2015 By Abbey Sharp Leave a Comment

Cookina Barbeque Reusable Grilling Sheet Review

Have you heard about Cookina? If you’re into grilling this Summer, you’re definitely going to want to check this out. With Spring in full gear, and BBQ season around the corner, we’ve all got juicy steaks, saucy ribs and beer-can chicken on the brain. Unfortunately, that enthusiasm is usually short lived after you get a look at the grit and grime caked on from last summer’s Labour Day bash. Admittedly, I also get a little anxious remembering the huge range of dietary restrictions I often have to cater to at my parties. I mean, I don’t know about you, but most of my vegetarian friends aren’t cool with their asparagus touching the same grill that I previously cooked my steak.
cookina_1_of_5.jpg

That’s why I’m planning to enter grilling season with a new friend in my BBQ belt called the Cookina Barbeque Reusable Grilling Sheet. Honestly, this thing is perfect for any foodie who just wants to sit down and enjoy the fruits (or meats) of their labour rather than putting their back out trying to violently scrape down their grill. It also makes for a healthier meal because the non-stick surface allows you to forgo the extra oil, while preventing you from any unwanted flares. That means fewer burnt burgers, and lower risk of possible carcinogens in your meal.

cookina_2_of_5.jpg

So here’s the tried and tested 411. You lay down a Cookina Barbeque sheet on your grill as it heats up—this baby is completely heat resistant up to 550° F! Not only does it actually produce those sexy Summer foodporn grill lines, but it also helps retain heat like a BBQ plate for flawless even cooking. You can also just wipe it down between uses to remove any cooking juices, flavours and odours, meaning you can cook Uncle Joe’s rare bloody lamb chops, wipe it down, and then caramelize fresh pineapple for dessert. And no, it won’t taste or smell anything like meat!

I am absolutely dying to bust out my Cookina sheet this summer with all my favourite grillable recipes. I could whip up my Vegan Asian Grilled Corn Salad with Coconut milk Dressing, then switch gears to make my Beer Marinated Flank Steak Bruschetta!

beef_canada_flank_steak_1_of_3.jpg

If you want to pick one up for yourself or as a great hostess gift for backyard parties, Cookina can be found at most home and cooking stores like Canadian Tire, Home Depot, RONA, Home Hardware, Metro, Sobeys/IGA and Costco.ca. You can find out more about the product by visiting their website at cookina.co !


What grilling recipes do you have in your repertoire that would benefit from the Cookina Barbeque Reusable Grilling Sheet? What gross leftover bits have been hanging out on your grates since last Summer? Tweet or instagram to me with the hashtag #WhatsOnYourGrill with your grilling confessions! I’m looking forward to seeing your healthy creations made easier on the grill!

Disclaimer: The preceding post was developed as part of an Ambassador program between Abbey Sharp and Cookina, however, as always, all opinions are genuine.

Abbey Sharp

Abbey Sharp is a Registered Dietitian (RD), regulated by the Ontario College of Dietitians. She is a mom, YouTuber, Blogger, award winning cookbook author, media coach specializing in food and nutrition influencers, and a frequent contributor to national publications like Healthline and on national broadcast TV shows.

www.abbeyskitchen.com/about-abbey/

Last Updated October 23, 2020. Published March 24, 2015 By Abbey Sharp 6 Comments

Quinoa Risotto (Quinotto) – Low Fat & Gluten Free

risotto, quinoa risotto, quinotto, healthy low fat risotto
I recently had an amazing dish at Mata Bar’s – a Vegetarian Quinoa Risotto (aka. Quin-otto) that was gluten free and low in fat. I was pretty determined to make my own version at home where I knew I could control the calories and fat. Because let’s be honest, I know how many calories an average meal out can pack. Spoiler alert- it’s probably more than any of us need. Even the most health-conscious options are often loaded with fat, sugar and salt, making dining out regularly and managing your weight seem like an impossible task. Trust me, I spend enough hours in the gym to testify to that.
quinoa_risotto_4_of_5.jpg

Well, to bridge the gap between delicious restaurant fare and calorie-conscious home cooking, I teamed up with Sobeys to satisfy my Culinary Cravings with a little dish quinoa risotto do-over at home.

A bowl of mushroom quinoa risotto.

Photo Credit: Goat Roti Chronicals

We all know quinoa is a super healthy grain- it’s high in protein and fibre, it’s low on the glycemic index and it’s naturally gluten free, so this automatically got my attention as a unique dish to try to make at home. And while quinoa risotto may sound healthy, in a restaurant, it’s sure to be packed with butter and cheese to make it creamy.  I knew I would have my work cut out for me.

Quinoa Risotto 101

But before I got down to calorie cutting, I wanted to nail the technique, so I called up Chef Felipe Faccioli from Mata Bar for the 411 on his popular Quinoa Risotto. His restaurant serves up some pretty delicious South American fare, and I knew he would be happy to help me nail this recipe. He told me that in South America, quinoa is a very popular crop so while its still a relatively new hot food here, they’ve been using it for generations in a quinoa risotto style dish called Quin-otto.

quinoa_risotto_1_of_5.jpg

Unlike Italian Arborio rice, quinoa isn’t a very starchy grain, so slowly adding in the hot stock doesn’t do all that much. Alternatively, Chef Felipe cooks the quinoa first before making it into quinoa risotto and then makes it creamy with loads of butter and Reggianito cheese, which is cheese from Argentina that originated when immigrant Italians tried to make cheese reminiscent of their famous Parmigiano Reggiano. I love butter and cheese, but I knew I would have to cut this stuff back. On the other hand, Chef Felipe also adds huge low-cal flavour in some unique ways I was totally going to steal. For example, he makes his own mushroom stock and he grinds up porcinis and adds the powder to add big umami flavour. He also gave me a great low-fat cooking tip that even I hadn’t tried before. While he doesn’t do this in the restaurant version himself, he told me that one thing they do in South America is puree hearts of palm into a thick white sauce in place of a lot of butter or cream. How hadn’t I tried this before? I was dying to give it a go.

quinoa_risotto_3_of_5.jpg

My first duty was to head to Sobeys and pick up all of the ingredients for my quinoa risotto adventures. I wanted to make a stock myself since mushroom stocks are hard to find, and generally really salty when you do. When I make my vegetable stocks, I like to lightly sauté everything in a spot of olive oil just to give a light caramelized flavour before adding in the water. Next, I grinded up the dried porcinis into a powder. You can sometimes find porcini powder but it’s way cheaper to just grind it up yourself. Then I used my stock and the powder to cook my tri-coloured quinoa (but you can use whatever quinoa you have on hand). Meanwhile, I sautéed up a variety of mushrooms that I found in the produce department at Sobeys and moved on to make the “creamy” hearts of palm sauce. This was ultimately what scared me. I gave the hearts of palm a really good rinse to get rid of the briny liquid, then pureed it with just enough milk to keep it going. Now it was time to assemble my quinoa risotto.

quinoa_risotto_5_of_5.jpg

Once the quinoa was cooked, in went the hearts of palm, cheese, mushrooms, frozen peas (they thaw out in a sec), and a little extra milk to thin it out. My George- the faux cream sauce actually worked!! And no, it didn’t taste like strange acidic canned veg. Culinary Cravings satisfied!

Check out this gluten free, vegetarian recipe for quinoa risotto and let me know what you think! Do you have a restaurant dish you’d like to see recreated? Leave a comment below or send me a tweet with the hashtag #BetterFoodForAll – you might just see your request on the blog!

quinoa_risotto_2_of_5.jpg
Print Recipe
5 from 1 vote

Sneaky Low-Fat Mushroom Quinoa Risotto (Quinotto)

Inspired by an amazing dish I had at Mata Bar’s, I was determined to make a low fat and low calories mushroom risotto (aka quinotto).
Prep Time15 minutes mins
Cook Time36 minutes mins
Total Time51 minutes mins
Course: Dinner
Cuisine: Italian
Servings: 4 people
Calories: 340kcal
Author: Abbey Sharp

Ingredients

Mushroom Stock

  • 1 small carrot peeled and diced
  • 1/2 onion diced
  • 3 cloves garlic minced
  • 1 lb button mushrooms sliced with stems + any stems from the sauteed mushrooms (below)
  • 4 Italian parsley sprigs
  • 5 leaves thyme
  • 1 bay leaf
  • 1 tsp black peppercorns
  • 6 cups water

Mushrooms

  • 0.5 oz package of dried porcini mushrooms
  • 398 ml can of Hearts of palm rinsed well
  • 1/3 cup fat free milk
  • Salt and pepper
  • 2 tsp olive oil
  • 2 lb assorted mushrooms sliced
  • 2 cloves garlic minced
  • 4 leaves sprigs thyme removed
  • Salt and pepper to taste

Quinoa

  • 2 tsp olive oil
  • 1 cup quinoa rinsed well
  • 1/2 cup dry white wine
  • 2 cups prepared mushroom stock see above
  • 1/4 cup porcini powder see above
  • 2 oz Parmigiano Reggiano cheese finely grated
  • 1/4 cup reduced fat ricotta cheese
  • 1/2 cup fat free milk
  • 1/2 cup frozen peas
  • Salt and pepper to taste
  • 1/4 cup Italian parsley finely chopped

Instructions

Mushroom Stock

  • Heat the oil in a large pot over medium-high heat. Add in the carrot and onion and cook, stirring occasionally, until the onions have softened, about 7 minutes. Add the garlic and cook, stirring occasionally, until fragrant, about 30 seconds.
  • Add the mushrooms, parsley, thyme, bay leaf, and peppercorns and cook for 5 minutes.
  • Add the water and bring up to a boil. Reduce the heat to low and simmer for an hour.
  • Strain through a fine-mesh strainer (discard the vegetable and herbs) and season with salt to taste. This can be made 3 days in advance or frozen 1-2 months in advance.

Mushrooms

  • Put the dried porcinis in a spice grinder or food processor and pulse until they reach a powder consistency. Set aside.
  • Add the hearts of palm and milk along with a pinch each of salt and pepper to the food processor and puree until smooth. Set aside.
  • Preheat the pan to medium high heat and add the olive oil. Once hot, add the mushrooms, garlic and thyme and cook until browned and tender, about 10 minutes. Season with salt and pepper to taste, remove from heat and set aside.

Quinoa

  • Preheat the olive oil in a medium saucepan over medium heat. Add in the quinoa and toss until coated.
  • Add in the white wine and let it evaporate.
  • Add in the stock and porcini powder and cook over medium low for about 10-12 minutes, or until the stock is almost fully absorbed.
  • Fold in the pureed artichoke hearts and stir until creamy and thick.

Assembly

  • Stir in the parmesan cheese, ricotta cheese, prepared mushrooms, peas, and milk and season with a pinch of salt and pepper, to taste.
  • Garnish with Italian parsley and additional grated cheese, if desired.

Nutrition

Calories: 340kcal

Disclaimer: The author has received consideration from Sobeys or Sobeys’ media partners in exchange for this content.  Sobeys has not reviewed these claims and is not responsible for the content.

Abbey Sharp

Abbey Sharp is a Registered Dietitian (RD), regulated by the Ontario College of Dietitians. She is a mom, YouTuber, Blogger, award winning cookbook author, media coach specializing in food and nutrition influencers, and a frequent contributor to national publications like Healthline and on national broadcast TV shows.

www.abbeyskitchen.com/about-abbey/

Last Updated March 20, 2015. Published March 20, 2015 By Abbey Sharp 8 Comments

Port Braised Short Ribs on Pappardelle

When special occasions creep up- like birthdays or holidays or even Saturdays (because sometimes we need to celebrate those too)- I try to bust out a slow and low recipe and cook at home. Something decadent and delicious like braised short ribs. Mmmm.. OMG. Braised short ribs are definitely a little more indulgent then what I would have time to whip up on a crazy weeknight between dance class and improv and everything else. Cooking at home is often a lot more exciting for me then eating out because it means I can literally have anything, have as much of it as I want, and do it all for a lot less cash.
short_rib_pappardelle_3_of_8.jpg

So when Valentines Day came around, I decided I wanted to stay in and make braised short ribs in my new Le Creuset Dutch Oven (thanks Mom!!).  Do you have a Le Creuset? No? You really should. These babies are built to last literally a lifetime and probably more! Seriously, my mom got hers as a wedding gift about 30 years ago, and its still in perfect condition today. Have you made braised short ribs with luscious port wine? OMG. You really should do that too.

short_rib_pappardelle_6_of_8.jpg

Well these braised short ribs are ideal for the Dutch oven because it allows you to get that beautiful sear, lots of tasty fonds (those browned stuck on bits), and then pop a lid on and cook it in the oven for 3 hours or so. It’s weekend eating at its absolute best, and honestly better than any overpriced V-Day prix-fixe can ever be.

short_rib_pappardelle_7_of_8.jpg

Braised Short Ribs Meet Port & Pasta = Heaven

This recipe for braised short ribs on pappardelle pasta was adapted from Bobby Flay’s version and despite being pretty easy to pull off, it will blow your socks off anyone you want to impress. Seriously, my fiancé is hyper-critical and he was raving about it for days after. The secret? Patience. You can’t rush short ribs, they need the time in a tasty boozy liquid to get tender and sweet. My goodness, my mouth is watering just reliving this meal. So I’m going to go have a snack before I have a foodgasm, and will just leave this here for your next weekend cooking project. Enjoy!

short_rib_pappardelle_8_of_8.jpg
Print Recipe
5 from 2 votes

Port Braised Short Rib Pappardelle

This recipe for braised short ribs on pappardelle pasta was adapted from Bobby Flay’s version and despite being pretty easy to pull off, it will blow your socks off anyone you want to impress. 
Prep Time15 minutes mins
Cook Time3 hours hrs
Total Time3 hours hrs 15 minutes mins
Course: Dinner
Cuisine: American
Servings: 4 people
Calories: 420kcal
Author: Abbey Sharp

Ingredients

  • 1 sprig rosemary
  • 3 sprigs thyme
  • 1 bay leaf
  • 1 small handful of parsley
  • 150 g pancetta diced
  • 1 tbsp olive oil
  • 2 1/2 lb short ribs
  • Salt and pepper
  • 1 large carrot peeled and diced
  • 1 large parsnip peeled and diced
  • 1 large stalk of celery diced
  • 2 shallots finely diced
  • 3 whole cloves of garlic peeled and left whole
  • 1/2 tbsp all purpose flour
  • 1 tbsp tomato paste
  • 1/2 cup port
  • 1 cup red wine
  • 1 3/4 cups good quality beef stock
  • Salt and pepper to taste
  • 1 lb pappardelle pasta
  • 3 tbsp finely grated parmigiano reggiano cheese
  • 1/3 cup fresh ricotta torn into small pieces
  • 1/4 cup Italian parsley leaves chopped

Instructions

  • Preheat oven to 325 F. Place the rosemary, thyme, bay and parsley in a piece of cheesecloth to make a bouquet garni. Tie the pouch closed with kitchen string and set aside.
  • Heat a large dutch oven over medium heat and add in the pancetta. Cook until crispy and rendered, then transfer to a bowl.
  • Return the casserole medium heat and add the oil if needed. Season the short ribs with salt and pepper and then add them to the oil to brown on all sides. Once browned, add them to the bowl with the pancetta.
  • Return the pot to medium heat and add the carrot, parsnip, celery, shallots and garlic. Saute until fragrant and golden, about 7-8 minutes.
  • Add the flour and tomato paste and stir until well incorporated. Deglaze with the port while scraping up the little bits on the bottom of the pan. Once the port has evaporated, add in the red wine, beef stock and the bouquet garni.
  • Return the ribs and pancetta to the casserole and bring the liquid to a full simmer over medium high heat, then cover the dish and put it in the oven. Cook until the ribs are very tender and fall off the bone, about 2 hours 45 minutes – 3 hours.
  • Remove the pot from the oven, transfer the short ribs to a cutting board and shred the meat from the bone. Discard the fat from the top of the sauce in the pan and add back the meat to the sauce. If it’s thick and syrupy, then leave as is, but if you feel it’s still fairly loose then reduce the sauce over medium heat. Keep warm.
  • Meanwhile, bring a large pot of salted water to a boil. Add in the pasta and cook according to the package directions for al dente. Drain, and add the noodles to the pot with the meat along with the parmigiano cheese.
  • Divide between four bowls and top with parsley and little dollops of the ricotta cheese.

Nutrition

Calories: 420kcal
Abbey Sharp

Abbey Sharp is a Registered Dietitian (RD), regulated by the Ontario College of Dietitians. She is a mom, YouTuber, Blogger, award winning cookbook author, media coach specializing in food and nutrition influencers, and a frequent contributor to national publications like Healthline and on national broadcast TV shows.

www.abbeyskitchen.com/about-abbey/

Last Updated March 6, 2015. Published March 6, 2015 By Abbey Sharp 1 Comment

Spiralizer Carrot Salad with Apples & Dried Cherries

Confession- I’m in love with my new spiralizer tool. Every week I go to the grocery store and think, “what will work well on the spiralizer”- seriously, it just makes food more fun. If I had a child, I would spiralize every vegetable I could find because it would surely make them more appealing to the palate and eye. This spiralizer carrot salad with apples and dried cherries is no exception.
carrot_apple_raisin_salad_spiralizer_recipe_2_of_6.jpg

You may have seen my recipe the other week for my low carb carbonara, a main course I whipped up using this tool. But this week I decided to try making an easy peasy carrot salad. I took inspiration from a classic salad my mom used to make when we were kids – carrots, raisins and apples.

carrot_apple_raisin_salad_spiralizer_recipe_4_of_6.jpg

Carrot Salad without Mayo

I know, I know. Back in the day, there was a lot of mayo in the mix but I figured we could lighten things up in my carrot salad with a honey lemon vinaigrette.

carrot_apple_raisin_salad_spiralizer_recipe_5_of_6.jpg

I also added in a few zucchini noodles to stretch the portion and reduce the calories and carbs overall. The result was a fresh, sweet, comforting carrot salad that looked as pretty as it tasted amazing. You’ve got to get one of these tools and check it out!

Do you love carrot salad? Have you ever tried spiralizer carrots in your salads or stir-fries? Leave me a comment below with your thoughts!

carrot_apple_raisin_salad_spiralizer_recipe_3_of_6.jpg
Print Recipe
5 from 1 vote

Healthy Spiralized Carrot, Apple & Dried Cherry Salad

This healthy salad is a fresh, sweet, comforting carrot salad that looks as pretty as it tastes amazing.
Prep Time10 minutes mins
Total Time10 minutes mins
Course: Salad
Cuisine: American
Servings: 4 people
Calories: 200kcal
Author: Abbey Sharp

Ingredients

Salad

  • 2 zucchinis
  • 3 carrots peeled
  • 2 Granny Smith apples cored
  • 2 tbsp dried cherries
  • 2 tbsp dried raisins

Dressing

  • Juice of 1 lemon
  • 1 tsp lemon zest
  • 1 tbsp honey
  • 2 tbsp olive oil
  • Salt and pepper

Instructions

  • Spiralize the zucchinis, carrots and apples into a bowl. Add in the cherries and raisins.
  • Mix together the dressing.
  • Toss the salad with the dressing and serve.

Nutrition

Calories: 200kcal
Abbey Sharp

Abbey Sharp is a Registered Dietitian (RD), regulated by the Ontario College of Dietitians. She is a mom, YouTuber, Blogger, award winning cookbook author, media coach specializing in food and nutrition influencers, and a frequent contributor to national publications like Healthline and on national broadcast TV shows.

www.abbeyskitchen.com/about-abbey/

Last Updated October 4, 2021. Published January 29, 2015 By Abbey Sharp 15 Comments

Dangerous Secrets from The Biggest Loser & My Petition To Make it Stop

I started watching The Biggest Loser (TBL) when it aired for the first time in 2004. This was long before I was a Registered Dietitian and before it became the most successful reality show of all time with over 7 million viewers each week. As a lay person (that is, not yet a health professional), I guess I could see the appeal. Overweight and obese people getting “healthy” by exercising and eating “right” in a “fat camp” style ranch. That’s the pitch. On the surface it seems okay- I guess we need more programs about getting “healthy”! But the fact that we need to make a whole sensationalized television show about fatness and the extreme strides these lucky participants must take to change that identity is our first clue that this is going to be a fat-shaming circus. Ah, but if only my problems with The Biggest Loser stopped there.

the_biggest_loser_1_of_3.jpg

Photo credit: Palmerinutrition.com

Once you watch The Biggest Loser , anyone with a soul can see just how wrong the whole process is. First, it supposes that fat people aren’t actually people. They’re just animals that need to be pushed around and “punished” because they’re “weak”, “lazy” and “stupid” for eating their way into their situation in the first place. As Season 3 winner Kai Hibbard reported one of the trainers saying, “Pain is just weakness leaving the body.” Hm… well, okay then. If you don’t subscribe to that idea before you tune in, research shows that watching the show may change your mind! A study published in the Journal of Obesity suggested that watching even one episode of the Biggest Loser increased hateful weight bias among viewers! This is particularly concerning to me when there are children watching, as it’s easy to sense and duplicate the disgust for fatness when they see it in their peers or even themselves.

Second, I’ve heard some fans of the show say that it’s “motivating” for them to watch. Really? Do you feel motivated to seek out a personal trainer when you’ve watched them degrade these people to the point of having an emotional anxiety attack, or a physical expulsion of the meager portion of diet food they’re allowed to eat? Do you feel motivated to hire a nutritionist to help you with some meal planning when they’re going to tell you to eat less than 1000 calories- barely enough to keep a sedentary adult going- nevermind one working out 8 hours a day! Do you have the financial, emotional and physical capability to quit your job and make losing weight the only thing on your agenda until the weight is gone? Here’s the thing- if losing weight is a goal of yours, that’s great, but wouldn’t you be more motivated by seeing someone do it in a way that you could realistically duplicate? As Hibbard told ABC news, she has had fans of The Biggest Loser tell her they’ve been trying to lose the weight as fast as they’ve seen her do it on TV, and in the process, have now developed eating disorders. Is this the kind of behaviour we want to inspire in the general public? Apparently, the show is not only unhelpful for viewers, but it’s also incredibly dangerous.

Finally, even if it were easy to fit extreme weight loss into your normal daily life (news flash guys, it’s not), wouldn’t you want to do it in a healthful manageable way? The recommended speed for weight loss that can realistically be maintained is 1-2 pounds per week. Guess what happens when you drop 25lb in seven days? Well, you can read on for the “real world” examples, but as a nutrition expert I have an unsavoury spoiler alert for you. A lot of that weight lost is a combination of water and muscle, which in turn slows your metabolism down and makes it almost impossible to maintain your new weight eating anything more than bird food. Actually, this has been studied where researchers found that by week 30 of an extreme diet and exercise regime like the one on The Biggest Loser, study participants metabolisms’ had slowed by more then 500 calories on top of what would be expected for the decline weight. What’s the result? You gain the weight right back, and often more due to that sluggish metabolism. But read on, it gets more demotivating.

Over the past year or so, I’ve seen a number of articles emerge where past The Biggest Loser contestants have “come out” to tell their stories. As a Registered Dietitian and a human being, these forthcomings have been heartbreaking to read. While I always found the show repulsive and dangerous for its outrageously forward fat-shaming, the brave tell-alls revealed a whole other layer of danger.  This is not a show about people getting healthy. This is a show that takes pleasure in watching people reduced to animals and broken down until they’re even more sick. But, hey, they lose like 20 pounds a week, so, yay – “healthy” stuff. Please tell me you can sense my sarcasm.

the_biggest_loser_2_of_3.jpg

Photo Credit: Getty Images

If you haven’t had a chance to read through some of these articles by the New York Post (here and here), and ABC News, let me summarize some of the revealing truths about this show. I also can add in my own tid-bits I collected from my interview of Season 3 contestant, Kai Hibbard. Since she started speaking out in 2007, Kai has received a lot of back lash from the network and from her former fellow contestants who claim she is being “ungrateful” for the Biggest Loser gift. I’m no psychologist but I would have to agree with the on-air Biggest Loser doctor who called this a mass case of Stockholm Syndrome. That is, the victims (contestants) are empathizing with their captures (the show). But why don’t you read on and make your own conclusions about this supposed Biggest Loser gift.

-The Biggest Loser contestants are made to sign contracts that forbid them from speaking poorly about the show. Some contestants, like Kai Hibbard (Season 3), immediately broke that contract.

-Before going to The Biggest Loser ranch, all of the contestants were sequestered in a hotel without being allowed to leave or speak to anyone. One anonymous contestant claimed that she thought her computer was bugged so they could watch her through the camera when she hadn’t checked in.

-In The Biggest Loser Season 3, there were 14 contestants who moved onto the ranch and 36 who went home to lose the weight on their own. In my conversation with Kai, she told me that the contestants at home were losing weight with the support of doctor and dietitian supervision. They also were on more “moderate” exercise regimes like working out “only” 2 1/2 hours a day. We’re  using quotations here, folks, because even that is a lot of time in the gym. In contrast, Kai reported that the few times they were given an opportunity to speak with a dietitian or see the doctor, their advice would be thwarted by the production team telling them to listen to their trainers instruction, instead. In other words, they were forced to choose weight reduction over health. Interestingly, Kai noted that when the home contestants joined the ranch contestants at the end of the show, the home “losers” were in far better shape and had actually lost more weight than the ranchers. They also had developed more life skills on how to actually maintain their weight. Kai told me that despite the home losers’ best efforts, the show producers would never let one of them win because the show wasn’t really about the home contestants.

-Once inside The Biggest Loser ranch, the 14 contestants weren’t allowed interaction with the outside world. They couldn’t call home for weeks at a time in fear they would reveal the show’s secrets. When they could call home, it would be a short 5 minute stint that would be supervised by the production team. They were also not allowed to go home for the holidays- during the 10 day Christmas break, they would have to sit in a secured house with a supervisor and speak to their families on the phone for 5 minutes.

-The trainers and producers would make disgusting fat-shaming remarks that dug at each contestant’s deepest insecurities and motivators. Kai Hibbard (Season 3) shared a few phrases she remembered in the New York Post article including: “You’re going die before your children grow up”; “You’re going to die, just like your mother” : “We’ve picked out your fat-person coffin”.

-On The Biggest Loser  Season 3, the contestants were housed in horse stalls and were told to race like livestock with sacks filled with their lost weight. I actually remember this episode, where Kai Hibbard walked in protect of the mortifying message behind the exercise, so the producers edited the take to make her look like lazy and weak.

-The contestants were forced to wear revealing sports bras instead of a full shirt until they lost a certain amount of weight.

-Typical work-outs on The Biggest Loser ranch would last for 5-8 hours straight each day without break.

-In the hours prior to a weigh in (especially the finale), the contestants would layer themselves up in multiple pieces of clothing and work out for hours without drinking water. The more dehydrated they could be, the less they would weigh on that scale.

-One contestant was encouraged to take up smoking to reduce their appetite- obviously helping them get on the road to “good health”. Kai told me that it didn’t matter what you did to lose that weight short of cutting off a limb, they just wanted you to come back to finale shockingly thinner.

-The Biggest Loser contestants were eating less then 1000 calories a day, most of which was provided by sponsors like Subway sandwiches (ew) and other junk foods like fat free processed cheese, deli meats, fake butter spray, sugar free Jello and energy drinks. Kai told me she maybe saw the occasional banana, as long as it was completely green (aka. gross).

-When Kai told a producer she wasn’t able to lose weight one week, they suggested a meal of celery dipped in water (I guess they didn’t watch my video!)

-Following her time on The Biggest Loser , Kai Hibbard (Season 3) experienced hair loss, irregular period, knee injury, severe thyroid problems, insomnia, short term memory loss and had such terrible shin splints from over-exercising, her doctor was surprised she was still even able to walk.  She also broke her pelvis shortly after, which she attributes to the undernourishment of the Biggest Loser diet.

-Ryan Benson (Season 1) was urinating blood after his season ended- a terrifying sign of potential kidney damage or failure.

-Suzanne Medonca (Season 2) was diagnosed with multiple stress fractures in her feet and the producers and trainers made her continue to workout.

-Rulon Gardner (Season 11) suffered neck and shoulder injuries but the producers threatened him to get up and work out.

-After the finale, Rachel Frederickson (Season 15) was working out 4 times a day in an effort to maintain her losses and even at that excessive level of exercise, still gained back 20 lbs within the first month.

-While Kai admits there’s no proof, she did recall her trainer, Kim Lyons, telling her that they would somewhat rig the weights- sometimes making you lose less one week and then tacking it onto the next week based on their story-line.

-Kai also told NBC that obsessing over food and exercise on the ranch fostered a full out eating disorder that will very likely be a long-term struggle. She told me how even through her high risk bed-rest pregnancy, she felt compelled to run as she bled.

-There is a private Biggest Loser alumni group on Facebook where the past-contestants can share their experiences during and after the show. Spoiler alert- just about everyone has gained a lot of the weight right back.


What Can You Do about The Biggest Loser BS?

Well first of all, don’t watch that crap. Do not be one of the 7 million people allowing fat-shaming dogma to brainwash them into becoming hateful people. Do not give the network the satisfaction of your viewership and associated financial gains from their crap-food sponsorship. Next, help me get this crap off the air so people who haven’t read this article can no longer be indoctrinated with this unhealthy rhetoric. Yes, the contestants on the show choose to be there, but from what I have been told, they are threatened if they speak out or want to leave and are bluntly victimized by the show for its financial gains. Please sign and share the petition here to help support a social shift away from hate for our bodies, food and self.

Abbey Sharp

Abbey Sharp is a Registered Dietitian (RD), regulated by the Ontario College of Dietitians. She is a mom, YouTuber, Blogger, award winning cookbook author, media coach specializing in food and nutrition influencers, and a frequent contributor to national publications like Healthline and on national broadcast TV shows.

www.abbeyskitchen.com/about-abbey/

Last Updated January 13, 2015. Published January 13, 2015 By Abbey Sharp 6 Comments

Gluten Free Mexican Meatloaf Muffins & Freezer Meals Tips

meatloaf muffins
Whether you have a culinarily challenged spouse or ravenous teens to feed, I think having some healthy freezer meals and ready to be rewarmed is key for crazy nights when you’re not home or are rushed to get a meal on the table. This is what I chatted with Marilyn Denis about for my November appearance here when I shared my recipe for yummy gluten free meatloaf muffins.

But there are a few things you need to know about freezer meals like these meatloaf muffins. Here are my top five tips for successful freezing:

  1. Cool foods for a few minutes on the counter, then put in the fridge for 1-2 hours before you put them in the freezer. Hot foods will raise the temperature of your freezer and put all your other food in the “danger zone” for bacterial growth.
  2. Don’t refreeze foods you already froze and thawed. This is a food safety hazard as bacteria can grow with each cycle of freezing and thawing.
  3. Think in small portions. Since you shouldn’t refreeze thawed food, I always make single size portions so that I only have to thaw out the portion I need and not waste food I can’t use.
  4. Always use proper freezer bags. Also, if you know it’s going to be more than a few weeks before you get to it, wrap in plastic or tin foil as well before putting the food in the bag.
  5. Label that food! In general, you have about 3 months for most frozen cooked food so it’s important for you to have a date of when you put it in there.

You know my meatloaf muffins are a breeze to freeze, but what else does and doesn’t freeze well?

Doesn’t Freeze Well:

-Raw or cooked eggs

-Veggies that are high in water like lettuces or herbs

-Any gravies or sauces that are thickened with flour or cornstarch (they separate)

-Cooked potatoes (we all know this one)

-Cooked pasta (turns to mush so if freezing lasagna, freeze it raw)

-Mayonnaise and any salads made with them (potato or egg salad)

-Most low fat dairy doesn’t work well- yogurt, cream cheese, cottage cheese

-Anything with gelatin

-Unwhipped cream

Works Well:

-Butter

-Cheese

-Pastries

-Breads

-Soups, stews or baby food

-Buttercream icing on cakes

-Pies

-Berries

-Grated cheese

-Blanched vegetables

-Raw dough

-Shelled nuts

I was recently on Marilyn Denis where I whipped up two of my favourite freezer meals and wanted to share them with you all.

Meatloaf Muffins with Southwestern Flare

These meatloaf muffins are really based on my regular loaf-pan sized Meatloaf recipe but I made them into cute little muffins so that they can be frozen individually and you can simply rewarm the portion you need. This is important because if I were to freeze a whole meatloaf and just want a little slice for supper or snack, I would have to thaw out the whole damn thing. Not only does that take more time, but please refer to tip 2 above.

You can transform your favourite meatloaf recipe into meatloaf muffins muffin, simply just adjust down the cooking time. I like this Mexican version because I use high fibre oats, and I reduce down the ketchup because I’ve got lots of flavour from the salsa, chipotle in adobo, corn and pepper. Oh yes, and we can’t forget that heavenly sprinkling of cheese- that really makes these babies exciting.

What are your go to freezer meals? Have you tried making these meatloaf muffins?

Print Recipe
5 from 1 vote

Freezer Friendly Healthy Gluten Free Southwestern Meatloaf Muffins

I like this Mexican version because I use high fibre oats, and I reduce down the ketchup because I’ve got lots of flavour from the salsa, chipotle in adobo, corn and pepper.
Prep Time10 minutes mins
Cook Time30 minutes mins
Total Time40 minutes mins
Course: Dinner
Cuisine: Southwestern
Servings: 4 people
Calories: 310kcal
Author: Abbey Sharp

Ingredients

  • 1 tsp cooking oil
  • 1/2 cup frozen corn
  • 1/4 cup red bell pepper finely diced
  • 1/4 cup onion finely diced
  • 1 whole egg beaten
  • 1/2 cup Old Fashioned Gluten Free Oats
  • 1/2 cup plus 2 tbsp mild salsa
  • 1 chipotle in adobo sauce finely minced, with sauce
  • 1/4 cup ketchup divided
  • 1 lb extra lean ground beef
  • 1 pinch salt and pepper pinch of each
  • 1/4 cup old cheddar finely grated

Instructions

  • Preheat oven to 350 F.
  • Heat the oil in small nonstick skillet over medium high heat. Add the corn, bell pepper and onion and sauté until translucent, about 5 minutes. Set aside to cool.
  • In a large bowl, combine the egg whites, oats, salsa, chipotle, 2 tbsp of ketchup, the beef, the cooked vegetables and a large pinch each of salt and pepper. Mix until well combined.
  • Using an ice cream scoop, divide the mixture into 12 lightly greased muffin tins. Top with the remaining 2 tbsp of ketchup using a brush and sprinkle with the cheese.
  • Bake for 25 minutes or until an instant read thermometer reads 160 F.
  • To freeze, remove them from the muffin tin by running a knife around the tin. Transfer to a tray lined with wax paper and cover with plastic wrap- refrigerate until cool. Place in the freezer for 1-2 hours or until frozen. Then you can transfer to a freezer bag that you label with the date.
  • When ready to eat, you can re-bake the muffins from frozen for 10-11 min at 425 F or pop in the microwave for a 1-2 min.

Nutrition

Calories: 310kcal
Abbey Sharp

Abbey Sharp is a Registered Dietitian (RD), regulated by the Ontario College of Dietitians. She is a mom, YouTuber, Blogger, award winning cookbook author, media coach specializing in food and nutrition influencers, and a frequent contributor to national publications like Healthline and on national broadcast TV shows.

www.abbeyskitchen.com/about-abbey/

Last Updated December 29, 2014. Published December 29, 2014 By Abbey Sharp Leave a Comment

Asador Etxebarri in Atxondo Bizkaia (Spain) * Michelin Star Restaurant Review


Opening Remarks:


-Asador Etxebarri is located in the Atxondo valley at the foothills of Mt. Anboto, about an hour away from San Sebastian.

-Asador means roaster, and Etxebarri (pronounced Etch-e-barri) is a Basque word comprised of “etxe” meaning home, and “barri” meaning new.

-The restaurant has 1 Michelin star, is named the 34th best restaurant in the world, and is praised for self-taught Chef Victor Arguinzoniz’s passion for wood-fired cooking.

-Unlike most Michelin star establishments, Etxebarri is only open for lunch (with the exception of Saturday, which serves dinner instead). Lunch is definitely not my preference for large meals, but on the bright side, mid-day munching usually means less money spent on booze, and better photos in natural light- #bloggerwin.


Ambiance:


-The restaurant is located in a quaint two-story country home made of large stones, bricks and wood. Apparently Chef Arguinzoniz used to be a timber worker and personally restored the old home himself.

-Inside, the space reminds me of an old dining hall at a country ranch- cozy, welcoming, and warm where the inherent rustic characteristics can shine.


-On the main floor is a bar with a few tables where locals seem to be gathering for a casual drink and a pintxos lunch.

-Upstairs is the gastronomic restaurant – a sun-lit room decorated very simply with a few handfuls of tables, some potted plates, white linens and simple wood chairs.


-We were the first table to arrive for our 1 PM reservation, so we were lucky enough to nab a table on the terrace outside. If the weather permits, do try to get one of these coveted spots because the view alone is reason to visit the restaurant. Imagine looking into the vast mountains, farmlands and greenery, all the while basking in the stunning late Summer weather.


Service:


-Unlike most Michelin star restaurants (though we must remember this has 1 and not 3 stars), Etxebarri’s service is casual, and more “home-style” than haute cuisine.

-With only a few women on staff and probably about 10-12 tables, I was told that a typical meal takes 3 hours time. Thankfully, because we were the first to arrive, we got a bit of a head start on our meal so we were in and out in about 2 hours.


-Despite the leisurely timing, and the fact that one of the three women who served us didn’t speak hardly any English, the meal ran incredibly smooth. Cutlery and plates were replaced between courses, dishes came at a fairly consistent pace (no super lengthy gaps) and they happily delivered fresh bread until we insisted no more por favor. We did have to refill our own water glasses, but I certainly don’t mind lifting a bottle.


Drink:


-Extebarri boasts an extensive wine list, with a number of reasonably priced bottles around the 20-40 € range. We had a full day ahead of us (it was just 1 PM!), so we chose to order by the glass. For me, a deliciously fruity and local Txakoli Itsasmendi and for him, a slightly more crisp Taleia Sauvignon Blanc- both were perfect light options for a hot Summer’s day.


Food:


-As previously alluded, Etxebarri is famed for its bespoke wood grill that pervades the senses the moment you walk in the door. Nearly each and every ingredient arrives to the table after a good smooch-sesh with the blazing element lending a summery, smoky and earthy flavour and aroma.


-In contrast with so much of the avant garde modernism going on around him, Chef Arguinzoniz’s cuisine moves in a more rustic direction, yet it somehow feels just as innovative and new. Even the description on the menu denotes utter simplicity. Here you are spared the waning poetry of some lengthy menus in favour of just one or two words per dish. And that’s not just laziness, but rather, the food really is this simple. Why cover up a naturally delicious and perfect ingredient?


-With the Chef’s past experience as a timber worker, he apparently designed and built the custom-made grilling platforms, cooking tools, and charcoals for different ingredients.  Talk about being hands-on!

-The 16-course tasting menu goes for 125€, and rotates between Earth, Ocean or Fire themes, depending on the seasonal products they find in the market.  There is also the option to go a la carte, with items ranging from around 22-200 €. Having already tackled about a weeks –worth of back-to-back tasting menus, I knew I would be more inclined to simply order a la carte. I also read online that a) the tasting menu features so much food people have to be rolled out, and b) they wished they had ordered a la carte. After watching some table neighbours move through the numerous courses, I was quite happy with our decision. I was also grateful that (without asking), the kitchen graciously split the portions in two for us.


Bread (Complimentary)


Deliciously crusty on the outside, and pillowy soft on the inside. This bread needed absolutely no butter or oil.


Chorizo (Complimentary)


Gorgeously smoky, fatty and perfectly spiced.


Zucchini Tomato Water (Complimentary)


A delicately sweet and mildly verdant drink to cleanse the palate before digging into a hearty lunch.


Buffalo Mozzarella (15 €)


A creamy, dense, and moist ball of cheese with a gentle whisper of smoke. This was hands down the best mozzarella I’ve ever had.


Tomato Salad (15 €)


Likewise, the remarkably sweet sliced tomatoes offered just a hint of smoke that was balanced by their natural sweetness and acidity. Never before in my life have I tasted such a fantastic tomato.


King Bolete with Eggplant (24€)


Perfectly seasoned vegetables,  the sweetness of the deeply caramelized eggplant was wonderfully counterbalanced by the umami-rich mushrooms. If you closed your eyes, the combination of meaty textures with the meaty smoke flavour would have you swearing you were eating – you guessed it – meat.


Scrambled Eggs of Mushrooms (24€)


This was certainly nothing like any scrambled eggs I’ve ever eaten before. The unctuous savoury eggs were creamy and velvety, with just enough textural contrast provided by the bits of woodsy mushrooms. A very rich dish that was delicious on its own, but even more satisfying sopped up by the wood-fired bread.


Beef Chop (65€)


This was undeniably the best damn steak I’ve ever had. The wickedly thick charcoaled crust was enhanced by a generous spatter of course salt that helped to contrast the buttery rare fat-strewn meat within. Oh boy. I think if I could request a main course for my last meal on earth, it would involve a whole Extebbari steak to myself.


Green Salad (Accompanied Steak)


Simple as simple gets but it couldn’t have been more welcome. The vinaigrette had a solid acidic bite to cut the richness of the beef, and I loved the crunchy shards of pungent onion.


Figs with Reduced Milk Ice Cream (9€)


Simple, yes, but one of the most delicious desserts I think I’ve ever had to date. The jammy figs were sticky, sweet, and sparkled in all their natural glory against the most luscious satiny ice cream I’ve ever had. If desserts were always this light and satisfying, there would be no need in the world for outrageous cronuts, crazy cupcakes or mile-high cakes.


Closing Remarks:


-For the 6 dishes (the mini portions above x 2 – except for the steak which was to share), the bill came to 200 € ($275 CAD). While everything tasted fantastic, the food was so simple and the portions were so modest, my immediate reaction was to feel a bit underwhelmed for the price. I mean, 15 € for one tomato? It felt a bit outrageous.

-But when I looked back, I felt there was something somewhat magical about the overall experience that would make me want to go back again and again.  I mean, as simple as that tomato was, it was the best damn tomato I’ve ever had. It was just a basic steak, but it was the best steak I’ve ever had. So many of the plates that graced our table were some of the best of their kind I have ever tasted so in retrospect I was thrilled with my meal. I am not sure I would feel the same if I were sitting indoors, as the breathtaking view really made the lunch shine.


-Would I recommend it? As long as you have the money to spend on a perfect, yet utterly simple meal, then absolutely I would. In the midst of all of the decadence of the Michelin world, Etxcebarri is real, natural, simple food done best, and it’s a meal I will remember for years to come.


Abbey Sharp

Abbey Sharp is a Registered Dietitian (RD), regulated by the Ontario College of Dietitians. She is a mom, YouTuber, Blogger, award winning cookbook author, media coach specializing in food and nutrition influencers, and a frequent contributor to national publications like Healthline and on national broadcast TV shows.

www.abbeyskitchen.com/about-abbey/

Last Updated December 19, 2014. Published December 19, 2014 By Abbey Sharp 1 Comment

Mexican Fresh Ham with Chili, Lime & Pineapple Salsa

This healthy Mexican Fresh Ham recipe with chili, lime and pineapple salsa will become a favourite on any holiday spread.

chili_lime_ham_7_of_11.jpg

Christmas is around the corner and for those of us who spent pretty much all of November eating Thanksgiving leftovers, the thought of another turkey is somewhat out of the picture. Sure, you could go with a prime rib, a pricey lamb rack or a reheat-and-eat style smoked ham, but this holiday, I discovered something new! Introducing the fresh ham that is totally boneless.

chili_lime_ham_3_of_11.jpg

That’s right, friends- this is not your momma’s bone-in cured country ham. This unique new fresh ham product by LiberTerre is raised in Manitoba without the use of any antibiotics or hormones on a strict grain diet without any animal by-products. The result is exceptional flavour and lean, healthy meat that will look amazing on any holiday spread.

chili_lime_ham_4_of_11.jpg

With so many sweets, treats, and fatty side dishes at the holidays, I love the idea of offering a leaner alternative to fatty prime rib or sodium-packed cured ham. This definitely makes it easier to feel a little less guilty about having that slice of pie or second glass of wine. It also takes up far less room in the fridge (a huge plus with all of the holiday meal dishes), takes a heck of lot less time to cook, is very affordable and is easy to customize with whatever flavours you desire!

chili_lime_ham_11_of_11.jpg

Traditionally, you could do something with apples, maple syrup, and cinnamon – but forget about tradition- I’m all about big flavour and I wanted to get spicy for my Christmas feast with a Mexican theme! And while this recipe is certainly great for the holidays but it’s a people pleaser for entertaining any time of year. But before we get started, there are a few things to take into consideration when cooking a beautiful LiberTerre fresh ham.

Fresh Ham 101

chili_lime_ham_9_of_11.jpg
  1. Fresh ham is very lean, so you’ve got to do something to tenderize it. I opted to go for a yummy 24 hour brine filled with bold Mexican flavours like chili and lime. You can also marinate it or pound it like I will be doing in my upcoming recipe for Schnitzel (subscribe on my site to make sure you get that!) Also, a quick note on brines for those who aren’t well versed- if you decide you want to brine (do it!) always rinse off the ham afterwards, pat it dry and then continue with cooking. If you want to add a rub like I did, refrain from adding salt to the mix because the meat will already be well seasoned from the brine.
chili_lime_ham_1_of_11.jpg

2) If you’re going to roast it, it’s best to give it a quick blast at high heat to caramelize the surface, and then reduce the heat to low and let it cook slowly. You’ll know it’s done when an instant read thermometer reads 160 F.

chili_lime_ham_5_of_11.jpg

3) Let the fresh ham rest before you slice in. Like all meat, a large boneless ham needs a good resting period before you slice it to ensure the juices don’t seep out onto your plate. Give it a good 30 minute rest tented with foil while you prepare the rest of your meal.

chili_lime_ham_8_of_11.jpg

So this holiday season, switch up your holiday spread with a LiberTerre fresh ham as the star of the show! Mix and match your family’s favourite brines, rubs and accompaniments and let me know what you come up with!

What are your favourite fresh ham recipes? Have you tried brining a fresh ham? Leave me a comment below with your go-to ideas!

chili_lime_ham_6_of_11.jpg
Print Recipe
4.50 from 2 votes

Healthy Fresh Chili & Lime Brined Ham with Mexican Spices and Pineapple Salsa

Inspired by Food & Wine's Chili Brined Fresh Ham
Prep Time1 hour hr
Cook Time1 day d 2 hours hrs 10 minutes mins
Total Time1 day d 3 hours hrs 10 minutes mins
Course: Dinner
Cuisine: Mexican
Servings: 10
Calories: 505kcal
Author: Abbey Sharp

Ingredients

Brine

  • 2 cups kosher salt
  • 1 cup sugar
  • 3 L cold water
  • 1/2 cup black peppercorns
  • 3 red chilies stemmed and chopped
  • 2 limes sliced
  • 2 cups ice cubes
  • 3 lb LiberTerre fresh boneless ham
  • 1 cup reduced sodium chicken broth see the Assembly set

Rub

  • 2 tbsp brown sugar
  • 1 1/2 tsp chili powder
  • 1 1/2 tsp cumin
  • 1 tsp smoked paprika
  • 1 tsp oregano
  • 1/2 tsp garlic powder
  • 1/2 tsp onion powder
  • 1/4 tsp cinnamon
  • 1/4 tsp cayenne optional- if you like it spicier
  • 2 tbsp olive oil

Salsa

  • 2 cups pineapple diced
  • 1 mango diced
  • 1 shallot minced
  • 1 red bell pepper diced
  • 1/2 - 1 chili seeds and ribs removed, minced, depending how hot you like it
  • 1 tsp agave
  • 1/2 lime zest and juice
  • 2 tbsp cilantro
  • Salt and pepper to taste

Instructions

Brine

  • In a large pot, combine the salt and sugar with 1 L of the water. Bring to a boil over moderately high heat, and stir until dissolved.
  • Once dissolved, stir in the peppercorns, chilies and limes. Add the remaining 2 L of water and the ice and stir until the ice has melted and the brine is at room temperature.
  • Once cool, add the ham. Cover the pot with plastic wrap, put a lid on and place the pot in the refrigerator for 24 hours.

Rub

  • The next day (when you’re getting ready to eat), preheat oven to 450 F.
  • Mix together all of the rub ingredients. Set aside.

Salsa

  • Mix together all of the ingredients in a medium bowl and set aside.

Assembly

  • Remove the ham from the brine and rinse under cold water to remove the brine. Discard the brine. Pat the ham dry with paper towels.
  • Cover the ham in the rub and place on a roasting rack in a baking dish. Pour the 1 cup of chicken broth into the bottom of the dish. Roast at 450 F for 10 minutes.
  • Reduce heat to 275 F. Roast for an additional 1 hour 45 minutes- 2 hours, or until an instant read thermometer reads 160 F.
  • Remove from oven and allow to rest tented for 30 minutes.
  • Slice and serve with the salsa.

Nutrition

Calories: 505kcal | Carbohydrates: 44g | Protein: 32g | Fat: 24g | Saturated Fat: 8g | Cholesterol: 84mg | Sodium: 1748mg | Potassium: 752mg | Fiber: 5g | Sugar: 31g | Vitamin A: 1100IU | Vitamin C: 73mg | Calcium: 85mg | Iron: 3mg

Disclaimer: The preceding post was developed in partnership with LiberTerre, however, as always, all opinions are genuine.

Abbey Sharp

Abbey Sharp is a Registered Dietitian (RD), regulated by the Ontario College of Dietitians. She is a mom, YouTuber, Blogger, award winning cookbook author, media coach specializing in food and nutrition influencers, and a frequent contributor to national publications like Healthline and on national broadcast TV shows.

www.abbeyskitchen.com/about-abbey/
  • Previous Page
  • Go to page 1
  • Interim pages omitted …
  • Go to page 84
  • Go to page 85
  • Go to page 86
  • Go to page 87
  • Go to page 88
  • Go to page 89
  • Next Page

Get started with

Eight Free Recipe Books

From the co-founder of Neue Theory and creator of the Hunger Crushing Combo

Sign me up!
Abbey smiling at table
Abbey Sharp

“Foods may never be nutritionally equal. But we can make them morally equal by recognizing that our worth is never determined by what's on our plate.”

— Abbey Sharp, RD About Abbey ◥

Books

  • HCC™
  • Mindful Glow
  • Free E-Books

Blog

  • Nutrition
  • Recipes
  • Motherhood
  • Life

Explore

  • Neue Theory™
  • Bite Back
  • YouTube

Abbey

  • About
  • Coaching
YouTube TikTok Instagram Facebook X Pinterest
Abbey Sharp - The No BS Dietitian From Abbeys Kitchen

© Abbey's Kitchen 2026  All Rights Reserved •  ACCESSIBILITY STATEMENT •  Privacy Policy

This site uses cookies. By continuing to browse the site, you are agreeing to the use of cookies Accept Privacy Policy
Privacy & Cookies Policy

Privacy Overview

This website uses cookies to improve your experience while you navigate through the website. Out of these, the cookies that are categorized as necessary are stored on your browser as they are essential for the working of basic functionalities of the website. We also use third-party cookies that help us analyze and understand how you use this website. These cookies will be stored in your browser only with your consent. You also have the option to opt-out of these cookies. But opting out of some of these cookies may affect your browsing experience.
Necessary
Always Enabled
Necessary cookies are absolutely essential for the website to function properly. This category only includes cookies that ensures basic functionalities and security features of the website. These cookies do not store any personal information.
Non-necessary
Any cookies that may not be particularly necessary for the website to function and is used specifically to collect user personal data via analytics, ads, other embedded contents are termed as non-necessary cookies. It is mandatory to procure user consent prior to running these cookies on your website.
SAVE & ACCEPT

Rate This Recipe

Your vote:


A rating is required
A name is required
An email is required