• Skip to main content

Abbey's Kitchen

Healthy Recipes, Nutrition Myth Busting, Healthy Eating Tips

  • Books
    • HCC™
    • The Mindful Glow Cookbook
    • Recipe eBooks
      • Family
      • Hypothyroidism
      • BLW
      • Vegan Week 1
      • Vegan Week 2
      • Vegan Week 3
      • Keto
      • Gluten Free Week 1
      • Gluten Free Week 2
      • Fitness
      • Paleo
  • Blog
    • Nutrition
    • Recipes
    • Motherhood
    • Life
  • Explore
    • Neue Theory™
    • Bite Back With Abbey Sharp
      • Apple Music
      • Spotify
      • Amazon Music
    • YouTube
  • Abbey
    • About
    • Coaching
    • Contact

Abbey Sharp

Last Updated March 22, 2021. Published March 22, 2021 By Abbey Sharp 11 Comments

Please Don’t Tell Me I Have a Better Bond with My Breastfed Baby

I share my story about how comments about having a different bond with my breastfed baby vs my bottlefed baby caused me anxiety and mom guilt.
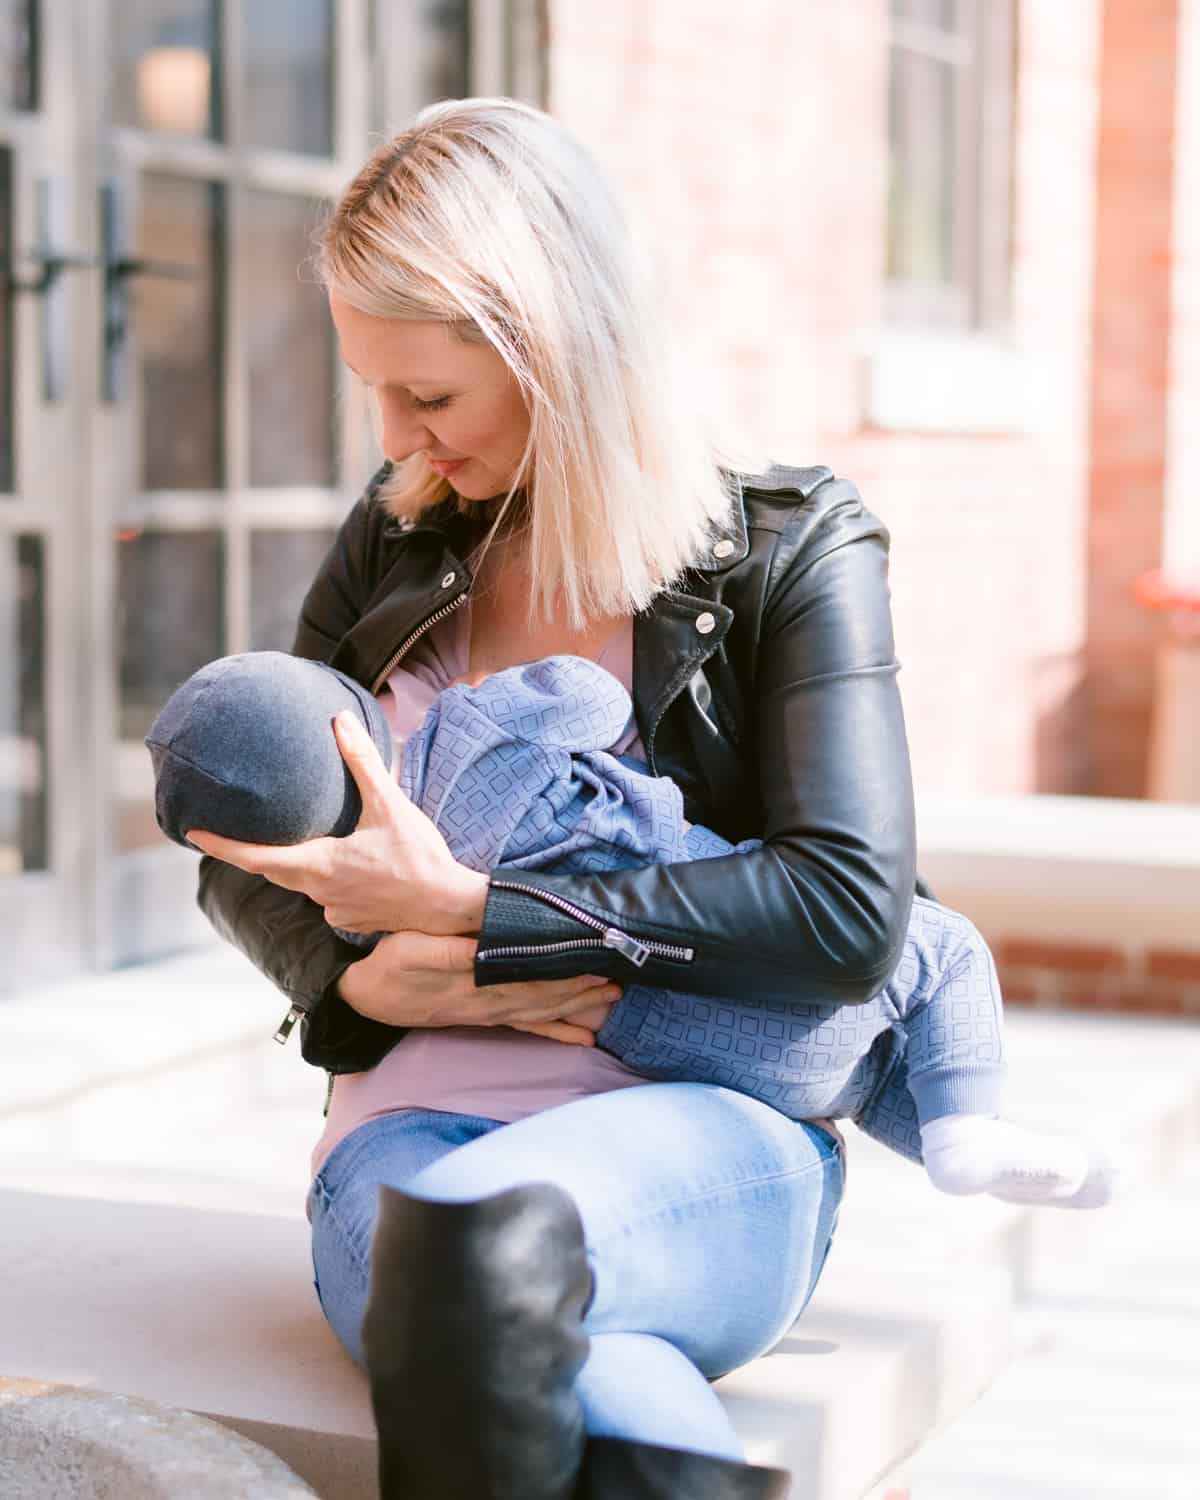
Abbey holding her breastfed baby while sitting outside.

Being pregnant and giving birth in a pandemic wasn’t exactly how I envisioned bringing my second (and probably last) child into this world. There were plenty of struggles and challenges related to pandemic postpartum life, but there are three major perks compared to my first.

One: I’ve received a hell of a lot fewer comments related to “baby weight”. I basically don’t leave the house, and when I do, I’m padded up pretty well in a huge winter parka, faux fur hat and mask, so you wouldn’t know me from Santa Clause on the street. As a result, there has been far less body checking than when I gave birth to my eldest where every gym visit would be accompanied by a dozen comments about how my body looked.

Two: Having no where to go, and no one to bother you at home really does foster a good environment for learning how to breastfeed. You don’t have people dropping by unannounced so you can literally just sit around with your boobs hanging out for skin to skin letting that newborn cluster feed all day long. No one is asking to hold the baby or feed the baby, it’s just you (for better or worse).

And three: We’ve gotten to spend more time together as a whole family because my hubs and I are both working from home (and this is a blessing and a huge challenge, of course).

My Postpartum Experience with E
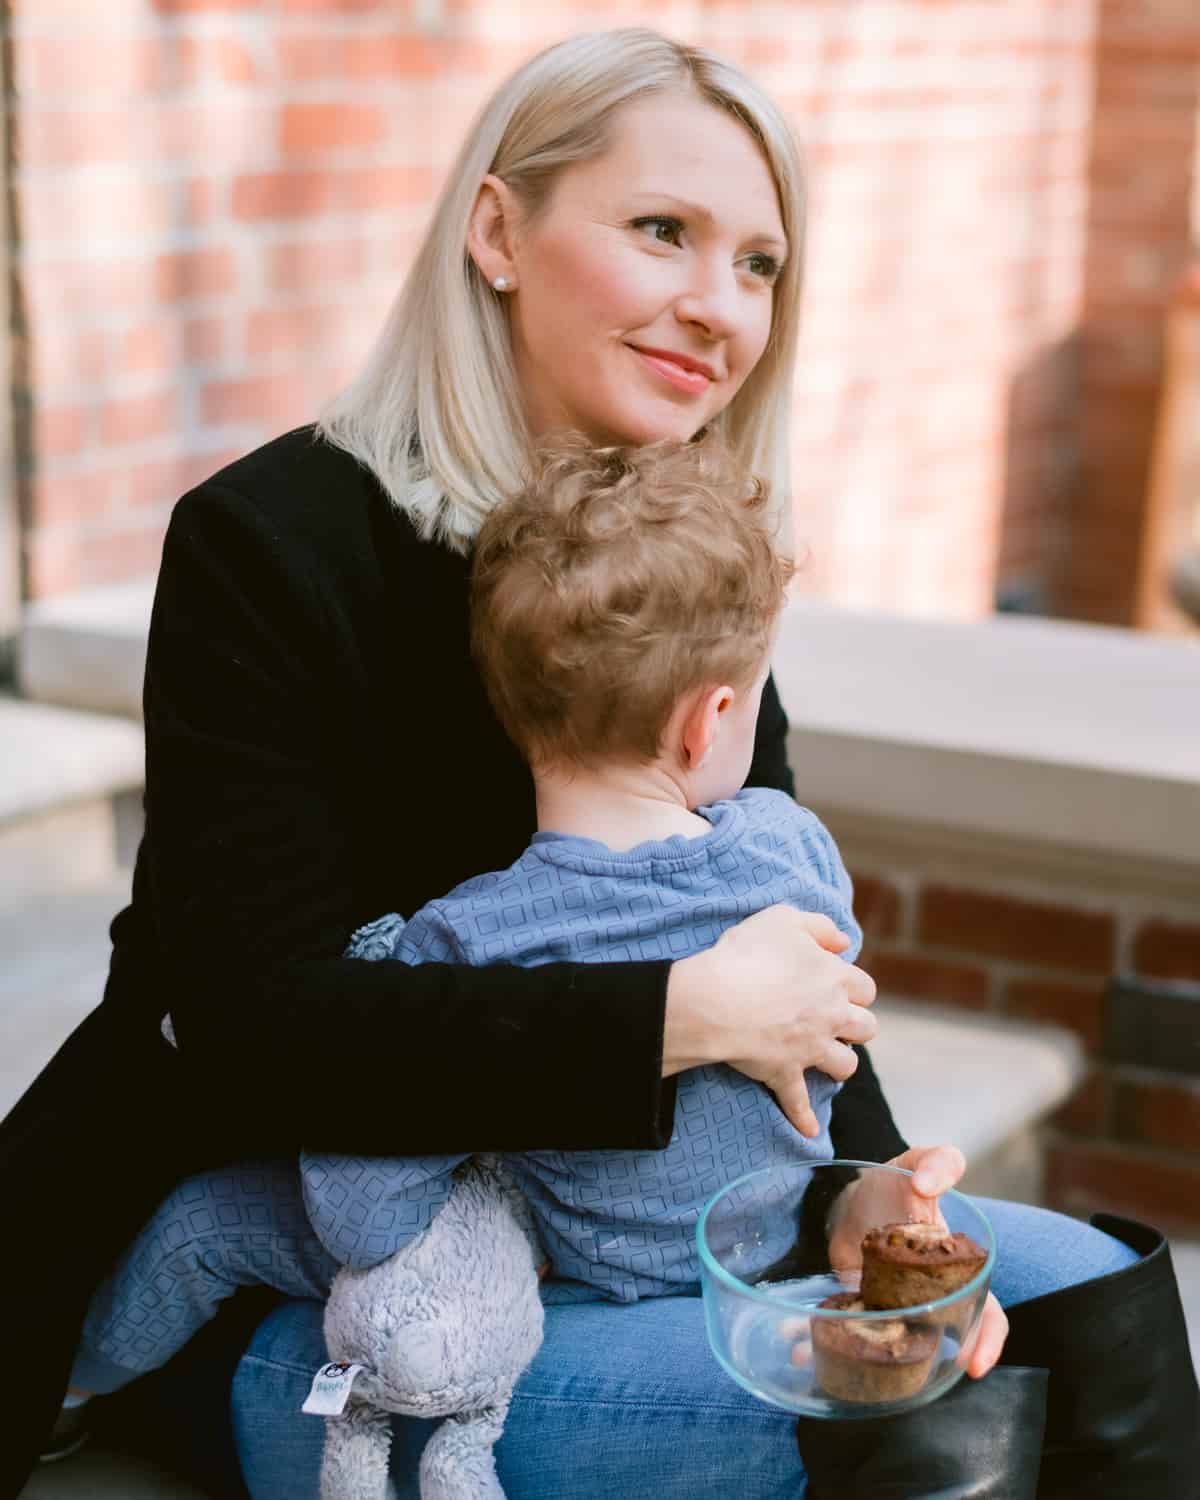
Abbey sitting outside with Big Boy E on her lap.

This was a huge departure from my first postpartum rodeo where I left the house for a national TV segment two weeks postpartum (thank you Spanx).

If you know my story with E, you know that breastfeeding didn’t come so easily to us. E had “one of the worst” lip and tongue ties the pediatric dentist had ever seen, and as a result, even after the release, his palate prevented him from latching at all. He also had colic and literally just purple screamed for 4 months straight until his digestive system worked itself out. To top it all off, like so many first time moms, I also struggled with supply. 

What our feeding routine basically looked like for the first two months was that I would attempt to feed him at the breast, he would scream and get frustrated (from low supply, and poor latch), I would then  feed him on the bottle and then I would pump. It was a whole process that lasted pretty much up until it was time to do it again. Obviously this was unsustainable for me, so others in the household also started to do the feeding while I did the pumping, and after two months of fighting to breastfeed and over $1000 in lactation consultants, physio and osteo, we decided it clearly wasn’t going to work. 

I made the decision to exclusively pump. 

For those who haven’t breastfed or pump, know that this is NOT an easy task. Pumping is uncomfortable, it often causes blocked ducts (I had mastitis 5 times), it takes a LOT longer to get the milk out, and it requires a military like schedule. Throw in supply issues, and you’re pumping every one to two hours on the clock. For me it meant 8 pumps each day, and 3 pumps each night. Hours of my day attached to that ball and chain for 13 miserable months. 

I quickly became the milk maid. 

I would sit at the table with my nursing cover on making the milk that someone else got to feed my child. My husband, my nanny, my mom, dad, in-laws, friends. Literally anyone could come over, pick up my baby, stare into his eyes and enjoy the rare moment of silence and contentment in between his shrill like colicy cries. 

My Postpartum Experience with O

Abbey carrying Baby O and Big Boy E outside.

Thankfully, that hasn’t been the experience with O.

After a quick tongue tie release in hospital, and few lactation consulting sessions, O was happily breastfeeding exclusively from day one. He is a happy smiley baby, barely cries, and lights up with the most sparkly blue eyes when I walk in the room. I’ve spent 24/7 with both of my kids since March 2020 and only really leave the house once a week for a few hours to pump out a few videos once a week. That has meant a lot of quality time with both O and E. 

And while I’ve managed to dodge the daily body checking and comments about “baby weight” in this postpartum pandemic era, it’s been replaced with a comment even more unsettling.

“You have a very “different” bond with O than E, I’m sure it’s because you’re breastfeeding O.”

What they’re saying is a compliment. What they probably mean is:

“Wow, he’s a real mamas boy”.

“Aw, he looks at you with such desire and love.”

“So sweet, your kid adores you.”

And yes, those are all lovely things to say and to hear. And I believe those things are true.

But what does my postpartum anxiety and mom-guilt ridden brain actually hear instead?

“Your bond with E is suffering because you didn’t breastfeed him.”

“E loves daddy more than you.”

“You should have worked less and stayed home more with E like you did with O.”

I actually recall hearing a similar comment when I was in the early days with E and someone would ask about how our breastfeeding was going.  While the breast-bottle-pump routine was really taking its toll on my mental health, everyone kept telling me to “keep it up, you’re doing great, it will be so nice to have that bond when you get the hang of it!” 

Even though these were seemingly innocent comments, my stubborn and guilt-ridden brain interpreted as a suggestion that if I didn’t get that kid on my damn breast, I would be ruining our relationship for life. This puts moms like me (who are really struggling being the sole provider of her baby’s nourishment and comfort) under a lot of pressure to continue something that may not be what’s best for them (or babe).

Thinking back about it, I question if I made the right decision to exclusively pump, and if I should have swallowed my pride about the benefits of breastfeeding and breastmilk, and exclusively formula fed from day one. Postpartum anxiety and mom guilt is so pervasive it twists even the most well-meaning comments into devastating (largely false) beliefs. When I’m feeling tired (read: all the time), I’m particularly vulnerable to this faulty logic about success at being a mom.
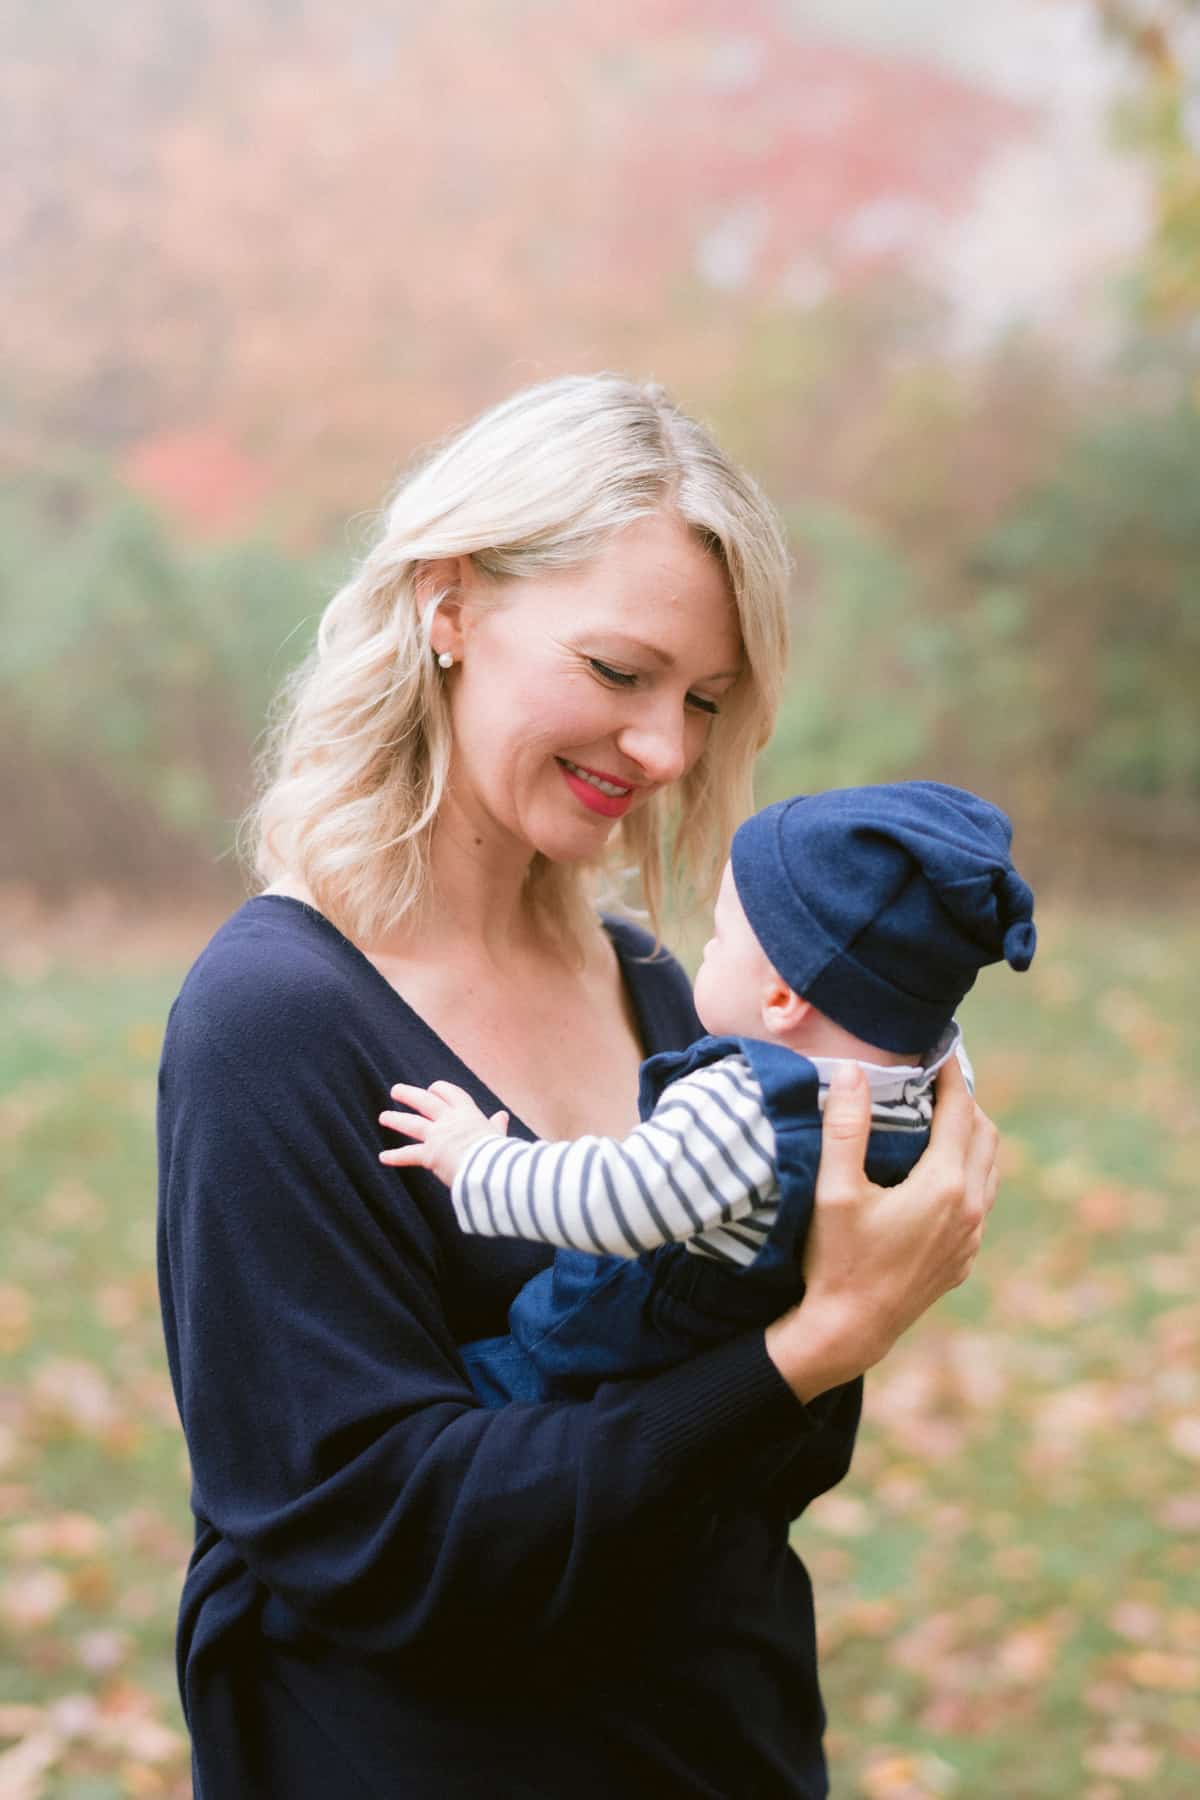
Abbey outside holding breastfed Baby O.

So I wanted to offer myself and others an alternative narrative that is better grounded in reality than the one my sleep deprived brain can craft.

  1. My bottle fed son absolutely adores me. He cries for me when he is upset (read: doesn’t get his way), he tells me he loves me daily, he hugs and kisses me without prompt. Not exclusively breastfeeding obviously did not “ruin” my chance at a strong bond.
  2. I have formed a close bond with my whole family this year since we have had the benefit (and challenge) of working from home. This is all just extra quality time (and quality time can also easily be put in on evenings and weekends if I was at work out of the home). This is not determined by breastfeeding or bottle feeding.
  3. My kids are just different from one another. O is ultimately just a happier kid, he has a “good bond” with everyone because by default, the kid just smiles. E is a sweet, emotionally aware and fun loving kid now but as a colicky newborn , basically just cried for 4 months straight.
  4. I am glad I gave E the chance to trust others to feed him and care for him. He has always been very social and confident interacting with others, even if his primary caregivers (my husband and I) are not around. That means I can leave him at grandmas or with the aunties without a separation anxiety melt down. Winning!

I am glad health professionals are starting to be encouraged to tell mothers that “fed is best” but the dominant discourse in wellness culture is that while formula provides adequate sustenance, breastfeeding still provides a unique magical bonding experience. I hope we can start to consider the challenges that that assumption may create for struggling moms.

So I hope this blog post connects with those of you who have been made to feel (or just innately feel) guilty about how not breastfeeding will impact your relationship with your child . And for those who are bystanders in these parent-child relationships, I hope it just gives you a bit of insight into the guilt-ridden mind of a new mom and helps serve as a reminder that even well meaning comments can potentially do harm. We don’t always know what moms insecurities are and how those insecurities can be turned into real panic in the face of a seemingly innocent comment.

So if you want to compliment a mom on the bond she has with her breastfed child, I encourage you to stick to the facts. You don’t know if the relationship is because of breastfeeding. You don’t know if its because we “stayed home from work” longer with her kids. You don’t know if it’s because of anything we did “right” or “better” as a mom.

So instead, you can just say “your child loves you” and we will get it. We will appreciate the reminder without any strings attached or pressure to DO something. Because even if we decide to stop breastfeeding, or to go to work, our child won’t stop loving us. Our magical bubble won’t instantly burst.

We are their moms. They’re going to love us no matter what. 

More Blog Posts You Might Like

  • How to Increase Breastmilk Supply From a Dietitian Mama’s Perspective
  • The Mom Guilt of Breastfeeding Failure
  • Caffeine and Breastfeeding – Is It Safe?
Abbey Sharp

Abbey Sharp is a Registered Dietitian (RD), regulated by the Ontario College of Dietitians. She is a mom, YouTuber, Blogger, award winning cookbook author, media coach specializing in food and nutrition influencers, and a frequent contributor to national publications like Healthline and on national broadcast TV shows.
www.abbeyskitchen.com/about-abbey/

Last Updated March 22, 2021. Published March 17, 2021 By Abbey Sharp 5 Comments

Diet for Your Blood Type – Hype or Hack?

We take a look at the research on the blood type diet to find out if eating according to your blood type is the key to improving health and lowering the risk of disease.

Most of us only think about our blood type when we’re looking to donate or receive blood. That is, until 2021 when the “Blood Type Diet” got another go as a popular weight loss trend. According to naturopathic doctor, Peter J D’Adamo, eating according to your blood type may just be the thing to improve our health and decrease our risk of disease.

D’Adamo first popularized the idea of the “blood type diet” back in 1996 with the release of his book “Eat Right for Your Type”. The diet has since continued to gain traction among celebrity wellness circles as the secret to health and longevity and is now making waves in the influencer world. But is there really a connection between your diet and your blood type? And is the blood type diet really the secret to improving our health and preventing disease? We dive into the research to find out.  

What is a “Blood Type”?

If you have never donated blood before, or you have been fortunate enough to have never received a blood transfusion, then your knowledge of blood types may or may not be a bit murky since high school health class. 

To summarize, everyone has a genetically determined blood type, and they fall into four categories: O, A, B, and AB. The “Rh factor” will also determine if your type is positive or negative. The main purpose of knowing your blood type is to ensure that your blood type is compatible with who you donate blood to and/or who receive blood from.

What is the Blood Type Diet?

When it comes to the blood type diet, the theory is that different blood types process foods differently and that following a specific diet can improve digestion, maintain our body weight, increase energy levels, improve mental clarity, and prevent disease. With that said, what does this mean for each blood type? Let’s break it down.

Type A – “The Cultivator”

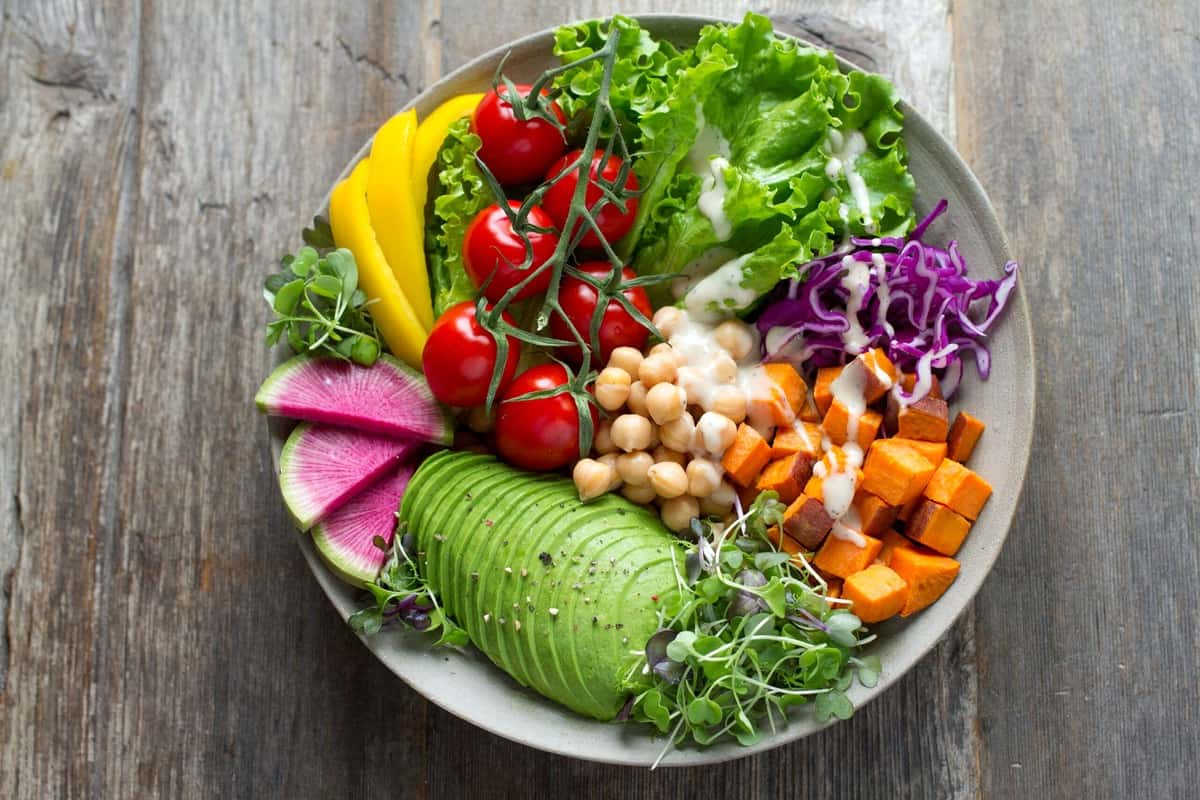
Birds eye view of a plant-based meal for those following the type A blood type diet.

According to the blood type diet, if you have blood type A you should consume a predominately meat-free, plant-based diet. This includes consuming a variety of fruit, vegetables, legumes, and whole grains while also emphasizing organic and fresh foods.

The rationale behind following a plant-based diet for this blood type is that people with type A have “sensitive immune systems and an increased risk of developing heart disease, cancer, and diabetes”.

Type B – “The Nomad”

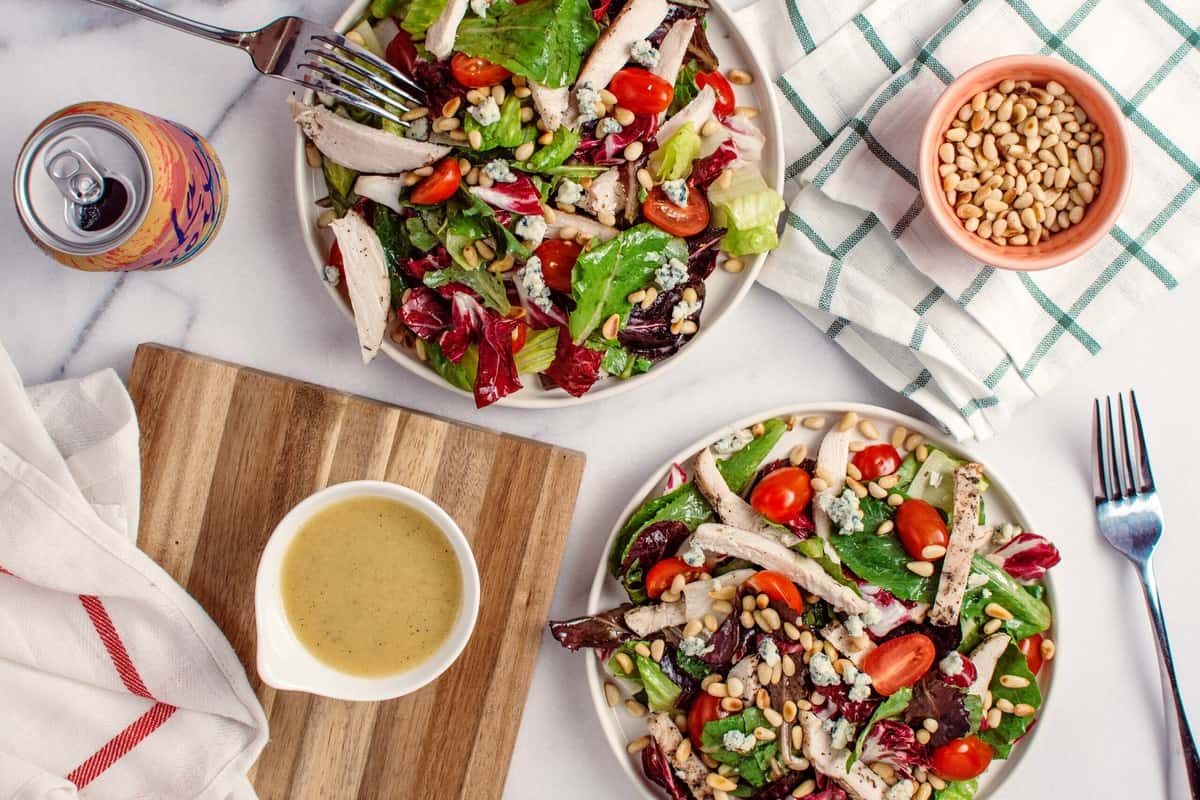
Birds eye view of several chicken salads as a meal option for those on the type B blood type diet.

Unlike the type A diet, type B blood types are encouraged to consume plants AND meat while also consuming small amounts of dairy. This diet, however, is less of an eating pattern and more of an arbitrary list of foods that you can and cannot eat. This includes eating green vegetables, eggs, low-fat dairy, and certain meats such as goat, lamb and rabbit. They should also avoid foods like corn, wheat, buckwheat, lentils, tomatoes, peanuts and sesame seeds. The rationale for being permitted to consume a somewhat wider variety of foods compared to the type-A diet is because B blood types have a “stronger immune system and tolerant digestive system”, meaning that they are apparently able to survive chronic diseases better than other blood types. Mmmkay.

Type O – “The Hunter”

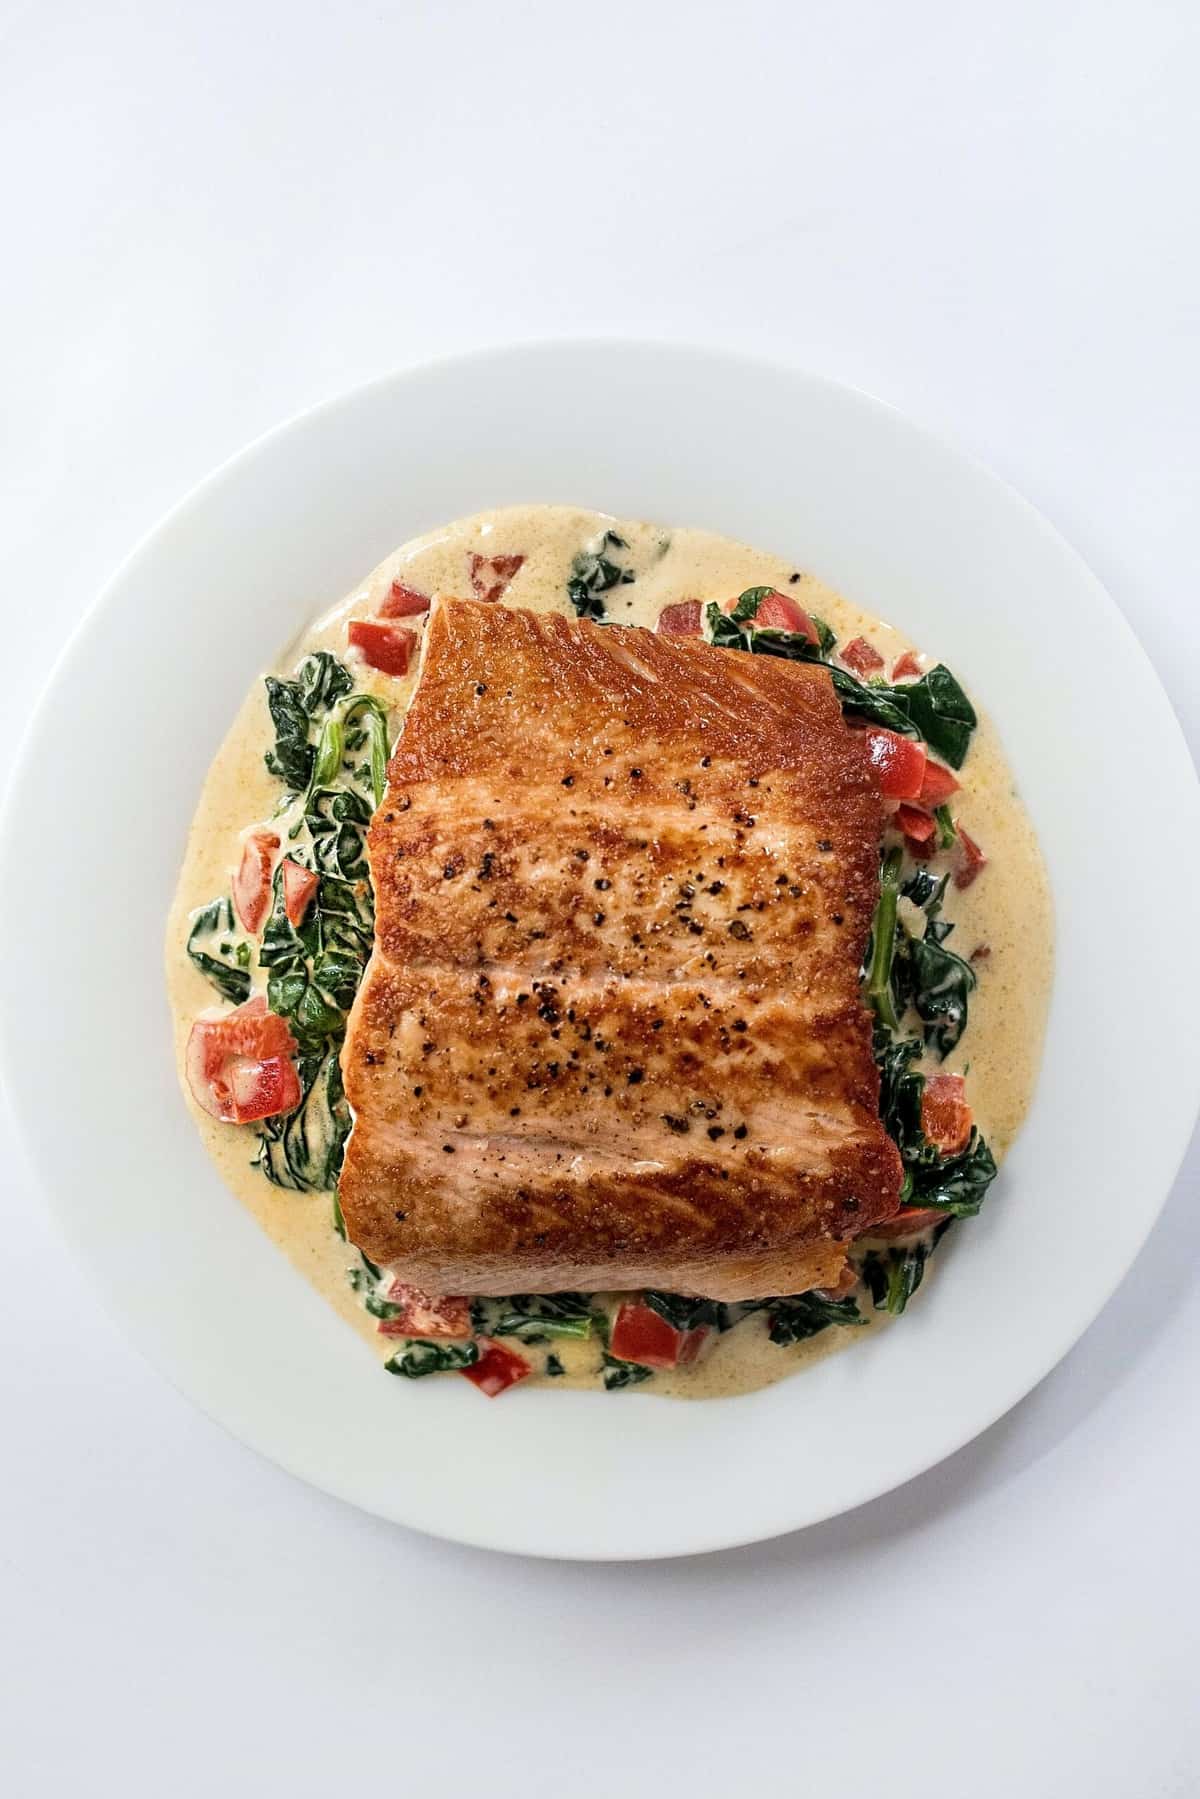
Birds eye view of salmon on a bed of greens in a white plate as an option for those following the type O blood type diet.

Those with an O blood type are to consume a high protein diet, because according to D’Adamo these types have higher levels of stomach acid and a greater ability to digest protein and fat. They should therefore prioritize lean meat, poultry, fish, fruit and vegetables while also eating smaller amounts of grains, beans and dairy.

Type AB – “The Enigma”

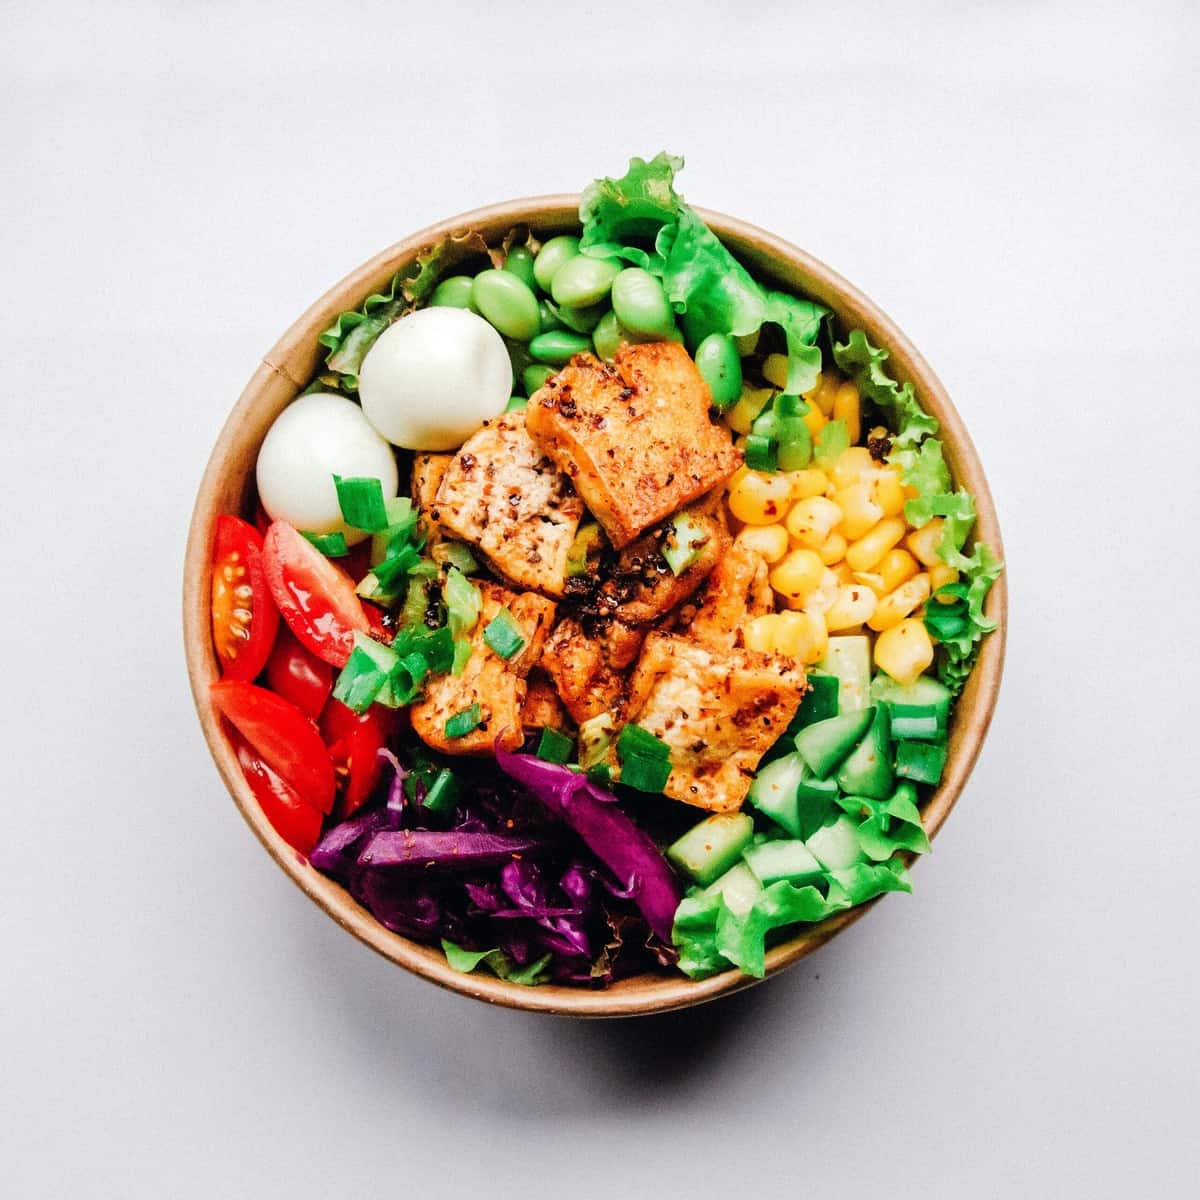
A close up of a tofu salad in a bowl with edamame, cucumber, tomato, corn, and cheese for those following the AB blood type diet.

Lastly, D’Adamo recommends that AB blood types consume tofu, seafood, dairy, and green veggies. He also claims that AB types have low stomach acid and should therefore consume smaller, more frequent meals while also avoiding smoked and cured meats, caffeine, and alcohol. In addition, he also recommends that AB types benefit from food combining and should therefore avoid starches and proteins in the same meal. This will help these types to “digest and metabolize foods more efficiently”. Now, I am not going to get into a whole spiel about how problematic food combining is, but if you are interested in my evidence-based take down, you can read all about food combining right here.

What Does the Research Say?

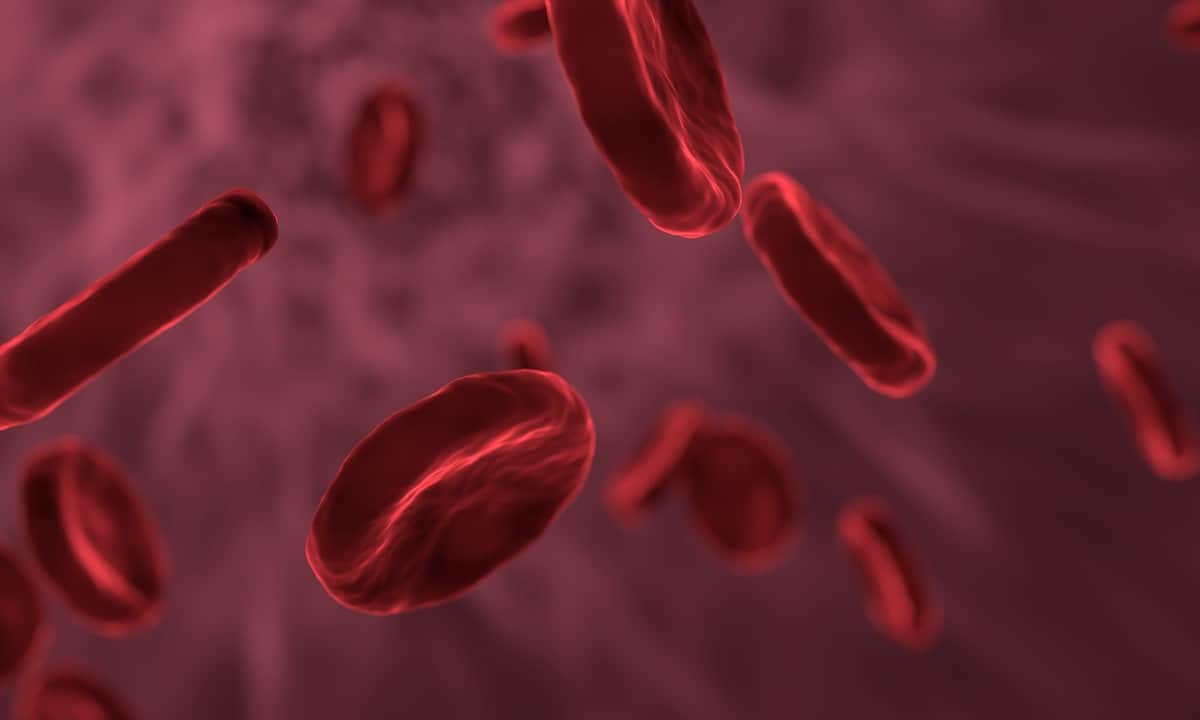
Image of red blood cells.

According to D’Adamo, he wrote his book based on “decades of ongoing research”. It appears that since the release of his book over two decades ago, that this research might still be ongoing (?) as the existing research on blood type diets is well… pretty scarce. There have only been a few studies (more specifically, three), that have looked at the health impacts of eating for your blood type. So, let’s take a closer look at the results.

Study #1

A 2013 systematic review looked at 16 studies to determine whether adhering to a specific diet according to blood type can improve health and lower disease risk. Since the research in this area is very limited, only one out of the 16 studies identified met the study’s selection criteria. This study compared changes in cholesterol between different blood types in response to a low-fat diet.

While the study outcomes did show improvements in cholesterol levels according to blood types, it’s important to mention that this study did not characterize their group by the ABO blood type (which is what D’Adamo uses). Rather, they categorized groups by MNS blood types which is functionally different from ABO.

As a result of the differences in blood type categorization, the study results did not answer the research question and therefore the authors concluded that there was no evidence suggesting that eating for your blood type is beneficial. However, there does exist evidence to suggests that certain blood types are more vulnerable to some disease. But more on that later.

Study #2

Another 2014 study with 1455 participants looked specifically at the ABO blood type diet developed by D’Adamo. This study found that those following the Type-A diet (a predominately plant-based diet) had better health outcomes. This included improvements in weight, cholesterol, and blood sugar management. However, the same health impacts were observed in an unmatched blood type group. This suggests that the health benefits of following the Type-A diet (aka plant based) are not exclusive to people with blood type A. This is something we already know! Eating more plants is healthy for everyone, not just those with Type A blood.

This study also found that those following the Type-O diet (a high protein diet) had lower triglyceride levels. However, the researchers concluded that this improvement in triglyceride levels was not related to the person’s blood type, specifically. Rather, it was a result of the low carb nature of the diet which has been shown to lower triglyceride levels. Meaning, whether or not someone has blood type O or any other blood type, their triglycerides levels will likely decrease by following a low carb diet.

Overall, the study concluded that the majority of individuals would benefit from the Type-A diet regardless of their blood type, as the health benefits of consuming a predominately plant-based diet are well documented. The same can be said about following the low carb Type-O diet and its effect on triglyceride levels. Therefore, the positive health impacts observed in this research study were unrelated to blood type and had more to do with the quality of the diet in general.

Study #3

Lastly, a more recent 2020 randomized control trial looked at 244 overweight individuals to determine whether the effects of a low-fat plant-based diet on specific health outcomes (including body weight, cholesterol, and blood sugar) was associated with blood type. All participants were assigned the same diet, regardless of blood type. The dietary intervention was similar to the diet that D’Adamo recommends for blood type A and recommends against for blood type O.

The researchers found that an individual’s blood type made no difference in their health outcomes when adhering to a plant-based diet. Similar to the second study mentioned, this study concluded that plant-based diets are equally beneficial for most individuals, regardless of their blood type. This is especially true when it comes to heart health and weight loss. This study also found no evidence to suggest that high-protein diets are beneficial for one blood type over another.

Is There a Link Between Blood Type and Disease Risk?

A picture of a heart hanging from a string.

While there is no current research to suggest that certain blood type groups will benefit from specific diets (although, D’Adamo’s research is still “on going” so the verdict may still be out on that front) – there does exist some research to suggest that certain blood types may make individuals more or less susceptible to some diseases.

Most of the research in this area has looked at the link between blood types and heart disease. For instance, several studies suggest that individuals with any blood type other than O (that is type A, B, or AB) have an increased risk of coronary heart disease, with one study showing that these groups are 11% more likely to develop heart disease compared to O blood types. Similarly, another study found that individuals with blood type O have a 15% reduced risk of coronary artery disease compared to other blood types. Moreover, some evidence suggests that individuals with blood type A tend to have higher cholesterol compared to other groups.

While type O may be seemingly fare better when it comes to heart disease, other research has shown that type O blood types have an increased risk of developing type 2 diabetes compared to blood type B.

With all of this in consideration, while we know that there IS a link between diet and heart health, we ALSO know that there are many risk factors for heart disease that go beyond your blood type. So, for example, if you have an O blood type but you also smoke, have a sedentary lifestyle, don’t manage your stress, consume alcohol in excess, and you don’t eat a heart healthy diet – these risk factors can increase the likelihood of developing heart disease regardless of your blood type.

Therefore, it is important to focus on healthy behaviours throughout the lifespan rather than looking at your blood type or anything else you can’t control as a sole indicator of health (because it certainly is not). On that note, if you are interested in more information on my top tips for eating a heart healthy diet, you can check out my blog post.

What’s the Deal with Lectins?

Three wooden spoons with a variety of dry beans.

Now, before we put the blood type diet to bed, there is one last point of contention that we need to touch on and that’s lectins. According to D’Adamo, when we consume foods containing lectins, a chemical reaction occurs in the blood that causes blood cells to clump together which can lead to “hormonal disruptions”. D’Adamo claims that certain people with different blood types will react differently to particular foods and their lectins, which has informed some of his dietary recommendations.

However, there is no research to date to suggest that lectins affect people in specific blood groups differently. In fact, research has shown that lectins do not cause any “clumping” of the blood like D’Adamo suggests.

Lectins (which are found in many foods such as grains, nuts, seeds, and legumes) have gained a pretty bed rep because they are an “anti-nutrient” – meaning, they can interfere with the digestion and absorption of nutrients in the body. However, the benefits of consuming lectin-containing foods far outweigh any potential adverse effect on our health. In fact, approximately 30% of our food is considered to have lectins, many of which are wholesome plant-based foods that are rich in antioxidants, fibre, vitamins and minerals.

Therefore, eliminating a whole class of healthy and beneficial foods while following the blood type diet is not necessary. Especially when these recommendations are based on “theory” without any strong evidence to back up these claims. If you want to learn more about anti-nutrients and lectins, you can read all about it in my blog posts on anti-nutrients and lectins.

Pros and Cons on the Blood Type Diet

An image of a melting red popsicle.

Now that we have covered what the blood type diet looks like and what the existing research has to say, what are the main takeaways from this diet? Let’s break down the pros and cons.

Pros

Despite the arbitrary dietary restrictions on the blood type diet, each diet is low in processed foods and added sugars, while also prioritizing lean proteins, fruits, and vegetables. As previously mentioned, the majority of individuals would benefit from following the plant-based diet suggested for the type-A groups.

In addition, one might naturally lose weight following the blood type diet. However, weight loss outcomes would likely not be significantly different from any other calorically restrictive diet.

Cons

In addition to the lack of research backing the blood type diet, the dietary recommendations are not very cost effective as D’Adamo recommends a lot of specialty and organic foods on the diet.

The dietary recommendations are also very specific and inflexible as they don’t really allow for personal taste preferences. For instance – someone on the AB-type diet who is lactose-intolerant and dislikes seafood is pretty much sh*t outta luck with tofu as their only source of protein (which also sounds incredibly boring).

Moreover, the blood type diet gives no consideration to health conditions and only makes recommendations based on a persons blood type. For instance, if an individual has diabetes, IBS, or lactose intolerance, their specific blood type diet would not be tailored to their condition and it may or may not be more restrictive as a result.

Most importantly, there is a serious lack of evidence to suggest that there is any benefit to eating according to your blood type. So, it is better to find a flexible and sustainable way of eating that works for you and your needs, rather than living your life according to a random list of foods you can and cannot eat.

Bottom Line

Overall, the current claims behind the blood type diet are based on theory and not so much on strong evidence. Therefore, more research is definitely needed to better understand any potential benefits of the blood type diet. While it is definitely possible for individuals to experience some health benefits from following select blood type diets (namely the type-A plant-based diet), current research suggests that this more so has to do with the quality of the diet itself rather than an individual’s blood type. With that said, I wouldn’t go rushing to find out your blood type or buy D’Adamo’s book so that you can follow a bogus set of eating rules.

Written by Giselle Segovia RD MHSc

More Blog Posts You Might Like

  • A Heart Healthy Diet: Top 10 Foods According to a Dietitian
  • Saturated Fat and Cholesterol 101
  • Are Vegetable Oils Unhealthy?
  • The “Sugar Feeds Cancer” Myth vs Facts

Abbey Sharp

Abbey Sharp is a Registered Dietitian (RD), regulated by the Ontario College of Dietitians. She is a mom, YouTuber, Blogger, award winning cookbook author, media coach specializing in food and nutrition influencers, and a frequent contributor to national publications like Healthline and on national broadcast TV shows.
www.abbeyskitchen.com/about-abbey/

Last Updated March 12, 2021. Published March 12, 2021 By Abbey Sharp 6 Comments

Tofu Nuggets (Healthy, Vegan & Kid Friendly)

These Vegan Baked Tofu Nuggets are the perfect meat-free nugget for baby led weaning (BLW), picky toddlers and kids who LOVE the dip their food in sweet sauce 😉

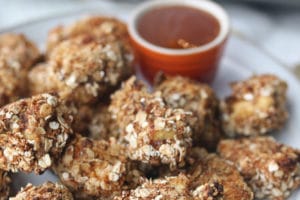
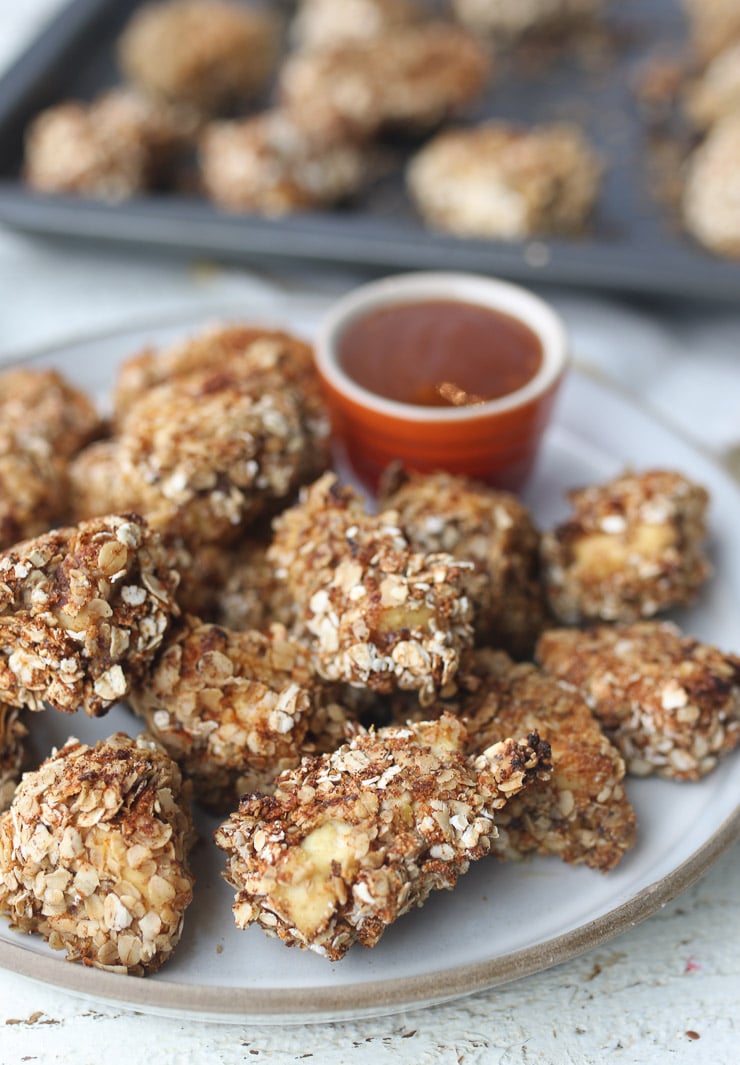
Plate of  tofu nuggets made with oatmeal with a sweet and sour sauce in a red ramekin.

I am always on the hunt for a good plant-based meal that I can share with my kiddos, and now that I am back on the baby led weaning train with my youngest son – it felt like we were due for some tasty vegan tofu nuggets that mama can enjoy as well!

I’ve made chicken nuggets before (and my kid LOVED those). I’ve also made everything bagel tofu nuggets for the grown ups who are OBSESSED with everything but the bagel spice like me. But these tofu nuggets are just PERFECTION and a must for any and all nugget lovers.

Table of contents

  • Why This Recipe Works
  • Key Ingredients
  • How to Make This Recipe
  • Expert Tips
  • Recipe FAQ
  • More Recipes You Might Like

Why This Recipe Works

If you love a good dippable nugget, then you have come to the right place because I guarantee that these baked tofu nuggets are about to be on heavy rotation in your household! Here are a few more reasons why this recipe is the bomb.com:

  • Baked not fried
  • Crispy on the outside, and tender on the inside
  • Toddler friendly
  • Great for baby led weaning
  • Plant based
  • Nutrition packed (high in protein and fibre!)
  • Requires less than 10 ingredients!

Key Ingredients

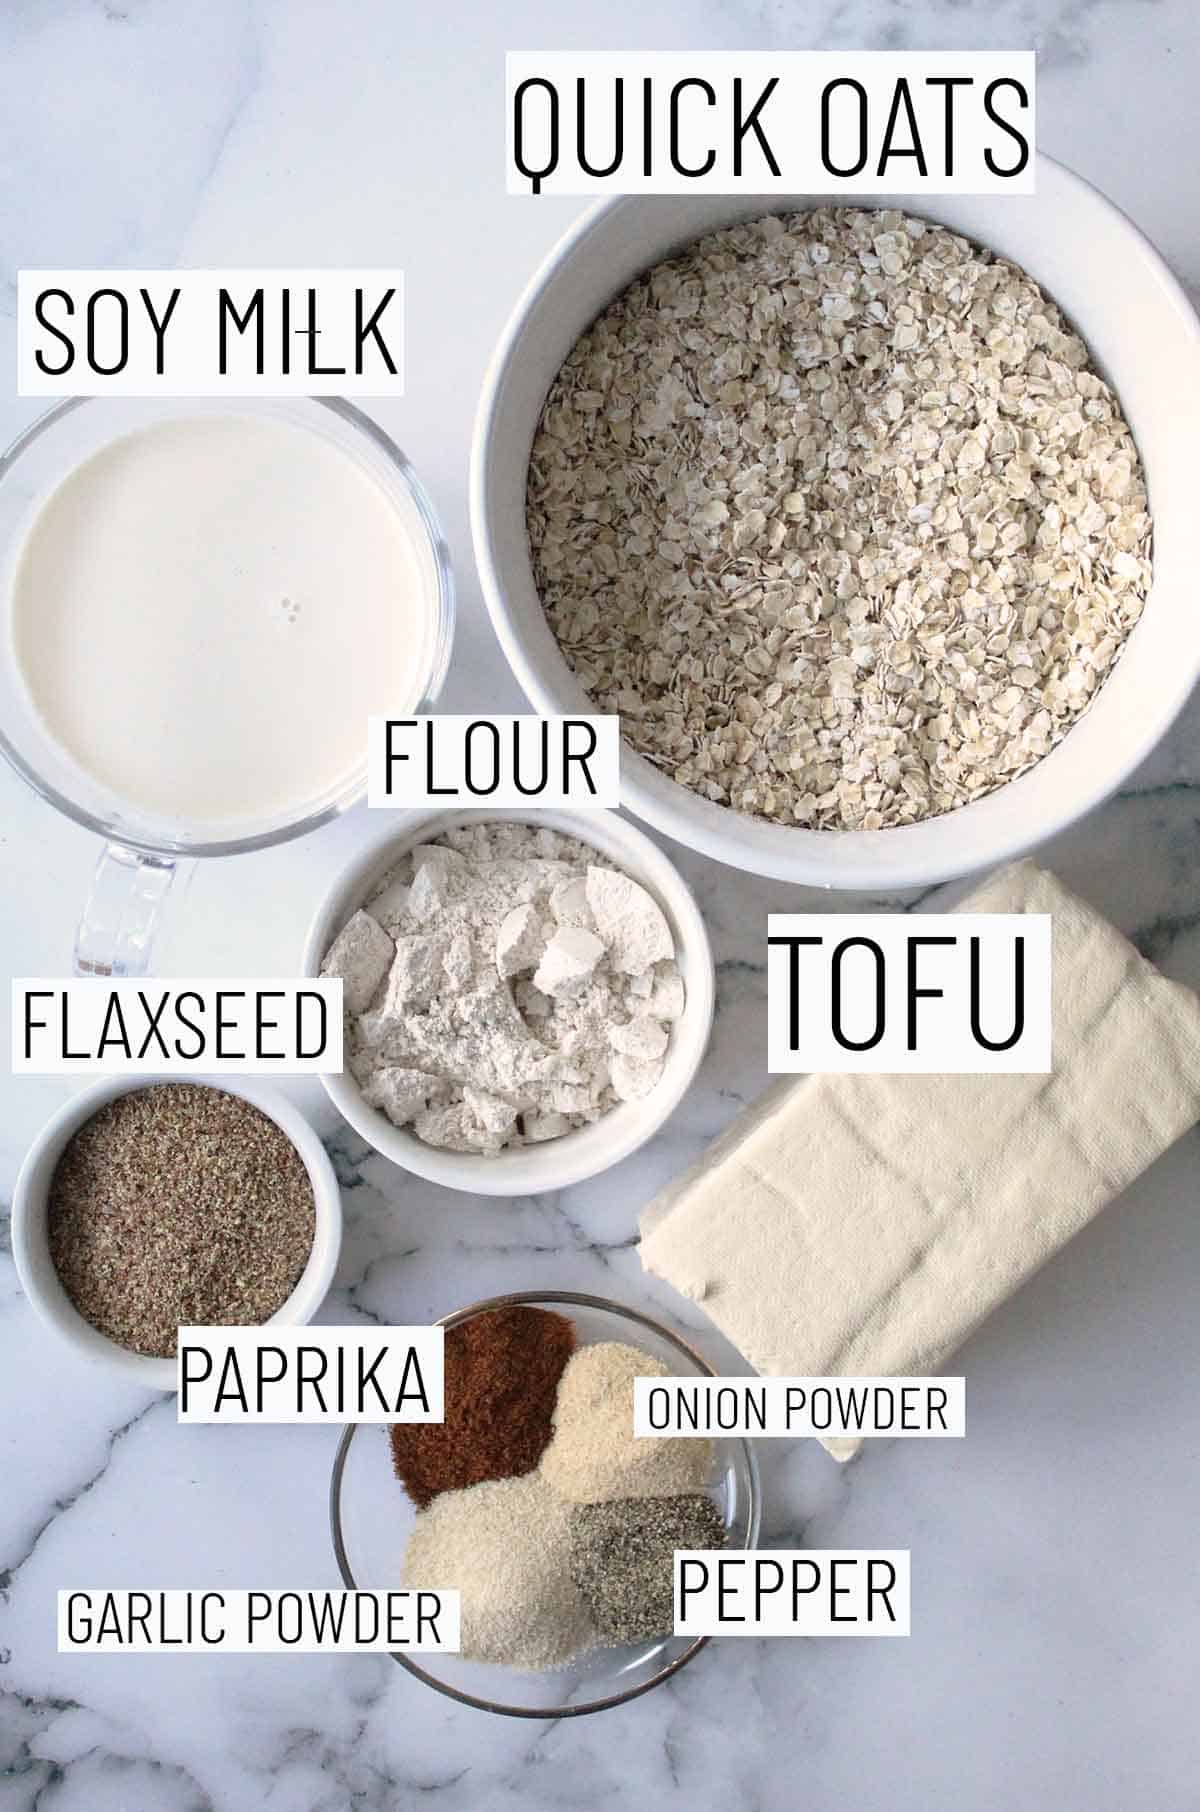
Flat lay image of recipe ingredients including oats, tofu, flour, soy milk, flaxseed, paprika, onion powder, garlic powder, and pepper.

Extra firm Tofu– If you’re not used to working with a lot of tofu, it’s really important that you SQUEEZE the excess liquid out. That means pressing the tofu on a baking sheet lined with towels and putting heavy items on top to get some of the excess moisture out. I also like to rip the tofu into pieces rather than cut them into cubes to make them look even more like REAL chicken nuggets.

Quick Cooking Oats – This is what adds a nice textural crunch on the outside along with some spices. If you only have rolled or old fashioned oats, you can give them a pulse in the food processor until they’ve been broken up a bit.

Ground Flax– This is your “egg”. By mixing the flax with the soy milk, and the flour, you’ll get a thick sticky paste that is perfect for adhering the oats.

Soy milk- You can swap in whatever your favourite non-dairy milk is but I prefer the thickness of soy milk over almond milk.

Oil in an oil atomizer- I do prefer to put my own olive oil into an oil atomizer since then you get a nice even coating of oil and you avoid some of the propellants and less quality oil in nonstick spray.

How to Make This Recipe

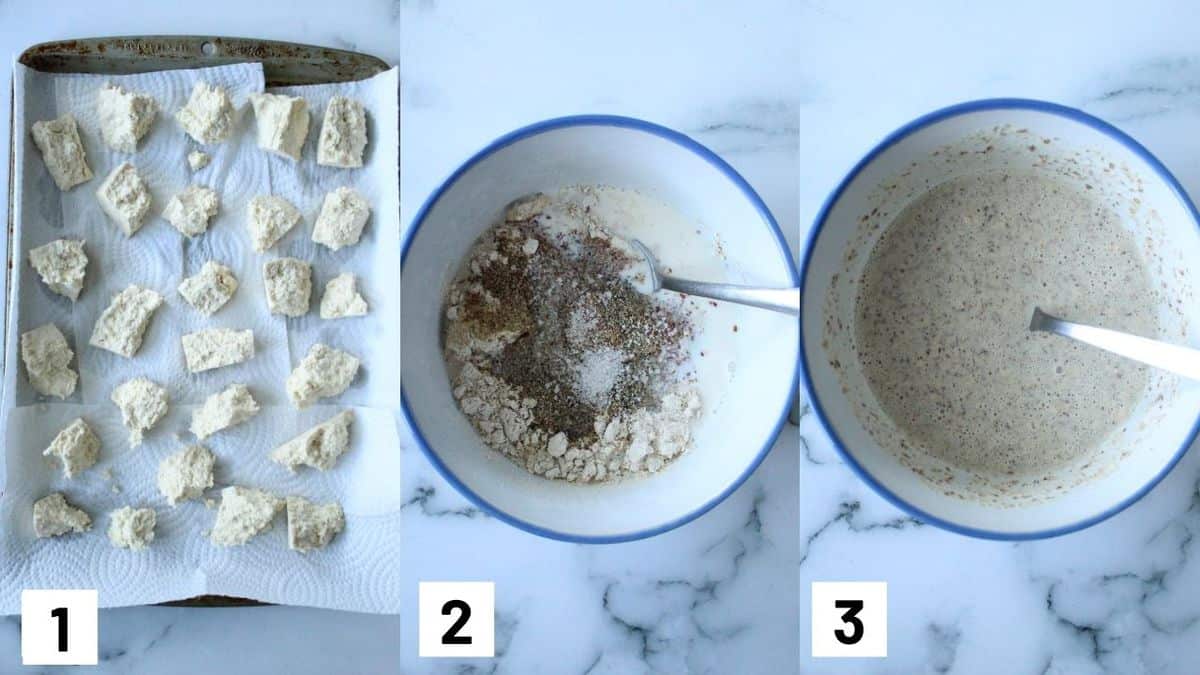
Three side by side images showing how to break up tofu into nugget shapes, and how to prepare the wet batter.

Step 1: Break the tofu pieces into rough nugget size (about an inch each), place them on a baking sheet lined with a kitchen towel. Top with another towel, and press down with heavy items. Allow to sit for 15-20 minutes.

Step 2: In a small bowl, whisk together all of the wet ingredients for the batter.

Step 3: Allow the mixture to sit for at least 10 minutes.

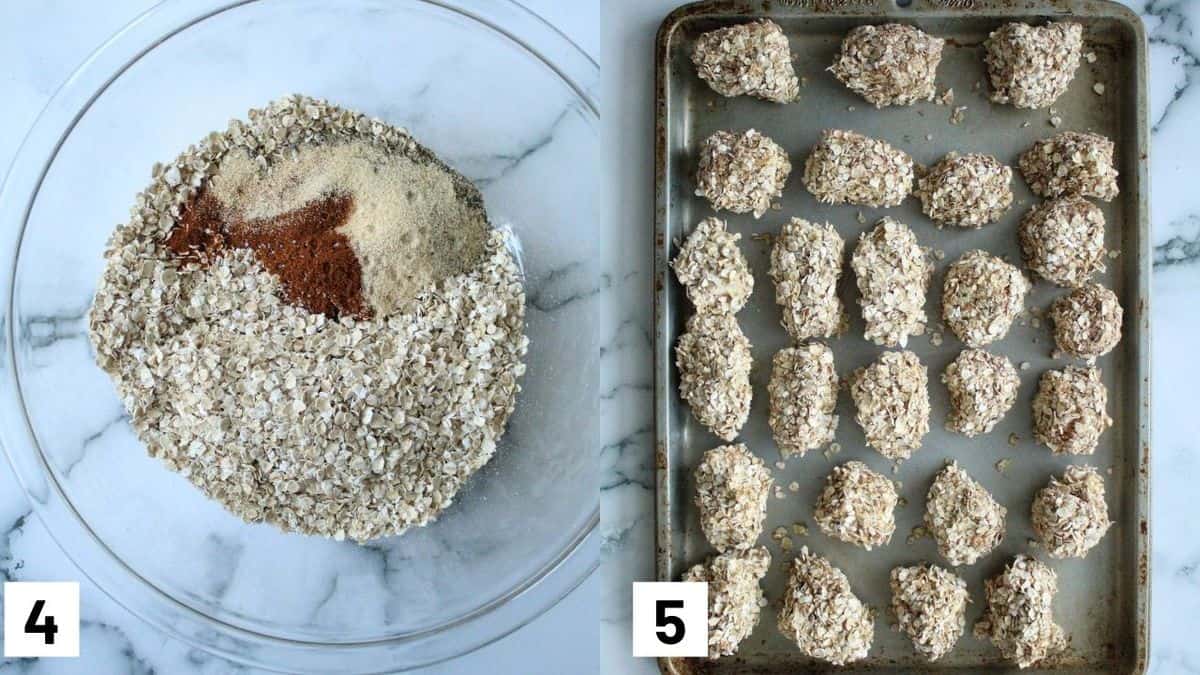
Two side by side images showing how to prepare the dry batter and the prepared baking sheet prior to being heated in the oven.

Step 4: In another bowl, mix together the oats, garlic powder, onion powder, paprika, pepper and salt.

Step 5: Dunk the tofu piece into the wet batter, then the dry oats, and transfer to the pre-heated baking sheet. Continue with the remaining tofu, then spray the tofu pieces with oil lightly. Bake for 12-14 minutes, then flip the tofu and spray again with oil. Bake for an additional 10-12 minutes more, until browned and crispy. Immediately sprinkle generously with fleur de sel.

Expert Tips

If you want your nuggets to get crispy without frying them, you HAVE to get that moisture out by pressing it out with heavy objects and towels (or paper towel). Do not skip that step.

You also will want to make sure not to overcrowd the baking sheet. Make sure there is at least 1/4″ between pieces and if you need to separate the tofu nuggets into two baking sheets, it may be worth it.

Also, preheat your baking sheet IN THE OVEN. Yes, I know that sounds strange but I like to get it hot so the second you put those nuggets on, the bottom doesn’t get soggy while the tops get crispy.

Recipe FAQ

How long will these last in the fridge?

These will be good for about 4 days in the fridge. To reheat, I would pop them into a 400 F oven for about 10 minutes until hot and crispy again.

Can I freeze these nuggets?

Yes, it’s very easy to freeze these. I would recommend allowing them to cool fully, then transferring them to a baking sheet lined with parchment paper and freezing for an hour until solid. Then I would pop them in a freezer bag for up to 4 months.

What are some good dips I can serve with these nuggets for my toddlers and babies?

We love dips in my house and my son LOVES to dip all of his nuggets and veggies into something. For those who like a classic, my no sugar added ketchup is a HUGE hit. And if you want to try some other combinations that are super toddler and kid friendly for these baked tofu nuggets, check out this post here.

What should I serve with these nuggets?

If you’re serving these as a meal for your family, some potatoes (mashed or boiled white or sweet) would be great, along with some steamed broccoli or green beans for an easy veg option. Or you can try some of these recipes.

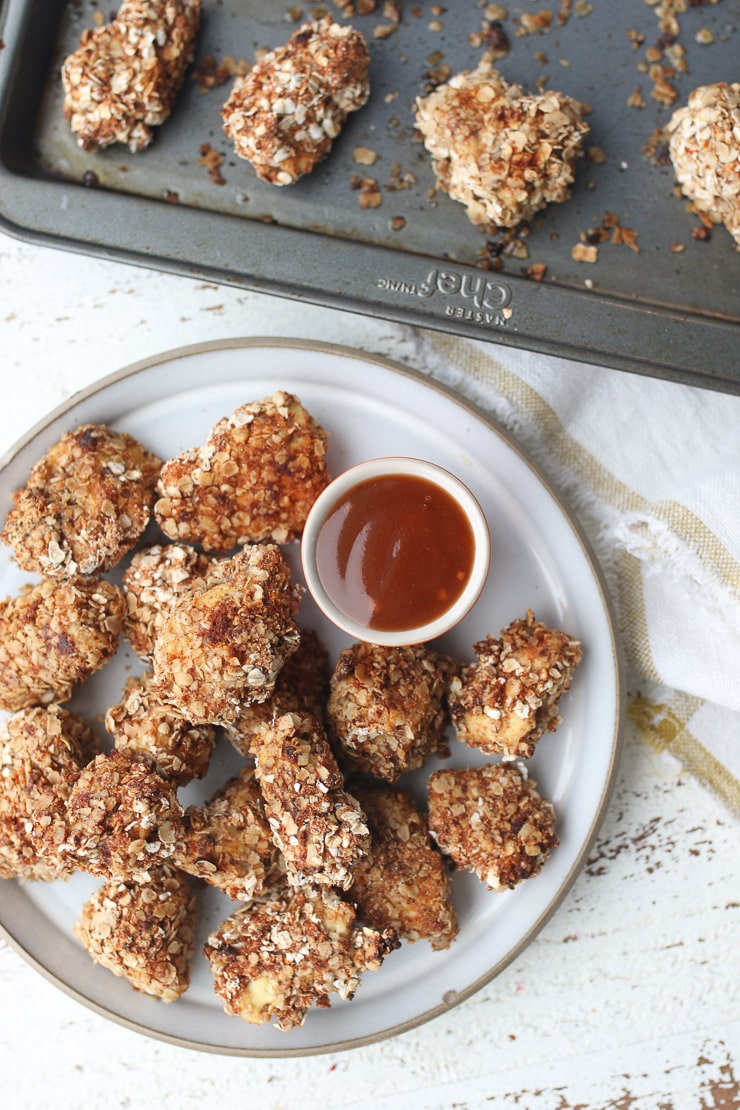
Birds eye view of tofu nuggets on a white plate with a dipping sauce with baking sheet in the background.

More Recipes You Might Like

We are huge nugget lovers in my house, so here are some more of my favourites!

  • EVERYTHING BAGEL VEGAN TOFU NUGGETS
  • MCDONALDS CHICKEN NUGGETS COPYCAT VERSION 
  • BUFFALO TOFU STICKS WITH RANCH DIP

What are some of your favourite meals for meatless Monday? Leave me a comment below!

Print Recipe
4.78 from 9 votes

Tofu Nuggets (Healthy, Vegan & Kid Friendly)

These Vegan Baked Tofu Nuggets are the perfect meat-free nugget for baby led weaning (BLW), picky toddlers and kids who LOVE the dip their food in sweet sauce 😉
Prep Time15 minutes mins
Cook Time30 minutes mins
Total Time45 minutes mins
Course: Dinner, Lunch
Cuisine: American
Servings: 6
Calories: 197kcal
Author: Abbey Sharp

Ingredients

Wet batter:

  • 1 1/2 cups soy milk
  • 6 tbsp whole wheat flour
  • ¼ cup ground flax
  • 1/2 tsp fine salt optional for babies
  • 1/2 tsp pepper optional for babies

Coating:

  • 2 cup quick cooking oats
  • 2 tsp garlic powder
  • 2 tsp onion powder
  • 2 tsp paprika
  • 1/2 tsp pepper
  • Fleur de sel on top optional
  • 1 pack extra firm tofu
  • Oil in an oil atomizer for spraying

Instructions

  • Break the tofu pieces into rough nugget size (about an inch each), place them on a baking sheet lined with a kitchen towel. Top with another towel, and press down with heavy items. Allow to sit for 15-20 minutes.
  • Preheat the oven to 425° and place a baking sheet in the oven to preheat.
  • In a small bowl, whisk together all of the wet ingredients for the batter. Allow the mixture to sit for at least 10 minutes.
  • In another bowl, together the oats, garlic powder, onion powder, paprika, pepper and salt.
  • Remove the baking sheet and grease with olive oil.
  • Dunk the tofu piece into the wet batter, then the dry oats, and transfer to the pre-heated baking sheet. Continue with the remaining tofu, then spray the tofu pieces with oil lightly.
  • Bake for 12-14 minutes, then flip the tofu and spray again with oil.
  • Bake for an additional 10-12 minutes more, until browned and crispy. Immediately sprinkle generously with fleur de sel.
  • Serve with your favourite sauce for dipping.

Notes

If you want your nuggets to get crispy without frying them, you HAVE to get that moisture out by pressing it out with heavy objects and towels. Do not skip that step.
You also will want to make sure not to overcrowd the baking sheet. Make sure there is at least 1/4″ between pieces and if you need to separate the tofu nuggets into two baking sheets, it may be worth that.
Also, preheat your baking sheet IN THE OVEN. Yes, I know that sounds strange but I like to get it hot so the second you put those nuggets on, the bottom doesn’t get soggy while the tops get crispy.

Nutrition

Calories: 197kcal | Carbohydrates: 26g | Protein: 11g | Fat: 6g | Saturated Fat: 1g | Sodium: 231mg | Potassium: 339mg | Fiber: 5g | Sugar: 2g | Vitamin A: 522IU | Vitamin C: 4mg | Calcium: 119mg | Iron: 3mg

Did you enjoy this baked tofu nuggets? Leave me a comment below with your thoughts!

Abbey Sharp

Abbey Sharp is a Registered Dietitian (RD), regulated by the Ontario College of Dietitians. She is a mom, YouTuber, Blogger, award winning cookbook author, media coach specializing in food and nutrition influencers, and a frequent contributor to national publications like Healthline and on national broadcast TV shows.
www.abbeyskitchen.com/about-abbey/

Last Updated March 9, 2021. Published March 10, 2021 By Abbey Sharp 11 Comments

Tofu Pudding with Sweet Potato (Vegan)

This vegan tofu pudding with sweet potato makes for a healthy and delicious snack, breakfast or dessert! It is super easy to prepare and requires less than 10 ingredients.

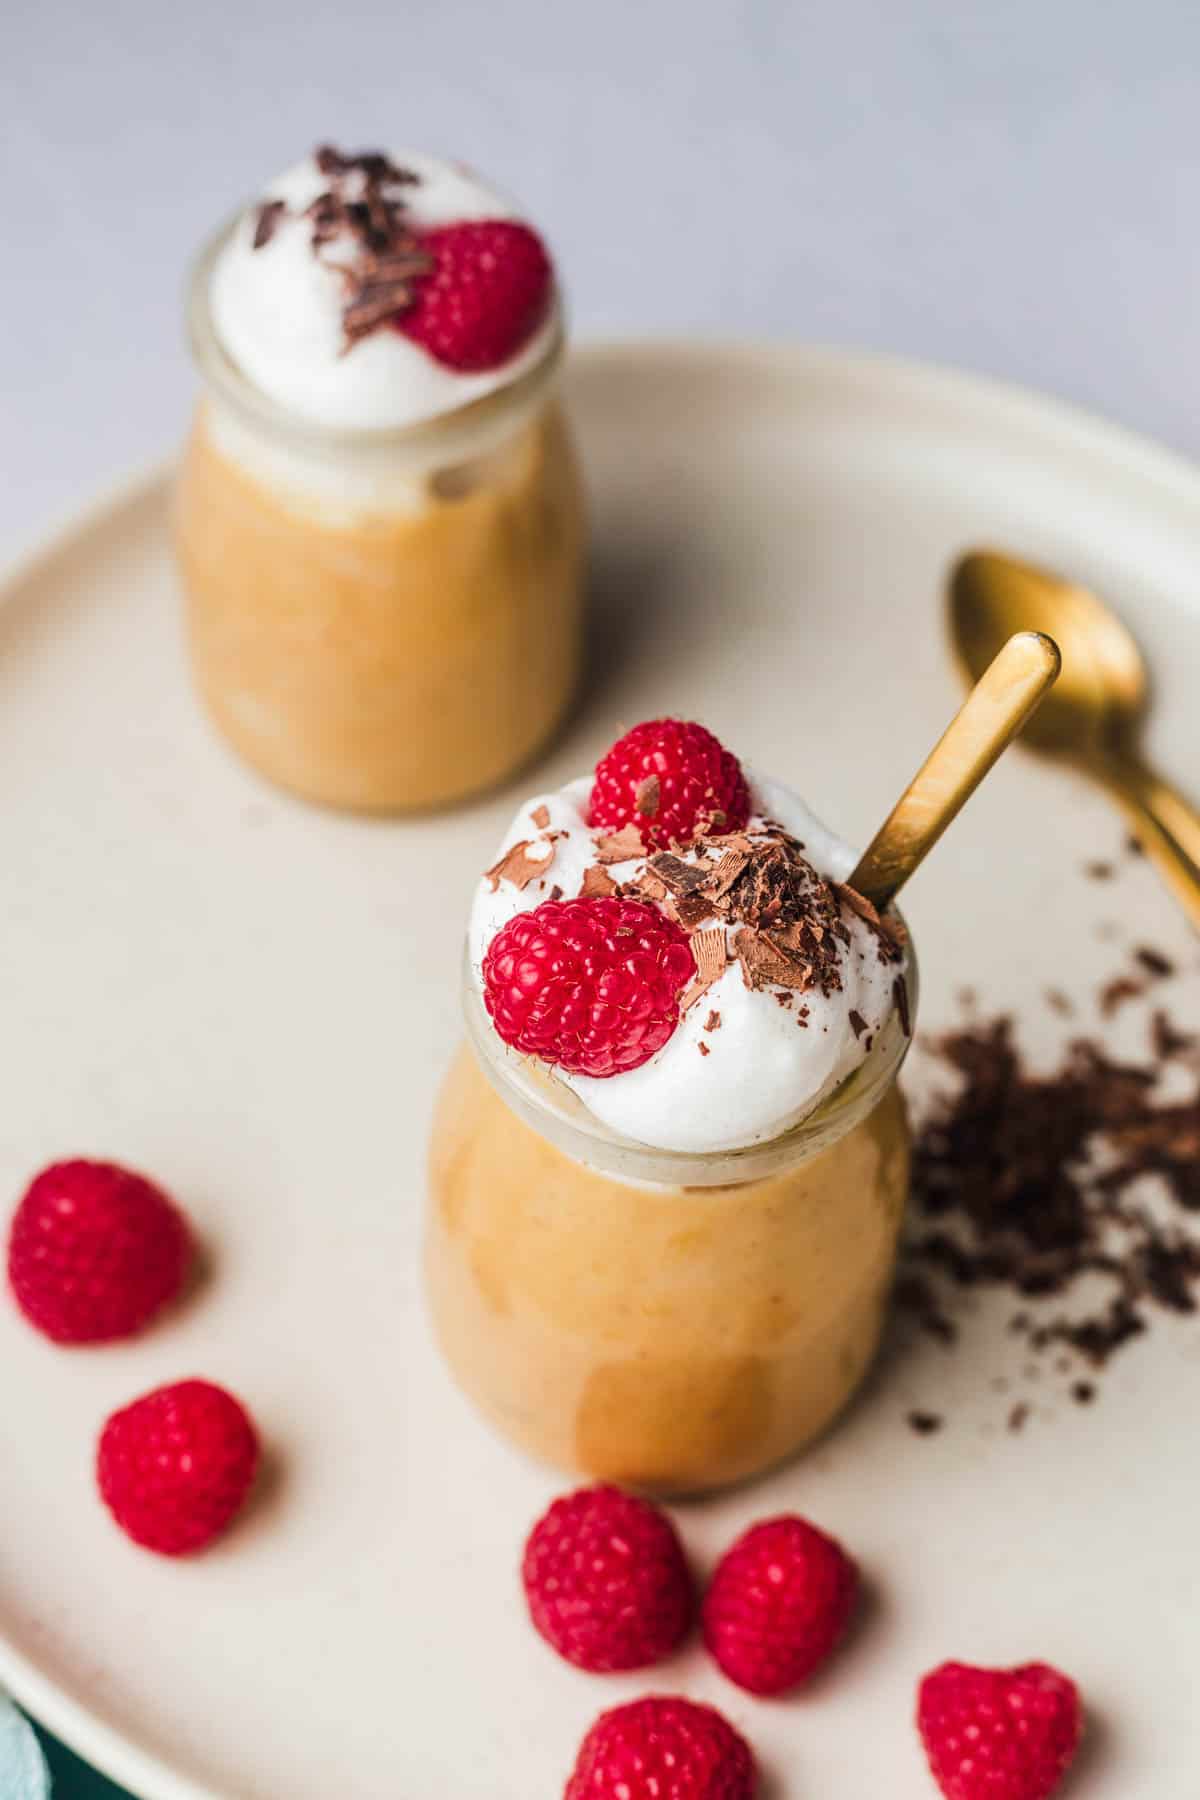
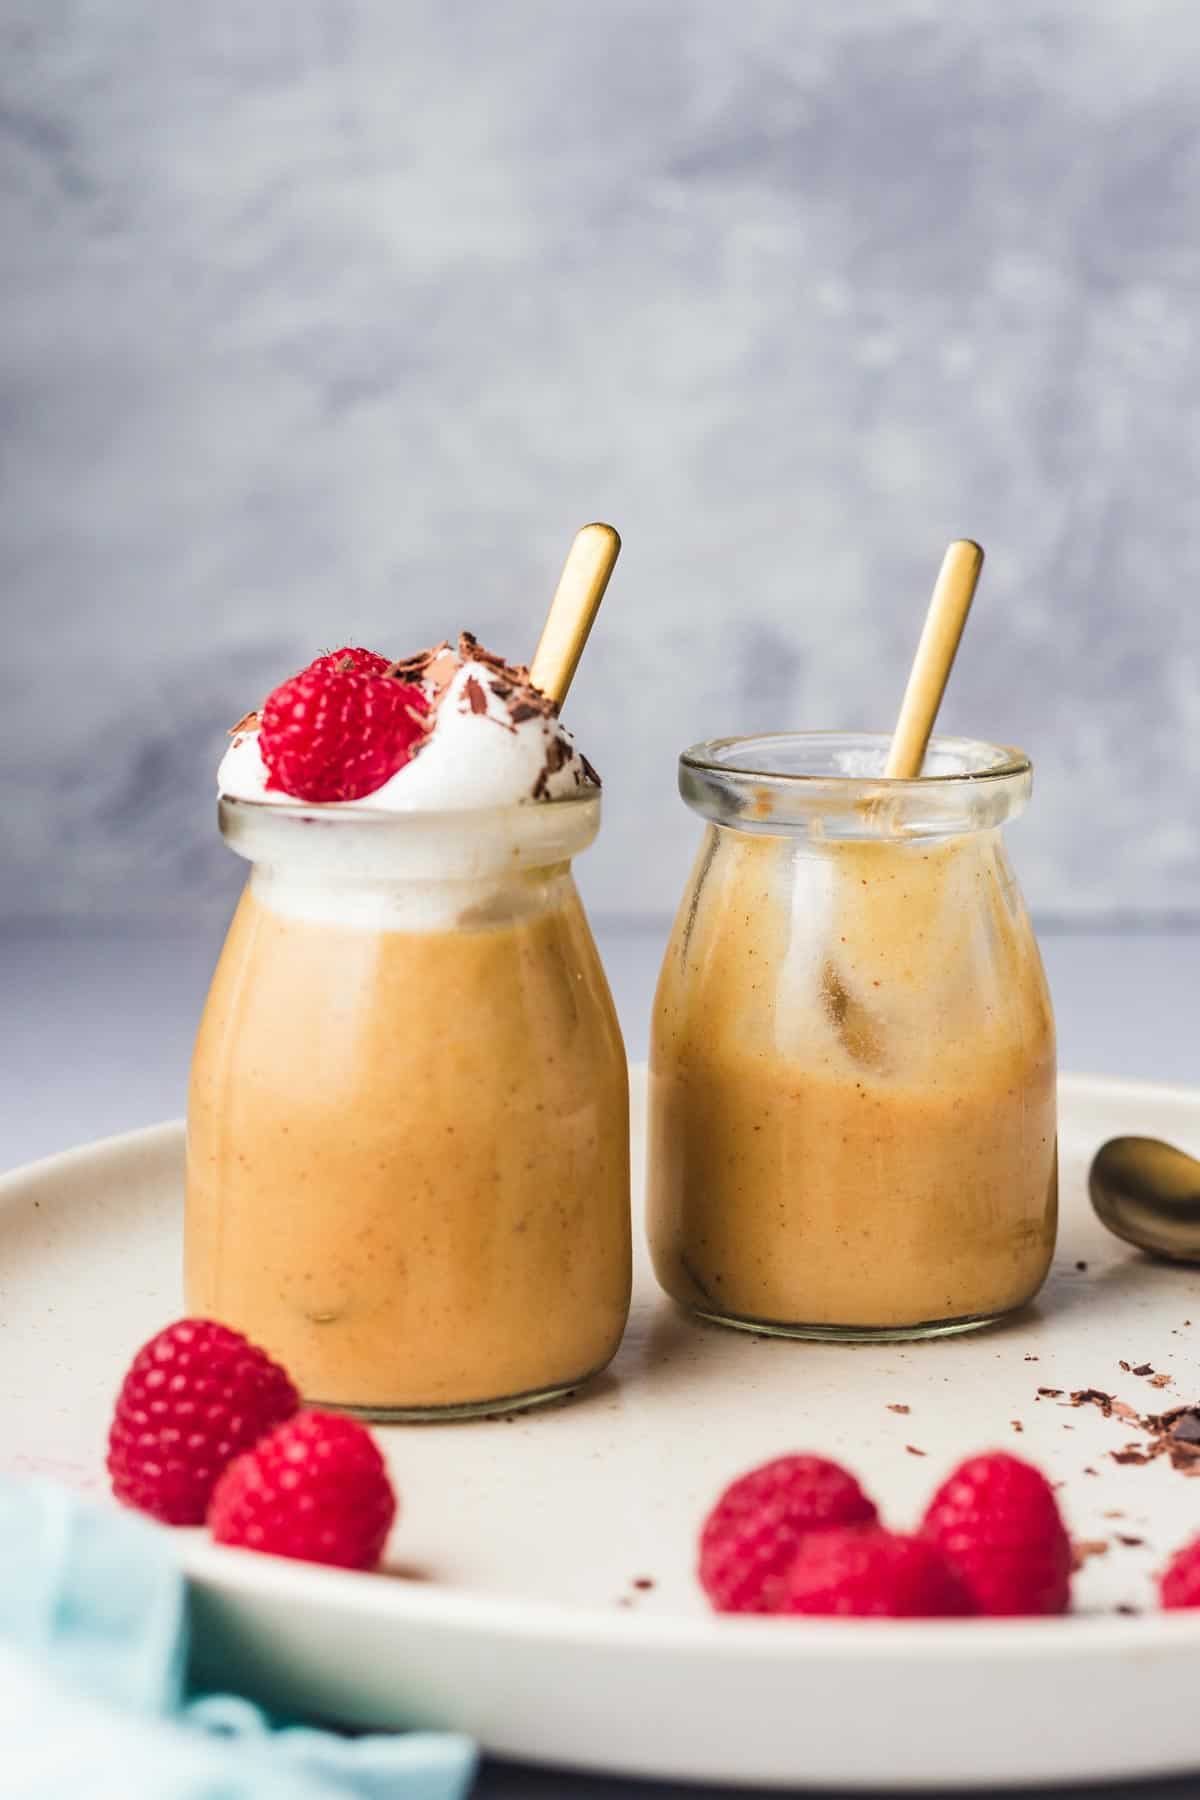
Close up of sweet potato tofu pudding in glass jars topped with raspberries, yogurt and shaved chocolate.

I have never met a tofu pudding that I didn’t like. But I am truly a sucker for a pudding that is as gorgeous as it is delicious. Thats where this vegan sweet potato tofu pudding comes into play!

This tofu pudding is naturally high in protein, and is made all the more colourful and naturally sweetened from the sweet potato. This tofu pudding is also super versatile as an after school snack for kiddos, dessert, or even a loaded breakfast customized with your favourite toppings!  

Table of contents

  • Why This Recipe Works
  • Key Ingredients
  • How To Make This Recipe
  • Expert Tips
  • Recipe FAQs
  • More Recipes Like This

Why This Recipe Works

If you love the creamy texture of a good pudding, then you absolutely have to try this vegan version! But if you need a little more convincing, here are a few more reasons why you absolutely NEED to try this tofu pudding.

  • 100% plant based
  • Requires less than 10 ingredients
  • Super easy to prepare
  • Tastes like a dream!
  • Perfect as a healthy snack or dessert

Key Ingredients

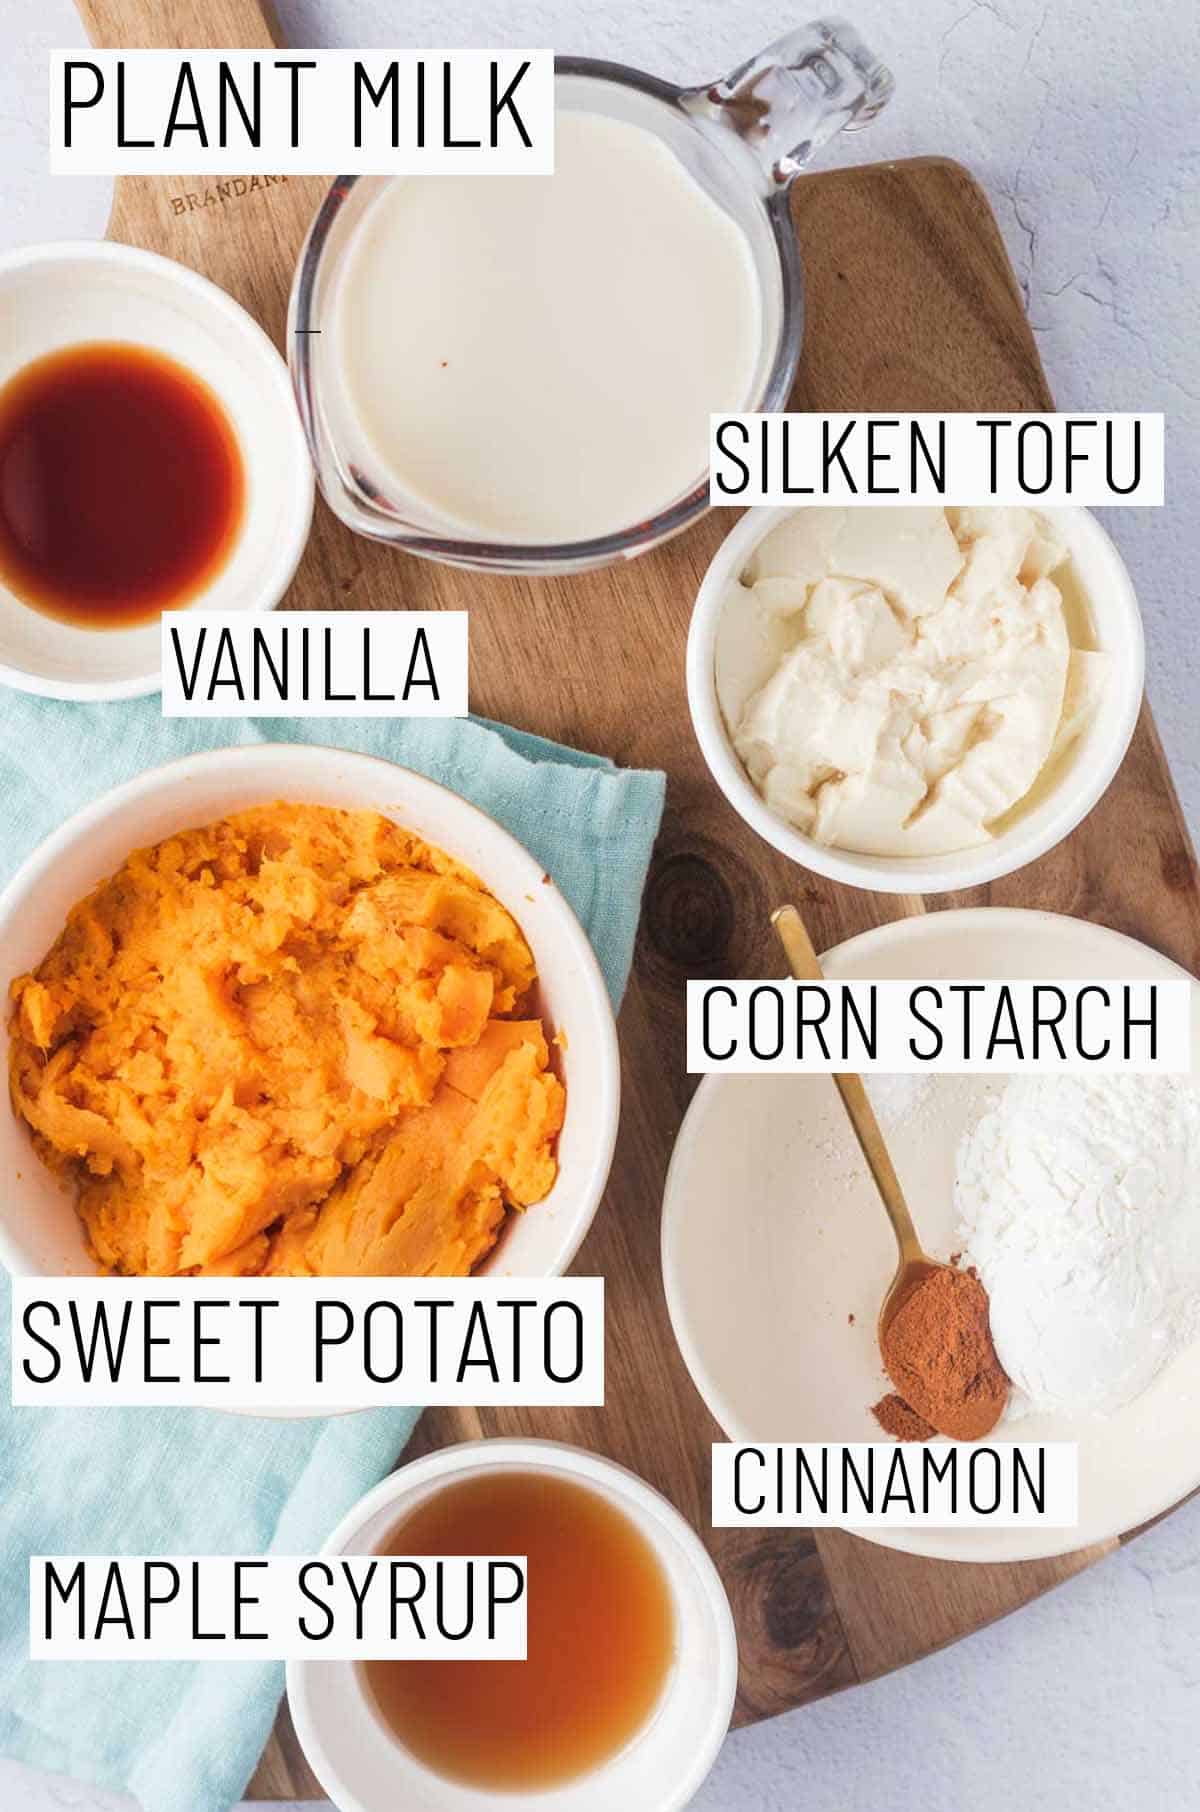
Flat lay image of portioned recipe ingredients including maple syrup, cinnamon, cornstarch, sweet potato, tofu, milk, and vanilla.

Plant Milk – This recipe is pretty flexible when it comes to what plant-based milk you choose to use. However, we personally prefer to use either almond or oat milk as it yields a smoother consistency.

Sweet Potato – This not only adds a nutrition boost to the tofu pudding, but it is also responsible for the gorgeous orange colour that will make you fall head over heels for this recipe!

Silken Tofu – This ingredient is key to preparing a super smooth tofu pudding! It is also very neutral in flavour which allows for the natural sweetness from the sweet potato to really stand out.

Cornstarch – We use cornstarch in this tofu pudding as a thickening agent when heating up the plant milk so that you’re not left with a super wet pudding.

How To Make This Recipe

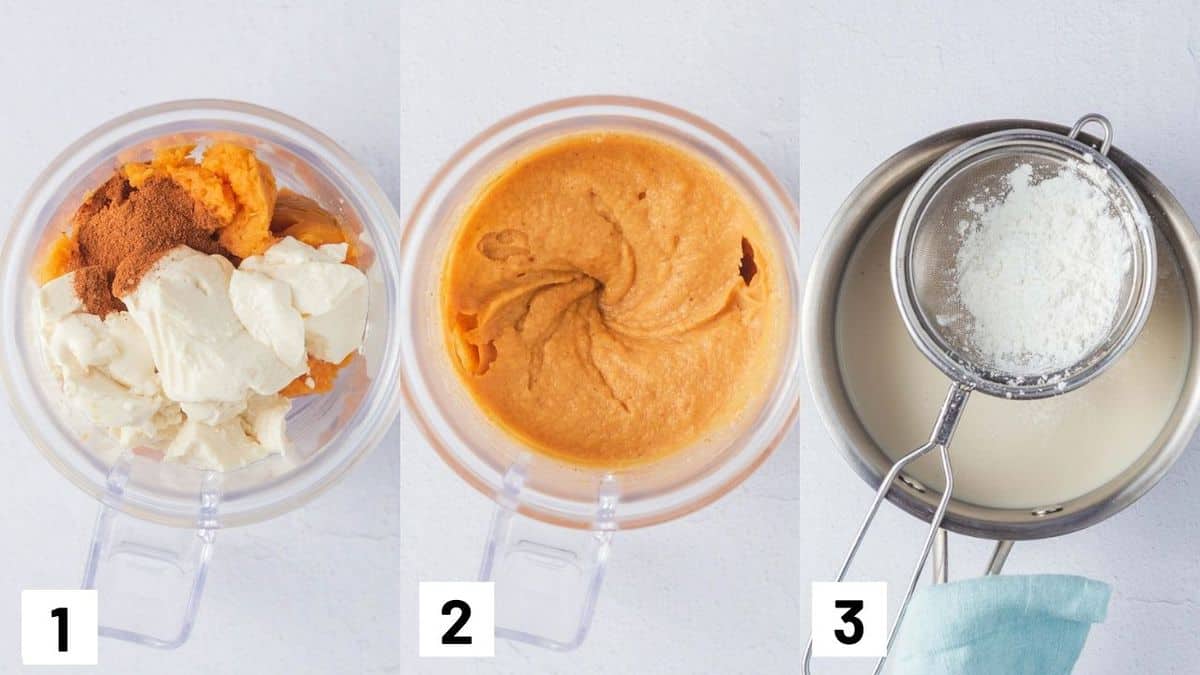
Three side by side images showing how to prepare recipe including combining ingredients in a food processor and heating up plant milk in a pan with cornstarch.

Step 1: Place the mashed sweet potato, tofu maple syrup, cinnamon and salt in a blender.

Step 2: Blend until well combined and smooth.

Step 3: Place the almond milk or oat milk in a medium saucepan, sift in the cornstarch and add vanilla and stir till it well combined with no lumps.

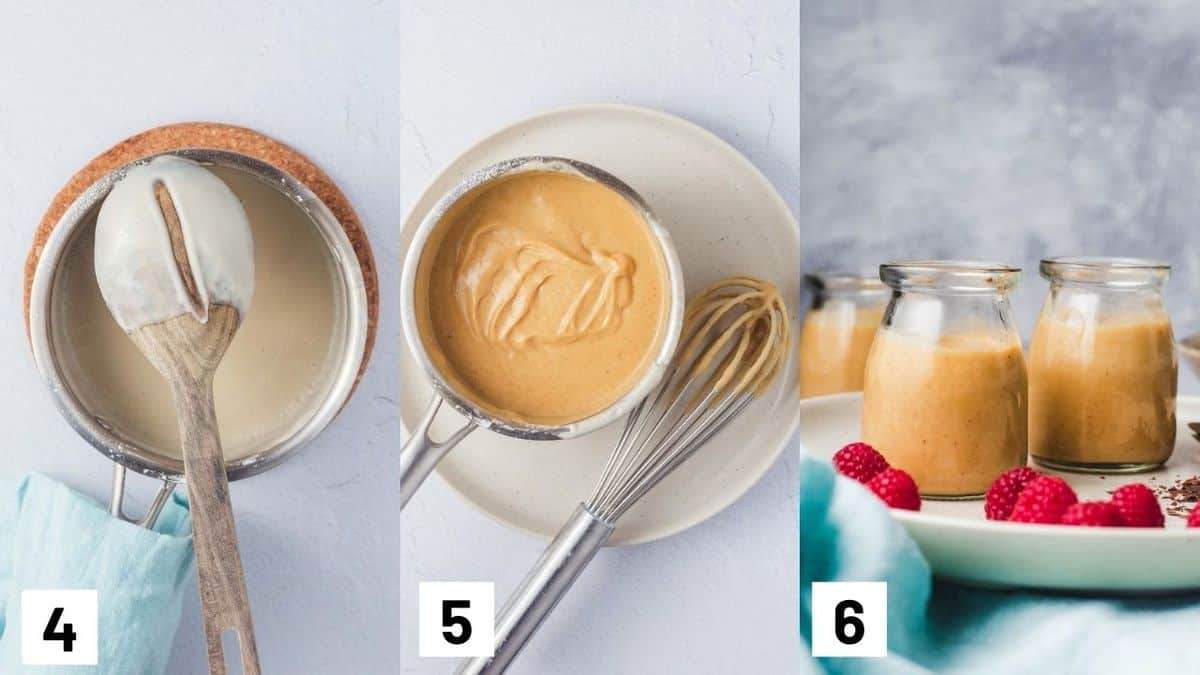
Three side by side images showing how to prepare dessert mixture.

Step 4: Bring this mixture to medium heat stir continuously until the mixture thickens. This should take about 5-10 minutes. When the cornstarch coats the back of the spoon it is done.

Step 5: Slowly add the tofu sweet potato mixture to the saucepan and stir until well combined. Store in the fridge for at least an hour to set. 

Step 6: Top with vegan whipped topping, vegan yogurt, shaved dark chocolate, raspberries or pomegranate.

Expert Tips

When it comes to cooking the sweet potato, we recommend boiling, steaming or pressure cooking without any added seasoning. The sweet potato is sweet enough as is and will later be combined with other flavour enhancers like vanilla, maple syrup, and cinnamon. While you can certainly roast the sweet potato if you want to, the browning might alter the flavour slightly.

It is also ideal to mix in the cornstarch before you heat the non dairy milk, this will ensure there are no clumps. However, if the pudding ends up clumping up, strain it before storing in the fridge.

Recipe FAQs

How long can I store this in the fridge?

This will keep in the fridge for about 3-4 days.

What toppings would you recommend?

We love to top this sweet potato tofu pudding with raspberries, pomegranate, vegan yogurt, and shaved chocolate. But honestly, anything goes! You can top with granola, nuts, seeds, a drizzle of maple syrup, and chopped fruit.

Is this recipe gluten free?

Yes this recipe is 100% gluten free.

Is this kid friendly?

Oh definitely! I fed this to my kiddo and it hardly stood a chance. They will LOVE the colour and smooth texture, and it is also packed with natural sweetness.

Can I serve this for breakfast?

Most definitely! You can serve yourself a larger portion to enjoy for breakie and top with your favourite toppings.

Close up of two jars of tofu pudding with one topped with yogurt, raspberries, and shaved chocolate.

More Recipes Like This

If you love a good pudding recipe, you’ll LOVE these pudding recipes on the blog.

  • Banana Peanut Butter Protein Pudding (Vegan)
  • Peanut Butter and Jelly Chia Pudding
  • Oatmeal Pudding (Vegan)
  • Coconut Rice Pudding with Kiwi and Mango

Did you enjoy this sweet potato tofu pudding? Let me know your thoughts down in the comments!

Print Recipe
5 from 8 votes

Tofu Pudding with Sweet Potato (Vegan)

This vegan tofu pudding with sweet potato makes for a healthy and delicious snack, breakfast or dessert! It is super easy to prepare and requires less than 10 ingredients.
Prep Time10 minutes mins
Cook Time1 hour hr 10 minutes mins
Total Time1 hour hr 20 minutes mins
Course: Dessert, Snack
Cuisine: American
Diet: Vegan
Servings: 5 – 6
Calories: 93kcal
Author: Abbey Sharp

Ingredients

  • 2 cups unsweetened plant based milk almond or oat recommended
  • 1 teaspoon vanilla
  • 3 tablespoons cornstarch
  • 1 cup cooked mashed sweet potatoes about 2 medium or 3 small roasted sweet potatoes
  • ½ cup silken tofu
  • 2 tablespoon maple syrup or to taste
  • 1 tsp cinnamon
  • Pinch of salt

Instructions

  • Place the mashed sweet potato, tofu maple syrup, cinnamon and salt in a blender and blend until well combined and smooth.
  • Place the almond milk or oat milk in a medium saucepan, sift in the cornstarch and add vanilla and stir till it well combined with no lumps. Bring this mixture to medium heat stir continuously until the mixture thickens. This should take about 5-10 minutes. When the cornstarch coats the back of the spoon it is done.
  • Slowly add the tofu sweet potato mixture to the saucepan and stir until well combined.
  • Store in the fridge for at least an hour to set.
  • Top with vegan whipped topping, vegan yogurt, shaved dark chocolate, raspberries or pomegranate.

Notes

When it comes to cooking the sweet potato, we recommend boiling, steaming or pressure cooking without any added seasoning. The sweet potato is sweet enough as is and will later be combine with other flavour enhancers like vanilla, maple syrup, and cinnamon. While you can certainly roast the sweet potato if you want to, the browning might alter the flavour slightly.
It is also ideal to mix in the cornstarch before you heat the non dairy milk, this will ensure there are no clumps. However, if the pudding ends up clumping up, strain it before storing in the fridge.

Nutrition

Calories: 93kcal | Carbohydrates: 17g | Protein: 2g | Fat: 2g | Saturated Fat: 1g | Sodium: 147mg | Potassium: 153mg | Fiber: 1g | Sugar: 6g | Vitamin A: 3775IU | Vitamin C: 1mg | Calcium: 148mg | Iron: 1mg

Abbey Sharp

Abbey Sharp is a Registered Dietitian (RD), regulated by the Ontario College of Dietitians. She is a mom, YouTuber, Blogger, award winning cookbook author, media coach specializing in food and nutrition influencers, and a frequent contributor to national publications like Healthline and on national broadcast TV shows.
www.abbeyskitchen.com/about-abbey/

Last Updated March 4, 2021. Published March 4, 2021 By Abbey Sharp 2 Comments

Szechuan Cacio e Pepe (Easy Spicy Pasta Recipe)

We are giving your favourite pasta recipe a bit of spicy flare with this Szechuan Cacio e Pepe! This recipe is super easy and only requires 7 ingredients and 25 minutes to prepare.

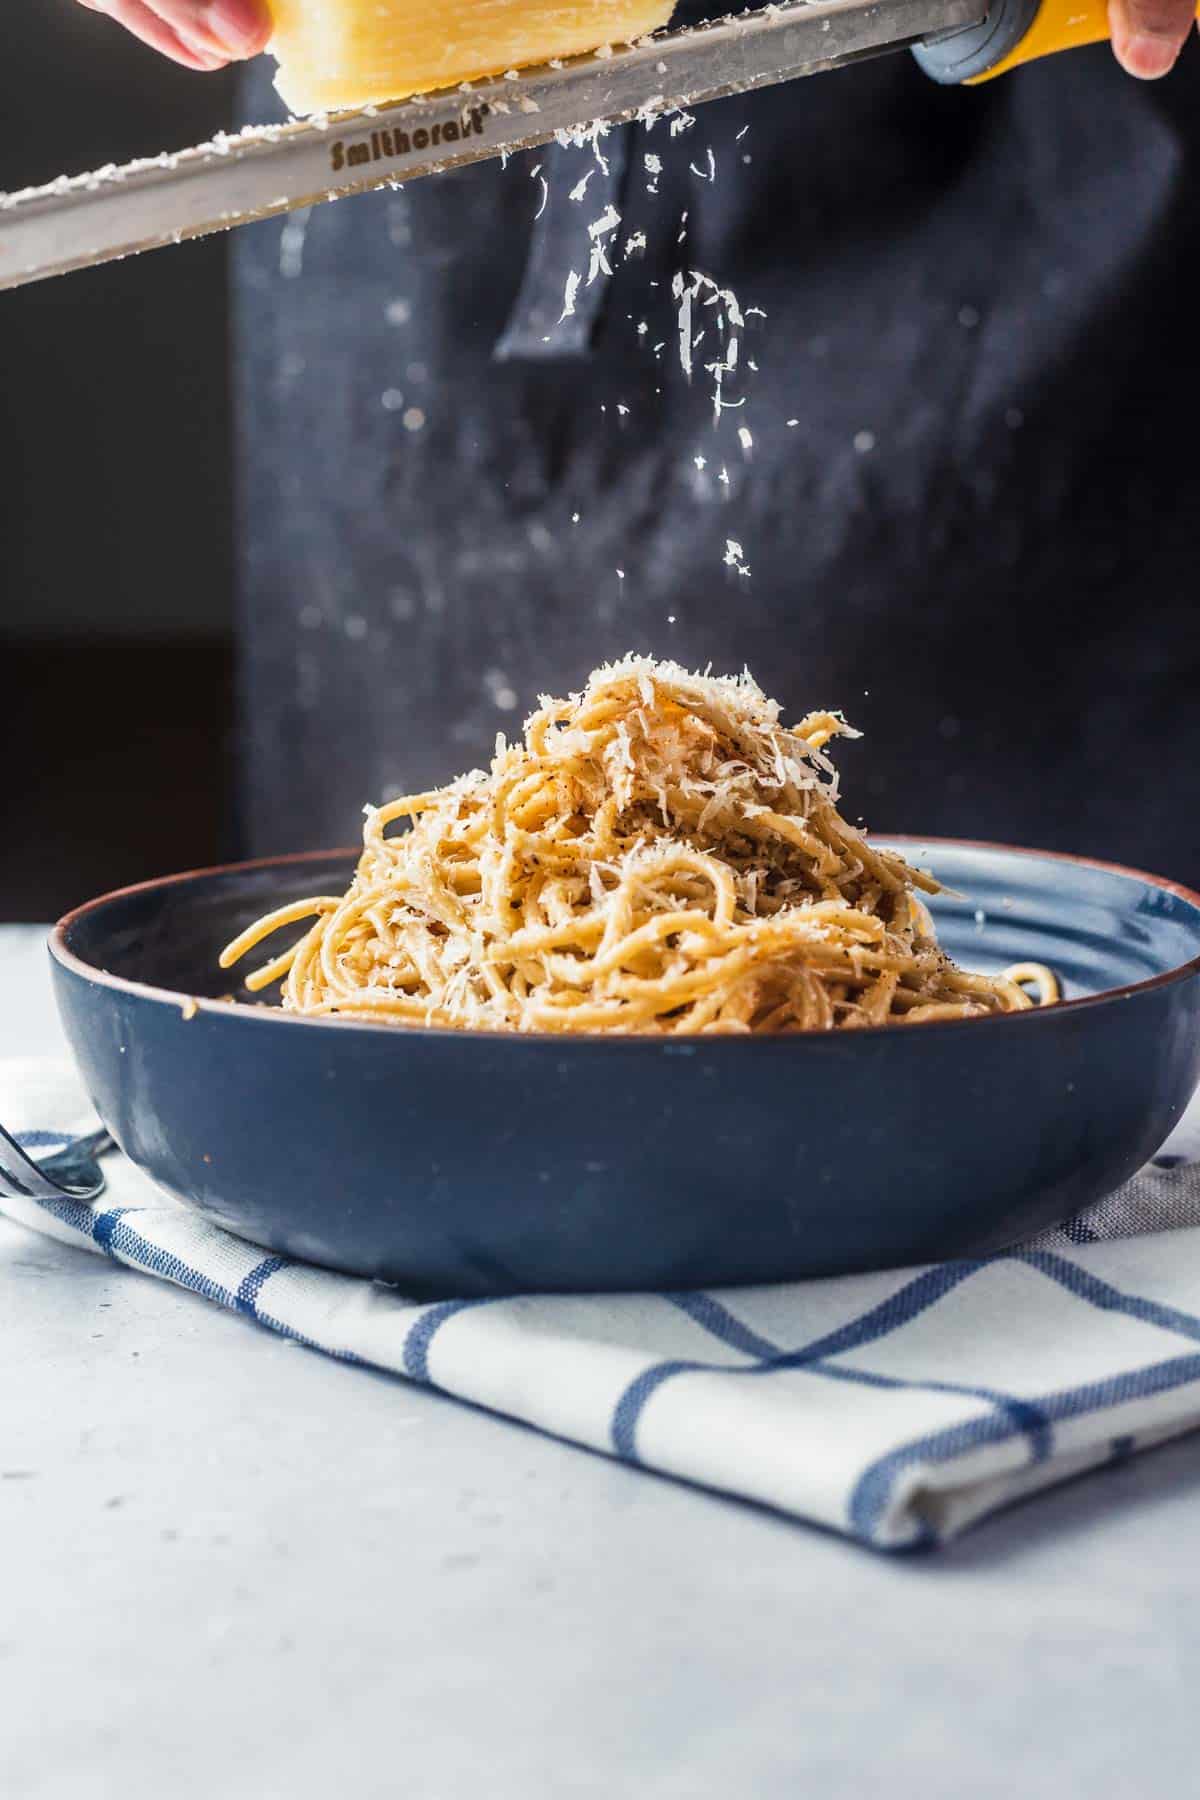
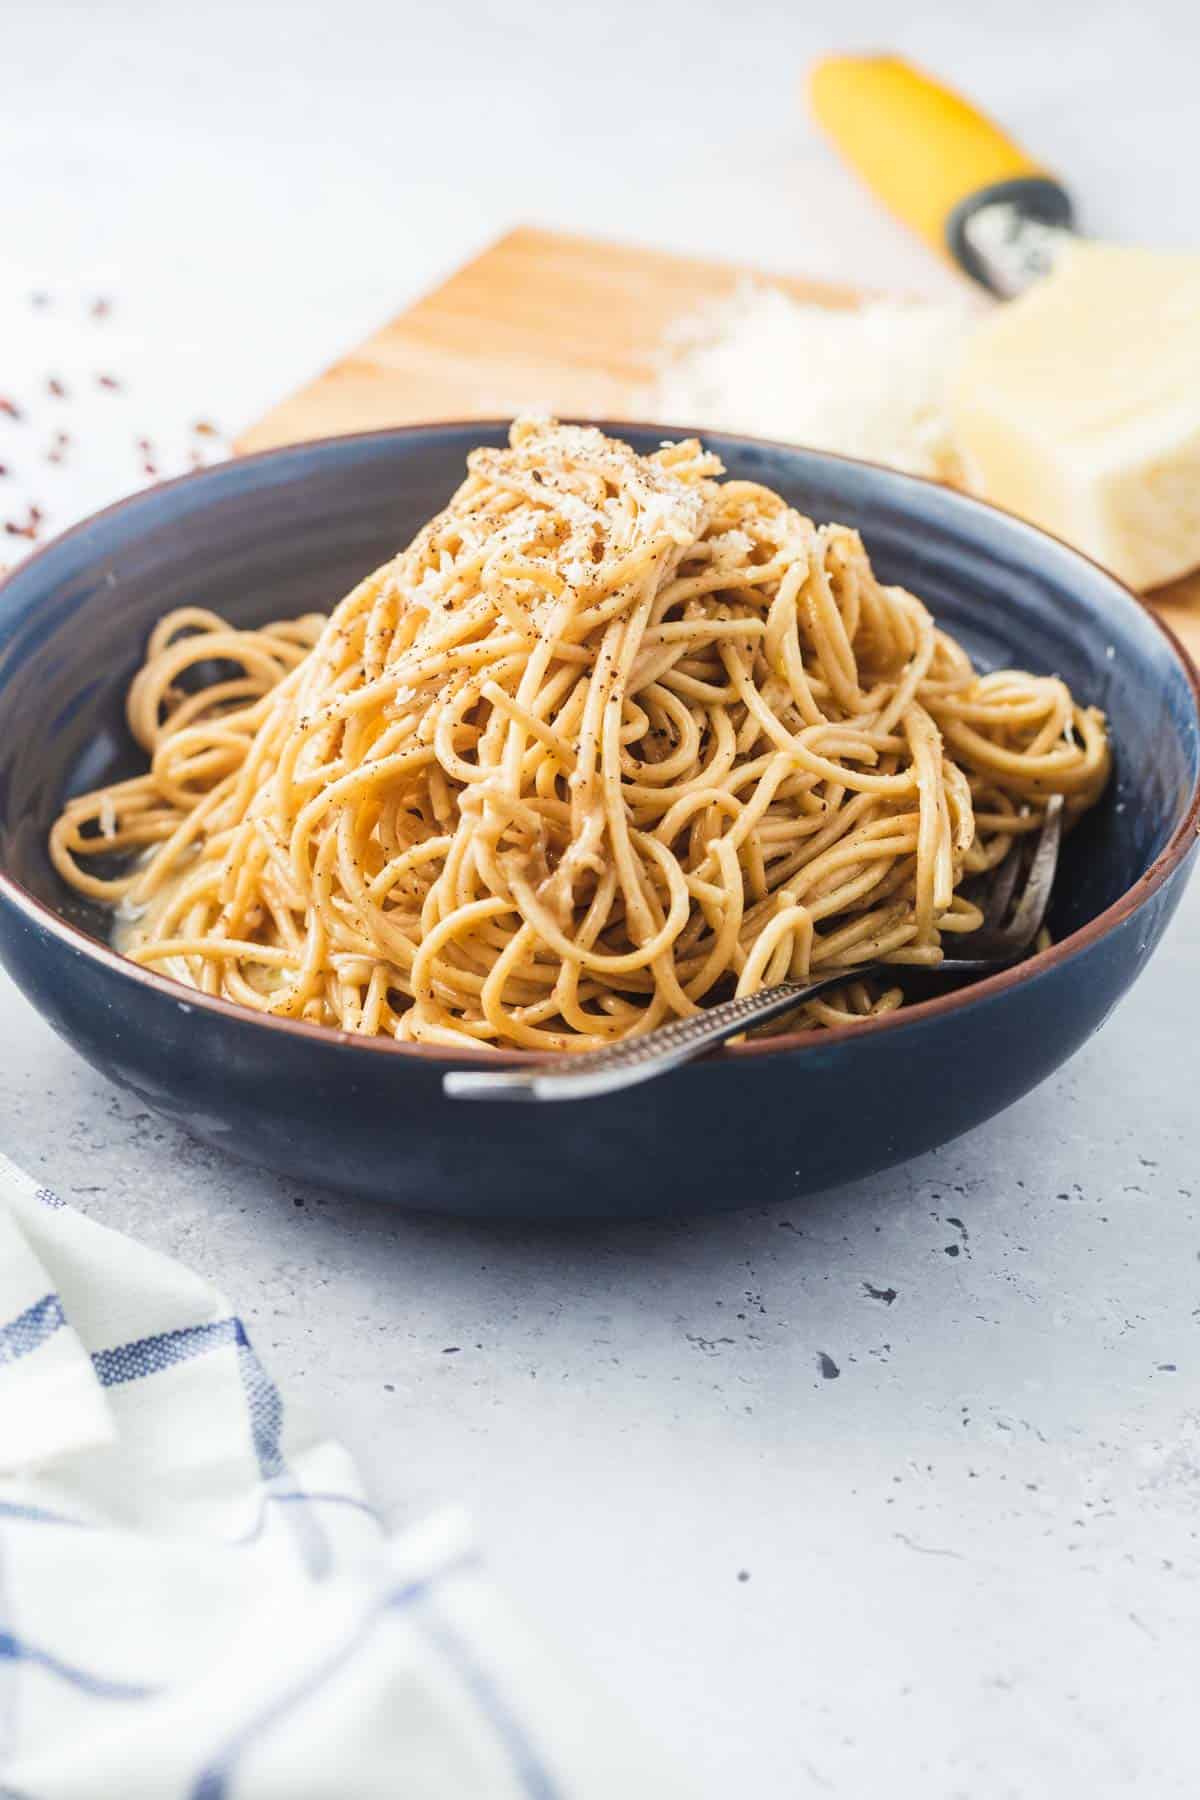
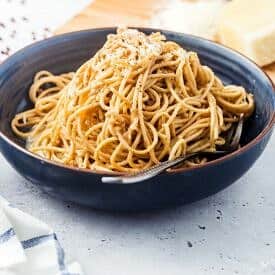
Szechuan Cacio e Pepe in a blue bowl with fresh parmesan cheese grated on top.

Friends, I am beyond excited to share this recipe with you! I am a pasta lover through and through, and one of my favs when I am in Italy is a traditional Cacio e Pepe. This is literally translated to “cheese and pepper” aka all good things in life.

This recipe is as simple and as delicious as it gets, but we are adding a very special twist in the pepper department with the addition of Szechuan peppercorns for some spicy flare. So grab your cacio and grab your pepe, because you are in for a treat with this Szechuan Cacio e Pepe pasta!

Table of contents

  • Why This Recipe Works
  • Key Ingredients
  • How to Make This Recipe
  • Expert Tips
  • Recipe FAQs
  • More Recipes You Might Like

Why This Recipe Works

This Szechuan Cacio e Pepe is made for pasta lovers who are open to a little Asian flare by way of Szechuan peppercorns. So if you have an open mind and an appetite, then here are some more reasons why this pasta might just becomes one of your new favourites!

  • Requires less than 10 ingredients
  • Only takes 25 minutes to prepare
  • High in protein (28 grams per serving)
  • A little spicy
  • Super cheesy!

Key Ingredients

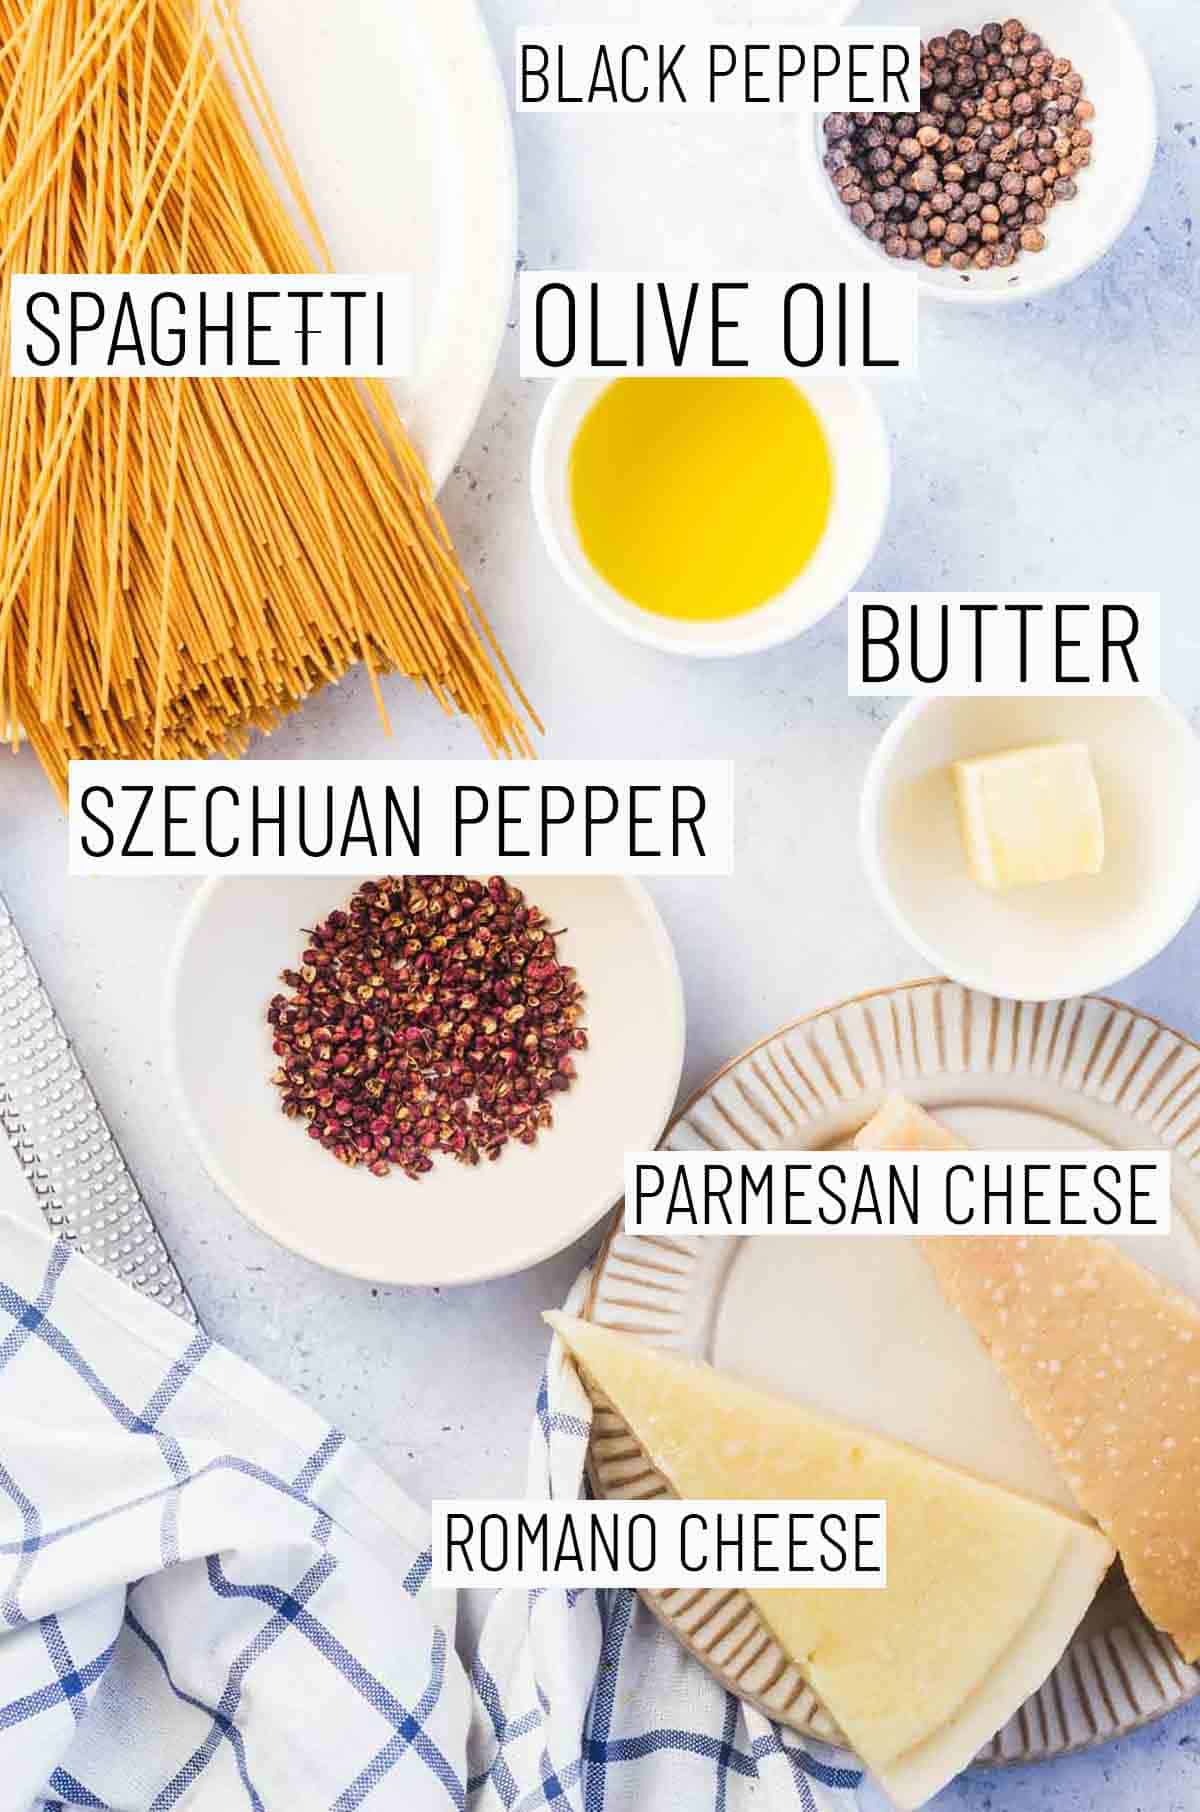
Flat lay image of recipe ingredients including black pepper, olive oil, butter, spaghetti, parmesan cheese, Romano cheese, and Szechuan pepper.

Cheese – To make this Szechuan Cacio e Pepe super cheesy we combine parmesan and Romano cheese. I also cant stress enough the importance of using freshly grated cheese. So yes, that means ditching the pre-grated stuff because it will not melt as well into the sauce and the flavour profile just doesn’t compare.

Peppercorns – While any traditional cacio e pepe recipe will use black peppercorns, we are adding our own little twist by combining it with Szechuan peppercorns, as well. If you know you know, but if you haven’t had the pleasure of tasting Szechuan pepper for yourself – let this be your yummy introduction!

Spaghetti – For this recipe we are using some whole wheat spaghetti, but any other high fibre spaghetti would be ideal! You can also make this recipe gluten free by using a gluten free pasta.

How to Make This Recipe

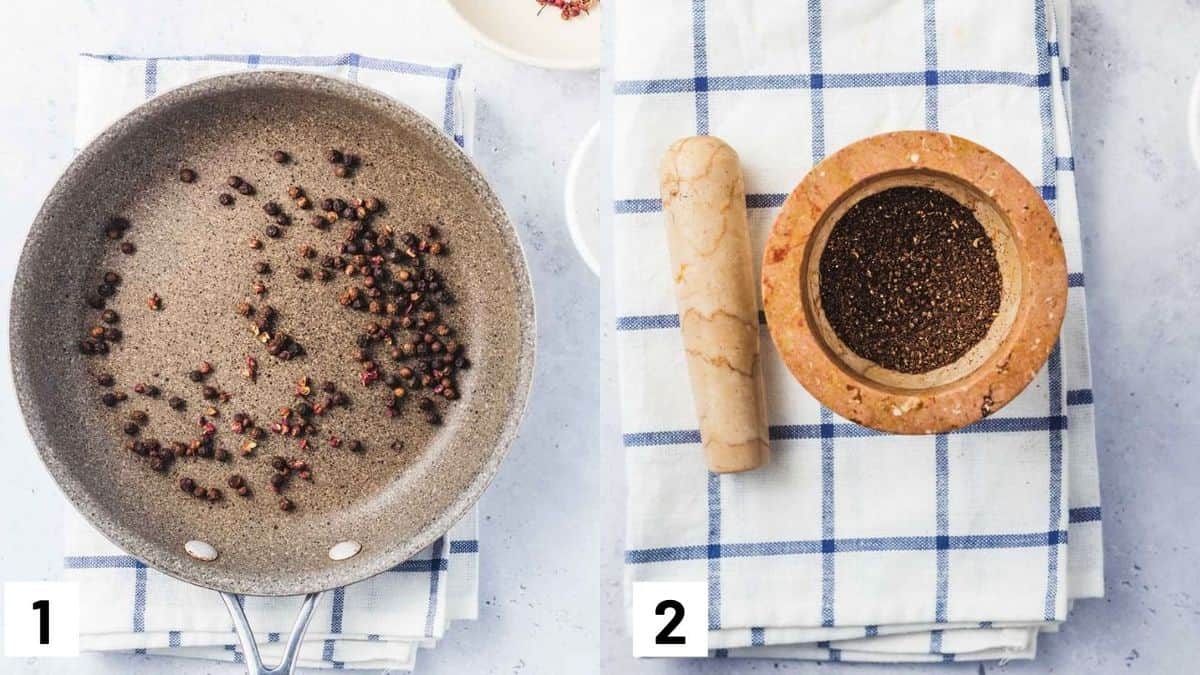
Two side by side images showing how to toast and grind the black and Szechuan peppercorns.

Step 1: Toast both the black and Szechuan peppercorn in a wide skillet over medium heat until fragrant, this should take a minute or two.

Step 2: Toss it into a mortar and pestle and grind to a coarse powder. 

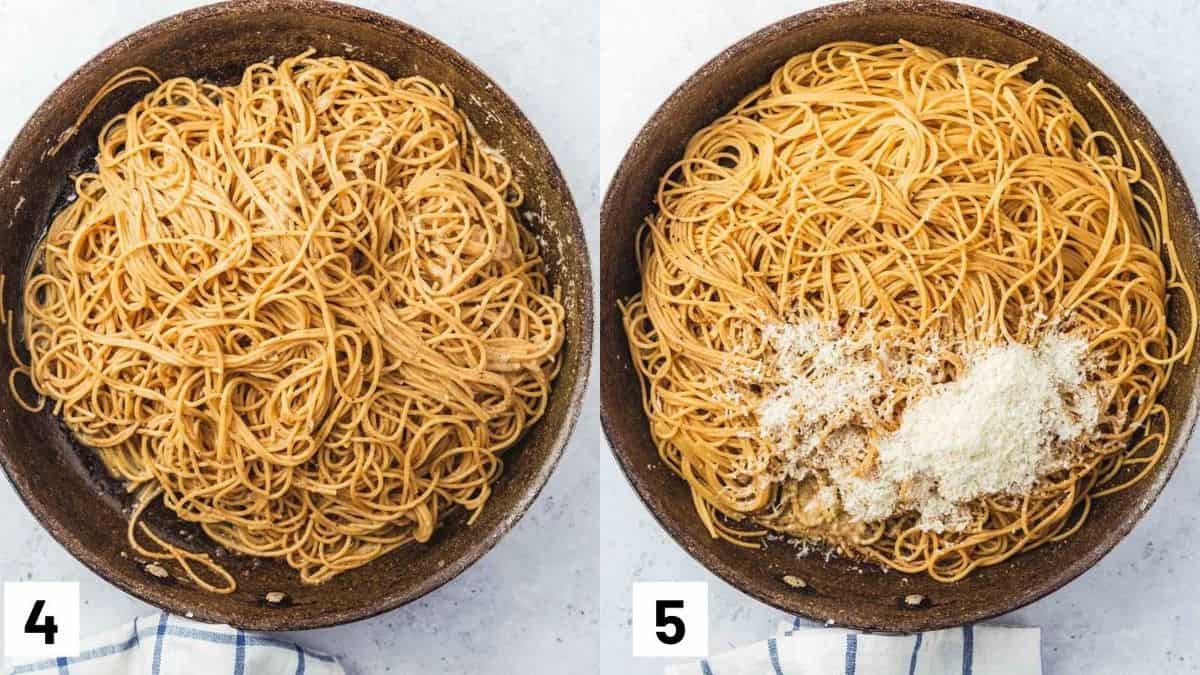
Two side by side images showing how to combine the pasta with the sauce and cheese.

Step 4: Bring olive oil and half the butter to medium high heat. Add in the toasted and freshly ground pepper and stir. Next add in ½ cup of the pasta water to form a sauce. Add the spaghetti toss till the spaghetti is well coated in the sauce.

Step 5: Turn off the heat and finish with remaining butter, pasta water and all the cheese. Toss some more till the pasta looks thick and glossy.

Expert Tips

  • We recommend waiting to add the cheese until AFTER you turn off the heat, otherwise it will become clumpy which is no bueno
  • Keep in mind that Szechuan peppers deliver a numbing sensation, so a little goes a long way. I’d suggest starting with ½ teaspoon and adding more depending on your taste preference
  • While this recipe is pretty simple and straight forward, for best results you will need a mortar and pestle and a micro plane zester

Recipe FAQs

Where can I buy Szechuan peppers?

You can find Szechuan peppercorns at any Asian market or spice purveyors. Otherwise, you can always purchase them online.

Is this recipe gluten free?

To make this recipe gluten free you can replace the whole wheat spaghetti with a gluten free variety. One of my personal favourites is this chickpea pasta because its packed with protein and fibre (while also being gluten free).

What can I serve with this pasta?

I am totally not against having this Szechuan cacio e pepe as my main meal because I loveeeee me some cheesy spicy carbs. But If you want to balance things out a bit and go easy on the carbs, you can enjoy this with a side of mixed greens, roasted veggies, or some lean protein. This pasta is so flavourful and you want it to stand out amongst anything you pair it with.

Can I make this vegan?

Absolutely! You’ll just have to replace the butter and cheese with vegan varieties. Easy peasy!

Szechuan Cacio e Pepe in a blue bowl topped with grated cheese.

More Recipes You Might Like

If you are a fellow pasta aficionado like me, then you’re going to love these pasta recipes on the blog!

  • Vegan Mushroom Pasta (with Healthy Creamy Sauce!)
  • Easy Jerk Chicken Pasta (Gluten Free)
  • Zoodles Carbonara Pasta
  • Pasta Bake with White Bean, Kale and Sausage

Have you tried this Szechuan Cacio e Pepe recipe? Are you a fan? Sound off in the comments below!

Print Recipe
5 from 3 votes

Szechuan Cacio e Pepe (Easy Spicy Pasta Recipe)

We are giving your favourite pasta recipe a bit of spicy flare with this Szechuan Cacio e Pepe! This recipe is everything you love about the classic pasta dish and is super easy to prepare any day of the week.
Prep Time10 minutes mins
Cook Time15 minutes mins
Total Time25 minutes mins
Course: Main Course, Side Dish
Cuisine: Italian, Chinese, American
Servings: 5 -6
Calories: 566kcal
Author: Abbey Sharp

Ingredients

  • 11/2 + 1/2 teaspoon black pepper
  • ½ teaspoon Szechuan pepper
  • 3 tablespoons butter
  • 2 tablespoons olive oil
  • 11/2 cups Pecorino romano grated with a micro plane zester
  • 1 cup parmesan cheese grated with a micro plane zester
  • 375 g whole wheat spaghetti 1 box
  • 1 – 11/2 cup pasta water
  • Salt

Instructions

  • Toast both the black and Szechuan peppercorn in a wide skillet over medium heat until fragrant, this should take a minute or two. Toss it into a mortar and pestle and grind to a coarse powder.
  • Bring a large pot of water to boil, salt generously. Add pasta to the pot, ensure to undercook by a couple of minutes. Reserve 1 cup of the pasta water and drain the spaghetti.
  • While the pasta is cooking, return the same wide skillet back to the stove. Bring olive oil and half the butter to medium high heat. Add in the toasted and freshly ground pepper and stir. Next add in ½ cup of the pasta water to form a sauce.
  • Add the spaghetti toss till the spaghetti is well coated in the sauce. Turn off the heat and finish with remaining butter, pasta water and all the cheese. Toss some more till the pasta looks thick and glossy (add some more water if needed)
  • Serve immediately with half a teaspoon freshly cracked black pepper and pecorino romano cheese.

Notes

  • We recommend waiting to add the cheese until AFTER you turn off the heat, otherwise it will become clumpy which is no bueno
  • Keep in mind that Szechuan peppers deliver a numbing sensation, so a little goes a long way. I’d suggest starting with ½ teaspoon and adding more depending on your taste preference.
  • While this recipe is pretty simple and straight forward, for best results you will need a mortar and pestle and a micro plane zester

Nutrition

Calories: 566kcal | Carbohydrates: 58g | Protein: 28g | Fat: 27g | Saturated Fat: 14g | Trans Fat: 1g | Cholesterol: 63mg | Sodium: 750mg | Potassium: 214mg | Fiber: 1g | Sugar: 1g | Vitamin A: 493IU | Calcium: 592mg | Iron: 3mg
Abbey Sharp

Abbey Sharp is a Registered Dietitian (RD), regulated by the Ontario College of Dietitians. She is a mom, YouTuber, Blogger, award winning cookbook author, media coach specializing in food and nutrition influencers, and a frequent contributor to national publications like Healthline and on national broadcast TV shows.
www.abbeyskitchen.com/about-abbey/

Last Updated March 1, 2021. Published March 1, 2021 By Abbey Sharp 13 Comments

Cabbage Roll in a Bowl (Vegan & Gluten Free)

These Vegan Cabbage Roll in a Bowl are an easy gluten free and low carb alternative to the traditional rice and meat-packed cabbage rolls. Perfect for anyone looking to cut back on their red meat intake or increase their veggie consumption!

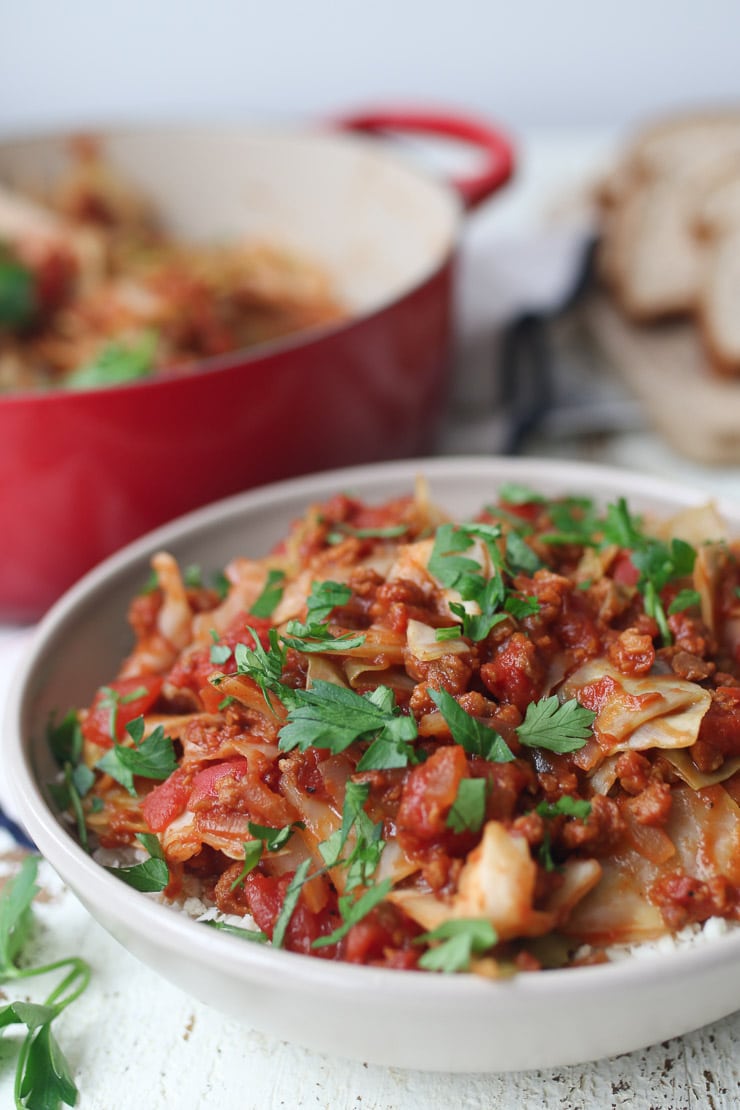
Unstuffed cabbage rolls served in a bowl topped with parsley.

When I was a kid, my mom used to make us cabbage rolls from scratch. It was a labour of love because making cabbage rolls takes a lot of steps. Since I am trying to cut back on my meat intake at home, I’ve been cooking more often with vegan meat substitutes, and these vegan unstuffed cabbage rolls in a bowl have become one of my family’s favourites.

Table of contents

  • Why This Recipe Works
  • Key Ingredients
  • How to Make This Recipe
  • Expert Tips
  • Recipe FAQs
  • More Recipes You Might Like

Why This Recipe Works

This cabbage roll in a bowl is sweet, “meaty” and could not be easier to make — they will quickly become one of your family’s faves! Need more reasons to love this vegan recipe?

  • Comfort in a bowl
  • Gluten-free
  • Low carb
  • One pot meal
  • Easily customizable

Key Ingredients

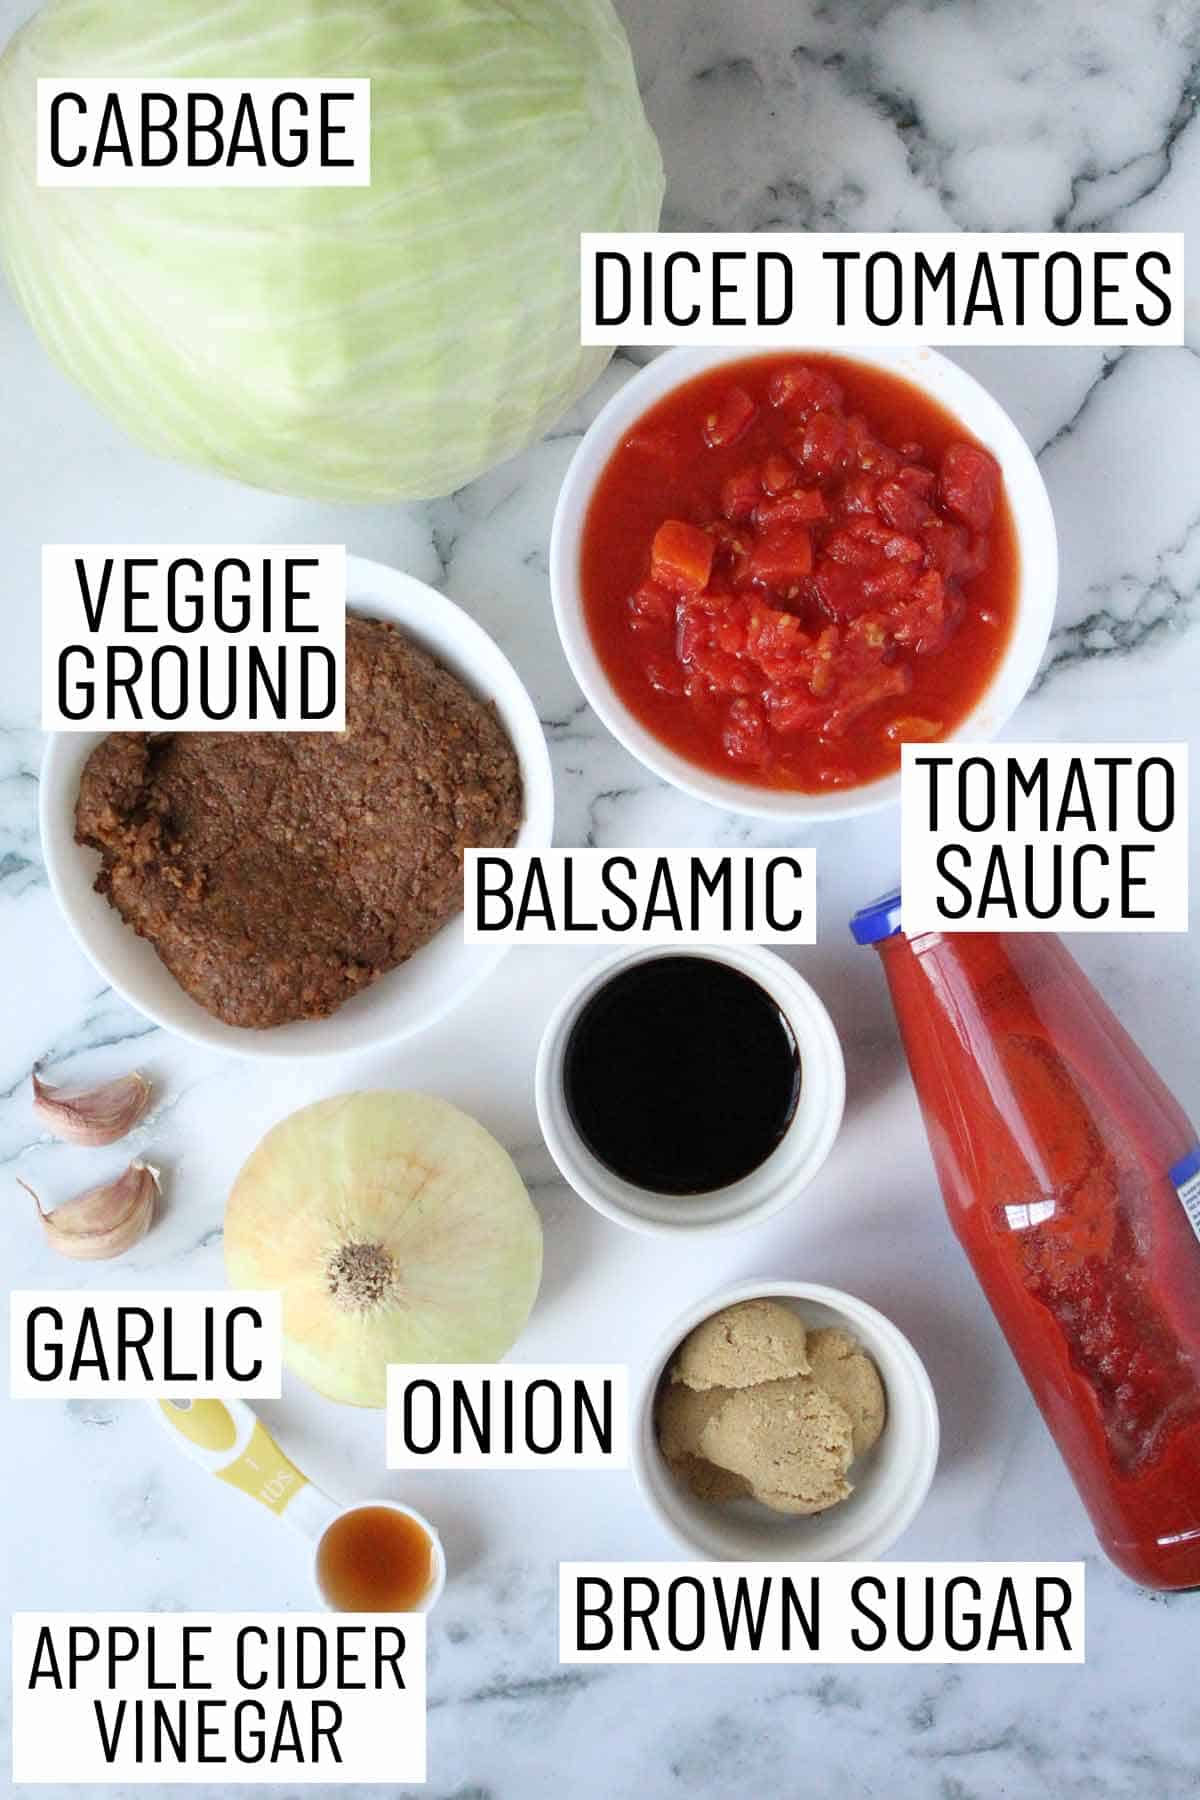
Overhead image of ingredients for cabbage roll in a bowl.

Aromatics — The sweet onions and garlic give your cabbage roll in a bowl a well rounded flavour profile.

Cabbage — Can’t make cabbage roll in a bowl without the cabbage! Be sure to pick one that is dense and firm.

Diced tomatoes and tomato sauce — Canned diced tomatoes and jarred tomato sauce works just fine for this recipe! No need to make your own.

Brown sugar or low calorie sugar — This adds a bit of sweetness to your recipe. We don’t need a lot so not to worry about adding too much sugar into your meal.

Veggie Ground Round — Instead of using ground beef in our cabbage roll in a bowl, we use a veggie ground round. However, if you don’t need this recipe to be vegan, ground meat can be used.

How to Make This Recipe

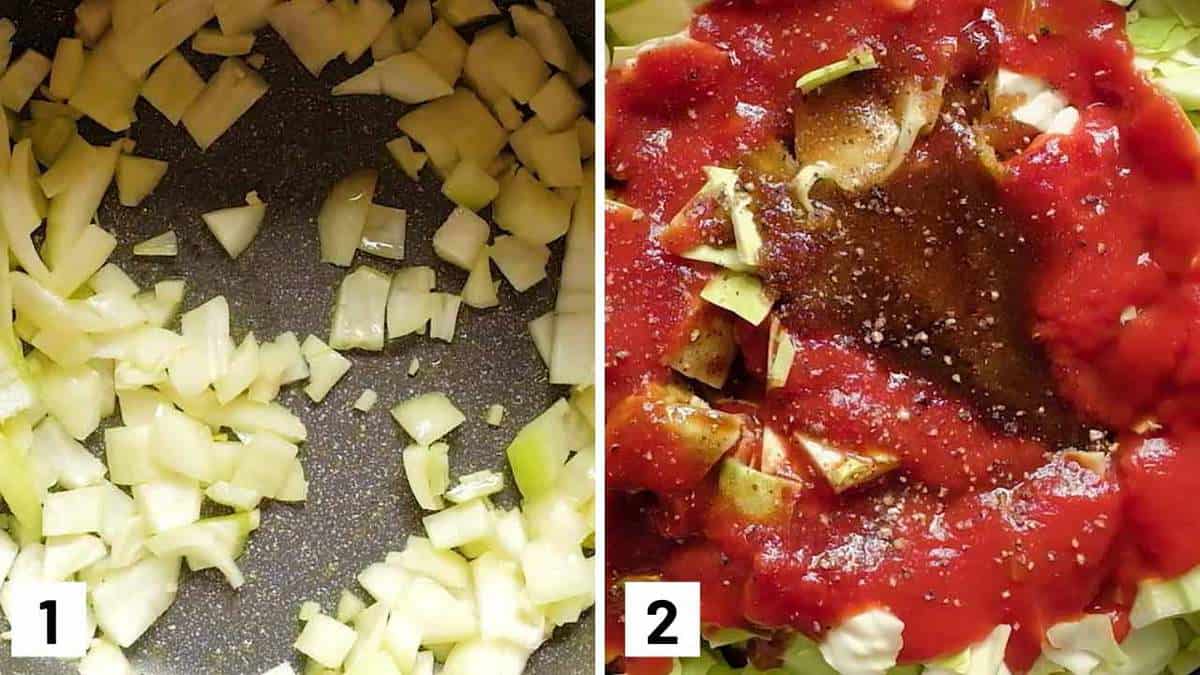
Set of two photos showing onion and garlic being sautéed and tomatoes, cabbage, tomato sauce, brown sugar, vinegar added to the pot.

Step 1: To a pot, add the olive oil and heat over medium heat. Add the onions and garlic and saute until softened. Strain the liquid out of the tomatoes but keep the liquid.

Step 2: Add the tomatoes, cabbage, tomato sauce, brown sugar, vinegar and a generous pinch each of salt and pepper to the pot. Put the lid on and cook for 15 minutes, or until the cabbage is softened.

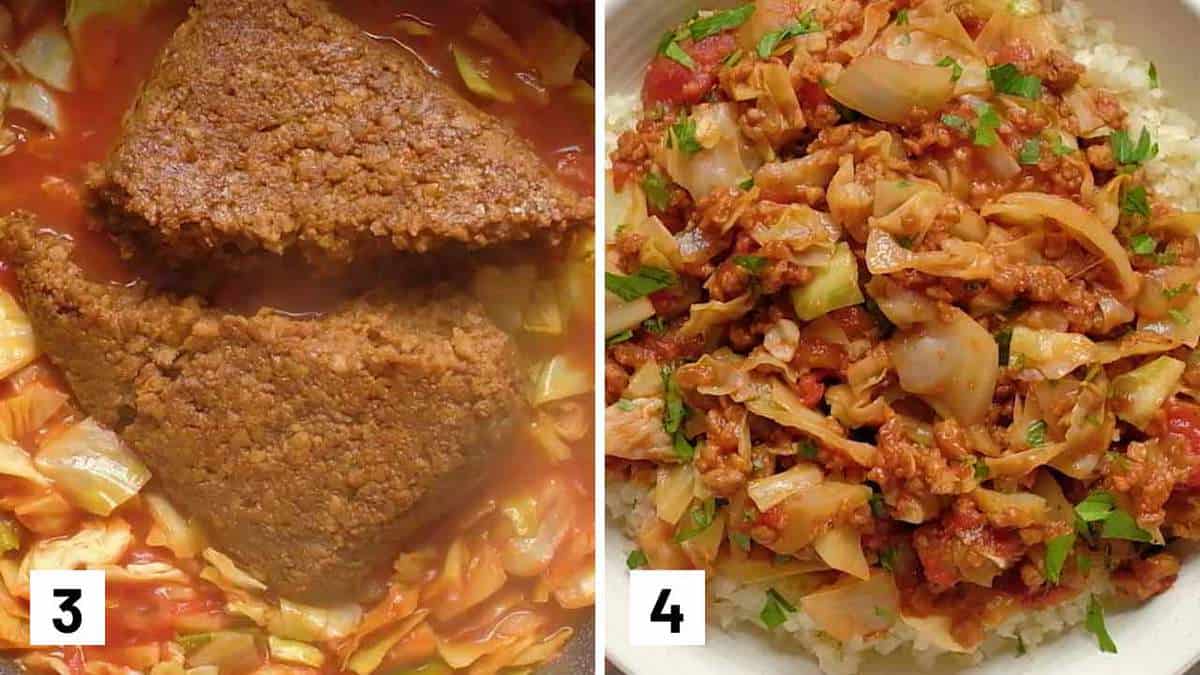
Set of 2 photos showing veggie ground added to the pan and unstuffed cabbage served over cauliflower rice.

Step 3: Remove the lid and stir in the veggie ground round. Depending on how much cabbage was in your head, you may want to add a bit of the tomato liquid that you reserved. Or if it’s already saucy enough, you can keep it without (personally, I don’t like it too loose/ watery so I usually leave it out.) Season again with salt and pepper to taste.

Step 4: Serve, if desired on cauliflower rice or regular rice and top with parsley to taste.

Expert Tips

You may need to cook the cabbage longer for better digestion (if you find cabbage difficult to digest). If this is the case cook the cabbage for an additional 30 mins until soft.

Give this cabbage roll in a bowl a spicy kick with some cayenne pepper and red chili flake if you aren’t making this recipe for your kids.

When picking a cabbage, look for one that has crisp leaves without any cracks or bruises. The leaves should also look bright and not dull or yellow in colour.

Recipe FAQs

What are cabbage rolls?

Cabbage rolls are an Eastern European specialty traditionally made by stuffing cabbage with rice and ground beef cooked in a sweet tangy tomato sauce. While cabbage rolls are time consuming, this cabbage roll in a bowl is a great way to enjoy cabbage rolls without the extra work!

How can I make these vegan unstuffed cabbage rolls as low carb as possible?

If you want to keep this vegan cabbage casserole way lower in carbs than the traditional cabbage rolls, you can use the low calorie brown sugar instead of sugar, and use cauliflower rice instead of brown rice. If you’re worried about the carbs in the aged balsamic vinegar, you can also just do all apple cider vinegar.

Are these vegan cabbage rolls in a bowl toddler, kid and family friendly?

When I was a kid, I was obsessed with cabbage rolls. My mom put the work in, obviously I am not LOL! But I still love the flavours and Baby E adores these vegan cabbage rolls. The flavours are pretty sweet and mild, so I love to serve them on rice for Baby E.

Can I batch prep the cabbage filling?

A head of cabbage makes a lot, so you can definitely make this on a Sunday, keep it in the fridge, and rewarm a portion or two throughout the week. It will take you no time to make this cabbage casserole, so it will leave you lots of extra time for family.

Can I freeze this unstuffed cabbage?

You can definitely freeze this unstuffed cabbage roll recipe. You can double the recipe (use a large Dutch oven!) and then let it cool before freezing it and in freezer safe bag. Thaw overnight and reheat when you’re ready to enjoy.

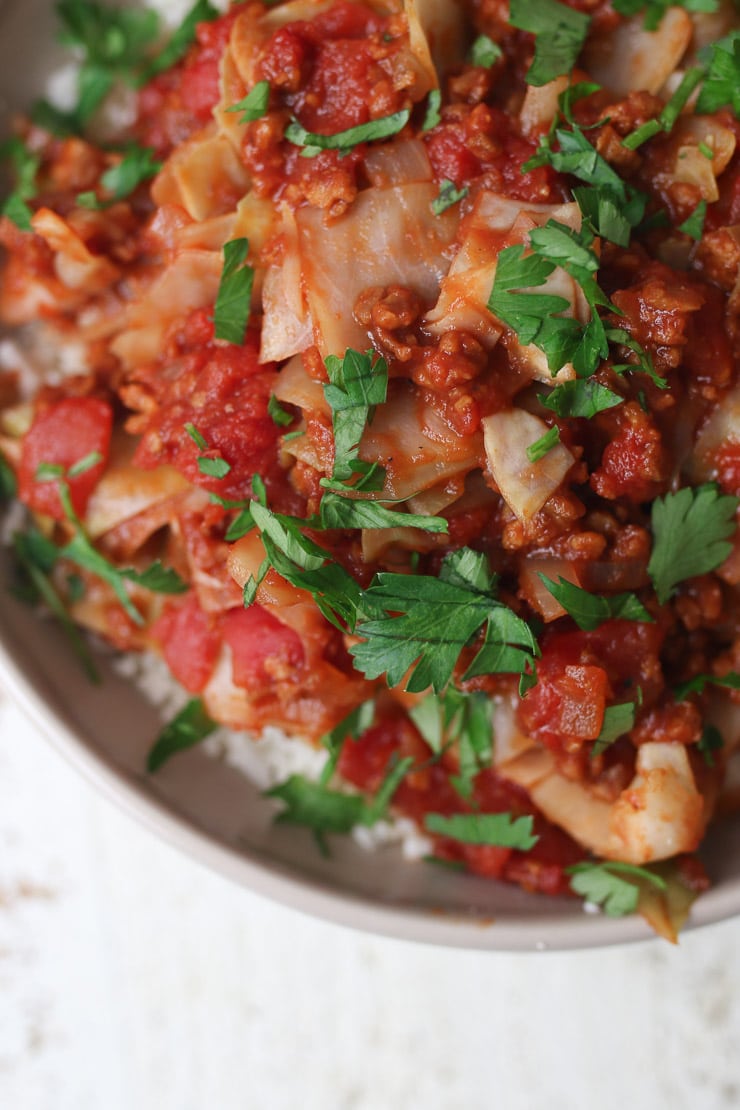
Close up of unstuffed cabbage roll dish in a bowl topped with parsley.

More Recipes You Might Like

If you’re looking for more delicious cabbage recipes, try these ones:

  • Cabbage Cheeseburger Casserole
  • Keto Cabbage Roll Enchiladas
  • Instant Pot Cabbage

Now loves, tell me, have you tried my cabbage rolls? Are you excited to try this easier version?

 
Print Recipe
4.86 from 14 votes

Cabbage Roll in a Bowl (Vegan & Gluten Free)

These Vegan Cabbage Roll in a Bowl are an easy gluten free and low carb alternative to the traditional rice and meat-packed cabbage rolls. Perfect for anyone looking to cut back on their red meat intake or increase their veggie consumption!
Prep Time20 minutes mins
Cook Time25 minutes mins
Total Time45 minutes mins
Course: Main Course, Dinner
Cuisine: American
Servings: 4 people
Calories: 284kcal
Author: Abbey Sharp

Ingredients

  • 1 tbsp extra virgin olive oil
  • 1/2 large sweet onion diced
  • 1 clove garlic minced
  • 1 small head cabbage (10 cups) chopped
  • 15 oz can diced tomatoes drained but juices reserved
  • 1 1/2 cups tomato sauce
  • 1/4 cup brown sugar or low calorie brown sugar sweetener
  • 1 tbsp apple cider vinegar
  • 1 1/2 tbsp good quality aged balsamic vinegar
  • 340 grams veggie ground round
  • Cauliflower rice or brown rice for serving
  • Parsley for serving

Instructions

  • To a pot, add the olive oil and heat over medium heat. Add the onions and garlic and saute until softened.
  • Strain the liquid out of the tomatoes but keep the liquid.
  • Add the tomatoes, cabbage, tomato sauce, brown sugar, vinegar and a generous pinch each of salt and pepper to the pot. Put the lid on and cook for 15 minutes, or until the cabbage is softened.
  • Remove the lid and stir in the veggie ground round. Depending on how much cabbage was in your head, you may want to add a bit of the tomato liquid that you reserved. Or if it's already saucy enough, you can keep it without (personally, I don't like it too loose/ watery so I usually leave it out.) Season again with salt and pepper to taste.
  • Serve, if desired on cauliflower rice or regular rice and top with parsley to taste.

Video

Notes

  • You may need to cook the cabbage longer for better digestion (if you find cabbage difficult to digest). If this is the case cook the cabbage for an additional 30 mins until soft.
  • Give this cabbage roll in a bowl a spicy kick with some cayenne pepper and red chili flake if you aren’t making this recipe for your kids.
  • When picking a cabbage, look for one that has crisp leaves without any cracks or bruises. The leaves should also look bright and not dull or yellow in colour.

Nutrition

Calories: 284kcal | Carbohydrates: 38g | Protein: 20g | Fat: 8g | Saturated Fat: 1g | Sodium: 859mg | Potassium: 993mg | Fiber: 12g | Sugar: 23g | Vitamin A: 592IU | Vitamin C: 99mg | Calcium: 146mg | Iron: 7mg
Abbey Sharp

Abbey Sharp is a Registered Dietitian (RD), regulated by the Ontario College of Dietitians. She is a mom, YouTuber, Blogger, award winning cookbook author, media coach specializing in food and nutrition influencers, and a frequent contributor to national publications like Healthline and on national broadcast TV shows.
www.abbeyskitchen.com/about-abbey/

Last Updated February 25, 2021. Published February 25, 2021 By Abbey Sharp 20 Comments

Kale Frittata with Red Pepper (High Iron BLW Recipe)

These Kale Frittata fingers are the perfect breakfast for Baby Led Weaning (BLW)! They’re a delicious and high iron option that your baby will love.

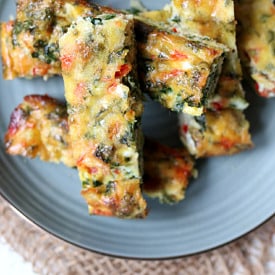
Pile of finger shaped frittata slices on a teal plate with eggs and kale in a bowl in the background.

If you’ve been following my Instagram stories, you’ve probably seen that I’ve been sharing my son’s baby led weaning meals every day. I’ve also been sharing my key insights on what’s been working, tips, tricks and other fun tidbits I’ve picked up along the way. A lot of you have been asking me for some of my baby led weaning (BLW) recipes and these kale frittata have become a fan favourite.

Table of contents

  • Why This Recipe Works
  • Key Ingredients
  • How to Make This Recipe
  • Expert Tips
  • Recipe FAQs
  • More Recipes You Might Like

Why This Recipe Works

These kale frittata are a great BLW recipe as they’re inexpensive, easy to make and modify, high in iron and vitamin C, BLW safe, are great for the whole family and most importantly, baby E loves them. Here are a few more reasons why you’ll love these!

  • Eggs are a great source of iron for growing babies.
  • Eggs are inexpensive and healthy.
  • They’re easy for babies to pick up and hold.
  • You can add other veggies.
  • Works as a snack too!

Key Ingredients

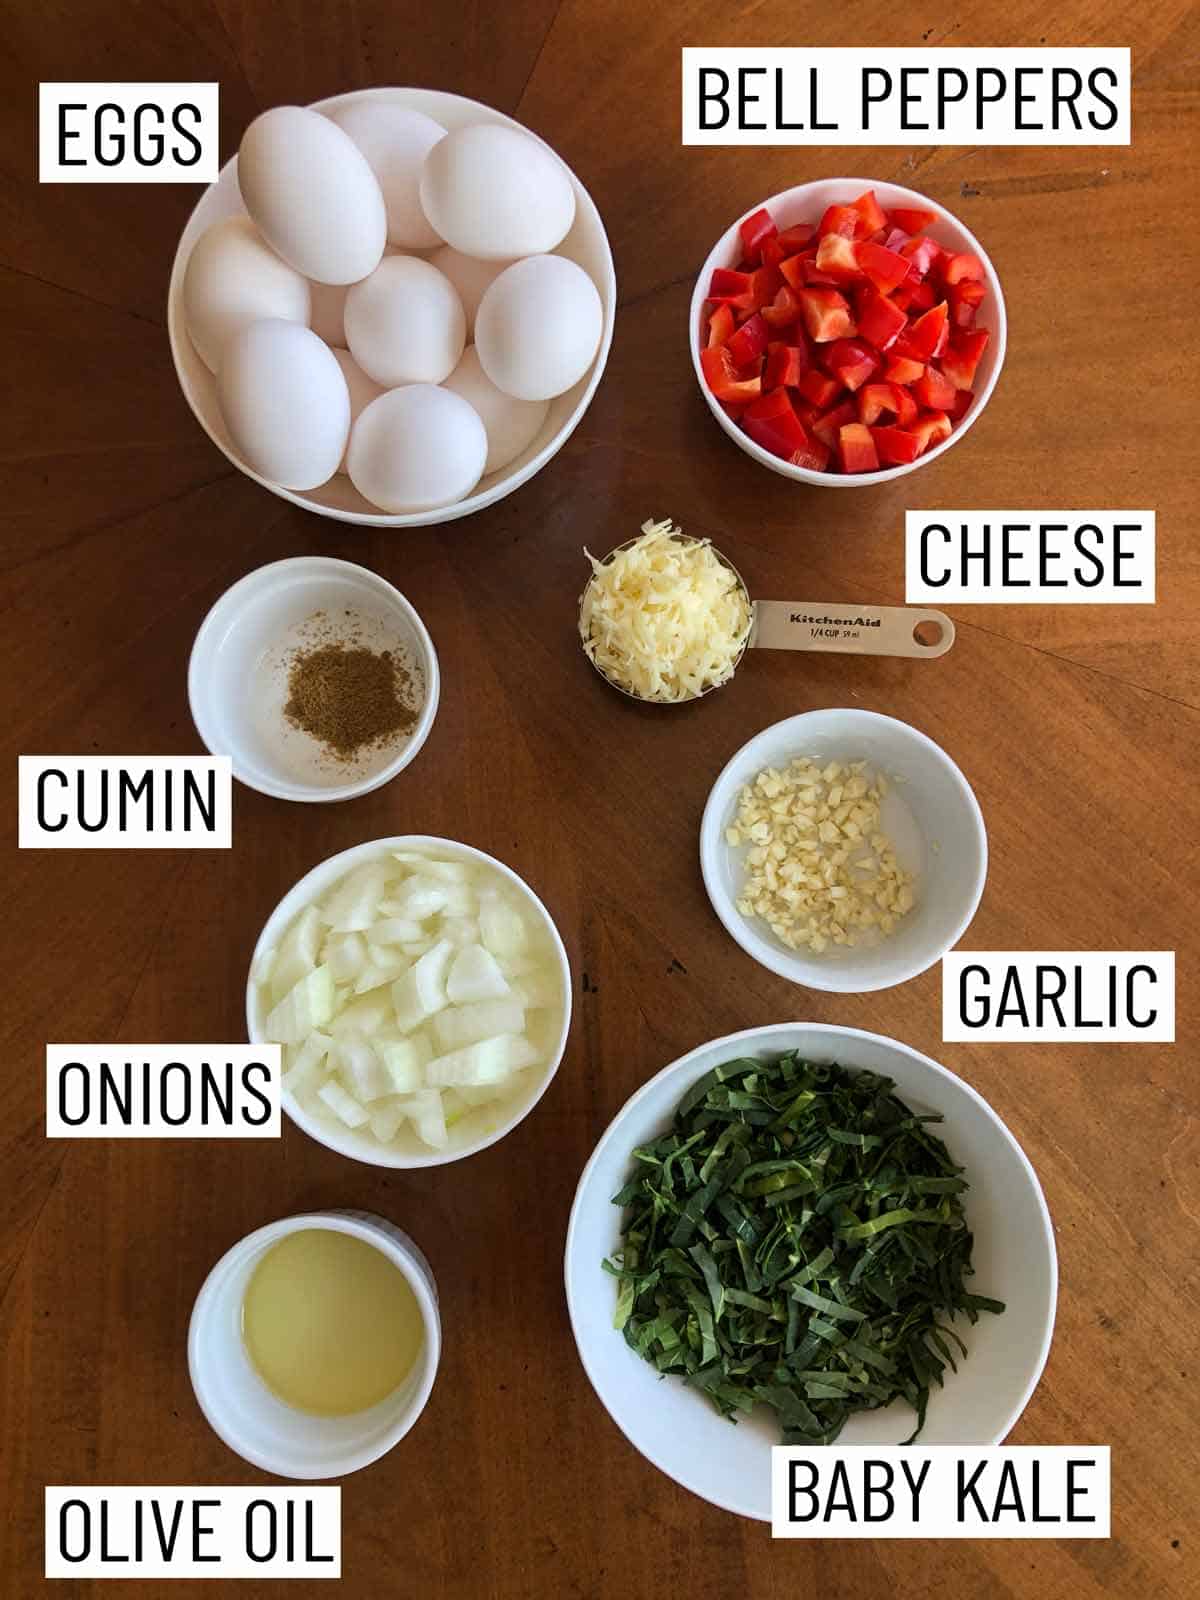
Overhead photo of ingredients needed to make recipe.

Eggs — Eggs are pretty inexpensive and are packed with nutrition. So even if your baby chucks half of their meal on the ground like mine often does, it’s not like he’s wasted filet mignon.

Vegetables — These kale frittata are packed with veggies that are good for your kiddo. We’ve got baby kale, onions, and bell peppers.

Cheese — Who doesn’t love cheese? Baby E is definitely a fan of cheese as am I.

How to Make This Recipe

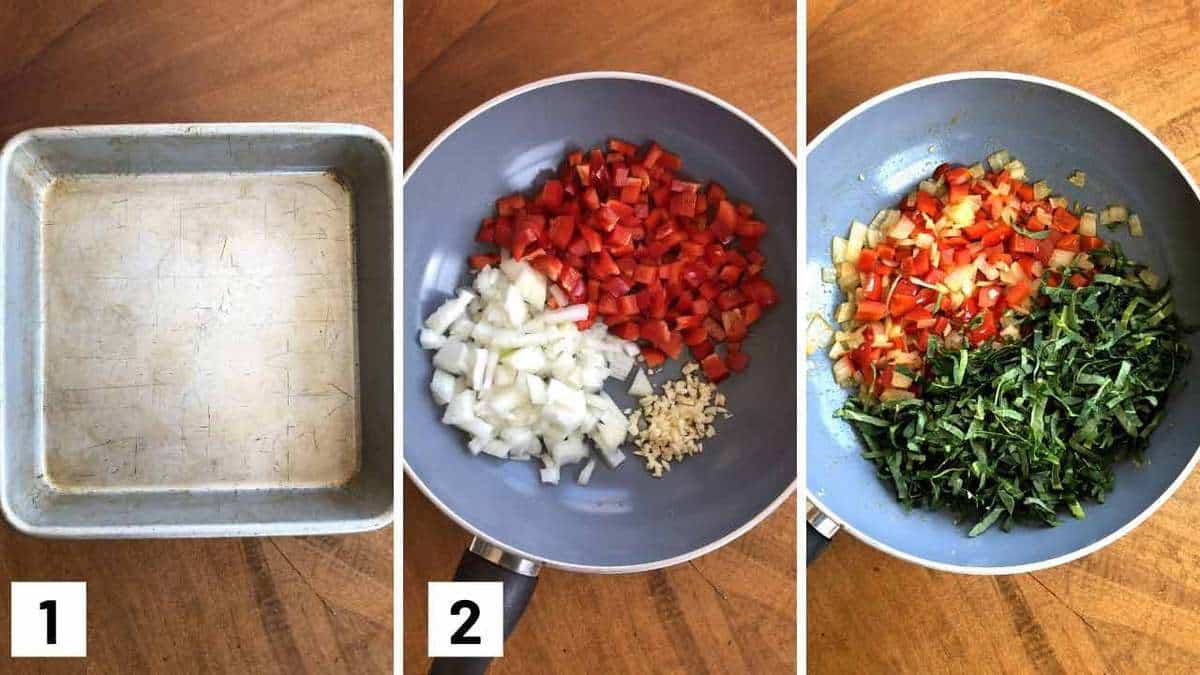
Set of 3 photos showing a greased pan, a pan with onions, peppers, and garlic, and then greens added to the pan.

Step 1: Preheat oven to 350 F. Lightly grease a 9″ square baking dish.

Step 2: To a medium skillet, sauté the onion, garlic, and bell peppers until soft, about 5 to 8 minutes. Add the kale and allow to wilt.

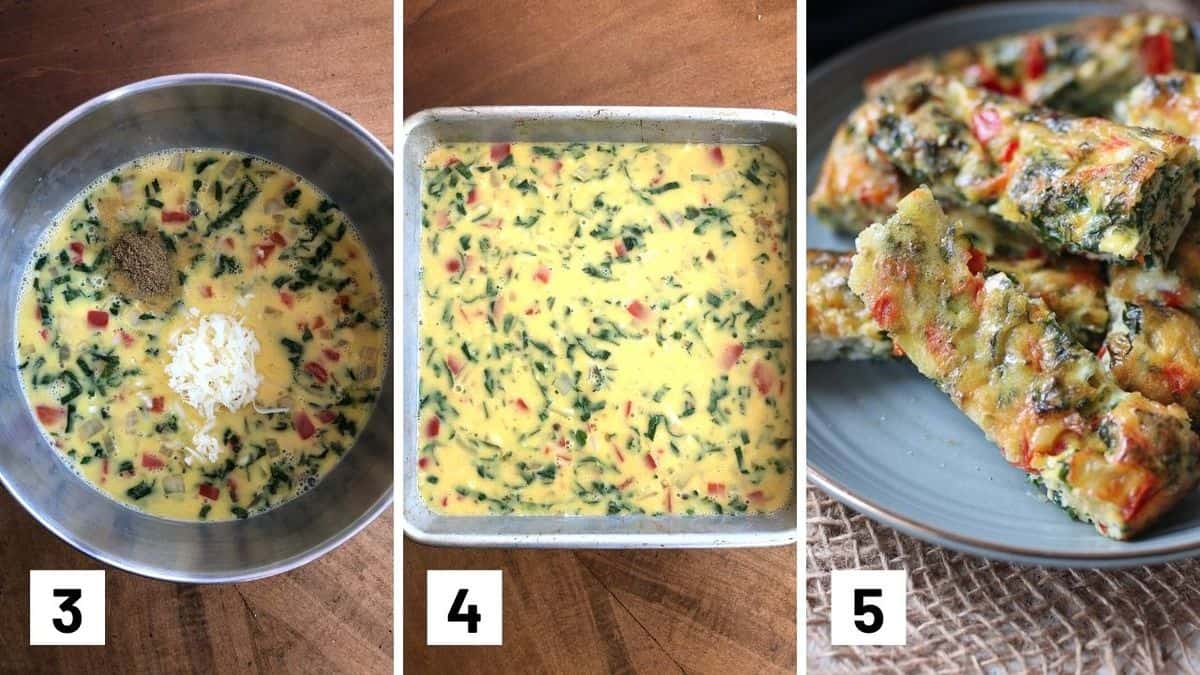
Set of 3 photos showing vegetables mixed with beaten eggs, added to the baking pan, and then baked.

Step 3: Beat the eggs in a bowl, then add in the vegetables, cumin, and cheese.

Step 4: Transfer to the baking dish and bake for 25 to 30 minutes or until fully set. If you jiggle the pan it should just slightly wobble. Allow to cool.

Step 5: Cut the frittata into 7 strips one way, and then once down the middle to yield 14 pieces. Then remove the pieces from the pan and cut them in half lengthwise to yield a total of 28 frittata fingers.

Expert Tips

It’s important to sauté your vegetables beforehand. You want to make sure the kale is nice and tender before adding them into the egg mixture and baking it. While you can add onions and bell peppers raw into the mixture, I find it more flavourful to sauté them first. Plus, it helps remove extra moisture.

Make sure you don’t over bake your kale frittata. An over-baked frittata can turn out spongey so give it a check at the 25 minute mark before deciding if it needs to bake for the full 30 minutes.

It’s best to season throughout (vegetables and eggs) and not skip step 3. You don’t want to season the frittata mixture after you’ve put it into the pan since you want the seasoning to be throughout and not surface-level.

Recipe FAQs

How do I store extra frittatas?

If you don’t finish the kale frittatas, simply store leftovers in an airtight container in the fridge for up to 5 days. Reheat in the microwave until warmed through.

Can I freeze this kale frittata?

If you want to freeze these frittatas, place them on a lined sheet pan and freeze, uncovered, for 2 to 3 hours or until frozen. Once frozen, transfer the kale frittata into a freezer safe container or bag.

Can I change the cheese?

You can definitely change up the cheese! You want to use melt-friendly cheeses such as cheddar, gruyère, and fontina cheese.

What other vegetables can I add in to this kale frittata?

You can put in any leftover vegetables that you have in the fridge into this frittata. It’s a great way to empty out the fridge! Try broccoli florets, cauliflower florets, peas, spinach, roasted butternut squash, etc. You can also add in some bacon bits! I recommend that you pick vegetables that are rich in vitamin C. The reason I like to focus on a vitamin C add-in is because vitamin C can help with the absorption of iron, making these kale frittata fingers perfect for when your baby starts solids with baby led weaning.

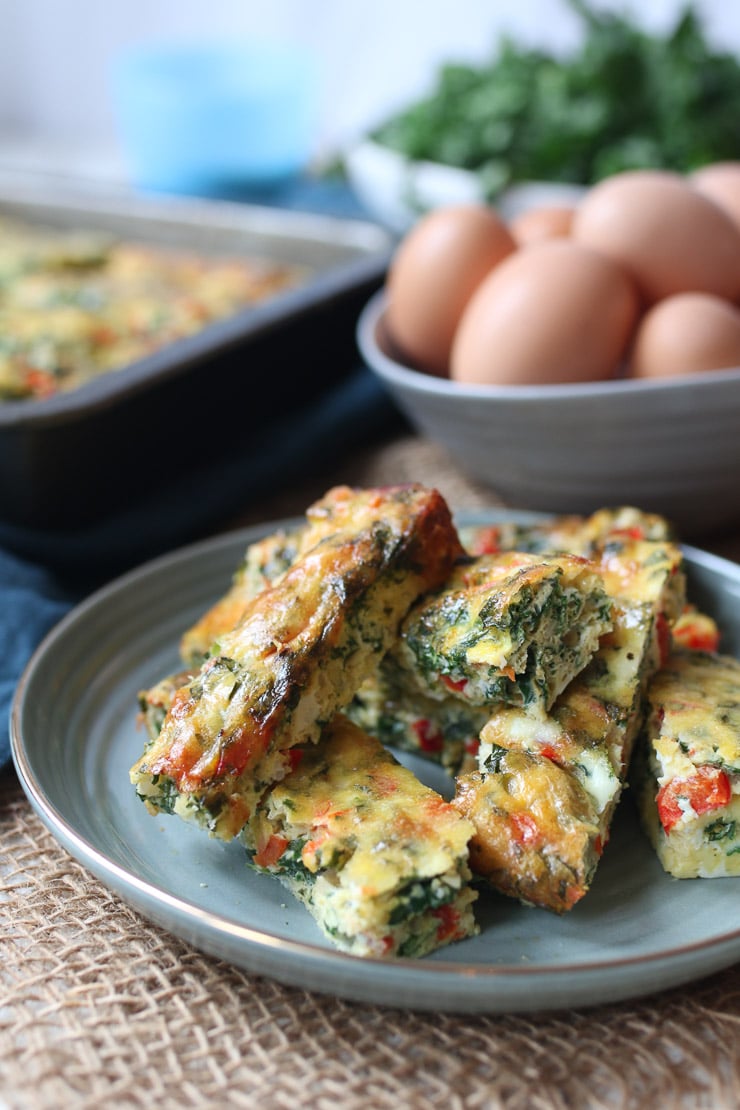
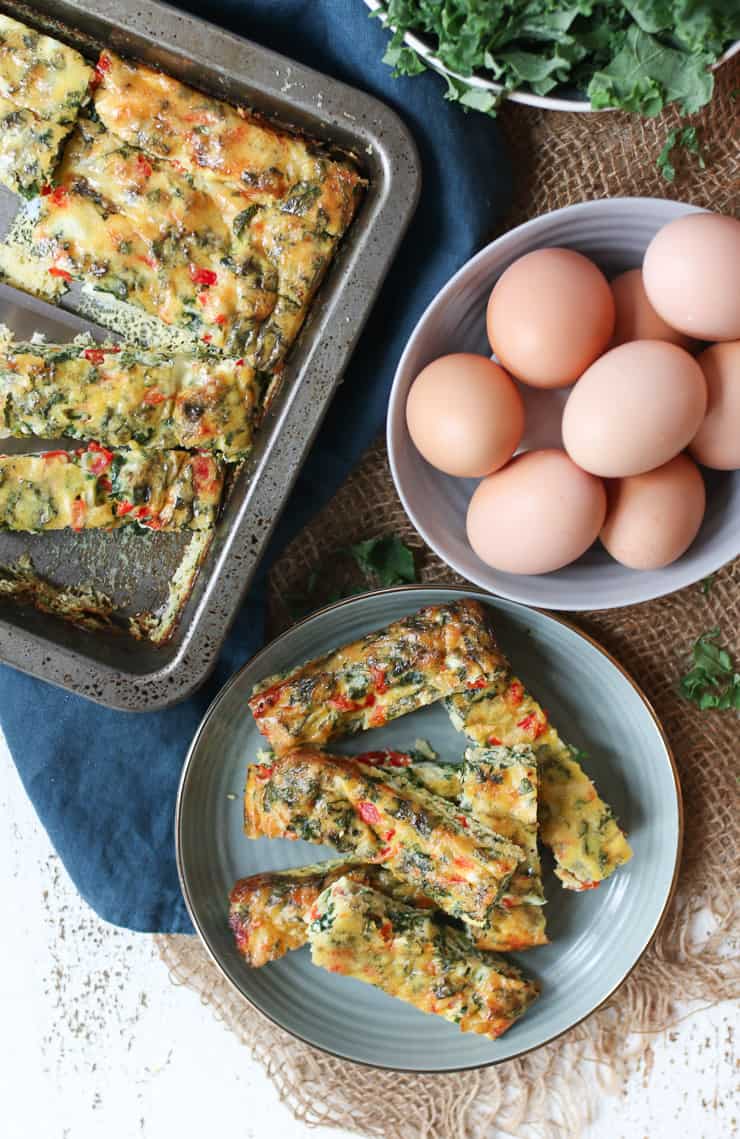
Birds eye view of frittata fingers on a blue plate with the sheet pan and bowl of eggs in the background.

More Recipes You Might Like

Want more BLW and toddler friendly recipes that your baby will love? Try these ones!

  • Banana Baked Oatmeal Fingers with Cherries
  • Pumpkin Waffles with Protein
  • BLW Carrot Cake Waffles
  • Healthy Toddler Finger Sandwiches

Now I want to know, what are some of your favourite iron rich recipes for baby? Leave me a comment below with your thoughts!

Print Recipe
5 from 4 votes

Kale Frittata with Red Pepper (High Iron BLW Recipe)

These Kale Frittata fingers are the perfect breakfast for Baby Led Weaning (BLW)! They're a delicious and high iron option that your baby will love.
Prep Time15 minutes mins
Cook Time38 minutes mins
Total Time53 minutes mins
Course: Main Course
Cuisine: Italian, American
Servings: 28 frittata fingers
Calories: 36kcal
Author: Abbey Sharp

Ingredients

  • 12 omega 3 enriched eggs
  • 1 tbsp olive oil plus more for greasing
  • 1 bell pepper minced
  • 1/2 onion minced
  • 2 cloves garlic minced
  • 1/4 cup shredded aged cheddar
  • 2 cups baby kale ribs removed and finely shredded
  • 1/2 tsp cumin

Instructions

  • Preheat oven to 350 F. Lightly grease a 9″ square baking dish.
  • To a medium skillet, saute the onion, garlic, and bell peppers until soft, about 5-8 minutes. Add the kale and allow to wilt.
  • Beat the eggs in a bowl, then add in the vegetables, cumin and cheese.
  • Transfer to the baking dish and bake for 25-30 minutes or until fully set. If you jiggle the pan it should just slightly wobble. Allow to cool.
  • Cut the frittata into 7 strips one way, and then once down the middle to yield 14 pieces. Then remove the pieces from the pan and cut them in half lengthwise to yield a total of 28 frittata fingers.

Notes

  • It’s important to sauté your vegetables beforehand. You want to make sure the kale is nice and tender before adding them into the egg mixture and baking it. While you can add onions and bell peppers raw into the mixture, I find it more flavourful to sauté them first. Plus, it helps remove extra moisture.
  • Make sure you don’t over bake your kale frittata. An over-baked frittata can turn out spongey so give it a check at the 25 minute mark before deciding if it needs to bake for the full 30 minutes.
  • It’s best to season throughout (vegetables and eggs) and not skip step 3. You don’t want to season the frittata mixture after you’ve put it into the pan since you want the seasoning to be throughout and not surface-level.

Nutrition

Calories: 36kcal | Carbohydrates: 1g | Protein: 3g | Fat: 2g | Saturated Fat: 1g | Cholesterol: 71mg | Sodium: 40mg | Potassium: 61mg | Fiber: 1g | Sugar: 1g | Vitamin A: 725IU | Vitamin C: 11.4mg | Calcium: 26mg | Iron: 0.5mg
Abbey Sharp

Abbey Sharp is a Registered Dietitian (RD), regulated by the Ontario College of Dietitians. She is a mom, YouTuber, Blogger, award winning cookbook author, media coach specializing in food and nutrition influencers, and a frequent contributor to national publications like Healthline and on national broadcast TV shows.
www.abbeyskitchen.com/about-abbey/

Last Updated August 30, 2022. Published February 23, 2021 By Abbey Sharp 32 Comments

Healthy Stuffed Sweet Potatoes with Apple & Caramelized Onion

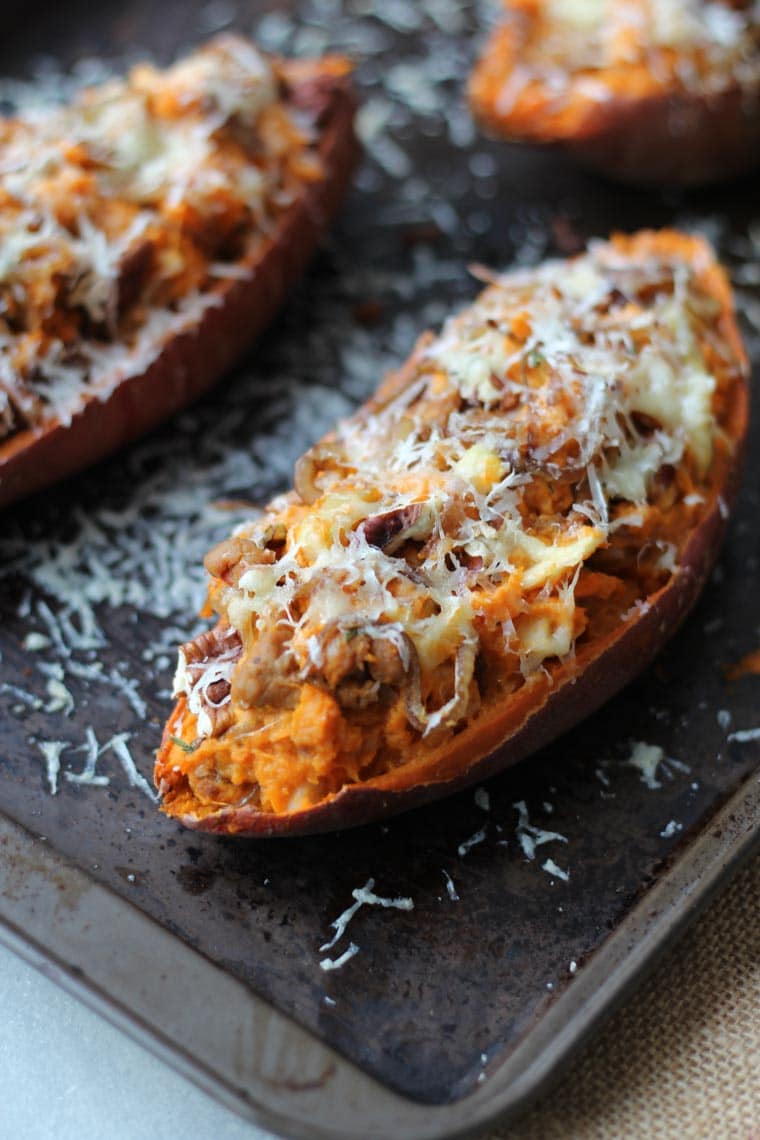
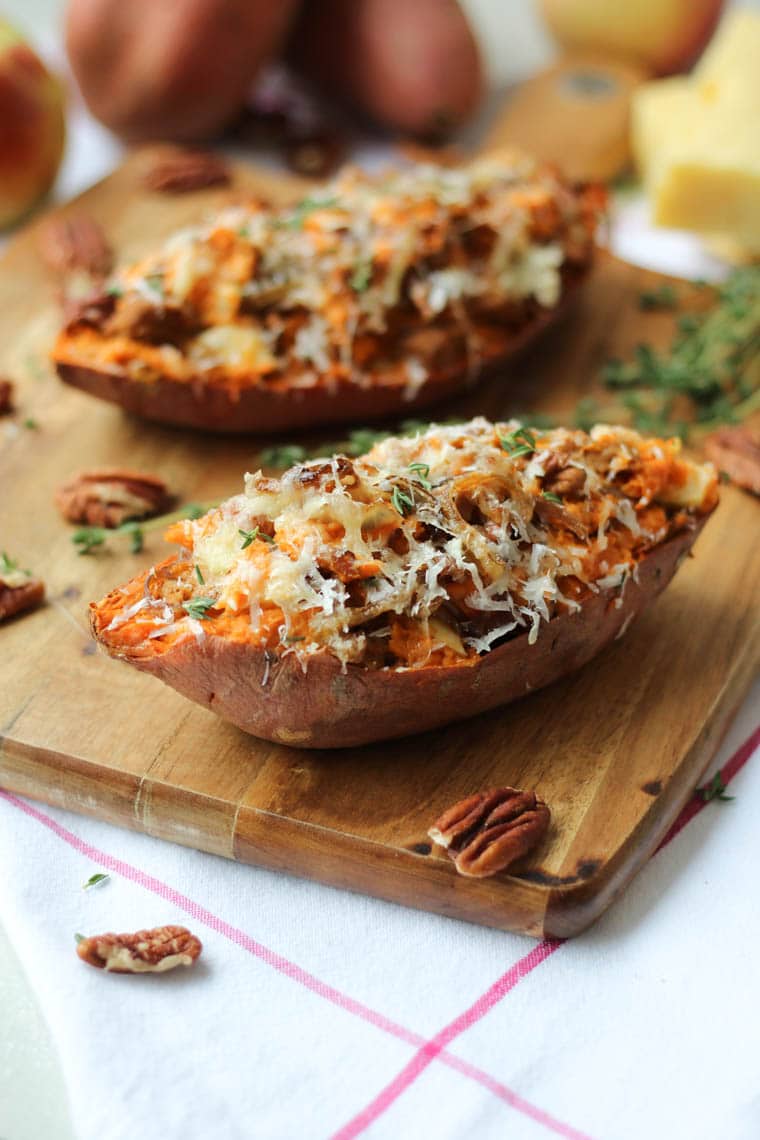
A close up of a baked sweet potato with caramelized onion and apple.

These decadent Healthy Stuffed Sweet Potatoes with Apple & Caramelized Onion is a nutritious and more flavourful take on the classic steak house staple. These healthy stuffed sweet potatoes are twice baked and works as both a main or side dish.

A close up of a baked sweet potato with caramelized onion and apple.

Confession: I love the Keg. And I don’t just love anything about the Keg, I specifically go for their twice baked potato. Cheesy, buttery and as big as my head, I could happily go to the Keg, skip the big steak and make a meal out of a colossal Twice Baked Potato. I’ve really been missing it lately so I decided to make my own at home and share it with you guys!

Table of contents

  • Why This Recipe Works
  • Key Ingredients
  • How to Make This Recipe
  • Expert Tips
  • Recipe FAQs
  • More Recipes You Might Like

Why This Recipe Works

This is a simple but delicious recipe that the whole family to love! If that’s not enough to convince you, then here’s a few more reasons of why you’ll love this healthy stuffed sweet potatoes recipe!

  • They’re so hearty
  • Full of flavour
  • Perfect for entertaining or as a weeknight side dish
  • Full of toasty cheesy goodness

Key Ingredients

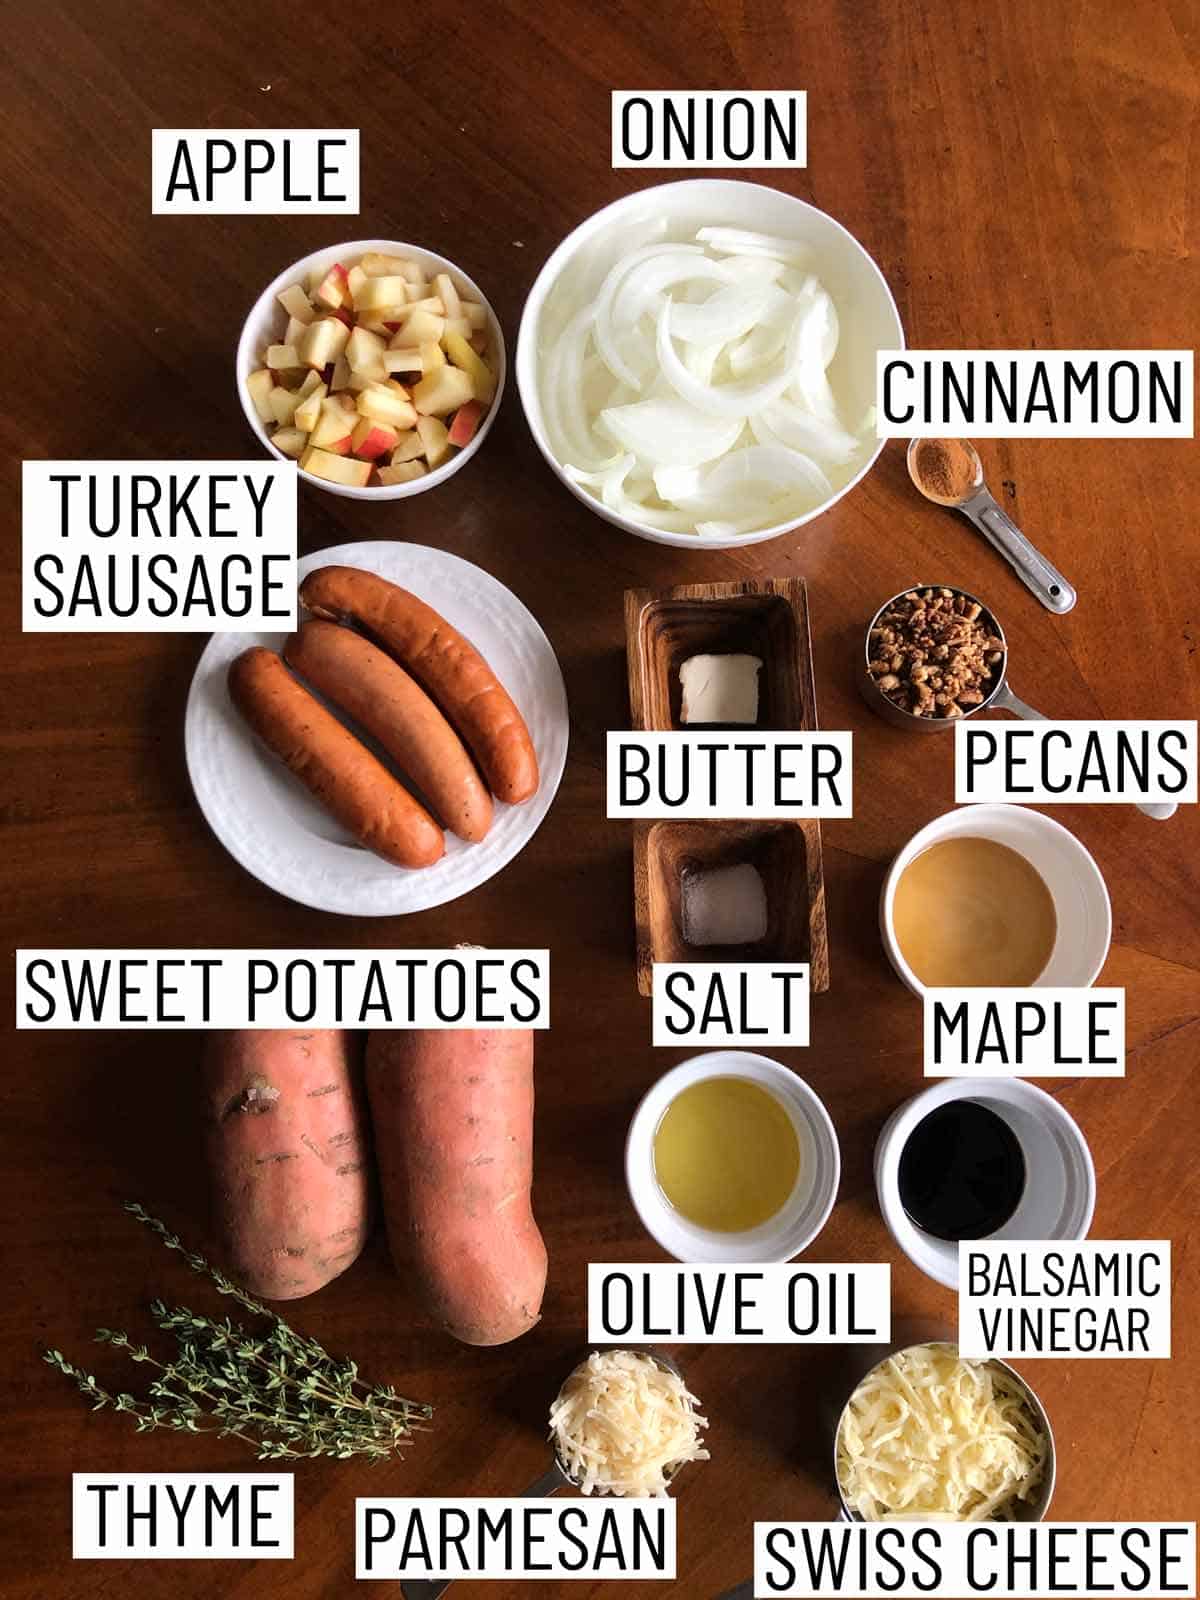
Overhead image of ingredients to make recipe.

Sweet Potatoes — Sweet potatoes are packed with fibre, minerals, and vitamins. Keep the skins on for extra added healthy benefits!

Onions — You know I love caramelized onions so it’s not surprising that we have some caramelized onions in this healthy stuffed sweet potatoes recipe.

Apples — The apples add a nice natural sweetness to this recipe and is a great way to use up random apples lying around the kitchen.

Turkey Sausage — High in protein, these turkey sausages helps make these stuffed sweet potatoes nice and hearty.

Cheese — We love our cheese around here! We use parmesan and Swiss cheese in our twice baked sweet potatoes.

How to Make This Recipe

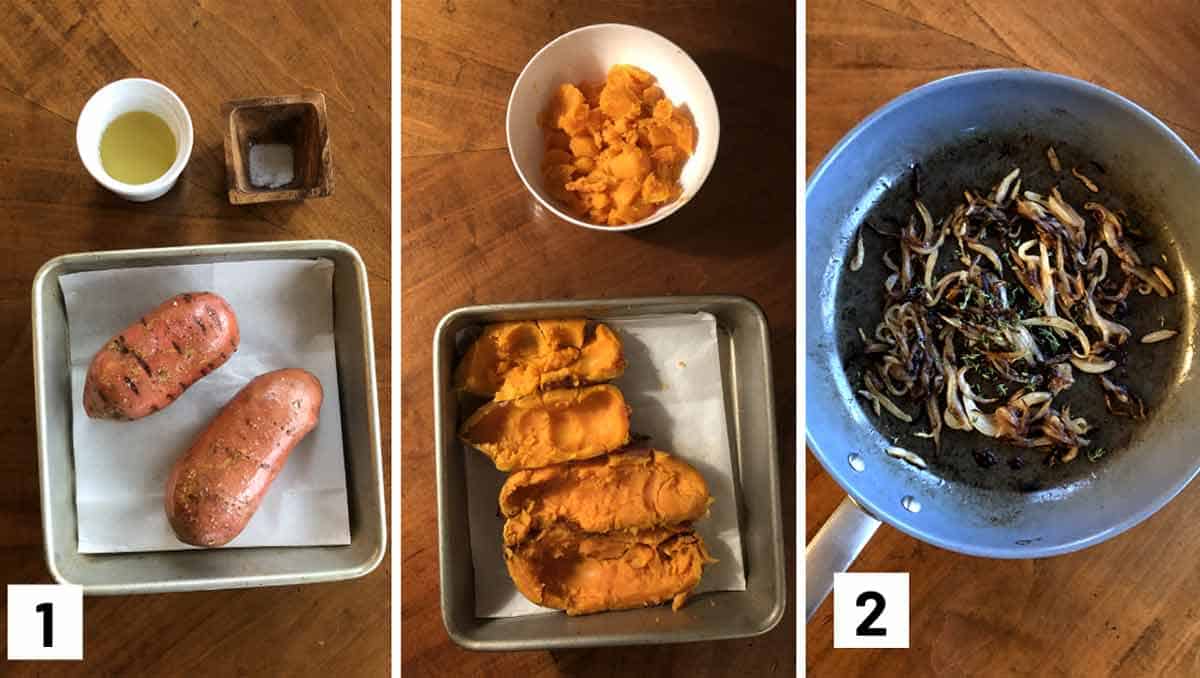
Set of 3 photos showing a baked and halved potato and onions being caramelized.

Step 1: Preheat oven to 350F and line a tray with parchment paper. Scrub the sweet potatoes well, and poke holes into them. Rub with 2 teaspoons of oil, sprinkle with ¼ tsp salt and roast for 1 hour or until very tender when you piece them with a fork. Once cool enough to touch, cut them in half lengthwise and scoop out the insides into a bowl, leaving a thin shell around the edges.

Step 2: While the potato is roasting, heat two teaspoons of oil and the butter in a large skillet over medium low heat. Add in the onions and coat them in the oil. Stirring every 5 minutes, let the onions cook until it reaches a caramelized amber colour, about 40 to 50 minutes. Add in the balsamic, thyme, and a pinch each of salt and pepper to taste. Set aside. Set aside.

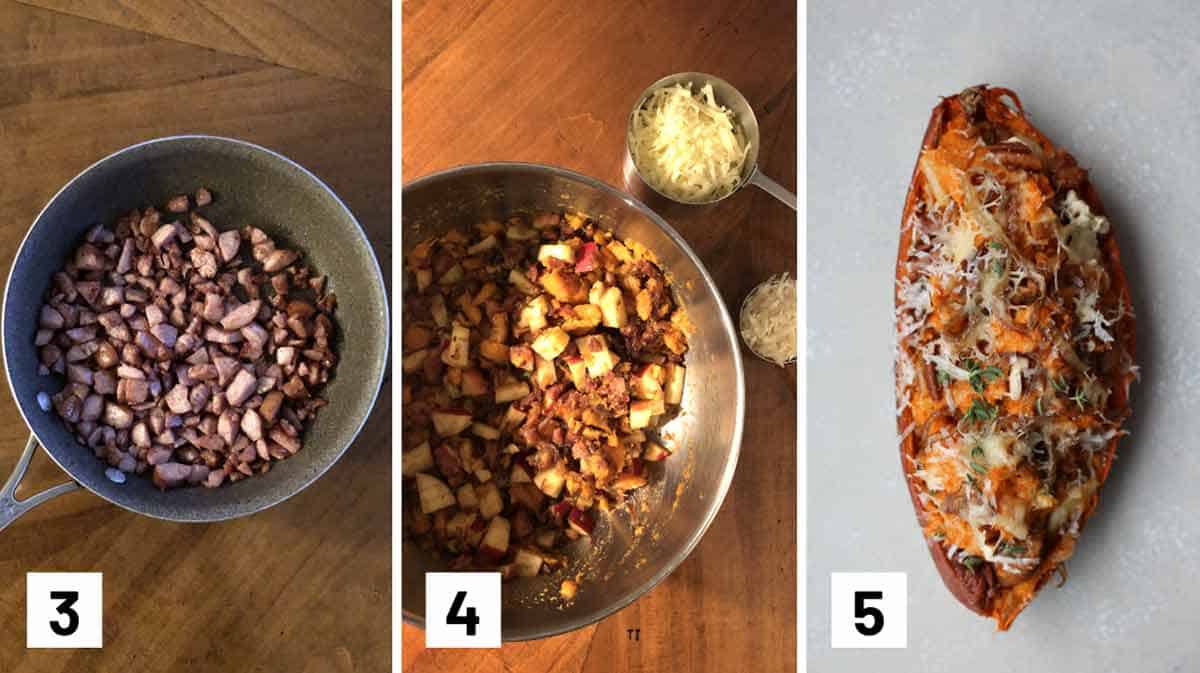
Set of 3 photos showing sausage being sauteed, stuffing being mixed, and a stuffed potato.

Step 3: Add the turkey sausage to a small skillet with 1 teaspoon of oil and break up the meat into small pieces. Cook until well browned then set aside.

Step 4: In a bowl, mix the sweet potato insides with the cinnamon, maple syrup, caramelized onion, cooked turkey, diced apple, ½ cup Swiss cheese, ¼ cup Parmesan cheese and salt and pepper, to taste.

Step 5: Stuff the sweet potato shells with the mixture, then top with pecans, ¼ cup of swiss cheese and 2 tablespoons of parmesan cheese. Place them in the oven for about 10 to 15 minutes until the skin gets lightly crispy and the mixture warms through.

Expert Tips

Make this vegetarian friendly by swapping the turkey sausage for chickpeas, lentils, or tofu.

Have leftover shredded chicken in the fridge? Use it up in the sweet potato instead of turkey sausage.

Make sure you pick sweet potatoes that are similar in size so they bake evenly.

Be sure to pat dry your sweet potatoes after giving them a good scrub. If the sweet potatoes have water on them, then the oil you add to it to roast them won’t stick to the potatoes.

Recipe FAQs

Can this be healthy stuffed sweet potatoes be made ahead of time?

You can! You can make just the sweet potato ahead of time and the stuffing the day of or make the whole stuffed sweet potato ahead of time. Store it in an airtight container and reheat in the oven. If you’re meal prepping and don’t have an oven, reheat this in the microwave.

Do I have to caramelize my onions?

I highly recommend you do! Caramelized onions add a layer of sweetness to your healthy stuffed sweet potatoes. Did you know you can freeze caramelized onions? If you don’t want to spend time making caramelized onions often, you can make a large batch ahead of time and freezing them in single serving portions.

What else can I add to my sweet potatoes?

Feel free to add more veggies to this to make this healthy stuffed sweet potatoes even more healthy. Try bell peppers, kale, spinach, broccoli, cauliflower, etc. Just be sure you make them bite sized pieces so they fit into your sweet potatoes nicely.

A close up of a baked sweet potato with caramelized onion and apple on a brown cutting board.

More Recipes You Might Like

Want more delicious recipes like my healthy stuffed sweet potatoes? Try these recipes:

  • Crispy Vegan Baked Quesadilla 
  • Vegan Creamy Mushroom and Caramelized Onion Pasta 
  • Sloppy Joes with Portobello Mushrooms
  • Sweet Potato Grilled Cheese Bites

Have you tried my Healthy Stuffed Sweet Potatoes? Leave me a comment below with your thoughts!

A close up of a baked sweet potato with caramelized onion and apple on a brown cutting board.
Print Recipe
5 from 7 votes

Healthy Stuffed Sweet Potatoes with Apple & Caramelized Onion

These decadent Healthy Stuffed Sweet Potatoes with Apple & Caramelized Onion is a nutritious and more flavourful take on the classic steak house staple. These healthy stuffed sweet potatoes are twice baked and works as both a main or side dish.
Prep Time15 minutes mins
Cook Time2 hours hrs 20 minutes mins
Total Time2 hours hrs 35 minutes mins
Course: Side Dish
Cuisine: American
Servings: 4 people
Calories: 488kcal
Author: Abbey Sharp

Ingredients

Sweet Potatoes:

  • 2 sweet potatoes
  • 2 tsp extra virgin olive oil
  • ¼ tsp sea salt

Caramelized Onion:

  • 2 tsp extra virgin olive oil
  • 1 tsp butter
  • 1 sweet onion thinly sliced
  • 1 tsp balsamic vinegar
  • 1 tsp thyme leaves

Filling:

  • 3 lean turkey sausage casings removed
  • ½ tsp cinnamon
  • 1 tsp maple syrup
  • Salt and pepper to taste
  • 1 red apple finely diced
  • 3/4 cup Swiss Cheese shredded, divided
  • ¼ cup plus 2 tbsp Parmesan Cheese shredded, divided
  • 1/3 cup pecans toasted and crushed

Instructions

  • Preheat oven to 350 F. Line a tray with parchment paper.
  • Scrub the sweet potatoes well, and poke holes into them. Rub with 2 teaspoons of oil, sprinkle with ¼ tsp salt and roast for 1 hour or until very tender when you piece them with a fork. Once cool enough to touch, cut them in half lengthwise and scoop out the insides into a bowl, leaving a thin shell around the edges.
  • While the potato is roasting, heat two teaspoons of oil and the butter in a large skillet over medium low heat. Add in the onions and coat them in the oil. Stirring every 5 minutes, let the onions cook until it reaches a caramelized amber colour, about 40 to 50 minutes. Add in the balsamic, thyme, and a pinch each of salt and pepper to taste. Set aside. Set aside.
  • Finally, add the turkey sausage to a small skillet with 1 teaspoon of oil and break up the meat into small pieces. Cook until well browned then set aside.
  • In a bowl, mix the sweet potato insides with the cinnamon, maple syrup, caramelized onion, cooked turkey, diced apple, ½ cup Swiss cheese, ¼ cup Parmesan cheese and salt and pepper, to taste.
  • Stuff the sweet potato shells with the mixture, then top with pecans, ¼ cup of swiss cheese and 2 tablespoons of parmesan cheese. Place them in the oven for about 10 to 15 minutes until the skin gets lightly crispy and the mixture warms through.

Notes

  • Make this vegetarian friendly by swapping the turkey sausage for chickpeas, lentils, or tofu.
  • Have leftover shredded chicken in the fridge? Use it up in the sweet potato instead of turkey sausage.
  • Make sure you pick sweet potatoes that are similar in size so they bake evenly.
  • Be sure to pat dry your sweet potatoes after giving them a good scrub. If the sweet potatoes have water on them, then the oil you add to it to roast them won’t stick to the potatoes.

Nutrition

Calories: 488kcal | Carbohydrates: 40g | Protein: 27g | Fat: 25g | Saturated Fat: 8g | Trans Fat: 1g | Cholesterol: 89mg | Sodium: 866mg | Potassium: 815mg | Fiber: 6g | Sugar: 15g | Vitamin A: 16398IU | Vitamin C: 12mg | Calcium: 316mg | Iron: 2mg
Abbey Sharp

Abbey Sharp is a Registered Dietitian (RD), regulated by the Ontario College of Dietitians. She is a mom, YouTuber, Blogger, award winning cookbook author, media coach specializing in food and nutrition influencers, and a frequent contributor to national publications like Healthline and on national broadcast TV shows.
www.abbeyskitchen.com/about-abbey/

Last Updated February 19, 2021. Published February 19, 2021 By Abbey Sharp 87 Comments

Sweet Potato Fritters with Lentils & Kale (Vegan BLW Recipe)

These Sweet Potato Lentil Baby Fritters are a fantastic high iron first food for babyled weaning, especially for vegetarian and vegan babies.

These *NEW AND IMPROVED* Sweet Potato Fritters with lentils and kale are a fantastic high iron first food for baby led weaning, especially for vegetarian and vegan babies.

Several sweet potato fritters on a yellow plate with sweet potato and kale in the background.

If you follow me on Instagram, you may have noticed that we love to share baby led weaning recipes on the feed! When I started solids with my first born, I wanted to introduce some of the major allergens right out of the gate via the baby-led weaning approach.

This meant that instead of relying on infant rice cereal for baby’s first sources of iron, I had to get a bit more creative in the kitchen. This was the inspiration for these sweet potato fritters with lentils which have since become an absolute favourite with my son even now that he’s a full blown toddler!

Table of contents

  • Why This Recipe Works
  • Key Ingredients
  • How to Make This Recipe
  • Expert Tips
  • Recipe FAQs
  • More Recipes You Might Like

Why This Recipe Works

My Big Boy E would be the first to tell you that these sweet potato fritters are the bomb dot com and not to sleep on them! Besides the fact that they kinda taste like a yummy crispy falafel, here are a few more reasons why these sweet potato fritters are great for baby led weaning.

  • Packed with with antioxidants and fibre
  • Good for regularity
  • Easy for baby to eat
  • vegan source of iron and protein
  • Requires less than 10 ingredients

Key Ingredients

Flat lay image of portioned ingredients for recipe including sweet potato, kale, cumin, paprika, olive oil, garlic, oats, flax egg, and red lentils.

Red Lentils – we use split red lentil to make these sweet potato fritters because they are super easy to work with and prep! All we do is soak them over night to soften and thats it, no pre-cooking required.

Oats – I will typically use rolled oats for this recipe, but you might find it easier to use quick cooking oats as they are smaller in size which may help to soak up the moisture from the sweet potato fritters slightly better. Otherwise, you can use rolled oats and grind them up a bit in the food processor.

Kale – I love to add a healthy dose of greens anywhere I can when i’m feeding my little one so I threw in some kale to make these sweet potato fritters. But you can of course add any green of your choice. Spinach would work great here as well!

Sweet Potato – Rather than pre-cooking the sweet potato here, we grate it and allow it to cook at the end when panfrying. I would also be mindful to press any excess liquid out from the grated sweet potato with paper towel before combining with the rest of the ingredients as the extra moisture might make it too wet to bind together.

Flax Egg – To make this recipe vegan we use a flax egg as a binder by combining 1 tablespoon of flax seed with 2 tablespoons of almond milk and letting it thicken in the fridge for 15 mins. But if you don’t need to make these vegan, you can use an egg instead.

How to Make This Recipe

Three side by side images showing how to prepare fritters in the foot processor and binding them with the oats.

Step 1-2: To a food processor, pulse the lentils, garlic, kale, sweet potato, cumin, paprika, and flax egg.

Step 3: Transfer to a bowl and stir in the oats.

Three side by side images showing how to shape the lentil fingers and pan frying them.

Step 4: Shape into long finger like “sticks” and place on a lined baking sheet.

Step 5-6: Heat the oil in a large nonstick skillet, and pan-fry on all sides until golden brown. Serve at room temperature.

Expert Tips

These sweet potato fritters are great for batch cooking which is why I like to make a big batch of them for the week! I keep half in the fridge for the week, and freeze the other half. Then every few days, I pull out a few little fritters and let them thaw in the fridge before dinner. Honestly, I’ve eaten a lot of these fritters myself since I like to model the eating in front of my son while he’s having his meal. If I enjoy them even without salt, I know they’re pretty good.

Also, let’s talk about shape. These fritters are easy for baby to pick up and hold because of their finger shape. They’re also soft enough inside that they can chewed on even without teeth.

I also really wanted to introduce kale or other dark nutritious greens, and since it’s hard for babies to eat salad, pureeing them into these baby fritters seemed like a perfect idea.

Recipe FAQs

Can I bake these instead of pan frying them?

You definitely can! Although they wont turn out as crispy and golden as they do when pan fried. I’d suggest baking at 375F for 30-35 mins and flipping them halfway.

How can I store these?

You can store these fritters in the fridge for 3-5 days or in the freezer for about 3 months.

Can I use an egg as a binder instead?

If you don’t need to make these vegan then yes definitely! I also like to use flax seed here because it boosts the omega 3 fats.

How much dry lentils yields one cup soaked?

To get 1 cup of soaked lentils you’ll need 1/2 cup dry soaked in about 1 cup of water (the lentils will expand significantly).

What can I do if my batter is too wet?

I’d suggest mixing in more oats (1 tbsp at a time) to help soak up some of the moisture and make it easier to work with and shape. Otherwise, you can also try sprinkling in a bit of flour or bread crumbs as well.

Birds eye view of BLW sweet potato and lentil fritters on a yellow plate.

More Recipes You Might Like

If you loved these sweet potato fritters for baby led weaning, then you are going to LOVE these recipes for your little one.

  • Salmon Sweet Potato Fritters
  • Sweet Potato Apple Muffins (High Iron)
  • Mini Broccoli and Egg Muffins
  • Hummus Baby Meatballs

Now loves, let me know, what are some of your baby’s favourite homemade snacks that are high in iron?

These Sweet Potato Lentil Baby Fritters are a fantastic high iron first food for babyled weaning, especially for vegetarian and vegan babies.
Print Recipe
4.88 from 24 votes

Sweet Potato Fritters with Lentils & Kale (Vegan BLW Recipe)

These Sweet Potato Fritters with lentils and kale are a fantastic high iron first food for baby led weaning, especially for vegetarian and vegan babies.
Prep Time10 minutes mins
Cook Time15 minutes mins
Total Time25 minutes mins
Course: Snack
Cuisine: American
Diet: Vegan
Servings: 10 Fritters
Calories: 123kcal
Author: Abbey Sharp

Ingredients

  • 1 cup soaked red split lentils soaked overnight in water, measured after soaking
  • 1 cup minced baby kale
  • 1 cup grated sweet potato
  • 2 cloves garlic minced
  • ¼ tsp cumin
  • 1/4 tsp sweet paprika
  • 1 flax egg 1 tbsp ground flax with 2 tbsp unsweetened almond milk
  • 1/2 cup gluten free oats
  • 2 tbsp extra virgin olive oil

Instructions

  • To a food processor, add the lentils, garlic, kale, sweet potato, cumin, paprika, and flax egg. Pulse for 3-5 minutes until fully combined, scrapping down the sides if needed.
  • Transfer mixture to a bowl and stir in the oats. If you find the mixture is too wet to shape, add more oats 1 tbsp at a time.
  • Shape into long finger like "sticks" and place on a baking sheet lined with a silpat or baking sheet.
  • Heat the oil in a large nonstick skillet, and pan-fry on all sides until golden brown. Fritters might be delicate when flipping so use a spatula and carefully flip them.
  • Serve at room temperature.

Video

Nutrition

Calories: 123kcal | Carbohydrates: 17g | Protein: 6g | Fat: 4g | Saturated Fat: 1g | Sodium: 12mg | Potassium: 271mg | Fiber: 7g | Sugar: 1g | Vitamin A: 2588IU | Vitamin C: 9mg | Calcium: 30mg | Iron: 2mg

Leave me a comment below with your thoughts on these sweet potato fritters!

Abbey Sharp

Abbey Sharp is a Registered Dietitian (RD), regulated by the Ontario College of Dietitians. She is a mom, YouTuber, Blogger, award winning cookbook author, media coach specializing in food and nutrition influencers, and a frequent contributor to national publications like Healthline and on national broadcast TV shows.
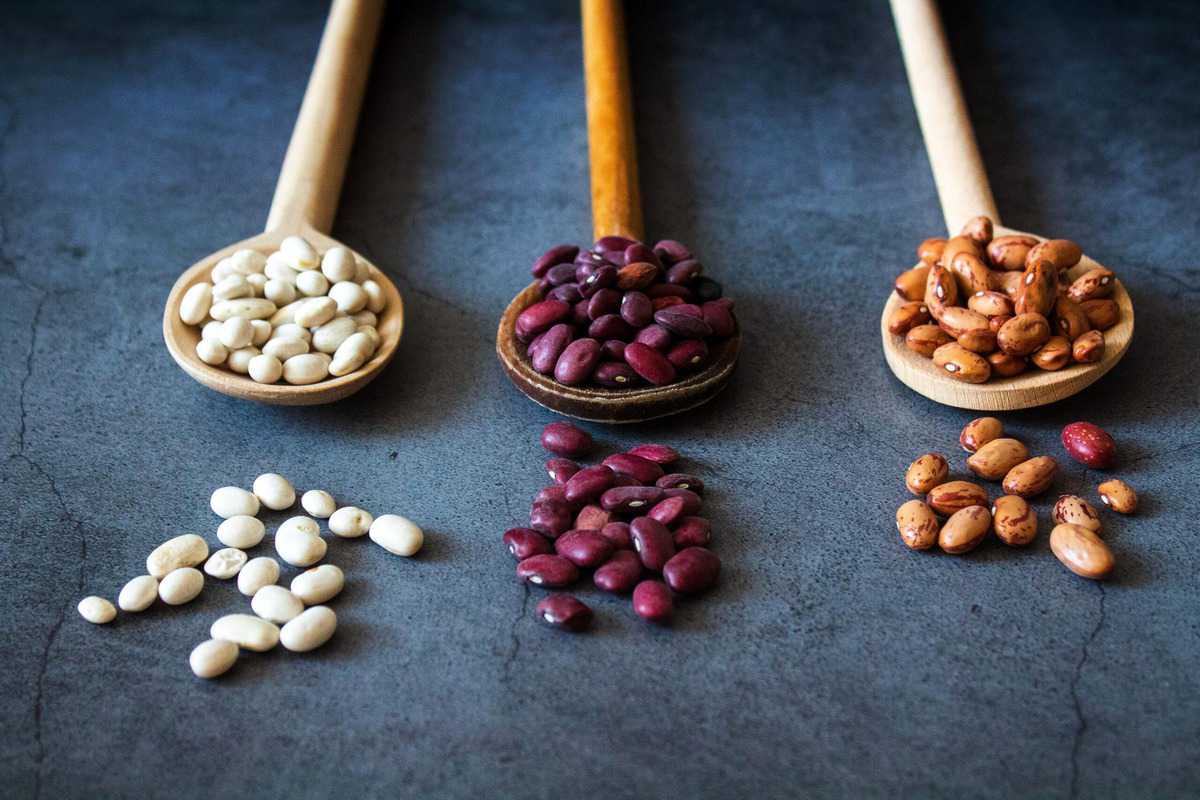
www.abbeyskitchen.com/about-abbey/

Last Updated February 16, 2021. Published February 17, 2021 By Abbey Sharp 8 Comments

Baby Muffins with Carrots (Healthy + No Sugar Added)

These healthy baby carrot muffins are super moist and nutrient packed! They also have no added sugar and are totally vegan and gluten free.

Close up of several baby muffins on a white plate.

If there is one snack I can always count on to power me through the midday energy slump its MUFFINS. Which is why I always try to make a fresh batch of the good stuff to help hold me over during the work week when I need a bit of an energy boost.

My latest go-to are these healthy carrot baby muffins! Not only do they have no added sugar, but they are a great way to sneak a little veg action into your afternoon snack break.

Table of contents

  • Why This Recipe Works
  • Key Ingredients
  • How To Make This Recipe
  • Expert Tips
  • Recipe FAQs
  • More Recipes You Might Like

Why This Recipe Works

Whether you are making these for yourself or for your kiddo, here are just a few more reasons why you need these baby muffins in your life:

  • Source of protein and fibre (2 grams of each per muffin)
  • Great for baby led weaning
  • Toddler friendly
  • Perfect for batch prepping
  • Vegan
  • Gluten free

Key Ingredients

Flat lay image showing portioned recipe ingredients including oat flour, almond flour, apple, carrot, banana, baking powder, salt, hemp hearts, oat milk, nutmeg, vanilla, cinnamon, and flax seed.

Carrots – the carrots in these baby carrot muffins add a healthy dose of antioxidants and fibre! If you want to speed up prep, you can buy pre-grated carrots.

Banana – Adding mashed banana to muffins is one of my go-to hacks for making baked goods sweet without any added sugar.

Flour – To make this recipe gluten free, we use a combination of oat flour and almond. If you wish to make oat flour from scratch, see our expert tips below to find out how!

Apple – The apple adds a little extra touch of sweetness and tartness, while also adding additional moisture to these baby muffins.

Oat Milk – To make this recipe vegan we use oat milk along with vegan butter. If you don’t need to make this recipe vegan you can substitute this for regular cows milk and butter. You can also see our expert tips if you wish to learn how to make oat milk from scratch!

How To Make This Recipe

Three side by side images showing how to make muffin batter by combining dry and wet ingredients.

Step 1: Combine and mix the flaxseed meal, plant milk, melted butter and vanilla extract in a large bowl.

Step 2: To the same bowl, add the grated apple, finely grated carrot, mashed banana and mix.

Step 3: Add the almond flour/meal, GF oat flour, GF baking powder, cinnamon, nutmeg, sea salt and mix until well combined.

Two side by side images showing the muffin batter in a muffin tray and baked muffins cooling on a cooling rack.

Step 4: Fill mini muffin tin with the mixture and sprinkle with hemp hearts (optional). Bake for 20-22 minutes or until tops feel firm.

Step 5: Cool in pan for 10 minutes, carefully remove the muffins from the tin and finish cooling them on a wire rack.

Expert Tips

These baby muffins are best enjoyed a few hours after baking or even better the next day! You can warm them up for a few seconds in your microwave.

You can store them in a sealed bag or covered glass container for a couple of days or freeze them for longer storage.  

If you wanted to make homemade plant milk instead of store-bought, you can combine about 1/2 cup of the seed or nut of your choice and 2 cups of water in a high-speed blender. Squeeze the milk through a mesh bag to remove the excess pulp. 

You can also make your own homemade oat flour from scratch by milling quick oats or large oats in a high-speed blender until fine.

Recipe FAQs

Can I freeze these muffins?

Yes, I always do! I’d suggest cooling them on a baking sheet and popping them into the freezer for about 30-60 mins until solid. You can then throw them into a freezer bag for up to 3 months. When you’re ready to eat, I just pull out a batch and let them thaw in the fridge or microwave them one at a time (in 30 second intervals to be safe).

Can I use these for baby led weaning?

Definitely! These muffins are very soft and easy for self-feeding so they’re the perfect healthy snack for little hands and new eaters.

Are these safe for kids with peanut allergies?

They are safe for most kiddos, however, not for those with tree nut allergies as these muffins are made with almond flour.

Can I make these baby muffins full sized?

Totally! I’d suggest adjusting the baking time to about 20-23 minutes or until a toothpick comes out clean.

Are these muffins gluten free?

Yep! We use gluten free flour for this recipe.

Several baby carrot muffins on a white plate with more cooling in a cooling rack in the background.

More Recipes You Might Like

  • Mini Peanut Butter Banana Muffins
  • Sweet Potato Apple Muffins
  • Spinach Muffins
  • PB & J Banana Mini Blender Muffins

Are you a fan of baby muffins? What are your favourite recipes these days?

Print Recipe
5 from 3 votes

Baby Muffins (Carrot Baby Muffins)

These healthy zero-sugar added baby carrot muffins are moist and packed with nutritious ingredients. 
Prep Time20 minutes mins
Cook Time20 minutes mins
Total Time40 minutes mins
Course: Snack
Cuisine: American
Diet: Gluten Free, Vegan
Servings: 16 muffins
Calories: 90kcal
Author: Abbey Sharp

Ingredients

  • 2 tablespoons flaxseed meal 16g
  • 1/2 cup homemade oat milk or hemp, almond* (116g)
  • 1/4 cup melted vegan butter or coconut oil (50g)
  • 1 teaspoon pure vanilla extract
  • 1 cup grated apple 2 smaller apples (128g)
  • 1 cup packed finely grated carrot 128g)
  • 1 medium ripe mashed banana 1/3 cup (92g)
  • 3/4 cup almond flour/meal 76g
  • 1-1/2 cup GF oat flour** 136g
  • 2 teaspoons GF baking powder***
  • 1 1/2 teaspoon cinnamon
  • 1/4 tsp nutmeg
  • 1/4 teaspoon sea salt
  • Hemp hearts to sprinkle on top

Instructions

  • Preheat oven to 375° F and grease a mini muffin pan.
  • Combine and mix the flaxseed meal, plant milk, melted butter and vanilla extract in a large bowl.
  • To the same bowl, add the grated apple, finely grated carrot, mashed banana and mix.
  • Add the almond flour/meal, GF oat flour, GF baking powder, cinnamon, nutmeg, sea salt and mix until well combined.
  • Fill mini muffin tin with the mixture and sprinkle with hemp hearts (optional). Bake for 20-22 minutes or until tops feel firm.
  • Cool in pan for 10 minutes, carefully remove the muffins from the tin and finish cooling them on a wire rack.

Notes

Best enjoyed a few hours later or even better the next day! You can warm them up for a few seconds in your microwave.
 
Store the mini muffins in a sealed bag or covered glass container for a couple of days or freeze them for longer storage.
 
*Make homemade plant milk with 1/2 cup of the seed/nut blended in a high-speed blender with about 2 cups of water. Squeeze through mesh bag to remove larger pulp. 
**You can make oat flour by milling quick oats or large oats in a high-speed blender.
***GF baking powder ingredients: cream of tartar, baking soda, tapioca starch. 
If using a non-GF brand (that contains other ingredients), it’s possible that less baking powder would be required. Alternatively, one could add just 1 teaspoon of baking soda only.
 

Nutrition

Calories: 90kcal | Carbohydrates: 8g | Protein: 2g | Fat: 6g | Saturated Fat: 1g | Trans Fat: 1g | Sodium: 122mg | Potassium: 87mg | Fiber: 2g | Sugar: 3g | Vitamin A: 1496IU | Vitamin C: 1mg | Calcium: 61mg | Iron: 1mg

Did you enjoy these carrot baby muffins? If so, I’d love to hear your thoughts down in the comments below!

Abbey Sharp

Abbey Sharp is a Registered Dietitian (RD), regulated by the Ontario College of Dietitians. She is a mom, YouTuber, Blogger, award winning cookbook author, media coach specializing in food and nutrition influencers, and a frequent contributor to national publications like Healthline and on national broadcast TV shows.
www.abbeyskitchen.com/about-abbey/
  • Previous Page
  • Go to page 1
  • Interim pages omitted …
  • Go to page 36
  • Go to page 37
  • Go to page 38
  • Go to page 39
  • Go to page 40
  • Interim pages omitted …
  • Go to page 89
  • Next Page

Get started with

Eight Free Recipe Books

From the co-founder of Neue Theory and creator of the Hunger Crushing Combo

Sign me up!
Abbey smiling at table
Abbey Sharp

“Foods may never be nutritionally equal. But we can make them morally equal by recognizing that our worth is never determined by what's on our plate.”

— Abbey Sharp, RD About Abbey ◥

Books

  • HCC™
  • Mindful Glow
  • Free E-Books

Blog

  • Nutrition
  • Recipes
  • Motherhood
  • Life

Explore

  • Neue Theory™
  • Bite Back
  • YouTube

Abbey

  • About
  • Coaching
YouTube TikTok Instagram Facebook X Pinterest
Abbey Sharp - The No BS Dietitian From Abbeys Kitchen

© Abbey's Kitchen 2026  All Rights Reserved •  ACCESSIBILITY STATEMENT •  Privacy Policy

This site uses cookies. By continuing to browse the site, you are agreeing to the use of cookies Accept Privacy Policy
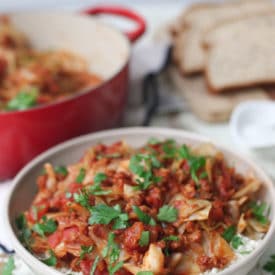
Privacy & Cookies Policy

Privacy Overview

This website uses cookies to improve your experience while you navigate through the website. Out of these, the cookies that are categorized as necessary are stored on your browser as they are essential for the working of basic functionalities of the website. We also use third-party cookies that help us analyze and understand how you use this website. These cookies will be stored in your browser only with your consent. You also have the option to opt-out of these cookies. But opting out of some of these cookies may affect your browsing experience.
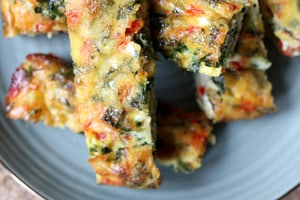
Necessary
Always Enabled
Necessary cookies are absolutely essential for the website to function properly. This category only includes cookies that ensures basic functionalities and security features of the website. These cookies do not store any personal information.
Non-necessary
Any cookies that may not be particularly necessary for the website to function and is used specifically to collect user personal data via analytics, ads, other embedded contents are termed as non-necessary cookies. It is mandatory to procure user consent prior to running these cookies on your website.
SAVE & ACCEPT

Rate This Recipe

Your vote:


A rating is required
A name is required
An email is required