• Skip to main content

Abbey's Kitchen

Healthy Recipes, Nutrition Myth Busting, Healthy Eating Tips

  • Books
    • HCC™
    • The Mindful Glow Cookbook
    • Recipe eBooks
      • Family
      • Hypothyroidism
      • BLW
      • Vegan Week 1
      • Vegan Week 2
      • Vegan Week 3
      • Keto
      • Gluten Free Week 1
      • Gluten Free Week 2
      • Fitness
      • Paleo
  • Blog
    • Nutrition
    • Recipes
    • Motherhood
    • Life
  • Explore
    • Neue Theory™
    • Bite Back With Abbey Sharp
      • Apple Music
      • Spotify
      • Amazon Music
    • YouTube
  • Abbey
    • About
    • Coaching
    • Contact

Abbey Sharp

Last Updated January 12, 2021. Published January 12, 2021 By Abbey Sharp 12 Comments

Keto Zucchini Boats with Philly Cheesesteak Stuffing

These keto zucchini boats with Philly cheesesteak stuffing are a delicious low carb and veggie packed alternative to the classic Philly cheese steak!
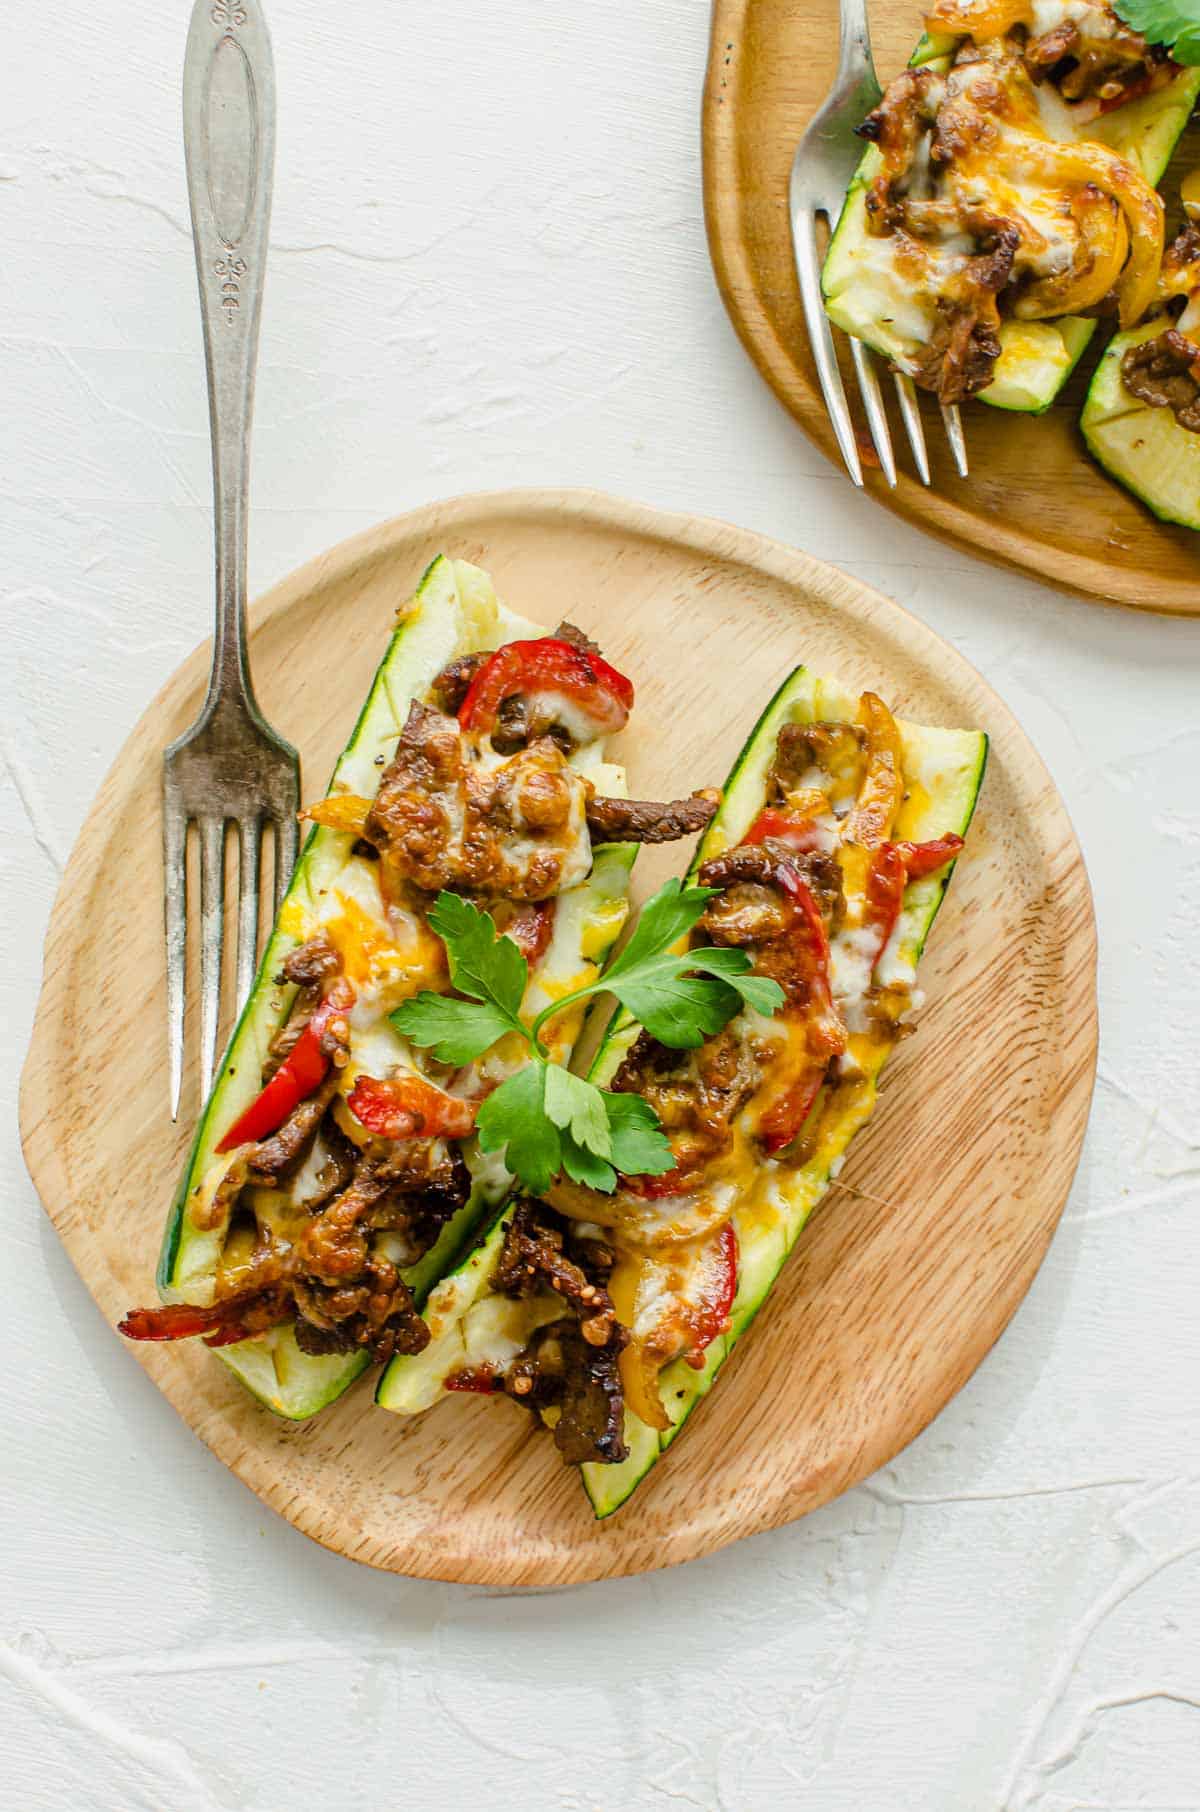
Birds eye view of prepared zucchini boats with Philly cheesesteak stuffing on a wooden plate topped with parsley.

Let’s talk about one of the best comfort food sandwiches out there – Philly Cheesesteak. I mean, how can you possibly resist the combination of shredded roast beef with melted cheese? It’s 100% drool worthy!

This time I’m giving this sammie a makeover by turning it into a delicious healthy weeknight dinner that is loaded with veggies, without sacrificing flavour! Introducing my keto zucchini boats with Philly cheesesteak stuffing.

This recipe is a delicious veggie-packed way to enjoy the delicious flavours of a classic Philly cheesesteak and will be sure to add a little extra comfort to your meal time.

Why This Recipe Works

I love taking classic comfort foods and giving them a healthy twist. If you are a fan of the classic comforting cheesesteak sammie but are looking for a lighter version, you’re gonna love these keto zucchini boats because they are:

  • Keto friendly
  • Low Carb
  • Gluten Free
  • Veggie Packed
  • Easy to Prepare
  • And 100% DELISH!

Table of contents

  • Why This Recipe Works
  • Key Ingredients
  • How to Make This Recipe
  • Expert Tips
  • Recipe FAQs
  • More Recipes You Might Like

Key Ingredients

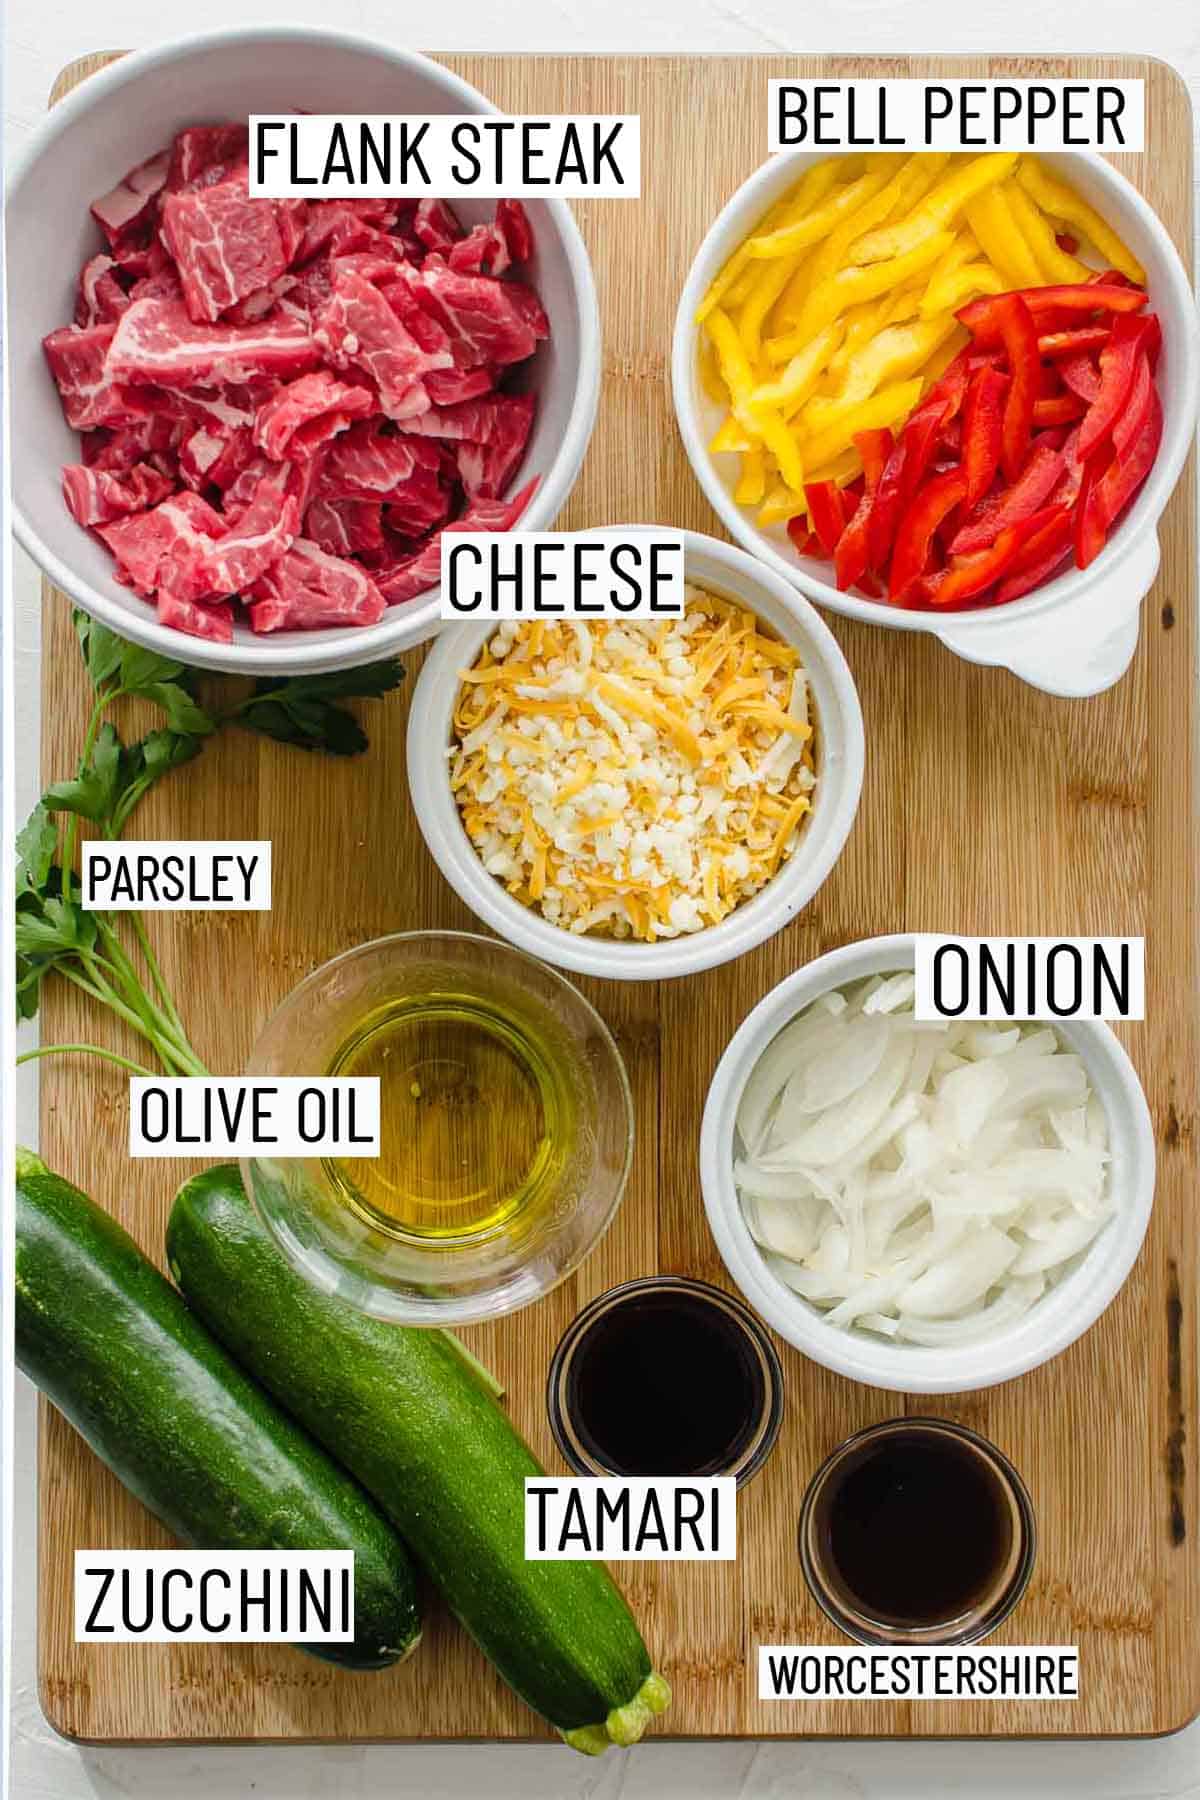
Flat lay of portioned ingredients for zucchini boats including steak, bell pepper, cheese, parsley, onion, olive oil, zucchini, tamari and worestershire sauce.

Cheese – We are staying true to tradition here with this keto zucchini boat recipe by using provolone cheese and blending it with the bold flavours of aged cheddar cheese.

Zucchini – Look for medium sized zucchinis as these will be easier to stuff with the cheesesteak filling, and don’t take as long to cook compared to larger sized zucchinis.

Flank Steak – We prefer to use flank steak in this recipe, but traditional cheesesteak recipes have also used rib-eye or top round. Ideally you want to pick a meat that has a nice marbling because it will add extra flavour to the keto zucchini boats.

Bell Pepper – We wanted to up the veggie power of this recipe so in addition to the onions and zucchini boats, we’ve also added some delicious bell peppers to make this recipe extra nutrient-rich.

Sauce – To make the sauce we combine tamari and worcestershire sauce to give the meat that delicious salty umami flavour!

How to Make This Recipe
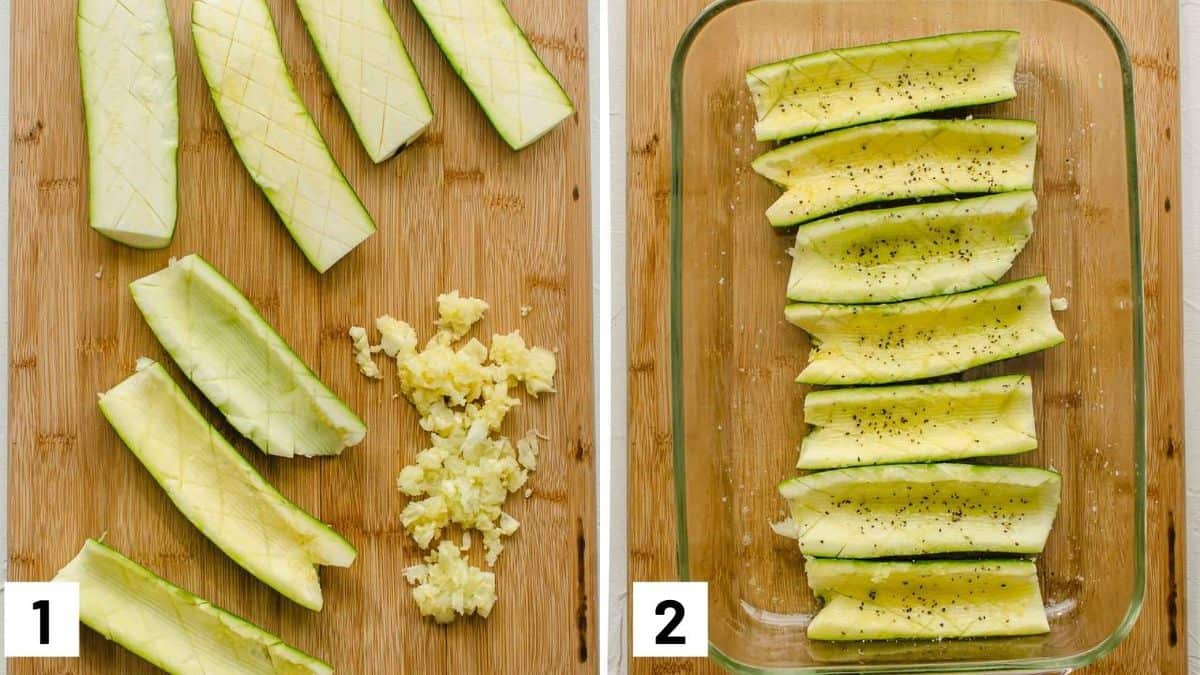
Two side by side images showing how to prepare zucchini by scoring, removing the flesh, and brushing with olive oil.

Step 1: Cut zucchini in half and score the inside, then remove a bit of the flesh. Chop into small pieces and set aside.

Step 2: Brush the zucchini with 1 tablespoon of olive oil and sprinkle with salt and pepper. Arrange in a large 12×9″ roasting dish and roast for 10 minutes.
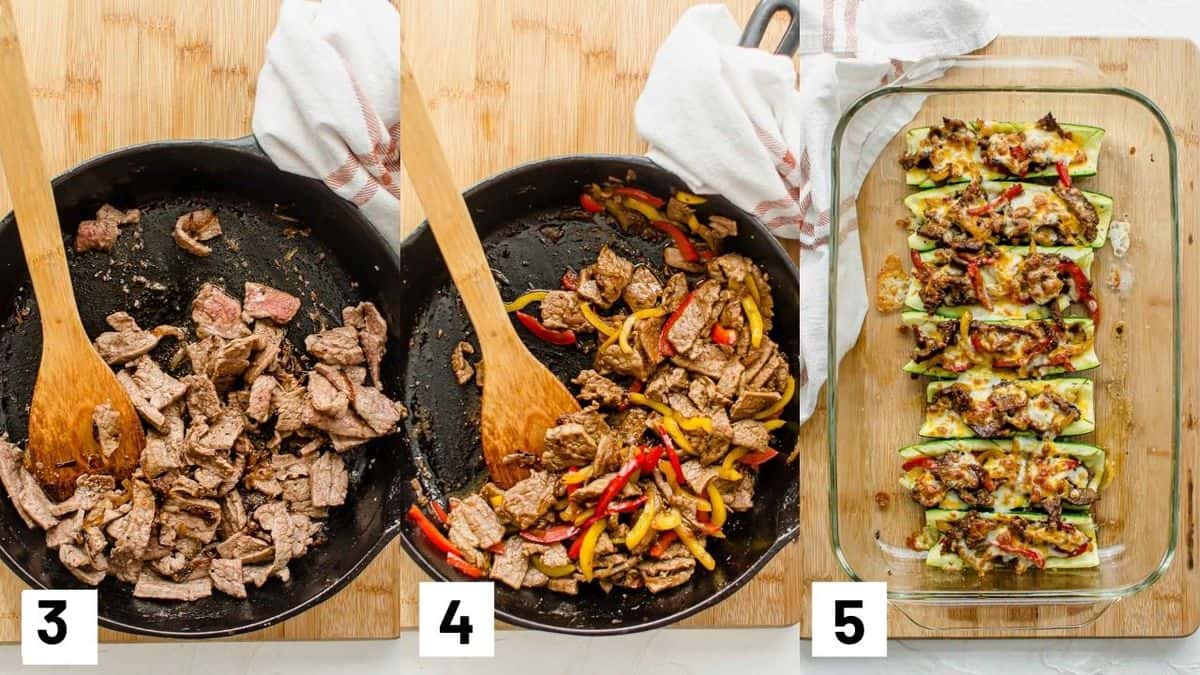
Three side by side images showing how to prepare the Philly cheesesteak filling for the zucchini boats including sauteeing the onion, steak, and veggies in a pan; adding the sauce; layering onto the zucchini boats and heating in the oven.

Step 3: Heat oil in a medium skillet over medium heat. Add in onion and beef and sprinkle generously with salt and pepper. Cook for 2 minutes.

Step 4: Add the bell peppers and onions along with a pinch of salt and pepper. Add the tamari and worcestershire sauce and allow to bubble and caramelize. Coat all the veggies and meat in the sauce.

Step 5: Layer the roast beef and sauteed vegetables onto the zucchini and top with shredded cheese.

Expert Tips

To make this recipe gluten free we’ve used tamari and gluten free worcestershire sauce. You can also use coconut aminos or soy sauce (if you don’t need to make this gluten free) in place of the tamari. Also, tamari and soy sauce tend to be high in sodium, so make sure to look for reduced-sodium options if they are available.

We also recommend using meat that is cut thin. You can request your butcher to do this for you, or you can do this at home by placing the meat in the freezer for 30 mins, and using a very sharp knife to cut the meat against the grain.

Be aware that zucchini also tends to be watery, so make sure you scoop out as much flesh as you can and don’t skip roasting the zucchini first before adding the filling! This will help to release water so that you’re not left with a mushy zucchini boat.

Recipe FAQs

What can I do with the left over zucchini flesh?

I will often repurpose the zucchini flesh by pureeing it into soups, using it in smoothies (trust me, its the best) or throwing it into my baking to make zucchini muffins or bread. You can also freeze it in a freezer bag and reuse at a later time so that it doesn’t go to waste.

What can I have on the side?

This meal is definitely on the lighter side so I get that for some people these zucchini boats can be a stand alone meal, while others may need to pair it with something else. If you need to keep this meal low carb or keto, you can pair this with a nice salad or another protein source like chicken or fried egg. But if you aren’t low carb, I personally love to pair this with a simple side of rice or pasta.

How long do these zucchini boats last in the fridge?

You can store these keto zucchini boats in the fridge for 3-4 days.
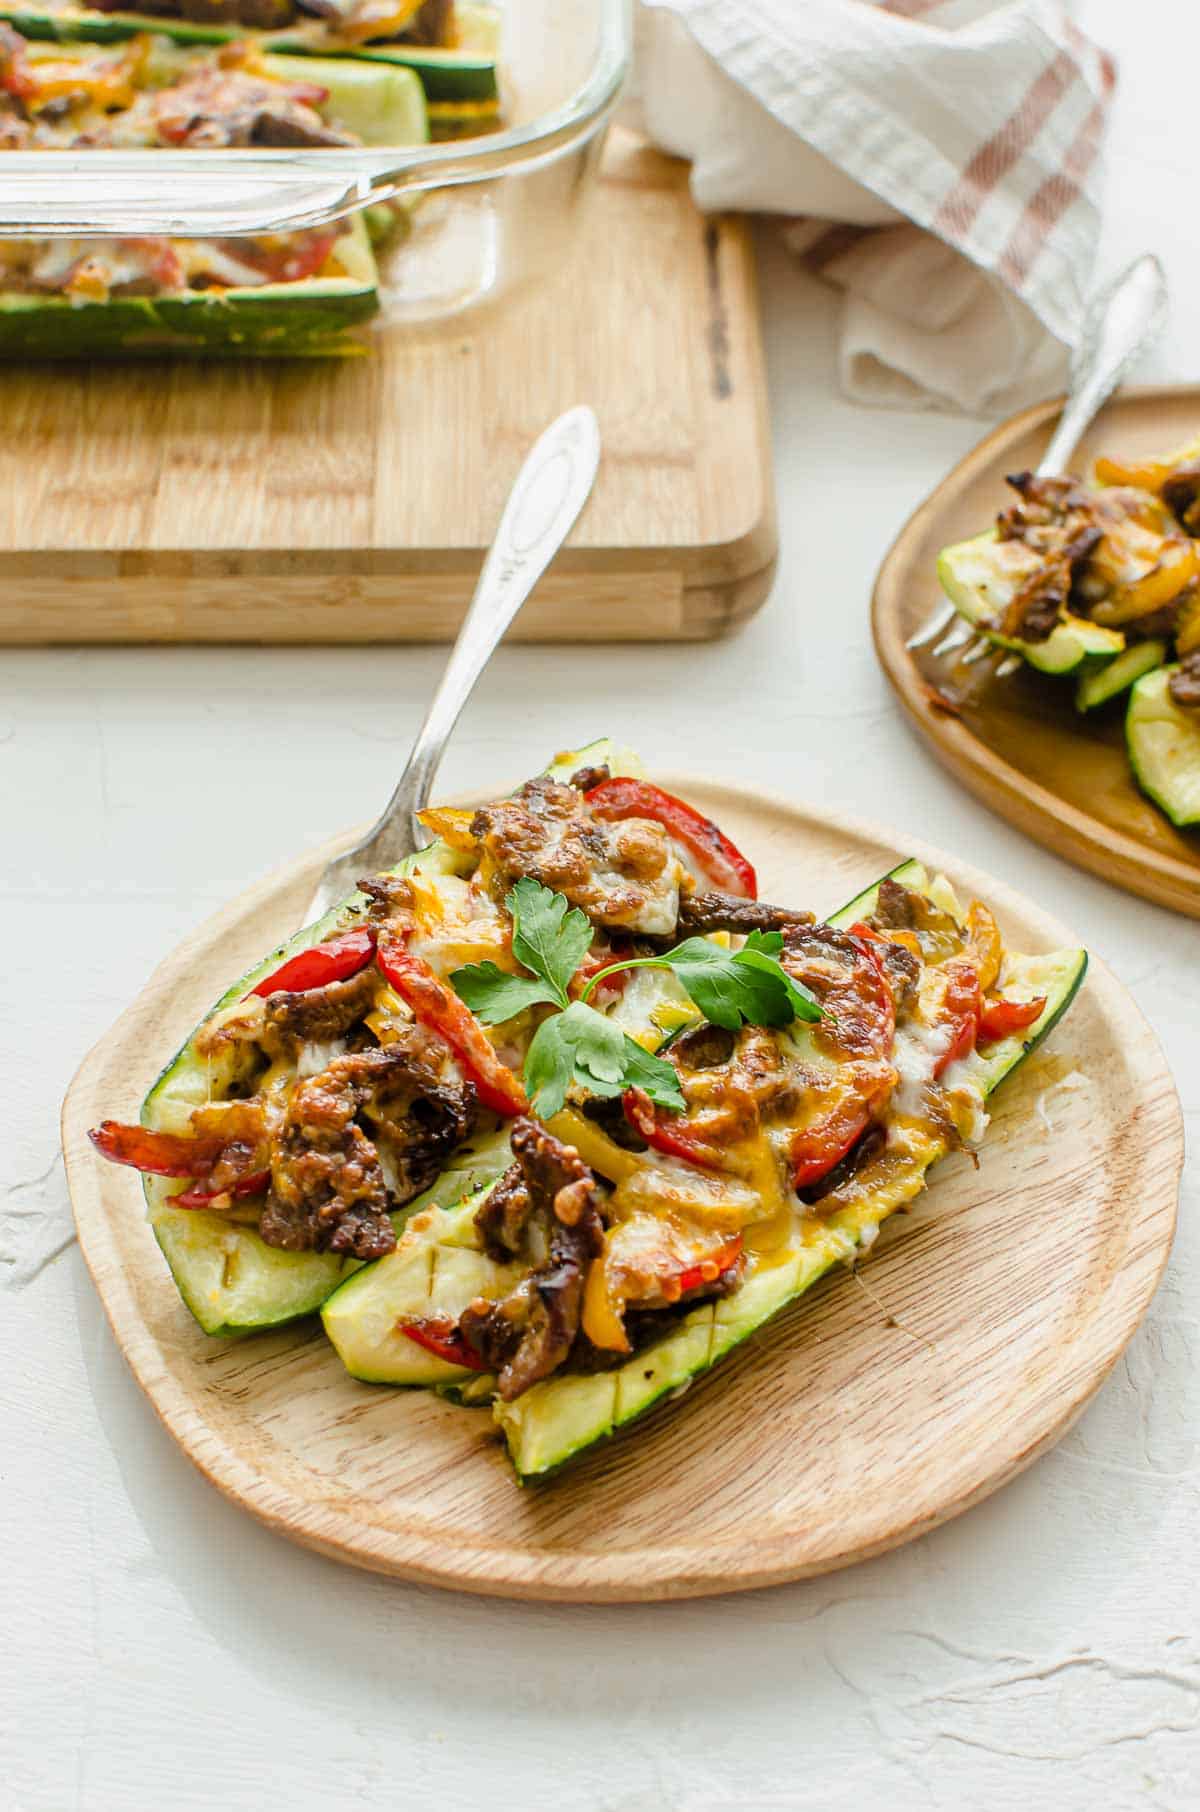
Close up of low carb cheesesteak on a wooden plate.

More Recipes You Might Like

If you are keto or low carb (or not), here are more popular recipes on the blog that you might like!

  • Healthy No Bean Walnut Chili
  • Egg Roll In A Bowl
  • Pizza Egg Muffins
  • Cauliflower Rice Casserole with Chicken and Broccoli

Now let me know, are you a Philly cheesesteak fan? What are some of your fave comfort food sandwiches?
Print Recipe
5 from 4 votes

Keto Zucchini Boats with Philly Cheesesteak Stuffing

These keto zucchini boats with Philly cheesesteak stuffing are a delicious low carb and veggie packed alternative to the classic Philly cheesesteak!
Prep Time10 minutes mins
Cook Time21 minutes mins
Total Time31 minutes mins
Course: Dinner
Cuisine: American
Servings: 4 people
Calories: 169kcal
Author: Abbey Sharp

Ingredients

  • 4 zucchini stem removed and halved lengthwise
  • 2 tbsp olive oil divided
  • 1/2 yellow onion thinly sliced
  • 1/2 lb flank steak sliced
  • 1/2 red bell pepper thinly sliced
  • 1/2 yellow bell pepper thinly sliced
  • 2 tsp reduced sodium tamari (gluten free if desired) or coconut aminos
  • 2 tsp worcestershire sauce (gluten free, if desired)
  • 1/2 cup provolone cheese shreddedd
  • 1/2 cup Aged orange cheddar shredded
  • Salt and pepper to taste
  • Parsley for serving

Instructions

  • Preheat oven to 400 F.
  • Score the inside (like you would an avocado), then remove a bit of the insides of the zucchini. Chop into small pieces and set aside. Brush the zucchini with 1 tablespoon of olive oil and sprinkle with salt and pepper. Arrange in a large 12×9" roasting dish and roast for 10 minutes.
  • Meanwhile, heat an additional tablespoon of oil in a medium skillet over medium heat. Add in onion and beef and sprinkle generously with salt and pepper. Cook for 2 minutes. Add the bell peppers and onions along with a pinch of salt and pepper. Add the tamari or coconut aminos and worcestershire sauce and allow to bubble and caramelize. Coat all the veggies and meat in the sauce.
  • Layer the roast beef and sauteed vegetables onto the zucchini and top with shredded cheese.
  • Return to the oven for 5 minutes until golden brown.
  • Garnish with parsley if desired and serve immediately.

Notes

To make this recipe gluten free we’ve used tamari and gluten free worcestershire sauce. You can also use coconut aminos or soy sauce (if you don’t need to make this gluten free) in place of the tamari. Also, tamari and soy sauce tend to be high in sodium, so make sure to look for reduced-sodium options if they are available.
We also recommend using meat that is cut thin. You can request your butcher to do this for you, or you can do this at home by placing the meat in the freezer for 30 mins, and using a very sharp knife to cut the meat against the grain.
Be aware that zucchini also tends to be watery, so make sure you scoop out as much flesh as you can and don’t skip roasting the zucchini first before adding the filling! This will help to release water so that you’re not left with a mushy zucchini boat.

Nutrition

Calories: 169kcal | Carbohydrates: 10g | Protein: 13g | Fat: 9g | Saturated Fat: 5g | Cholesterol: 27mg | Sodium: 538mg | Potassium: 673mg | Fiber: 3g | Sugar: 6g | Vitamin A: 1150IU | Vitamin C: 88.8mg | Calcium: 286mg | Iron: 1.3mg

Have you tried these keto zucchini boats? Let me know your thoughts down in the comments below!

Abbey Sharp

Abbey Sharp is a Registered Dietitian (RD), regulated by the Ontario College of Dietitians. She is a mom, YouTuber, Blogger, award winning cookbook author, media coach specializing in food and nutrition influencers, and a frequent contributor to national publications like Healthline and on national broadcast TV shows.
www.abbeyskitchen.com/about-abbey/

Last Updated January 11, 2021. Published January 11, 2021 By Abbey Sharp 18 Comments

Everything Bagel Chicken Breasts (Healthy + Gluten Free)

These Everything Bagel Chicken Breasts are an easy and delicious family friendly dinner recipe that are also keto friendly, low carb and gluten free.

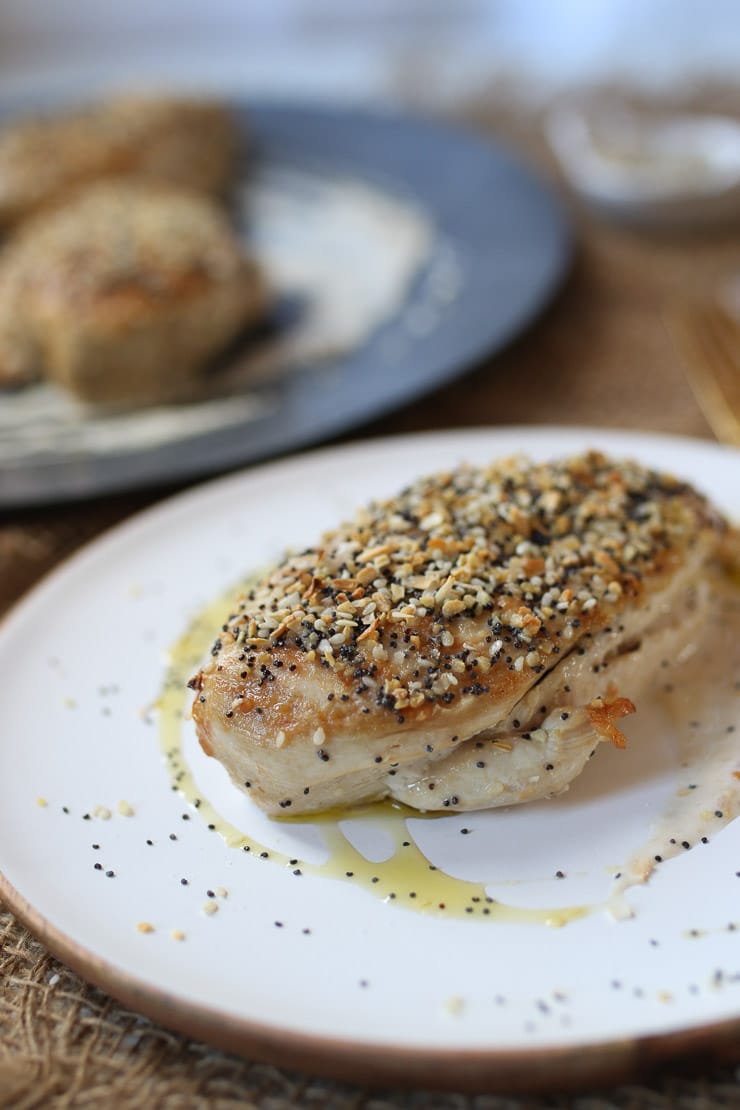
These Everything Bagel Chicken Breasts are an easy and delicious family friendly dinner recipe that are also keto friendly, low carb, and gluten free.

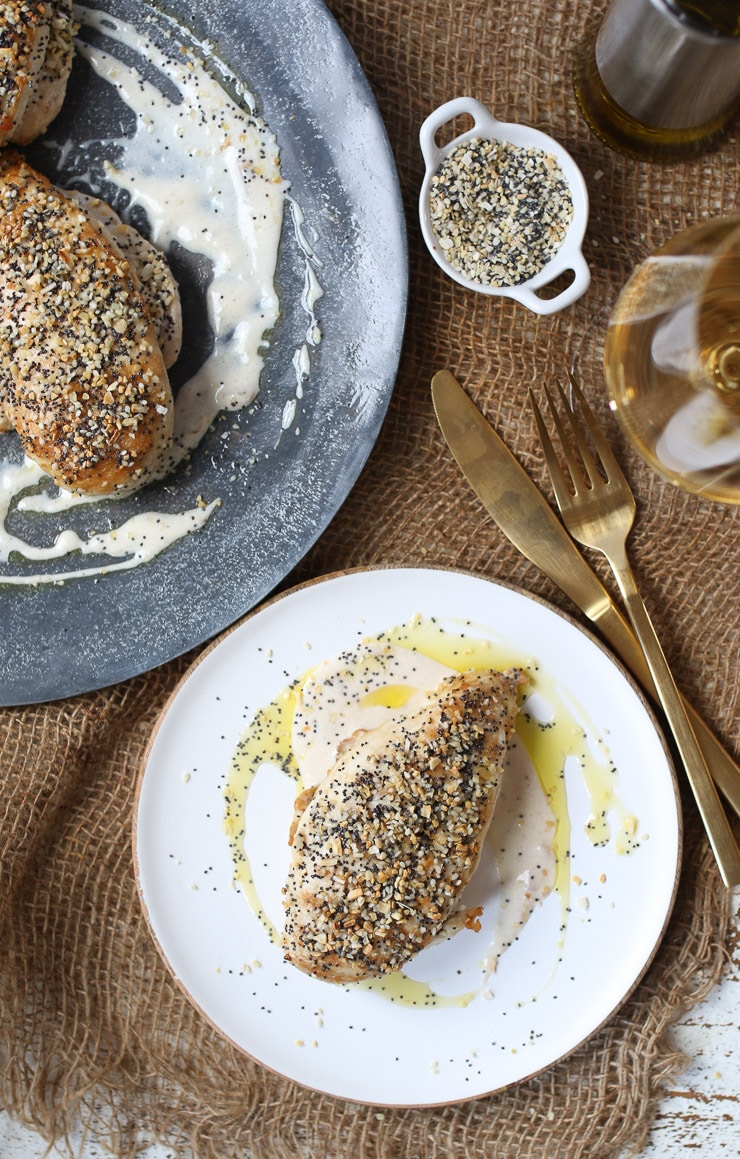
Birds eye view of chicken breast served on a white plate topped with seasoning.

I wasn’t raised Jewish so I never got really into the whole bagel thing to be honest. I would much rather take a thick slice of challah, sourdough or even baguette to a dense bagel. But there is something undeniably delicious about an everything bagel. At least the top of it. I mean, would I happily lick the everything spice off the top of the everything bagel, leaving said bagel all soggy and clean out in the cold on its own? Yes, yes I would. So I figured it was likely time that I found a way to get my everything bagel fix the way I like it – on anything but a bagel. Introducing my Everything Bagel Chicken Breasts. My hubby’s Jewish family may be offended, but only until they tried this easy protein packed family friendly dinner.

Why This Recipe Works

The combination of everything bagel seasoning and chicken is a mix of two of my favourite things. The toppings of everything bagels and chicken! The everything bagel seasoning gives such a delicious crunch to the chicken that’ll have you reaching for seconds.

The creamy sauce that’s paired with this is not only easy but finger licking good. Seriously. You serve this with your everything bagel chicken and you’re going to want to serve it with everything!

It’s easy. There isn’t really anything easier than topping chicken breasts with everything bagel seasoning. Plus, if you don’t have everything bagel seasoning, it’s super easy to make your own!

Table of contents

  • Why This Recipe Works
  • Key Ingredients
  • How to Make This Recipe
  • Expert Tips
  • Recipe FAQs
  • More Recipes You Might Like

Key Ingredients

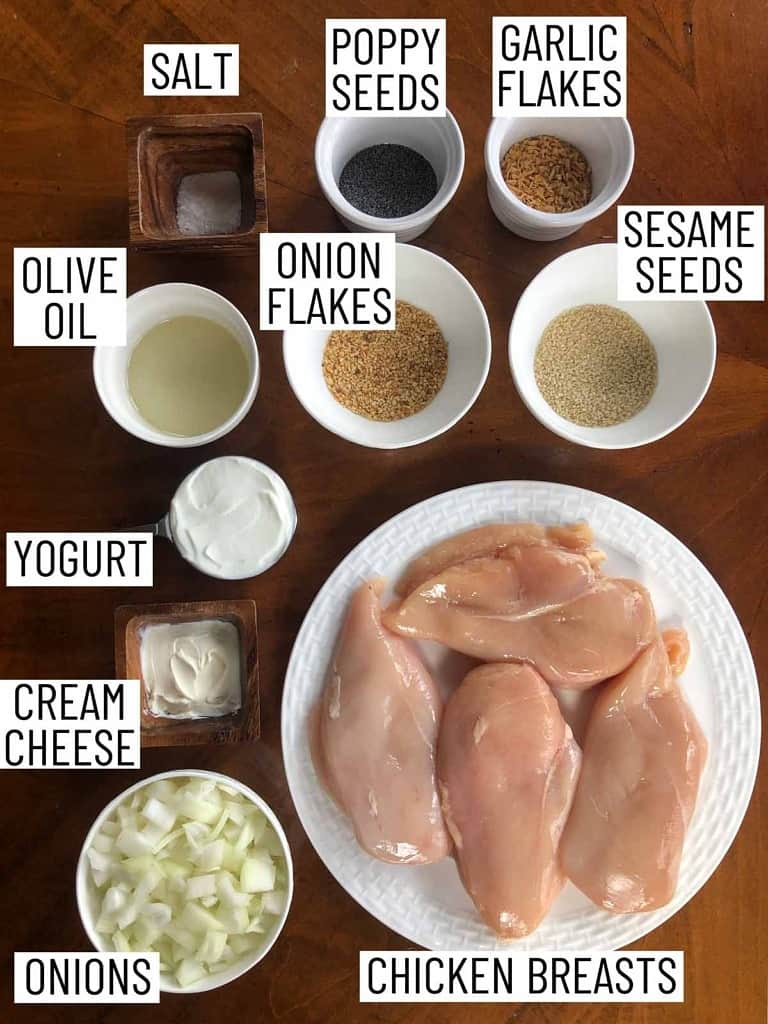
Overhead image of ingredients for everything bagel chicken breasts: chicken breasts, onions, cream cheese, yogurt, olive oil, salt, poppy seeds, garlic flakes, onion flakes, sesame seeds.

Chicken Breasts — We use boneless, skinless chicken breasts for this everything bagel chicken recipe. While chicken breasts are the ideal choice for this recipe, you can certainly use chicken thighs instead. Make sure they’re similar in size so they cook evenly.

Everything Bagel Seasoning — While you can now buy this at Trader Joes, I’m Canadian, and us northerners have been deprived of the goodness of TJs thus far. Luckily, it’s super easy to make your own. It’s literally just a mixture of poppy seeds, sesame seeds, garlic flakes, onion flakes and salt.

Onions — This is the base of our sauce that’s mixed with cream cheese and yogurt. Caramelizing the onions add so much flavour to the sauce. It takes time but it’s worth the wait.

How to Make This Recipe

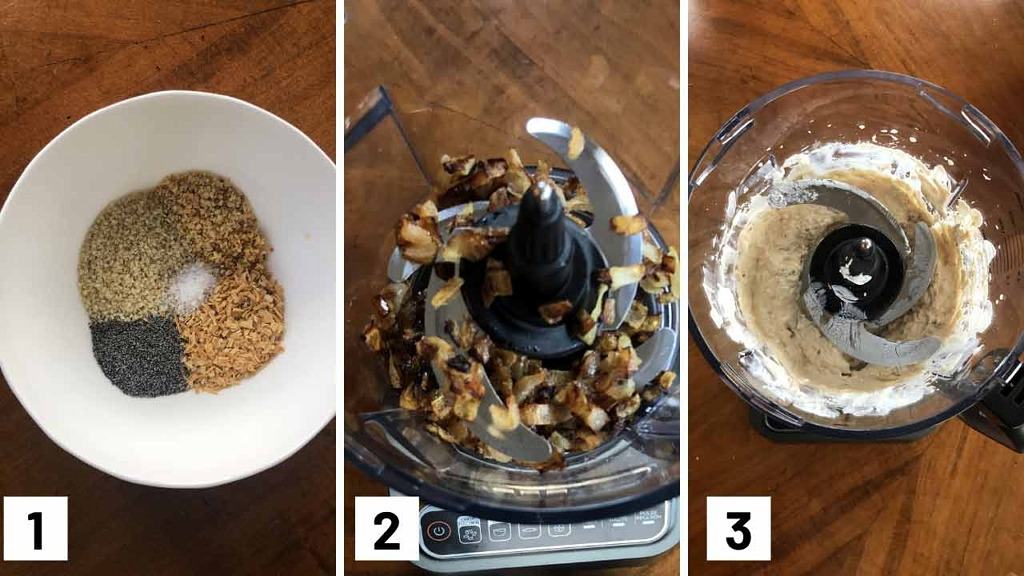
Set of three step by step photo of combining the seasonings, browned onions in a food processor, and pureeing the onions with cream cheese and yogurt.

Step 1: To a small bowl, mix together the poppyseeds, sesame seeds, garlic, onion and salt. Set aside.

Step 2: To a medium skillet, heat a tablespoon of olive oil over medium low heat. Add the onion and cook slowly until it reaches a dark amber colour. Transfer to a food processor and allow to cool.

Step 3: Once at room temperature, add in the cream cheese and yogurt and puree until smooth. Season with salt and pepper, to taste

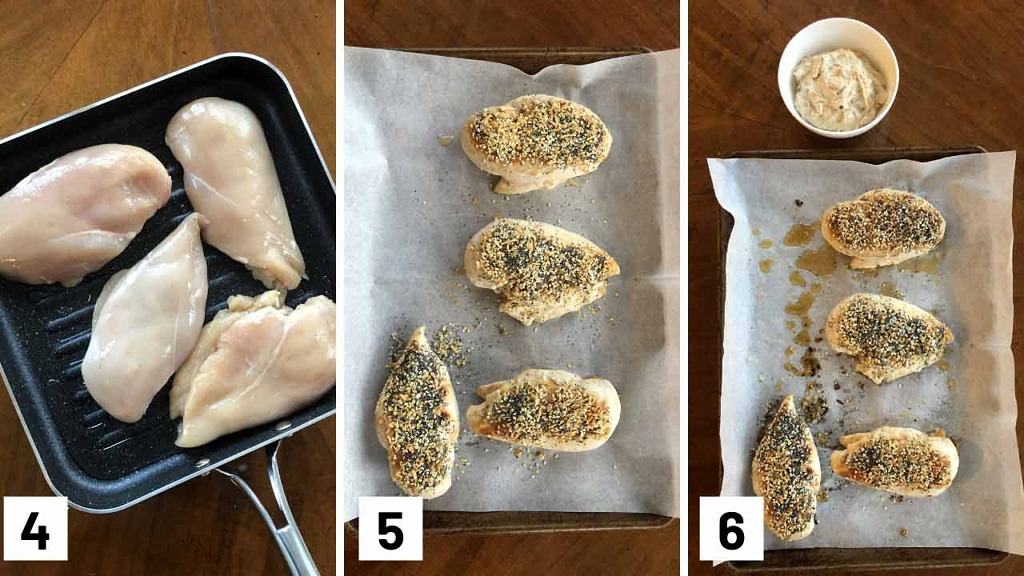
Step 4: Meanwhile, preheat oven to 400F. Heat a grill pan with another tablespoon of oil over medium high heat. Add the chicken breasts and cook until golden brown on both sides.

Step 5: Transfer the chicken breasts to a baking sheet and top with a generous sprinkle of the everything bagel mixture, reserving about 1/2 of it for garnish or another meal. Bake until the breasts reach an internal temperature of 165F.

Step 6: Serve the chicken breasts with the cream cheese onion yogurt for dipping and garnish the plate with a sprinkle of the everything bagel seasoning.

Step by step set of three photos of cooking chicken on a grill pan, covering chicken breasts in everything bagel seasoning, and then baking them.

Expert Tips

Make sure you coat the chicken breasts GENEROUSLY with the homemade everything bagel spice mixture, and then finish them in the oven until they’re cooked through. We sear it first so we don’t risk burning the seasoning in the oven.

To get your cream cheese mixture to blend easily, you can soften the cream cheese before adding it to the food processor by leaving it out on your counter.

This everything bagel chicken is done once it’s reached an internal temperature of 165F. To check this easily, use an instant read thermometer.

To save time, you can also make your everything bagel spice ahead of time as it’ll keep in your pantry for months.

Recipe FAQs

What Can I Serve This With?

This low carbohydrate simple supper idea is fantastic with green beans and quinoa, or sliced up and served on a bed of greens for a fast lunch.

Can I Meal Prep This?

You definitely can! You can make a double batch to meal prep for the week. Simply store it in an airtight container once it has cooled and transfer it to the fridge.

Can I Use Chicken Thighs?

You most certainly can! Just be sure to adjust your cooking time. Chicken thighs are dark meat, so they take longer to cook due to its fat content and density.

Is This Everything Bagel Chicken Gluten Free?

This recipe is 100% gluten free.

What Else Can I Use This Bagel Spice On?

Try my Everything Bagel Tofu Nuggets, Everything Bagel Avocado Bean Sandwich, Everything Bagel Salad, or my Everything Bagel Devilled Eggs.

White meat everything bagel spiced chicken breast served on a white plate.

More Recipes You Might Like

Want more delicious chicken recipes like this everything bagel chicken? Try these ones!

  • Greek Sheet Pan Chicken Breasts
  • Rosemary Chicken Breast Sheet Pan Dinner
  • Sticky Chicken Breast Sheet Pan Dinner
  • French Onion Chicken Breast
  • Persimmon Ginger Chicken One Pot Dinner
  • Baked Chicken Parmesan Foil Pack Dinner

Now loves, I would love to know what else would you put this spice mix on?

Leave me a comment below with your thoughts!

These Everything Bagel Chicken Breasts are an easy and delicious family friendly dinner recipe that are also keto friendly, low carb and gluten free.
Print Recipe
4.16 from 13 votes

Everything Bagel Chicken Breasts (Healthy + Gluten Free)

These Everything Bagel Chicken Breasts are an easy and delicious family friendly dinner recipe that are also keto friendly, low carb and gluten free.
Prep Time10 minutes mins
Cook Time20 minutes mins
Total Time30 minutes mins
Course: Main Course
Cuisine: American
Servings: 4 people
Calories: 244kcal
Author: Abbey Sharp

Ingredients

Everything bagel spice blend:

  • 1 tbsp poppyseeds
  • 1 tbsp sesame seeds
  • 1 tbsp dried garlic flakes
  • 1 tbsp dried onion flakes
  • 1 tsp kosher or sea salt

Sauce:

  • 1 tbsp olive oil
  • 1 onion diced
  • 2 tbsp lite cream cheese
  • 1/2 cup plain full fat yogurt

chicken:

  • 1 tbsp extra virgin olive oil
  • 4 skinless boneless chicken breasts
  • Olive oil for serving

Instructions

  • To a small bowl, mix together the poppyseeds, sesame seeds, garlic, onion and salt. Set aside.
  • To a medium skillet, heat a tablespoon of olive oil over medium low heat. Add the onion and cook slowly until it reaches a dark amber colour. Transfer to a food processor and allow to cool.
  • Once at room temperature, add in the cream cheese and yogurt and puree until smooth. Season with salt and pepper, to taste
  • Meanwhile, preheat oven to 400 F.
  • Heat a grill pan with another tablespoon of oil over medium high heat. Add the chicken breasts and cook until golden brown on both sides.
  • Transfer the chicken breasts to a baking sheet and top with a generous sprinkle of the everything bagel mixture, reserving about 1/2 of it for garnish or another meal. Bake until the breasts reach an internal temperature of 165 F.
  • Serve the chicken breasts with the cream cheese onion yogurt for dipping and garnish the plate with a sprinkle of the everything bagel seasoning.

Notes

  • Make sure you coat the chicken breasts GENEROUSLY with the homemade everything bagel spice mixture, and then finish them in the oven until they’re cooked through. We sear it first so we don’t risk burning the seasoning in the oven.
  • To get your cream cheese mixture to blend easily, you can soften the cream cheese before adding it to the food processor by leaving it out on your counter.
  • Chicken is done once it’s reached an internal temperature of 165F. To check this easily, use an instant read thermometer.
  • To save time, you can also make your everything bagel spice ahead of time as it’ll keep in your pantry for months.

Nutrition

Calories: 244kcal | Carbohydrates: 9g | Protein: 27g | Fat: 11g | Saturated Fat: 3g | Cholesterol: 80mg | Sodium: 797mg | Potassium: 600mg | Fiber: 2g | Sugar: 4g | Vitamin A: 105IU | Vitamin C: 4.3mg | Calcium: 117mg | Iron: 1.2mg
Abbey Sharp

Abbey Sharp is a Registered Dietitian (RD), regulated by the Ontario College of Dietitians. She is a mom, YouTuber, Blogger, award winning cookbook author, media coach specializing in food and nutrition influencers, and a frequent contributor to national publications like Healthline and on national broadcast TV shows.
www.abbeyskitchen.com/about-abbey/

Last Updated January 8, 2021. Published January 9, 2021 By Abbey Sharp 37 Comments

Raw Vegan Cheesecake with Caramel Apples

This caramel apple raw vegan cheesecake is gluten free and made with no refined sugar. Instead, it features a combination of cashews and dates with a date caramel apple topping. Trust me, you won't even care that it's vegan.

 This raw vegan cheesecake with caramel apples is gluten free and made with no refined sugar. Instead, it features a combination of cashews and dates with a date caramel apple topping. Trust me, you won’t even care that it’s vegan.

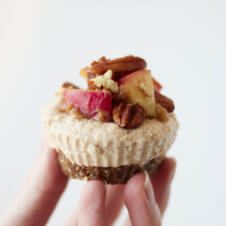
A hand holding up raw vegan cheesecake.


You all know I’m no vegan, and I don’t like when “health halos” (like gluten free or vegan) cloud our understanding of what’s healthy. But when you can make cheesecake out of nuts, dates, and oats without anything processed involved, I am totally on board. Introducing my raw vegan cheesecake with caramel apples- get ready to have your mind blown!

Table of contents

  • Why This Recipe Works
  • Key Ingredients
  • How to Make This Recipe
  • Expert Tips
  • Recipe FAQs
  • More Recipes You Might Like

Why This Recipe Works

I know you must be thinking “Abbey, how can you possibly make cheesecake vegan?”. To be honest, I used to think the same thing! But having been inspired by Minimalist Baker’s basic recipe as a guide, I couldn’t help experiment for myself and man oh man are the results ever so delicious! This raw vegan cheesecake is also totally natural, packed with fibre, protein and healthy fats and delicious.

The best thing about this recipe is that it uses up simple ingredients that are likely already sitting in your pantry. So with a little vegan culinary magic, I promise this recipe will trick even the most avid cheesecake lover.

Key Ingredients

Flat lay image of portioned ingredients of raw vegan cheesecake including lemon juice, cinnamon, cashews, salt, oats, pecans, red apple, dates, vanilla, soy milk, and coconut oil.

Cheesecake layer – To make the raw vegan cheesecake layer we combine creamy cashews, soy milk, sweet dates and tangy lemon juice. Believe it or not, these ingredients do a pretty stellar job of mimicking the flavour.

Base – the base is made by a simple combination of dates, pecans, oats, cinnamon and salt. To make this recipe no bake, this layer goes in the freezer to harden.

Date Caramel Apple Topping – If you are new to making date caramel you are in for a treat (literally!). This caramel alternative combines sweet dates with salt, lemon juice, soy milk and vanilla. When combined with chopped apples it makes for a finger licking cheesecake topper that will make your tastebuds sing!

How to Make This Recipe

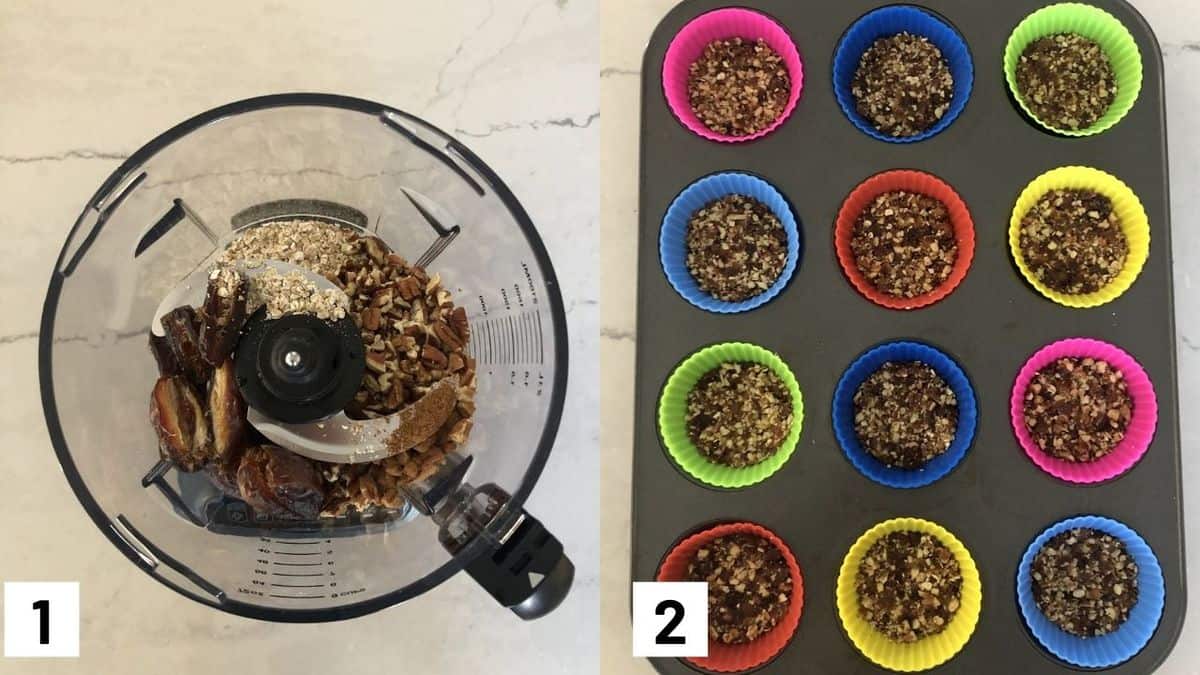
Two side by side images showing how to make the cheesecake base with dates, pecans, oats and cinnamon and pressing mixture into cupcake liners.

Step 1: In a food processor, puree the dates, pecans, oats, cinnamon and salt until it forms a sticky crust-like consistency.

Step 2: Press about 2 tablespoons into the bottoms of 12 silicon cupcake liners, transfer to the freezer for an hour.

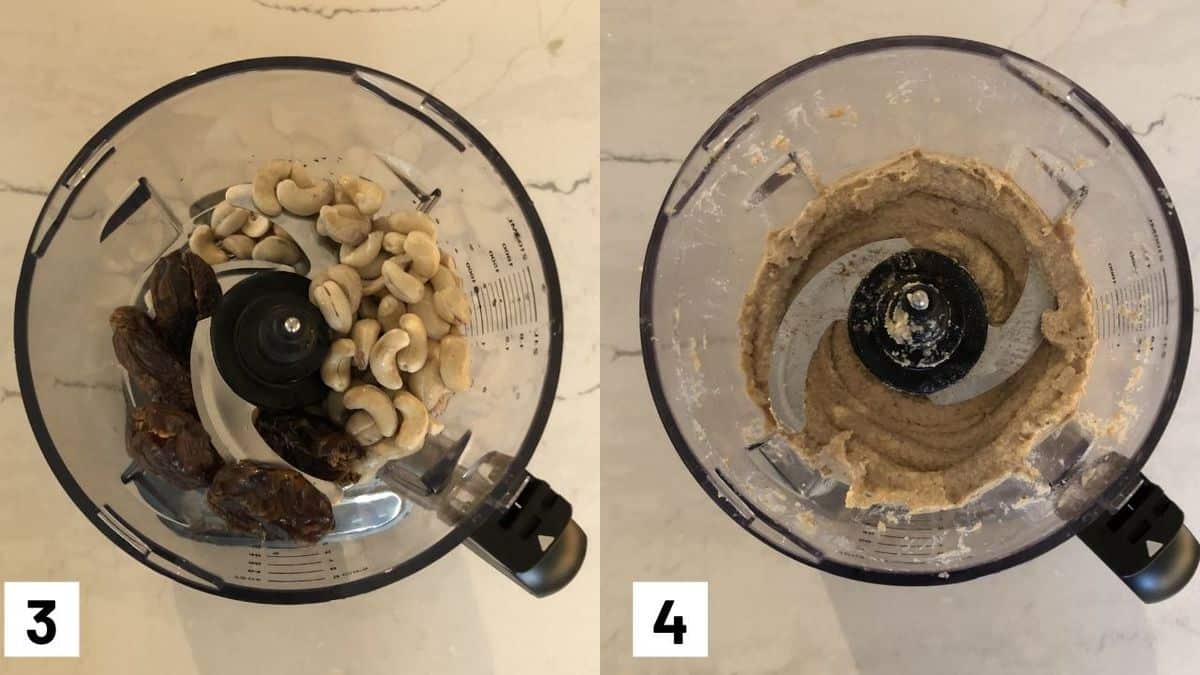
Two side by side images showing how to make cheesecake layer by processing cashews, dates, lemon juice, oil, vanilla and cinnamon.

Step 3: Meanwhile, puree the cashews and dates until well pureed, then add in the soy milk, lemon juice, oil, vanilla and cinnamon.

Step 4: Puree until very smooth.

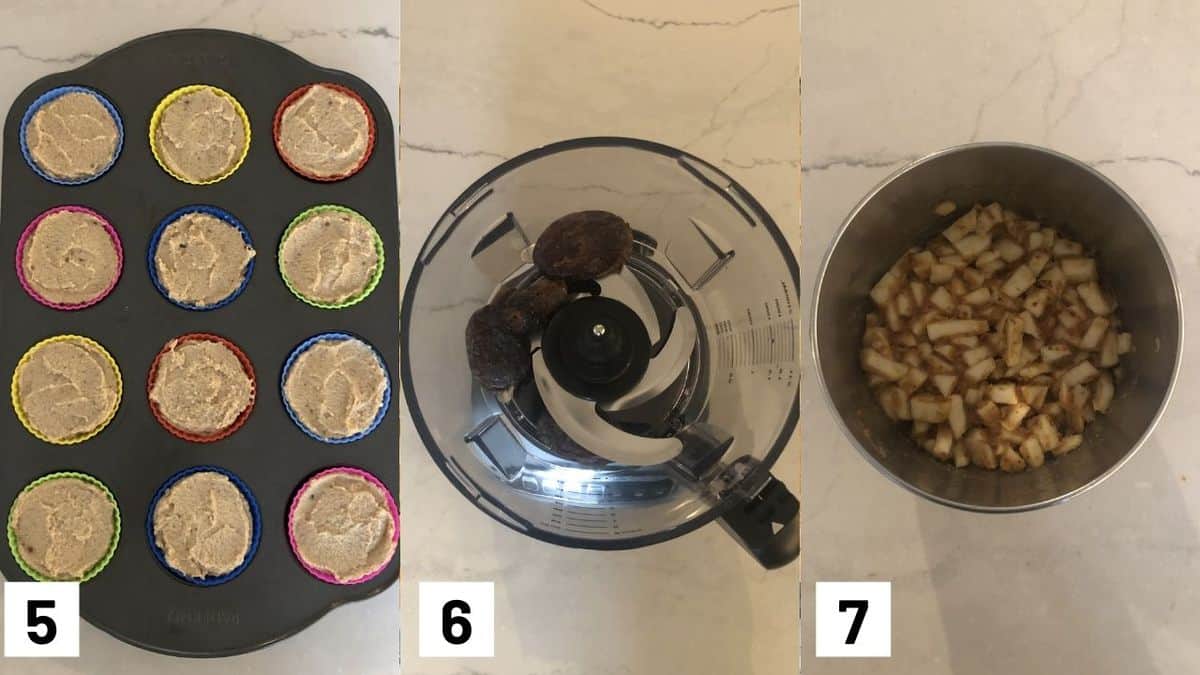
Three side by side images showing the cheesecake mixture being added to the cupcake liners, and tossing the apples in the vegan caramel.

Step 5: Add the mixture to the frozen crust mixture, and freeze for 4-6 hours.

Step 6: Puree the dates in the food processor until gummy, then add in the salt, lemon juice, soy milk and vanilla. Puree until it reaches a very thick caramel-like consistency.

Step 7: In a bowl, toss the apples with the caramel until well coated. Carefully remove the cheesecakes, top with a spoonful of the apple caramel and pecans and eat with a fork immediately.

Expert Tips

The key to making raw vegan cheesecake is to soak your cashews overnight so they get soft and easy to puree. If you want to make this recipe today and don’t have time to let the cashews soak, you can soak them in boiling water for 1-2 hours. However – I will say that soaking the cashews overnight yields a creamier texture FYI.

A high-speed blender or food processor is also highly recommended for this recipe as it will result in the creamiest dreamiest texture! I also love to use silicon cupcake molds for this recipe as it makes it super easy to pop out the raw vegan cheesecake from the muffin tin once frozen (the molds can also be reused which I love).

Recipe FAQs

Can I use a different milk besides soy milk?

Absolutely! We like using soy milk because it’s higher in protein but you can use any plant-based milk that you prefer. I think coconut milk would be absolutely divine in this recipe.

How can I store these?

I prefer to store these in the freezer. When I want to enjoy them I let them sit at room temperature for a few minutes and then dig in!

What can I use If I don’t have pecans?

I used pecans for this recipe because it’s what I had on hand, but this recipe is versatile enough that you can use walnuts or almonds instead.

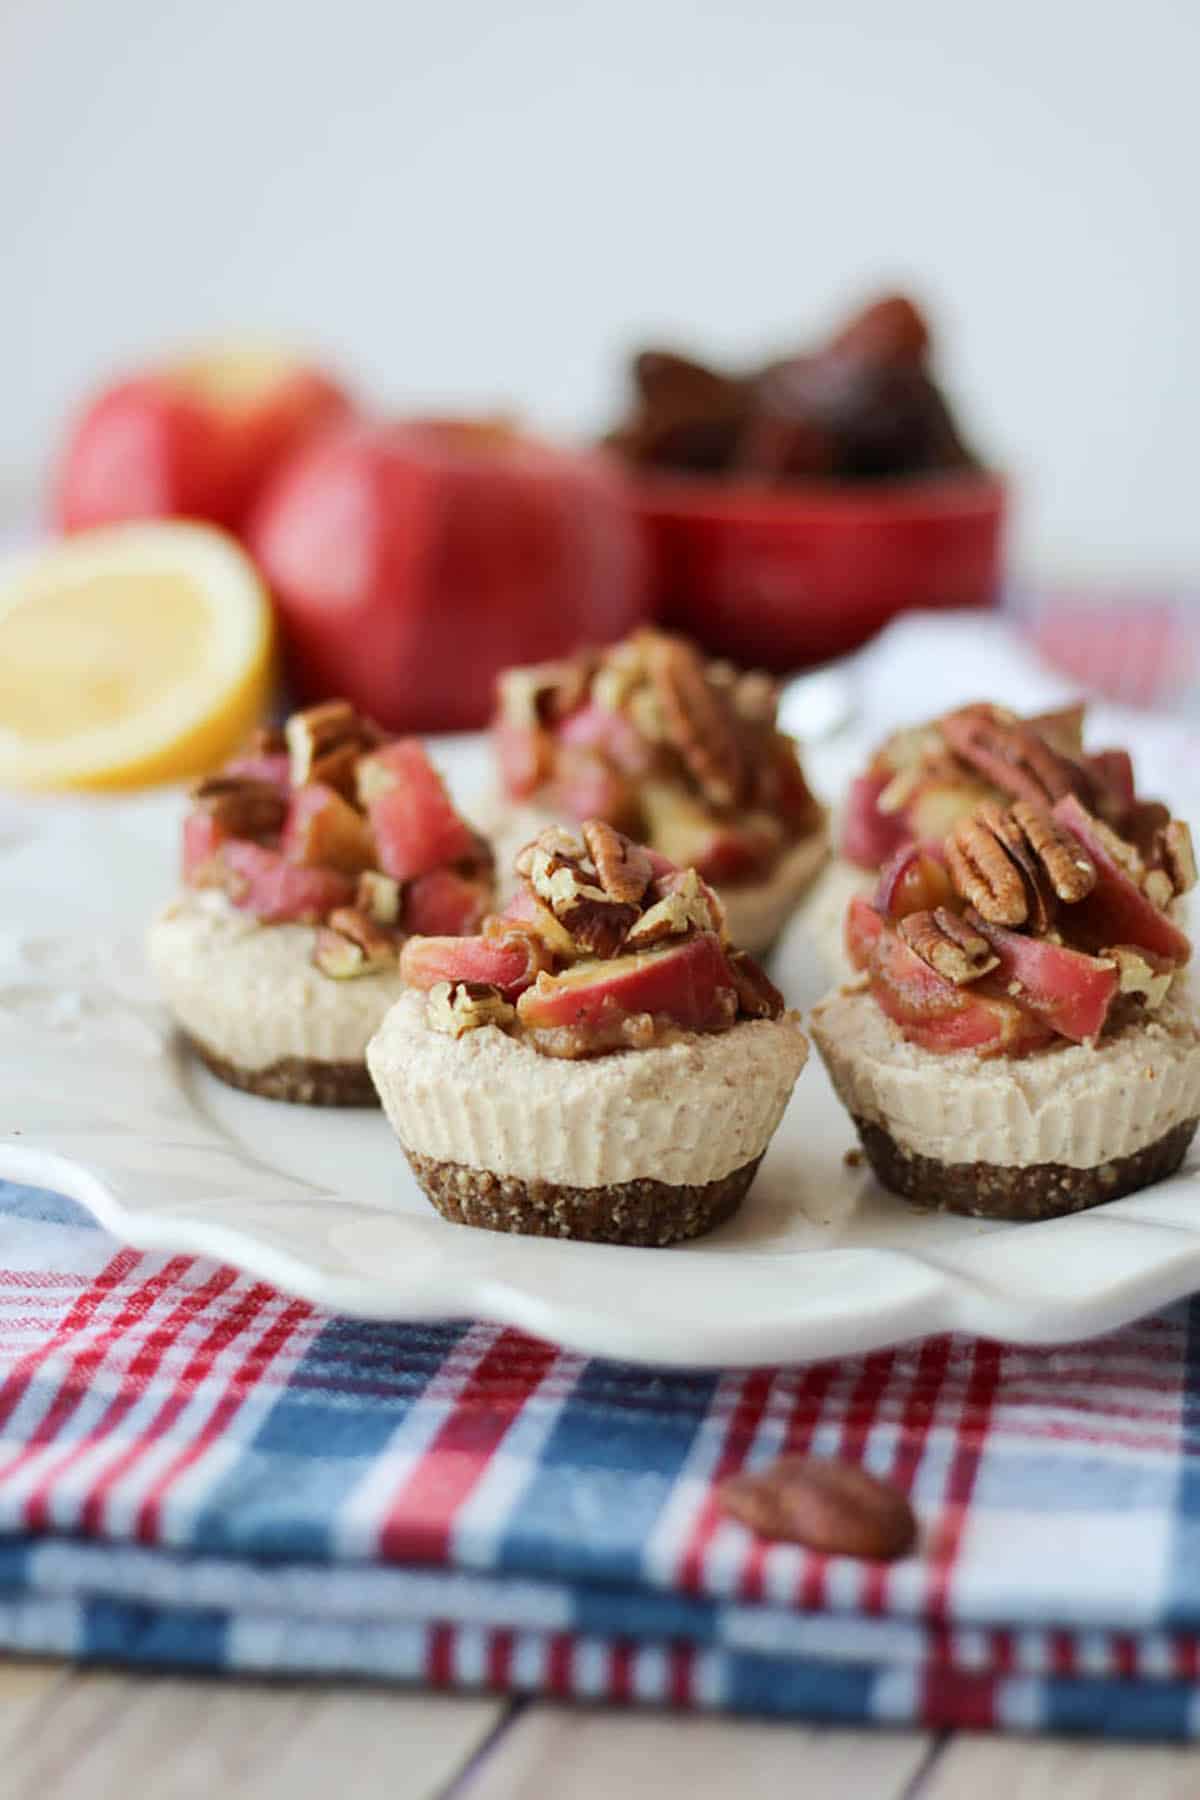
Several raw vegan cheesecakes on a plate.

More Recipes You Might Like

Here are more cheesecake recipes on the blog that you’ll love!

  • Matcha Cheesecake Parfaits (Vegan, No Bake)
  • Strawberry Cheesecake Pancakes (High Protein, Gluten Free)
  • Cheesecake Stuffed French Toast Crepes
  • Nutella Cheesecake Chocolate Cups (Vegan)
  • Cheesecake Dessert Nachos (Dairy Free & Sugar Free)

Have you tried making this caramel apple raw vegan cheesecake?

This caramel apple raw vegan cheesecake is made with a combination of cashews and dates with a date caramel apple topping.
Print Recipe
5 from 4 votes

Raw Vegan Cheesecake with Caramel Apples

This caramel apple raw vegan cheesecake is made with a combination of cashews and dates with a date caramel apple topping.
Prep Time5 hours hrs
Total Time5 hours hrs
Course: Dessert
Cuisine: American
Diet: Vegan
Servings: 12 people
Calories: 284kcal
Author: Abbey Sharp

Ingredients

  • 7 dates pitted and minced
  • 1 cup pecans roughly chopped
  • 2 tbsp gluten free oats
  • 1/2 tsp cinnamon
  • 1 Pinch salt
  • 1 1/2 cups raw cashews soaked for 8 hours and drained
  • 1/2 cup dates
  • 1/2 cup unsweetened soy milk
  • 1/4 cup lemon juice
  • 1/3 cup coconut oil melted
  • 1 1/2 tsp vanilla extract
  • 1/2 tsp cinnamon

Caramelized Apples

  • 1/2 cup dates
  • 1/4 tsp salt
  • 1 tsp lemon juice
  • 1/4 cup unsweetened soy milk
  • 1/2 tsp vanilla
  • 1 large red apple peeled and diced
  • 1/3 cup pecans crushed

Instructions

  • In a food processor, puree the dates, pecans, oats, cinnamon and salt until it forms a sticky crust-like consistency. Press about 2 tablespoons into the bottoms of 12 silicon cupcake liners, transfer to the freezer for an hour.
  • Meanwhile, puree the cashews and dates until well pureed, then add in the soy milk, lemon juice, oil, vanilla and cinnamon. Puree until very smooth.
  • Add the mixture to the frozen crust mixture, and freeze for 4-6 hours.
  • Right before serving, puree the dates in the food processor until gummy, then add in the salt, lemon juice, soy milk and vanilla. Puree until it reaches a very thick caramel-like consistency.
  • In a bowl, toss the apples with the caramel until well coated.
  • Carefully remove the cheesecakes, top with a spoonful of the apple caramel and pecans and eat with a fork immediately.

Video

Nutrition

Calories: 284kcal | Carbohydrates: 22g | Protein: 5g | Fat: 21g | Saturated Fat: 7g | Sodium: 60mg | Potassium: 302mg | Fiber: 4g | Sugar: 14g | Vitamin A: 44IU | Vitamin C: 3mg | Calcium: 42mg | Iron: 2mg

What flavour of cheesecake should I lighten up next? Leave me a comment below with your go-to flavours and I’ll get to work in the kitchen!

Abbey Sharp

Abbey Sharp is a Registered Dietitian (RD), regulated by the Ontario College of Dietitians. She is a mom, YouTuber, Blogger, award winning cookbook author, media coach specializing in food and nutrition influencers, and a frequent contributor to national publications like Healthline and on national broadcast TV shows.
www.abbeyskitchen.com/about-abbey/

Last Updated December 28, 2020. Published January 8, 2021 By Abbey Sharp 10 Comments

Baked Vegan Mac and Cheese with Everything Bagel Crust

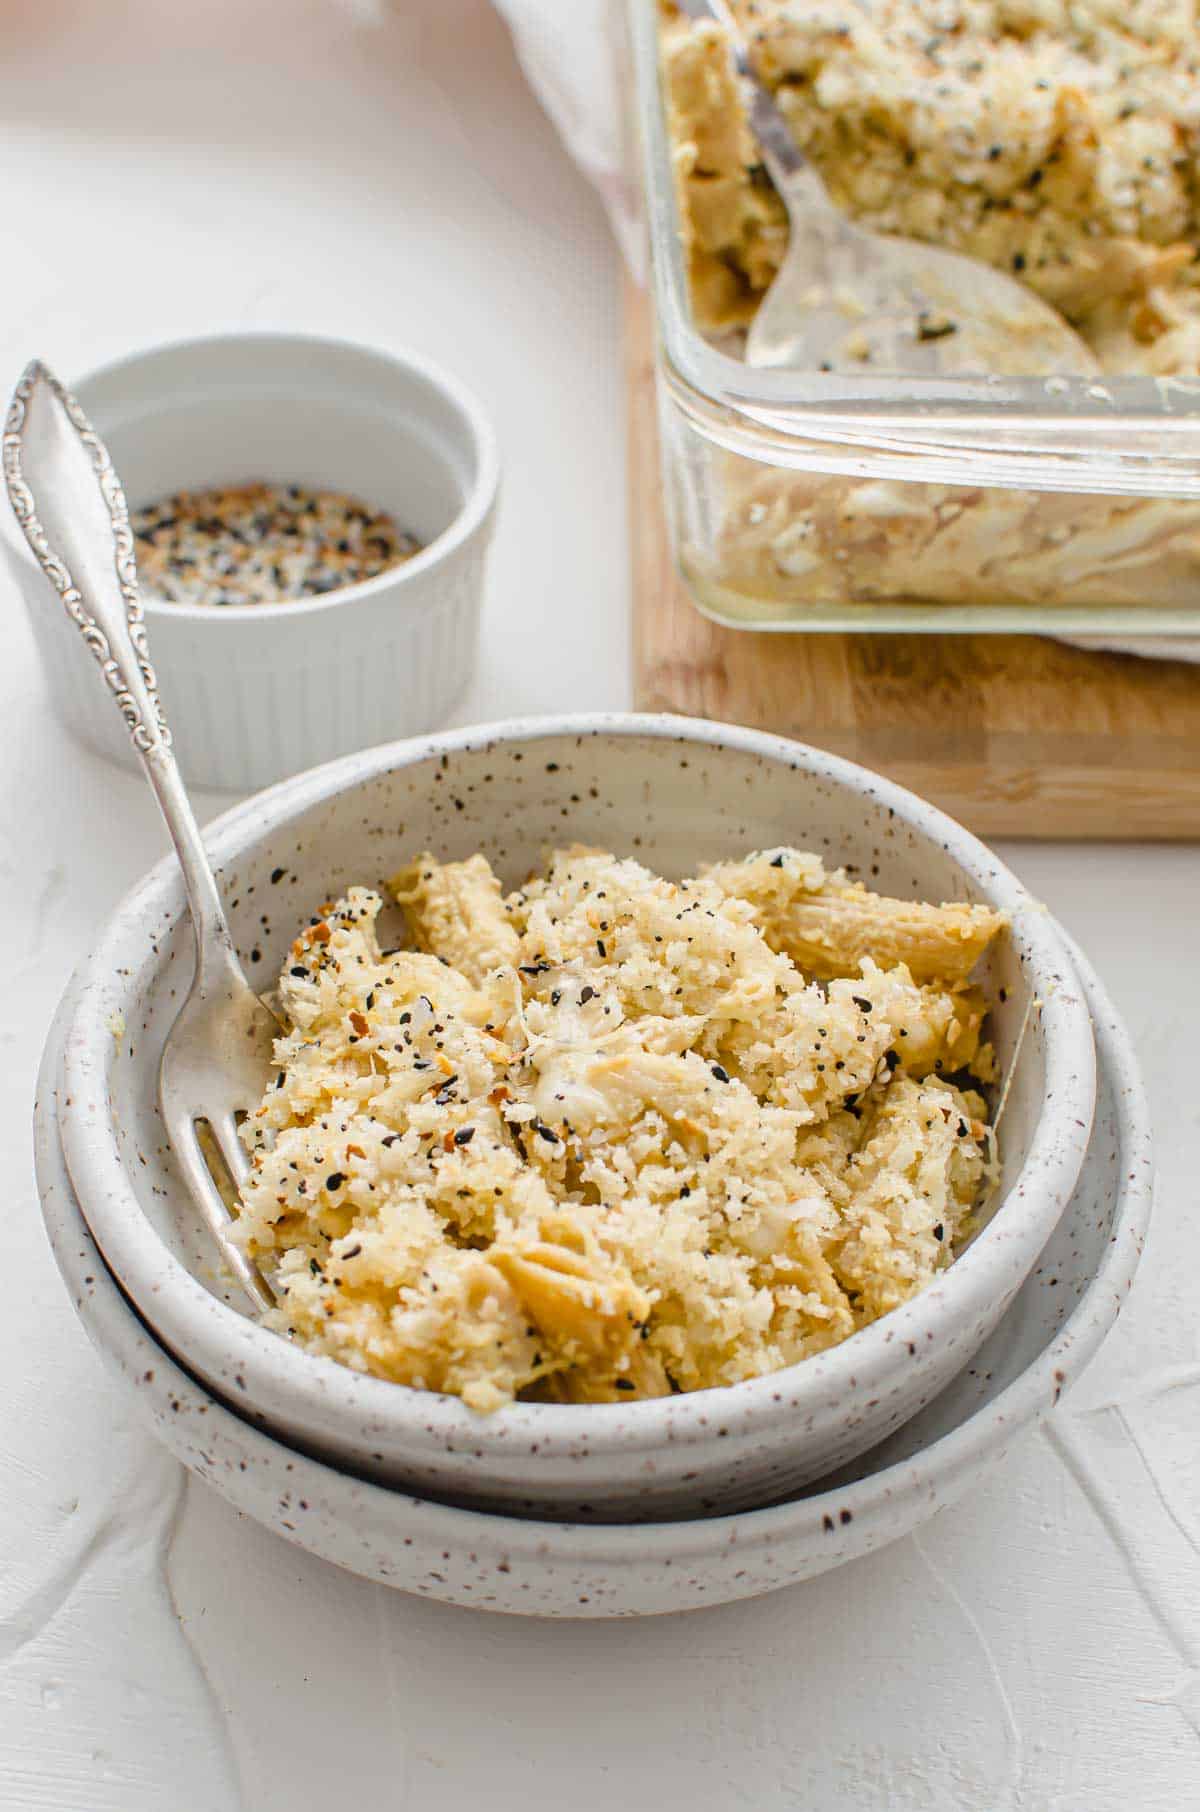
A bowl of baked vegan mac and cheese in a bowl with a fork inside of it.

This baked vegan mac and cheese is the best easy family dinner recipe for inspiring more meatless Mondays in your family. Even better, it’s freezer friendly!

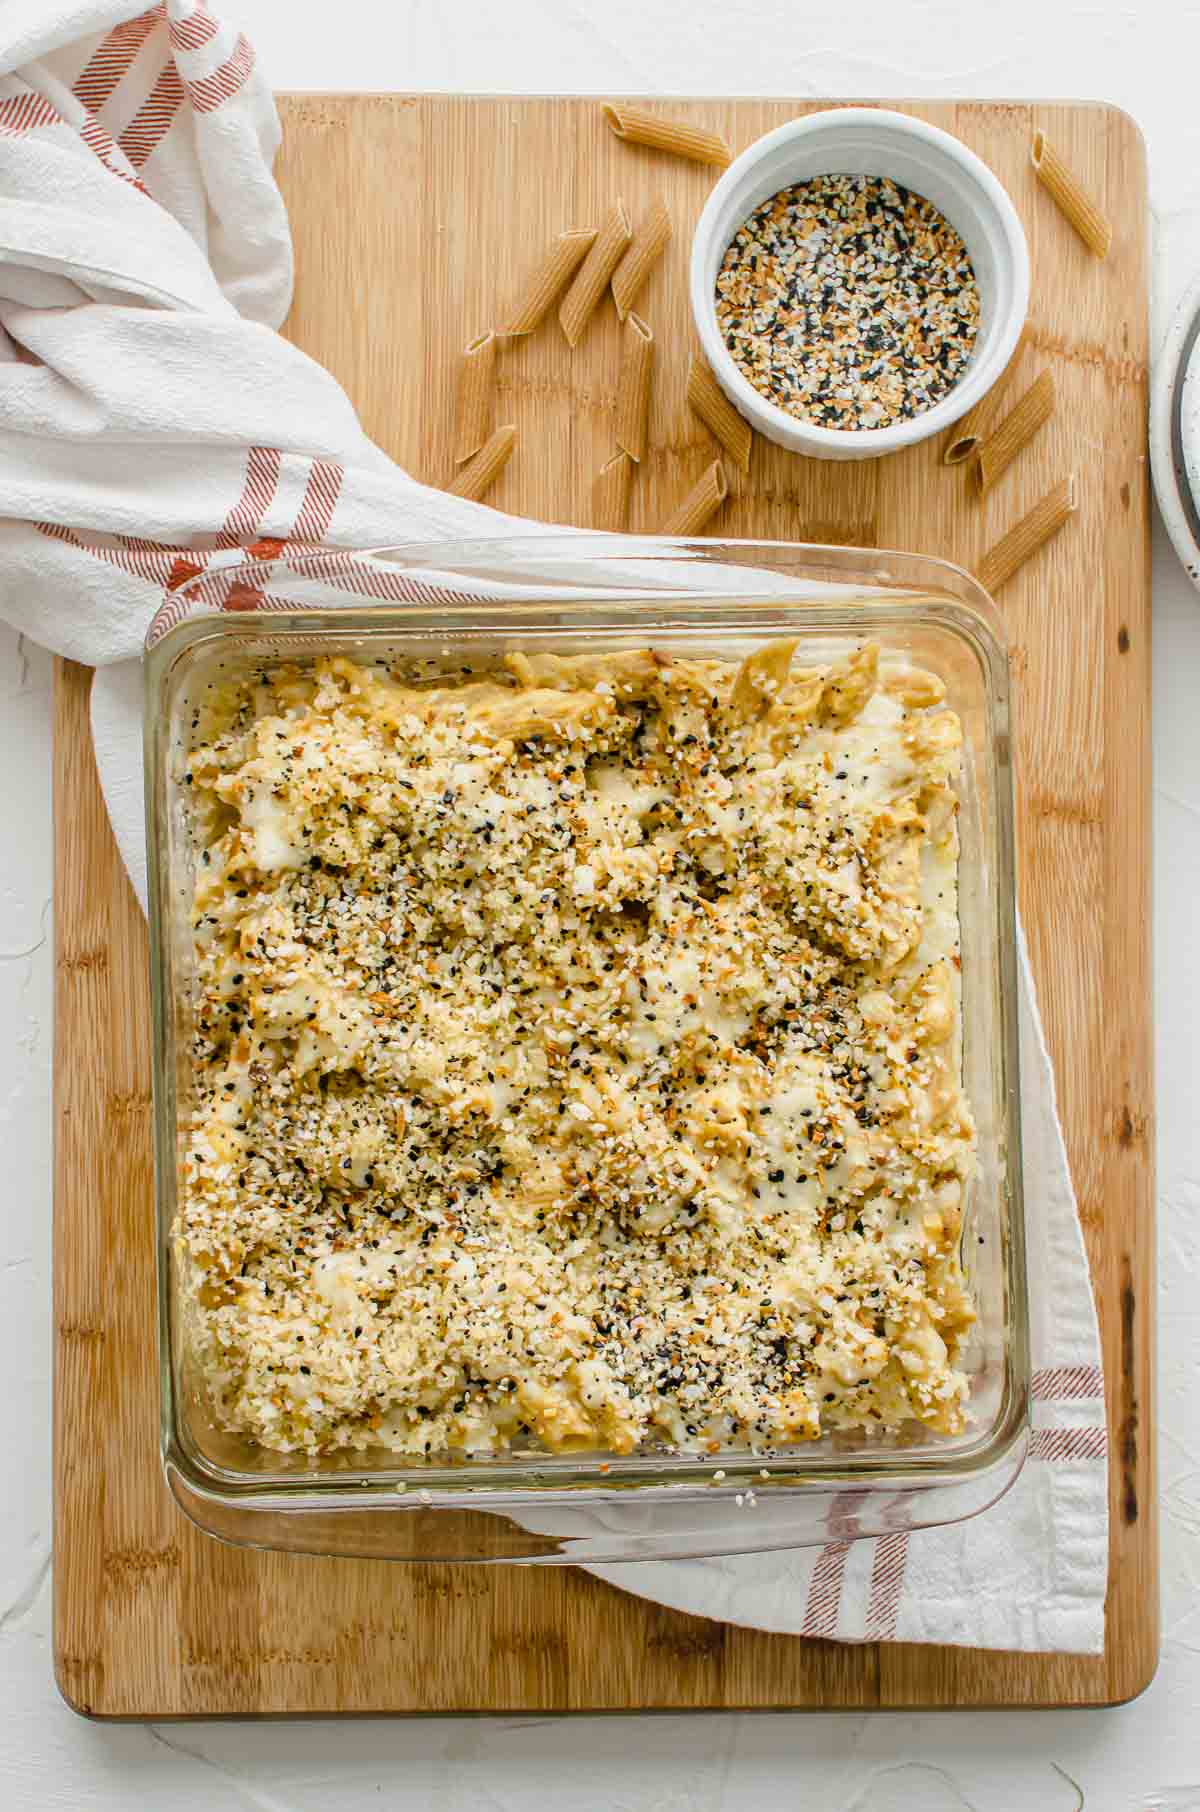
A baking dish filled with baked vegan mac and cheese on a serving board.

Can’t stop, won’t stop with the everything bagel recipes. We’ve got these amazing chicken breasts, awesome devilled eggs, and NOW I’m back at it with a baked vegan mac and cheese. Honestly, I gave this to the hubs and he was like NO WAY this is vegan. Yes way, my friend. Even Baby E gobbled it up.

Why This Recipe Works

I like caramelized onions in all the things, and I think onions are a natural pairing wth everything bagel because onion is also one of the ingredients in the mix. It also adds a nice texture and amazing natural sweetness to this otherwise savoury dish. So it’s worth the time it takes to caramelize your onions.

The sauce in this mac and cheese is made from creamy cashews, lemon juice and nutritional yeast – all vegan staples that yield a surprisingly cheesy creamy “bechamel” like sauce. No dairy needed!

It’s the perfect family friendly meal! Everyone loves everything bagel seasoning and mac and cheese is always a hit. It’s salty, crunchy, crispy, savoury, and pairs absolutely amazing with cheese. Your family will be reaching for seconds.

Key Ingredients

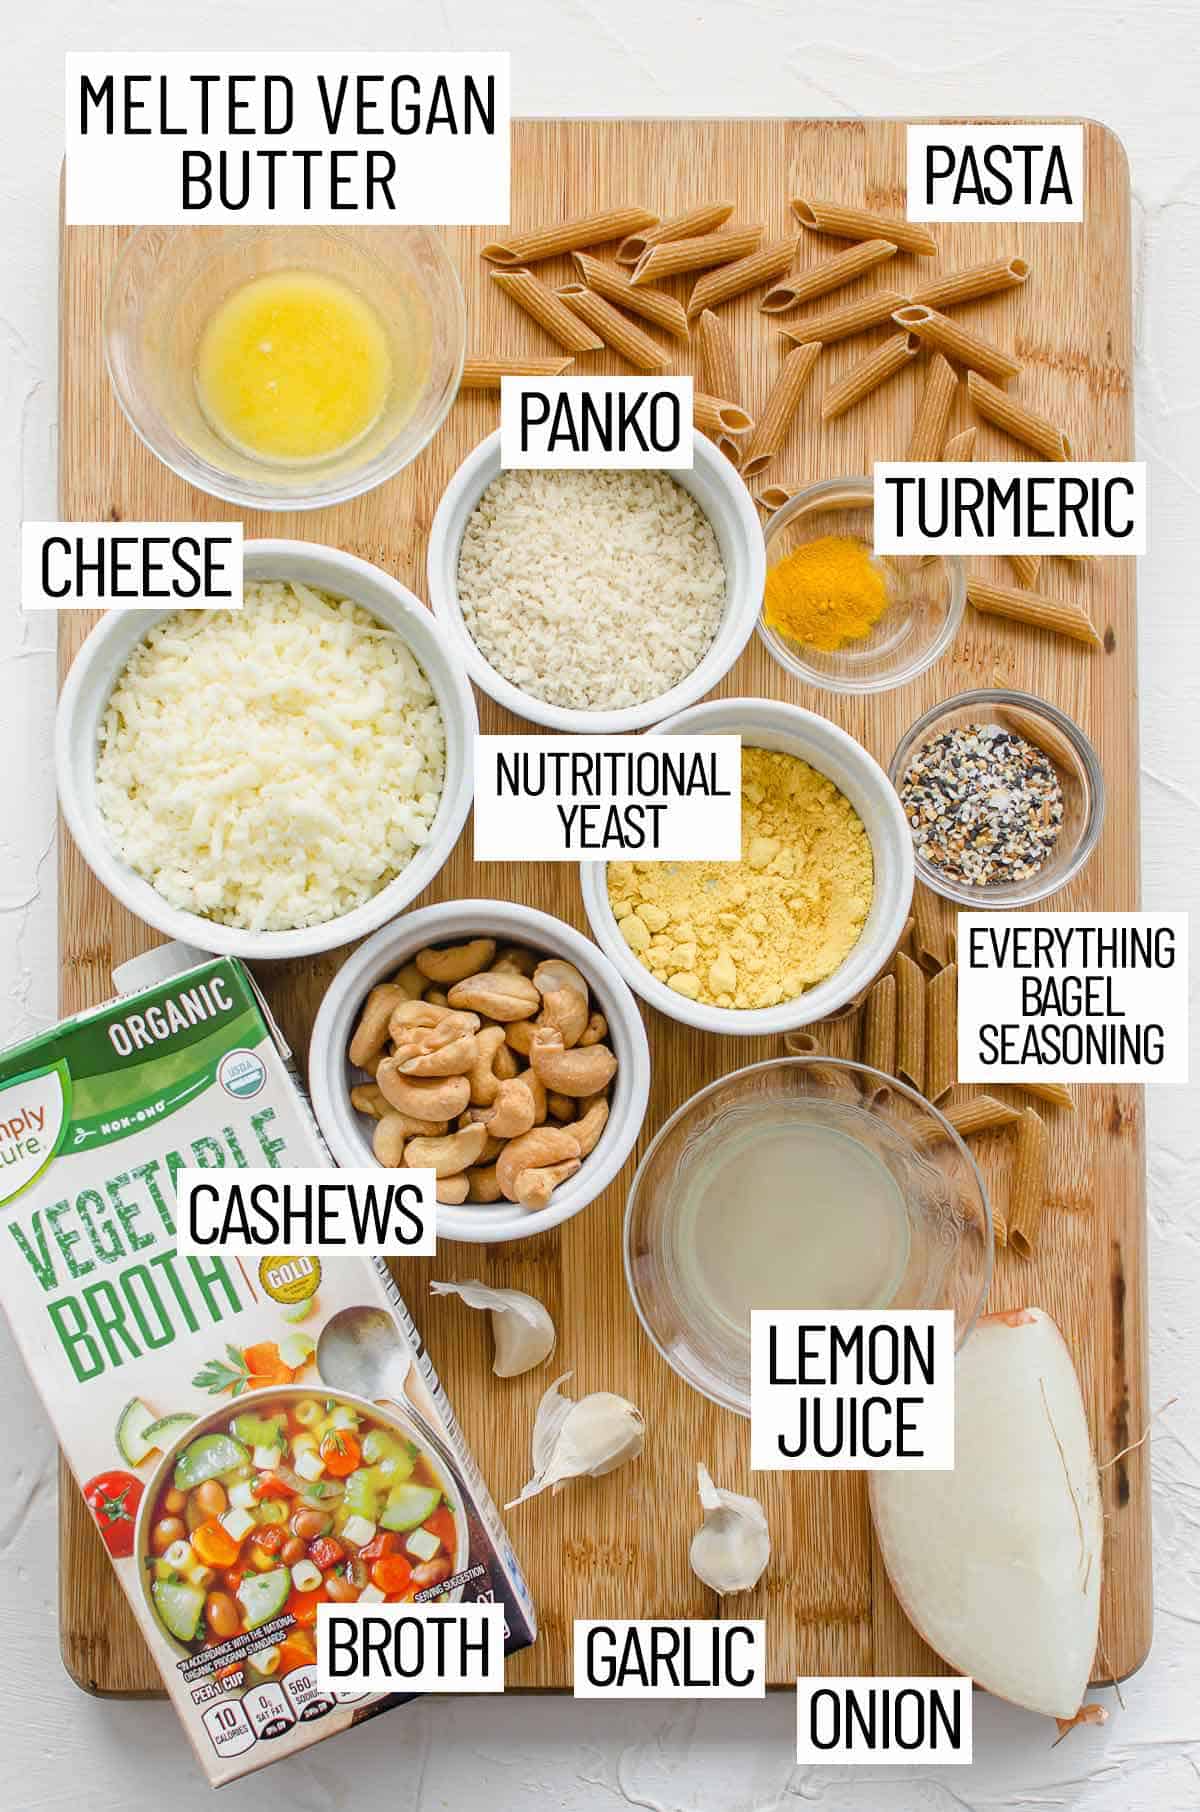
Overhead photo of ingredients for everything bagel mac and cheese including broth, garlic onion, lemon juice, everything bagel seasoning, nutritional yeast, cheese, panko, turmeric, pasta, and melted butter.

Onions — It’ll take a bit of time but caramelizing the onions add so much flavour to this baked vegan mac and cheese. Be sure to slice them thinly!

Pasta — We like to use whole grain penne pasta but you can use whatever you have on hand. You can also sub in with gluten free pasta if looking to make this for a gluten free friend.

Nutritional Yeast — When you blend up your cashews to make your sauce, the nutritional yeast gives it a cheesy nutty flavour. It also adds extra vitamins and minerals to your mac and cheese!

Everything Bagel — We make our own by combining poppy seeds, sesame seeds, garlic flakes, onion flakes, and kosher salt but you can also purchase some at the store or online.

How To Make This Recipe

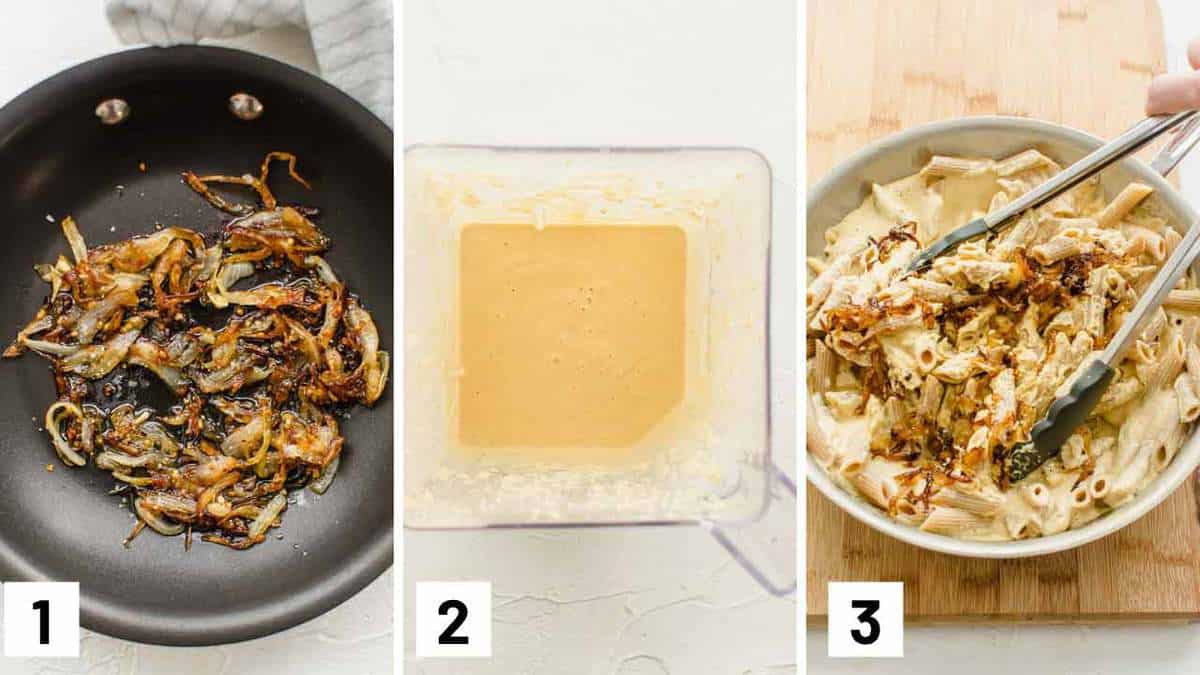
Instructional photo showing caramelized onions, cashew mixture in a blender, and mixing the mixture with the pasta and onions.

Step 1: Preheat oven to 400F and then to a large nonstick skillet, heat the olive oil over medium low heat. Add the onion and garlic and cook until fragrant and caramelized, about 45-60 minutes.

Step 2: Meanwhile, to a high speed blender, puree the cashews, broth, lemon juice, salt, nutritional yeast and turmeric until very smooth. Meanwhile, cook the whole grain pasta for 2 minutes less than the recommending cooking time on the package.

Step 3: Add the pasta and sauce to the skillet with the caramelized onions and toss to coat.

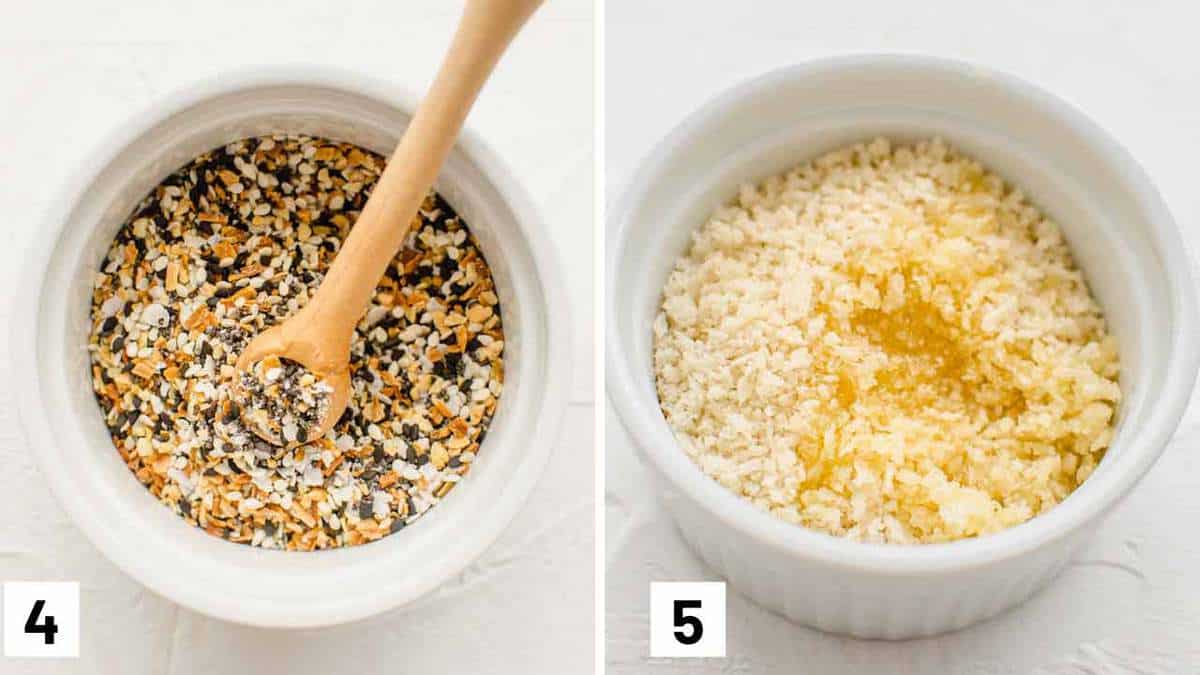
Two photos showing everything bagel seasoning and panko mixed with butter.

Step 4: In a bowl, mix together the poppyseed, sesame seeds, garlic flakes, onion flakes and kosher salt.

Step 5: In another bowl, mix the vegan butter and panko.

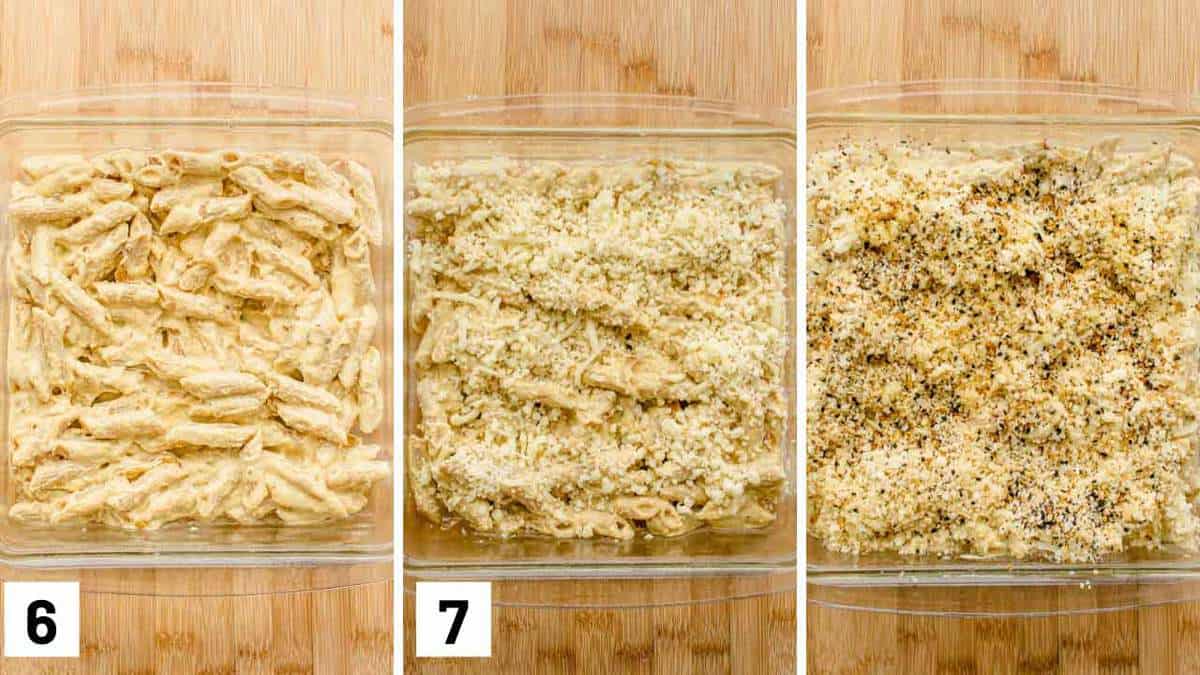
Instructional photos showing the pasta going into a baking dish, sprinkling cheese and panko, and then topping off with everything bagel seasoning.

Step 6: To a 9 inch square or round oven-safe dish, layer half of the pasta and top with 1 cup of the vegan shreds. Add the remaining pasta.

Step 7: Top with the remaining 1 cup of vegan cheese shreds, the panko breadcrumbs and the everything bagel spice. Bake for 10-15 minutes on the top shelf until browned. Serve immediately.

Expert Tips

You can make your everything bagel seasoning ahead of time. You can combine the ingredients and store it in an airtight container inside of your pantry for up to a year and use it in whatever you like.

If you don’t have panko, you can substitute in (gluten free) breadcrumbs.

Be patient with the onions. Caramelized onions need time to slowly cook and deepen in colour, flavour, and sweetness. Onions have natural sugar in them that’ll help with caramelizing so you don’t need to add any extra sugar.

Make sure you are using raw cashews (not roasted) and that they’re soaked beforehand. If you forgot to soak them, you can try and the quick soak method by boiling it in water for around 20 minutes.

Recipe FAQs

How Do I Freeze This?

If you want to double the recipe and freeze half, this baked vegan mac and cheese freezers super well. After baking, transfer the mac and cheese into a freezer containers, let cool before covering, and freeze for up to 3 months.

How Do I Reheat From Frozen?

You can reheat your mac and cheese straight from frozen! Bake it in the oven at 400F for about an hour covered with foil and then finish it uncovered for 15 to 20 minutes or until heated through.

Can I Add Veggies To This?

You absolutely can add veggies to this baked vegan mac and cheese! You can add some finely chopped broccoli or cauliflower to the mac and cheese!

Do I Need To Use Penne Pasta?

No! This mac and cheese works with many different types of pastas. You can use pasta shells, macaroni, etc. The more nooks and crannies in the pasta, the better they hold up your cheesy sauce.

A bowl of baked vegan mac and cheese in a bowl with a fork inside of it.

More Recipes You May Like

If you’re looking for more recipes to use your everything bagel seasoning in, try these recipes!

  • EVERYTHING BAGEL TOFU NUGGETS 
  • VEGAN EVERYTHING BAGEL AVOCADO BEAN SANDWICH 
  • EVERYTHING BAGEL SALAD
  • BREAKFAST KETO BAGELS WITH EGGS WITH EVERYTHING BAGEL SEASONING
A bowl of baked vegan mac and cheese in a bowl with a fork inside of it.
Print Recipe
5 from 5 votes

Baked Vegan Mac and Cheese with Everything Bagel Crust

This Everything Bagel Vegan Mac and Cheese is the best easy family dinner recipe for inspiring more Meatless Mondays in your family.
Prep Time15 minutes mins
Cook Time1 hour hr 10 minutes mins
Total Time1 hour hr 25 minutes mins
Course: Main Dish
Cuisine: American
Servings: 8
Calories: 563kcal
Author: Abbey Sharp

Ingredients

  • 2 tbsp extra virgin olive oil
  • 2 onions thinly sliced
  • 4 cloves garlic minced
  • 2 1/2 cup cashews soaked
  • 1 1/4 cup no salt added vegetable broth
  • 1/4 cup lemon juice
  • ½ teaspoons  salt
  • Heaping 1/2 cup nutritional yeast
  • 1/4  teaspoon  turmeric
  • 375 g box of whole grain penne pasta use gluten free if needed
  • 1 cup vegan cheese shreds

Everything bagel spice:

  • 2 tsp poppyseeds
  • 2 tsp sesame seeds
  • 2 tsp garlic flakes
  • 2 tsp onion flakes
  • 2 tsp kosher salt

Topping:

  • ½   cup panko breadcrumbs
  • 1 tablespoon vegan butter melted
  • 1 cup vegan cheese shreds

Instructions

  • Preheat oven to 400 F.
  • To a large nonstick skillet, heat the olive oil over medium low heat. Add the onion and garlic and cook until fragrant and caramelized, about 45-60 minutes.
  • Meanwhile, to a high speed blender, puree the cashews, broth, lemon juice, salt, nutritional yeast and turmeric until very smooth.
  • Meanwhile, cook the whole grain pasta for 2 minutes less than the recommending cooking time on the package.
  • Add the pasta and sauce to the skillet with the caramelized onions and toss to coat.
  • In a bowl, mix together the poppyseed, sesame seeds, garlic flakes, onion flakes and kosher salt.
  • In another bowl, mix the vegan butter and panko.
  • To a 9 inch square or round oven-safe dish, layer half of the pasta and top with 1 cup of the vegan shreds. Add the remaining pasta.
  • Top with the remaining 1 cup of vegan cheese shreds, the panko breadcrumbs and the everything bagel spice. Bake for 10-15 minutes on the top shelf until browned. Serve immediately.

Notes

  • You can make your everything bagel seasoning ahead of time. You can combine the ingredients and store it in an airtight container inside of your pantry for up to a year and use it in whatever you like.
  • If you don’t have panko, you can substitute in (gluten free) breadcrumbs.
  • Be patient with the onions. Caramelized onions need time to slowly cook and deepen in colour, flavour, and sweetness. Onions have natural sugar in them that’ll help with caramelizing so you don’t need to add any extra sugar.
  • Make sure you are using raw cashews (not roasted) and that they’re soaked beforehand. If you forgot to soak them, you can try and the quick soak method by boiling it in water for around 20 minutes.

Nutrition

Calories: 563kcal | Carbohydrates: 63g | Protein: 17g | Fat: 30g | Saturated Fat: 6g | Sodium: 1177mg | Potassium: 463mg | Fiber: 3g | Sugar: 5g | Vitamin A: 145IU | Vitamin C: 7mg | Calcium: 88mg | Iron: 5mg
Abbey Sharp

Abbey Sharp is a Registered Dietitian (RD), regulated by the Ontario College of Dietitians. She is a mom, YouTuber, Blogger, award winning cookbook author, media coach specializing in food and nutrition influencers, and a frequent contributor to national publications like Healthline and on national broadcast TV shows.
www.abbeyskitchen.com/about-abbey/

Last Updated December 28, 2020. Published December 28, 2020 By Abbey Sharp Leave a Comment

Vegan Curry with Spaghetti Squash Noodles (Gluten Free + Low Carb)

This easy vegan curry with chickpeas with baked spaghetti squash noodles is gluten free, packed with fibre with no grains.

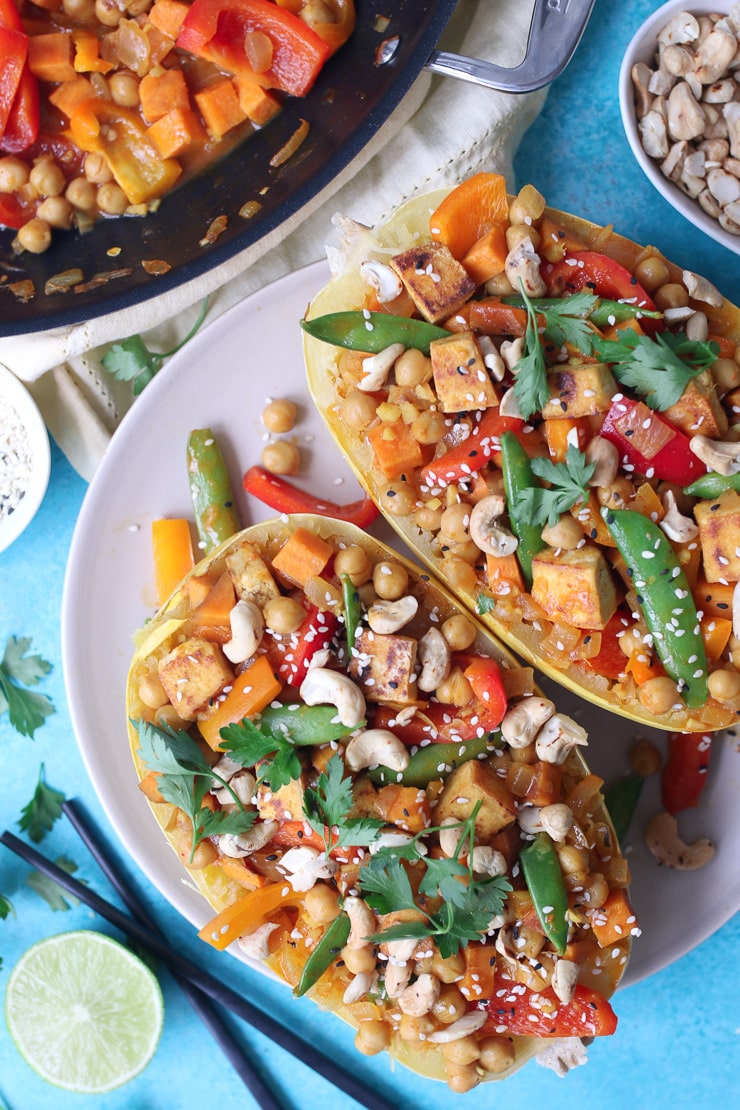
Birds eye view of vegan curry on top of spaghetti squash.

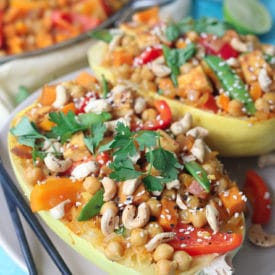
I am a huge curry fan. We order Thai curry almost every week because I just love the sweet, spicy and tangy flavour. But for nights I’m craving those flavours when I want to lighten things up, this easy vegan curry with baked spaghetti squash noodles totally does the trick!

Why This Recipe Works

This is a hearty vegan curry that hits the spot. Packed with vegetables and flavour, you’re going to want to add this to your menu regularly! I know the idea of making a Thai curry from scratch is super overwhelming, but this version could not be easier.

If you want to impress your guests, I find that serving this vegan curry inside of a spaghetti squash makes it super eye-catching. Even better, everyone gets their own squash so serving is super easy.

This is a super easy recipe to change up. Since we are using loads of vegetables, once you get the hang of the recipe, you can swap them out for different vegetables! You’ll never get bored of this recipe.

Table of contents

  • Why This Recipe Works
  • Key Ingredients
  • How to Make This Recipe
  • Expert Tips
  • Recipes FAQs
  • More Recipes You Might Like

Key Ingredients

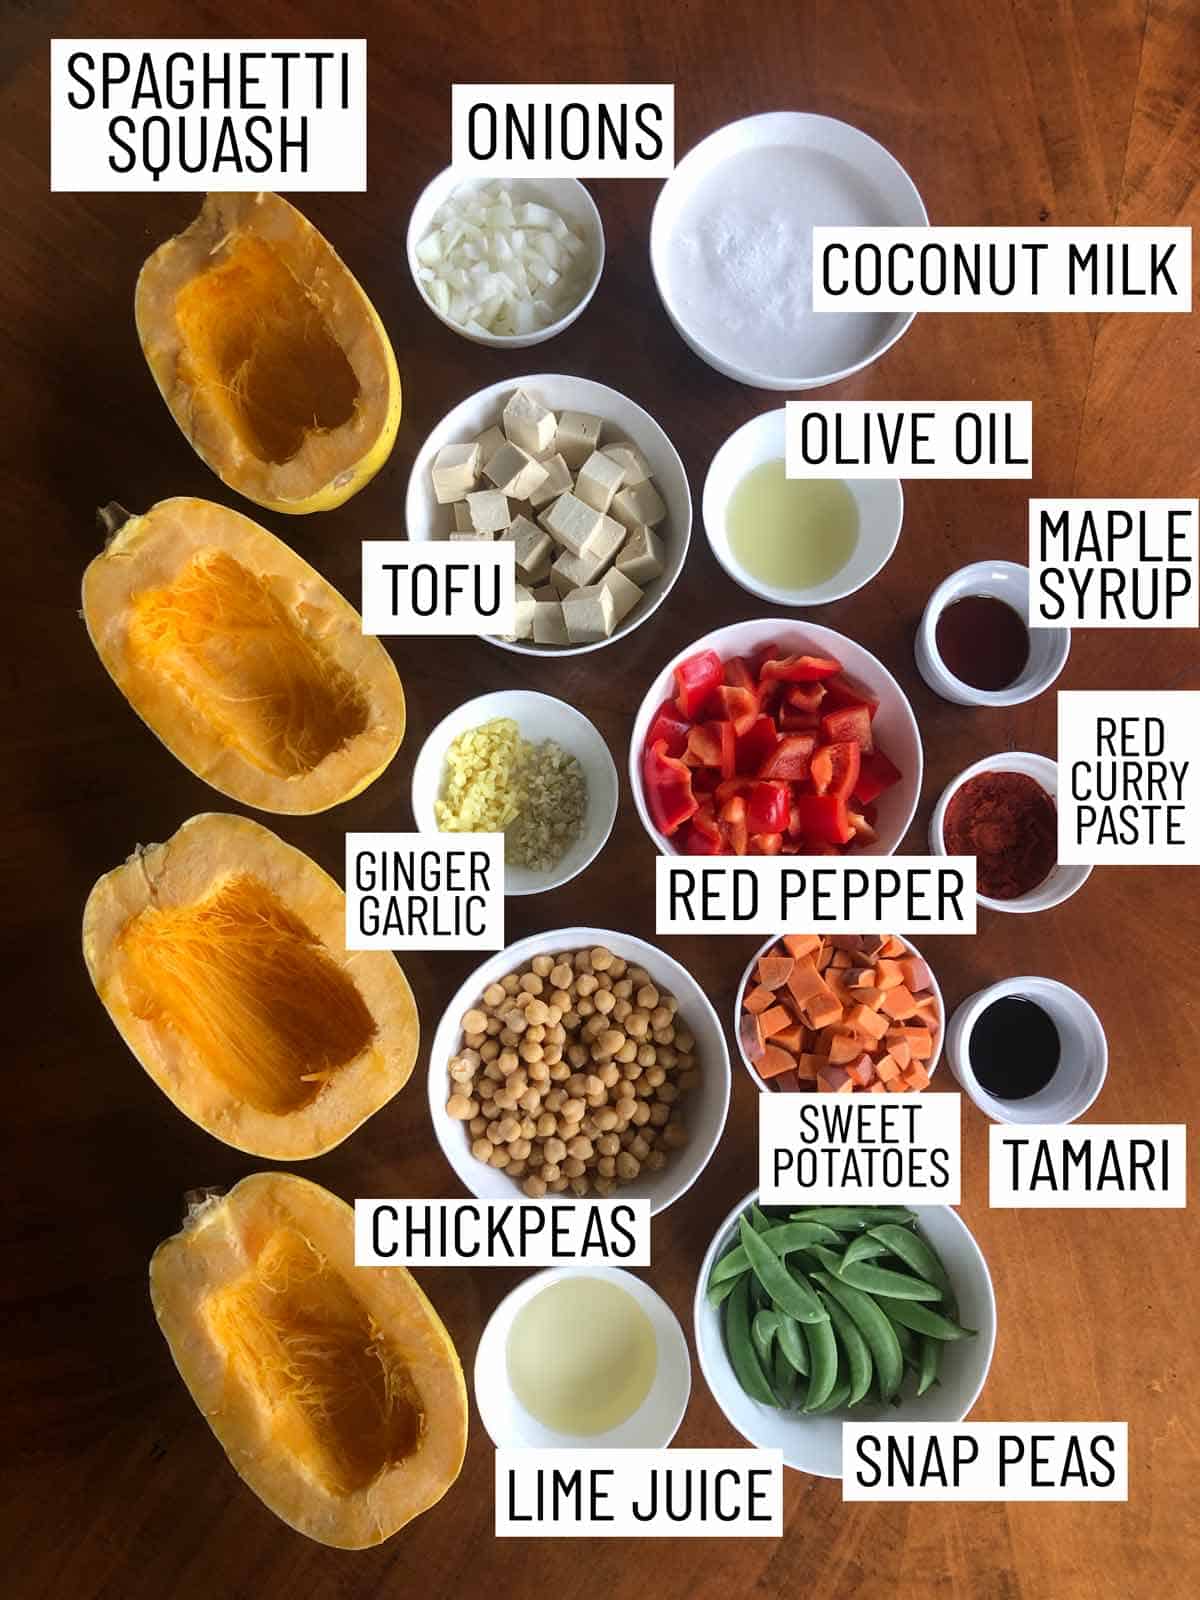
Overhead photo of ingredients needed to make a vegan curry with spaghetti squash.

Spaghetti squash — Did you know that spaghetti squash is packed with fibre, vitamins, minerals, and antioxidants? It might look like an odd ingredient to work with, it’s super easy to cook!

Tofu — We like to use extra firm tofu. We press the tofu (with paper towels around it or a tofu press to absorb excess moisture) so that it can get nice and crispy!

Flavour enhancers — These are ingredient that you’re not going to want to skip out on! You’ll want to make sure you get quality ginger, red curry paste, low sodium tamari, maple syrup, lime, and lite coconut milk.

Veggies — This vegan curry is packed with veggies (and chickpeas!). We like using sweet potato, snap peas, and bell peppers. The more colourful vegetables, the better!

How to Make This Recipe

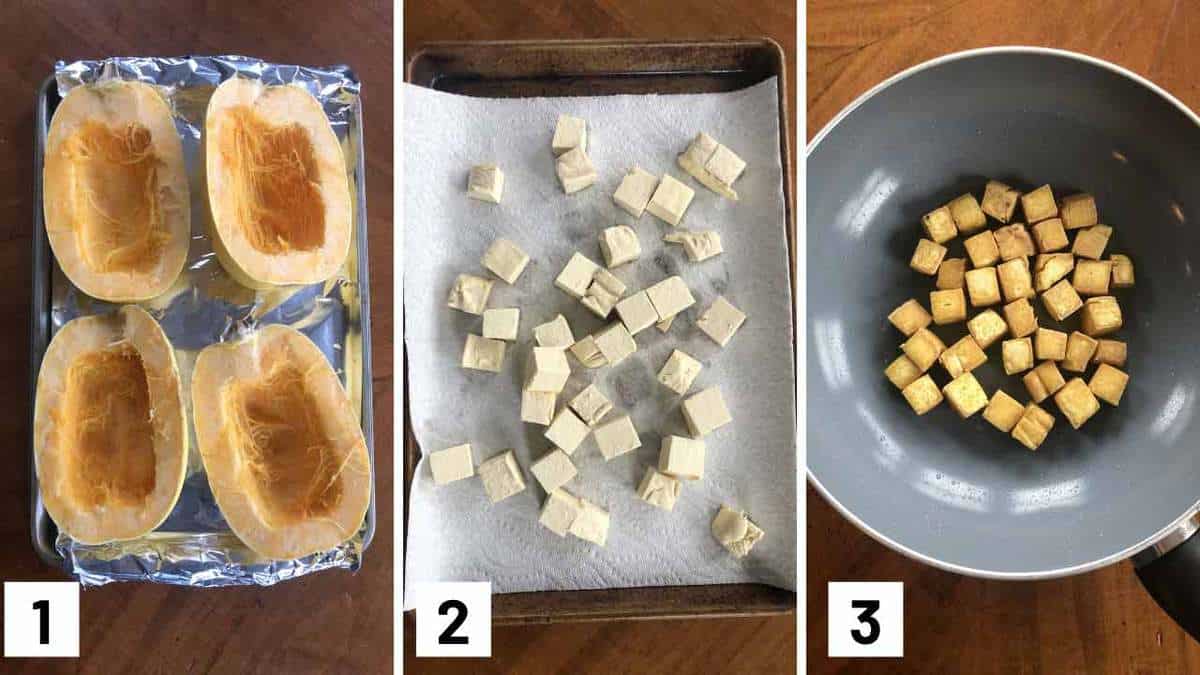
Step by step photos showing how to roast a spaghetti squash, cut tofu, and stir fry tofu.

Step 1: To bake the spaghetti squash, cut the squash in half lengthwise and remove the inner seeds. Place it on a baking sheet lined with tin foil, poke some holes in it and cover with foil. Bake for one hour at 375 F until soft. Alternatively, you can microwaving the spaghetti squash by placing cut side down on a plate covered in plastic wrap for about 10-15 minutes or until soft.

Step 2: Scrape the flesh with a fork to pull it into noodles. Season with salt and pepper and keep the noodles in the squash shell. Set aside.

Step 3: Place paper towel on a baking sheet and place the tofu on the paper towel. Top with more paper towel and a bunch of heavy items and press the moisture out for 15 minutes before cutting into bite sized cubes.

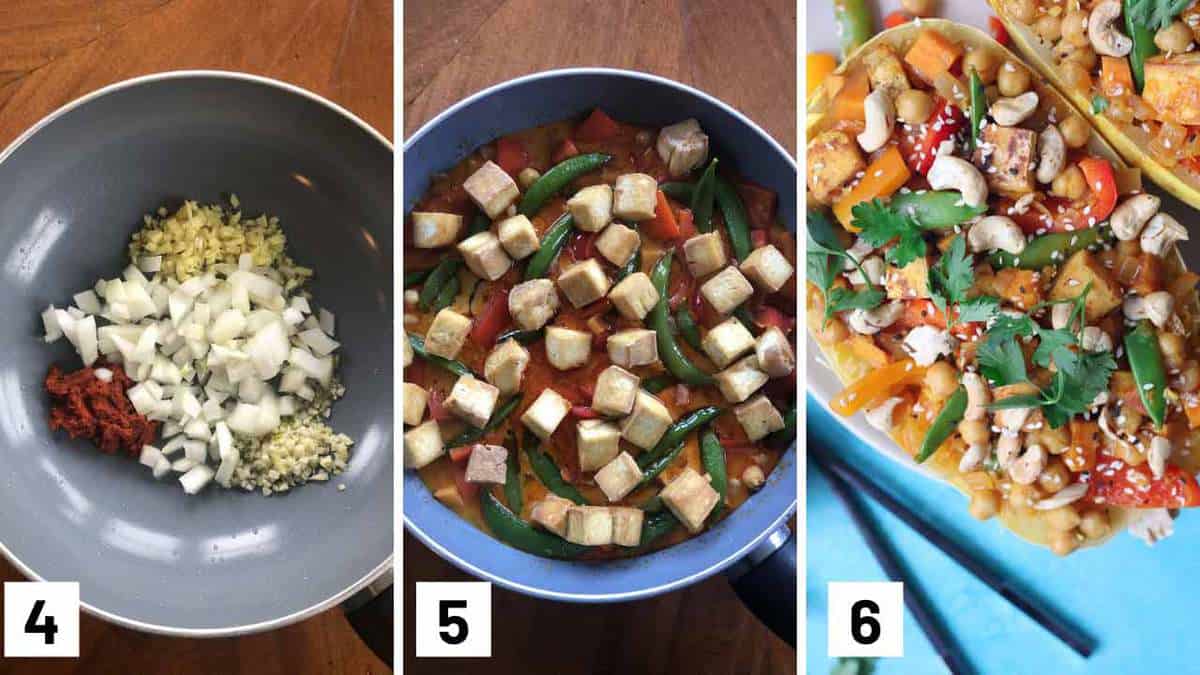
Step by step photos showing how to make the curry base before adding in the vegetables to cook and then stuffing it inside the spaghetti.

Step 4: To a large pan, I heat half of the olive oil over medium heat, then add the tofu and brown on all sides. Season with a pinch each of salt and pepper and then remove and set aside.

Step 5: Add the remaining olive oil and add in the onions, garlic, ginger, and red curry paste. Saute until fragrant. Add in the tamari, maple syrup, lime juice, coconut milk and sweet potatoes, cover and cook for 10 minutes until the sweet potatoes are almost completely soft.

Step 6: Add in the snap peas, bell peppers and chickpeas and cook just until soft, about 5 minutes. Toss in the tofu, and toss everything with the sauce. Season everything with salt and pepper, to taste.

Step 7: Serve the vegan curry sauce on top of the spaghetti squash and garnish with sesame seeds, toasted cashews and cilantro.

Expert Tips

To save time, you can press your tofu while your spaghetti squash is in the oven.

Some other vegetables you can use include carrots, broccoli (cut into small pieces), spinach, or whatever you have in your fridge!

If you are having trouble cutting your spaghetti squash in half, I suggest poking a couple of holes in it and then microwaving it for 1-2 minutes. This should soften it up a bit to make it easier to cut into.

If you’re not a fan of chickpeas, you can swap for lentils or another legume of your choice!

If you are making this to serve for a gluten-free friend, keep in mind that while tamari and soy sauce may taste the same, soy sauce contains gluten and cannot be swapped in.

Recipes FAQs

Can I substitute rice or noodles for the baked spaghetti squash?

You can use anything you want in place of the spaghetti squash as a base. Rice, quinoa, rice noodles or spaghetti would be amazing for the base of the curry. To keep it lower carb, you can do zucchini noodles, spaghetti squash or cauliflower rice, as well.

Can I add chicken or shrimp to the vegan coconut curry sauce?

This is a great easy vegan curry as is, but if your family prefers a little meat, you can swap the tofu for chicken, shrimp or a “faux” meat as well.

Would this curry sauce be okay to be made ahead of time for meal prep?

I have prepped this curry sauce 3 days ahead and it always keeps really well, so if you want to meal prep this easy vegan curry on the weekend and you can reheat it the week later.

Can I use a different squash?

You can stuff any squash but keep in mind that you’ll be missing the “noodles” if you swap it. This vegan curry would be really lovely inside a large acorn squash as well.

More Recipes You Might Like

If you’re a fan of curry and would like more curry recipes, try these ones from the blog!

  • CHICKEN CURRY WITH CAULIFLOWER AND SWEET POTATOES
  • VEGAN YELLOW BEET COCONUT CURRY SOUP
  • VEGAN CURRIED SWEET POTATO SOUP WITH APPLES AND CIDER
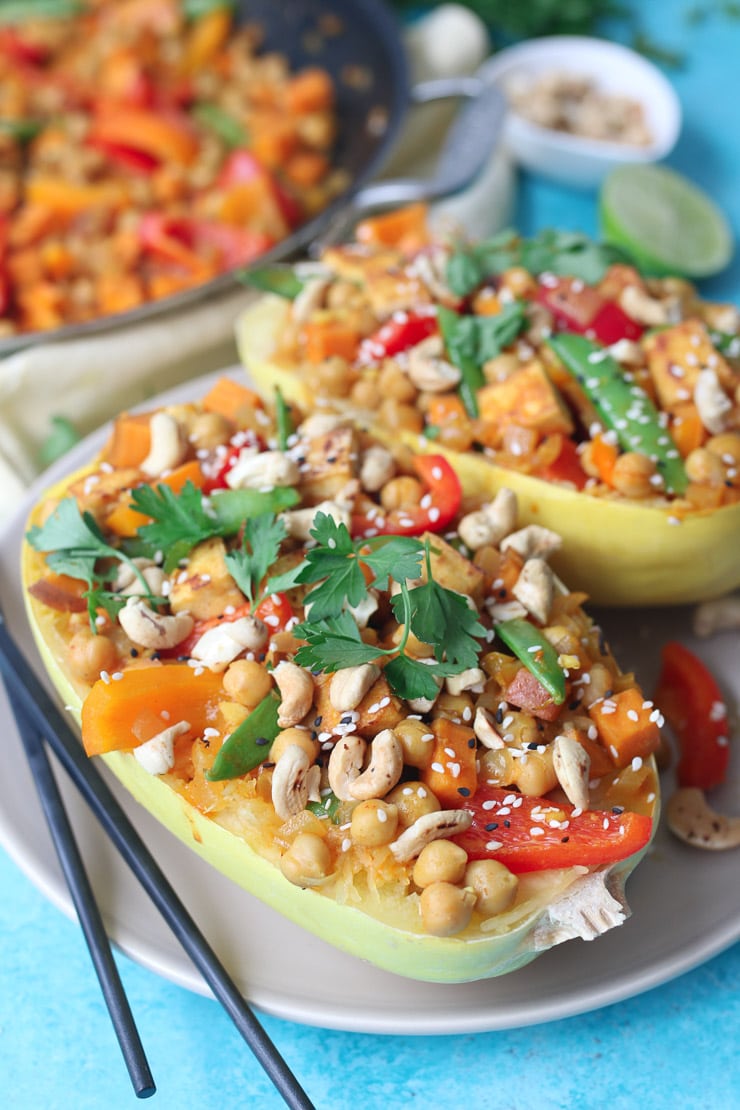
vegan curry topped with sesame seed and parsley

Have you ever tried to substitute in spaghetti squash noodles for regular noodles? Leave me a comment below with your thoughts!

Print Recipe
4.50 from 2 votes

Vegan Curry With Baked Spaghetti Squash Noodles

This easy vegan curry with chickpeas with baked spaghetti squash noodles is gluten free, packed with fibre with no grains
Prep Time15 minutes mins
Cook Time35 minutes mins
Total Time50 minutes mins
Course: Main Course
Cuisine: Thai
Servings: 4
Calories: 506kcal
Author: Abbey Sharp

Ingredients

  • 2 spaghetti squash halved and seeds removed
  • 300 grams extra firm tofu cubed
  • 3 tbsp extra virgin olive oil divided
  • 1/2 onion diced
  • 3 cloves garlic minced
  • 1 1/2 tbsp ginger minced
  • 1 1/2 tbsp red curry paste
  • 1 1/2 tbsp low sodium tamari
  • 1 1/2 tbsp maple syrup or to taste
  • juice of 1 small lime
  • 20 oz lite coconut milk
  • 1 sweet potato scrubbed and finely diced
  • 1 1/2 cups snap peas
  • 2 bell peppers cut into chunks
  • 1 can chickpeas drained and rinsed
  • salt and pepper to taste

Instructions

  • To bake the spaghetti squash, cut the squash in half lengthwise and remove the inner seeds. Place it on a baking sheet lined with tin foil, poke some holes in it and cover with foil. Bake for one hour at 375 F until soft. Alternatively, you can microwaving the spaghetti squash by placing cut side down on a plate covered in plastic wrap for about 10-15 minutes or until soft. Scrape the flesh with a fork to pull it into noodles. Season with salt and pepper and keep the noodles in the squash shell. Set aside.
  • Place paper towel on a baking sheet and place the tofu on the paper towel. Top with more paper towel and a bunch of heavy items and press the moisture out for 15 minutes before cutting into bite sized cubes.
  • Then to a large pan, I heat half of the olive oil over medium heat, then add the tofu and brown on all sides. Season with a pinch each of salt and pepper and then remove and set aside.
  • Add the remaining olive oil and add in the onions, garlic, ginger, and red curry paste. Saute until fragrant. Add in the tamari, maple syrup, lime juice, coconut milk and sweet potatoes, cover and cook for 10 minutes until the sweet potatoes are almost completely soft.
  • Add in the snap peas, bell peppers and chickpeas and cook just until soft, about 5 minutes. Toss in the tofu, and toss everything with the sauce. Season everything with salt and pepper, to taste.
  • Serve the vegan curry sauce on top of the spaghetti squash and garnish with sesame seeds, toasted cashews and cilantro.

Notes

  • To save time, you can press your tofu while your spaghetti squash is in the oven.
  • Some other vegetables you can use include carrots, broccoli (cut into small pieces), spinach, or whatever you have in your fridge!
  • If you are having trouble cutting your spaghetti squash in half, I suggest poking a couple of holes in it and then microwaving it for 1-2 minutes. This should soften it up a bit to make it easier to cut into.
  • If you’re not a fan of chickpeas, you can swap for lentils or another legume of your choice!
  • If you are making this to serve for a gluten-free friend, keep in mind that while tamari and soy sauce may taste the same, soy sauce contains gluten and cannot be swapped in.

Nutrition

Calories: 506kcal | Carbohydrates: 61g | Protein: 12g | Fat: 25g | Saturated Fat: 12g | Sodium: 649mg | Potassium: 1017mg | Fiber: 11g | Sugar: 25g | Vitamin A: 8338IU | Vitamin C: 111mg | Calcium: 187mg | Iron: 4mg
Abbey Sharp

Abbey Sharp is a Registered Dietitian (RD), regulated by the Ontario College of Dietitians. She is a mom, YouTuber, Blogger, award winning cookbook author, media coach specializing in food and nutrition influencers, and a frequent contributor to national publications like Healthline and on national broadcast TV shows.
www.abbeyskitchen.com/about-abbey/

Last Updated December 24, 2020. Published December 24, 2020 By Abbey Sharp 7 Comments

Sheet Pan Gnocchi with Veggies Meal (Vegan)

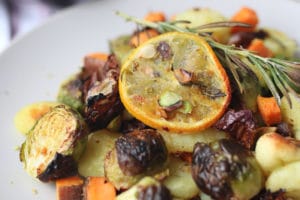
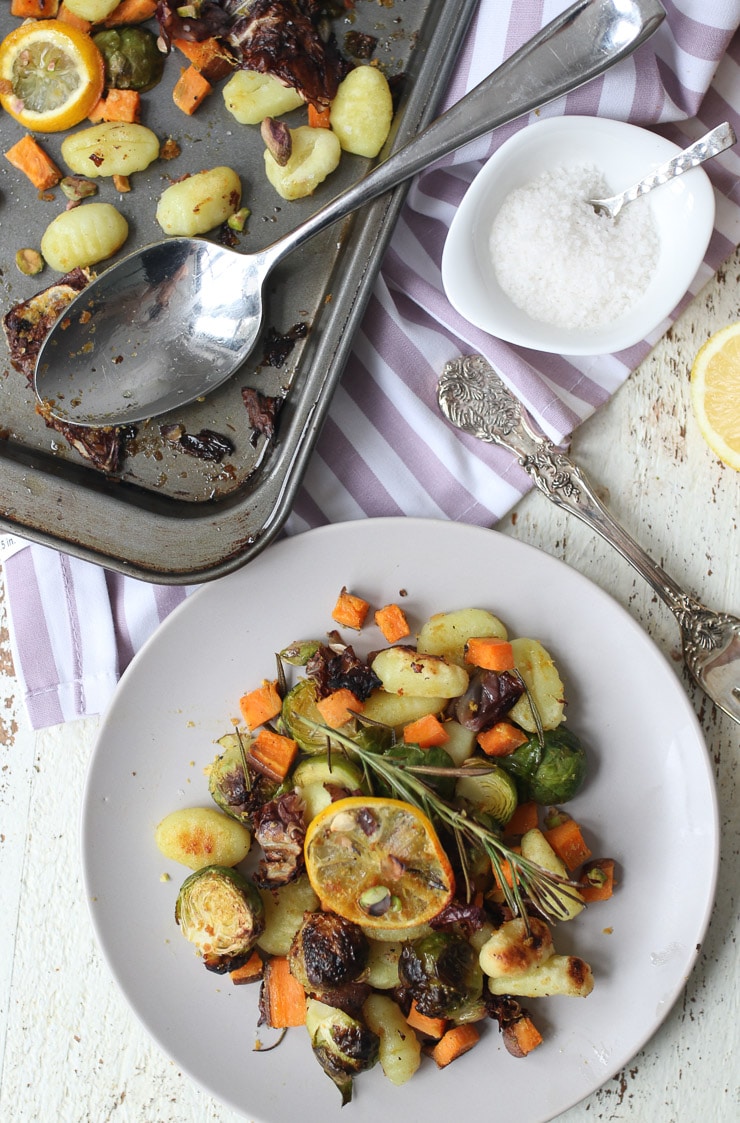
Gnocchi and vegetables on a plate.

This sheet pan gnocchi with sweet potato and brussel sprouts is the perfect vegan weeknight dinner and couldn’t be easier to make!

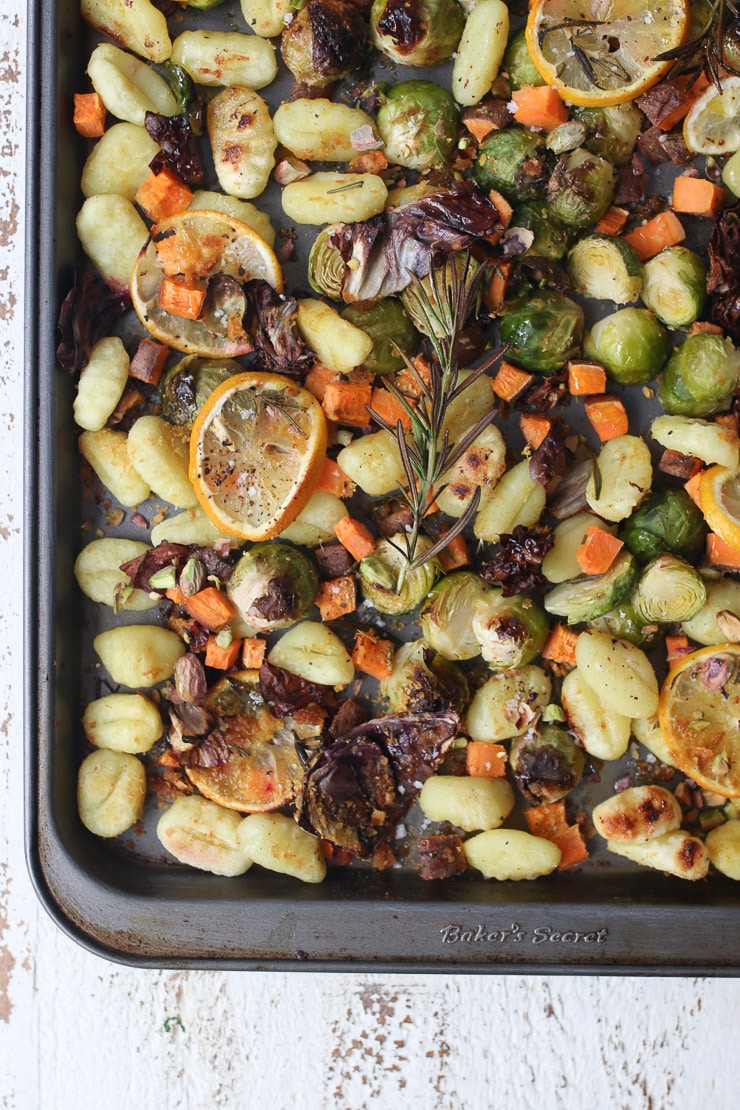
birds eye view of Gnocchi and vegetables on a sheet pan.

Sheet pan meals are a great time saver because they don’t require you to have to clean more than one pan to make a great meal. All of the ingredients would get cooked at the same time on one sheet pan so it’s fast to cook and easy to clean.

On busy weeknights, it’s so easy to just quickly toss everything on a sheet pan and roast it in the oven. No fuss, no muss. It’s so easy that you can even have your kids help out!

Why This Recipe Works

This is such a fast recipe to put together. From start to finish, this sheet pan gnocchi only takes 30 minutes! Plus with the sheet pan being the method of cooking, it’s super easy to clean or you can even use parchment paper or tin foil to make for even faster clean up.

This sheet pan gnocchi is packed with flavour. Once the vegetables have roasted and caramelized in the sheet pan, the flavours just pop! There’s nothing better than roasted vegetables.

The nutritional yeast gives the sheet pan gnocchi a nutty cheesy flavour while adding protein, vitamins, minerals and antioxidants to the dish.

Table of contents

  • Why This Recipe Works
  • Key Ingredients
  • How To Make This Recipe
  • Expert Tips
  • Recipe FAQs
  • More Recipes You May Like

Key Ingredients

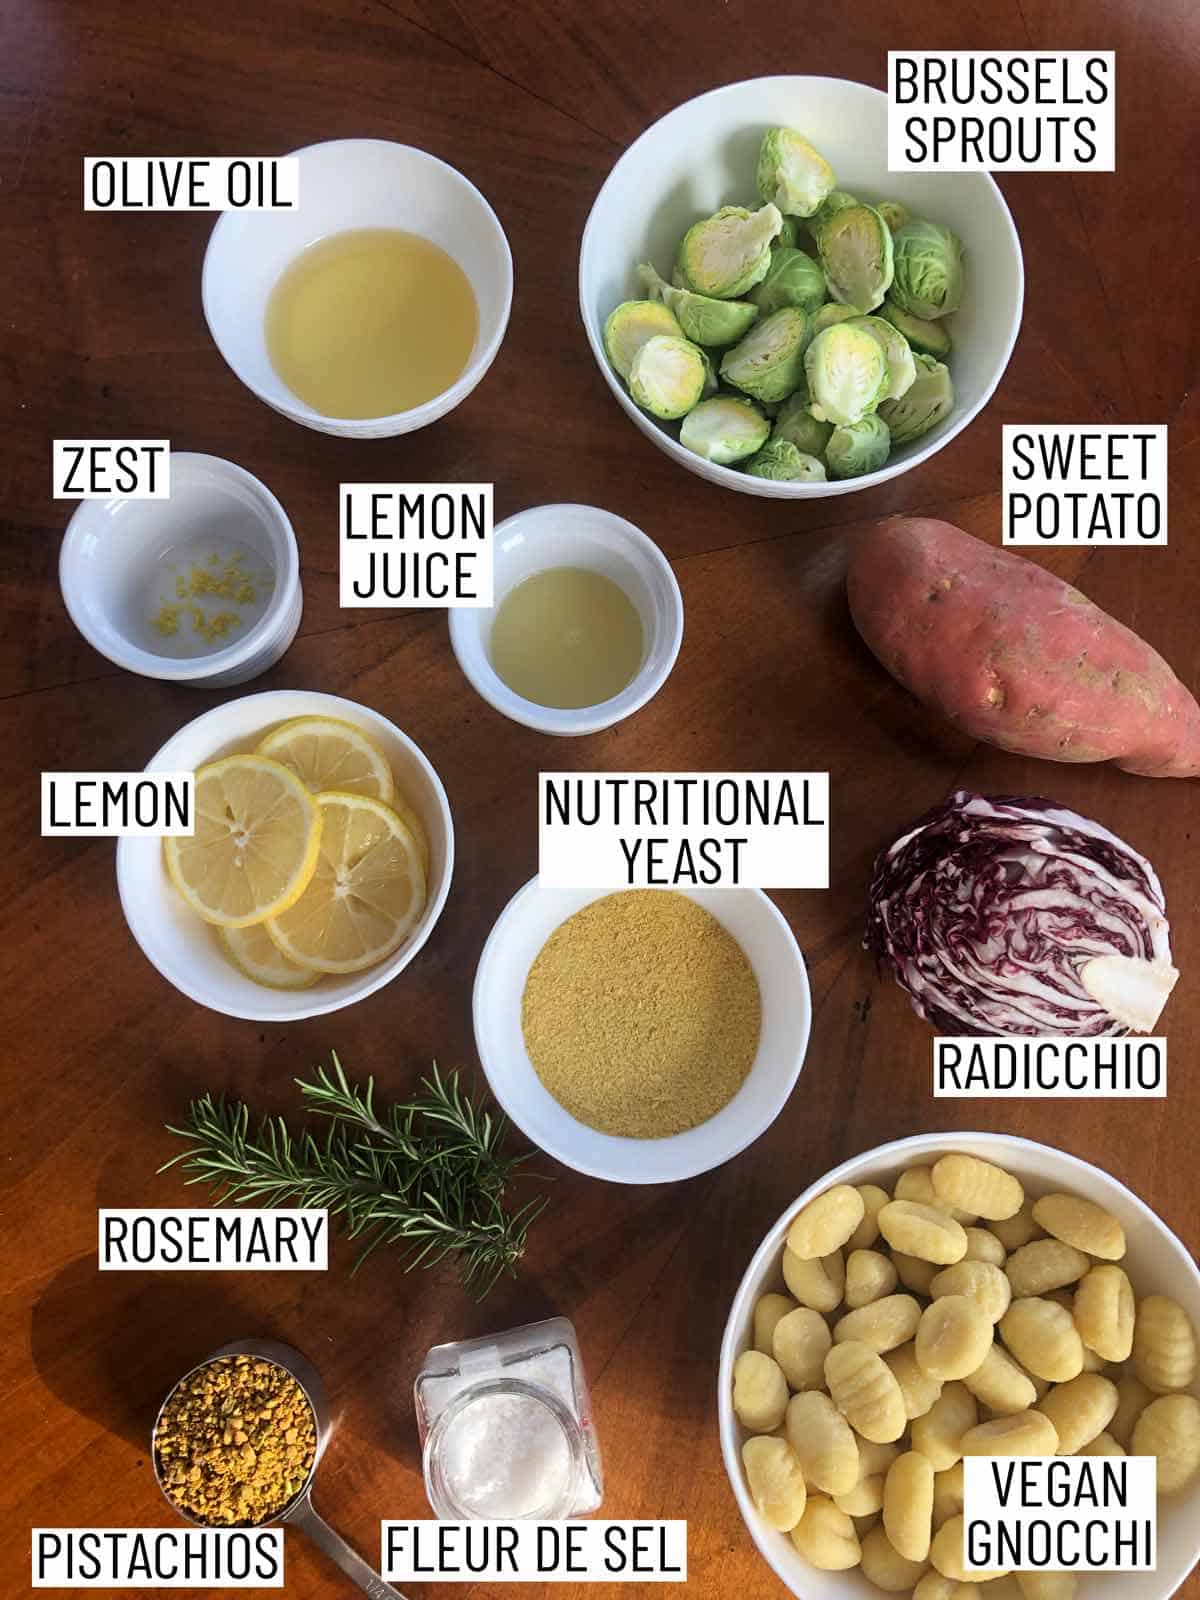
Flat lay image of portioned recipe ingredients including sweet potato, radicchio, vegan gnocchi, fleur de sel, pistachios, rosemary, lemon, nutritional yeast, olive oil, and brussels sprouts.

Vegan Gnocchi — Vegan prepared gnocchi is simply gnocchi made without eggs and you’re not even going to notice the difference! They’re so good! Check the label as not all of the prepared gnocchi is vegan.

Vegetables — We used Brussels sprouts, radicchio, and a sweet potato. Be sure to remove any damaged outer leaves for the Brussels sprouts and radicchio and give the sweet potato a good scrub if you’re not peeling it.

Flavour Booster — We love using lemons to add a bright fresh flavour to the sheet pan gnocchi, the rosemary is so aromatic, and the nutritional yeast gives the dish a nice nutty flavour that goes so well with the pistachios on top!

How To Make This Recipe

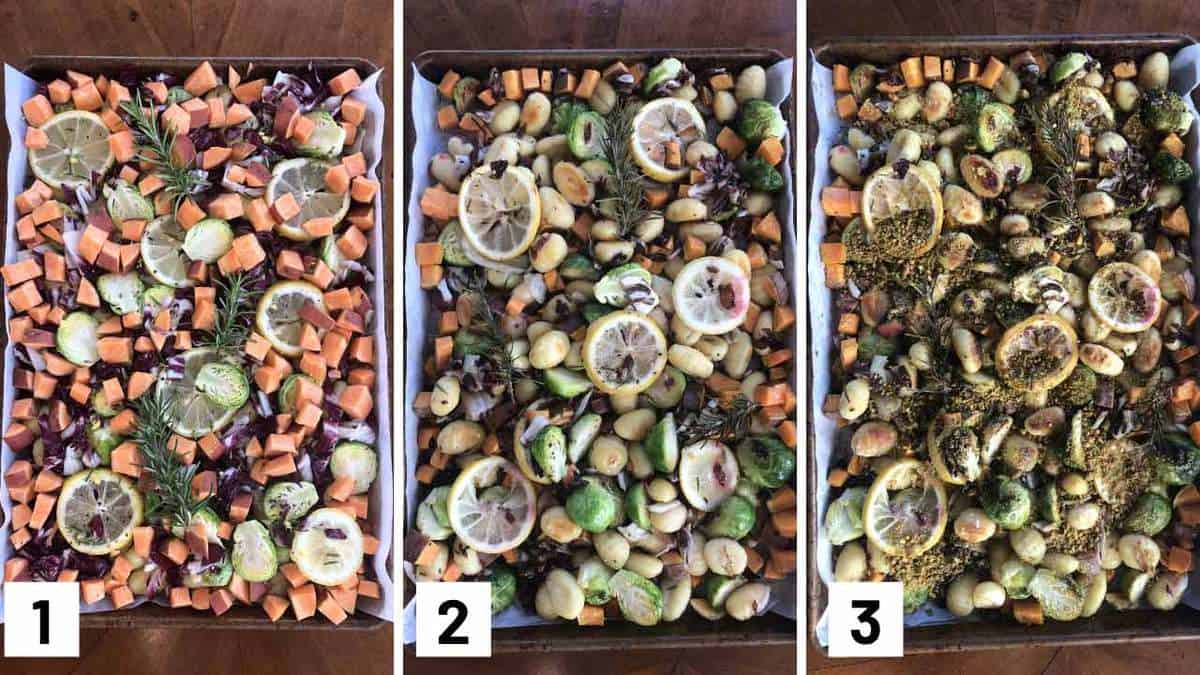
Three side by side images of the steps of the recipe: ingredients added to a sheet pan, roasted, then adding on nutritional yeast.

Step 1: Preheat oven to 450F. On a large baking sheet, mix together the gnocchi, raddichio, brussels sprouts, sweet potatoes, lemon slices and minced rosemary.

Step 2: Drizzle generously with the 3 tbsp olive oil and season with a pinch each of salt and pepper. Top with lemon zest and rosemary sprigs. Bake for 15 minutes, then flip or stir the ingredients. Increase the heat to broil and pop it back under the broiler until golden brown, about 3-5 minutes.

Step 3: Remove from the oven and top with nutritional yeast to taste, fleur de sel, the juice of 1/2 lemon, and pistachios. Drizzle generously with olive oil and enjoy.

Expert Tips

Fleur de sel is a distinctive pyramid-shaped salt crystals that is perfect for finishing off dishes. However, if you don’t have any, you can try flakey sea salt!

You want the oven to be hot for this. You want the vegetables to caramelize so you want to make sure the oven is properly preheated. Vegetables get so tasty when roasted as the caramelization concentrates the natural sugars.

A super quick way to get crushed pistachio is by pulsing it in a food processor. If you don’t want a food processor, roll the pistachio under a rolling pin.

If you don’t have fresh rosemary, you can always use dried rosemary for this sheet pan gnocchi.

Remember to cut off the stem end of the Brussels sprouts and remove any bruised or discoloured leaves.

Recipe FAQs

Can I switch up the vegetables in here if I don’t have sweet potatoes and Brussels sprouts?

Yes! You can make this vegan sheet pan gnocchi meal with eggplant, tomatoes and zucchini, or peas and pesto!

Could I make this gnocchi non vegan?

Yes! I actually really like nutritional yeast as a vegan alternative to parmesan because it’s rich in fibre and protein but if you don’t want to make this vegan, you can use any gnocchi (could have cheese in it), and you can load it up with lots of cheese for serving – parmesan or goats cheese would be fabulous!

Can I prepare this sheet pan gnocchi ahead of time and reheat as meal prep?

I love doing sheet pan meals for meal prep because generally, they keep really well. My recommendation is to store it in an airtight container and when ready to serve, reheat it either in a pan or in the microwave and that’s when I would finish with the olive oil, lemon juice, pistachios, nutritional yeast and fleur de sel. Basically, roast everything on the baking sheet and garnish when you’re ready to eat.

birds eye view of Gnocchi and vegetables on a plate next to a sheet pan with additional food

More Recipes You May Like

Want some more sheet pan recipes like this sheet pan gnocchi? You’re in luck because I’m legit obsessed so I have a lot of them. Check these out!

  • Halloumi Chickpea Vegetarian Sheet Pan Dinner
  • Greek Sheet Pan Chicken Breasts
  • Rosemary Chicken Breast Sheet Pan Dinner 
  • Vegan Chickpea and Cauliflower Sheet Pan Dinner 
  • Sticky Chicken Breasts Sheet Pan Dinner 
  • Chinese Five Spice Shrimp Stir Fry Sheet Pan Dinner 

What are some of your go-to ways to eat gnocchi?

Gnocchi and vegetables on a plate.
Print Recipe
5 from 5 votes

Vegan Gnocchi Sheet Pan Meal 

This sheet pan gnocchi with sweet potato and brussel sprouts is the perfect vegan weeknight dinner and couldn't be easier to make!
Prep Time10 minutes mins
Cook Time20 minutes mins
Total Time30 minutes mins
Course: Dinner
Cuisine: Italian, American
Diet: Vegan, Vegetarian
Servings: 4 people
Calories: 209kcal
Author: Abbey Sharp

Ingredients

  • 1 pack vegan prepared gnocchi
  • 1/2 head radicchio
  • 1 1/2 cups brussels sprouts trimmed and halved
  • 1 sweet potato scrubbed and finely diced
  • 3 tbsp extra virgin olive oil plus more for drizzling
  • 1 lemon thinly sliced, plus zest and juice of 1/2 lemon, divided
  • 2 tbsp fresh rosemary minced plus 3 sprigs
  • 1/4 cup crushed pistachios
  • 3-4 tbsp nutritional yeast or to taste
  • Salt and pepper to taste
  • Fleur de sel

Instructions

  • Preheat oven to 450 F.
  • On a large baking sheet, mix together the gnocchi, raddichio, brussels sprouts, sweet potatoes, lemon slices and minced rosemary.
  • Drizzle generously with the 3 tbsp olive oil and season with a pinch each of salt and pepper.
  • Top with lemon zest and rosemary sprigs. Bake for 15 minutes, then flip or stir the ingredients.
  • Increase the heat to broil and pop it back under the broiler until golden brown, about 3-5 minutes.
  • Remove from the oven and top with nutritional yeast to taste, fleur de sel, the juice of 1/2 lemon, and pistachios. Drizzle generously with olive oil and enjoy.

Notes

  • Fleur de sel is a distinctive pyramid-shaped salt crystals that is perfect for finishing off dishes. However, if you don’t have any, you can try flakey sea salt!
  • You want the oven to be hot for this. You want the vegetables to caramelize so you want to make sure the oven is properly preheated. Vegetables get so tasty when roasted as the caramelization concentrates the natural sugars.
  • A super quick way to get crushed pistachio is by pulsing it in a food processor. If you don’t want a food processor, roll the pistachio under a rolling pin.
  • If you don’t have fresh rosemary, you can always use dried rosemary.
  • Remember to cut off the stem end of the Brussels sprouts and remove any bruised or discoloured leaves.

Nutrition

Calories: 209kcal | Carbohydrates: 17g | Protein: 6g | Fat: 14g | Saturated Fat: 2g | Sodium: 28mg | Potassium: 466mg | Fiber: 5g | Sugar: 3g | Vitamin A: 4921IU | Vitamin C: 44mg | Calcium: 42mg | Iron: 2mg

Have you tried making this sheet pan gnocchi? Let me know your thoughts down in the comments below!

Abbey Sharp

Abbey Sharp is a Registered Dietitian (RD), regulated by the Ontario College of Dietitians. She is a mom, YouTuber, Blogger, award winning cookbook author, media coach specializing in food and nutrition influencers, and a frequent contributor to national publications like Healthline and on national broadcast TV shows.
www.abbeyskitchen.com/about-abbey/

Last Updated December 21, 2020. Published December 21, 2020 By Abbey Sharp 2 Comments

Stuffed Chicken Breast with Sweet Potatoes & Prosciutto

These Sweet Potato & Apple Stuffed Prosciutto Wrapped Chicken Breasts are a perfect easy gluten free fall or winter meal for days you're getting tired of basic chicken!

These stuffed chicken breast with sweet potatoes & prosciutto are an easy fall or winter meal for days you’re getting tired of basic chicken!

Close up of stuffed chicken breasts  on a plate with mashed sweet potato and green beans on the side.

We LOVE a good chicken recipe here at Abbey’s Kitchen. Chicken breasts are easy to cook, easy to find, relatively inexpensive, protein-packed and generally quite acceptable. Kids eat it. Adults eat it. No drama at the dinner table. So there is pretty much no going wrong with this dinner staple.

However, I think we can all agree that sometimes our standard go-to chicken recipes can get a little boring and need a bit of a makeover from time-to time. Our solution? Stuffed chicken breast wrapped in prosciutto!

Table of contents

  • Why This Recipe Works
  • Key Ingredients
  • How to Make This Recipe
  • Expert Tips
  • Recipe FAQs
  • More Recipes You Might Like

Why This Recipe Works

I have a theory that if you wrap anything in prosciutto, it automatically becomes fancy. This stuffed chicken breast recipe is all the proof you need! The prosciutto not only elevates an otherwise boring chicken recipe, but it adds an extra pop of saltiness and crispy texture. I also think that stuffing chicken is a great way to keep it from drying out and add a TON of flavour.

This stuffed chicken recipe is anything but boring – you get some sweetness from the apple and sweet potato, mixed in with the savoury flavours of prosciutto and chicken, as well as some creaminess and rich flavour from the chevre. Y-U-M! The thing that I love the most about this recipe is that it is elevated enough to enjoy for the holidays or for entertaining guests, and easy enough to pull off on a weekday! Win-win.

Key Ingredients

Flat lay of portioned recipe ingredients including chicken breast, sweet potato, apple, chevre, rosemary, and prosciutto.

Chicken Breast – While chicken breasts are the ideal choice for this recipe, you can certainly use chicken thighs instead. While chicken thighs tend to be more flavourful than chicken breasts, keep in mind they are smaller so they may not hold as much stuffing as a chicken breast would.

Sweet Potato – The stuffing is made up of mashed sweet potato mixed with chevre. But this recipe is super versatile, and you can use regular potato instead or substitute for a different creamy cheese. It really comes down to your own taste preferences.

Apple – We like to use a crisp and juicy red apple that can hold its own in this recipe and bring out some natural sweetness. McIntosh, Honey Crisp, and Empire are all great options.

Prosciutto – This is where the magic happens! Prosciutto can be slightly difficult to work with, especially when cut very thin, as it can easily fall apart in your hands. But patience is key! Even if you have to layer a few pieces together to wrap around the chicken breast, the prosciutto is pretty workable and stays in place quite well.

Chevre – chevre is fancy terminology for goats milk cheese, and really brings this recipe to the next level! However, if you aren’t a fan of goats milk cheese you can use any cream cheese instead or throw in some crumbled feta cheese.

How to Make This Recipe

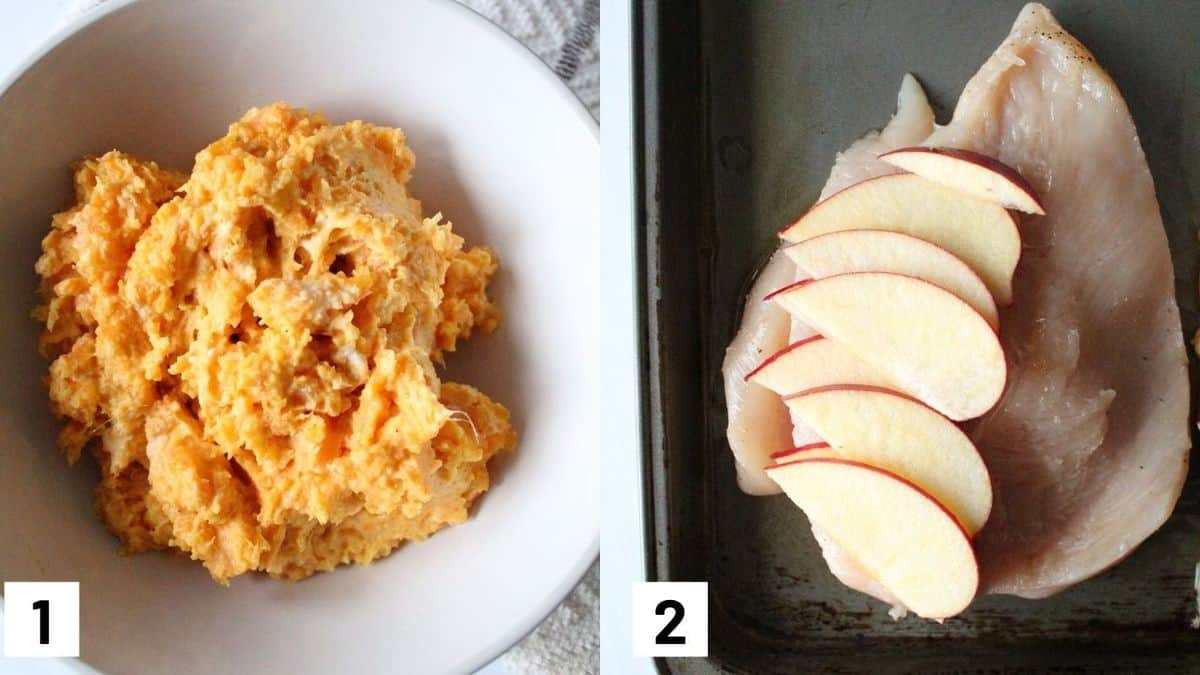
Two side by side images of first two steps of recipe showing the sweet potato mixture, and sliced chicken breast with apple slices on a sheet pan.

Step 1: In a bowl, scoop out the flesh of the sweet potato and mix it with the chevre.

Step 2: Line the bottom half of the chicken opening with the apple.

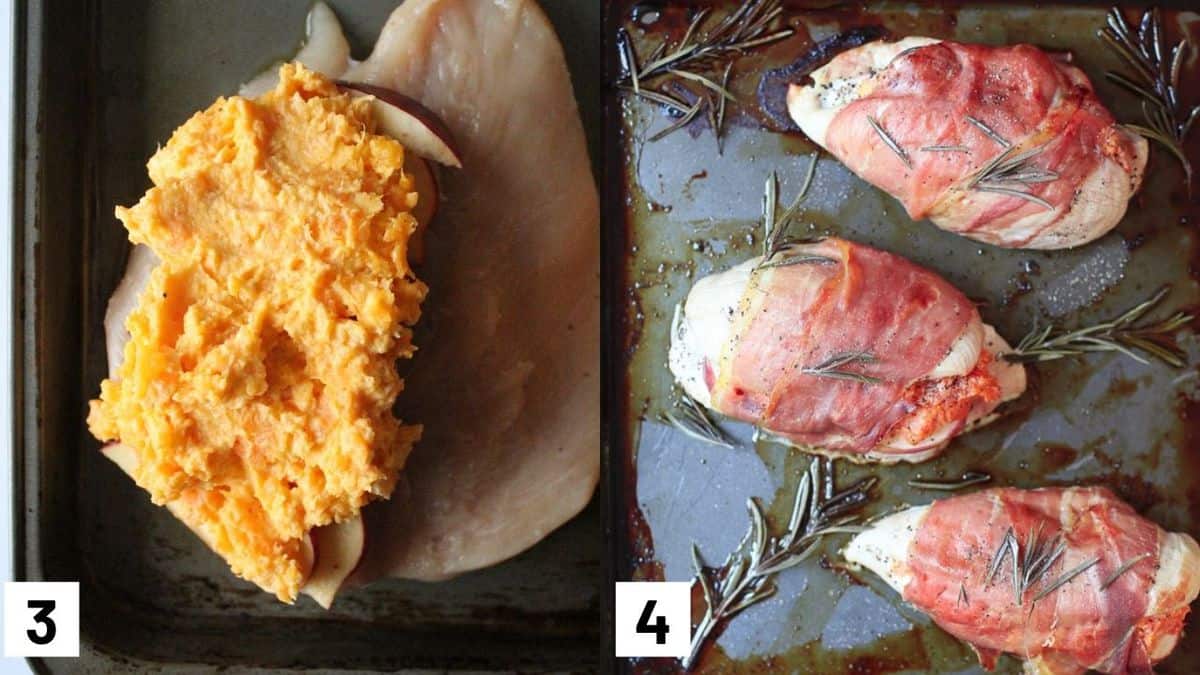
Two side by side images showing the final steps of recipe including sweet potato mixture layered on top of apples, and how to wrap prosciutto.

Step 3: Layer on the sweet potato-chevre mixture on top of the apple.

Step 4: Carefully wrap the chicken breasts closed with two pieces each of overlapping prosciutto, making sure the end is under the chicken. Place on the baking sheet topped with rosemary and roast for 15 minutes, or until a meat thermometer inserted into the centre of the chicken reads 165 F.

Expert Tips

The tiny bit of fat on the prosciutto really helps keep the chicken moist, so make sure not to discard these pieces. It also adds a delicious porky flavour to the otherwise bland breasts.

I would also highly recommend investing in a meat thermometer (if you don’t have one already) to check the doneness of the chicken breast to ensure they are safe to eat. Because the stuffed chicken breasts are wrapped with the prosciutto, it can be a bit more challenging to eye ball whether or not the chicken is fully cooked. So just to stay on the safe side and prevent any potential food borne illness, a meat thermometer is your best bet! Ideally the chicken should have an internal temperature of 165F.

If you want to speed things along and get these stuffed chicken breasts on the table STAT, i’d recommend purchasing two small sized sweet potatoes as they take less time to roast vs larger sized potatoes. If you’re impartial to the taste of roasted sweet potatoes and want to get food on the table even sooner you can pop them in the microwave. Using a fork poke a few holes in the sweet potato (this will help to let out the steam) and microwave for 5-7 minutes, turning half way through. If not yet fully cooked, you can continue to microwave for 30 second intervals.

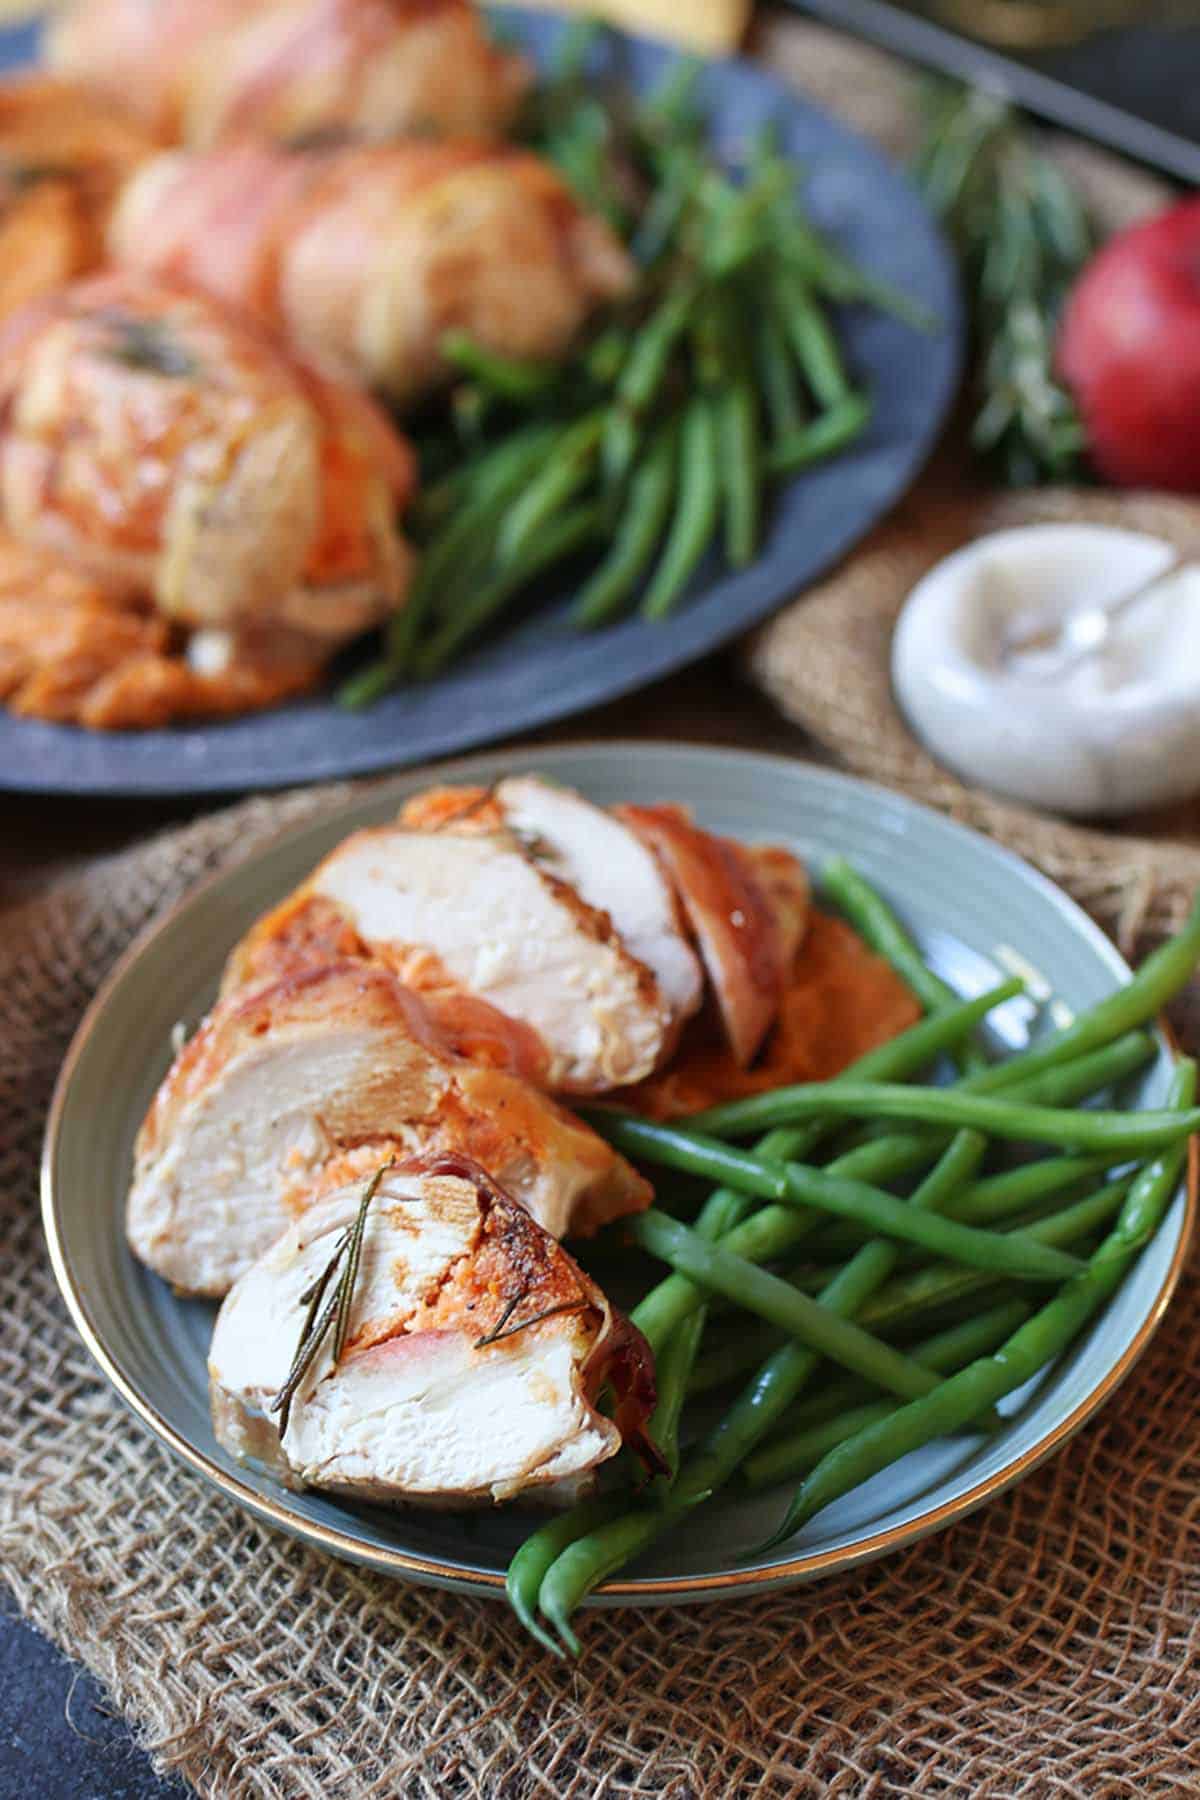
Complete holiday recipe cut in four pieces on a blue plate with green beans on the side.

Recipe FAQs

Can I make this dairy free?

Yes absolutely. You can simply omit the chevre entirely or use a dairy free vegan cheese instead.

Is this recipe gluten free?

This recipe is 100% gluten free.

What can I pair this with?

I love to pair this recipe with some leftover mashed sweet potato and green beans. But it would also pair beautifully with any roasted winter veggie and any other starch or grain of choice.

What other fruits can I use besides apple?

I have personally never used any other fruit for this recipe but I imagine this would taste divine with other seasonal fruits like pears or plums!

More Recipes You Might Like

Here are some more of my favourite chicken recipes that are made to impress!

  • French Onion Chicken
  • Greek Sheet Pan Chicken
  • Rosemary Chicken Breast with Roasted Grapes and Garlic
  • Persimmon Ginger Chicken Breast

So friends, let me know what are some of your fancy-pants ways to serve chicken breasts when you’re in a chicken rut?

These Sweet Potato & Apple Stuffed Prosciutto Wrapped Chicken Breasts are a perfect easy gluten free fall or winter meal for days you're getting tired of basic chicken!
Print Recipe
5 from 2 votes

Stuffed Chicken Breast with Sweet Potatoes & Prosciutto

These stuffed chicken breast with sweet potatoes & prosciutto are an easy fall or winter meal for days you're getting tired of basic chicken!
Prep Time40 minutes mins
Cook Time15 minutes mins
Total Time55 minutes mins
Course: Dinner
Cuisine: American
Servings: 4 people
Calories: 274kcal
Author: Abbey Sharp

Ingredients

  • 1 lb chicken breasts with a deep slit cut into it lengthwise
  • 1 sweet potato roasted
  • 1/4 cup chevre
  • 1/2 red apple thinly sliced
  • 8 slices prosciutto
  • 3 sprigs rosemary
  • Salt and pepper to taste

Instructions

  • Preheat oven to 425 F.
  • Sprinkle the chicken breasts with salt and pepper.
  • In a bowl, scoop out the flesh of the sweet potato and mix it with the chevre. Line the bottom half of the chicken opening with the apple and pile on some of the sweet potato-chevre mixture.
  • Carefully wrap the chicken breasts closed with two pieces each of overlapping prosciutto, making sure the end is under the chicken.
  • Place on the baking sheet topped with rosemary and roast for 15 minutes, or until a meat thermometer inserted into the centre of the chicken reads 165 F. Enjoy!

Nutrition

Calories: 274kcal | Carbohydrates: 10g | Protein: 29g | Fat: 12g | Saturated Fat: 5g | Cholesterol: 90mg | Sodium: 308mg | Potassium: 585mg | Fiber: 2g | Sugar: 4g | Vitamin A: 4815IU | Vitamin C: 3.2mg | Calcium: 35mg | Iron: 1mg

Did you try this stuffed chicken breast wrapped in prosciutto? Leave me a comment below with your thoughts!

Abbey Sharp

Abbey Sharp is a Registered Dietitian (RD), regulated by the Ontario College of Dietitians. She is a mom, YouTuber, Blogger, award winning cookbook author, media coach specializing in food and nutrition influencers, and a frequent contributor to national publications like Healthline and on national broadcast TV shows.
www.abbeyskitchen.com/about-abbey/

Last Updated December 16, 2020. Published December 18, 2020 By Abbey Sharp Leave a Comment

Vegan Green Bean Casserole (Healthy with No Canned Soup)

This healthy vegan green bean casserole recipe is creamy and flavourful, without using canned soup! It makes for the perfect gluten free vegetable side dish.

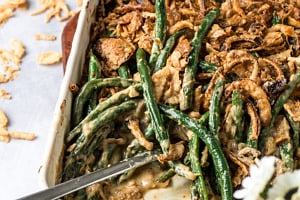
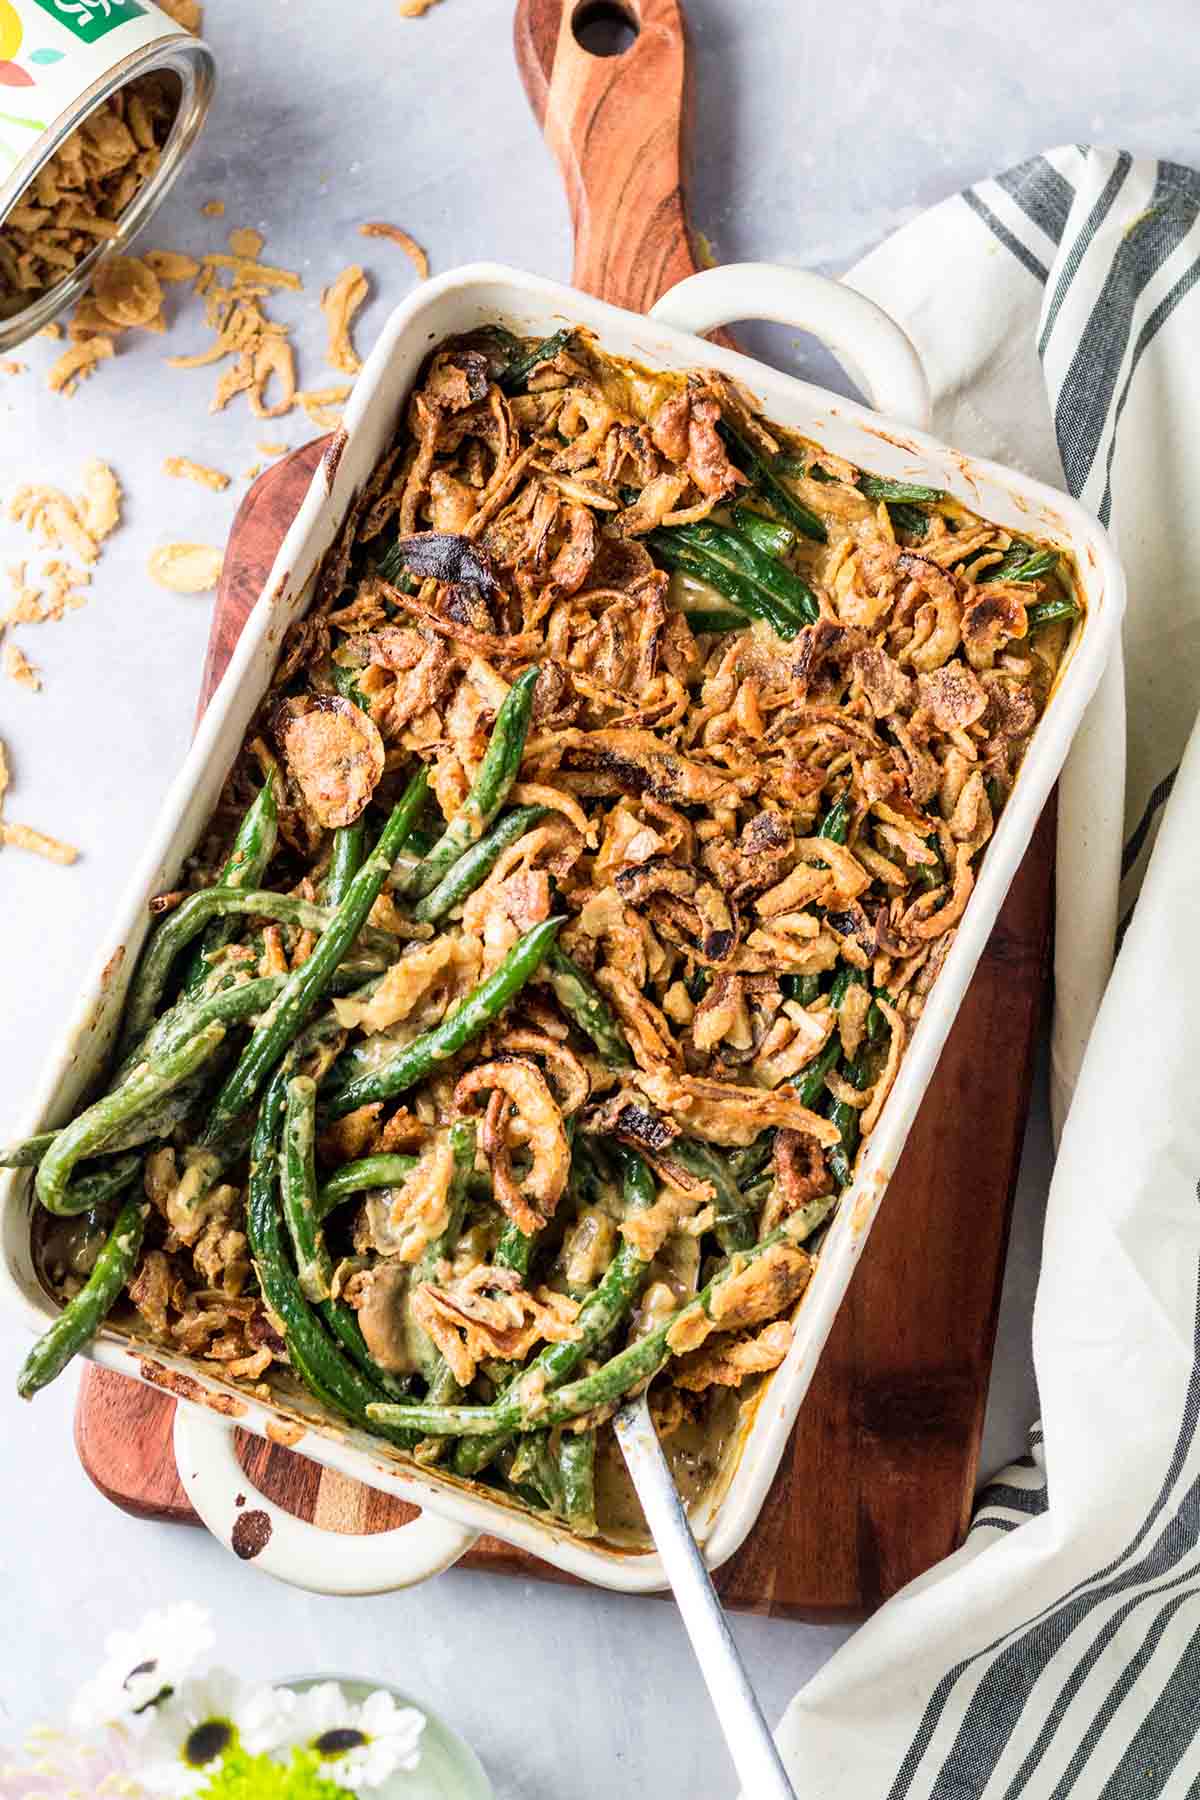
Birds eye view image of green bean casserole in a baking dish topped with crispy onions.

I have very few holiday memories that DON’T feature a green bean casserole. I would even argue that a holiday dinner spread just isn’t quite complete without one.

While I love the flavour and creaminess of a delicious green bean casserole, I always felt like it could do without the addition of canned mushroom soup. And hey – nothing against mushroom soup! Those bad boys have gotten me through sick days in my childhood more times than I can count. But with a little bit of culinary magic, I promise you won’t even notice the difference with this vegan green bean casserole.

Table of contents

  • Why This Recipe Works
  • Key Ingredients
  • How to Make This Recipe
  • Expert Tips
  • Recipe FAQs
  • More Recipes You Might Like

Why This Recipe Works

This vegan green bean casserole ditches the usual canned mushroom soup for the real deal – fresh cremini mushroom. We also make a simple and savoury cream sauce that is totally vegan and 100% drool worthy. The best part about this recipe is topping it off with crispy onions for a little extra crunch and flavour. Pass the beans please!

Key Ingredients

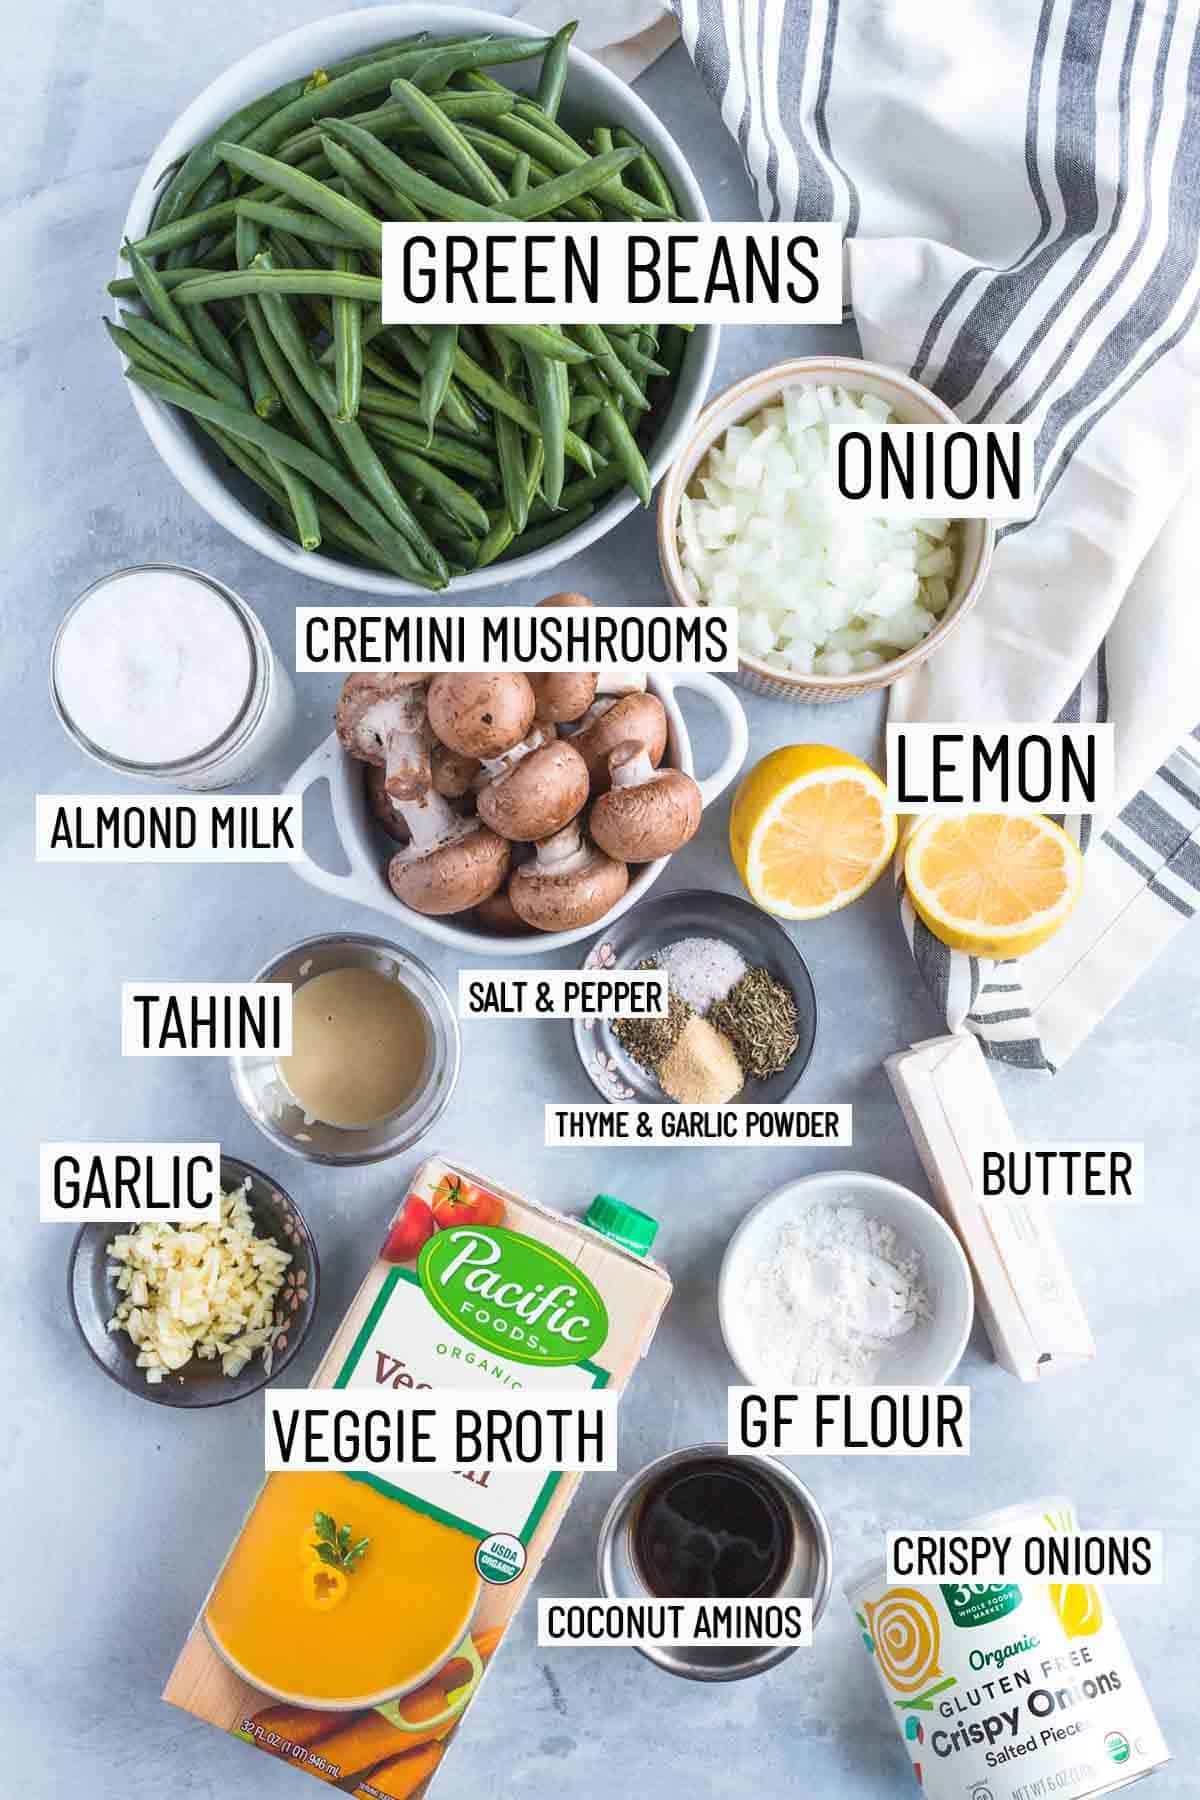
Flat lay image of portioned recipe ingredients including onion, lemon, mushroom, almond milk, green beans, tahini, spices, butter, flour, veggie broth, garlic, coconut aminos, and crispy onions.

Green Beans – I like to use fresh blanched green beans for this recipe. While you can use frozen if you prefer, the end result won’t be as crispy and the frozen variety may result in a more watery casserole.

Spices – we use a blend of salt, pepper, thyme, and garlic powder. Simple and to the point, but will bring out the savoury flavours of this dish.

Casserole Sauce – to make the sauce, we combine a mixture of vegetable broth, almond milk, lemon juice, coconut aminos and tahini. We also make a delicious slurry using vegetable broth and gluten free flour to help thicken the sauce.

Crispy Onions – to really boost the flavour and texture of the green bean casserole, we like to add a special touch by topping it off with some crispy onions. These are insanely delicious and I highly recommend you don’t skip out on this step!

How to Make This Recipe

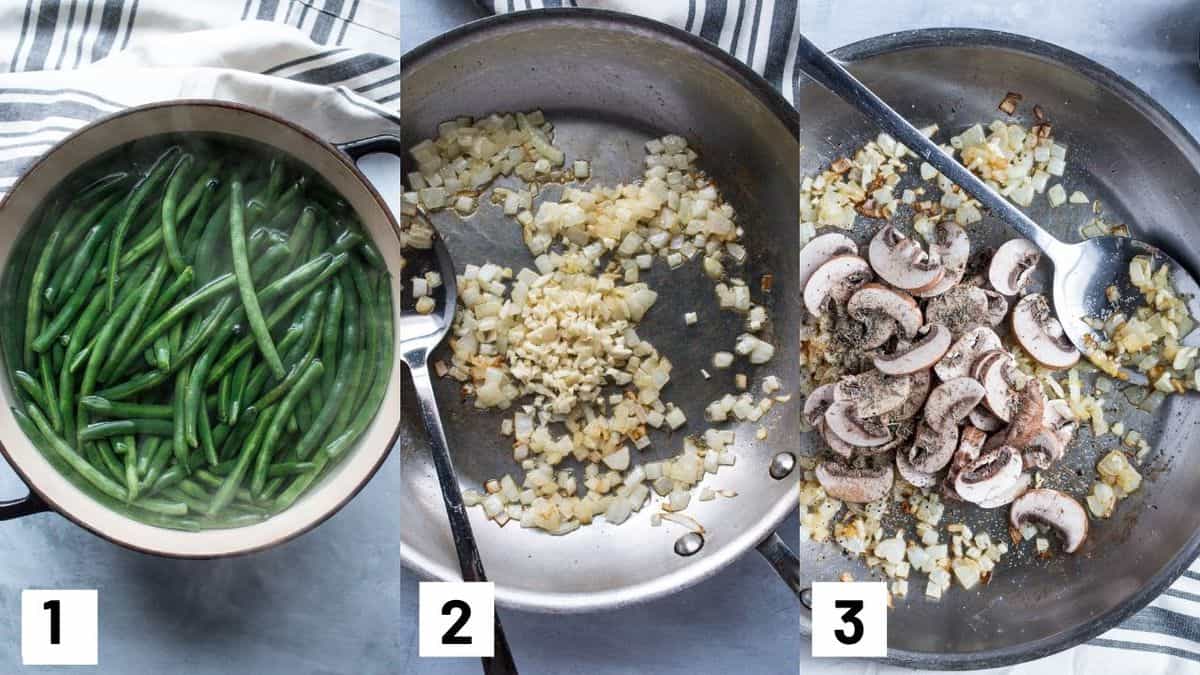
Three side by side images of the first three steps of the recipe including blanching the green onions, and sauteing onions, garlic, and mushrooms.

Step 1: Blanch green beans in a large pot of boiling water. Blanch them for a few minutes so they are tender but still crisp. Remove the green beans from the water and run them under hot water to stop them from continuing to cook.

Step 2: Heat your butter in a large skillet over medium heat. Once hot, add the onion. Saute for 5-7 minutes or until very soft. Add the garlic and stir until fragrant.

Step 3: Add the mushrooms and half of the thyme, pepper, salt and garlic powder. Stir for a few minutes until the mushrooms are tender.

Two side by side images showing how to make the slurry as well as mixing and cooking down the casserole sauce.

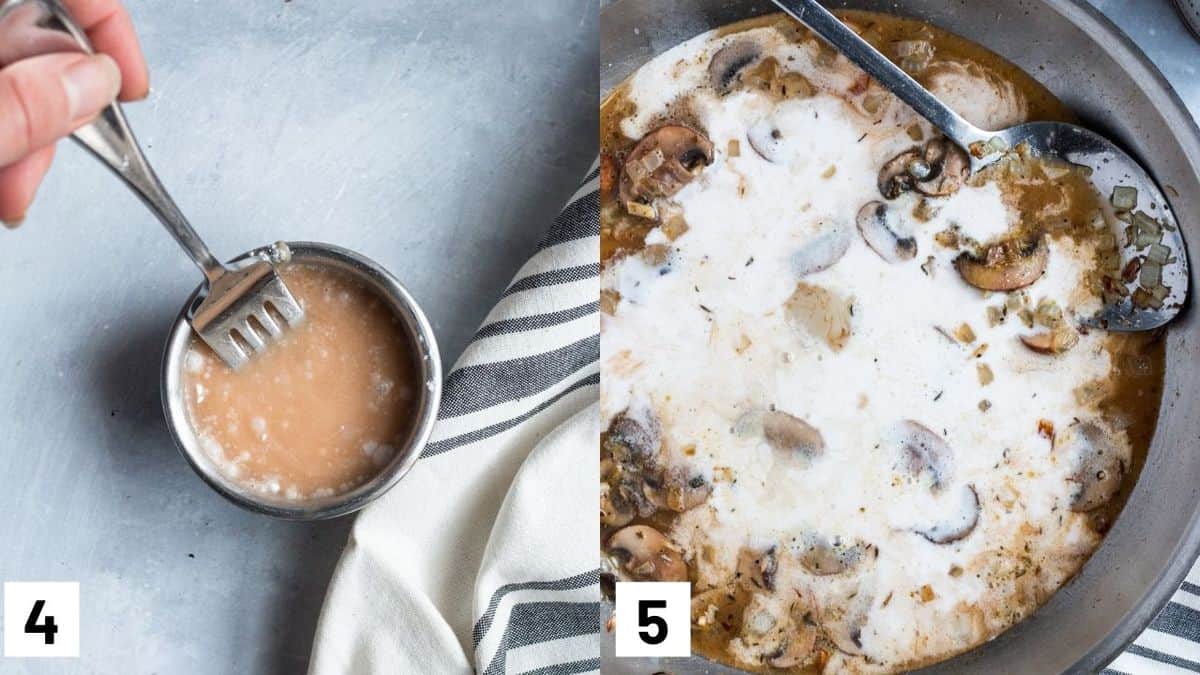
Step 4: Make a slurry with ¼ cup of the vegetable broth and the flour.

Step 5: Pour the remaining vegetable broth into the skillet along with the almond milk, lemon juice, coconut aminos and tahini and stir. Once the mixture begins to bubble, add the slurry to the pan. Stir until the sauce thickens.

Two side by side images showing the cooked green beans added to the casserole sauce and poured into a baking dish and topped with crispy onions.

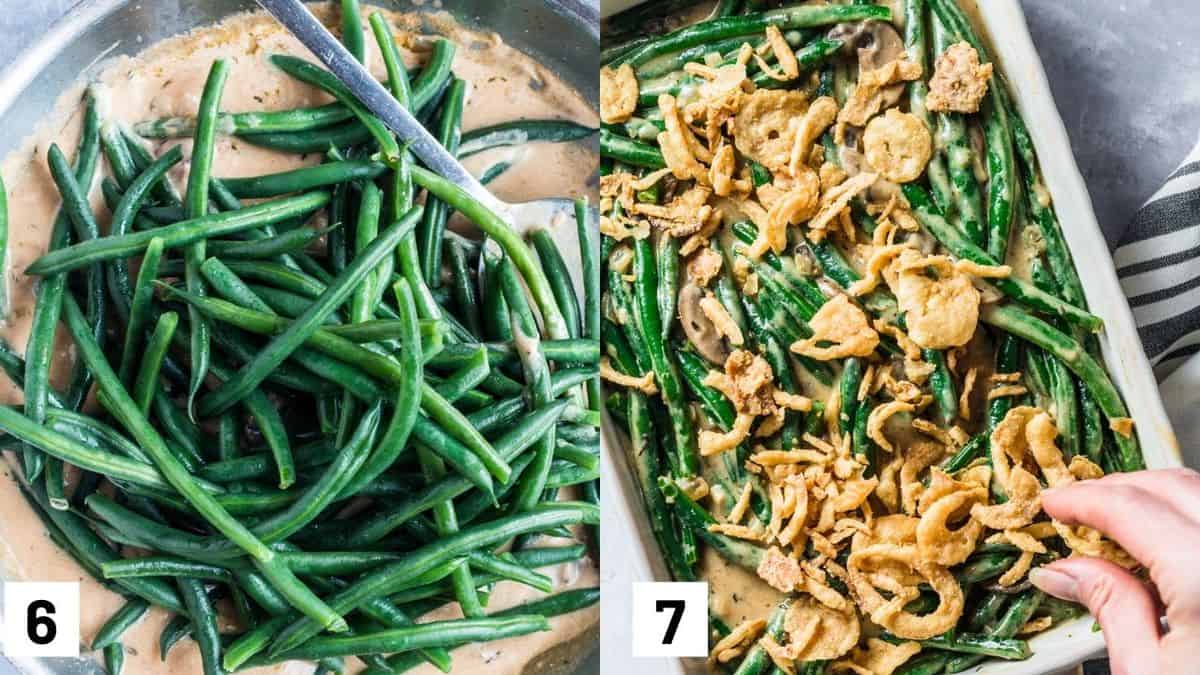
Step 6: Add the green beans to the pan and coat the green beans in the sauce. Remove the pan from the heat.

Step 7: Pour the green bean mixture into a 9”x13” baking dish. Top with crispy onions. Bake in a 375 degree oven for 25-30 minutes until the onions are browned and the sauce is bubbly. Allow the casserole to rest for 10 minutes before eating.

Expert Tips

We used gluten-free crispy onions from Whole Foods but you can also make your own by following this how-to recipe here.

Feel free to use your favorite milk of choice for this recipe. I used a full-fat dairy-free almond milk which made it super creamy. If you can’t find full fat almond milk, you can combine any store-bought unsweetened almond milk with a little coconut milk to help boost the fat content.

The thickness of coconut aminos tends to vary by brand. We used a thicker variety which only required 2 tablespoons, but if you are using a thinner brand like, you can use 3 or even more tablespoons. You can also swap out the coconut aminos for a low-sodium gluten-free tamari. If you do this, use a bit less salt than the recipe calls for and adjust salt to taste.

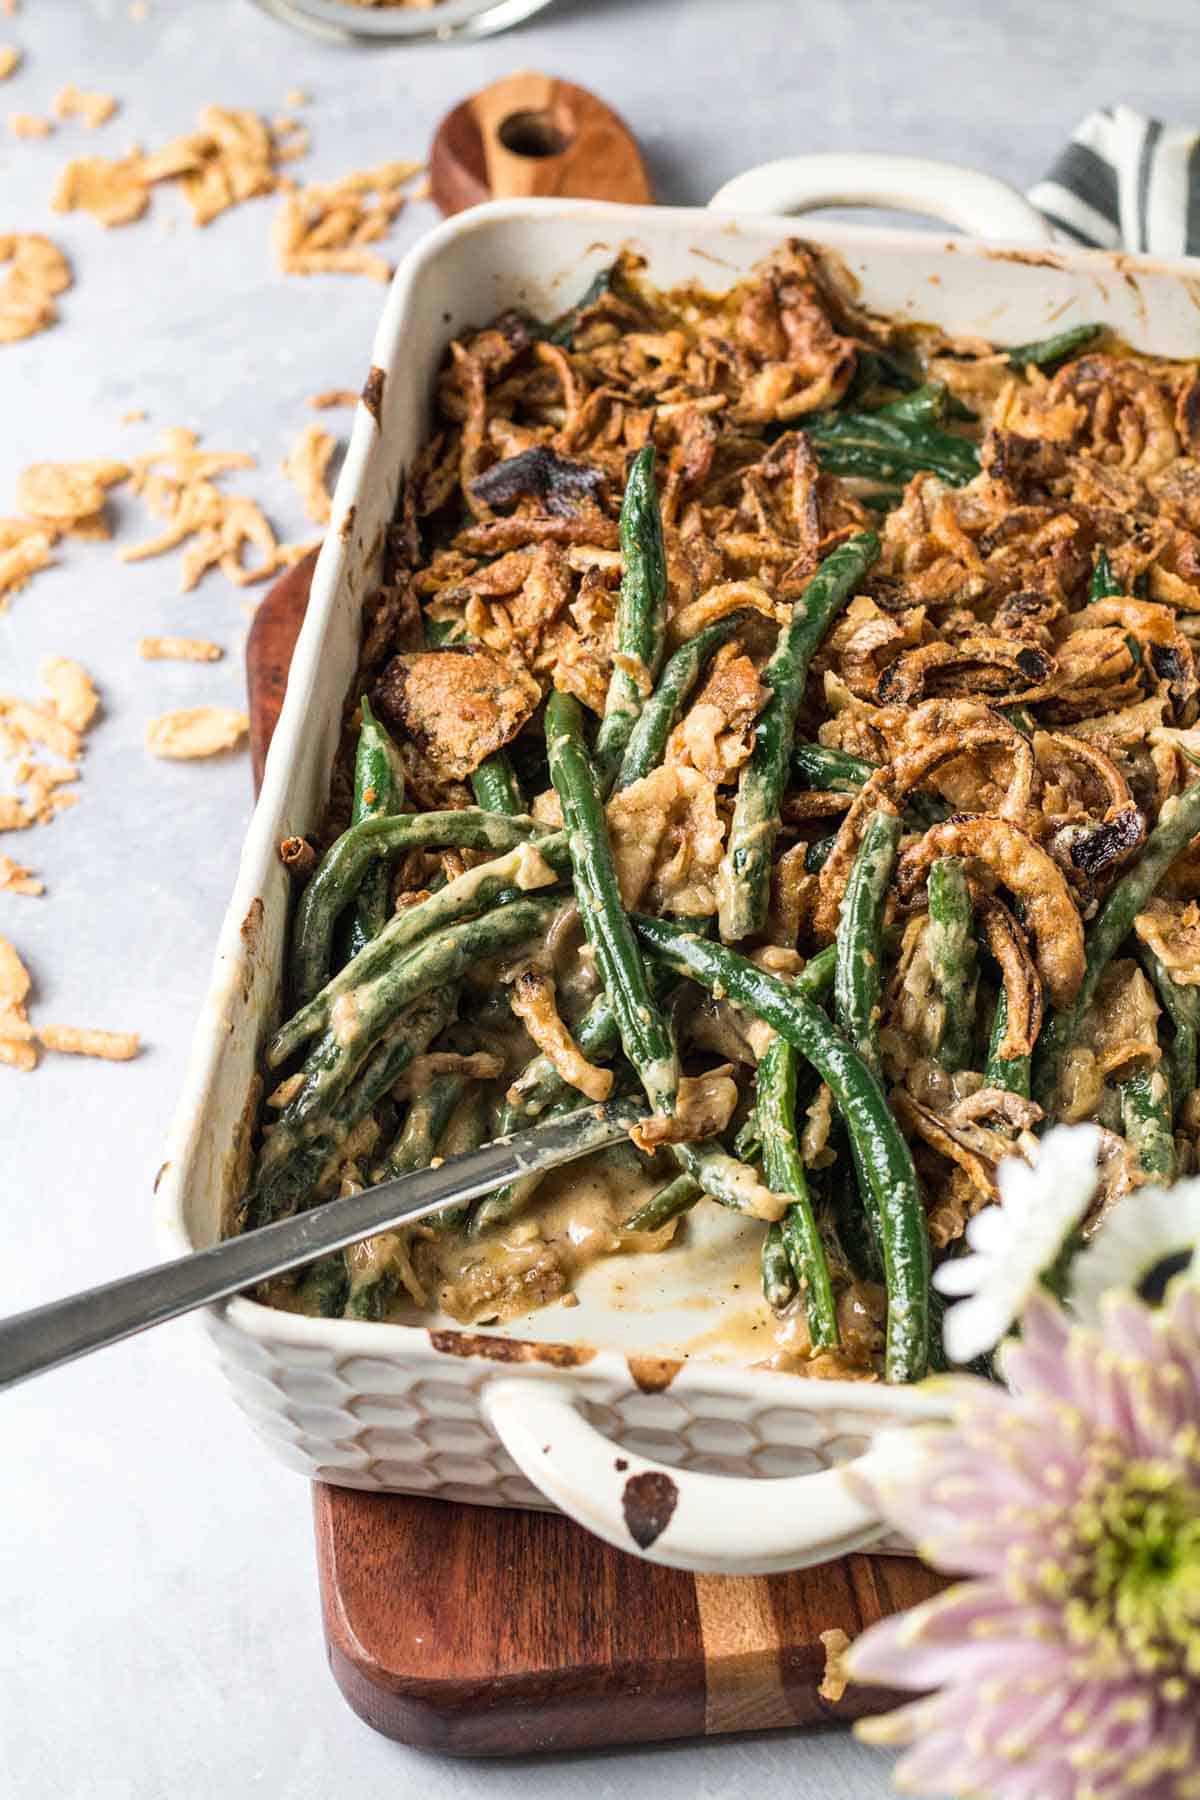
Close up of vegetable casserole in. a baking dish topped with crispy onions.

Recipe FAQs

Is this recipe gluten free?

Yes this recipe is totally gluten-free for all my gluten intolerant friends.

Can I add cheese to the recipe?

Oh you absolutely can! And it would make it totally delish. If you don’t need to make this vegan you can add a cup of gruyère, parmesan, or Monterey jack for the last 10 minutes in the oven. You can also use any shredded vegan cheese as well if you want to keep this recipe vegan friendly.

How can I make crispy onions from scratch if I can’t find them storebought?

Super simple! All you gotta do is coat sliced onion rings with flour, panko, and salt and pop them in the oven until golden brown. You can follow this recipe right here.

More Recipes You Might Like

Here are more of my favourite casserole recipes that you might also enjoy!

  • Chicken Bacon Ranch Casserole (Gluten Free)
  • Cauliflower Rice Casserole with Chicken and Broccoli
  • Mexican Pasta Casserole (Vegan)
  • Cajun Sausage and Cauliflower Rice Casserole

Do you love a good veggie casserole this time of year? Have you every made green bean casserole without canned soup before?

Print Recipe
5 from 4 votes

Vegan Green Bean Casserole (Healthy with No Canned Soup)

This healthy vegan green bean casserole recipe is creamy and flavourful, without using canned soup! It makes for the perfect gluten free vegetable side dish.
Prep Time10 minutes mins
Cook Time45 minutes mins
Total Time55 minutes mins
Course: Side Dish
Cuisine: American
Diet: Vegetarian, Gluten Free, Vegan
Servings: 6
Calories: 310kcal
Author: Abbey Sharp

Ingredients

  • 1.5 lb. green beans trimmed and blanched
  • 2 tbsp. butter or vegan butter
  • 1 cup minced onion
  • 4 cloves minced garlic
  • 8 oz. cremini mushrooms sliced or chopped
  • 2 tsp. dried thyme
  • 1 tsp. black pepper
  • 1/2 tsp salt
  • 1/2 tsp. garlic powder
  • 1 cup almond milk I used a full-fat almond milk from Elmhurst1925
  • 1 cup vegetable broth
  • 1 tbsp. Gluten-Free flour
  • 2.5 tsp. lemon juice
  • 2 tbsp. coconut aminos I used Big Tree Farms brand
  • 1 tbsp. tahini paste
  • 3 cups or more Gluten-Free Crispy Onions (I used Whole Foods brand)

Instructions

  • Preheat your oven to 375 degrees Fahrenheit. Heat a large pot of water over medium heat on your stovetop. Once boiling, add the green beans and blanch them for a few minutes so they are tender but still crisp. Remove the green beans from the water and run them under hot water to stop them from continuing to cook.
  • Heat your butter in a large skillet over medium heat. Once hot, add the onion. Saute for 5-7 minutes or until very soft. Add the garlic and stir until fragrant. Add the mushrooms and half of the thyme, pepper, salt and garlic powder. Stir for a few minutes until the mushrooms are tender.
  • Make a slurry with ¼ cup of the vegetable broth and the flour.
  • Pour the remaining vegetable broth into the skillet along with the almond milk, lemon juice, coconut aminos and tahini and stir. Once the mixture begins to bubble, add the slurry to the pan. Stir until the sauce thickens.
  • Add the blanched and drained green beans to the pan and coat the green beans in the sauce. Remove the pan from the heat. The sauce should be the consistency of a thick cream sauce. If the mixture is too thin, heat it over the stovetop for a little longer until it thickens. If it is too thick, add a little more broth.
  • Pour the green bean mixture into a 9”x13” baking dish. Top with crispy onions.
  • Bake in a 375 degree oven for 25-30 minutes until the onions are browned and the sauce is bubbly. Allow the casserole to rest for 10 minutes before eating.

Notes

  • We used gluten-free crispy onions from Whole Foods but you can also make your own!
  • Feel free to use your favorite milk for this recipe. I used a full-fat dairy-free almond milk which helped it be super creamy. If you don’t have access to a milk like this or don’t want to make your own, you can combine any store-bought unsweetened almond milk with a little coconut milk.
  • The Big Tree Farms brand coconut aminos is thick and flavorful. If you are using a thinner coconut aminos from a brand like Coconut Secret or Trader Joes, you can use 3 or even more tablespoons. You can also swap out the coconut aminos for a low-sodium gluten-free tamari. If you do this, use a bit less salt than the recipe calls for and adjust salt to taste.

Nutrition

Calories: 310kcal | Carbohydrates: 30g | Protein: 5g | Fat: 20g | Saturated Fat: 9g | Cholesterol: 11mg | Sodium: 797mg | Potassium: 491mg | Fiber: 5g | Sugar: 6g | Vitamin A: 1051IU | Vitamin C: 18mg | Calcium: 147mg | Iron: 4mg

Now tell me – Did you enjoy this vegan green bean casserole? Don’t forget to rate it and leave me a comment down below!

Abbey Sharp

Abbey Sharp is a Registered Dietitian (RD), regulated by the Ontario College of Dietitians. She is a mom, YouTuber, Blogger, award winning cookbook author, media coach specializing in food and nutrition influencers, and a frequent contributor to national publications like Healthline and on national broadcast TV shows.
www.abbeyskitchen.com/about-abbey/

Last Updated December 6, 2020. Published December 6, 2020 By Abbey Sharp 18 Comments

Mini Banana Muffins for Baby Led Weaning

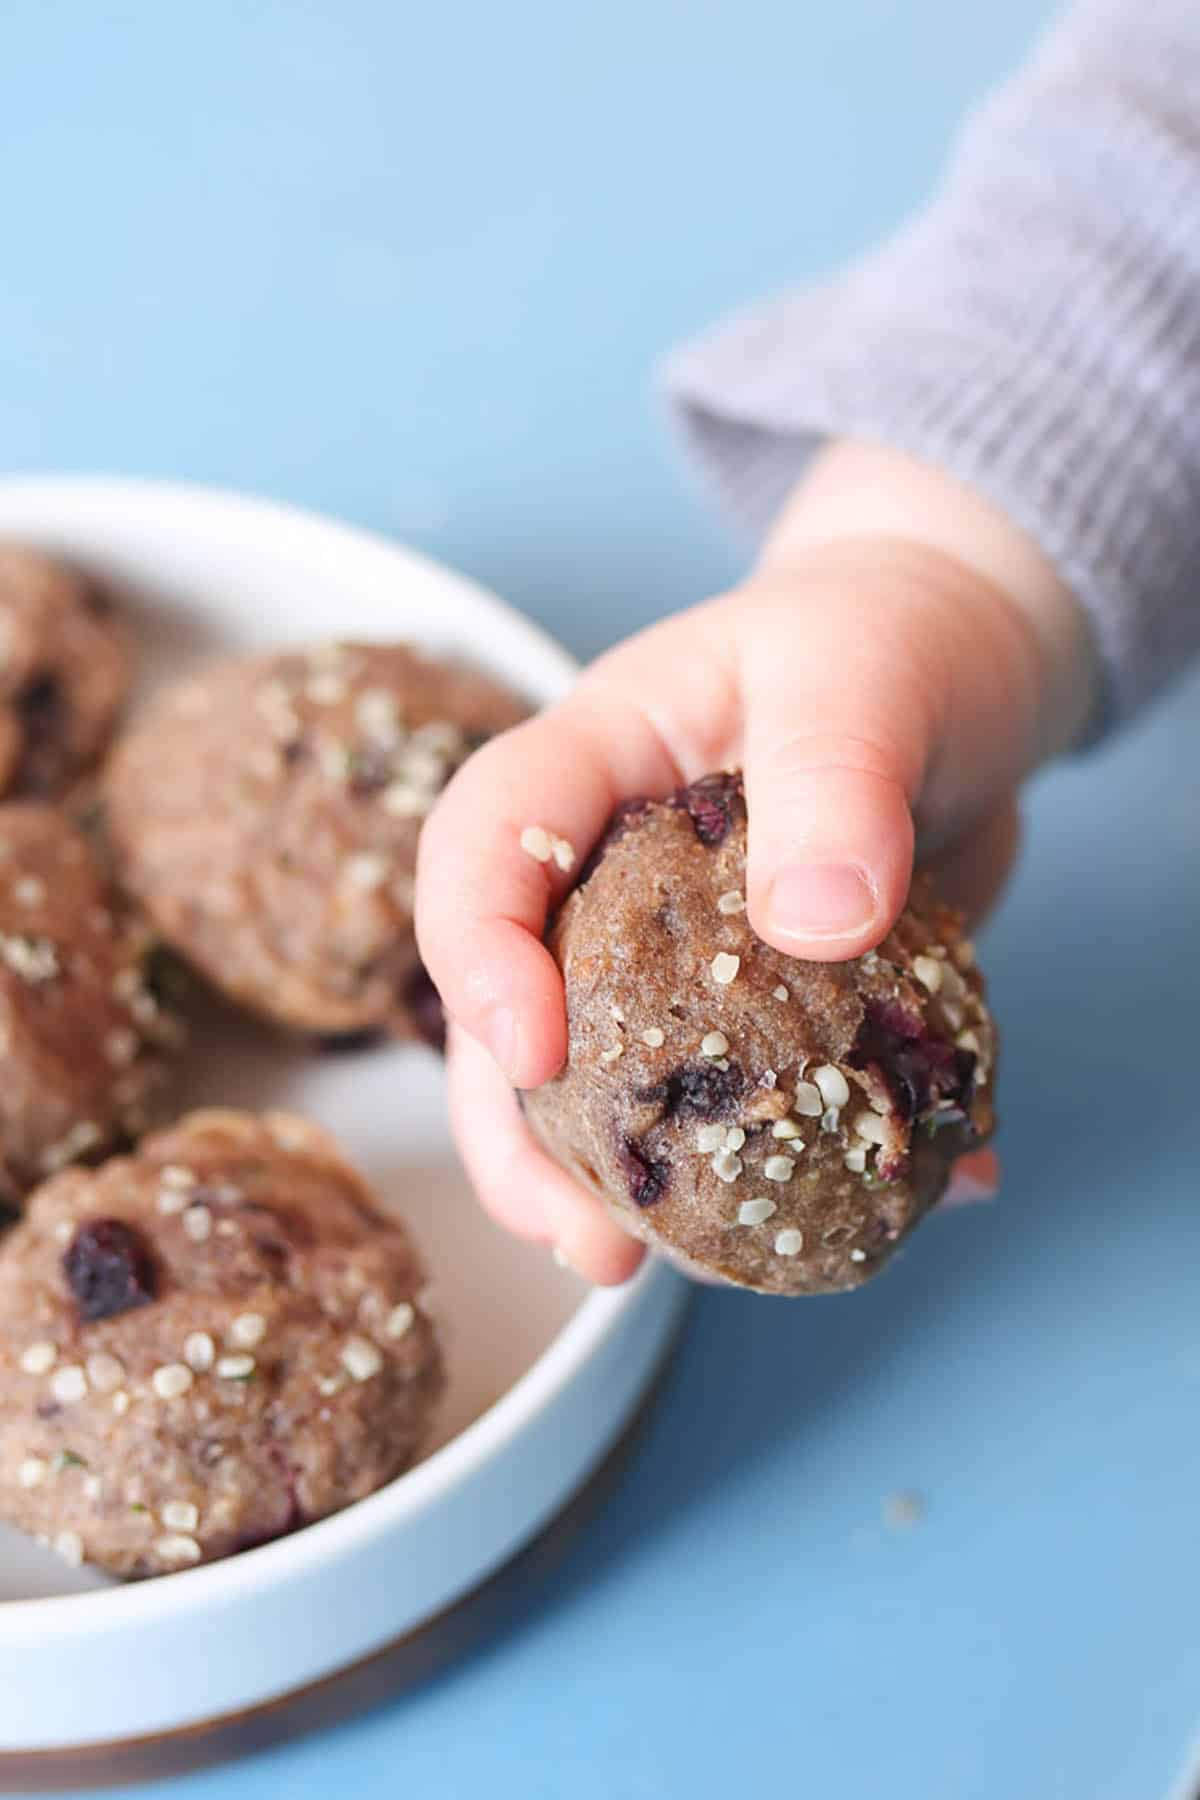
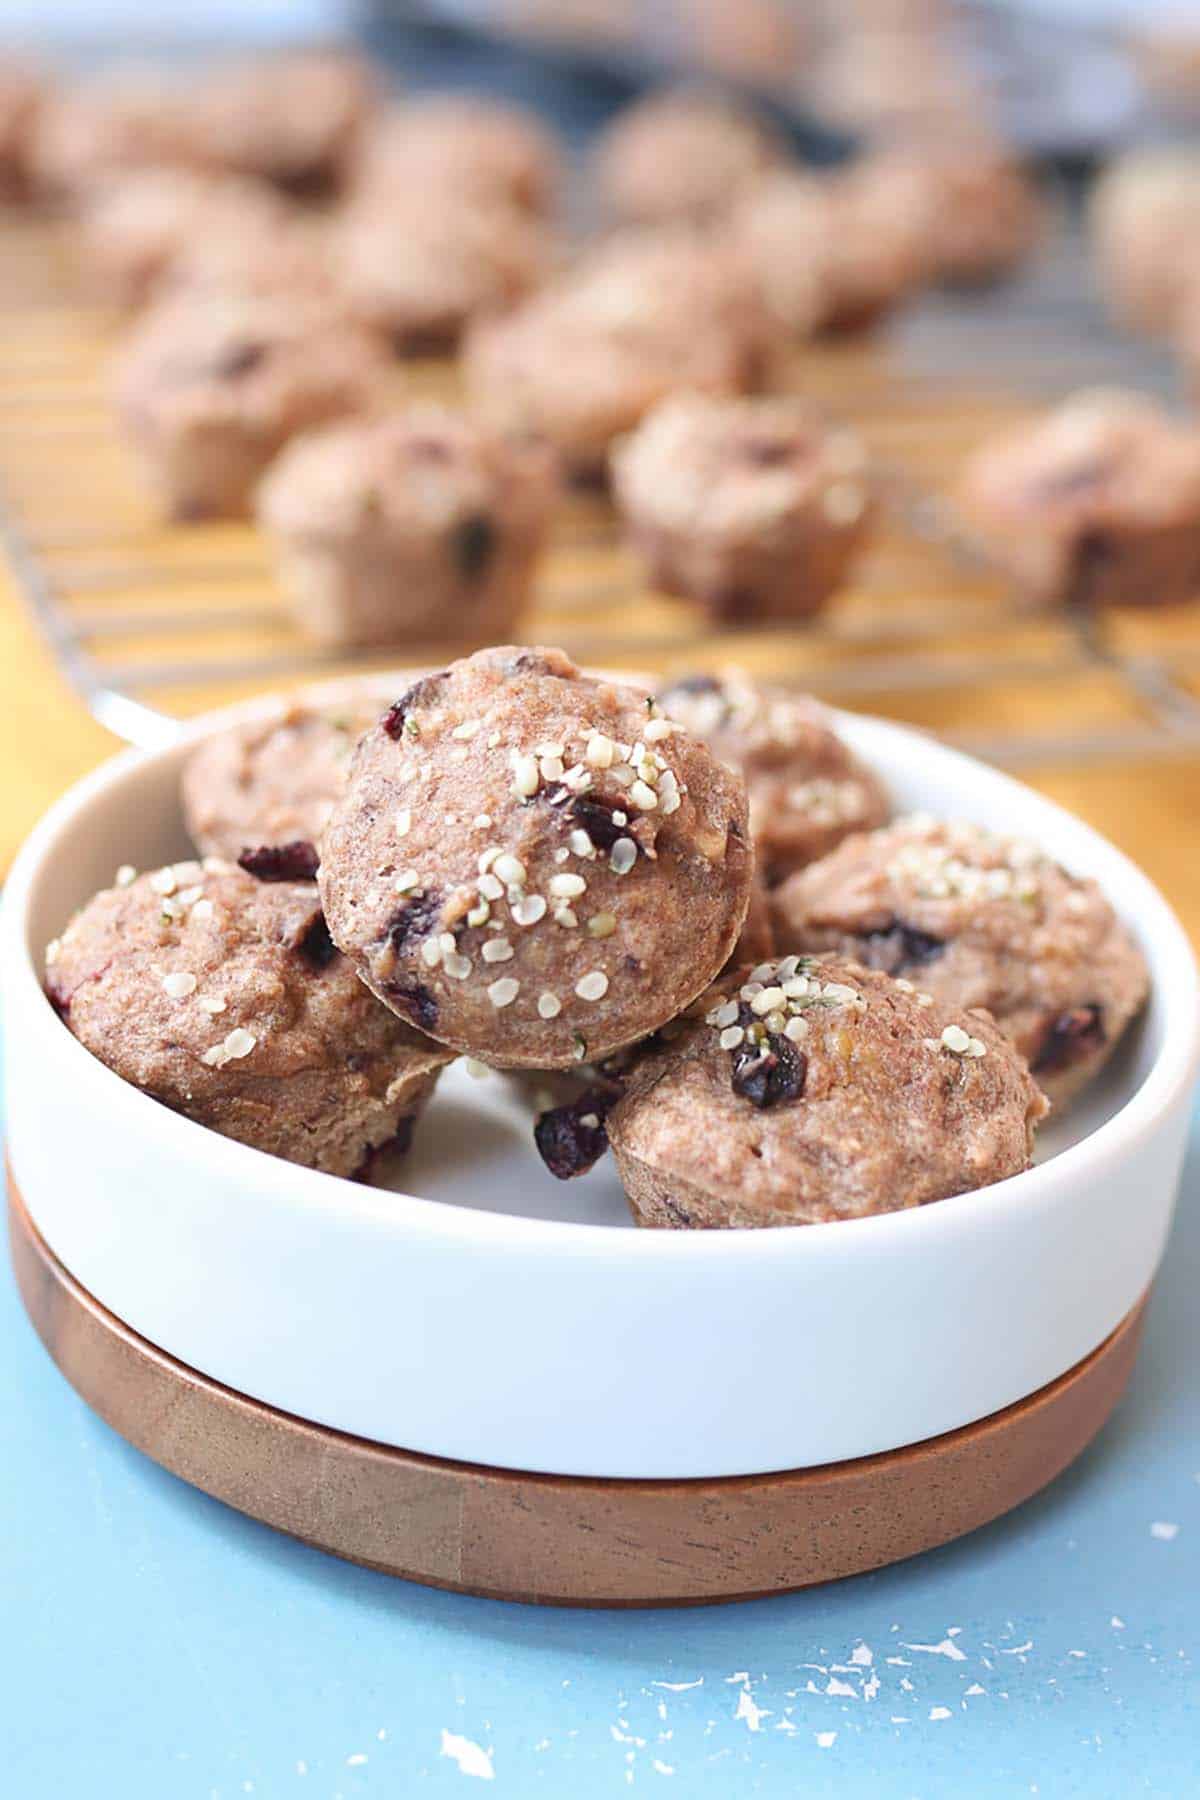
Baby hand holding mini muffin next to a white bowl filled with mini muffins.

These mini banana muffins are great healthy snacks for kids or babies who are fed using baby led weaning techniques.

A baby hand reaching for banana mini muffins on a plate.

If you’ve been following me on instagram for a while, you probably know that I like to share a lot of the baby led weaning recipes that I have made for my son.

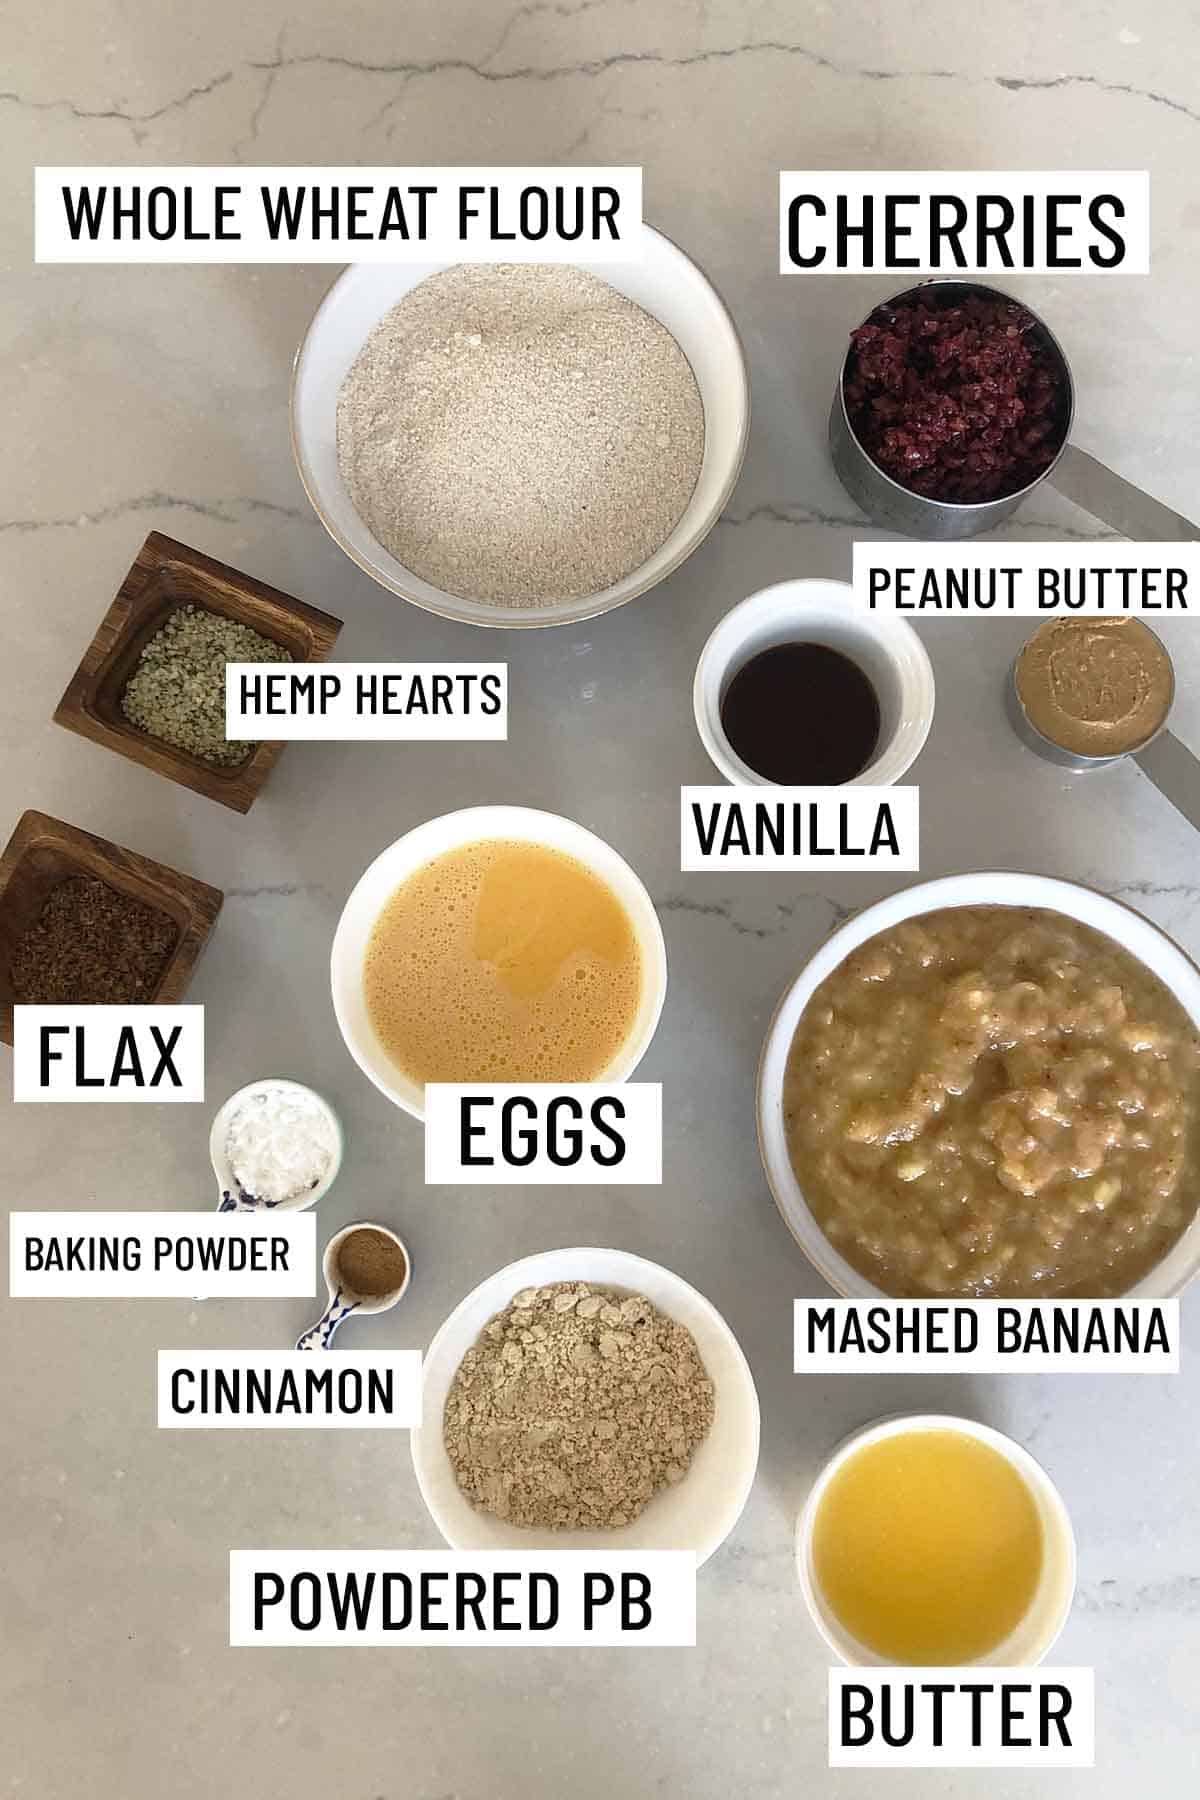
When we first started solids, one thing that I was always feeding my little guy is one of my personal favourites – PEANUT BUTTER. Not only is peanut butter great for allergen introduction, but the stuff is just hella good, hella nutritious, and easy to throw into basically anything. Including these mini banana muffins for baby led weaning.

I promise you, these mini banana muffins will satisfy not only your little one – but the whole family! If you are not sure how to offer allergens (like peanut butter) when starting solids, we have a whole blog post on allergen introduction which you can read about right here.

Table of contents

  • Key Ingredients
  • How to Make This Recipe
  • Expert Tips
  • Recipe FAQs
  • More BLW Recipes You Might Like

Key Ingredients

Birds eye view of portioned ingredients for recipes including butter, peanut butter, banana, cinnamon, baking powder, eggs, flax, hemp hearts, vanilla, cherries, and whole wheat flour.

Peanut Butter – I use a combination of peanut butter for body, and powdered peanut butter for extra peanut flavour and protein as it basically stands in for some of the flour.

Bananas – The key to making mini muffins delicious without any added sugar for your baby is to use really ripe bananas.

Flax Seed & Hemp Hearts – I like to sneak flax into any of my healthy snacks for kids to add omega 3s, plus I top mine off with hemp hearts for an even bigger and better dose.

Cherries – I used minced frozen cherries for these mini muffins because they add extra sweetness, but you can totally use whatever fruit you have on hand or leave them out. The last time I made these I used blueberries and he loved them just as much.

How to Make This Recipe

Images of the first three steps to make baby led weaning recipe including how to make the wet and dry batter.

Step 1: To a bowl, mix together the banana, peanut butter, eggs, vanilla, butter and cherries.

Step 2: To another large bowl, mix the flour, powdered peanut butter, baking powder, cinnamon and flax.

Step 3: Add the wet ingredients to the dry and mix until combined.

Two images showing the last two steps to make recipe including how to scoop batter into pan and sprinkling with hemp hearts.

Step 4: Add the batter to the muffin tins (pretty much up to the top)

Step 5: Sprinkle with hemp hearts. Bake for 10-12 minutes until a toothpick inserted into the middle comes out clean and the muffins feel springy.

Expert Tips

These mini banana muffins are honestly so delicious, you will be so surprised that they have no added sugar or salt and are loaded with fibre and good fats. They’re also a fantastic way to keep your baby’s allergen tolerance up.

Make a big batch and keep some in the freezer to bust out for emergency snacks but don’t be surprised if you go through them quickly. My son ate three for one snack alone, which is a pretty impressive portion for the little guy!

Several mini banana muffins on a white plate with ore muffins on a muffin tray in the background.

Recipe FAQs

Can I freeze these mini muffins?

Yes definitely. They can be stored for up to 3 months in the freezer.

What can I use instead of the powdered peanut butter?

The powdered peanut butter functions as flavour and a binder so you would probably need to substitute with more flour. If you want more of a peanut butter flavour, I would also suggest adding a bit more natural peanut butter to the recipe.

Can I make these vegan?

For sure! You can use a flax egg and vegan butter instead.

Can I make these gluten free?

You can make these mini banana muffins gluten free by using a gluten free flour like oat flour or almond flour.

More BLW Recipes You Might Like

Hummus Baby Meatballs

Banana Baked Oatmeal Fingers with Cherries

Baby Cereal Protein Pancakes

Chickpea Peanut Butter Biscuits

I would love to hear what you and your babies, toddlers and partners think of these mini banana muffins?

What are some of your favourite healthy snacks for kids?

These BLW Banana Peanut Butter Cherry Mini Muffins are the perfect kid snack for your toddler or baby who is fedd using baby led weaning techniques.
Print Recipe
4.91 from 10 votes

Mini Banana Muffins for Baby Led Weaning

These mini banana muffins for baby led weaning are one of my favourite healthy snacks for kids for your toddler or baby who is fedd using baby led weaning techniques.
Prep Time10 minutes mins
Cook Time12 minutes mins
Total Time22 minutes mins
Course: Snack
Cuisine: American
Servings: 36 mini muffins
Calories: 70kcal
Author: Abbey Sharp

Ingredients

  • 2 1/4 cup mashed very ripe banana about 2 large
  • 1/4 cup natural peanut butter
  • 3 eggs beaten
  • 1 tbsp vanilla
  • 1/2 cup melted butter
  • 1 cup frozen cherries minced
  • 1 1/2 cups whole wheat flour
  • 1/4 cup powdered peanut butter
  • 1 1/2 tsp baking powder
  • 1/2 tsp cinnamon
  • 2 tbsp ground flax
  • 2 tbsp hemp hearts

Instructions

  • Preheat oven to 350 F and grease 36 mini muffin tins.
  • To a bowl, mix together the banana, peanut butter, eggs, vanilla, butter and cherries. To another large bowl, mix the flour, powdered peanut butter, baking powder, cinnamon and flax. Add the wet ingredients to the dry and mix until combined.
  • Add the batter to the muffin tins (pretty much up to the top) and sprinkle with hemp hearts. Bake for 10-12 minutes until a toothpick inserted into the middle comes out clean and the muffins feel springy.
  • Allow to cool and enjoy.

Video

Nutrition

Calories: 70kcal | Carbohydrates: 7g | Protein: 2g | Fat: 4g | Saturated Fat: 2g | Cholesterol: 20mg | Sodium: 39mg | Potassium: 91mg | Fiber: 1g | Sugar: 2g | Vitamin A: 115IU | Vitamin C: 1.1mg | Calcium: 19mg | Iron: 0.5mg

If you’re not already following my instagram stories, be sure you follow me to get a daily dose of BLW inspiration! 

Abbey Sharp

Abbey Sharp is a Registered Dietitian (RD), regulated by the Ontario College of Dietitians. She is a mom, YouTuber, Blogger, award winning cookbook author, media coach specializing in food and nutrition influencers, and a frequent contributor to national publications like Healthline and on national broadcast TV shows.
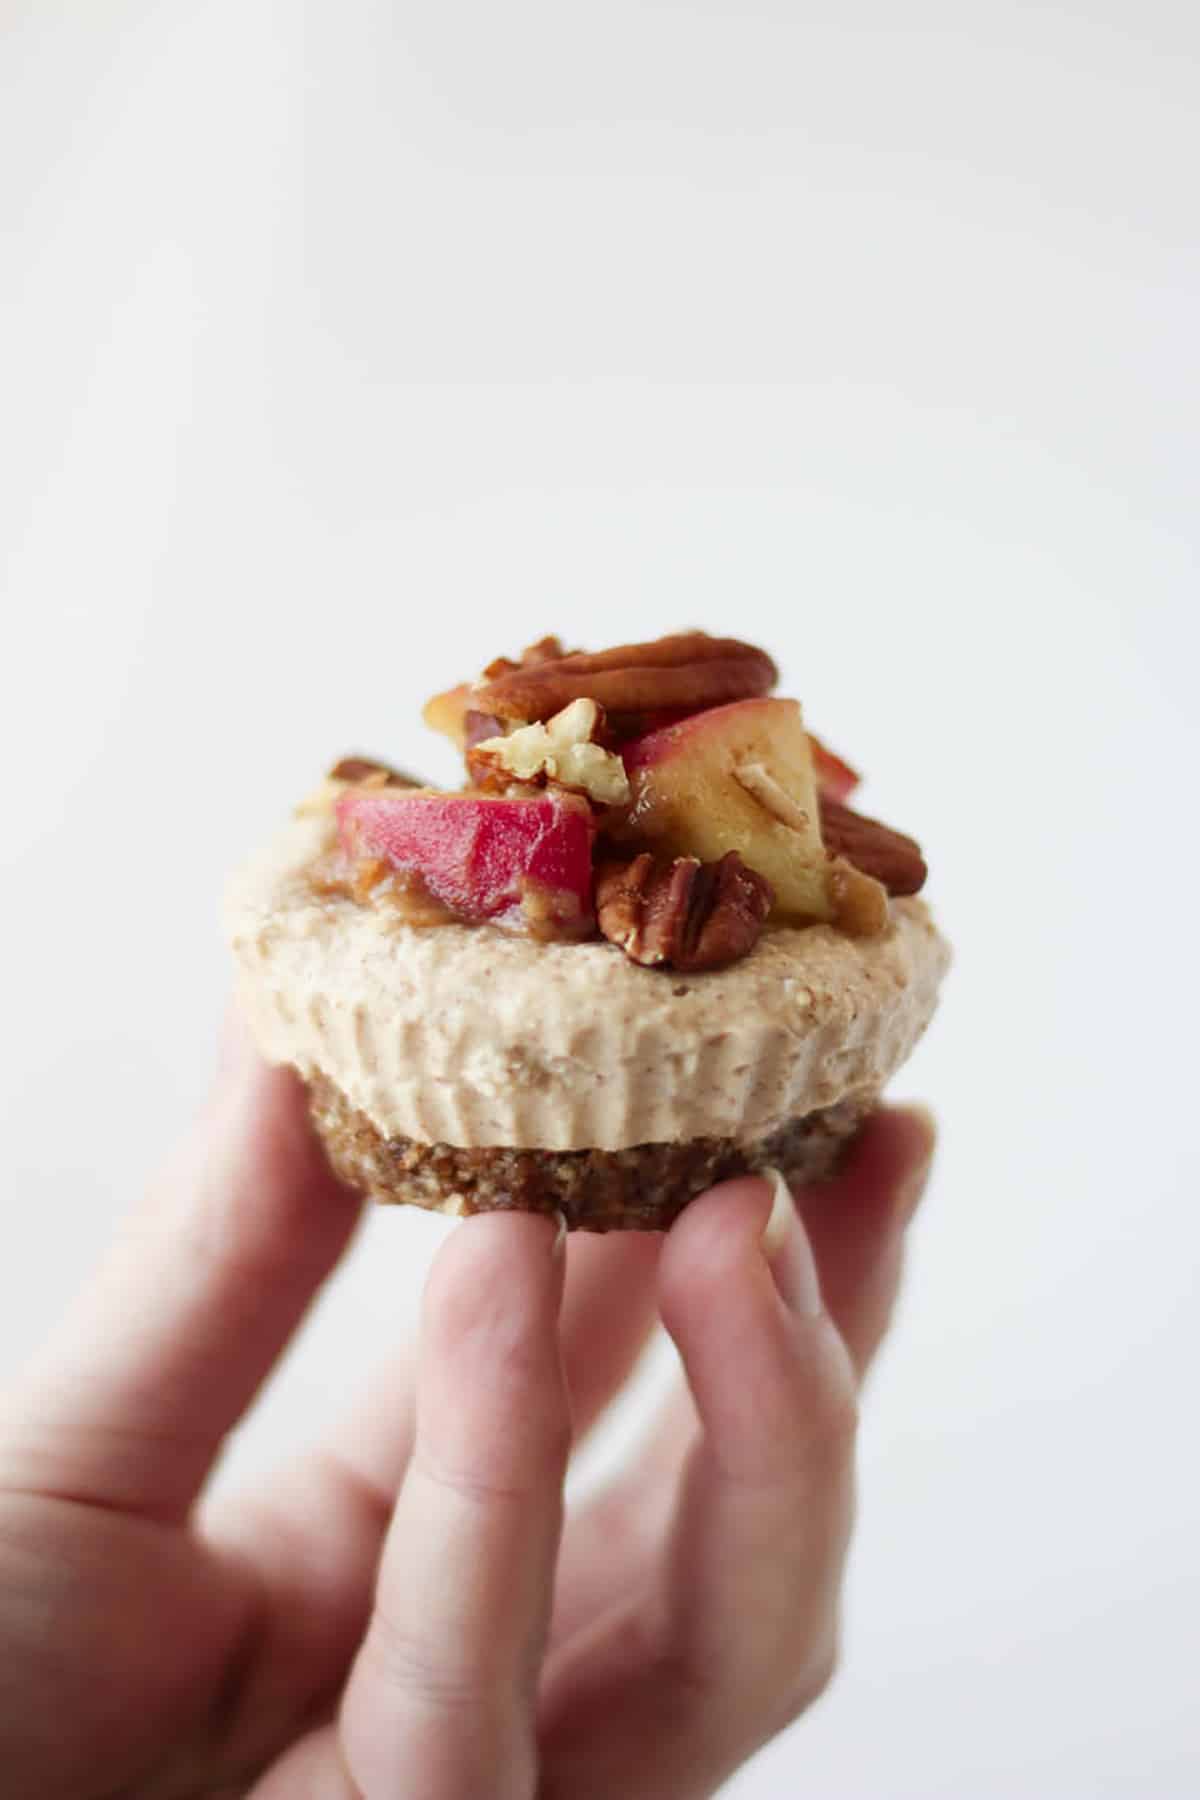
www.abbeyskitchen.com/about-abbey/

Last Updated December 25, 2021. Published December 4, 2020 By Abbey Sharp 2 Comments

Gluten Free Quiche with Kale and Butternut Squash

This gluten free quiche with kale and butternut squash with homemade crust is the perfect vegetarian recipe that can be enjoyed for breakfast, lunch, or dinner!

Birds eye view of five slices of gluten free quiche on a clear plate.

Something I always absolutely LOVE for brunch is a good quiche recipe. It basically combines all of my favourite foods and textures:

  • Eggs? CHECK
  • Cheese? CHECK
  • Veggies? CHECK
  • A delicious flaky crust? DOUBLE CHECK

We have been cooking up a ton of seasonal recipes here at Abbey’s Kitchen, and I had a ton of butternut squash and kale left over. So whats a gal to do? Throw it into a gluten free quiche. I myself am not gluten free, but I decided to share a homemade gluten free crust so that all of my gluten free friends reading this can enjoy this brunch staple.

Table of contents

  • Why This Recipe Works
  • Key Ingredients
  • How to Make This Recipe
  • Expert Tips
  • Recipe FAQs
  • More Recipes You Might Like

Why This Recipe Works

Quiche is a classic brunch and breakfast staple because it is so easy to throw together but it presents so nicely. When I was developing this recipe, I knew I wanted to make it gluten free friendly so that all folks at the table would be able to enjoy it. To make this recipe gluten free, we’re using a combination of gluten free flour (pretty much any 1:1 gluten free flour will do) and almond flour. The gluten free flour makes the crust taste as close to it’s gluten-filled counterpart as possible, and the almond flour adds a delicious flavour and a nice dose of healthy fats. Win-win!

The eggs and cheese also come together in this recipe to make for the perfect savoury dish, plus they provide protein and healthy fats. Add in some veggies for a little bit of fibre and extra nutrition (I’m using kale and butternut squash here, but throw in whatever you enjoy!), and you’ve got yourself a complete vegetarian meal all in one dish! What’s not to love?

Key Ingredients

Birds eye view of portioned ingredients to make gluten free quiche including butternut squash, kale, almond flour, salted butter, onions, gruyere, gluten free flour, and eggs.

Butternut Squash – Whether you use frozen or fresh butternut squash to make this gluten free quiche, it doesn’t really make much a difference in flavour but it makes a HUGE difference when it comes to the amount of time spent prepping. So if you have a little more time on your hands, you can definitely opt for fresh butternut squash. But if not, frozen butternut squash is the way to go.

Kale – I love throwing a nutrient-packed green anywhere I can in my cooking, and kale is without question a nutrition power house! It’s loaded with antioxidants and micronutrients. But, this recipe super flexible with any green so if you have arugula, swiss chard, or spinach on hand instead of kale you can totally throw that in instead.

Cheese – While I prefer to use gruyere cheese for this gluten free quiche recipe, it technically wouldn’t make this quiche vegetarian because gruyere contains rennet. So if you need to make this recipe vegetarian, opt for a mild cheddar instead.

Onions – Who doesn’t like a good caramelized onion to spruce up a recipe? We use sweet onion for this recipe as it gives off more sweetness when caramelized.

Gluten Free Flour – To make this gluten free quiche, we use gluten free flour. If you don’t need to make this gluten free then you can use regular all purpose flour OR (to make your life easier) you can purchase a store bought crust instead.

How to Make This Recipe

Step by step images for how to make the gluten free crust including mixing ingredients together, adding an egg, and working the dough into a ball.

Step 1: Pour the flour, almond flour, and baking soda into a large bowl. Cut the butter into small pieces and use a pastry cutter or the back of a fork to break up the butter into tiny pieces and distribute it throughout the flour. Add in 1 tablespoon of water at a time and continue working the dough until a crumbly mixture forms.

Step 2: Mix the egg into the dough.

Step 3: Work the dough until it forms a ball.

Raw gluten free crust pressed into a crust shape prior to baking.

Step 4: Roll the dough out between two pieces of parchment paper and gently transfer the flattened dough to a greased glass pie dish. Press the dough into the pie dish and shape the edges of the crust however you like. Use the fork to prick a few sets of holes into the bottom of the crust. Place the pie crust in the fridge for an hour to chill.

Step 5: Take the pie crust out of the fridge and place a large piece of aluminum foil on top. Press the foil so it sits on top of the crust and covers the edges of the crust. I used sugar to help weigh the crust down, but you can also use pie weights. Place the crust in the oven for about 30 minutes to bake, then remove it and allow it to sit for 5 minutes or so before carefully removing the foil from it.

Three images showing how to cook quiche fillings including roasting the butternut squash, caramelizing the onions, and sauteeing the kale.

Step 6: While the crust is baking, toss the diced butternut squash with a little oil and place on a baking sheet. Roast for 30 minutes or so, or until the squash is soft.

Step 7: Heat the butter in a skillet over medium heat. Once the butter is melted and bubbly, add the sliced onion. Caramelize the onion by letting it brown and occasionally giving it a stir with a spoon or spatula. Add a small pinch of salt while they’re cooking. Allow it to cook for about 10 minutes or until they are browned to your liking, soft and sweet.

Step 8: Add the kale and a pinch of salt, pepper and thyme. Saute until the kale is wilted, then add in the butternut squash. Remove the veggies from the heat and allow them to cool slightly.

Two side by side images showing how to make egg filling including mixing egg mixture with kale and butternut squash.

Step 9: In a large bowl, combine the eggs, milk, and remaining spices and whisk together.

Step 10: Once the vegetables have cooled for a while, slowly mix them into the eggs. Grate your cheese on a box grater and mix half of the cheese into the eggs. 

Two side by side images showing egg mixture being added to the gluten free crust and topped with cheese, as well as the final finished dish.

Step 11: When the crust has cooled slightly, pour the egg mixture into the crust. Sprinkle the remaining cheese on top of the quiche.

Step 12: Place the quiche into the oven and bake for 45-50 minutes, or until the egg has set and is firm. Remove the quiche from the oven and allow it to cool for 10 minutes before slicing.

Expert Tips

Work with cold butter and ice cold water when making the crust. If you don’t have a pastry cutter, you can use your hands to work the butter into the dough. Don’t overwork the dough or you’ll end up with a tough crust. If your dough is too dry, you can add more water 1 teaspoon at a time until you can form the dough into a ball.

I recommend a glass pie dish for this recipe. You refrigerate the dough After rolling it and shaping it in your pie dish. The foil and weights are essential for the blind bake as it keeps the crust from shrinking while baking. This method is adapted from Serious Eats and in my opinion is the foolproof way to bake pie crusts → see here for reference.

If you’re not a fan of kale, you can use spinach or another hearty green, If you don’t like gruyere, try jarlsberg, a mild cheddar or similar.

A slice of gluten free quiche on a plate.

Recipe FAQs

How long does this recipe stay fresh?

This quiche lasts about 3-4 days in the fridge.

What else can I add into this recipe?

You can honestly toss in any veggie into this gluten free quiche and it will likely taste amazeballs. But some of my personal favourite veggie combinations include leek & mushroom, asparagus and bacon, and caramelized onion with bell peppers.

Can I buy store-bought crust?

Absolutely you can! If you don’t need to make this recipe gluten free then you can go for any pre-made crust you can find (ideally one that is lower in sodium). If you can’t find any gluten free crust at the store you can totally make this crustless or make a quinoa crust like this one here.

Can I make this recipe dairy free?

For sure! If you can’t tolerate dairy, feel free to throw in any shredded dairy free cheese that you enjoy. I would try to use one that you know melts well.

More Recipes You Might Like

Here are some more egg-based brunch recipes that you might like!

  • Cheesy Spinach Egg Waffles
  • Pizza Egg Muffins
  • Spring Vegetable Breakfast Pizza
  • Easy Curry Shakshuka
  • Avocado Devilled Eggs with Everything Bagel Spice
  • Egg Strata with Apples and Caramelized Onions

Have you made gluten-free crust from scratch before?
What other add-ins would you add to this gluten free quiche recipe?

Print Recipe
5 from 2 votes

Gluten Free Quiche with Kale and Butternut Squash

This gluten free quiche with kale and butternut squash with homemade crust is the perfect vegetarian recipe that can be enjoyed for breakfast, lunch, or dinner!
Prep Time1 hour hr
Cook Time1 hour hr
Total Time2 hours hrs
Course: brunch, Breakfast, Lunch
Cuisine: American
Diet: Gluten Free, Vegetarian
Servings: 8
Calories: 400kcal
Author: Abbey Sharp

Ingredients

Crust:

  • 1.5 cups GF flour I used a Vitacost flour blend
  • ½ cup fine almond flour
  • Scant ½ tsp. Baking soda
  • 6 tbsp. cold salted butter
  • 6 tbsp. Ice water
  • 1 large egg

Filling:

  • 3 cups diced butternut squash
  • Oil spray or a small amount of avocado oil
  • 2 tbsp. Butter
  • 1 sweet onion thinly sliced
  • 1 head lacinato kale thinly sliced
  • 1 tsp. Dried thyme
  • ½ tsp black pepper
  • ¼-½ tsp salt
  • 1 dozen eggs
  • 2 tbsp. almond milk or milk of choice
  • ½ cup or more gruyere cheese

Instructions

  • Pour the flour, almond flour, and baking soda into a large bowl. Cut the butter into small pieces and use a pastry cutter or the back of a fork to break up the butter into tiny pieces and distribute it throughout the flour. Add the ice water 1 tablespoon at a time and continue working the dough with the cutter, a fork or your hands so a crumbly mixture forms. You want the water and butter to be evenly distributed throughout the dough. Mix the egg into the dough and work it just until a ball of dough forms.
  • Roll the dough out between two pieces of parchment paper and gently transfer the flattened dough to a greased glass pie dish. Press the dough into the pie dish and shape the edges of the crust however you like. Use the fork to prick a few sets of holes into the bottom of the crust. Place the pie crust in the fridge for an hour to chill.
  • Preheat your oven to 350 degrees Fahrenheit. Take the pie crust out of the fridge and place a large piece of aluminum foil on top. Press the foil so it sits on top of the crust and covers the edges of the crust. I used sugar to help weigh the crust down, but you can also use pie weights. Fill the aluminum lined pie crust with about an inch of sugar, making sure that it weighs down every portion of the bottom of the crust.
  • Place the crust in the oven for about 30 minutes to bake, then remove it and allow it to sit for 5 minutes or so before carefully removing the foil from it.
  • While the crust is baking, toss the diced butternut squash with a little oil and place on a baking sheet. Roast for 30 minutes or so, or until the squash is soft.
  • Heat the butter in a skillet over medium heat. Once the butter is melted and bubbly, add the sliced onion. Caramelize the onion by letting it brown and occasionally giving it a stir with a spoon or spatula. Add a small pinch of salt while they’re cooking. Allow it to cook for about 10 minutes or until they are browned to your liking, soft and sweet. Add the kale and a pinch of salt, pepper and thyme. Saute until the kale is wilted, then add in the butternut squash. Remove the veggies from the heat and allow them to cool slightly.
  • In a large bowl, combine the eggs, milk, and remaining spices and whisk together. Once the vegetables have cooled for a while, slowly mix them into the eggs. Grate your cheese on a box grater and mix half of the cheese into the eggs.
  • When the crust has cooled slightly, pour the egg mixture into the crust. If you’ve shaped the pie crust in peaks like we did, you should have no problem fitting all of the egg mixture into the crust. If you shaped the crust in a very shallow manner, you may have a little filling left over. Sprinkle the remaining cheese on top of the quiche.
  • Place the quiche into the oven and bake for 45-50 minutes, or until the egg has set and is firm. If you’d like, you can use a pie crust shield or pieces of foil to prevent the crust from burning. I kept foil around the edges of the crust for the first 25-30 minutes or baking, and removed it for the rest.

Notes

  • Work with cold butter and ice cold water when making the crust. If you don’t have a pastry cutter, you can use your hands to work the butter into the dough. Don’t overwork the dough or you’ll end up with a tough crust. If your dough is too dry, you can add more water 1 teaspoon at a time until you can form the dough into a ball.
  • I recommend a glass pie dish for this recipe. You refrigerate the dough After rolling it and shaping it in your pie dish. The foil and weights are essential for the blind bake as it keeps the crust from shrinking while baking. This method is adapted from Serious Eats and in my opinion is the foolproof way to bake pie crusts. — see here for reference https://www.seriouseats.com/2016/10/how-to-blind-bake-a-pie-crust.html
  • If you’re not a fan of kale, you can use spinach or another hearty green, If you don’t like gruyere, try jarlsberg, a mild cheddar or similar.

Nutrition

Calories: 400kcal | Carbohydrates: 29g | Protein: 17g | Fat: 26g | Saturated Fat: 12g | Cholesterol: 307mg | Sodium: 321mg | Potassium: 379mg | Fiber: 5g | Sugar: 5g | Vitamin A: 7150IU | Vitamin C: 22mg | Calcium: 216mg | Iron: 4mg

Did you like gluten free quiche recipe? Let me know down in the comments below!

Abbey Sharp

Abbey Sharp is a Registered Dietitian (RD), regulated by the Ontario College of Dietitians. She is a mom, YouTuber, Blogger, award winning cookbook author, media coach specializing in food and nutrition influencers, and a frequent contributor to national publications like Healthline and on national broadcast TV shows.
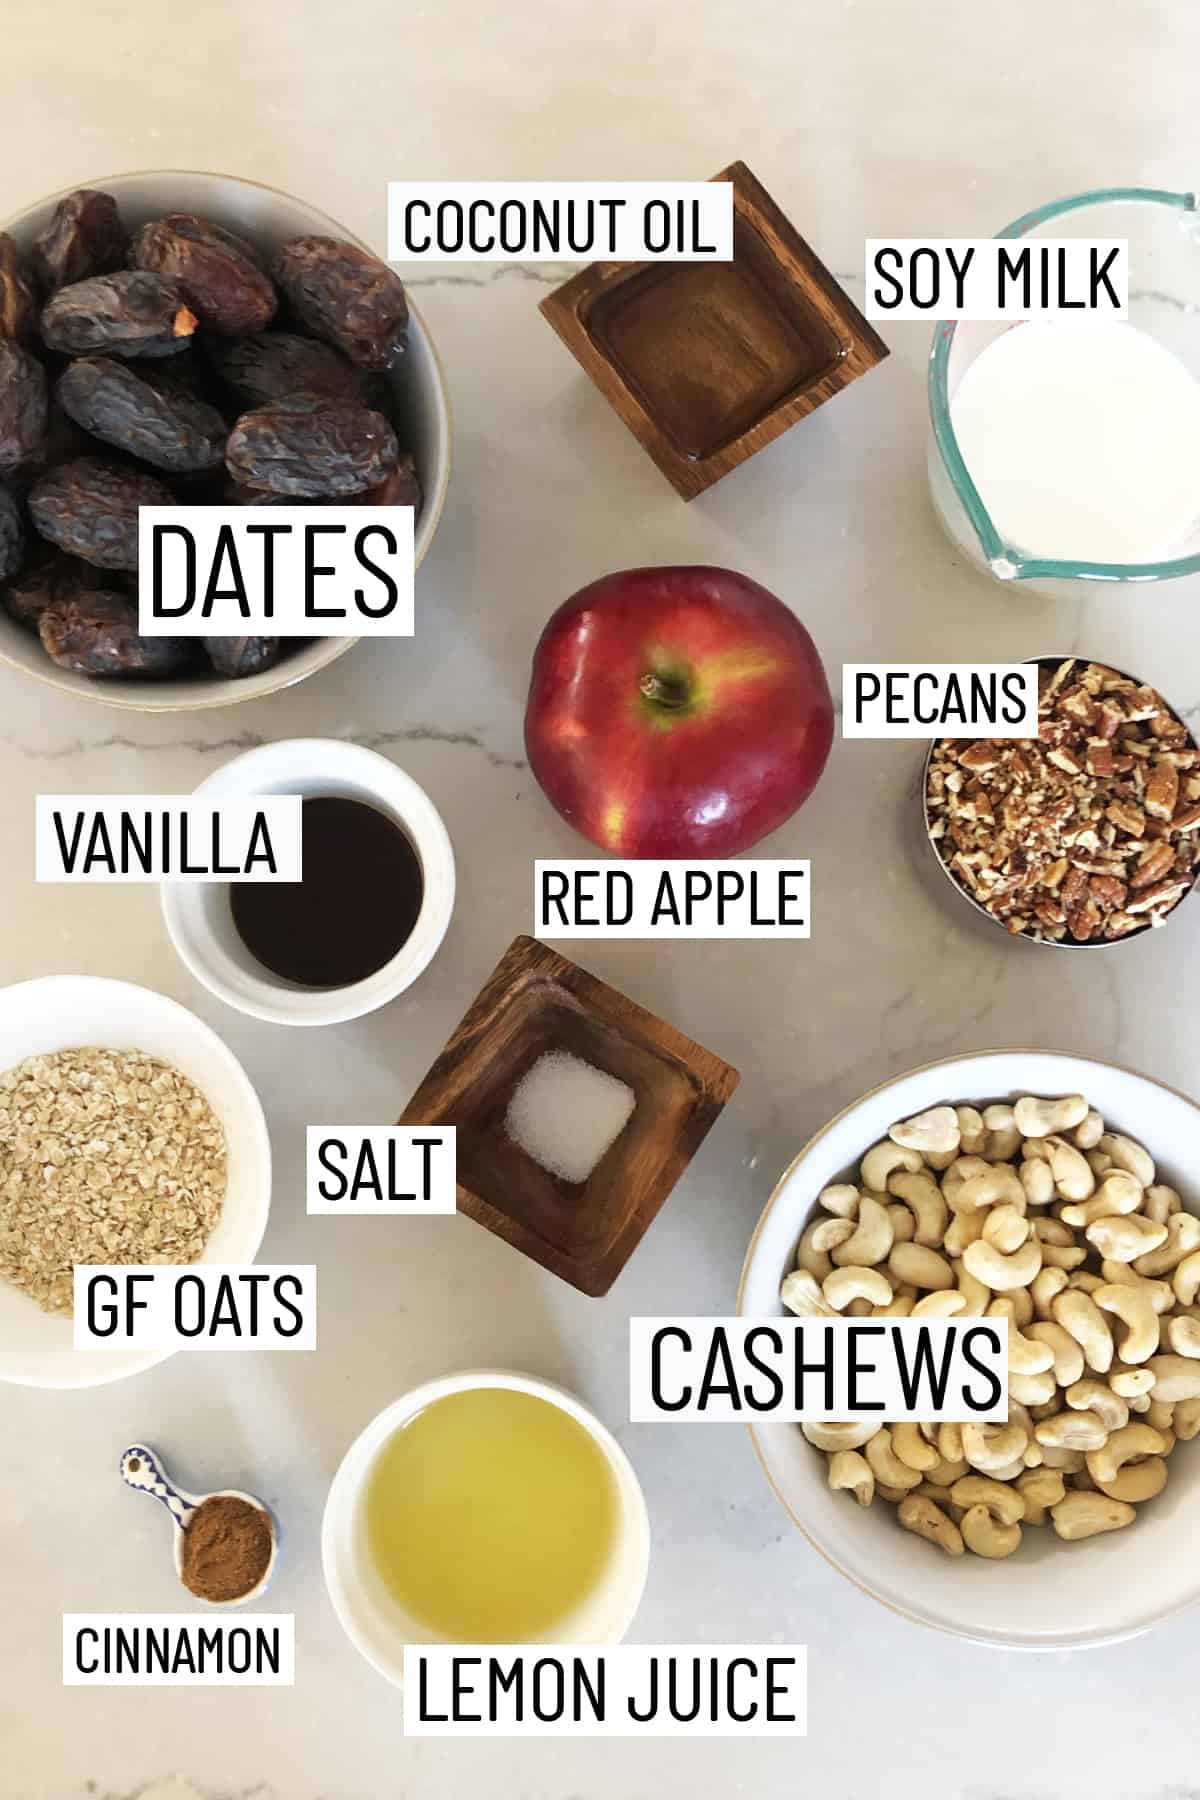
www.abbeyskitchen.com/about-abbey/
  • Previous Page
  • Go to page 1
  • Interim pages omitted …
  • Go to page 38
  • Go to page 39
  • Go to page 40
  • Go to page 41
  • Go to page 42
  • Interim pages omitted …
  • Go to page 89
  • Next Page

Get started with

Eight Free Recipe Books

From the co-founder of Neue Theory and creator of the Hunger Crushing Combo

Sign me up!
Abbey smiling at table
Abbey Sharp

“Foods may never be nutritionally equal. But we can make them morally equal by recognizing that our worth is never determined by what's on our plate.”

— Abbey Sharp, RD About Abbey ◥

Books

  • HCC™
  • Mindful Glow
  • Free E-Books

Blog

  • Nutrition
  • Recipes
  • Motherhood
  • Life

Explore

  • Neue Theory™
  • Bite Back
  • YouTube

Abbey

  • About
  • Coaching
YouTube TikTok Instagram Facebook X Pinterest
Abbey Sharp - The No BS Dietitian From Abbeys Kitchen

© Abbey's Kitchen 2026  All Rights Reserved •  ACCESSIBILITY STATEMENT •  Privacy Policy

This site uses cookies. By continuing to browse the site, you are agreeing to the use of cookies Accept Privacy Policy
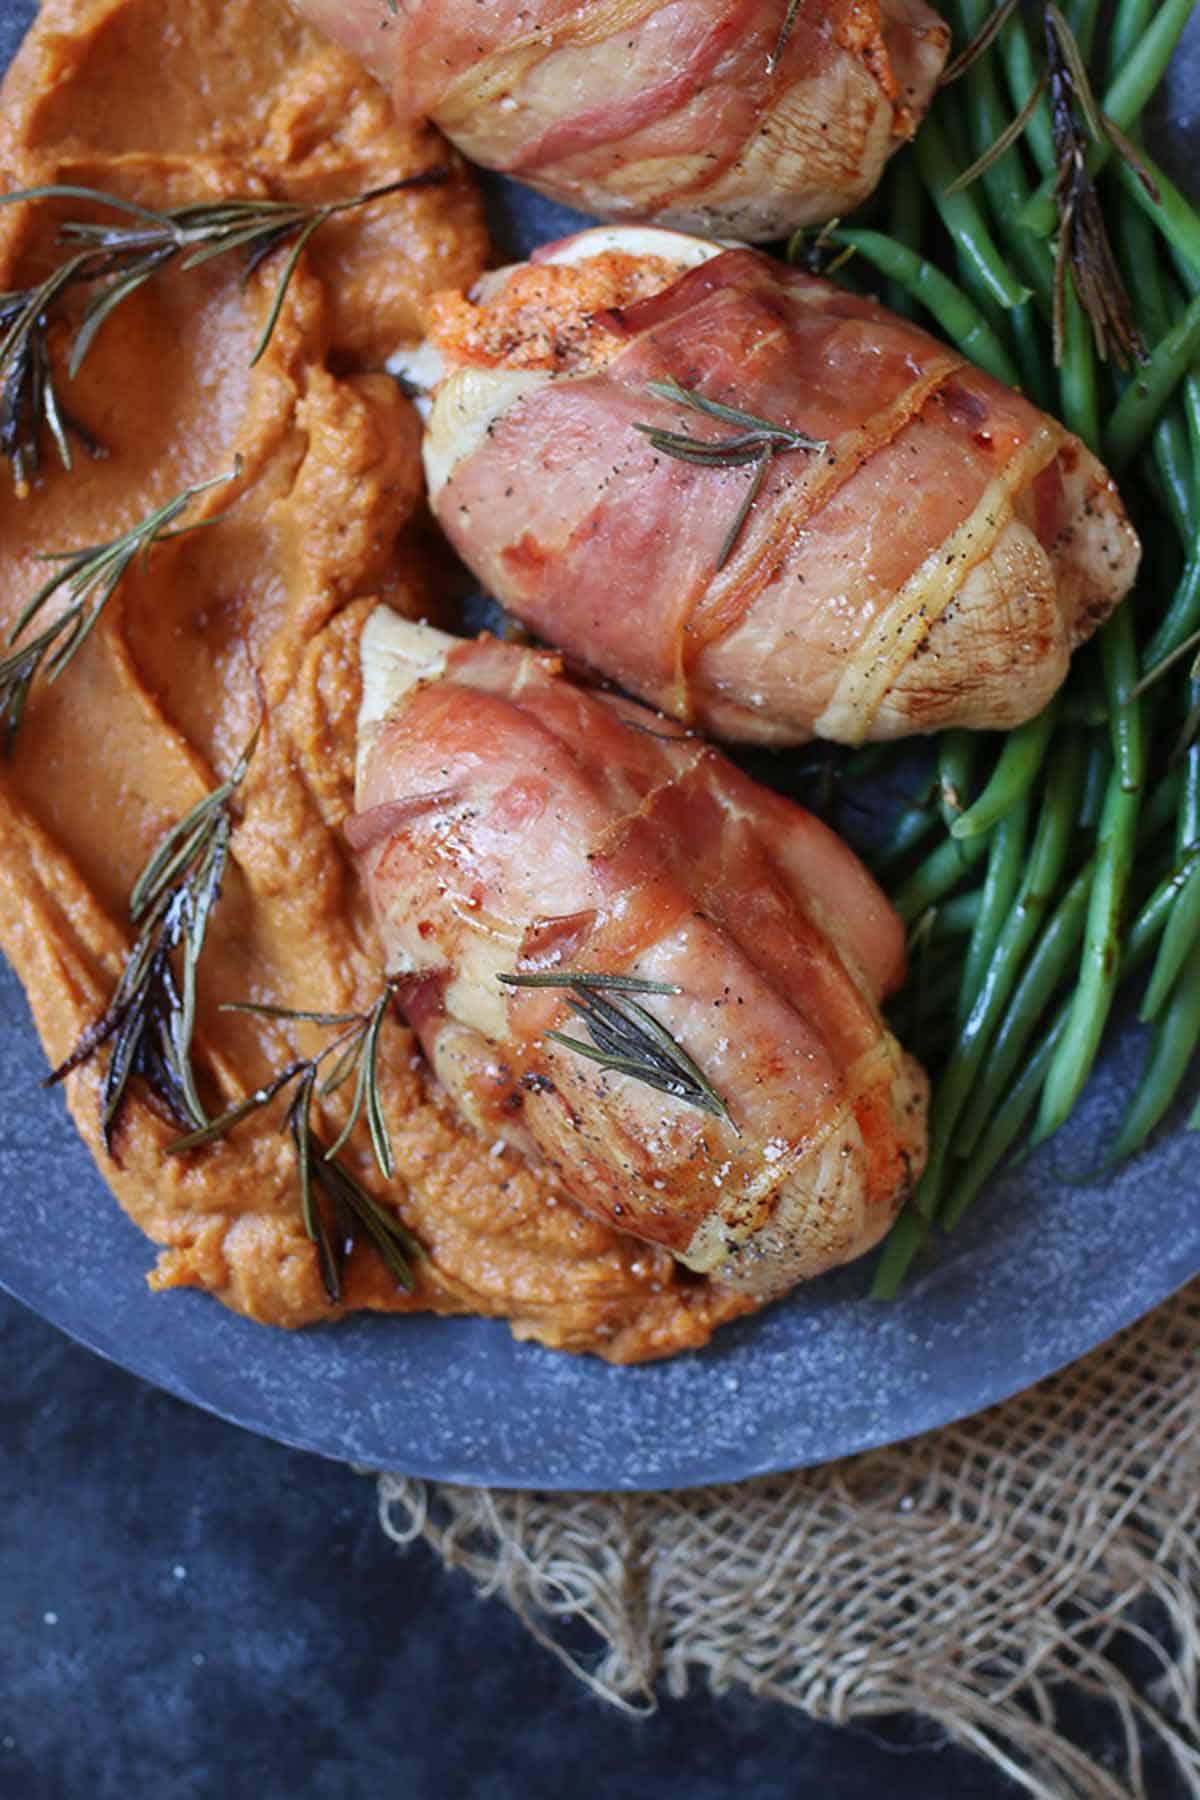
Privacy & Cookies Policy

Privacy Overview

This website uses cookies to improve your experience while you navigate through the website. Out of these, the cookies that are categorized as necessary are stored on your browser as they are essential for the working of basic functionalities of the website. We also use third-party cookies that help us analyze and understand how you use this website. These cookies will be stored in your browser only with your consent. You also have the option to opt-out of these cookies. But opting out of some of these cookies may affect your browsing experience.
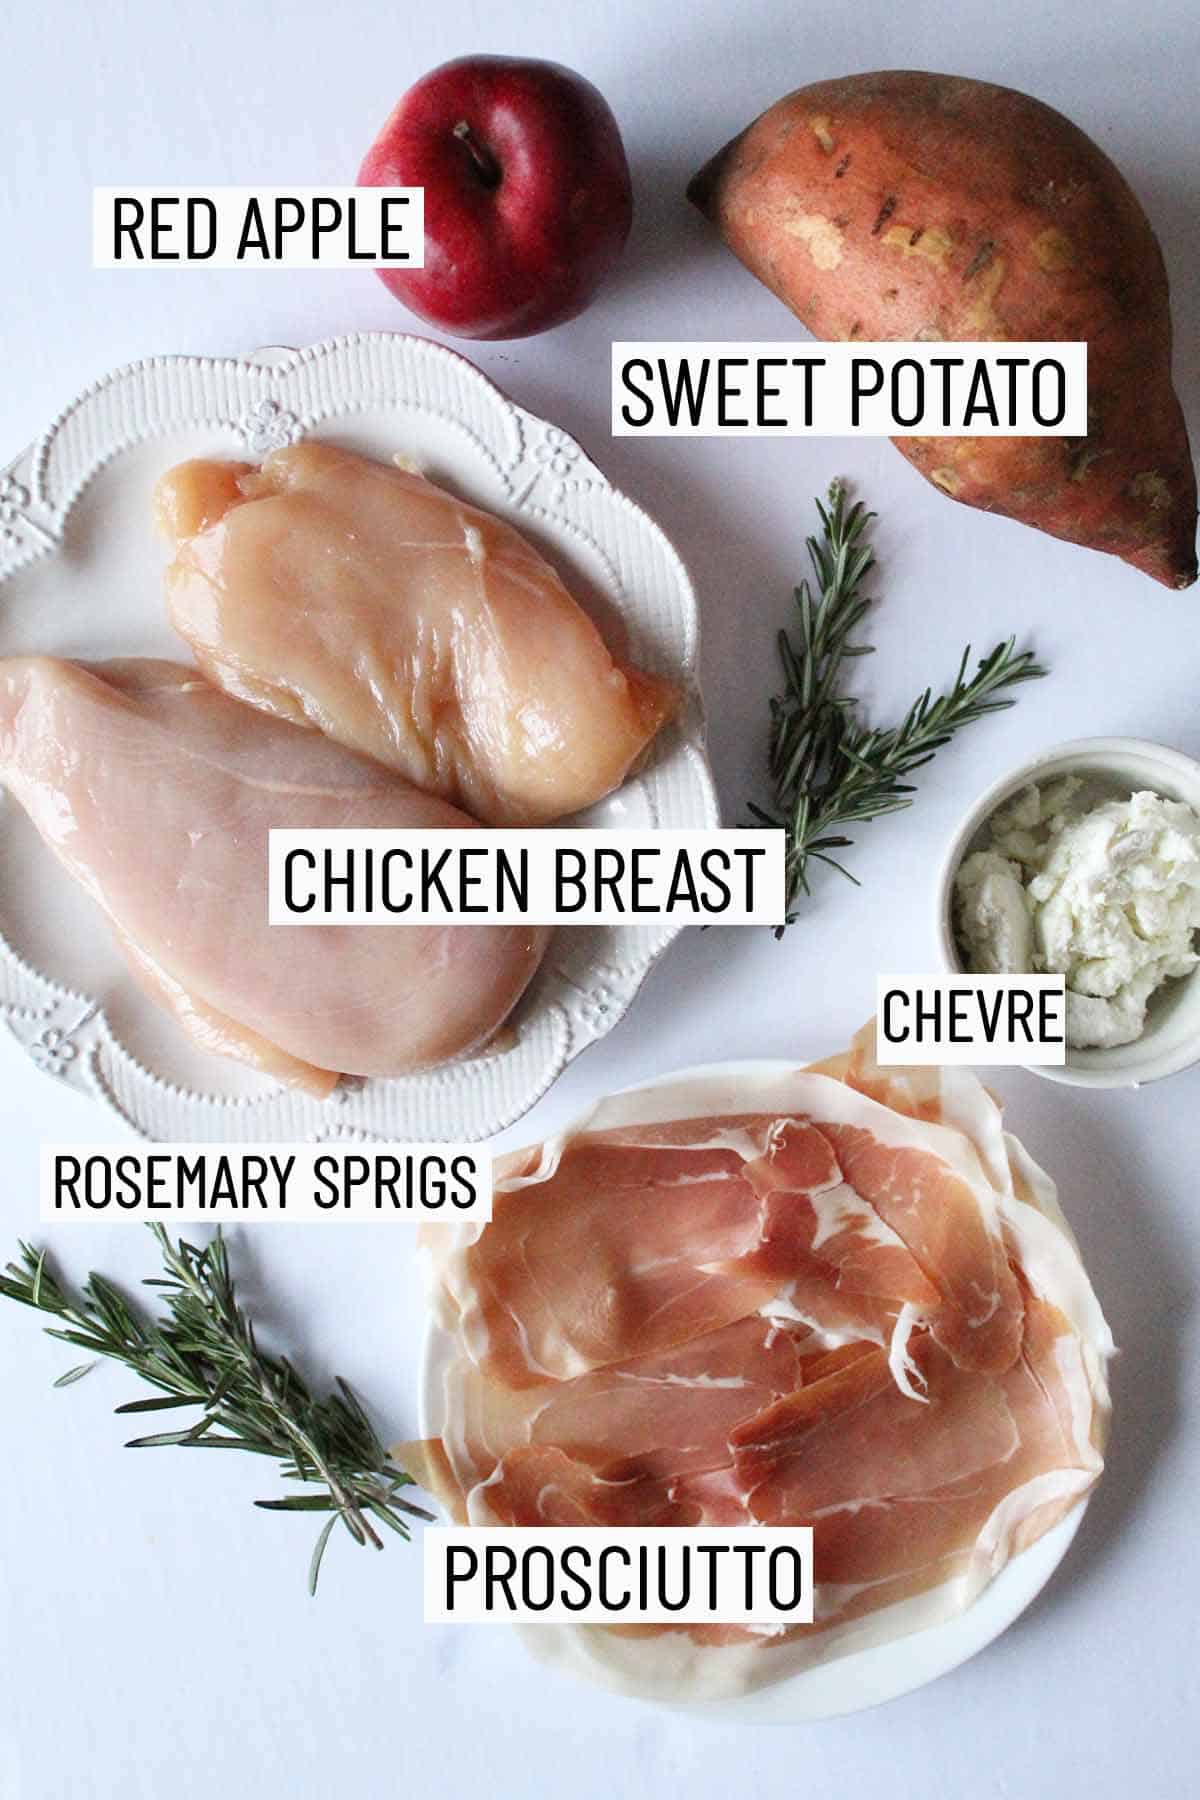
Necessary
Always Enabled
Necessary cookies are absolutely essential for the website to function properly. This category only includes cookies that ensures basic functionalities and security features of the website. These cookies do not store any personal information.
Non-necessary
Any cookies that may not be particularly necessary for the website to function and is used specifically to collect user personal data via analytics, ads, other embedded contents are termed as non-necessary cookies. It is mandatory to procure user consent prior to running these cookies on your website.
SAVE & ACCEPT

Rate This Recipe

Your vote:


A rating is required
A name is required
An email is required