• Skip to main content

Abbey's Kitchen

Healthy Recipes, Nutrition Myth Busting, Healthy Eating Tips

  • Books
    • HCC™
    • The Mindful Glow Cookbook
    • Recipe eBooks
      • Family
      • Hypothyroidism
      • BLW
      • Vegan Week 1
      • Vegan Week 2
      • Vegan Week 3
      • Keto
      • Gluten Free Week 1
      • Gluten Free Week 2
      • Fitness
      • Paleo
  • Blog
    • Nutrition
    • Recipes
    • Motherhood
    • Life
  • Explore
    • Neue Theory™
    • Bite Back With Abbey Sharp
      • Apple Music
      • Spotify
      • Amazon Music
    • YouTube
  • Abbey
    • About
    • Coaching
    • Contact

Abbey Sharp

Last Updated February 12, 2021. Published February 16, 2021 By Abbey Sharp 2 Comments

Best No Sugar Added Yogurt – Tips for Choosing, Taste Differences & Benefits

DISCLAIMER: This post was developed in sponsored partnership with Liberte, however, as always, all opinions are genuine.

We discuss how to choose the best no sugar added yogurt, considering various taste differences in plain varieties, as well as the health and nutritional benefits.
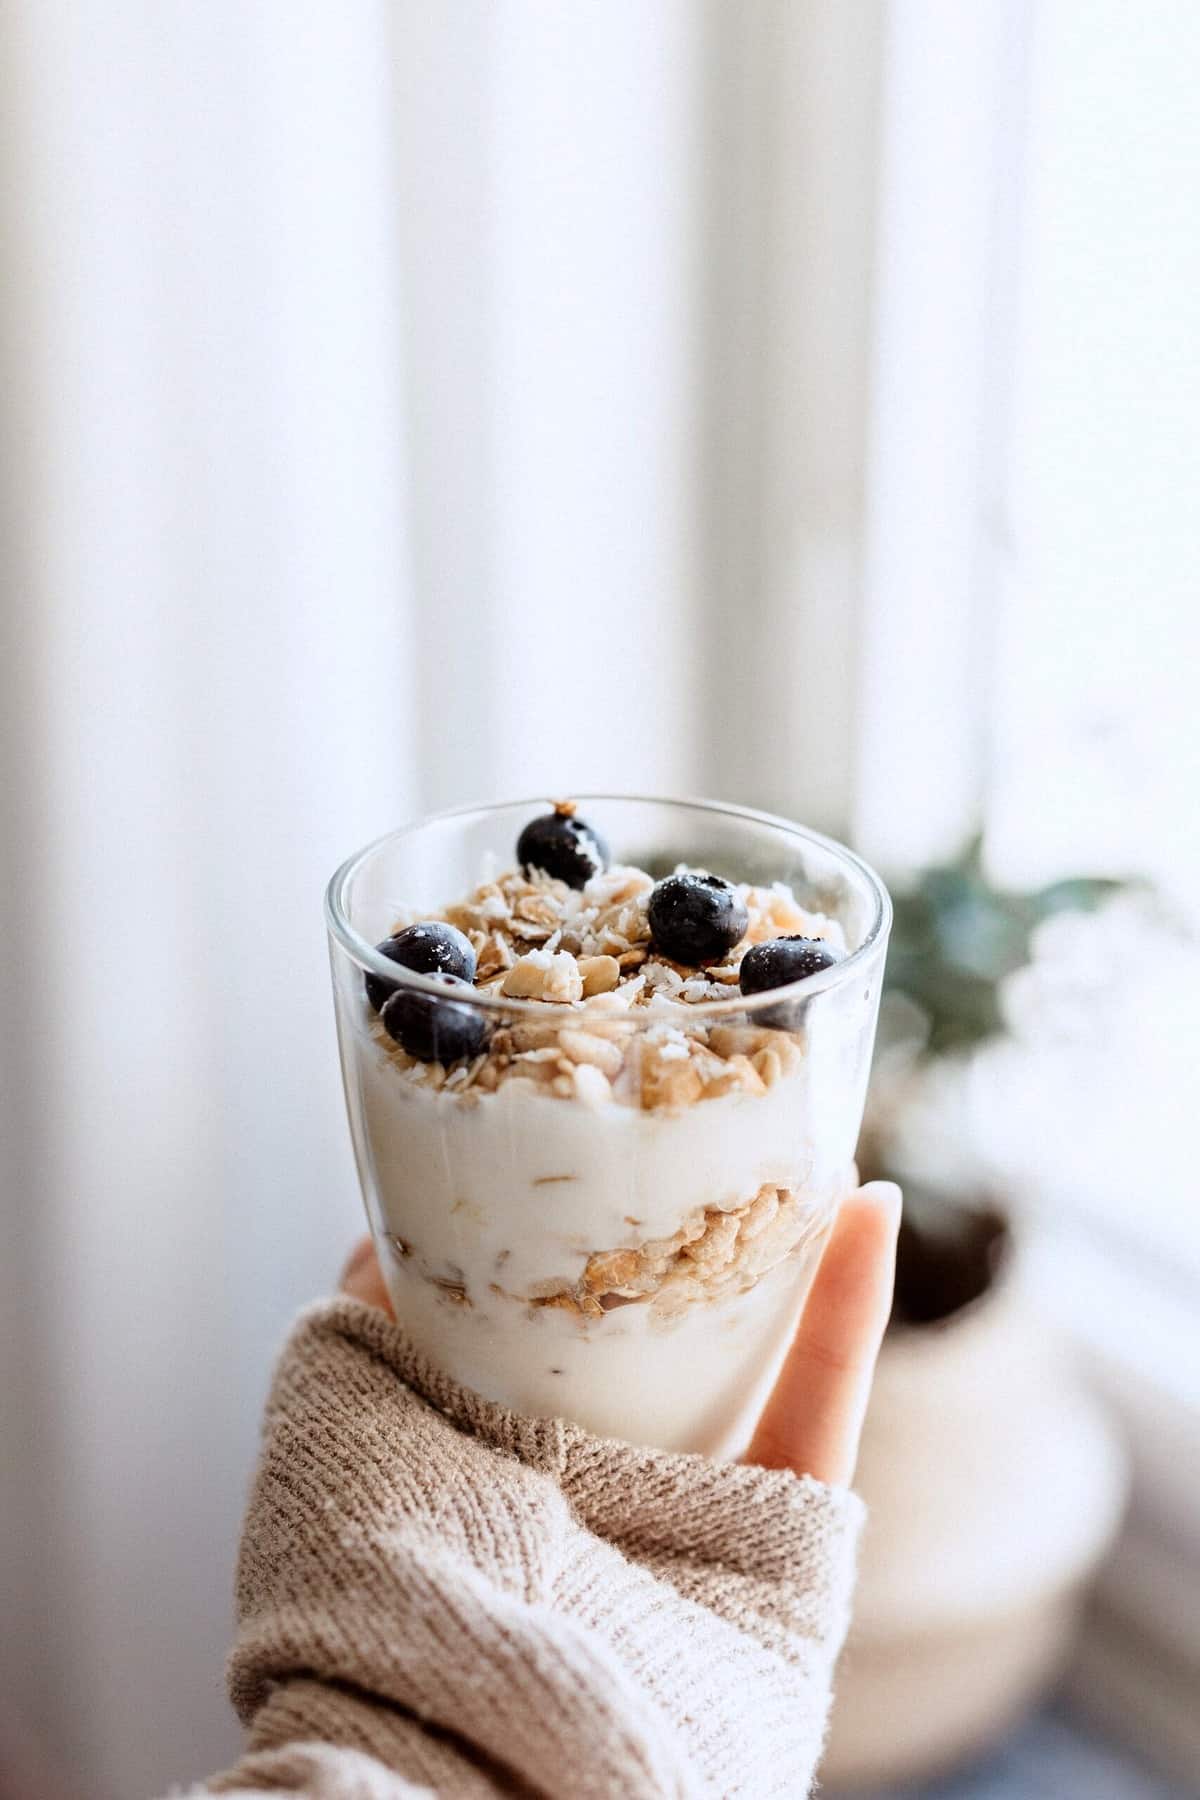
A hand holding up a breakfast parfait with blueberries and granola.

If you ever want to feel completely overwhelmed, go into a grocery store yogurt aisle and pray you make it out with just one tub. The options when it comes to yogurt today are pretty exhaustive. It seems like no matter what your dietary goals, or taste preference, there is a yogurt for you.

What is Yogurt?

Yogurt (also known as yoghurt) is a dairy product produced by fermenting milk with bacterial cultures. The bacteria produce lactic acid which is what makes the distinct yogurt taste.

The Nutritional Benefits of plain Yogurt
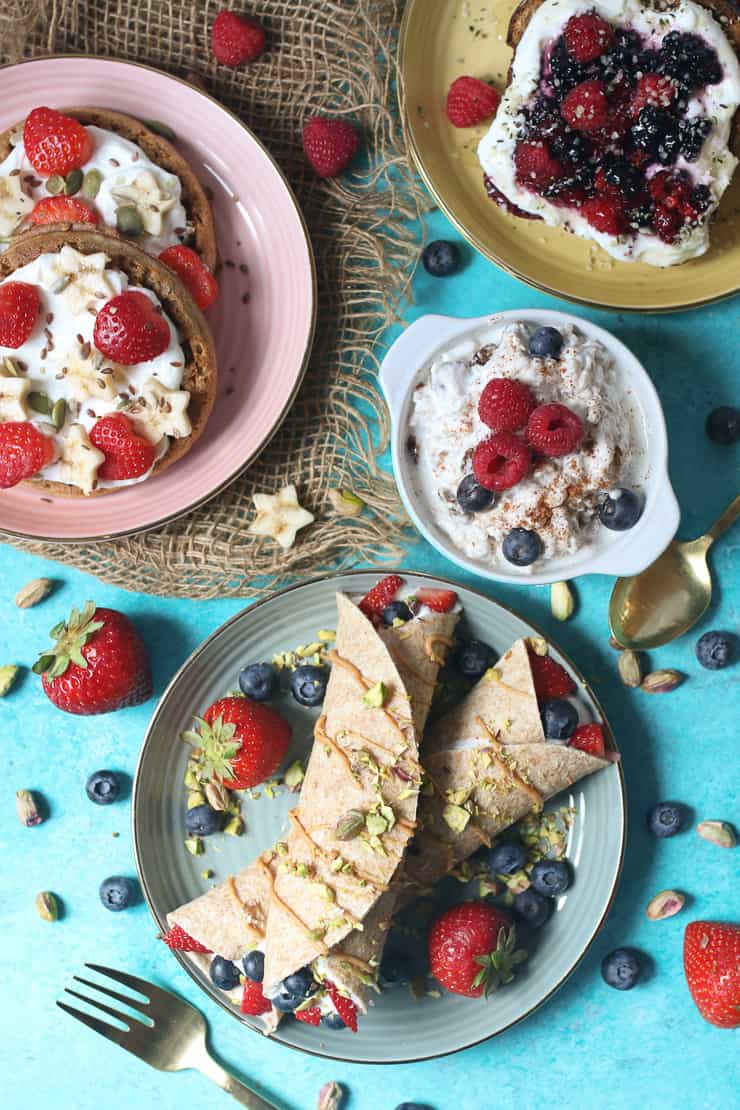
Birds eye view of healthy breakfast options including waffles, oats, and toast.

Yogurt contains protein (ranging from 6-20 grams or so per serving), and supplies carbohydrates (in the inherent form of lactose) and dairy fat (ranging depending on milk fat percentage from 0-10%). It’s also typically has calcium and vitamin D (if fortified). While all yogurt are fermented, some yogurts also contain added probiotics to help support a healthy gut and/or immune system.

Types of Yogurt

There are a number of types of yogurt available on shelves today, hence why it’s often hard to choose a favourite! Here’s a brief overview of the varieties you’ll find.

Greek yogurt

Greek yogurt has most of its liquid whey strained out, yielding a very thick and high protein yogurt.

Skyr

Drained in the making to create a thick texture that gives a rich and silky-smooth mouthfeel. This Icelandic yogurt is high in protein.

Kefir

Think of Kefir like drinkable yogurt. It’s made with different cultures from traditional yogurt and thin enough that you can drink it out of a glass like a smoothie.

Stirred/ Swiss/ Traditional Yogurt

This is a thinner tangy yogurt that is a classic yogurt base.

Dairy Free Yogurt alternative

With the popularity of plant-based diets, there are now a lot of dairy free yogurt alternatives on the market that are made with different ingredients like soy, almonds and oats for those who do not consume or cannot tolerate cow’s milk.

How to Choose a Healthy Yogurt
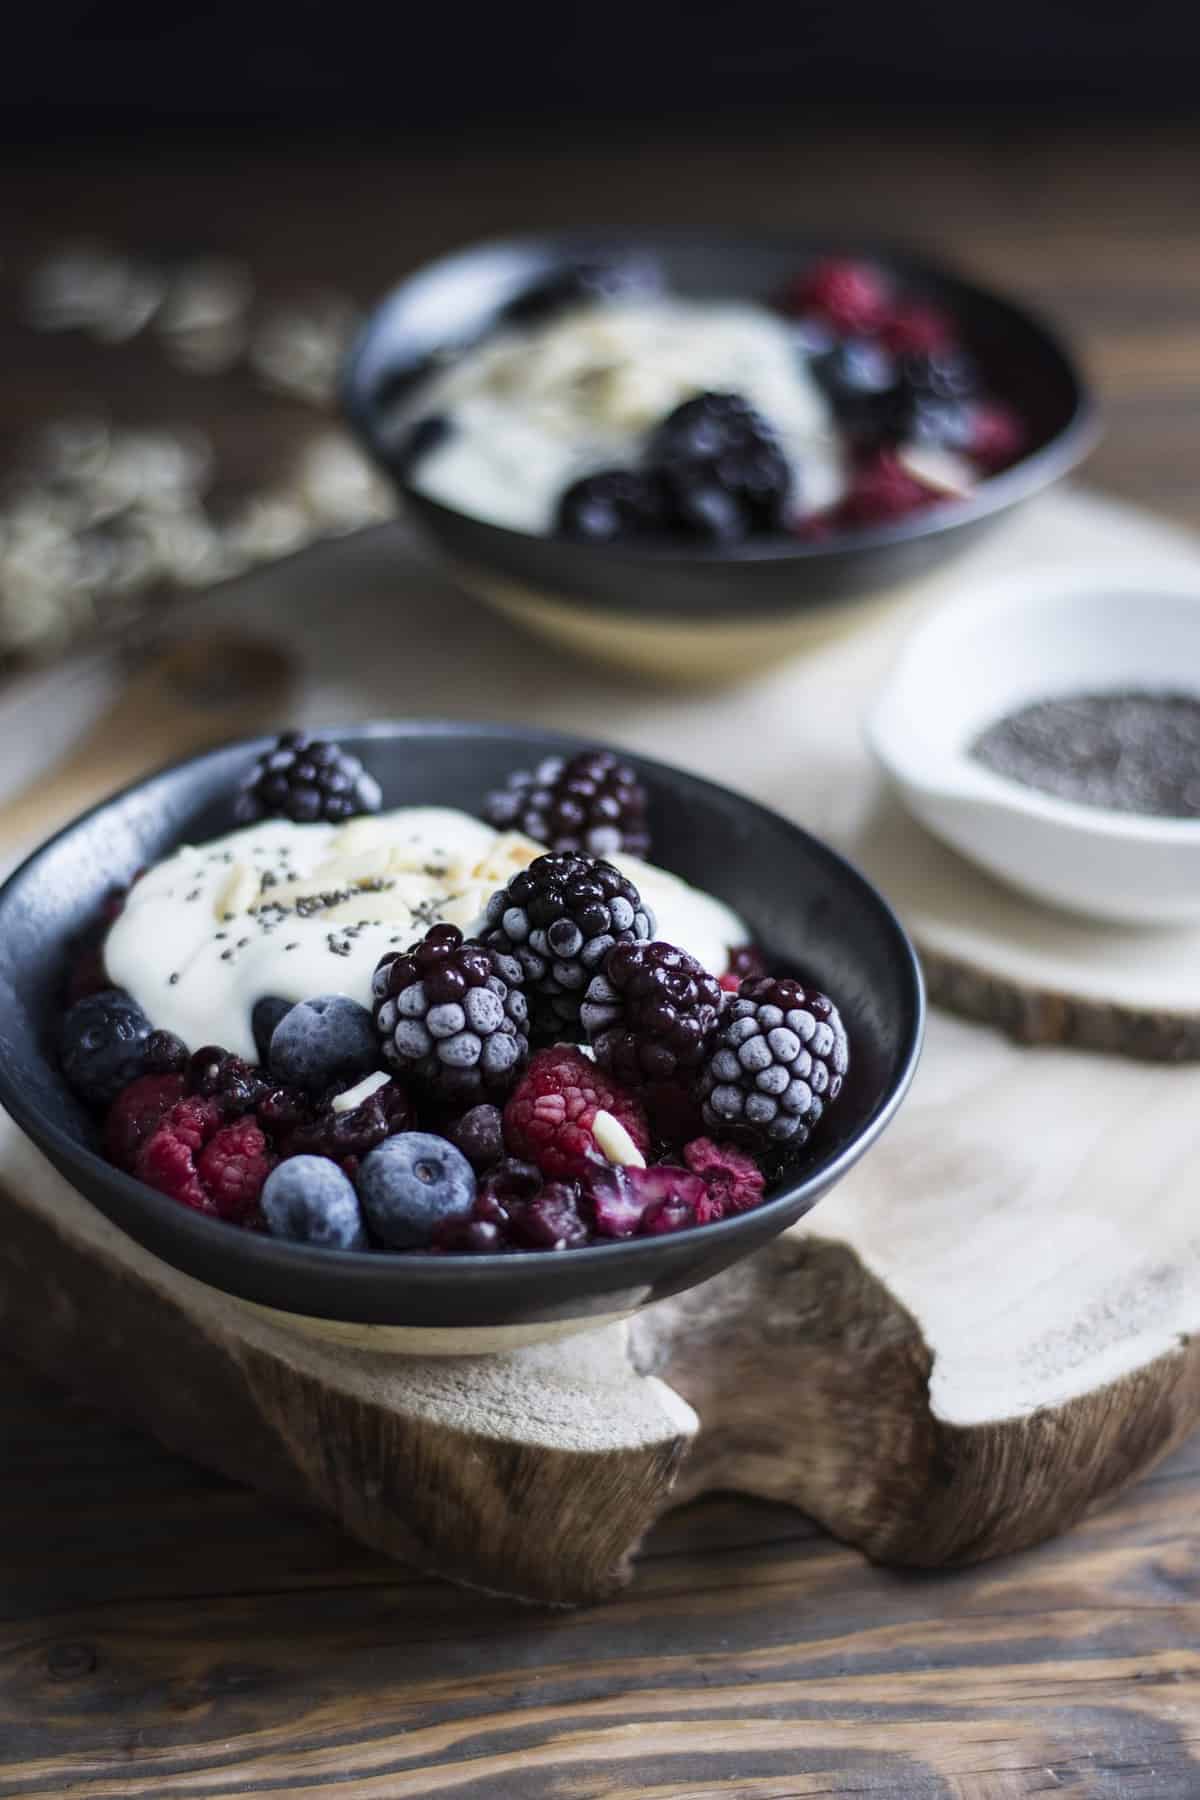
A bowl of yogurt topped with frozen berries.

My first tip for people when choosing a yogurt is to look for a plain no sugar added yogurt so that you can then add your own sugar or flavour. So that’s why I was so excited when I heard that Liberté was launching their Plain Collection with 15 different plain yogurt varieties, all with no added sugar. This makes it so much easier to find a simple yogurt without any additional sugar or ingredients that you can flavour to fit your preferences and dietary needs.

No Sugar Added Taste Test

I put a bunch of Liberté’s plain yogurts to the test in a head to head taste test so you could get a sense of which yogurt is best for you.

Liberté Méditerranée
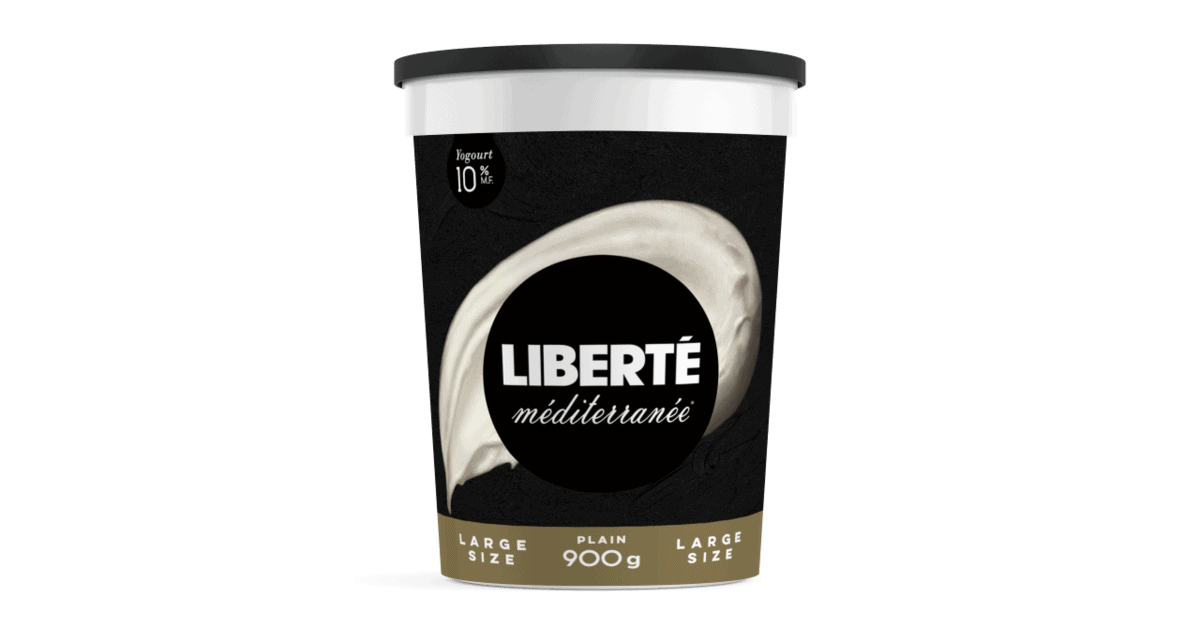
A containter of Liberté Méditerranée yogurt.

If you are looking for a luxurious yogurt, this is definitely it. It’s super creamy and light with a very mild acidic note. And with 10% milk fat and 6 grams of protein per serving with no gelatine or sugar, it’s perfect for dessert or a fancy brunch.

Liberté Greek
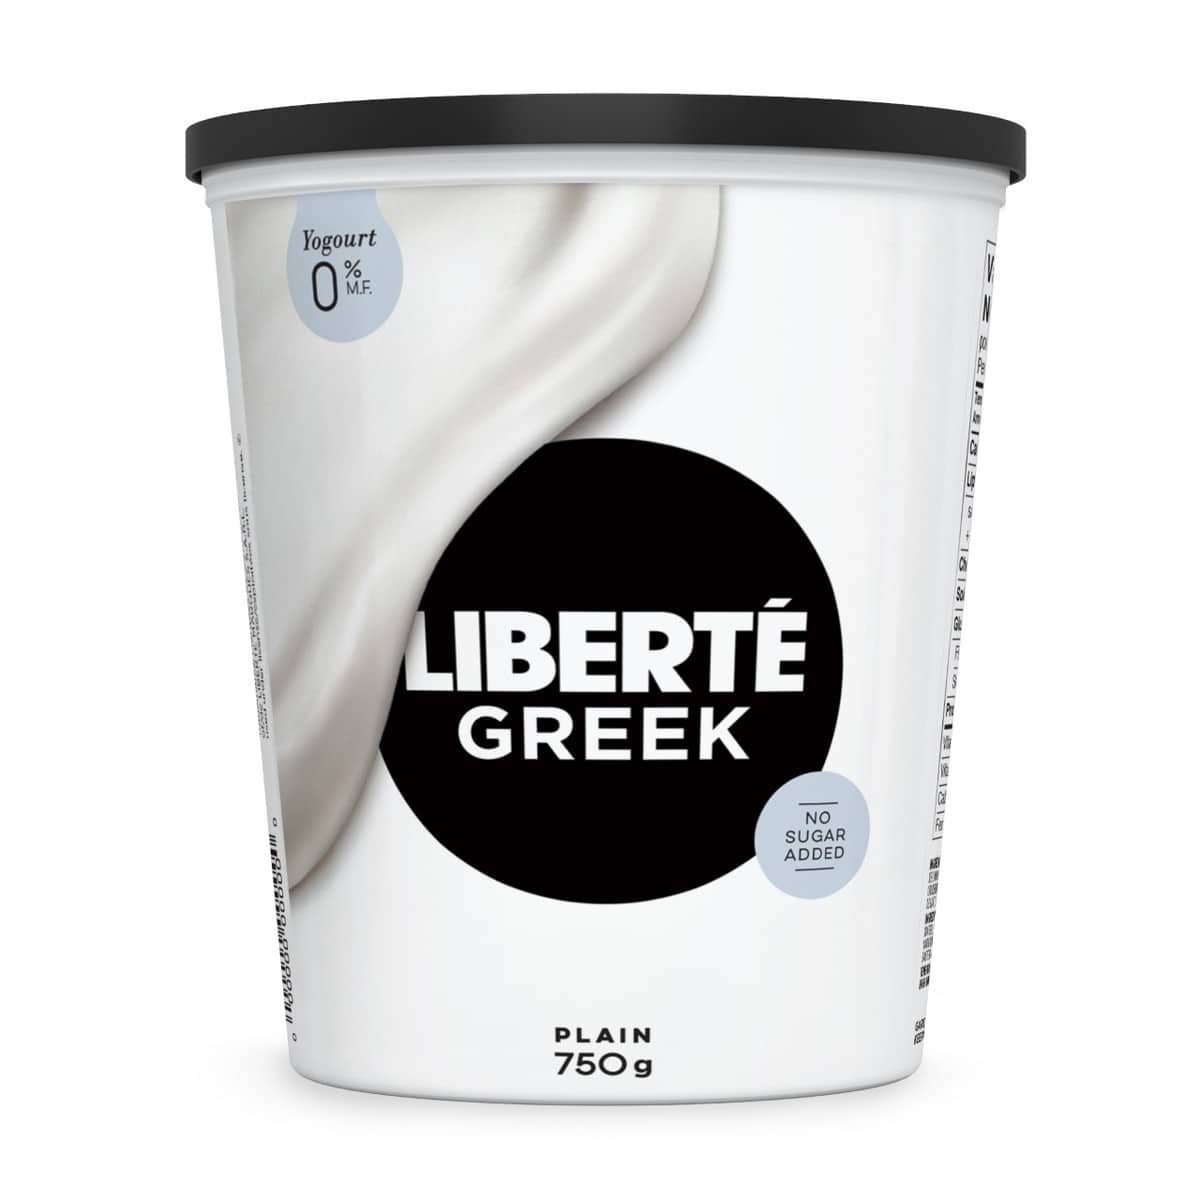
A container of Liberté Greek yogurt.

If you’re looking for a nutritious high protein option for a quick post-workout snack, this Greek yogurt is perfect. I love the natural sweetness, rounded mouthfeel and clean mildly acidic taste. It’s available in 0% (this one is also available in lactose free), 2% or 5% milk fat with an impressive 15-17 grams of protein per serving. The lactose free is ideal for those who want to reap the benefits of dairy but who are one of the 20% of Canadian’s with lactose intolerance. Greek 0% and 2% are also available in organic and they contain probiotics. I think the 5% is my absolute favourite yogurt because I feel you get the luxurious texture of the Méditerranée but with the protein of a Greek yogurt.

Liberté Organic – Traditional and Organic Greek
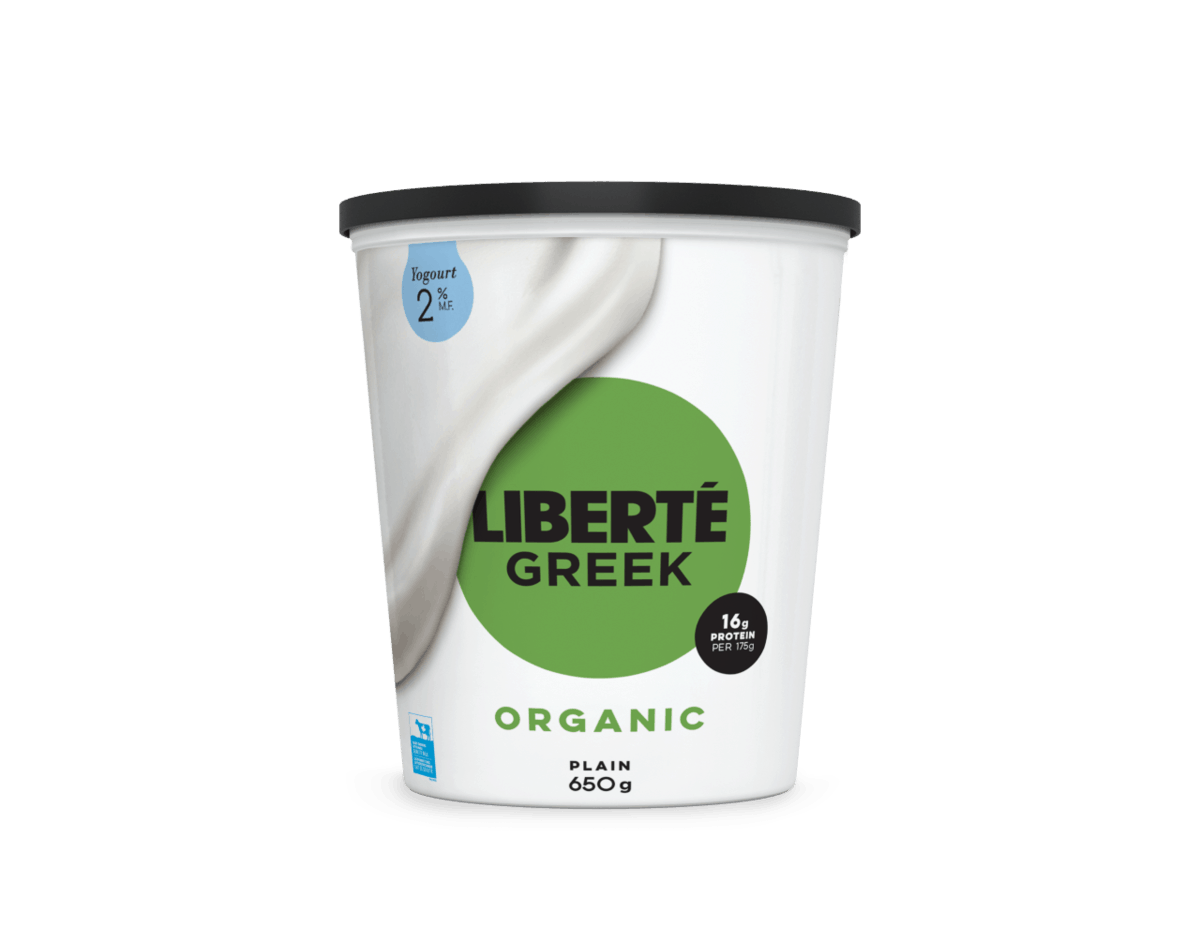
A container of Liberté Organic Greek yogurt.

For those who are committed to eating organic , there are two different styles to choose from. The organic traditional is a low fat option with 10-11 grams of protein each and either 0% or 2.5% milk fat along with containing probiotics. These are perfect simple smooth yogurts with no added sugar, preservatives or gelatine. There is also an organic Greek which has 16-17 grams of protein per serving and comes in 0% or 2% milk fat. This one has a very rich and creamy texture.

Liberté Classique
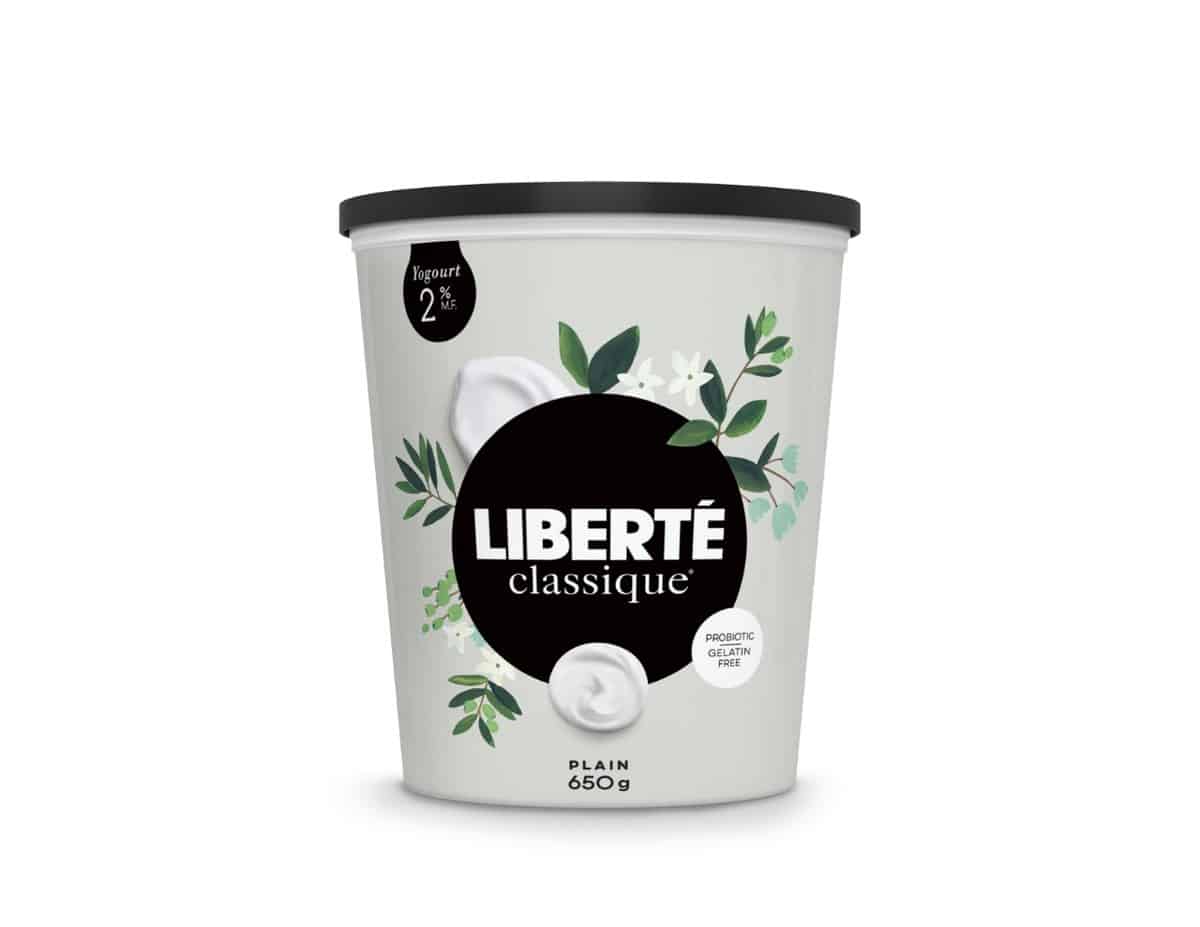
A container of Liberté Classique yogurt.

If you’re a traditional yogurt kinda person, you will love the Classique line, available in 0%, 2% and lactose free. It has a very light and loose texture, and a very fresh, clean taste with a balance of sweetness and nice acidic finish. This one has added probiotics but no gelatine or sugar, with 10 grams of protein per serving. I love this yogurt in my smoothies to add tang and body without making them too thick.

Liberté Skyr
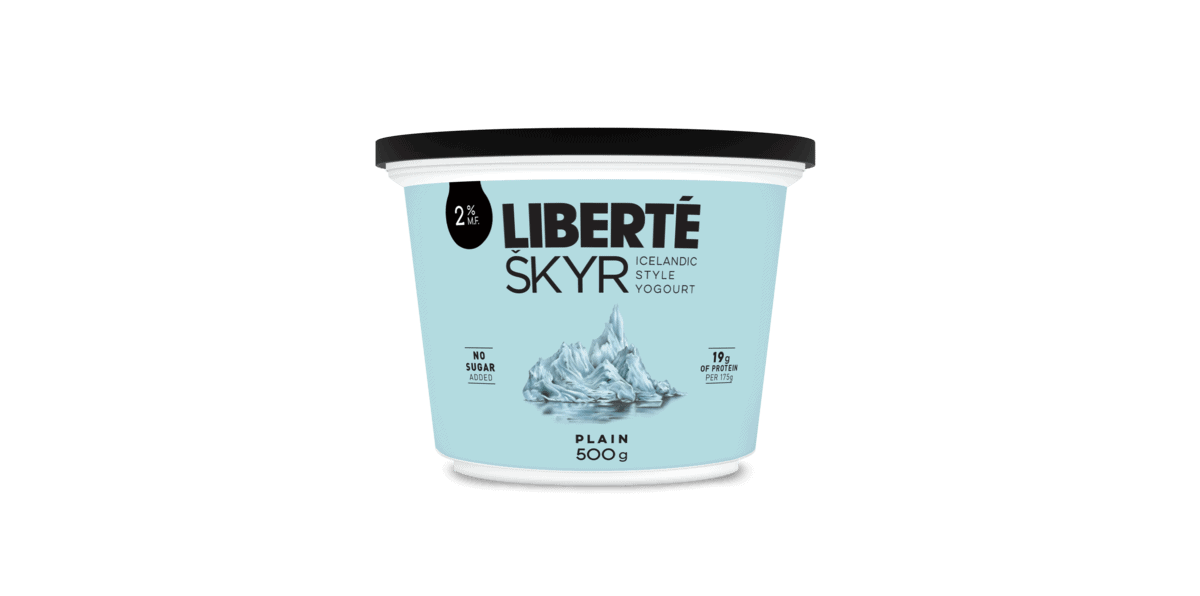
A container of Liberté Skyr yogurt.

If you like Greek yogurt, you’ll love Skyr too. This Icelandic style yogurt has a nice bright acidity and creamy texture that has 19 grams of protein per serving and no gelatine or preservatives.

Liberté Kefir (not including the Liberté Kefir effervescent)
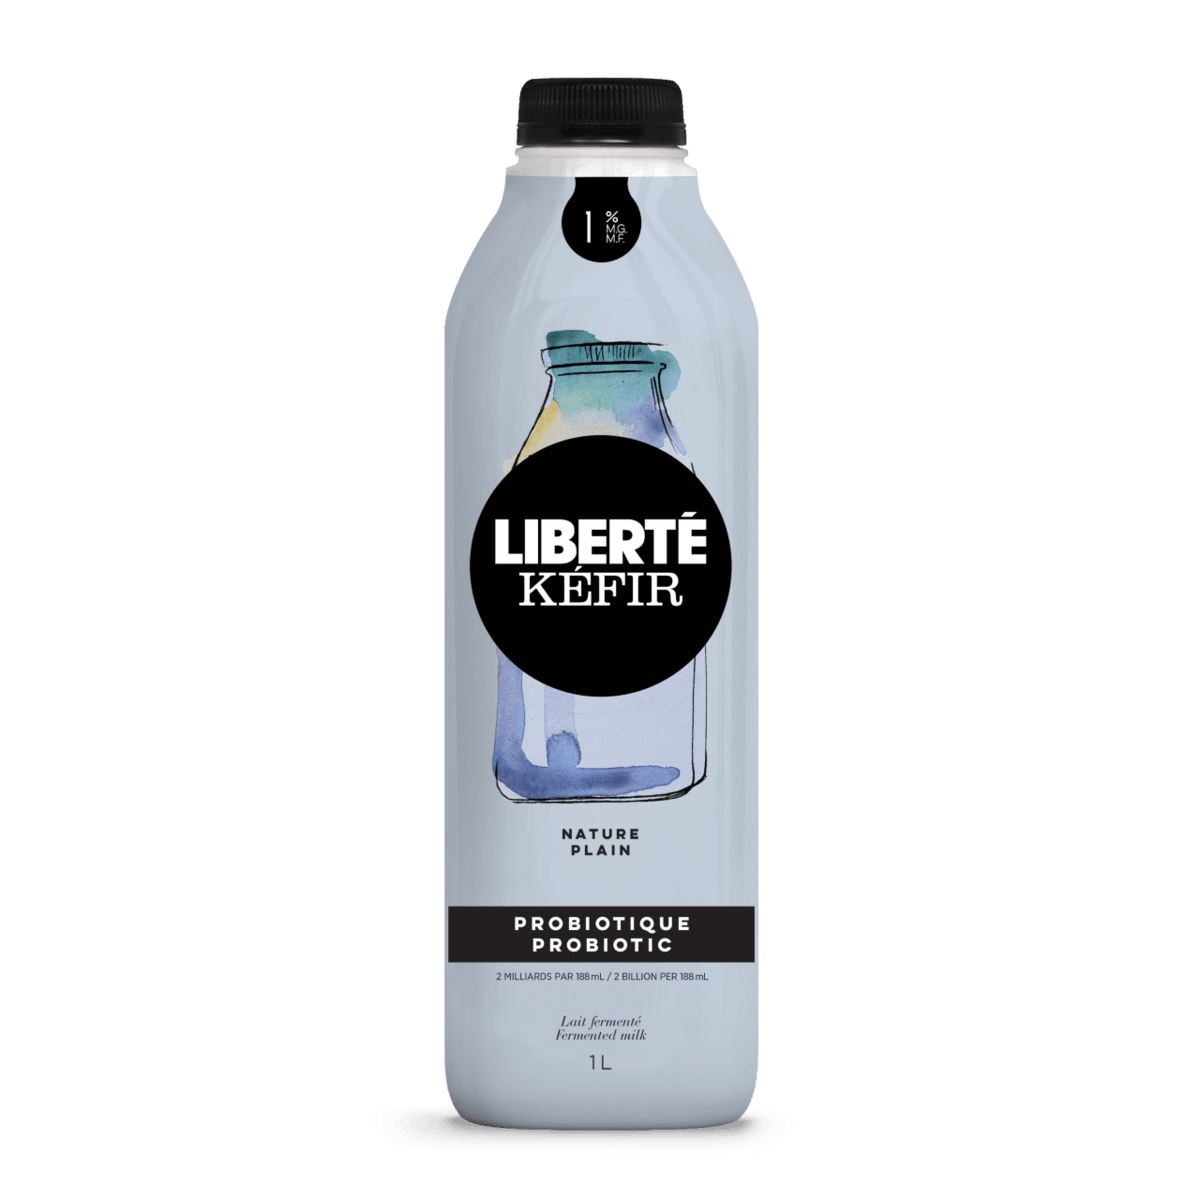
A container of Liberté Kefir.

If you’re looking for a sippable way to pack in your probiotics, this all-natural yogurt drink has 2 billion probiotic CFUs per ¾ cup and 7 grams of protein per serving. This is a great alternative to milk with cereal, or an awesome on the go drink all by itself if you like a “mouth puckering” experience. You can get it in plain 1% or organic 1%.

Liberté Dairy Free
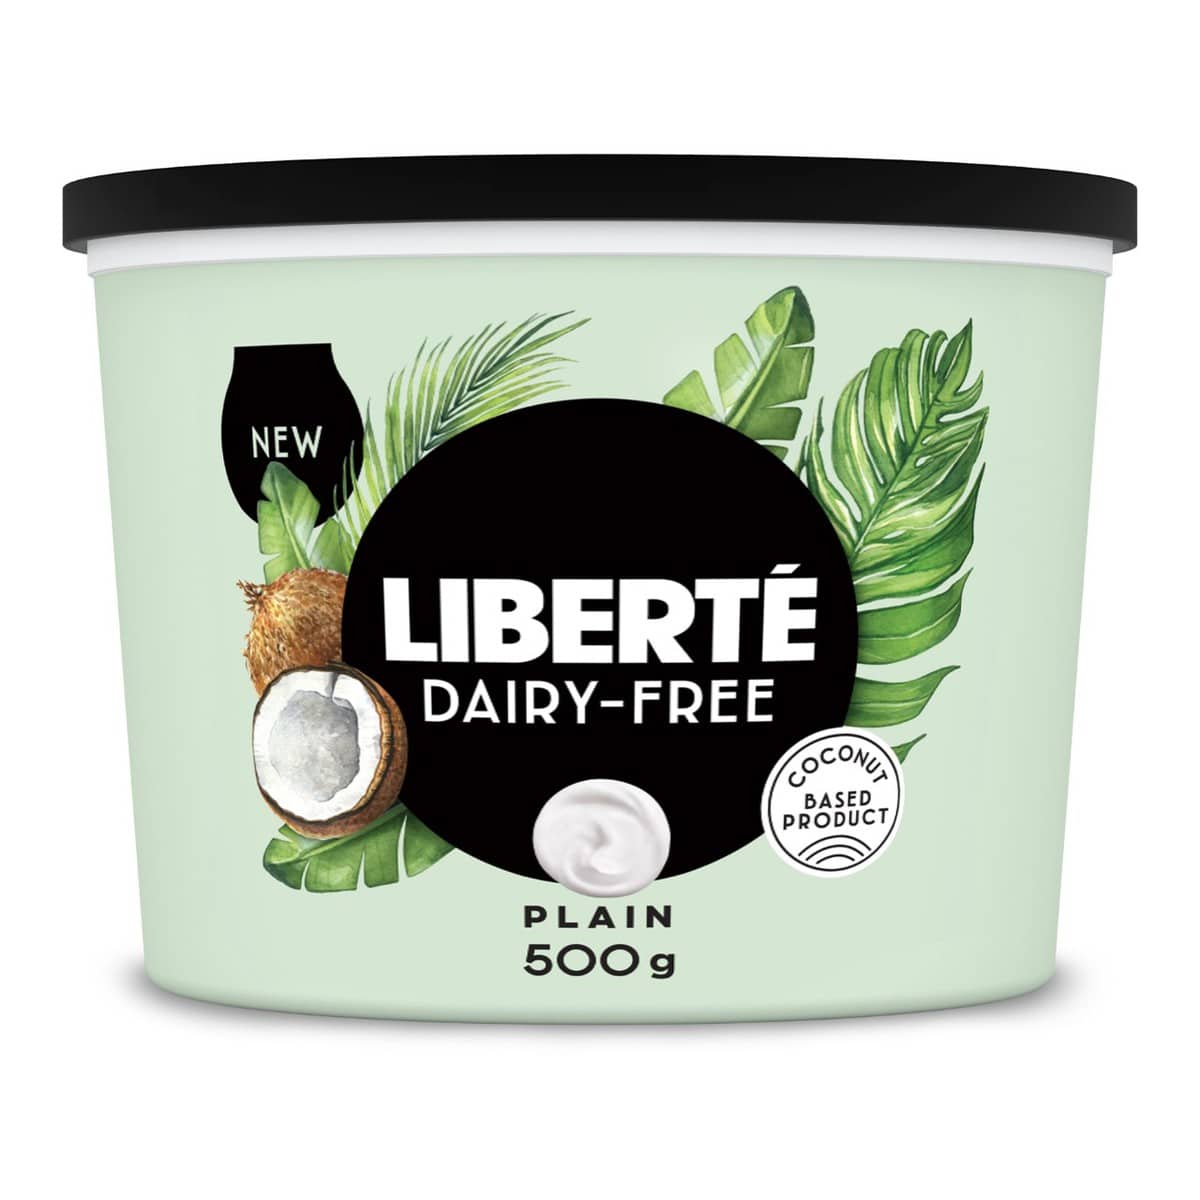
A container of Liberté Dairy Free.

For my vegan, paleo and dairy-free friends, Liberté has a coconut-based dairy-free option with just three ingredients and 120 calories per serving.

I hope this taste test helped you narrow down the right no sugar added plain yogurt for you and your family. Let me know in the comments what your go-to yogurt is!

More Blog Posts You Might Like

  • Best Healthy Packaged Snacks for Kids According to Dietitian Moms
  • Yogurt Breakfast Ideas for Kids to Assemble on the Go
  • Can I get Enough Probiotics from Yogurt or Should I Take A probiotics?

Disclaimer: This post was developed in paid partnership with Liberté, however all opinions are genuine.

Abbey Sharp

Abbey Sharp is a Registered Dietitian (RD), regulated by the Ontario College of Dietitians. She is a mom, YouTuber, Blogger, award winning cookbook author, media coach specializing in food and nutrition influencers, and a frequent contributor to national publications like Healthline and on national broadcast TV shows.
www.abbeyskitchen.com/about-abbey/

Last Updated March 14, 2023. Published February 10, 2021 By Abbey Sharp 2 Comments

Hasselback Beets with Pistachio Pesto (Gluten Free)

These hasselback beets with pistachio pesto are as delicious as they are gorgeous! They also make for the perfect easy gluten free side dish that is great for entertaining and wowing your guests.

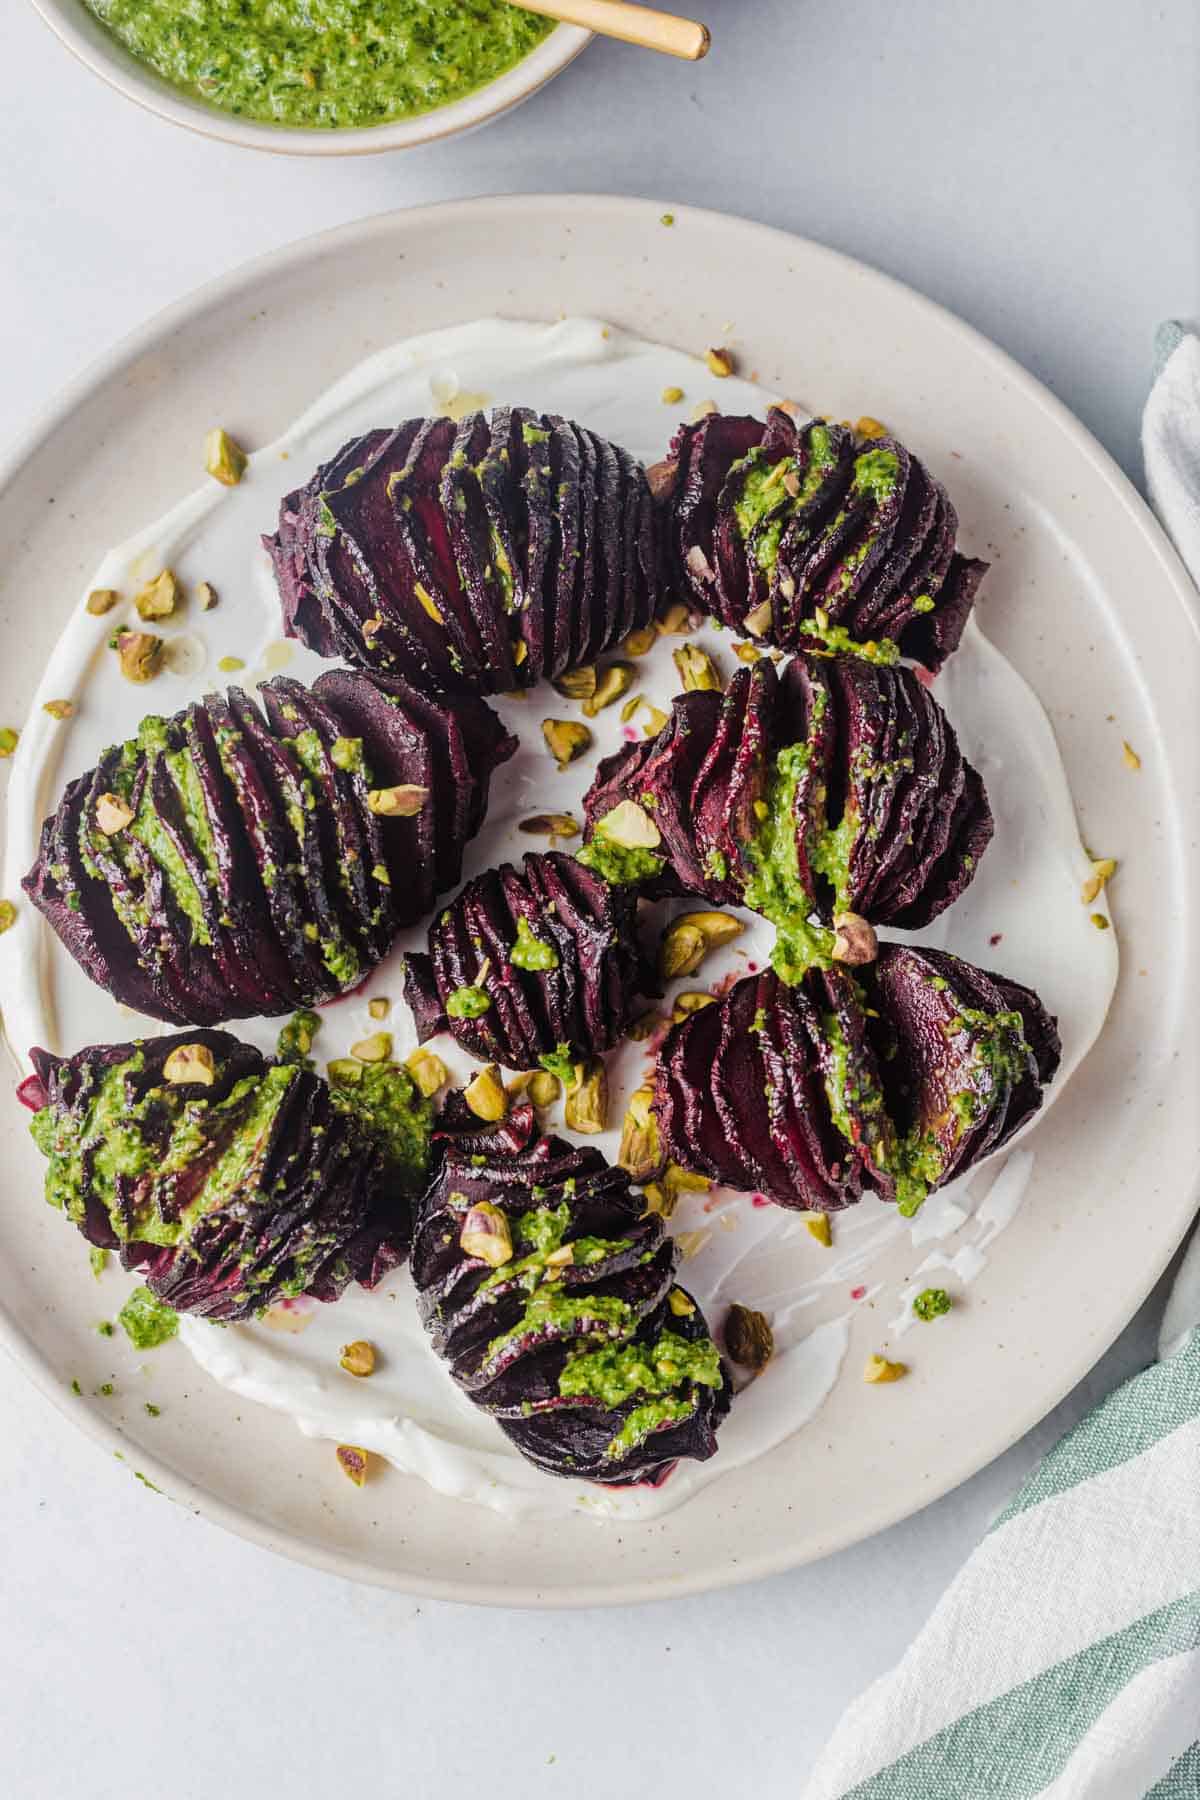
Birds eye view close up of hasselback beets on a white plate drizzled with pistachio pesto.

You know those meals that are almost too pretty to eat? Like it almost feels wrong to eat them because they are total eye candy? That’s exactly how we feel about these hasselback beets with pistachio pesto.

But this recipe is way more than just a pretty face! While the colour combination in this recipe is gorgeous to look at, the taste is also totally up to par. I mean, can you really go wrong with adding pesto to just about anything? Probably not. But it totally belongs on these hasselback beets and will quickly become your go-to side dish to wow your friends and family.

Table of contents

  • Why This Recipe Works
  • Key Ingredients
  • How to Make This Recipe
  • Expert Tips
  • Recipe FAQs
  • More Recipes You Might Like

Why This Recipe Works

If you’re not already sold by the sheer beauty of these hasselback beets (the combination of the purple and green like COME ON), here are a few more reasons why you need this recipe in your life!

  • Gluten free
  • Easy to prepare
  • Vegetarian
  • Only requires 10 ingredients
  • Perfect for entertaining or as a weeknight side dish

Key Ingredients

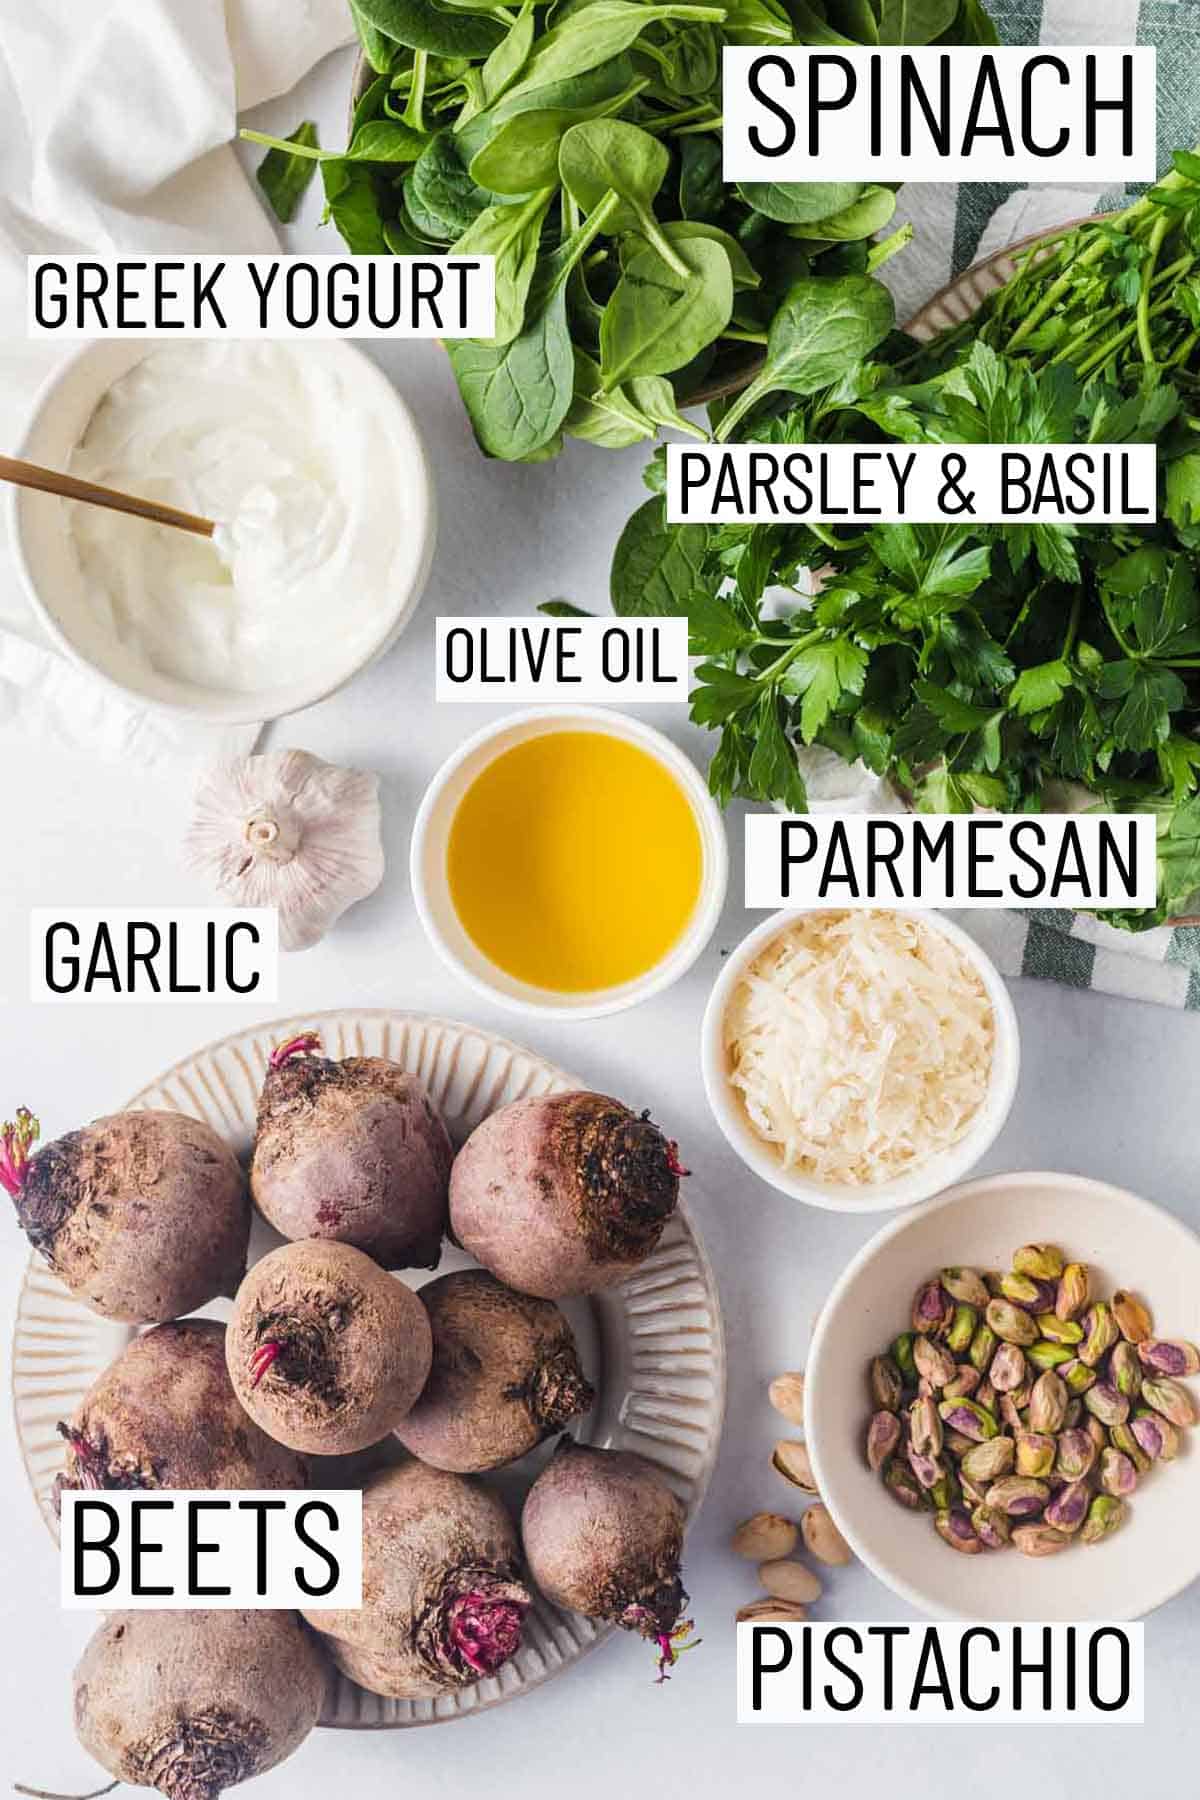
Flat lay images of portioned ingredients for recipe including beets, pistachio, parmesan, olive oil, garlic, parsley, basil, and spinach.

Pistachio Pesto – instead of pine nuts (which is traditionally used to make pesto) we are using pistachios along with a combination of herbs and greens including basil, parsley, and spinach. Oh and parmesan for good measure! I love pesto because it is pretty forgiving when it comes to the nuts and greens you decide to throw into it. So feel free to mix things up with kale, cilantro, arugula etc.

Beets – To make the hasselback beets we use small to medium sized red beets. We are keeping things simple by using a beet variety that is easy to find year round, but I think this recipe would be absolutely divine (and friggen beautiful) with candy cane or yellow beets as well!

Greek Yogurt – The flavours of these hasselback beets come together with a generous dollop of plain Greek yogurt or labneh for some extra creaminess.

How to Make This Recipe

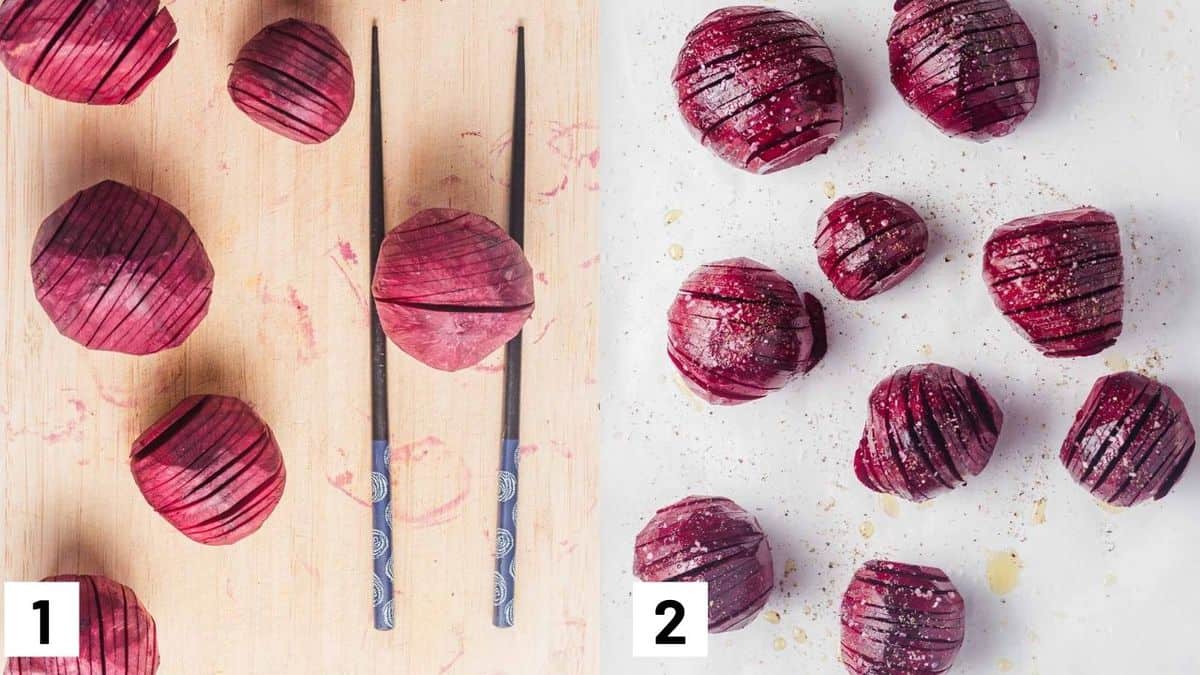
Two side by side images showing how to slice and roast beets.

Step 1: Wash, scrub, and peel the beets and carefully hasselback them by slicing straight down but stopping just short of slicing all the way through so that they retain their shape. Each slice can be between ¼ inch and 1/8 inch thick.

Step 2: Arrange the beets on the prepared baking sheet and fan the slices out as much as possible. Drizzle olive oil, season with a generous pinch of salt and pepper and let it roast in the oven for 1 hour – 1 hour 15 minutes.

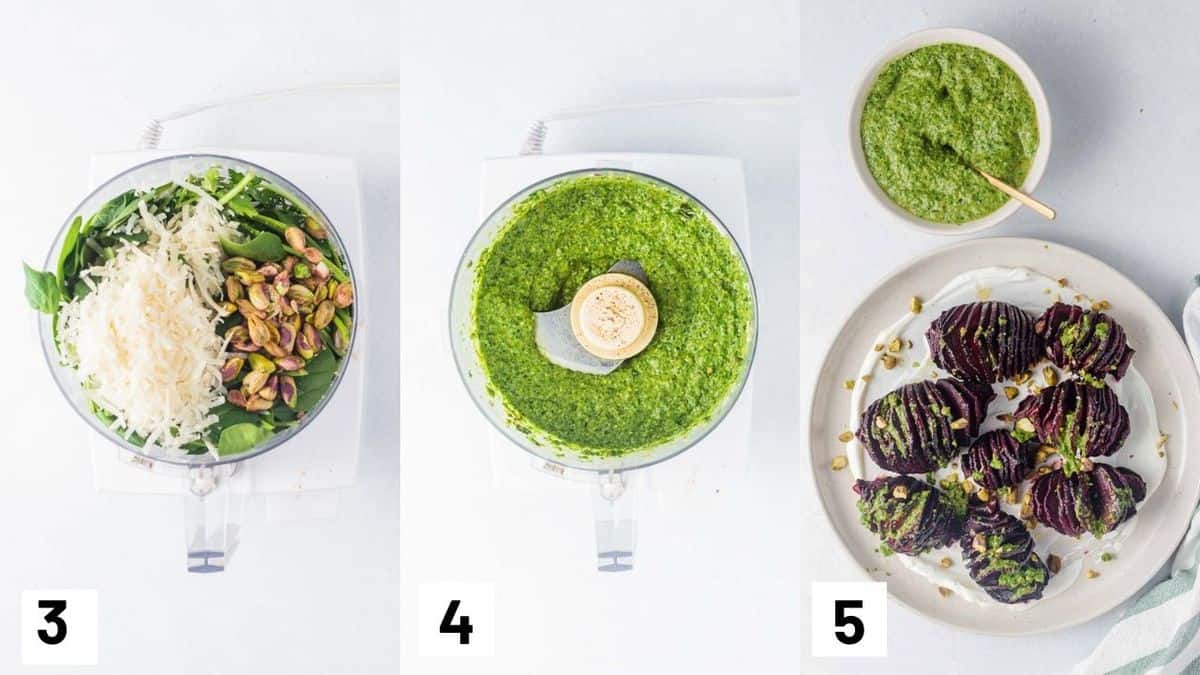
Three side by side images showing how to prepare pistachio and garnish the beets.

Step 3: Prepare pesto by adding all the ingredients except olive oil into a food processor.

Step 4: Pulse a few times until everything is coarsely ground. With the motor running drizzle in the olive oil in a steady stream until the pesto is smooth and vibrant. Taste and adjust seasoning.

Step 5: Spread the greek yogurt on a serving platter arrange the beets, drizzle the pesto and top with additional chopped pistachio.

Expert Tips

For a fool proof method to slice the beets hasselback style place it on a wooden ladle or in between chopsticks. This will serve as a guide and prevent from cutting all the way through the beets.

These hasselback beets can also be served warm or cold and is great for meal prep! Both the pesto and beets can be made 3 days ahead.

Recipe FAQs

Can I make this vegan?

Yes absolutely. You would have to omit the parmesan cheese from the pesto. You could also add about 1/4 cup of nutritional yeast or vegan cheese to the pesto to substitute for the cheesy flavour. You can also substitute the labneh for a vegan yogurt alternative.

How can I make this allergy friendly?

To make this recipe allergy friendly you can omit or replace the pistachios with an allergy friendly seed like pumpkin or sunflower as they will provide a similar crunchy texture and healthy fats!

Can I freeze the pesto?

Oh yes! This is one of my favourite pesto hacks. You can freeze the pesto by pouring it into an empty ice cube tray and covering with plastic wrap. Frozen pesto will keep in the freezer for up to 6 months.

How else can I use up leftover pesto?

The possibilities are endless! You can add to pasta, use as a spread on toast or crackers, mix into your salad dressing, or you can have it with your morning eggs! Some of my favourite recipes to use up pesto include these avocado zucchini noodles and this pesto flatbread with roasted grapes and figs.

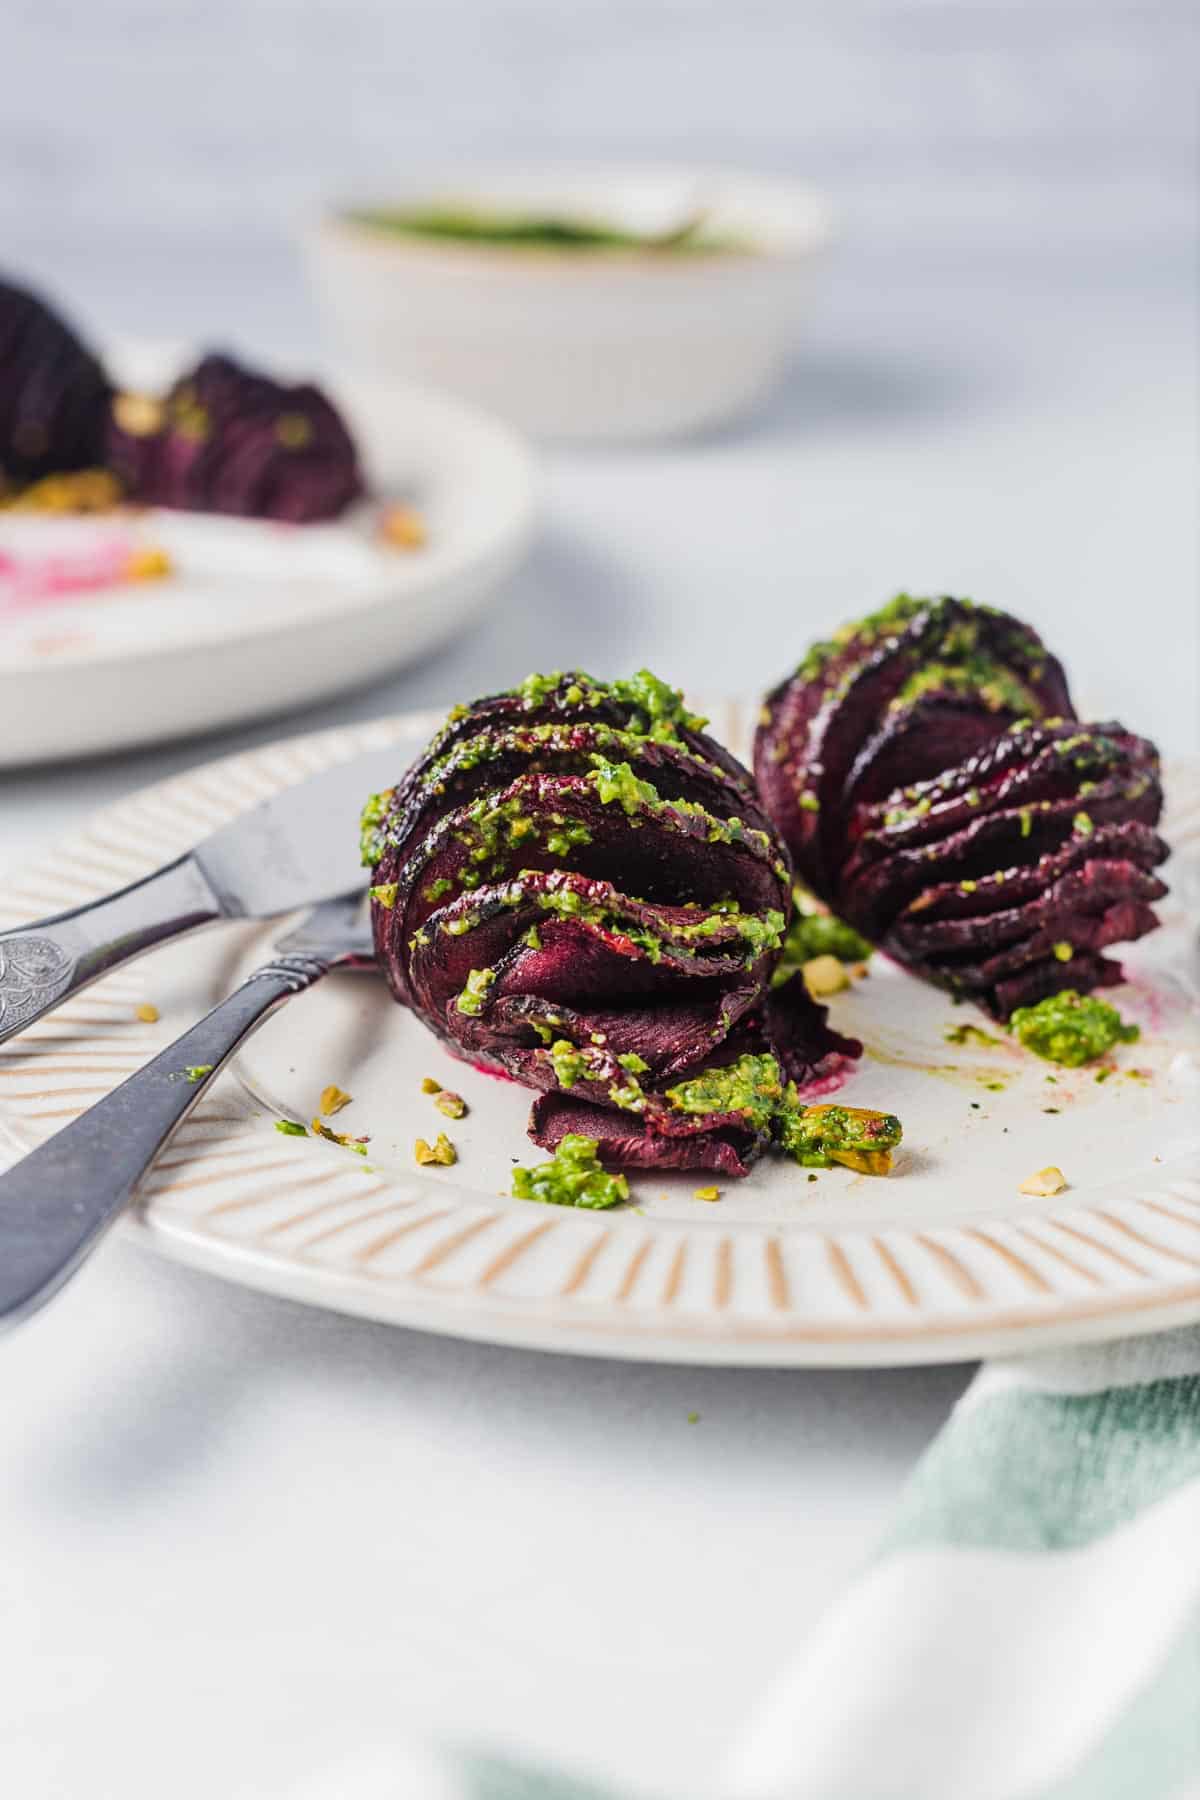
Close of up two hasselback beets with pistachio pesto on a white plate.

More Recipes You Might Like

If you need more beet inspo, you’ll LOVE these delicious beet recipes.

  • Baked Beet Chips with Orange Dip
  • Beet Gnocchi with Rainbow Chard
  • Apple Chutney with Beets & Ginger
  • Curry Soup with Yellow Beets

What are your favourite beet recipes lately?

Print Recipe
5 from 1 vote

Hasselback Beets with Pistachio Pesto (Gluten Free)

These hasselback beets with pistachio pesto are as delicious as they are gorgeous! They also make for the perfect easy gluten free side dish that is great for entertaining and wowing your guests.
Prep Time10 minutes mins
Cook Time1 hour hr
Total Time1 hour hr 10 minutes mins
Course: Side Dish
Cuisine: American
Diet: Gluten Free, Vegetarian
Servings: 6
Calories: 245kcal
Author: Abbey Sharp

Ingredients

  • 6-8 Beets select beets that are small to medium size
  • Flaked sea salt and pepper
  • Olive Oil

Pistachio Pesto

  • ½ cup roasted unsalted pistachio
  • ⅓ cup olive oil
  • 1 clove of garlic
  • ½ cup fresh parsley
  • 1 big bunch of basil
  • 2 handfuls of baby spinach
  • Juice of 1 lemon
  • ½ cup parmesan
  • Salt and pepper

Garnish

  • ½ cup labneh or greek yogurt
  • Chopped roasted pistachio

Instructions

Prepare the beets

  • Preheat your oven to 400F and line a baking tray with parchment.
  • Wash and scrub the beets, pat it dry.
  • Peel the beets and then ‘hasselback’ your beets. To create accordion style cuts or hassleback, slice straight down into the beets, but stop just short of cutting it all the way through. Each slice can be between ¼ inch and 1/8 inch thick. For a fool proof method to slice the beets hasselback style place it on a wooden ladle or in between chopsticks. This will serve as a guide and prevent from cutting all the way through the beets.
  • Arrange the beets on the prepared baking sheet and fan the slices out as much as possible. Drizzle olive oil, season with a generous pinch of salt and pepper and let it roast in the oven for 1 hour – 1 hour 15 minutes. When they are done you want to ensure you can pierce them easily with a knife.

Prepare the Pesto

  • While the beets are in the oven, prepare the pesto. Add all the ingredients except olive into a food processor. Pulse a few times until everything is coarsely ground. With the motor running drizzle in the olive oil in a steady stream until the pesto is smooth and vibrant. Taste and adjust seasoning.

To serve

  • Spread the greek yogurt on a serving platter arrange the beets, drizzle the pesto and top with additional chopped pistachio.

Nutrition

Calories: 245kcal | Carbohydrates: 12g | Protein: 8g | Fat: 19g | Saturated Fat: 4g | Trans Fat: 1g | Cholesterol: 7mg | Sodium: 207mg | Potassium: 433mg | Fiber: 3g | Sugar: 7g | Vitamin A: 575IU | Vitamin C: 11mg | Calcium: 149mg | Iron: 2mg

Did you LOVE these hasselback beets? Leave me a comment down below and let me know your thoughts!

Abbey Sharp

Abbey Sharp is a Registered Dietitian (RD), regulated by the Ontario College of Dietitians. She is a mom, YouTuber, Blogger, award winning cookbook author, media coach specializing in food and nutrition influencers, and a frequent contributor to national publications like Healthline and on national broadcast TV shows.
www.abbeyskitchen.com/about-abbey/

Last Updated November 28, 2021. Published February 9, 2021 By Abbey Sharp 37 Comments

High Protein Oatmeal (No Protein Powder)

This High Protein Oatmeal with Crème Brûlée crackle is a delicious and nutritious morning-friendly version of the decadent dessert!

A birds eye view image of high protein oatmeal in a white bowl with a wooden spoon with oats, and a second portion in the background.

I think of oatmeal as the ultimate comfort food. It probably has to do with the fact that I literally grew up on oatmeal so its tied to nostalgia from my childhood. But regardless, I can always count on oatmeal to make me feel good both emotionally, and physically too! Plus, it’s just so dang delicious.

So if you are also part of the oatmeal fan club, you’re gonna love this high protein oatmeal with crème brûlée crackle! This recipe literally tastes like eating dessert for breakfast, but is packed with protein to help fuel your morning.

Table of contents

  • Why This Recipe Works
  • Key Ingredients
  • How to Make This Recipe
  • Expert Tips
  • Recipe FAQs
  • More Recipes You Might Like

Why This Recipe Works

Besides the fact that this recipe combines the comfort of oatmeal with the decadence of crème brûlée (need I say more?), here are just a few more reasons why I KNOW you’re totally gonna dig this recipe.

  • High protein without using any protein powder
  • Takes only 15 minutes to prepare
  • Uses less than 10 ingredients
  • Gluten free

Key Ingredients

Flat lay image of portioned recipe ingredients including water, rolled oats, brown sugar, maple syrup, salt, vanilla bean, egg whites, and cinnamon.

Rolled Oats – I prefer using old fashioned rolled oats rather than steel cut because they tend to cook faster and hold more liquid. If you’re in a time crunch though, you can also try using instant oats and decrease the cook time but the texture won’t be quite the same.

Egg whites – Without using any protein powder, I like to boost the satisfying power of this high protein oatmeal by whisking in some whipped egg whites to yield a fluffy texture. If this is your first time experimenting with whipped egg whites in oatmeal, then boy are you in for a treat!

Brown Sugar – to get the irresistible crème brûlée crackle, we sprinkle a bit of brown sugar on top of the high protein oats and torch the crap out of it! In other words, we get it all nice and brown like you would with a classic crème brûlée.

How to Make This Recipe

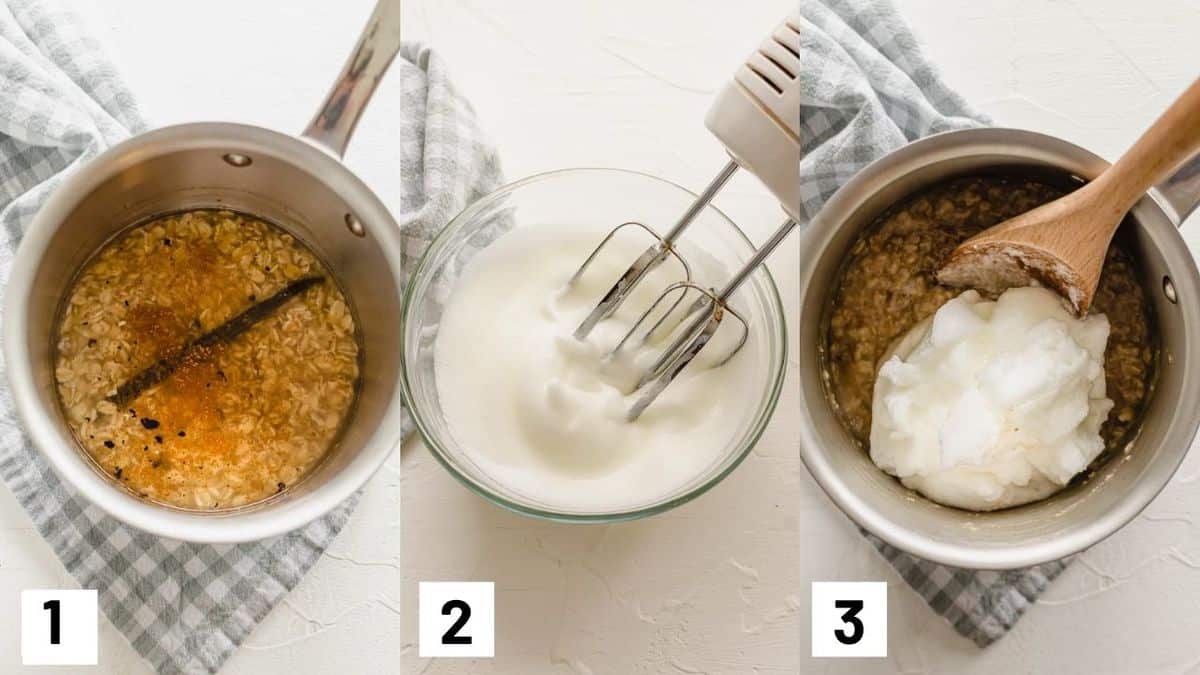
Three side by side images showing how to prepare recipes including cooking the oatmeal, whipping the egg whites, and combining together.

Step 1: In a small pot, combine the oats, water, salt, cinnamon, vanilla bean seeds and the residual vanilla bean pods. Bring the mixture to a simmer over medium-high heat, then reduce the heat to medium. Stir the pot occasionally until the oats have absorbed almost all of the water but are still very moist and thick (about 3-5 minutes).

Step 2: In a bowl, using a hand mixer beat the egg whites until they froth up.

Step 3: Add beaten egg whites to the pot with the oats. Cook, stirring constantly until the mixture is creamy and fluffs up- about 3 minutes. Remove the vanilla bean pods and add maple syrup, to taste. When ready to serve, top with brown sugar. Using a blow torch, brulee the top of the oatmeal bowls until caramelized and golden and dig in!

Expert Tips

While you may be surprised to see that we are using water instead of milk to make this high protein oatmeal, there is good reason. While I am not above using milk to whip up a batch of the good stuff, I take the texture of this oatmeal recipe very seriously! I mean, this ain’t your average oatmeal recipe… its Crème Brûlée oatmeal! So it deserves the very best VIP treatment.

With that said, using water tends to yield a creamier bowl of oatmeal which is on par with the texture of a Crème Brûlée dessert. On the other hand, using too much milk can quickly turn the texture of this recipe thick and sticky, and that just won’t do this time around. But if you insist on adding milk to this recipe, i’d suggest adding just a splash!

Recipe FAQs

What can I use instead of egg whites to make this vegan friendly?

You could try substituting it with aquafaba (which is the leftover liquid from a can of chickpeas) and whipping it the same way you would the egg whites, however it doesn’t have much protein. Otherwise, you could omit the egg whites, and instead of cooking the oats with water you can use a high protein plant-based milk like soy milk.

What if I don’t have a blow torch?

If you have oven safe boils available you can try broiling it in the oven instead but make sure to keep a close eye on it because it can burn crazy quickly!

Can I make this ahead of time?

Absolutely you can! You can try making this the same way you would make overnight oats and adding the crème brûlée crackle before serving.

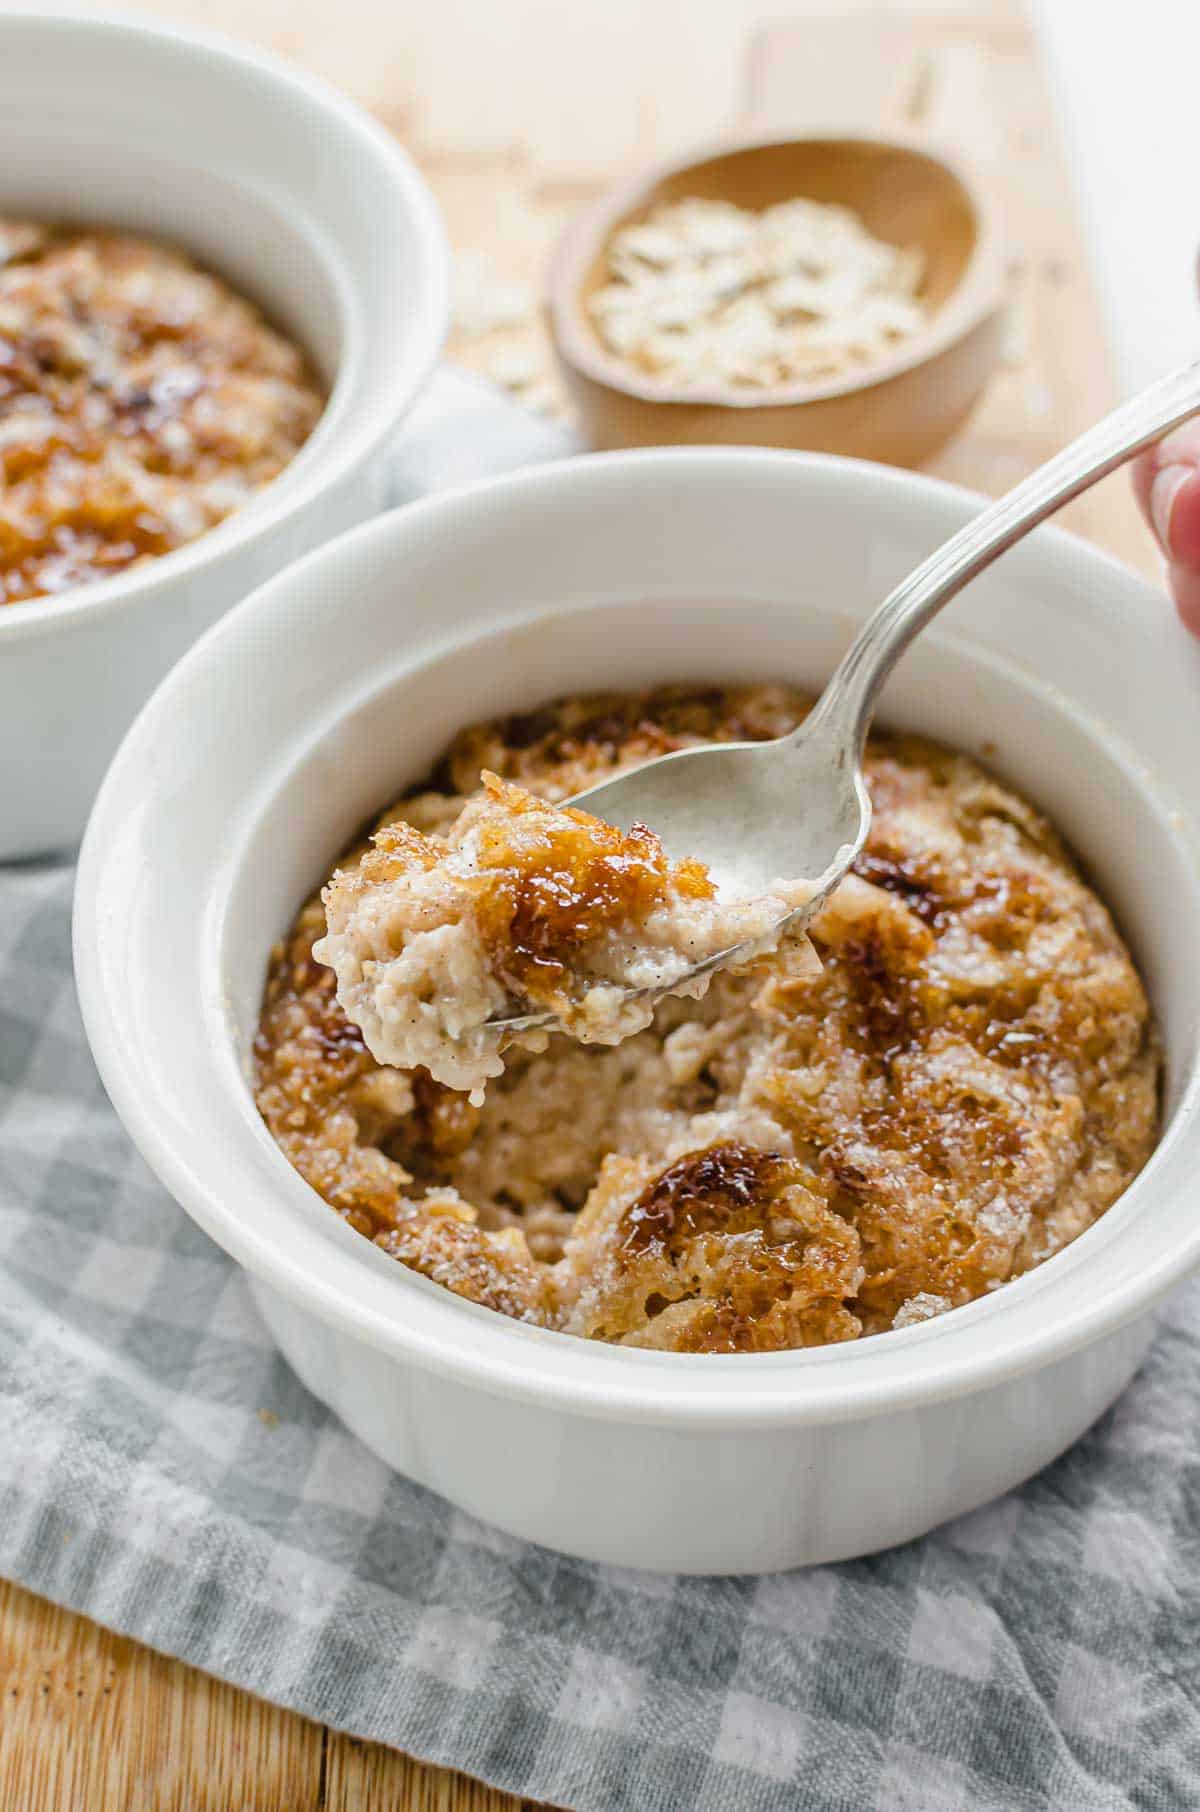
A spoon picking up a bite of high protein oatmeal from a white bowl.

More Recipes You Might Like

Here are more high protein oatmeal recipes that I know you’ll LOVE!

  • Whipped Protein Oatmeal (3 Ways!)
  • Pina Colada Protein Oatmeal
  • Tiramisu Overnight Oats
  • Korean Savoury Oats

Now I want to know – What are some of your favourite comfort food breakfasts?

Print Recipe
5 from 4 votes

High Protein Oatmeal with Crème Brûlée Crackle

This High Protein Oatmeal with Crème Brûlée crackle is a delicious morning-friendly version to enjoy this decadent dessert!
Prep Time5 minutes mins
Cook Time10 minutes mins
Total Time15 minutes mins
Course: Breakfast
Cuisine: French
Servings: 4 people
Calories: 177kcal
Author: Abbey Sharp

Ingredients

  • 1 cup old fashion rolled oats (gluten free if needed)
  • 3 cups water
  • ¼ tsp salt
  • 1 tsp cinnamon
  • 2 vanilla beans split and scraped out
  • 2 cups egg whites pasteurized
  • Maple syrup to taste

Topping

  • 8 tsp light brown sugar

Instructions

  • In a small pot, combine the oats with the water, salt, cinnamon, vanilla bean seeds and the residual vanilla bean pods. Bring the mixture to a simmer over medium-high heat, then reduce the heat to medium. Stir the pot occasionally until the oats have absorbed almost all of the water but are still very moist and thick- about 3-5 minutes.
  • In a bowl, beat the egg whites until they froth up, then add them to the pot with the oats. Cook, stirring constantly until the mixture is creamy and fluffs up- about 3 minutes.
  • Remove the vanilla bean pods, and maple syrup, to taste.
  • Divide between four bowls and sprinkle with about two teaspoons of brown sugar. Using a blow torch, brulee the top of the oatmeal bowls until caramelized and golden and dig in!

Video

Nutrition

Calories: 177kcal | Carbohydrates: 23g | Protein: 16g | Fat: 2g | Saturated Fat: 1g | Sodium: 360mg | Potassium: 282mg | Fiber: 2g | Sugar: 9g | Calcium: 36mg | Iron: 1mg

Have you tried this Crème Brûlée high protein oatmeal yet? What did you think?

Abbey Sharp

Abbey Sharp is a Registered Dietitian (RD), regulated by the Ontario College of Dietitians. She is a mom, YouTuber, Blogger, award winning cookbook author, media coach specializing in food and nutrition influencers, and a frequent contributor to national publications like Healthline and on national broadcast TV shows.
www.abbeyskitchen.com/about-abbey/

Last Updated February 4, 2021. Published February 4, 2021 By Abbey Sharp 9 Comments

Beet Soup with Apples & Ginger (Vegan)

This creamy vegan beet soup with apples & ginger is as delicious as it is beautiful, and totally perfect for a Valentine’s Day dinner with your love.

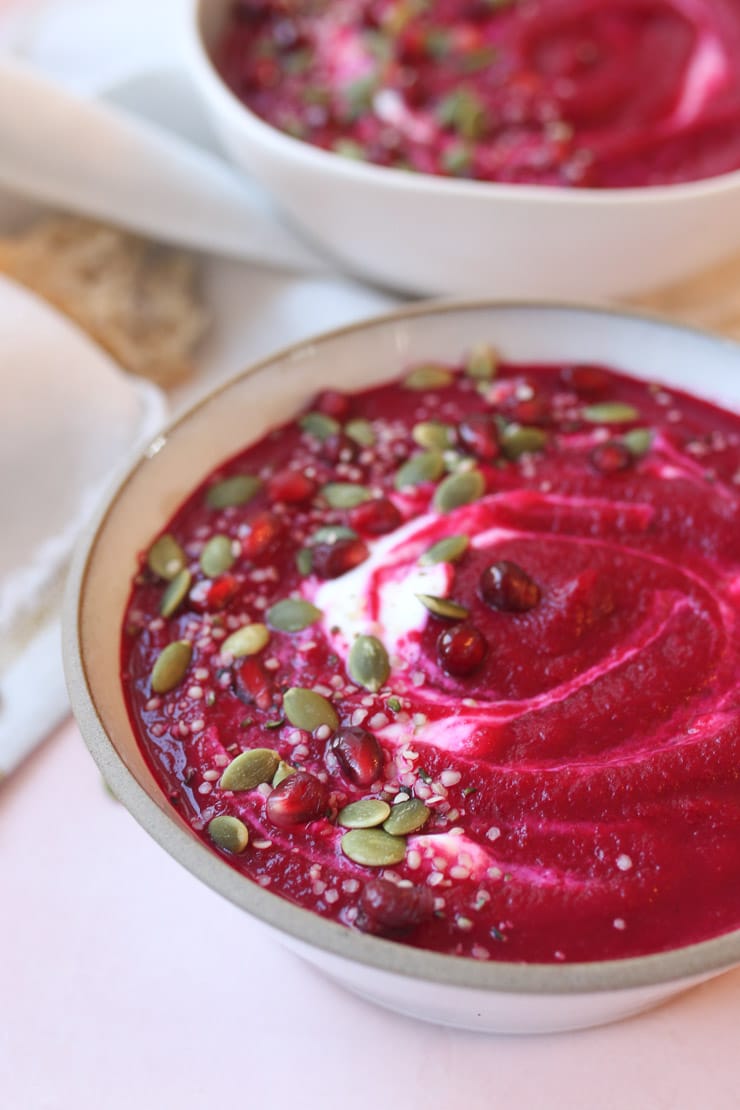
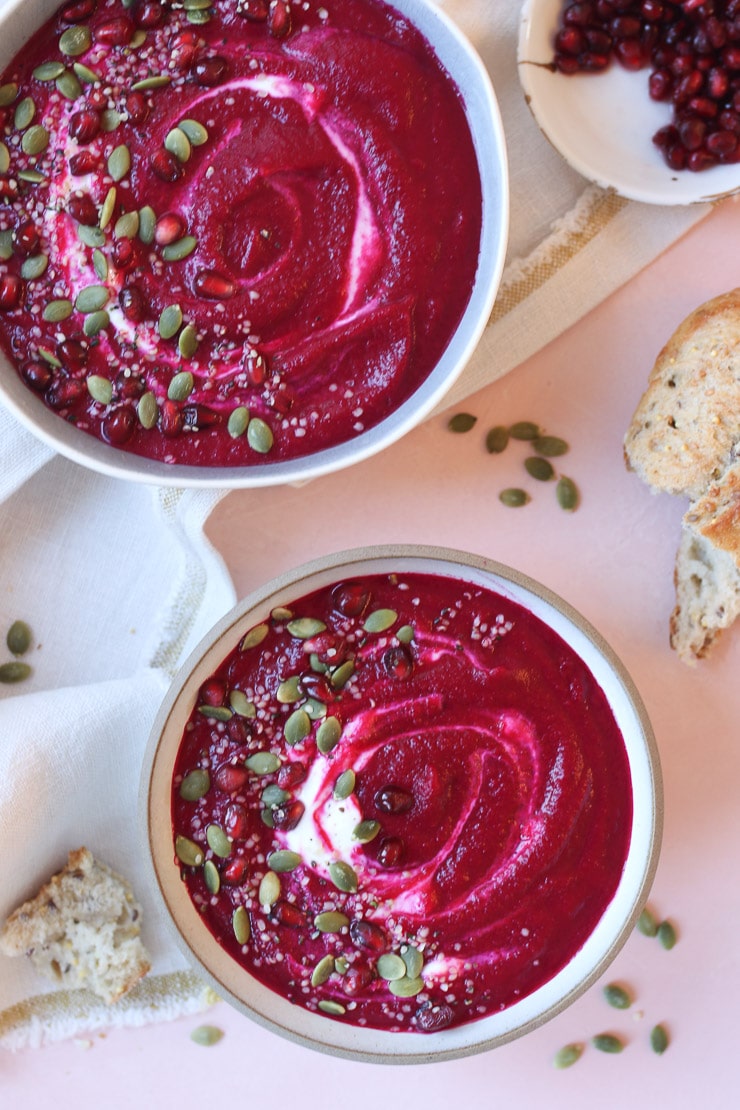
red beet soup in a bowl topped with pomegranate and pumpkin seeds

With Valentine’s Day around the corner, I got you covered with this awesome creamy beet soup that is super easy to pull off (even for the non-chef), but also crazy beautiful in the bowl. Impress your loved ones with this beet soup that looks restaurant quality but in reality, didn’t take long to pull together.

Why This Recipe Works

I love beet soup in general (check out my recipe for yellow beet soup here), but this one is particularly sweet and warm thanks to the addition of apples, ginger and apple pie spice. Is it butterflies in your date’s stomach or the warming spices? That’s up to you two to decide!

Most of the work on this recipe is just preparing it to go in the pot. After you’ve sliced and diced, the soup just simmers. That’s the beauty of it. Spend this time working on something else (like maybe a dessert like these No Bake Nutella Cheesecake Cups)

It’s not just pretty and pink, it’s also packed with nutrients from the beets and apples. Two birds, one stone! Don’t feel like you need to restrict yourself to having this for Valentine’s Day, enjoy this nutritious soup year around.

Table of contents

  • Why This Recipe Works
  • Key Ingredients
  • How To Make This Recipe
  • Expert Tips
  • Recipe FAQs
  • More Recipes You May Like

Key Ingredients

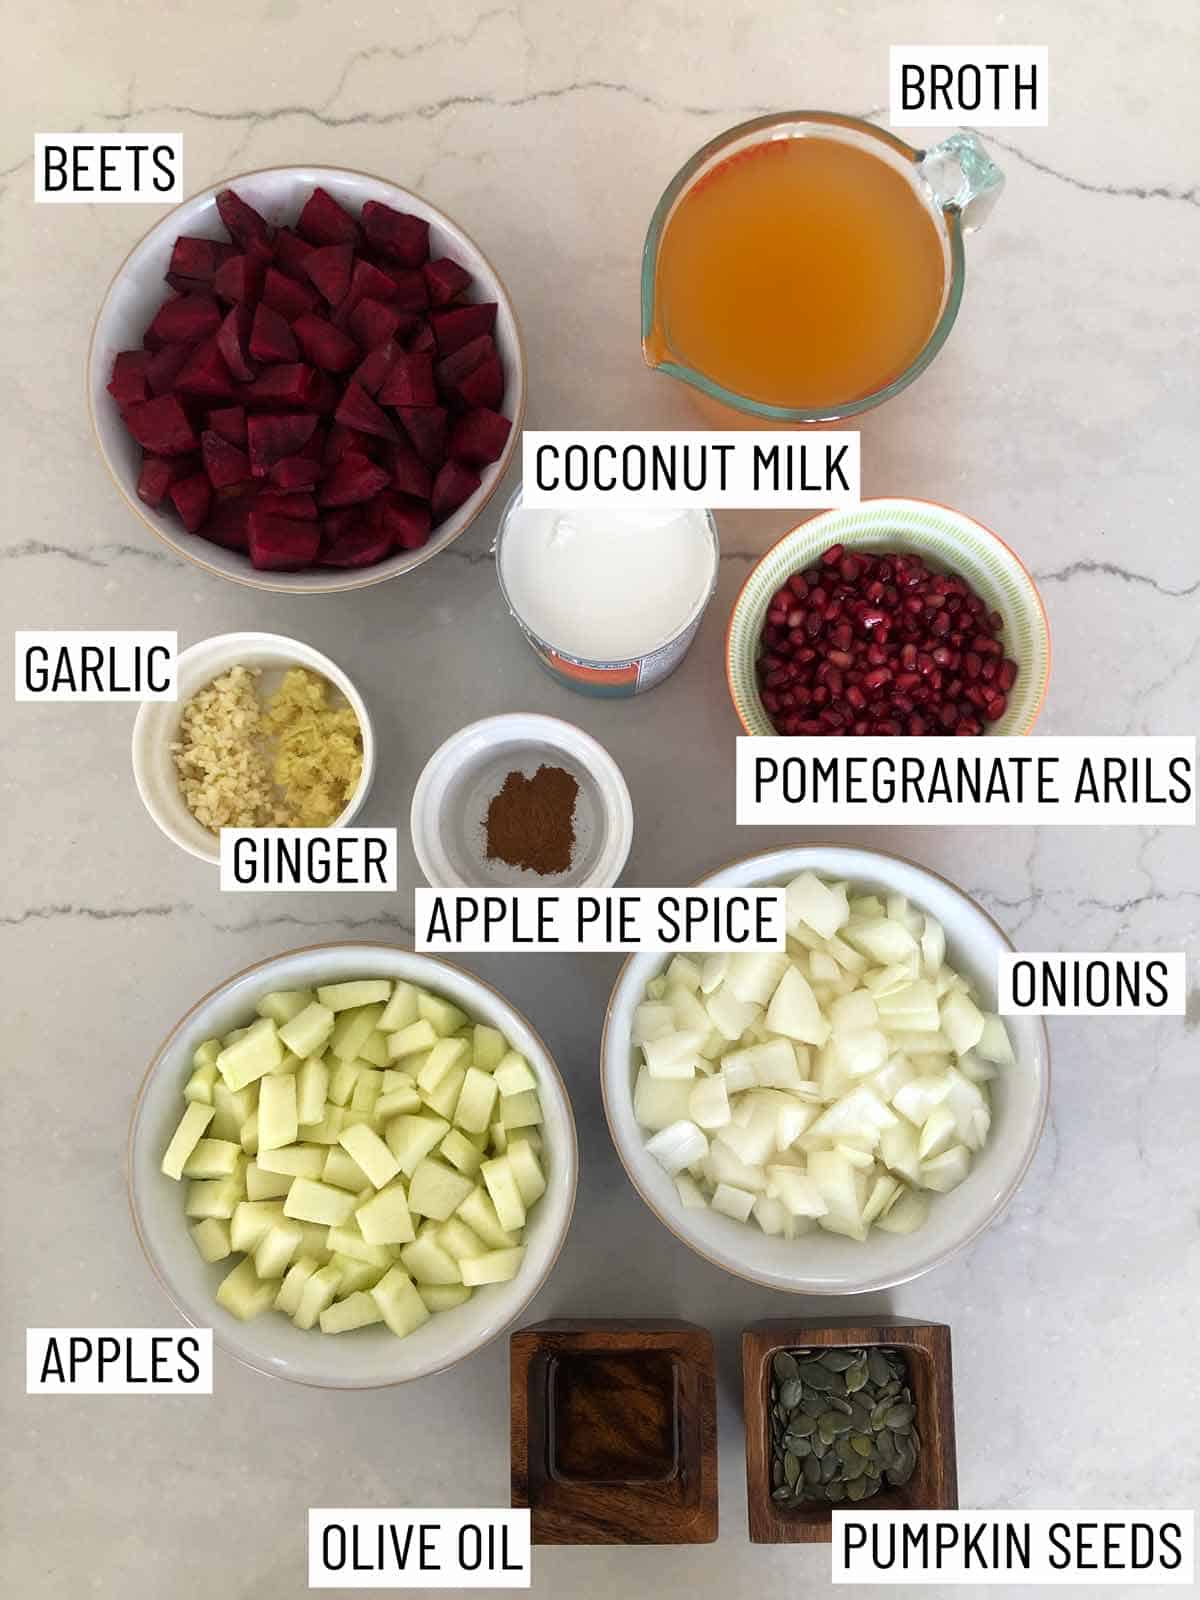
Overhead image of ingredients: broth, coconut milk, pomegranate arils, onions, pumpkin seeds, olive oil, apples, apple pie spice, ginger, garlic, and beets.

Beets — Beets are rich in vitamins and nutrients. They’ve got antioxidant properties, anti-inflammatory properties, and fibre as well!

Apples — The apples help add to the natural sweetness that this beet soup has without adding any sugars to it.

Warming Spices — the ginger and apple pie spice gives you this warm feeling from the inside out. If you’ve never tried apple pie spice in a soup, I 100% recommend you give it a try!

Coconut Milk — To help make this soup creamy without adding heavy cream to it, we use coconut milk instead.

How To Make This Recipe

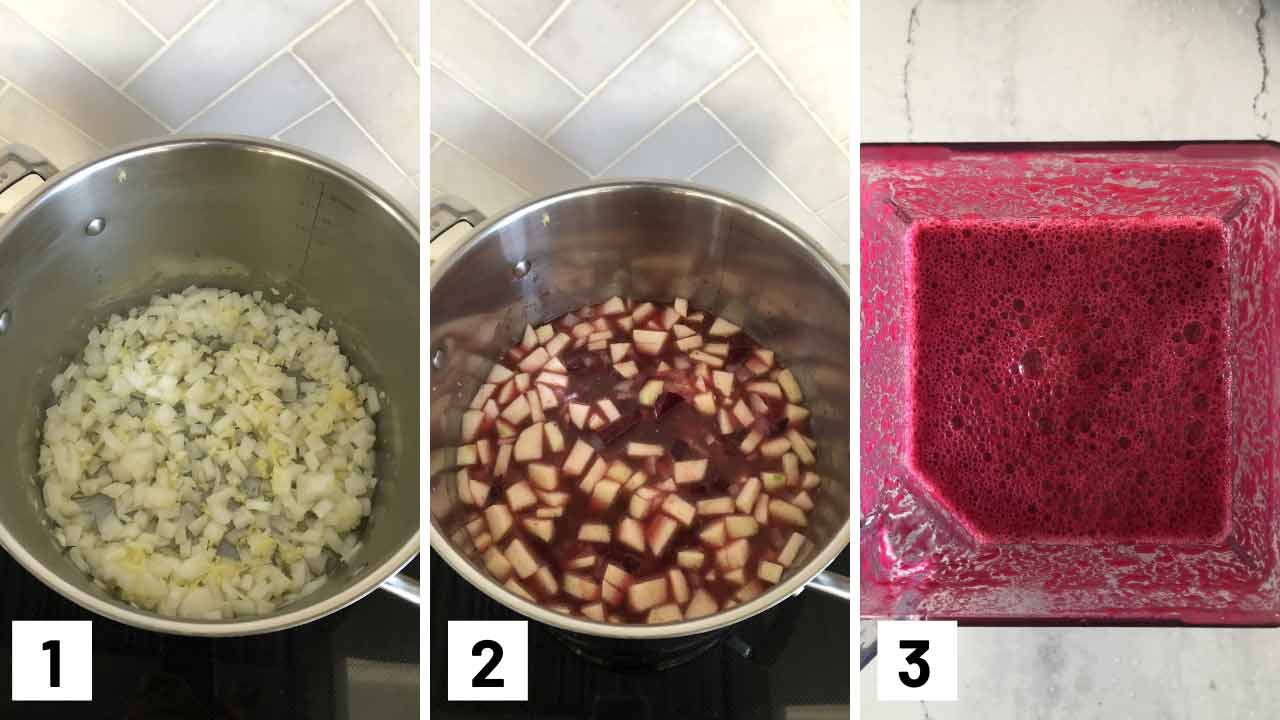
Step by step photos making beet soup: sauteing onions, garlic, ginger, adding in the broth, beets, and apples, and then blending it up.

Step 1: To a large soup pot, heat the olive oil over medium heat. Add the onion, garlic and ginger and saute until fragrant and soft, about 3 minutes.

Step 2: Add the beets, apples, vegetable broth, and apple pie spice, cover and cook for 40 minutes or until the beets are soft.

Step 3: Add the cream from the top of the coconut milk can, along with ¼ cup of the coconut water to start. Transfer to a blender (or puree with a hand blender) until very smooth. If too thick, add more of the coconut water and season with salt and pepper, to taste.

Expert Tips

Don’t have apple pie spice? Make your own by combining 4 tablespoons ground cinnamon, 1½ teaspoons ground nutmeg, ½ teaspoon ground allspice, 1 teaspoon ground ginger, and 1½ teaspoons ground cardamom. If you have extra, store it in an airtight container inside of your spice cabinet.

When peeling and dicing your beets, be careful of stains. To avoid stains on your wooden cutting board, you can spray it with some oil beforehand so the stains don’t set in. If your hands are stained, just rub some baking soda on them with some water and that should help clear it up.

When blending hot soup, you need to make sure there’s a way for the steam to release. Most lids should have an option for that. If not, let the soup cool a bit before blending or use an immersion stick blender instead.

Recipe FAQs

Is this vegan beet soup kid-friendly?

Yes! My son loves the natural sweetness of the beets and apple in this soup. I also find a lot of kids (especially girls, thanks to society’s gendering of foods) love PINK foods, so this will be a huge hit with your whole family on Valentine’s Day.

Can I batch prep this apple and beet soup and freeze some of it for later?

Yes! I actually sometimes double the recipe for this vegan beet soup and place half of it into a large freezer bag laying FLAT in my freezer. this makes it way easier to stack so you don’t have a bunch of mis-shapen freezer bags taking up space.

Can I use a different type of beet?

Candy cane beets also gives your beet soup a beautiful pink colour if you want to use a different beet. While golden beets can be used as well, it’ll no longer be pink!

What other toppings can I use?

Use any nuts, seeds, dried berries, crispy chickpeas, etc you have on hand! I also like hemp hearts as a topping as it adds extra nutrition to the soup.

two red beet soup in a bowl topped with pomegranate seed and pumpkin seeds

More Recipes You May Like

Want some more vegan Valentine’s Day recipes that would compliment that beautiful vegan beet soup nicely? Try these ones!

  • VEGAN AVOCADO ZUCCHINI NOODLES WITH PESTO 
  • PISTACHIO PARSLEY VEGAN PESTO PASTA SALAD
  • VEGAN UNSTUFFED CABBAGE ROLLS IN A BOWL 
  • VEGAN GUACAMOLE STUFFED SWEET POTATOES WITH SPICY CHICKPEAS 

What are you going to be doing or serving for Valentine’s Day? Do you go out for dinner or stay in and cook? Leave me a comment below!

Print Recipe
4.89 from 9 votes

Beet Soup with Apples & Ginger (Vegan)

This creamy vegan beet soup with apples & ginger is as delicious as it is beautiful, and totally perfect for a Valentine's Day dinner with your love.
Prep Time5 minutes mins
Cook Time45 minutes mins
Total Time50 minutes mins
Course: Soup
Cuisine: American
Servings: 4
Calories: 122kcal
Author: Abbey Sharp

Ingredients

  • 2 tbsp olive oil
  • 1 onion chopped
  • 2 cloves garlic chopped
  • 2 1/2 tbsp fresh grated ginger
  • 3 ½ cups peeled and finely diced red beets
  • 2 cups peeled and diced green apples
  • 5 cups low sodium vegetable broth
  • ½ tsp apple pie spice
  • 1 can lite coconut milk
  • Salt and pepper to taste

To top:

  • Coconut yogurt or additional coconut milk or cream
  • Pumpkin seeds
  • Pomegranate arils

Instructions

  • To a large soup pot, heat the olive oil over medium heat. Add the onion, garlic and ginger and saute until fragrant and soft, about 3 minutes.
  • Add the beets, apples, vegetable broth, and apple pie spice, cover and cook for 40 minutes or until the beets are soft.
  • Add the cream from the top of the coconut milk can, along with ¼ cup of the coconut water to start. Transfer to a blender (or puree with a hand blender) until very smooth. If too thick, add more of the coconut water and season with salt and pepper, to taste.

Notes

  • Don’t have apple pie spice? Make your own by combining 4 tablespoons ground cinnamon, 1½ teaspoons ground nutmeg, ½ teaspoon ground allspice, 1 teaspoon ground ginger, and 1½ teaspoons ground cardamom. If you have extra, store it in an airtight container inside of your spice cabinet.
  • When peeling and dicing your beets, be careful of stains. To avoid stains on your wooden cutting board, you can spray it with some oil beforehand so the stains don’t set in. If your hands are stained, just rub some baking soda on them with some water and that should help clear it up.
  • When blending hot soup, you need to make sure there’s a way for the steam to release. Most lids should have an option for that. If not, let the soup cool a bit before blending or use an immersion stick blender instead.

Nutrition

Calories: 122kcal | Carbohydrates: 28g | Protein: 3g | Fat: 1g | Saturated Fat: 1g | Sodium: 1333mg | Potassium: 512mg | Fiber: 6g | Sugar: 18g | Vitamin A: 714IU | Vitamin C: 11mg | Calcium: 32mg | Iron: 1mg
Abbey Sharp

Abbey Sharp is a Registered Dietitian (RD), regulated by the Ontario College of Dietitians. She is a mom, YouTuber, Blogger, award winning cookbook author, media coach specializing in food and nutrition influencers, and a frequent contributor to national publications like Healthline and on national broadcast TV shows.
www.abbeyskitchen.com/about-abbey/

Last Updated January 28, 2021. Published February 1, 2021 By Abbey Sharp Leave a Comment

Instant Pot Cabbage (Easy + Vegan)

This delicious instant pot cabbage makes for a quick and easy plant-based side dish that is made in under 20 minutes!

Instant pot cabbage in a bowl and garnished with dill and cilantro.

Confession time: I am in a serious love affair with my instant pot these days. It fast tracks meals like nobody’s business which helps to keeps my hands free to tend to my mompreneur duties. Name a better kitchen appliance, I dare you!

So now that we’ve got my love for instant pots out of the way, I am excited to share one of my most recent favourite recipes to come out of this handy dandy cooking device – instant pot cabbage.

I don’t know about you but whenever I buy a whole head of cabbage, I RARELY get a chance to use up the whole thing. I mean there are only so many slaws, salads, and stir frys that I can throw it into. My solution? Throw it into the instant pot with a little bit of this and a little bit of that, and you have a delicious side dish that will last you all week!

Table of contents

  • Why This Recipe Works
  • Key Ingredients
  • How to Make This Recipe
  • Expert Tips
  • Recipe FAQs
  • More Recipes You Might Like

Why This Recipe Works

Here are just a few reasons why we are loving up on this instant pot cabbage recipe in a big way:

  • Good source of fibre (5 grams per serving)
  • Uses less than 10 ingredients
  • Takes less than 20 minutes to prepare
  • 100% plant based
  • Veggie packed!
  • Great for meal prep

Key Ingredients

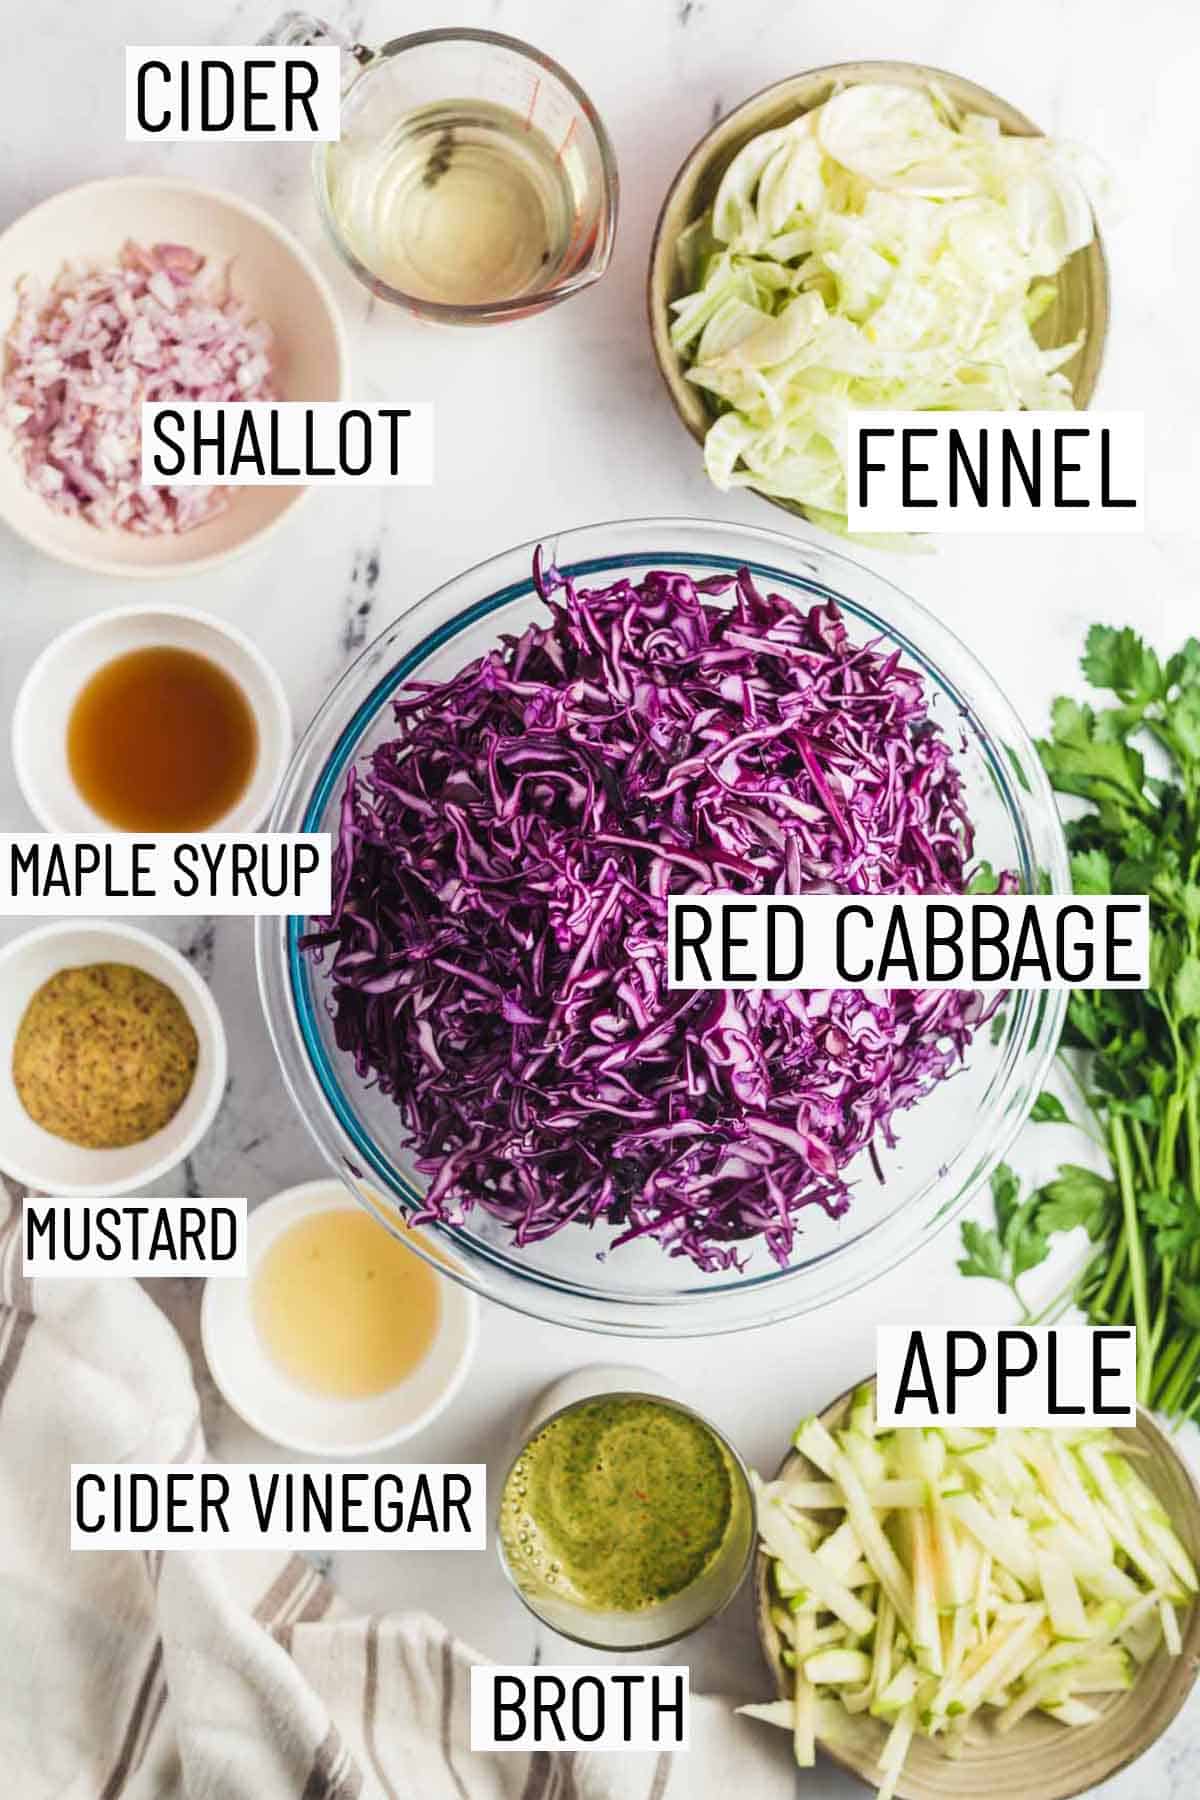
Flat lay image of recipe ingredients for recipe including fennel, cider, shallot, maple syrup, mustard, cider vinegar, broth, apple, and red cabbage.

Red Cabbage – We use red cabbage for this recipe because it adds a beautiful pop of colour to meals and is loaded with nutrients and antioxidants. However, you can absolutely substitute for green cabbage if that is what you have on hand.

Apple & Fennel – While the red cabbage can probably stand alone in this recipe, we like to kick things up a notch by adding in some flavour boosters by way of fennel and apple. The apple provides a bit of tart sweetness to the instant pot cabbage, while the fennel provides a lovely mild earthy flavour.

Flavour Add-ins – Heres where things get interesting. To make this instant pot cabbage taste extra yummy, we combine a tasty mixture of cider vinegar, maple syrup, grainy mustard, cider alcohol, and broth. Are you sold yet?

How to Make This Recipe

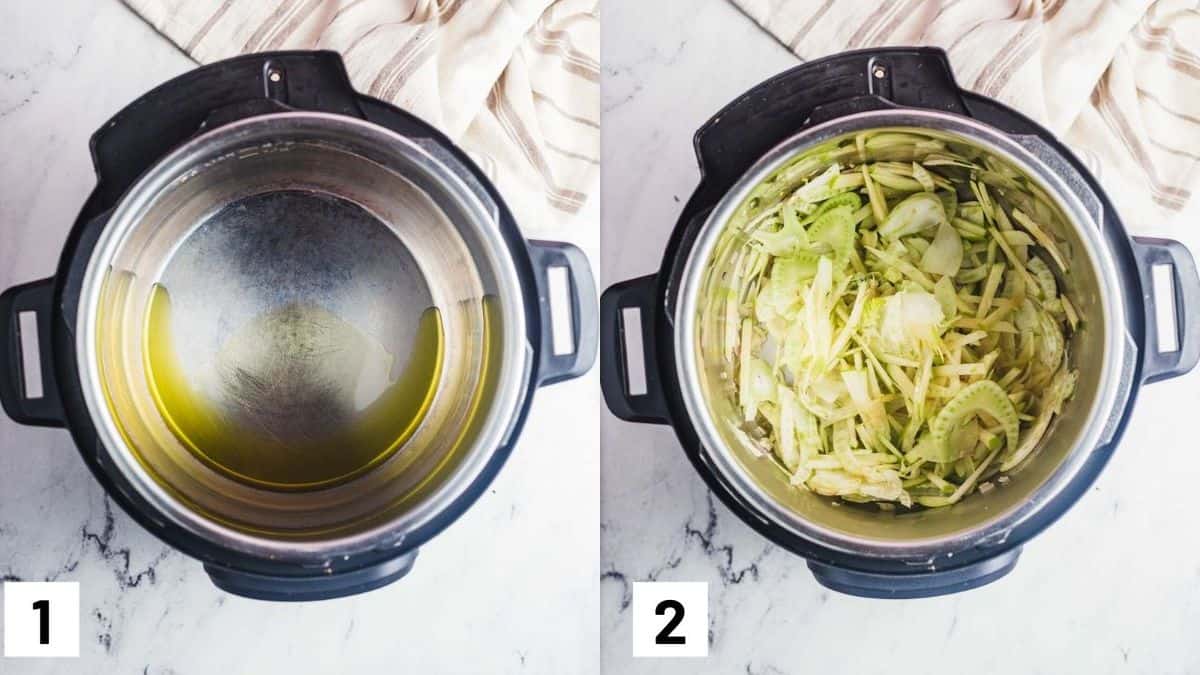
Two side by side images showing how to prep the instant pot, as well as adding in shallots, fennel and apple.

Step 1: Set the Instant Pot to saute. Add olive oil and let it heat up.

Step 2: Add in diced shallots and cook for 2-3 minutes till it becomes translucent. Add in fennel and apple and stir till it is nice and fragrant, about a minute.

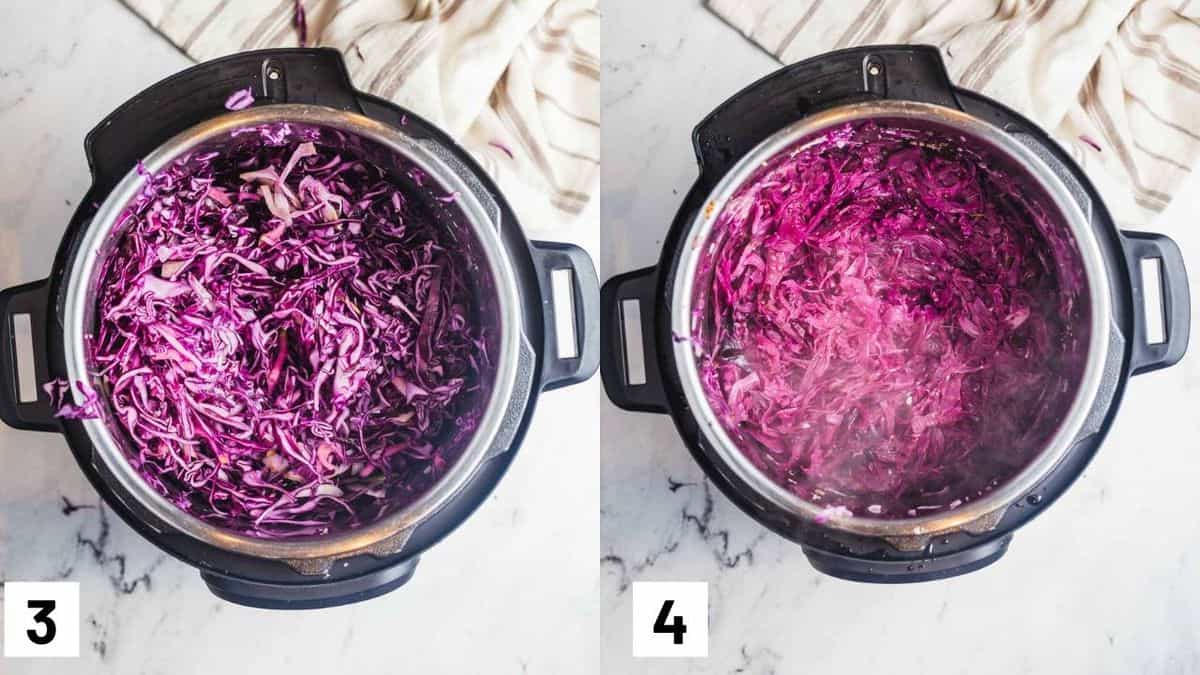
Two side by side images showing how to prepare red cabbage in the instant pot.

Step 3: Mix in cider vinegar, alcoholic cider, vegetable broth, grainy mustard and maple syrup. Add the cabbage and stir till everything is well uniformly mixed in. Add a big pinch of sea salt and generous amounts of freshly cracked black pepper.

Step 4: Hit cancel on your Instant Pot. Close the lid and set the pressure valve to the ‘sealing’ position. Set the Instant Pot to pressure cook on manual mode for 5 minutes. Once the time is up, quick release the pressure. Open it carefully. Taste and adjust seasoning. 

Expert Tips

I recommend using a mandoline for shredding cabbage. It makes shredding 2lb cabbage so much easier. 

This recipe is also great for meal prep! You can make a big batch over the weekend and use throughout the week as an accompaniment to meals, or as an add in to salads. It is also tastes delicious on its own on top of toast!

Recipe FAQs

What can I pair this with?

I love to have this instant pot cabbage as a side for tofu, meat loaf, or this balsamic chicken recipe. Honestly, the combinations are endless and really come down to personal preference!

How long will this last in the fridge?

This recipe will last in the fridge for about 3-5 days.

Is this recipe gluten free?

Yes! This recipe is gluten free, however just make sure you are double checking the labels.

What instant pot would you recommend?

This one here is one of my favs and is insanely multi-functional!

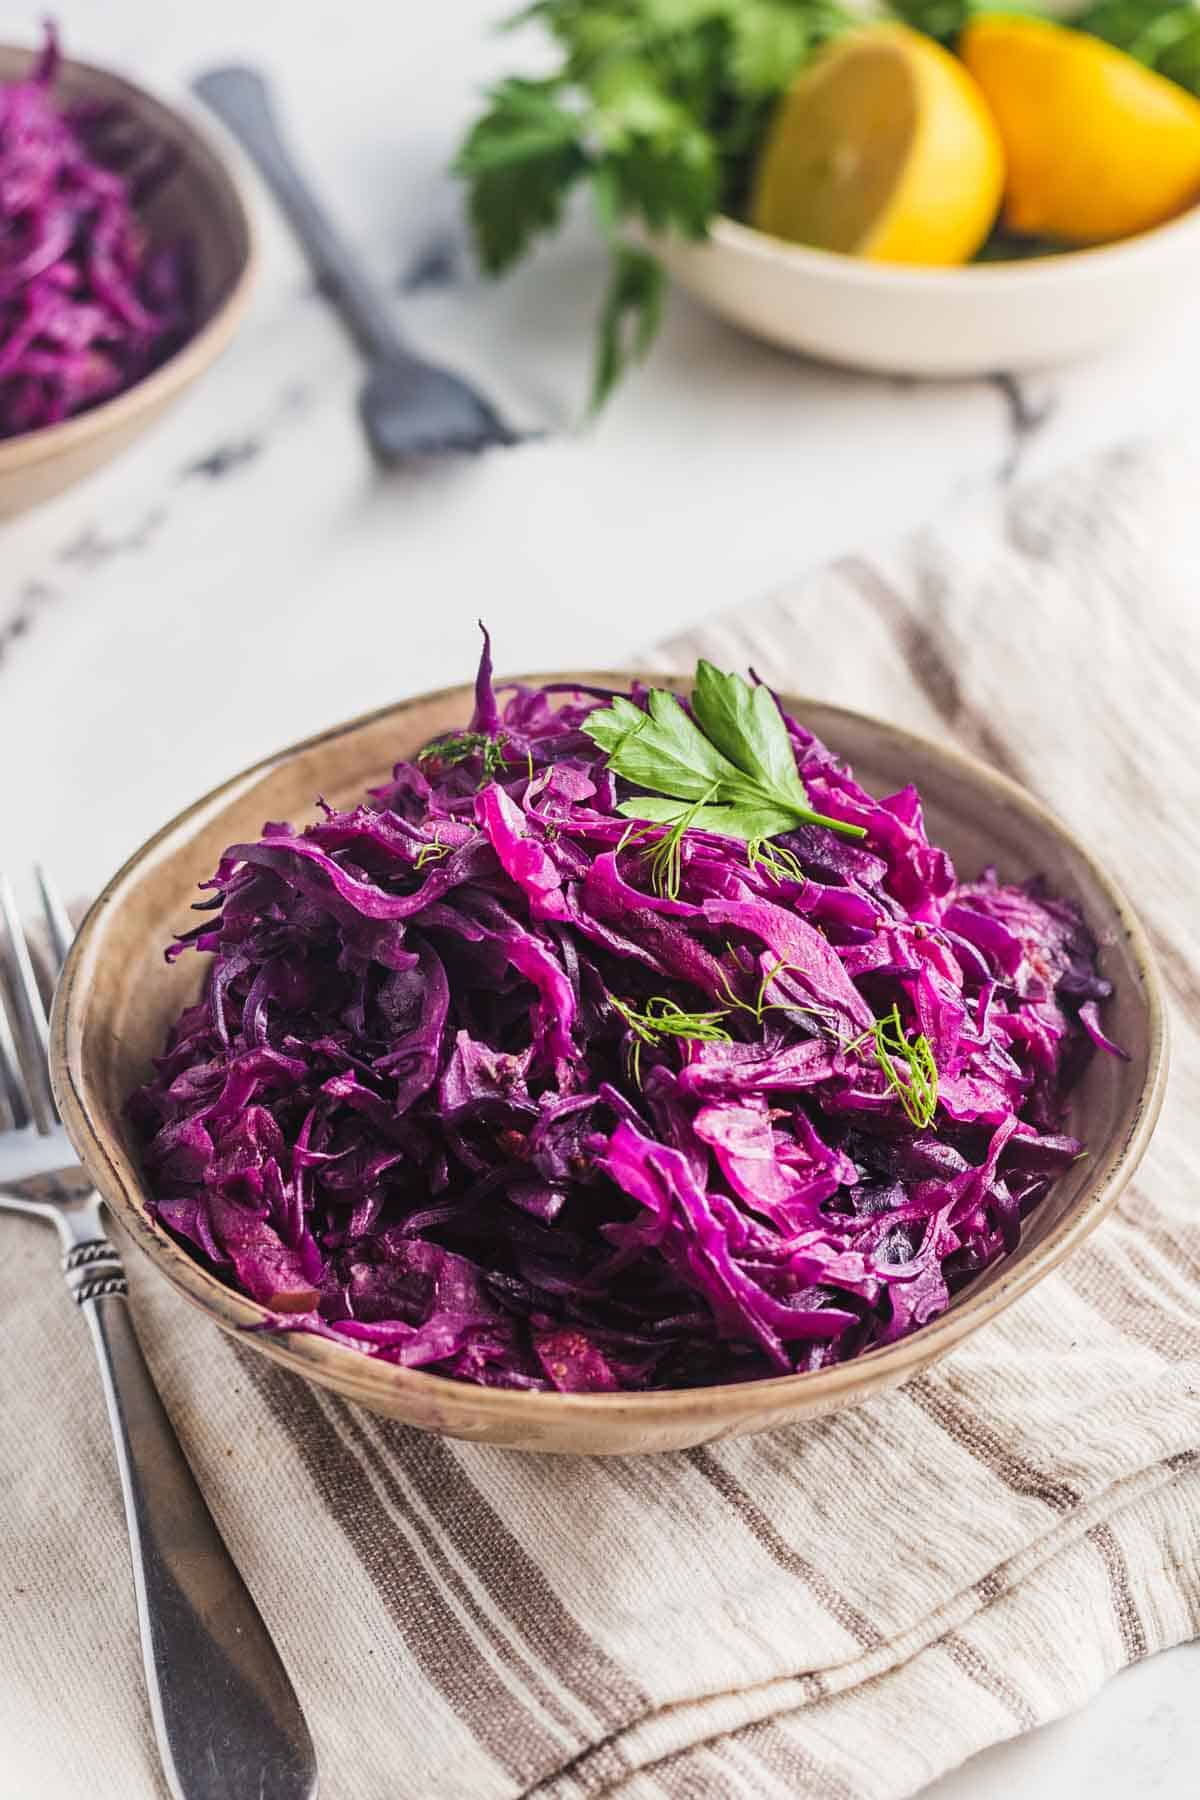
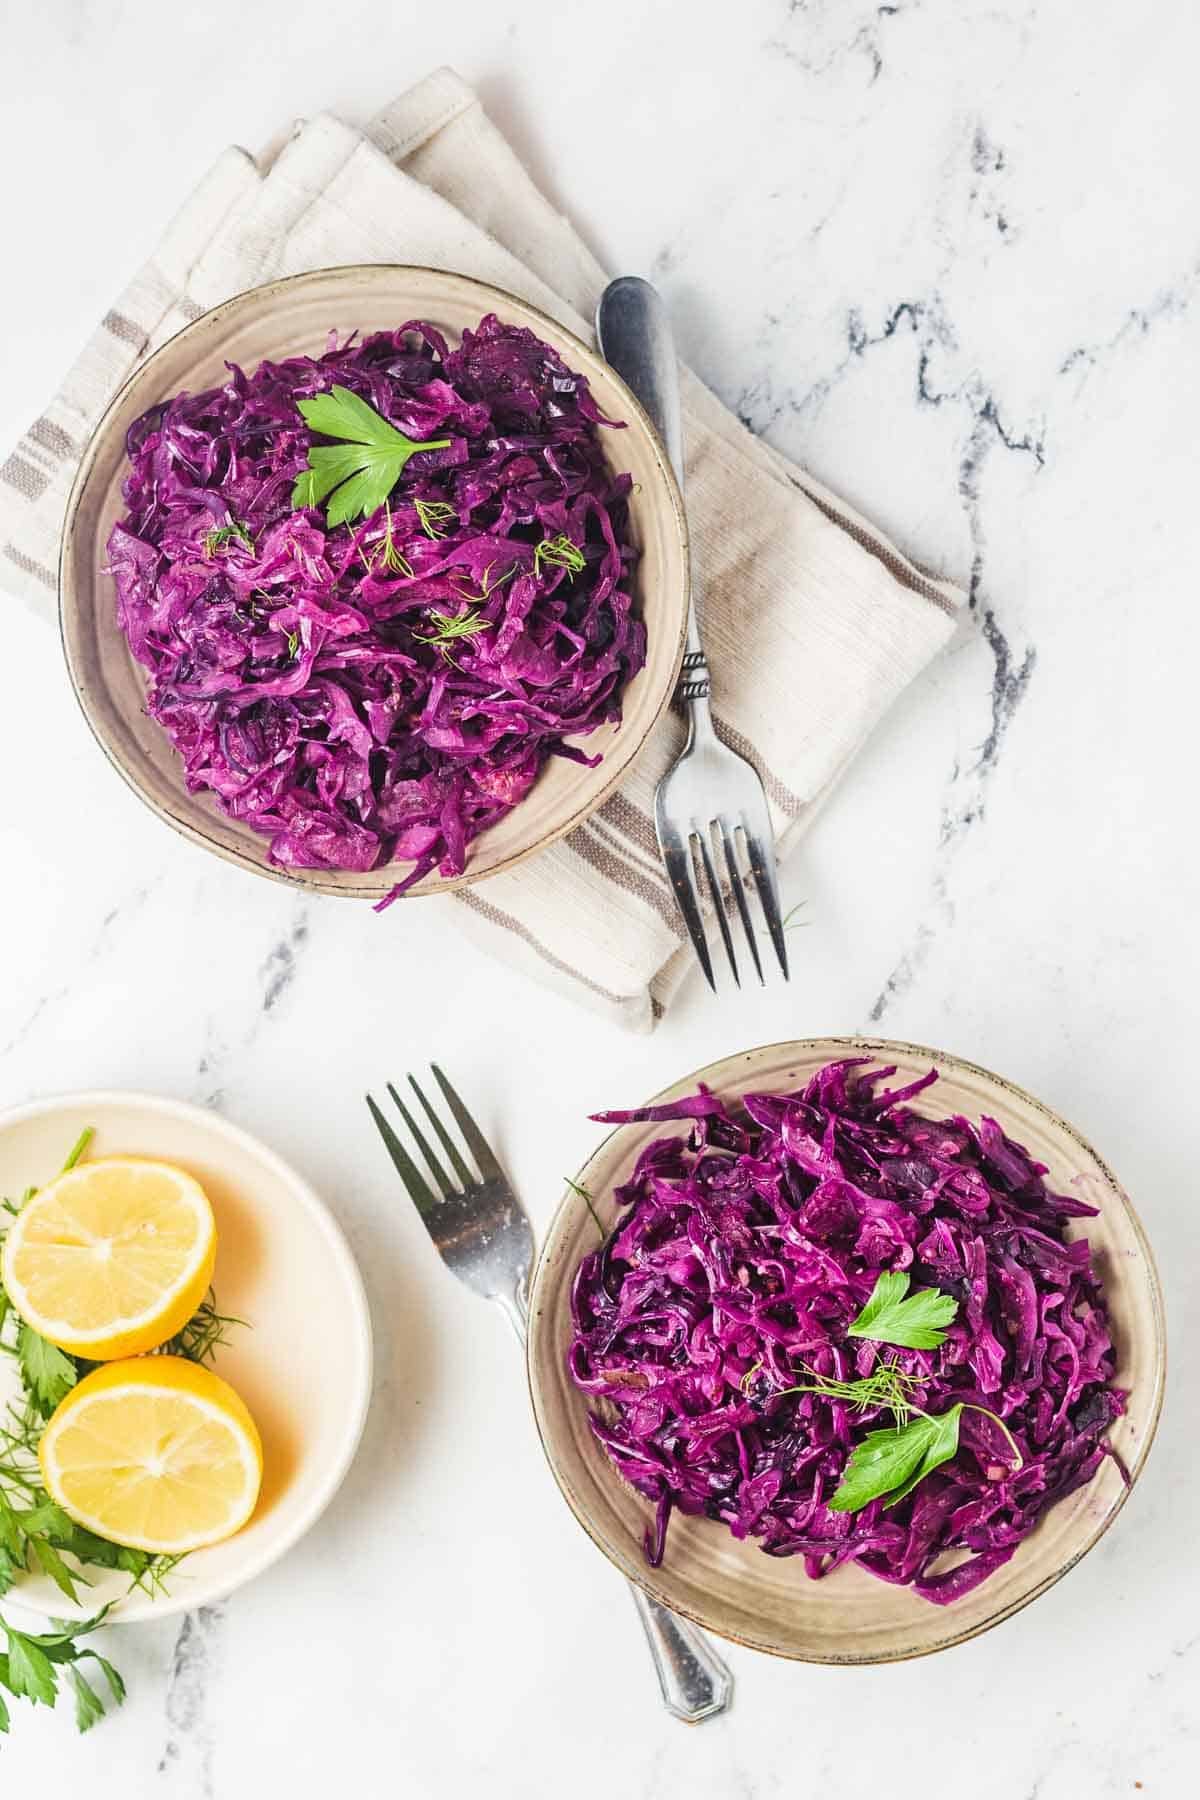
Birds eye view of two servings of instant pot cabbage in brown coloured bowls and garnished with parsley with a halved lemon on the side.

More Recipes You Might Like

Here are more of my favourite recipes to make in the instant pot!

  • Orange Chicken and Cauliflower
  • Baked Beans with No Added Sugar
  • Ginger Sweet Potato Soup

Whats your favourite recipe to make in the instant pot these days?

Print Recipe
5 from 2 votes

Instant Pot Cabbage (Vegan)

This delicious instant pot cabbage makes for a quick and easy plant-based side dish that is made in under 20 minutes!
Prep Time5 minutes mins
Cook Time10 minutes mins
Total Time15 minutes mins
Course: Side Dish
Cuisine: American
Diet: Vegan
Servings: 6
Calories: 128kcal
Author: Abbey Sharp

Ingredients

  • 1 tablespoons extra virgin olive oil divided
  • 2 shallots diced
  • 3/4 bulb of fennel finely shredded (reserve the fronds for garnish)
  • 1 granny smith apples cut into matchsticks
  • 1 head red cabbage finely shredded (about 2 lbs)
  • 1 tablespoons cider vinegar
  • 1/2 cup dry alcoholic cider
  • 1/2 cup vegetable broth or stock cube mixed with water
  • 2 tablespoons grainy mustard
  • 2 tablespoons pure maple syrup
  • Sea salt and freshly cracked black pepper

Garnish

  • Freshly chopped parsley
  • Squeeze of lemon juice

Instructions

  • Set the Instant Pot to saute. Add olive oil and let it heat up. Add in diced shallots and cook for 2-3 minutes till it becomes translucent.
  • Add in fennel and apple and stir till it is nice and fragrant, about a minute. Mix in cider vinegar, alcoholic cider, vegetable broth, grainy mustard and maple syrup. Add the cabbage and stir till everything is well uniformly mixed in. Add a big pinch of sea salt and generous amounts of freshly cracked black pepper.
  • Hit cancel on your Instant Pot. Close the lid and set the pressure valve to the ‘sealing’ position. Set the Instant Pot to pressure cook on manual mode for 5 minutes. Once the time is up, quick release the pressure. Open it carefully. Taste and adjust seasoning.
  • Garnish with freshly chopped parsley, fennel fronds, a big squeeze of lemon and some more freshly cracked black pepper before serving.

Notes

I recommend using a mandoline for shredding cabbage. It makes shredding 2lb cabbage so much easier. 
This recipe is great for meal prep, make a big batch over the weekend and use throughout the week. Add the garnish just before serving. 
It makes a great side and it is also delicious on toast.

Nutrition

Calories: 128kcal | Carbohydrates: 24g | Protein: 3g | Fat: 3g | Saturated Fat: 1g | Sodium: 118mg | Potassium: 562mg | Fiber: 5g | Sugar: 14g | Vitamin A: 1620IU | Vitamin C: 85mg | Calcium: 93mg | Iron: 2mg

Did you enjoy this instant pot cabbage? Let me know your thoughts down in the comments below!

Abbey Sharp

Abbey Sharp is a Registered Dietitian (RD), regulated by the Ontario College of Dietitians. She is a mom, YouTuber, Blogger, award winning cookbook author, media coach specializing in food and nutrition influencers, and a frequent contributor to national publications like Healthline and on national broadcast TV shows.
www.abbeyskitchen.com/about-abbey/

Last Updated January 22, 2021. Published January 22, 2021 By Abbey Sharp 51 Comments

Vegan Cauliflower Soup with Roasted Chickpeas and Parsnips

Vegan Roasted Cauliflower, Parsnip and Chickpea Soup I share my favourite recipe for Vegan Roasted Cauliflower, Parsnip and Chickpea Soup that is perfect for holiday entertaining or a healthy weeknight meal. 3 tbsp extra virgin olive oil, divided 1 head cauliflower, cut into small pieces 1 can chickpeas, drained, rinsed and dried really well 1/2 onion, minced 2 cloves garlic, minced 6 parsnips, peeled and diced 1 1/2 tsp cumin 1 1/2 tsp herbs de provence 5 sprigs thyme, leaves only 1 L vegetable broth 1 can lite coconut milk Salt and pepper, to taste Garnish: Coconut milk Extra virgin olive oil Thyme Preheat oven to 450 F. Place the cauliflower on one baking sheet with a tablespoon of oil. Place the chickpeas on another baking sheet with a tablespoon of oil. Roast both until super crispy and caramelized, about 30 minutes for the cauliflower and 40-45 minutes for the chickpeas. Season generously with salt and pepper and set aside about 1/2 cup of each for garnish. Meanwhile, add the last tablespoon of oil to a large pot along with the onion. Saute until soft, about 5 minutes. Add in the garlic and saute for another 30 seconds. Add the parsnips, cumin, herbs de province, thyme leaves and broth and bring to a boil. Reduce to a simmer and put the lid on the pot. Simmer for about 20 minutes, then add in the cauliflower and chickpeas (minus the 1/2 cup each). Cook for another 5 minutes until everything is very soft. Using a hand blender, puree until smooth. Add the coconut milk and puree again to incorporate. Season with salt and pepper, to taste. To serve, add a swirl of coconut milk and olive oil. Top with the cauliflower and chickpeas and some fresh thyme leaves. Enjoy!

I share my favourite recipe for vegan cauliflower soup with roasted chickpeas and parsnips that is perfect for healthy weeknight meal during cold winter months.

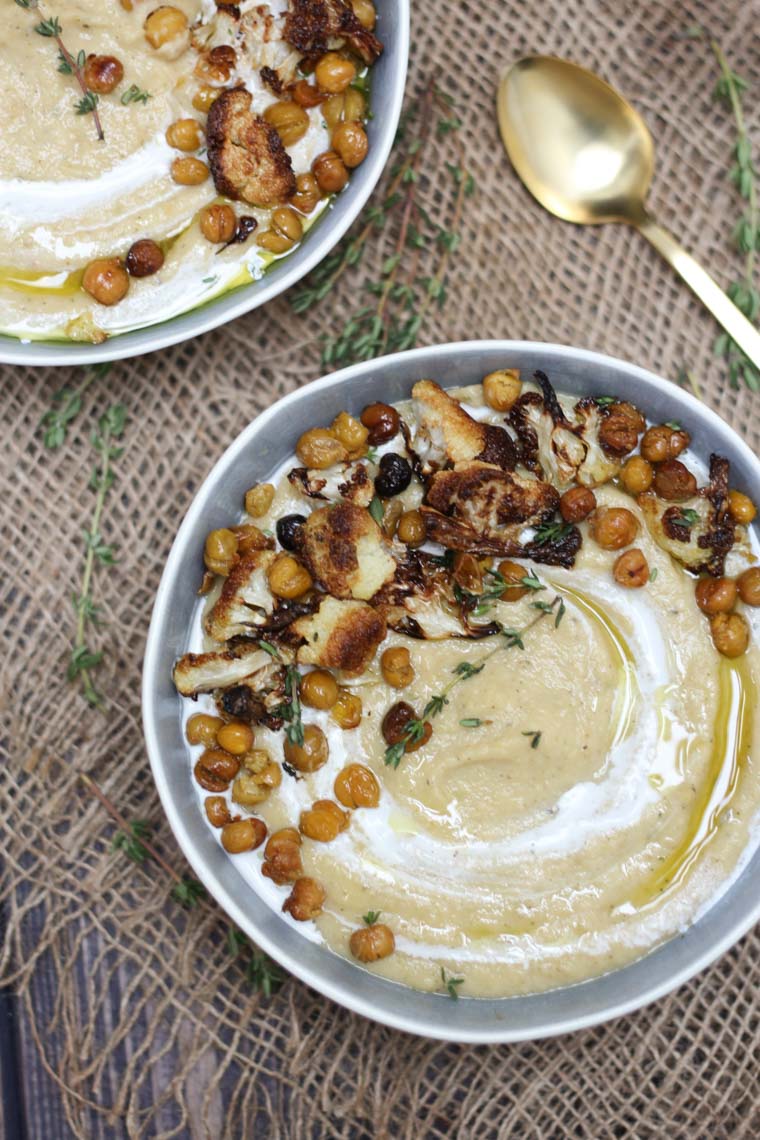
birds eye view of Soup served in two bowls garnished with cauliflower and chickpeas.

I gotta admit, I’m a bit of a soup-a-holic. Especially during the cold Canadian winters, a warming soup is quite possibly the only silver lining to enduring these frigid temperatures.

So I’ve gotten into the habit of making one big batch of soup every Sunday so that I have something to get me through the week. One of my ultimate favourites is this vegan cauliflower soup with roasted chickpeas and parsnips!

I mean, roasted cauliflower on its own is a force to be reckoned with but adding it to make a creamy dreamy soup is just oh so delish!

Table of contents

  • Why This Recipe Works
  • Key Ingredients
  • How to Make This Recipe
  • Expert Tips
  • Recipe FAQs
  • More Recipes You Might Like

Why This Recipe Works

If you crave soup on the regular during the winter months, then you are totally speaking my language! You’re also in luck because this vegan cauliflower soup is definitely one for the books because it’s:

  • Plant based
  • High protein
  • High fibre
  • Gluten free
  • Super creamy
  • Great for batch prepping!

Key Ingredients

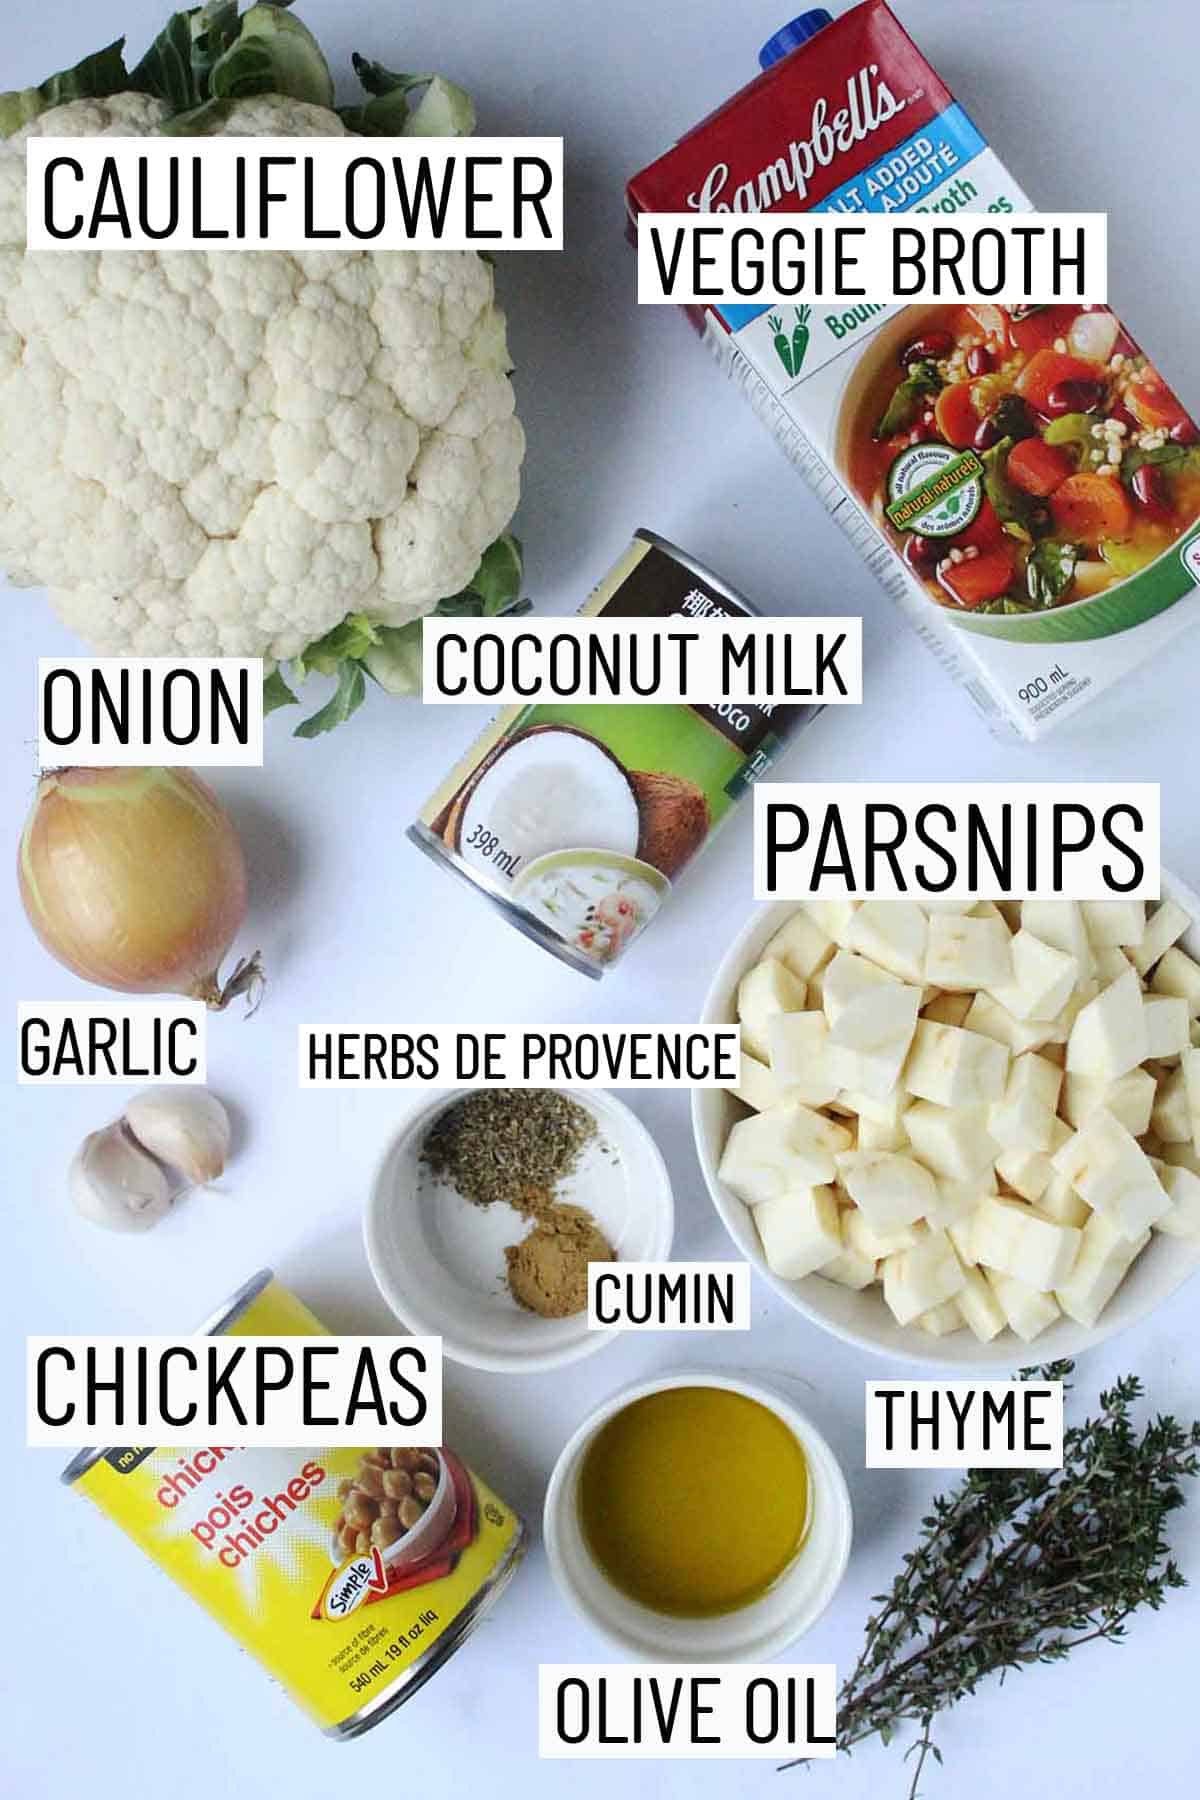
Flat lay image of recipe ingredients including thyme, olive oil, chickpeas, spices, cauliflower, parsnips, coconut milk, garlic, onion, and broth.

Cauliflower – We roast a whole head of cauliflower for this vegan cauliflower soup and save about 1/2 cup for garnish (and if we’re being honest, for snacking). While you can use frozen cauliflower if you prefer, we highly recommend using fresh cauliflower for roasting as it tends to yield a more caramelized flavour.

Parsnips – Is it just me or are cauliflower and parsnips a match made in heaven? They compliment each other so well so I knew I had to throw in this yummy root veg to join the party. Look for 6 small parsnips or 3 medium sized parsnips to use for this soup.

Chickpeas – To up the protein factor in a big way, we roast up some chickpeas and blend it together with the soup. It doesn’t alter the flavour in any way and makes it that much more of a satisfying and balanced meal.

Herbs & Spices – We use a combination of cumin, herbs de provence, and thyme makes this soup extra flavourful.

Coconut Milk – Ok real talk, what would we do without coconut milk? The ultimate flavour hack, if I do say so myself. Though this vegan cauliflower soup certainly isn’t an asian-inspired soup by any means – the coconut milk very much belongs here. We also recommend using full fat coconut milk as this will add extra creaminess and yummy flavour.

How to Make This Recipe

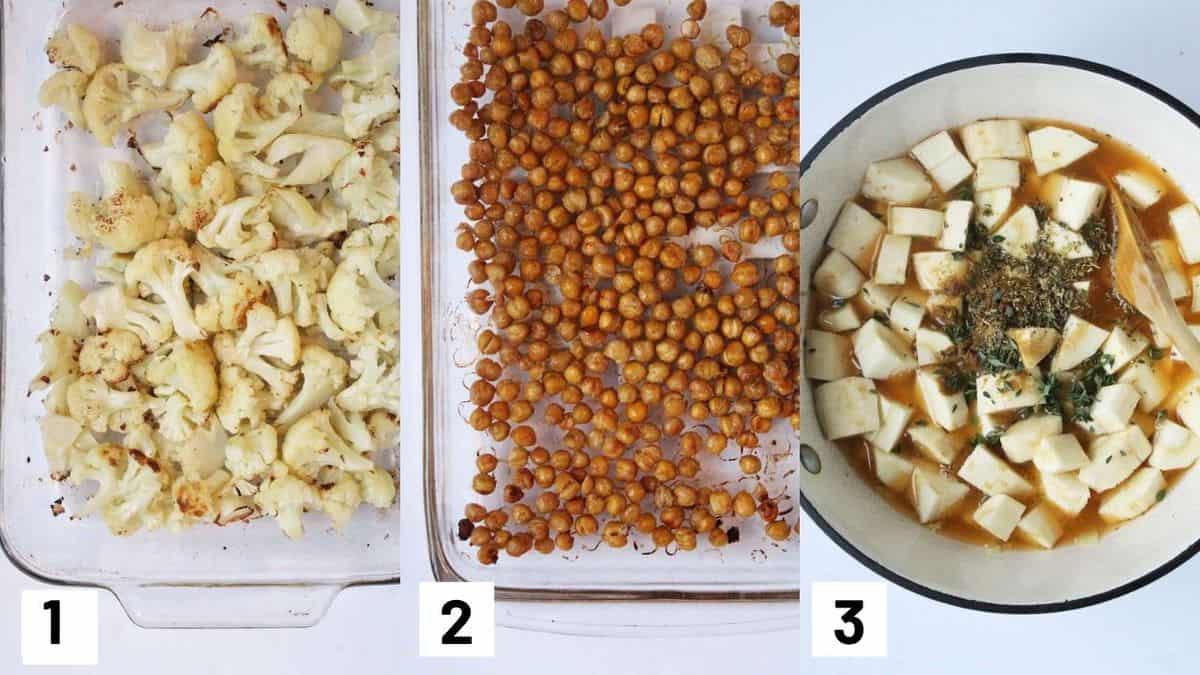
Three side by side images showing how to roast the cauliflower and chickpeas, as well as adding all ingredients to the sauce pot to simmer.

Step 1: Place the cauliflower on one baking sheet with a tablespoon of oil. Roast for 30 minutes.

Step 2: Place the chickpeas on another baking sheet with a tablespoon of oil. Roast for 40-45 minutes for the chickpeas.

Step 3: Saute onion in a large pot until soft, about 5 minutes. Add in the garlic and saute for another 30 seconds. Add the parsnips, cumin, herbs de province, thyme leaves and broth and bring to a boil. Reduce to a simmer for about 20 minutes.

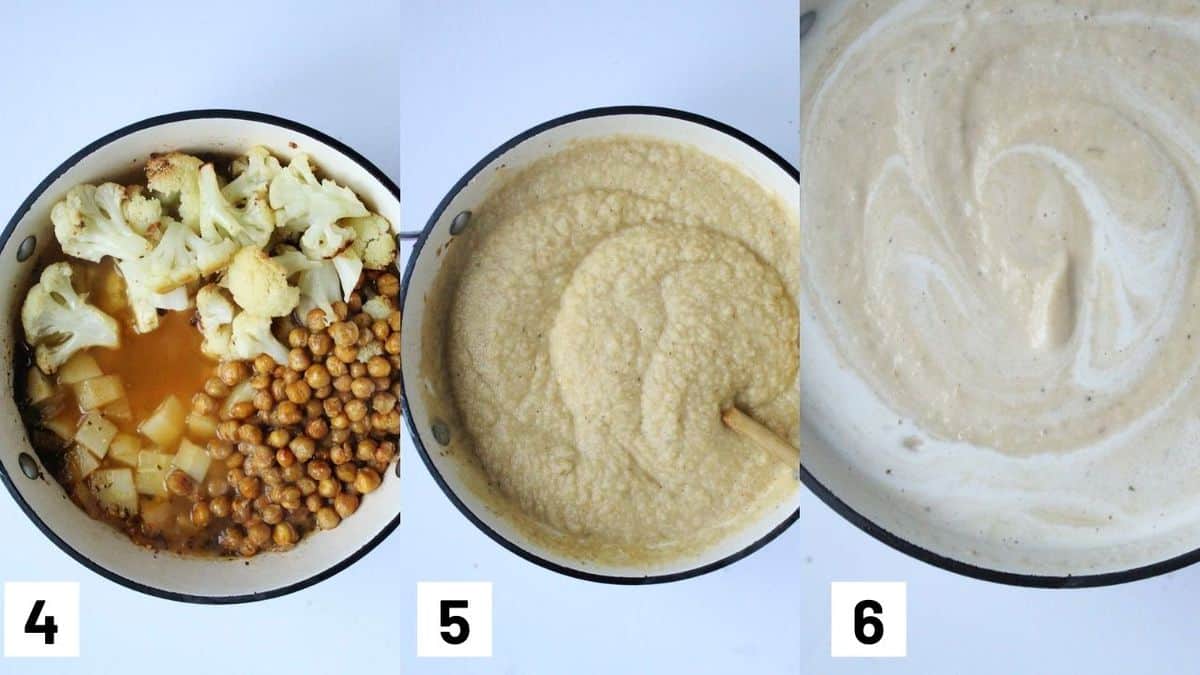
Three side by side images showing the roasted cauliflower and chickpeas added to the sauce pot, as well as pureeing the soup and adding coconut milk.

Step 4: Add in the cauliflower and chickpeas (preserve 1/2 cup of each for garnish). Cook for another 5 minutes until everything is very soft.

Step 5: Using a hand blender, puree until smooth.

Step 6: Add the coconut milk and puree again to incorporate. Season with salt and pepper, to taste.

Expert Tips

While I prefer to use a hand blender to puree this vegan cauliflower soup so that everything stays in one pot, if you don’t have a hand blender available you can also transfer the soup to a blender instead. This blender right here is one of my favourites for seamlessly blending soups and smoothies.

Another one of my favourite cooking hacks is using coconut milk powder as a substitute for coconut milk. It is virtually the exact same thing, you just add the coconut milk powder to the soup and mix together and you literally don’t even notice the difference. Best thing about it? It’s way cheaper than coconut milk in a can so its an easy hack if you are shopping on a budget.

Recipe FAQs

Can I use store-bought roasted chickpeas?

Absolutely! There are so many flavours to choose from now a days, so it would be fun to experiment with different flavours. These ones right here are my personal fav. Depending on the blender you use, the store bought roasted chickpeas may or may not blend as well as they tend to be harder and more crispy than when making from scratch. So to ensure you still yield a creamy soup, i’d suggest blending up cannellini beans with the soup and using the store-bought roasted chickpeas as the topper.

Is this recipe gluten free?

Yes this recipe is gluten free, but always make sure to double check the labels to ensure the product was made in gluten free facility.

What can I use instead of chickpeas for protein?

Cannellini beans are a great alternative but if for whatever reason you want to avoid beans entirely (i.e. they cause digestive issues), then i’d recommend blending in silken tofu instead.

How long does this last in the fridge and freezer?

This soup lasts about 4 days in the fridge and about a month in the freezer.

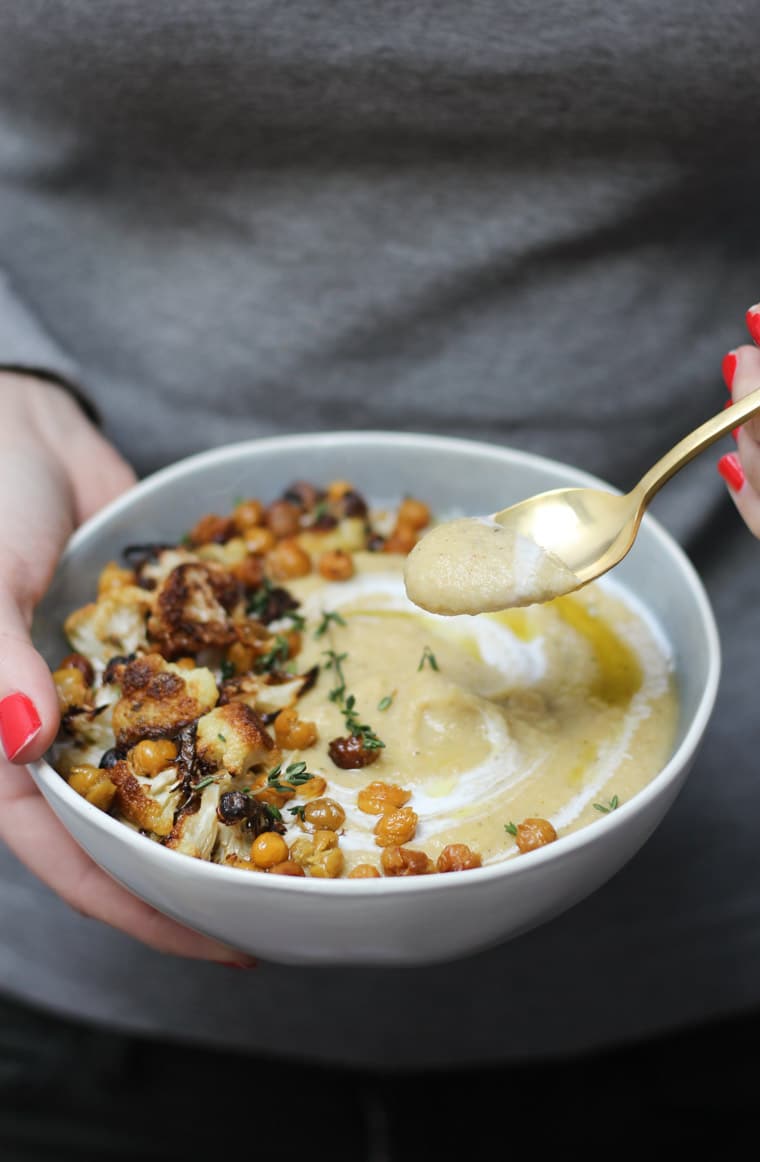
Hands holding bowl of vegan cauliflower and parsnip soup garnished with fresh herbs and chickpeas and spoon.
 

More Recipes You Might Like

Here are some more of my favourite soup recipes you might enjoy!

  • Creamy Mushroom Soup with Rosemary and White Beans 
  • Yellow Beet Coconut Curry Soup
  • Florida OJ Ginger Sweet Potato Soup
  • Roasted Fennel Tomato Soup Chickpea Croutons
  • Curried Sunchoke and Chickpea Soup

Now let me know – what are some of your favourite winter soups lately?

Vegan Roasted Cauliflower, Parsnip and Chickpea Soup I share my favourite recipe for Vegan Roasted Cauliflower, Parsnip and Chickpea Soup that is perfect for holiday entertaining or a healthy weeknight meal. 3 tbsp extra virgin olive oil, divided 1 head cauliflower, cut into small pieces 1 can chickpeas, drained, rinsed and dried really well 1/2 onion, minced 2 cloves garlic, minced 6 parsnips, peeled and diced 1 1/2 tsp cumin 1 1/2 tsp herbs de provence 5 sprigs thyme, leaves only 1 L vegetable broth 1 can lite coconut milk Salt and pepper, to taste Garnish: Coconut milk Extra virgin olive oil Thyme Preheat oven to 450 F. Place the cauliflower on one baking sheet with a tablespoon of oil. Place the chickpeas on another baking sheet with a tablespoon of oil. Roast both until super crispy and caramelized, about 30 minutes for the cauliflower and 40-45 minutes for the chickpeas. Season generously with salt and pepper and set aside about 1/2 cup of each for garnish. Meanwhile, add the last tablespoon of oil to a large pot along with the onion. Saute until soft, about 5 minutes. Add in the garlic and saute for another 30 seconds. Add the parsnips, cumin, herbs de province, thyme leaves and broth and bring to a boil. Reduce to a simmer and put the lid on the pot. Simmer for about 20 minutes, then add in the cauliflower and chickpeas (minus the 1/2 cup each). Cook for another 5 minutes until everything is very soft. Using a hand blender, puree until smooth. Add the coconut milk and puree again to incorporate. Season with salt and pepper, to taste. To serve, add a swirl of coconut milk and olive oil. Top with the cauliflower and chickpeas and some fresh thyme leaves. Enjoy!
Print Recipe
4.50 from 20 votes

Vegan Cauliflower Soup with Roasted Chickpeas and Parsnips

I share my favourite recipe for vegan cauliflower soup with roasted chickpeas and parsnips that is perfect for healthy weeknight meal during cold winter months.
Prep Time15 minutes mins
Cook Time1 hour hr 30 minutes mins
Total Time1 hour hr 45 minutes mins
Course: Dinner
Cuisine: American
Diet: Vegan
Servings: 4 -6 people
Calories: 447kcal
Author: Abbey Sharp

Ingredients

  • 3 tbsp extra virgin olive oil divided
  • 1 head cauliflower cut into small pieces
  • 1 can chickpeas drained, rinsed and dried really well
  • 1/2 onion minced
  • 2 cloves garlic minced
  • 6 parsnips peeled and diced
  • 1 1/2 tsp cumin
  • 1 1/2 tsp herbs de provence
  • 5 sprigs thyme leaves only
  • 1 L vegetable broth
  • 1 can lite coconut milk
  • Salt and pepper to taste

Garnish:

  • Coconut milk
  • Extra virgin olive oil
  • Thyme

Instructions

  • Preheat oven to 450 F.
  • Place the cauliflower on one baking sheet with a tablespoon of oil. Place the chickpeas on another baking sheet with a tablespoon of oil. Roast both until super crispy and caramelized, about 30 minutes for the cauliflower and 40-45 minutes for the chickpeas. Season generously with salt and pepper and set aside about 1/2 cup of each for garnish.
  • Meanwhile, add the last tablespoon of oil to a large pot along with the onion. Saute until soft, about 5 minutes. Add in the garlic and saute for another 30 seconds. Add the parsnips, cumin, herbs de province, thyme leaves and broth and bring to a boil. Reduce to a simmer and put the lid on the pot. Simmer for about 20 minutes, then add in the cauliflower and chickpeas (minus the 1/2 cup each). Cook for another 5 minutes until everything is very soft.
  • Using a hand blender, puree until smooth. Add the coconut milk and puree again to incorporate. Season with salt and pepper, to taste.
  • To serve, add a swirl of coconut milk and olive oil. Top with the cauliflower and chickpeas and some fresh thyme leaves. Enjoy!

Video

Notes

While I prefer to use a hand blender to puree this vegan cauliflower soup so that everything stays in one pot, if you don’t have a hand blender available you can also transfer the soup to a blender instead. This blender right here is one of my favourites for seamlessly blending soups and smoothies.
Another one of my favourite cooking hacks is using coconut milk powder as a substitute for coconut milk. It is virtually the exact same thing, you just add the coconut milk powder to the soup and mix together and you literally don’t even notice the difference. Best thing about it? It’s way cheaper than coconut milk in a can so its an easy hack if you are shopping on a budget.

Nutrition

Calories: 447kcal | Carbohydrates: 73g | Protein: 13g | Fat: 14g | Saturated Fat: 2g | Sodium: 1444mg | Potassium: 1530mg | Fiber: 21g | Sugar: 17g | Vitamin A: 626IU | Vitamin C: 112mg | Calcium: 188mg | Iron: 5mg

Did you enjoy this vegan cauliflower soup? Leave a comment below with your thoughts!

Abbey Sharp

Abbey Sharp is a Registered Dietitian (RD), regulated by the Ontario College of Dietitians. She is a mom, YouTuber, Blogger, award winning cookbook author, media coach specializing in food and nutrition influencers, and a frequent contributor to national publications like Healthline and on national broadcast TV shows.
www.abbeyskitchen.com/about-abbey/

Last Updated January 21, 2021. Published January 21, 2021 By Abbey Sharp 7 Comments

Vegan Curry Soup with Yellow Beets

With winter around the corner, this vegan yellow beet coconut curry soup is the perfect gluten free recipe to stay warm and cozy. Whether your entertaining for the holidays or needing an easy weeknight dinner recipe, this vegan curry soup will do the trick.

Perfect for soup season, this vegan curry soup with yellow beets is the perfect gluten free recipe to stay warm and cozy. Have dinner done in less than an hour.

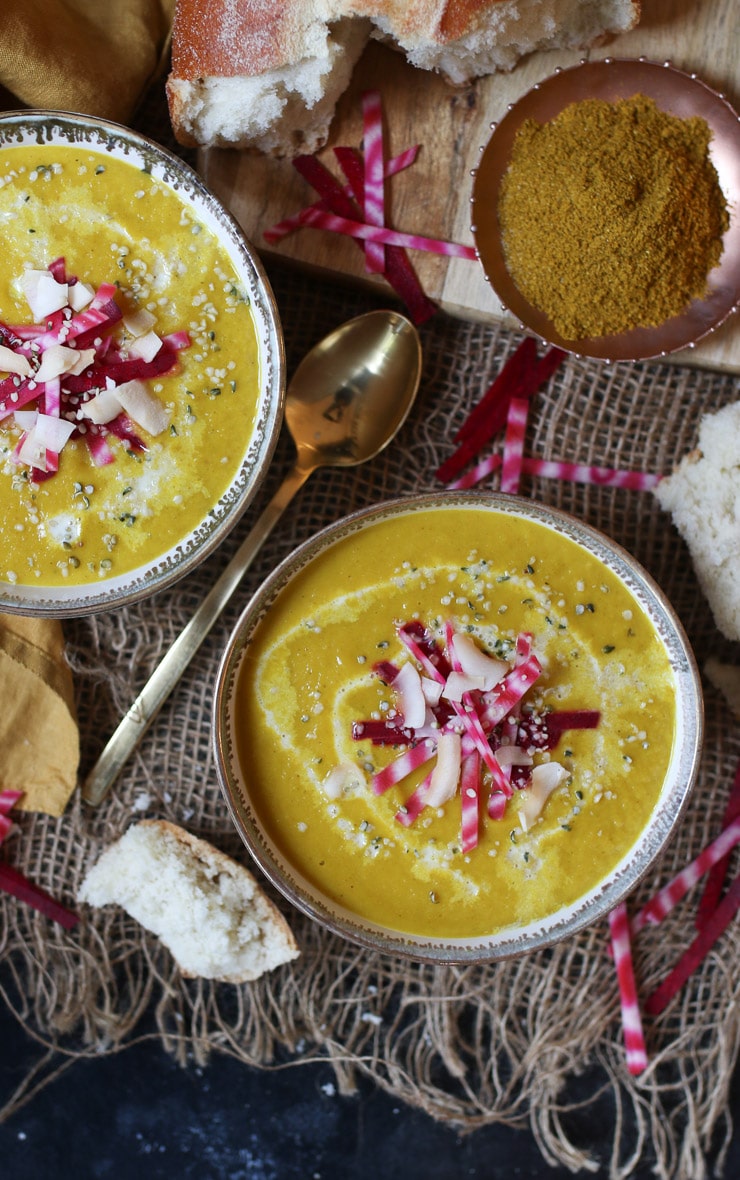
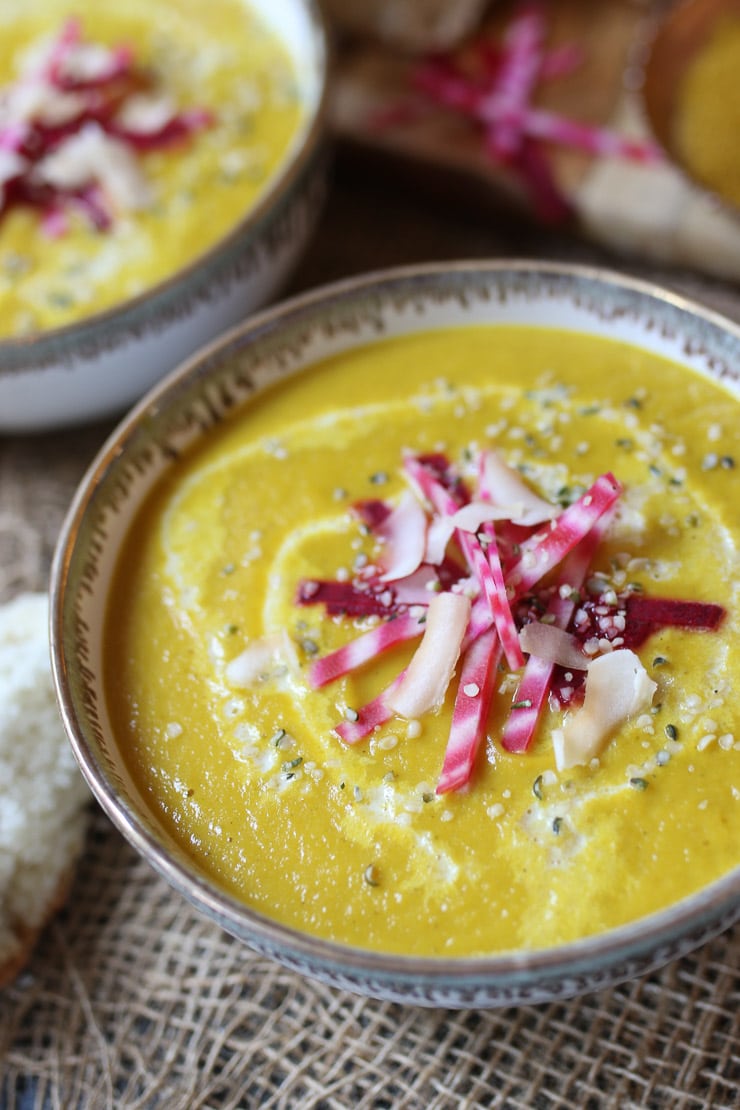
birds eye view of two grey and white bowls filled with vegan curry spiced beet and coconut soup garnished with beets, hemp hearts, and coconut

So fall went by in the blink of an eye, and now we’re basically in winter, which has got me craving the coziest of foods. Aside from pulling out my big ass parka, another way I like to stay warm on a cold night is with soup like my vegan curry soup. I’ve been on a serious soup kick lately since it’s the only way I can cope with the long Canadian winter ahead.

Last week I shared with you my adult version of a childhood classic: my vegan roasted fennel tomato soup with gluten free chickpea croutons and this week I’m super excited to share with you my completely plant based and gluten free beet coconut curry soup.

Why This Recipe Works

Today, I’m using one of my fave colourful veggies, yellow beets, to whip up the creamiest of curry soups. One bowl of this, and you’ll forget about the cold weather… temporarily. It’s truly the best meal to have on a cold winter night!

It’s creamy without using dairy. Since we are using coconut milk, that makes this vegan curry soup freezer friendly as well!

Most of the cook time is allocated for simmering. So your general hands-on cook time is not that high and you can easily make this on a weeknight without spending ages in the kitchen.

Table of contents

  • Why This Recipe Works
  • Key Ingredients
  • How to Make This Recipe
  • Expert Tips
  • Recipe FAQs
  • More Recipes You Might Like

Key Ingredients

Overhead photo of ingredients for a vegan curry including vegetable broth, curry, salt and pepper, olive oil, hemp hearts, toasted coconut chips, onion, red beets, yellow beets, coconut milk, carrots, garlic, and ginger.

Yellow Beets — Or also known as golden beets, they’re not as sweet as red beets and has a more mellow and less earthy flavour.

Curry Powder — A little bit of yellow curry powder goes a long way, this curry powder is relatively mild compared to other ones so be sure you don’t accidentally grab a spicier version.

Broth — I recommend using a low salt/no salt added vegetable broth and then seasoning it to taste. This way you don’t end up with an overly salty vegan curry soup.

Toppings — There are so many options! Our favourite toppings are hemp hearts, toasted coconut chips (such a nice crunch!), and red beets.

How to Make This Recipe

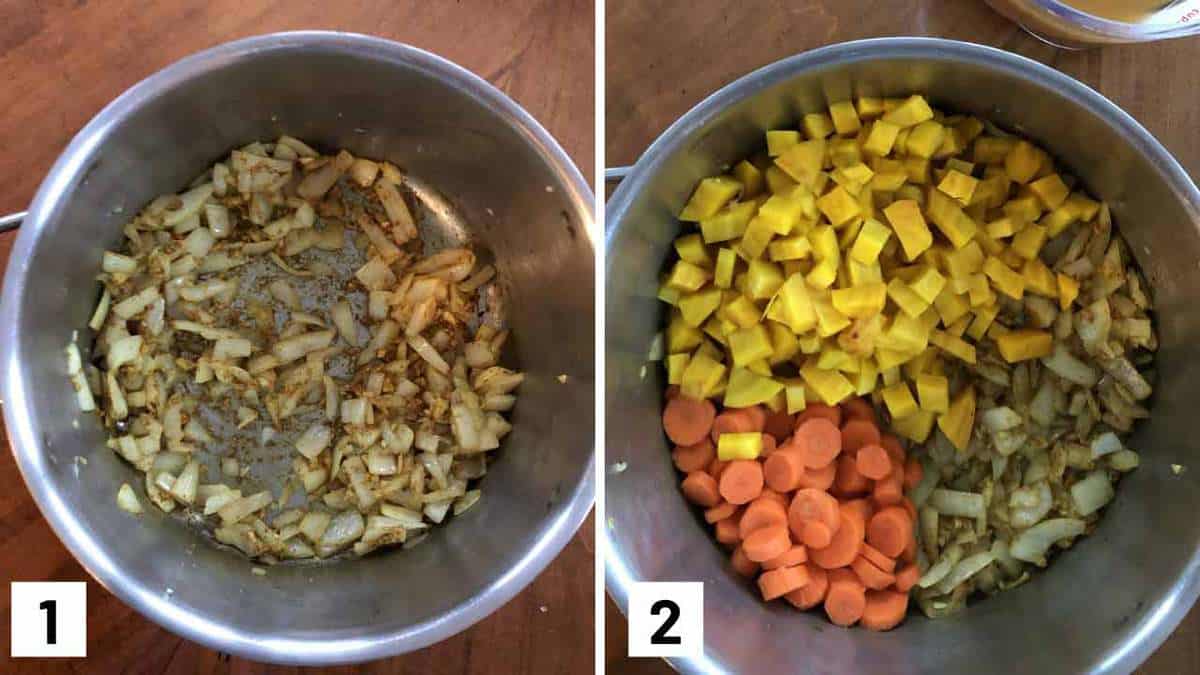
Two instructional photos of a pot with onions and seasoning, then a pot with the beets and carrots added in.

Step 1: Heat the oil in a large soup pot over medium high heat. Add the onion, garlic and ginger and stir until soft, about 3-4 minutes. Add the curry powder, and stir everything until the spices coat the vegetables.

Step 2: Next, add in the carrots, yellow beets and stir to combine.

A pot with the curry soup with broth added, then coconut milk added, and then pureed.

Step 3: Then add in the low sodium broth and bring to a boil. Reduce the heat to a simmer, top with the lid and cook for about 45 minutes, or until the beets are very soft. Add in the coconut milk. Transfer to a stand blender or blend with a handblender until smooth.

A set of two photos showing a soup with toppings beside it and then the soup with the toppings on it.

Step 4: To serve, top this vegan curry soup with a swirl of coconut milk, the colourful beets, coconut chip and hemp hearts. Enjoy!

Expert Tips

Be very careful when you add in hot soup into a blender. If you are using a blender instead of a handheld blender to puree your soup, be sure have a way to allow steam to escape as you blend.

If you want a chunkier vegan curry soup, you can blend up 50-70% of the soup so you can have bites of vegetable with your soup.

If you plan on meal prepping this, avoid adding in the toppings until you’re ready to serve.

For your toppings, the beets can be raw or cooked. It’s up to you!

Recipe FAQs

Is This Gluten Free?

This is a naturally gluten free recipe!

Can This Vegan Curry Soup Be Made Ahead?

Most definitely. This vegan curry soup is a great make ahead meal as it reheats wonderfully in the microwave or on the stove top. Store in an airtight container in the fridge for up to 4 days.

Can I Freeze This?

You can freeze this soup as we don’t use dairy or potatoes to thicken the soup. Thanks to the coconut milk, you can freeze this soup! Be sure to use a freezer friendly container.

What Other Toppings Can I Use?

You can try adding in toasted nuts and seeds as toppings as well. Gluten free croutons or crispy chickpeas would be a great topping as well.

close up of curry flavoured vegan yellow beet and coconut soup garnished with beets, hemp hearts, and coconut

More Recipes You Might Like

Want more recipes like this vegan curry soup? Try these ones from the blog:

  • Vegan Potato Soup
  • Sweet Potato Curry Soup
  • Vegan Tomato Soup
  • Vegan Butternut Squash Soup with Red Lentils

Now I want to hear from you! Have you been pulling out your fave winter soup recipes to stay warm with the cold weather? Share your favourite soup combinations below!

With winter around the corner, this vegan yellow beet coconut curry soup is the perfect gluten free recipe to stay warm and cozy. Whether your entertaining for the holidays or needing an easy weeknight dinner recipe, this vegan curry soup will do the trick.
Print Recipe
5 from 1 vote

Vegan Curry Soup with Yellow Beets

Perfect for soup season, this vegan curry soup with yellow beets is the perfect gluten free recipe to stay warm and cozy. Have dinner done in less than an hour.
Prep Time10 minutes mins
Cook Time50 minutes mins
Total Time1 hour hr
Course: Soup
Cuisine: Indian, American
Servings: 4 – 6 people
Calories: 168kcal
Author: Abbey Sharp

Ingredients

  • 2 tbsp extra virgin olive oil
  • 1 large yellow sweet onion diced
  • 3 cloves garlic minced
  • 3 tbsp fresh ginger minced
  • 2 tsp curry powder
  • 1 cup carrots peeled and diced
  • 3 cups yellow beets peeled and diced
  • 4 cups low sodium vegetable broth
  • 1 can lite coconut milk
  • Salt and pepper to taste

GARNISH

  • Red or candy cane beets sliced julienne
  • Toasted coconut chips
  • Hemp hearts

Instructions

  • Heat the oil in a large soup pot over medium high heat. Add the onion, garlic and ginger and stir until soft, about 3-4 minutes. Add the curry powder, and stir everything until the spices coat the vegetables.
  • Next, add in the carrots, yellow beets, and low sodium broth and bring to a boil. Reduce the heat to a simmer, top with the lid and cook for about 45 minutes, or until the beets are very soft. Add in the coconut milk. Transfer to a stand blender or blend with a handblender until smooth.
  • To serve, top with a swirl of coconut milk, the colourful beets, coconut chip and hemp hearts. Enjoy!

Notes

  • Be very careful when you add in hot soup into a blender. If you are using a blender instead of a handheld blender to puree your soup, be sure have a way to allow steam to escape as you blend.
  • If you want a chunkier soup, you can blend up 50-70% of the soup so you can have bites of vegetable with your soup.
  • If you plan on meal prepping this, avoid adding in the toppings until you’re ready to serve.
  • For your toppings, the beets can be raw or cooked.

Nutrition

Calories: 168kcal | Carbohydrates: 24g | Protein: 3g | Fat: 8g | Saturated Fat: 1g | Sodium: 1050mg | Potassium: 579mg | Fiber: 5g | Sugar: 15g | Vitamin A: 5880IU | Vitamin C: 11.8mg | Calcium: 52mg | Iron: 1.4mg
Abbey Sharp

Abbey Sharp is a Registered Dietitian (RD), regulated by the Ontario College of Dietitians. She is a mom, YouTuber, Blogger, award winning cookbook author, media coach specializing in food and nutrition influencers, and a frequent contributor to national publications like Healthline and on national broadcast TV shows.
www.abbeyskitchen.com/about-abbey/

Last Updated January 15, 2021. Published January 16, 2021 By Abbey Sharp 20 Comments

Vegan Buddha Bowl with Gochujang Sauce

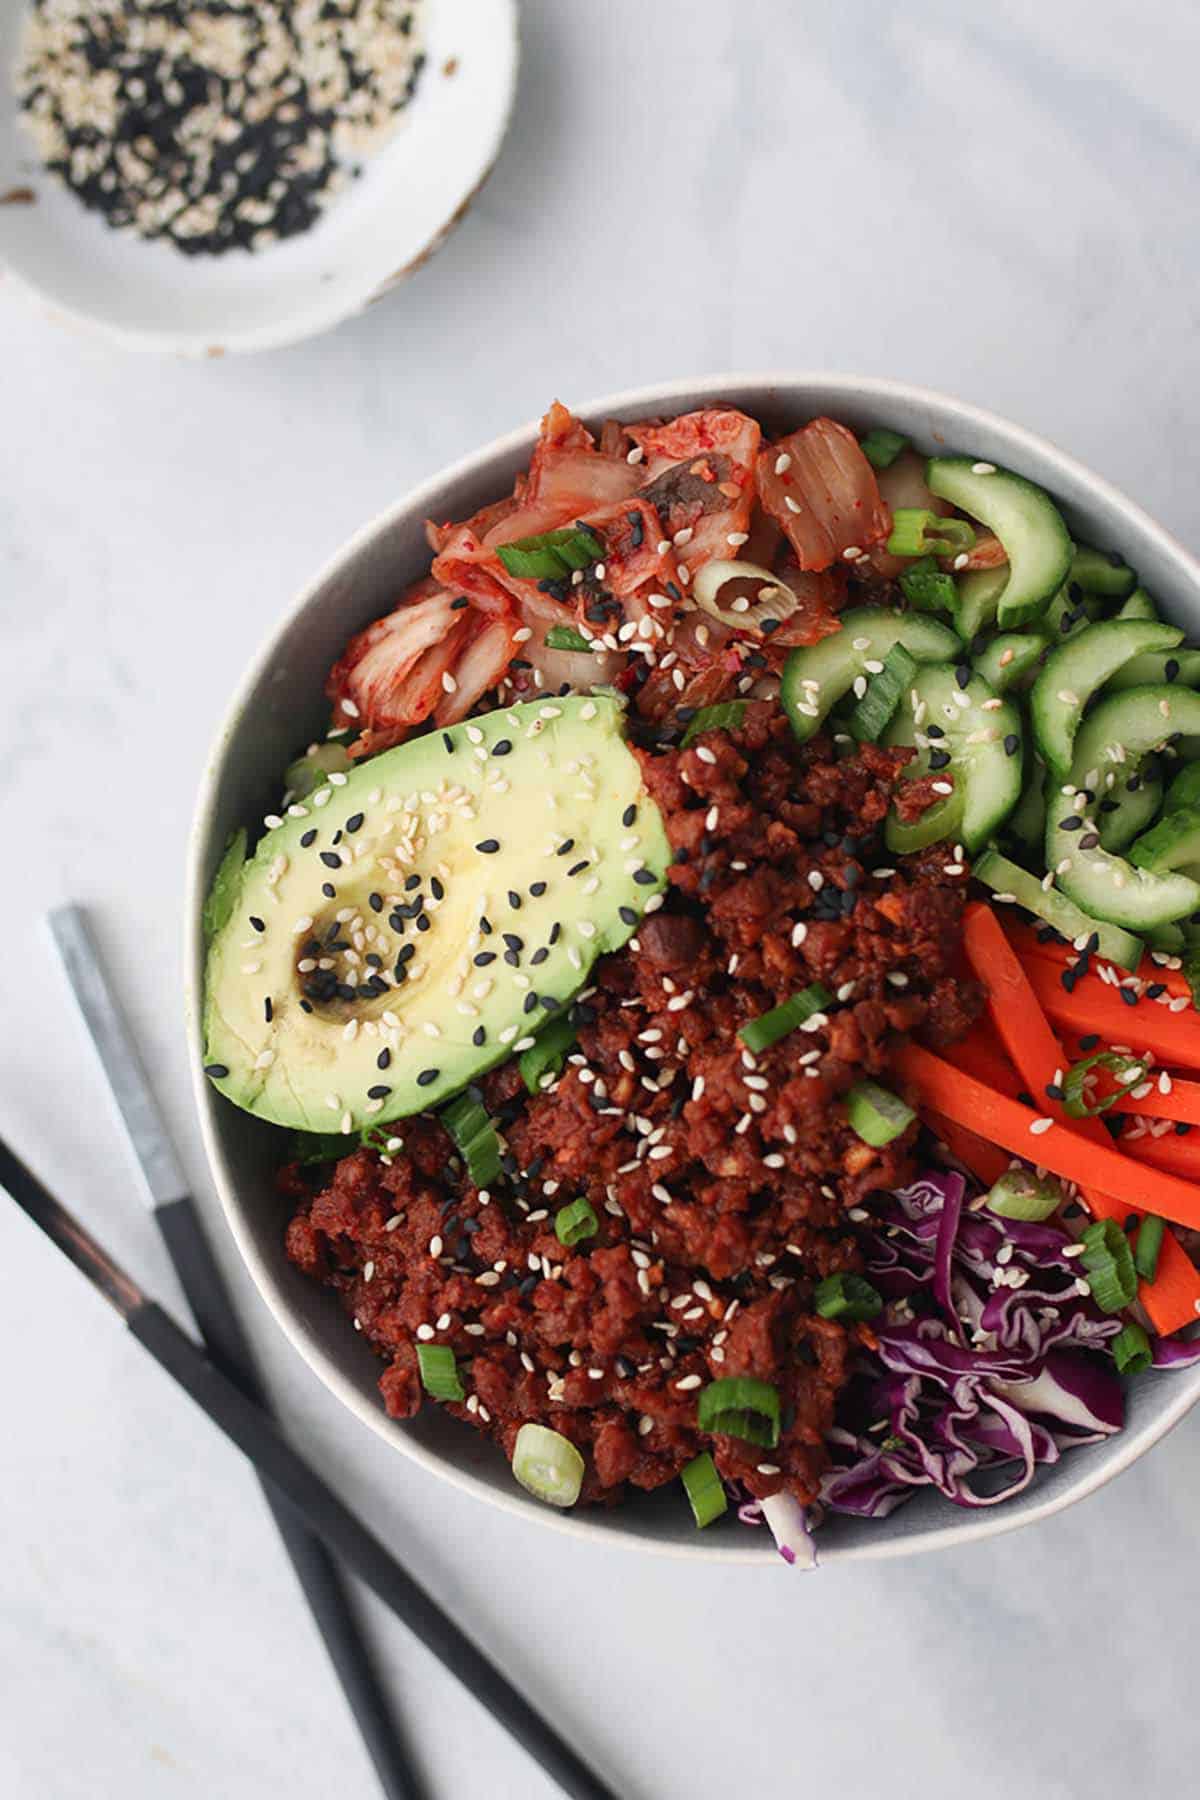
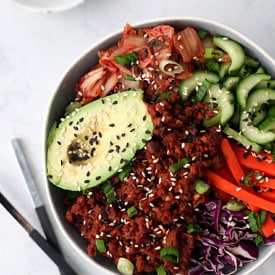
Big bowl containing avocado, veggies and vegan meat.

This vegan buddha bowl with Gochujang sauce is packed with sweet and spicy flavour but is completely gluten free, and plant based. 

Birds eye view of Korean bowl with veggie toppings and vegan meat garnished with sesame seed and green onion with two chop sticks laying on the side.

Recently, my husband and I have become obsessed with Korean BBQ. We live not far from Little Korea town in Toronto, and since being stuck in quarantine we want to support local businesses as much as possible. Which means we have UberEats-ed more than our fair share of Korean food and loved every minute of it.

While the love for my UberEats app is strong, the hefty bill is not. That’s why I decided to bring the restaurant into our home by adding my own plant-based spin on things with this Korean vegan buddha bowl. This plant-based “beef” meal is packed with sweet and spicy flavour, and is amazing over a bowl of rice with kimchi and fresh veg.

Table of contents

  • Why This Recipe Works
  • Key Ingredients
  • How To Make This Recipe
  • Expert Tips
  • Recipe FAQs
  • More Recipes You Might Like

Why This Recipe Works

To be honest, there isn’t anything I DON’T love about this recipe, maybe besides the fact that it requires a bit of extra time chopping vegetables. But once I get that sweet and spicy party going in my mouth, it is oh so worth it!

This recipe is:

  • Plant-based
  • Gluten Free
  • Sweet & spicy
  • High protein
  • High Fibre
  • Rich in antioxidants and probiotics!

Key Ingredients

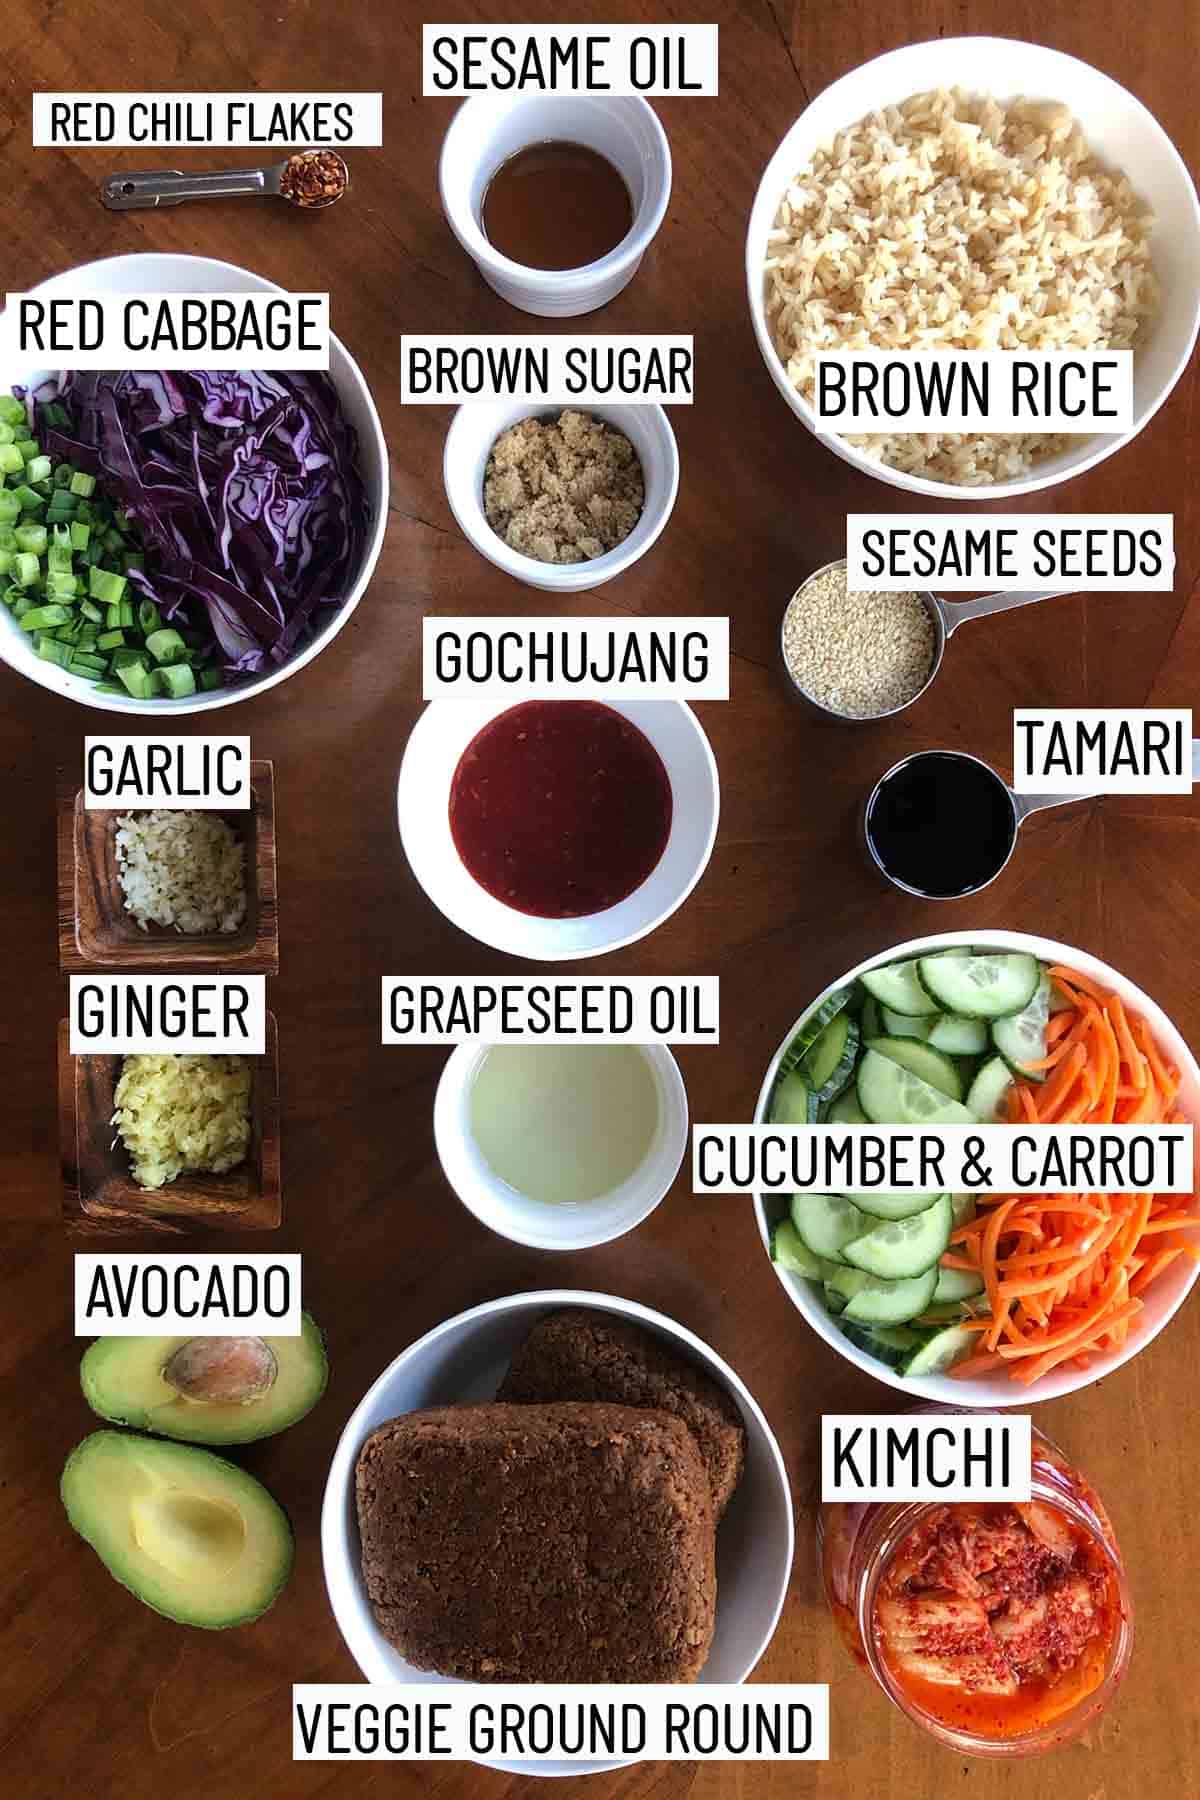
Flat lay image of portioned ingredients for recipe including the vegetable toppings, ingredients for the sauce, and the veggie meat.

Veggie Meat – while you can totally use ground meat for this recipe if you don’t need to make it vegan, we are keeping things more plant-based this time around by using veggie meat. You can find it in any health food section or wherever they sell tofu and other plant-based protein alternatives.

Sauce – to make the delicious sweet and spicy sauce we combine brown sugar, tamari, sesame oil, red pepper, Gochujang, grapeseed oil, garlic, and ginger.

Toppings – we like to top this vegan buddha bowl with a variety of crunchy fresh veggies including cucumber, carrots, red cabbage and green onion. We also love to add avocado for healthy fats, and kimchi for the probiotics and delicious spicy sour flavour!

How To Make This Recipe

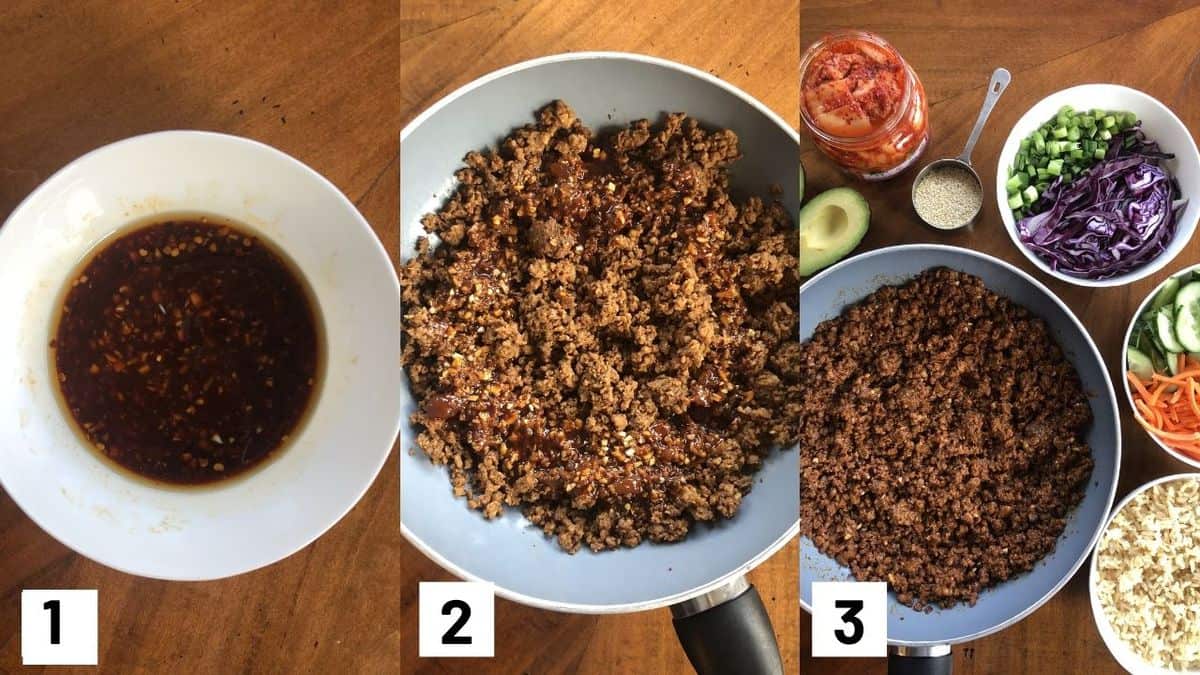
Three side by side images showing how to prepare recipe including how to make the sauce; sauteeing veggie meat, and adding toppings.

Step 1: To a bowl, mix together the brown sugar, tamari, sesame oil, red pepper, Gochujang, grapeseed oil, garlic, and ginger. Mix well.

Step 2: Heat a large skillet over medium high heat and add in the veggie ground round. Saute just to break up the pieces before adding in the sauce, and tossing until everything is coated.

Step 3: Add brown rice to six bowls, top with the Yves veggie ground round and any additional toppings, as desired. Enjoy warm.

Expert Tips

Like I said, while I love this vegan buddha bowl and its a great recipe for eating more plant-based – this mama doesn’t always have the time to be chopping veg all day! So to cut a few corners, I would recommend purchasing pre-cut veggies if you can OR pre-chopping the veg one day ahead of time so that its easy to pull out of the fridge and add to your bowl. That way you only really have to prep the sauce and cook the veggie meat, which takes about 10 mins or less!

You can also play around with whatever veggies you have on hand to make it easier for you. I used carrot, cucumber, and cabbage because its what I had on hand and I love the satisfying crunch they provide. But feel free to use up any veg you have sitting in your fridge like bell peppers, radishes, tomatoes, red onions, mixed greens, etc! This recipe is super versatile.

Recipe FAQs

What is Gochujang?

I’m obsessed with Gochujang and it’s become super trendy for a reason. It’s literally the backbone of Korean cooking. It’s a red chili paste that’s sticky, spicy and pungent, and usually is made with glutinous rice, fermented soy beans, salt and some kind of sweetener.

Can I make this low carb and keto?

It’s totally easy to make this beef bowl low in carbs and keto friendly. I recommend swapping the rice for cauliflower rice or a lettuce leaf, and you can use a non-calorie sweetener in place of the brown sugar and a mixture of sriracha and non-calorie sweetener instead of the Gochujang. You will have to adjust the ratio depending on how spicy you like it, but if you like it hot, go heavy on the sriracha.

Can I batch cook the beef mixture for meal prep?

Yes! This Korean vegan “meat” is amazing for meal prep for the week but I do recommend simply cooking up the meat with the sauce and cooking the rice separately. You can store each separately in the fridge for 4 days, but trust me, I wouldn’t expect this will last that long.

What vegan veggie ground round do you recommend?

I’m a big fan of using Yves Veggie Ground Round in any recipe that calls for ground beef. I love that it has no artificial preservatives and is low in fat, and even by a beef-lovers standards, it tastes amazing. It’s become a total staple in our household as we transition to eating more plant-based meals in our diet.

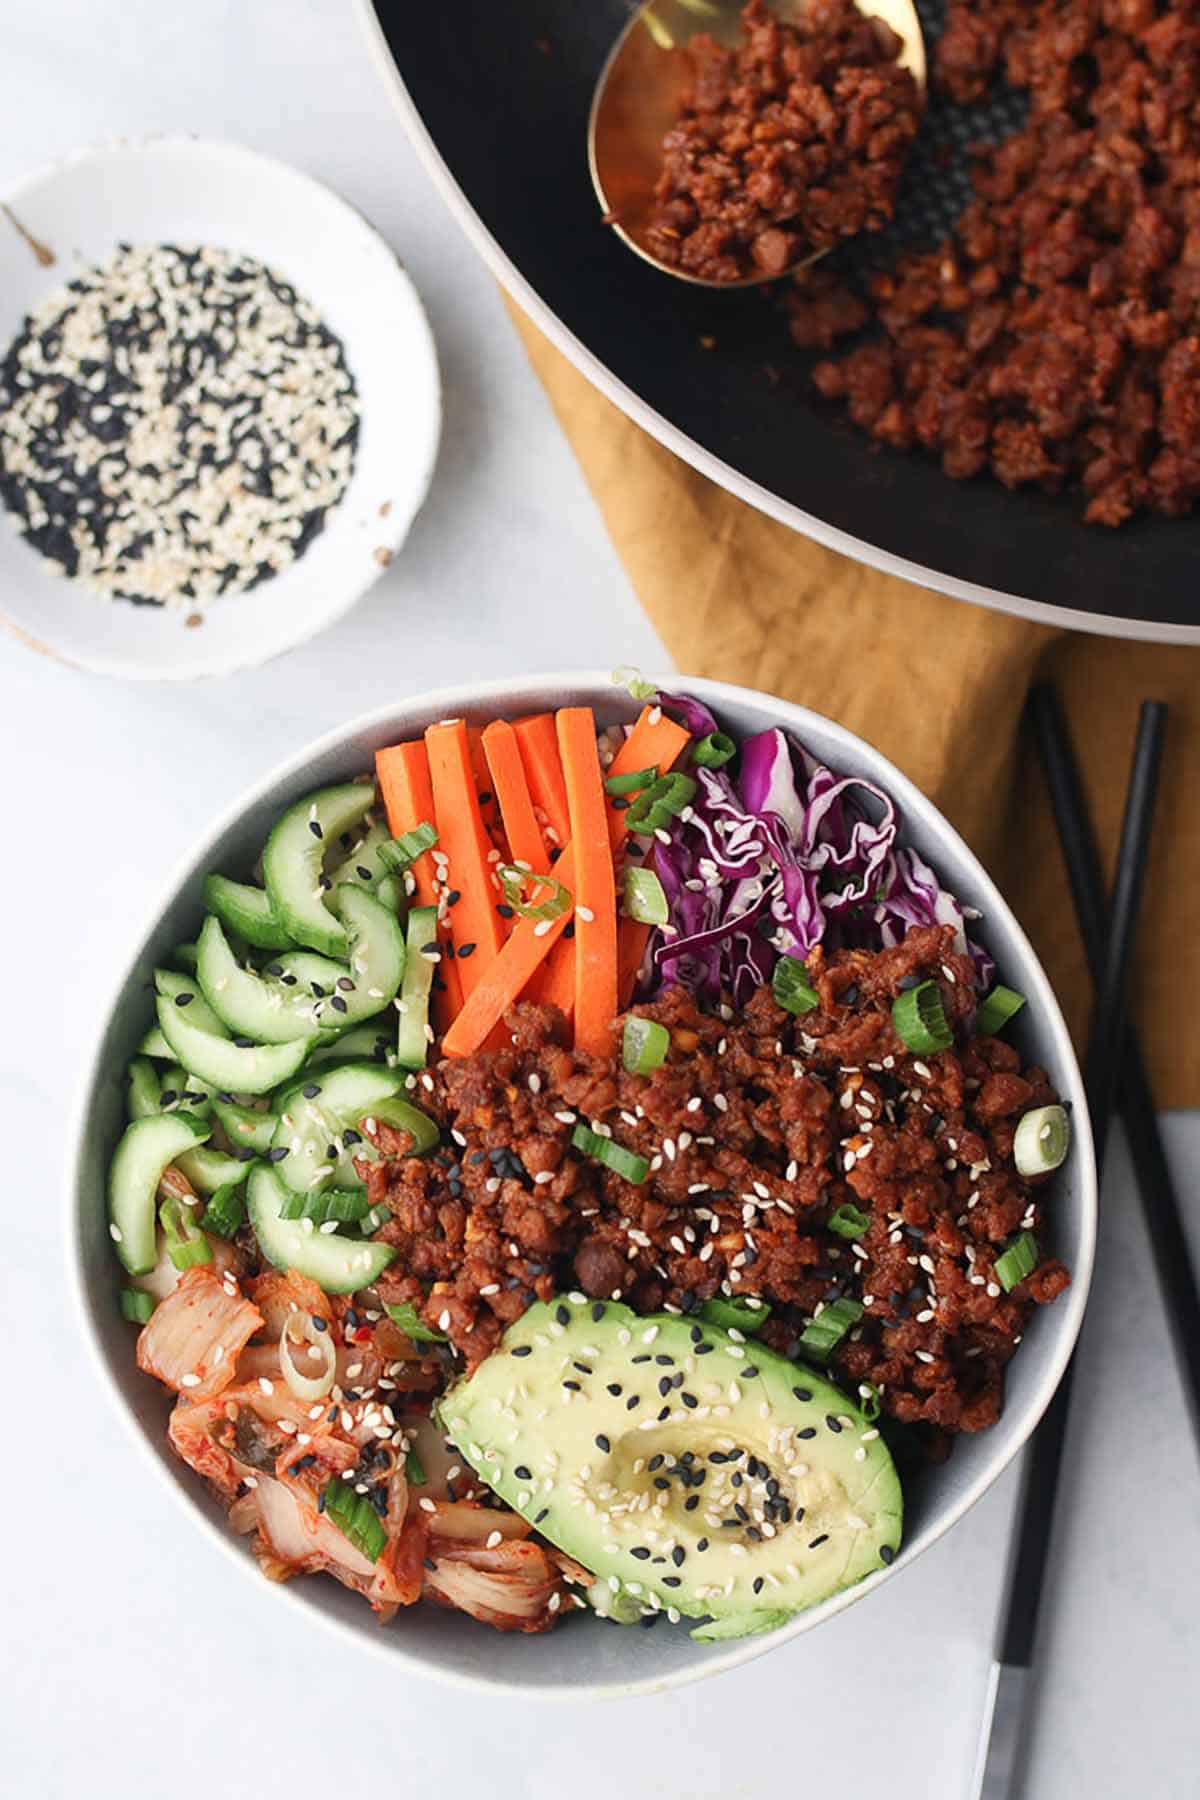
Birds eye view of vegan buddha bowl garnished with green onion and sesame seed with a bowl of sesame seeds in the background and two chopsticks laying on the side.

More Recipes You Might Like

Here are some of my favourite plant-based recipes using veggie ground round!

  • Crispy Vegan Baked Quesadilla 
  • Vegan Creamy Mushroom and Caramelized Onion Pasta 
  • Sloppy joes with portobello mushrooms

Now tell me, what are some of your favourite meals that you would like to see made vegan?

Print Recipe
5 from 7 votes

Vegan Buddha Bowl with Gochujang Sauce

This vegan buddha bowl with gochujang sauce is packed with sweet and spicy flavour but is completely gluten free, and plant based.
Prep Time15 minutes mins
Cook Time5 minutes mins
Total Time20 minutes mins
Course: Dinner, Lunch
Cuisine: American, korean
Servings: 6 people
Calories: 432kcal
Author: Abbey Sharp

Ingredients

  • 2 tbsp brown sugar
  • ¼ cup gluten free low sodium tamari
  • 2 tsp toasted sesame oil
  • ¼ tsp crushed red pepper omit for less spice
  • 2 tbsp gochujang
  • 1 tbsp grapeseed oil
  • 4 cloves garlic minced
  • 1 tbsp grated ginger
  • 2 packs of Yves Veggie Ground Round
  • For the Bowl:
  • Cooked Brown rice
  • Sliced cucumber
  • Carrot cut julienne
  • Red Cabbage shredded
  • Kimchee
  • Avocado
  • Green onions sliced on a bias
  • White and black sesame seeds

Instructions

  • To a bowl, mix together the brown sugar, tamari, sesame oil, red pepper, gochujang, grapeseed oil, garlic, and ginger. Mix well.
  • Heat a large skillet over medium high heat and add in the Yves veggie ground round. Saute just to break up the pieces before adding in the sauce, and tossing until everything is coated.
  • Add brown rice to six bowls, top with the Yves veggie ground round and any additional toppings, as desired. Enjoy warm.

Nutrition

Calories: 432kcal | Carbohydrates: 20g | Protein: 25g | Fat: 6g | Saturated Fat: 1g | Sodium: 570mg | Potassium: 60mg | Fiber: 10g | Sugar: 5g | Vitamin A: 35IU | Vitamin C: 1mg | Calcium: 12mg | Iron: 5mg

Have you tried making this Korean vegan buddha bowl? Leave me a comment below and send this to someone who loves Korean food!

Abbey Sharp

Abbey Sharp is a Registered Dietitian (RD), regulated by the Ontario College of Dietitians. She is a mom, YouTuber, Blogger, award winning cookbook author, media coach specializing in food and nutrition influencers, and a frequent contributor to national publications like Healthline and on national broadcast TV shows.

www.abbeyskitchen.com/about-abbey/

Last Updated March 2, 2021. Published January 15, 2021 By Abbey Sharp Leave a Comment

Everything Bagel Green Bean Fries (vegan)

These green bean fries make the perfect vegan snack or side dish for anyone who loves everything bagel seasoning. They are crispy, flavourful, nutrient-packed and super easy to prepare!

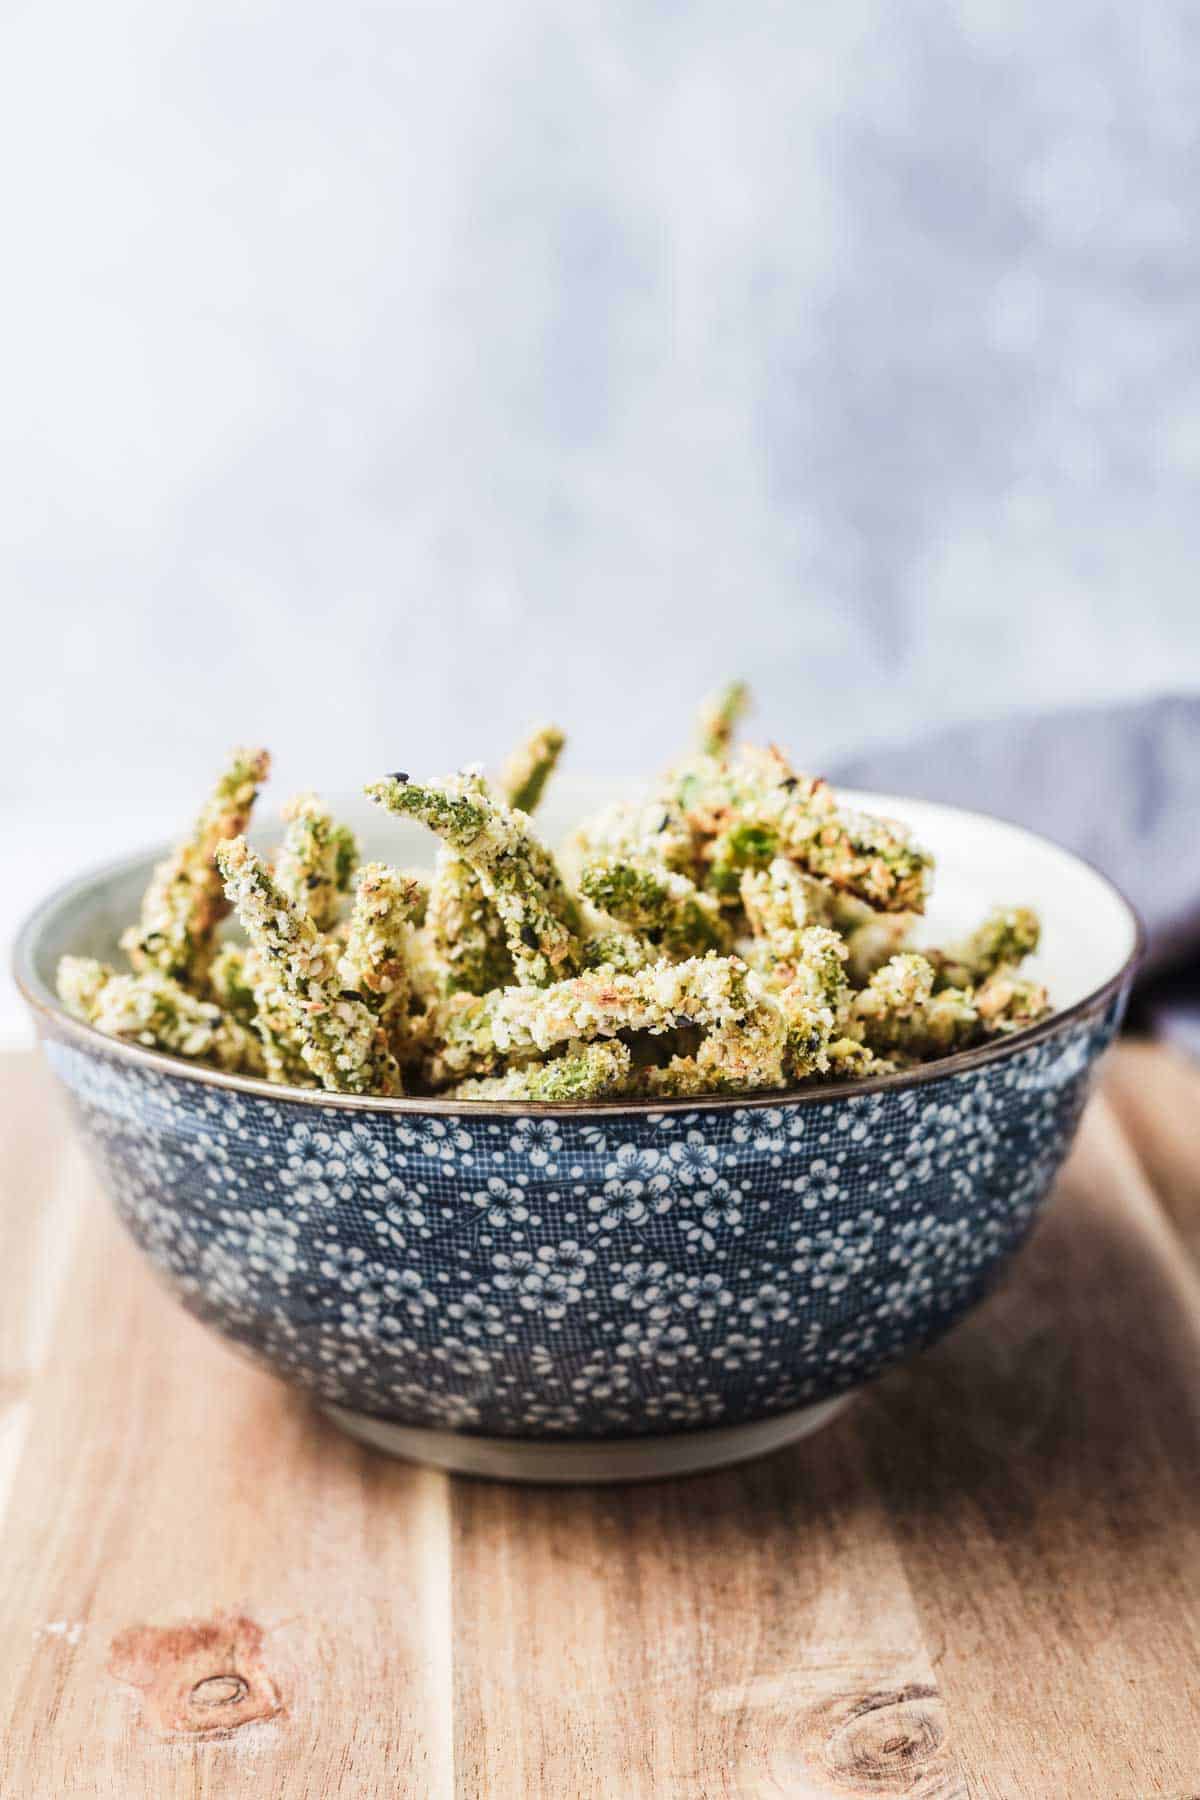
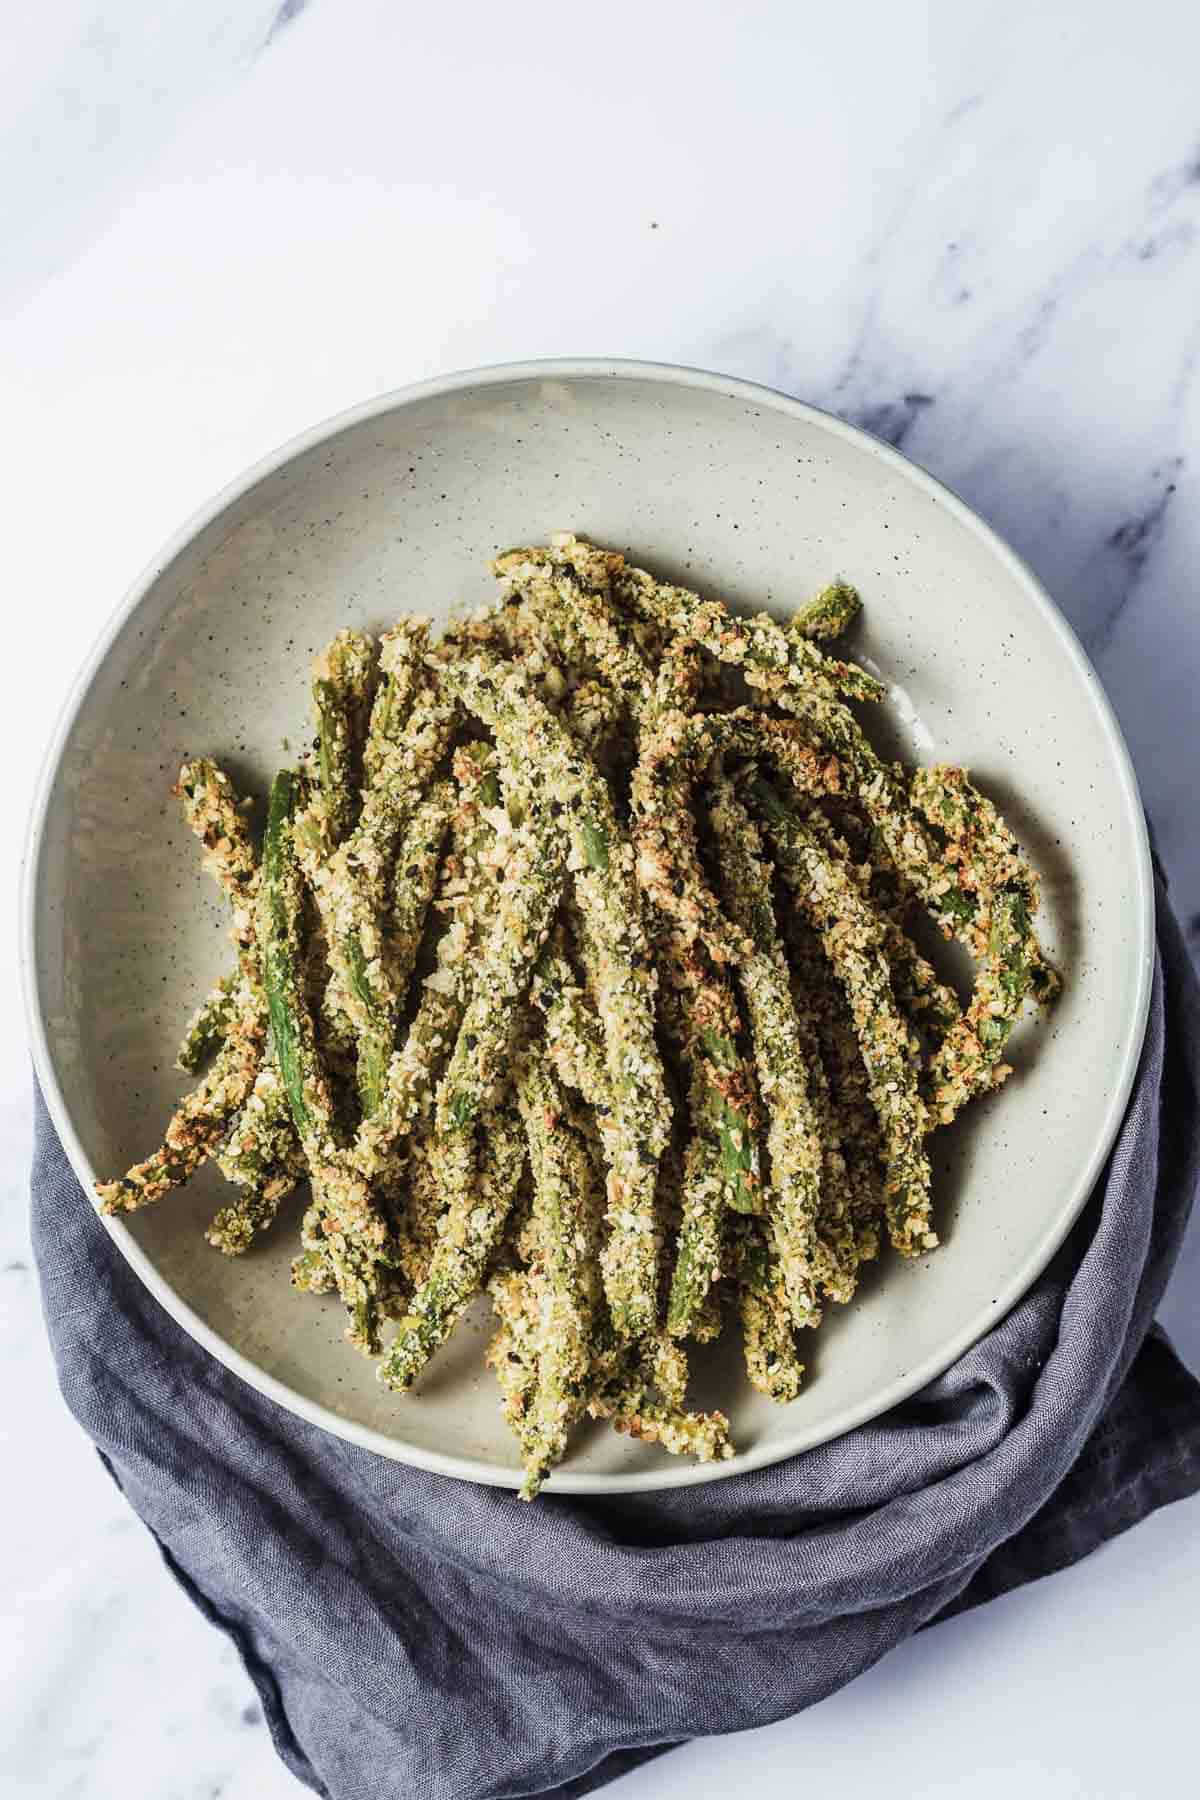
Several green bean fries in a blue floral bowl.

Ahh the humble green bean. Quite possibly the easiest veggie to prepare. Whether you wanna make them roasted or blanched, or use frozen or canned, green beans are easy as pie to add to meals and are arguably the one veggie that goes with just about anything.

But if we’re being totally honest… green beans can get a bit boring after a while, am I right?

Well luckily, I have just the recipe to make them exciting AF. Introducing these green bean FRIES with everything bagel seasoning. Yep. You heard that right. Not only are we making green beans crispy and delicious like yummy french fries but we are also adding my FAV seasoning of all time.

So throw away everything you thought you knew about green beans because we are giving them a serious glow up!

Table of contents

  • Why This Recipe Works
  • Key Ingredients
  • How to Make This Recipe
  • Expert Tips
  • Recipe FAQs
  • More Recipes You Might Like

Why This Recipe Works

These green bean fries with everything bagel seasoning are no joke. They pretty much hit all of my criteria when it comes to a tasty side dish. These green bean fries are:

  • Crispy
  • Flavourful
  • Made in under 30 minutes!
  • Only requires 6 ingredients
  • High Protein (6 grams per serving)
  • High Fibre (6 grams per serving)

Key Ingredients

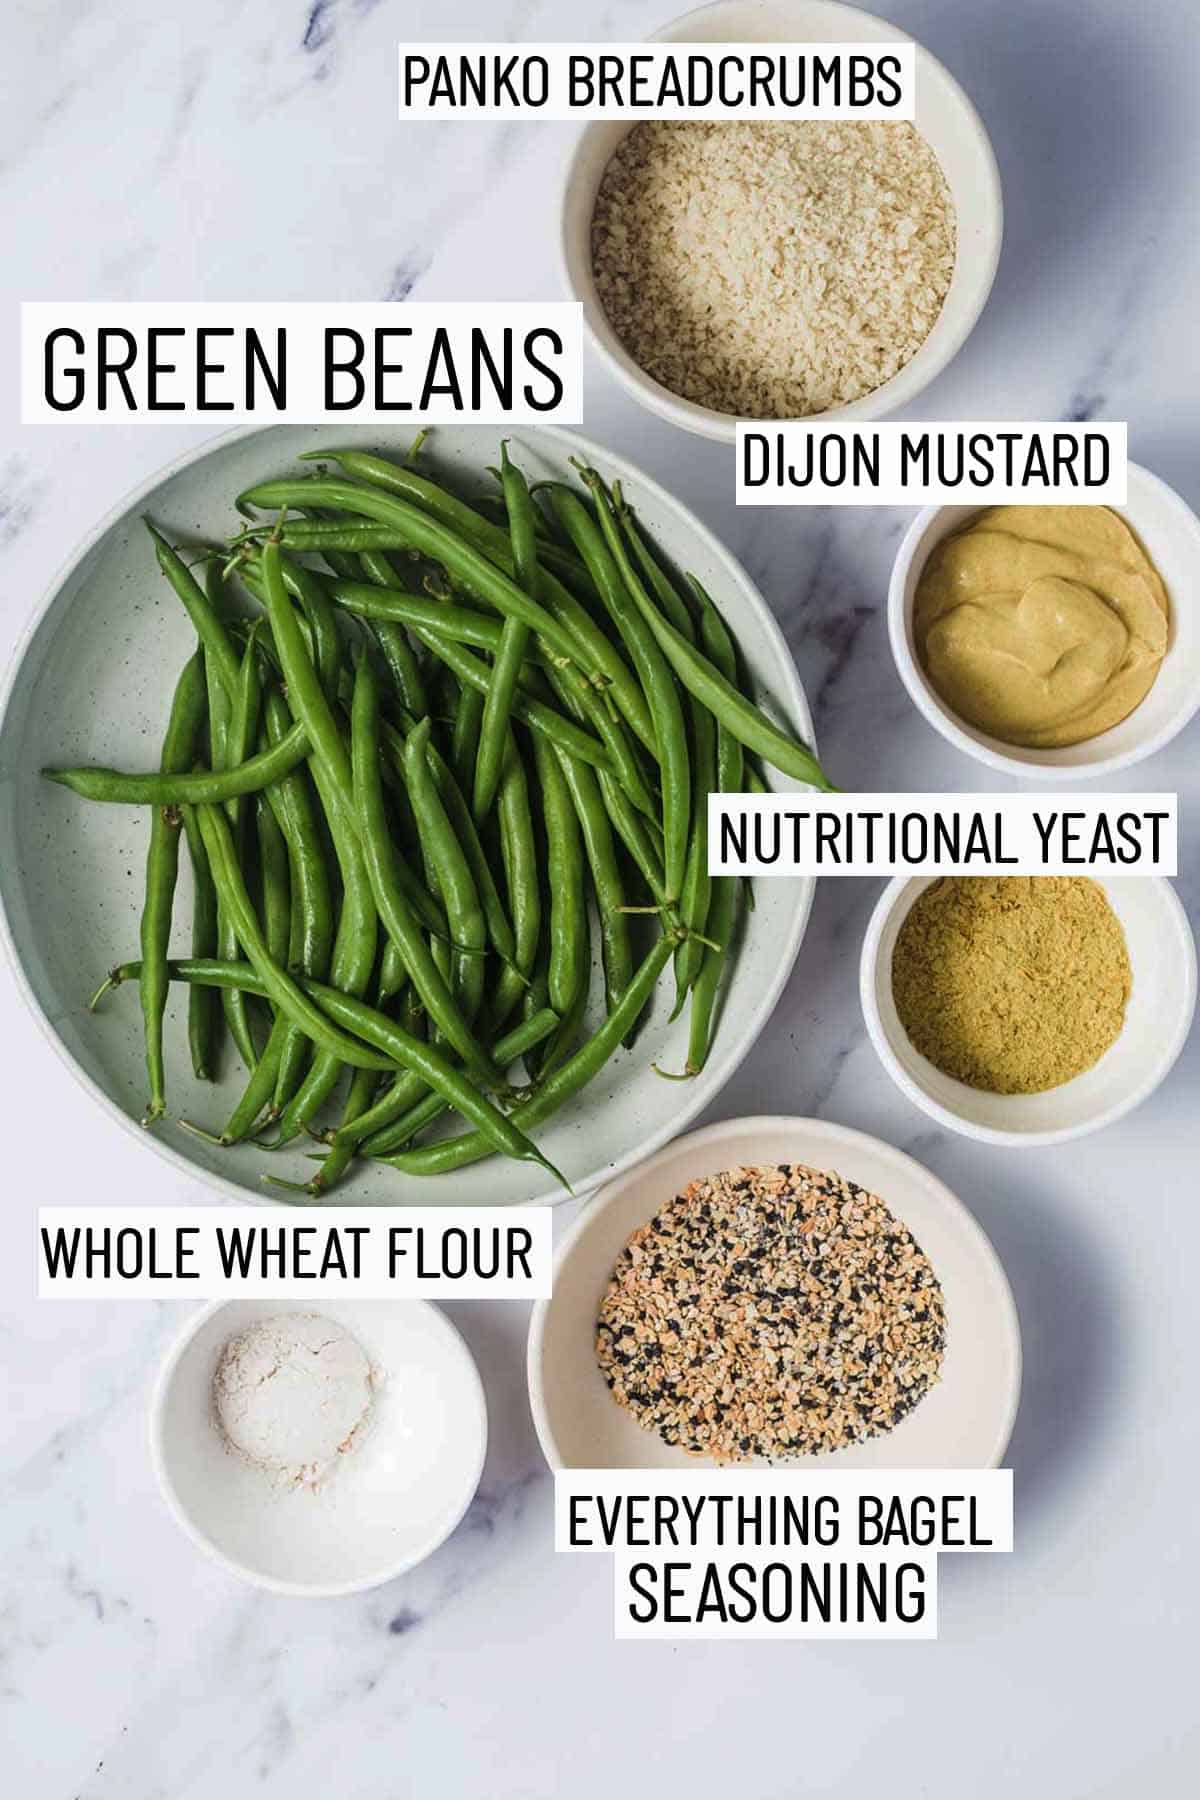
Flat lay image of portioned recipe ingredients including green beans, panko breadcrumbs, dijon mustard, nutritional yeast, everything bagel seasoning, and whole wheat flour.

Green Beans – we use fresh green beans because they get super crispy and hold flavour very well. While we have never tried this recipe with canned or frozen green beans, you can totally try it out if you have that on hand. But keep in mind that it might alter the texture and flavour profile.

Dijon Mustard – instead of an egg wash, we keep things super simple (and vegan) by using dijon mustard instead. The dijon also gives it a delicious spice and depth of flavour – all my dijon mustard loving folks know what I’m talkin about 😉

Nutritional Yeast – we add nutritional yeast to the dry mixture because not only does it bump up the protein content, but it also adds a delicious cheesy flavour too. If you don’t need to make this vegan, you can also use dry parmesan cheese instead.

Everything Bagel Seasoning – If you live in Canada like me, everything bagel seasoning is often hard to come by. But not to worry! I got you covered with my homemade recipe which combines white and black sesame seeds, salt, dried onion, dried garlic, and poppy seed (see recipe below).

How to Make This Recipe

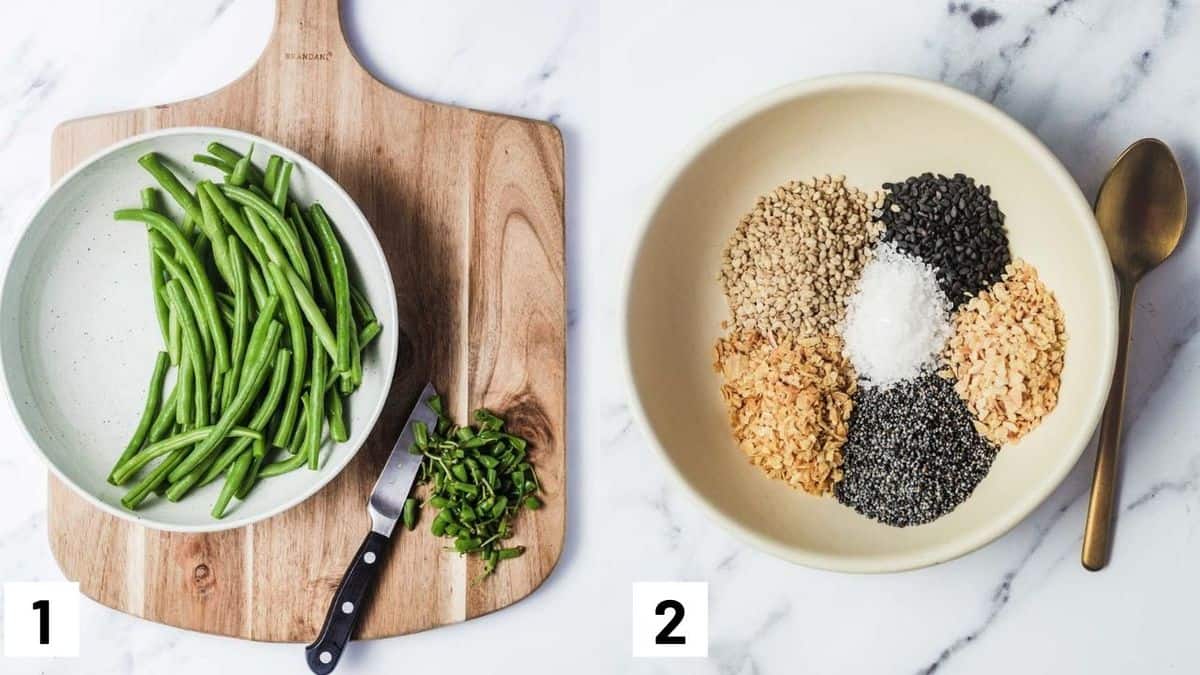
Two side by side images showing how to prep the green beans by cutting the stems, and how to prepare the everything bagel seasoning from scratch.

Step 1: Prep the green beans but washing them and cutting off the hard stems.

Step 2: Prepare the everything bagel spice by mixing together the seasonings. Set aside.

Three side by side images showing how to prepare the coating including dredging the beans in flour, adding to wet and dry mixture, and placing on the baking sheet to cook.

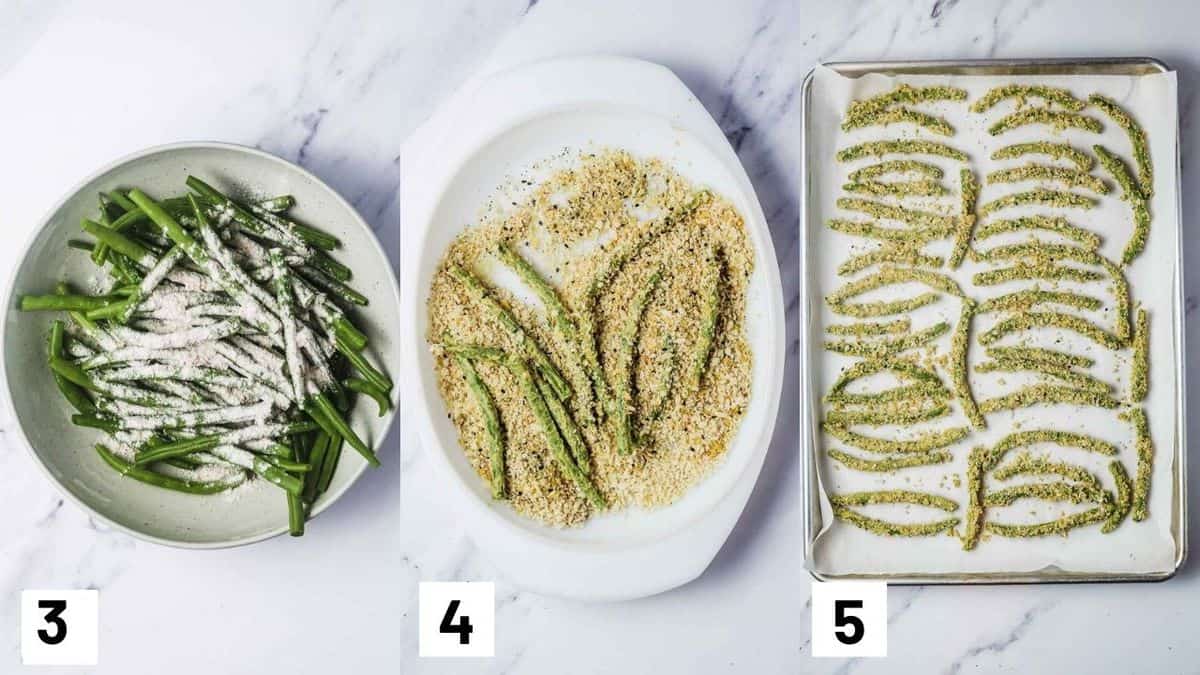
Step 3: Toss the green beans in flour to lightly coat them.

Step 4: Add dijon mustard to a shallow baking dish. In another baking dish mix panko, nutritional yeast, and everything bagel seasoning. Toss the green beans in mustard and mix till it is evenly coated. Then dredge it in panko bagel seasoning mixture, pressing to coat.  

Step 5: Place the green beans in a single layer on the prepared baking sheet. Bake for 10 – 12 minutes, or until golden and crisp.

Expert Tips

It’s important to make sure that the green bean fries are placed on a single layer when placing them on the baking sheet. Be mindful to not over crowd the baking sheet because it might prevent them from getting super crispy.

If the green bean fries are not as crispy as you want them to be, you can also broil them for 3-5 minutes at the end of their cook time. But make sure to watch the oven because broiling can go from crispy to burnt real quick!

Recipe FAQs

How long do these last in the fridge?

They should last in the fridge for about 3-5 days. I would recommend reheating them in the oven or toaster oven for a few minutes so they stay crispy.

What can you use as a dip?

I think these taste totally delicious solo, but they would also taste super yummy with a side of sriracha mayo or a honey mustard yogurt sauce like this one here.

Are these toddler friendly?

Yes 100%. My toddler devoured these green bean fries! They are also a super fun way to feed your little one veggies along and they also have a healthy dose of protein and fibre.

Where can I purchase everything bagel seasoning?

You can purchase everything bagel seasoning at Costco or Trader Joes (if you live in the US). You can also purchase some online here. Otherwise, you can make it from scratch (see recipe below).

What can I serve this with if i’m using it as a side dish?

These green bean fries can be eaten on their own as a snack, or you an eat it along side a vegan pasta, casserole, or soup. You can try pairing them with these butternut squash stuffed shells or this potato soup.

Birds eye view of green bean fries laying flat on a white plate.

More Recipes You Might Like

If you love everything bagel seasoning as much as I do, then you have to try these recipes!

  • Everything Bagel Tofu Nuggets
  • Mac and Cheese with Everything Bagel Crust (Vegan)
  • Everything Bagel Avocado Sandwich (Vegan)
  • Everything Bagel Chicken Breasts

What recipes do you like to top off with everything bagel seasoning? I’d love to know!

Print Recipe
5 from 1 vote

Green Bean Fries with Everything Bagel Seasoning (Vegan)

These green bean fries make for the perfect vegan snack or side dish for anyone who loves everything bagel seasoning. They are crispy, flavourful, and super easy to prepare!
Prep Time15 minutes mins
Cook Time12 minutes mins
Total Time27 minutes mins
Course: Side Dish, Snack
Cuisine: American
Diet: Vegan, Vegetarian
Servings: 4
Calories: 146kcal
Author: Abbey Sharp

Ingredients

  • 2 cups fresh green beans washed and trimmed (about 40-50 green beans)
  • 1 tablespoon whole wheat flour
  • 3 tablespoons Dijon mustard
  • ¾ cup panko breadcrumbs
  • 2 -3 tablespoons nutritional yeast
  • 3 tablespoons everything bagel seasoning

Everything Bagel Mixture

  • 1 teaspoon black sesame seeds
  • 1 teaspoon white sesame seeds
  • 11/2 teaspoon minced dried garlic
  • 11/2 teaspoon minced dried onion
  • 2 teaspoon poppy seeds
  • 1 teaspoon flaked sea salt

Instructions

  • Preheat the oven to 425 F. Line a baking sheet with parchment paper or coat it with nonstick spray.
  • Prep the green beans but washing them and cutting off the hard stems.
  • Prepare the everything bagel spice by mixing together the seasonings. Set aside.
  • Toss the green beans in flour to lightly coat them. Add dijon mustard to a shallow baking dish. In another baking dish mix panko, nutritional yeast, and everything bagel seasoning.Toss the green beans in mustard and mix till it is evenly coated. Then dredge it in panko bagel seasoning mixture, pressing to coat.
  • Place the green beans in a single layer on the prepared baking sheet. Bake for 10 – 12 minutes, or until golden and crisp.

Video

Notes

It’s important to make sure that the green bean fries are placed on a single layer when placing them on the baking sheet. Be mindful to not over crowd the baking sheet because it might prevent them from getting super crispy.
If the green bean fries are not as crispy as you want them to be, you can also broil them for 3-5 minutes at the end of their cook time. But make sure to watch the oven because broiling can go from crispy to burnt real quick!

Nutrition

Calories: 146kcal | Carbohydrates: 28g | Protein: 6g | Fat: 3g | Saturated Fat: 1g | Sodium: 1394mg | Potassium: 457mg | Fiber: 6g | Sugar: 7g | Vitamin A: 816IU | Vitamin C: 20mg | Calcium: 123mg | Iron: 3mg

Have you tried making these green bean fries? Let me know your thoughts down in the comments below!

Abbey Sharp

Abbey Sharp is a Registered Dietitian (RD), regulated by the Ontario College of Dietitians. She is a mom, YouTuber, Blogger, award winning cookbook author, media coach specializing in food and nutrition influencers, and a frequent contributor to national publications like Healthline and on national broadcast TV shows.
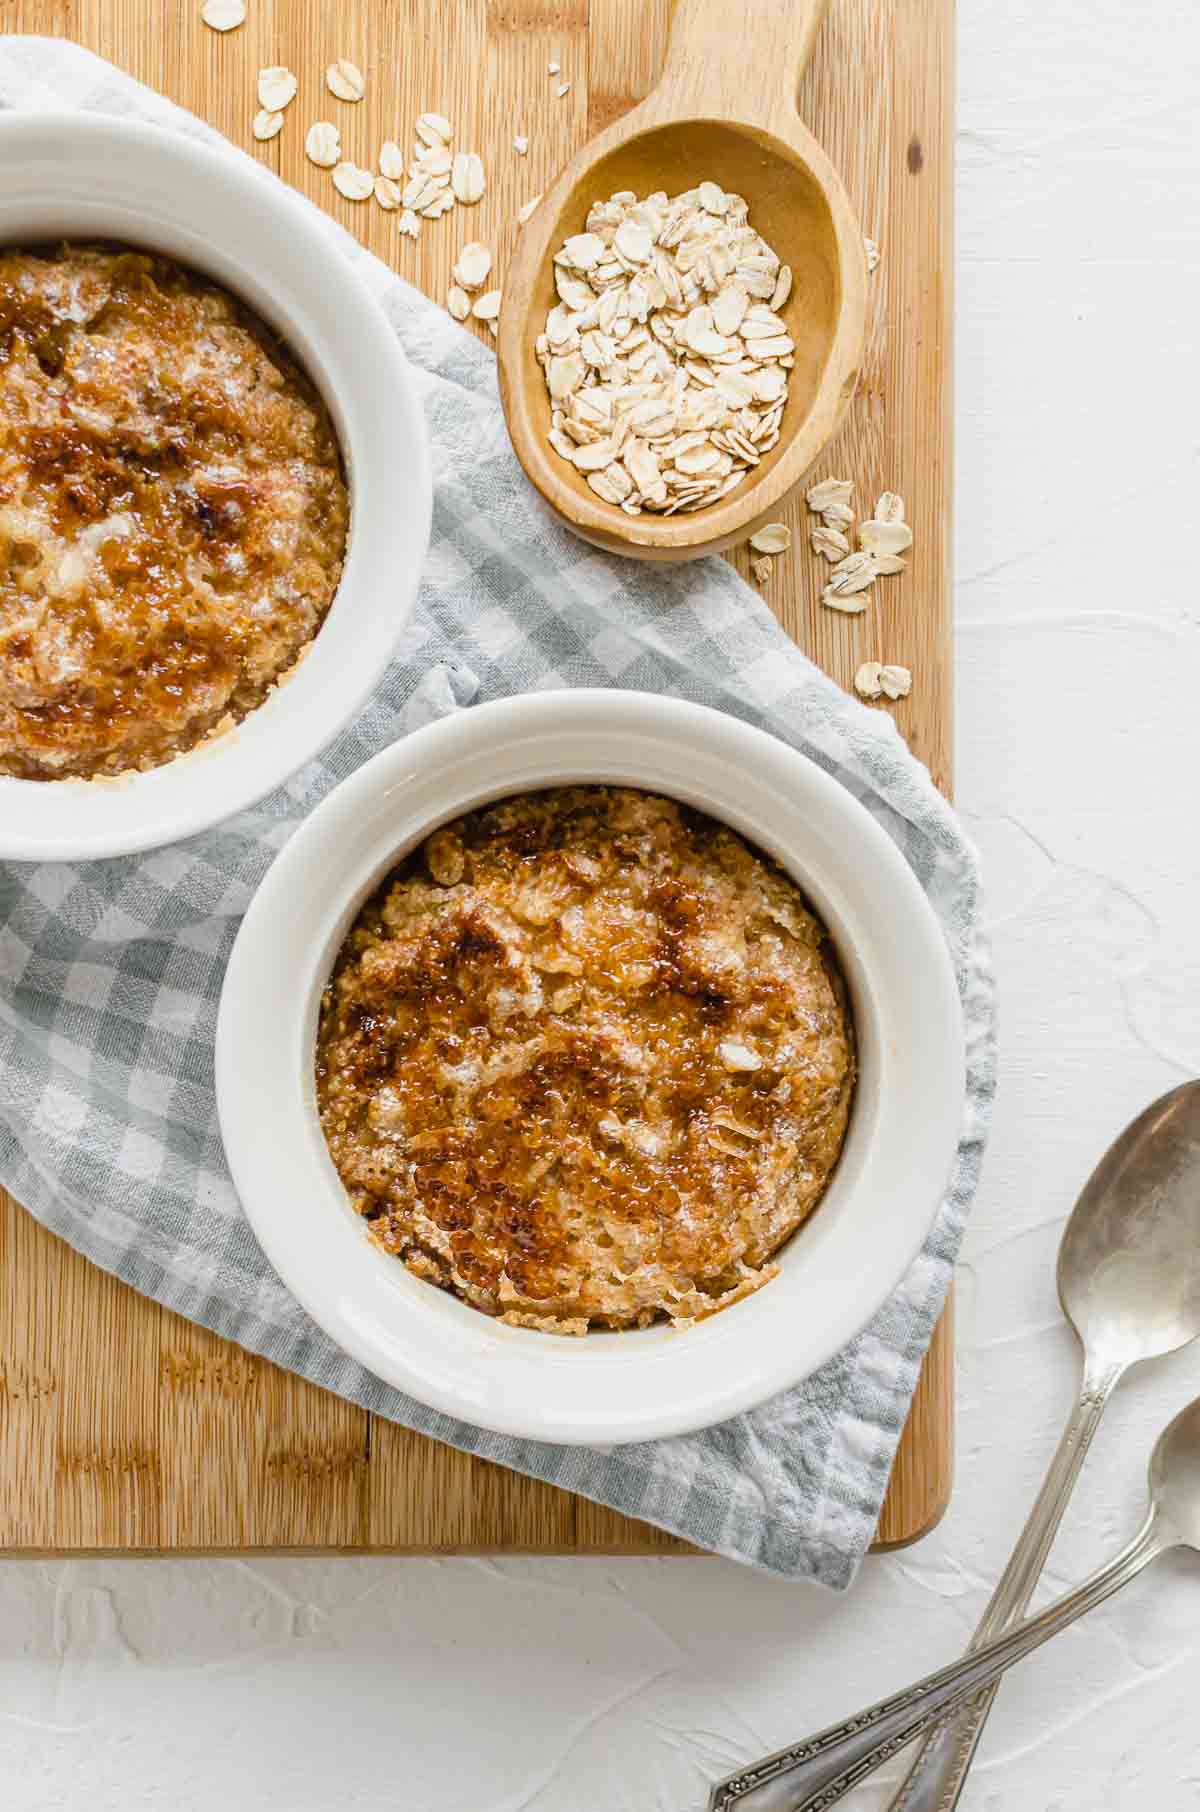
www.abbeyskitchen.com/about-abbey/

Last Updated January 19, 2022. Published January 14, 2021 By Abbey Sharp 24 Comments

Intermittent Fasting and Working Out: Will it Help or Hinder Your Performance?

I share the 411 on intermittent fasting and working out and whether or not it can enhance or hinder athletic performance and fitness level.

Woman who does intermittent fasting and working out seen running up a flight of stairs.

When it comes to exercise and athletic performance, I’ve noticed an increased interest in practicing intermittent fasting (IF). Intermittent fasting involves eating all your calories in a smaller time window (usually 8 hours), and fasting for the remainder of the day (usually 16 hours). For most people, this means skipping breakfast and having an earlier dinner, though it could be a lot more extreme depending on the regime you choose.

In light of the public interest and countless message boards debating the potential benefits and consequences of intermittent fasting and working out, today we’re gonna dig deep into the evidence and shed some light on how intermittent fasting can impact your performance and fitness.

Intermittent Fasting and Working Out

Ramadan Fasting in Athletes

Table setting for Ramadan.

Before we jump into the specifics, let’s start from the beginning with the OG of fasting: Ramadan. This marks the most sacred month of the year in Islam, where strict fasting from all foods and even liquids is observed from sunrise to sunset.

Since this has been around for so long, there’s been countless studies done on Ramadan’s effect on athletes. Depending on where you are in the world and how much sunlight you get in a day, the fasting period can range anywhere from 11-16 hours. If you’re counting, these no-food periods are quite comparable to intermittent fasting. So how did the athletes fair during their month of daily fasting?

A 2016 review found that athletes practicing Ramadan fasting reported feelings of fatigue and stress.  We are not surprised of the emotional effects of fasting. However, when it comes to the physical effects of fasting, the evidence shows no difference in physical performance in Ramadan fasting athletes. Perhaps it’s due to making a strong effort to maintain proper nutrition?

One study on 734 athletes found that though most waking hours were spent fasting, almost half of the athletes maintained the same caloric intake as their pre-fasting period, fuelling them with proper amounts of energy. Sports equates to bucketloads of sweat, so obviously hydration is also super important. Three quarters of athletes reported drinking more fluids than they usually do outside of Ramadan month.

Cup filled with water and lemon slice

Though feelings of stress are commonly reported, the athletes stayed mentally sharp and on their A-game. One study looked at the effects of fasting on an elite karate group and found their reaction time and neuromuscular performance were unaffected from Ramadan fasting.

A few years later, another study compared athletes’ muscular endurance pre-Ramadan vs. two weeks and four weeks into their fasts, and found that muscular force and endurance were pretty much unchanged. However, it’s important to note that they emphasized the importance of maintaining the same high-level training throughout Ramadan to prevent “detraining”, which would have a negative impact on performance.

So it seems that even though athletes felt more stressed and fatigued (understandably so), the general consensus with the physical evidence is that Ramadan fasting has a very small impact on exercise performance. It seems as though so long as athletes take proper care of their nutrition, hydration and keep up with their normal training routine, they’re good to go.

A nike running shoe up against a wall.

However, it’s super important to note that most of these studies were conducted in a super controlled test environment (aka athletes were hooked up to machines and all that jazz). In a competitive sport environment, there are so many other factors that could interact with fasting which could affect performance. For example, perhaps outdoor heat can affect the hydration status or calories burned? These are yet to be explored, and we do need more real-life studies in real-life settings that take into account the multitude of challenges of competitive sport events. Isn’t that always the case with research? As always, we need to see more before drawing conclusions.

Metabolic Changes

Increased Insulin Sensitivity

Blood glucose meter to measure the effect of intermittent fasting and working out on blood sugar levels.

One of the most prominent improvements found from intermittent fasting is improved insulin sensitivity. For example, one 2017 review reported a reduction in blood sugar levels while intermittent fasting (compared to a continuous energy restriction diet). It seems that when we zero in on intermittent fasting and working out, the results are similar, if not even more pronounced!

Research has found that intermittent fasting and working out facilitates higher muscular adaptations that lead to improved glucose tolerance and insulin sensitivity. However, it’s noted that this effect appears to be more prominent in individuals who ate a high-calorie, fat-rich diet.

On the other hand, one study compared fasting athletes with high-carb athletes and found very similar results – fasting athletes had reduced glycogen breakdown during exercise. In addition, some research has linked high levels of glycogen with insulin resistance. So, following that association, fasting athletes with reduced glycogen levels in their bodies can mean increased insulin sensitivity. Makes sense?

Increased fat metabolism

When fasting and exercising on an empty stomach, overall studies have shown that your body metabolizes more fat and becomes progressively better at doing so with increasing levels of physical intensity. One study found that intermittent fasting and working out led to increased fat metabolism (aka fat is being used for fuel as opposed to glucose).

In addition, research suggests that fat utilization within the first 30 minutes of exercise is greater in fasting athletes compared to fed ones.

Impact of Intermittent Fasting on Working Out

Cyclists racing on a road while intermittent fasting and working out.

When it comes to intermittent fasting and exercise performance, the overall research is similar to that of Ramadan fasting – meaning that intermittent fasting has an overall small impact on athletic ability.

One study took a look at overnight fasting plus caloric restriction in cyclists, and found that not only did they have the same endurance performance, but their power-to-weight ratio actually improved!

Another study focused on men after 12 weeks of intermittent fasting and found no difference in muscle power output in both young and old men. Similarly, a 2018 randomized control trial found that intermittent fasting did not negatively affect lean mass retention or muscular function in young men doing resistance training.

However, a recent 2020 review found mixed results on the effects of intermittent fasting and muscle strength. For example, some studies reviewed reported subtle increases in grip strength, vertical jump, and overall muscle strength. While other studies found no significant change in strength. This same review also stated that Ramadan fasting could cause aerobic impairments such as decreased aerobic capacity.

With that said, we still need more research on intermittent fasting and working out to get a clear picture of its impacts on athletic performance, strength, and endurance.

Growth Hormone and Impact on Athletic Performance

Growth hormone (GH) is a controversial topic in the competitive sport world, as research has shown that it can increase lean body mass, leading to many athletes taking a synthetic version for a competitive advantage. Interestingly, there’s some evidence showing that your body’s natural production of GH increases during intermittent fasting, leading many to believe that intermittent fasting can improve overall athletic performance.

However, an increase in growth hormone and potential increase in lean body mass doesn’t automatically mean you’ll be faster and stronger. A comprehensive review on this topic looked at all the up-to-date studies on this and concluded that although yes, GH increases lean body mass, it doesn’t improve strength, and may even reduce exercise capacity.

With that in consideration, while intermittent fasting may help to increased growth hormone and thereby body mass – it may not necessarily improve strength and exercise capacity. Like we said, more research is needed in this area to get a clear picture of the relationship between intermittent fasting and physical markers of strength.

Intermittent Fasting Improving Post-Exercise Recovery

Bench next to a tree and beach.

So now let’s talk about the effects intermittent fasting during the recovery phase. Some research suggests that intermittent fasting and working out (specifically endurance training) may be beneficial for the recovery period, as it can facilitate more rapid re-activation of muscle protein translation. This means that the muscle repairs itself quicker than it would under normal, non-fasting circumstances.

Another study done in 2009 found similar results for resistance training while intermittent fating. An hour after lifting weights in a fasted state, levels of p70s6 kinase (which indicates muscle growth) were found to have doubled, compared to those who lifted weights in a fed state. So based on this early research it seems that intermittent fasting and working out may be an aid in rapid recovery.

Does Intermittent Fasting Increase Iron Deficiency Risk in Athletes?

Iron is an essential component in your red blood cells that help transport oxygen to different muscles during exercise. Athletes actually have an increased risk of iron deficiency and this is especially true in female athletes who also have to account for loss of blood through their monthly visit from aunt flow!

Red bench in front of a red wall.

To understand how this relates to intermittent fasting, we have to first understand how iron is absorbed in our bodies. A hormone called hepcidin is a key regulator of iron absorption. When hepcidin levels are high, iron absorption is low, potentially due to inflammation. The female athletes in this study had higher hepcidin levels during intensive training season, despite the fact that they ate more iron-rich foods. So it seems that higher intensity level training is linked to higher hepcidin levels, and therefore lower iron, putting some athletes at increased risk for anemia.

Unfortunately, this phenomenon of athletes and low iron stores clashes directly with intermittent fasting due to timing issues.

The best window of opportunity for peak iron absorption is in the mornings, because hepcidin will be lowest and making iron more readily absorbed. However, intermittent fasting follows a skip-breakfast approach on most days which can interfere with the maximum absorption of iron.

With that said, athletes are already at a higher risk for iron-deficiency and anemia, and intermittent fasting can increase that risk.

How to Safely Practice Intermittent Fasting: Action Plan

Person writing in a journal.

So – what if you still want to do intermittent fasting and workout?

Here’s how to do it safely.

A lot of it really just boils down to ensuring that you get enough calories and nutrients in the period of time that you do eat. These are the main things to keep in mind if you do choose to make an informed decision to follow intermittent fasting:

Hydrate, hydrate, hydrate.

About 20% of our daily water intake comes from food, and we’re more likely to be reminded to drink water during structured meal times. So on fasting days your risk of dehydration may be higher from the lack of water-containing food intake during the mornings, and the cues for you to drink water with meals. So be mindful of staying hydrated, especially during your workouts!

Don’t treat eating periods as a “free for all”.

Look, I’m all about the occasional indulgence, but if improved metabolism and performance outcomes are your goals for intermittent fasting, then it’s best not to treat the shortened eating periods as “binge fests”. But remember, the only difference between intermittent fasting and a regular eating pattern are the time windows, not the actual food you put in your mouth. So on that note…

Make every bite count.

Since the time period where you can eat is shortened, it’s super important to make sure that your meals are filled with the good ole’ protein, healthy fat and fibre. This means lean proteins like chicken or fish, whole grains and avocados, seeds and nuts.

Contribution by:
RD2B Trista Chan
RD Kevin Iwasa-Madge

More Blog Posts You might Like

If you liked this blog post on intermittent fasting and working out, then you might also enjoy these evidence-based reads:

  • The Best Pre- and Post-workout Meals
  • Intermittent Fasting For Weight Loss: The Evidence Based Pros and Cons
  • Can You Drink Coffee While Intermittent Fasting
  • What Is The Best Beverage To Drink During Exercise?


Abbey Sharp

Abbey Sharp is a Registered Dietitian (RD), regulated by the Ontario College of Dietitians. She is a mom, YouTuber, Blogger, award winning cookbook author, media coach specializing in food and nutrition influencers, and a frequent contributor to national publications like Healthline and on national broadcast TV shows.
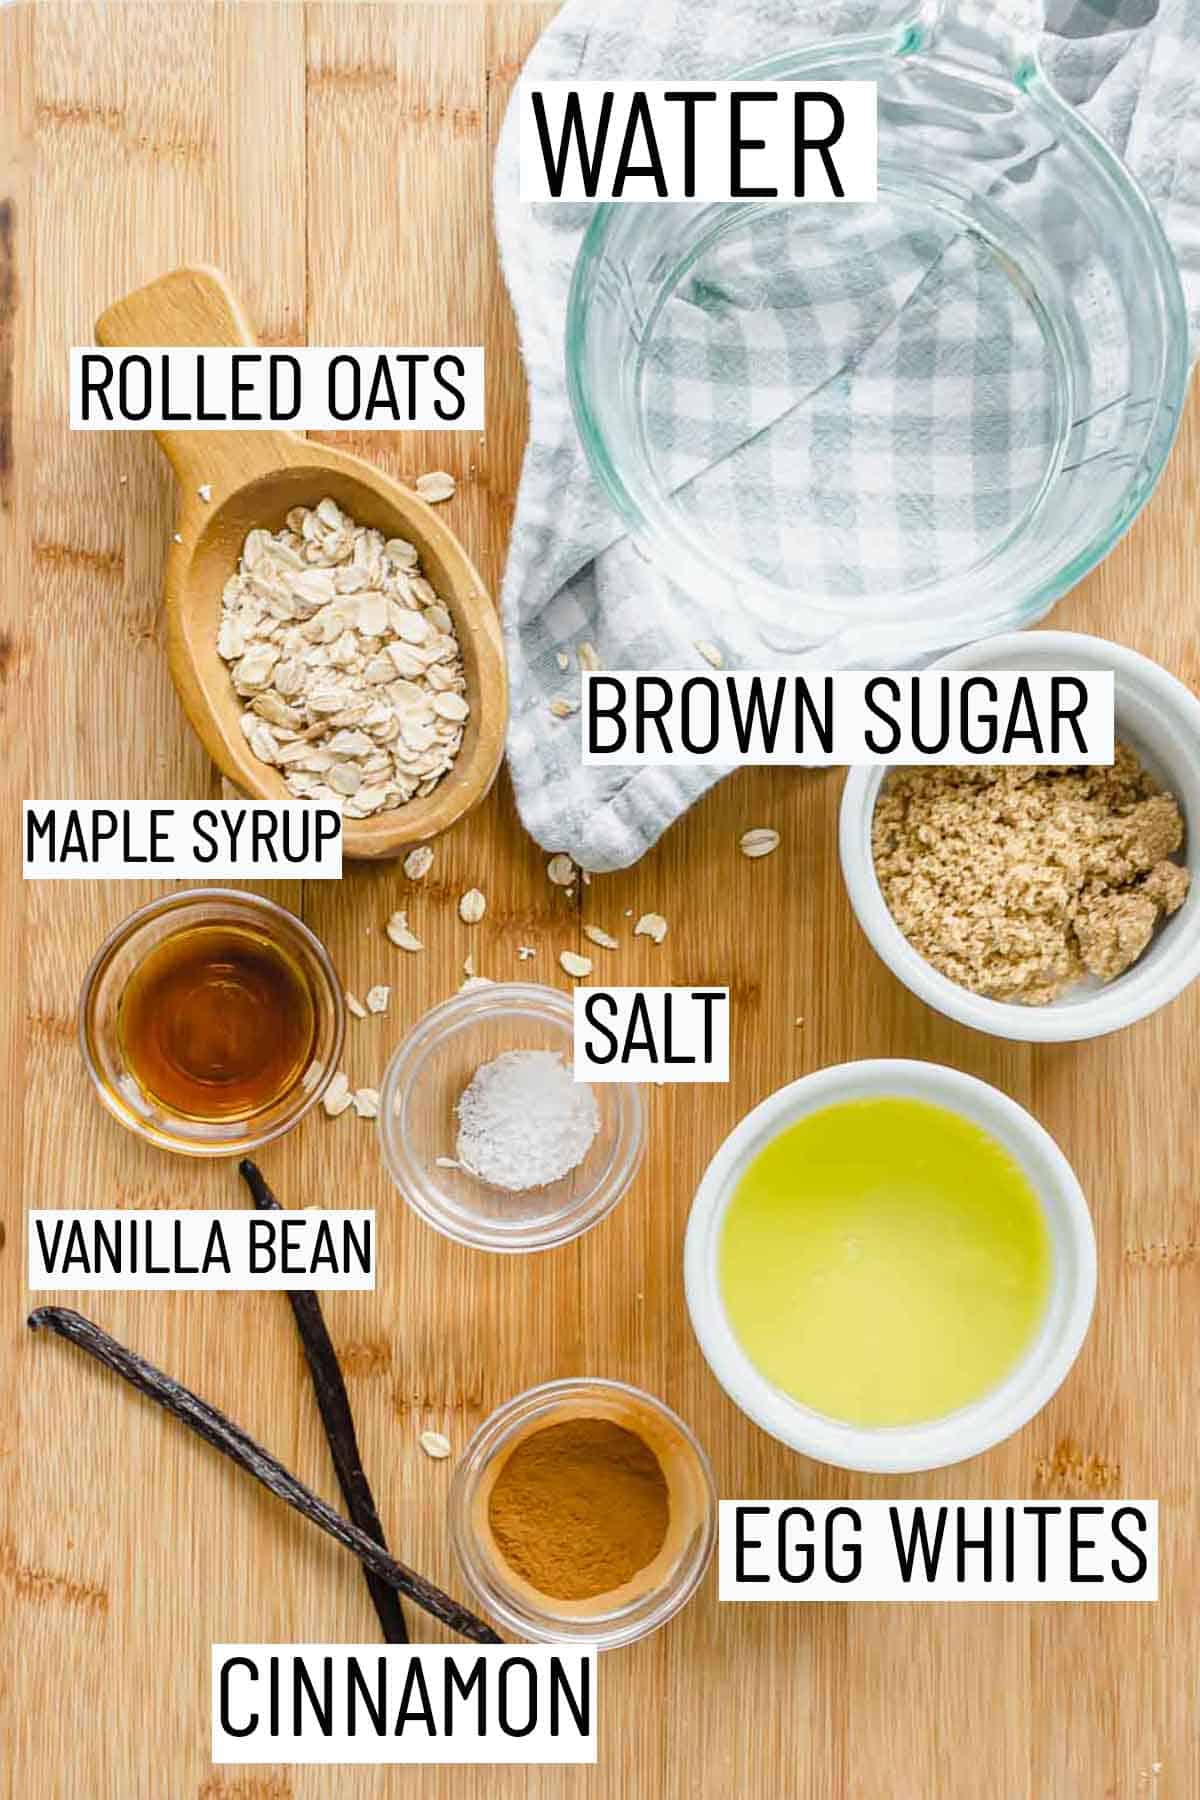
www.abbeyskitchen.com/about-abbey/
  • Previous Page
  • Go to page 1
  • Interim pages omitted …
  • Go to page 37
  • Go to page 38
  • Go to page 39
  • Go to page 40
  • Go to page 41
  • Interim pages omitted …
  • Go to page 89
  • Next Page

Get started with

Eight Free Recipe Books

From the co-founder of Neue Theory and creator of the Hunger Crushing Combo

Sign me up!
Abbey smiling at table
Abbey Sharp

“Foods may never be nutritionally equal. But we can make them morally equal by recognizing that our worth is never determined by what's on our plate.”

— Abbey Sharp, RD About Abbey ◥

Books

  • HCC™
  • Mindful Glow
  • Free E-Books

Blog

  • Nutrition
  • Recipes
  • Motherhood
  • Life

Explore

  • Neue Theory™
  • Bite Back
  • YouTube

Abbey

  • About
  • Coaching
YouTube TikTok Instagram Facebook X Pinterest
Abbey Sharp - The No BS Dietitian From Abbeys Kitchen

© Abbey's Kitchen 2026  All Rights Reserved •  ACCESSIBILITY STATEMENT •  Privacy Policy

This site uses cookies. By continuing to browse the site, you are agreeing to the use of cookies Accept Privacy Policy

Privacy & Cookies Policy

Privacy Overview

This website uses cookies to improve your experience while you navigate through the website. Out of these, the cookies that are categorized as necessary are stored on your browser as they are essential for the working of basic functionalities of the website. We also use third-party cookies that help us analyze and understand how you use this website. These cookies will be stored in your browser only with your consent. You also have the option to opt-out of these cookies. But opting out of some of these cookies may affect your browsing experience.
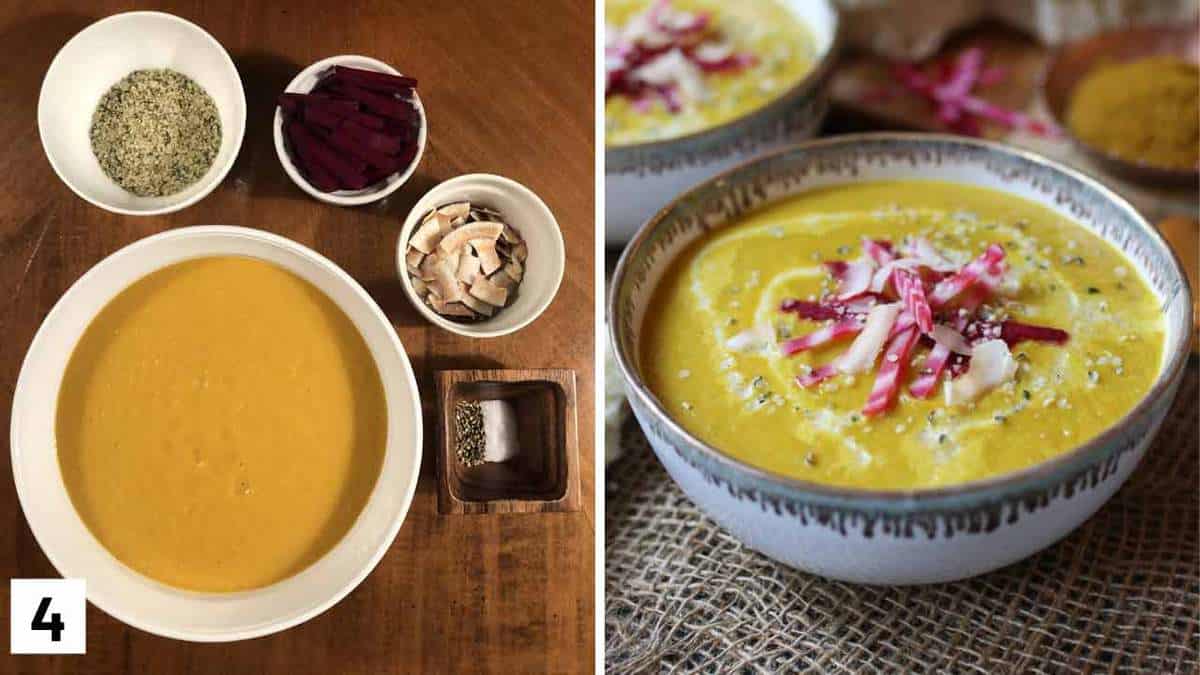
Necessary
Always Enabled
Necessary cookies are absolutely essential for the website to function properly. This category only includes cookies that ensures basic functionalities and security features of the website. These cookies do not store any personal information.
Non-necessary
Any cookies that may not be particularly necessary for the website to function and is used specifically to collect user personal data via analytics, ads, other embedded contents are termed as non-necessary cookies. It is mandatory to procure user consent prior to running these cookies on your website.
SAVE & ACCEPT

Rate This Recipe

Your vote:


A rating is required
A name is required
An email is required