• Skip to main content

Abbey's Kitchen

Healthy Recipes, Nutrition Myth Busting, Healthy Eating Tips

  • Books
    • HCC™
    • The Mindful Glow Cookbook
    • Recipe eBooks
      • Family
      • Hypothyroidism
      • BLW
      • Vegan Week 1
      • Vegan Week 2
      • Vegan Week 3
      • Keto
      • Gluten Free Week 1
      • Gluten Free Week 2
      • Fitness
      • Paleo
  • Blog
    • Nutrition
    • Recipes
    • Motherhood
    • Life
  • Explore
    • Neue Theory™
    • Bite Back With Abbey Sharp
      • Apple Music
      • Spotify
      • Amazon Music
    • YouTube
  • Abbey
    • About
    • Coaching
    • Contact

Abbey Sharp

Last Updated April 22, 2021. Published April 22, 2021 By Abbey Sharp 1 Comment

Vegan Fettuccine Alfredo (Gluten free)

birds eye view of fettuccini alredo pasta on a white plate garnished with parsley

This is the best vegan fettuccine alfredo pasta recipe you’ll ever make. It is packed with fibre, protein and healthy fats! On top of that, not only is it vegan, it’s also gluten-free!
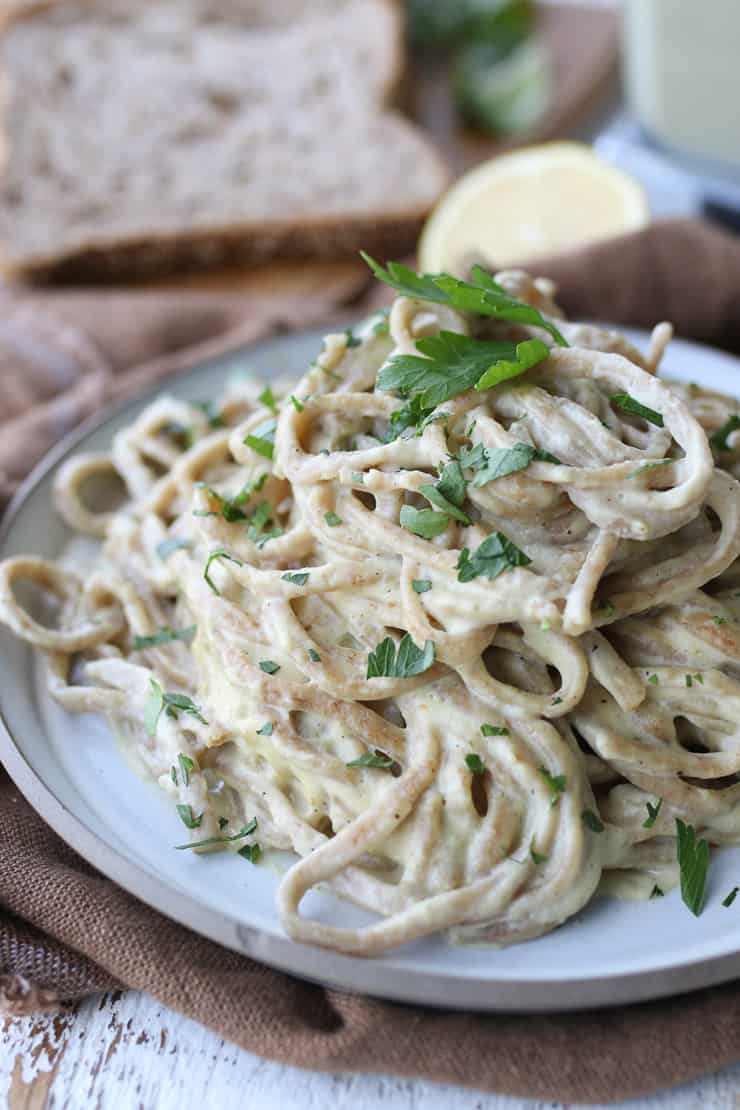
close up of vegan fettuccini alfredo on a white plate.

I love how decadent a good creamy fettuccini alfredo pasta is. However, as I get older, I realize it’s getting harder for me to have a ton of super rich cream based pastas on the regular so I’ve taken to lightening them up and making them plant based when I can.  This delicious fettuccini pasta is one of my favourite creations so far and you’ll love how easy it is to make.

Table of contents

  • Why This Recipe Works
  • Key Ingredients
  • How to Make This Recipe
  • Expert Tips
  • Recipe FAQs
  • More Recipes You Might Like

Why This Recipe Works

This vegan fettuccine alfredo is rich, creamy, “cheesy,” and yet a totally dairy-free, healthier lighter version of the classic Italian staple. On top of that, you’ll love this recipe as it’s:

  • Only 10 ingredients
  • Easy to customize
  • Tasty AF
  • You don’t even notice it’s vegan
  • Made in 30 minutes

Key Ingredients

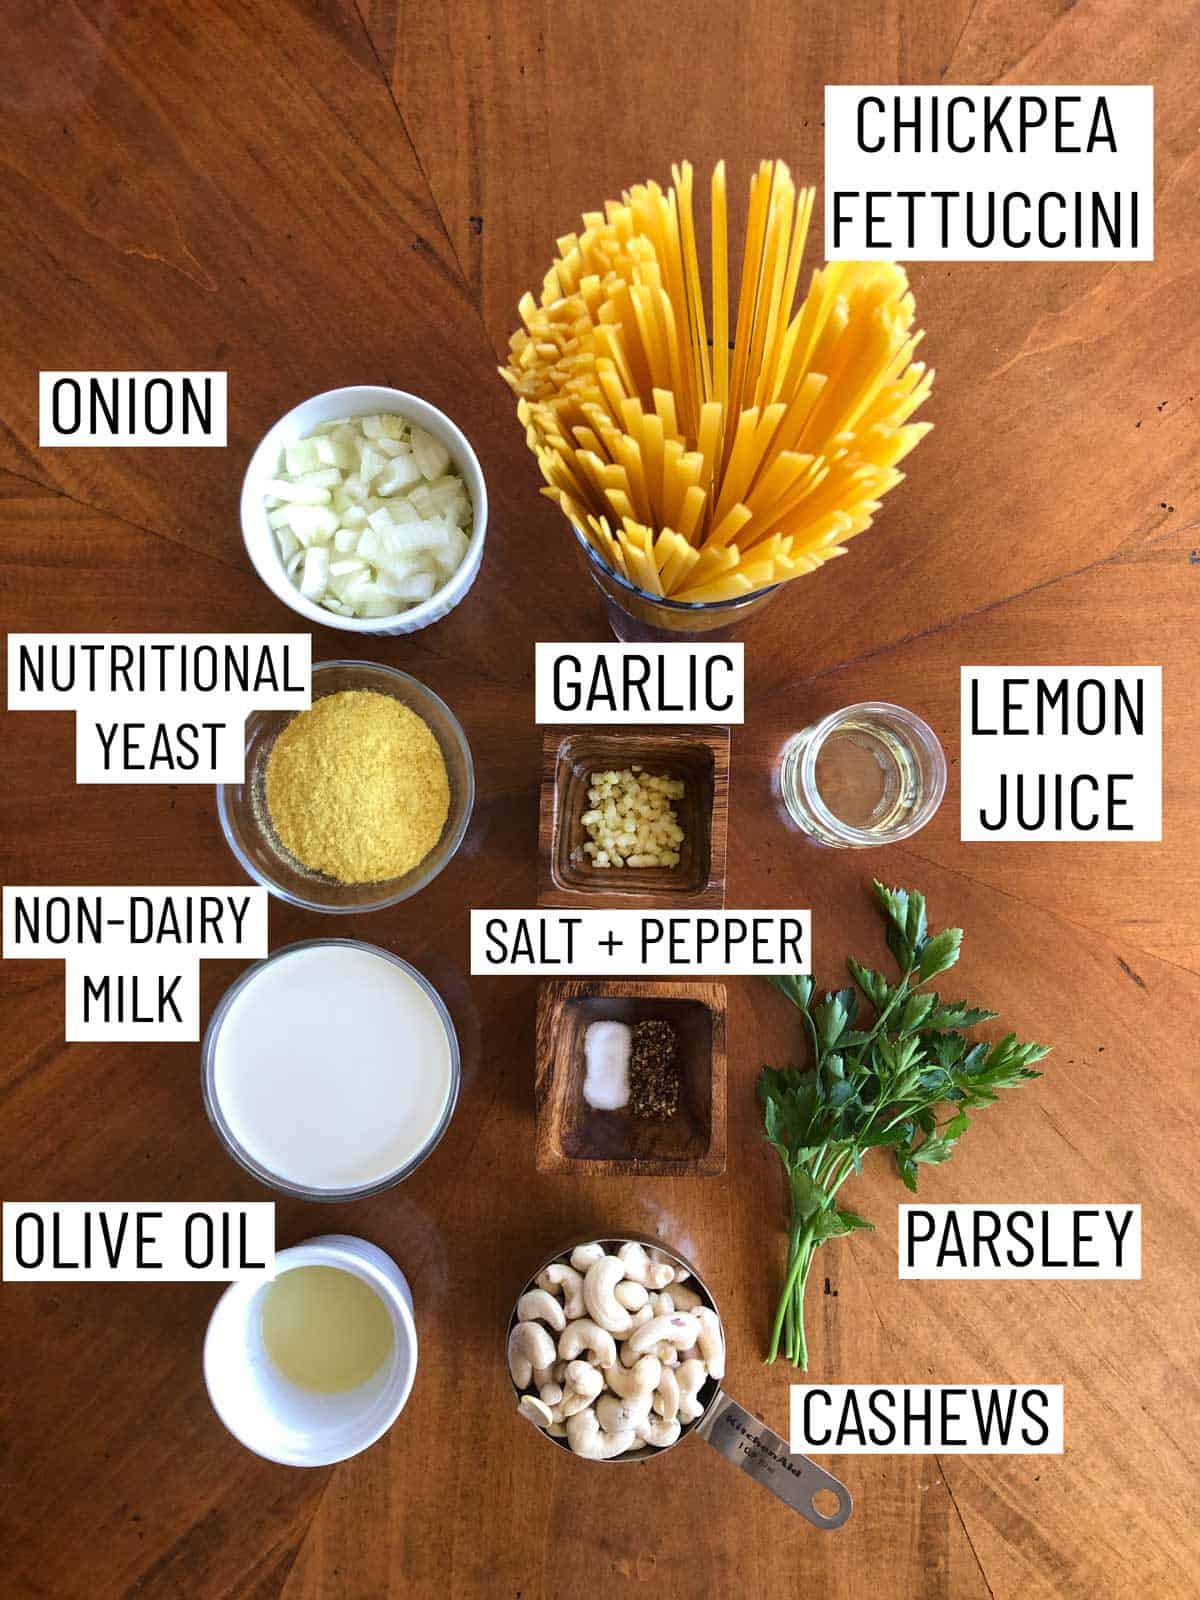
Ingredients needed to make vegan fettuccini.

Aromatics — You know, that means garlic and onions sautéed in a little olive oil. We just cannot make any Italian dish without that.

Soaked cashews — Soaking your cashews gives this dish its luscious creamy consistency. I recommend soaking them overnight to make it easy but if you’re in a pinch, see my note below on how to quickly soak them.

Fortified nutritional yeast — Nutritional yeast gives this vegan fettuccine alfredo a cheesy flavour but without any dairy or cheese! It’s also a great source of protein and vitamin B12 if you go with the fortified version.

Unsweetened oat milk — Any non dairy milk will work here but i do prefer a thicker one like oat or soy milk to almond milk which I find a bit watery.

Lemon juice — This just helps cut the sweetness of the cashew cream and bring a little zip to the alfredo sauce.

Chickpea fettuccini — Don’t feel limited by the fact that we call this fettuccini alfredo. If you have linguine, macaroni, spaghetti, whatever – use what you like and have. I love chickpea pasta for the extra protein but feel free to use whole wheat, regular, gluten free – whatever you’ve got!

How to Make This Recipe
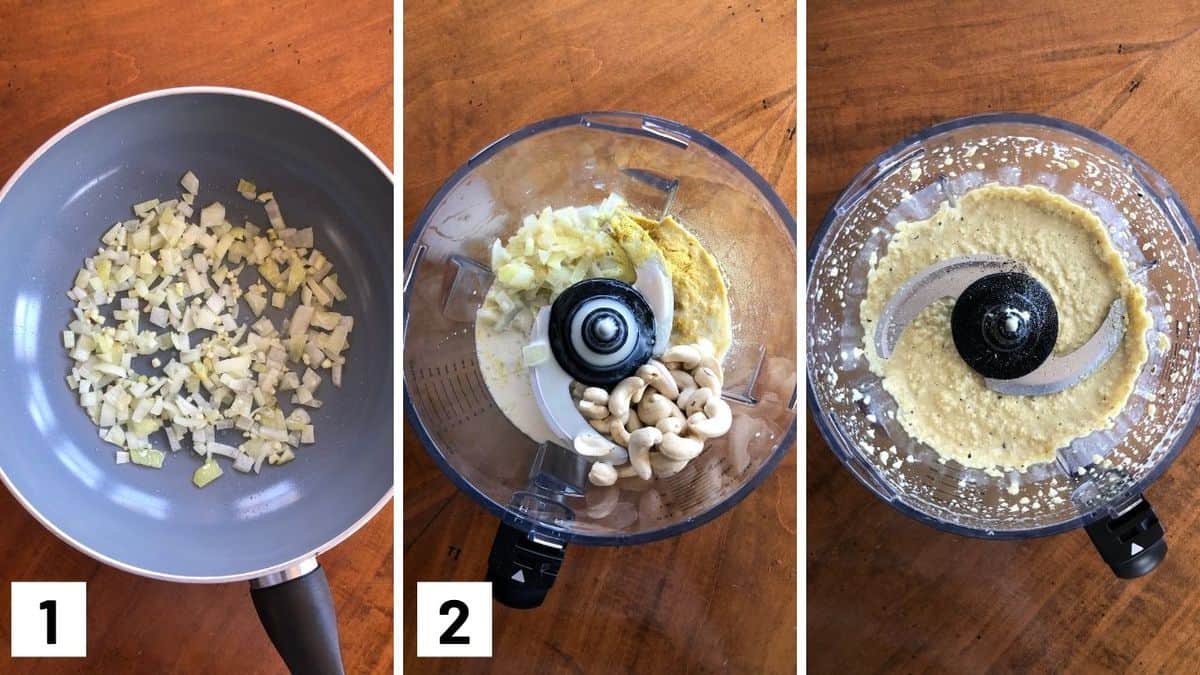
Set of 3 photos showing onions and garlic being cooked and then added to a food processor to blend with other ingredients.

Step 1: To a small nonstick skillet, add the oil over medium heat along with the onion and garlic. Saute until softened and transfer to a blender.

Step 2: Add the soaked cashews, nutritional yeast, oat milk, lemon juice, salt and pepper, to taste and puree until very smooth.
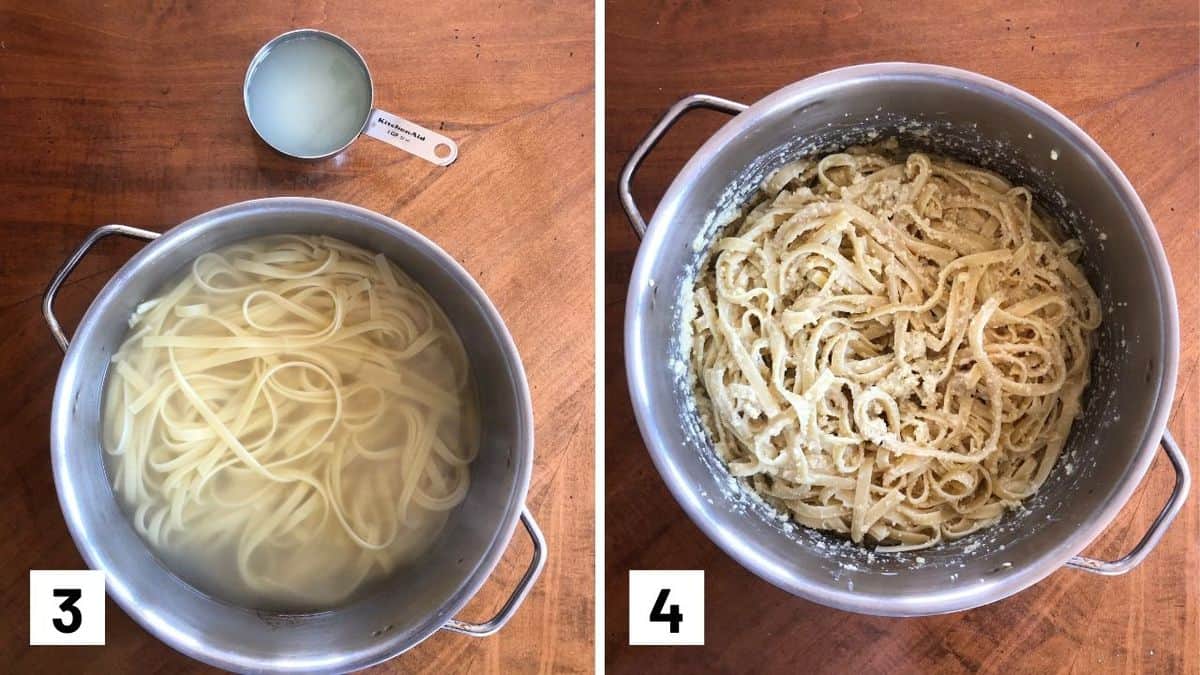
Set of two photos showing pasta being cooked in a pot and then coated in the sauce.

Step 3: Meanwhile, cook the pasta in a large pot of salted water, reserving a cupful of the cooking water before you drain.

Step 4: Pour the sauce into a pot and heat over low heat. Add the pasta and toss until coated. If it gets too thick you can add a splash of the cooking water. Top with parsley and enjoy.

Expert Tips

Want to make this more veggie packed? Try adding in some peas, broccoli, cauliflower, mushrooms, or spinach to this.

Don’t like chickpea pasta? Try lentil pasta to keep this gluten-free.

Feel free to adjust how thick and creamy you’d like your sauce to be by adding extra liquid to thin it out if you’d like.

If you’d like take this up a notch, you can garnish the pasta with lemon zest and red pepper flakes.

Recipe FAQs

What Should I serve this with?

Any pasta dish demands some salad and bread in my opinion. This fettuccini would go amazing with this easy gluten free focaccia bread, and this delicious roasted broccoli salad.

Is this vegan fettuccine alfredo gluten free?

This sauce is naturally gluten free! If you want to ensure the whole dish is gluten free, just be sure to use gluten free pasta.

Can I use whole wheat pasta?

Absolutely, you can use whatever kind of pasta you have on hand that you and your family like.

Can I use zoodles to make this recipe really low carb?

You bet! I do recommend following the instructions here to ensure you get the moisture out of the zoodles so they don’t make the sauce super watery.

How can I quickly soak cashews if I didn’t do it the night before?

You can put your cashews in a small pot and cover them with water. Bring the water to a boil, cover and remove from the heat. Allow it to sit for 15-20 minutes, then drain and use!

Can I make this sauce ahead of time and how long will it last?

You can make the vegan alfredo sauce up to 3 days ahead and store it in the fridge. When you’re ready to make pasta, keep about a cup of the pasta cooking liquid and set it aside. Then heat the sauce up in a saucepan, add your cooked pasta and if your sauce is too thick, add a little of the pasta cooking water to thin it out.
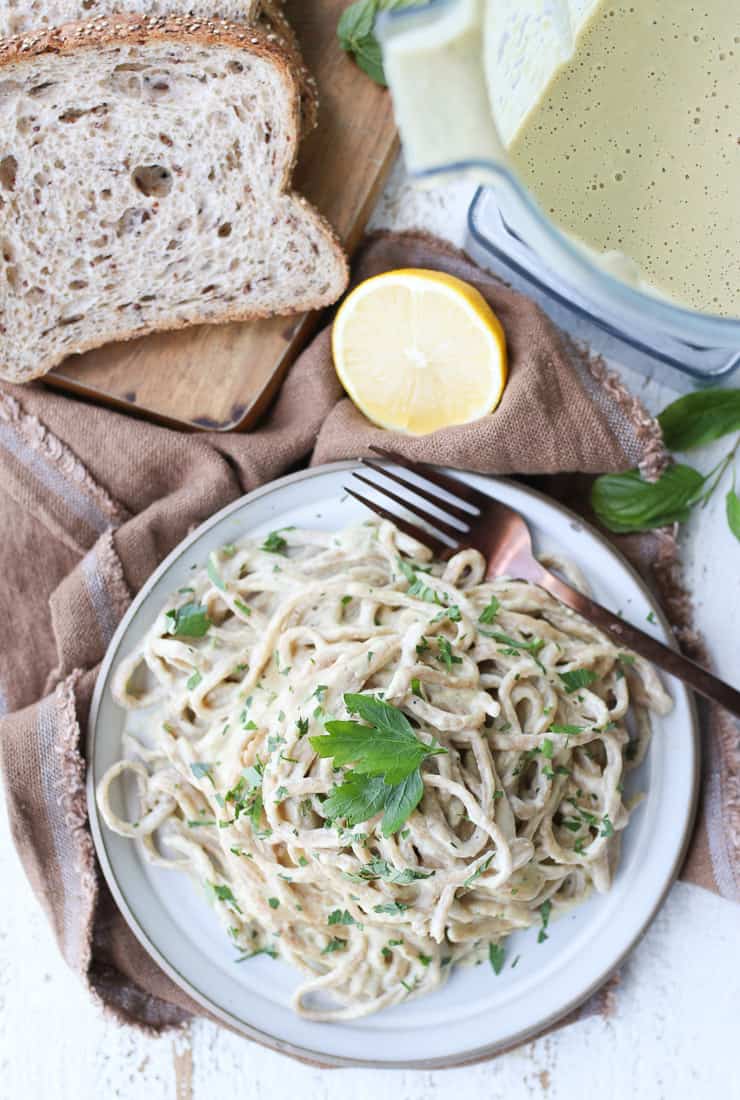
birds eye view of vegan alfredo pasta on a white plate

More Recipes You Might Like

Want some more pasta recipes like my vegan fettuccine alfredo? Try my

  • Tuna Pesto Pasta 
  • Hummus Pasta with Zucchini Noodles 
  • Pasta Bake with Sausage, White Beans & Kale 
  • Minestrone Skillet Pasta 

What is your favourite classic pasta dish that you would like to see veganized? Leave me a comment below with your thoughts!
birds eye view of fettuccini alredo pasta on a white plate garnished with parsley
Print Recipe
5 from 2 votes

Vegan Fettuccine Alfredo (Gluten free)

This is the best vegan fettuccine alfredo pasta recipe you'll ever make. It is packed with fibre, protein and healthy fats! On top of that, not only is it vegan, it's also gluten-free!
Prep Time10 minutes mins
Cook Time20 minutes mins
Total Time30 minutes mins
Course: Main Course, Dinner, Lunch
Cuisine: Italian, American
Servings: 5
Calories: 543kcal
Author: Abbey Sharp

Ingredients

  • 2 tsp extra virgin olive oil
  • 1/2 onion diced
  • 2 large garlic cloves minced
  • 1 cup soaked cashews
  • ¼ cup fortified nutritional yeast
  • 1 cup unsweetened oat or soy milk
  • 1 ½ tsp lemon juice
  • Salt and pepper to taste
  • 1 lb cooked chickpea fettuccini
  • Parsley for garnish

Instructions

  • To a small nonstick skillet, add the oil over medium heat along with the onion and garlic. Saute until softened and transfer to a blender.
  • Add the soaked cashews, nutritional yeast, oat milk, lemon juice, salt and pepper, to taste and puree until very smooth.
  • Meanwhile, cook the pasta in a large pot of salted water, reserving a cupful of the cooking water before you drain.
  • Pour the sauce into a pot and heat over low heat. Add the pasta and toss until coated. If it gets too thick you can add a splash of the cooking water.
  • Top with parsley and enjoy.

Notes

  • Want to make this more veggie packed? Try adding in some peas, broccoli, cauliflower, mushrooms, or spinach to this.
  • Don’t like chickpea pasta? Try lentil pasta to keep this gluten-free.
  • Feel free to adjust how thick and creamy you’d like your sauce to be by adding extra liquid to thin it out if you’d like.
  • If you’d like take this up a notch, you can garnish the pasta with lemon zest and red pepper flakes.

Nutrition

Calories: 543kcal | Carbohydrates: 77g | Protein: 20g | Fat: 18g | Saturated Fat: 3g | Cholesterol: 76mg | Sodium: 46mg | Potassium: 518mg | Fiber: 5g | Sugar: 5g | Vitamin A: 242IU | Vitamin C: 5mg | Calcium: 112mg | Iron: 4mg
Abbey Sharp

Abbey Sharp is a Registered Dietitian (RD), regulated by the Ontario College of Dietitians. She is a mom, YouTuber, Blogger, award winning cookbook author, media coach specializing in food and nutrition influencers, and a frequent contributor to national publications like Healthline and on national broadcast TV shows.

www.abbeyskitchen.com/about-abbey/

Last Updated July 20, 2021. Published April 21, 2021 By Abbey Sharp Leave a Comment

Can Collagen Supplements Tighten Skin?

We review the research to answer the question – can collagen supplements tighten skin? As well as explore other possible health benefits like joints, bones, and weight loss.

Woman touching her face.

In recent years, nutrition supplements have been raging on the internet and sworn by beauty gurus and fitness junkies alike. One supplement caught up in the craze is collagen.

Collagen supplement fans claim it can reduce wrinkles, plump and tackle aging effects on skin. Alongside these claims, other proponents boast collagen as a tool to relieve  joint pain, prevent bone loss and even promote weight loss. So we dive into the research to find out if collagen is all its cracked up to be and answer the question – can collagen supplements tighten skin?

What is Collagen?

Collagen supplements on an orange slice.

Collagen is an abundant protein found in our bodies and vital for the structural integrity of our bones, skin, muscle, hair, and tendons. Collagen can be found in a variety of foods such as bone marrow and animal broths, but dietary collagen is not essential to our nutritional needs. This is because our bodies are naturally able to produce collagen by taking amino acids from protein rich foods and various other nutrients like vitamin C to make all the collagen we need, in house. 

There are vegan “collagen boosting” supplements on the market, but these are made of vitamins (i.e. vitamin C) and minerals (i.e. zinc) that the body uses to make collagen. Researchers have also discovered a way to make vegan collagen using genetically modified yeast and bacteria, specifically P. pastoris. However, it is not yet widely available. 

Types of Collagen 

While nearly 28 types of collagen have been identified, there are four main types. 

  • Type I is made of densely packed fibres that provide structure to skin, bones, tendons, fibrous cartilage, connective tissue and teeth. Type I accounts for 90% of the body’s collagen. 
  • Type II is made of loosely packed fibres found in elastic cartilage to cushions joints. 
  • Type III supports the structure of organs, muscles and arteries. 
  • Type IV is found in the layers of the skin and aids in filtration. 

Let’s dive into what the research says about collagen supplements and examine the four alleged benefits including skin health, joint pain, bone health, and weight loss. 

 Collagen and Skin Health

Woman in a bath tub surrounded by orange slices.

As we age, our production of collagen declines and impacts the structural integrity of our collagen network in our skin. This results in sagging of the skin, wrinkles and aesthetic effects of aging. However, the good news is that the research does seem to indicate that collagen supplements may tighten skin and help to delay skin aging. 

For example, one 2015 study found that oral collagen supplementation increased skin hydration and density by improving both quantity and quality of the collagen network. Similarly, another 2015 randomized control trial looked closely at the effects of collagen on skin elasticity, hydration and wrinkles and found that participants experienced a significant reduction in the depth of wrinkles. Participants also experienced a 14% increase in water content in the skin, and improved skin elasticity.

In addition, a recent 2020 systematic review found that all studies reported beneficial effects of collagen supplementation on skin aging in both healthy and unhealthy subjects. 

On the other hand, a recent 2019 review found that the few studies it evaluated found only modest benefits to using collagen supplement. The authors suggested that while preliminary findings are exciting, there are a lot of limitations to the research. For example, the studies used different collagen manufactures, varying doses, and confounding active ingredients such as vitamins and minerals, all of which may impact findings. Participant characteristics were also mixed in terms of geographical location, age, sex, and thus these variables impact our ability to generalize the results.

With that said, collagen supplementation may help to improve skin health however it also highly depends on the type of supplement used and how it is made.

Collagen for Joint Pain

A wooden dummy.

Collagen is abundant in our tendons and ligaments. However, as we age and produce less collagen in the body,  it increases the risk for joint disorders such as osteoarthritis (OA). Luckily, there is promising research indicating that collagen supplementation may help with OA by reducing pain and inflammation and increasing collagen synthesis. 

An early 2006 review of the literature found that collagen supplements significantly increased collagen synthesis, resulting in improvements in OA pain and joint function. A more recent review from 2020 examining 41 also studies found significant benefits for OA symptoms and cartilage healing. Similarly, another 2019 meta-analysis of randomized placebo-controlled trials found that collagen is effective in improving OA symptoms. 

While current preliminary research has been overall positive on the effects of collagen supplementation for joint relief, these studies are not without limitations. Namely, many clinical studies have been small scaled, short-term and in some cases, not even in humans. 

Generally speaking, the body of research we do have suggests that collagen supplements may be an effective therapy for some people with joint disorders and joint pain, but we need more research to recommend it across the board.

Collagen for Bone Health

Birds eye view of collagen supplements on a white plate.

Osteoporosis (OP) is a disease of the skeletal system characterized by bone mass loss, reduced skeletal structure and increased risk of fractures. Aging is one contributing factor to OP that we can’t exactly prevent, but it’s been proposed that inadequate collagen earlier on in life may play a role.

Unfortunately, the current research on collagen and bone metabolism in humans is limited. However, there is a growing body of evidence that collagen may help support calcium absorption, bone density and bone formation.

For example, one 2018 randomized control study provided participants with 5 grams of collagen per day which resulted in a significant increase in bone density in the spine and neck.  On the other hand, one 2000 study looked at populations throughout the USA, UK, and Germany found no significant differences in reported pain improvement from collagen, but some other symptom improvements in the German group and participants with severe OP.  

So how much do you need to take to see a benefit? While various studies used different dosages, a 2016 review of the literature recommended a dosage of 12 g of collagen to encourage some of these bone building benefits.

Does Collagen Support Weight Loss?

Finally let’s talk about collagen’s alleged role in aiding in weight loss by “boosting” metabolism. One 2008 study tested oral consumption of gelatin (a source of collagen) during one meal on both “normal weight” and “obese” participants. The study concluded that gelatin may help maximize satiety, therefore potentially aiding in weight loss efforts in “obese” patients, but that would be true for any rich source of protein, including protein rich foods, not limited to collagen. 

Should You Take a Collagen Supplement?

Collagen supplements on a silver spoon against a yellow background.

Most research we have on the benefits of collagen is relatively exploratory and preliminary, so we can’t say for certain that a very specific dosage or brand of collagen supplementation will result in the benefits discussed. I know it’s tempting to focus all our attention on one nutrient alone but we have to make sure we have an overall healthy diet. 

Since our bodies are able to make collagen from breaking down protein, we don’t actually need to consume collagen specific supplements if you’re getting a wide range of collagen in the diet already. For example, you can derive collagen from bone broth, beef, chicken, fish, egg whites and dairy. In addition, as mentioned earlier, vitamin C plays an important role as a precursor to collagen. Therefore, consuming a variety of vitamin C containing fruits and vegetables (such as citrus fruit, bell peppers, cruciferous vegetables, and berries) are also important. 

If you’re vegan and want to get your collagen fix from food you can consume foods that are high in the most abundant amino acids in collagen (glycine, lysine and proline).  This includes foods such as soy products, black and kidney beans, pumpkin, squash, sunflower and chia seeds, pistachios, peanuts and cashews. 

BOTTOM LINE

It’s important to keep in mind that supplements are not highly regulated. As mentioned, some collagen supplements add other ingredients to the product, such as vitamins, minerals and hyaluronic acid, and the combination of all these ingredients are not yet well understood. While the preliminary studies seem promising and safe, there is still a lack of large-scale randomized control trials and it is also still unclear what the optimal dose is. 

Not to mention, some collagen supplements cost a pretty penny. So if you consume a well-balanced diet that includes foods naturally high in collagen ( such as meat, fish, eggs and dairy) and adequate amounts of protein in general, then you probably don’t need to spend extra cash on a collagen supplement! If you are curious about trying a collagen supplement, always speak to your doctor beforehand and make sure you choose a third party tested (e.g., ConsumerLab.com) product. 

More Blog Posts You Might Like

  • The Hormonal Acne Diet – The Best Foods for Healthy Clear Skin
  • Foods that Cause and Treat Eczema
  • Is Dairy Bad for Bones and Osteoporosis?

Contribution by Sydney Ma MHSc

Abbey Sharp

Abbey Sharp is a Registered Dietitian (RD), regulated by the Ontario College of Dietitians. She is a mom, YouTuber, Blogger, award winning cookbook author, media coach specializing in food and nutrition influencers, and a frequent contributor to national publications like Healthline and on national broadcast TV shows.

www.abbeyskitchen.com/about-abbey/

Last Updated April 20, 2021. Published April 20, 2021 By Abbey Sharp 3 Comments

Shakshuka Breakfast with Curry Spice

This easy curry spiced Shakshuka is a flavourful, vegetarian brunch, lunch or dinner made with go-to pantry & freezer staples. Only one pan is required so cleaning up is a breeze.

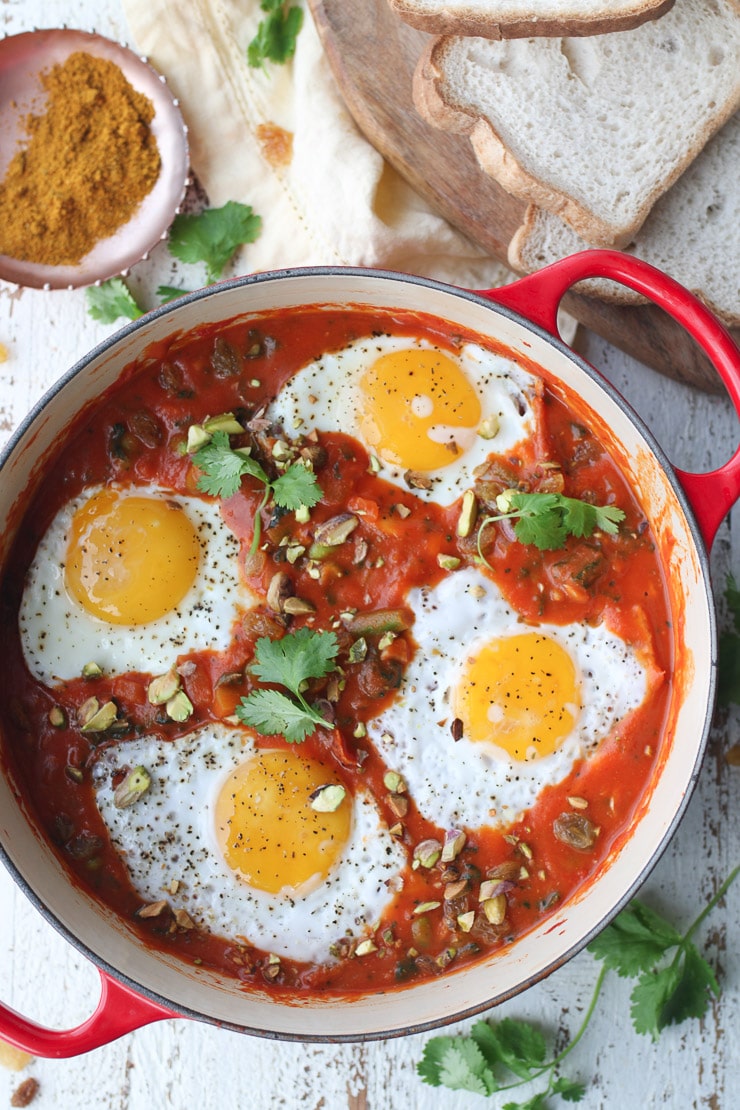
birds eye view of curry shakshuka in a red pot garnished with parsley and pistachios

When I was travelling in Israel, I was introduced to the eat-any-time staple, Shakshuka. I love the simplicity, the flavour, and how delicious that sauce and runny egg is on a nice piece of hearty bread or flatbread.

Shakshuka or shakshouka is a Middle Eastern and Israeli dish made of a thick tomato sauce flavoured with herbs and spices that make the bed for eggs to be baked on top. It’s a saucy meal that’s perfect for eating with bread or flatbread. It’s also easy to make it vegetarian or throw some leftover meat in there.

Why This Recipe Works

So while I have a more classic veggie-packed shakshuka already on the blog here, and another one in Mindful Glow, I thought it would be fun to switch up the sauce flavour a bit and add some heat. Other than being perfect for any time of the day, here are a few more reasons as to why you’ll love this shakshuka:

  • One pan recipe = less dishes
  • Packed with healthy goodness
  • Budget friendly
  • Super easy to make
  • Gluten-free
  • Dairy-free

Table of contents

  • Why This Recipe Works
  • Key Ingredients
  • How to Make This Recipe
  • Expert Tips
  • Recipe FAQs
  • More Recipes You Might Like

Key Ingredients

Aromatics — For this curry flavour, I use onion, garlic, ginger, red curry paste, cumin and curry powder. I like mine spicy so I use a lot of the curry paste, but if you want it to be milder, you can always cut back.

Tomato Passata — This is the base that mixes with the spices to yield that rich sweet tomato sauce for dunking your bread in.

Coconut Milk — Feel free to use either lite or regular, depending how rich you want the sauce.

Frozen Veggies — I use frozen butternut squash, shelled edamame and kale to add some extra protein and fibre without any effort at all!

Eggs — This is an egg based dish so make sure you get some really nice eggs. I like omega-3 enriched eggs, or at least a free range / grass fed egg which will have a nice deep orange yolk.

How to Make This Recipe

Set of 3 photos showing a cast iron with onions being cooked with spices, tomato and coconut milk mixed together, and then butternut squash, kale, and edamame added.

Step 1: Preheat oven to 375F. Heat the olive oil in a cast iron skillet over medium heat. Add the onion and saute for 2 minutes. Add the garlic and ginger, and saute for 30 seconds. Add in the curry paste, cumin, and curry powder and stir until fragrant and the onions are coated in the spices.

Step 2: Add the tomato sauce and coconut milk and simmer on medium low heat with the lid off for 15 minutes until the sauce thickens and reduces slightly.

Step 3: Add the squash, edamame, kale and raisins, stir everything until well combined. Season with salt and pepper, to taste.

Set of two photos showing eggs being added to the shakshuka and then baked.

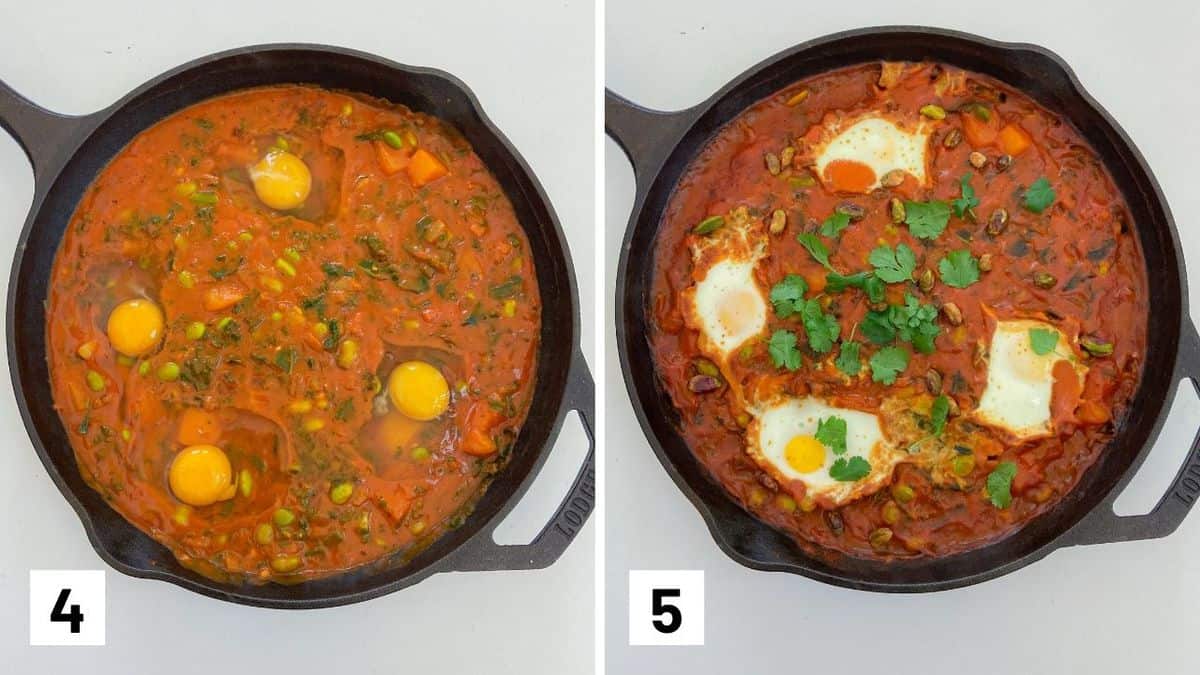
Step 4: Using a large spoon, make 4-6 wells (or however many you need for serving). Add one egg into each well and season with salt and pepper.

Step 5: Transfer to the oven and bake until the eggs are just set about 9-11 minutes. Serve topped with pistachios and cilantro.

Expert Tips

Want to add some cheese to this? Try topping your shakshuka with feta or goat cheese. Skip this suggestion if you need this to be dairy-free.

Be sure to use a cast iron skillet or oven safe skillet as this goes from stovetop to oven. Don’t have a cast-iron skillet? Transfer to a sheet pan before adding the eggs to bake. Don’t want to use your oven? You can also place a lid over top of your skillet to steam your eggs through. The end result won’t be exactly the same but it works in a pinch.

Want to add some meat to this? Spanish style chorizo or spicy chorizo is a great addition to shakshuka!

Recipe FAQs

Can I make this shakshuka for a crowd (ie. 8-12 people?)

Yes, in fact I regularly make shakshuka for a large crowd but it does require an extra step. Since most cast iron frying pans are not going to be big enough for 8-12 eggs or more, I like to make my sauce in the pan (you can do this up to 3 days ahead) and double the sauce recipe. Then when your guests arrive, put the sauce in a large 9×13″ baking pan and add your eggs on top and bake until set. Voila! Shakshuka for a crowd!

Is this recipe kid-friendly?

Like I said, with all of that curry paste, it can be spicy. My kiddo would not be able to handle the 2 tsp of curry paste that I personally prefer to add. But if I was making this for a family with young children, I would omit the curry paste or add just a tiny bit.

Can I add other vegetables to my shakshuka?

This curry shakshuka is very versatile, so you can add whatever fresh or frozen veg you have on hand. Spinach, cauliflower, bell peppers, zucchini, eggplant, peas would all be super delicious in this!

What can I do with the leftover sauce?

What leftover sauce? LOL Honestly, I would go to down with a nice bread and sop that up, but if there’s still extra, I would definitely use that curry on rice or noodles the next day. It’s also really good on a quickly microwaved or baked sweet potato!

What can I serve with this shakshuka?

Whether you’re having this shakshuka for brunch or dinner, I do like to serve it with a nice bread and salad. Here are some recipe ideas:
Roasted Broccoli Salad with Tahini
Everything Bagel Salad
Flax focaccia
Storebought or homemade Naan

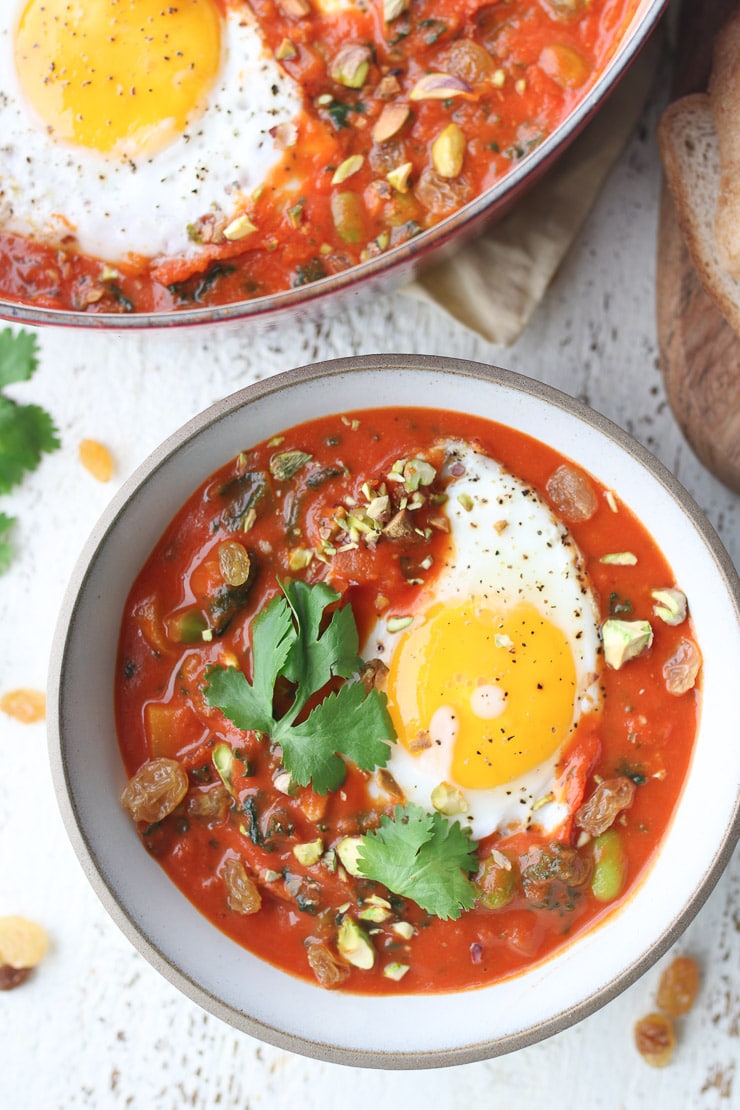
birds eye view of curry flavoured egg shakshuka garnished with fresh herbs served in a large white bowl.

More Recipes You Might Like

Here are some delicious breakfast recipes you might also enjoy:

  • SWEET POTATO WAFFLES LATKES 
  • VEGAN ORANGE POPPYSEED WAFFLES 
  • EVERYTHING BAGEL SALAD 
  • SHEET PAN PROTEIN PANCAKES 
  • VEGAN STUFFED SWEET POTATOES WITH PB&J

What are you making for breakfast or brunch using pantry or freezer staples? Leave me a comment below with your ideas!

Print Recipe
5 from 3 votes

Shakshuka Breakfast with Curry Spice

This easy curry spiced Shakshuka is a flavourful, vegetarian brunch, lunch or dinner made with go-to pantry & freezer staples. Only one pan is required so cleaning up is a breeze.
Prep Time5 minutes mins
Cook Time25 minutes mins
Total Time30 minutes mins
Course: Breakfast, Lunch, brunch
Cuisine: Indian, American, Middle Eastern
Servings: 5
Calories: 427kcal
Author: Abbey Sharp

Ingredients

  • 1 tbsp extra virgin olive oil
  • 1 small onion finely diced
  • 3 cloves garlic minced
  • 1 tbsp grated ginger
  • 1-2 tsp red curry paste depending on how spicy you like it – I like it spicy!
  • 1 tsp cumin
  • 1 tsp curry powder
  • 680 ml bottle of passata/ tomato puree
  • 400 ml can lite or regular coconut milk
  • 1 ½ cups frozen butternut squash
  • 1 cup frozen shelled edamame
  • 2 cups frozen kale
  • ¼ cup golden raisins
  • Salt and pepper to taste
  • 4-6 eggs depending on how many servings
  • ¼ cup crushed pistachios
  • Cilantro as garnish

Instructions

  • Preheat oven to 375F.
  • Heat the olive oil in a cast iron skillet over medium heat. Add the onion and saute for 2 minutes. Add the garlic and ginger, and saute for 30 seconds. Add in the curry paste, cumin, and curry powder and stir until fragrant and the onions are coated in the spices.
  • Add the tomato sauce and coconut milk and simmer on medium low heat with the lid off for 15 minutes until the sauce thickens and reduces slightly.
  • Add the squash, edamame, kale and raisins, stir everything until well combined. Season with salt and pepper, to taste.
  • Using a large spoon, make 4-6 wells (or however many you need for serving). Add one egg into each well and season with salt and pepper. Transfer to the oven and bake until the eggs are just set about 9-11 minutes.
  • Serve topped with pistachios and cilantro.

Notes

  • Want to add some cheese to this? Try topping your shakshuka with feta or goat cheese. Skip this suggestion if you need this to be dairy-free.
  • Be sure to use a cast iron skillet or oven safe skillet as this goes from stovetop to oven. Don’t have a cast-iron skillet? Transfer to a sheet pan before adding the eggs to bake. Don’t want to use your oven? You can also place a lid over top of your skillet to steam your eggs through. The end result won’t be exactly the same but it works in a pinch.
  • Want to add some meat to this? Spanish style chorizo or spicy chorizo is a great addition to shakshuka!

Nutrition

Calories: 427kcal | Carbohydrates: 36g | Protein: 15g | Fat: 28g | Saturated Fat: 17g | Cholesterol: 131mg | Sodium: 115mg | Potassium: 1400mg | Fiber: 6g | Sugar: 14g | Vitamin A: 8209IU | Vitamin C: 61mg | Calcium: 161mg | Iron: 8mg
Abbey Sharp

Abbey Sharp is a Registered Dietitian (RD), regulated by the Ontario College of Dietitians. She is a mom, YouTuber, Blogger, award winning cookbook author, media coach specializing in food and nutrition influencers, and a frequent contributor to national publications like Healthline and on national broadcast TV shows.

www.abbeyskitchen.com/about-abbey/

Last Updated May 10, 2021. Published April 19, 2021 By Abbey Sharp Leave a Comment

Churro French Toast (Vegan + Healthy)

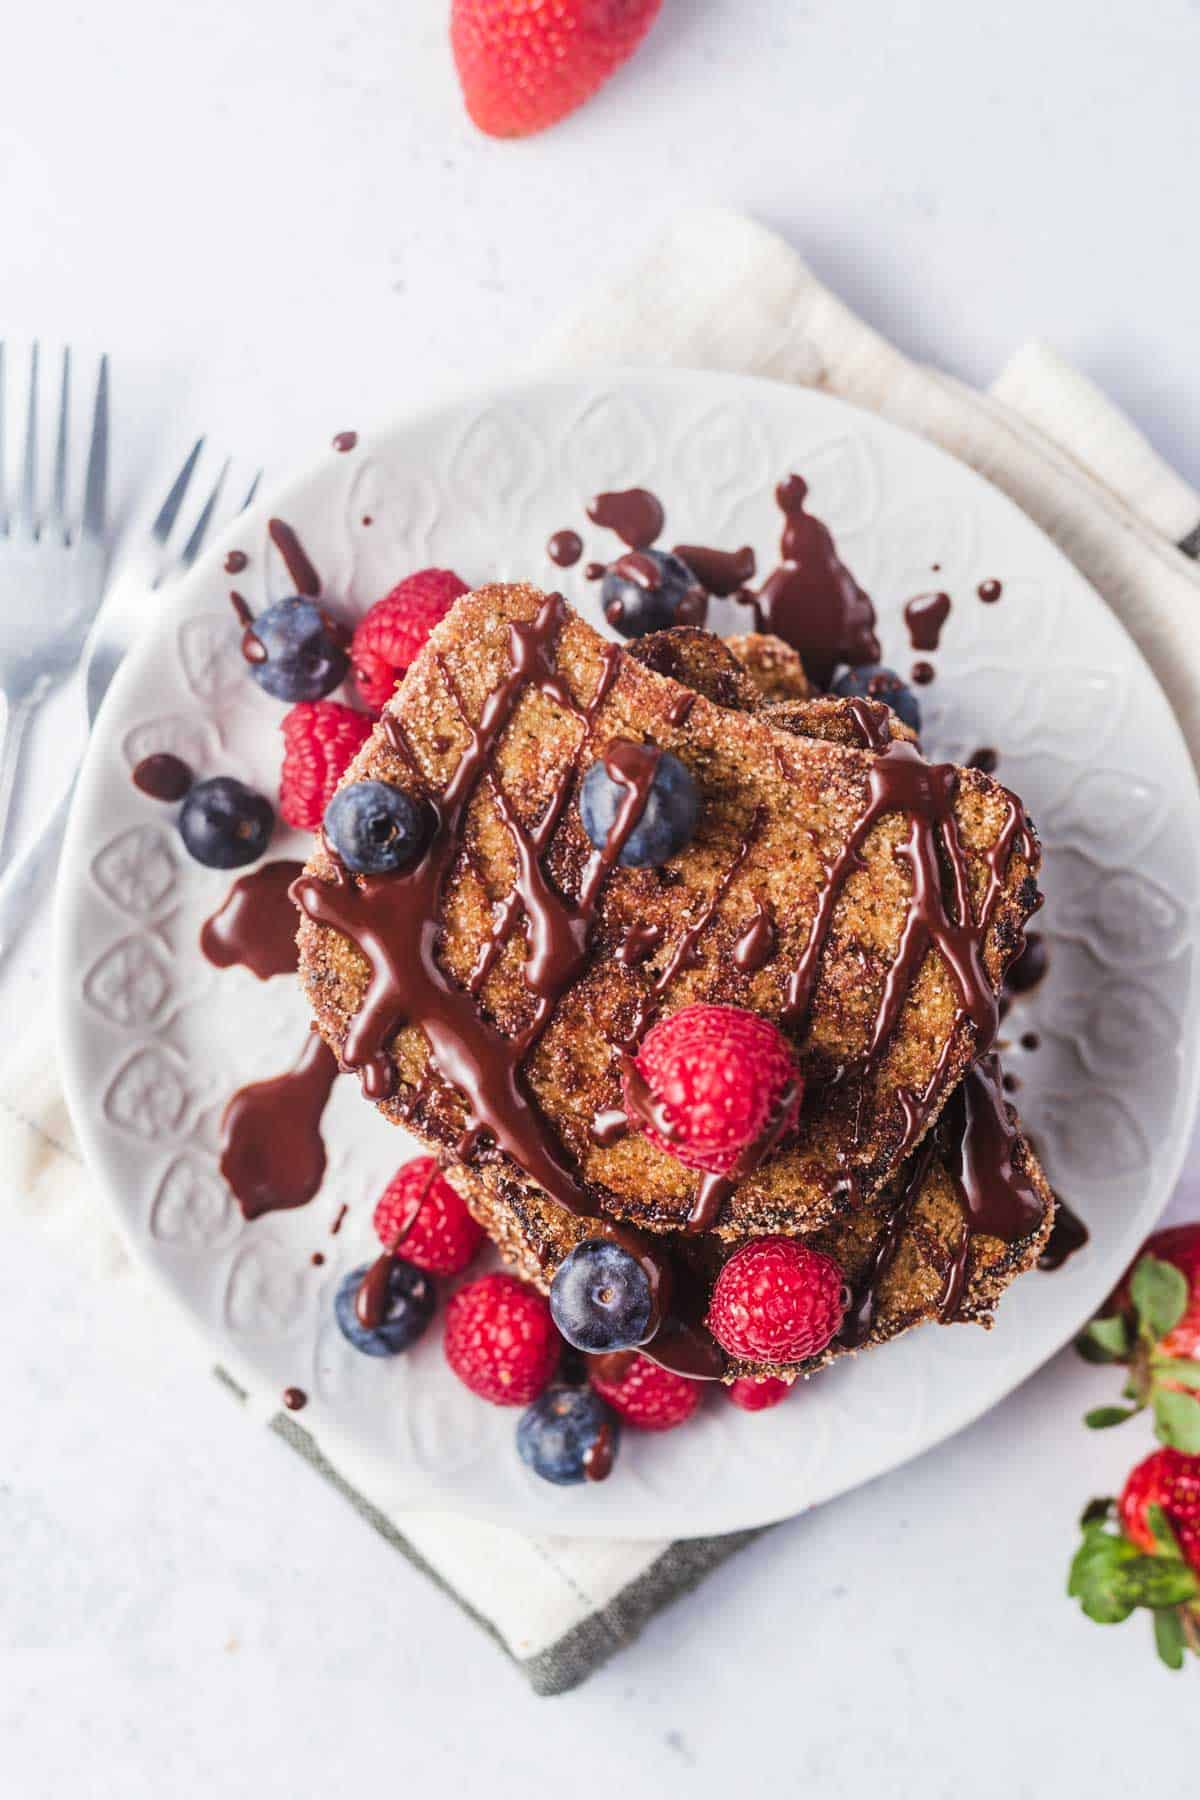
This healthy vegan churro French toast puts a delicious twist on this breakfast favourite. This recipe is also packed with protein and fibre, and is the perfect excuse to have dessert for breakfast!

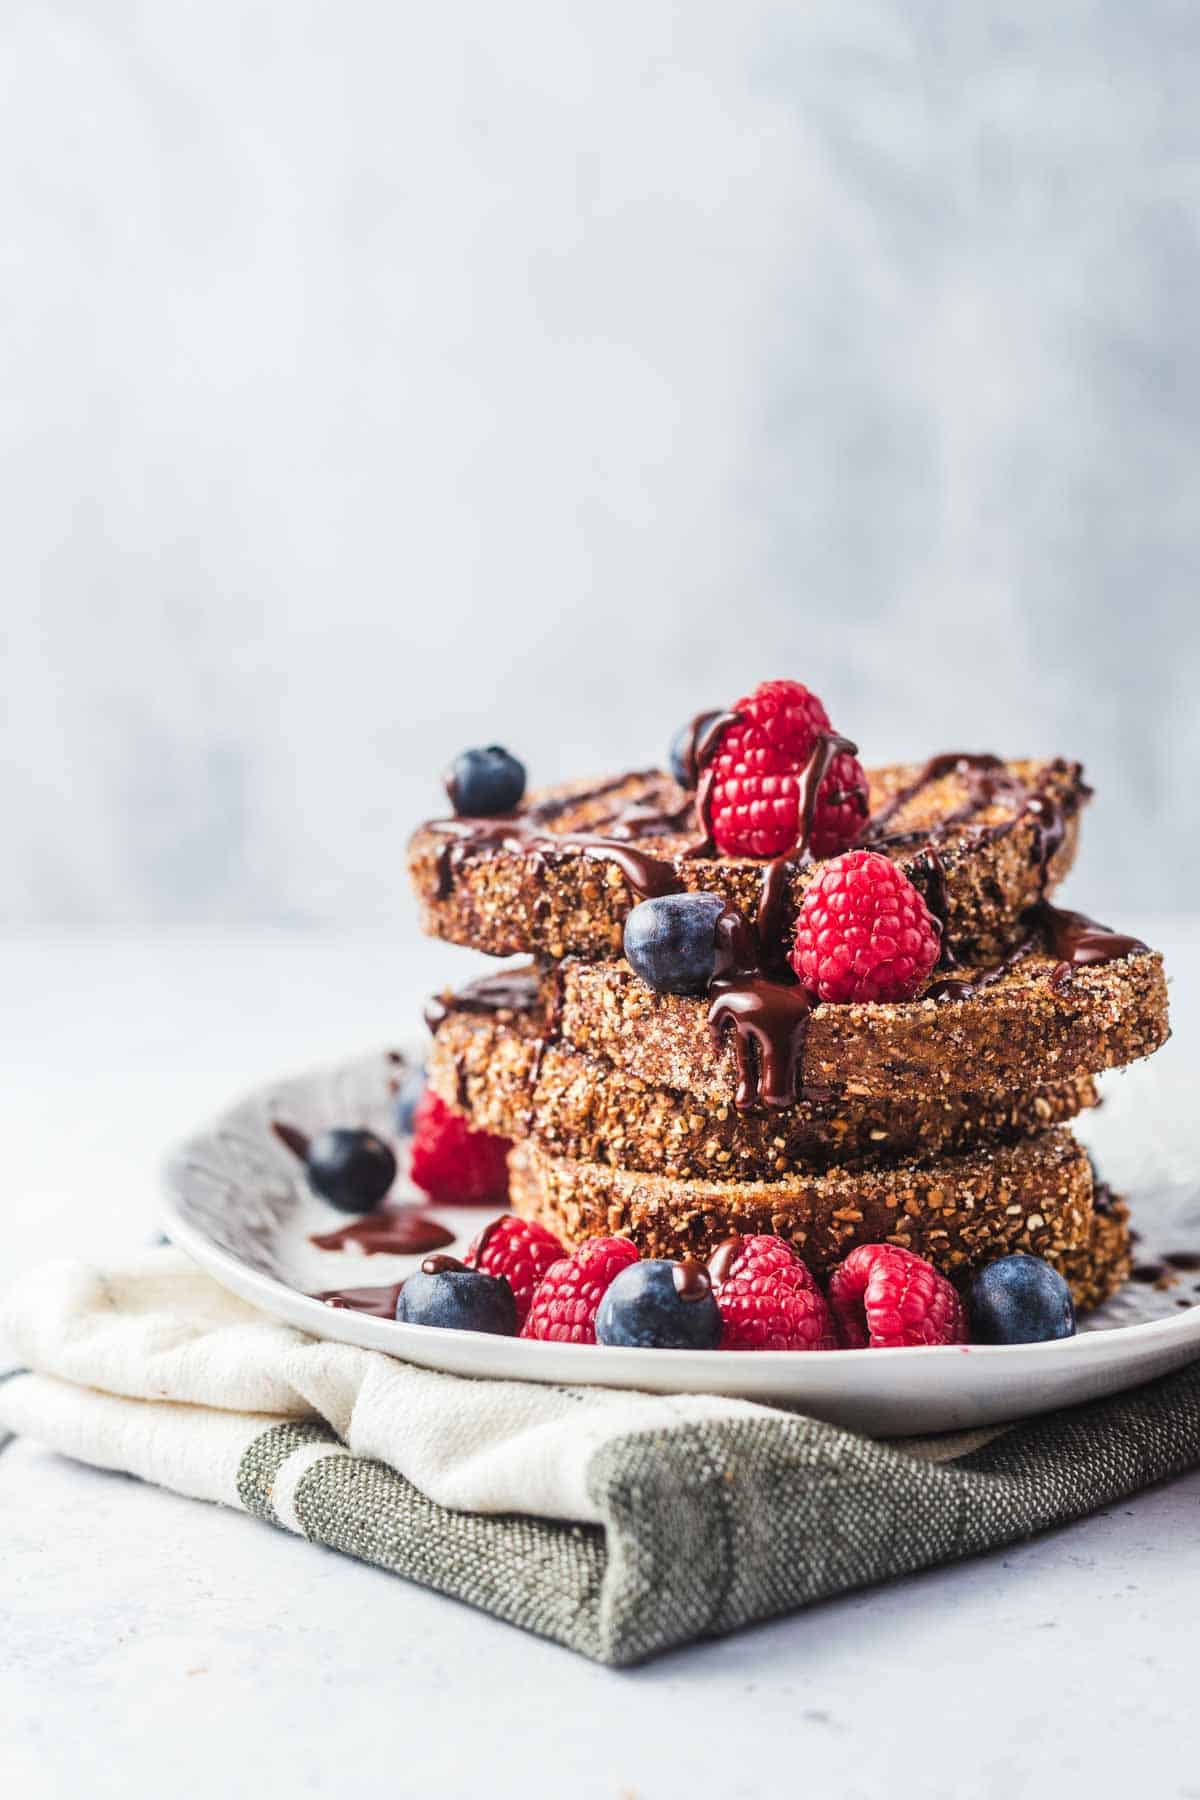
Churro french toast stacked on a plate and topped with berries and chocolate.

There are very few brunch recipes that beat a classic French toast – its easier to prepare than pancakes or waffles, and is a tasty way to satisfy a morning sweet tooth.

But what if I told you that French toast is also the perfect vehicle to enjoy a churro for breakfast? Yep. You heard that right.

With a little bit of this and a little bit of that, we’ve transformed the unbeatable French toast into churro French toast. *hold for applause*.

Table of contents

  • Why This Recipe Works
  • Key Ingredients
  • How to Make This Recipe
  • Expert Tips
  • Recipe FAQs
  • More Recipes You Might Like

Why This Recipe Works

If you are sold at the churro and French toast combination alone, I don’t blame you. Its friggen genius (If I do say so myself)! But if you needed even more convincing that this healthy sweet breakfast is a must for your brunch spread, here are more reasons why we are loving this recipe right now!

  • It only takes 30 minutes to prepare
  • Its egg-free and dairy-free
  • High in protein (8g per 2 slices)
  • High in fibre (6g per 2 slices)
  • It’s the perfect excuse to eat chocolate for breakfast!

Key Ingredients

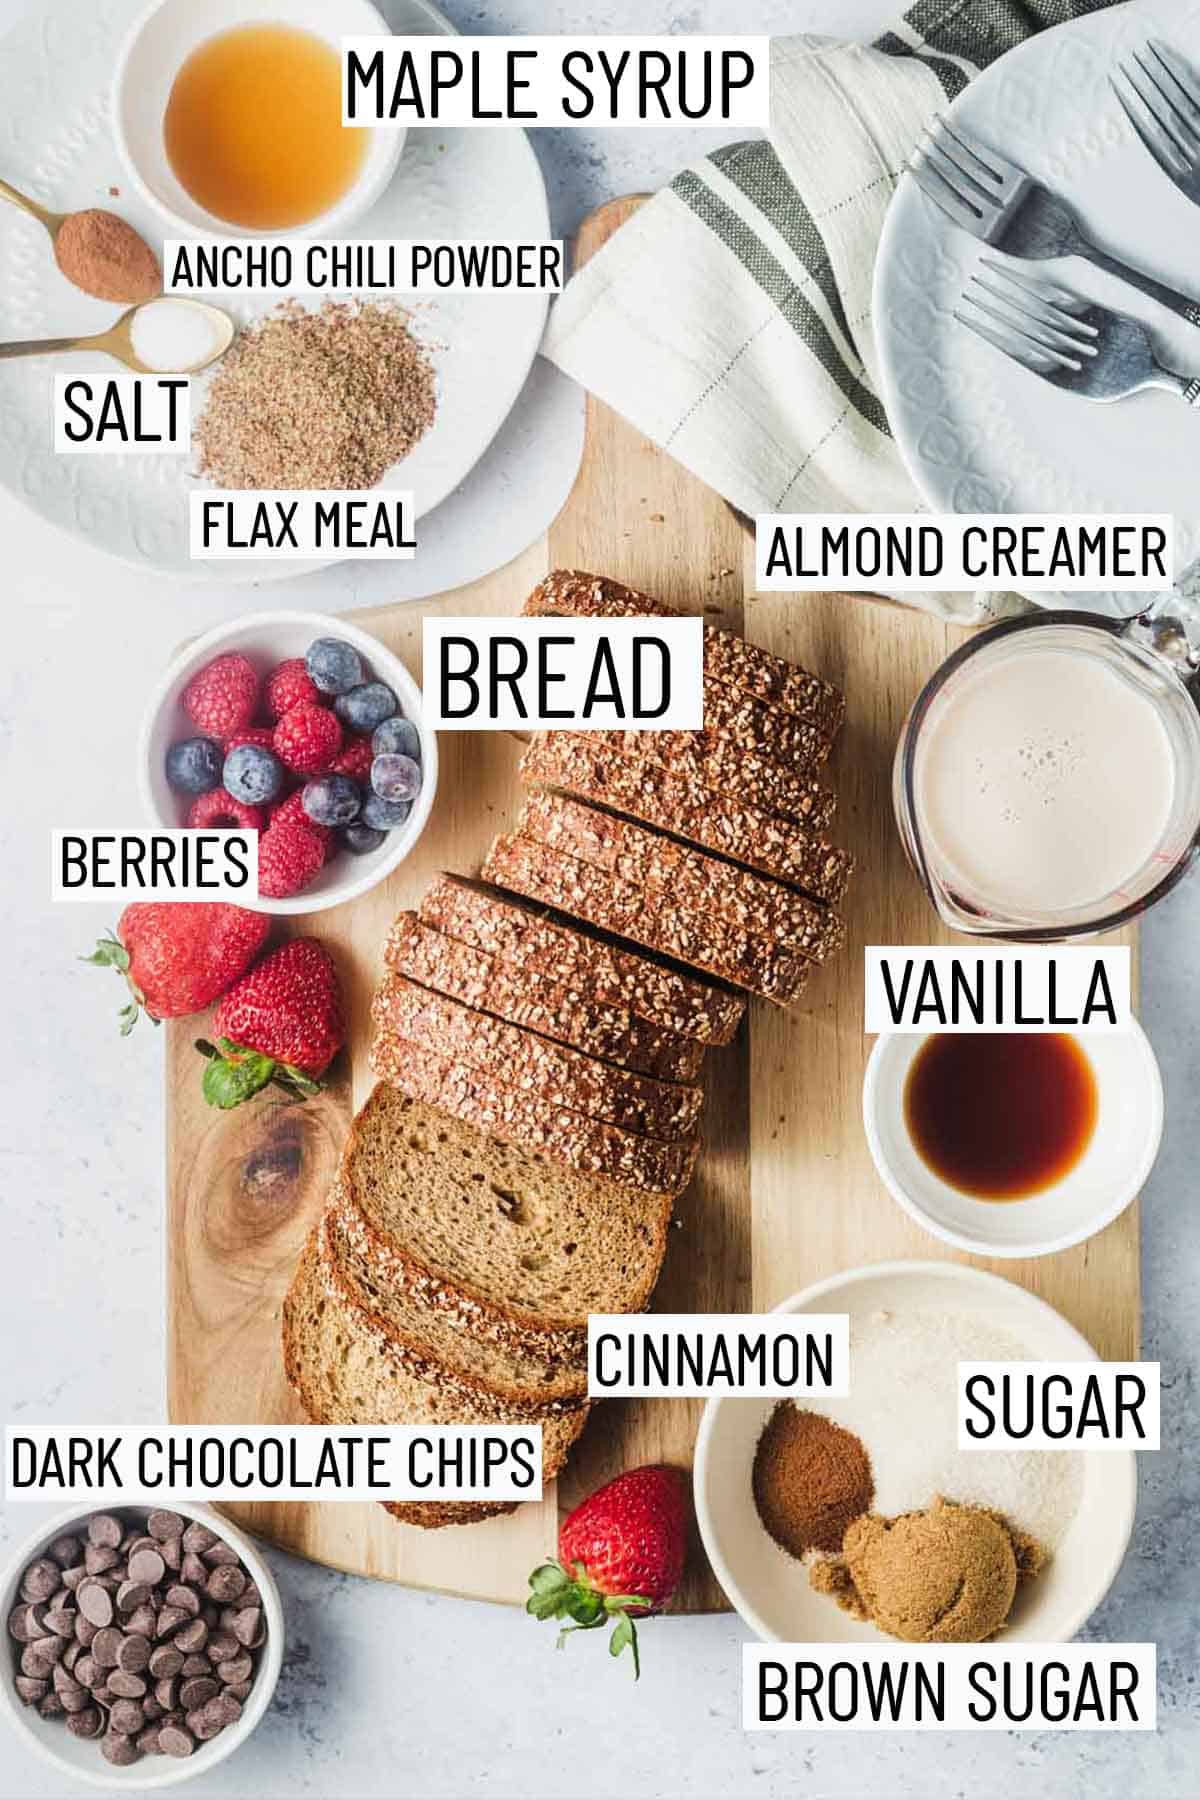
Flat lay image of portioned ingredients including sugar, vanilla, almond creamer, dark chocolate, bread, berries, flax seed, salt, ancho chili powder, maple syrup.

Chocolate Sauce – We are not kidding around with this chocolate sauce, my friends! While you can certainly combine a simple mixture of melted chocolate and coconut oil, we are taking things up a notch by using almond creamer for a creamier and thicker texture. The addition of cinnamon, salt, maple syrup and ancho chili powder also take things to a whole other level. You’ll thank me later!

French Toast – To make this recipe vegan, we are using a flavoured flax egg instead of regular eggs by combining flax meal with maple, almond creamer, vanilla, cinnamon and salt. I love my eggs, but this combo definitely gives eggs a run for its money!

Churro Crust – to make this churro French toast, we make a churro crust using three simple ingredients – granulated sugar, brown sugar, and cinnamon. Easy peasy!

How to Make This Recipe

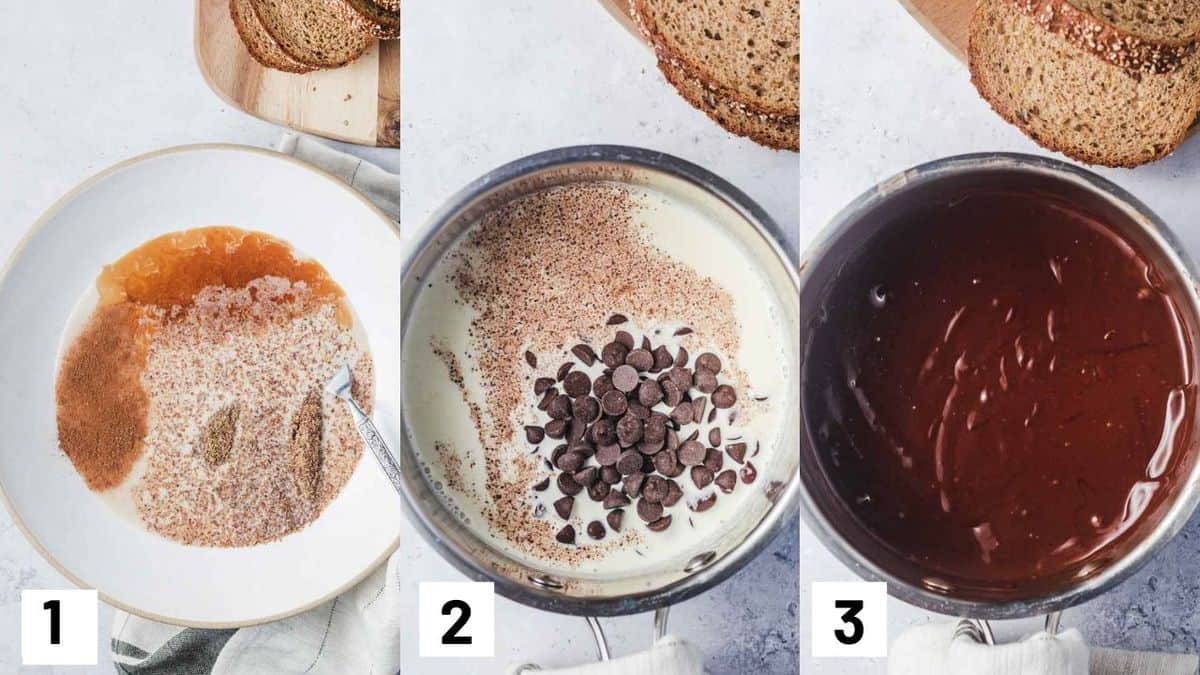
Three side by side images showing ho to make the flax egg mixture and the chocolate sauce.

Step 1: In a pie plate or baking dish, mix together flax meal, maple, almond creamer, vanilla, cinnamon and salt. Set in fridge for 20 minutes.

Step 2-3: While the flax egg mixture is thickening in the refrigerator, make the chocolate sauce. Heat the almond creamer in the microwave in 30 second intervals or in a small saucepan until simmering. Add the chocolate chips, cinnamon, maple, chili powder (if using) and salt and stir until the chocolate is melted. Set aside and keep warm.

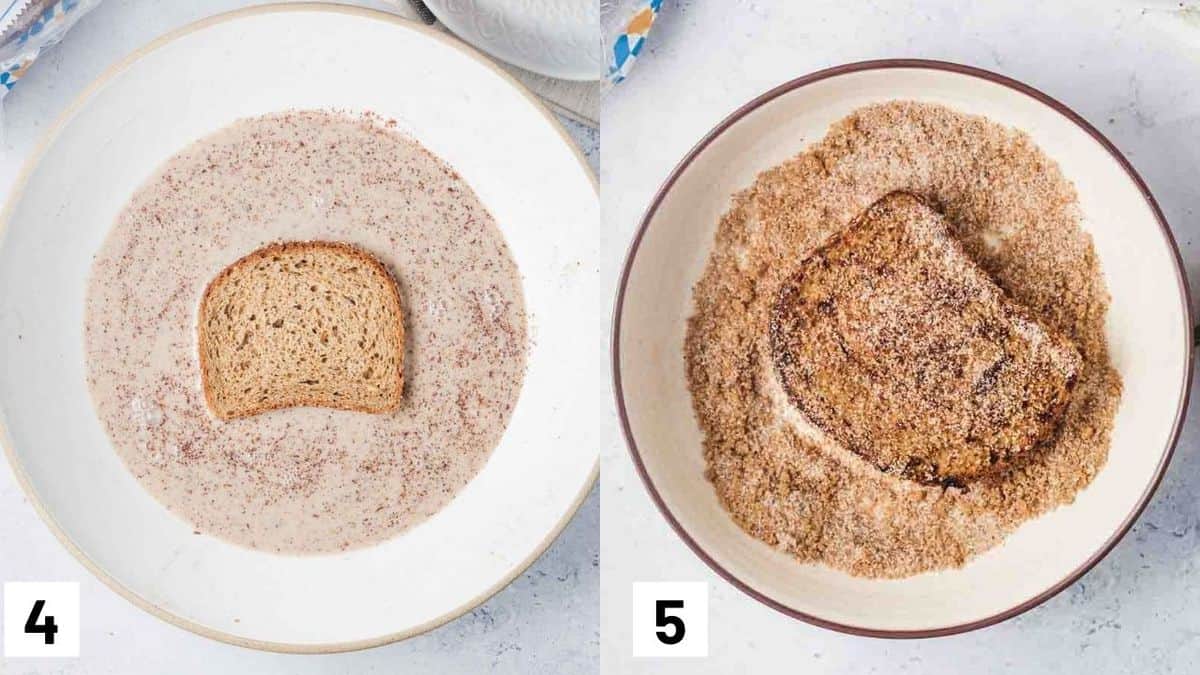
Two side by side images showing how to coat bread in churro french toast mixture.

Step 4-5: In another plate or dish, combine the granulated sugar, brown sugar and cinnamon. Submerge the bread into the flax egg mixture on both sides for 10 seconds per side. Heat a griddle or large nonstick pan with the oil or butter over medium heat. Add the bread and cook on each side for about 3-4 minutes. Immediately coat in the cinnamon sugar.

Expert Tips

If you are skeptical about making French toast without eggs, I don’t blame you! I was too. The most important step to making a flax or chia egg is to give it time to firm up and set in the fridge. There is a bit of a sweet spot though because if you set it too long (especially if you are using chia seeds), it can turn into a pudding consistency and we certainly don’t want that. As a general rule of thumb aim to let the flax egg set for no longer than 20 mins, and the chia egg no longer than 15 mins.

Recipe FAQs

What can I serve this with?

If you don’t want to serve this with the chocolate sauce, you can always go for a generous drizzle of classic maple syrup and topped with some fruit. I also love to serve French toast with my homemade easy chia jam alongside a brunch salad or my vegan maple sausages.

Can I make this gluten free?

Definitely! To make this gluten free you can use a gluten free bread instead.

Is this recipe kid friendly?

Oh yes definitely! My kid loves this recipe (almost a little too much lol). But I would say if you are feeding this to your kiddo, to omit the ancho chili from the chocolate sauce as it might be a bit too spicy for them.

Is it better to use flax or chia seeds for this recipe?

Honestly, it really comes down to preference and what you have on hand! But from a nutrition perspective, chia seeds provide more protein and fibre while flax seeds provide more omega 3 fats. The chia seed egg will also provide a slightly more grainy texture than the flax seed egg but its barely noticeable when combined with a seedy bread and the churro crust.

Birds eye view of churro French toast stacked on a plate topped with berries and drizzled with chocolate sauce.

More Recipes You Might Like

I wasn’t kidding when I said I LOVE French toast. So you best believe we have tons more french toast recipes where that came from! Here are some of our favs:

  • Healthy French Toast Casserole
  • Tofu French Toast (Vegan + Gluten Free)
  • Healthy French Toast Wraps
  • Cheesecake Stuffed French Toast Crepes

Do you love having French toast for breakfast? Would you try this churro version?

Print Recipe
5 from 1 vote

Churro French Toast (Vegan + Healthy)

This healthy vegan churro French toast puts a delicious twist on this breakfast favourite. This recipe is also packed with protein and fibre, and is the perfect excuse to have dessert for breakfast!
Prep Time20 minutes mins
Cook Time10 minutes mins
Total Time40 minutes mins
Course: Breakfast, Dessert
Cuisine: French, American
Diet: Gluten Free, Vegan
Servings: 4
Calories: 471kcal
Author: Abbey Sharp

Ingredients

Chocolate Sauce:

  • ½ cup vanilla unsweetened almond creamer
  • ½ cup dark chocolate chips
  • 1 tsp cinnamon
  • 1 tbsp maple syrup
  • ¼ – ½ tsp ancho chili powder optional, to taste
  • ¼ tsp sea salt

French Toast:

  • 2 tbsp ground white chia seeds or flax meal
  • 1 tbsp maple syrup
  • 1 cup vanilla unsweetened almond creamer
  • 1 tsp vanilla extract
  • 1/2 tsp ground cinnamon
  • ¼ tsp salt
  • 8 slices Stonemill Sprouted Rye & 12 Grains

Crust:

  • ¼ cup granulated sugar
  • 2 tbsp brown sugar
  • 1 tsp cinnamon
  • Oil or butter of your choice for pan-frying

Instructions

  • In a pie plate or baking dish, mix together flax meal, maple, almond creamer, vanilla, cinnamon and salt. Set in fridge for 20 minutes.
  • While the flax egg mixture is thickening in the refrigerator, make the chocolate sauce. Heat the almond creamer in the microwave in 30 second intervals or in a small saucepan until simmering. Add the chocolate chips, cinnamon, maple, chili powder (if using) and salt and stir until the chocolate is melted. Set aside and keep warm.
  • In another plate or dish, combine the granulated sugar, brown sugar and cinnamon. Submerge the bread into the flax egg mixture on both sides for 10 seconds per side
  • Heat a griddle or large nonstick pan with the oil or butter over medium heat. Add the bread and cook on each side for about 3-4 minutes. Immediately coat in the cinnamon sugar.
  • Serve warm with a drizzle of the chocolate sauce.

Video

Notes

If you are skeptical about making French toast without eggs, I don’t blame you! I was too. The most important step to making a flax or chia egg is to give it time to firm up and set in the fridge. There is a bit of a sweet spot though because if you set it too long (especially if you are using chia seeds), it can turn into a pudding consistency and we certainly don’t want that. As a general rule of thumb aim to let the flax egg set for no longer than 20 mins, and the chia egg no longer than 15 mins.

Nutrition

Calories: 471kcal | Carbohydrates: 77g | Protein: 8g | Fat: 11g | Saturated Fat: 7g | Cholesterol: 1mg | Sodium: 707mg | Potassium: 300mg | Fiber: 6g | Sugar: 41g | Vitamin A: 37IU | Vitamin C: 1mg | Calcium: 156mg | Iron: 2mg

If you tried this churro French toast, let me know your thoughts down in the comments below!


Abbey Sharp

Abbey Sharp is a Registered Dietitian (RD), regulated by the Ontario College of Dietitians. She is a mom, YouTuber, Blogger, award winning cookbook author, media coach specializing in food and nutrition influencers, and a frequent contributor to national publications like Healthline and on national broadcast TV shows.

www.abbeyskitchen.com/about-abbey/

Last Updated June 3, 2021. Published April 15, 2021 By Abbey Sharp 11 Comments

Vegan Baked Oatmeal with Chocolate and Zucchini

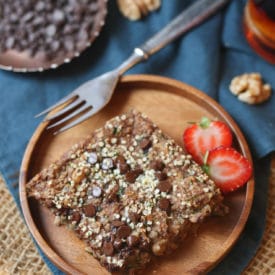
Square of zucchini baked oatmeal on a wooden plate.

Breakfast time has never been this exciting with this delicious vegan baked oatmeal with chocolate and zucchini! Naturally gluten-free, kid friendly, and packed with healthy goodness, you’ll be looking forward to having this baked oatmeal for breakfast!

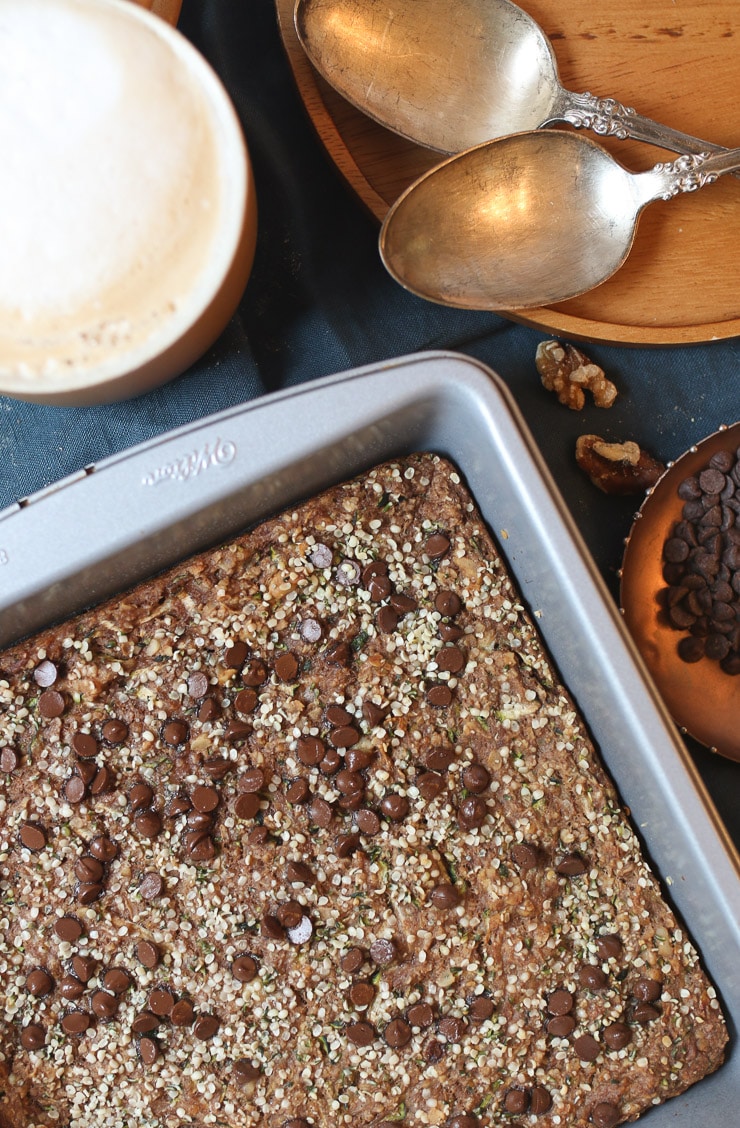
Chocolate zucchini baked oatmeal in a silver pan.

Packed with healthy fats and veggies, when enjoying this vegan baked oatmeal for breakfast, you might think it’s actually a dessert! Thanks to the fibre rich ingredients and veg, this baked oatmeal will keep you full all morning long. Plus, any reason to have some chocolate chips for breakfast is a win! Who’s with me?

Table of contents

  • Why This Recipe Works
  • Key Ingredients
  • How to Make This Recipe
  • Expert Tips
  • Recipe FAQs
  • More Recipes You Might Like

Why This Recipe Works

Like I mentioned earlier, this vegan baked oatmeal is a healthy way to start off the day as it’s packed with healthy fats and fibre. On top of that, is simple plant based breakfast is also:

  • Gluten-free
  • Tasty AF
  • Has plenty of chocolate
  • Has sneaky vegetable serving
  • Meal prep friendly
  • Family friendly

Key Ingredients

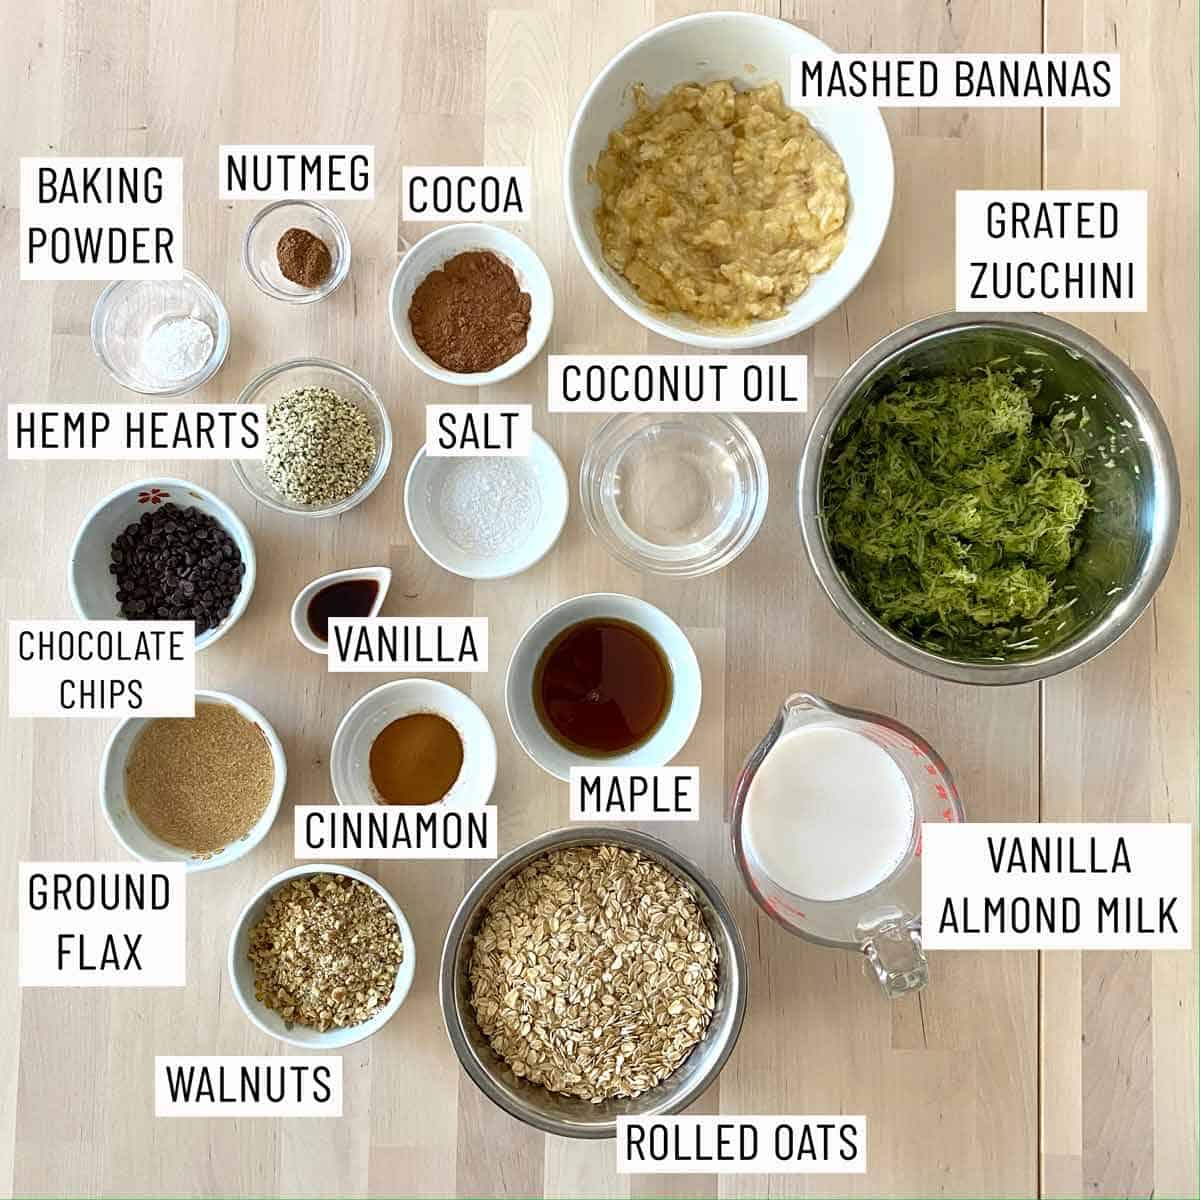
Ingredients needed to make Vegan Baked Oatmeal with Chocolate and Zucchini.

Oats — We use some old fashioned rolled oats to help bind the sweet potato bars as well. They’re packed with fibre as well.

Zucchini — You’d be surprised about what zucchini can do. It keeps our vegan oatmeal bake nice and moist while adding nutritional value.

Bananas — A ripe banana adds in extra naturally sweetness as well as replaces the need for butter.

Ground flaxseed – This is not only packed with heart healthy omega 3s, protein and fibre, but makes a vegan alternative to eggs when mixed with water. Our walnuts and hemp hearts also adds extra omega 3s to the oatmeal. The more the merrier!

Chocolate — Chocolate is definitely a key ingredient for this oatmeal bake. We’ve got chocolate chips on top of them as well as cocoa powder mixed in!

How to Make This Recipe

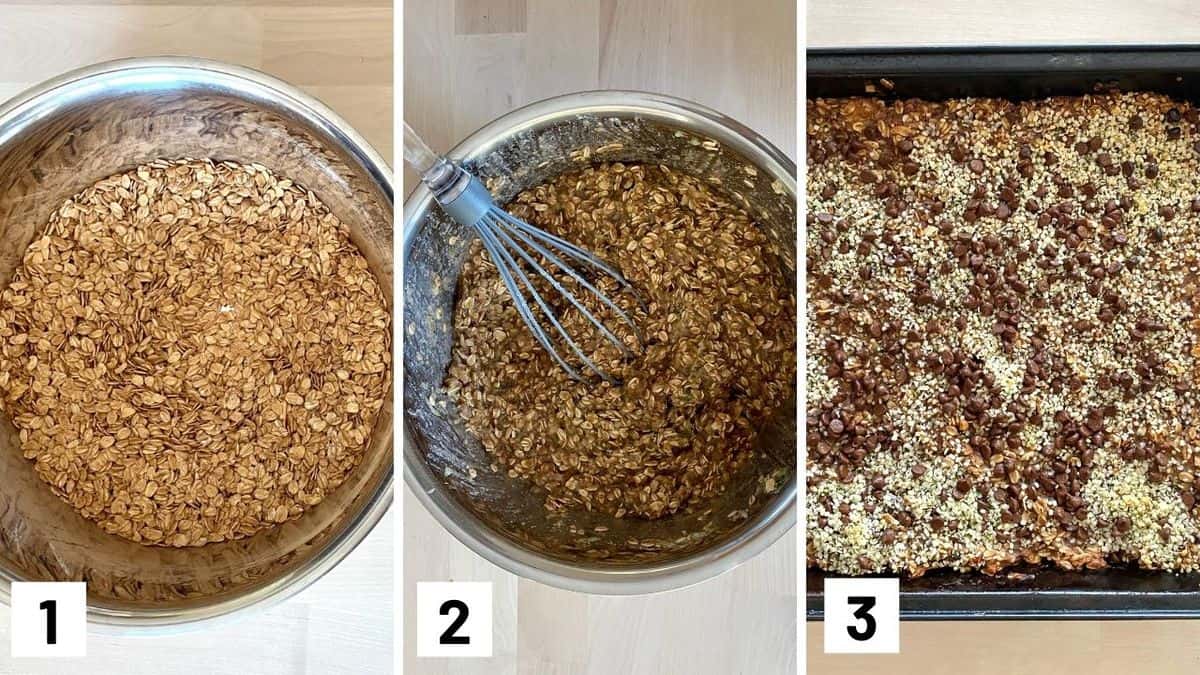
Set of three photos showing mixing the dry ingredients in a bowl, adding in the wet ingredients, then transferring to bake in a pan with toppings.

Step 1: Preheat oven to 375 F. Grease two 9″ square baking dishes. Then in a large bowl, mix together the oats, cinnamon, cocoa, nutmeg, baking powder and salt.

Step 2: In another, mix the almond milk, maple, flax eggs, coconut oil, vanilla, banana, zucchini, and walnuts. Mix into the dry ingredients.

Step 3: Transfer mixture to the two baking dishes. Sprinkle with chocolate chips and hemp hearts. Bake for 22-25 minutes or until golden brown on the outsides and firm to the touch. Allow to cool before cutting into pieces.

Expert Tips

The best bananas for this vegan oatmeal bake is the spottiest bananas you can find. The more ripe the bananas are, the sweeter it’ll be for your oatmeal.

The easiest way to shred your zucchini is by using a box grater or with an attachment in your food processor.

Zucchinis have a high water content. After you’ve grated them, you can wrap it up in a cheesecloth or paper towel and squeeze out as much liquid from them as possible. This prevents them from releasing the liquid while it bakes in the oven, resulting in a watery oatmeal bake.

Recipe FAQs

Is this oatmeal bake gluten free?

Yes! Assuming you use a certified gluten free oat brand, you will have a completely gluten free Vegan Chocolate Zucchini Baked Oatmeal that is safe for people with celiac and gluten intolerance.

Is this easy breakfast recipe safe for babies (BLW) or toddlers?… it has chocolate!

It can be! If you want to include the walnuts, just mince them SUPER fine (or pulse in a food processor). Otherwise, you can sub in some almond flour or more hemp hearts. You can also add apple sauce or more banana in place of the maple syrup and avoid the chocolate if you want it to be completely sugar free. It’s super versatile to make this baked oatmeal baby friendly, and you can also check out my BLW baked oatmeal fingers here.

How do I meal prep or freeze this vegan oatmeal bake?

To make this zucchini baked oatmeal meal prep friendly for the freezer, I suggest letting the baked oatmeal cool, then cut it into strips or squares and wrap each in foil or plastic wrap to freeze. Then you can easily just pull one or two pieces out as you need them throughout the week.

How long will this veggie packed breakfast last in the fridge?

This zucchini baked oatmeal will stay pretty fresh for about 4 or 5 days. Just be sure you are storing it in an airtight container so it doesn’t go stale and stays fresh. If you think you can’t go through it fast enough, then I suggest cutting it up and freezing it.

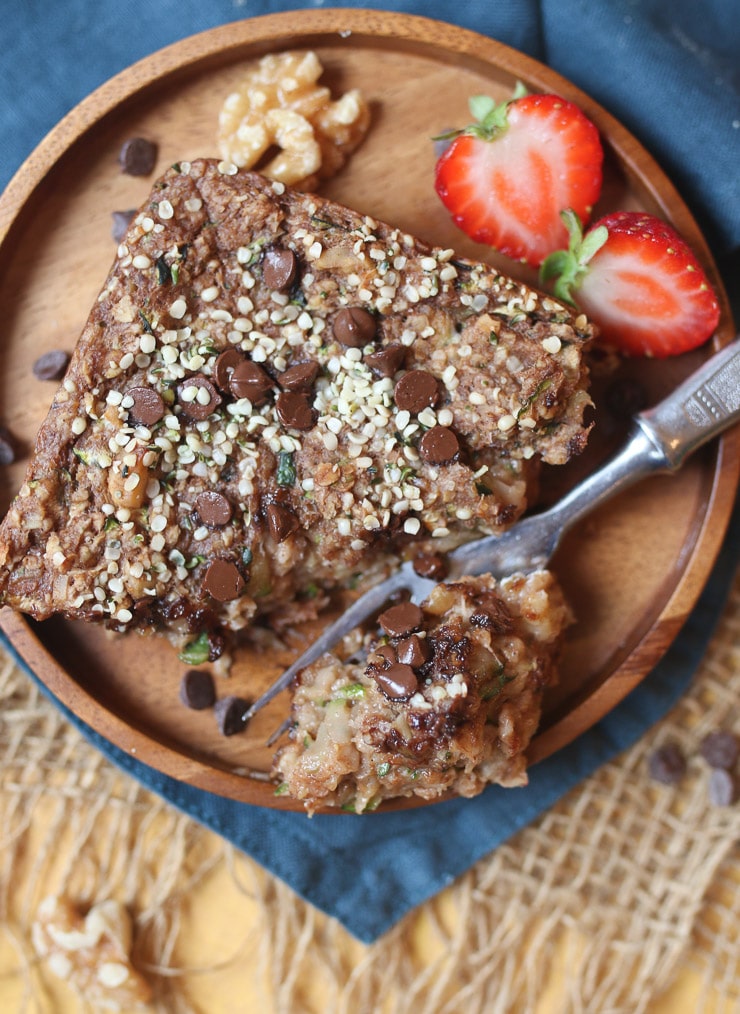
Birds eye view of a piece of chocolate zucchini baked oatmeal square on a wooden plate garnished with hemp seeds and chocolate chips with strawberries on the side

More Recipes You Might Like

Want MORE delicious oatmeal recipes to kick start your mornings? Try these reader favourites:

  • Cherry Almond Baked Oatmeal Fingers
  • Patriotic Oatmeal Breakfast Bars
  • Chocolate Zucchini Bread Oatmeal Zoats
  • High Protein Oatmeal with Crème Brûlée Crackle

So loves, let me know- what some of your favourite easy fast breakfast options? Leave me a comment below with your ideas and be sure to share this!

Square of zucchini baked oatmeal on a wooden plate.
Print Recipe
5 from 5 votes

Vegan Baked Oatmeal with Chocolate and Zucchini

Breakfast time has never been this exciting with this delicious vegan baked oatmeal with chocolate and zucchini! Naturally gluten-free, kid friendly, and packed with healthy goodness, you'll be looking forward to having this baked oatmeal for breakfast!
Prep Time10 minutes mins
Cook Time25 minutes mins
Total Time35 minutes mins
Course: Breakfast, Snack
Cuisine: American
Servings: 16 bars
Calories: 169kcal
Author: Abbey Sharp

Ingredients

  • 2½ cups rolled oats
  • 2 tsp cinnamon
  • ½ tsp nutmeg
  • 1 tbsp cocoa powder
  • 1 tsp baking powder
  • 1 tsp salt or less for babies
  • 1¼ cup unsweetened vanilla almond milk
  • ¼ cup maple syrup
  • 2 flax eggs 2 tbsp ground flax + 1/4 cup water set in fridge 1 hour
  • 3 tbsp melted coconut oil
  • 2 tsp vanilla
  • 2 small ripe bananas mashed
  • 2 medium zucchini grated and liquid squeezed out
  • ½ cup walnuts finely minced
  • ¼ cup dark mini chocolate chips
  • 3 tbsp hemp hearts

Instructions

  • Preheat oven to 375 F. Grease two 9″ square baking dishes.
  • Mix together the oats, cinnamon, cocoa, nutmeg, baking powder and salt in one bowl.
  • In another, mix the almond milk, maple, flax eggs, coconut oil, vanilla, banana, zucchini, and walnuts. Mix into the dry ingredients.
  • Transfer mixture to the two baking dishes. Sprinkle with chocolate chips and hemp hearts. Bake for 22-25 minutes or until golden brown on the outsides and firm to the touch. Allow to cool before cutting into pieces.

Video

Notes

  • The best bananas for this vegan oatmeal bake is the spottiest bananas you can find. The more ripe the bananas are, the sweeter it’ll be for your oatmeal.
  • The easiest way to shred your zucchini is by using a box grater or with an attachment in your food processor.
  • Zucchinis have a high water content. After you’ve grated them, you can wrap it up in a cheesecloth or paper towel and squeeze out as much liquid from them as possible. This prevents them from releasing the liquid while it bakes in the oven, resulting in a watery oatmeal bake.

Nutrition

Calories: 169kcal | Carbohydrates: 20g | Protein: 4g | Fat: 9g | Saturated Fat: 3g | Cholesterol: 1mg | Sodium: 182mg | Potassium: 205mg | Fiber: 3g | Sugar: 8g | Vitamin A: 79IU | Vitamin C: 6mg | Calcium: 62mg | Iron: 1mg
Abbey Sharp

Abbey Sharp is a Registered Dietitian (RD), regulated by the Ontario College of Dietitians. She is a mom, YouTuber, Blogger, award winning cookbook author, media coach specializing in food and nutrition influencers, and a frequent contributor to national publications like Healthline and on national broadcast TV shows.

www.abbeyskitchen.com/about-abbey/

Last Updated April 1, 2021. Published April 7, 2021 By Abbey Sharp 1 Comment

Vegan Breakfast Sandwich with Tofu

This delicious vegan breakfast sandwich with tofu is an easy healthy breakfast that you can make ahead and enjoy on-the-go!

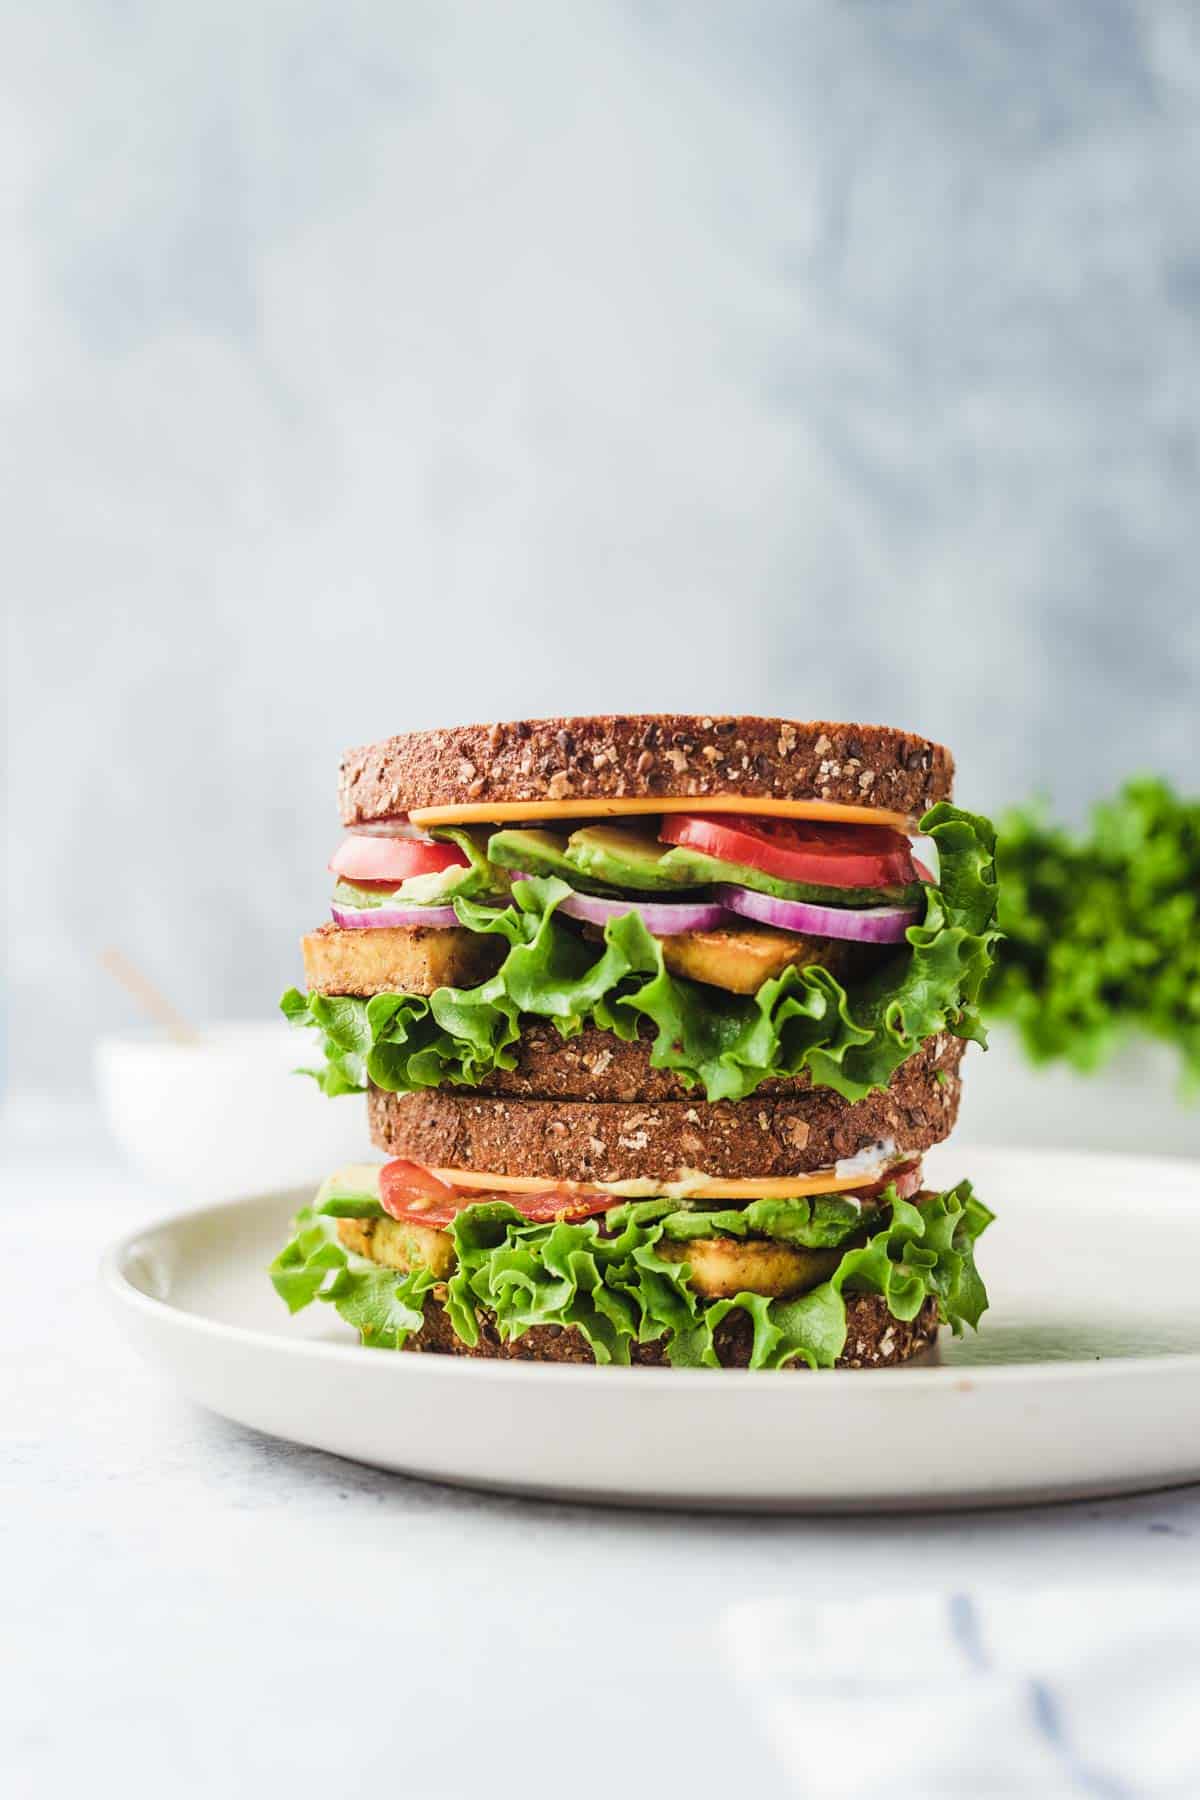
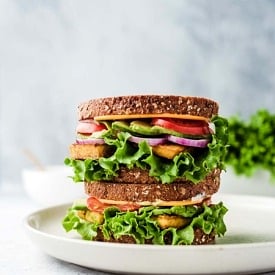
A stacked tofu breakfast sandwich on a white plate.

Does anyone else fall into a breakfast rut from time to time? Every now and then, I find that my standard breakfasts get a bit too routine and a bit too boring. So when I am in need of a bit more inspo, I turn to this vegan breakfast sandwich with tofu.

This sandwich is a nutrient-dense and satisfying morning meal that is chock full of protein, fibre, and flavour! It also makes for the perfect breakfast option if you are looking to incorporate more plant-based meals into your life.

Table of contents

  • Why This Recipe Works
  • Key Ingredients
  • How to Make This Recipe
  • Expert Tips
  • Recipe FAQs
  • More Recipes You Might Like

Why This Recipe Works

This vegan breakfast sandwich has quickly become my new fav as we enter the Spring months because it is just so dang fresh and tasty. Here are a few reasons why we are digging this recipe big time!

  • High protein (28 grams per serving)
  • High Fibre (15 grams per serving)
  • Plant-based
  • Family friendly
  • Great for on-the-go

Key Ingredients

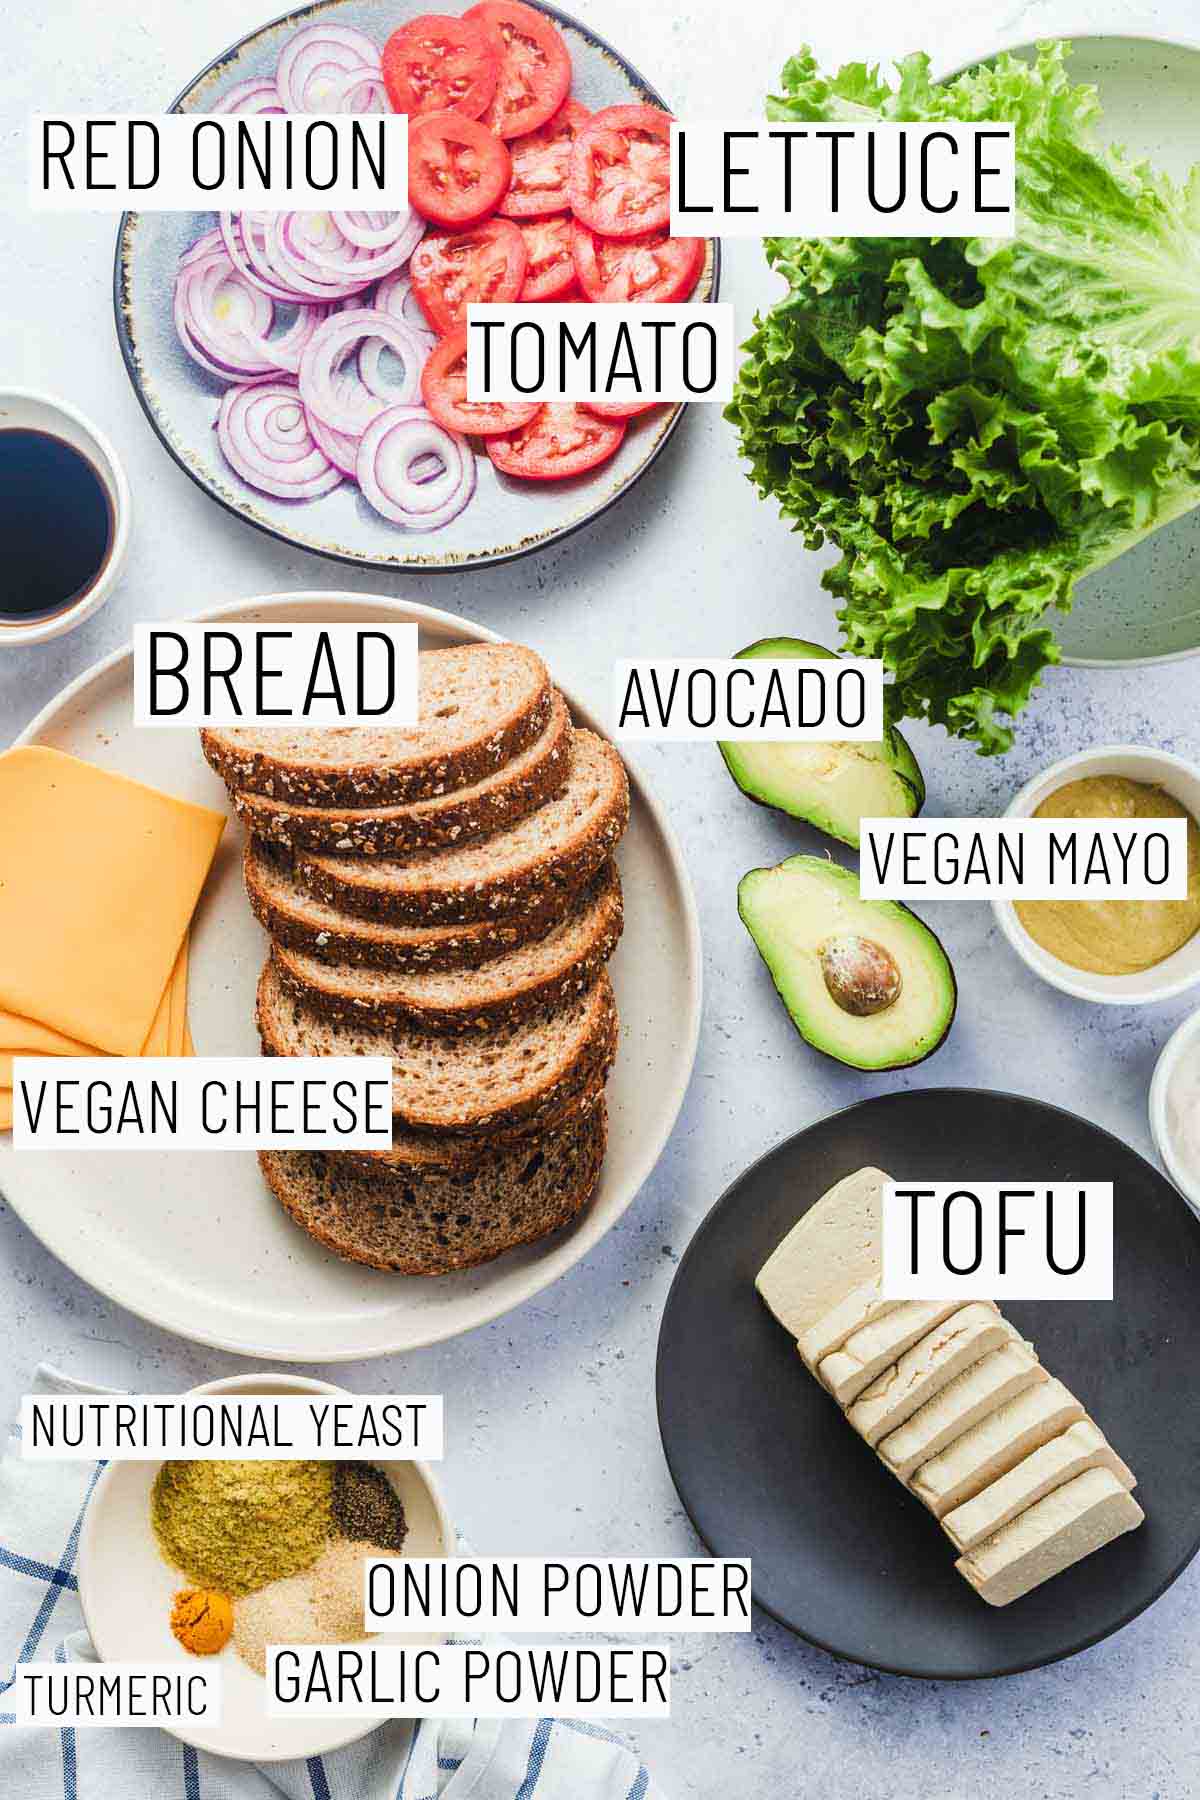
Flat lay image of portioned recipe ingredients including bread, cheese, mayo, tofu, lettuce, tomato, red onion, and seasonings.

Tofu – For this recipe we are using extra firm tofu as it is easier to crisp up and has a better mouth feel for a sandwich. I also recommend looking for tofu that is calcium-set as this will provide an extra calcium boost.

Veggies – When it comes to veggies, the crunchier and more colourful the better! You can totally switch up the veggies depending on what you have on hand. But for me, any good sammy has to have tomatoes, crispy lettuce, avo, and red onion.

Seasoning – To make the tofu extra flavourful, we season it with onion powder, garlic powder, nutritional yeast, and turmeric.

How to Make This Recipe

Two side by side images showing how to prepare recipe.

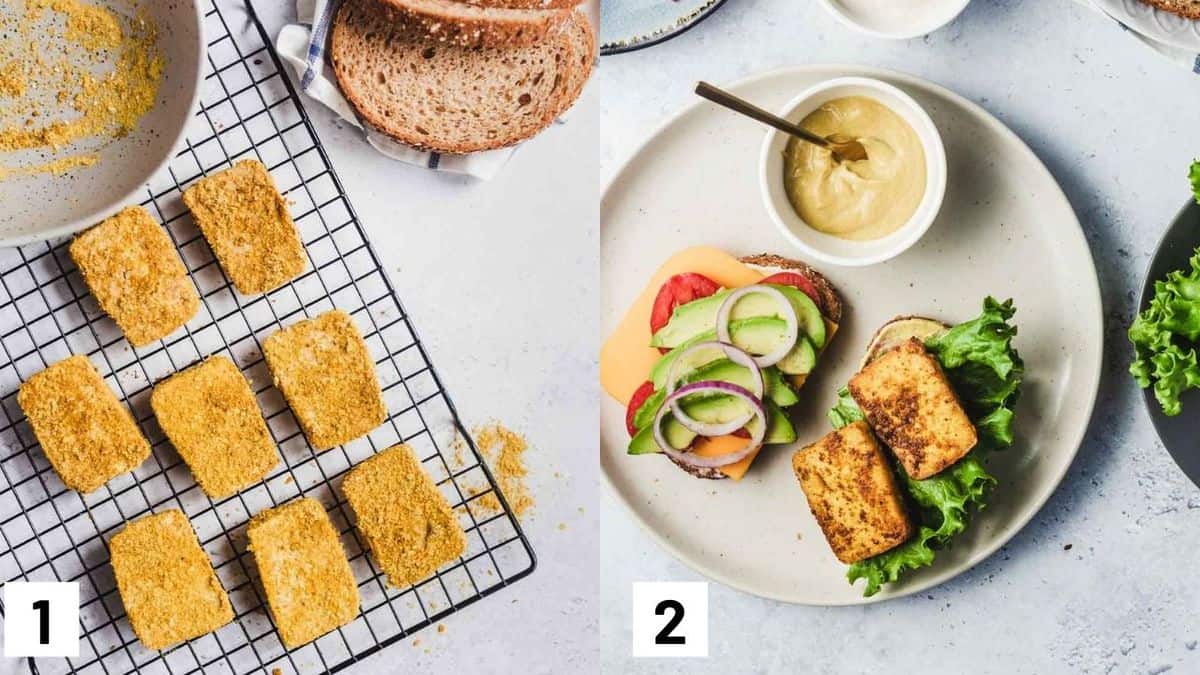
Step 1: In a pie plate, mix together the nutritional yeast, onion, garlic, turmeric, salt and pepper. Press the tofu into the mixture on both sides. Heat a nonstick skillet over medium high heat and add the tofu. Cook on one side for 3 minutes until golden brown, then flip to the other. Repeat with the remaining tofu pieces.

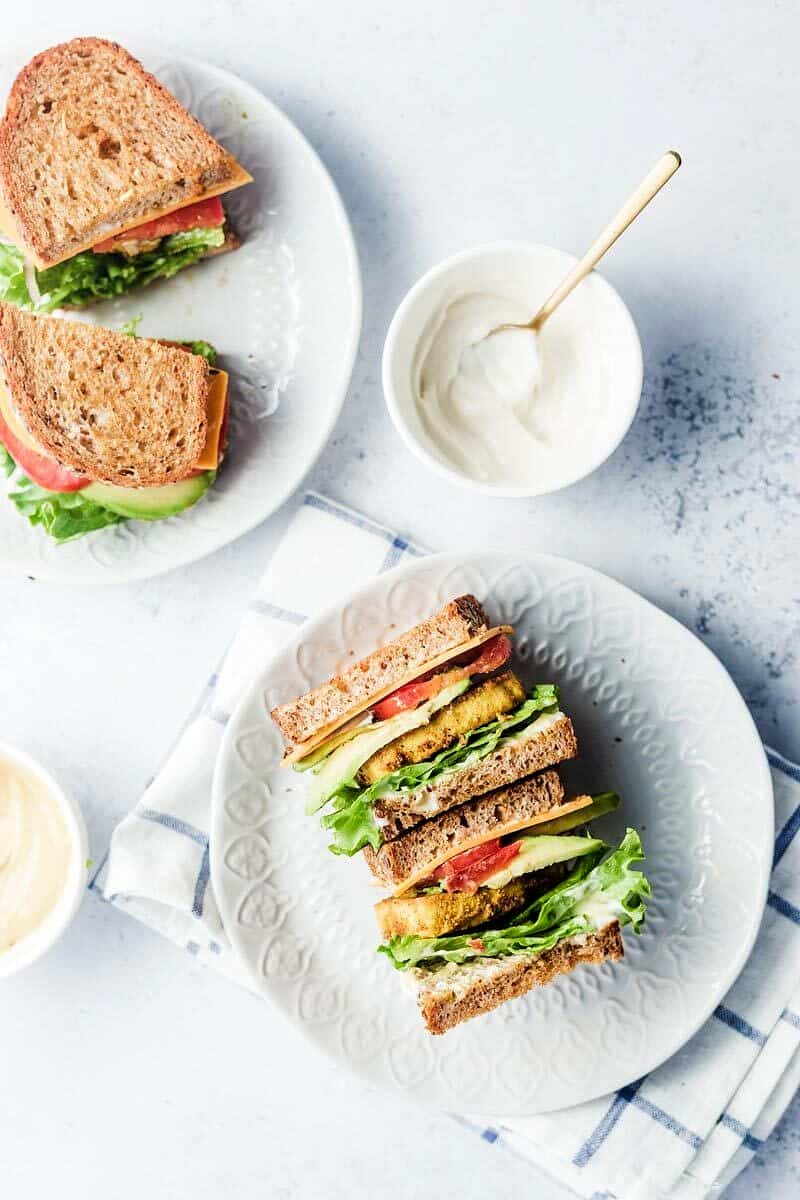
Step 2: Build the breakfast sandwich by layering the avocado, tomato, onion, tofu, vegan cheese, sprouts and vegan mayonnaise on toasted bread. Top with the other slice. Enjoy!

Expert Tips

If you don’t have a ton of time in the mornings, I would recommend meal prepping the tofu and pre-chopping the veggies so that all you have to do in the morning is reheat and assemble. Otherwise, you can do a quick shallow fry with a bit of soy sauce or tamari and call it a day.

You can also bake the tofu if you don’t want to fry it, however it won’t be as crispy.

Recipe FAQs

How long does the tofu keep in the fridge?

The tofu lasts for about 3-5 days in the fridge making this vegan breakfast sandwich perfect for meal prepping. Just pre-cook the tofu and pre-chop the veggies and assemble when you are ready to enjoy.

Can I make this gluten free?

Yes absolutely. You can pair this sandwich with your choice of gluten free bread or enjoy with a lettuce bun.

Can I make this low carb?

If a lettuce bun is not your think, you can also turn this into a salad to make it low-carb friendly.

Is this kid friendly?

Oh yes! My toddler ate this up. It’s also a great option if you are trying to get more plant-based foods into your little one.

Birds eye view of tofu breakfast sandwich on a white plate.

More Recipes You Might Like

If you enjoyed this vegan breakfast sandwich, then you are going to love more sandwich recipes on the blog!

  • Everything Bagel Sandwich with Avocado (Vegan)
  • Avocado Chickpea Salad Sandwich (Vegan)
  • Vegan Sloppy Joes with Roasted Portobello Mushroom
  • Cranberry Chicken Salad with Avocado

Would you have this vegan breakfast sandwich for breakfast? What are your favourite plant-based brunch recipes lately? Let me know in the comments below!

Print Recipe
5 from 2 votes

Vegan Breakfast Sandwich with Tofu

This vegan breakfast sandwich with tofu is an easy healthy breakfast that you can make ahead and enjoy on-the-go!
Prep Time20 minutes mins
Total Time20 minutes mins
Course: Breakfast, Lunch, brunch
Cuisine: American
Diet: Vegan, Vegetarian
Servings: 4
Calories: 527kcal
Author: Abbey Sharp

Ingredients

  • 8 slices 1/2” extra firm tofu, drained and pressed
  • 2 tbsp nutritional yeast
  • 1/2 tsp onion powder
  • 1/2 tsp garlic powder
  • 1/8 tsp turmeric
  • Generous pinches each of salt and pepper
  • 2 tbsp extra virgin olive oil
  • 8 slices whole grain Bread toasted
  • 8 thin slices red tomato
  • 4 thin slices orange vegan cheese
  • Vegan mayonnaise to taste
  • 1 cup microgreens sprouts or lettuce
  • 8 thin red onion rings
  • 1 avocado thinly sliced

Instructions

  • In a pie plate, mix together the nutritional yeast, onion, garlic, turmeric, salt and pepper.
  • Press the tofu into the mixture on both sides.
  • Heat a nonstick skillet over medium high heat and add the tofu. Cook on one side for 3 minutes until golden brown, then flip to the other. Repeat with the remaining tofu pieces.
  • Build the breakfast sandwich by layering the avocado, tomato, onion, tofu, vegan cheese, sprouts and vegan mayonnaise on toasted bread. Top with the other slice. Enjoy!

Nutrition

Calories: 527kcal | Carbohydrates: 63g | Protein: 28g | Fat: 21g | Saturated Fat: 3g | Sodium: 366mg | Potassium: 1636mg | Fiber: 15g | Sugar: 21g | Vitamin A: 2141IU | Vitamin C: 56mg | Calcium: 198mg | Iron: 5mg
Abbey Sharp

Abbey Sharp is a Registered Dietitian (RD), regulated by the Ontario College of Dietitians. She is a mom, YouTuber, Blogger, award winning cookbook author, media coach specializing in food and nutrition influencers, and a frequent contributor to national publications like Healthline and on national broadcast TV shows.
www.abbeyskitchen.com/about-abbey/

Last Updated June 29, 2020. Published April 1, 2021 By Abbey Sharp 111 Comments

Salmon Fritters with Sweet Potato (Baby Led Weaning Recipe)

Baby grabbing a salmon sweet potato fritter.

These Salmon Fritters with Sweet Potatoes are a delicious high iron meal or snack and are also baby led weaning friendly. Easy super to make and are make-ahead friendly!

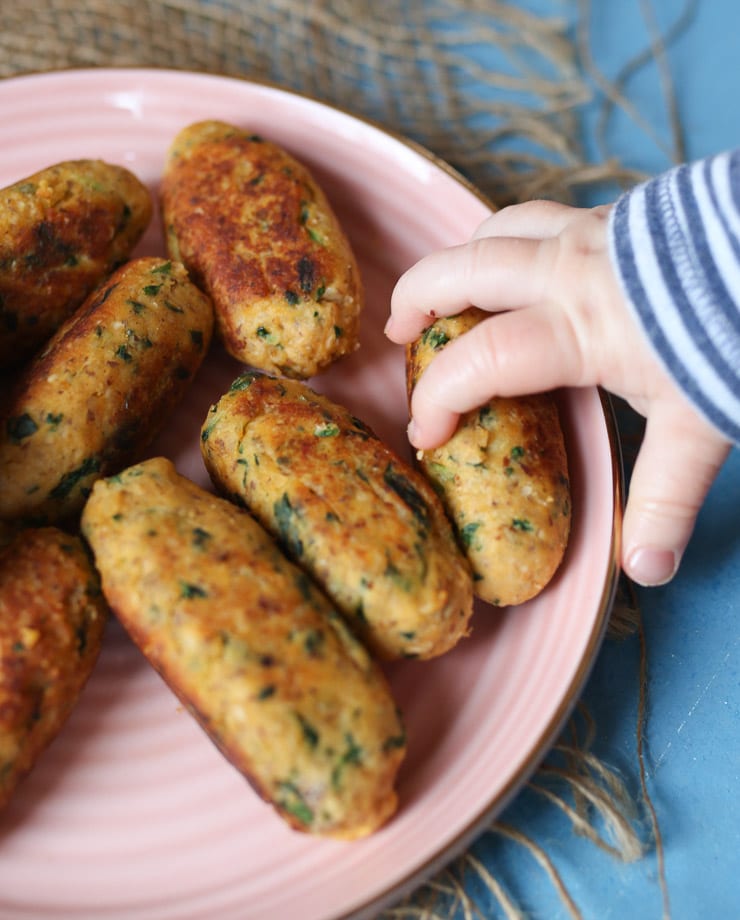
Baby's hand grabbing a finger sized salmon fritter on a rose coloured plate.

Are you looking to incorporate more salmon in your child’s diet but don’t know how? Try these super easy salmon fritters with sweet potatoes. These salmon fritters are perfect as a snack and you can even make them into burgers for a healthy burger night! Due to the texture of these fritters and shape, they are an easy way to introduce your little one to fish.

Table of contents

  • Why This Recipe Works
  • Key Ingredients
  • How to Make This Recipe
  • Expert Tips
  • Recipe FAQs
  • More Recipes You Might Like

Why This Recipe Works

You won’t believe how easy it is to make these salmon fritters. Both the adults and the babies in your family will love these! On top of being easy, here are a few more reasons as to why you’ll love this recipe:

  • Packed with healthy ingredients
  • High in iron
  • The perfect shape for babies to grab onto
  • Freezer friendly

Key Ingredients

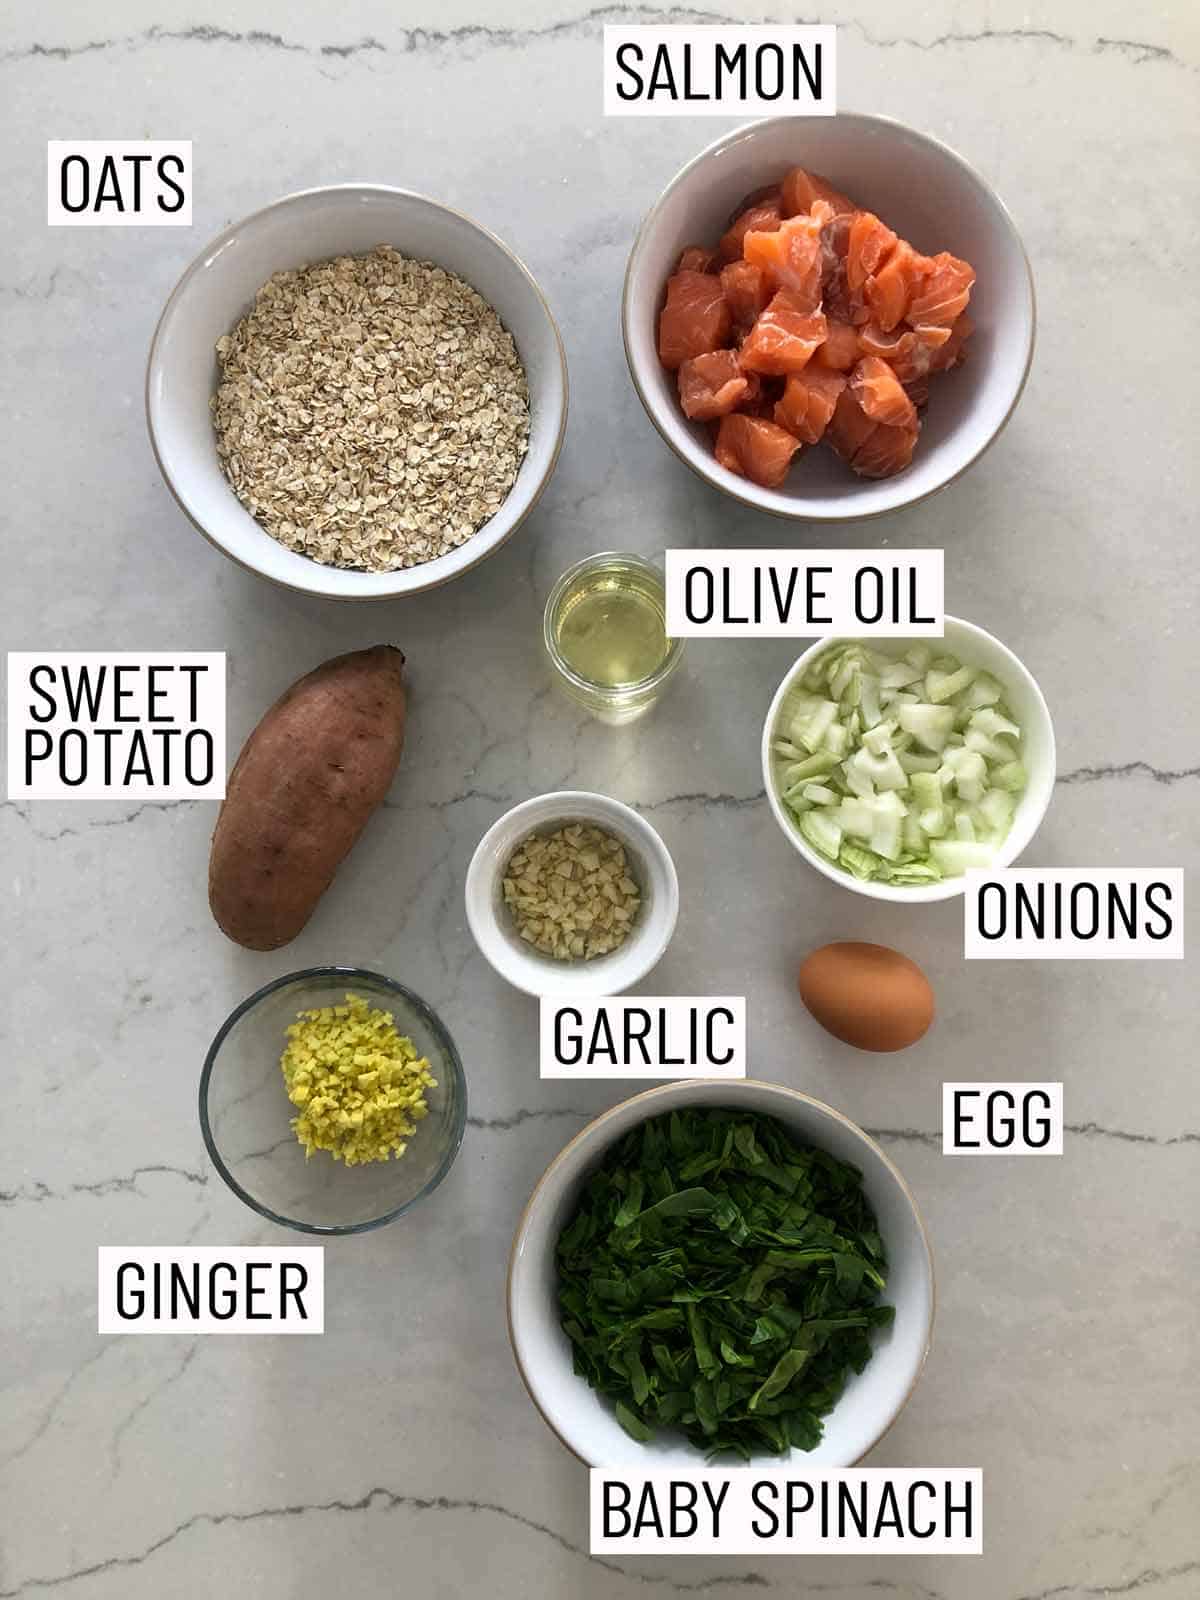
Overhead view of ingredients needed to make salmon fritters.

Salmon — Packed with omega-3s and healthy goodness like protein, the salmon is a great healthy base to these fritters.

Spinach — Spinach is an iron packed ingredient in these fritters. It’s super easy to slip into these salmon fritters that your little ones won’t even noticed that there’s veggies in them.

Oats — We use some old fashioned rolled oats to help bind the salmon fritters together. While some recipes may use panko or breadcrumbs, this is a gluten-free way to hold the fritters together.

Sweet Potato — Sweet potatoes are packed with fibre, minerals, and vitamins. Another healthy ingredient for our salmon fritters!

How to Make This Recipe

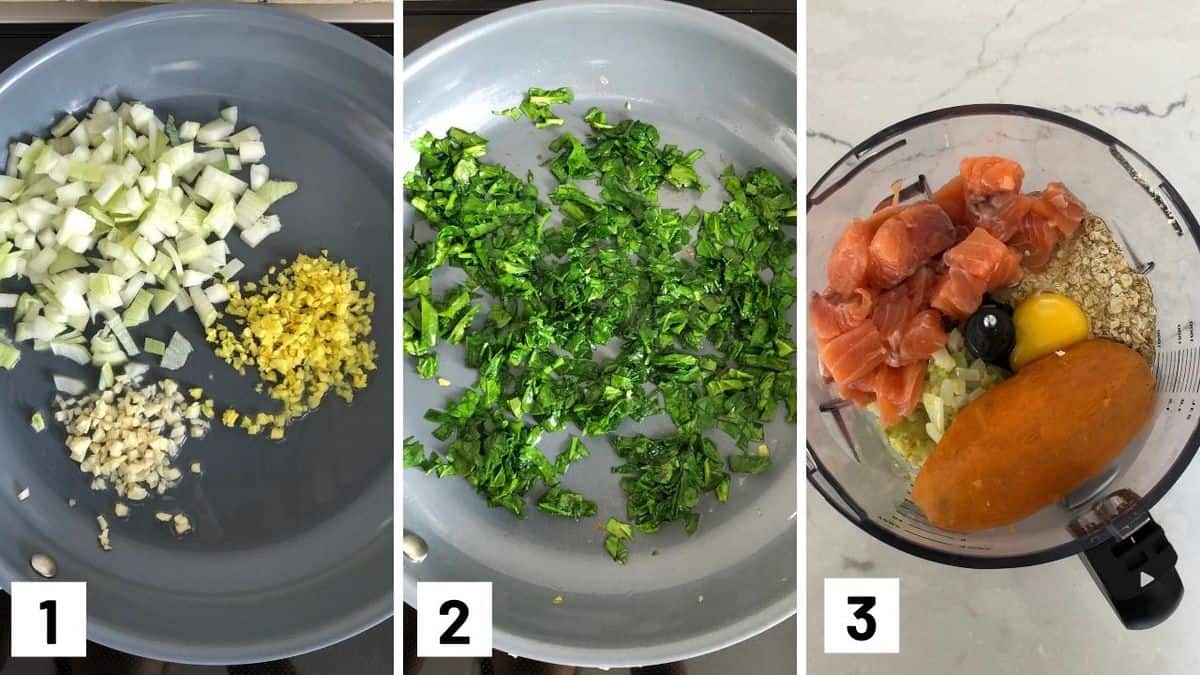
Set of 3 photos showing sauteing the ingredients for fritters before adding them to a food processor.

Step 1: Preheat oven to 350 F. To a large skillet, heat a tablespoon of olive oil and add the onion, garlic and ginger. Saute for 2-3 minutes until soft then add to a food processor.

Step 2: Return the pan to the heat and add in the spinach. Cook until wilted, about 2 minutes. Set aside

Step 3: To the food processor, add the salmon, egg, cooked sweet potato flesh (discarding the skins), onion, garlic, ginger and oats. Pulse until the mixture comes together, then add in the spinach. Pulse just until you see it mixed through.

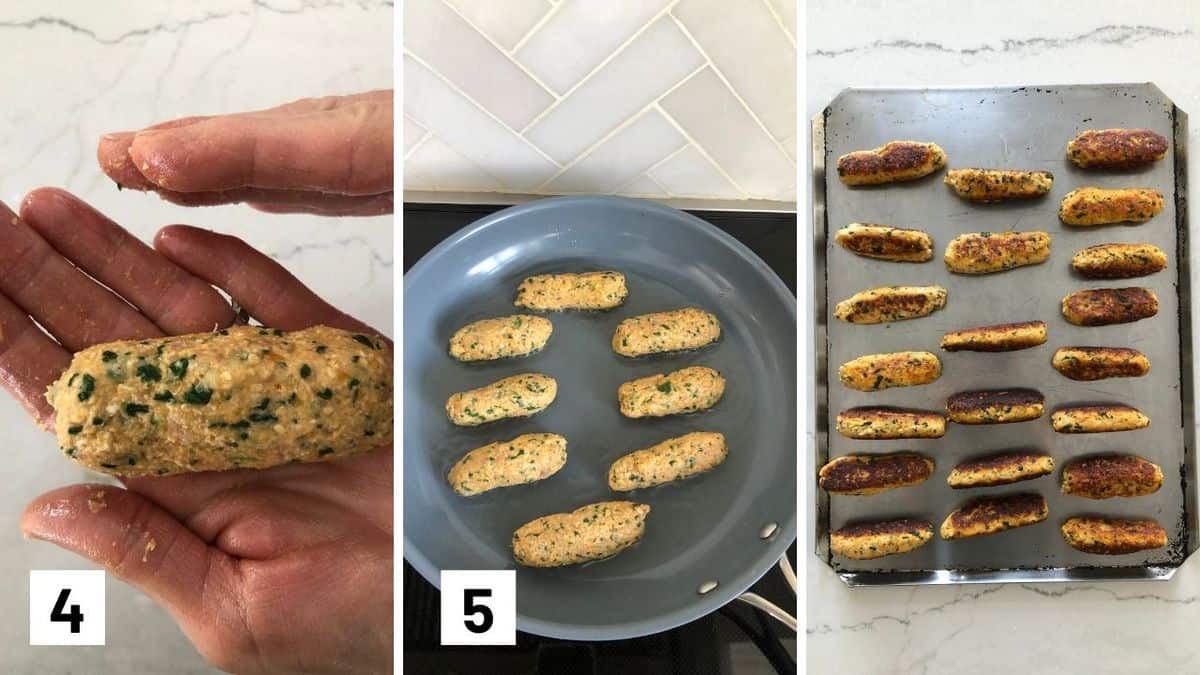
Set of 3 photos showing shaping salmon fitters before pan frying and baking them.

Step 4: Oil your hands and add another coating of oil to the pan. Roll the mixture into finger like fritters.

Step 5: Pan-fry the salmon fritters until golden brown. Transfer to a baking sheet. Continue with the remaining fritters, then finish in the oven until cooked to an internal temperature of 145 F, about another 10 minutes. Serve at room temperature or warm.

Expert Tips

Oiling your hands before shaping the salmon fritters helps prevents the fritters from sticking to your hands. It also gives the fritters a little bit of oil so you can pan fry them without adding oil to the pan.

This recipe uses fresh salmon. While canned salmon is cheaper, something to take note of is the sodium levels in canned salmon. Some may have high amounts of sodium which is not recommended for babies.

Since this recipe makes 15 to 20 salmon fritters, if you have leftovers, you can store them in an airtight container in the fridge for up to 3 to 4 days.

Recipe FAQs

Are salmon fritters recommended for baby lean weaning?

If you’re just getting started with BLW, I recommend you check this out first. So we know how important omega 3’s are for brain development, and salmon is one of the absolute best sources there is. Want to know my secret to easy BLW? Make everything a fritter – and a log shaped fritter, if possible. The long shape is easy for baby to pick up, and a fritter is a great way to combine literally anything you have in the house.

Can I skip pan frying?

You can definitely skip pan frying these salmon fritters and just bake them exclusively! However, I like to try to get these nice and golden before baking.

Are these freezer friendly? How do I freeze salmon fritters?

These fritters are perfect for freezing! Make a big batch, let them cool and add to a freezer friendly container/bag. Reheat on a baking sheet in the oven for 10-15 minutes in a 350 degree preheated oven.

How can I turn salmon fritters into salmon patties?

Turn these salmon fritters into a meal by forming into larger patties. Just know that these will take a bit longer to cook. Use a temperature thermometer to know when it’s done. It’s recommended to cook fish to an internal temperature of 145 degrees F (62.8 degrees C).

Salmon Sweet Potato Fritters on a pink plate

More Recipes You Might Like

Want more BLW and toddler friendly recipes that your baby will love? Try these ones!

  • Banana Baked Oatmeal Fingers with Cherries
  • Pumpkin Waffles with Protein
  • BLW Carrot Cake Waffles
  • Healthy Toddler Finger Sandwiches

Now I want to know, what are some of your favourite healthy recipes for your baby? Leave me a comment below with your thoughts!

These Salmon Sweet Potato Fritters are a delicious high iron meal for starting solids with baby using a Baby Led Weaning (BLW) approach.
Print Recipe
4.82 from 93 votes

Salmon Fritters with Sweet Potato (Baby Led Weaning Recipe)

These Salmon Fritters with Sweet Potatoes are a delicious high iron meal or snack and are also baby led weaning friendly. Easy super to make and are make-ahead friendly!
Prep Time20 minutes mins
Cook Time15 minutes mins
Total Time35 minutes mins
Course: Dinner
Cuisine: American
Servings: 15 – 20 fritters
Calories: 73kcal
Author: Abbey Sharp

Ingredients

  • ¾ lb salmon skin and bones removed and roughly chopped
  • 1 medium sweet potato cooked
  • 1 omega 3 egg
  • 1 tbsp olive oil plus more for cooking
  • ½ onion diced
  • 3 cloves garlic minced
  • 2 tbsp fresh ginger minced
  • 1¼ cup oats
  • 2 cups baby spinach minced

Instructions

  • Preheat oven to 350 F.
  • To a large skillet, heat a tablespoon of olive oil and add the onion, garlic and ginger. Saute for 2-3 minutes until soft then add to a food processor.
  • Return the pan to the heat and add in the spinach. Cook until wilted, about 2 minutes. Set aside
  • To the food processor, add the salmon, egg, cooked sweet potato flesh (discarding the skins), onion, garlic, ginger and oats. Pulse until the mixture comes together, then add in the spinach. Pulse just until you see it mixed through.
  • Oil your hands and add another coating of oil to the pan. Roll the mixture into finger like fritters and pan-fry until golden brown. Transfer to a baking sheet. Continue with the remaining fritters, then finish in the oven until cooked to an internal temperature of 145 F, about another 10 minutes. Serve at room temperature or warm.

Video

Notes

  • Oiling your hands before shaping the salmon fritters helps prevents the fritters from sticking to your hands. It also gives the fritters a little bit of oil so you can pan fry them without adding oil to the pan.
  • This recipe uses fresh salmon. While canned salmon is cheaper, something to take note of is the sodium levels in canned salmon. Some may have high amounts of sodium which is not recommended for babies.
  • Since this recipe makes 15 to 20 salmon fritters, if you have leftovers, you can store them in an airtight container in the fridge for up to 3 to 4 days.

Nutrition

Calories: 73kcal | Carbohydrates: 7g | Protein: 6g | Fat: 2g | Saturated Fat: 1g | Cholesterol: 23mg | Sodium: 31mg | Potassium: 202mg | Fiber: 1g | Sugar: 1g | Vitamin A: 1630IU | Vitamin C: 1.8mg | Calcium: 16mg | Iron: 0.7mg
Abbey Sharp

Abbey Sharp is a Registered Dietitian (RD), regulated by the Ontario College of Dietitians. She is a mom, YouTuber, Blogger, award winning cookbook author, media coach specializing in food and nutrition influencers, and a frequent contributor to national publications like Healthline and on national broadcast TV shows.
www.abbeyskitchen.com/about-abbey/

Last Updated April 5, 2021. Published March 29, 2021 By Abbey Sharp 26 Comments

Sweet Potato Breakfast Bowl (Gluten Free & Vegan)

This Sweet Potato Breakfast Bowl is an easy vegan breakfast that is a great alternative to cereal or toast. It is also a tasty way to enjoy sweet potatoes in a way that isn’t savoury.

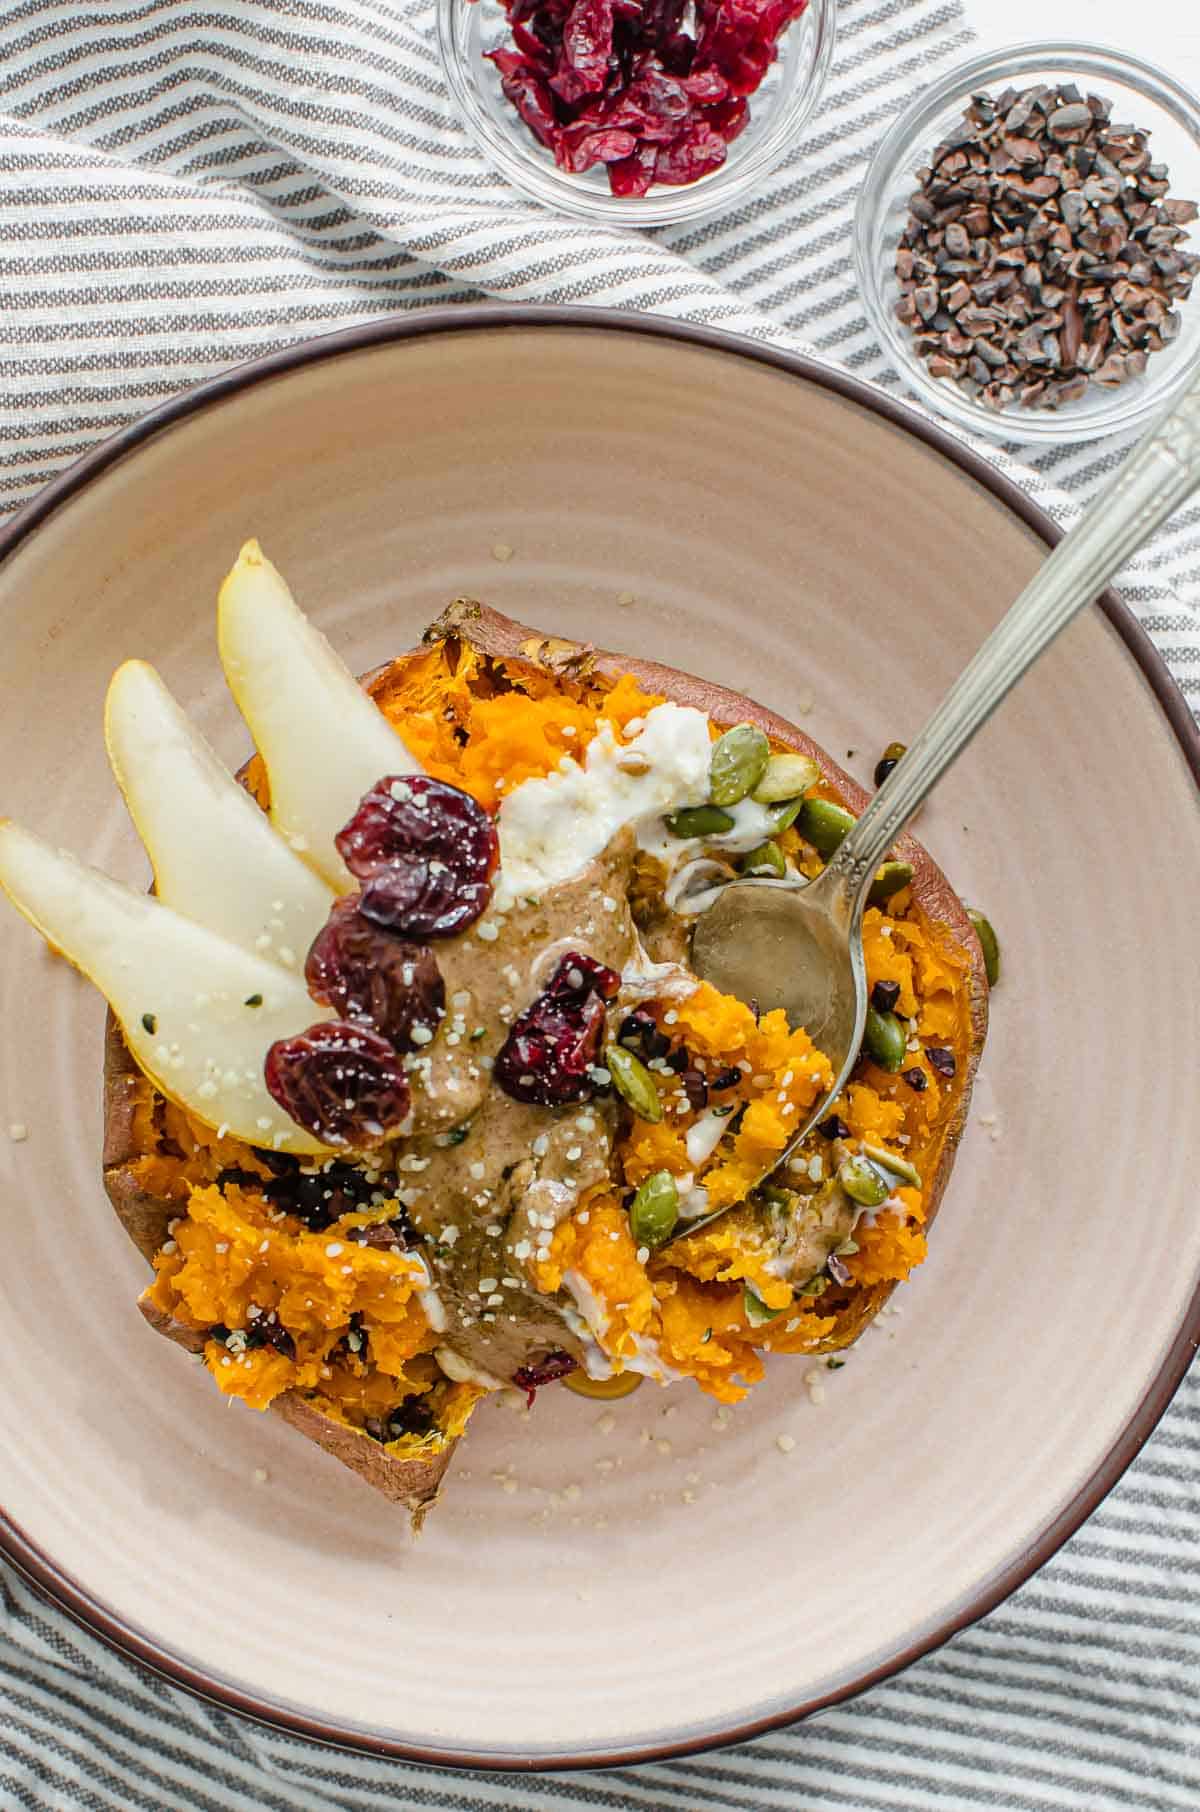
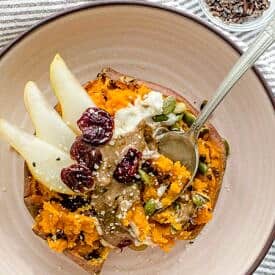
Birds eye view image of sweet potato breakfast bowl with cacao nibs and cranberries on the side.

They say breakfast is the most important meal of the day, and while I have a hell of a lot of breakfast recipes (oh hello protein pancakes, no oats porridge, and protein avocado toast), I feel there’s always room for more. I for one can always use inspiration for breakfast. So for my vegan and gluten free friends, I wanted to share what’s now become a staple in my house- my Vegan Sweet Potato Breakfast Bowl.

Why This Recipe Works

If you’re like me and LOVE sweet potatoes, then this recipe is a great way to enjoy sweet potatoes in a non-savoury breakfast meal. Here are a few more reasons why this recipe is the bomb dot com.

  • Full of fibre and healthy fats
  • Great as a pre or post workout snack
  • Easy to prepare
  • Toppings galore!

Key Ingredients

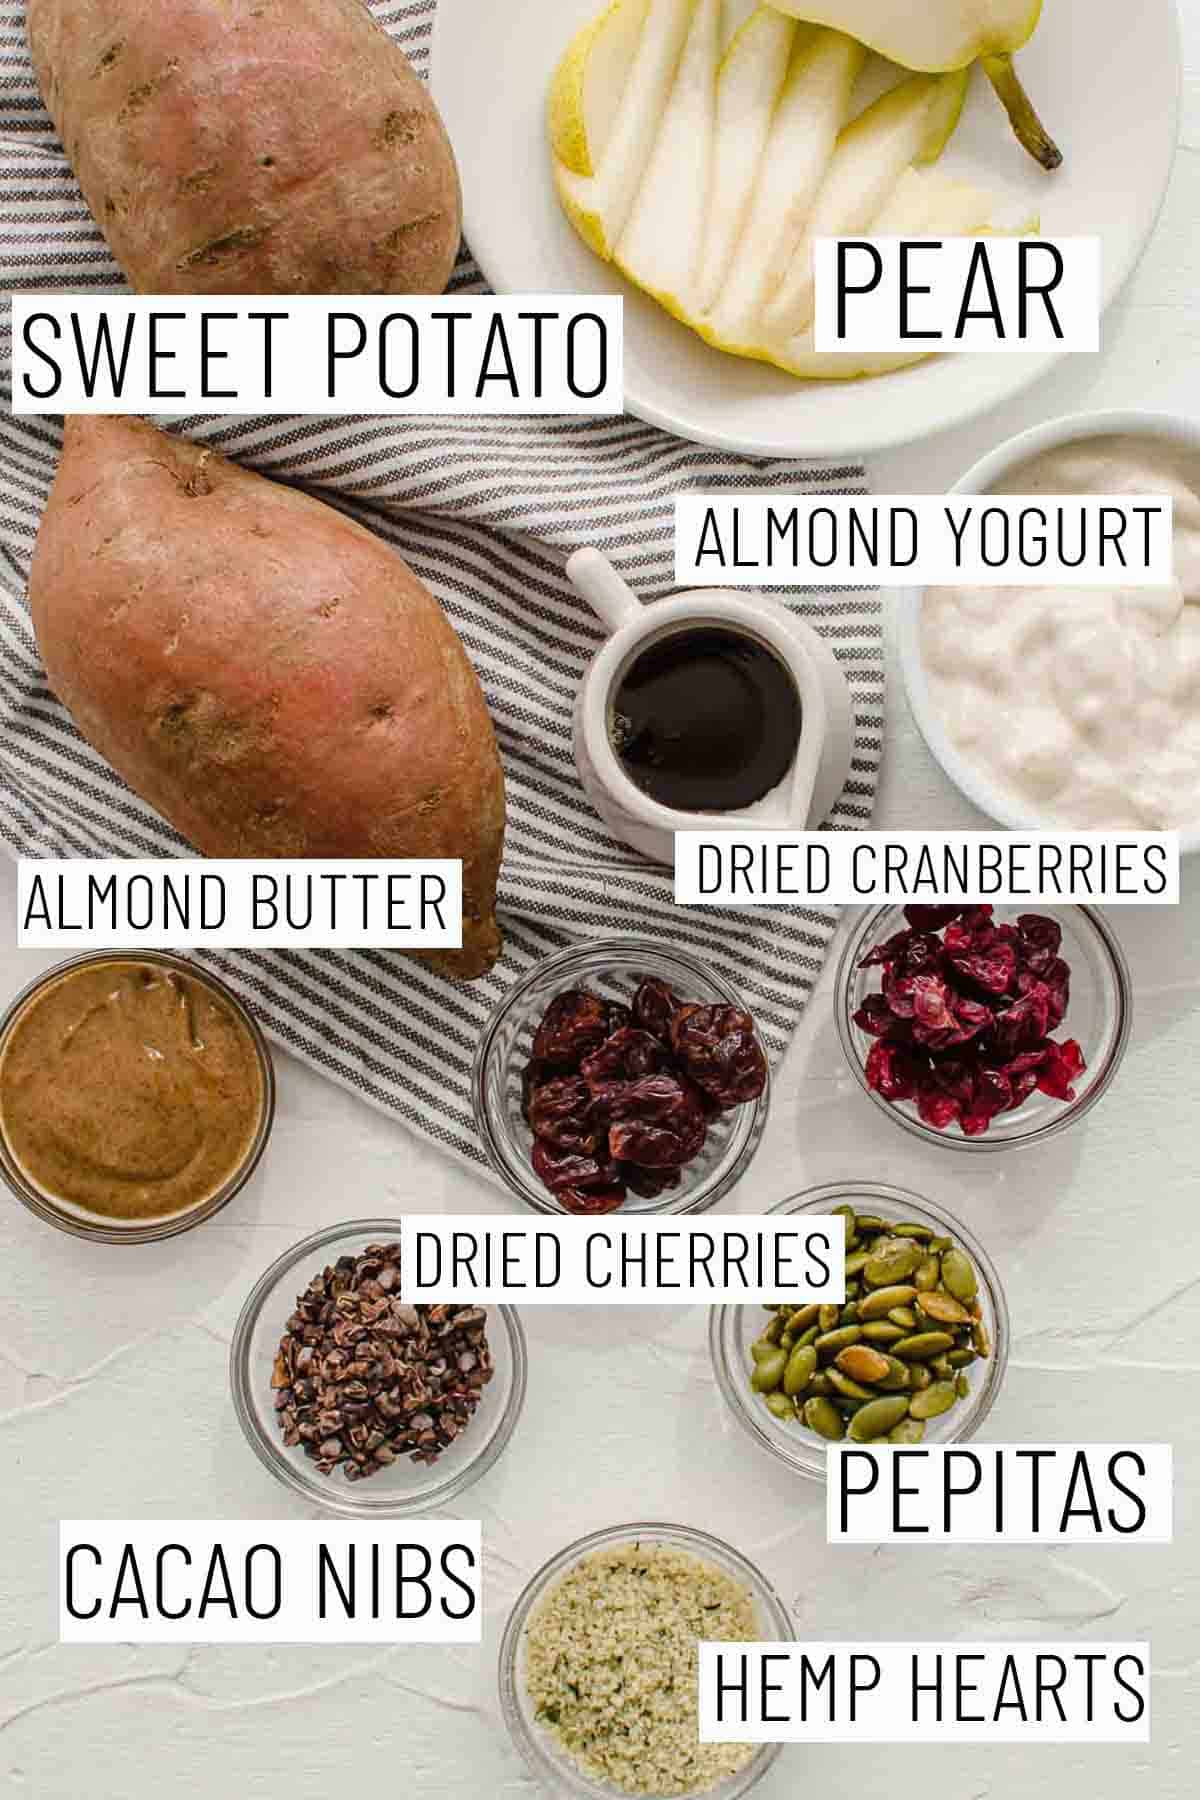
Flat lay image of portioned recipe ingredients including sweet potato, pear, almond yogurt, dried cranberries, almond butter, dried cherries, pepitas, cacao nibs, and hemp hearts.

Sweet Potato – depending on your appetite in the morning, you can use a small or medium sweet potato for this recipe. I find this sweet potato bowl to be pretty filling (especially with the toppings), so I usually stick to a small sized sweet potato so I can go ham on the toppings.

Toppings – The best part of this sweet potato bowl is the toppings! I like to top it off with hemp hearts, pepitas, cacao nibs, dried fruit, pear, almond butter, and yogurt. But really, anything goes!

How to Make This Recipe

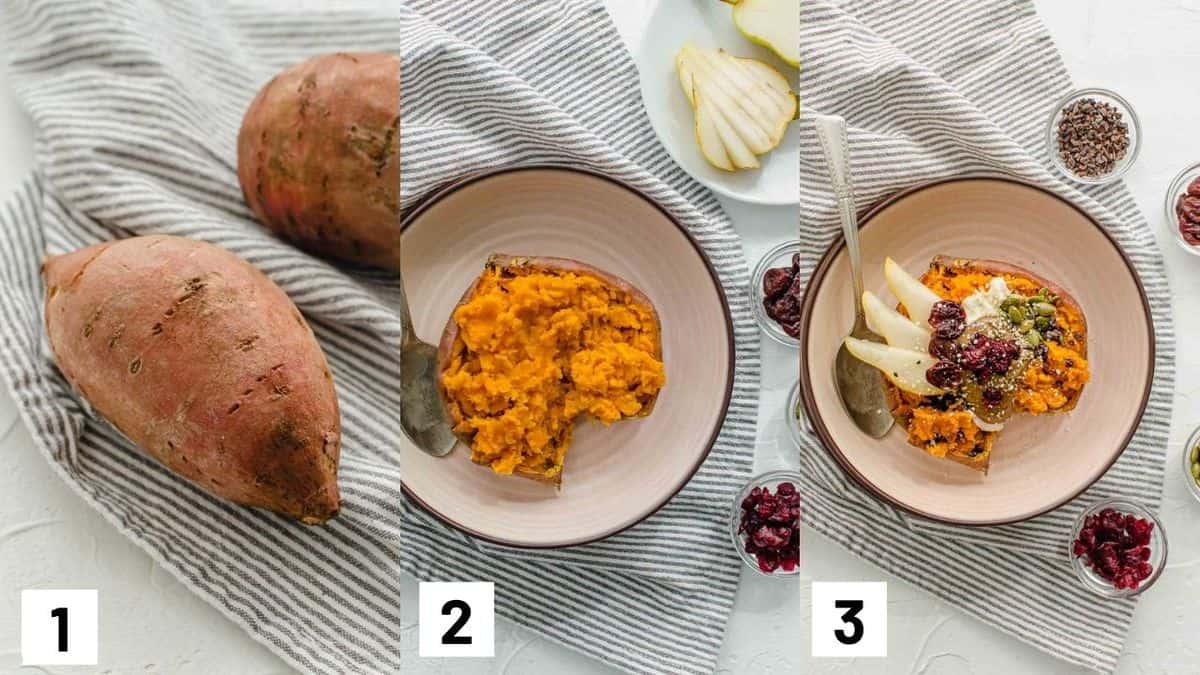
Three side by side images showing how to prepare recipe including heating yam and adding recipe toppings.

Expert Tips

If you are baking your sweet potato, I recommend giving it a few pokes with you fork and wrapping the whole thing in tin foil. Then bake it at 450 F for about 45 minutes until it’s VERY tender inside. You don’t want to have to struggle to get that goodness out.

If you’re microwaving it for a quick morning nosh, I usually give it some pricks, put it on a plate, and cover the plate and let it go for about 10-15 minutes on high. You’ll know it’s done when you can insert a fork in and it comes it super easily.

As for toppings, you can totally add whatever you have in your pantry. I like to top my sweet potato breakfast bowl with almond yogurt, almond butter, pears, dried cherries, dried cranberries, cacao nibs, pepitas and hemp hearts.

Recipe FAQs

How can I make this higher in protein?

It really depends on how much of each topping you add to the sweet potato breakfast bowl which will determine its protein content. Nut butter, yogurt, pepitas, and hemp seeds are all great sources of protein! So if you want to make sure this breakfast bowl is high in protein to fuel your day, make sure to incorporate these ingredients into your topping selection.

Can I meal prep this?

100%! You can roast up a few sweet potatoes ahead of time and keep in them in the fridge for when you are ready to serve. Simply reheat in the microwave and add your toppings. Easy peasy!

What other toppings can I use?

Honestly there is no limit! It really depends on what you like and what you have on hand. In my opinion, you can’t go wrong with fruit (fresh and/or dry), nut butter, seeds, and yogurt. So delish!

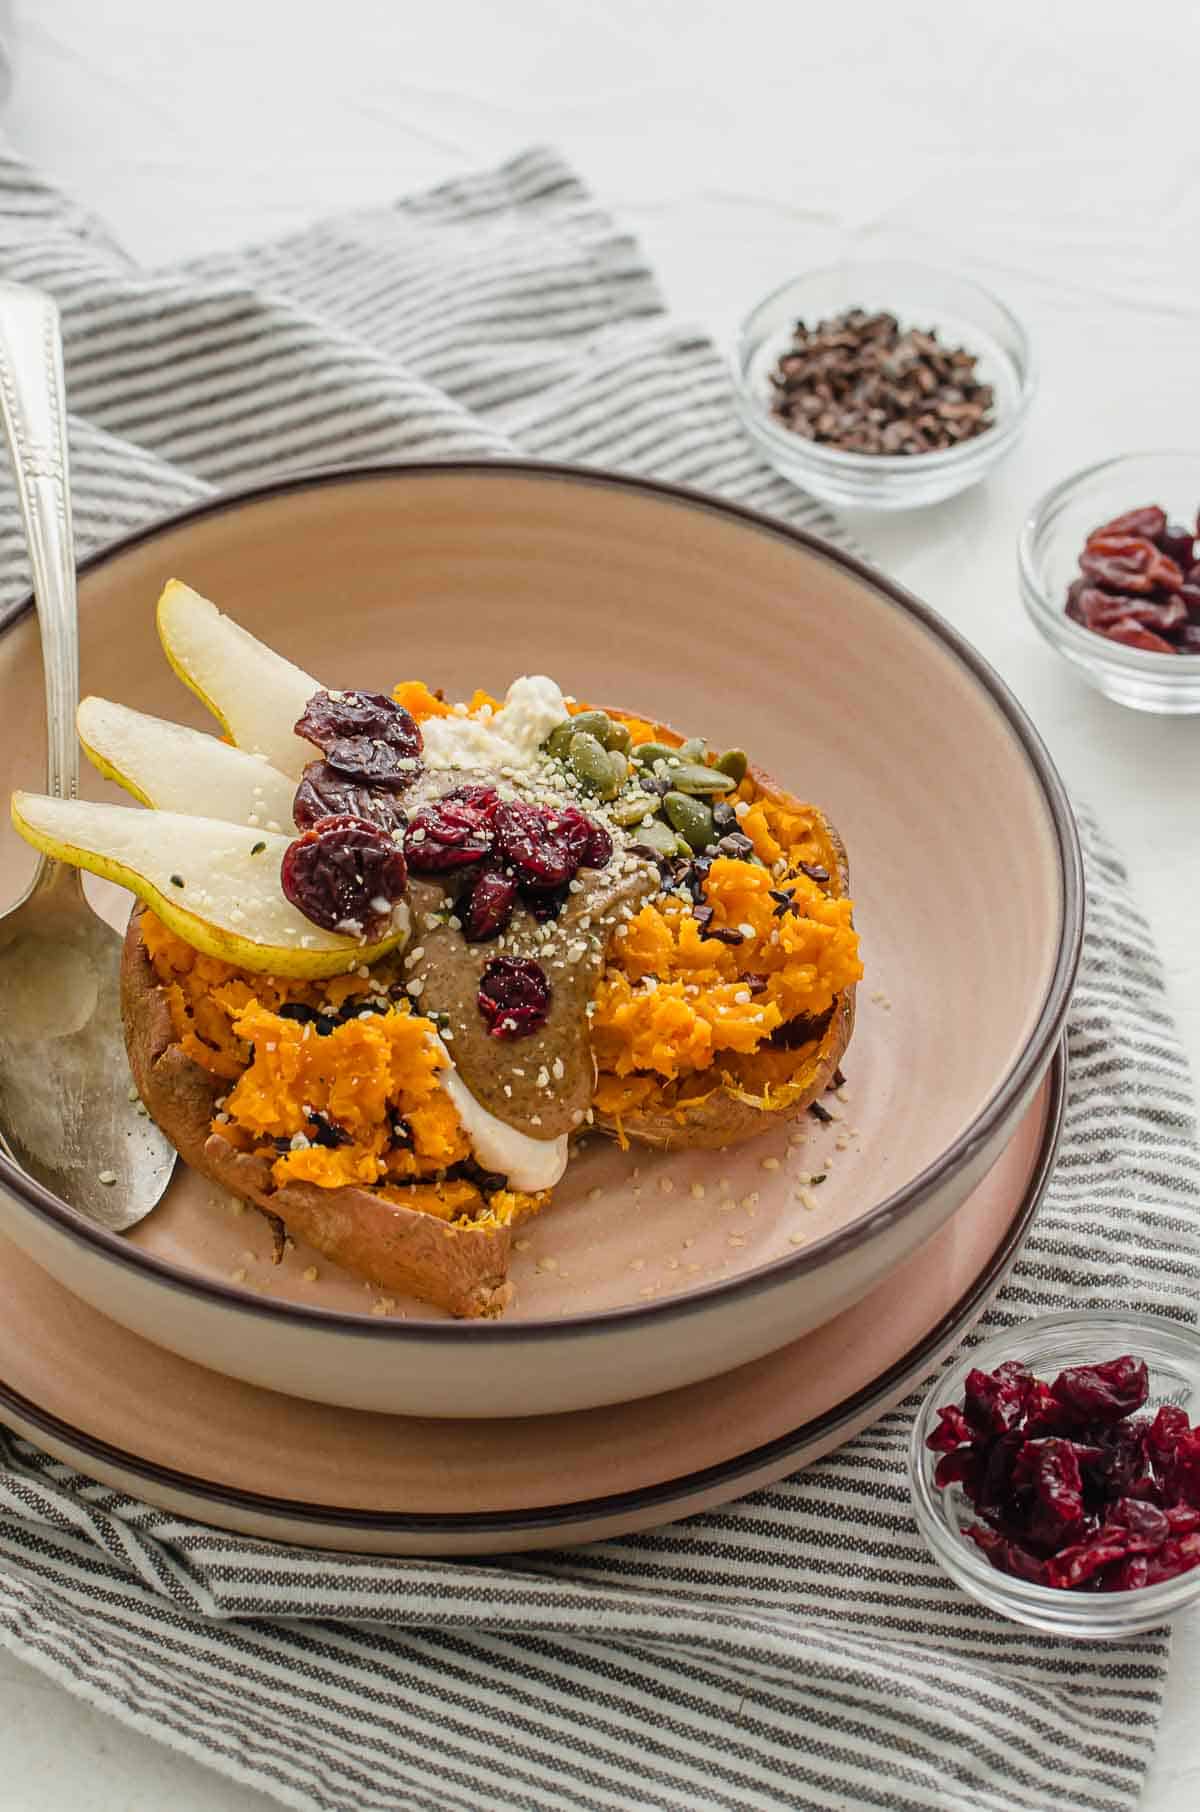
Close up of sweet potato breakfast bowl with toppings in a pink bowl.

More Recipes You Might Like

If you’re a big sweet potato fan, you’re going to love more of these sweet potato recipes on the blog!

  • Tofu Pudding with Sweet Potato
  • Stuffed Sweet Potato with PB&J (Vegan & High Protein)
  • Sweet Potato Grilled Cheese Bites
  • Sweet Potato Waffle Latkes

I would LOVE to know from you guys what your go-to toppings would be on your Vegan Sweet Potato Breakfast Bowl? What do you have in your fridge and pantry that would go amazing on your little tater tot?

Leave me a comment below with your thoughts and ideas!

Print Recipe
4.85 from 13 votes

Sweet Potato Breakfast Bowl (Vegan & Gluten Free)

This Sweet Potato Breakfast Bowl is an easy vegan breakfast that is a great alternative to cereal or toast. It is also a tasty way to enjoy sweet potatoes in a way that isn't savoury.
Prep Time5 minutes mins
Total Time5 minutes mins
Course: Breakfast
Cuisine: American
Diet: Gluten Free, Vegan
Servings: 1
Calories: 112kcal
Author: Abbey Sharp

Ingredients

  • 1 sweet potato skin on, baked or microwaved until really soft inside
  • Sliced pear
  • Almond butter
  • Almond yogurt
  • Pepitas
  • Dried cherries
  • Dried cranberries
  • Hemp hearts
  • Cacao nibs

Instructions

  • Place the cooked sweet potato in a bowl and top with all of your favourite toppings.
  • Yep, it's really that easy! Dig in!

Notes

If you are baking your sweet potato, I recommend giving it a few pokes with you fork and wrapping the whole thing in tin foil. Then bake it at 450 F for about 45 minutes until it’s VERY tender inside. You don’t want to have to struggle to get that goodness out.
If you’re microwaving it for a quick morning nosh, I usually give it some pricks, put it on a plate, and cover the plate and let it go for about 10-15 minutes on high. You’ll know it’s done when you can insert a fork in and it comes it super easily.
As for toppings, you can totally add whatever you have in your pantry. I like to top my sweet potato breakfast bowl with almond yogurt, almond butter, pears, dried cherries, dried cranberries, cacao nibs, pepitas and hemp hearts.

Nutrition

Calories: 112kcal | Carbohydrates: 26g | Protein: 2g | Fat: 1g | Saturated Fat: 1g | Sodium: 72mg | Potassium: 438mg | Fiber: 4g | Sugar: 5g | Vitamin A: 18445IU | Vitamin C: 3.1mg | Calcium: 39mg | Iron: 0.8mg
Abbey Sharp

Abbey Sharp is a Registered Dietitian (RD), regulated by the Ontario College of Dietitians. She is a mom, YouTuber, Blogger, award winning cookbook author, media coach specializing in food and nutrition influencers, and a frequent contributor to national publications like Healthline and on national broadcast TV shows.
www.abbeyskitchen.com/about-abbey/

Last Updated July 31, 2023. Published March 24, 2021 By Abbey Sharp 14 Comments

Sweet Potato Chickpea Patties (BLW)

These sweet potato chickpea patties are the perfect high iron baby led weaning recipe that uses simple ingredients. It is also gluten free and vegetarian!

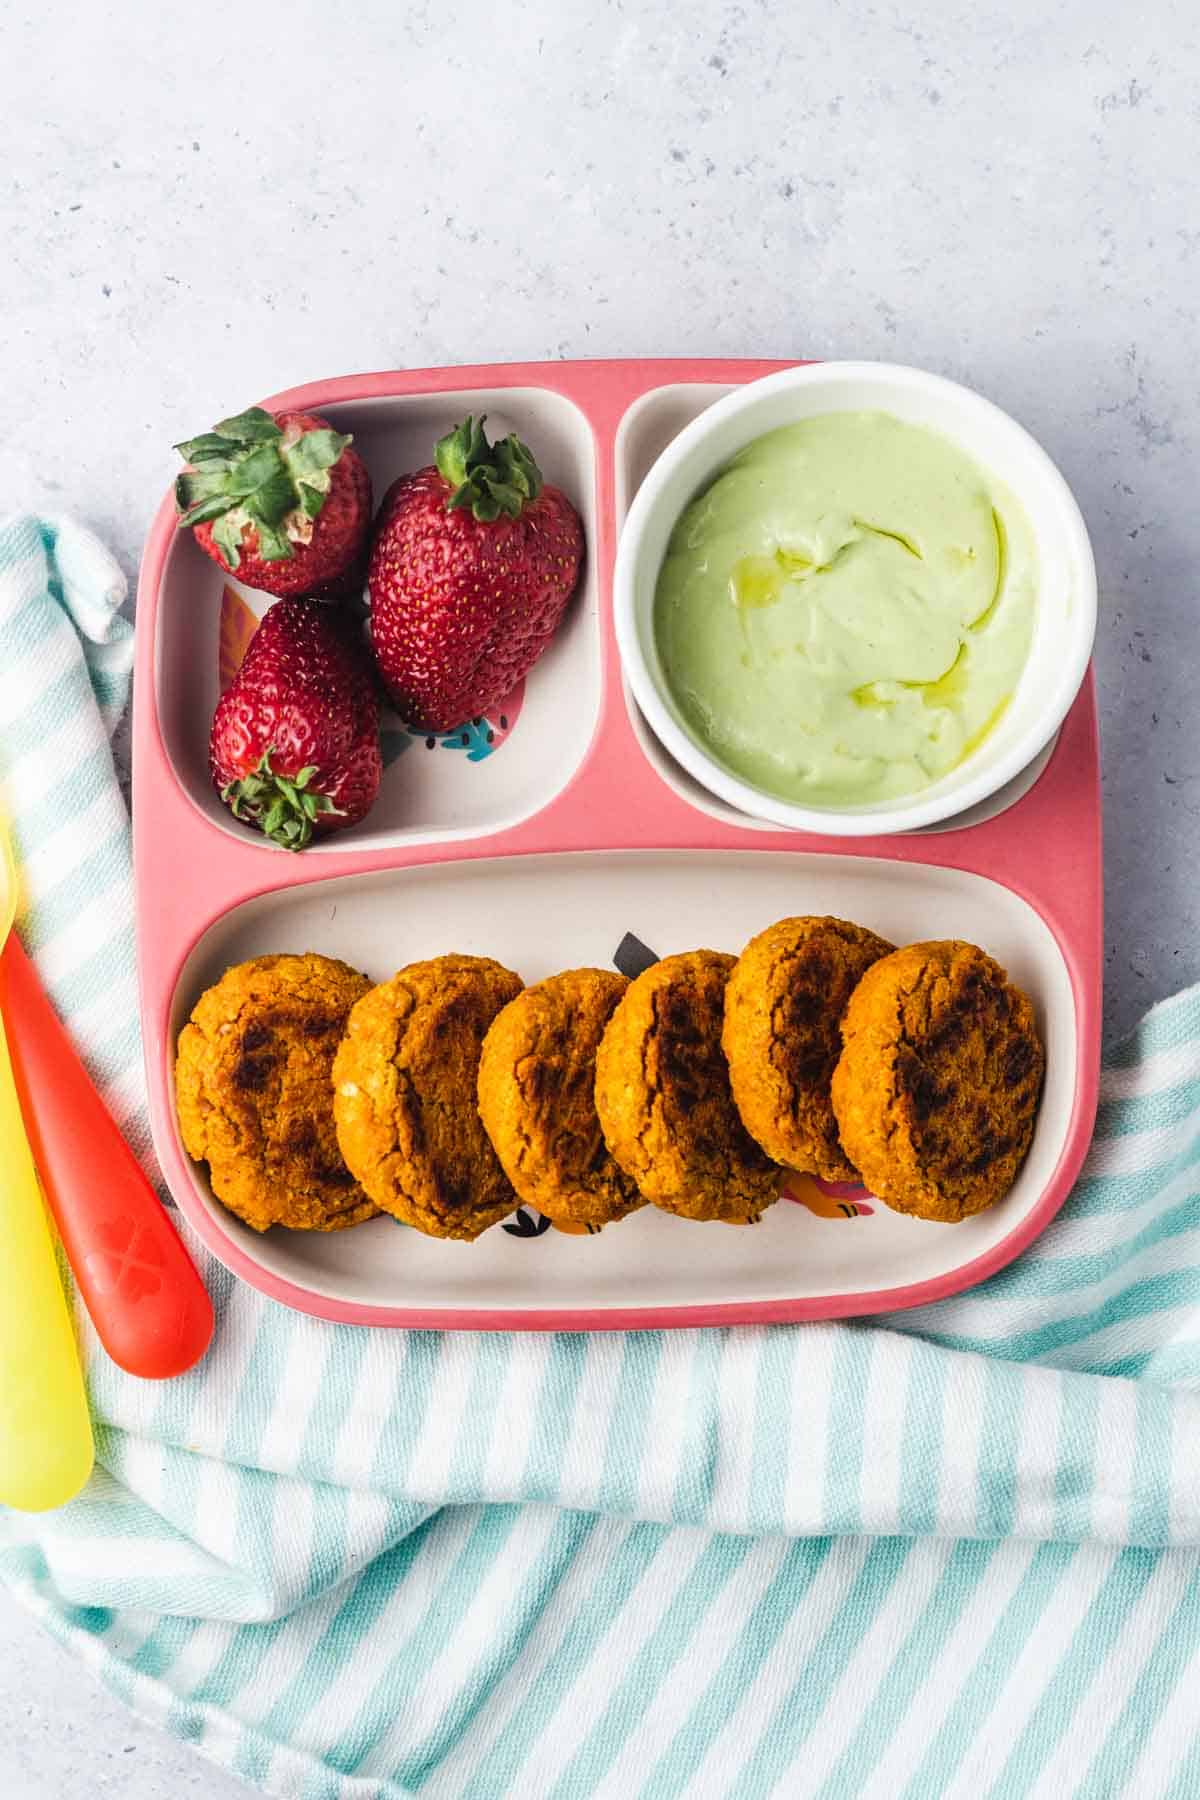
Birds eye view of plated sweet potato chickpea patties in a feeding tray served with avocado sauce and strawberries.

It’s official. My second born has officially hopped on the baby led weaning train which means we are pumping out new baby led weaning recipes on the regular.

But I will say, not much has changed since I was developing baby led weaning recipes with my first born – I still like to keep things super simple, easy, and to the point. That means using simple ingredients that are nutrient-dense, along with minimal equipment. Because ain’t nobody got time for dat!

So If you are also a mama (or dada) that is pressed for time and wants to ensure that your little babe gets the nutrition that they need without the fuss, then these sweet potato chickpea patties are right up your alley!

Table of contents

  • Why This Recipe Works
  • Key Ingredients
  • How to Make This Recipe
  • Expert Tips
  • Recipe FAQs
  • More Recipes Like This

Why This Recipe Works

These sweet potato chickpea patties have a high approval rating in my household from both my baby and toddler. I’ll admit, even mama had a few bites and thoroughly enjoyed. Here are a few more reasons why we are loving this recipe!

  • High in protein and fibre
  • Requires few ingredients and minimal equipment
  • Family Friendly
  • Gluten free, vegetarian, and vegan (if you omit the sauce)

Key Ingredients

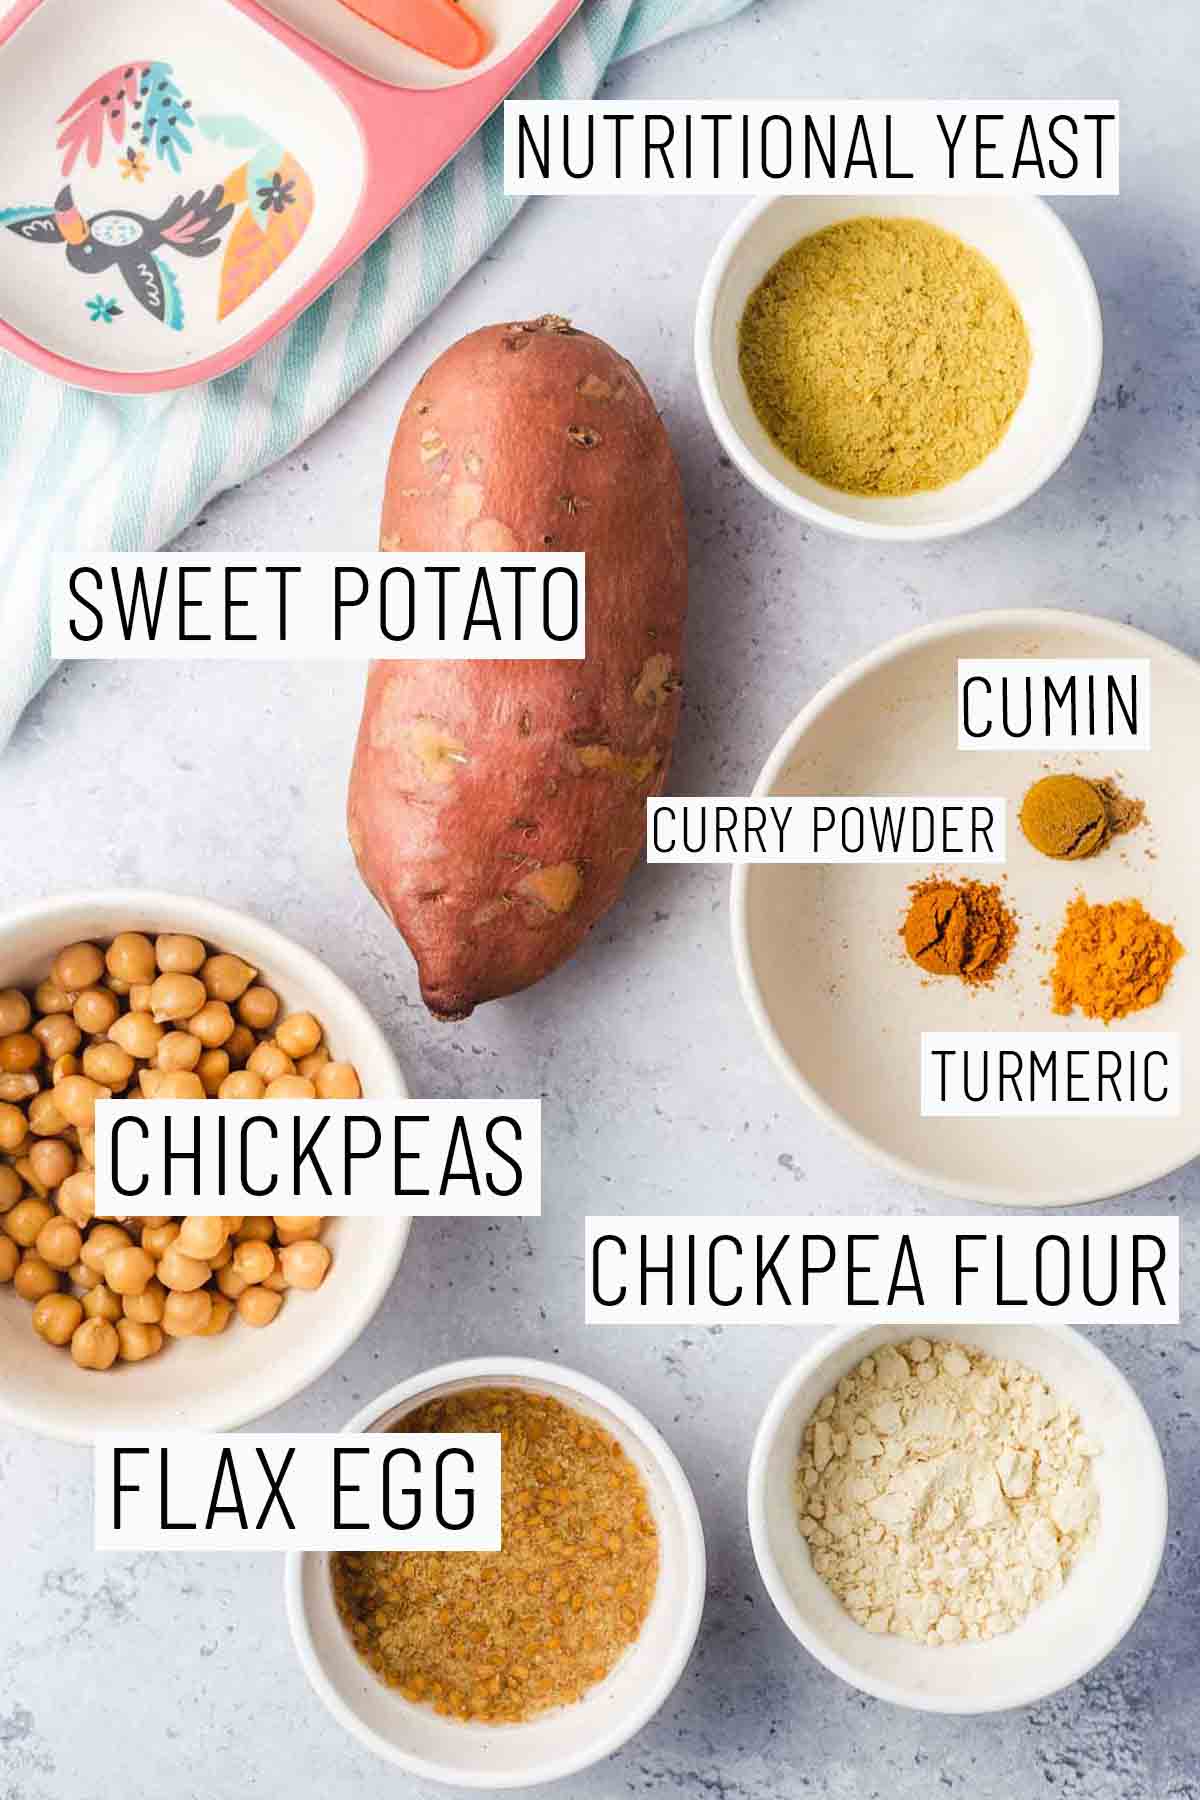
Flay lat image of portioned recipe ingredients including sweet potato, nutritional yeast, chickpeas, turmeric, cumin, curry powder, chickpea flower, and flax egg.

Sweet Potato – For this these sweet potato chickpea patties we use one medium sweet potato. Sweet potatoes are also nutrient-dense and very palatable for babies starting solids.

Chickpeas – I love using chickpeas in my baby led weaning recipes because they are a great source of protein, fibre, and iron!

Flax Egg – the flax egg acts as a binder to help hold the patties together. If you don’t need to make these vegan, you can use an egg instead.

Chickpea Flour – the chickpea flour works with the flax egg to help bind everything together. Chickpea flour is also gluten friendly and complements this recipe quite nicely. But you can feel free to use an alternative flour like almond or oat instead.

Spices – To flavour these patties we use a combination of cumin, curry powder, and turmeric. We only use about a 1/4 teaspoon of these spices as a little bit goes a long way. But if you are making these for adults, you can be a bit more liberal with the spice quantities.

Nutritional Yeast – Nutritional yeast is a great source of protein and B12! It also adds a yummy cheese like flavour to the patties, which is great if you want to make these patties vegan.

How to Make This Recipe

Three side by side images showing how to cook sweet potato, and adding all ingredients into a food processor until blended.

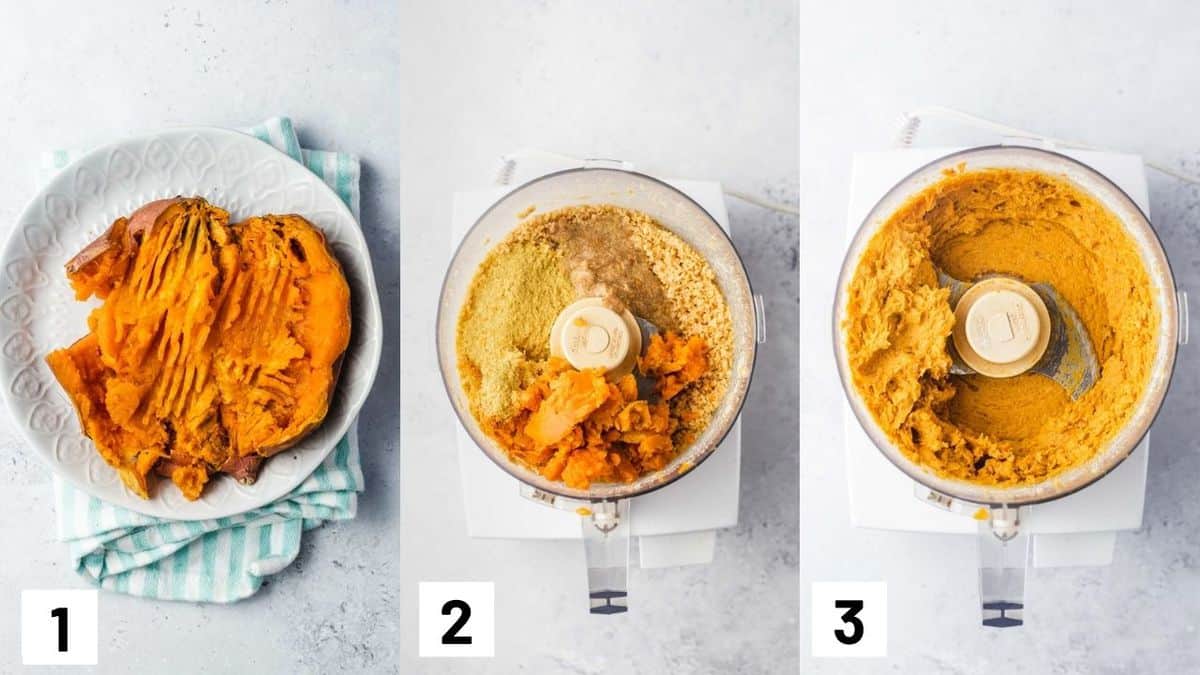
Step 1: Pierce sweet potato with a fork, wrap with a damp paper towel, and microwave on high for 8-9 minutes. Carefully cut the sweet potato in half and scoop out the flesh and set it aside.

Step 2: Drain and add half a cup of chickpeas to the food processor. Pulse until it breaks down to a coarse texture. Add the sweet potato flesh and pulse to combine. Add in curry powder, cumin powder, turmeric powder, flax egg, chickpea flour, nutritional yeast.

Step 3: Pulse until blended. Let the mixture set in the fridge for about 30 minutes.

Two side by side images showing how to shape the patties and baking on a baking tray with the avocado sauce on the side.

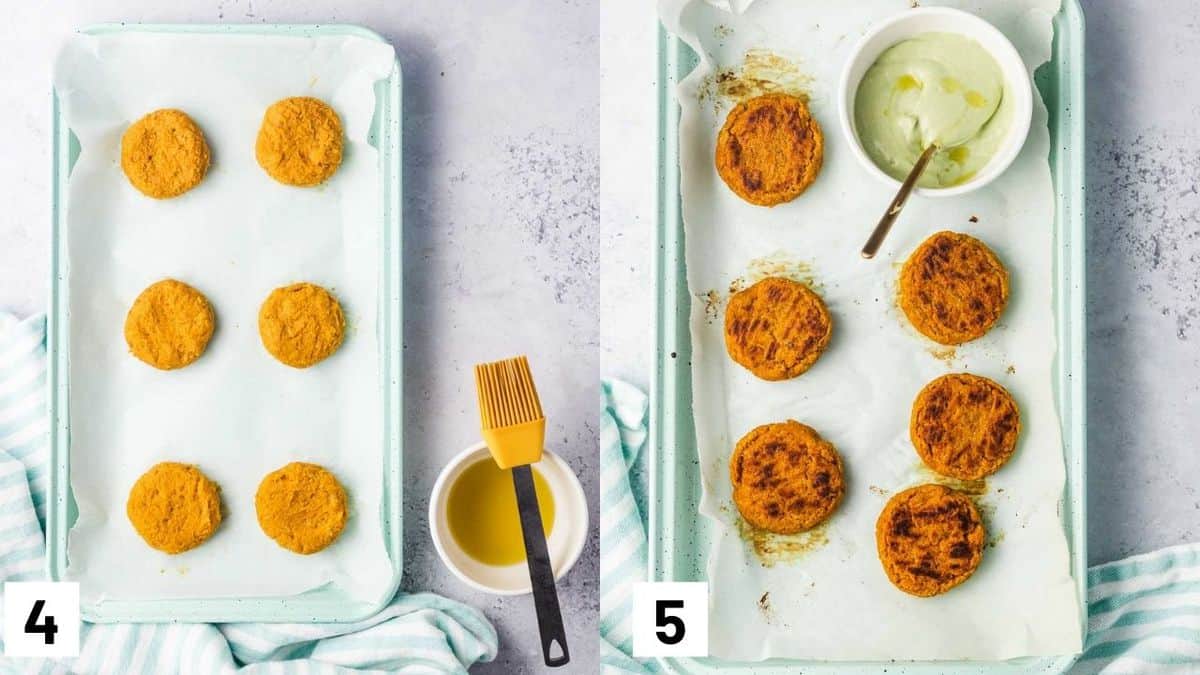
Step 4: Shape the mixture into patties and transfer to a baking tray and brush with olive oil.

Step 5: Bake for 10 – 15 minutes until lightly golden, flipping halfway through. While the patties are in the oven, add all the sauce ingredients to a blender and blend to form a smooth sauce.

Expert Tips

To cook the sweet potato, you can certainly roast or boil. However, my favourite sweet potato hack is to poke several holes in it with a fork, wrap in a wet paper towel, and nuke it in the microwave for about 10 minutes. This will save you SO much time!

We also recommend toasting the chickpeas flour before combining with the rest of the ingredients for the patties as this will bring out a nice nutty flour.

If you are making this for your little one, keep in mind that a little bit of spice goes a long way. However, if you are making this for yourself, feel free to add more spice to yield a more flavourful patty.

Recipe FAQs

Can I freeze these patties?

For sure. These should keep in the freezer for up to 6 months!

Can I make this recipe for adults?

Totally! If you are making this for you AND your little one, you can set aside half of the blended ingredients and add salt to the adult portion before baking.

Are there any allergens in this recipe?

These patties are allergy friendly and don’t contain any of the common allergens. However, if you a guide for allergen introduction with your little one you can check that out in my allergen guide.

Are these patties high in iron?

Yes! One patty provides around 2mg of iron which is great for infants. If you are interested in more information on iron rich foods, I talk all about it in my iron-rich guide for babies and toddlers.

Can I make the avocado sauce vegan?

Absolutely. Instead of Greek yogurt, you can substitute it for a plain vegan-friendly option instead.

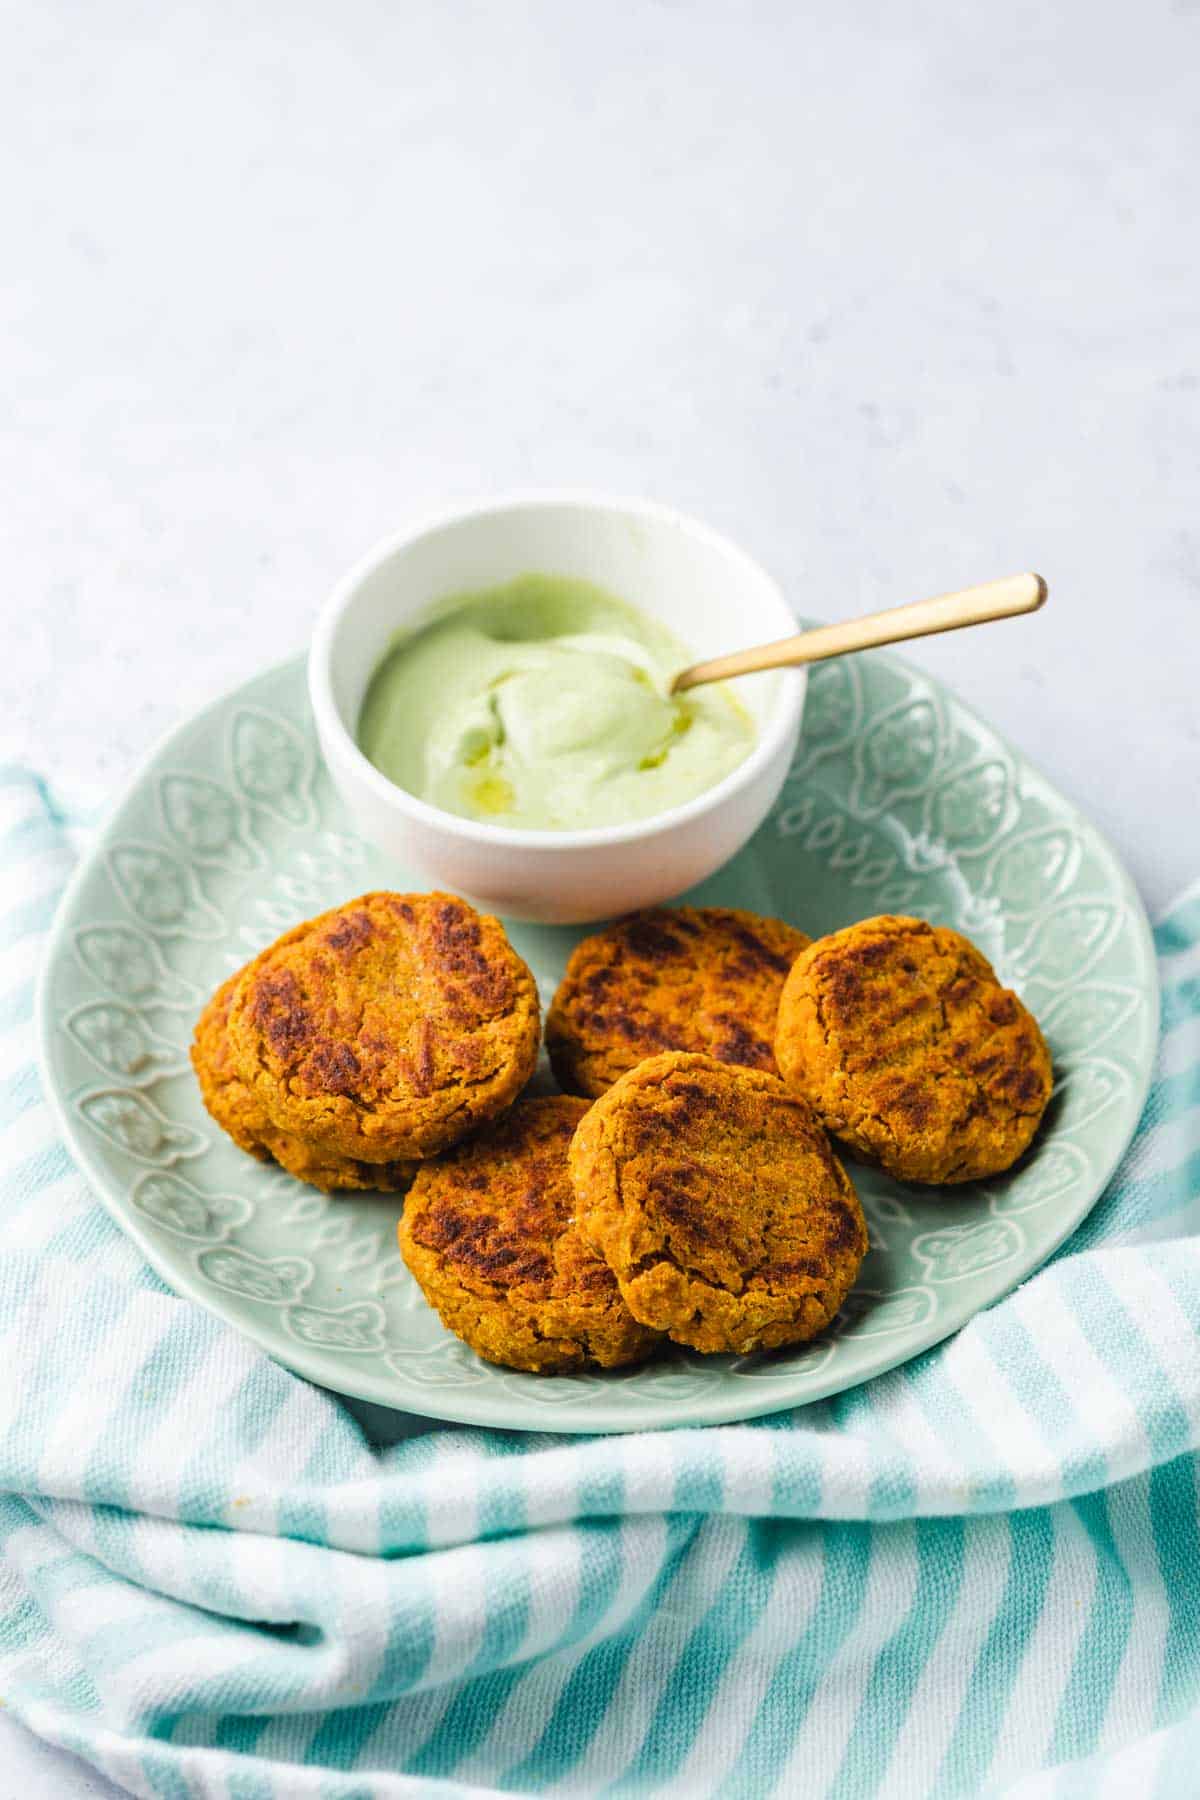
Close up image of sweet potato chickpea patties on a green plate served with avocado sauce on the side.

More Recipes Like This

If you liked this recipe, you’ll love more of these baby led weaning recipes on the blog!

  • Sweet Potato Fritters with Lentil & Kale
  • Kale Frittata with Red Peppers
  • Sweet Potato Apple Muffins
  • Hummus Baby Meatballs

Did you enjoy these sweet potato chickpea patties? Let me know your thoughts down in the comments below!

Print Recipe
5 from 9 votes

Sweet Potato Chickpea Patties (BLW)

These sweet potato chickpea patties are the perfect high iron baby led weaning recipe that uses simple ingredients. It is also gluten free and vegetarian!
Prep Time50 minutes mins
Cook Time15 minutes mins
Total Time1 hour hr 5 minutes mins
Course: Snack, baby food
Cuisine: American
Diet: Gluten Free
Servings: 6 patties
Calories: 159kcal
Author: Abbey Sharp

Ingredients

  • 1 medium sweet potato
  • ¼ teaspoon mild curry powder
  • ¼ teaspoon cumin powder
  • ¼ teaspoon turmeric powder
  • 1 flax egg
  • ½ cup chickpeas
  • 2 tablespoons chickpea flour
  • 2 tablespoons nutritional yeast
  • 1 tablespoon olive oil

Avocado greek yogurt sauce

  • 1/2 an avocado
  • ¼ cup greek yogurt
  • 1 tablespoon olive oil
  • Zest of 1 lemon
  • 1 teaspoon lemon juice
  • ½ teaspoon cumin powder

Instructions

  • Dry roast the chickpea flour in a small dry skillet, until fragrant and begins to change colour (about 5 minutes). Set aside in a small bowl.
  • Wash the sweet potato, pierce with a fork and wrap with a damp paper towel. Microwave on high for 8-9 minutes. Start with 4 minutes and then do an additional 4-5 minutes.
  • Carefully cut the sweet potato in half and scoop out the flesh and set it aside.
  • Drain and add half a cup of chickpeas to the food processor. Pulse until it breaks down to a coarse texture. Add the sweet potato flesh and pulse to combine. Add in curry powder, cumin powder, turmeric powder, flax egg, chickpea flour, nutritional yeast. Pulse a few more times till everything is well blended.
  • Let the mixture set in the fridge for about 30 minutes, this will make it easier to shape.
  • Preheat the oven to 350 F. Line a baking tray with parchment.
  • Lightly grease your hands and shape the mixture into patties. Transfer the patties to the baking tray and brush with olive oil. Bake for 10 – 15 minutes until lightly golden, flipping halfway through.
  • While the patties are in the oven, add all the sauce ingredients to a blender and blend to form a smooth sauce.
  • Serve patties warm or at room temperature along with the dipping sauce.

Nutrition

Calories: 159kcal | Carbohydrates: 16g | Protein: 5g | Fat: 9g | Saturated Fat: 1g | Cholesterol: 1mg | Sodium: 29mg | Potassium: 360mg | Fiber: 5g | Sugar: 3g | Vitamin A: 5382IU | Vitamin C: 3mg | Calcium: 41mg | Iron: 2mg
Abbey Sharp

Abbey Sharp is a Registered Dietitian (RD), regulated by the Ontario College of Dietitians. She is a mom, YouTuber, Blogger, award winning cookbook author, media coach specializing in food and nutrition influencers, and a frequent contributor to national publications like Healthline and on national broadcast TV shows.
www.abbeyskitchen.com/about-abbey/

Last Updated March 23, 2021. Published March 23, 2021 By Abbey Sharp 4 Comments

Beefaroni (Vegan & Kid Friendly Copy Cat Recipe!)

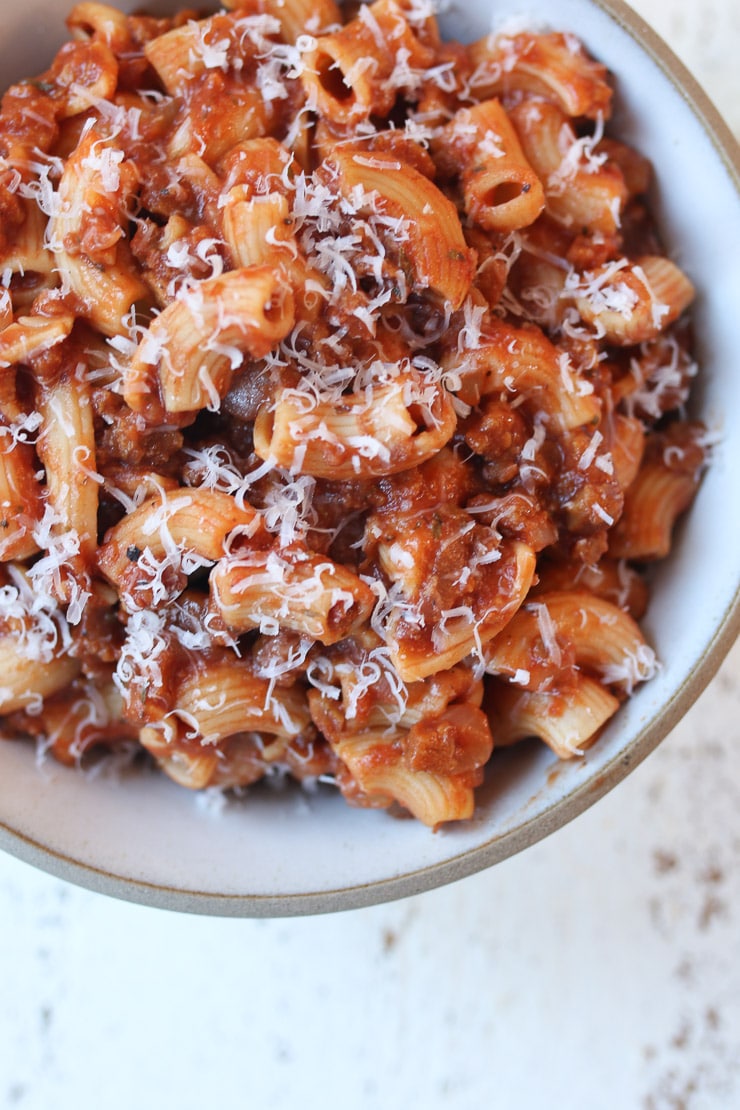
This vegan version of the childhood favourite, beefaroni, is an easy and gluten free kid copycat that only take a couple of minutes to throw together! Super nostalgic, perfect for a busy weeknight, and SO delicious!

Birdseye view of vegan beefaroni.

Growing up, having beefaroni was always such a treat. While my parents made a point to make us healthy meals, there’s no child out there that wouldn’t be excited when beefaroni was spotted in the kitchen. There really isn’t anything better than macaroni and beef in a thick tomato sauce!

Table of contents

  • Why This Recipe Works
  • Key Ingredients
  • How to Make This Recipe
  • Expert Tips
  • Recipe FAQs
  • More Recipes You Might Like

Why This Recipe Works

You will absolutely love this simple take on beefaroni made vegan. If you need some convincing, here are some amazing reasons why you should make this for dinner tonight:

  • It’s family friendly
  • Done in under 30 minutes
  • Can easily double for a crowd
  • Comforting and nostalgic AF
  • Leftovers can be frozen

Key Ingredients

Overhead view of ingredients needed to make vegan beefaroni.

Vegan Ground Beef — To keep this vegan, we use vegan ground “beef” as a substitute to make this vegan beefaroni. I personally love to use the Yves ground round, but you can use whatever imitation meat you can find at your local grocery store.

Gluten-Free Pasta — To keep our homemade beefaroni gluten-free, we use chickpea pasta. If you don’t have a macaroni shaped pasta, any type with crooks and grooves works well in this recipe.

Nutritional Yeast — To give the sauce a nice nutty cheesy flavour, we use nutritional yeast. It’s also a complete protein and is packed with B-vitamins.

Tomato Sauce — While I use a basic tomato sauce for this beefaroni, you can get flavoured tomato sauce if you’d like such as mushroom tomato sauce, basil garlic tomato sauce, etc.

How to Make This Recipe

Set of three photos showing cooking pasta, sauteing onions, and adding in sauce, nutritional yeast, and vegan beef into a pan.

Step 1: Cook the pasta according to the package directions and set aside.

Step 2: Meanwhile, heat the olive oil in a large skillet over medium heat. Add the onion and sauté for 5 minutes until soft before adding the vegan ground beef, tomato sauce, thyme, oregano, sugar and nutritional yeast.

Set of two photos showing cooking down sauce for beefaroni and adding in the cooked pasta to the sauce.

Step 3: Cook until the tomato sauce reduces slightly and the flavours marry, about 10 minutes. Season with salt and pepper, to taste.

Step 4: Add the pasta into the sauce and toss to coat. Serve topped with vegan (or regular) cheese, if desired.

Expert Tips

Fully free to top this beefaroni with as much vegan cheese as you’d like. There’s no such thing as too much cheese. To get your kiddos involved, you can give them the option of putting on their own shredded cheese on top of their bowl of beefaroni.

Want to take this vegan beefaroni to next level?! Transfer your cooked beefaroni into a cast iron or casserole dish, top with gluten-free breadcrumbs and/or cheese, and broil until crispy or melted.

If this is for adults only, you can kick this up a notch with a teaspoon of cayenne pepper or crushed chili pepper to add some heat.

Recipe FAQs

Is this vegan beefaroni kid friendly?

The FRIENDLIEST. Let me tell you, my kid ate leftovers from this recipe for 4 days straight and never complained! It’s got a super kid friendly sweet tomato flavour. Also, don’t all kids love pasta? YOU’RE WINNING.

Will meat-lovers miss the meat in this recipe?

Seriously, a lot of these “meat” substitutes now taste exactly like meat and are already cooked so they’re even faster to cook up. You really cannot screw up this vegan beefaroni – it’s almost as easy as opening a can of the real stuff!

What pasta do you recommend to make it gluten free?

I’m a big fan of lentil pasta and chickpea pasta because it’s not only gluten free but it’s super high in protein and fibre! That way, even my kiddo JUST eats pasta for dinner, I know he’s getting a nice balance of nutrients and not just white flour.

Can I add vegetables to this to make it a full balanced meal?

Sure! While not traditional in real nostalgic beefaroni, there’s no reason why you can’t add some cooked broccoli or cauliflower to this dish to bulk it up. You can even throw in some frozen peas, corn, and/or carrots at the end to quickly add in veggies.

Can I make this beefaroni with real beef if I’m not vegan?

Of course! Just make sure to cook it fully with the onions and garlic before adding in the rest of the ingredients.

How do I freeze this?

Once the beefaroni has cooled after being cooked, transfer it to an airtight freezer friendly container or bag. Freeze for up to 3 months. When ready to eat, thaw in the fridge overnight and reheat in the microwave or on the stove.

Birdseye view of vegan beefaroni in a white bowl.

More Recipes You Might Like

If you’d like another kid-friendly nostalgic copycat recipes like this beefaroni, try these recipes:

  • Shake and Bake Chicken
  • Rainbow twinkies
  • PB & J Whoopie Pie
  • Vegan Sloppy Joes with Roasted Portobello Mushroom

Now lovelies, tell me, what are your favourite childhood recipes that you like to recreate?

Print Recipe
5 from 9 votes

Beefaroni (Vegan & Kid Friendly Copy Cat Recipe!)

This vegan version of the childhood favourite, beefaroni, is an easy and gluten free kid copycat that only take a couple of minutes to throw together! Super nostalgic, perfect for a busy weeknight, and SO delicious!
Prep Time5 minutes mins
Cook Time20 minutes mins
Total Time25 minutes mins
Course: Main Course
Cuisine: American
Servings: 4
Calories: 461kcal
Author: Abbey Sharp

Ingredients

  • 8 oz uncooked chickpea macaroni
  • 2 tsp olive oil
  • 1 small onion finely chopped
  • 1 300 g pack vegan ground “beef”
  • 680 ml tomato sauce
  • 1 tsp dried thyme
  • 1 tsp dried oregano
  • 2 tbsp brown sugar or maple syrup
  • 2 tbsp nutritional yeast
  • Salt and pepper to taste
  • ½ c vegan or regular parmesan or other hard cheese, or more to taste

Instructions

  • Cook the pasta according to the package directions and set aside.
  • Meanwhile, heat the olive oil in a large skillet over medium heat. Add the onion and sauté for 5 minutes until soft before adding the vegan ground beef, tomato sauce, thyme, oregano, sugar and nutritional yeast.
  • Cook until the tomato sauce reduces slightly and the flavours marry, about 10 minutes. Season with salt and pepper, to taste.
  • Add the pasta into the sauce and toss to coat. Serve topped with vegan (or regular) cheese, if desired.

Notes

  • Fully free to top this beefaroni with as much vegan cheese as you’d like. There’s no such thing as too much cheese. To get your kiddos involved, you can give them the option of putting on their own shredded cheese on top of their bowl of beefaroni.
  • Want to take this vegan beefaroni to next level?! Transfer your cooked beefaroni into a cast iron or casserole dish, top with gluten-free breadcrumbs and/or cheese, and broil until crispy or melted.
  • If this is for adults only, you can kick this up a notch with a teaspoon of cayenne pepper or crushed chili pepper to add some heat.

Nutrition

Calories: 461kcal | Carbohydrates: 66g | Protein: 31g | Fat: 12g | Saturated Fat: 2g | Cholesterol: 4mg | Sodium: 1560mg | Potassium: 928mg | Fiber: 16g | Sugar: 20g | Vitamin A: 736IU | Vitamin C: 17mg | Calcium: 198mg | Iron: 10mg
Abbey Sharp

Abbey Sharp is a Registered Dietitian (RD), regulated by the Ontario College of Dietitians. She is a mom, YouTuber, Blogger, award winning cookbook author, media coach specializing in food and nutrition influencers, and a frequent contributor to national publications like Healthline and on national broadcast TV shows.
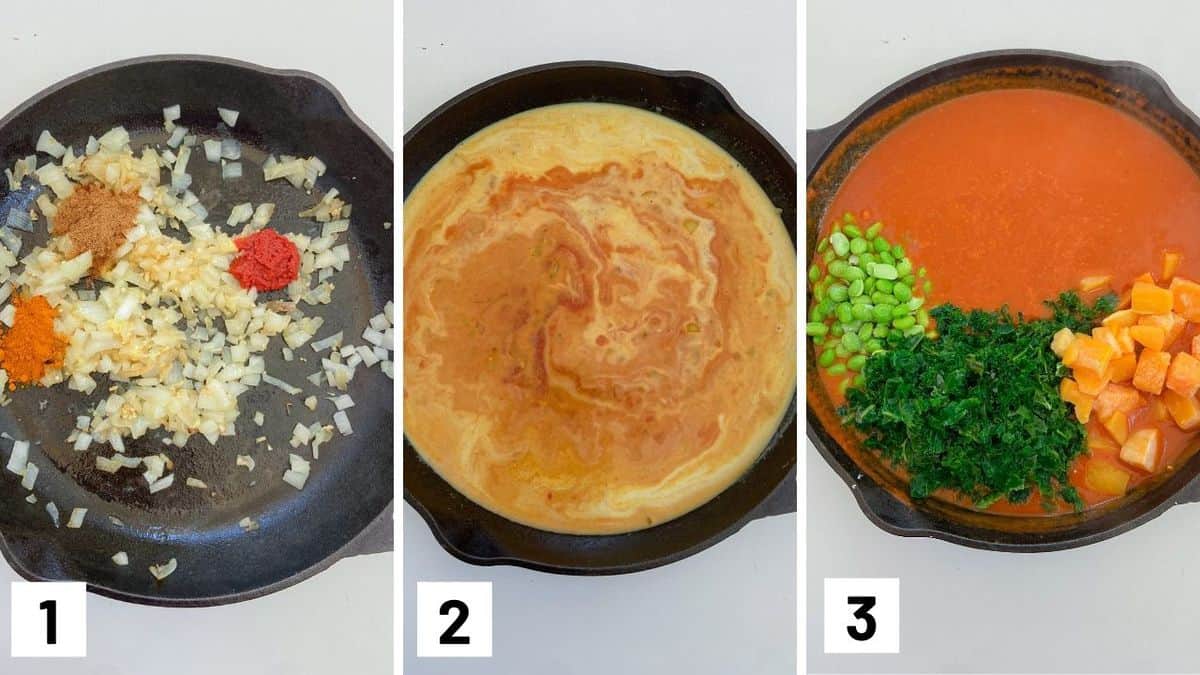
www.abbeyskitchen.com/about-abbey/
  • Previous Page
  • Go to page 1
  • Interim pages omitted …
  • Go to page 35
  • Go to page 36
  • Go to page 37
  • Go to page 38
  • Go to page 39
  • Interim pages omitted …
  • Go to page 89
  • Next Page

Get started with

Eight Free Recipe Books

From the co-founder of Neue Theory and creator of the Hunger Crushing Combo

Sign me up!
Abbey smiling at table
Abbey Sharp

“Foods may never be nutritionally equal. But we can make them morally equal by recognizing that our worth is never determined by what's on our plate.”

— Abbey Sharp, RD About Abbey ◥

Books

  • HCC™
  • Mindful Glow
  • Free E-Books

Blog

  • Nutrition
  • Recipes
  • Motherhood
  • Life

Explore

  • Neue Theory™
  • Bite Back
  • YouTube

Abbey

  • About
  • Coaching
YouTube TikTok Instagram Facebook X Pinterest
Abbey Sharp - The No BS Dietitian From Abbeys Kitchen

© Abbey's Kitchen 2026  All Rights Reserved •  ACCESSIBILITY STATEMENT •  Privacy Policy

This site uses cookies. By continuing to browse the site, you are agreeing to the use of cookies Accept Privacy Policy
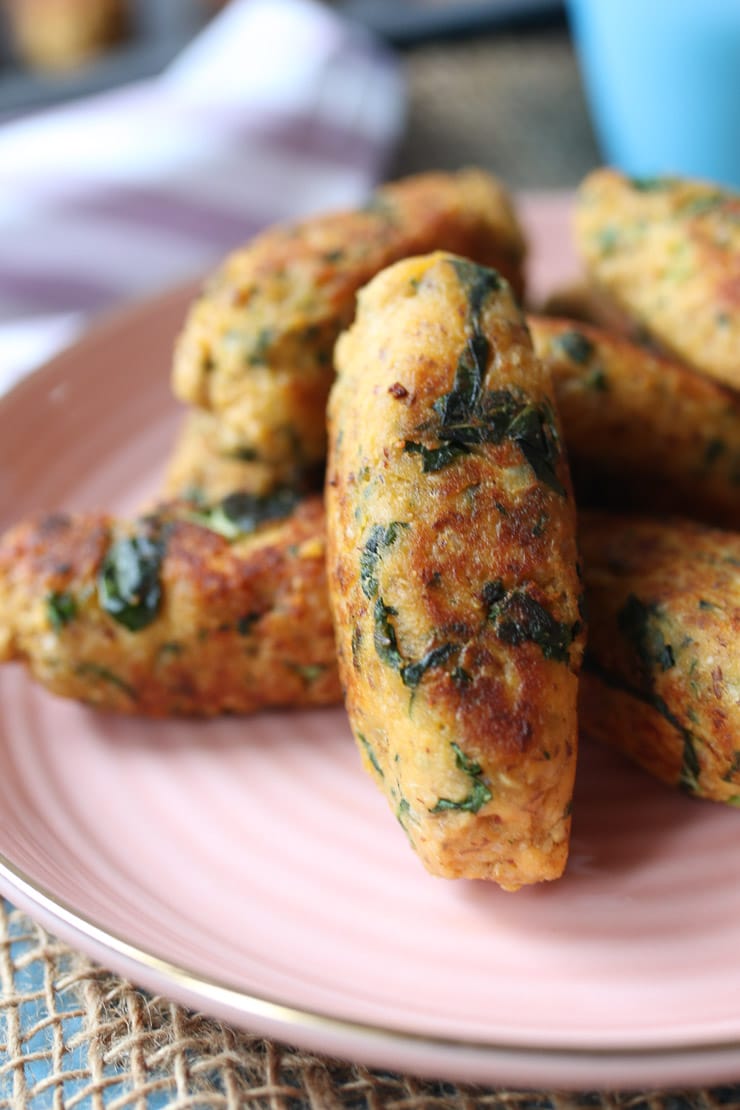
Privacy & Cookies Policy

Privacy Overview

This website uses cookies to improve your experience while you navigate through the website. Out of these, the cookies that are categorized as necessary are stored on your browser as they are essential for the working of basic functionalities of the website. We also use third-party cookies that help us analyze and understand how you use this website. These cookies will be stored in your browser only with your consent. You also have the option to opt-out of these cookies. But opting out of some of these cookies may affect your browsing experience.
Necessary
Always Enabled
Necessary cookies are absolutely essential for the website to function properly. This category only includes cookies that ensures basic functionalities and security features of the website. These cookies do not store any personal information.
Non-necessary
Any cookies that may not be particularly necessary for the website to function and is used specifically to collect user personal data via analytics, ads, other embedded contents are termed as non-necessary cookies. It is mandatory to procure user consent prior to running these cookies on your website.
SAVE & ACCEPT

Rate This Recipe

Your vote:


A rating is required
A name is required
An email is required