• Skip to main content

Abbey's Kitchen

Healthy Recipes, Nutrition Myth Busting, Healthy Eating Tips

  • Books
    • HCC™
    • The Mindful Glow Cookbook
    • Recipe eBooks
      • Family
      • Hypothyroidism
      • BLW
      • Vegan Week 1
      • Vegan Week 2
      • Vegan Week 3
      • Keto
      • Gluten Free Week 1
      • Gluten Free Week 2
      • Fitness
      • Paleo
  • Blog
    • Nutrition
    • Recipes
    • Motherhood
    • Life
  • Explore
    • Neue Theory™
    • Bite Back With Abbey Sharp
      • Apple Music
      • Spotify
      • Amazon Music
    • YouTube
  • Abbey
    • About
    • Coaching
    • Contact

Abbey Sharp

Last Updated August 27, 2021. Published August 27, 2021 By Abbey Sharp 16 Comments

Summer Melon Sticks with Lemon Cherry Dip (Easy Vegan Snack)

Honeydew melon fries next to poppyseed cherry dip.

These vegan summer melon sticks served with lemon poppy seed cherry dip makes an easy gluten-free summer snack, breakfast, or dessert that the whole family will love.
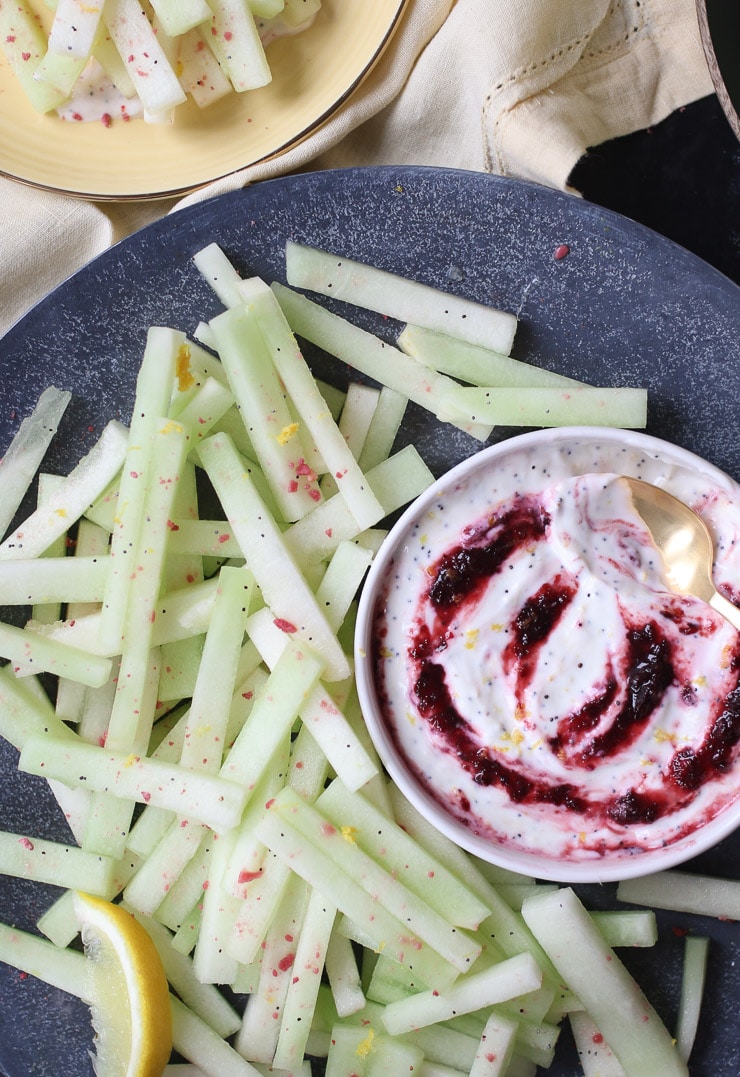
Honeydew melon fries next to poppyseed cherry dip.

Want something fresh, tangy, and colourful? You NEED to make these summer melon sticks. I know you guys LOVED my Watermelon Fries with coconut lime dip so much that I had to get back to it with an equally sweet and tangy treat. Made with honeydew melon, you’re going to love this easy refreshing snack.

Table of contents

  • Why This Recipe Works
  • Key Ingredients
  • How to Make This Recipe
  • Expert Tips
  • Recipe FAQs
  • More Recipes You Might Like

Why This Recipe Works

If you love my watermelon fries then these summer melon sticks are going to be a smash hit. They’re also…

  • Perfect for little ones as fry-shaped foods mean that they can easily grab them and pick up them up.
  • Flavourful with the toppings
  • Easy homemade sauce
  • Refreshing snack
  • Naturally gluten-free
  • Vegan friendly

Key Ingredients

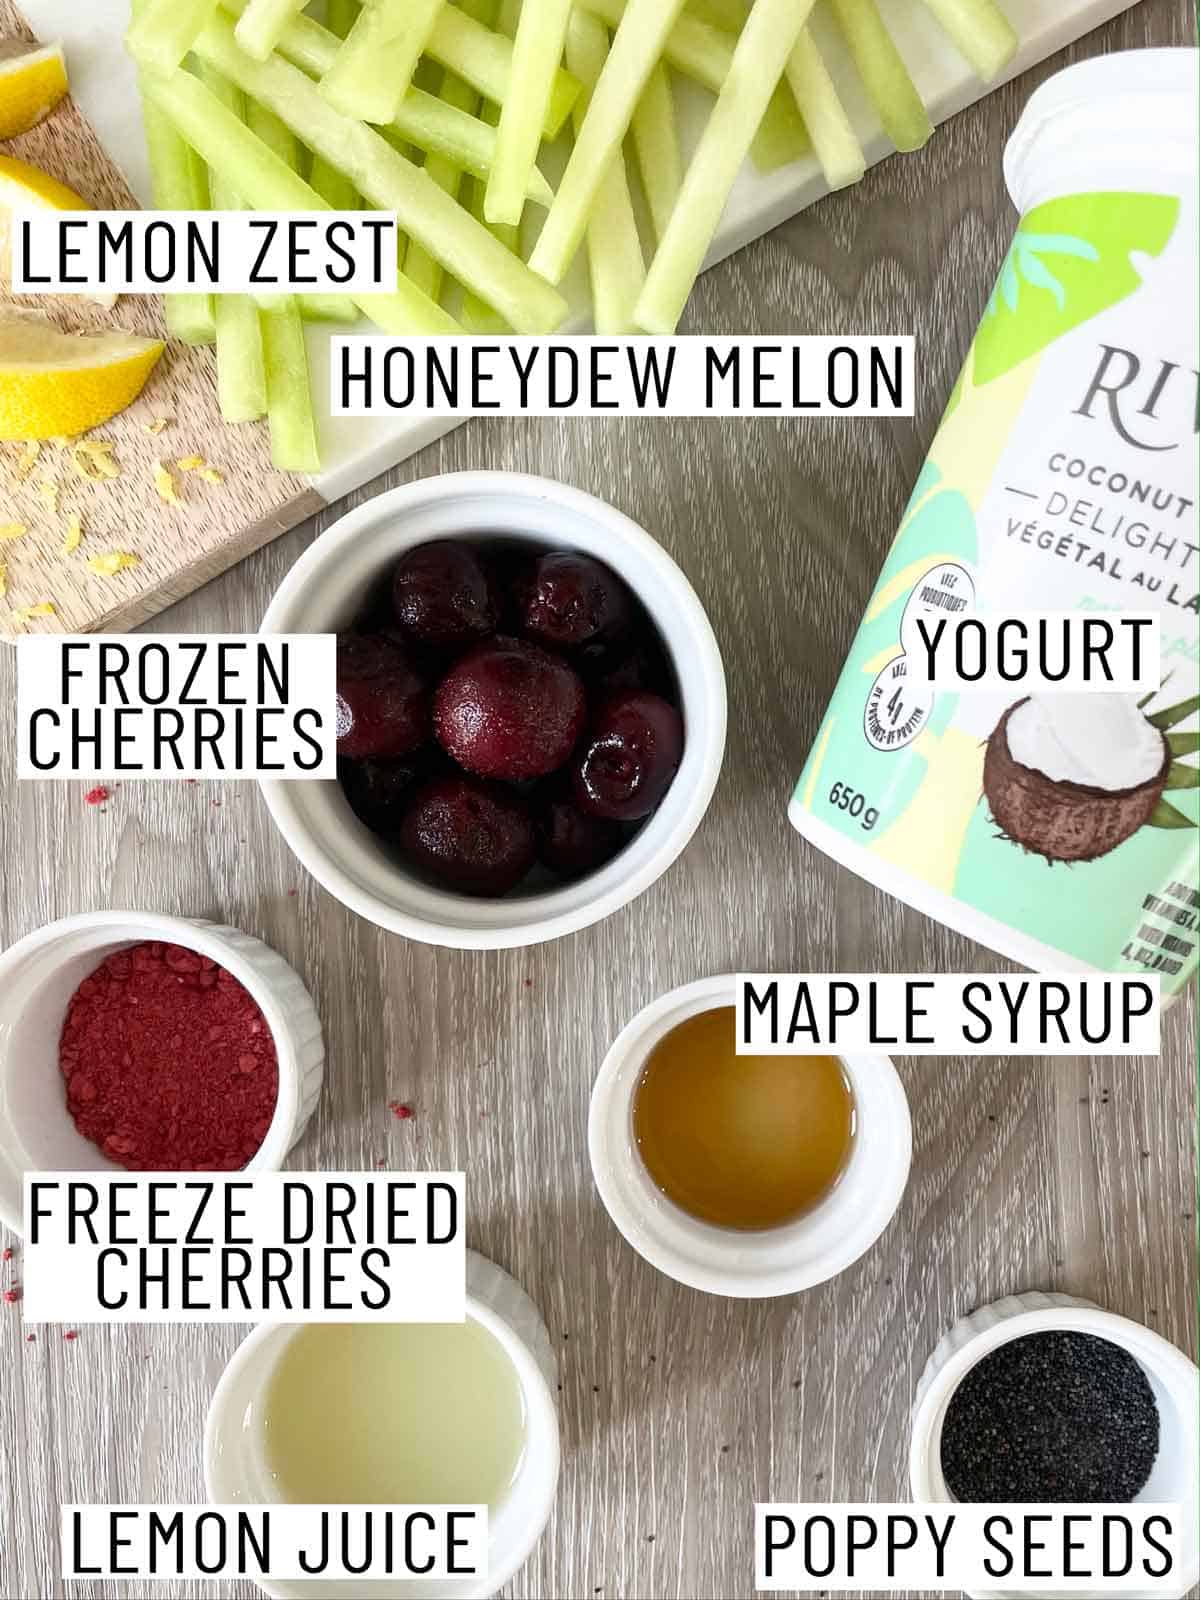
Ingredients needed to make honeydew sticks.

Honeydew melon — Honeydew melons are packed with healthy goodness from Vitamin C to B6, to K! The summer melons are also naturally sweet and are a kid-favourite!

Frozen cherries — To make life easier, we buy frozen cherries as they come pitted.

Maple syrup — For some added sweetness, I use maple syrup. If you do not need this to be vegan, you can use honey as well. Coconut Sugar is a great substitution as well.

Yogurt — I use coconut yogurt but any non-dairy yogurt will do. Don’t need this to be vegan? Use regular yogurt instead.

How to Make This Recipe
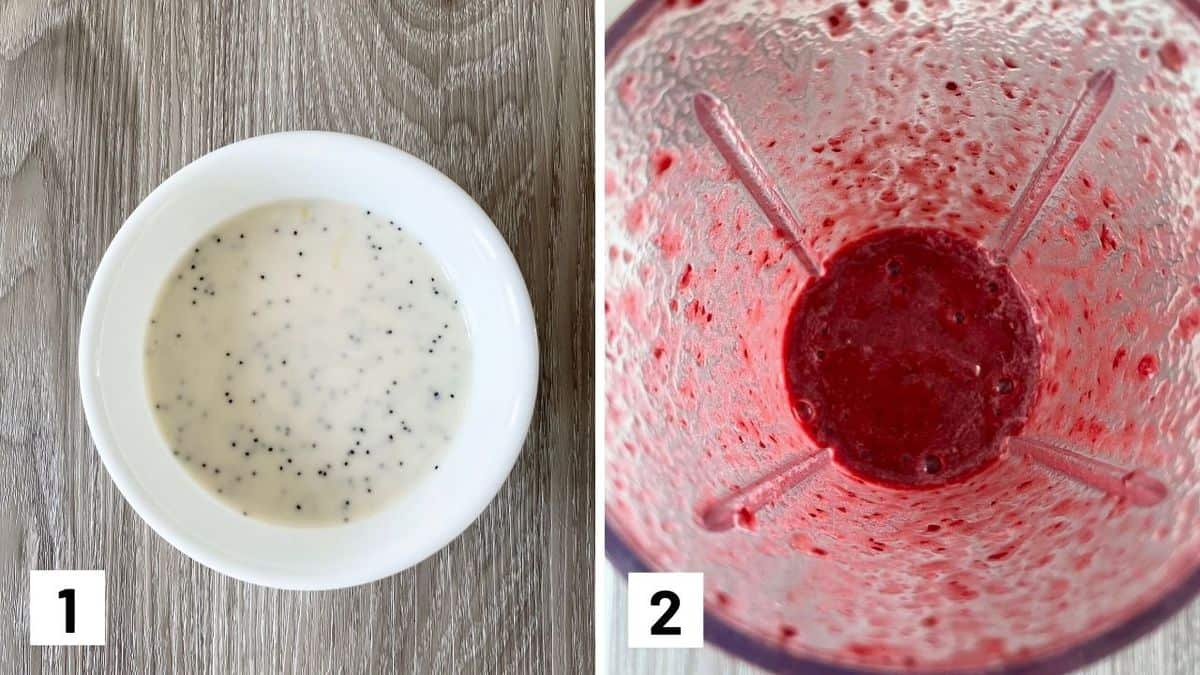
Set of two photos showing lemon, yogurt, and poppy seeds combined and then frozen cherries blended.

Step 1: Mix together the yogurt, lemon zest, juice, poppy seeds, and maple syrup for the dip.

Step 2: Puree the frozen cherries.
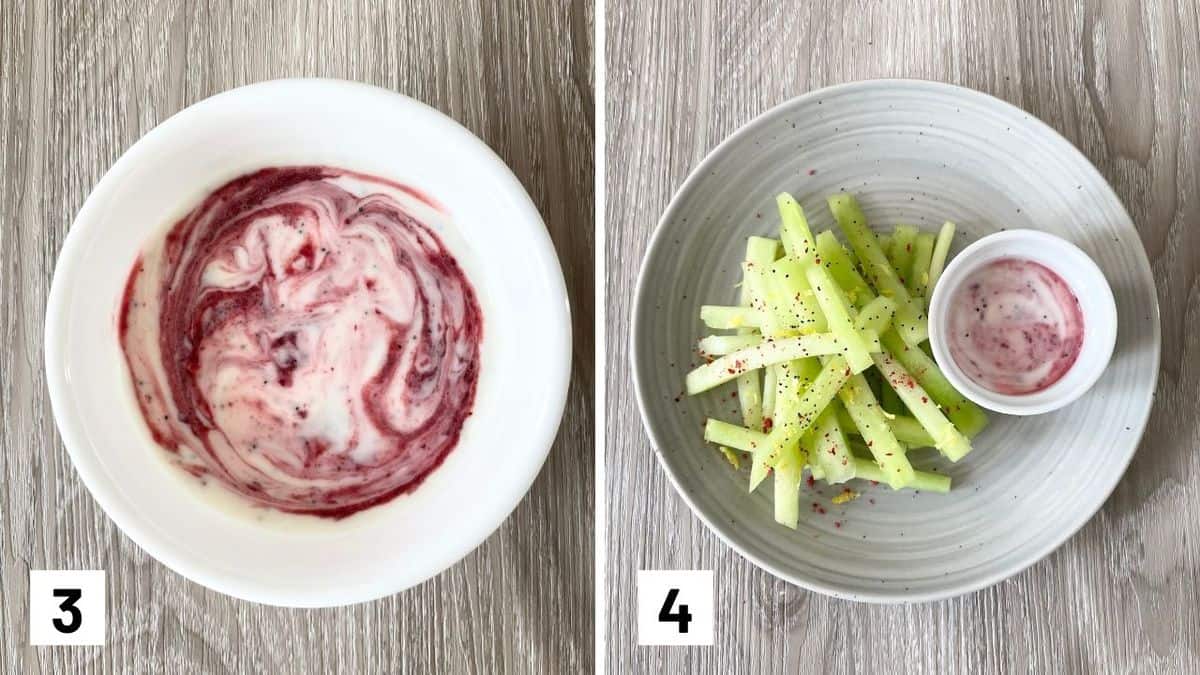
Set of two photos showing the cherry puree added to the yogurt sauce and then the final dish.

Step 3: Swirl the cherry puree on top of the dip.

Step 4: To serve, top the summer melon sticks with freeze-dried cherry dust, poppy seeds, and lemon zest and serve with the dip.

Expert Tips

To make cut the sticks for this easy summer melon fries, I literally just cut a honeydew melon into strips before cutting them into matchstick-sized sticks (offends and scraps are totally my snacks).

If you want to serve this to your little one without any added sugar from the maple syrup, just pull back a touch on the lemon and add a little extra of the naturally sweet cherry puree to balance things out. This summer melon recipe is the perfect refreshing and safe snack for BLW, for your toddlers, kids, and adults, alike.

Use a blender or food processor to puree the cherries. If you do not have one, allow the frozen cherries to thaw a bit and mash with a fork, spoon, or potato masher.

Recipe FAQs

How far in advance should I make this recipe if I want to prepare it for entertaining guests?

I’d suggest cutting up the melon into strips a few days in advance but I recommend adding the topping prior to serving. Cut honeydew melon can be stored in an airtight container in the fridge for up to 5 days and the dipping sauce can be stored separated for up to 5 days as well.

Can I add another fruit?

You sure can! Turn this into a whole platter by adding watermelon fries or cut cantaloupe into match sticks sizes.

Can I use bottled lemon juice?

I recommend using freshly squeezed lemon for the best flavour. Bottled lemon juice sometimes has a bitter aftertaste.

Can I use lime?

If you don’t have any fresh lemons on you, fresh limes can work in a pinch as well in this summer melon recipe.
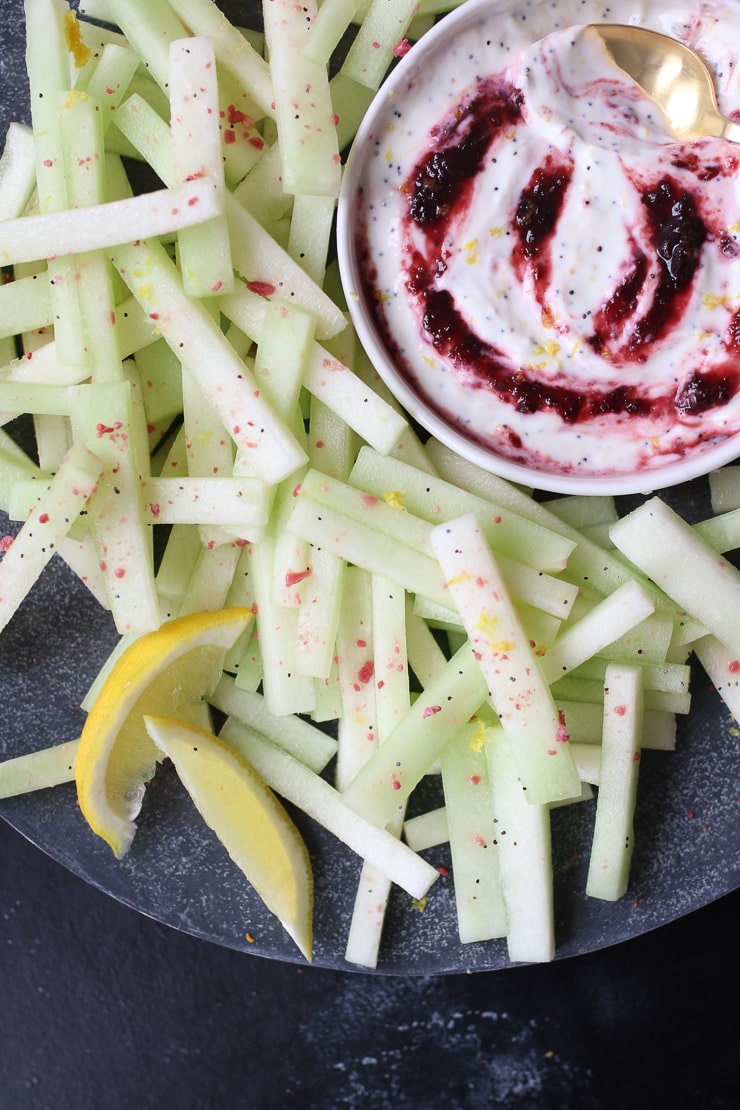
Honeydew melon fries next to poppyseed cherry dip.

More Recipes You Might Like

Want more fruity recipes like these summer melon sticks? Try these reader favourites!

  • WATERMELON FRIES WITH COCONUT LIME DIP
  • GRILLED WATERMELON AND AVOCADO SALAD
  • VEGAN GRILLED PEACHES WITH BLACKBERRY COCONUT CREAM

What are your favourite ways to get your little ones to enjoy more fruit like this summer melon recipe? Leave me a comment below with your thoughts!
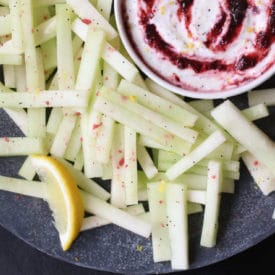
Honeydew melon fries next to poppyseed cherry dip.
Print Recipe
4.10 from 10 votes

Summer Melon Sticks with Lemon Cherry Dip (Easy Vegan Snack)

These vegan summer melon sticks served with lemon poppy seed cherry dip makes an easy gluten-free summer snack, breakfast, or dessert that the whole family will love.
Prep Time5 minutes mins
Total Time5 minutes mins
Course: Snack
Cuisine: American
Servings: 4 people
Calories: 138kcal
Author: Abbey Sharp

Ingredients

  • ½ large honeydew melon cut into French-fry shapes

Dip

  • ¾ cup plain non-dairy yogurt
  • 1 tbsp lemon zest
  • ¼ cup lemon juice
  • 1 tsp poppy seeds
  • 1-2 tsp. maple syrup
  • ½ cup frozen cherries thawed

Garnish

  • 2 tbsp freeze dried cherries pulverized in a food processor
  • ½ tsp poppy seeds
  • 1 tsp lemon zest

Instructions

  • Mix together the yogurt, lemon zest, juice, poppyseeds and maple syrup for the dip.
  • Puree the frozen cherries and swirl them on top of the dip.
  • To serve, top the fries with freeze-dried cherry dust, poppyseeds and lemon zest and serve with the dip.

Notes

  • To make cut the sticks for this easy summer melon fries, I literally just cut a honeydew melon into strips before cutting them into matchstick-sized sticks (offends and scraps are totally my snacks).
  • If you want to serve this to your little one without any added sugar from the maple syrup, just pull back a touch on the lemon and add a little extra of the naturally sweet cherry puree to balance things out. It’s the perfect refreshing and safe snack for BLW, for your toddlers, kids, and adults, alike.
  • Use a blender or food processor to puree the cherries. If you do not have one, allow the frozen cherries to thaw a bit and mash with a fork, spoon, or potato masher.

Nutrition

Calories: 138kcal | Carbohydrates: 31g | Protein: 2g | Fat: 1g | Saturated Fat: 1g | Sodium: 35mg | Potassium: 517mg | Fiber: 3g | Sugar: 24g | Vitamin A: 80IU | Vitamin C: 134.4mg | Calcium: 81mg | Iron: 2mg
Abbey Sharp

Abbey Sharp is a Registered Dietitian (RD), regulated by the Ontario College of Dietitians. She is a mom, YouTuber, Blogger, award winning cookbook author, media coach specializing in food and nutrition influencers, and a frequent contributor to national publications like Healthline and on national broadcast TV shows.
www.abbeyskitchen.com/about-abbey/

Last Updated July 21, 2020. Published August 23, 2021 By Abbey Sharp 43 Comments

Green pancakes with Spinach & Avocado (BLW & Toddler Friendly)

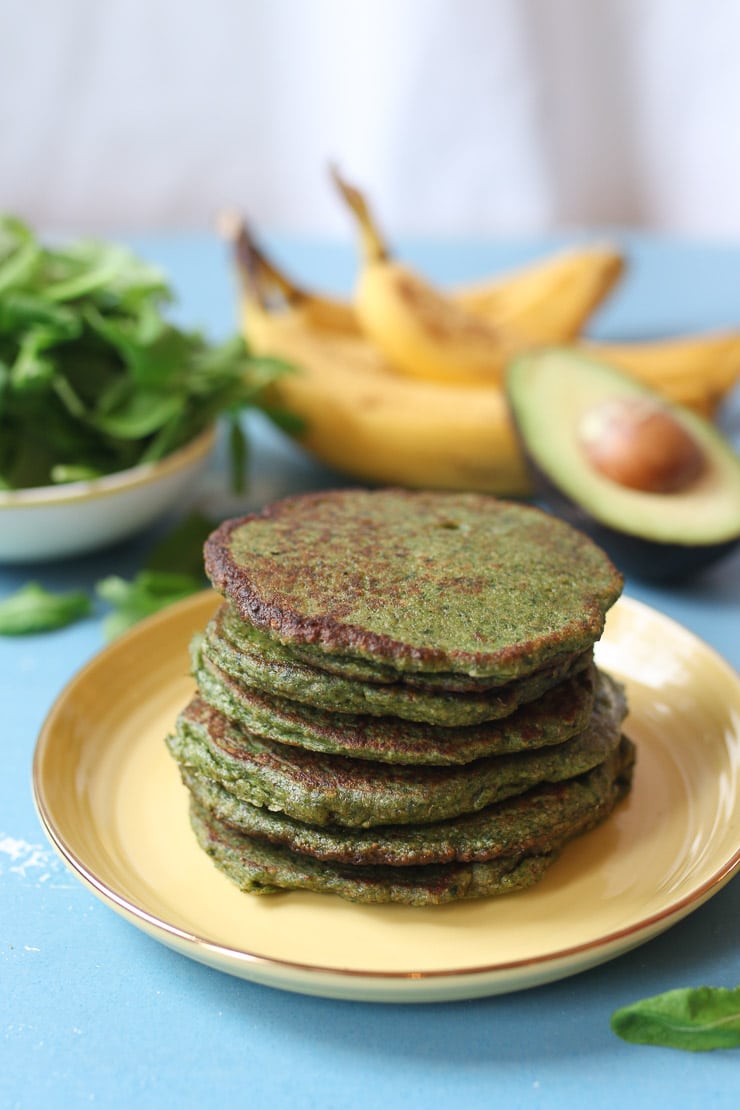
Stack of spinach and avocado green pancakes on a yellow plate.

These delicious and healthy green pancakes are made with spinach and avocado with no dyes! It’s the perfect baby led weaning recipe as these green pancakes are loved by kids, toddlers, babies, and adults! They are so quick and easy to make!

Stack of spinach and avocado green pancakes on a yellow plate.

Moms and dads, if you’re not already following me on Instagram, get to it now, because I have been serving up my daily adventures feeding my son. I have been overwhelmed with requests from all of you to share the recipes I’ve been posting about so I’m making an extra effort to try to do this at least once every week.

This week, I have been trying to figure out some ways to sneak extra green things into my sons’ meals, and while he isn’t quite advanced enough to eat lettuce leaves, I can definitely puree them into these green pancakes which are the perfect finger foods for kids.

Table of contents

  • Why This Recipe Works
  • Key Ingredients
  • How to Make This Recipe
  • Expert Tips
  • Recipe FAQs
  • More Recipes You Might Like

Why This Recipe Works

Not just for St. Patrick’s day, these green pancakes are perfect for everyday breakfast as they’re:

  • Packed with protein
  • Made with wholesome ingredients
  • Naturally green with no dyes
  • Blender pancakes = less prep work

Key Ingredients

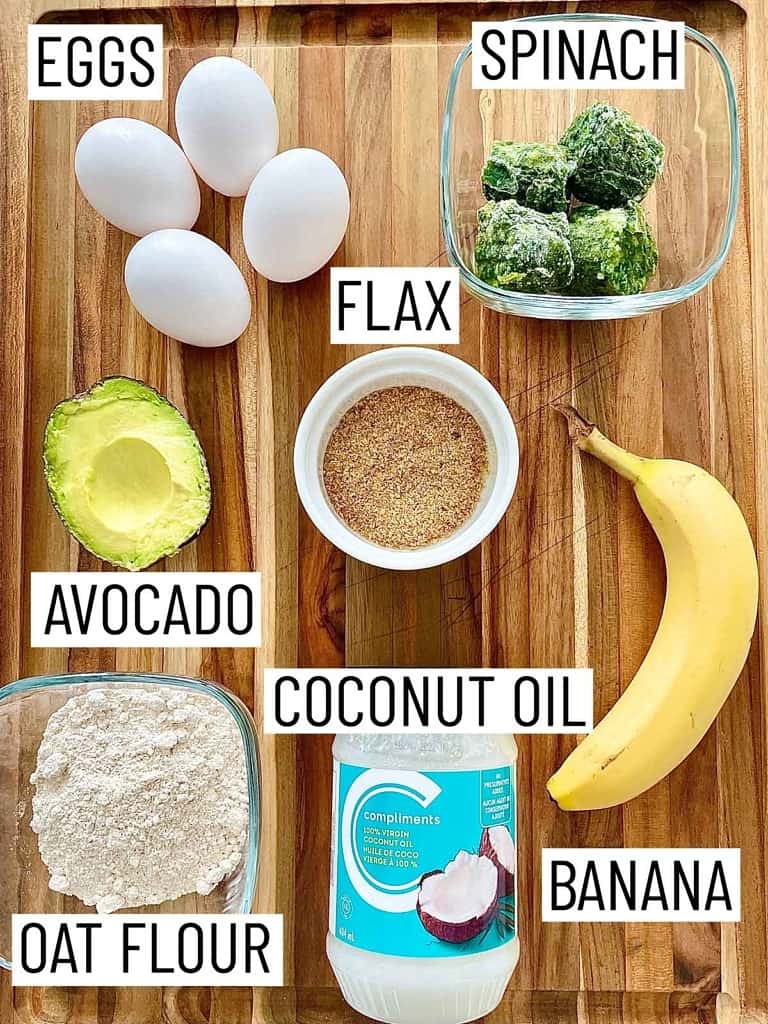
Ingredients needed to make green pancakes.

Oat flour — Oats are not a major allergen so this is an ideal option if you haven’t yet tested wheat for allergies so this green pancake recipe uses oat flour instead of all-purpose flour.

Spinach — I use frozen spinach as they’re easy to stock up on but you can also use kale or fresh spinach if that’s what you have.

Ground flax — The ground flax adds healthy omega 3s, fibre, and protein.

Eggs — I like using omega 3 eggs if you can find them just as an added source of these important fats.

How to Make This Recipe

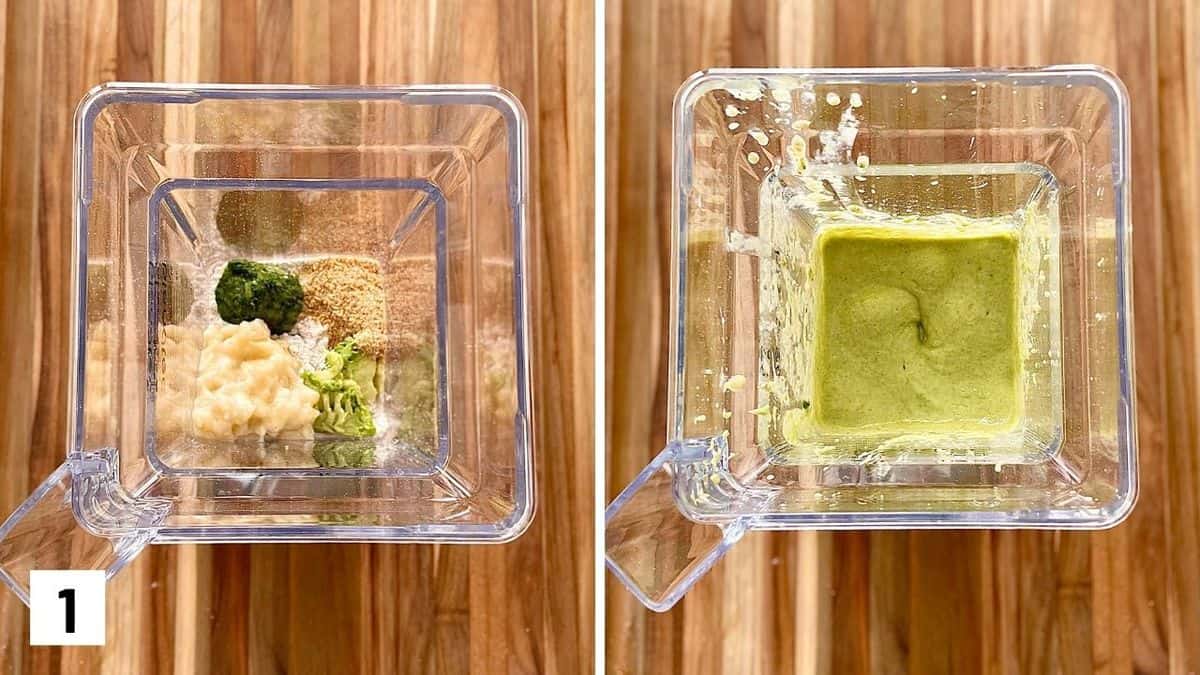
Set of two photos showing batter ingredients added to a blender and mixed.

Step 1: Add all of the ingredients to a blender and puree until smooth.

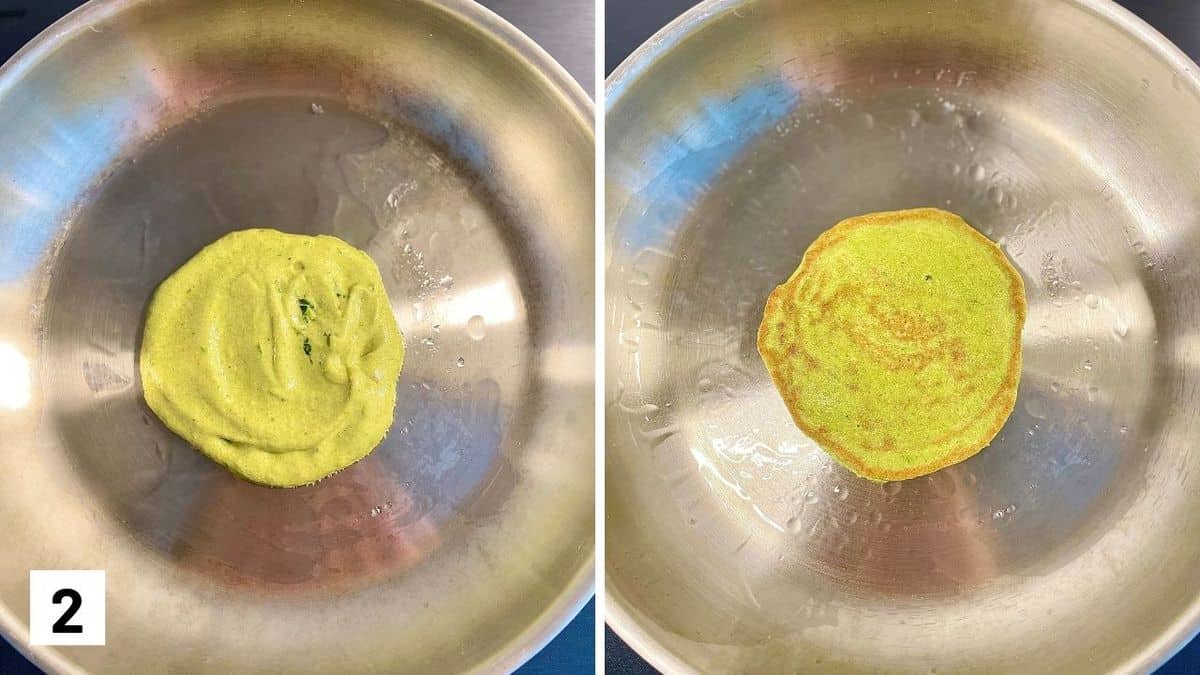
Set of two photos showing batter added to a greased pan and then cooked and flipped.

Step 2: Heat the butter, oil, or coconut oil in a large nonstick skillet over medium heat. Cook the pancakes on either side- about ¼ cup at a time – until golden brown. Serve to your baby lukewarm.

Expert Tips

Since we are using oat four in this spinach pancake recipe instead of regular flour to keep it gluten free, it tends to yield a thicker batter. For this reason, you won’t get the same bubbling effect to indicate when the pancake is ready to be flipped. So instead, look for browning around the edges of the pancakes to indicate flipping time.

While oats are naturally gluten-free, if you are making this for someone with a wheat allergy, be sure to make sure the oats were processed in a facility that is gluten-free as there could be cross-contamination. You can also get certified gluten-free oat flour if you prefer for this BLW green pancake recipe.

Recipe FAQs

Why are these green pancakes great for baby led weaning?

If you’ve read my introduction piece on BLW, you’ll know that you want soft foods (like pancakes), that are easy for babies to pick up (um.. like pancakes). If your little one is just starting out with eating, then definitely you can cut these baby spinach and avocado green pancakes into strips to make it easier for them to pick up and get into their mouth. Either way, they’re super easy finger foods for kids, toddlers, babies, and adults, alike that you can feel good serving any time of day.

Can I make these ahead of time?

You can! Just make them and allow them to cool before storing them in an airtight container in the fridge. They should last for up to 3 days in the fridge.

Can I freeze these pancakes?

I recommend placing each pancake onto a baking sheet and then transferring the sheet to the freezer for 1 hour. Then you can place all the pancakes together in a freezer bag to freeze for up to 3 months.

Can I add different fruit to these pancakes?

OMG Yes! Like all pancakes, these healthy green pancakes are very versatile, and you can throw in any fruit or berries or add-ins you want. Heck, you can add sprinkles if it’s a special occasion. You do you!

How can I make oat flour from scratch?

Super easy! All you gotta do is pulse gluten free oats in the food processor or a high speed blender until it reaches a flour like consistency.

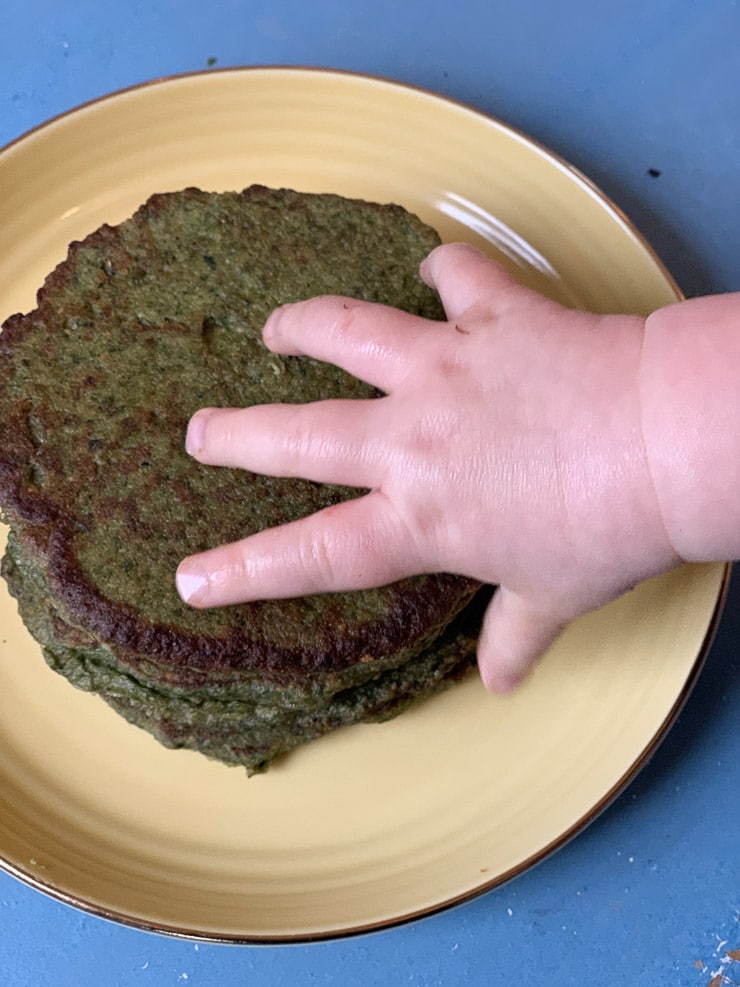
Baby's hand on a stack of spinach and avocado green pancakes.

More Recipes You Might Like

Want more delicious pancake recipes like my green pancakes? Try these:

  • Sheet Pan Protein Pancakes with PB, Chocolate and Banana 
  • Baby Cereal Pancakes 
  • Baby Spinach and Avocado Green Pancakes 
  • Chocolate Peanut Butter Banana Protein Pancakes 
  • Nutella Protein Pancakes 

Now lovelies, tell me – what are some of your go-to baby led weaning easy finger foods for your kids and babies?

Stack of spinach and avocado green pancakes on a yellow plate.
Print Recipe
4.83 from 17 votes

Green pancakes with Spinach & Avocado (BLW & Toddler Friendly)

These delicious and healthy green pancakes are made with spinach and avocado with no dyes! It's the perfect baby led weaning recipe as these green pancakes are loved by kids, toddlers, babies, and adults! They are so quick and easy to make!
Prep Time10 minutes mins
Cook Time5 minutes mins
Total Time15 minutes mins
Course: Breakfast
Cuisine: American
Servings: 6 pancakes
Calories: 268kcal
Author: Abbey Sharp

Ingredients

  • 1 cup oat flour gluten free if needed
  • 4 eggs

  • 1/2 avocado
  • ¾ cup ripe mashed banana
  • ½ cup frozen spinach
  • 1 tbsp ground flax seed
  • Butter coconut oil or olive oil, for cooking

Instructions

  • Add all of the ingredients to a blender and puree until smooth.
  • Heat the butter, oil or coconut oil in a large nonstick skillet over medium heat. Cook the pancakes on either side- about ¼ cup at a time – until golden brown.
  • Serve to your baby lukewarm.

Video

Notes

  • Since we are using oat four in this spinach pancake recipe instead of regular flour to keep it gluten free, it tends to yield a thicker batter. For this reason, you won’t get the same bubbling effect to indicate when the pancake is ready to be flipped. So instead, look for browning around the edges of the pancakes to indicate flipping time.
  • While oats are naturally gluten-free, if you are making this for someone with a wheat allergy, be sure to make sure the oats were processed in a facility that is gluten-free as there could be cross-contamination. You can also get certified gluten-free oat flour if you prefer for this BLW green pancake recipe.

Nutrition

Calories: 268kcal | Carbohydrates: 30g | Protein: 11g | Fat: 11g | Saturated Fat: 2g | Cholesterol: 163mg | Sodium: 85mg | Potassium: 482mg | Fiber: 5g | Sugar: 4g | Vitamin A: 2580IU | Vitamin C: 6mg | Calcium: 76mg | Iron: 2.7mg
Abbey Sharp

Abbey Sharp is a Registered Dietitian (RD), regulated by the Ontario College of Dietitians. She is a mom, YouTuber, Blogger, award winning cookbook author, media coach specializing in food and nutrition influencers, and a frequent contributor to national publications like Healthline and on national broadcast TV shows.
www.abbeyskitchen.com/about-abbey/

Last Updated July 25, 2022. Published August 18, 2021 By Abbey Sharp 14 Comments

Best Diet for PCOS | Is Weight Loss Necessary?

I share an updated in depth post on the best diet for PCOS, as well as supplement and herb recommendations and whether or not weight loss is necessary.

A while back I did a two part blog post on PCOS management (if you missed it, you can check out part one and part two). Since that post, there’s been newer evidence on PCOS recommendations, so in this post we are going to review the new evidence on the best diet for PCOS and discuss if weight loss is necessary in PCOS treatment. To answer this question, I’ll include some quotes from a conversation I had with intuitive eating Dietitian, Julie Duffy Dillon, who specializes in PCOS.

What is PCOS?

Blurred woman standing in background with green leaves in foreground.

PCOS aka Polycystic Ovary Syndrome, involves an imbalance in a woman’s sex hormones like estrogen, progesterone and testosterone leading to the growth of ovarian cysts (aka benign masses). If left untreated, PCOS can lead to irregular or absent periods, infertility, unwanted hair growth on the face and body, acne, alopecia (hair loss from head), pregnancy complications and even cancer.

PCOS can be diagnosed when at least two out of the three of the following occurs:

  1. The ovaries are “polycystic” because either there are 12 or more follicles on one ovary or the size of one or both ovaries is high
  2. Hyperandrogenism where there are high levels of androgens (male hormones) and/or symptoms of excess androgens like acne or excess hair growth
  3. There are issues with your period like lack of periods, irregular periods or lack of ovulation

For me personally, I was diagnosed because I wasn’t ovulating at all, and my ovaries were slightly polycystic. Of course, everyone is different so PCOS can look and operate completely differently depending on the individual.

The Best Diet for PCOS

Two bowls of yogurt topped with a variety of fruit.

Low Glycemic Diet

One of the longstanding recommendations on the best diet for PCOS management is a low glycemic diet. A low Glycemic index, or low GI diet, consists of carbohydrate-based foods that are slow digesting and cause a gradual rise in blood sugar and insulin, plus of course lots of protein and healthy fats.

Some examples of low GI carbohydrates include:

  • Whole grain breads
  • Steel cut oats
  • Bulgur
  • Sweet potato
  • Apples
  • Prunes
  • Milk
  • Chickpea
  • Lentils

One study found that when women with PCOS followed a low GI diet, their menstrual regularity improved compared to individuals who followed a standard healthy diet. This likely has something to do with the fact that fewer blood sugar spikes and falls improved insulin sensitivity which in turn improved menstrual irregularity.

A more recent 2019 study found that a low GI diet improved menstrual irregularity in 80% of women with PCOS. However in that study, the low GI diet was energy restricted, so it is unclear whether the change reported was because of the energy restriction or the low GI diet. The researchers believe that a low GI diet may delay the absorption of carbohydrates and improve metabolic pathways and insulin resistance.

It’s important to note that low GI doesn’t mean low carb. The evidence for the use of low carb diets like keto for PCOS is still in its infancy. I was able to find one super small study with 11 patients that saw some improvements, but as we will discuss later, we have no clue if this is sustainable for most people.

A systematic review examined a variety of diets in the treatment of PCOS, and found that a low carb diet was associated with a greater decrease in insulin resistance compared with a conventional diet. They also found that a low GI diet targeting weight loss was associated with a greater reduction in insulin resistance compared to a conventional weight loss diet.

The evidence on the best diet for PCOS suggests that choosing higher fibre lower glycemic index carbohydrates is way more sustainable. So the recommendation is that you can still enjoy carbs and a variety of carbs, you’ll just want to select those that have more fibre so you don’t see the same insulin spike. You’ll also want to pair those carbs with lean protein, and healthy fats to help stabilize those blood sugars further.

Finally, even though its tempting given the diet culture we live in, the best diet for PCOS is one that ensures you are eating enough and eating regularly. When we let ourselves get too hungry, our blood sugars plummet, we get ravenous, and then we see a massive spike when we do finally eat. Restricting also sends us into a binge and restrict cycle which can perpetuate metabolic dysfunction.

PCOS Supplement and Herb Recommendations

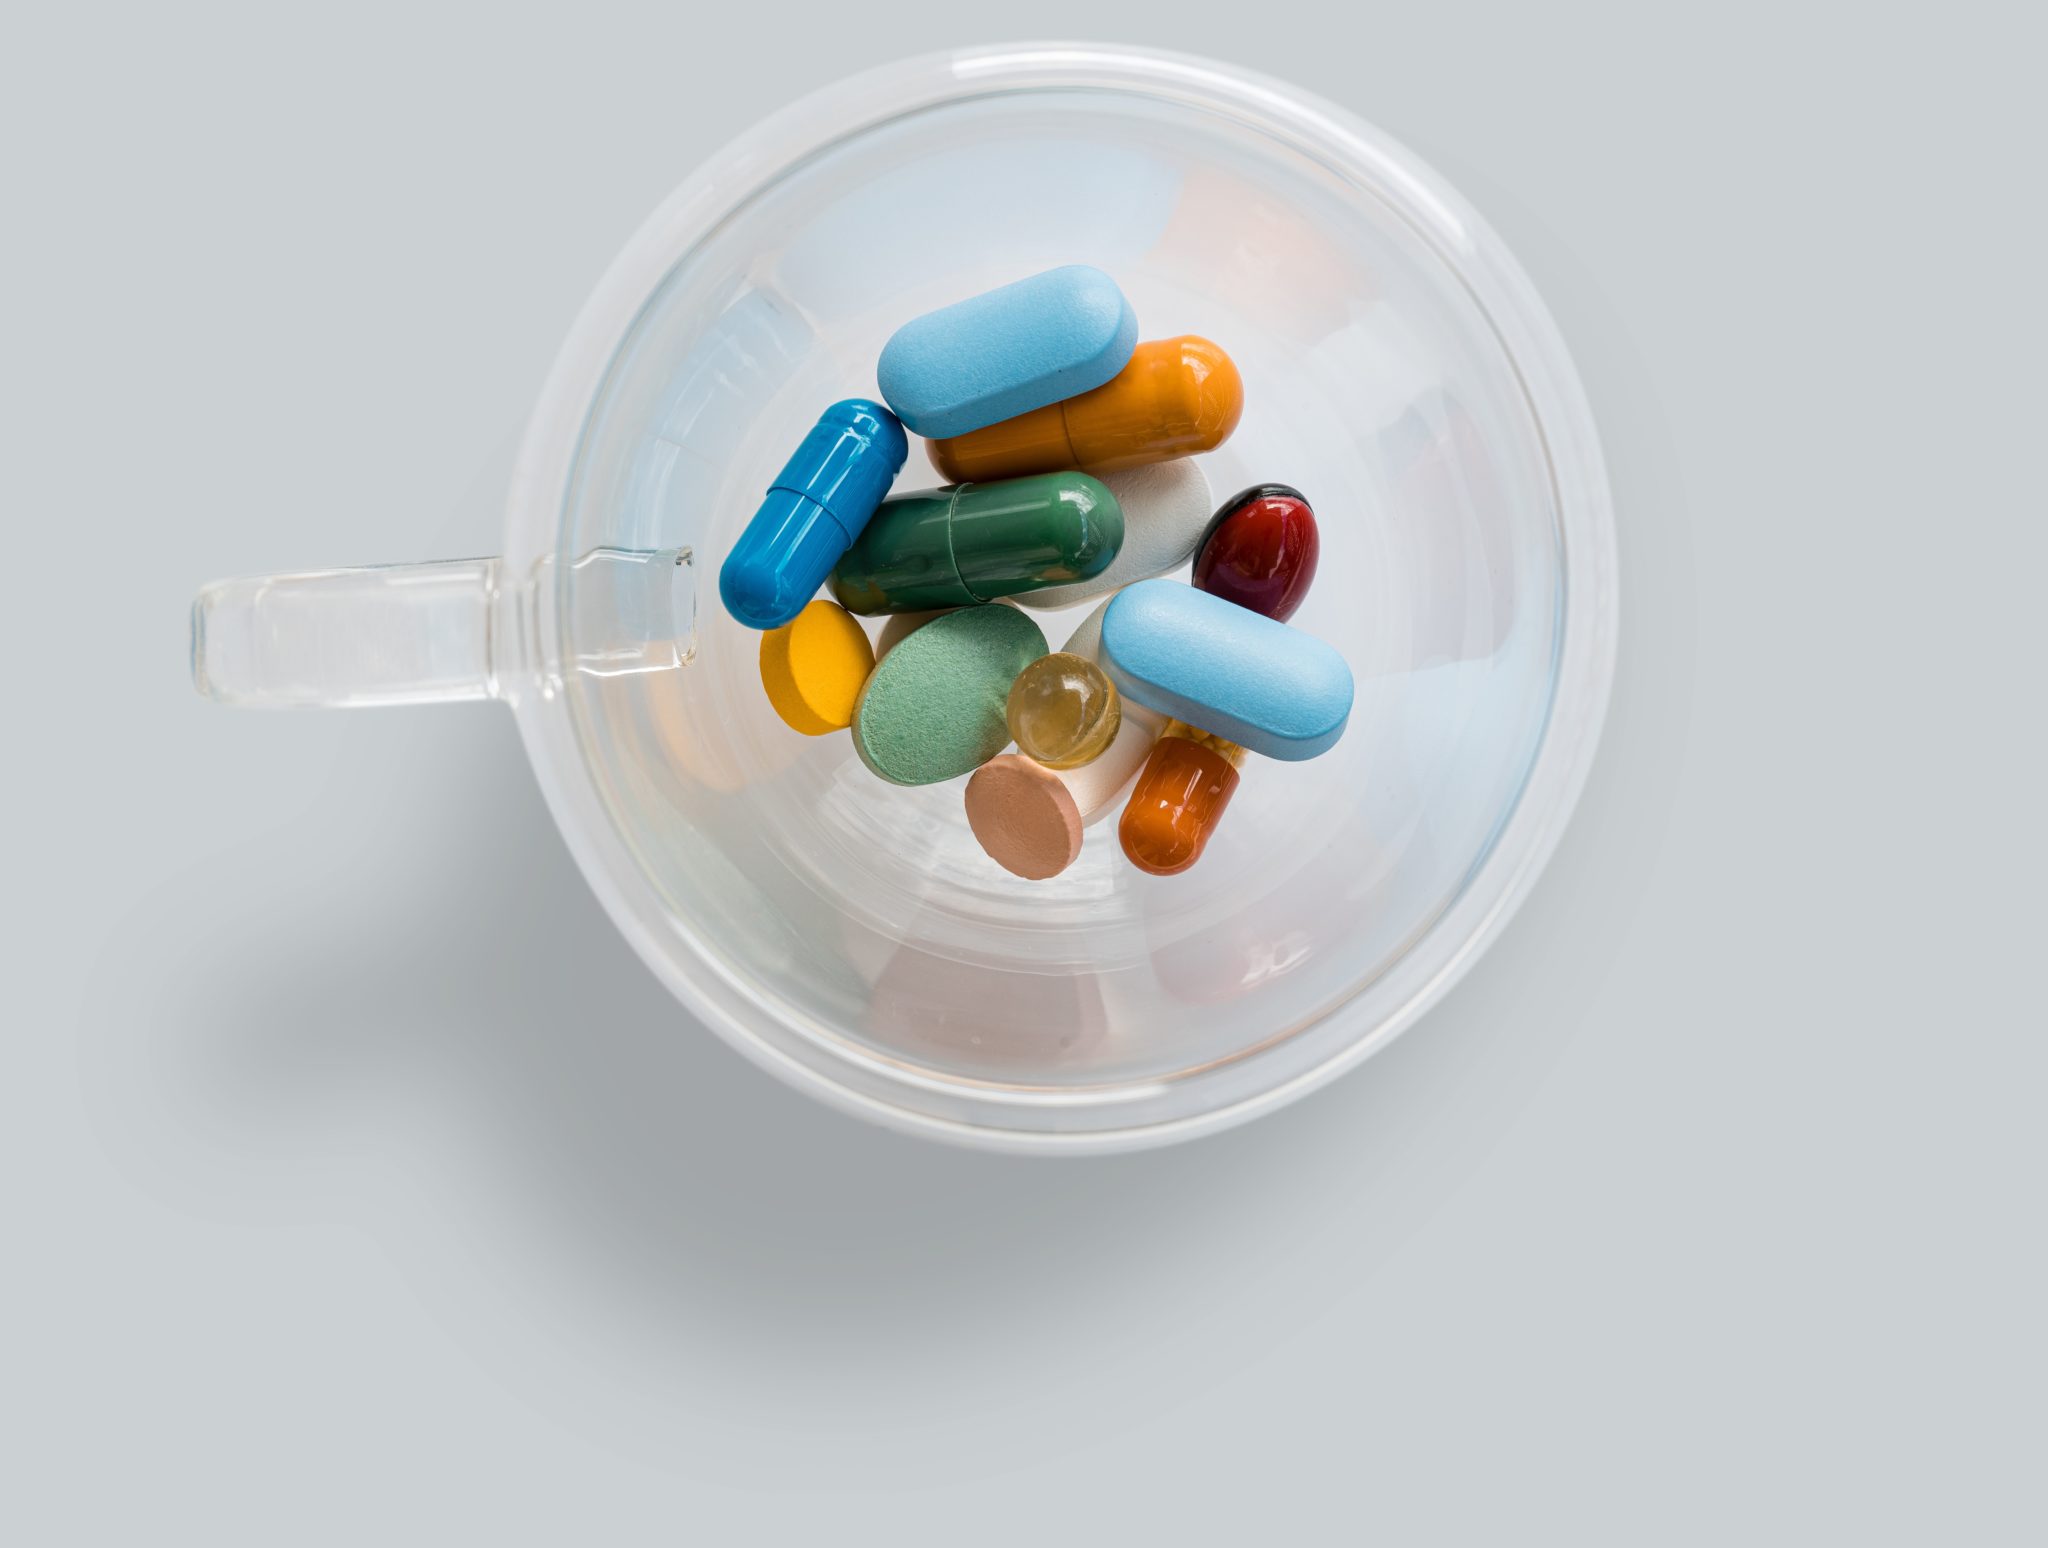
In addition to the best diet for PCOS, there are also a ton of supplements and herbs that claim to eradicate PCOS symptoms, but we really only have solid evidence to support a few.

A variety of capsules and supplements for PCOS.

Inositol

Inositol is a small molecule that is structurally similar to glucose and is naturally found in foods like whole grains and citrus fruits. One 2016 systematic review found that the supplementation of inositol improved hormonal and reproductive disturbances in PCOS. Another 2017 meta-analysis found that inositol improved the metabolic profile of women with PCOS and reduced some of the high levels of androgen hormones that cause a lot of the symptoms and problems. Finally, the evidence also suggests that it may improve pregnancy outcomes for women with PCOs undergoing IVF.

Omega 3

Most of us could probably benefit from an omega-3 supplement. One 2018 systematic review and meta-analysis found that omega 3 supplementation in PCOS patients helped improve insulin resistance and reduce total cholesterol, triglyceride and LDL levels.

Vitamin D

Vitamin D deficiency is common in women with PCOS, possibly because of the metabolic and endocrine disorders associated with the disease. While it is often recommended that patients supplement with vitamin D, the research is still a little unclear. For example, one 2015 systematic review and meta-analysis found a positive association between PCOS and vitamin D deficiency, but they did not find that vitamin D supplementation had a beneficial effect. That being said, more research is needed to further assess the association between vitamin D levels and PCOS treatment. Regardless, in my professional opinion, most people (especially here in Canada) can benefit from a vitamin D supplement.

Probiotics

While we’re still not 100% sure about vitamin D on its own, research has found that the combination of vitamin D and a probiotic supplement may be effective at treating PCOS symptoms. One 2019 randomized controlled trial found that vitamin D and probiotic co-supplementation improved depression, anxiety and stress scale scores in women with PCOS. It was also associated with a significant reduction in total testosterone, hirsutism, CRP (inflammation), and the oxidative stress marker malondialdehyde compared with a placebo.

Chromium

Chromium is an essential trace element that may play a role in treating PCOS symptoms by improving the body’s response to insulin. A 2018 systematic review and meta-analysis did not find any significant differences in insulin metabolism, hormone status and lipid profiles between the chromium treated group and the control group. At the moment, chromium does not seem to have any significant benefit for women with PCOS. Future studies are still necessary.

Cinnamon

A 2018 mouse study found that cinnamon supplementation may improve insulin resistance and may be a potential therapeutic agent for the treatment of PCOS. Moreover, a 2014 human study involving 45 women with PCOS found that cinnamon supplementation improved menstrual cyclicality. We are still in need of larger human studies to know the efficacy of cinnamon supplementation in the treatment of PCOS symptoms.

Turmeric

Research has shown that C-reactive protein, aka CRP (a marker for inflammation), is typically higher in PCOS patients and when CRP is reduced so are the metabolic symptoms of PCOS. Since turmeric has anti-inflammatory properties, some research has found that it may decrease CRP levels, thereby improving PCOS symptoms. In a 2017 rat study, rats treated with turmeric increased the number of corpus luteum and a decrease in inflammatory markers. At the moment there is still not enough evidence to support its efficacy.

Zinc

Zinc is an essential trace element which is responsible for the function of over 300 enzymes. It also plays a crucial role in insulin metabolism. Women with PCOS typically have lower zinc levels and that deficiency may be associated with abnormal lipid profiles. So does supplementation help?

In a 2001 study, a zinc supplement or placebo was given to 60 women with PCOS. The results showed a significant reduction in the levels of total cholesterol, LDL, triglycerides in the zinc treated group. Based on that, zinc supplementation may be effective at improving lipid metabolism in women with PCOS. Further more current research is needed before recommending its effectiveness.

Evening Primrose Oil

A 2018 randomized controlled trial was performed on 60 women with PCOS and vitamin D deficiency. Participants receiving vitamin D and evening primrose oil for 12 weeks experienced improved triglycerides and LDL cholesterol.

Berberine

In a 2012 study, the short term effect of berberine was compared to metformin on various metabolic parameters. The results found that berberine showed a decrease in total cholesterol, triglycerides, LDL and an increase in HDL. A recent 2018 systematic review and meta-analysis concluded that berberine showed a promising prospect in treating PCOS, but the mechanisms are still unclear. Higher quality studies are still needed to confirm its effect.

Herbs

There are lots of herbs that are often recommended for treating PCOS including maca root, ashwaganda, holy basil, licorice, chasteberry, and tribulus terristris. While many of these herbs carry some antioxidant and anti-inflammatory properties, the research on their effectiveness is very limited. While it is totally possible that one or a combination of these herbs may serve as good adjuncts to traditional supplements and medication, they shouldn’t be relied on all on their own.

PCOS Lifestyle Recommendations

Woman with PCOS sleeping in her bed with white sheets.

Prioritize Sleep

Research has shown that sleep disorders and insomnia are significantly more common in women with PCOS. It also goes without saying that getting crappy sleep when you’re struggling with already messed up hormones can totally worsen symptoms.

Smoking Cessation 

Smoking as been found to worsen PCOS symptoms and even put someone at high risk for metabolic syndrome, so it is therefore recommended to avoid or quit smoking.

Acupuncture

There is some evidence that acupuncture may influence ovulation by affecting levels of various hormones. However its mechanism is still not well understood and there is currently insufficient evidence to support the use of acupuncture for the treatment of ovulation disorders in women with PCOS. Regardless, a lot of women find acupuncture stress relieving and may therefore be a nice compliment to the traditional health care regime.

Avoid Endocrine Disruptors

Over the years, it has been suggested that endocrine disruptor chemicals, Bisphenol A (aka, BPA), may contribute to the rise in PCOS. Some animal studies have found that BPA exposure disrupted ovarian and reproductive functions in females while a 2017 systematic review and meta-analysis found that PCOS patients had significantly higher BPA levels compared to a control group. Researchers from this study believe that BPA might be involved in the insulin-resistance and hyperandrogenism of PCOS, however more high quality studies are needed to explore this association.

Weight Loss for PCOS Management

Blue plate with tiles that spell "weight loss" against a white background.

Finally, one lifestyle change that has ALWAYS been recommended for the treatment of PCOS is weight loss.

Why is Weight Loss Universally Recommended for PCOS?

Weight loss is commonly recommended for individuals with PCOS as it is based on research suggesting that obesity and abdominal fat can exacerbate PCOS symptoms by increasing insulin resistance. However, not all individuals with PCOS struggle with insulin resistance or diabetes – I’m a good example of that. Furthermore, a lot of experts suggest that doling out universal weight loss advice to those with PCOS could actually have really dangerous effects.

For one, disordered eating is significantly more prevalent in women with PCOS with 86% of patients with PCOS presenting with a subclinical eating disorder. While it’s unclear why this is, it’s likely related to the shame that women carry and the pressure that’s been placed on this population to lose weight at any expense.

To further discuss “ditching the diet”, I had an enlightening conversation with Registered Dietitian, Julie Duffy Dillon, who is an intuitive eating and PCOS specialist.

Is Weight Loss Bad Advice for those with PCOS?

I asked Julie why weight loss is bad advice for women living with PCOS and she emphasized that PCOS has a genetic component and since weight doesn’t cause PCOS, why would it fix it? We also know from countless studies that diets don’t work for most people, so why would it work for people with PCOS?

Julie also mentioned that many people with PCOS experience binge eating, because yo-yo dieting predicts binge eating. With the many hormonal issues going on with PCOS, like high circulating insulin, these issues can lead to really intense cravings. In other words, if someone with PCOS goes on a diet and eliminates foods like carbs and sugar, that will intensify those cravings.

It’s important to note that PCOS cravings are nothing like the common cravings that people without PCOS experience. According to Julie, this is how PCOS cravings play out:

“PCOS cravings are different. They’re primal. Every cell in the body is screaming: EAT. It’s like someone who’s been drowning, and finally coming to the surface and breathing and gasping for air. PCOS cravings are the same. So when we tell people, just lose weight, it’s basically telling people not to be so obsessed with air. That’s silly because we need air to breathe and we need food to live“

Can Weight Loss Worsen PCOS?

According to Julie, weight cycling or yo-yo dieting is actually connected to higher insulin levels, higher testosterone, higher cortisol, higher cholesterol and higher blood pressure. All of these things are connected to PCOS, which can only worsen symptoms.

Researchers have found that people with PCOS are in a chronic pro-inflammatory state which is connected to lots of fatigue and brain fog. They’ve also connected that same pro-inflammatory state to weight cycling. Again, all of this is worsening the symptoms of PCOS.

Julie has also found from her clinical experience, that since so many people are constantly told to lose weight, people will generally avoid the doctor because of that. So when you avoid the doctor and neglect your healthcare needs, that will obviously worsen your symptoms and overall health.

On top of all this, Julie believes that a general blanket statement to lose weight teaches us that:

“Fat bodies or larger bodies are bad and is a form of discrimination and weight stigma. We also know that weight stigma is associated with higher insulin levels, cortisol, cholesterol and blood sugars”

So at the end of the day, the very thing that weight is treating with PCOS may just make it worse.

How to Respond to PCOS Cravings

A lot of women with PCOS often describe feeling overwhelming cravings, particularly for carbs. This phenomenon occurs because cells that have become insulin resistant are no longer responding to insulin, so the pancreas keeps producing more insulin to compensate. Since the muscles aren’t properly getting the glucose it wants, it’s basically just floating in the blood stream, effectively starving and sending out more signals for their preferred source of fuel- sugar! So I asked Julie how women could respond to their cravings without worsening their PCOS by gaining more weight or spiking their insulin.

People with PCOS are often told to ignore their cravings, but Julie has an interesting perspective and instead suggests to “lean into carb cravings”. She sees carb cravings as the guidepost to help people understand what they need to treat their PCOS and that “carb cravings should be listened to, respected and not shunned. It’s the way that they know that their condition needs more attention.”

When the carb craving hits, Julie recommends taking a step back and asking yourself:

  • “Have I been eating enough?”
  • “Have I been sleeping enough?”
  • “Am I eating enough protein?”
  • “Am I restricting too much?”
  • “Am I exercising too much?”
  • “Have I been taking my supplements?”

Eating Intuitively When You Have PCOS

Woman with PCOS taking a bite out of sandwich.

Now that we have covered the best diet for PCOS, how can someone with PCOS eat intuitively when their hormones are giving them mixed signals about what their body actually needs? Julie breaks down her recommendations on the best diet for PCOS management and how to honour your hunger without going on a diet.

Eating Enough calories

To prevent those primal cravings, it’s important that you’re eating enough food and listen to those carb cravings.

Eating More Protein for symptom management

Julie recommends incorporating protein in the morning or before bed as it may help to balance energy levels and cravings.

Inositol

Julie recommends the use of supplements like Inositol as it has a lot of research to support its use. However, make sure to speak to your healthcare provider about using it.

Move Your Body

Move their body in way that feels good! People with PCOS often believe they have to torture their body with exercise, and do it when they don’t feel like it. However that shouldn’t be the case. Find an exercise that works for you, and when you do, you may even start to crave moving.

Bottom Line

Finally, Julie admits that one of the hardest things for people with PCOS is to find a way to respect and love your body. Often people are told not to love their body and are told they need to be smaller. If you can find a way to love your body, research has found that this can lower cortisol levels, inflammation, triglycerides. These are things that are associated with PCOS. Finding compassion and realizing that your body can still do amazing things can all help with the treatment of PCOS.

I want to end on that awesome note and I especially want to thank Julie for the amazing interview I had with her. If you want to get in touch with her and check out her blog and social media, here are her contact details:

https://www.juliedillonrd.com/pcos/

Instagram

Facebook

More Blog Posts You Might Like

If you liked this post on the best diet for PCOS, then you may also like these blog posts:

  • Period Talk: What to Do When You Lost Your Period
  • Does Seed Cycling for Hormonal Balance Even Work?
  • The Menstrual Cycle Diet | What to Eat on Your Period
  • What to Eat to Help You Get Pregnant

Become an Abbey’s Kitchen Subscriber

Abbey Sharp

Abbey Sharp is a Registered Dietitian (RD), regulated by the Ontario College of Dietitians. She is a mom, YouTuber, Blogger, award winning cookbook author, media coach specializing in food and nutrition influencers, and a frequent contributor to national publications like Healthline and on national broadcast TV shows.
www.abbeyskitchen.com/about-abbey/

Last Updated August 17, 2021. Published August 16, 2021 By Abbey Sharp 1 Comment

Vegan Key Lime Pie (Easy No Bake Snack)

A mini vegan key lime pie on a serving board.

These vegan key lime pies make for the perfect summer snack! Made with only a handful of ingredients, they are also gluten-free, no-bake, and loaded with healthy fats and protein.

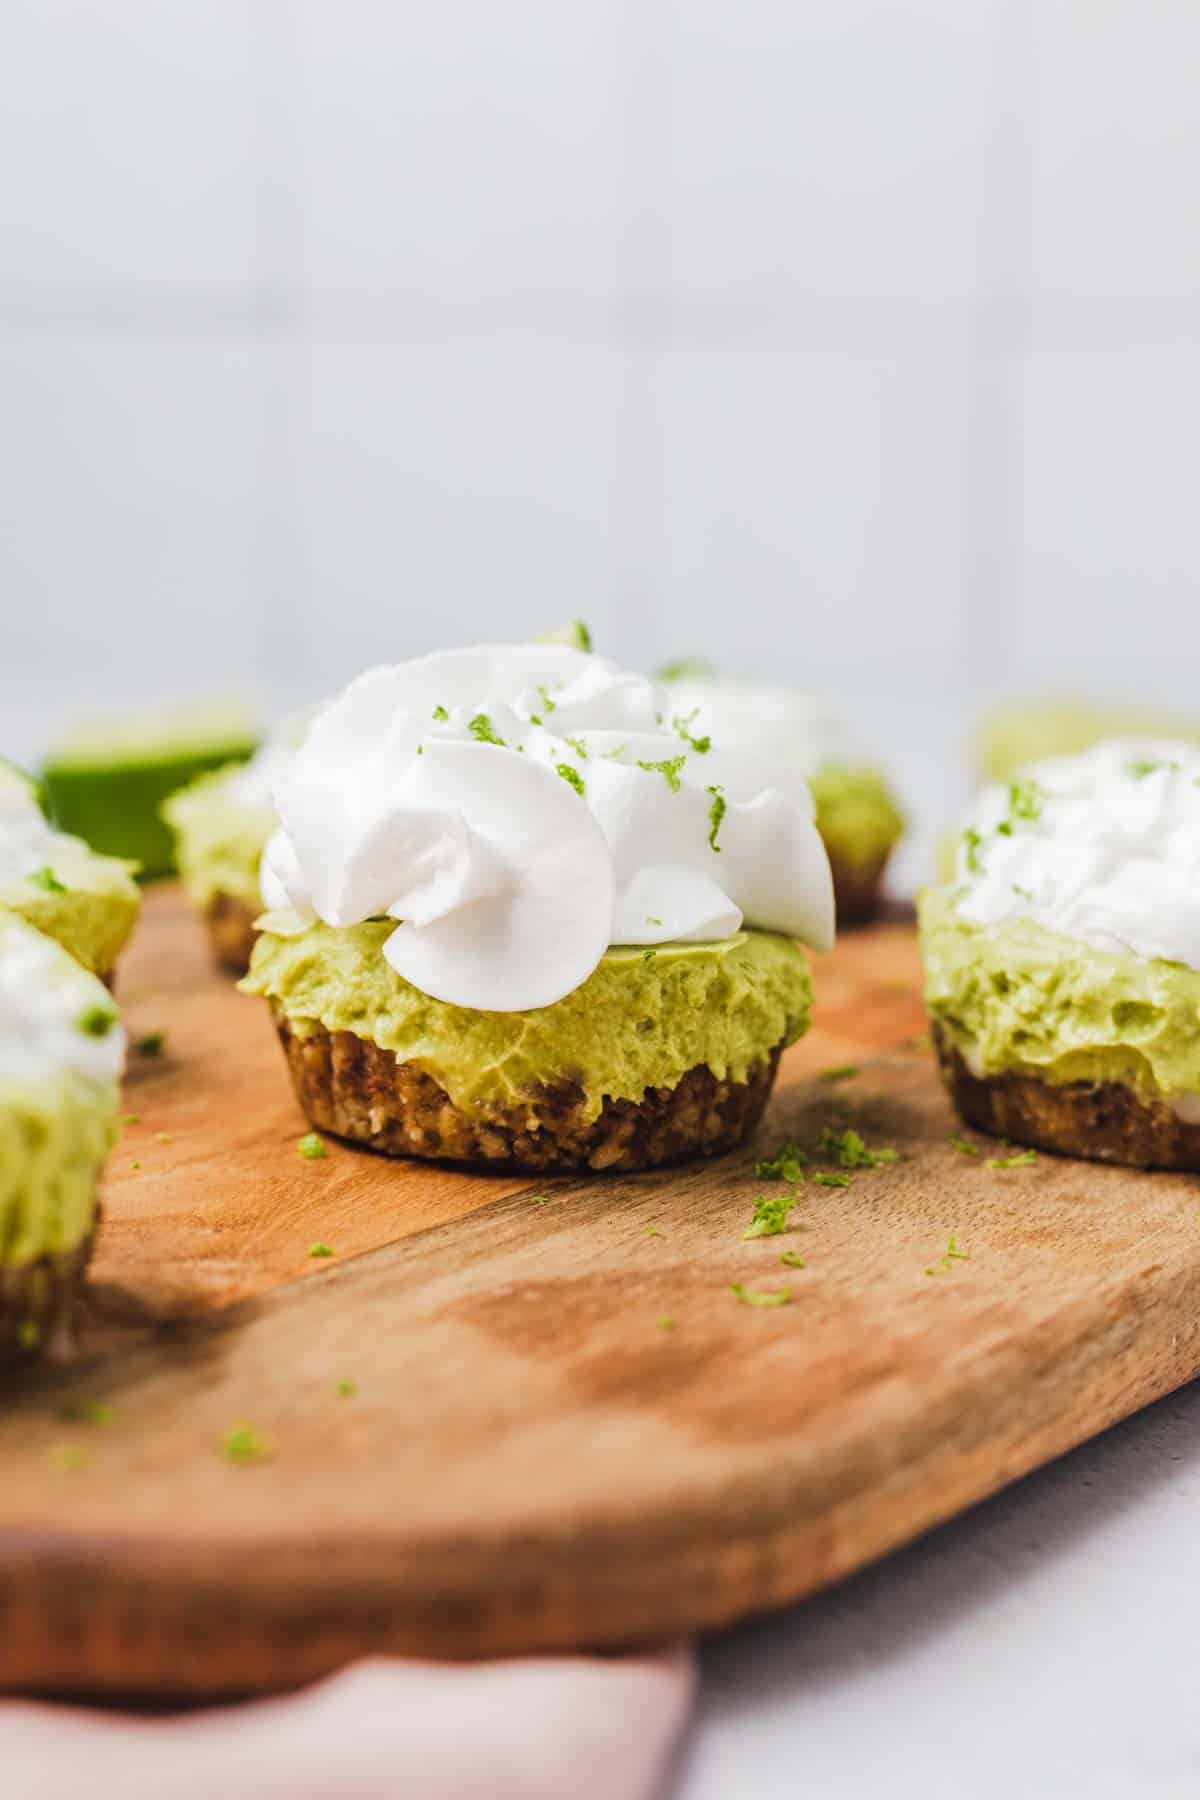
A mini vegan key lime pie on a serving board.

Creamy, tangy, and absolutely delicious, you will love these mini vegan key lime pies. They are the perfect little bites that my little ones are obsessed with! Even better, these mini key lime pies do not involve baking so you can skip heating up the kitchen (hello hot summer days!). They are perfect for both special occasions and as a weeknight treat so grab the ingredients on your next grocery run and make these ASAP.

Table of contents

  • Why This Recipe Works
  • Key Ingredients
  • How to Make This Recipe
  • Expert Tips
  • Recipe FAQs
  • More Recipes You Might Like

Why This Recipe Works

While I already know that these vegan key lime pies are delightful little bites, here are a few more reasons why you should make these treats!

  • Super easy to make
  • The perfect balance of sweet and tangy
  • Make-ahead friendly
  • Gluten-free and vegan-friendly
  • Refreshing, satisfying, and perfect on a hot summer day

Key Ingredients

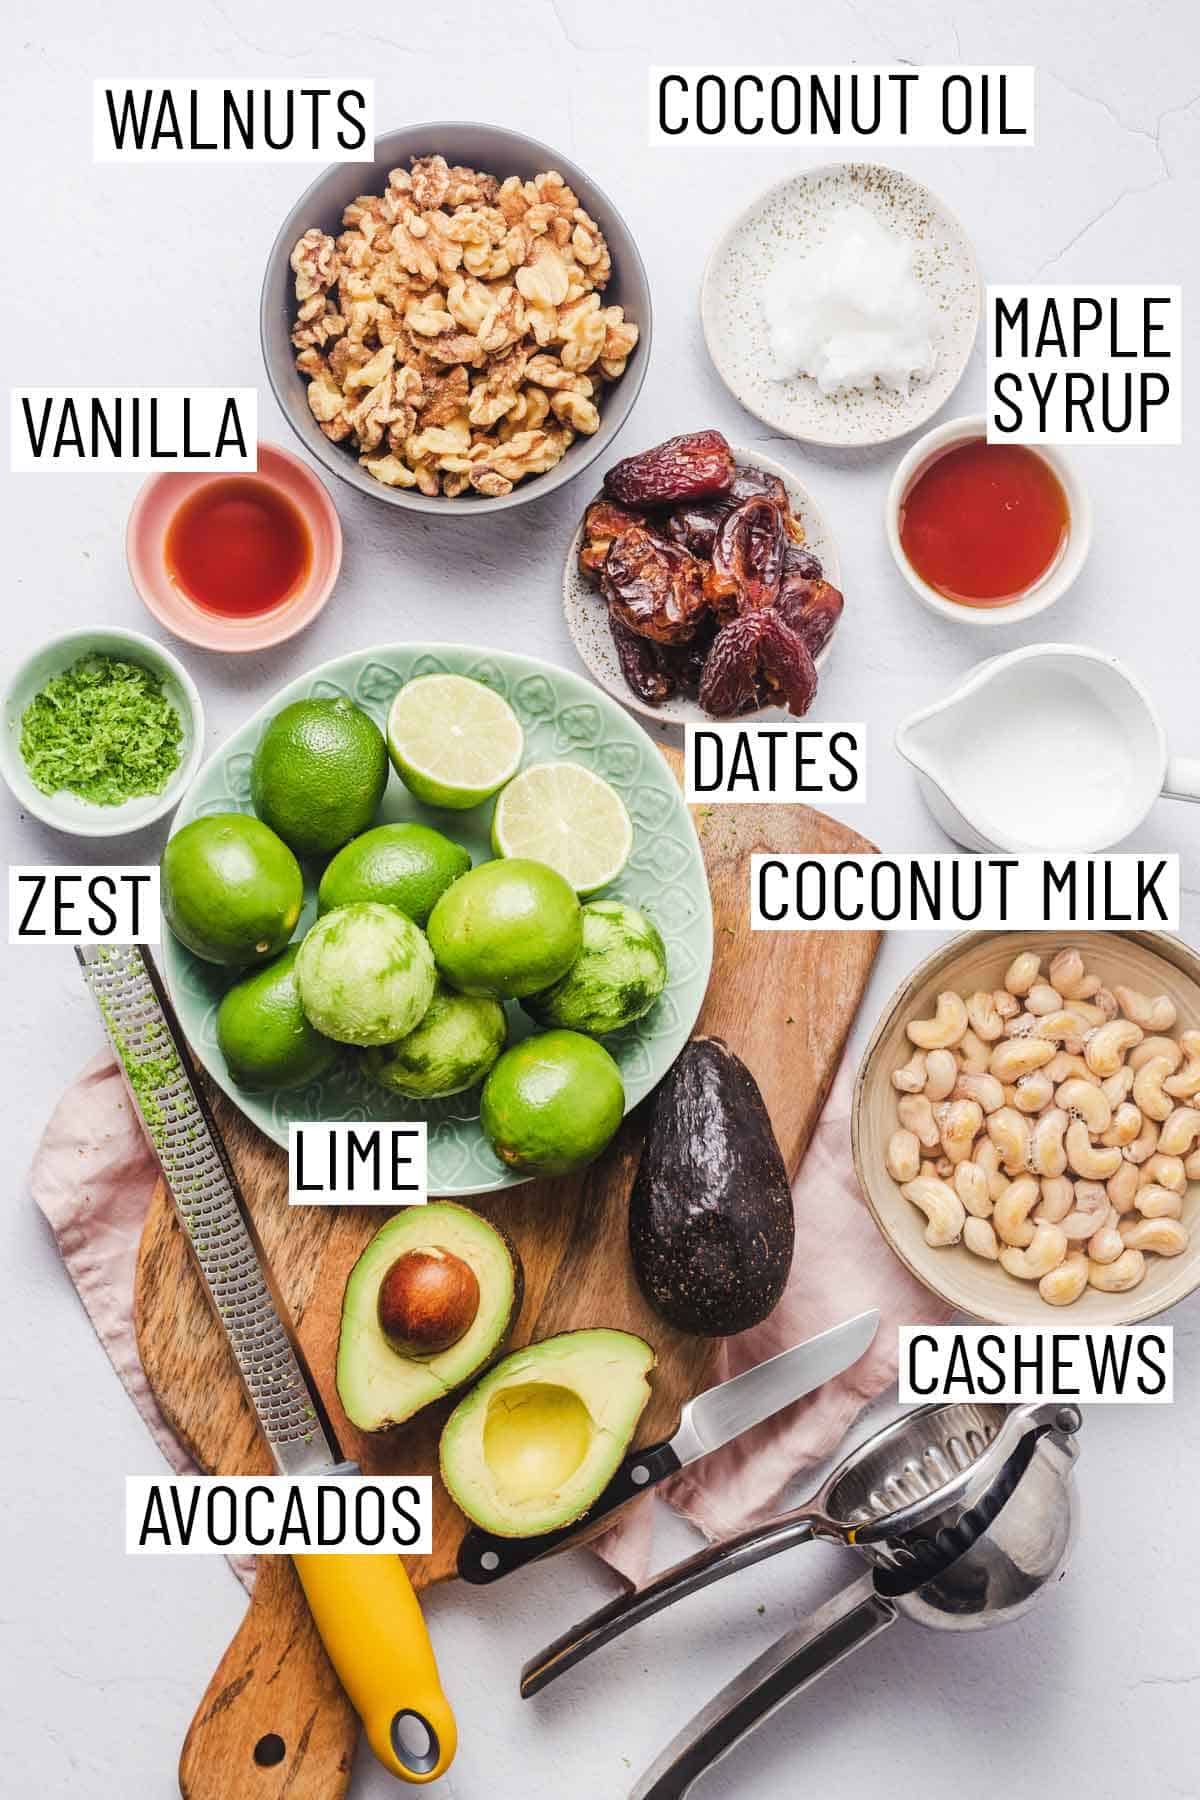
Ingredients needed to make vegan key lime pies.

Avocados — Packed with healthy fats and nutrients, avocado is a must for this vegan key lime pie. They help make the filling absolutely creamy and luscious. Be sure to use ripe avocado as unripe avocados will be hard and won’t blend together smoothly.

Coconut milk — Coconut milk makes the filling lighter than traditional key lime pie but makes it just as creamy. Be sure to use full-fat coconut milk.

Key Limes — You can’t make a key lime pie without key limes! While they do come in bottles, I recommend just juicing your own as you’ll need the zest of the limes. Keep in mind that when ripe, key limes are closer to yellow than they are green.

Raw cashews — When soaked and blended, these cashews turn silky smooth. I don’t recommend substituting for another nut.

Dates — Did you know you can buy them pitted? This will save you some time and washing a sticky cutting board. The dates not only adds sweetness, but they’ll help bind your crust together.

How to Make This Recipe

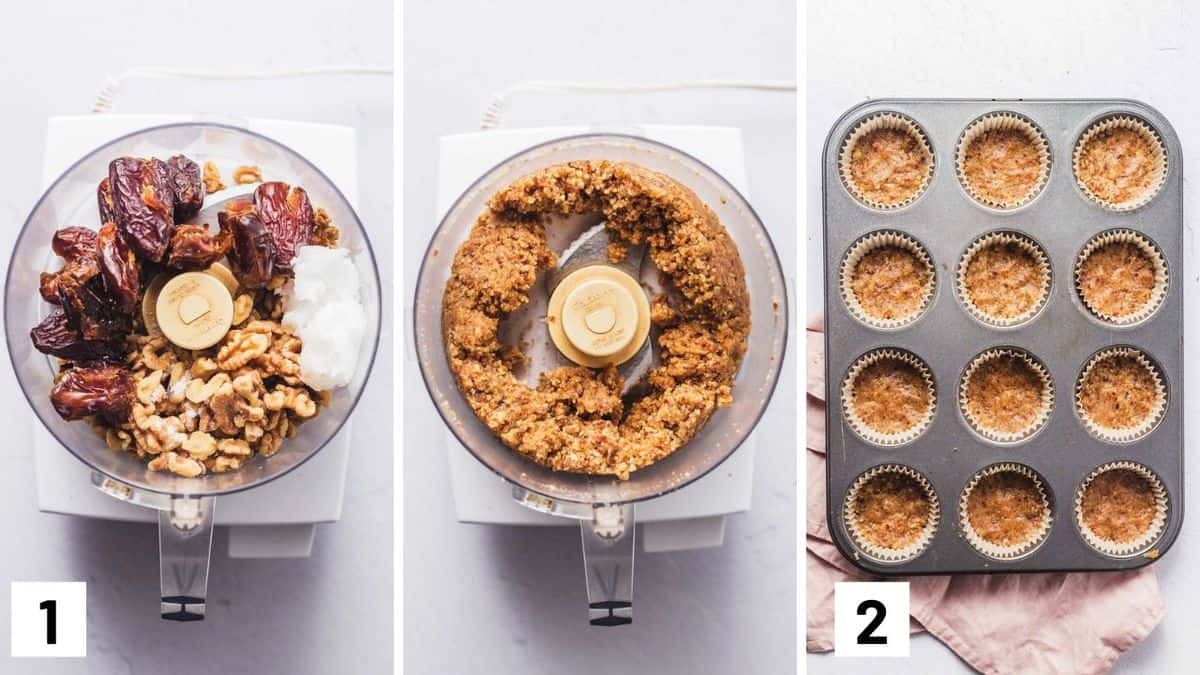
Set of three photos showing the before and after of the crust ingredients in a food processor and then pressed into a muffin tin.

Step 1: Combine dates, walnuts, coconut oil and salt in a food processor and pulse until well combined.

Step 2: Fill a muffin tray with 12 silicon muffin moulds. Press 1 spoonful of crust into muffin moulds until flat.

Set of three photos showing the filling before and after its been blended and then added on top of the crusts in the muffin tin.

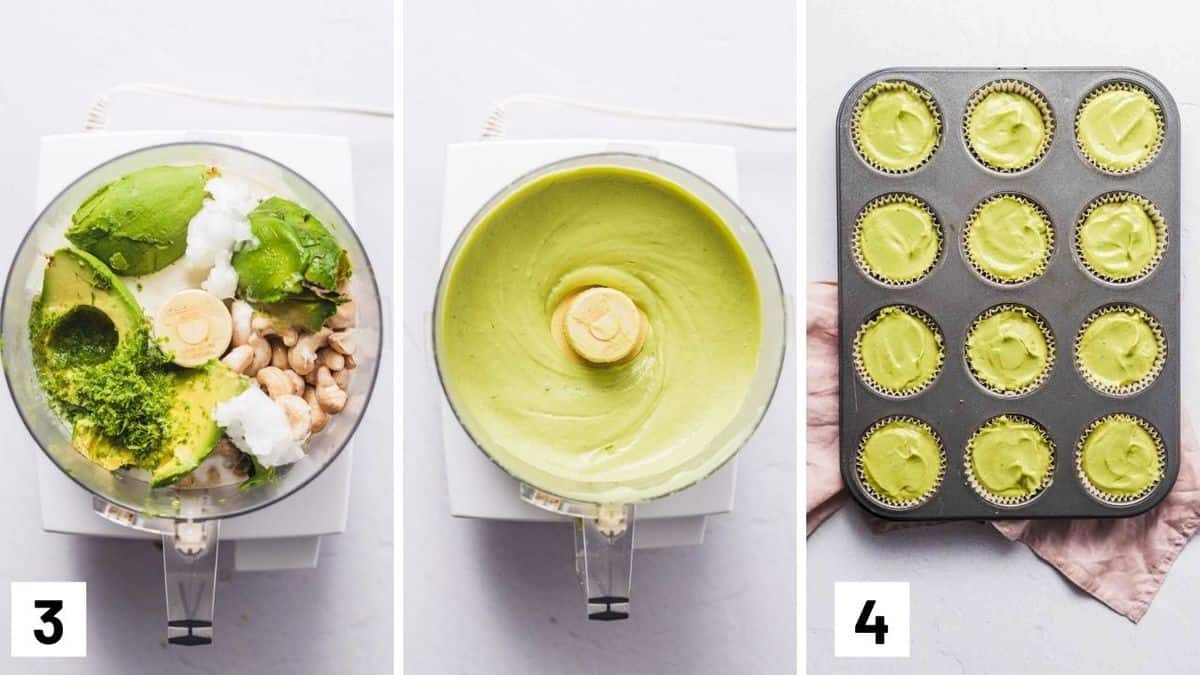
Step 3: Rinse the food processor and add the remaining ingredients. Pulse until blended.

Step 4: Add ¼ cup of filling to mould and top. Gently tap muffin mold against a counter to flatten filling and remove any air bubbles.

Set of two photos showing additional zest being made and then topping the mini pies with zest, cream, and lime wedges.

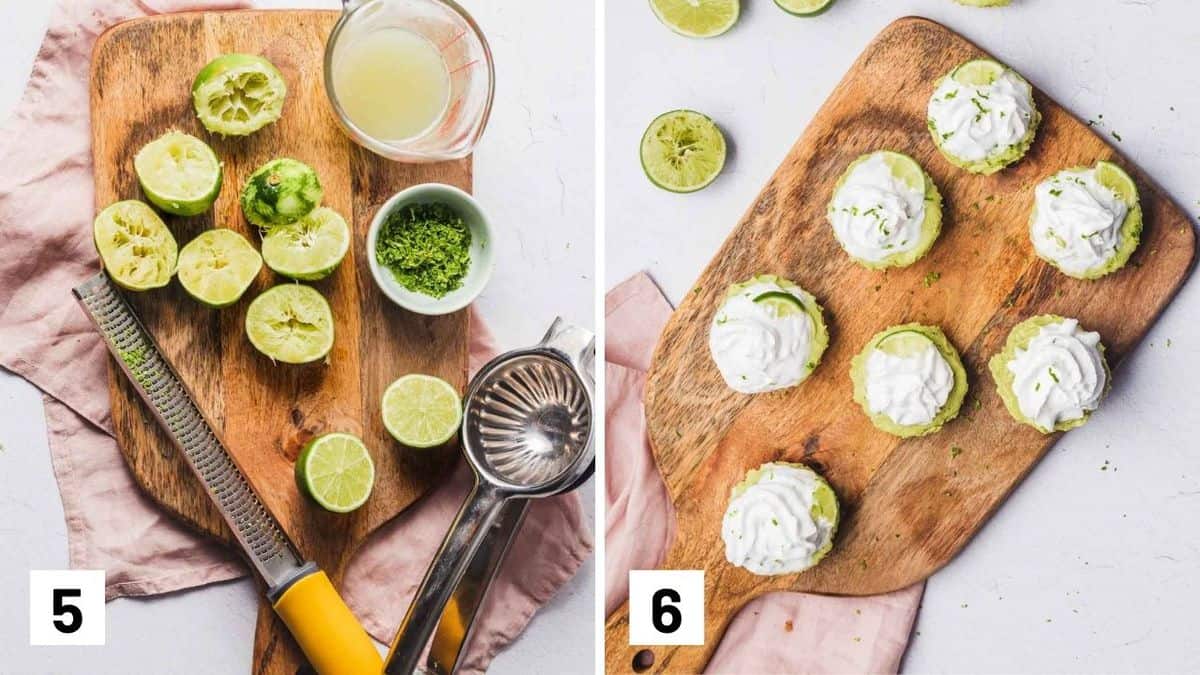
Step 5: Top each of the vegan key lime pies with lime zest.

Step 6: Cover with plastic wrap and set in the freeze for 2-4 hours or until hardened. Then garnish of some whipped coconut cream, toasted coconut, and a tiny lime triangle

Expert Tips

I always recommend using real vanilla extract for the filling. Artifical extract just does not taste as good.

Fresh lime juice has a brightness and flavour that is difficult to recreate with bottled lime juice. Sometimes bottled lime juice has an aftertaste to it so use freshly squeezed key limes for this vegan key lime pie whenever possible.

Only take out how many ever you need from the freezer, it is difficult to put it back since it is so soft. 

You can serve this right out of the freezer on a hot day, no need to bring it to room temperature.

Recipe FAQs

What is the difference between key limes and regular limes?

Key limes are tarter and super-aromatic in comparison to regular limes. They also have a floral note to them. Unlike key limes, regular limes last longer in the fridge so if you purchase key limes, be sure to use them ASAP. If you are unable to find key limes, you can swap with regular limes.

How long does this vegan key lime pie last?

If properly wrapped to prevent freezer burn, these mini key lime pies can last for up to a month in the freezer. Although, I recommend eating them as soon as you’re able to as the flavour will not be as strong over time.

What if I don’t have maple syrup?

If you don’t have pure maple syrup, you can try using agave or honey if you don’t have to keep this vegan. Keep in mind that maple syrup is not as sweet as the two so you’ll have to adjust the amount of sweetener added if swapped.

Does this taste strongly of coconut?

No! The key lime flavouring is strong enough that you won’t taste a ton of coconut throughout.

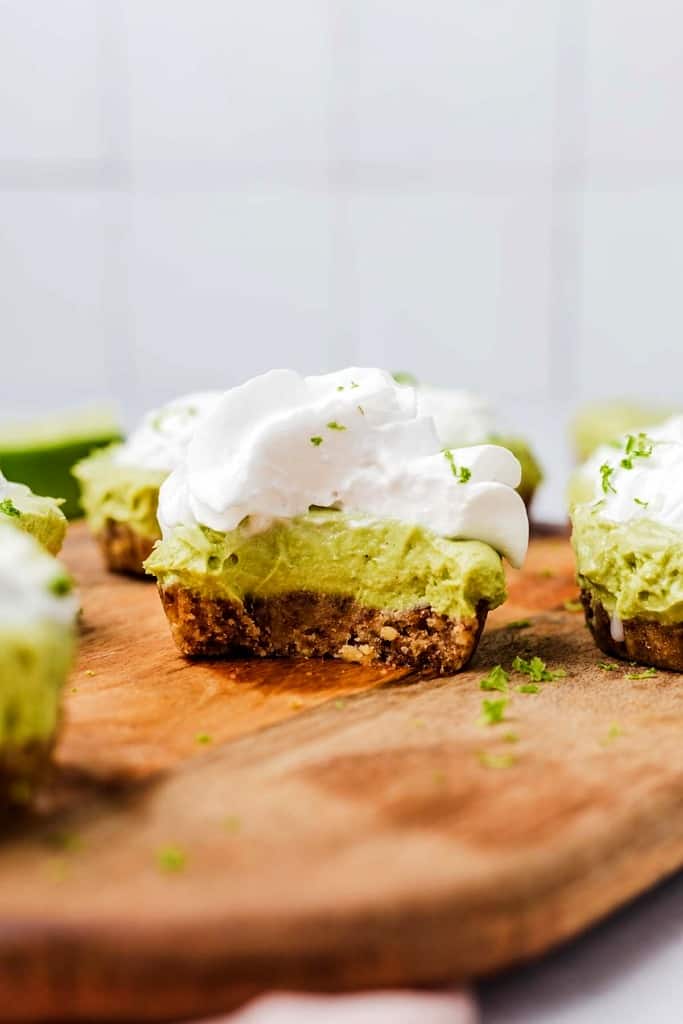
A mini no-bake pie with a bite taken out of it.

More Recipes You Might Like

Want more delightful little desserts like this vegan key lime pie? Give these ones a whirl.

  • COOKIE DOUGH BITES (VEGAN & GLUTEN FREE)
  • TOFU PUDDING WITH SWEET POTATO (VEGAN)
  • EASY CHOCOLATE COVERED ESPRESSO BEANS (VEGAN & GLUTEN FREE)

Are you a fan of key lime pie? Let me know your favourite pie down in the comments below!

A mini vegan key lime pie on a serving board.
Print Recipe
5 from 3 votes

Vegan Key Lime Pie (Easy No Bake Snack)

You are going to love this easy Vegan Key Lime Pie recipe! Made with only a handful of healthy ingredients, these mini key lime pies are also gluten-free! And the best part….there's no baking involved!
Prep Time15 minutes mins
Freeze Time2 hours hrs
Total Time2 hours hrs 15 minutes mins
Course: Dessert
Cuisine: American
Servings: 12 pies
Calories: 323kcal
Author: Abbey Sharp

Ingredients

For the Crust:

  • 1 cup pitted dates 10
  • 1½ cup walnuts
  • 2 tbsp coconut oil
  • pinch of salt

For the Filling

  • 1 cup raw cashews soaked for 4 or more hours
  • 4-5 limes, juiced or more for more tart flavour
  • 2-3 tsp lime zest plus more for garnishing
  • 1 tsp vanilla
  • ½ cup maple syrup or more to taste
  • ½ cup coconut milk
  • 2 ripe avocados
  • 2 tbsp coconut oil

Instructions

  • Combine dates, walnuts, coconut oil and salt in a food processor and pulse until well combined.
  • Fill a muffin tray with 12 silicon muffin molds. Press 1 spoonful of crust into muffin molds until flat.
  • Rinse food processor and add remaining ingredients. Pulse until blended.
  • Add ¼ cup of filling to mold and top.
  • Gently tap muffin mold against a counter to flatten filling and remove any air bubbles.
  • Top with lime zest.
  • Cover with plastic wrap and set in the freeze for 2-4 hours or until hardened.
  • Garnish of some whipped coconut cream, toasted coconut and a tiny lime triangle

Notes

  • I always recommend using real vanilla extract for the filling. Artifical extract just does not taste as good.
  • Fresh lime juice has a brightness and flavour that is difficult to recreate with bottled lime juice. Sometimes bottled lime juice has an aftertaste to it so use freshly squeezed key limes for this vegan key lime pie whenever possible.
  • Only take out how many ever you need from the freezer, it is difficult to put it back since it is so soft. 
  • You can serve this right out of the freezer on a hot day, no need to bring it to room temperature.

Nutrition

Calories: 323kcal | Carbohydrates: 23g | Protein: 6g | Fat: 26g | Saturated Fat: 8g | Polyunsaturated Fat: 8g | Monounsaturated Fat: 8g | Sodium: 6mg | Potassium: 434mg | Fiber: 5g | Sugar: 12g | Vitamin A: 64IU | Vitamin C: 10mg | Calcium: 42mg | Iron: 2mg
Abbey Sharp

Abbey Sharp is a Registered Dietitian (RD), regulated by the Ontario College of Dietitians. She is a mom, YouTuber, Blogger, award winning cookbook author, media coach specializing in food and nutrition influencers, and a frequent contributor to national publications like Healthline and on national broadcast TV shows.
www.abbeyskitchen.com/about-abbey/

Last Updated August 14, 2021. Published August 14, 2021 By Abbey Sharp 2 Comments

Vegan Paella with Chickpeas & Veggie Sausage

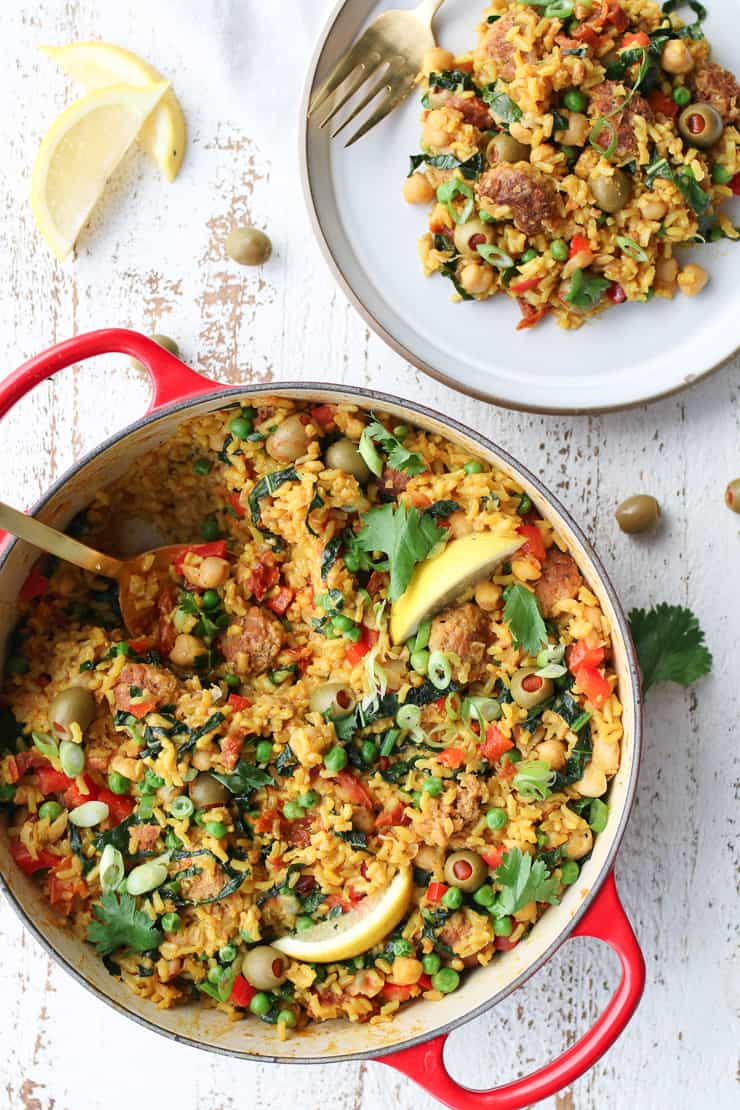
This healthy Vegan Paella made with chickpeas and veggie sausage is a simple one-pan meal that is packed with protein, veggies, and healthy fats!

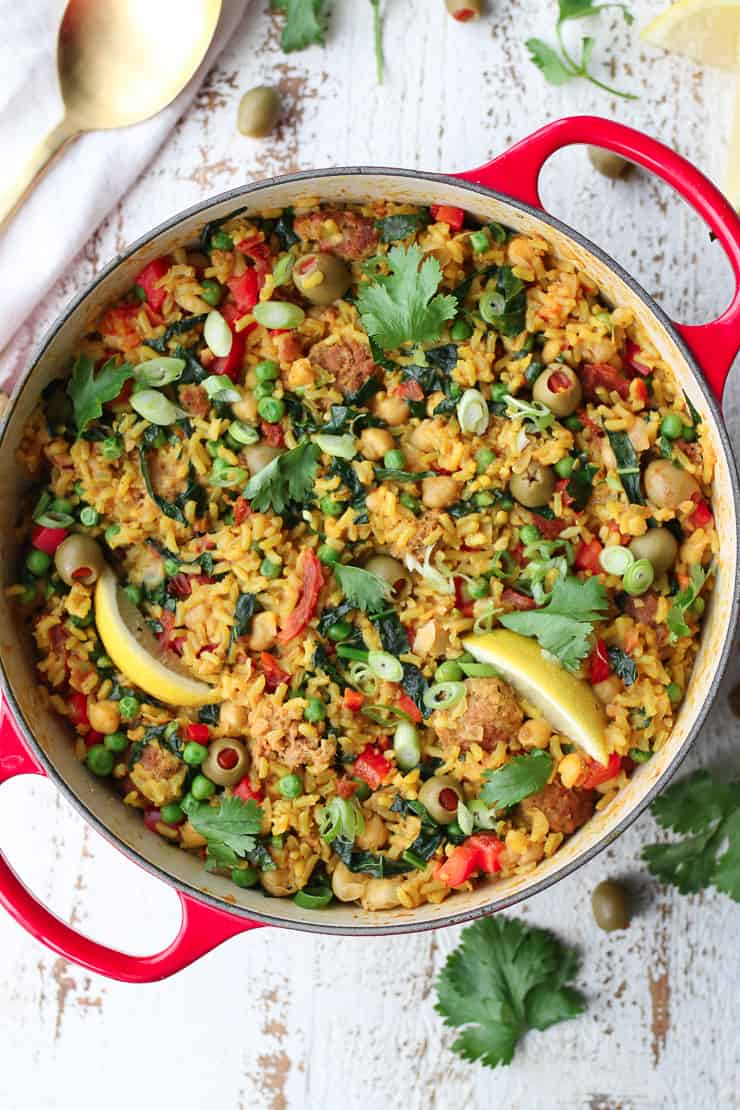
birds eye view of paella in red pan and served on a white plate garnished with two lemon wedges .

There are so many reasons to cook at home. Don’t get me wrong, I love take-out and going to restaurants but sometimes that just isn’t possible. I have spent the past 5 months getting really creative in the kitchen, trying to recreate some of my go-to restaurant meals.

One of my favourites is paella, and while I obviously don’t have a massive outdoor paella pan I figured I could make a homemade healthy vegan paella on the stove at home and make it just (okay, almost) as good. 

Traditionally, paella is a rice-based dish that originated in Valencia, Spain. The word paella actually means frying pan so it essentially is a one-pan rice dish cooked with vegetables, aromatics, and either seafood or meat. This vegan paella is my at-home take on the dish. You can check out this post from The Guardian for information about traditional paella.

Table of contents

  • Why This Recipe Works
  • Key Ingredients
  • How to Make This Recipe
  • Expert Tips
  • Recipe FAQs
  • More Recipes You Might Like

Why This Recipe Works

While not traditional, this homemade vegan paella is pretty darn tasty. Here are some reasons why you need to make this recipe this week:

  • It’s weeknight friendly.
  • It’s budget friendly.
  • Made in one single pan for easy clean up.
  • The whole family will love it.
  • It’s protein-packed.

Key Ingredients

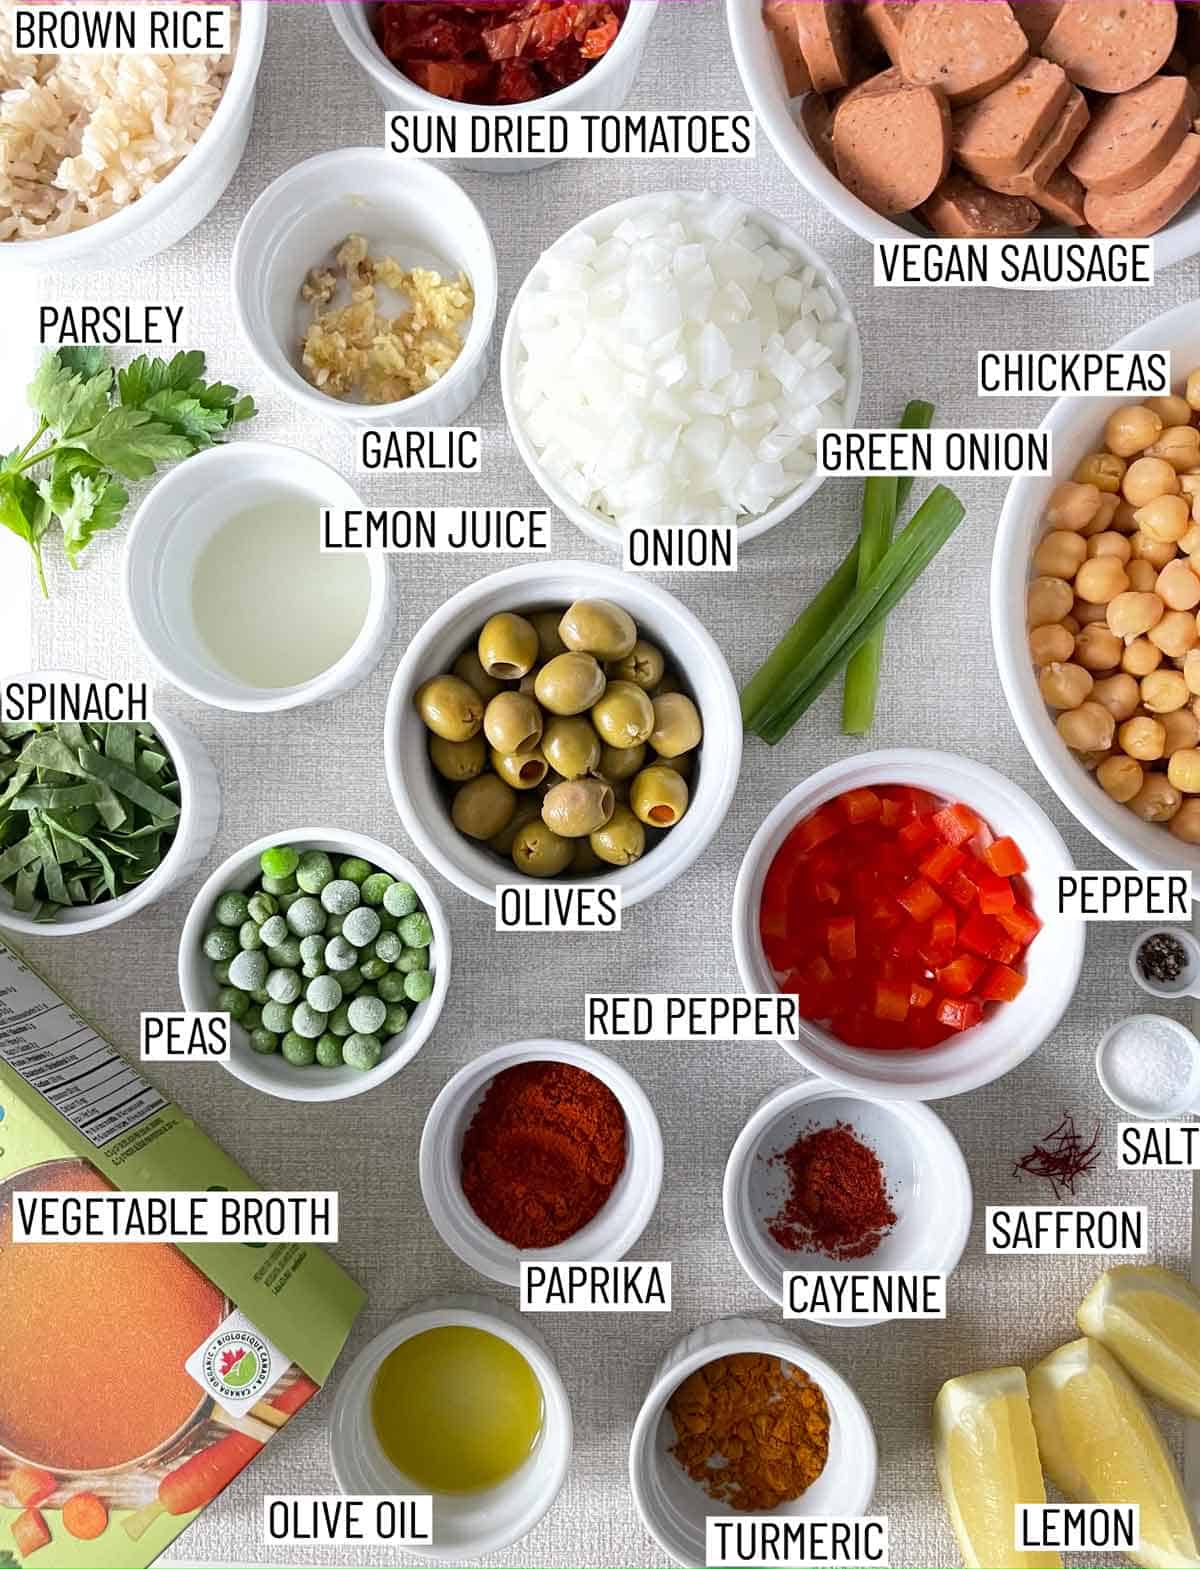
Ingredients needed to make vegan paella.

Vegan Sausage — You can use the “precooked” vegan sausages or ones that require cooking (like Beyond Meat), just make sure they’re browned before you move to the next step.

Saffron — This is what gives paella rice that amazing yellow colour, but if you don’t have this on hand (and it’s pricey so feel free to skip), just add a few pinches of turmeric for an easy hack. If you’ve got both, add both!

Whole Grain Parboiled Brown Rice — You can use any other kind of rice but it will change the cooking time and possibly the liquid as well. If you’re switching things up, keep an eye on the pan to make sure it doesn’t get too dry, and if it does, before the rice is cooked, you can add some more broth.

Chickpeas — This is another great way to add some extra fibre and protein, but you could also omit these or use a different canned bean.

Veggies — Since this is a one pan dish, I like to try to throw in whatever veg I have on hand, and bell peppers, spinach, peas, and sundried tomatoes are super delish in this paella. Feel free to add your own touch to it.

Olives — This gives an automatic Spanish feel, and I LOVE the salty kick. My son is also totally obsessed with olives so it makes this dish a winner every time.

How to Make This Recipe

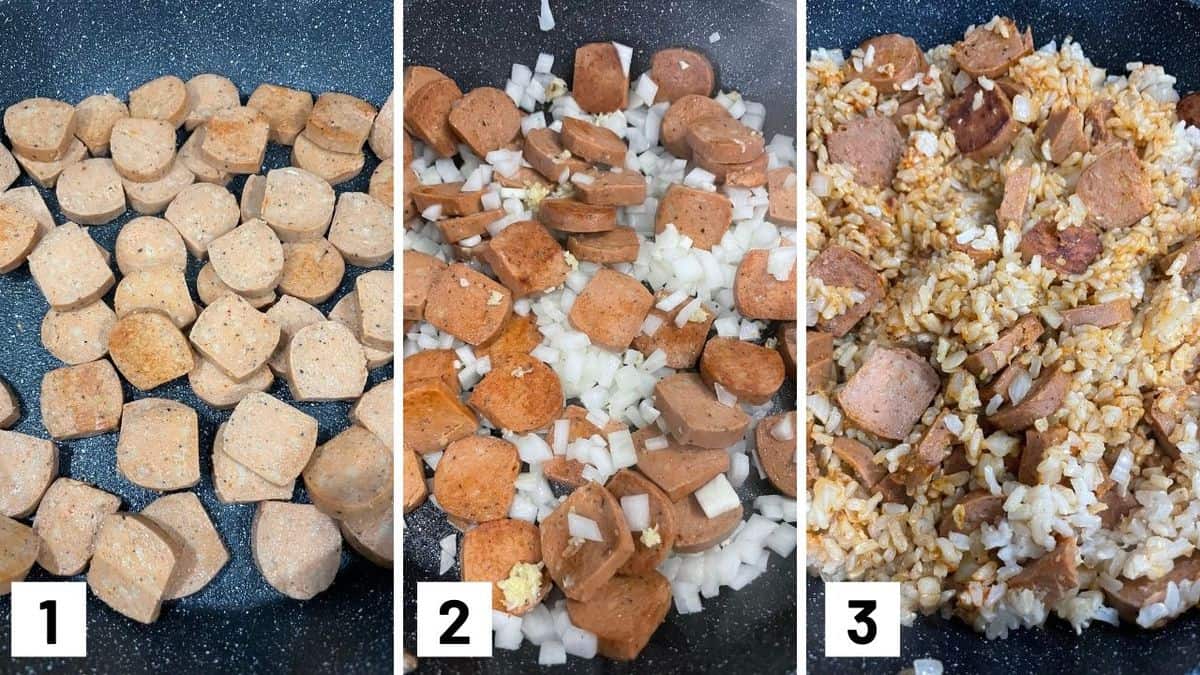
Set of three photos showing veggie sausage cooked in a pan, onions and garlic added to the pan, then rice and seasoning added.

Step 1: Add 1 teaspoon of olive oil to a large cast iron skillet. Add the vegan sausages and cook on both sides until browned.

Step 2: Add another teaspoon of olive oil, along with the onion and garlic, and saute for 2 to 3 minutes.

Step 3: Add in the cayenne, smoked paprika, and rice and toss in the olive oil.

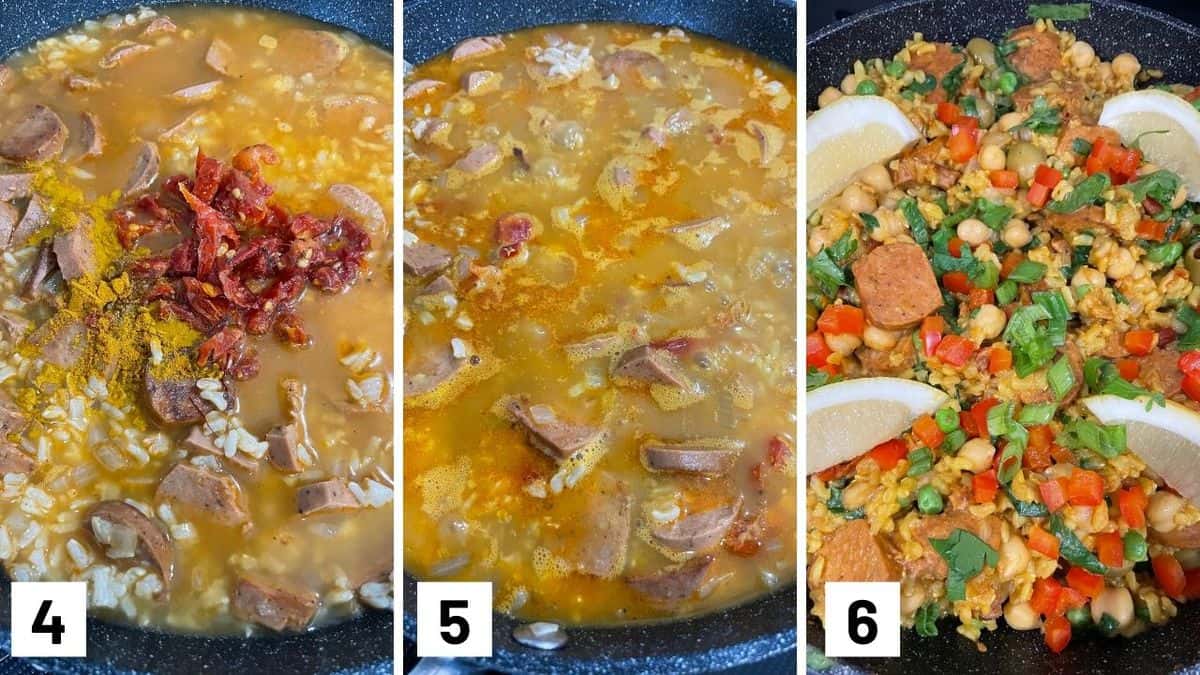
Set of three photos showing broth, saffron, and sundried tomatoes added to the pan, simmered, then chickpeas, bell peppers, spinach, peas, olives added.

Step 4: Add broth, saffron, and sundried tomatoes into the saucepan and bring to a boil. Put the lid on, and simmer for 30 min, or until almost all of the broth is absorbed.

Step 5: Remove the lid and add in the chickpeas, bell peppers, spinach, peas, olives, lemon juice and salt and pepper.

Step 6: Cook until the peas have thawed and the spinach is wilted. Top off with parsley, green onions, and lemon wedges.

Expert Tips

The peas can go into the pan frozen, it will cook through in next to no time so there’s no need to thaw them.

If you don’t have smoked paprika, use sweet or regular paprika.

Use the largest pan or skillet you have to make this if you do not have a paella pan. A large pan will allow the rice to cook more evenly.

Make sure all the veggies are chopped relatively evenly with each other. This helps them all cook evenly and you’ll be able to have a bit of everything with every spoonful.

Recipe FAQs

What other vegetables or ingredients can I throw in this paella?

Paella is a very versatile recipe so feel free to use this recipe and add whatever you have on hand. You could do shrimp or other shellfish, regular sausage or chicken thighs if you’re not vegan. You can also add kidney beans or tofu for other sources of protein. Veggies that work great include asparagus, cauliflower, zucchini, squash, sweet potato or snap peas.

What kind of vegan sausage did you use?

You can use whatever you prefer (even regular sausage if you’re not vegan), but when I made this I used Beyond Meat sausages. I have also made this with Yves (cooked) sausage.

Is this recipe spicy?

It does depend on the sausage you use so use mild sausage if you don’t like heat. It also depends on how much cayenne you add. But generally, by my standards, it’s not really that “spicy”.

Is this paella kid friendly?

Well, my kiddo loves rice and olives so I would say yes, it is definitely kid-friendly. If your kid is very sensitive to spices, then you can dial back on the cayenne.

Can I batch prep this for meal prep for the week?

This recipe makes an amazing batch prepped meal since you can cook it all in one pan (YAY minimal cleanup!) and then divvy it up into containers for the week.

Can I freeze cooked rice?

You can make a big batch of this paella and transfer it into freezer containers to be reheated throughout the week. Let the paella cool to almost room temperature, then freeze it immediately. When ready to eat, allow it to thaw in the fridge for an hour just so you can break it up a bit. Then you can reheat it in the microwave or stovetop.

Is this vegan paella gluten free?

Rice is naturally gluten free so yes, this is not only vegan but also gluten free and dairy free.

birds eye view of paella in a red pot.

More Recipes You Might Like

Want more rice-based recipes like this easy vegan paella for weeknight dinners? Try these ones:

  • Vegan Enchilada Bowl 
  • Hawaiian Chicken Meatballs 
  • Orange Chicken and Cauliflower Bowl 

What are some of your favourite ways to use rice? Leave me a comment below if you have tried this veg paella.

Print Recipe
5 from 4 votes

Vegan Paella with Chickpeas & Veggie Sausage

This healthy Vegan Paella is packed with so much flavour! Made with chickpeas and veggie sausage, this is a simple one-pan meal that is packed with protein, veggies, and healthy fats! Perfect for the entire family.
Prep Time10 minutes mins
Cook Time40 minutes mins
Total Time50 minutes mins
Course: Main Course
Cuisine: Spanish
Servings: 5
Calories: 465kcal
Author: Abbey Sharp

Ingredients

  • 2 tsp olive oil
  • 350-400 g pack of vegan sausage cut into coins
  • 1 small Spanish onion finely diced
  • 3 garlic cloves minced
  • 1/4 tsp cayenne pepper or more to taste
  • 2 tsp smoked paprika
  • Pinch saffron or 1 tsp turmeric or optionally both
  • 1 ½ cups of whole grain parboiled brown rice
  • 4 1/4 cups reduced sodium vegetable broth
  • 1/3 cup sun dried tomatoes
  • 1 can 19 oz chickpeas, drained and rinsed
  • 1 red pepper finely diced
  • 1 cup spinach sliced and lightly packed
  • 1 cup peas frozen
  • ½ c pimento olives
  • 2 tsp lemon juice
  • Salt and pepper to taste

To serve:

  • Parsley minced
  • Green onions minced
  • Lemon wedges

Instructions

  • Add 1 teaspoon of olive oil to a large cast iron skillet. Add the vegan sausages and cook on both sides until browned.
  • Add another teaspoon of olive oil, along with the onion and garlic and saute for 2-3 minutes.
  • Add in the cayenne, smoked paprika, and rice and toss in the olive oil.
  • Add broth, saffron, and sundried tomatoes into the saucepan and bring to a boil. Put the lid on, and simmer for 30 min, or until almost all of the broth is absorbed.
  • Remove the lid and add in the chickpeas, bell peppers, spinach, peas, olives, lemon juice and salt and pepper. Cook until the peas have thawed and the spinach is wilted.
  • Top off with parsley, green onions and lemon wedges.

Notes

  • The peas can go into the pan frozen, it will cook through in next to no time so there’s no need to thaw them.
  • If you don’t have smoked paprika, use sweet or regular paprika.
  • Use the largest pan or skillet you have to make this if you do not have a paella pan. A large pan will allow the rice to cook more evenly.
  • Make sure all the veggies are chopped relatively evenly with each other. This helps them all cook evenly and you’ll be able to have a bit of everything with every spoonful.

Nutrition

Calories: 465kcal | Carbohydrates: 65g | Protein: 26g | Fat: 12g | Saturated Fat: 2g | Sodium: 1517mg | Potassium: 837mg | Fiber: 8g | Sugar: 10g | Vitamin A: 2508IU | Vitamin C: 50mg | Calcium: 55mg | Iron: 17mg
Abbey Sharp

Abbey Sharp is a Registered Dietitian (RD), regulated by the Ontario College of Dietitians. She is a mom, YouTuber, Blogger, award winning cookbook author, media coach specializing in food and nutrition influencers, and a frequent contributor to national publications like Healthline and on national broadcast TV shows.
www.abbeyskitchen.com/about-abbey/

Last Updated May 9, 2022. Published August 11, 2021 By Abbey Sharp 1 Comment

Intuitive Eating Weight Loss? | Sustainable Gentle Nutrition Tips

Is intuitive eating weight loss a thing? We provide 15 dietitian approved gentle nutrition weight loss tips to help you sustainably lose weight without going on a crash diet.

Weight Loss Cheat Sheet
Several tiles on a blue plate spelling "weight loss".

If you have landed on this blog post, perhaps you are on your intuitive eating journey but are also looking to lose weight. While it is certainly possible to have weight loss goals while simultaneously being an intuitive eater, I first want to highlight that intuitive eating is NOT a weight loss diet. In fact, intuitive eating is actually incompatible with weight loss.

So what is the point of this blog post then? Glad you asked.

Even though intuitive eating isn’t a weight loss diet, it is still possible to incorporate some of the intuitive eating principles on your weight loss journey, regardless of your goal. I would also much rather someone seek out the support of an evidence-based dietitian for gentle weight loss support, than to fall for extreme fad diets they see online.

With that said, I wanted to share 15 gentle nutrition tips to help you achieve sustainable weight loss without going on a restrictive crash diet.

Tip #1 Think about what you can add not take away

Plate of food for intuitive eating weight loss.

Most of the fad diets out there focus on eliminating certain foods or food groups from our diet. Whether it’s gluten, sugar, dairy, or booze – we’re always cutting something out in the name of weight loss. While cutting out foods you love often “works” in the short term, we very quickly burn out, give in, and eat ALL the forbidden foods. Sound familiar?

When we let ourselves fall into “scarcity mentality”, we go on a bit of a rebellious streak that makes us want what we can’t have even more. So when it comes to “intuitive eating weight loss”, I prefer to stop thinking about what we are taking away, and focus instead on what we are adding to our diet. For example, maybe we make a point to add a serving of salad with our sandwich lunch, or add a source of protein like greek yogurt to our bowl of cereal at breakfast.

The point is that even if we don’t consciously think about cutting foods out, adding satiating foods IN often helps edge out some of the less nutritious, less satiating foods. For example, when you have a protein rich breakfast rather than just simple carbs at breakfast, you’re less likely to find yourself snacking on powdered donuts in the office before lunch. The result is that you often end up consuming fewer calories without even noticing you’re doing it. This little mindset tweak of imagining abundance rather than denial is often enough to keep people more dedicated and motivated to stick with a new healthy habit.

Tip #2: The hunger crushing combo

My long term followers know I’m talking about fibre, protein and healthy fats. Feeling satiated longer is valuable for most people because – you’re not yourself when you’re hungry. But when it comes to “intuitive eating weight loss”, specifically, satiety is key.

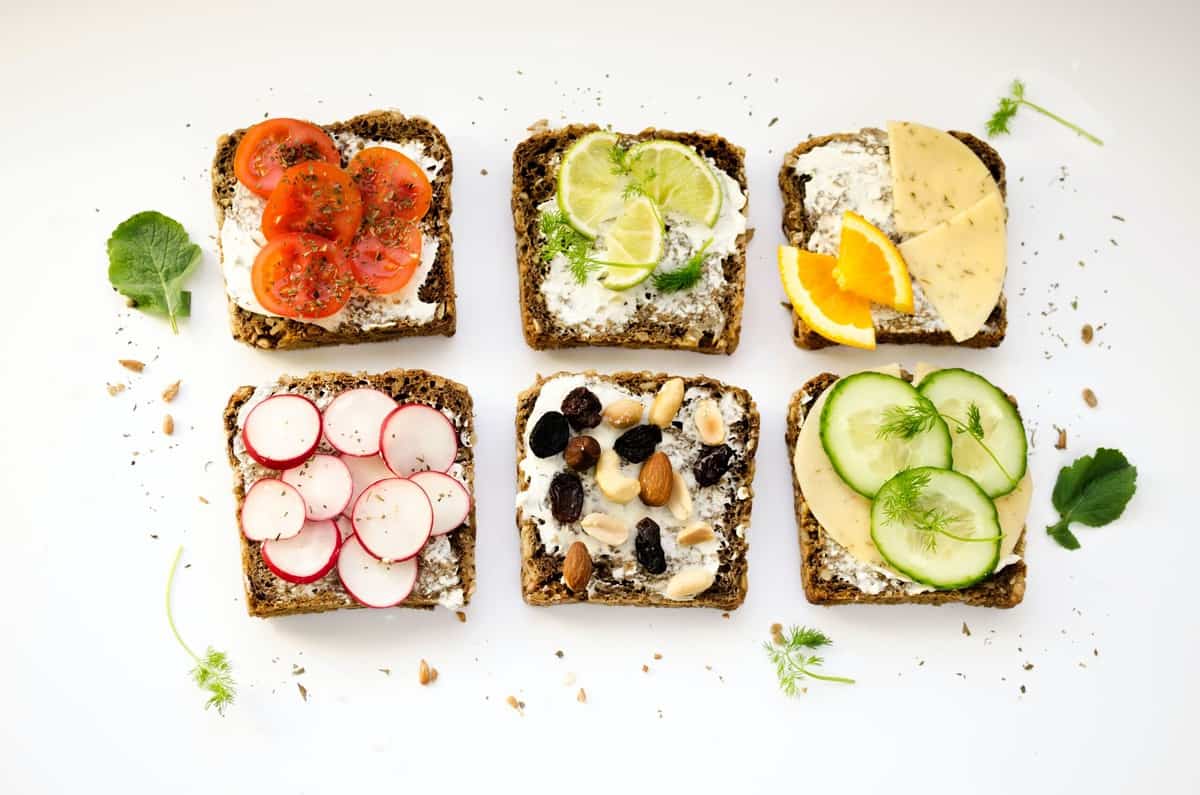
Six pieces of toast with a variety of toppings.

It’s really hard to create any kind of caloric deficit if you feel like eating your own arm off.  But each of these three food components have scientific reasoning as to why they keep you satisfied for longer. For instance, protein is the macronutrient that requires the most work to digest, meaning its transit time in your GI tract is longer than that of other foods. Protein has also been proven to reduce grehlin levels (aka your hunger hormone). One study found that participants who consumed 30% of calories from protein consumed almost 500 calories less a day compared to those who consumed 15% of calories from protein.

As for fat, fat is the strongest inhibitor of gastric emptying which means that it helps food to stay in your stomach longer, therefore keeping you feeling fuller even longer. Finally, fibre helps reduce the blood sugar response of carbohydrate-containing foods by slowing down transit time, delaying stomach emptying, preventing blood sugar crashes and reducing hunger.  So yes to fibre, protein and healthy fat in some combination in most meals and snacks.

Tip #3: Dress up those naked carbs

Naked carbs are foods like white bread, desserts, white rice etc – in other words, they’re foods lacking the hunger crushing combination we just discussed. Which is basically just another way of conceptualizing the hunger crushing combination.

My suggestion is to combine your naked carb with some protein and/or fat to help boost the satiety factor and slow the blood sugar and insulin response. For example, if you like white bread have your white bread – i’m not going to force you to give it up or switch to a fermented sprouted bread if thats not enjoyable to you. But perhaps you can smear that bread with some natural nut butter and top it off with berries, or throw on some mashed avocado and an egg. This is not only going to help ward off hunger a lot longer (thereby reducing the likelihood of a snack attack) but it will also keep your insulin levels from jolting up and down.

Tip #4: Slow down and tune in

One review of the literature found that eating slower was associated with eating less, while other research suggests that fast eaters are more likely to gain weight compared to slower eaters. This is most likely because it takes about 20 minutes for your stomach to communicate to your brain that you’re satisfied. My suggestion for “intuitive eating weight loss” is to carve out time for you to sit down and enjoy your meal. If that means you need to pencil meal times into your day planner or set a google calendar alert so that it’s not just an afterthought, then do it.

A white plate with the words "hunger" spelled across it.

Imagine your hunger is like a gas gauge – ask yourself where you are on the hunger scale from 0-10 before you start eating. As you eat, tune into your hunger and ask yourself again:

Where are you now?
If you started at a 2 or 3, and you’re half way through what’s on your plate, are you a 5 now?
A 6?
Still a 3?

It’s okay not to see an abrupt shift or even be able to recognize what it feels like to satisfy your hunger yet, it definitely takes practice to hear. Now keep eating until you feel at a place that is comfortable for you. For some people thats a 6 or 7, especially for experienced intuitive eaters, but for others it feels uncomfortable to be anything less than a 10. Thats okay too.

I don’t want to turn this into a hunger/ fullness diet but you might find that with enough data collection and enough mindfulness that a 10 no longer feels so good. But you’re never going to know if you rush through the meal and miss those early warning signs that you’re full.

Tip #5: Get rid of distractions

Even if you are eating at a snails pace, its hard to tune into your body’s internal cues if you’re surrounded by external distractions. I’m talking about your phone, your computer, TV, driving, walking etc. But we do know that distracted eating is often one of the biggest triggers for mindless eating.

An analysis of the research found that folks who ate with distractions ate 10% more than those who ate without distractions. It not only seems to have an immediate impact on how much you eat during the distracted meal, but also in subsequent meals as well, as we often forget we even ate or how much. Its like my hubby who will tell me he “didn’t eat anything that day” but Ive watched him eat a bagel, banana, apple, cheese and half a rotisserie chicken while taking business calls over the kitchen sink. When we eat on autopilot, the food just somehow makes it into our mouths. So power down and invest in the time to eat uninterrupted, and then use that mental bandwidth to refer back to that hunger scale from within.

Tip #6: Meal prep

Because we’re not great at making mindful decisions when we’re ill prepared. If we go back to the analogy of our body as a car and our hunger being our gas gauge, it’s hard to find the best deal on gas if we haven’t mapped out our route. When we get desperate, we’re likely to overspend at the boojie full service station.

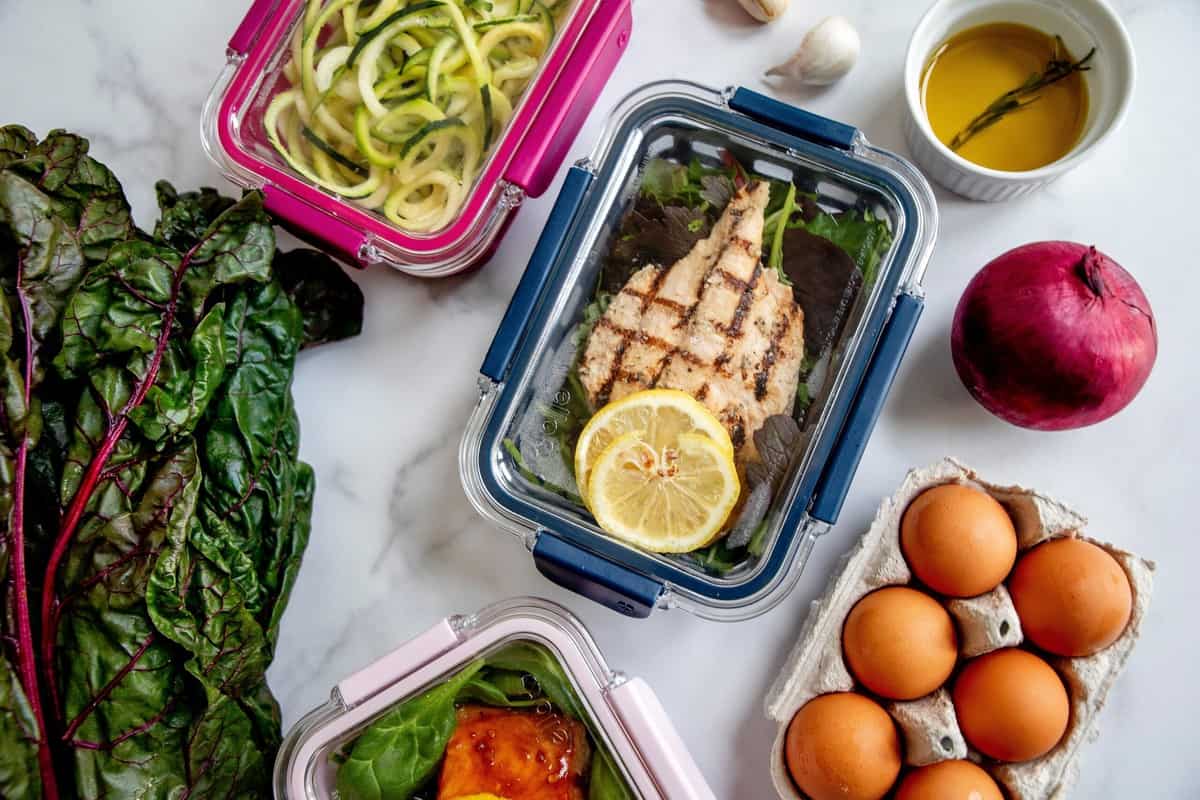
Meal prepped food for intuitive eating weight loss.

The same goes for food and nutrition. I know we’re all busy, but I see meal prep as a small investment. Everyone does meal prep differently, some people like to pick a few recipes and make a big batch of a few full meals to be divvied up in containers for the week.  Personally, I get bored of this. I also find it makes it hard to honour my cravings in the moment because I feel obligated to eat 5 days of the same recipe that maybe I was craving a whole week ago.

I personally prefer to make meal components and then combine them in different ways throughout the week. For example, i’ll grill a bunch of chicken breasts and bake some tofu, make a big pot of quinoa or rice, and chop up and roast a ton of veg. Then I have the building blocks for different salads, soups, stir-fries and sandwiches that I can mix and match with a different sauce or garnish. 

Tip #7: do a fridge and pantry makeover

No, I’m not actually saying you need to go on a kitchen detox and throw out all the “junk” before your diet begins. Im actually suggesting that you simply reorganize things to make more nutritious foods more convenient and accessible. For me, this is an extension of the meal prep tip but it doesn’t necessarily require more cooking.

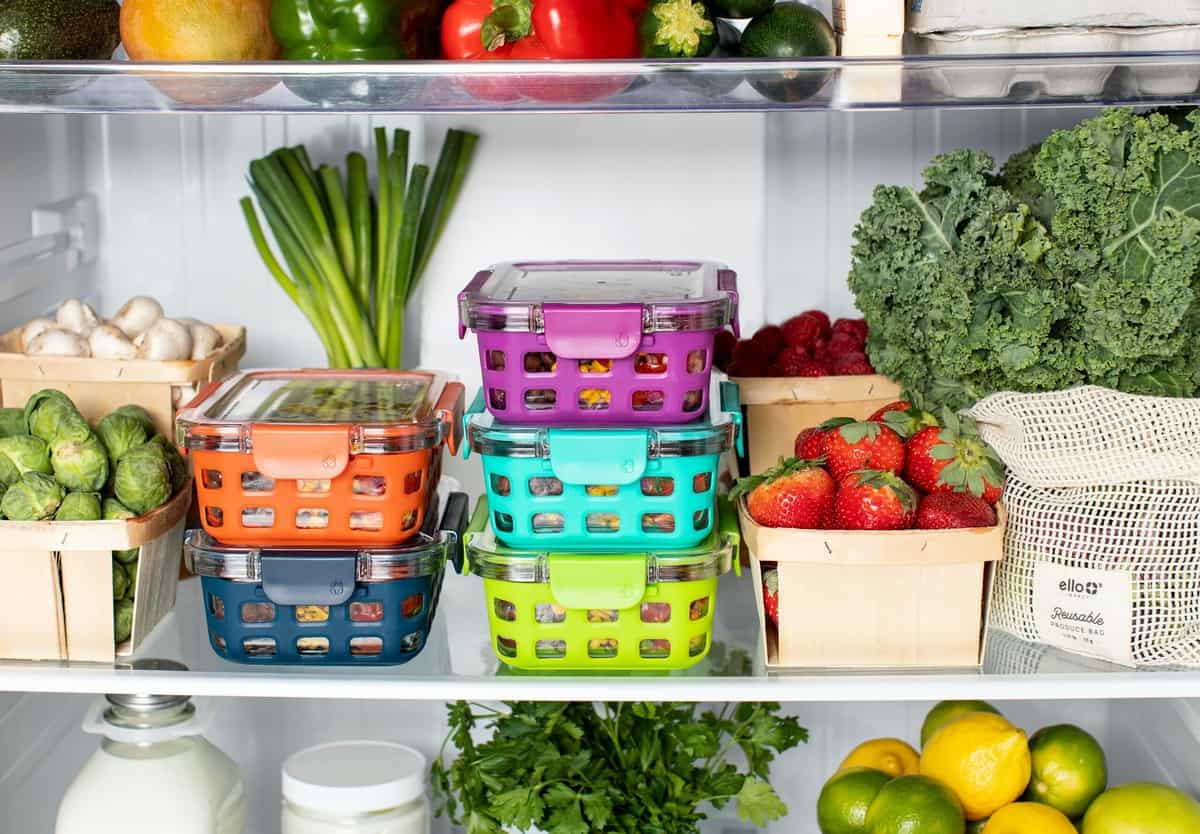
Prepped food in an organized fridge.

I always recommend washing and prepping nutritious stuff and placing it front and center in the fridge or pantry so that the moment hunger hits, it’s the most intuitive and convenient choice to make. If you really want a little chips or some ice cream, it’s okay to keep them in the house, but place them somewhere where you would have to actively seek them out, not just constantly grab them because they’re the first thing you see. Again this encourages us to be more mindful and deliberate about our choices, even more indulgent ones, which will usually lead to greater satisfaction and less mindless overeating.

Tip #8: Approach trigger foods wisely

I’ll start off by saying I’m not a fan of overt restriction and that means that I don’t think any foods should be completely off limits, even when you’re trying to lose weight. Which is why I would suggest allowing yourself said “trigger” food every day, which may work for a lot of people who are trying to lose weight who have a history of yoyo dieting.

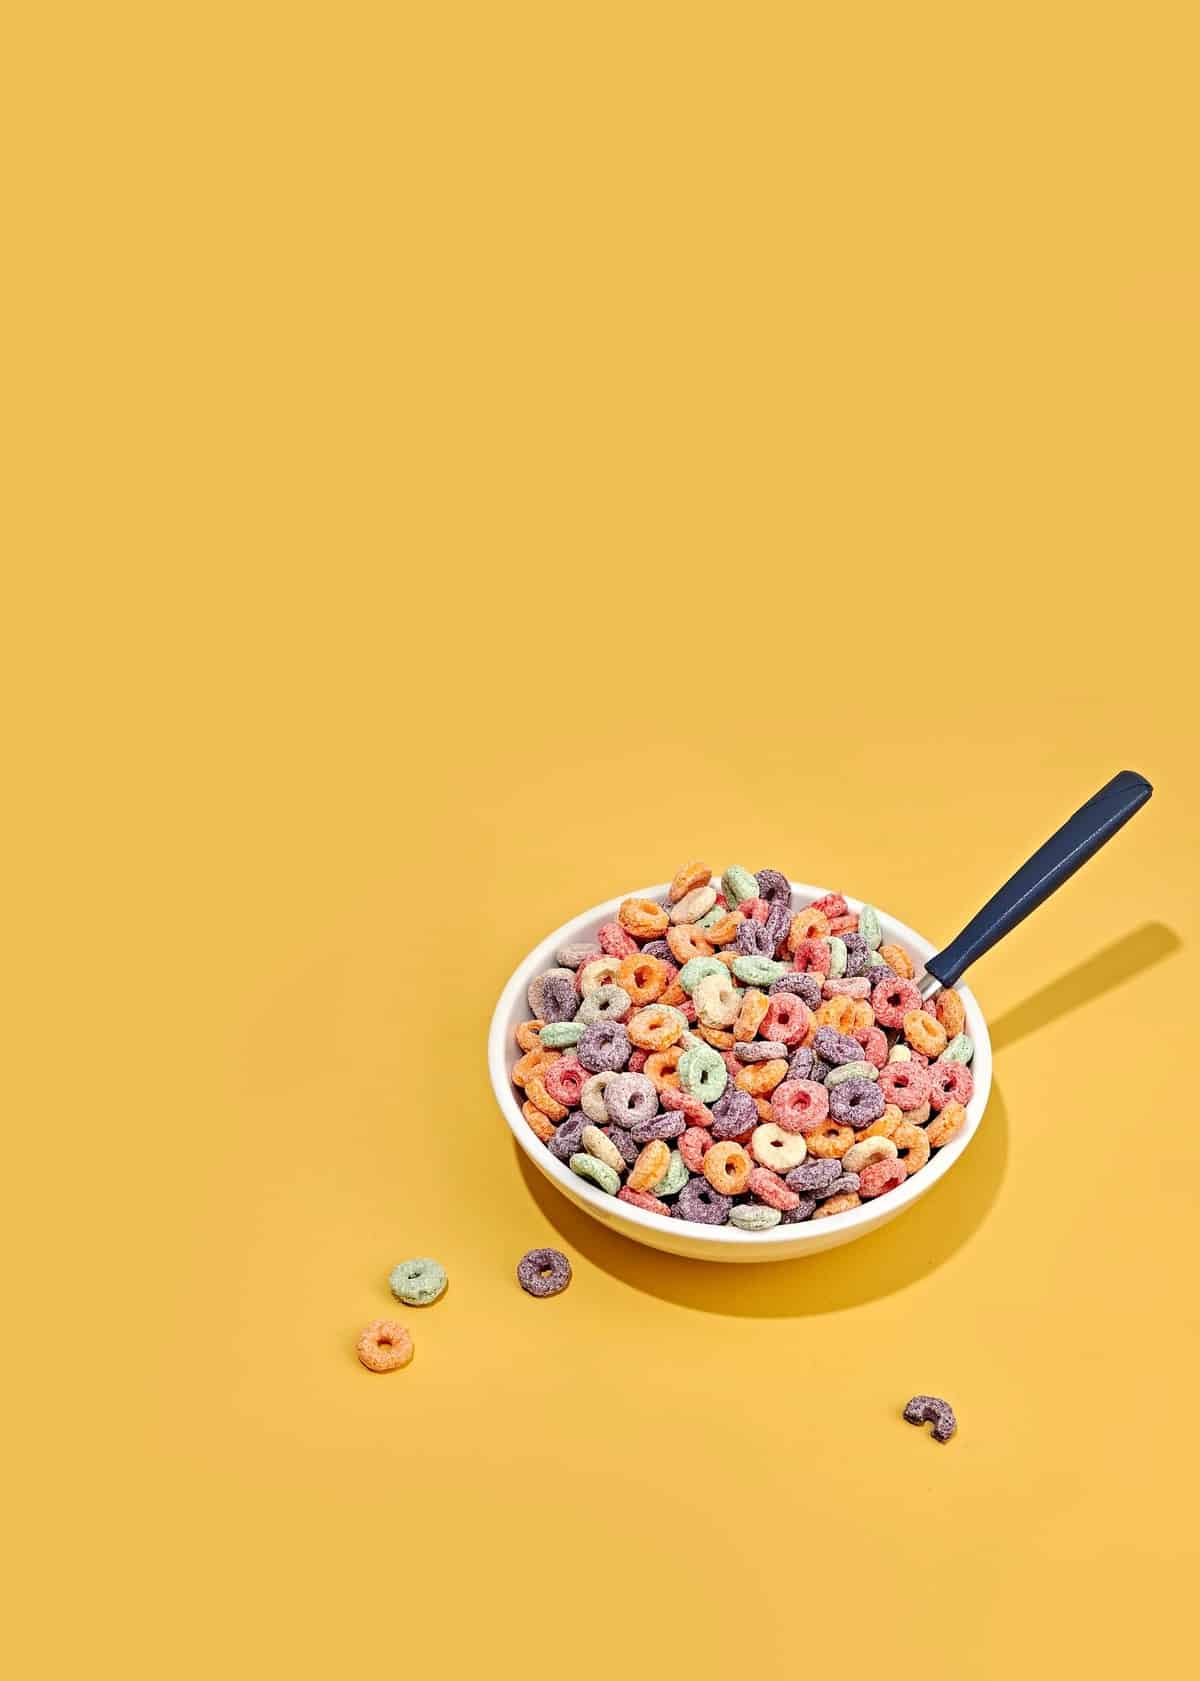
To explain this even further, I’ll share my personal story with trigger foods and disordered eating. When I was struggling with food, my trigger was sugary cereal. I was obsessed. So as part of my healing process, I started to make it part of my daily routine. I challenged myself to have a bowl of sugary cereal every morning without guilt or shame until eventually, the novelty wore off.

Fruit loop cereal in a bowl.

In the present day, I have no interest in sugary cereal when it’s in the house. Having said that, I also understand that not everyone is at a point in their relationship with food where they feel confident having all of their “trigger” foods hanging around. So in this case, particularly in the context of weight loss, I would suggest either mindfully and intentionally planning to buy them or going out for them, and when you do, enjoying them guilt free.

This is what I would call awareness, not restriction. You’re aware that this food is easy for you to overeat so you’re being intentional and mindful as you enjoy it, but you’re still approaching it with permission so as not to trigger a binge restrict cycle.

Tip #9: Make water your BFF

I think its a really common piece of diet advice to “not drink your calories” when trying to lose weight and that you should avoid all juice, soda, alcohol, and sugary coffee drinks. However, I am not that extreme. My approach is to choose water for hydration purposes and to work everything else into your diet the same way you would a fun ice cream cone with friends, or Friday family pizza night.

A hand holding up a glass of water for intuitive eating weight loss.

The reason why I am more intentional about limiting calorie-laden beverages compared to food is that we know that its easier to override our natural hunger and fullness cues when we drink our calories vs eating them.  There are a few reasons for this but experts believe that people have a harder time deriving psychological satisfaction from drinks because they mindlessly chug them back. On the other hand, we interact longer with food through smelling, biting, chewing, and intentionally swallowing.

Liquids also travel faster through the GI tract so they alter satiety and hunger hormones differently than food, especially if its a drink with little to no protein, fibre or fat. Research suggests that even when eating intuitively, we just don’t fully compensate for the calories we consume in liquids by eating less food. As a result, it’s easy to gain weight when drinking a lot of calories. In fact, one study on over 50,000 women found that those who increased their intake of sugar sweetened drinks from one a week to one per day added 358 calories daily and gained significant weight, while women who reduced their intake cut 319 calories.

But If juice is your thing, or you need double cream and double sugar in your coffee to function in life – then of course, work that into your day as you would anything else that will make your eating pattern sustainable and enjoyable. But what I am saying is to choose water for hydration, whole foods for nutrients, fibre, and satiety, and sugar sweetened beverages for pleasure, flavour and fun.

Tip #10: find your food faves

Take some time to figure out what you actually truly like. This goes for so called “healthy” foods as well as alleged “junk”. Through this you’ll maybe discover what special foods you will enjoy fully and more mindfully that will result in feeling truly satisfied rather than continually on a hunt for what you really want.

This also means diving deep to determine which “diet” alternatives are sufficient alternatives and which are not. For example, if you love Halo Top, great. But if eating a pint of Halo Top triggers a satisfaction hunt for the real deal and in the process you need to eat a bag of chocolate chips, a few low fat popsicles, and then finally plow through your Ben and Jerry’s, its probably not a great choice. So figure out what foods you truly want and enjoy and strategically work them into your week.

Tip #11: Prioritize sleep & manage stress

A grey cat sleeping on a bed.

There is solid evidence that skimping on these basic acts of self care can be detrimental to your weight loss efforts. Evidence suggests that lack of sleep can increase our hunger hormone ghrelin, reduce our satiety hormone leptin and as a result, can increase appetite and weight. It may also interfere with the reward center in the brain, resulting in greater cravings for high sugar and high fat foods. Its therefore not surprising that a 6-year prospective study found that those who slept less than 5 hours and more than 9 hours a night were 35% and 25% more likely to experience a 5 kilogram weight gain over 6 years, respectively.

Likewise, we have ample evidence that increases in the stress hormone cortisol is associated with weight gain over time. This increase in cortisol tends to result in gravitating towards more accessible food because we lack the mental energy to plan, prep, and cook.  Not to mention we also use food as a coping mechanism for stress.

Tip #12: Acknowledge your emotional eating patterns

Try not to weaponize food. It’s normal and healthy to eat in response to emotions some times since food is intrinsically and socially linked to celebration, mourning, culture and more. But when it becomes our only coping mechanism to deal with our emotions, it becomes a dangerous weapon. So try to experiment with other coping strategies for difficult times like journaling, walking, a hot shower, doodling, meditation or talking to a friend. If you’re finding yourself consistency turning to food to manage your emotions, a licensed therapist can definitely help.

Tip #13: choose whole foods more often

I don’t believe in setting arbitrary guidelines or rules on how much of your diet should be from whole unprocessed or minimally processed foods like yogurt or frozen fruit, vs ultra-processed snack foods or fast foods. There is no quality evidence that would inform a hard and fast ratio like this and I just see it as another rule to obsess over and inevitably break.

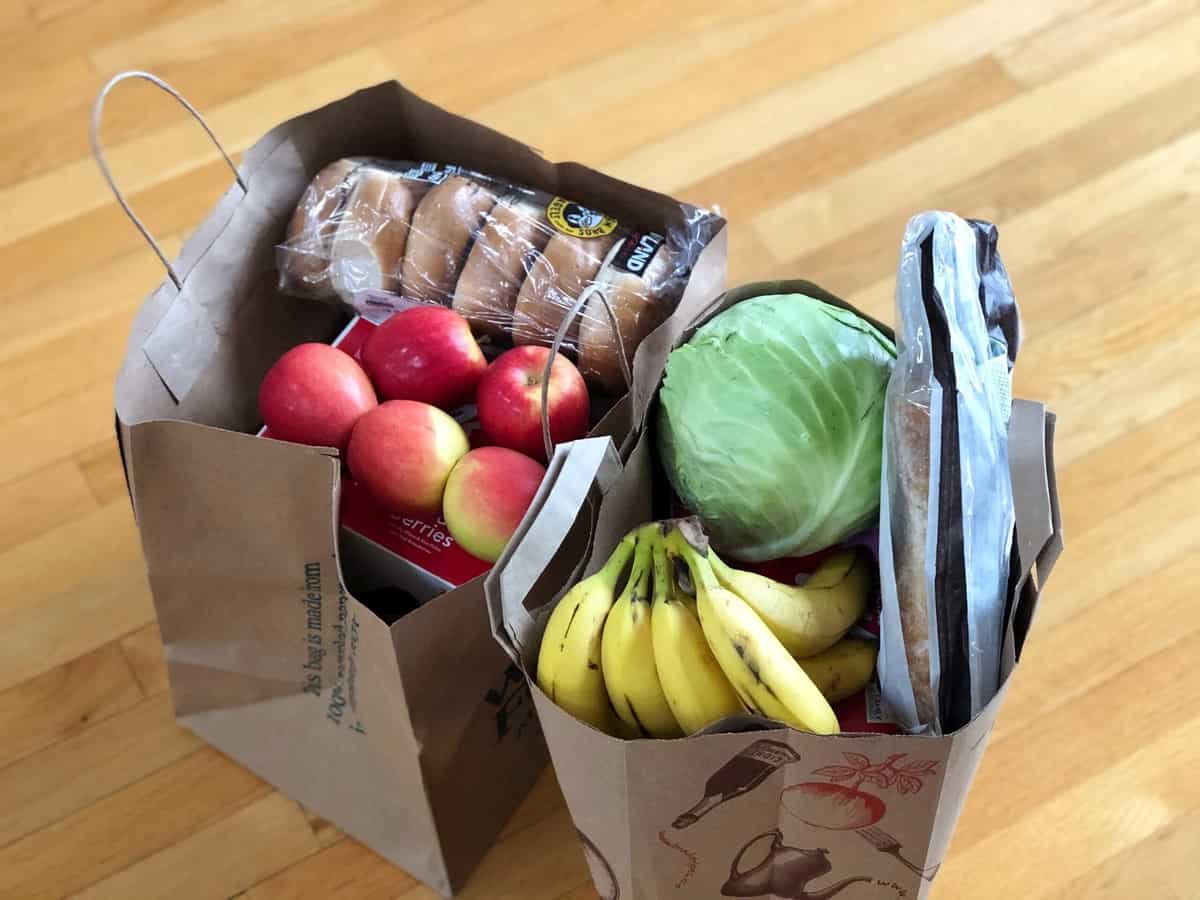
Two grocery bags full of fresh food.

So my advice instead is to think of convenience foods as “assistants” to the whole foods doing the heavy lifting in your diet. If a store bought ranch dressing is going to help you get a salad on your plate – eat the damn ranch. If popping a frozen pizza into the oven once a week means you help reduce your stress and get to bed at a reasonable hour, pizza party it is. Focus on the majority of your diet coming from whole or minimally processed foods, and let go of any guilt associated with the rest.

Tip #14: Move your body in ways that feel good

I actually think its helpful to decouple your association of exercise with weight loss. Yes, of course, exercise contributes to a caloric deficit which in turn can enable weight loss. But research suggests that exercise doesn’t contribute as much as we like to think to weight loss efforts and putting too much stock into it give people a false sense of entitlement to extra calories because they “put in the work”.

Regardless, we know there are tons of benefits to exercise. So my suggestion is to just focus on movement you enjoy. Ultimately, if you don’t enjoy the movement, you’re not going to stick to it, or you’re going to let it encourage overconsumption as a “reward” for a punishing regime. So incorporate some daily movement into your day as an act of self care, ideally something to support metabolic muscle like resistance training. But ultimately, make it something you can stick to for life. 

A woman doing yoga.

Tip #15: be kind to yourself

Losing weight is a marathon, not a sprint. Please do not make it a sprint. Because if your running skills are like mine, there’s a good chance you’ll fall on your face and never want to run again. In other words, if you rush it, statistically you’re more likely to gain that weight right back. Since we need to look at this as a long game, I also don’t recommend weighing yourself too often or maybe not at all. The scale is just one tool that may be supportive for some and toxic for others. Ultimately, everyone will have success markers that work best for them.

But if the weight loss stalls, don’t freak out. You’re not failing, so don’t give up and forgo the progress you’ve made and the healthy habits you’ve formed. Shift the focus to other markers of success to help you maintain momentum, even if the number on the scale isn’t what you want to see. Weight loss is so complicated and as much as we want to simplify it to calories in and calories out, our bodies often have other plans. So the best thing we can do is to work with our body not against it and give yourself some grace.

Bottom Line

My goal with these “intuitive eating weight loss” tips is to shift the focus away from denial and restriction, and towards more additive considerations that focus on self care, nourishment and optimizing nutrition. A reminder that this is not an exhaustive set of tips and if you are looking to find solutions that work for you, you’ll want to work with a dietitian for personalized care. But if you are sick of the extreme diet rollercoaster and the associated weight cycling, I hope these gentle nutrition tips offered some evidence-based long-term lifestyle changes to consider.

More Blog Posts You Might Like

If you liked this blog post on intuitive eating weight loss , then you might also like more blog posts on intuitive eating!

  • Will Intuitive Eating Help Me Lose Weight?
  • How to Make Peace with Food
  • How to Reject the Diet Mentality
  • Challenging the Food Police
Abbey Sharp

Abbey Sharp is a Registered Dietitian (RD), regulated by the Ontario College of Dietitians. She is a mom, YouTuber, Blogger, award winning cookbook author, media coach specializing in food and nutrition influencers, and a frequent contributor to national publications like Healthline and on national broadcast TV shows.
www.abbeyskitchen.com/about-abbey/

Last Updated August 10, 2021. Published August 10, 2021 By Abbey Sharp 67 Comments

Watermelon Cake (Vegan Summer Dessert!)

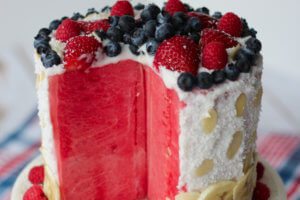
A sliced opened watermelon cake with berries on top.

This fresh Watermelon Cake is the perfect summertime dessert! It’s light, refreshing, and is delightful on a hot day. Made with just a handful of ingredients, you don’t even have to turn on the oven to prepare this cake!

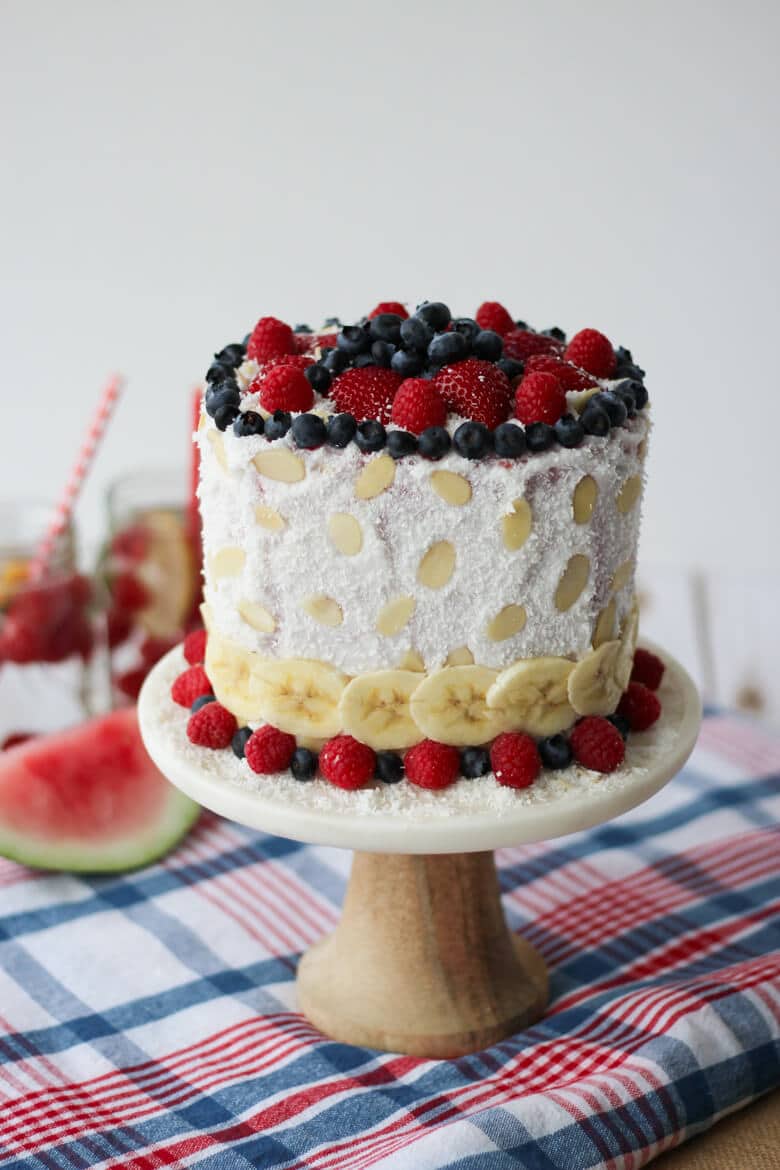
watermelon cake topped with berries on a serving dish.

There are a lot of things I truly love about summer (you know, like ice cream, burgers, butter-soaked corn, beer), but the best thing by far is watermelon. While watermelon is fantastic just sliced up and slurped up, it’s irresistible in this vegan watermelon cake. It’s a perfect dessert to please a crowd because it’s light enough that you can enjoy after a huge BBQ dinner, dairy-free, vegan, gluten-free, and OMG so good.

Table of contents

  • Why This Recipe Works
  • Key Ingredients
  • How to Make This Recipe
  • Expert Tips
  • Recipe FAQs
  • More Recipes You Might Like

Why This Recipe Works

I make this watermelon cake at least once a month in the summer months and here is why you should as well!

  • It’s great for summer evenings or holidays such as the 4th of July, Canada Day, and labour day.
  • It comes together quickly.
  • You can decorate it however you please.
  • It doesn’t require planning ahead. There’s no need to bake, chill, etc.

Key Ingredients

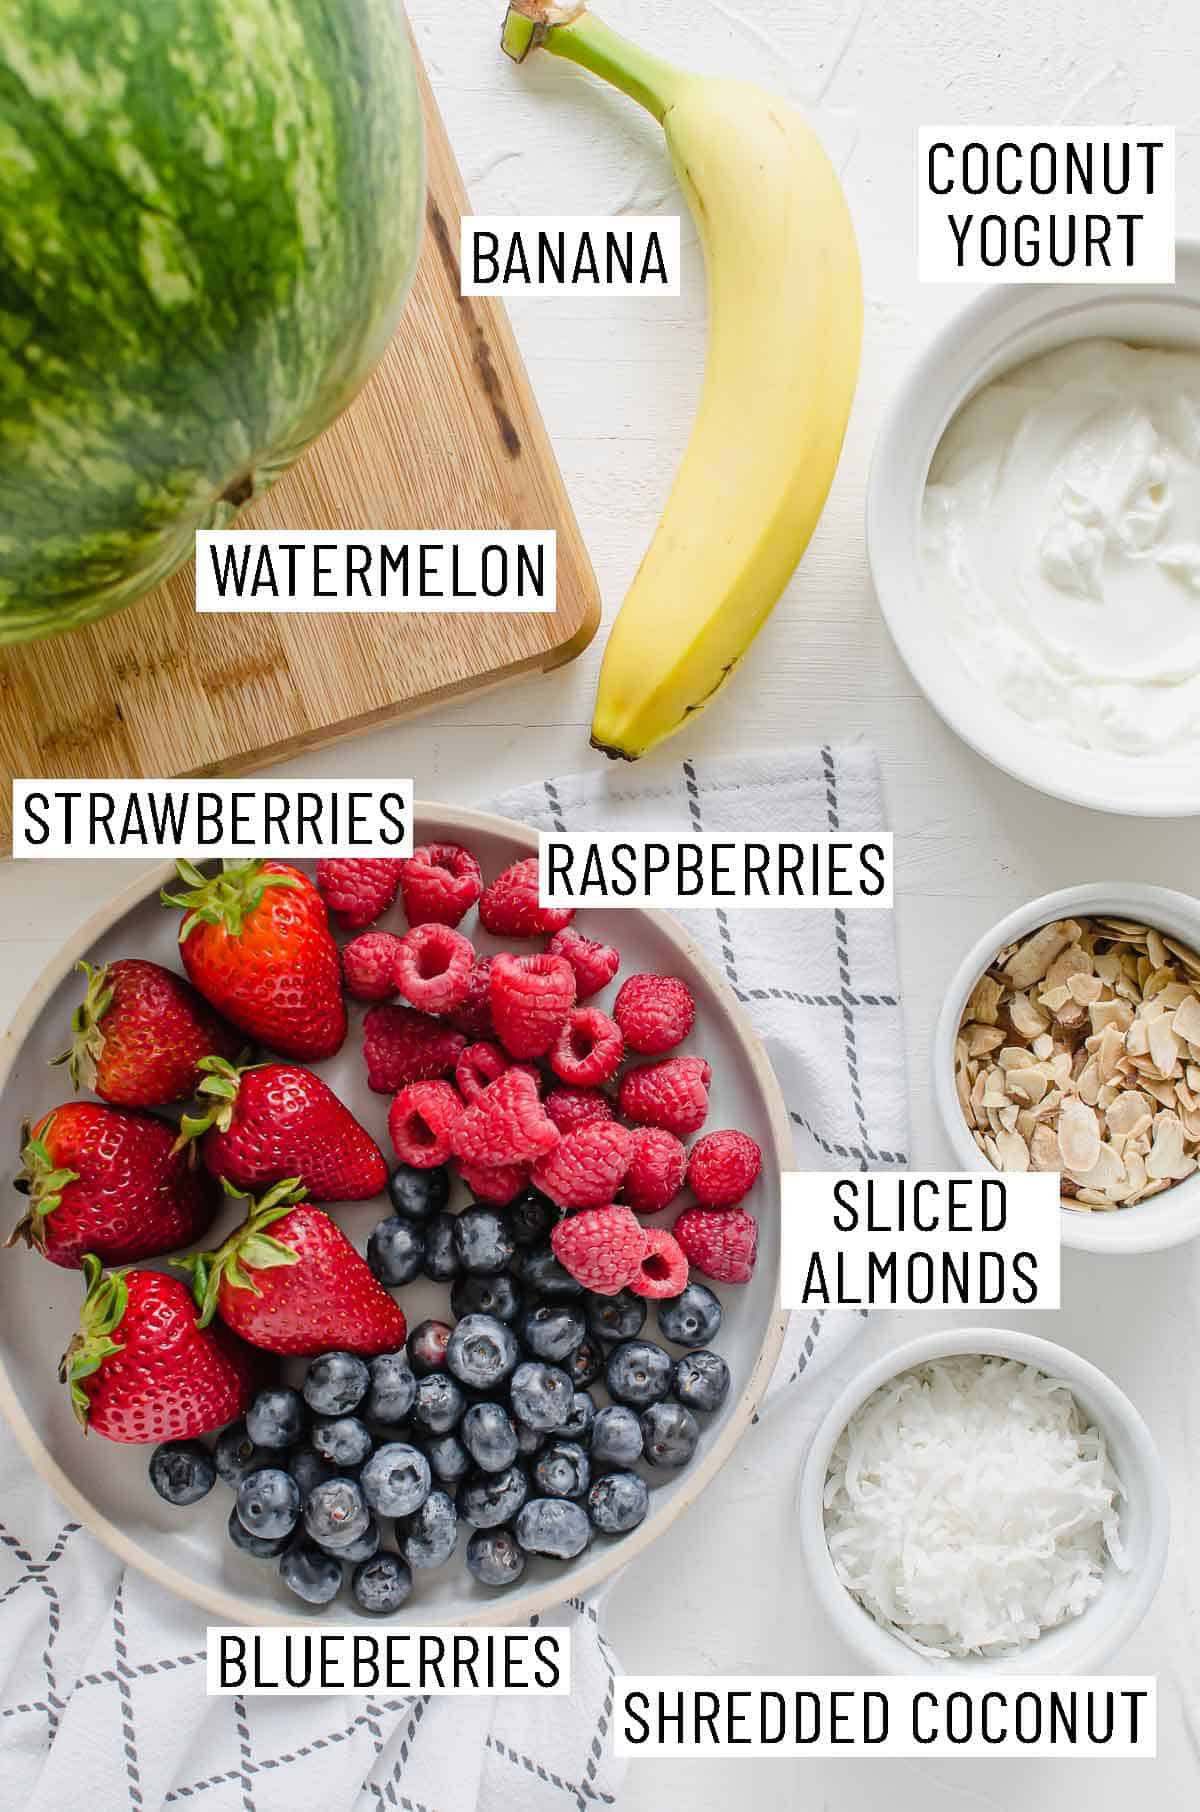
Ingredients needed to make a watermelon cake.

Watermelon — Watermelon is low in calories and packed with antioxidants like lycopene which research has linked to a reduced risk of certain cancers.

Coconut yogurt — This is what we “frost” the cake with. The coconut flavour pairs really well with the watermelon as well.

Shredded coconut — Again, this is used to frost the cake as it’s mixed into the coconut yogurt. It also adds to the coconut flavouring!

Toppings — I decorate and top the watermelon cake with an assortment of fresh fruits and sliced almonds. Feel free to change it around!

How to Make This Recipe

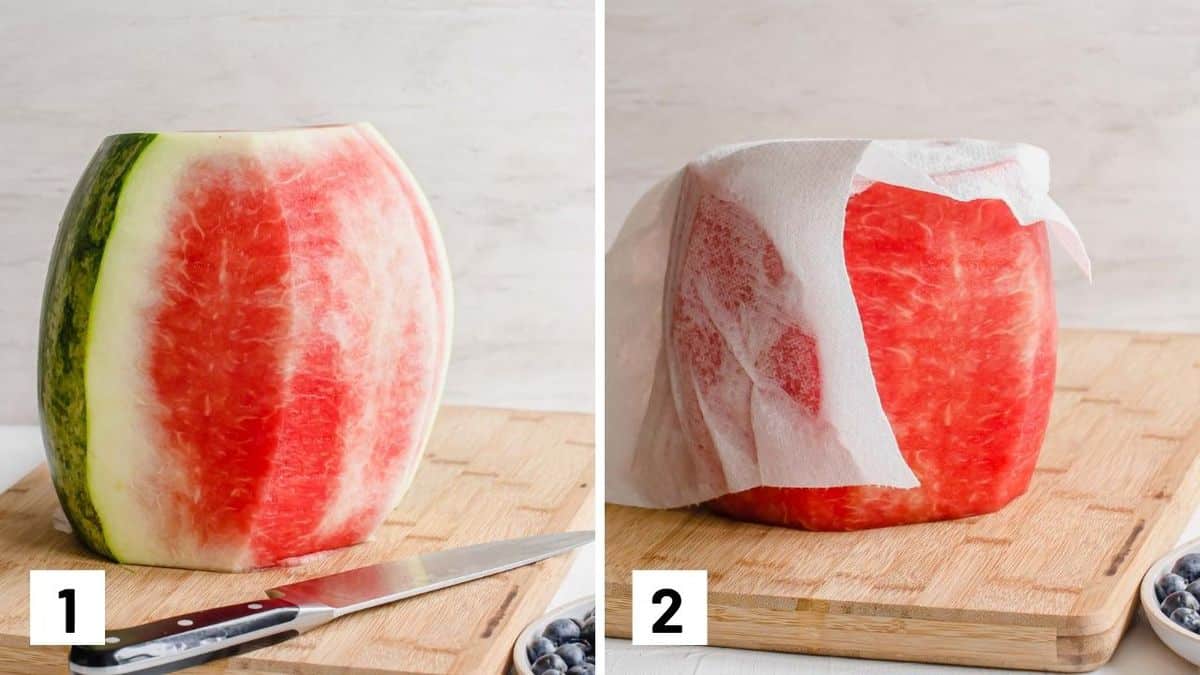
Set of two photos showing a watermelon with the skin cut off and then patted dry with a paper towel.

Step 1: Cut off the ends of the watermelon and sit it up straight. Cut the watermelon edges off to yield a straight up and down side all around. Then go around the sides you just removed and round off the edges so it looks a bit more circular.

Step 2: Pat the watermelon a bit dry with a paper towel or a dishtowel. Set onto serving platter or cake stand on top of newspaper.

Set of two photos showing yogurt mixed with shredded coconut and then spread on to the fruit on a serving platter.

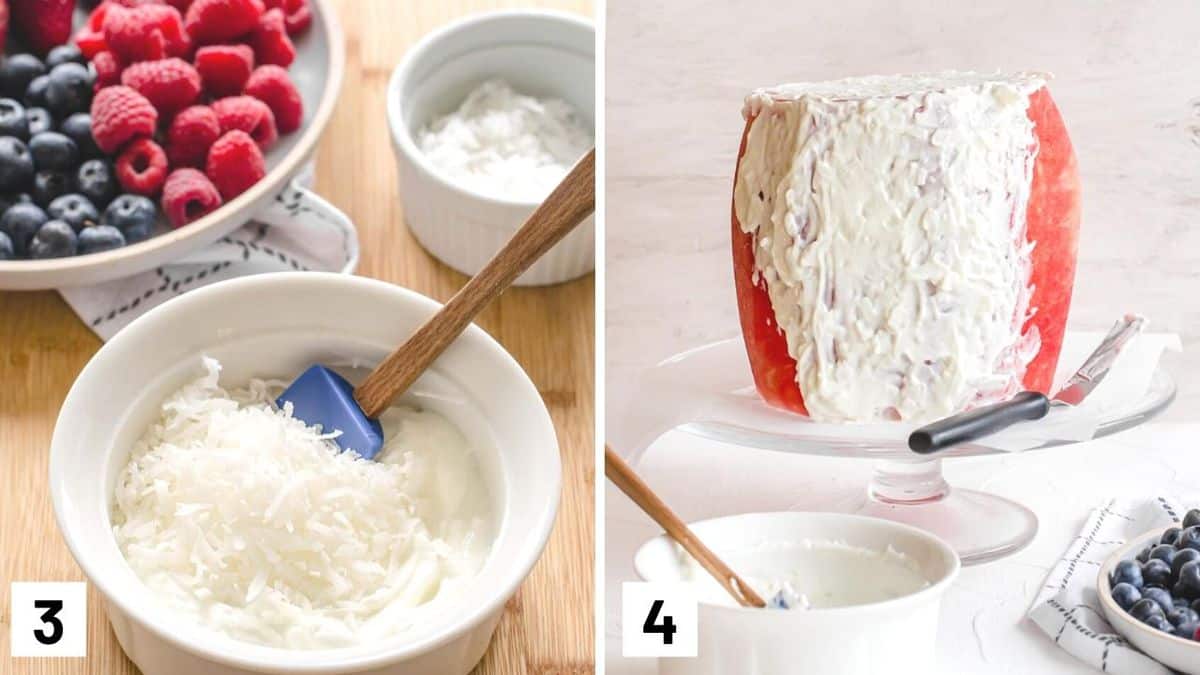
Step 3: In a small bowl, mix together the equal parts yogurt and coconut.

Step 4: Add a very thin layer on the top and sides of the watermelon. It may seem like more is better, but it will actually make it harder to decorate.
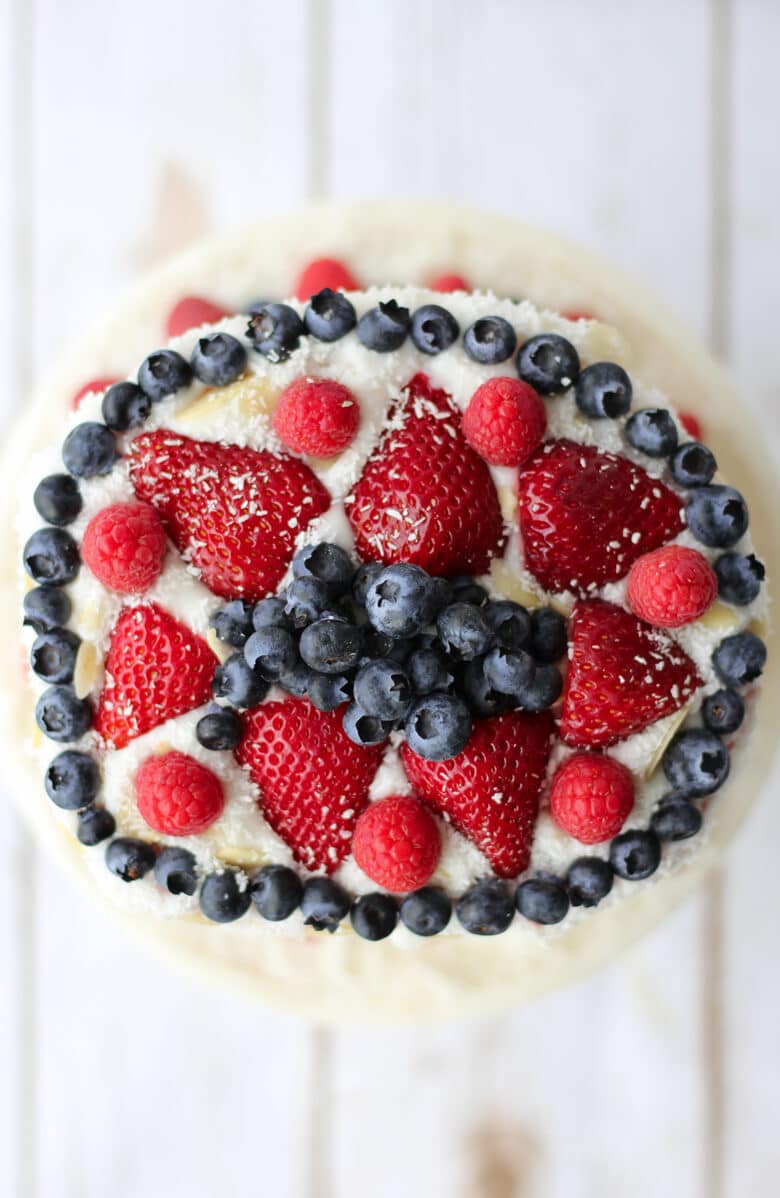
Decorate the top of the watermelon cake with the berries and sliced almonds.

Expert Tips

Feel free to skip the fruit and coat with some sprinkles, chocolate shavings, or coconut whipped cream! Feel free to change things around.

An offset spatula makes frosting the watermelon cake much easier.

Can’t finish a whole watermelon? Cut it in half and wrap the other half with plastic wrap and store it in the fridge. Frost and serve just half of the watermelon.

Recipe FAQs

How do I pick a watermelon?

A watermelon should feel heavy for its size. When you knock on it, there should be a deep sound if ripe. If it sounds hollow, it’s overripe. If the melon is very shiny, it is likely underripe as well.

How do I store leftovers?

Simply store the leftover watermelon cake in an airtight container or covered in the fridge. Enjoy it as soon as possible.

What if I have a nut allergy?

Simply skip the almonds if you have a nut allergy.

Why do I need to put down a newspaper?

Sprinkling the coconut onto the sides can be difficult, so I suggest you place a newspaper down and gently toss the coconut onto the sides. I also found that you can blow it on and it works A-MAZ-ING, but I maybe wouldn’t tell anyone you did that LOL

watermelon cake topped with mixed berries.

More Recipes You Might Like

Want more vegan friendly recipes like this watermelon cake? Try these reader favourites:

  • VEGETABLE SPRING ROLLS WITH CASHEW DIPPING SAUCE (VEGAN!)
  • VEGAN CAULIFLOWER WINGS WITH “HONEY” GARLIC SAUCE
  • PROTEIN OATS WITH TOFU (VEGAN)
  • VEGAN BUTTER “CHICKEN” WITH TOFU (GLUTEN FREE)

Have you tried making a vegan watermelon cake? Leave me a comment below with some of your favourite ideas!

For all my American friends, this red, white and blue Vegan Watermelon Cake will be the healthiest dessert at your 4th of July party. It's low calorie, low fat, dairy free and gluten free!
Print Recipe
4.93 from 13 votes

Watermelon Cake (Vegan Summer Dessert!)

This fresh Watermelon Cake is the perfect summertime dessert! It's light, refreshing, and is delightful on a hot day. Made with just a handful of ingredients, you don't even have to turn on the oven to prepare this cake!
Prep Time20 minutes mins
Total Time20 minutes mins
Course: Dessert
Cuisine: American
Servings: 8 -10 people
Calories: 273kcal
Author: Abbey Sharp

Ingredients

Cake

  • 1 large watermelon
  • 1/2 cup dairy-free coconut yogurt unsweetened
  • 1/2 cup unsweetened finely shredded coconut

Decorations

  • 1 small banana very thinly sliced
  • 6 strawberries halved
  • 1/3 cup blueberries
  • 1/2 cup raspberries
  • 1/4 cup unsweetened finely shredded coconut
  • 2 tbsp thinly sliced almonds

Instructions

  • Cut off the ends of the watermelon and sit it up straight. Cut the watermelon edges off to yield a straight up and down side all around. Then go around the sides you just removed and round off the edges so it looks a bit more circular.
  • Pat the watermelon a bit dry with paper towel or a dish towel. Set onto serving platter on top of newspaper.
  • In a small bowl, mix together the equal parts yogurt and coconut. Add a very thin layer on the top and sides of the watermelon. It may seem like more is better, but it will actually make it harder to decorate.
  • Decorate the top of the cake with the berries. I added a ring of blueberries around the edge, strawberries on top, raspberries peeking between the strawberries and lots of blueberries in the middle.
  • Lightly toss coconut in between any empty places on the top and all along the sides of the “cake”.
  • Add a row of alternating blueberries and raspberries along the bottom, then an overlapping ring of thin banana slices. Finish with thinly sliced almonds scattered throughout the sides of the cake.
  • Refrigerate until ready to serve and enjoy crisp and cold.

Notes

  • Feel free to skip the fruit and coat with some sprinkles, chocolate shavings, or coconut whipped cream! Feel free to change things around.
  • An offset spatula makes frosting the watermelon cake much easier.
  • Can’t finish a whole watermelon? Cut it in half and wrap the other half with plastic wrap and store it in the fridge. Frost and serve just half of the watermelon.

Nutrition

Calories: 273kcal | Carbohydrates: 52g | Protein: 5g | Fat: 8g | Saturated Fat: 5g | Sodium: 11mg | Potassium: 778mg | Fiber: 5g | Sugar: 40g | Vitamin A: 3210IU | Vitamin C: 56.6mg | Calcium: 70mg | Iron: 1.9mg
Abbey Sharp

Abbey Sharp is a Registered Dietitian (RD), regulated by the Ontario College of Dietitians. She is a mom, YouTuber, Blogger, award winning cookbook author, media coach specializing in food and nutrition influencers, and a frequent contributor to national publications like Healthline and on national broadcast TV shows.
www.abbeyskitchen.com/about-abbey/

Last Updated August 9, 2021. Published August 9, 2021 By Abbey Sharp 4 Comments

Fruit Spring Rolls (Easy Vegan Recipe)

fruit spring rolls on a pink plate

These easy fruit spring rolls are a nutrient dense snack, breakfast or healthy dessert that is naturally gluten free and vegan! Super easy to make, you’ll want to enjoy these fresh fruit rolls all summer long.

fruit spring rolls on a pink plate.

One of my favourite summer appetizers or snacks is cold rolls. I love that I can use up whatever veggies, protein, and noodles I have going on in the house, and they’re delicious dipped in homemade or store-bought sauce. But as I try to get creative with new interesting breakfasts for my son, I had an idea – why don’t I make sweet fruit spring rolls, instead? And alas, these beauties were born and man, were they ever good.

Table of contents

  • Why This Recipe Works
  • Key Ingredients
  • How to Make This Recipe
  • Expert Tips
  • Recipe FAQs
  • More Recipes You Might Like

Why This Recipe Works

These fruit spring rolls have been my go-to summer recipe and I bet they’ll be yours as well! Some of the reasons I love them are:

  • Practically no-cook recipe.
  • Easy way to use up leftovers or odds and ends in the fridge.
  • Perfect size for toddler hands.
  • They’re so refreshing.

Key Ingredients

Ingredients needed to make fruit spring rolls.

Quinoa — Quinoa is packed with plant-based protein and fibre and is a hearty delicious grain. I always make a big batch of it at the start of the week and then can throw it into salads, soups, stir-fries, breakfast bowls, or meals like this!

Nut Butter — Use your favourite or whatever your family has on hand, but this not only adds healthy fats, fibre, and protein but also is the “glue” that sticks your quinoa together for the fruit spring rolls filling.

Rice paper wraps — Yah, you kinda need these to make rice paper rolls. These are usually found in the Asian / International section of your local grocery store. They can also be found online.

Fruit — Use whatever you like and enjoy. I do find that mangos are particularly delicious, but you could make these in the fall with apples, summer with blueberries, and spring with strawberries if you want.

Toppings — Add in any seeds or nuts you would like to add a satisfying crunch.

Yogurt — This is my go-to dip, and if you’re not vegan, you can use a Greek yogurt for extra protein. Otherwise, any plant-based yogurt will work here!

How to Make This Recipe

Set of two photos showing quinoa being mixed with nut butter and seasonings and rice paper being soaked with water.

Step 1: In a bowl, mix together the cooked quinoa, nut butter, cinnamon, and salt. Set aside.

Step 2: Carefully place one rice paper wrap into a pie plate filled with luke warm water. Allow it to soften until it’s easily pliable. Place on a flat surface or cutting board.

Set of three photos showing how to roll a rice paper wrap.

Step 3: Layer about 3 tbsp of the quinoa mixture onto the lower 2/3 of the wrap along with the fruit, and nuts or seeds. Roll the bottom over the filling, then tuck in the sides, and continue to roll up. Serve these fruit spring rolls with yogurt for dipping!

Expert Tips

Don’t let the rice paper soak for too long in the water or it’ll let up folding into itself as you remove it from the water, making it harder to work with.

These fruit spring rolls are difficult to make too far ahead of time as the rice paper will harden in the fridge. If you’d like to prepare these ahead of time, you can prep the quinoa mixture in an airtight container in the fridge. You can also cut your fruit ahead of time. This way, all you have to do is roll them the morning of.

For an even fruitier flavour to your summer rolls, you can cook your quinoa in orange juice.

Recipe FAQs

What should I serve these cold rolls with?

These cold rolls are great for breakfast with some yogurt for added protein, or for a snack all on their own.

Can I use rice or noodles instead of quinoa?

Yes, this recipe is very versatile when it comes to the carbs (you could even just do fruit if you really wanted to), but I do love quinoa for the extra protein!

Can I make this recipe nut-free?

You can use sun butter for these fruit spring rolls to make them nut-free and school-friendly if packing these into lunch boxes.

What herbs could you add?

If you have access to some summer herbs, basil or mint would be so delicious in these rice paper wraps with all that summer fruit!

How can I make these even more like a dessert?

Ohhh good question! I would totally add in some chocolate chips or skor bits to the roll and then serve it with a dark chocolate dip instead of yogurt. HELLO.

What is your favourite yogurt for dipping?

I prefer a plain Greek yogurt with a little honey swirled in, but if you’re plant-based, soy yogurt will have the most protein compared to almond, or coconut.

Are these fruit spring rolls kid friendly?

Are you kidding? Look how fun they are! Kids LOVE to dip (check out some of my favourite dips here), so these are fruity, sweet, colourful and super dippable.

rice paper wraps with fruit and quinoa on a pink plate

More Recipes You Might Like

Want more fruity snacks just like these fruity spring rolls? Here are some favourites:

  • Apple Oatmeal Muffins 
  • Sheet Pan Pancake Fingers 
  • Blueberry Pomegranate and Lemon Popsicles 
  • Vegan Oatmeal Breakfast Bars with Berries 

What are some of your favourite add ins for these easy fruit spring rolls? Leave me a comment below with ideas on what you’re adding!

three fruit spring rolls stacked ontop of one another
Print Recipe
5 from 5 votes

Fruit Spring Rolls (Easy Vegan Recipe)

These easy fruit spring rolls are a nutrient dense snack, breakfast or healthy dessert that is naturally gluten free and vegan! Super easy to make, you'll want to enjoy these fresh fruit rolls all summer long!
Prep Time20 minutes mins
Total Time20 minutes mins
Course: Snack
Cuisine: American
Servings: 8
Calories: 153kcal
Author: Abbey Sharp

Ingredients

  • 1 cup cooked quinoa
  • 3 tbsp natural nut butter
  • 1/4 tsp cinnamon
  • Pinch salt
  • 8 round rice paper wraps
  • 2 tbsp nuts or seeds minced if whole
  • 2 cups fresh sliced berries or fruit
  • Yogurt for dipping

Instructions

  • In a bowl, mix together the cooked quinoa, nut butter, cinnamon and salt. Set aside.
  • Carefully place one rice paper wrap into a pie plate filled with luke warm water. Allow it to soften until it’s easily pliable. Place on a flat surface or cutting board.
  • Layer about 3 tbsp of the quinoa mixture onto the lower 2/3 of the wrap along with the fruit, and nuts or seeds. Roll the bottom over the filling, then tuck in the sides, and continue to roll up. Serve with yogurt for dipping!

Notes

  • Don’t let the rice paper soak for too long in the water or it’ll let up folding into itself as you remove it from the water, making it harder to work with.
  • These fruit spring rolls are difficult to make too far ahead of time as the rice paper will harden in the fridge. If you’d like to prepare these ahead of time, you can prep the quinoa mixture in an airtight container in the fridge. You can also cut your fruit ahead of time. This way, all you have to do is roll them the morning of.
  • For an even fruitier flavour to your summer rolls, you can cook your quinoa in orange juice.

Nutrition

Calories: 153kcal | Carbohydrates: 23g | Protein: 5g | Fat: 5g | Saturated Fat: 1g | Cholesterol: 2mg | Sodium: 139mg | Potassium: 130mg | Fiber: 3g | Sugar: 4g | Vitamin A: 18IU | Vitamin C: 1mg | Calcium: 20mg | Iron: 1mg
Abbey Sharp

Abbey Sharp is a Registered Dietitian (RD), regulated by the Ontario College of Dietitians. She is a mom, YouTuber, Blogger, award winning cookbook author, media coach specializing in food and nutrition influencers, and a frequent contributor to national publications like Healthline and on national broadcast TV shows.
www.abbeyskitchen.com/about-abbey/

Last Updated October 15, 2021. Published August 4, 2021 By Abbey Sharp Leave a Comment

Cow’s Milk Protein Allergy in Infants | Should breastfeeding moms go dairy-free?

Baby laying down with bottle.

We explore the research on Cow’s Milk Protein Allergy in infants, its symptoms, risk factors, and treatment options as well as if breastfeeding moms need to go dairy-free.

Infant laying down with bottle of milk with cows milk protein.

Food allergies affect up to 10% of infants and the prevalence of allergies in children continues to be on the rise. Cow’s Milk Protein Allergy (CMPA) is among the most common allergies found in babies and is diagnosed in 2 to 6% of children, primarily in infants under the age of one. In this blog post we deep dive into all things CMPA and break down the common symptoms, risk factors, diagnostic tests, treatment options, and whether or not you need to go dairy-free.

Cow looking into camera with one cow on either side.

What is a food allergy?

First things first, what is a food allergy and how does the body react when an allergen is ingested? In short, a food allergy is when the body’s immune system responds abnormally to the protein in a certain food that is otherwise harmless. This results in an allergic reaction ranging from a rash to anaphylaxis, the latter of which can be life-threatening.

The most common food allergens include: 

  • Peanuts
  • Tree nuts
  • Eggs 
  • Fish
  • Crustaceans/molluscs
  • Wheat
  • Soy
  • Sesame seeds
  • Mustard
  • Sulphites
  • Milk 

Regardless of the type of food allergy, there are two different immune reactions that can occur in the body in response to an allergen:

  1. Immunoglobulin E (IgE) mediated: The body creates the IgE antibody which usually occurs within 30 minutes of consuming the allergen and may result in symptoms as serious as anaphylaxis.
  2. Non-IgE mediated: Other parts of the immune system respond to the allergen, but it does not involve IgE antibodies. The exact response is still not fully understood. In contrast to IgE mediated reactions, allergy symptoms are delayed by a few hours or even days, and often include rashes or digestive problems.

What is CMPA?

CMPA is an allergy to the casein and/or whey protein found in cow’s milk and can be either IgE mediated or non-IgE mediated. This means it can result in symptoms ranging from mild to severe often including digestive discomfort and breathing issues. The symptoms, tests, and treatments depend on whether the allergy is IgE or non-IgE mediated as this determines the way the allergy presents itself in the body.

Cow’s milk protein can be found in breastmilk in very small amounts if the mother consumes dairy. A mother can continue to breastfeed a child with CMPA, but some dietary changes may be recommended by their doctor or dietitian.

Lactose Intolerance vs CMPA

CMPA and lactose intolerance are commonly mistaken for one another. As mentioned, a food allergy is the abnormal immune response to a protein in a food. A food intolerance, on the other hand, is an abnormal digestive response. With a food intolerance, food is not digested properly due to sensitivities to certain ingredients or a lack of digestive enzymes. This may lead to symptoms like cramps, nausea, and diarrhea. Common intolerances include those to gluten or lactose.

CMPA is sometimes referred to as cow’s milk protein intolerance or CMPI, which may lead to some confusion. In reality CMPI is not an intolerance at all, as the reaction is initiated by the immune system (NOT the digestive system). In short, CMPI was once used to describe non-IgE mediated CMPA before non-IgE mediated allergies were well understood.

With that in mind, lactose intolerance occurs when an individual cannot produce lactase, the digestive enzyme needed to break down the lactose sugar found in cow’s milk. Consuming lactose when one is lactose intolerant will result in digestive distress such as bloating, stomach pain, and diarrhea. Despite their discomfort, these symptoms are not life-threatening and can often be mediated by ingesting a lactose enzyme, like Lactaid, prior to consuming dairy. While lactose intolerance is very rare in children under the age of 5, it is often a lifelong condition.

On the other hand, CMPA has the potential to be life-threatening as it can trigger a more aggressive immune reaction in the body. Luckily CMPA is not a lifelong condition as nearly half of all infants outgrow this disorder after 1 year, 75% outgrow it after 3 years, and almost all children outgrow it after 5 years. Despite their differences, CMPA and lactose intolerance can both be managed by eliminating cow’s milk or other dairy products from the diet.

Young girl holding glass of milk and mouth.

What are the symptoms of CMPA?

Common symptoms of CMPA can be divided into four categories: 

  1. Skin – symptoms include eczema, rash or hives, and swelling.
  2. Digestive – symptoms include diarrhea, constipation, vomiting, and acid reflux.
  3. Respiratory – symptoms include difficulty breathing, runny nose, and coughing.
  4. Other – such as trouble sleeping, drowsiness, or excessive crying. 

Of these types, skin and digestive problems are the most common, especially in non IgE-mediated allergies (delayed). If the allergy is IgE-mediated, the symptoms will be present within a few minutes and are more likely to include respiratory issues, as well as skin and digestive problems.

Luckily, most children affected by CMPA tend to experience mild to moderate symptoms, rather than severe. Regardless, all symptoms can be managed through changes to the diet, so an accurate and early diagnosis is important. 

What are the risk factors?

While there is no single cause of cow’s milk protein allergy in infants, genetics is one of the most commonly sourced risk factors. A child whose parents have allergies (to food or non-food items) has a higher risk of developing an allergy to cow’s milk protein than does a child whose parents do not have any allergies. One study found that the risk is even higher if the child’s mother has a food allergy when compared to fathers with food allergies. The same study found that exposure to antibiotics while in the womb and the introduction of food or drink other than breastmilk before the age of 4 months may contribute to the risk of CMPA.

There is also some evidence that early exposure to cow’s milk protein, either through breastmilk or complementary foods after the age of 6 months, may act as a protective factor against CMPA. This means that a breastfeeding mother who consumes cow’s milk or introduces it into their child’s diet after 6 months of age may lower the baby’s risk of developing CMPA.

Baby breastfeeding.

How Is CMPA Diagnosed?

If a cow’s milk allergy is suspected, diagnostic tests include a blood test, skin prick test, or a patch test, as well as an elimination diet paired with a food challenge. If your baby is displaying any symptoms of CMPA, it is important to get tested as the long-term effects of undiagnosed cow’s milk protein allergy in infants can affect a child’s growth and development by increasing their risk of stunted growth, rickets (a vitamin D/calcium deficiency), anemia, malnutrition, undeveloped bones, asthma, colic, and acid reflux.

Blood Test

The blood test, often known as a Radioallergosorbent Test or RAST, tests for IgE antibodies. A very little amount of blood is taken and tested for the antibodies against cow’s milk protein. This test will not be effective if your child’s allergy is non IgE-mediated.

Skin Prick Test

The skin prick test, or scratch test, also tests for IgE antibodies. A small scratch is made to the child’s skin, usually on the arm, and a small amount of the allergen is added to the area. If a cow’s milk protein allergy exists, the skin will react. After a few minutes, the area will be inflamed, itchy, and/or red, indicating a possible allergic reaction.

Doctor doing allergy skin prick test for cows milk protein allergy on patient’s arm.

Patch Test

The patch test is similar to the skin prick test, but rather than scratching the skin the child wears a patch with the allergen on their arm or back for about 48 hours. Your doctor will then assess whether the allergen resulted in a reaction, which may also include inflammation, itchiness, and/or redness.

Elimination Diet & Oral Food Challenge

The elimination/food challenge combination test is considered the gold standard of CMPA testing as it is often the most reliable. The elimination diet requires the child to cut out cow’s milk protein for 2 to 6 weeks and slowly reintroduce it back into the diet through what is called an oral food challenge.

If symptoms do not improve during the elimination diet, consult your doctor regarding other possibilities, as it is unlikely that your child has CMPA. If symptoms disappear or improve with elimination of cow’s milk protein, and then reappear upon reintroduction, the test is positive. This means that the child will likely be prescribed an elimination diet to avoid cow’s milk products. The child can then be re-challenged 6 to 12 months after the initial food challenge reaction to determine whether they have outgrown the allergy.

If your child is diagnosed with a mild to moderate non-IgE mediated cow’s milk allergy, they may be reintroduced to dairy-containing foods using the Milk Ladder. This is a 6-step evidence-based approach that can be introduced after the child has been milk-free for at least 6 months. This guideline starts the child out with foods that contain small amounts of cow’s milk, such as a cookie, and progresses to liquid pasteurized cow’s milk. This approach tests the child’s tolerance and should always be done under the supervision of a doctor or dietitian.

CMPA is rarely found in babies who are exclusively breastfed. Should it be suspected, the mother may undergo a similar elimination diet and food challenge.

Dietary Recommendations for Cow’s Milk Protein Allergy in Infants

Dietary recommendations for moM

While it is rare, some babies react to the cow’s milk protein in breastmilk and breastfeeding mothers may be required to eliminate it from their diet. As discussed, after a few months of following an elimination diet, cow’s milk protein may be reintroduced through an oral food challenge following the milk ladder while also monitoring the baby’s tolerance and symptoms. However, unless CMPA is properly diagnosed, it is not recommended that a breastfeeding mother avoid dairy products as it can increase the risk of calcium deficiency in mom. 

In some instances, a child with CMPA may also react to soy, but the research on this is limited. With that said, we can’t say for certain that breastfeeding mothers should avoid soy to prevent a CMPA reaction in baby. However, anecdotally, some breastfeeding mothers may find that going soy-free may help to improve CMPA symptoms, so going soy-free may be a matter of trial and error. If you wanted to try going soy-free to see if it improves CMPA symptoms in your little one, this would mean eliminating foods such as edamame, soy milk, tofu, miso, soy sauce, tempeh, soybeans, soy nuts, and meat alternatives containing soy.

If you do decide to trial a dairy-free and/or soy-free diet, make sure to speak to your doctor or dietitian about a calcium supplement and how you can compensate with plant-based sources of calcium such as nuts, legumes, leafy greens, and fortified foods. This is particularly important for breastfeeding mothers as the breast milk will pull calcium from bone stores to ensure that the baby gets enough, which can have long-term implications for bone health. 

Dietary recommendations for the child

Just as with breastfeeding mothers, children with CMPA may be required to eliminate cow’s milk from their diet. This includes milk, cream, yogurt, ice cream, cheese, cottage cheese, chocolate, sauces, dips, and other prepackaged foods that are made with cow’s milk. Children over the age of 12 months do not usually require breastmilk or formula supplementation to meet their nutritional needs since they can eat a balanced diet while following an elimination diet. On the other hand, children under the age of 12 months may require a formula to supplement their diet if breastfeeding is not an option. 

It is important to note that you should never place your child on an elimination/reintroduction diet without a doctor’s recommendation and supervision. Limiting cow’s milk from the diet without proper guidance may lead to an imbalanced diet, or calcium and vitamin D deficiency.

Cows milk protein foods including cheese, yogurt, and milk on white surface.

Soy Formula

Up to 14% of children with CMPA also react to soy. While it is not recommended to eliminate soy from a child’s diet without a reaction or doctor’s recommendation, soy formula may not be an option for your child if they cannot tolerate it.

Extensively Hydrolyzed Formula

This type of formula contains the cow’s milk protein casein that has been broken down so that it is easier for the child to digest. This option is tolerated by 90% of infants with CMPA.

Amino Acid Formula

If your child does not tolerate soy or extensively hydrolyzed formulas, amino acid formulas are a great option. This type of formula contains amino acids, which are the building blocks of protein. It is tolerated by most children with CMPA as it is often made from either corn or rice. However, keep in mind that this formula tends to be more costly and has a unique flavour that some children do not like. 

Bottom line

Cows milk protein allergy in infants is among the most common allergies found in babies and can result in mild to severe symptoms in your little one. Unlike lactose intolerance, CMPA is usually outgrown but must be managed through dietary changes by eliminating dairy products from the child’s diet – whether it be through solid foods and/or from the mom’s breast milk. Before making any change to you or your child’s diet, make sure to consult with your doctor and dietitian so that CMPA can be properly diagnosed and you can prevent nutritional deficiencies through supplementation and non-dairy foods. 

Contribution by: Rebecca Harris, MHSc (c)
Edited by: Giselle Segovia RD, MHSc

MORE BLOG POSTS YOU MIGHT LIKE 

  • Is Soy Formula Bad for Babies that are Vegan or Allergic to Dairy? 
  • Why Are Food Allergies in Kids on the Rise? | Allergy Prevention Tips
  • Are Food Sensitivity Tests BS or Legit? A Dietitian’s Perspective
  • How and When to Introduce Food Allergens to Babies with Baby Led Weaning or Spoon-Feeding
  • Do Babies Need Cow’s Milk? | Is Raising an Infant Vegan Safe and Healthy?
Abbey Sharp

Abbey Sharp is a Registered Dietitian (RD), regulated by the Ontario College of Dietitians. She is a mom, YouTuber, Blogger, award winning cookbook author, media coach specializing in food and nutrition influencers, and a frequent contributor to national publications like Healthline and on national broadcast TV shows.
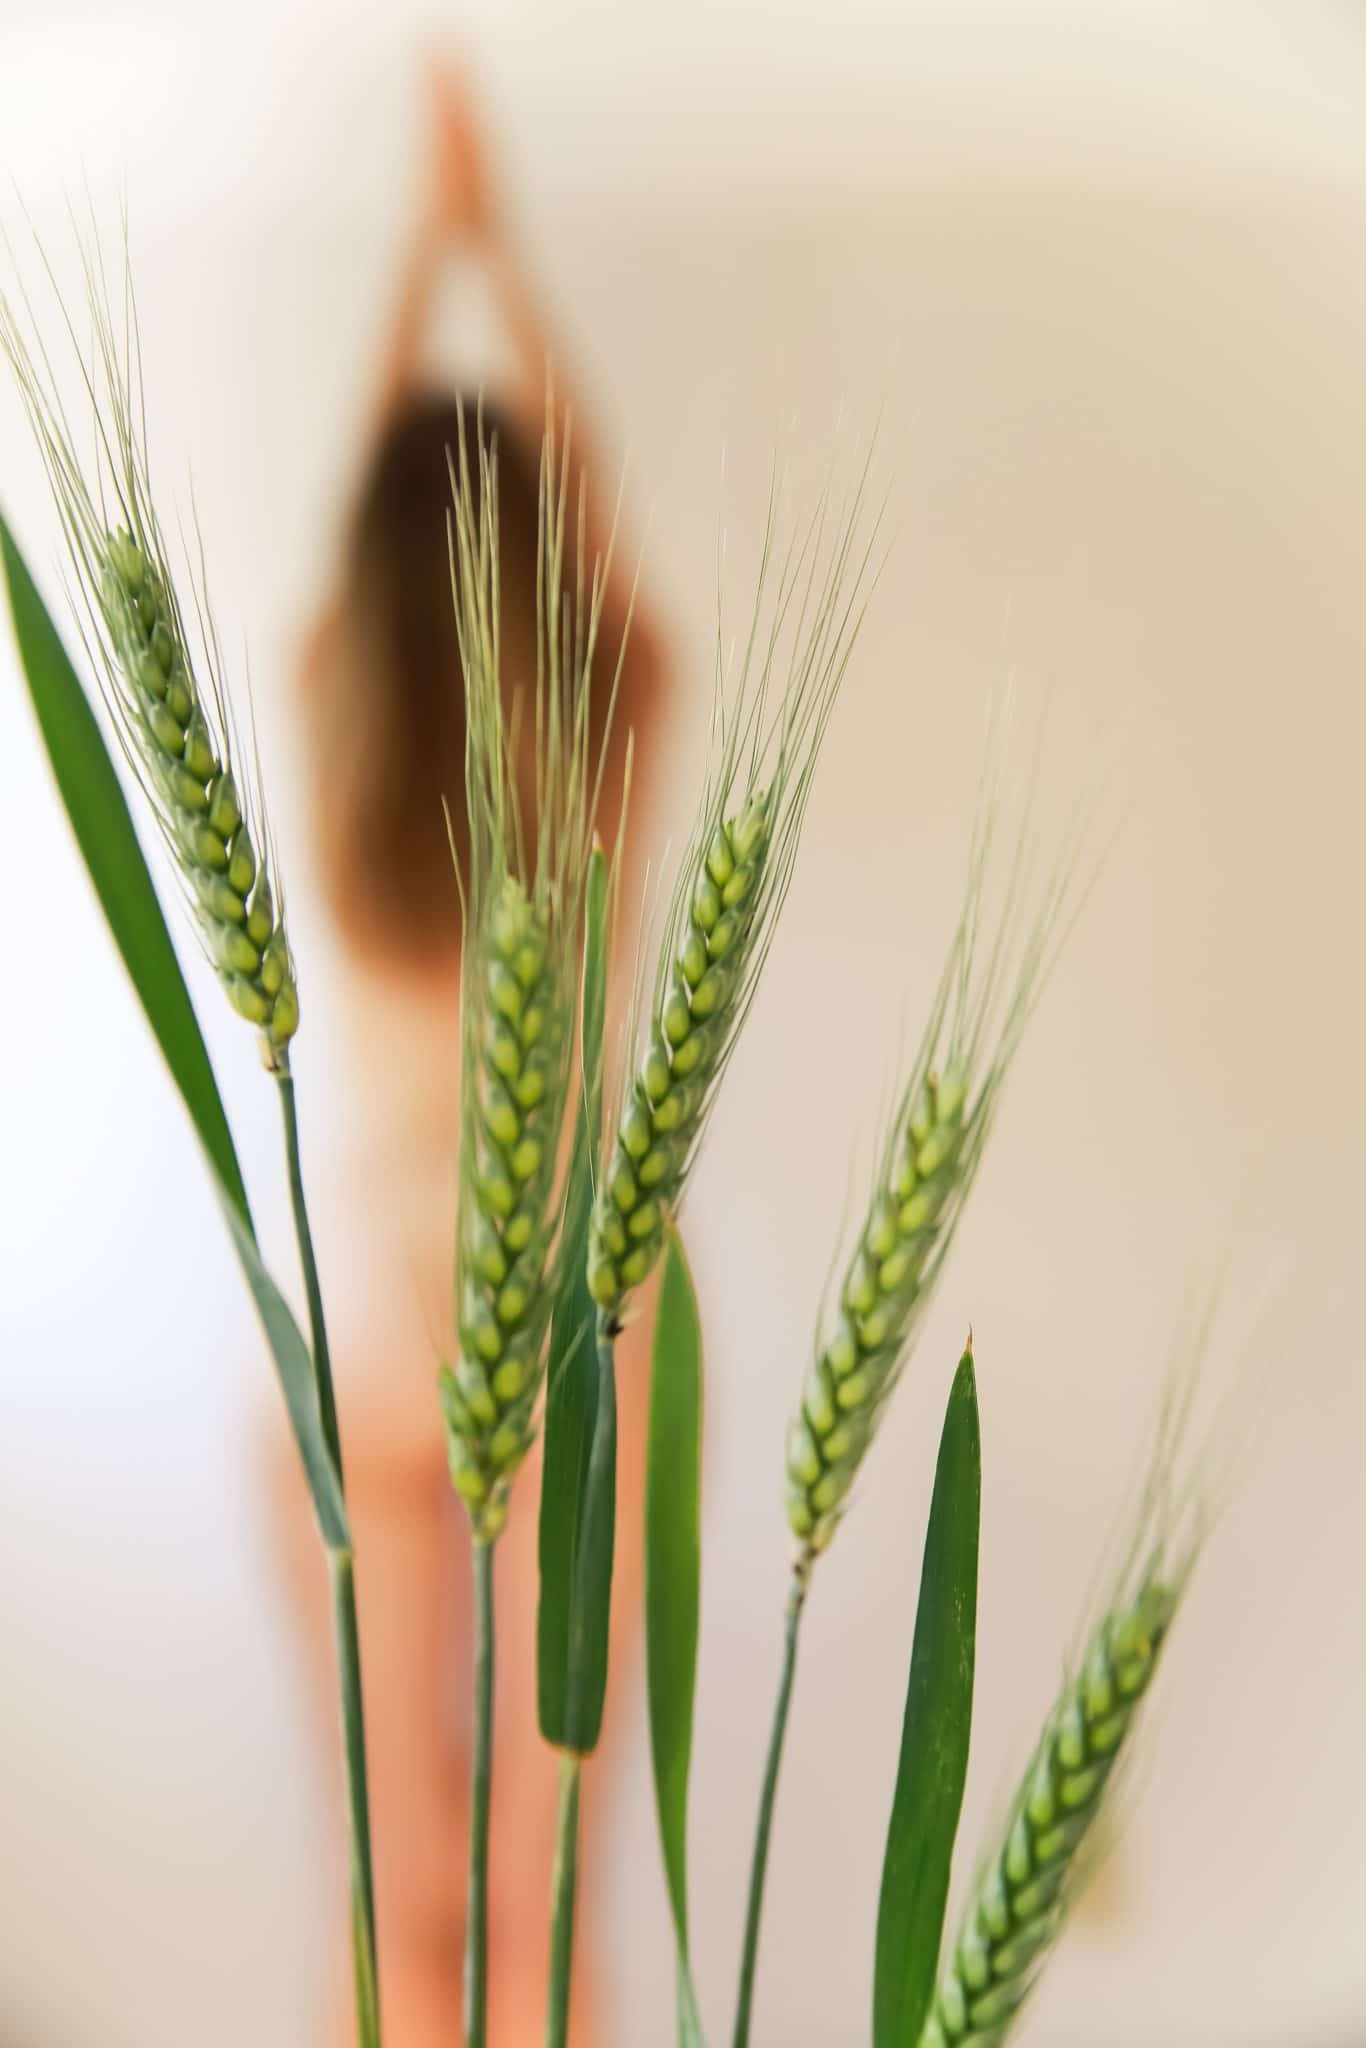
www.abbeyskitchen.com/about-abbey/

Last Updated August 30, 2022. Published August 3, 2021 By Abbey Sharp Leave a Comment

Salted Toffee Cookies (Vegan Lactation Recipe)

lactation toffee cookies on a baking tray

These Salted Toffee Lactation Cookies are naturally gluten-free, vegan-friendly, and packed with ingredients said to help increase breastmilk production (but they’re so good, even non-breastfeeding folks will love them!)

salted toffee cookies on a white plate

Well, folks, I am officially in the thick of this newborn breastfeeding life. If you recall from my first postpartum experience, breastfeeding was a massive struggle for me. I didn’t have enough milk (supply issues), and our latch was so bad E just would never be able to stay on the boob for more than a hot minute without screaming his head off. This time around, I had enough milk to get me going (not a crazy amount but enough to feed O plus a bit to freeze), but our latch wasn’t the greatest. I do notice that when my boobs are extra full with milk that he drinks better (and therefore sleeps better), so I’m anxious to make sure my supply doesn’t dwindle. That’s where these amazing lactation cookies come in. Packed with a sweet flavour and lots of nutritious add-ins for mama’s milk, these salted toffee cookies make amazing breastfeeding fuel AND a sweet treat for the whole family.

Table of contents

  • Why This Recipe Works
  • Key Ingredients
  • How to Make This Recipe
  • Expert Tips
  • Recipe FAQs
  • More Recipes You Might Like

Why This Recipe Works

Need some convincing reasons to enjoy these toffee cookies on repeat?

  • They’re so tasty
  • Not just for new moms. Everyone will love these!
  • Packed with healthy goodness
  • Vegan-friendly
  • Gluten-free
  • Freezer-friendly

Key Ingredients

Ingredients needed to make toffee cookies.

Toffee Bits — If you are strictly vegan, follow my recipe below for homemade toffee bits. Otherwise, you can purchase toffee bits at your local bulk store or in the baking aisle. 

Ground flax — This is to prepare the flax eggs to keep these cookies vegan. I like to mix it with almond milk just for extra flavour, but you can always use water. The flax also adds healthy omega 3s, fibre, and protein, and is said to help promote breastmilk production.

Gluten-free quick oats — No not use steel cut oats in their place.

Gluten-free all-purpose flour —If you’re not gluten-free, you can feel free to use regular all-purpose flour here.

Brewers yeast — Brewers yeast doesn’t really have much of a flavour (maybe just kinda toasty), but it is said to be one of the best ingredients for promoting milk production.

Vegan butter — If you don’t need to keep these vegan, feel free to use regular butter instead.

Dark brown sugar — I like a good molasses-rich dark brown sugar, but you can also use light brown sugar in its place.

Cashew butter — If you don’t have cashew butter, peanut or almond will work. I just prefer cashew in this recipe because it is relatively neutral in flavour so it allows the toffee to shine.

Fleur de sel — Adding a little salt on top takes a good cookie and makes it a GREAT one.

How to Make This Recipe

Set of three photos showing vegan butter, sugar, maple syrup, soy milk, and salt in a pan, simmered, then cracked into a bowl.

Step 1: To make the toffee for these toffee cookies, line a baking sheet with parchment or a silpat and set it aside. Have a small heavy saucepan heated to medium-high and add the butter, sugar, soy milk, and salt. Stir until the sugar and butter melts.

Step 2: Cook until it reaches the hard crack stage (300 F or 150 C) – watch your thermometer like a hawk because it can easily get too hot. Turn off the heat, and carefully (using gloves) pour the toffee onto the parchment or silpat and spread it out quickly. Place in the fridge or freezer until set (about 10 minutes in the freezer).

Step 3: Remove the baking sheet from the freezer and smash the toffee into tiny pieces. Set aside.

Set of three photos showing the vegan butter being beat and then mixed with the dry ingredients and formed into round balls.

Step 4: Prepare the flax eggs by combining 2 tbsp of flaxseed with 5 tbsp unsweetened vanilla almond milk. Refrigerate for 10-15 minutes until it looks thick and gloopy. In a mixer, beat the vegan butter until softened. Add in the sugar and beat until it looks smooth and fluffy. Preheat the oven the 350 degrees F and line three baking sheets with parchment paper or a silpat. Add in the cashew butter, flax eggs, and vanilla and beat until mixed.

Step 5: In a large bowl, mix together the oats, gluten-free flour, brewer’s yeast, flaxseed, baking powder, soda, cinnamon, and salt. Stir the wet ingredients into the dry and then fold in the toffee pieces if using.

Step 6: Roll the toffee cookie batter into balls about 1 1/2 inches in diameter and place on the baking sheet with about 2 inches between them. Gently press the cookies down just a touch. Sprinkle generously with fleur de sel. Bake for 15-17 minutes or until the bottoms are light golden brown. Allow to cool for at least 5 minutes before picking up.

Expert Tips

Purchase toffee bits instead of making your own to save time making these toffee cookies.

Store in an airtight container for up to 5 days, or in the freezer for 6 months. You can leave them at room temperature.

Want to make this more fun? Add some chocolate chips to the toffee cookies!

To smash the toffee bits, you can use a meat mallet or rolling pin.

The toffee recipe that worked the best used Earth Balance and was heated to a hard crack (300 F) vs a soft crack. The toffee recipe down below makes around double of what you need. Cutting the recipe any smaller would require a very tiny pot. You can always store the extra toffee in an airtight container in the fridge for another recipe.

Recipe FAQs

What are the ingredients that make these good for breastfeeding

There are a lot of wives tales about certain foods helping with breastmilk production. I actually wrote a whole blog post about them, which you can check out right here. The truth is, there isn’t a ton of evidence for these “galactagogues” as they’re called, but regardless, these ingredients do tend to be nutrient dense and delicious, and therefore help YOU get the fuel you need to make milk. Here are the ingredients in this recipe that supposedly do the trick:
– Oats
– Flax
– Brewers Yeast

Do I need to make these toffee cookies vegan?

Absolutely not. While I have not tested these without the flax eggs (since the added flax was a bonus for the breastmilk and for extra nutrition), you can try using regular eggs and regular dairy butter.

Do these cookies have to be gluten free?

Nope. You can use non-gluten-free oats and flour if you’re not sensitive to gluten. 

What if I’m allergic to nuts?

If the cashew butter is a no-no, you can try using a soy-based butter or sunflower seed butter. Either one will work!

What else can I do to increase my breastmilk supply?

There are a lot of food, supplement, herb, and non-food suggestions on how to increase your milk supply. We wrote a whole evidence-based blog post on breastmilk supply that you can check out right here.

Are these lactation cookies safe for people who are not breastfeeding?

Of course! I can ASSURE YOU that these cookies will not just make a man make breastmilk LOL Nor will it encourage a woman to start leaking if she is not already nursing and producing those hormones. These lactation cookies are 100% safe for anyone who loves oatmeal cookies and salted toffee (aka EVERYONE).

Can I freeze these cookies and how long will they last?

These cookies can be stored at room temperature in an air-tight container for about 3-4 days. To freeze them, put them on a baking sheet lined with a silpat and freeze for 30 minutes before transferring to a freezer bag for up to 4 months.

birds eye view of salted toffee cookies

More Recipes You Might Like

We love lactation cookies around here and a lot of them are vegan! Here are some of our favourites if you love these toffee cookies:

  • Vegan Carrot Cake Lactation Cookies 
  • Salted Chocolate Almond Vegan Lactation Cookies 
  • Lemon Poppyseed Vegan Lactation Cookies 
  • Vegan Salted Tahini Cookies 

What are you trying to eat more of if you’re breastfeeding to increase your breastmilk supply? Leave me a comment below with your thoughts! 

lactation toffee cookies on a baking tray
Print Recipe
5 from 2 votes

Salted Toffee Cookies (Vegan Lactation Recipe)

These Salted Toffee Lactation Cookies are naturally gluten-free, vegan-friendly, and packed with ingredients said to help increase breastmilk production (but they're so good, even non-breastfeeding folks will love them!)
Prep Time30 minutes mins
Cook Time20 minutes mins
Total Time50 minutes mins
Course: Dessert, Snack
Cuisine: American
Servings: 36 Cookies
Calories: 215kcal
Author: Abbey Sharp

Ingredients

For the Toffee (Optional):

  • ¼ cup vegan butter I use Earth Balance
  • ¼ cup & 2 tbsp white sugar
  • 2 tbsp unsweetened soy milk
  • 2½ tsp maple syrup
  • Sprinkle of Salt

For the Toffee Cookies:

  • 3 flax eggs 3 tbsp ground flaxseed with 7 tbsp unsweetened vanilla almond milk
  • 3 cups gluten free quick oats
  • 1½ cups gluten free all purpose flour
  • 5 tbsp brewers yeast
  • 3 tbsp ground flaxseed
  • ½ tsp baking powder
  • ½ tsp baking soda
  • ½ tsp cinnamon
  • ¼ tsp salt
  • 1 cup vegan butter
  • 1½ cups dark brown sugar
  • ¼ cup cashew butter
  • 2 tsp vanilla extract
  • ¼ cup vegan toffee bits
  • Fleur de sel for garnish

Instructions

To Make the Optional Toffee:

  • Line a baking sheet with parchment or a silpat and set aside.
  • Have a heavy saucepot heated to medium high and add the butter, sugar, maple, soy milk and salt. Stir until the sugar and butter melts. Cook until it reaches the soft crack stage (285 F) – watch your thermometer like a hawk because it can easily get too hot.
  • Turn off the heat, and carefully (using gloves) pour the toffee onto the parchment or silpat and spread it out quickly. Place in the fridge or freezer until set then smash into tiny pieces. Set aside.

To Make the Toffee Cookies:

  • Preheat the oven the 350 degrees F and line three baking sheets with parchment paper or a silpat.
  • Prepare the flax eggs by combining 3 tbsp of flaxseed with 7 tbsp unsweetened vanilla almond milk. Refrigerate for 10-15 minutes until it looks thick and gloopy.
  • In a large bowl, mix together the oats, gluten free flour, brewer’s yeast, flaxseed, baking powder, soda, cinnamon, and salt.
  • In another bowl (or your stand mixer), beat the vegan butter until softened. Add in the sugar and beat until it looks smooth and fluffy. Add in the cashew butter, flax eggs, and vanilla and beat until mixed.
  • Stir the wet ingredients into the dry and then fold in the toffee pieces if using.
  • Roll into balls about 1 1/2 inches in diameter and place on the baking sheet with about 2 inches between them (12 per baking sheet). It should yield about 36 cookies.
  • Gently press the cookies down just a touch.
  • Sprinkle generously with fleur de sel and bake for 15-17 minutes until the bottoms and sides turn golden brown. Allow to cool for at least 5 minutes before picking up. Store in an airtight container for up to 5 days, or in the freezer for 6 months.

Notes

  • Purchase toffee bits instead of making your own to save time making these toffee cookies.
  • Store in an airtight container for up to 5 days, or in the freezer for 6 months. You can leave them at room temperature.
  • Want to make this more fun? Add some chocolate chips to the toffee cookies!
  • To smash the toffee bits, you can use a meat mallet or rolling pin.
  • The toffee recipe that worked the best used Earth Balance and was heated to a hard crack (300 F) vs a soft crack. The toffee recipe down below makes around double of what you need. Cutting the recipe any smaller would require a very tiny pot. You can always store the extra toffee in an airtight container in the fridge for another recipe.

Nutrition

Calories: 215kcal | Carbohydrates: 27g | Protein: 3g | Fat: 11g | Saturated Fat: 3g | Cholesterol: 2mg | Sodium: 157mg | Potassium: 127mg | Fiber: 2g | Sugar: 17g | Vitamin A: 505IU | Calcium: 28mg | Iron: 1mg
Abbey Sharp

Abbey Sharp is a Registered Dietitian (RD), regulated by the Ontario College of Dietitians. She is a mom, YouTuber, Blogger, award winning cookbook author, media coach specializing in food and nutrition influencers, and a frequent contributor to national publications like Healthline and on national broadcast TV shows.
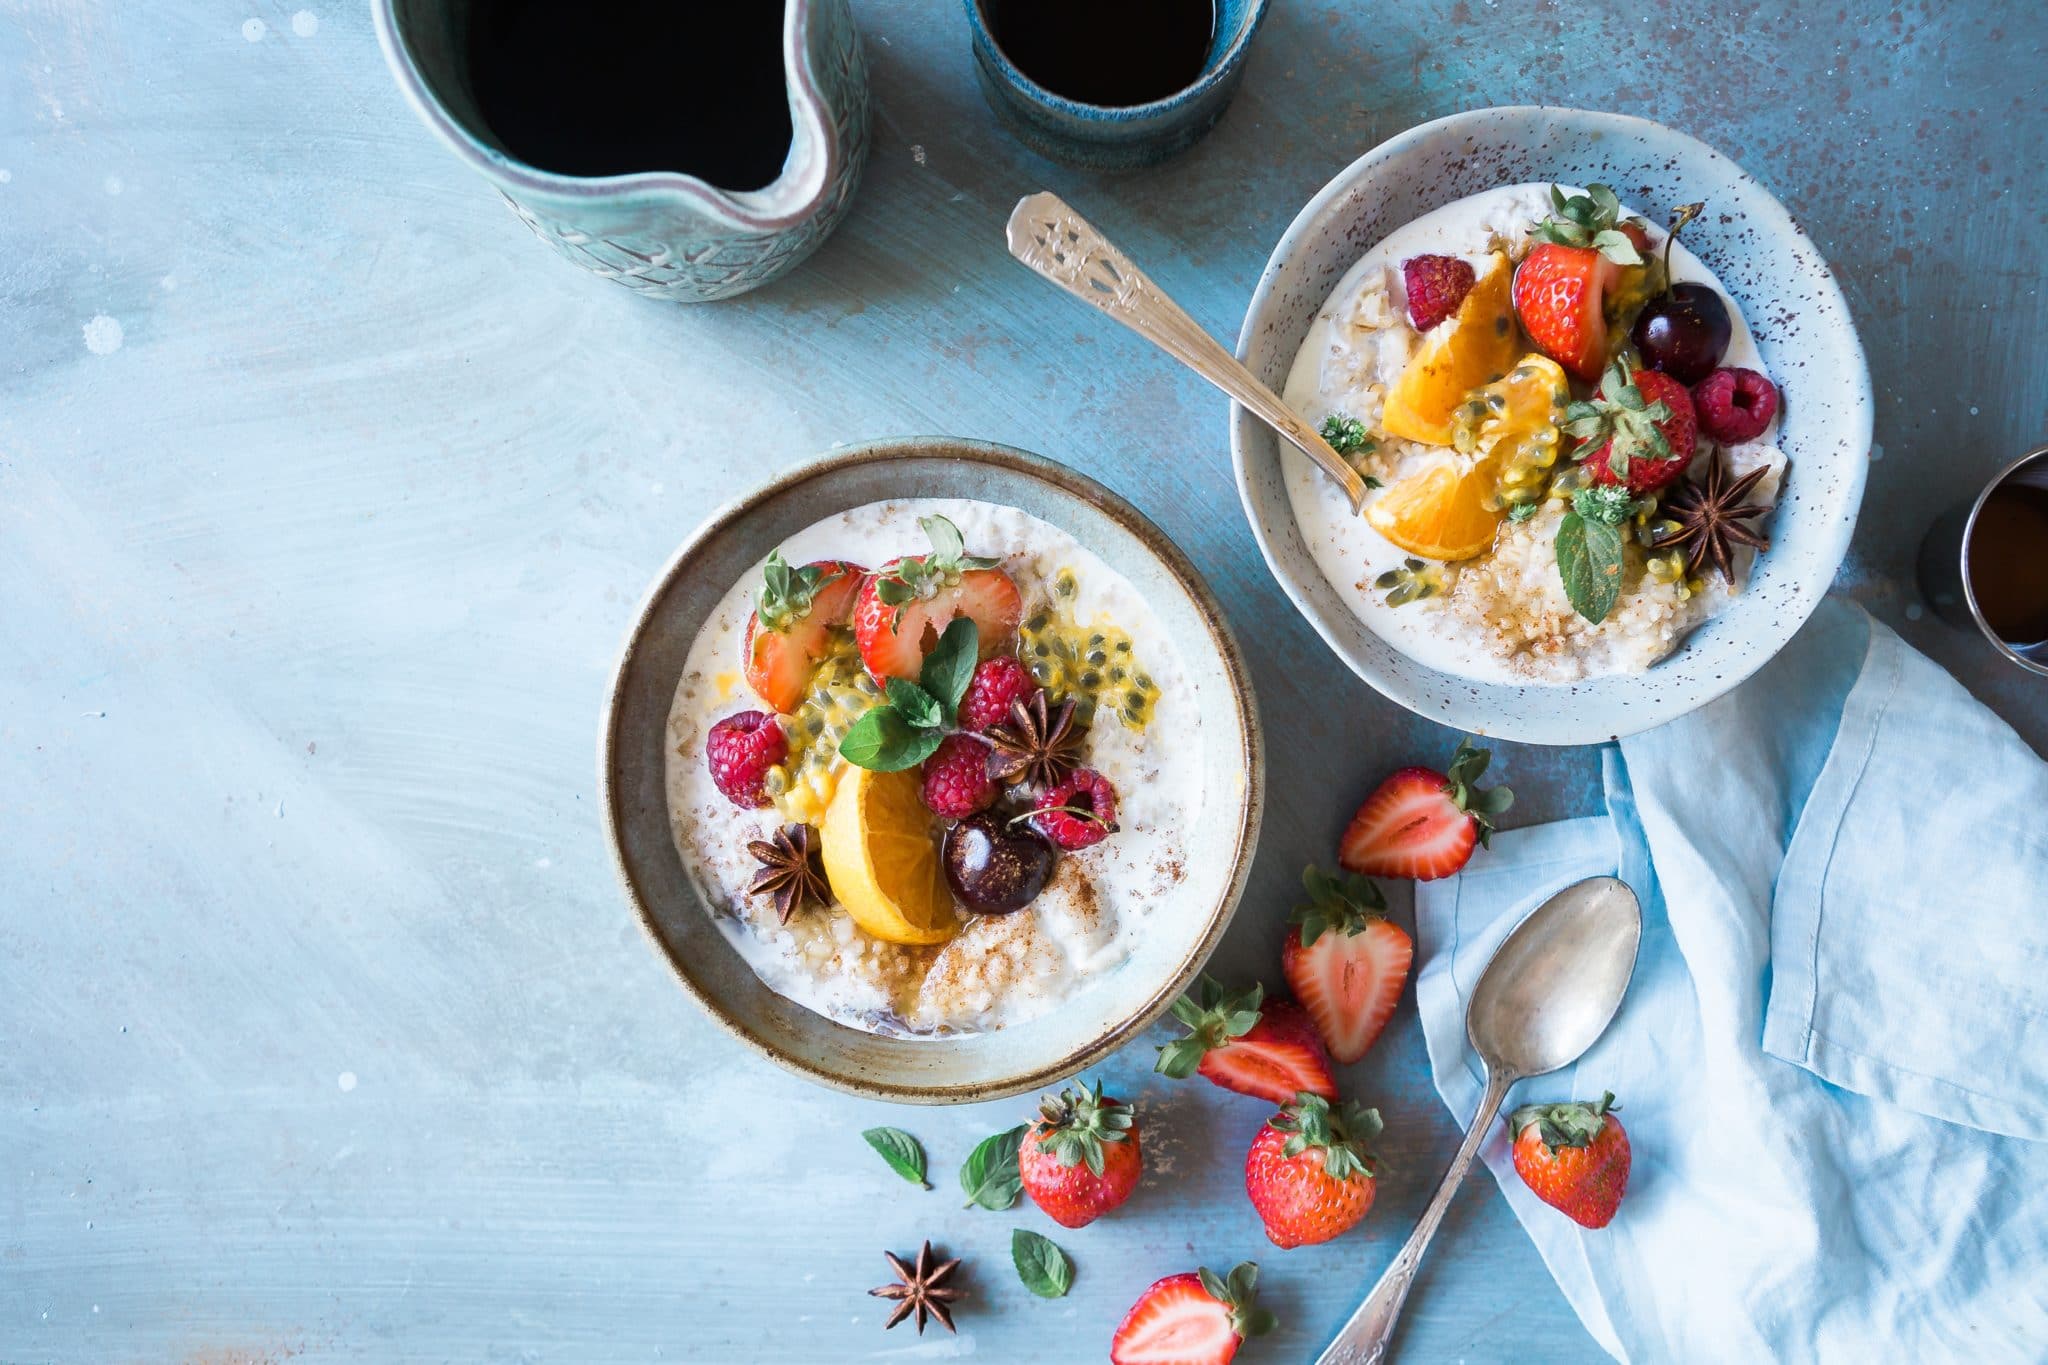
www.abbeyskitchen.com/about-abbey/
  • Previous Page
  • Go to page 1
  • Interim pages omitted …
  • Go to page 32
  • Go to page 33
  • Go to page 34
  • Go to page 35
  • Go to page 36
  • Interim pages omitted …
  • Go to page 89
  • Next Page

Get started with

Eight Free Recipe Books

From the co-founder of Neue Theory and creator of the Hunger Crushing Combo

Sign me up!
Abbey smiling at table
Abbey Sharp

“Foods may never be nutritionally equal. But we can make them morally equal by recognizing that our worth is never determined by what's on our plate.”

— Abbey Sharp, RD About Abbey ◥

Books

  • HCC™
  • Mindful Glow
  • Free E-Books

Blog

  • Nutrition
  • Recipes
  • Motherhood
  • Life

Explore

  • Neue Theory™
  • Bite Back
  • YouTube

Abbey

  • About
  • Coaching
YouTube TikTok Instagram Facebook X Pinterest
Abbey Sharp - The No BS Dietitian From Abbeys Kitchen

© Abbey's Kitchen 2026  All Rights Reserved •  ACCESSIBILITY STATEMENT •  Privacy Policy

This site uses cookies. By continuing to browse the site, you are agreeing to the use of cookies Accept Privacy Policy
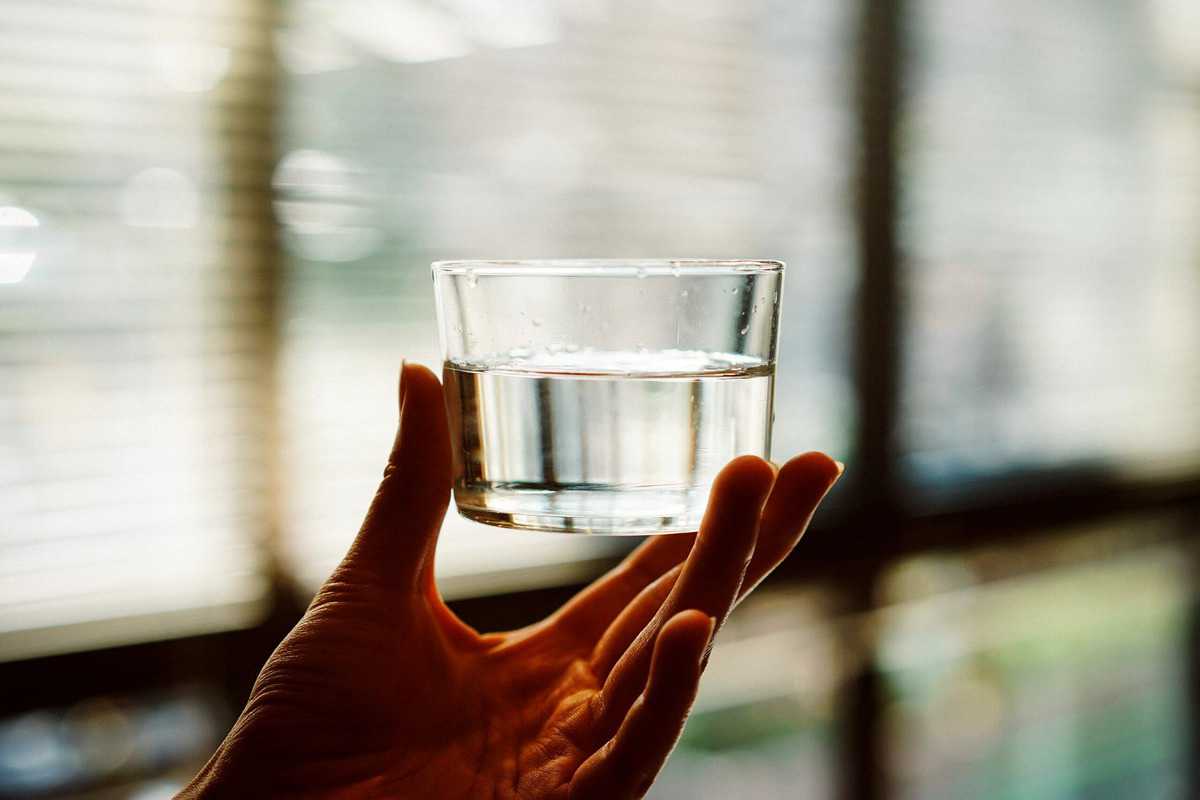
Privacy & Cookies Policy

Privacy Overview

This website uses cookies to improve your experience while you navigate through the website. Out of these, the cookies that are categorized as necessary are stored on your browser as they are essential for the working of basic functionalities of the website. We also use third-party cookies that help us analyze and understand how you use this website. These cookies will be stored in your browser only with your consent. You also have the option to opt-out of these cookies. But opting out of some of these cookies may affect your browsing experience.

Necessary
Always Enabled
Necessary cookies are absolutely essential for the website to function properly. This category only includes cookies that ensures basic functionalities and security features of the website. These cookies do not store any personal information.
Non-necessary
Any cookies that may not be particularly necessary for the website to function and is used specifically to collect user personal data via analytics, ads, other embedded contents are termed as non-necessary cookies. It is mandatory to procure user consent prior to running these cookies on your website.
SAVE & ACCEPT

Rate This Recipe

Your vote:


A rating is required
A name is required
An email is required