• Skip to main content

Abbey's Kitchen

Healthy Recipes, Nutrition Myth Busting, Healthy Eating Tips

  • Books
    • HCC™
    • The Mindful Glow Cookbook
    • Recipe eBooks
      • Family
      • Hypothyroidism
      • BLW
      • Vegan Week 1
      • Vegan Week 2
      • Vegan Week 3
      • Keto
      • Gluten Free Week 1
      • Gluten Free Week 2
      • Fitness
      • Paleo
  • Blog
    • Nutrition
    • Recipes
    • Motherhood
    • Life
  • Explore
    • Neue Theory™
    • Bite Back With Abbey Sharp
      • Apple Music
      • Spotify
      • Amazon Music
    • YouTube
  • Abbey
    • About
    • Coaching
    • Contact

Abbey Sharp

Last Updated July 22, 2023. Published July 26, 2023 By Abbey Sharp 40 Comments

Keto While Breastfeeding | Is it Safe & How Does it Affect Breastmilk?

We review the evidence on whether or not you can breastfeed on the keto diet. Is it safe for you and your baby and how does it affect your breastmilk?

We review the evidence on whether or not keto while breastfeeding is safe for you and your baby and how it impacts your breastmilk.
Grey background with two forks and letters spelling "keto diet".

If you’ve been keeping up with the news at Abbey’s Kitchen, you’ve probably noticed that I talk quite a bit about the keto diet. This all started a few years ago, when my girl and fellow registered dietitian Abby Langer and I caused a bit of a stir with our video of us trying different keto recipes. Some people were, less than pleased, to put it very, very nicely!

To clear up some of my messages and to provide a 360 snapshot on how the diet actually works, I did a comprehensive review of the evidence of keto diet and its impact on weight loss, amongst other diseases like neurological diseases, cardiovascular disease and Type 2 diabetes.

Emerging research in diets always catch my attention, and as a dietitian, it’s my duty to stay informed and to put on my critical lens. So when I heard people taking on the keto diet while breastfeeding, I was instantly interested in learning about this new trend and its safety and associated risks. Plus, being a new mom, I always strive to learn the best and newest evidence to help support other moms and moms-to-be in this incredible journey!

So let’s get to it.

Keto While Breastfeeding: Is it Safe?

As with most super early-stage research, mice trials are what we start with and then work off of. Here in Toronto, researchers at The Hospital for Sick Children conducted 3 of them, each focusing on different phases of mices’ pregnancies and post-natal lives:

Before we discuss if its safe to breastfeeding while on a keto diet, let’s rewind and start with the effect of a keto diet during pregnancy.

Study #1: How Does the Keto Diet Affect the Embryo’s Organ Development?

Researchers studied mice separated into either a standard diet or a keto diet. After mating, the embryos were then tracked at 13.5 and 17.5 days gestation. What did they find? There were notable size differences – the keto embryos were larger at 13.5 days, and then interestingly, their growth slowed and became smaller than the standard diet embryos by the time they reached 17.5 days! In the keto embryos, the development of their internal organs were also altered. Could this mean potential organ dysfunction and behaviour changes later in life due to keto while breastfeeding? Still unclear.

This is some great starting information about keto while breastfeeding, however, it’s still not enough for us to draw conclusions yet, especially since this is a study of mice. But what we do know is that a keto diet during pregnancy may be linked to a smaller embryo size and altered rates of organ development. What about post-birth?
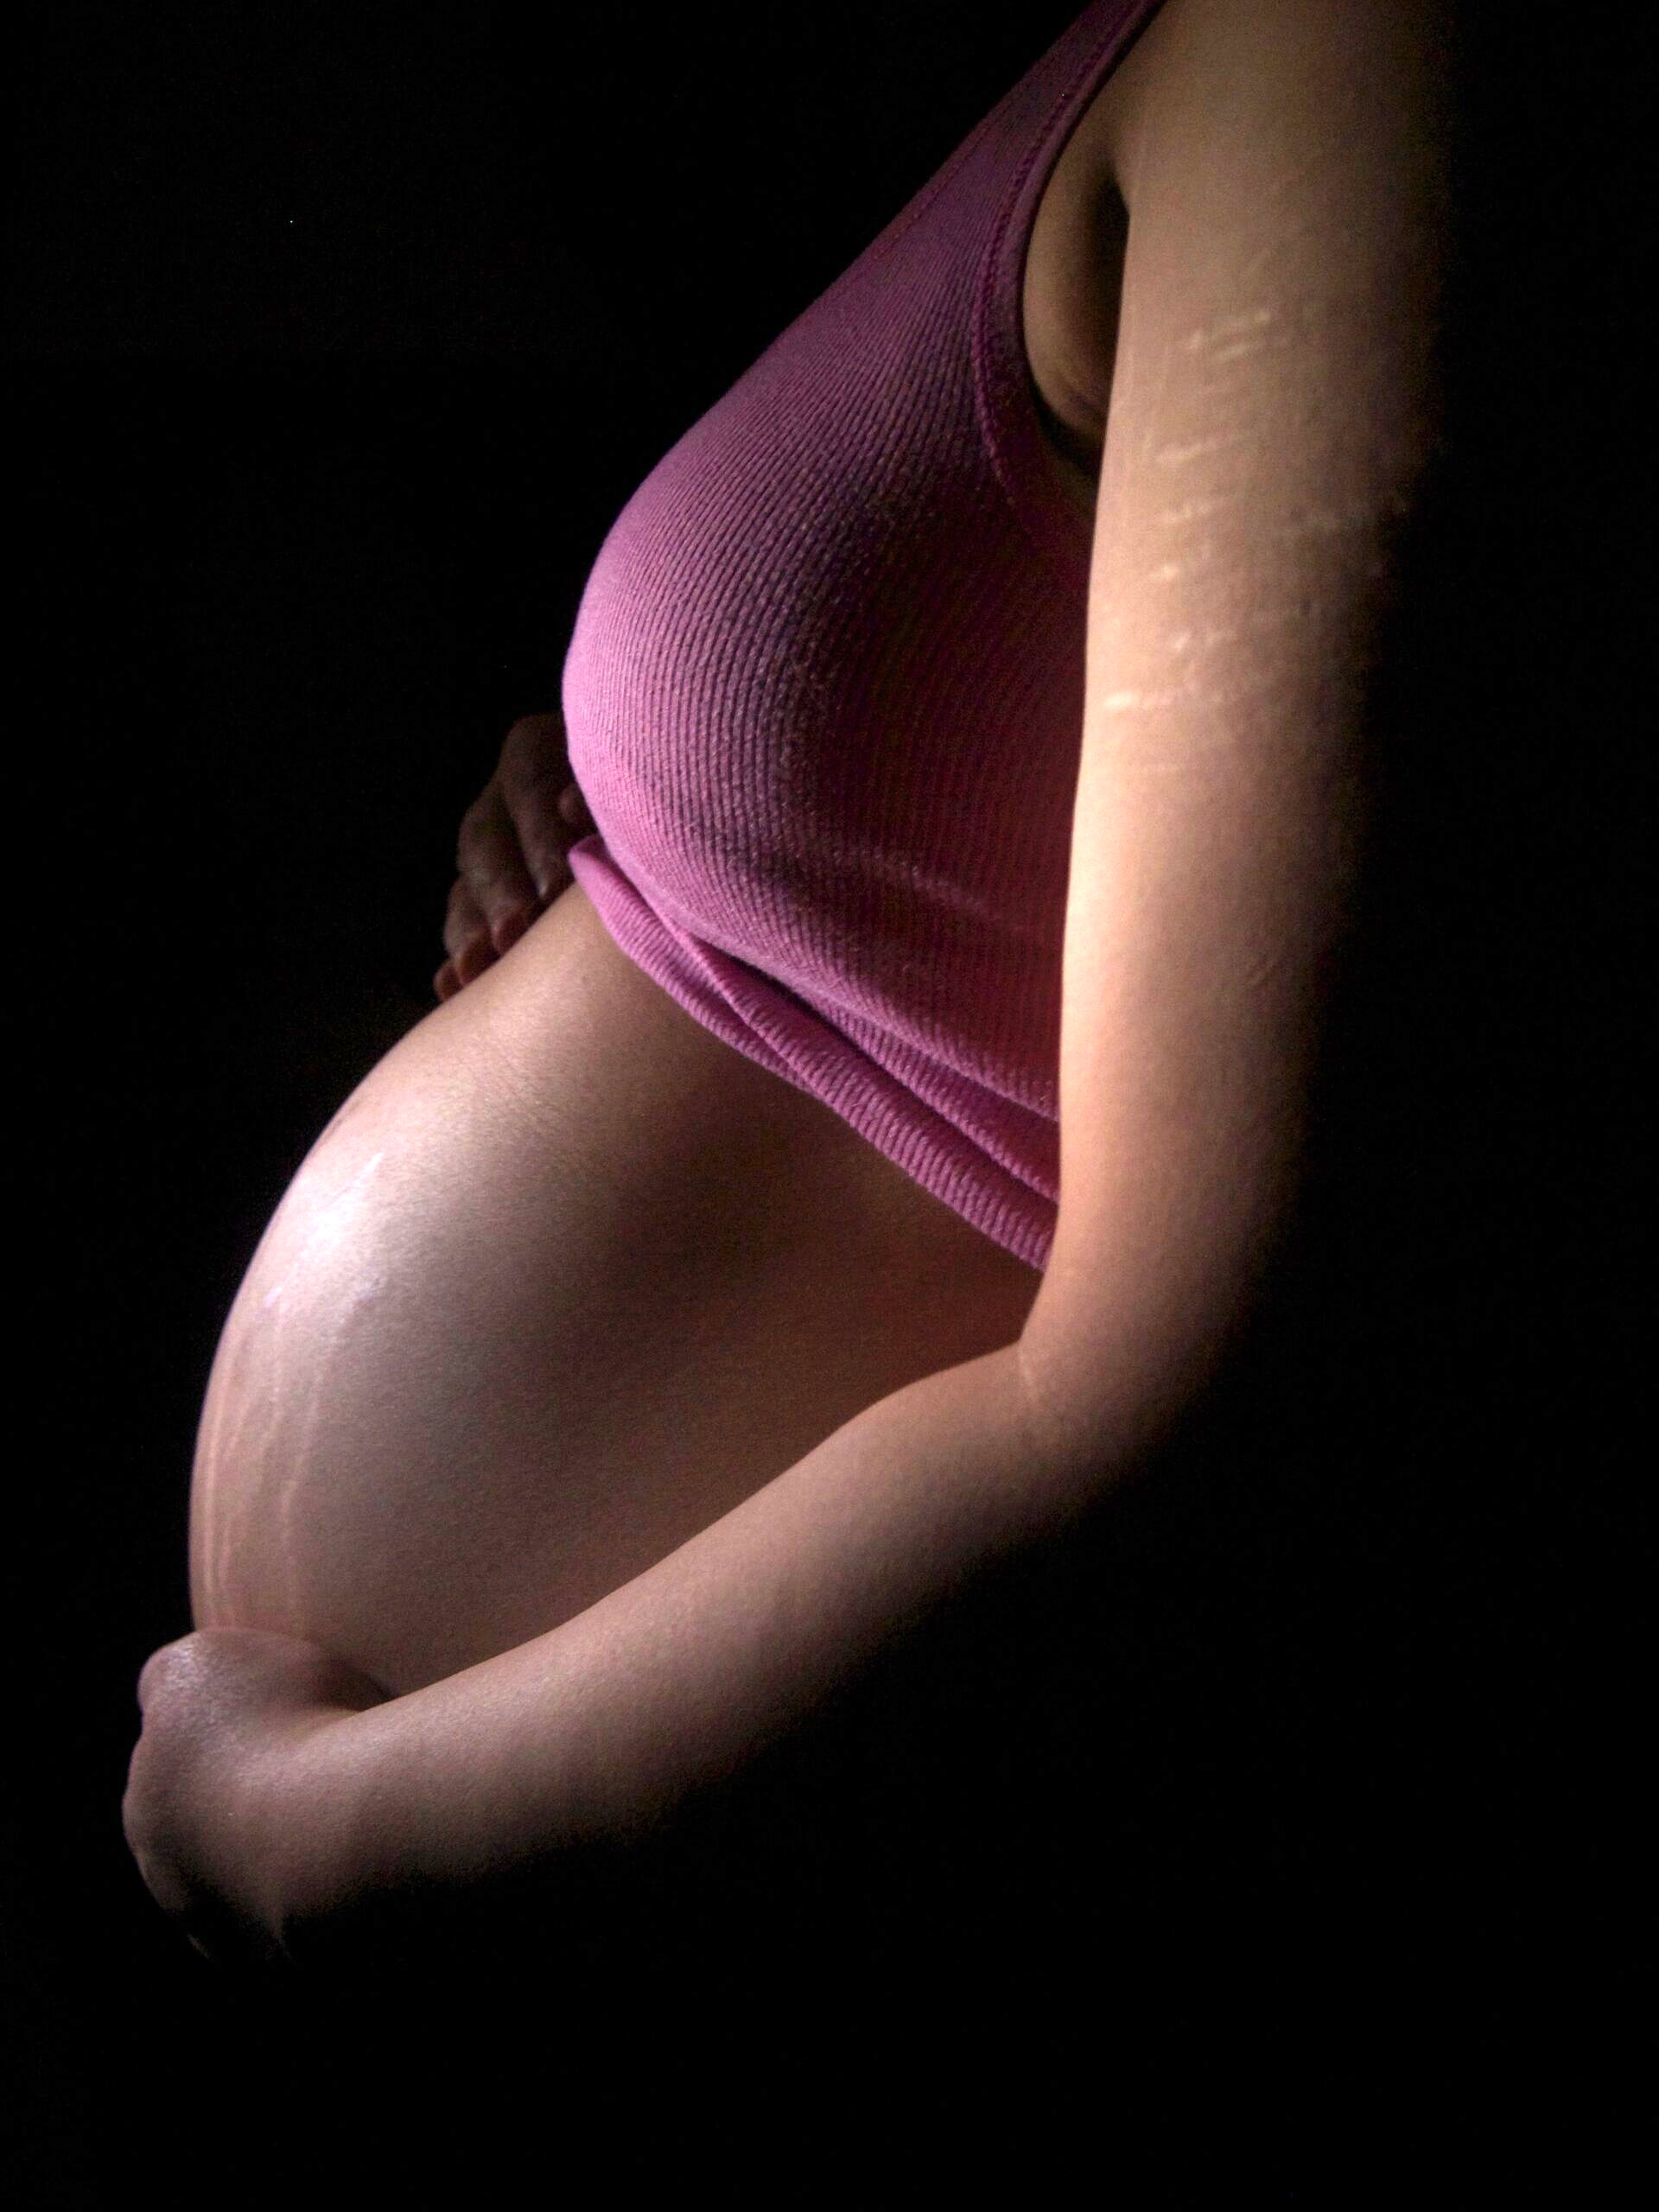
Pregnant person holding their stomach.

Study #2: How Does the Keto Diet Affect Breastfeeding and the Baby’s Growth?

Now the second study of this series on keto while breastfeeding. Similar to study #1, the researchers compared a keto and breastfeeding group to a standard group of pregnant mice, but this time, they focused on the mice and their offspring post-birth.

The results were fascinating. The keto mice who were lactating experienced severe physiological strain, and even went into ketoacidosis, a very dangerous complication where the body produces too many ketones, leading to high amounts of acid in the blood. In fact, they ended up dying within a few days after giving birth! This is perhaps due to the increased energy needs during lactation. As moms require way more energy than normal to produce milk, they burn more fat and create more ketones, pushing them way past the state of ketosis (the normal goal for someone on a keto diet), and into the dangerous territory of ketoacidosis.
Baby getting fed a bottle in their stroller.

To make matters worse, the keto while breastfeeding babies experienced slowed growth, indicating that the breast milk from the keto mothers was insufficient in its nutrition, volume or both. In this case, it was a lose-lose situation, for both the mom and the babe. Finally, the keto mice also had lower fertility, and if they did become pregnant, their litter sizes were much smaller than average.

Study #3: Does a Keto Diet During Pregnancy Have Lasting Effects into Adulthood?

Let’s talk about the keto diet and adulthood. The final study looked at the long-term effects of the keto diet by studying the adult offspring. After undergoing various physical and psychological tests, the adult mice of keto prenatal diets were show to be more physically active with a tendency towards hyperactivity, and exhibit less behavioural signs of anxiety and depression. So, I guess you can say these studies ended on a promising note? Let’s tie all the information about keto while breastfeeding together and see.

So – Is Keto While Breastfeeding Safe?

Looking at these studies, we know that a keto and pregnancy, as well as keto while breastfeeding in mice may be linked to their offspring’s organ development, metabolism, and behaviour well into adulthood.

Here’s a quick recap about keto while breastfeeding:

  • Embryo sizes are notably smaller in pregnant mice on the keto diet
  • All lactating mice on keto diet died, and their children were considered small
  • Mice on the keto diet had higher rates of infertility
  • Adult offspring of prenatal keto diets were more physically active, showed less signs of anxiety and depression

What does this mean, exactly? Although the lactating keto mice who died sounds pretty terrifying and is definitely something to think about, at the end of the day these are still mice trials, and with this premature research, it’s too early to comment on its safety.

Bottom line: moms have been breastfeeding on regular diets for a very, very, long time, and it has worked out wonderfully for them. I personally wouldn’t mess with a good thing.

High Fat Diets and Breastfeeding
Burgers on a hot grill.

Here’s what they found. The actual milk volume and the amount of protein in the milk were unaffected. However, the amount of fat in mom’s milk was actually much higher, resulting in the baby consuming more energy. This is because fat is higher in energy. Also, the amount of energy that the new moms burned, during rest phase and while breastfeeding was much higher if they were on a high fat diet, indicating a higher potential for weight loss.

But before all the new moms start upping their fat intake, let’s consider a few factors. There were only seven new moms included in this study. SEVEN! That’s hardly enough to generalize their health outcomes to the public. Also, these seven women were only on a high fat diet for eight days, and then a regular diet for eight days to compare. Do you think that trying a new diet for only eight days can make a significant impact? I don’t.

The Dangerous Case of “Lactation Ketoacidosis”

Alright, so in the earlier mouse trial about keto while breastfeeding, we saw that lactating mothers on the keto diet went into ketoacidosis and subsequently died. For all those who don’t speak science, ketoacidosis occurs when your body breaks down too much fat to meet your energy needs, resulting in too many ketones in your body causing a buildup of acid in your blood. In extreme cases, it can be fatal, so it goes without saying this should be taken very seriously.

Though there are no controlled studies that have investigated this on a human level (it probably wouldn’t pass ethics approval), there are eleven case reports of real women with lactation ketoacidosis while breastfeeding on a low carb diet. Very rare, but true and definitely worth looking into. These case reports are super interesting because ketoacidosis is traditionally a condition that affects those with diabetes, not lactating mothers!
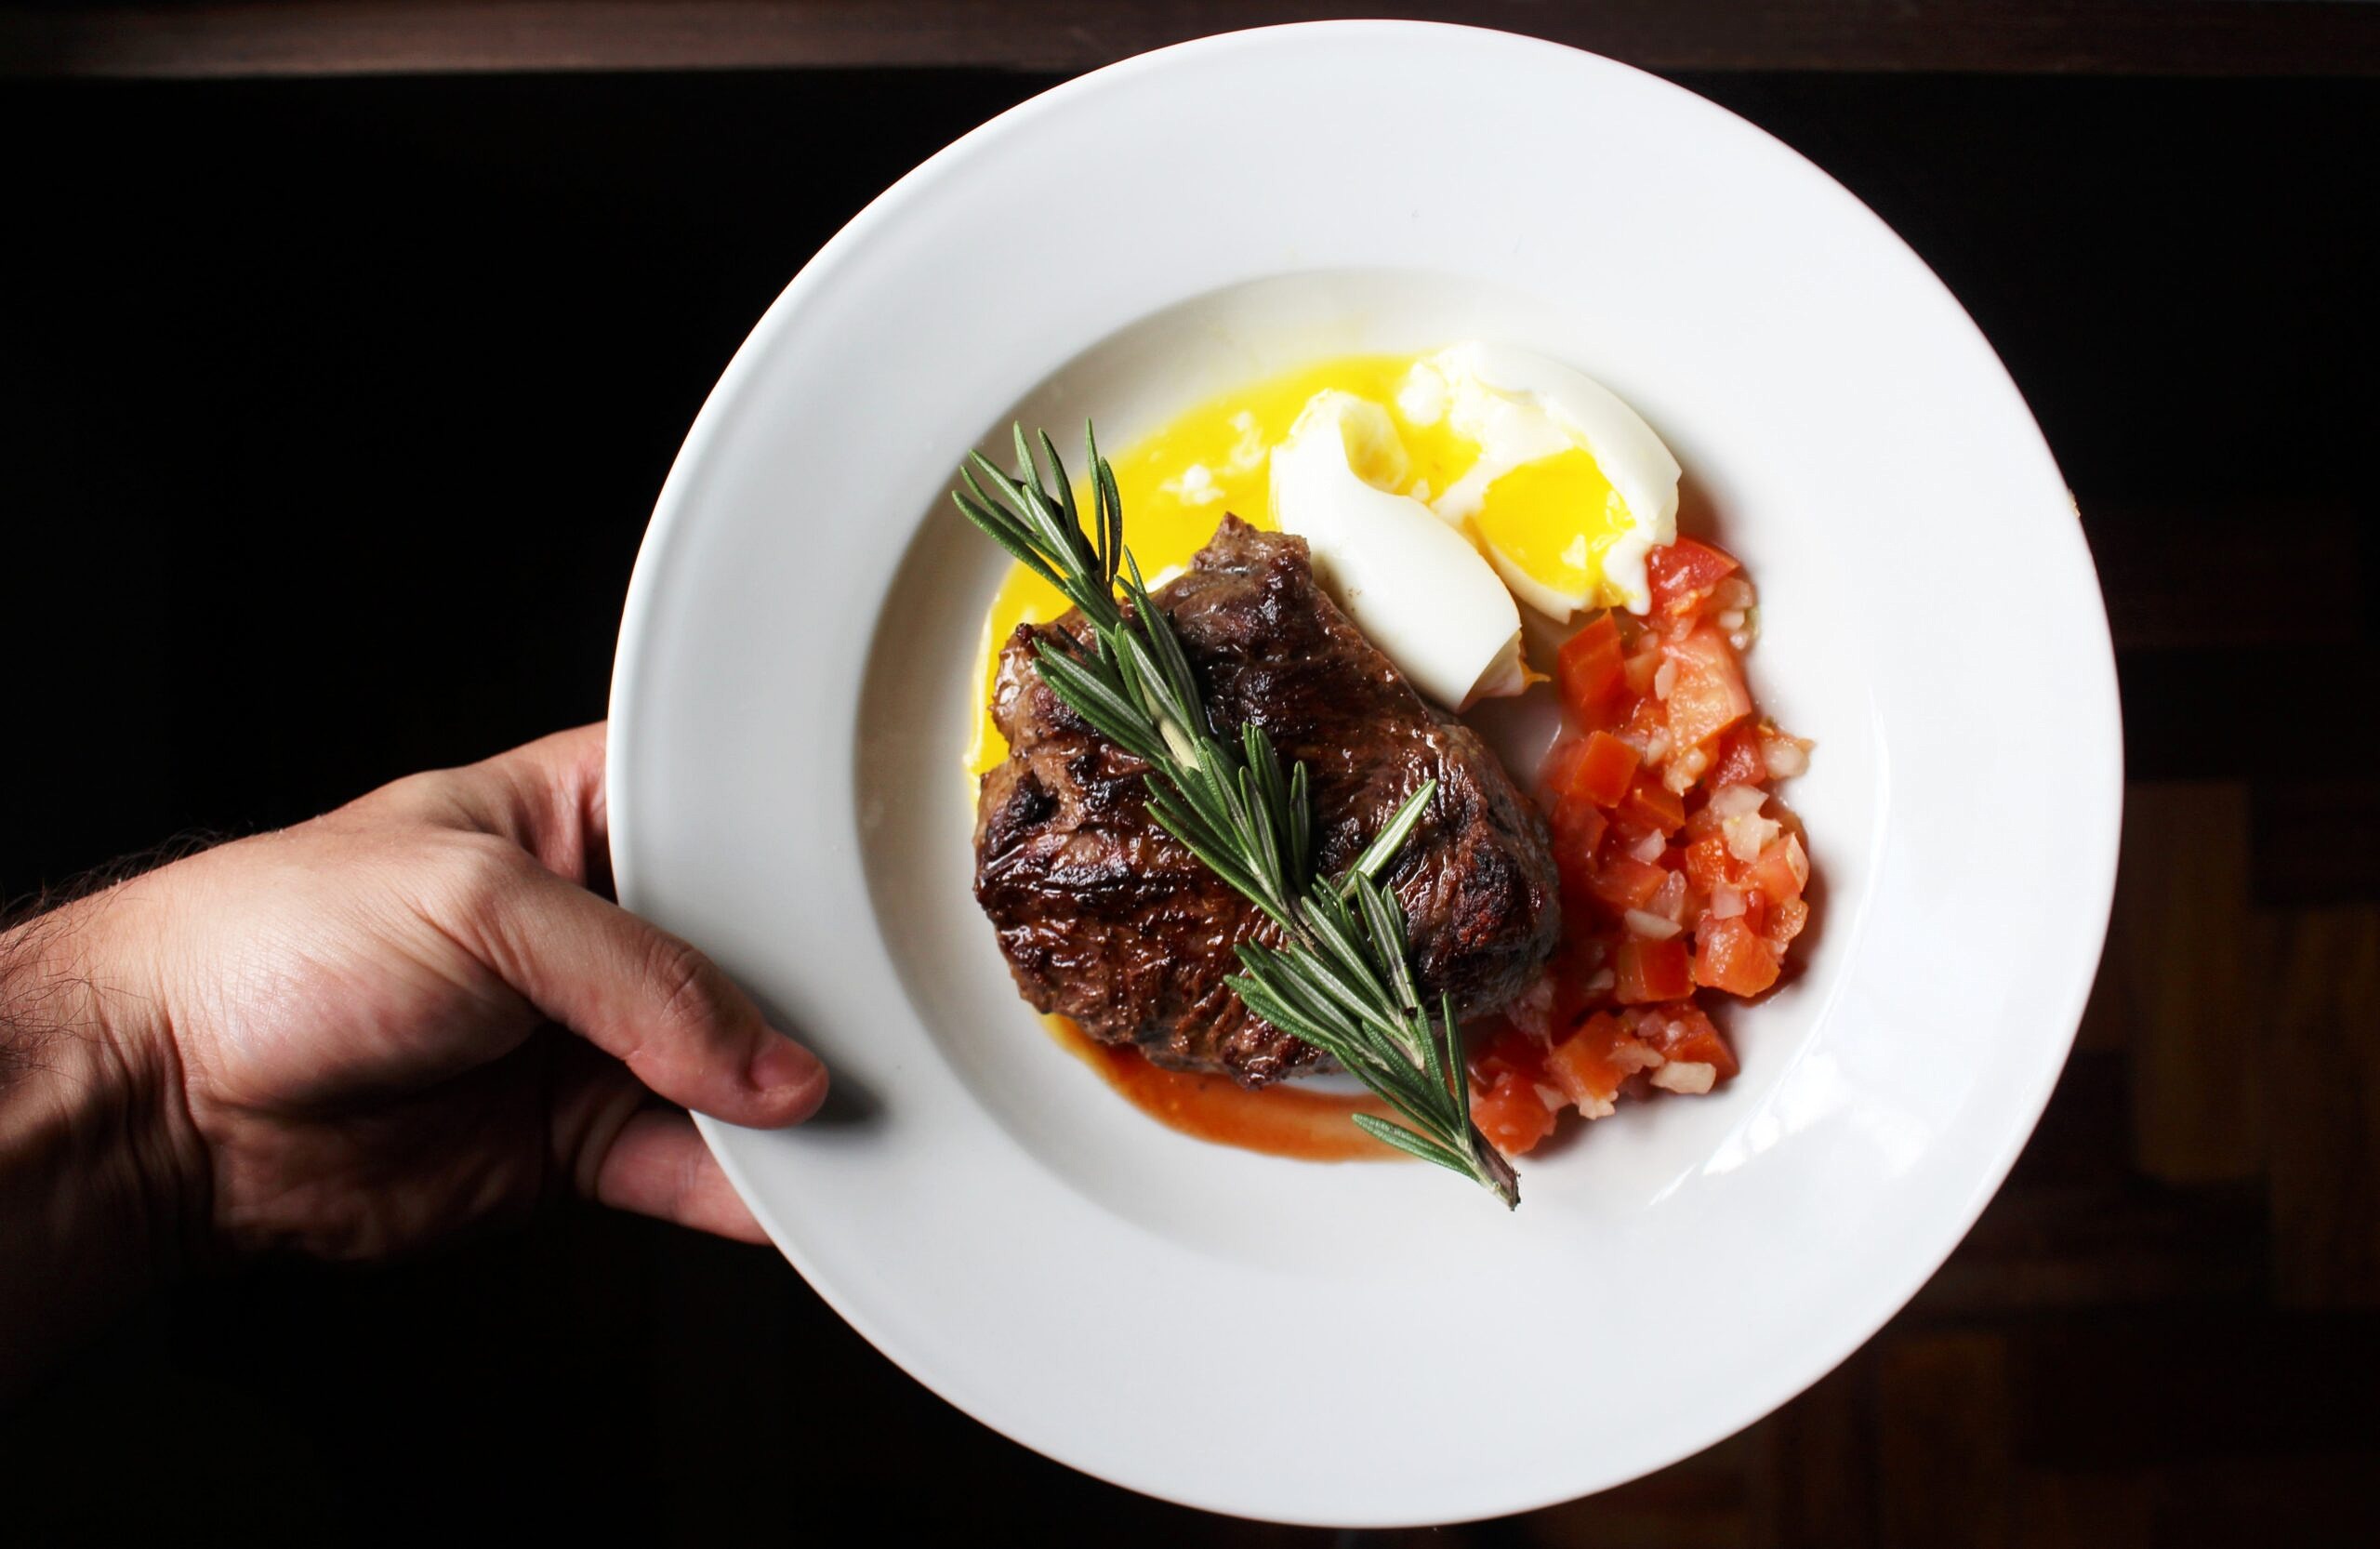
Plate of keto food.

Let’s look at one of those eleven case reports on keto while breastfeeding.

A 27 year old woman exclusively breastfed her 8-week old baby while following a low carb diet. She experienced vomiting and diarrhea, and was unable to eat anything for a few days – landing her in the ER. Turns out she had severe ketoacidosis and was treated quickly with intravenous fluids and told to increase her carb intake. Thankfully this was a happy ending and she recovered quickly and fully! (Read a few more case studies here, here and here).

Researchers and health professionals believe that this happens because energy demands are much higher during lactation. That, in combination with a low carb intake can push the body into lactation ketoacidosis. Thankfully, it can be resolved quickly from increased carbohydrate intake and intravenous fluids. So if you’re feeling signs of lactation ketoacidosis such as nausea and vomiting and you’re on a low-carb diet, please head to the emergency department ASAP!

So What Should You Eat While Breastfeeding?
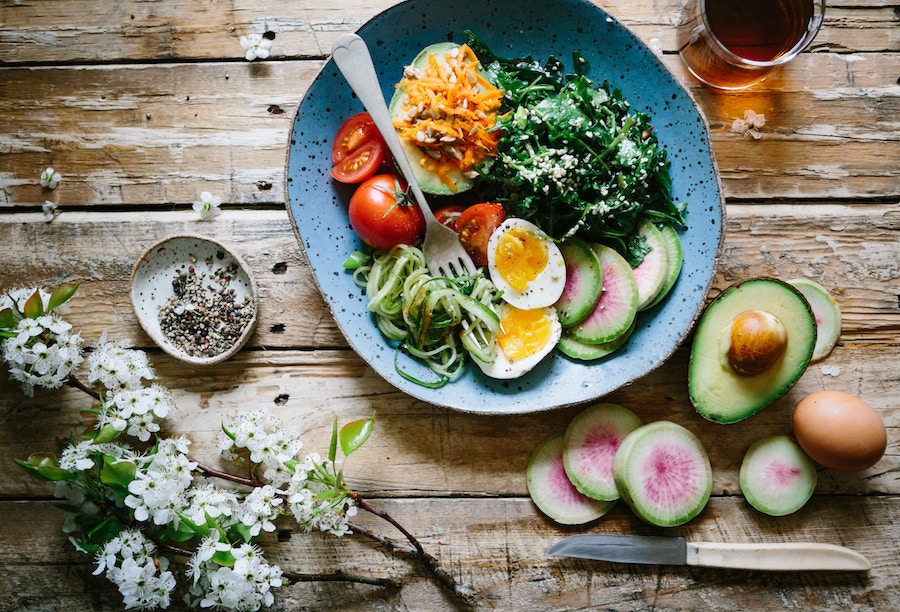
A salad on a wooden board.

I think it’s safe to say that the studies we talked about today, although premature, push us to lean towards an unfavourable approach when it comes to keto while breastfeeding (I’ve also previously touched upon it here). I don’t think we have enough research to say it’s not safe to breastfeed on the keto diet. At the same time, I also don’t think it’s worth the very clear risk. There are so many other eating patterns that people follow and new ones emerging all the time – so on a broader scope, you may be wondering how maternal diet impacts breastfeeding in general.

A few years, ago, a review of the best and up-to-date evidence explored this very relationship: maternal diet and the nutritional composition of breast milk. We were hoping this would give mothers more insight into how their diet can affect their baby. However, the evidence found by researchers was pretty diverse and, for lack of a better phrase, all over the place. The largest association they found was between fish consumption and omega-3 fats in the breast milk, and Vitamin C consumption and concentrations in the breast milk. But even then, the findings weren’t too significant.
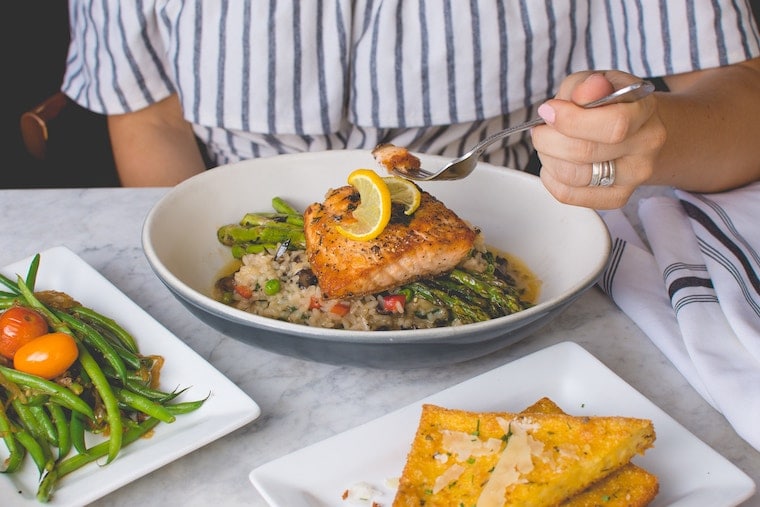
Person holding a fork eating salmon.

Since the review found such inconsistent evidence about keto while breastfeeding, the researchers actually stated that this “work made [them] realize how scattered and weak the evidence is that is currently used in everyday clinical practice.” There’s a huge emphasis for more structured research into maternal diet and breastmilk composition and implications, with more clear standards for the definitions and study methods.

Contribution By:

RD2B Trista Chan

MORE BLOG POSTS YOU MIGHT LIKE:

If you liked this blog post discussing keto while breastfeeding, then you might also enjoy more blog posts on breastfeeding:

  • Mom Guilt | My Breastfeeding Failure Story
  • How Much Caffeine Can You Have While Breastfeeding?
  • Cow’s Milk Protein Allergy in Infants | Should Breastfeeding Moms Go Dairy Free? 
  • The Truth About Drinking Alcohol While Breastfeeding: Will it Harm My Baby?
  • Not Losing Weight Breastfeeding? Does Breastfeeding Cause Weight Loss or Weight Gain?
  • The Ultimate Exclusively Pumping & Breastfeeding Essentials Guide

 

Abbey Sharp

Abbey Sharp is a Registered Dietitian (RD), regulated by the Ontario College of Dietitians. She is a mom, YouTuber, Blogger, award winning cookbook author, media coach specializing in food and nutrition influencers, and a frequent contributor to national publications like Healthline and on national broadcast TV shows.
www.abbeyskitchen.com/about-abbey/

Last Updated July 22, 2023. Published July 24, 2023 By Abbey Sharp 3 Comments

BEST Dark Chocolate Almond Bark with Granola Crunch

This dark chocolate almond bark with granola crunch is super simple to make, loaded with protein and fibre, and a healthy snack or dessert option!

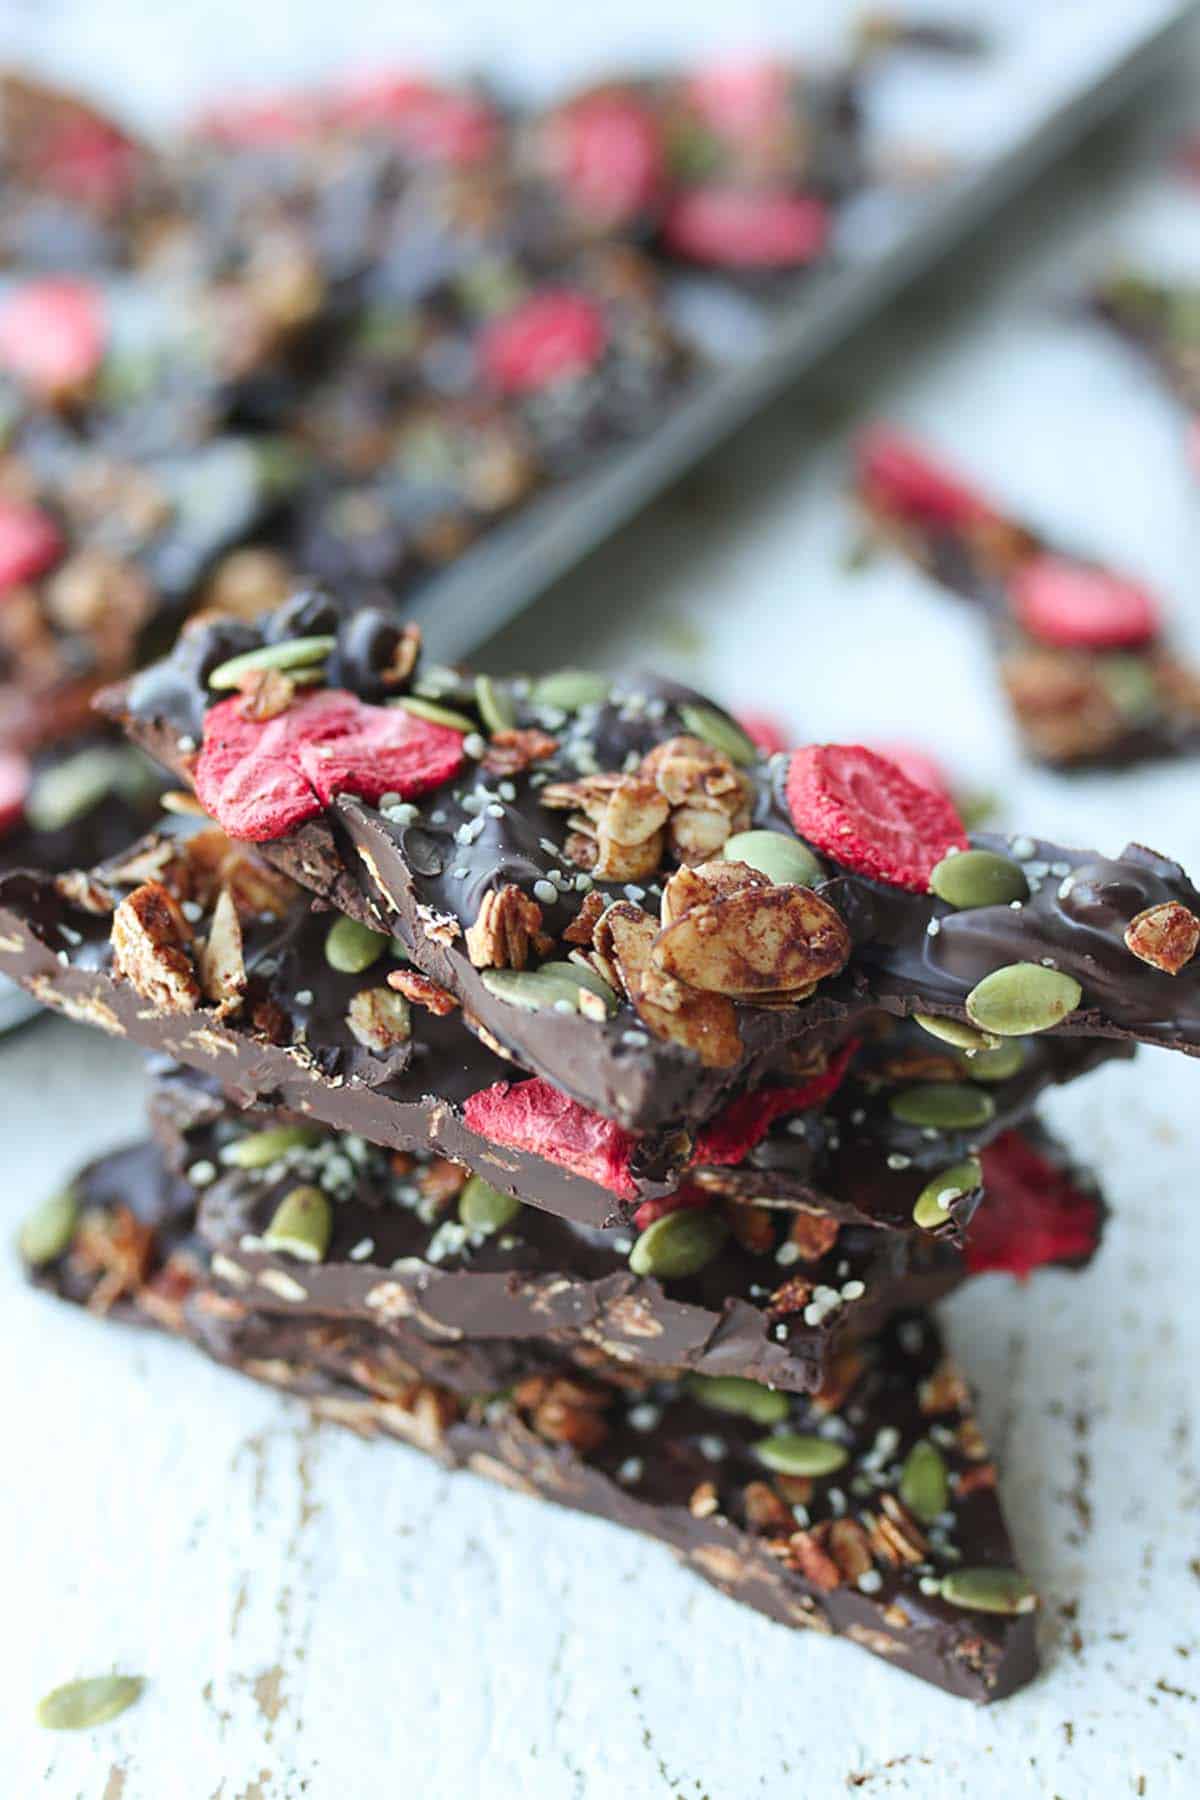
Several pieces of dark almond chocolate bark stacked on top of one another.

Do you LOVE a sweet treat after meals but prefer to make something that is simple and to the point? You are speaking this mama’s language! This is called taste hunger, and it is when we want to taste a food but don’t necessarily feel hungry for it. It’s a completely valid and common reason to eat, and we shouldn’t feel any shame for it.

Luckily, this dark chocolate almond bark is a literal life saver when it comes to my post-dinner sweet treat. Not only does it take about 30 minutes to whip up, but its so versatile and easy to make that you pretty much can’t mess it up.

Table of contents

  • Why This Recipe Works
  • Key Ingredients
  • How to Make This Recipe
  • Expert Tips
  • Recipe FAQs
  • More Recipes You Might Like

Why This Recipe Works

This year, I decided to take this chocolate bark up a notch by adding a homemade granola crumble for extra crunch and texture. It’s also secretly lower in sugar, because making granola from scratch lets me play with the flavour profile to meet my taste preferences- does anyone else find the store-bought varieties a bit too sweet?!

The best thing about making dark chocolate almond bark from scratch is that it’s the dessert version of “anything but the kitchen sink” type of meals. You can literally add any topping to it and it’s guaranteed to taste good. For this recipe, I decided to keep it simple by adding freeze dried berries, pumpkin seeds, and hemp hearts. But you can totally go ham here.

Key Ingredients

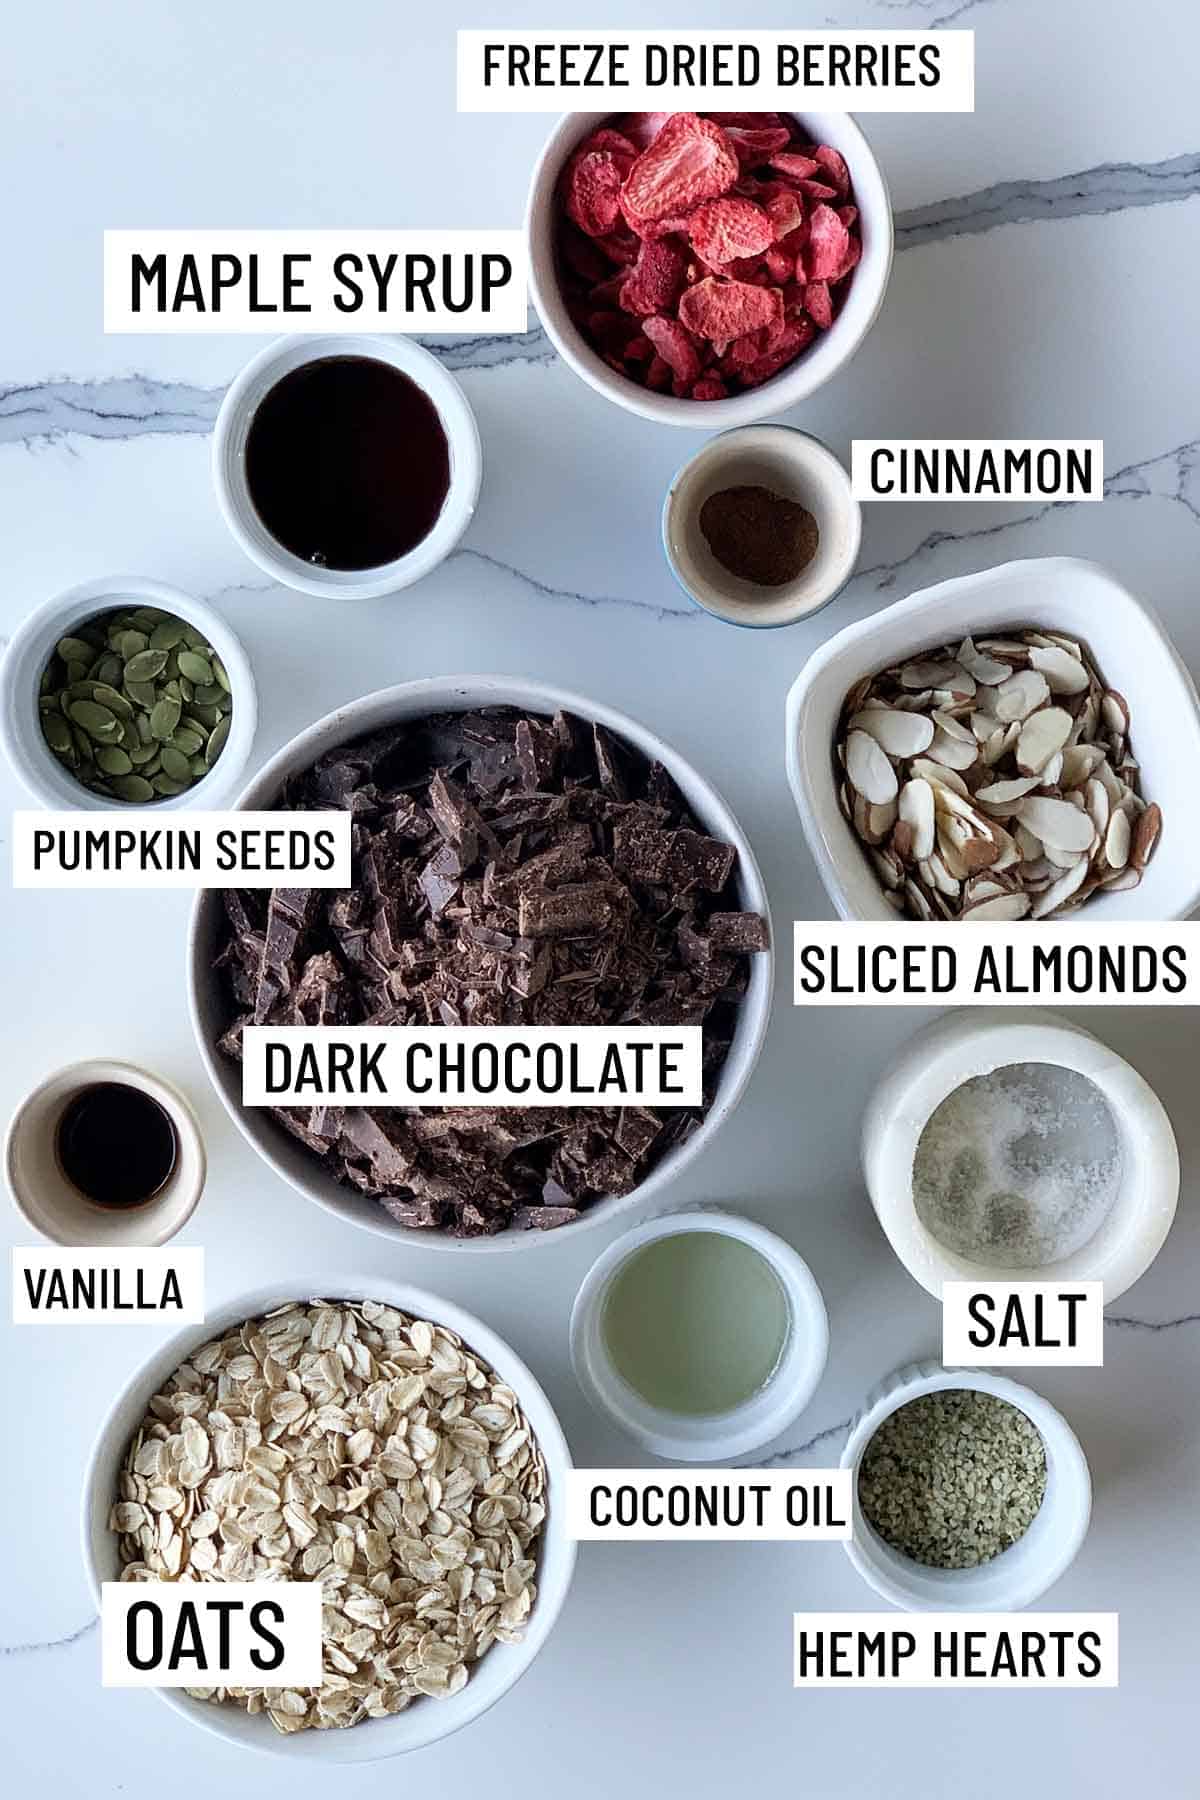
Birds eye view of portioned recipe ingredients for dark chocolate almond bark including freeze dried berries, maple syrup, cinnamon, pumpkin seeds, sliced almonds, dark chocolate, salt, vanilla, oats, coconut oil, and hemp hearts.

Oats – I like to make my own granola from scratch by combing the oats with almonds, salt, cinnamon, coconut oil, maple syrup and vanilla. If you want to skip this step, you can buy pre-made granola instead.

Dark Chocolate – I love the combination of the bitterness from the dark chocolate with the freeze dried berries. Dark chocolate also has antioxidant properties, as well. However, you can also feel free to experiment and use milk chocolate or white chocolate if you prefer.

Toppings – I like to top this chocolate almond bark with hemp hearts, and pumpkin seeds for extra texture and healthy fats.

How to Make This Recipe

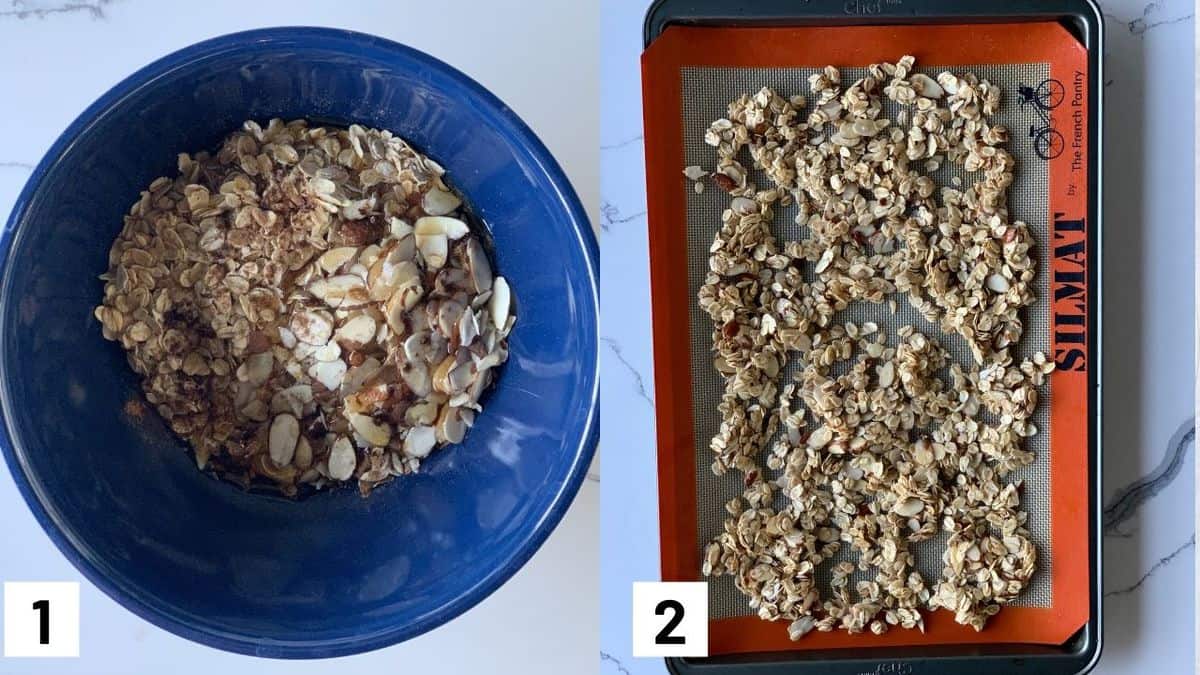
Two images showing how to make granola crumble including adding the ingredients to the mixing bowl, and laying granola out on a baking sheet to bake in the oven.

Step 1: To a bowl, mix together the oats, almonds, salt, cinnamon, coconut oil, maple syrup and vanilla.

Step 2: Spread out onto the baking sheet and bake for 10 minutes. Stir, then bake another 5-8 minutes. Set aside to cool and break into smaller pieces.

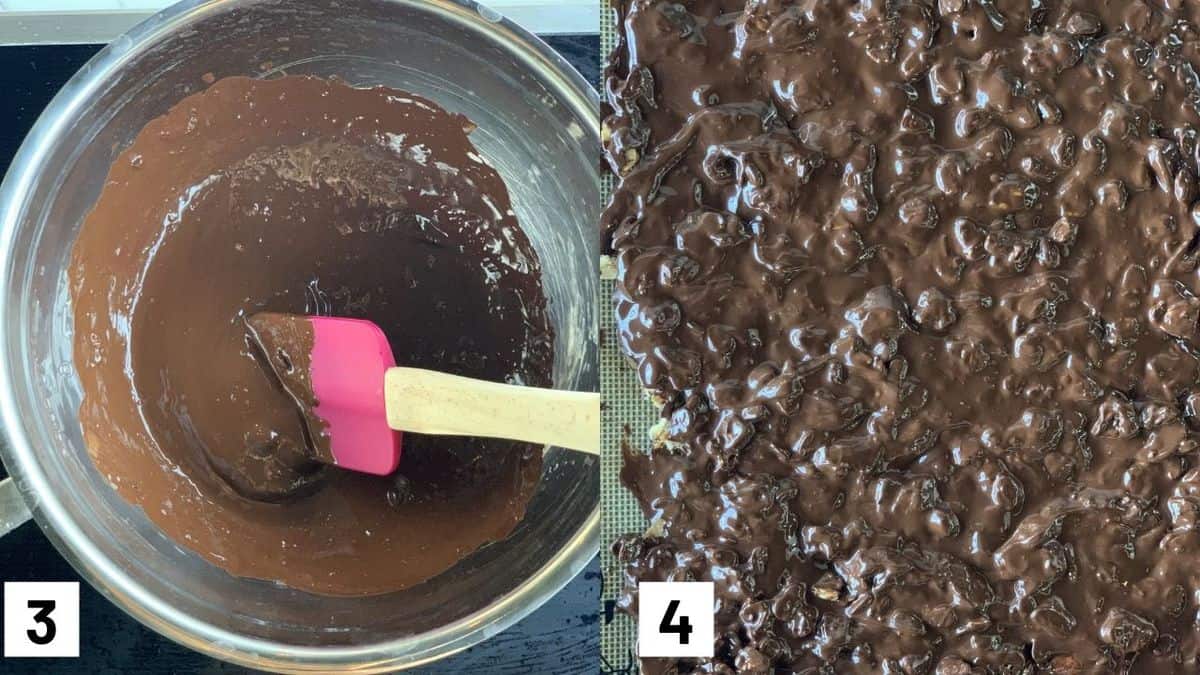
Two images showing how to make the chocolate including how to heat up the chocolate over the stove and adding it on top the granola.

Step 3: Melt the chocolate in a heat proof bowl, over a pot of simmering water.

Step 4: Add half of the granola to the baking sheet. Top with the melted chocolate.

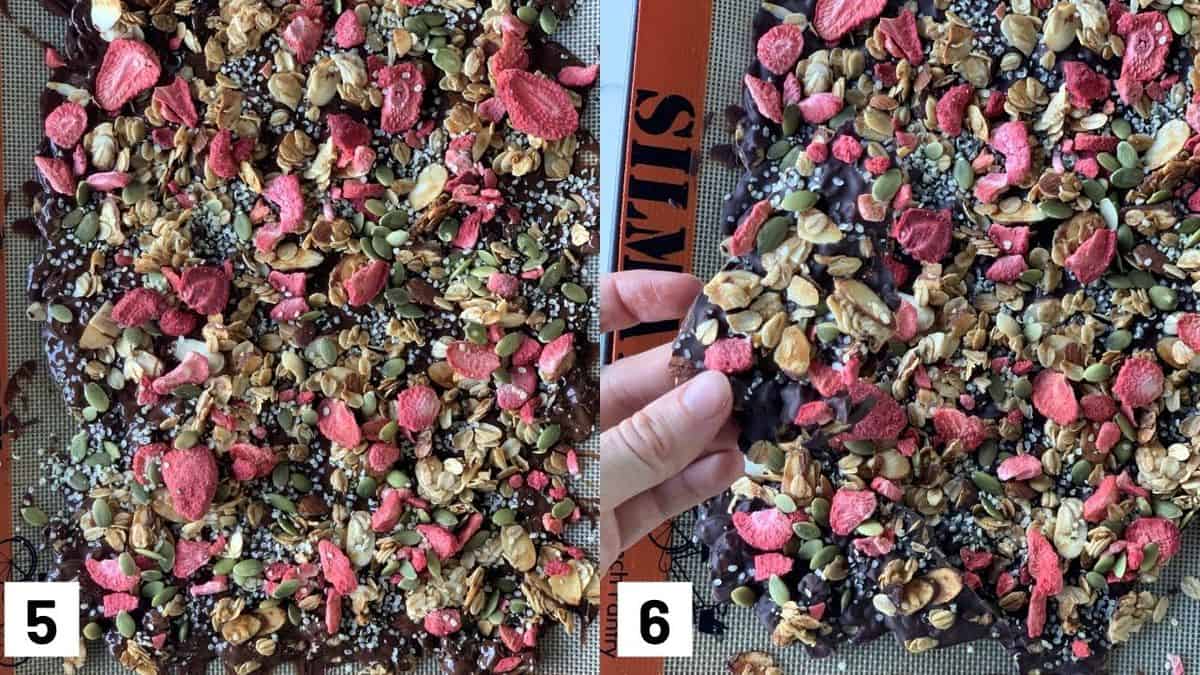
Two side by side images showing the toppings being added to the chocolate almond bark prior to freezing, and a hand breaking the frozen chocolate bark into small pieces.

Step 5: Finish with the remaining granola, freeze dried fruit, hemp hearts and pumpkin seeds.

Step 6: Allow to freeze or chill in the fridge then break into pieces.

Expert Tips

I personally love to make my own granola from scratch because I like to modify it to my own taste preferences while also making it lower in sugar compared to most store-bought varieties. However, in the interest of saving time, you can definitely buy pre-made granola for this chocolate bark. Look for one that is lower in sugar and ideally one that has almonds to make it extra crunchy.

If you don’t have freeze dried fruit available, you can also use chopped dried fruit instead such as mango, cranberries, or apricots.

To melt the chocolate, I like to do it on the stove top by creating a double boiler. But you can also simply do this in the microwave by combining the chocolate with a bit of coconut oil and heating it up for 30 second intervals and stirring in between.

Dark chocolate almond bark pieces on a pink plate.

Recipe FAQs

Is this recipe vegan?

To make this recipe vegan, be sure to use dairy-free chocolate.

Can I make this gluten free?

Absolutely. If you are making the granola from scratch, you can use gluten free oats. Otherwise, look for gluten free granola at the store.

Is this recipe kid friendly?

Absolutely! What kid doesn’t like a little chocolate? However, be mindful as this recipe does contains nuts. So if you are worried about nut allergies, you can replace the almonds with pepitas or sunflower seeds.

How can I store this?

You can store this dark chocolate almond bark covered at room temperature for up to a week.

What other toppings can I add to this?

The combinations are literally endless! You can add nuts, seeds, dried fruit, coconut, pretzels, and pretty much anything else you might have on hand.

More Recipes You Might Like

Here are some more vegan treat recipes you might enjoy!

  • Vegan Maple Roasted Persimmons and Figs 
  • Oatmeal Cookie Cups with Chocolate Mousse 
  • Vegan Chia Pudding Granola Cups with Peaches & Blueberries 
  • Vegan Oatmeal Pudding
  • No Bake Nutella Cheesecake Cups
  • No Bake Oatmeal Bars (3 Ingredient Snack)

Have you made chocolate bark before? What are your favourite toppings to add?

Print Recipe
5 from 2 votes

Best Dark Chocolate Almond Bark with Granola Crunch

This dark chocolate almond bark with granola crunch is super simple to make, loaded with protein and fibre, and a healthy snack or dessert option!
Prep Time10 minutes mins
Cook Time20 minutes mins
Total Time30 minutes mins
Course: Dessert, Snack
Cuisine: American
Diet: Vegetarian
Servings: 20 pieces
Calories: 291kcal
Author: Abbey Sharp

Ingredients

Granola:

  • 1 cup large flake oats
  • ½ cup sliced almonds
  • Pinch salt
  • 2 tsp cinnamon
  • 1 ½ tbsp melted coconut oil
  • 3 tbsp maple syrup
  • ½ tsp vanilla extract

Bark:

  • 4 cups dark chocolate finely chopped or chocolate chips (vegan, if desired)
  • ½ cup freeze dried berries
  • 1 tbsp hemp hearts
  • 2 tbsp pumpkin seeds

Instructions

  • Preheat oven to 350 F and line a baking sheet with a silpat or parchment paper.
  • To a bowl, mix together the oats, almonds, salt, cinnamon, coconut oil, maple syrup and vanilla. Spread out onto the baking sheet and bake for 10 minutes.
  • Stir, then bake another 5-8 minutes. Set aside to cool and break into smaller pieces.
  • Meanwhile, melt the chocolate in a heat proof bowl, over a pot of simmering water. Add half of the granola to the baking sheet.
  • Top with the melted chocolate. Then finish with the remaining granola, freeze dried fruit, hemp hearts and pumpkin seeds.
  • Allow to freeze or chill in the fridge then break into pieces.

Notes

I personally love to make my own granola from scratch because I like to modify it to my own taste preferences while also making it lower in sugar compared to most store-bought varieties. However, in the interest of saving time, you can definitely buy pre-made granola for this chocolate bark. Look for one that is lower in sugar and ideally one that has almonds, as well.
If you don’t have freeze dried fruit available, you can use chopped dried fruit instead such as mango, cranberries, or apricots.
To melt the chocolate, I like to do it on the stove top by create double boiler. But you can also simply do this in the microwave by combining the chocolate with a bit of coconut oil and heating it up for 30 second intervals and stirring in between.

Nutrition

Calories: 291kcal | Carbohydrates: 27g | Protein: 4g | Fat: 18g | Saturated Fat: 10g | Cholesterol: 1mg | Sodium: 8mg | Potassium: 376mg | Fiber: 5g | Sugar: 14g | Vitamin A: 18IU | Vitamin C: 72mg | Calcium: 42mg | Iron: 6mg
Abbey Sharp

Abbey Sharp is a Registered Dietitian (RD), regulated by the Ontario College of Dietitians. She is a mom, YouTuber, Blogger, award winning cookbook author, media coach specializing in food and nutrition influencers, and a frequent contributor to national publications like Healthline and on national broadcast TV shows.
www.abbeyskitchen.com/about-abbey/

Last Updated July 24, 2023. Published July 21, 2023 By Abbey Sharp 31 Comments

Tiramisu Protein Overnight Oats | Healthy Make Ahead Breakfast Recipe

These Tiramisu Protein Overnight Oats are one of my favourite healthy make ahead breakfast recipes for busy mornings when I'm craving something sweet.

 These Tiramisu Protein Overnight Oats are one of my favourite healthy make ahead breakfast recipes for busy mornings when I’m craving something sweet.

I love overnight oats because I can make a huge batch, throw them into the fridge and have a healthy breakfast all week long. And for days I’m feeling particularly indulgent, this tiramisu protein overnight oats recipe fits the bill. The hallmarks of a good tiramisu are mascarpone cheese, lady fingers, chocolate, and of course, coffee. Yes, you could enjoy all of these things separately for breakfast, but together, in an Instagrammable mason jar, it just feels so right.

Table of contents

  • Why This Recipe Works
  • Key Ingredients
  • How to Make This Recipe
  • Expert Tips
  • Recipe FAQs
  • More Recipes You Might Like

Why This Recipe Works

I never knew I loved coffee so much until I became a mom. I’m now officially obsessed with coffee. And for days when drinking my coffee is just not enough, I like to find ways to eat it too. Introducing my tiramisu protein overnight oats, a crazy delicious healthy make ahead breakfast recipe that feels super indulgent and yet is a sinch to pull off. I also love this recipe because it’s

  • Perfectly balanced with carbs, fat and protein
  • SO easy to make – only requires 2 steps!
  • A simple way to get your caffeine kick in for the day!

Key Ingredients

Cottage Cheese – This might sound like an odd ingredient to add into overnight oats but trust me….if you can puree it down to a smooth consistency, it adds a creamy texture while also packing in protein!

Lady Finger Cookies – These sweet little cookies/biscuits add a great crispy texture to break up the consistency of the oats. You can buy these cookies at any grocery store or if you’re feeling fancy there are so many homemade recipes online!

Brewed Coffee – What is a tiramisu recipe without coffee? This recipe requires only 1 cup of brewed coffee, so use it as your morning coffee kick or add this tiramisu protein overnight oats recipe into your daily morning routine for some extra caffeine.

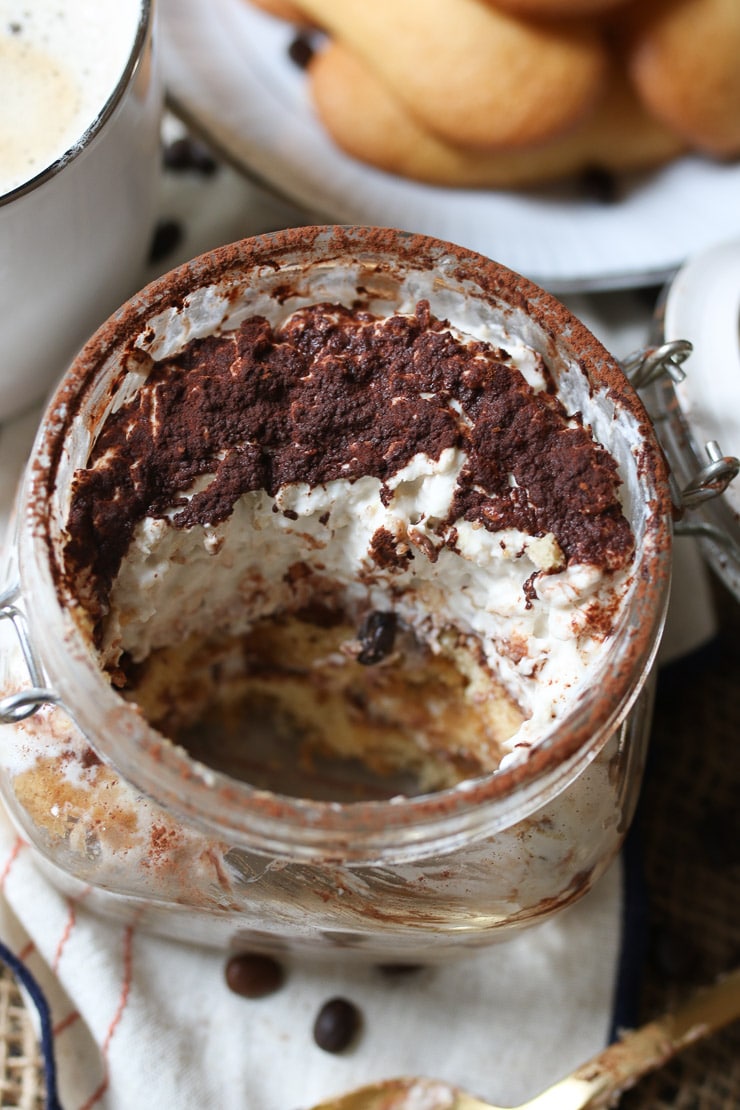
birds eye view of half eaten tiramisu protein oatmeal in a glass jar topped with cocoa powder

How to Make This Recipe

Step 1: In a bowl, combine the oats, almond milk, mascarpone, pureed cottage cheese and maple syrup, to taste. Let sit in the fridge overnight.

Step 2: The next morning, quickly dip the lady fingers in the coffee and layer half of them into the bottom of of some mason jars. Add a dusting of cocoa and a layer of the overnight oats. Repeat with another layer of the cookies, cocoa and oats, and finish with cocoa powder. Enjoy cold or at room temperature.

Expert Tips

I highly recommend using a food processor or blender to combine the cottage cheese to give it a creamy and smooth consistency!

And of course, you can’t forget the coffee. A quick dip for my lady finger cookies in some coffee yields just enough of a bitter bite to compliment the uber creamy overnight oats mixture. These tiramisu protein overnight oats prove that you can eat cake for breakfast and feel DAMN good about it.

close up of half eaten tiramisu protein oatmeal in a glass jar

Recipe FAQs

How much caffeine is in this tiramisu overnight oats recipe?

This recipe only requires 1 cup of brewed coffee which provides ~95 mg of caffeine

How much protein is in this recipe?

Thanks to the protein packed cottage cheese in this recipe, these overnight oats have ~14 grams of protein per serving!

How do I store this recipe?

I personally like to make mine the night before just so it’s fresh and doesn’t feel super mushy. But if you like to meal prep, I recommend storing overnight oats in an airtight container in the fridge for up to 5 days.

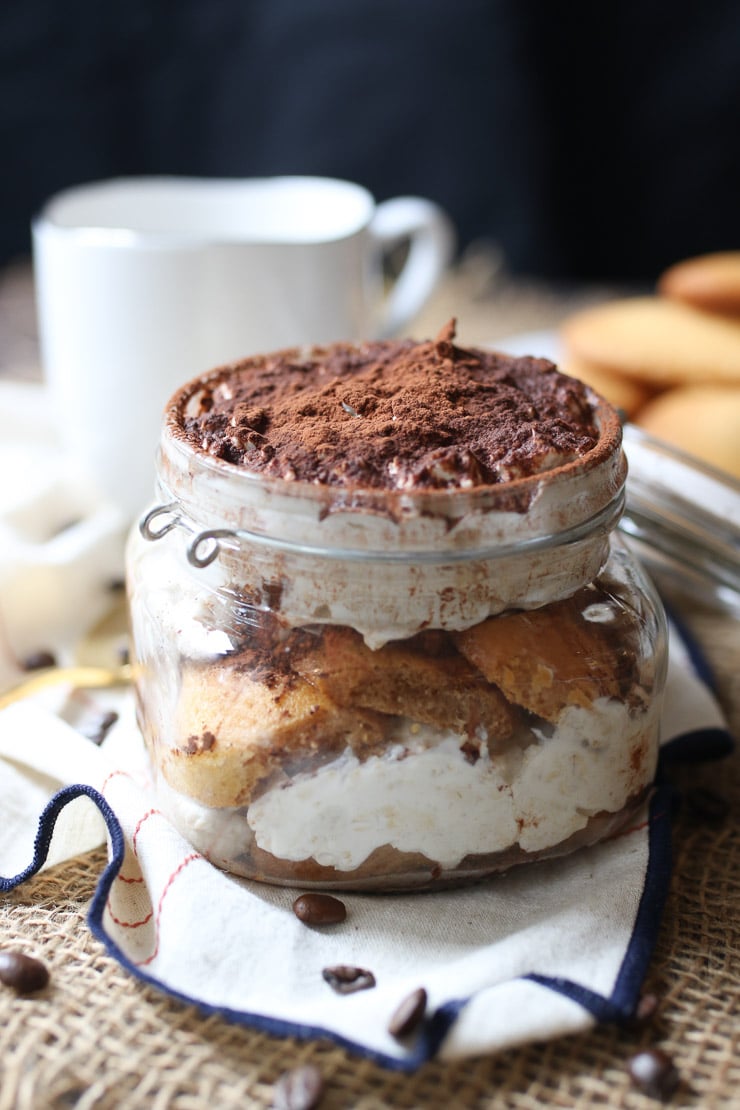
tiramisu protein oatmeal in a glass jar topped with cocoa powder

More Recipes You Might Like

Looking for other quick and easy breakfast ideas like this tiramisu overnight oats recipe? Check out some of my favs on the blog!

  • VEGAN BREAKFAST CASSEROLE
  • EGG AND VEGGIE MUFFINS 
  • NO BAKE OATMEAL BARS
  • BREAKFAST BREAD PUDDING MUFFINS WITH BERRIES

Now loves, let me know- what would your dream overnight oats flavour combo be? Do you love tiramisu as much as I do? Have you tried these tiramisu protein overnight oats? Leave me a comment below with your thoughts!

These Tiramisu Protein Overnight Oats are one of my favourite healthy make ahead breakfast recipes for busy mornings when I'm craving something sweet.
Print Recipe
4.88 from 25 votes

Tiramisu Protein Overnight Oats | Healthy Make Ahead Breakfast Recipe

These Tiramisu Protein Overnight Oats are one of my favourite healthy make ahead breakfast recipes for busy mornings when I’m craving something sweet.
Prep Time4 hours hrs
Total Time4 hours hrs
Course: Breakfast
Cuisine: Italian, American
Servings: 4 people
Calories: 366kcal
Author: Abbey Sharp

Ingredients

Oats:

  • 1 1/4 cups rolled oats
  • 1 1/4 cup unsweetened vanilla almond milk or your preferred vegan milk
  • 1/2 cup Mascarpone
  • 1 cup cottage cheese pureed
  • Maple syrup to taste

Assembly:

  • 8 lady finger cookies halved
  • 1 cup brewed coffee
  • Unsweetened cocoa powder for dusting

Instructions

  • In a bowl, combine the oats, almond milk, mascarpone, pureed cottage cheese and maple syrup, to taste. Let sit in the fridge overnight.
  • The next morning, quickly dip the lady fingers in the coffee and layer half of them into the bottom of of some mason jars. Add a dusting of cocoa and a layer of the overnight oats. Repeat with another layer of the cookies, cocoa and oats, and finish with cocoa powder. Enjoy cold or at room temperature.

Video

Nutrition

Calories: 366kcal | Carbohydrates: 33g | Protein: 14g | Fat: 20g | Saturated Fat: 10g | Polyunsaturated Fat: 1g | Monounsaturated Fat: 2g | Cholesterol: 86mg | Sodium: 317mg | Potassium: 200mg | Fiber: 3g | Sugar: 2g | Vitamin A: 590IU | Calcium: 201mg | Iron: 2mg
Abbey Sharp

Abbey Sharp is a Registered Dietitian (RD), regulated by the Ontario College of Dietitians. She is a mom, YouTuber, Blogger, award winning cookbook author, media coach specializing in food and nutrition influencers, and a frequent contributor to national publications like Healthline and on national broadcast TV shows.
www.abbeyskitchen.com/about-abbey/

Last Updated July 9, 2023. Published July 14, 2023 By Abbey Sharp 21 Comments

Homemade Mac and Cheese Bites with Butternut Squash (BLW Recipe)

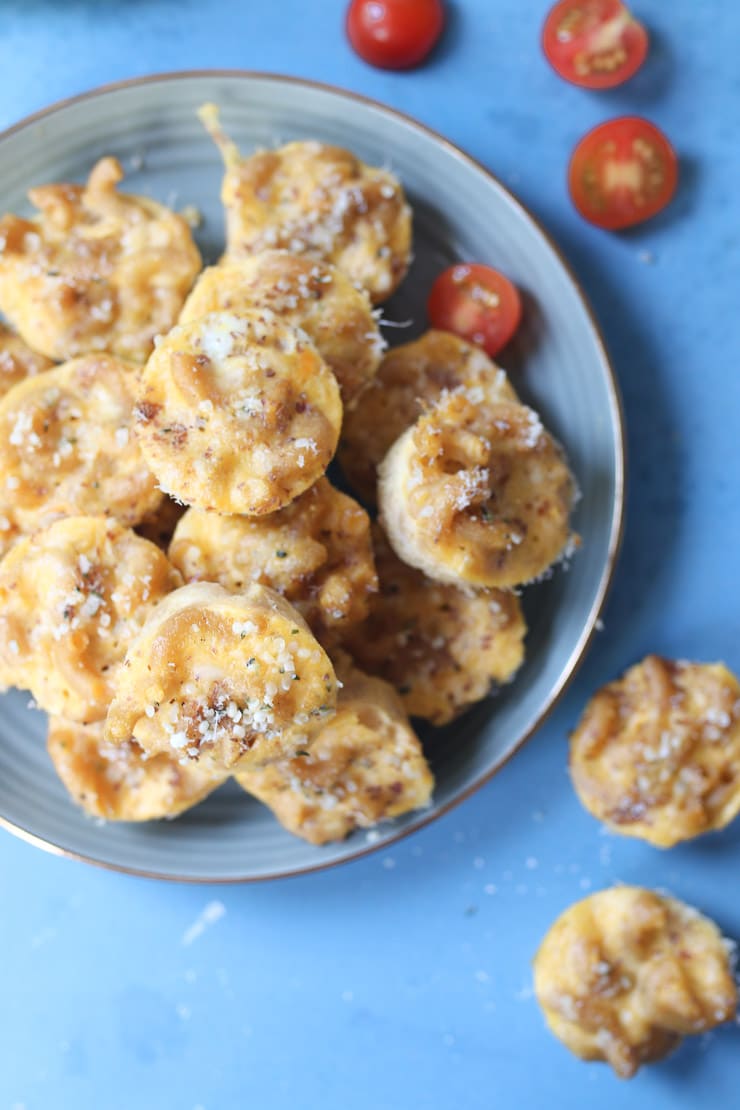
Mac and cheese bites on a blue plate.

These homemade butternut squash mac and cheese bites make the perfect on the go healthy snack for baby led weaning, kids and adults!

Homemade mac and cheese bites on a blue plate.

I’m pretty sure mac and cheese is a childhood right of passage. So there is NO WAY I am skimping out on this childhood experience for my boys. While I have no issues with the blue box stuff (#nostalgia), I wanted to create a finger food for the kiddos that’s easy to take with me for on-the-go snacks, and easy to batch prep and freeze! These homemade mac and cheese bites check all the boxes.

Table of contents

  • Why This Recipe Works
  • Key Ingredients
  • How to Make This Recipe
  • Expert Tips
  • Recipe FAQs
  • More Recipes You Might Like

Why This Recipe Works

My kids are obsessed with these homemade mac and cheese bites, and so am I! Here’s why we love em:

  • Baby led weaning friendly
  • Packed with nutrients
  • Naturally sweetened with vegetables
  • Made with pantry and freezer staples

Key Ingredients

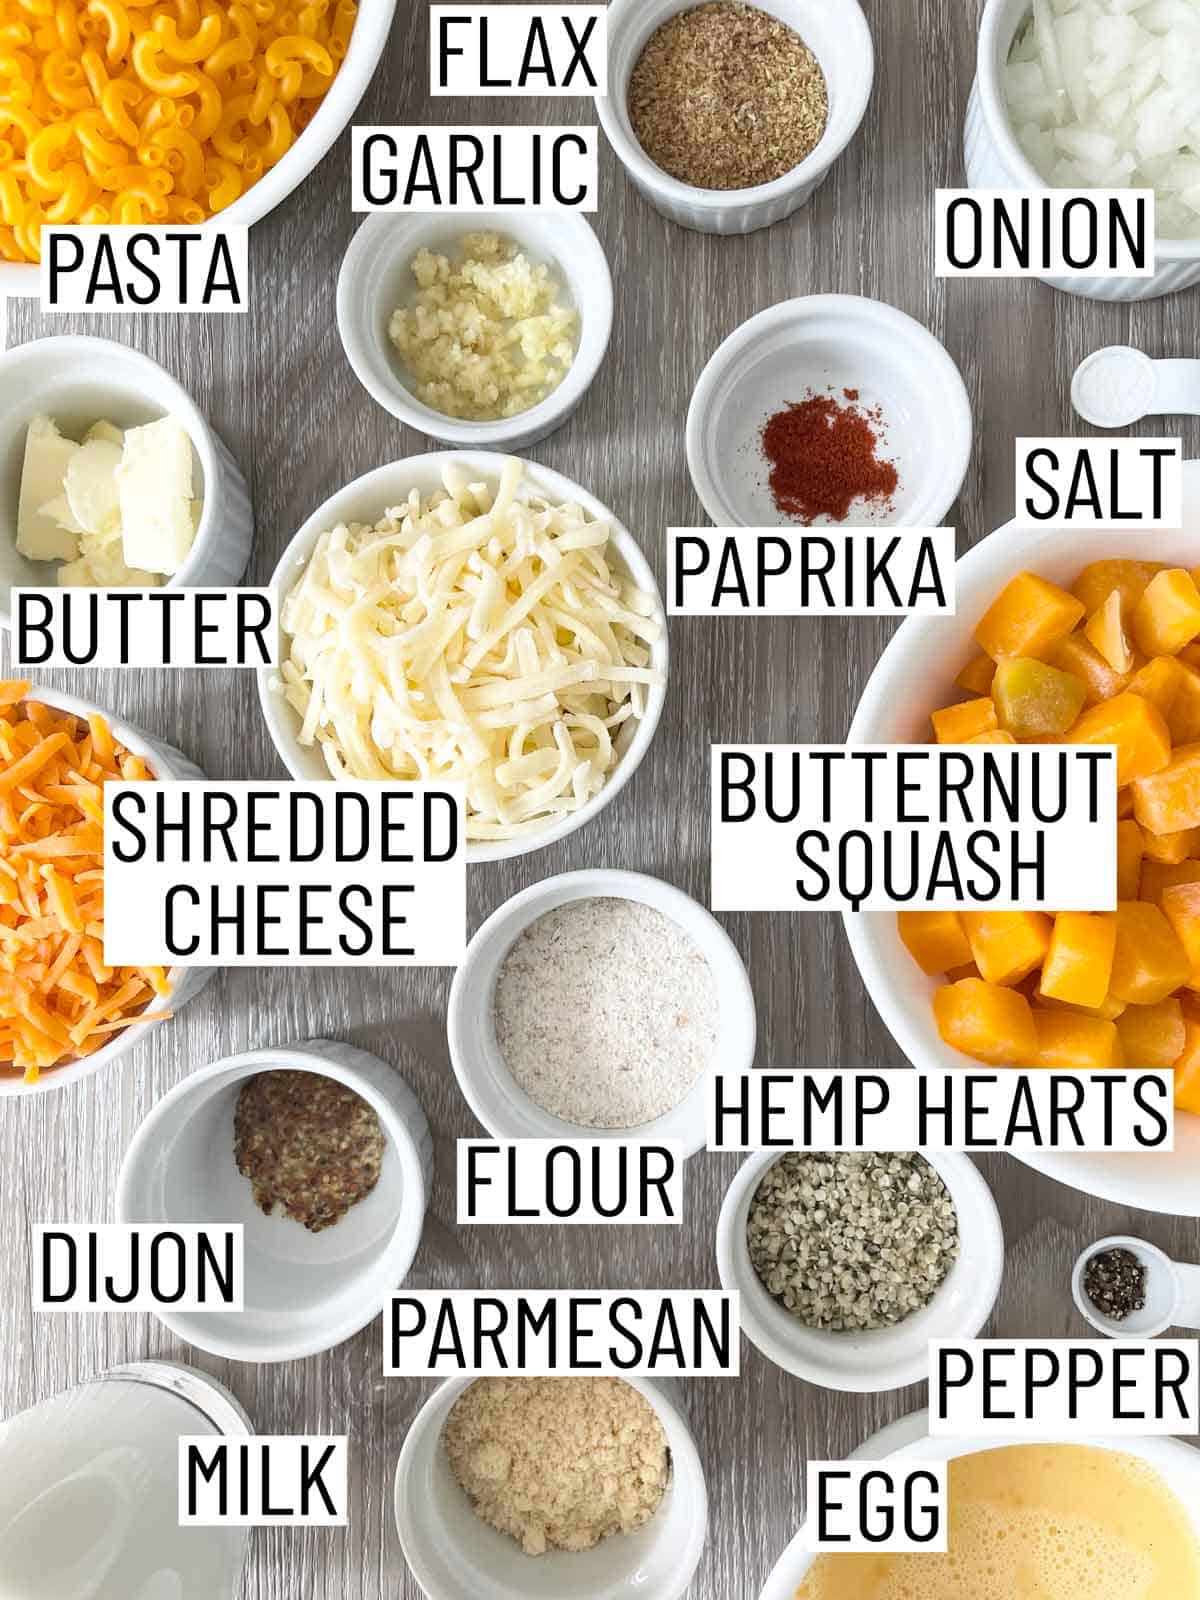
Ingredients needed to make homemade mac and cheese bites.

Chickpea macaroni — I like using chickpea pasta as it provides extra protein and nutrients.

Butternut Squash — You can use fresh or frozen butternut squash for this stuffed shell recipe. Butternut squash is a great source of fibre and is packed with vitamins A, C, E and B!

Cheese — I use a mix of cheeses for these mac and cheese bites. I use grated cheddar, grated fresh mozzarella, and finely grated parmesan cheese. The more the merrier.

Toppings — For extra nutrients, we top the mac and cheese bites with flax and hemp hearts. They don’t change the flavour so your kids won’t even notice it!

How to Make This Recipe

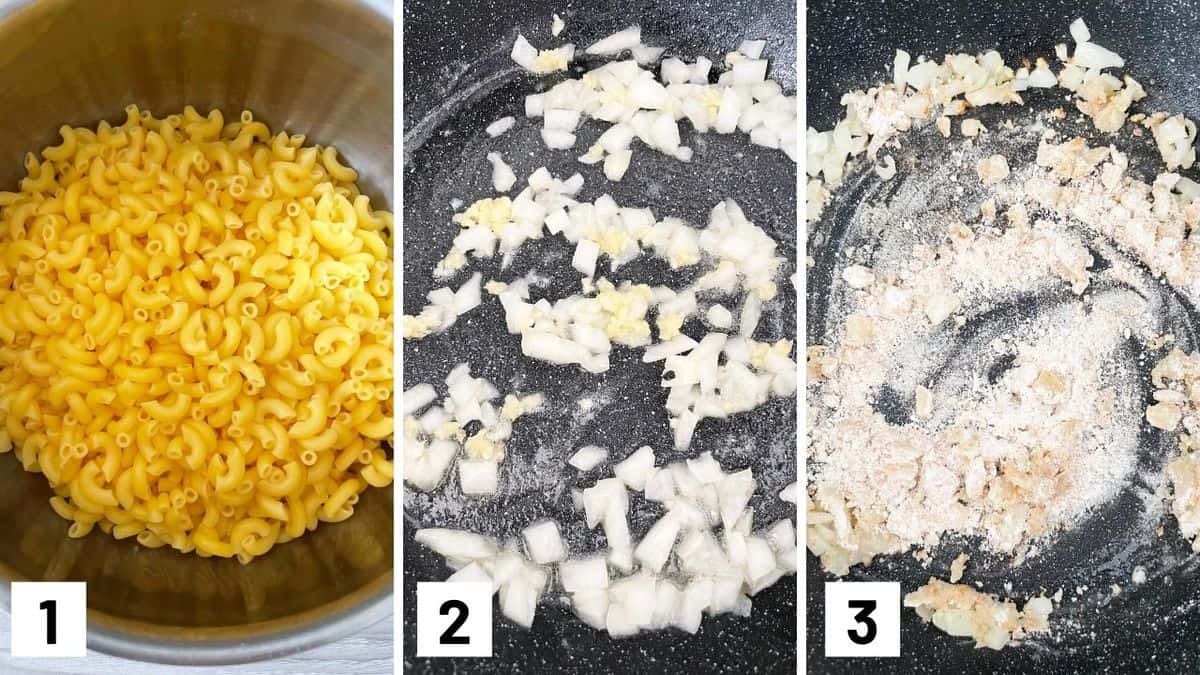
Set of three photos showing cooked pasta and making a roux.

Step 1: Cook the pasta al dente according to box directions. Set aside.

Step 2: To a medium skillet with high sides, over medium heat, heat the butter. Add the onions and garlic and cook until softened and fragrant, about 2-3 minutes.

Step 3: Add the flour and stir to make a roux.

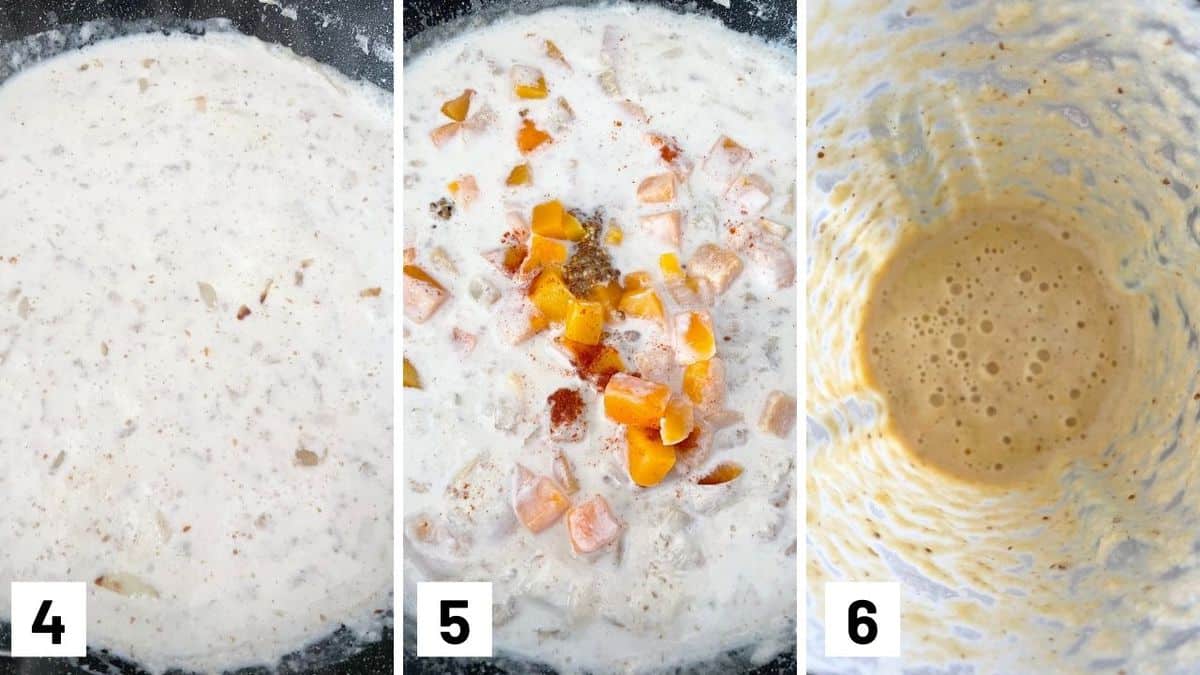
Set of three photos showing making a butternut squash sauce.

Step 4: Add the milk and cook over medium low heat, stirring frequently until the milk bubbles slightly and thickens.

Step 5: Add the butternut squash, mustard and paprika and cook for an additional 4-5 minutes until they are soft.

Step 6: Transfer to a blender and puree until smooth.

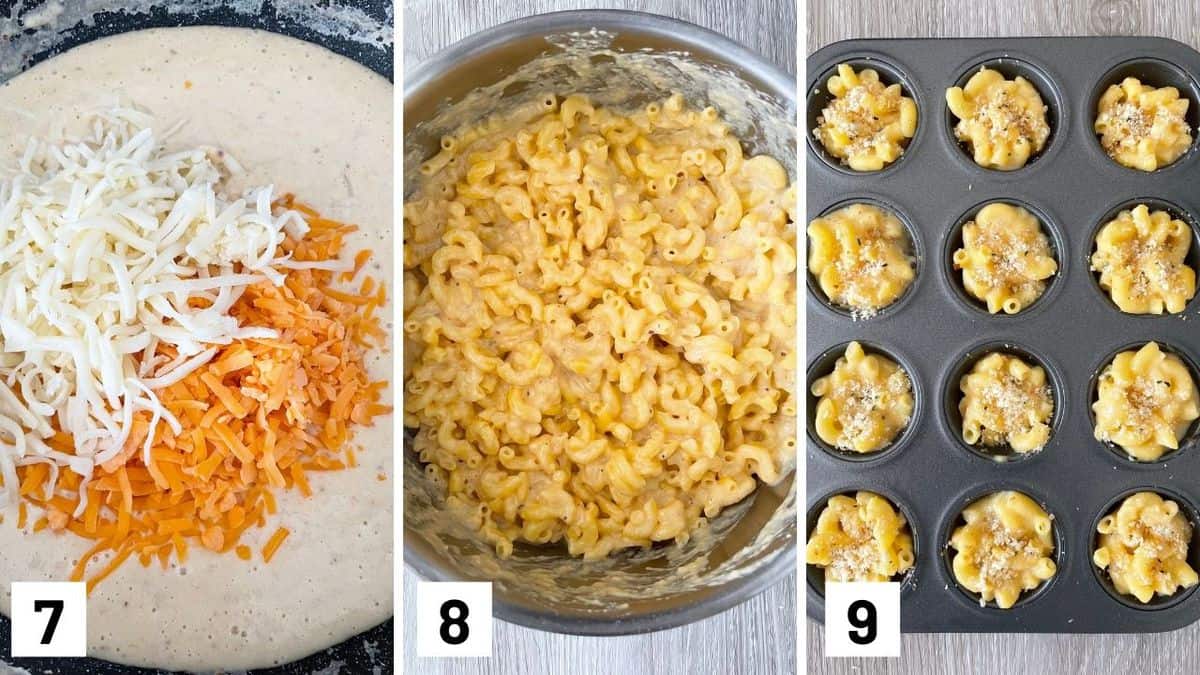
Set of three photos showing cheese sauce being made, coating pasta with it, and then transferred to a muffin tin.

Step 7: Return the sauce back to the pot over medium low heat and add the cheddar and mozzarella cheese. Cook until the cheese melts. Season with salt and pepper to taste.

Step 8: Take the sauce off the heat and add to the pasta.

Step 9: Beat the eggs and quickly mix with the sauce and pasta. Spray the mini muffin tins with nonstick spray. Fill the muffin tins with the mixture and top with flax, hemp hearts and parmesan. Bake for 15-20 minutes or until golden brown and set in a 350 degree oven. Serve right away, or transfer to a freezer bag to pull out as easy on the go snacks.

Expert Tips

I recommend grating your own cheese instead of buying pre-grated cheese. Pre-grated cheese doesn’t melt as nicely as cheese that you grate yourself.

You can add panko on top of the mac and cheese bites before baking to give them more of a crunch.

If you are looking to buy a muffin tin for this, I recommend a silicone muffin tin as you can easily pop the mac and cheese bites out in a flash.

Recipe FAQs

Are these homemade mac and cheese bites freezer friendly?

Obvs. I’m a mom, so making these mini mac muffins isn’t just for fun. These cups are just what I need when I need to pack a quick lunch for the boys, or a snack when we go to the park. When the mac and cheese bites have cooled, flash freeze them on a sheet pan then throw them in a freezer bag. Then, when the moment strikes, these cups will save the day.

Can I make these mac and cheese bites gluten free?

You bet! Just go for gluten free pasta and flour! My pick is chickpea or bean based pasta for extra nutrition!

How do I get extra protein into these squash mac and cheese bites?

We are a huge fan of using bean based pasta because it packs a ton of fibre and protein! If your kid is a carbaholic like mine (they all are!!) this is a great way to sneak some extra protein in.

Can I use regular pasta?

Yes, you can definitely use regular pasta instead of chickpea pasta for these little mac and cheese bites.

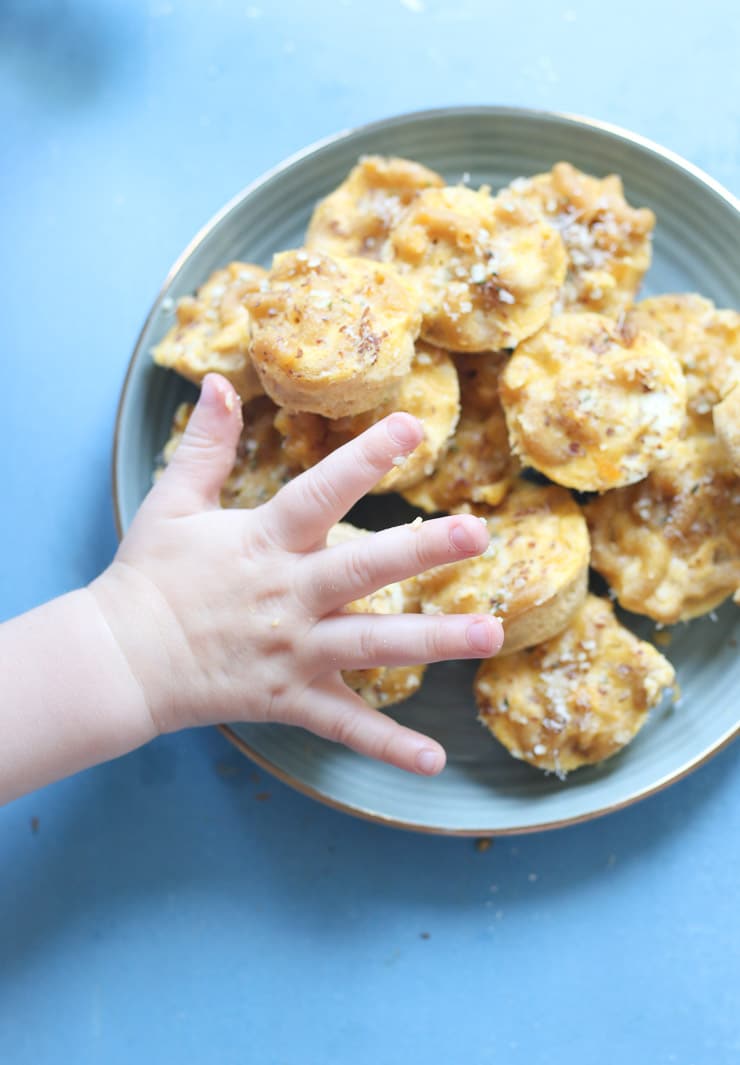
Baby grabbing a mac and cheese bite

More Recipes You Might Like

Want some more BLW recipes like these homemade mac and cheese bites? Try these ones:

  • Cheesy High Iron Baby Meatballs
  • BLW Peanut Butter Banana Mini Muffins
  • Vegan Homemade Granola Bars
  • BLW Chickpea Peanut Butter Baby Biscuits

Now I want to hear from you. What are your go-to baby led weaning snack recipes?

Mac and cheese bites on a blue plate.
Print Recipe
5 from 12 votes

Homemade Mac and Cheese Bites with Butternut Squash (BLW Recipe)

These homemade Mac and Cheese Bites make for the perfect on-the-go healthy snack or lunch with extra veggies to boot for babies, toddlers, kids, and even parents too.
Prep Time15 minutes mins
Cook Time30 minutes mins
Total Time45 minutes mins
Course: Snack
Cuisine: American
Servings: 72 bites
Calories: 47kcal
Author: Abbey Sharp

Ingredients

  • 1 lb chickpea macaroni
  • 2 tbsp butter
  • 1/2 yellow onion finely diced
  • 2 cloves garlic minced
  • 3 tbsp whole wheat flour
  • 1 3/4 cups whole milk
  • 2 cups frozen butternut squash cubes thawed
  • 1 tsp dijon mustard
  • 1/4 tsp paprika
  • 1 cup grated cheddar
  • 1 cup grated fresh mozzarella
  • Salt and pepper to taste
  • 2 eggs beaten
  • 2 tbsp hemp hearts
  • 2 tbsp finely grated parmesan cheese
  • 1 tbsp ground flax

Instructions

  • Cook the pasta al dente according to box directions. Set aside.
  • To a medium skillet with high sides, over medium heat, heat the butter.
  • Add the onions and garlic and cook until softened and fragrant, about 2-3 minutes.
  • Add the flour and stir to make a roux.
  • Add the milk and cook over medium low heat, stirring frequently until the milk bubbles slightly and thickens.
  • Add the butternut squash, mustard and paprika and cook for an additional 4-5 minutes until they are soft.
  • Transfer to a blender and puree until smooth. Return the sauce back to the pot over medium low heat and add the cheddar and mozzarella cheese. Cook until the cheese melts. Season with salt and pepper to taste.
  • Take the sauce off the heat and add to the pasta.
  • Beat the eggs and quickly mix with the sauce and pasta.
  • Spray 72 mini muffin tins with nonstick spray (ideally use silicon like these ones). Fill the muffin tins with the mixture and top with flax, hemp hearts and parmesan.
  • Bake for 15-20 minutes or until golden brown and set in a 350 degree oven.
  • Serve right away, or transfer to a freezer bag to pull out as easy on the go snacks.

Notes

  • I recommend grating your own cheese instead of buying pre-grated cheese. Pre-grated cheese doesn’t melt as nicely as cheese that you grate yourself.
  • You can add panko on top of the mac and cheese bites before baking to give them more of a crunch.
  • If you are looking to buy a muffin tin for this, I recommend a silicone muffin tin as you can easily pop the mac and cheese bites out in a flash.

Nutrition

Calories: 47kcal | Carbohydrates: 5g | Protein: 3g | Fat: 2g | Saturated Fat: 1g | Cholesterol: 9mg | Sodium: 37mg | Potassium: 29mg | Fiber: 1g | Sugar: 1g | Vitamin A: 473IU | Vitamin C: 1mg | Calcium: 36mg | Iron: 1mg
Abbey Sharp

Abbey Sharp is a Registered Dietitian (RD), regulated by the Ontario College of Dietitians. She is a mom, YouTuber, Blogger, award winning cookbook author, media coach specializing in food and nutrition influencers, and a frequent contributor to national publications like Healthline and on national broadcast TV shows.
www.abbeyskitchen.com/about-abbey/

Last Updated July 9, 2023. Published July 12, 2023 By Abbey Sharp 6 Comments

Foods and Supplements for Fertility and Getting Pregnant

We have compiled an evidence based comprehensive list of foods and supplements for fertility to help you get pregnant faster and reduce the risk of miscarriage.

As a fellow infertility warrior, I can attest to how easy it is to get suckered into doing ANYTHING suggested for trying to conceive. Even if it’s seemingly complete BS, if the internet tells us to try it, we will. There are lots of mommy blogs out there recommending what to eat, what not to eat, supplements and the like, but aside from your daily prenatal multivitamin, are there any legitimate recommendations for foods and supplements for fertility to take to increase your chances of getting pregnant?

image of woman with visible pregnant stomach holding her stomach standing sideways

Let’s take a look at some of the research on fertility supplements and foods for helping you get pregnant and stay pregnant.

Common Supplements for Fertility when Trying to Conceive

It’s very common for women and men who are struggling to get pregnant to be recommended a variety of vitamins and other supplements to help them conceive. But what does the research say about these common additions to the diet?

Omega-3 fatty acids

Early research suggests that a diet high in omega-3’s may help improve reproductive success by improving oocyte quality in women. In this study, participants consumed a diet where 2% of overall calories were omega-3’s. Oocytes are cells in the ovaries that play a major role in embryo development and since low oocyte quality might be a possible cause of fertility issues, it is thought that boosting up their quality may help you conceive.

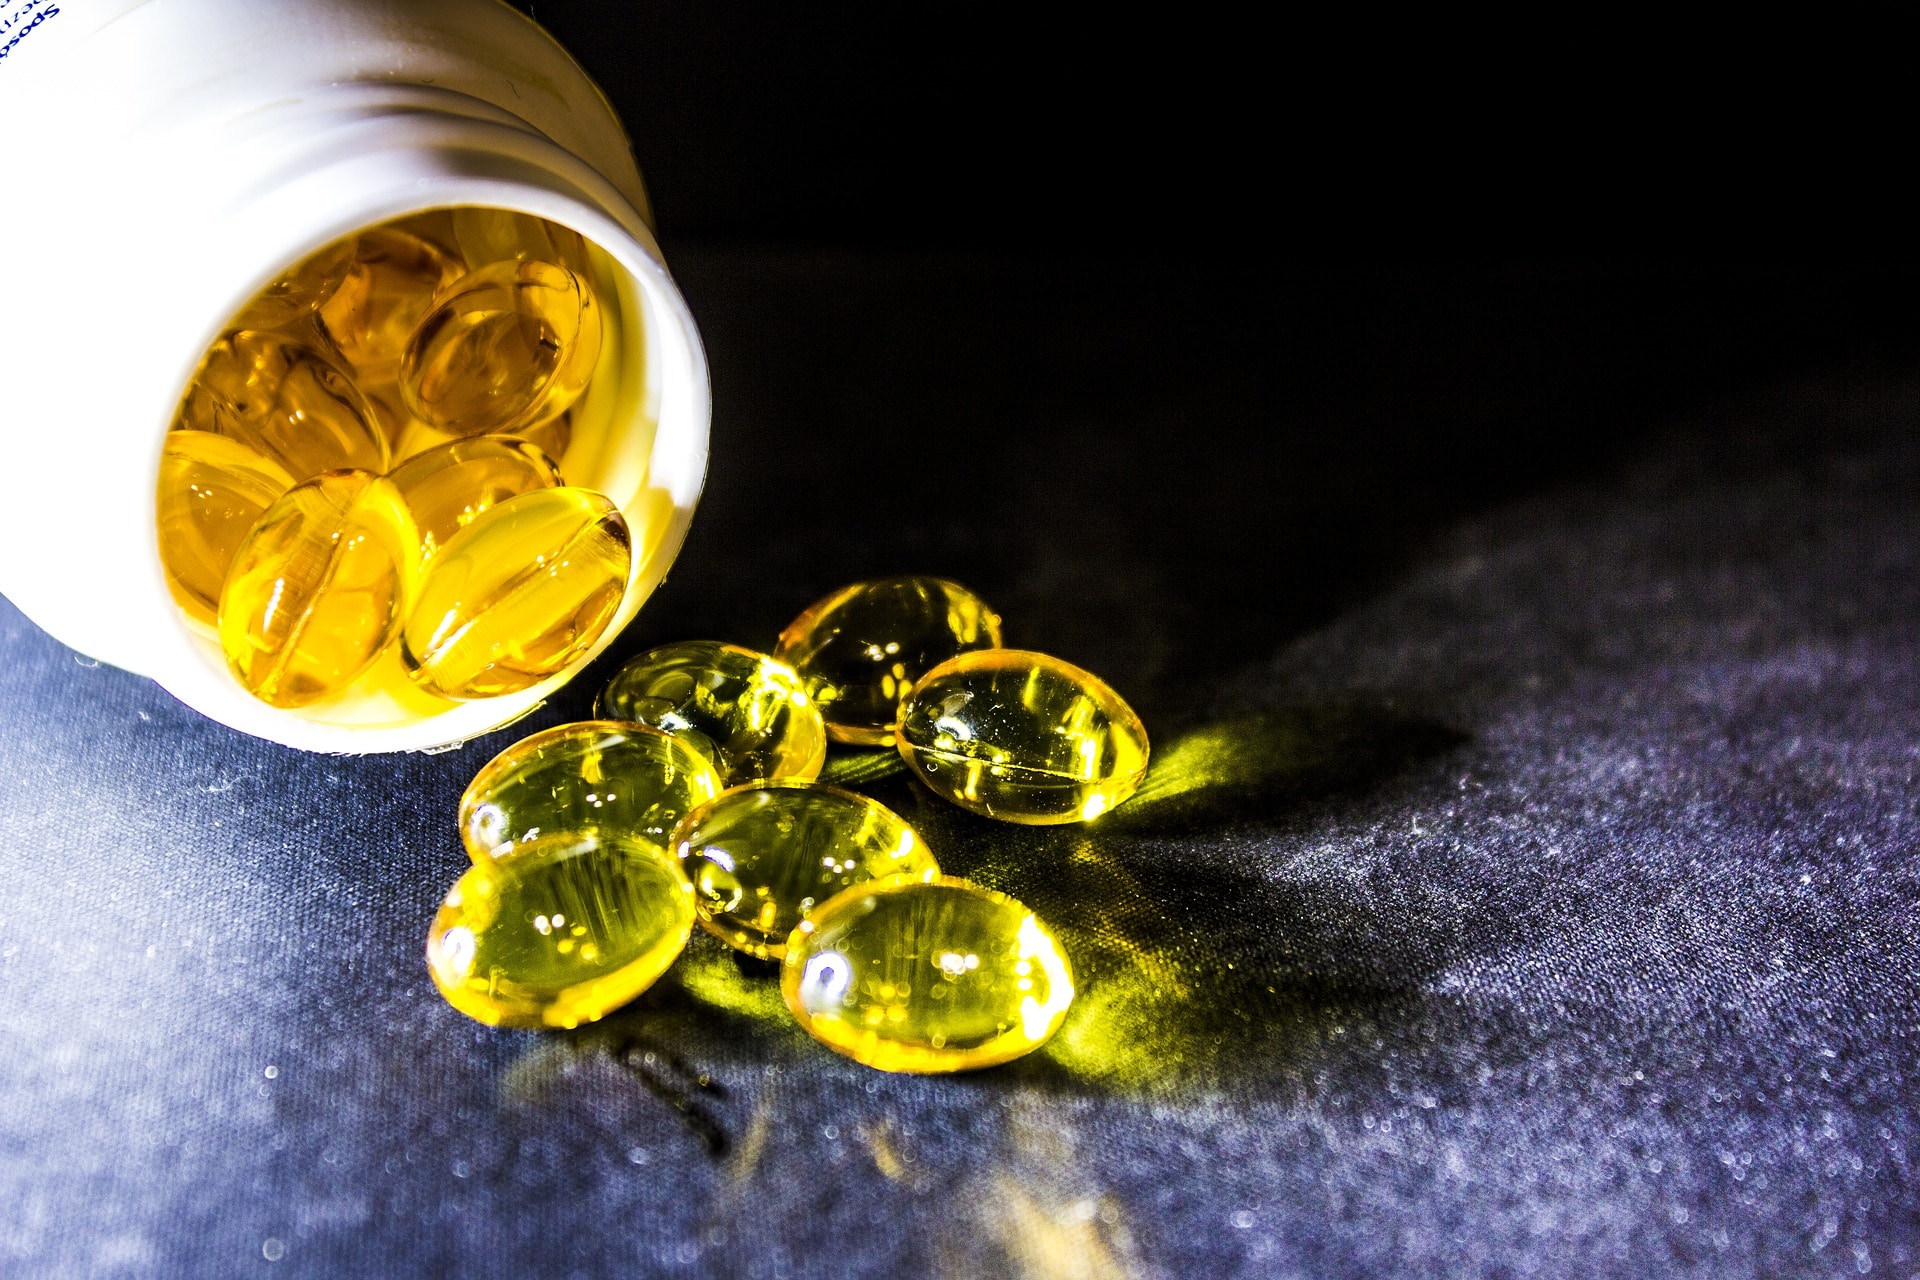
close up of translucent yellow fertility supplements coming out of a white pill bottle against a dark background

Folic acid

Studies have shown that folic acid plays a significant role in oocyte quality, implantation, fetal growth, and placentation. One particular study demonstrated that women who received folic acid supplementation had better quality oocytes than women who did not receive supplementation. Ample research has also demonstrated that folic acid is necessary for proper embryo development and growth since it plays a role in the prevention of neural tube defects . In male fertility, one research study suggested that folic acid supplementation resulted in about a 16% decrease in sperm damage while another study supplemented a sample size of 65 men with 15 mg of folic acid and the results showed that they had a significant increase in sperm count and motility. Folate naturally occurs in nature as vitamin B9, while folinic acid (folic acid) is the synthetic version which your body takes longer to convert. Methylated folate is another form of folate that is naturally occurring, but it has some advantages over folic acid because it is absorbed in the body faster. It is currently recommended to take around 600mg of folic acid when trying to conceive and throughout pregnancy.

Zinc

Research on women in relation to zinc in fertility is unfortunately limited. Research in mice has suggested that zinc deficiency may be linked with improper embryo development due to a defect in placenta development. Some research has also shown that a deficiency in zinc in female rabbits may be linked with a decreased interest in male counterparts, resulting in decreased ovulation. The endometrium was also found to be very inactive in these rabbits, making it difficult to conceive. In another study, a zinc deficiency in monkeys was related to impaired reproduction, however some monkeys with the deficiency could still conceive. Overall, zinc supplementation could possibly help with infertility in women, but more actual human research should be done in women to make more clear recommendations. In contrast, research on the effects of zinc in male fertility found that men with idiopathic sub-fertility had lower zinc concentrations in seminal plasma compared to those who didn’t. It was also found that men with higher sperm counts had higher seminal plasma zinc concentrations. Lastly, research has found that zinc supplementation may be linked with less sperm damage in males.

Vitamin D

Evidence suggests that vitamin D may be directly related to anti-Müllerian hormone (AMH) production, as research suggests that women with higher concentrations of vitamin D tend to have higher ovarian reserves and oocyte quality. As mentioned earlier, oocytes are the cells in the ovaries responsible for embryo development, so with good quality oocytes and ovarian reserves we may see a boost in overall fertility. Another study found that vitamin D may have a protective role against endometriosis by increasing endometrial thickness inside the endometrium.

Vitamin E

As a powerful antioxidant, vitamin E can help reduce oxidative stress, which in turn can possibly reduce the risk of common reproductive disorders such as endometriosis, infertility, PCOS, etc. Vitamin E may also help increase endometrial thickness by increasing the blood flow to the endometrium in women, and supplementation has been linked to reduced sperm damage in men.

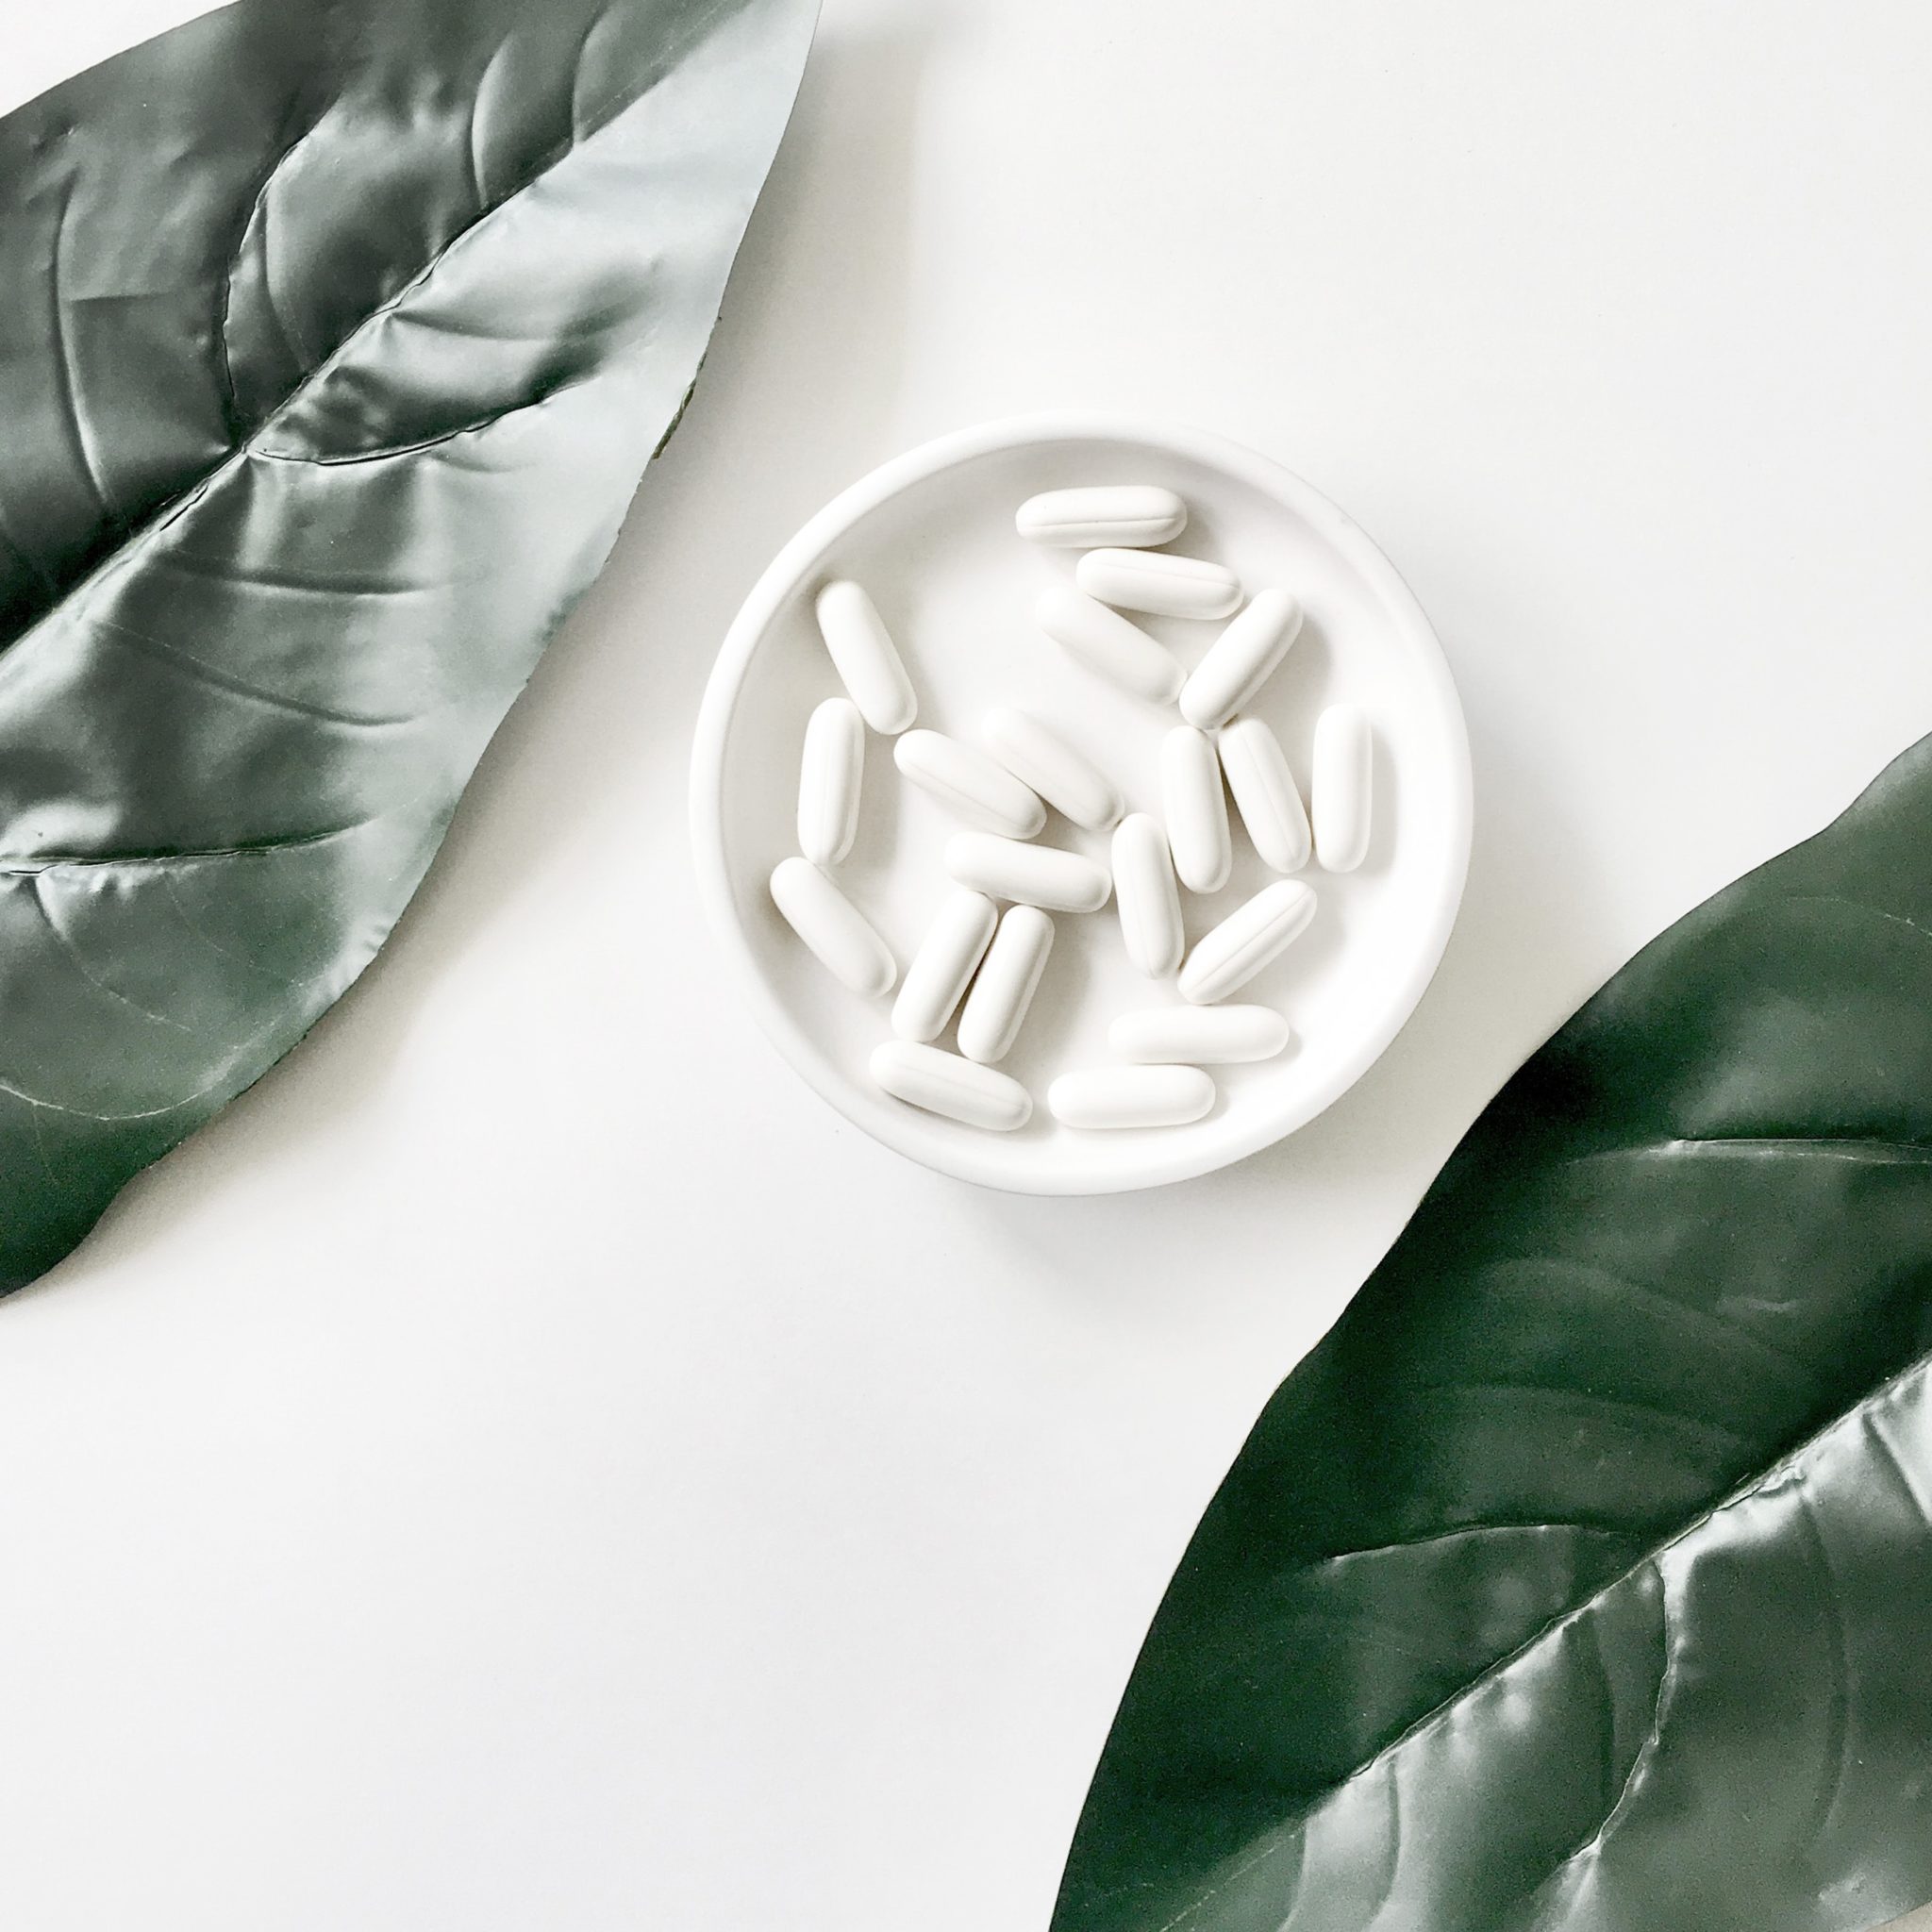
birds eye image of white fertility supplements in a white bowl against a white background with 2 green plants in the upper left and lower right corners

Coenzyme Q10

Coenzyme Q10 is important for providing energy to cells, and as we age, our levels of coenzyme Q10 diminish making it more difficult for our bodies to do normal processes, such as fertilization. Research suggests that coenzyme Q10 supplementation may be linked to improved ovarian response in women with low ovarian reserves. One study found that coenzyme Q10 may help with PCOS symptoms by balancing insulin levels, as well as sex hormones. Another study found that the health of a woman’s eggs increased as coenzyme Q10 supplementation was introduced at 600mg/day. In male fertility, research has found that coenzyme Q10 was linked with higher sperm motility and count.

Choline

Choline is a vitamin that is essential for proper development throughout one’s lifetime, especially cognitive growth. Evidence suggests that human fetuses receive a large amount of choline during pregnancy, hence why the needs of a mother-to-be are very high, around 450-550mg/day. Unfortunately, research shows that most women do not get adequate amounts of choline during pregnancy. Although research linking choline with fertility is limited, it is possible that choline is needed for a healthy pregnancy and therefore needed to become pregnant.

L-arginine

Research on L-arginine and its impacts on fertility in women is very limited. Of the research found, early pilot studies suggested that supplementation of L-arginine (16g/day) improved ovarian response, endometrium quality, and associated pregnancy rates. It was also found (here, here) that supplementation of L-arginine increased sperm motility and sperm count in men.

Bromelain

While it has been long speculated that bromelain (found in pineapple) has anti-inflammatory properties, which may be used for blood thinning to supply more blood to the uterus to prepare the uterus for implantation and pregnancy, the evidence in humans is lacking.

Selenium

Research on selenium and female infertility is very scarce. One study found that selenium deficiencies were associated with improper fetus development, pregnancy complications, and miscarriages. In men, research has found that supplementation may improve conception and motility.

Iron

It is without a doubt that iron is needed for proper fetal development during pregnancy, but what about while trying to get pregnant? During pregnancy, it is recommended by the National Institutes of Health (NIH) that women aim to get about 27mg/day of iron. It is possible that an iron deficiency when trying to conceive can put one at a greater risk of infertility due to a lack of ovulation and menstruation. However, we don’t have specific evidence to back that up. One long term study found that 438 women with infertility decreased their risk of ovulatory infertility when they supplemented with iron over an 8 year period, but we need more research to confirm.

image of fertility supplements

Acetyl L-carnitine (ALC)

Research has shown that Acetyl L-carnitine (ALC) has powerful antioxidant properties to reduce oxidative stress. Since oxidative stress has been linked to female infertility, it is believed that consuming adequate antioxidants may help reduce the risk of oxidative stress and damage. There is also some evidence that ALC may be linked with improved oocyte quality and maturation. However, more research should be conducted to confirm this.

L-citrulline

Evidence suggests that L-citrulline may be linked with increased sperm count and motility in men. However, research on L-citrulline in women is extremely scarce.

Maca

Although there is very little quality research, a 2016 review found that maca powder was associated with improved semen quality. However, most of the studies either had a small sample size, not enough trials, or there was a high risk of bias. Further research should definitely be conducted before making any conclusions.

Bee pollen and propolis

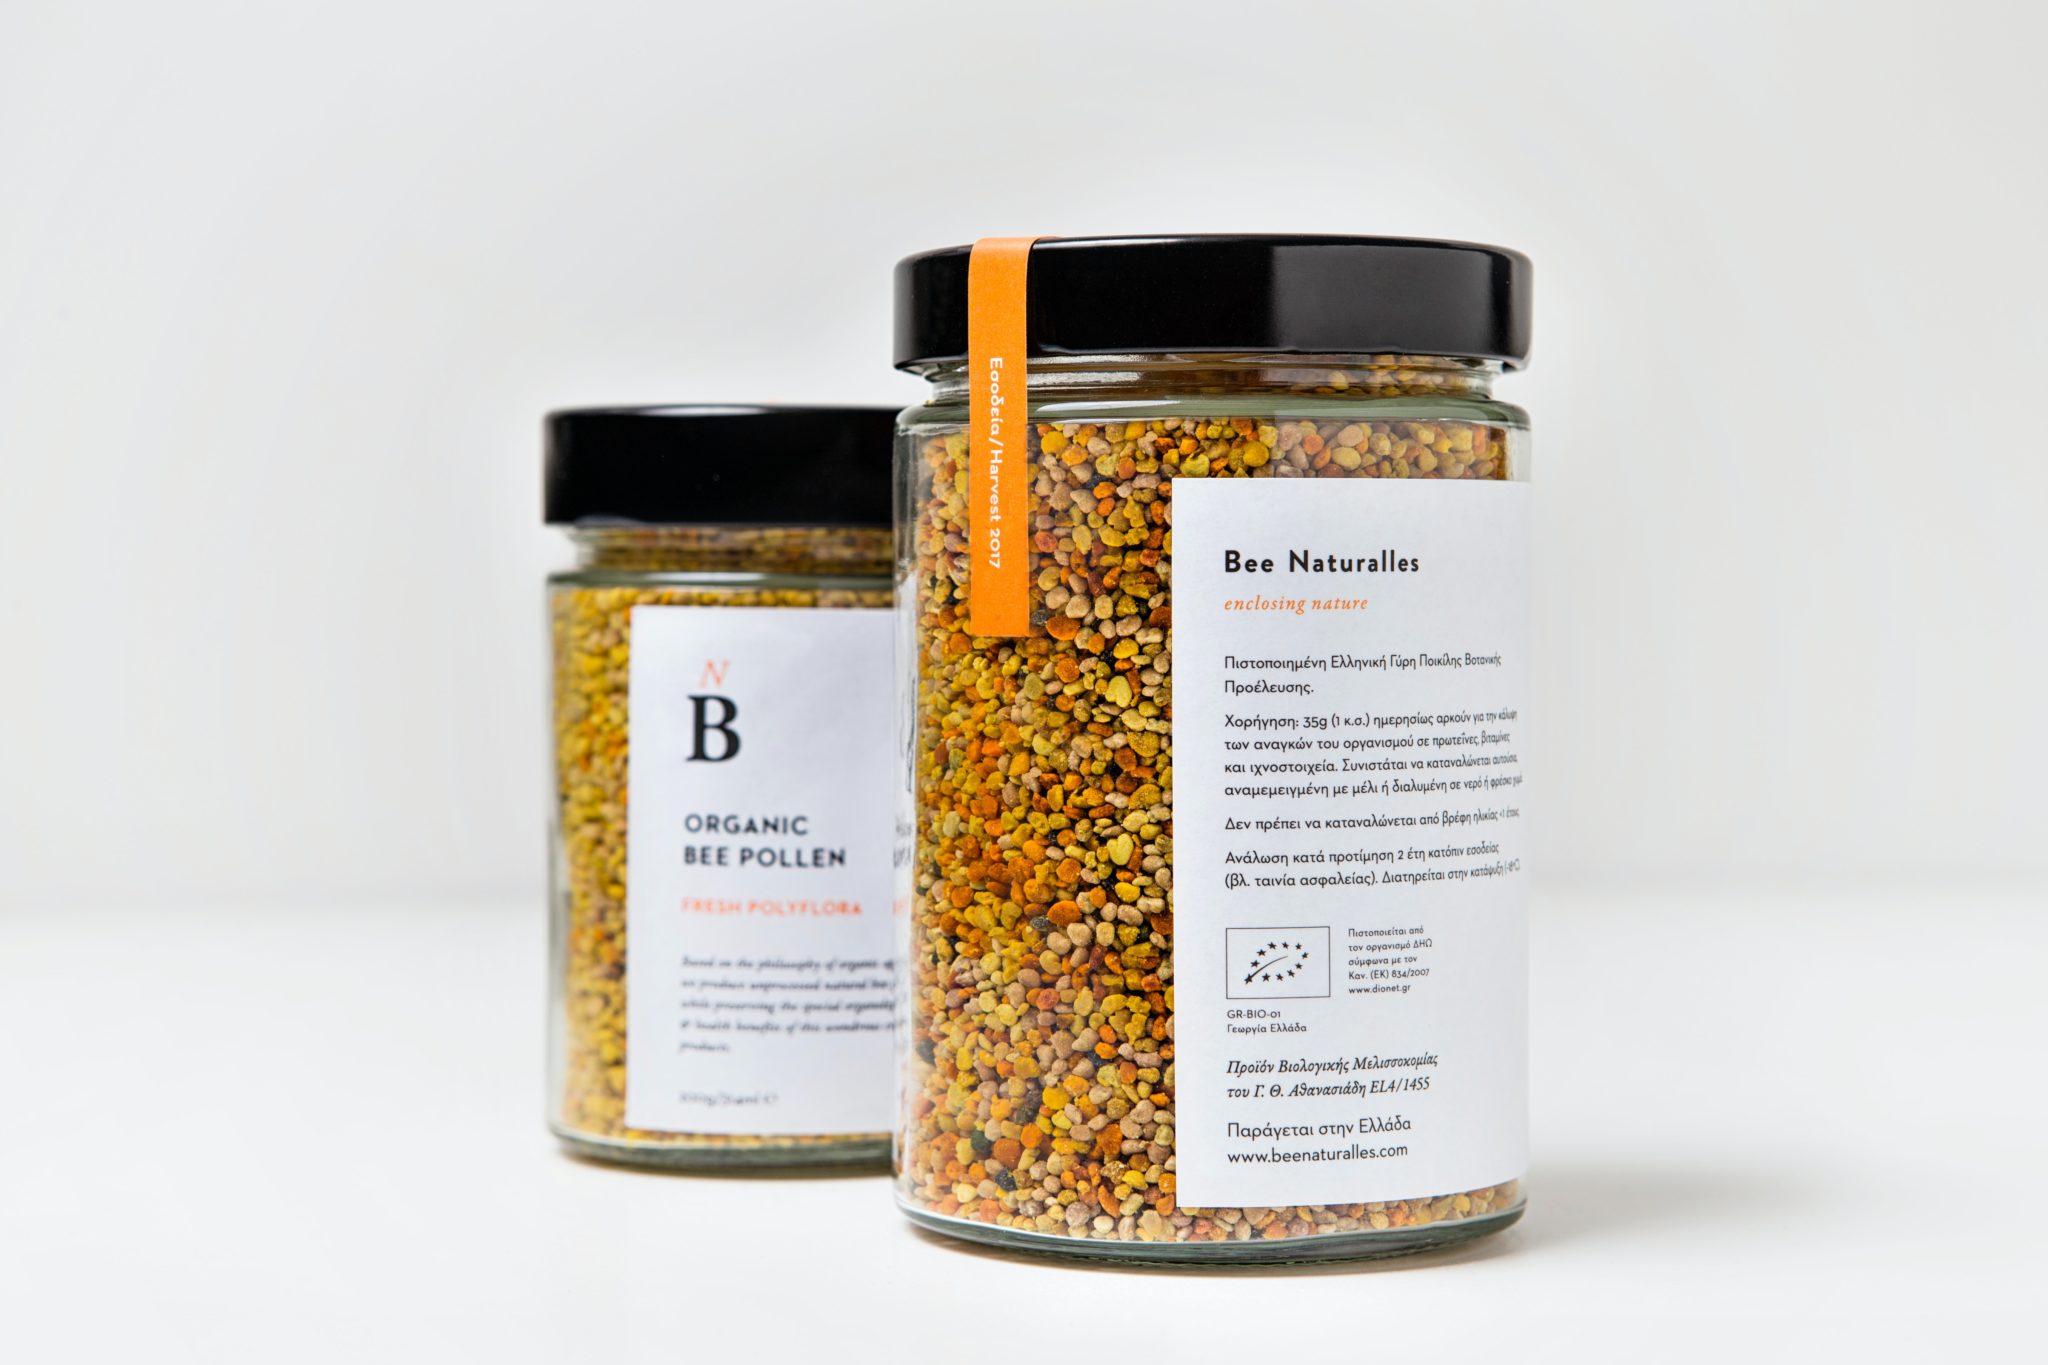
One animal study conducted in 2011 found that the consumption of bee pollen in male subjects was linked to improved sperm quality. Again, there is not adequate human data to draw any conclusions. In women with endometriosis, one study found that consumption of bee propolis (500mg, twice a day) was linked to a 40% increase in the chances of becoming pregnant. Again, more research is required.

image of pee pollen as a fertility supplement

Royal Jelly

Animal research shown that royal jelly, produced by bees, may increase ovarian hormones through its alleged estrogenic effects, and promote hormonal balance which can help with infertility issues. Obviously human trials are needed to confirm.

N-acetyl cysteine (NAC)

In men with varicocele (aka enlargement of the veins in the scrotum), it was shown that treatment with 600mg/day of NAC after surgery improved sperm quality and resulted in a 22% increase in pregnancy rates. Of course, we don’t know if that’s the supplement or surgery doing the trick. In women with PCOS, research suggests that supplementation of 50mg of NAC twice daily may help induce ovulation.

Inositol

In a research study with over 900 women being treated for anovulation, supplementation of inositol improved pregnancy rates by 6.13% by increasing embryo quality and number of oocytes retrieved. As discussed in our PCOS post, we also know that inositol is a powerful adjunct for women as one study suggests it may help restore ovulation and improve your chances of pregnancy.

B-vitamins

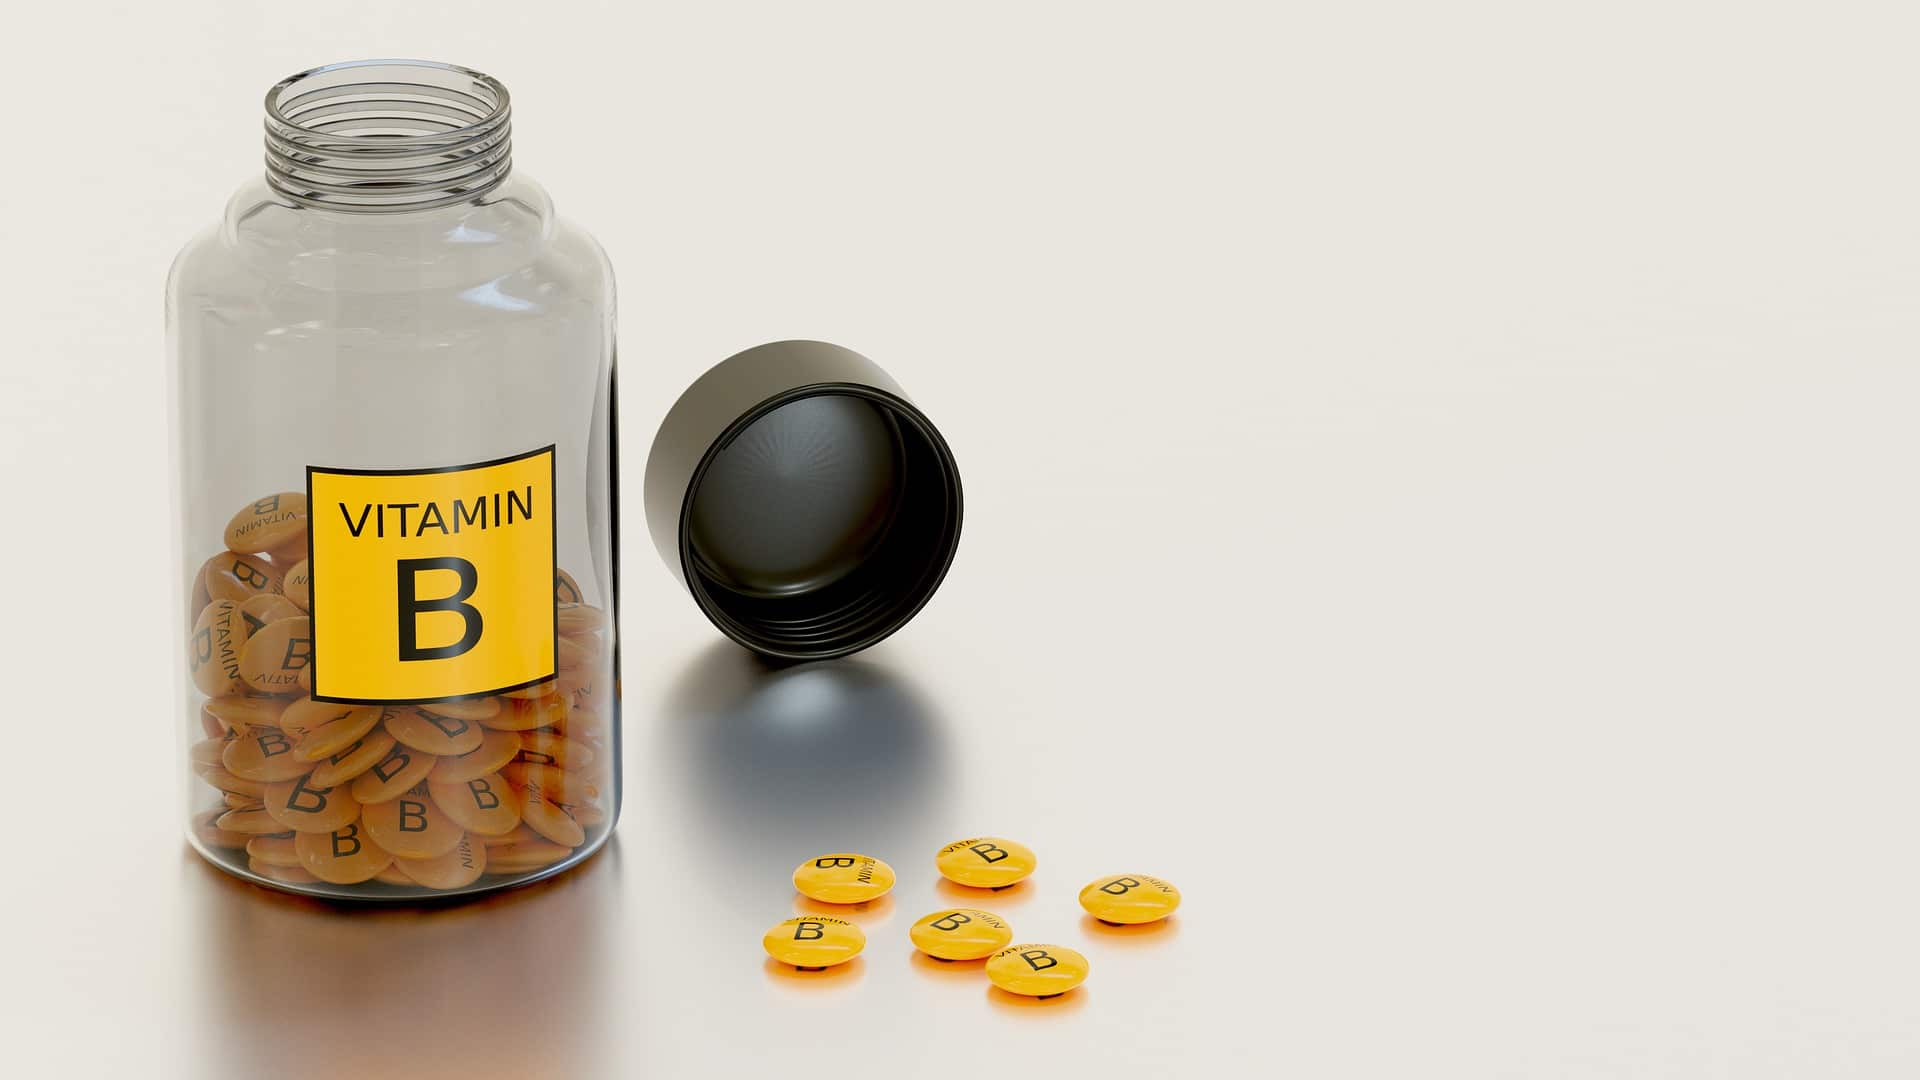
In addition to folic acid, research has found that 27% of men who consumed 1000 mcg of B12 per day showed an increase in sperm count. Another study found that 50% of men who received 1500 mcg/day of B12 saw increased sperm motility and sperm count.

image of vitamin B as a supplement that may assist with fertility

Melatonin

Melatonin has also been shown to play a role in fertility and may potentially improve IVF outcomes. A 2014 review found that melatonin acts as an antioxidant and improves the quality of the eggs by reducing the level of an oxidizing agent called 8-OHdg. By protecting the egg from free radical damage, melatonin may help women improve fertility by creating healthier and more fertile eggs. Research also suggests that melatonin may play a role in fetal development and assist with IVF treatments. One 2014 systematic review found that melatonin supplementation during IVF may increase pregnancy rate by as much as 21%. BONUS! It helps you sleep (see lifestyle factors below!).

Pyrroloquinoline quinone (PQQ)

PQQ is a powerful antioxidant that is often recommended to improve fertility. While research is limited, the few studies on PQQ and fertility were performed on mice. Despite showing positive results on reproductive performance and growth in mice, more human research is needed in this area to fully understand the role of PQQ and fertility.

Acai Berry Powder

An ongoing study conducted by CCRM fertility has shown promising results on the effectiveness of acai berry powder and pregnancy outcomes for women undergoing IVF. Despite the small sample size, 81% of study participants achieved ongoing clinical pregnancies. Though the study is still ongoing and conclusions still need to be drawn from total outcomes, it is speculated that the high level of antioxidants in the acai berry powder may be a powerful supplement to support ovarian function.

Top Fertility Foods and Diet Tips

We just talked about all the supplements for fertility, but there are also foods and dietary patterns that may help support conception and a healthy pregnancy.

Plant Based Protein

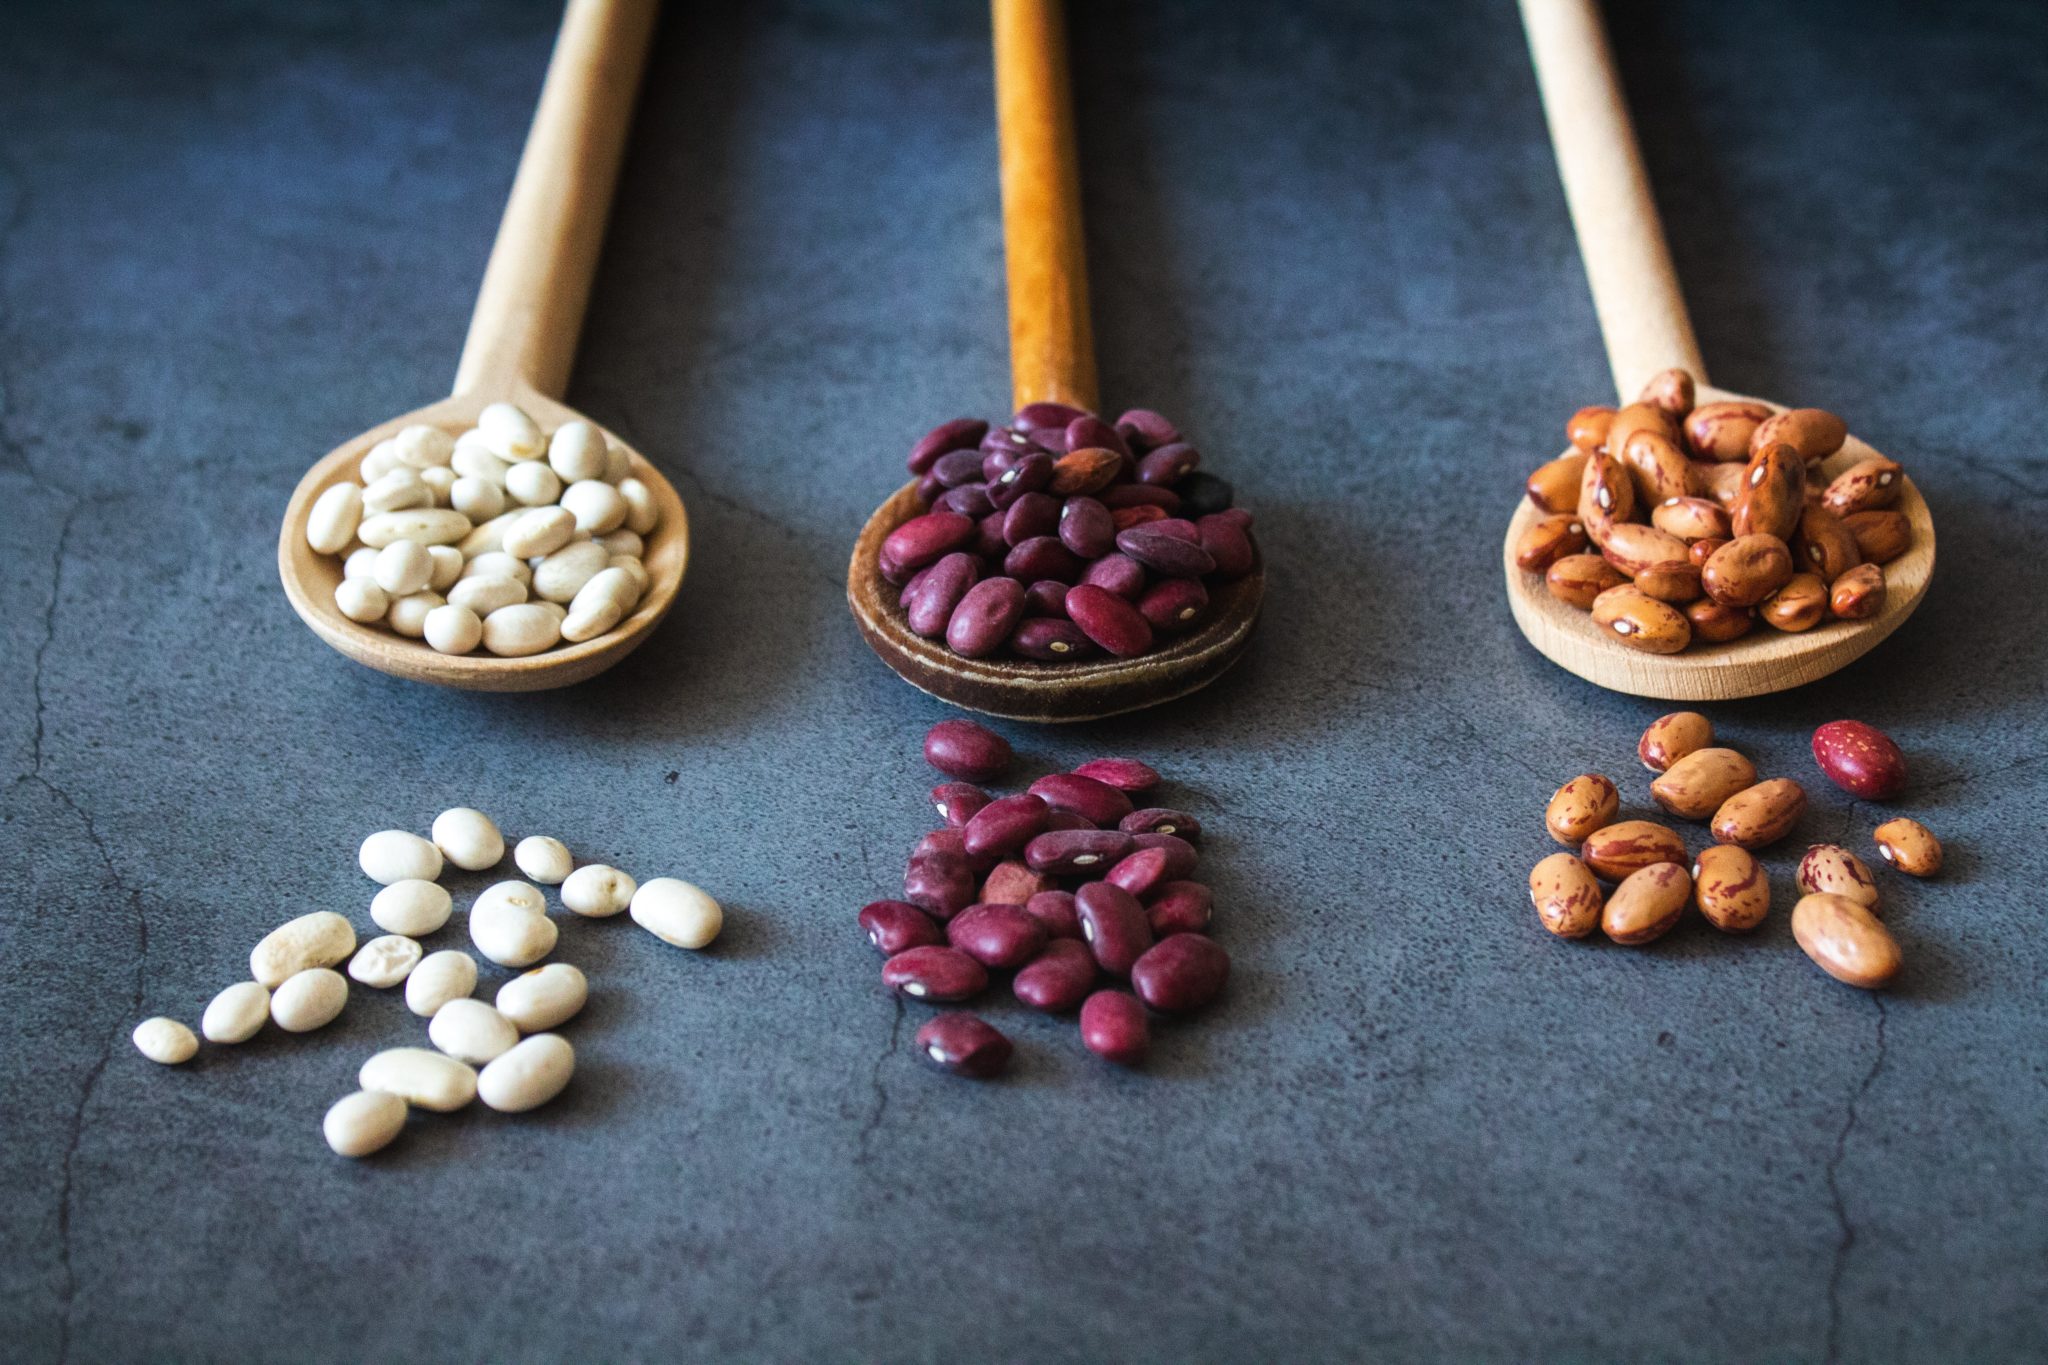
Considering the popularity of plant-based diets in general, there’s been a lot of talk of the impact of vegan protein versus animal protein on fertility. Research has shown that swapping out animal protein for plant-based protein may decreases one’s risk of ovulatory infertility. Another study found that consuming more animal protein resulted in a 32% increase in the risk of infertility. This can possibly be attributed to the high amounts of saturated fat, antibiotics, and hormonal residues found in animal protein. In contrast, research has shown that non-heme iron (the type we find in plant based proteins) may help decrease the risk of anovulatory infertility. This doesn’t mean you need to go completely plant based or vegan, but I do think we can all benefit from incorporating more plant-based protein into our week.

image of dried beans on wooden spoons to represent plant based protein foods that may assist with fertility

Full Fat Dairy

While we just talked about eating more plant based, let’s look at the research on high fat versus low fat dairy. Research (here, here) suggests that there is a positive association between low fat dairy and risk of anovulatory infertility, while there is an inverse relationship between high fat dairy and risk of anovulatory infertility. Higher fat dairy products tend to have higher estrogen concentrations, and estrogens are known to decrease IGF-I levels which may explain the decreased risk of anovulatory infertility.

Walnuts

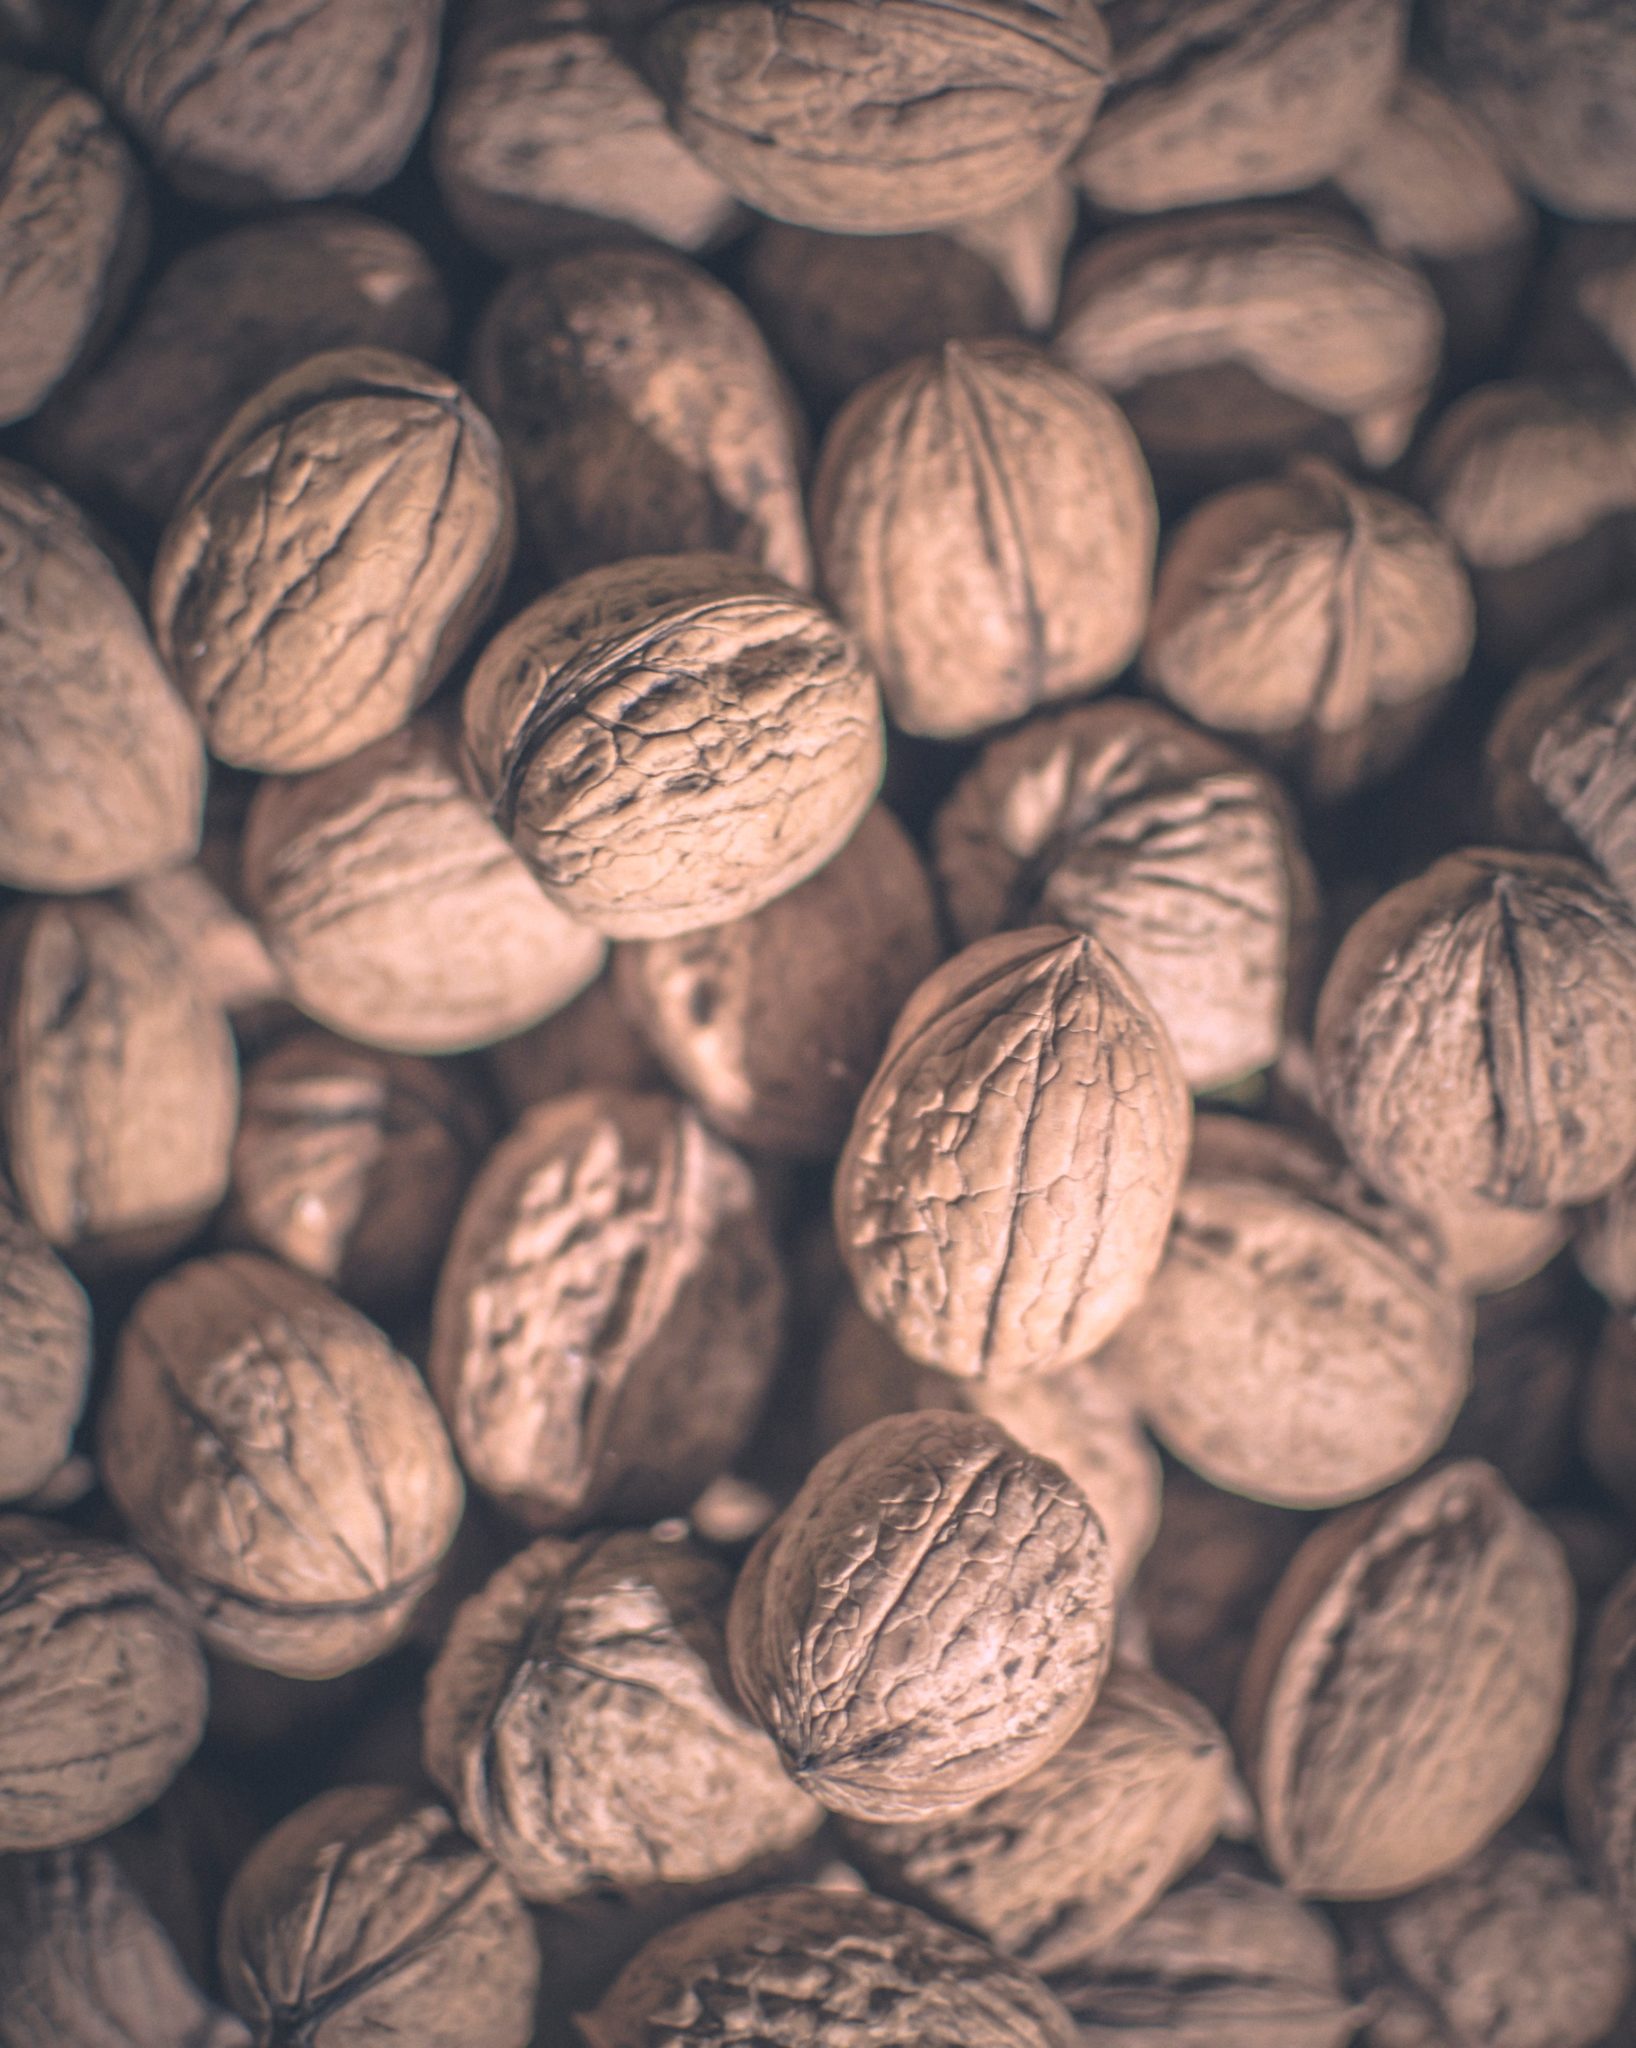
Walnuts are known to be rich in antioxidants which fight the free radicals in our bodies that cause damage to our cells and energy stores. Research suggests that consuming 75g of walnuts per day may be associated with increased sperm motility, count, and morphology in men. It was also found that the increase in sperm quality was correlated with increased serum levels of alpha linolenic acid (ALA) and omega-6 fatty acids. This is because these fatty acids are critical in maintaining many cellular functions not only in fertility, but many other metabolic processes in the body.

image of shelled walnuts to represent foods that help with pregnancy

Breakfast

Another topic that has been in discussion recently in relation to fertility is whether you should eat the majority of your energy intake earlier in the day or later in the day. Research on 60 lean women with PCOS found that the women who ate a larger breakfast compared to lunch and dinner had an increased ovulation rate than the women who ate larger meals later in the day. The research also demonstrated that the women who ate a larger breakfast had decreased insulin levels (by 54%) and testosterone levels (by 50%). So, basically what this means is that eating breakfast may help with the extremely high testosterone levels in women with PCOS. In addition, the women in this study experienced improved insulin sensitivity and high insulin resistance has been associated with a higher risk of anovulation and ultimately, infertility.

Fibre Rich Carbs

One study from 2007 found that increased intake of cereal fibre (10g/day) was associated with 44% decrease in the risk of anovulatory infertility in women over the age of 32. However, no significant association was found in younger women. However, another study found that even a 5g/day increase in dietary fibre was associated with a 78% increase in the risk of anovulation. It’s hard to say what the consensus is here, but it doesn’t hurt to take this information into account when discussing fertility. More research should definitely be conducted on this topic.

It was also found that in patients with PCOS, a low glycemic index diet had a higher percentage (24.6% versus 7%) of ovulatory cycles compared to patients with a normal glycemic index diet.

Foods to Limit when Trying to Conceive

Trans Fats

Fats have been in discussion amongst the nutrition community for years, and while there are still a lot of disagreement about specific types of fats and their impact on health, I think we can all agree that trans fats aren’t so great. Trans fats come in two forms, natural and artificial. There have been a few studies (here, here) showing that moderate consumption of natural sources of trans fat, such as the ones found in meat and dairy products, aren’t likely harmful to one’s health. However, artificially made trans-fats, for example the ones found in fried fast foods and vegetable shortening, have been linked to an increased risk of infertility. One study found that even a 2% increase in the consumption of trans fat was associated with a 94% increase in the risk of ovulatory infertility. The study did not state whether or not the trans-fat studied was natural or artificially produced, but regardless, it may be best to try to avoid trans-fats while trying to get pregnant. On the other hand, a study conducted found that increased monounsaturated fat (MUFA) consumption was associated with higher odds of birth, while polyunsaturated fat (PUFA) was inversely correlated with embryo quality. Meaning the more PUFA consumed, the higher the count of poor-quality embryos.

High Glycemic Index Carbohydrates

Although not much research has been done on the correlation between carbohydrates and fertility, one study on 438 women found a positive correlation between high glycemic index (GI) carbohydrate intake and risk of ovulatory infertility, while low GI carbs reduced this risk. So, as high GI carb intake increased, the risk for ovulatory infertility increased as well. Though there is little research out there, this is definitely something to take into account when attempting to increase fertility. There has also been research done suggesting that a low carb diet may be linked with decreased PCOS symptoms, which is the diagnosis of a lot of women struggling with infertility. One small study found that women with PCOS who reduced their carbohydrate intake to 20g/day for 24 weeks experienced on average a 12% decrease in body weight, 22% decrease in testosterone, 36% decrease in FSH, and a 54% decrease in fasting insulin. Another study found that a low GI diet improved menstrual irregularity in over 80% of women with PCOS. One 2010 study also found that a low GI diet may improve menstrual cyclicity in 95% of women with PCOS.

birds eye view of coffee beans in a heart shape with a mug of coffee in the centre against a wooden background

Caffeine

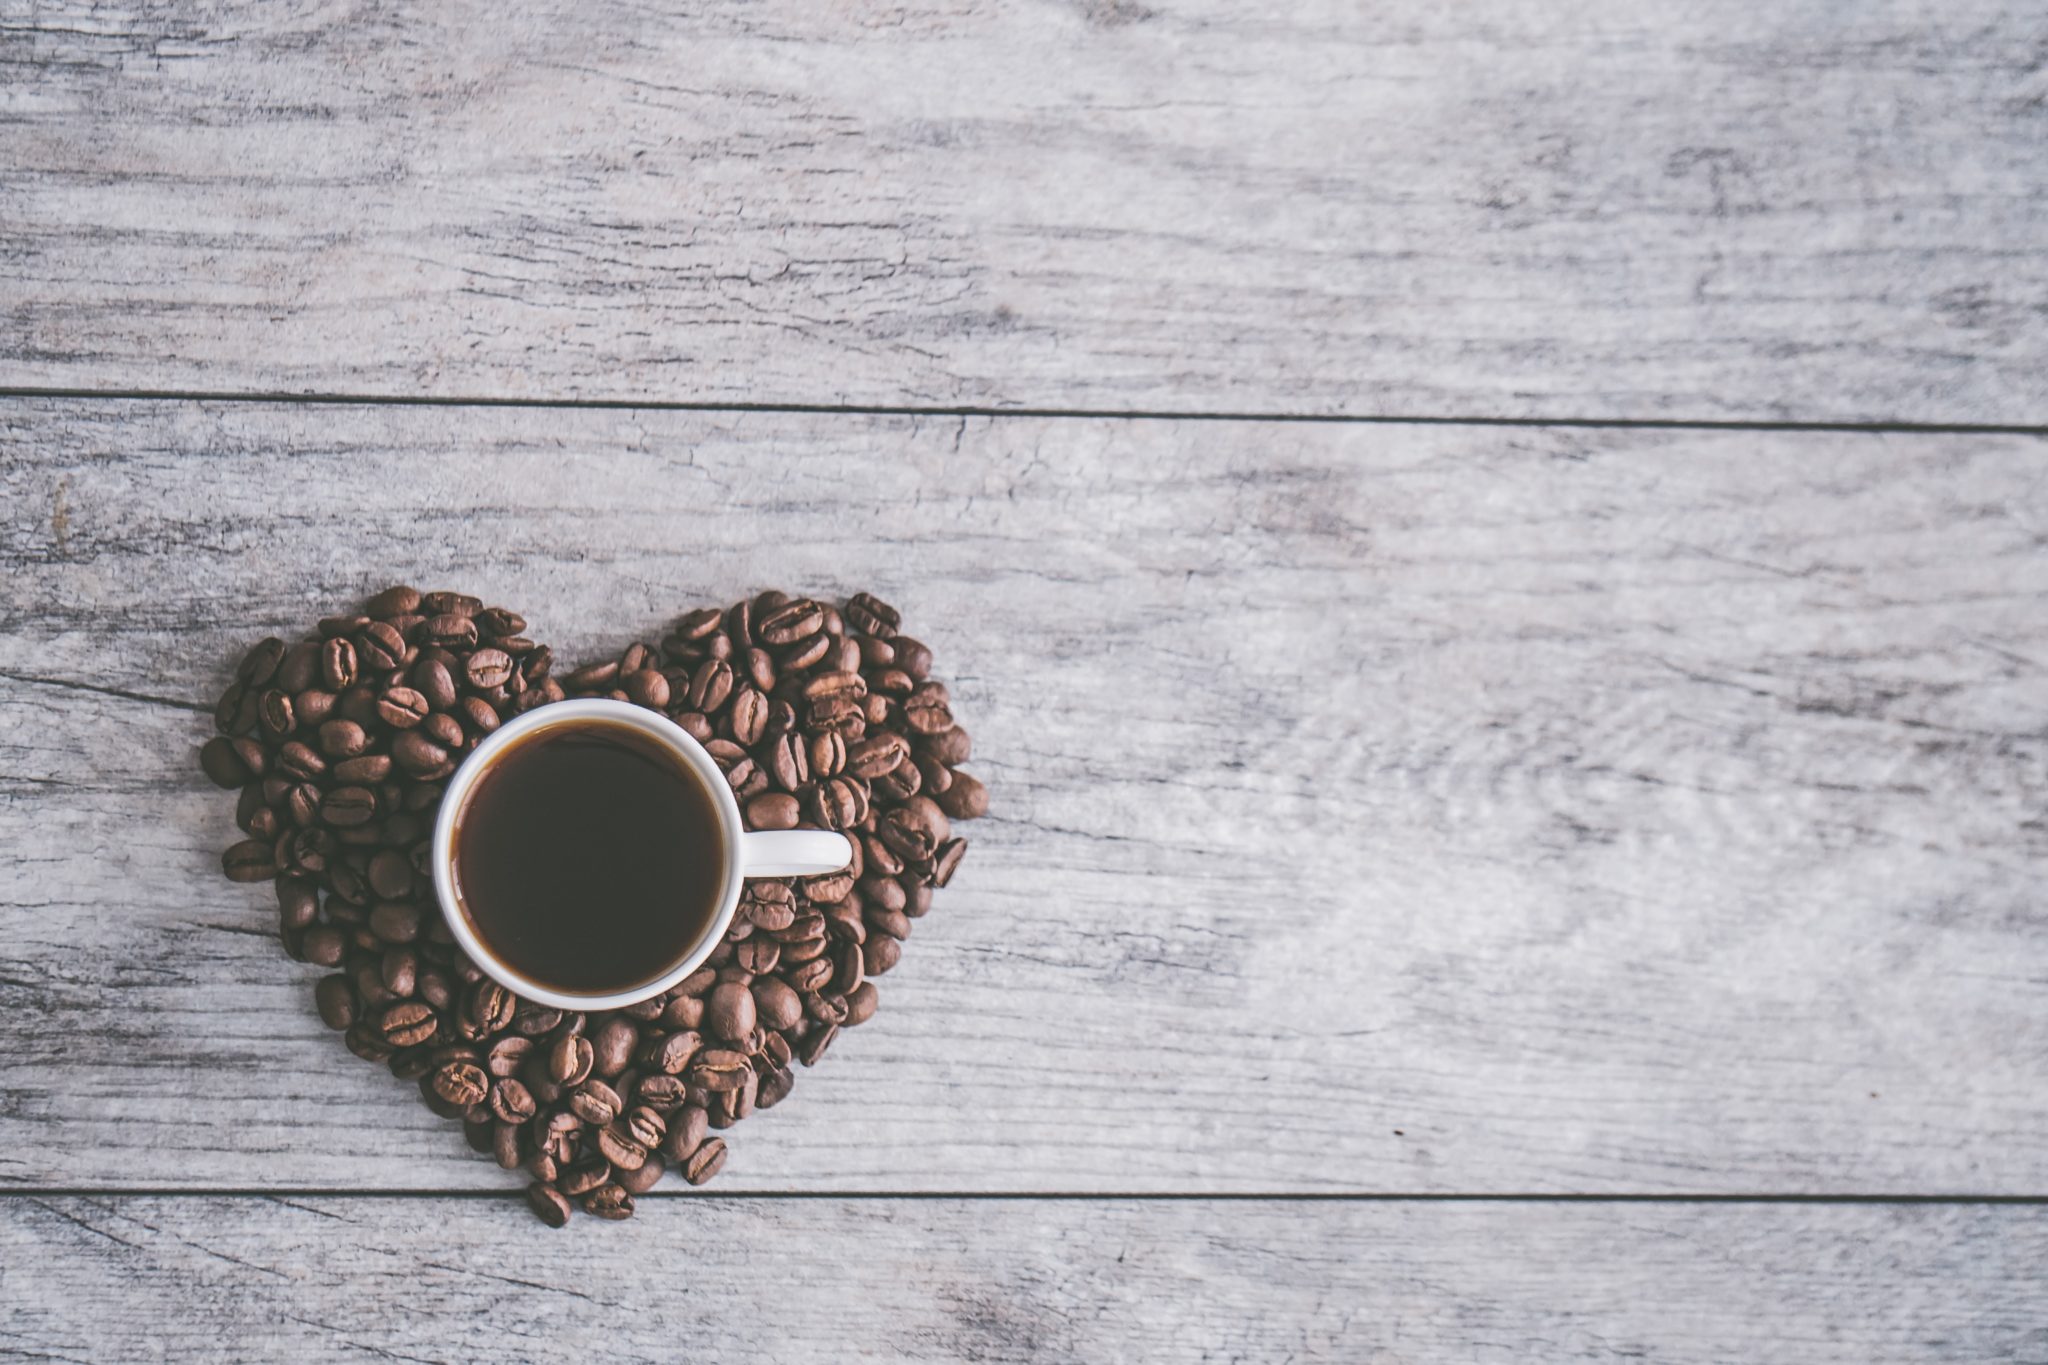
Consuming caffeine has been discussed t a lot in the pregnancy community. One large study found that women who consume over 500mg of caffeine a day took over 9 months longer to conceive than women who consumed less than 500mg/day. Another study found that increases in caffeine intake by 100mg/day was associated with increased risk of miscarriage. A third study found that women who consumed over 75mg all the way to upwards of 900mg/day had an increased risk of a spontaneous miscarriage compared to women who consume less than 75mg/day. More research on the actual mechanism by which this association occurs should be done to understand the reasoning behind these findings. Official guidelines recommend no more than 200mg of caffeine/day which is equivalent to about one 12 oz coffee.

Alcohol

group of people "cheersing" with glasses of wine

Some research has found that low to moderate consumption of alcohol (about 1 standard drink/day for women, 2 for men) did not play a role in trying to conceive. However, other research has found that high alcohol consumption (140g/week, about 10 standard drinks) increased the risk of infertility in women, while moderate consumption (1 standard drink/day for women) had no correlation with fertility. Although there may be some varying findings on this association, these findings should be at least taken into consideration when deciding to consume alcohol, and if so, how much is safe. This is because alcohol is pro-inflammatory which can possibly increase the inflammation in relation to the endometrium. Inflammation is one of the major issues with endometriosis, so limiting alcohol intake might be something to consider when discussing fertility.

Other Lifestyle Considerations for Increasing Fertility

person in running shoes exercising to represent activities that may assist with pregnancy

Exercise

It’s no doubt that regular exercise is good for an individual’s health regardless of whether or not you’re trying to conceive. In terms of the role of exercise in fertility, one large study found that any type of physical activity was associated with an increase in fertility among obese women, while moderate physical activity resulted in a small increase in overall fertility, regardless of BMI. This can possibly be explained through another study that found that the risk of ovulatory infertility increased as BMI increased in women. Also, it was suggested that physical activity may improve ovarian function by reducing insulin resistance. In another study, 60 of the 67 women resumed ovulation and 52 of them achieved pregnancy following a healthy lifestyle program that included physical activity. In the comparison group, none of these results were found. On the other hand, it has been shown (here, here) that strenuous exercise can result in hypothalamic dysfunction which in turn can lead to menstrual cycle irregularities and suppression of GnRH (responsible for the release of follicle stimulating hormone) which can then cause fertility issues such as anovulation. Moderation is definitely key so choose an activity that you enjoy doing and listen to your body.

Stress Management

Stress is without a doubt something we all deal with on a daily basis, but how does stress effect fertility? Multiple studies (here, here, here) suggest that infertility is significantly associated with stress. One study found that stress significantly reduced the probability of achieving pregnancy in 274 women. Researchers explained that as alpha-amylase (can be used to measure stress response) concentrations rose, the probability of conceiving decreased. Another study found that higher levels of stress was associated with irregular menstrual cycles and anovulation. If stress plays a factor in fertility, learning how to manage stress may play a huge role in your fertility journey. Some possible ways to manage stress include exercising, attending therapy, or finding a distracting hobby to take your mind off of it.

image of person sleeping under the covers

Getting Enough Sleep

Sleep deprivation in women may impact the release of luteinizing hormone (LH) which is what triggers ovulation and regulates your cycle. This may explain why one analysis found that female shift workers (those who work at night or rotated shifts) were at higher risk of miscarriage and other menstrual cycle disturbances. Again, we definitely need more research, but we know how important sleep is for hormone regulation and stress management, so this really would make sense.

Bottom Line on Foods and Supplements for Fertility

It’s safe to say that women and men who are struggling with infertility are often desperate to do whatever they can to improve their chances. While the research in this area is limited and it’s unlikely that for most women and men that adding a little bee pollen will make or break their chances, in a lot of cases, the recommended foods and supplements are low risk and healthy, in general. Again, it’s important to remember that you are not at fault for your infertility if you do not make all of these dietary changes – lots of people get pregnant despite doing exactly the opposite of these suggestions!

But as someone who struggled myself with infertility, I understand that sometimes you just want to feel like you did everything you could, and making small changes to your diet may give you some sense of control. Ultimately, if it brings you peace of mind, it may be worth exploring some of these options, but if it makes you more anxious and stressed to think about all of these things, it definitely will not help the cause. Either way, it’s always best to speak to your health care provider about the best supplements and diet changes for you.

Baby dust to you and yours! xoxox

More Blog Posts You May Like

Did you enjoy this post about foods and supplements for fertility? Looking for other fertility blog posts? Check out some of my favs below!

  • BIRTH CONTROL INFERTILITY | RISKS AND EFFECTS OF BIRTH CONTROL ON FUTURE FERTILITY
  • SEED CYCLING FOR FERTILITY | DOES IT ACTUALLY WORK?
  • DOES ALCOHOL & CAFFEINE AFFECT FERTILITY OR CAUSE MISCARRIAGE?

So tell me, have you tried any of these foods or supplements for fertility? Are there any others that seemed to help you conceive? I would love to hear about your experience below!

Contribution by: Medline Hermann

Abbey Sharp

Abbey Sharp is a Registered Dietitian (RD), regulated by the Ontario College of Dietitians. She is a mom, YouTuber, Blogger, award winning cookbook author, media coach specializing in food and nutrition influencers, and a frequent contributor to national publications like Healthline and on national broadcast TV shows.
www.abbeyskitchen.com/about-abbey/

Last Updated July 9, 2023. Published July 10, 2023 By Abbey Sharp 6 Comments

Hawaiian Meatballs Recipe with Sweet & Spicy Sauce

This Hawaiian Meatballs recipes uses chicken and sweet & spicy sauce for insane flavour. It’s the perfect family friendly weeknight meal that only takes 30 minutes to prepare!

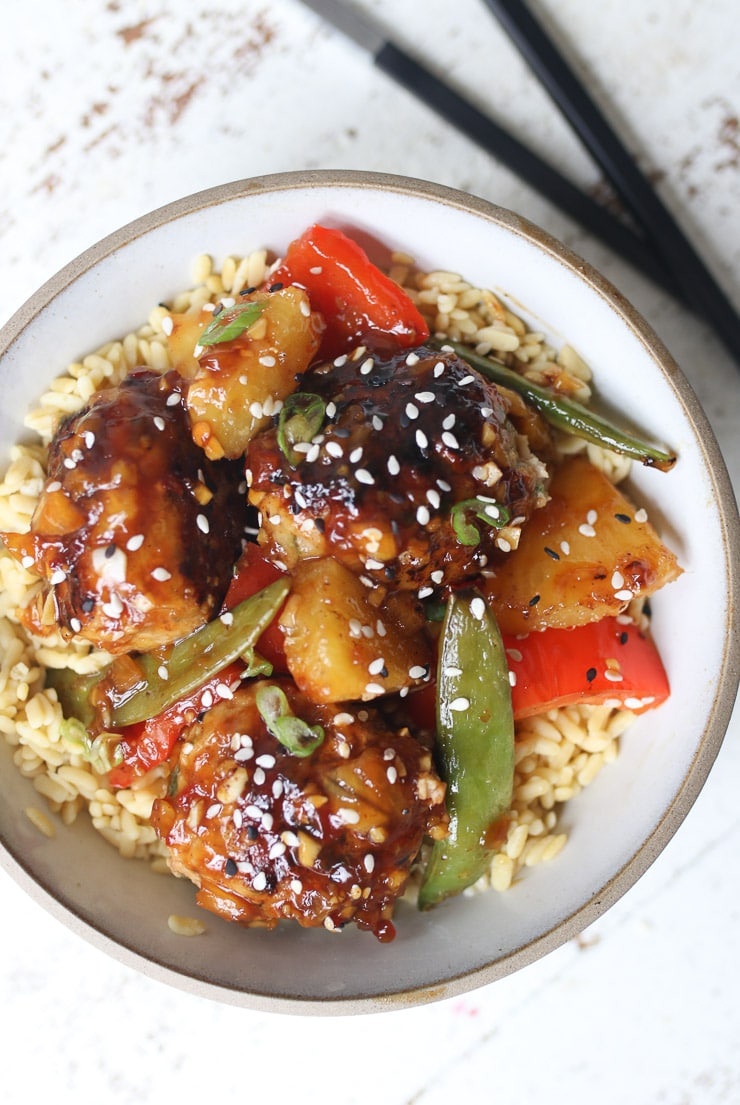
Hawaiian meatballs in white plate on top of a bed of rice topped with sesame seeds

You know when you’ve got a hankering for take-out but you just don’t want to pay the cray Uber delivery fees? Yeah, welcome to my daily struggle.

So in order to satisfy my weekly craving for some tasty sweet & spicy food (while also saving big time on service fees), I make an effort to ensure that I have all of the ingredients I need to make the meals I crave – and do it really fast!

This skillet Hawaiian Meatballs recipe was a huge hit in my family because they combine the sweetness of pineapple with the richness of coconut. I swear its like a flavour bomb went off in my mouth, and I certainly ain’t mad about it.

Table of contents

  • Why This Recipe Works
  • Key Ingredients
  • How to Make This Recipe
  • Expert Tips
  • Recipe FAQs
  • More Recipes You Might Like

Why This Recipe Works

So beyond the fact that these Hawaiian meatballs are packed with delicious sweet & spicy flavour, they also make for a great weeknight meal because they are:

  • High in protein
  • Only take 30 minutes to prepare
  • Require less than 15 ingredients
  • Family friendly
  • Uses up pantry staples

Key Ingredients

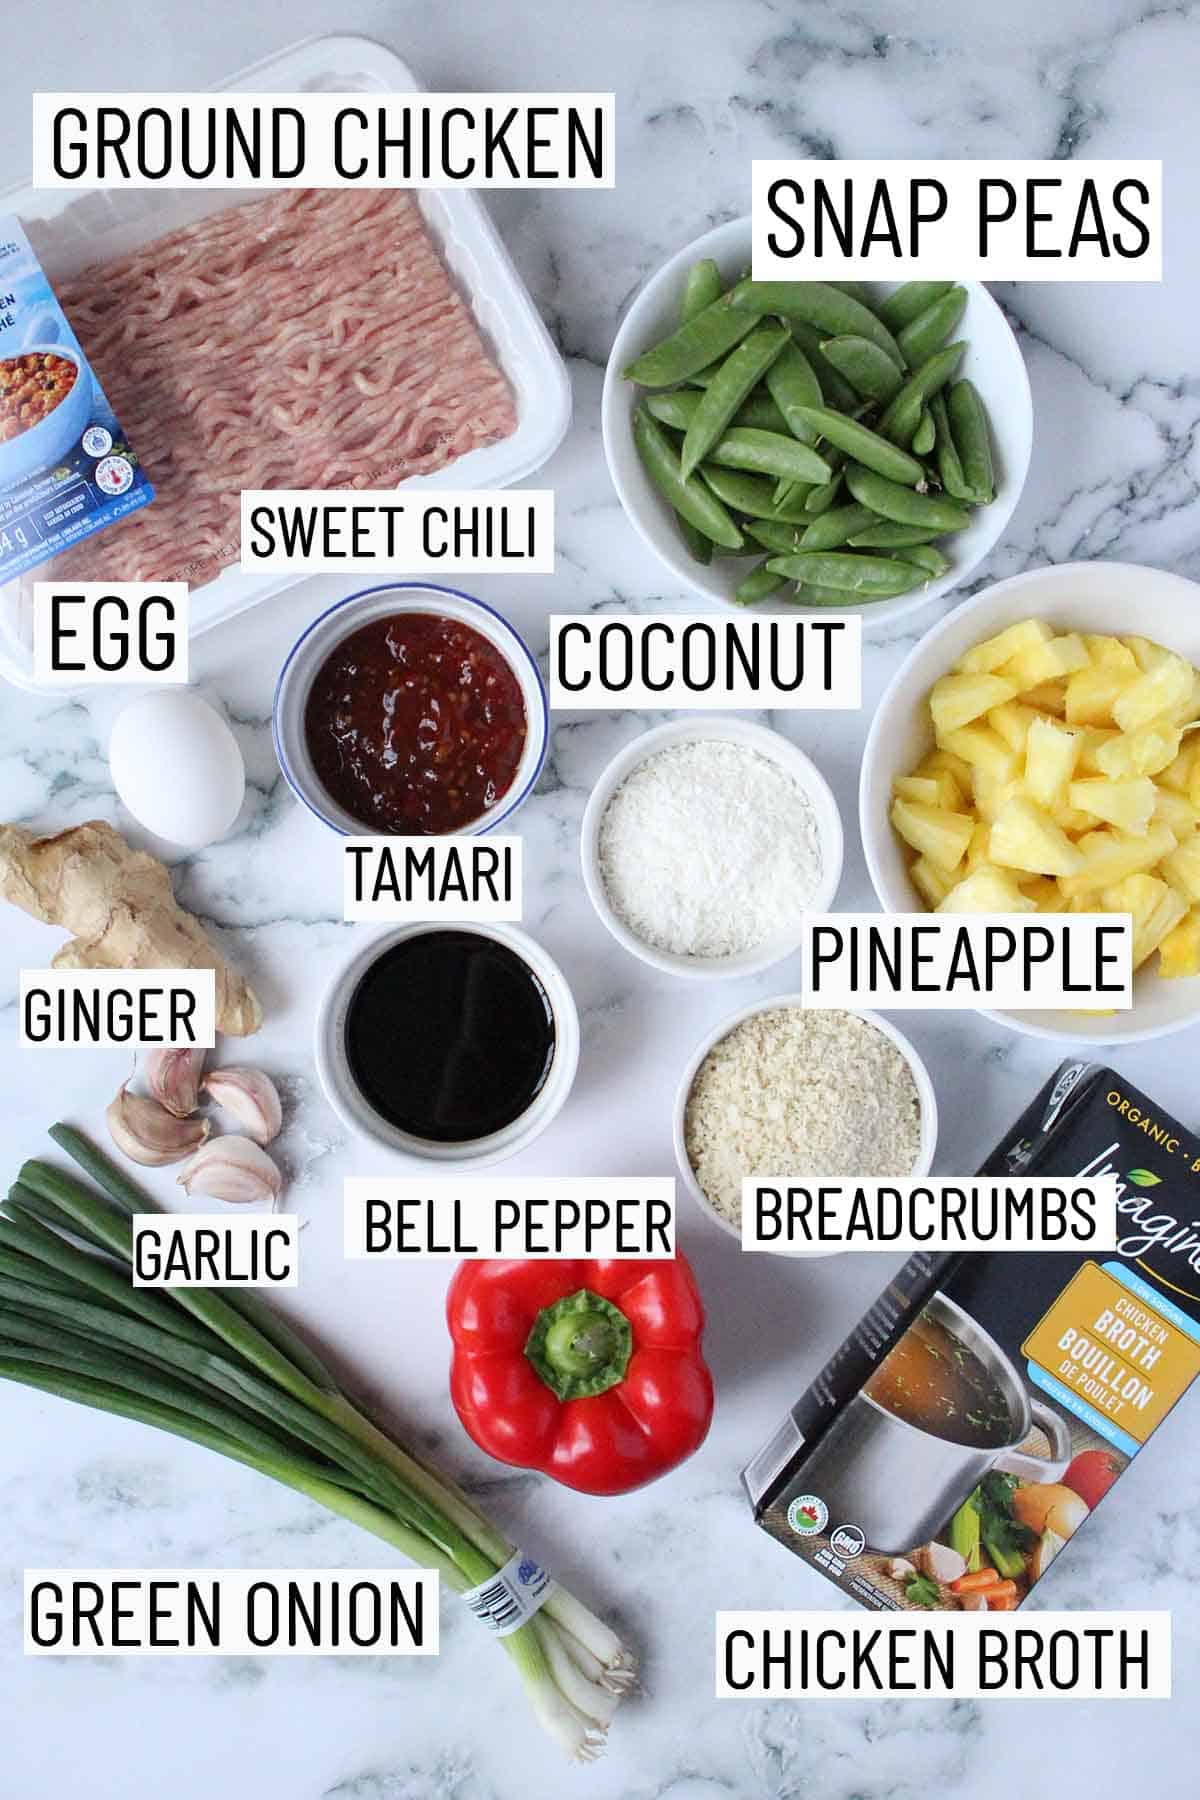
Flat lay image of portioned hawaiian meatballs recipe ingredients including snap peas, ground chicken, sweet chili sauce, coconut, pineapple, tamari, egg, ginger, garlic, breadcrumbs, broth, bell pepper, and green onion.

Chicken Meatballs – To make this Hawaiian meatball recipe, we use ground chicken, egg to bind, unsweetened shredded coconut, green onions, garlic, ginger, and tamari or soy sauce. You can absolutely substitute the chicken for ground beef, pork, or veggie meat.

Sweet & Spicy Sauce – To make the sauce we combine 5 simple ingredients including broth, tamari, sweet chili sauce, minced pineapple and cornstarch for thickening.

Garnish – I like to top these off with a bit of sesame seeds and green onion. But you can also garnish with a bit of cilantro or extra shredded coconut.

How to Make This Recipe

Three side by side images showing how. to prepare and brown chicken meatballs.

Step 1: To a bowl, mix together the chicken, egg, panko, coconut, green onions, garlic, ginger, salt, tamari and pepper. Form into 12 (about 3 tbsp) balls.

Step 2: Add one tablespoon of oil to a skillet over medium high heat and add the meatballs. Brown on each side, about 1-2 minutes per side

Step 3: Transfer meatballs to a prepared baking sheet.

Two side by side images showing how to cook the vegetables in a skillet and adding them to a baking sheet withthe meatballs.

Step 4: Add a teaspoon of oil to the pan and briefly heat bell pepper and snap peas for about 2-3 minutes.

Step 5: Add veggies to the baking sheet with the meatballs. Bake for 7-10 minutes or until the meatballs reach an internal temperature of 165 F.

Three side by side images showing how to prepare the sauce in a skillet and adding them to the prepared meatballs and vegetables.

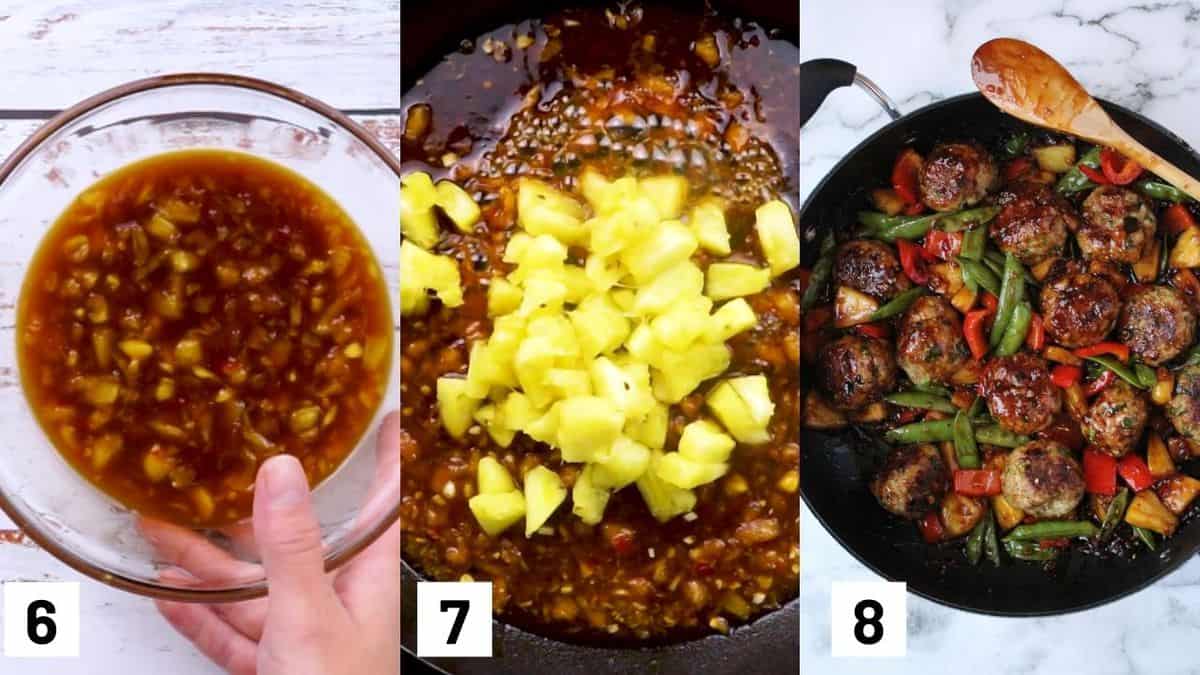
Step 6: Meanwhile, make the sauce in a bowl by mixing together the broth, tamari, sweet chili sauce, pineapple and cornstarch. Set aside.

Step 7: Add in the garlic and ginger to a skillet and cook for 1-2 minutes. Add in the prepared sauce and cook on medium low until bubbling. Add the pineapple and cook for 1-2 minutes.

Step 8: Once meatballs are cooked through, carefully toss them and the vegetables in the sauce. Serve with rice and top with green onions and sesame seeds.

Expert Tips

If you are in a rush, you can totally skip the first step and pop the meatballs into the oven right away. However, I prefer to brown them slightly so they get some nice colour and a bit more flavour.

Bell peppers and snap peas are our veggies of choice for these Hawaiian meatballs because they give off a lovely crunch, but this recipe is super versatile and you can definitely use whatever veggie you have on hand! This recipe would work well with broccoli, mushroom, and carrots.

I would also definitely recommend adding the meatballs at the end once the sauce has had a chance to bubble and thicken. This prevents the meatballs from getting soggy in the sauce.

You can serve this Hawaiian meatballs recipe with rice or cauliflower rice and a sprinkle of sesame seeds and green onions. You’re welcome lovers!

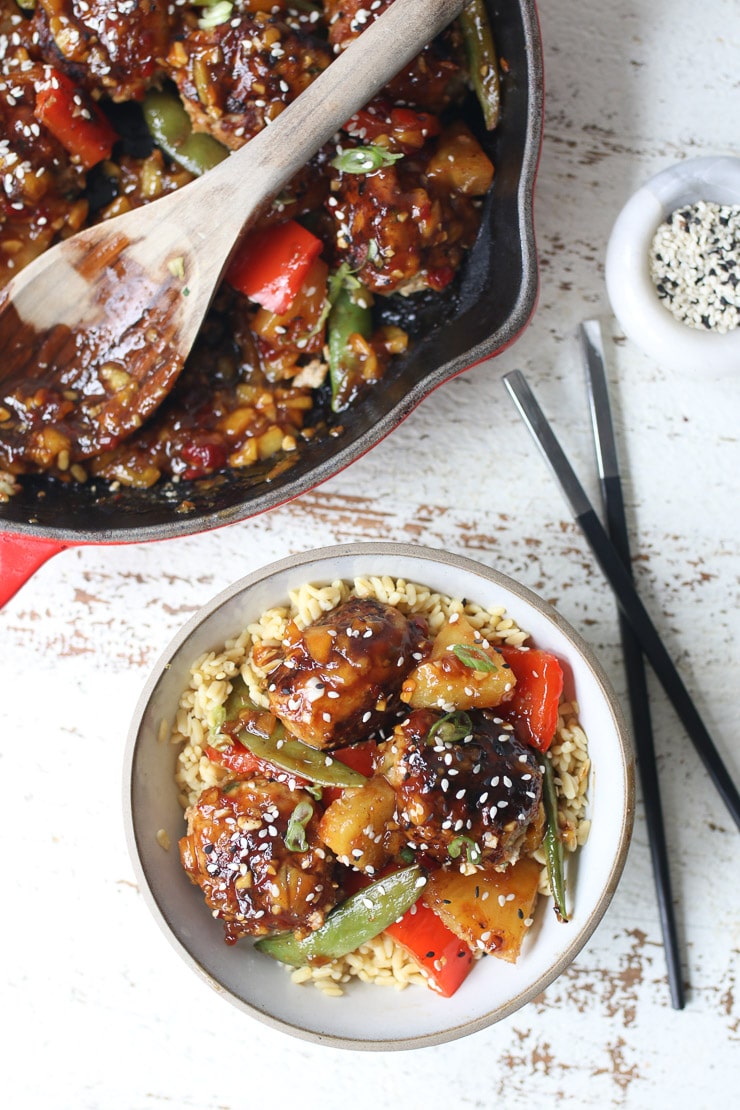
Hawaiian chicken meatballs on a white plate with chopsticks, sesame seed, and pot in the background.

Recipe FAQs

Can I make this meatballs recipe vegan?

I have not tried but you could swap in a flax egg and vegan meat if you want to give that a go. If you do, please let us know what happens below in the comments!

Can I make these gluten free?

Absolutely, you would just want to make sure to use gluten free panko and tamari and double check that your sweet chili sauce is free of any additives with gluten.

Can I batch prep this and serve them as cocktail meatballs?

Great idea! I love cocktail meatballs, and these sweet and spicy Hawaiian meatballs would be a huge hit!

Is this sauce too spicy for a toddler?

You know your toddler’s spice tolerance better than I do but I can say that my 2 year old loved the Hawaiian meatballs and the sauce.

More Recipes You Might Like

We are huge meatball lovers! Here are some of my favourite meatball recipes.

  • CHEESY HIGH IRON MEATBALLS
  • GLUTEN FREE HUMMUS MEATBALLS 
  • VEGETARIAN WHITE BEAN “MEAT BALLS”
  • CRANBERRY TURKEY COCKTAIL MEATBALLS

What are your go-to skillet meals? Have you tried this Hawaiian meatballs recipe? Leave me a comment below with your thoughts!

Print Recipe
5 from 5 votes

Hawaiian Meatballs Recipe with Sweet & Spicy Sauce

This Hawaiian Meatballs recipe uses chicken and sweet & spicy sauce for a flavour packed meal that only takes 20 minutes to make.
Prep Time5 minutes mins
Cook Time20 minutes mins
Total Time25 minutes mins
Course: Main Course
Cuisine: American
Servings: 5
Calories: 382kcal
Author: Abbey Sharp

Ingredients

  • 1 tbsp + 1 tsp extra virgin olive oil divided
  • 1 lb extra lean ground chicken
  • 1 large egg beaten
  • 3/4 cup panko breadcrumbs
  • ½ cup unsweetened finely shredded coconut
  • ½ cup green onions finely minced
  • 2 cloves garlic finely minced
  • 1 1/2 tsp ginger grated
  • 1/2 tsp salt
  • 1 tbsp reduced sodium tamari
  • ½ tsp ground pepper
  • 1 red bell pepper cut into chunks
  • 1 ¼ cup snap peas

Sauce

  • 1/3 c low sodium or no sodium chicken broth
  • ¼ cup low sodium tamari
  • 1/3 cup sweet chili sauce
  • 1/3 cup finely minced ripe pineapple
  • 2 tsp cornstarch
  • 2 tsp extra virgin olive oil
  • 2 cloves garlic finely minced
  • 1 tsp ginger grated
  • 1 1/4 cup pineapple cut into chunks

Garnish

  • 2 tsp green onions thinly sliced
  • ¼ tsp sesame seeds

Instructions

  • Preheat oven to 400F and grease baking sheet with cooking spray.
  • To a bowl, mix together the chicken, egg, panko, coconut, green onions, garlic, ginger, salt, tamari and pepper. Form into 12 (about 3 tbsp) balls.
  • Add one tablespoon of oil to a skillet over medium high heat and add the meatballs. Brown on each side, about 1-2 minutes per side and transfer to baking sheet.
  • Toss the bell pepper and snap peas with the remaining teaspoon of oil and add to the baking sheet. Bake for 7-10 minutes or until the meatballs reach an internal temperature of 165 F.
  • Meanwhile, make the sauce in a bowl by mixing together the broth, tamari, sweet chili sauce, pineapple and cornstarch. Set aside.
  • Add another teaspoon of oil to the original pan and add in the garlic and ginger. Cook for 1-2 minutes, then add in the sauce. Cook on medium low until bubbling.
  • Add the pineapple and cook for 1-2 minutes, then once the meatballs are cooked through, carefully toss them and the vegetables in the sauce.
  • Serve with rice and top with green onions and sesame seeds.

Video

Notes

If you are in a rush, you can totally skip the first step and pop the meatballs into the oven right away, However, I prefer to brown them slightly so they get some nice colour and a bit more flavour.
Bell peppers and snap peas are our veggies of choice for these Hawaiian meatballs because they give off a lovely crunch, but this recipe is super versatile and you can definitely use whatever veggie you have on hand! This recipe would work well with broccoli, mushroom, and carrots.
I would also definitely recommend adding the meatballs at the end once the sauce has had a chance to bubble and thinking. This prevents the meatballs from soging up in the sauce.
You can serve these Hawaiian meatballs on rice or cauliflower rice with sesame seeds and green onions. You’re welcome lovers!

Nutrition

Calories: 382kcal | Carbohydrates: 32g | Protein: 22g | Fat: 20g | Saturated Fat: 8g | Cholesterol: 111mg | Sodium: 1080mg | Potassium: 774mg | Fiber: 4g | Sugar: 17g | Vitamin A: 1183IU | Vitamin C: 73mg | Calcium: 59mg | Iron: 3mg
Abbey Sharp

Abbey Sharp is a Registered Dietitian (RD), regulated by the Ontario College of Dietitians. She is a mom, YouTuber, Blogger, award winning cookbook author, media coach specializing in food and nutrition influencers, and a frequent contributor to national publications like Healthline and on national broadcast TV shows.
www.abbeyskitchen.com/about-abbey/

Last Updated July 5, 2023. Published July 7, 2023 By Abbey Sharp 50 Comments

Chicken Cauliflower Rice Casserole with Broccoli (Healthy Keto Friendly)

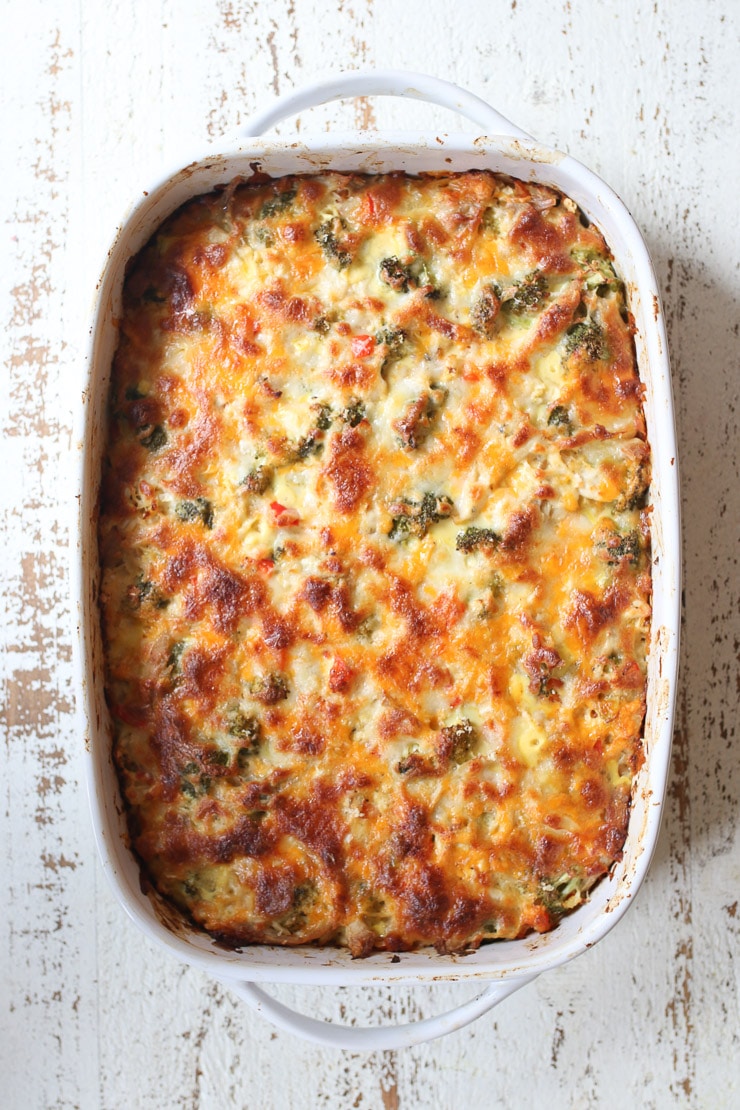
This Chicken Cauliflower Rice Casserole with Broccoli is a perfect baby and toddler friendly family dinner. Have dinner on the table in less than an hour. It’s also naturally low in carbs, high in fibre and keto-friendly. 

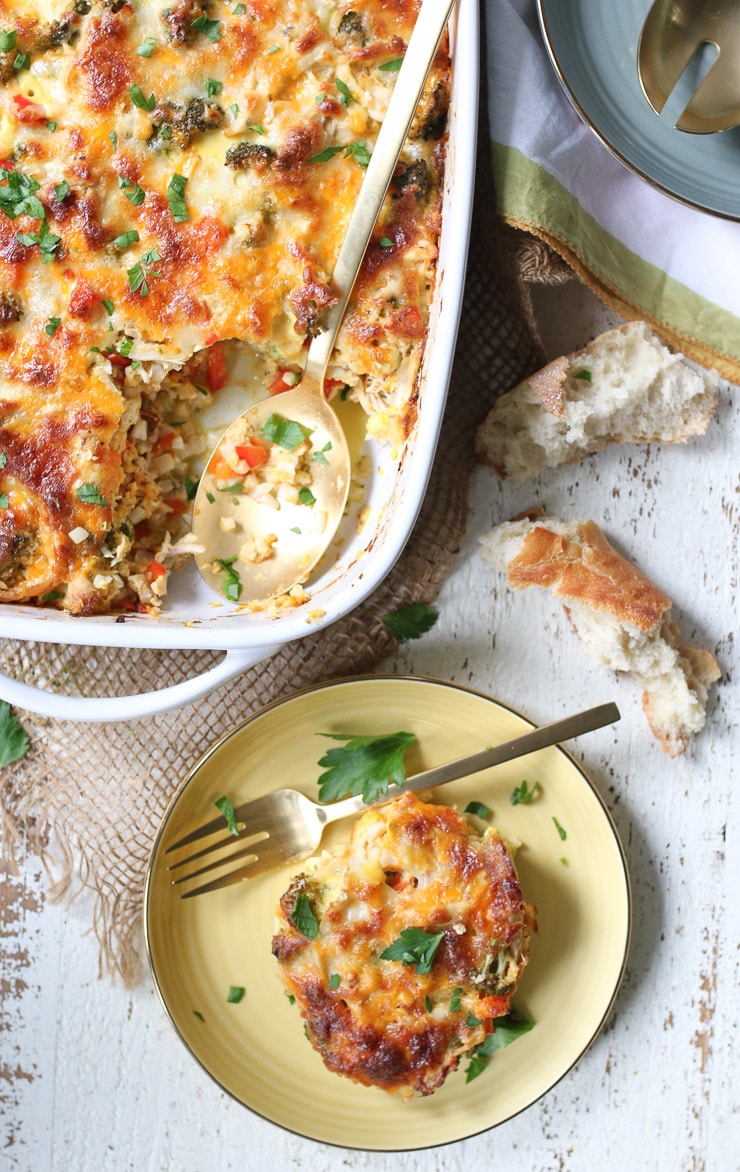
Overhead image of a cauliflower rice casserole in a white baking dish.

I don’t think I fully appreciated the beauty of the classic casserole until I became a mom. But since I now legit have no more than 30 minutes to make a meal, and I have to do it with a kid throwing tupperware all over the floor, I like to keep things simple. This Chicken Cauliflower Rice Casserole with Broccoli takes a few amazingly simple short cuts like frozen cauliflower rice and a rotisserie chicken to get a balanced, high protein meal on the table STAT.

Why This Recipe Works

This is such a simple weeknight dinner that is cooked in one dish. The less dishes to do on a busy night, the better.

This chicken cauliflower rice casserole can easily be doubled and made in two baking dishes to freeze one for later or meal prep the second casserole! It reheats wonderfully and you’re going to love how it’s such a time saver.

This casserole uses a lot of shortcuts to make dinner time easier. We like to use shred a rotisserie chicken instead of taking the time to make a chicken on a weeknight. We also use pre-riced cauliflower rice to keep prep time to a minimum.

Key Ingredients

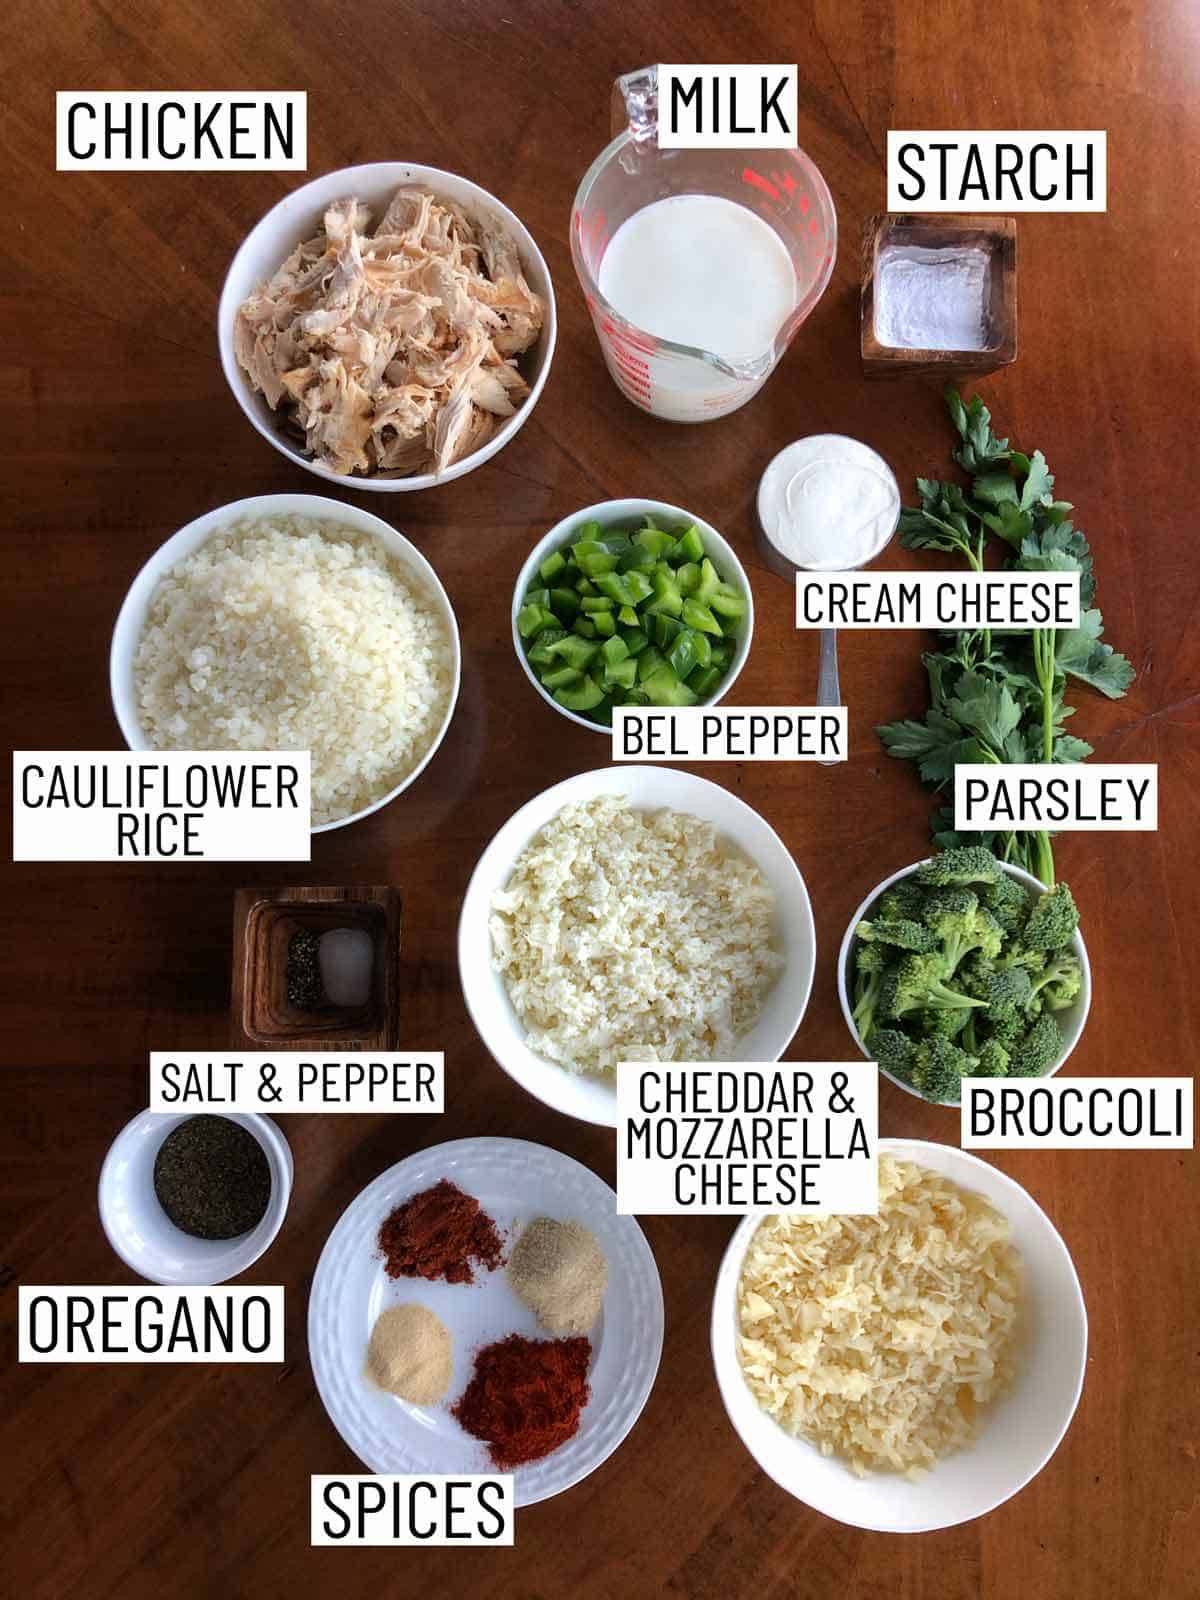
Overhead image of ingredients requires to make a cauliflower rice casserole.

Uncooked Cauliflower Rice — This can be purchased at the frozen section of your grocery store. If you’re unable to find it, you can make your own by placing cauliflower florets into a food processor.

Vegetables — On top of the cauliflower, we also have broccoli and bell pepper to up the vegetable quota. If you want to add more or different vegetables, you are welcome to!

Rotisserie Chicken — To make for less clean up and time spent in the chicken, we use a pre-cooked rotisserie chicken. This cauliflower rice casserole is also great if you’ve got leftover chicken hanging around in your fridge as well.

Cheeses — We use a variety of cheeses to make this casserole. We use cream cheese, cheddar cheese, and mozzarella cheese. If you have a different melty cheese that you like to use like parmesan or gruyere. It’s up to you!

Seasoning — Since this is meant to be a kid friendly recipe, we use pretty mild seasonings such as oregano, garlic powder, onion powder, paprika, and salt and pepper. Chili is optional, depending on your kiddo’s tolerance.

How to Make This Recipe

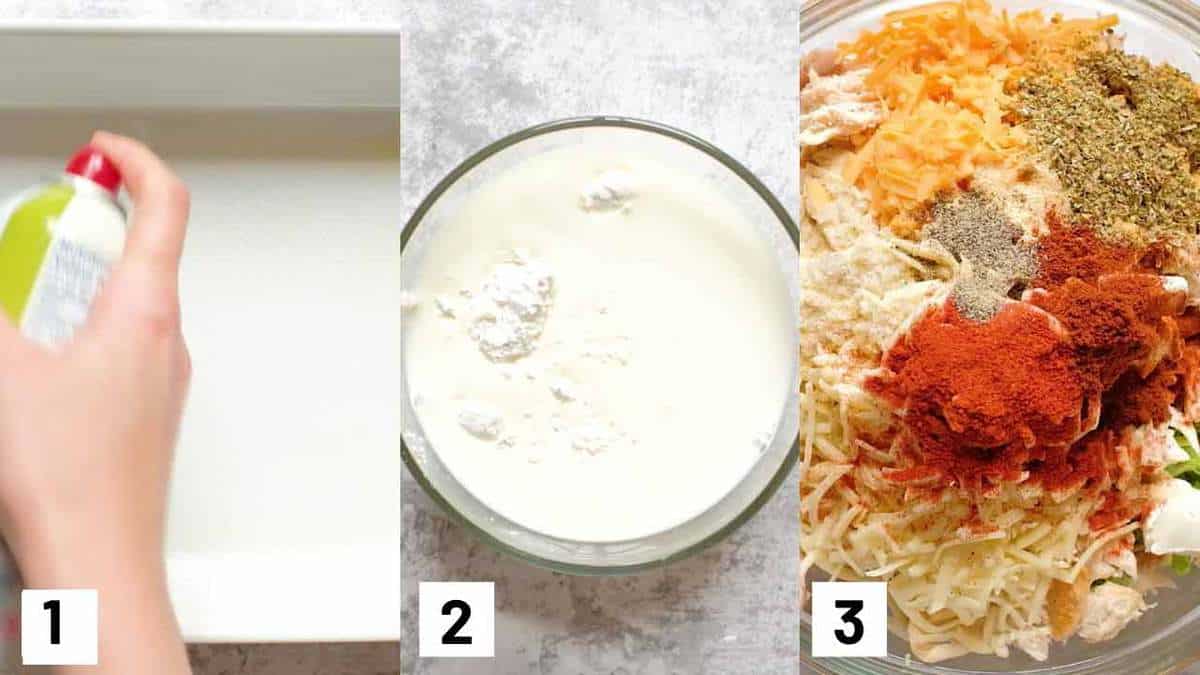
Three process shot of how to grease a baking dish, combining milk and starch, and mixing the casserole ingredients.

Step 1: Preheat oven to 400F and grease a 13×9” casserole dish.

Step 2: In a small bowl, mix together the milk and the cornstarch or tapioca starch.

Step 3: In a large bowl, mix together the cauliflower rice, broccoli, bell pepper, chicken, milk and starch mixture, cream cheese, 1 cup cheddar, 1 cup mozzarella, oregano, garlic, onion, paprika, chili if using, pepper and salt.

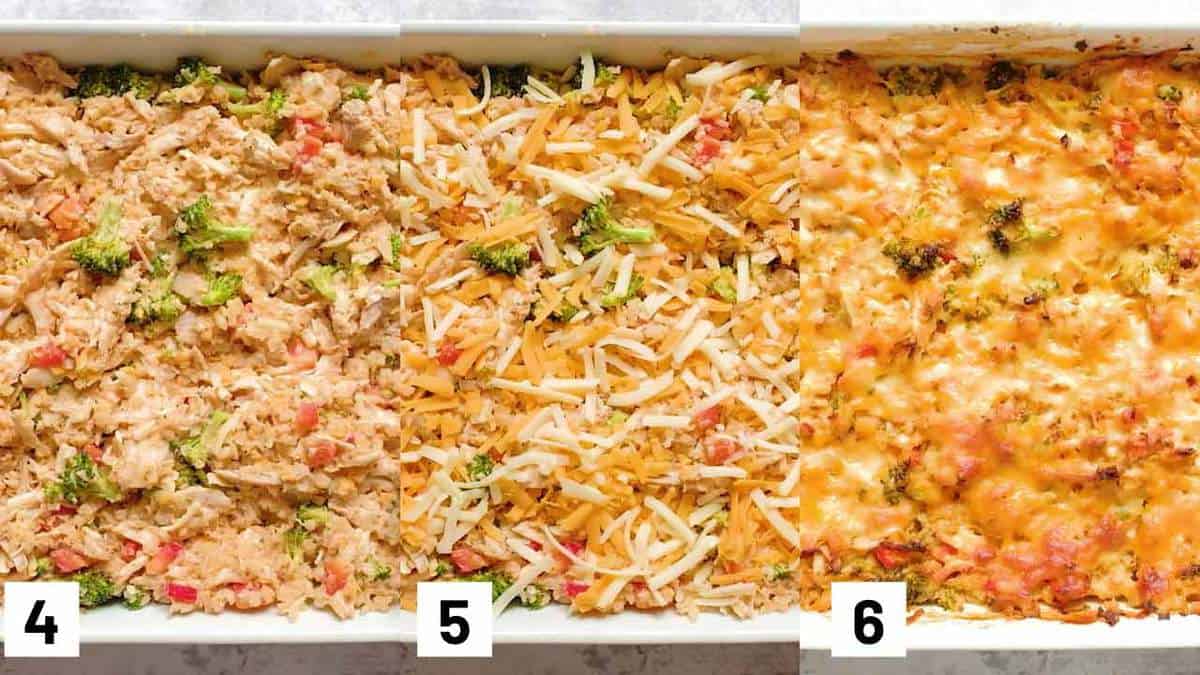
Three process photos showing the cauliflower casserole pre-baked, then topped with cheese, then baked.

Step 4: Toss to mix very well and transfer to the casserole dish.

Step 5: Top with the remaining ½ cup of cheddar and ½ cup of mozzarella.

Step 6: Bake for 45 minutes uncovered or until golden brown. Allow to sit for 5 minutes before topping with parsley and enjoying.

Expert Tips

Want to freeze this for later? Once you’ve baked the chicken cauliflower rice casserole and allowed it to cool, simply wrap it up tightly with plastic wrap or aluminum foil and transfer to the freezer. When ready to enjoy, allow it to thaw overhead in the fridge overnight before heating it through in the oven.

I would suggest shredding your own cheese as pre-shredded cheese have a flour coating on them that prevents them from clumping. However, this makes it grainy when melted. To quickly shred a block of cheese, you can use a food processor.

If you do not want to use cooking spray in your baking dish, you can use parchment or tin foil but your dish might still stick to it. You can always grease your pan with butter or olive oil as an alternative to cooking spray.

Recipes FAQs

Is this chicken cauliflower rice casserole kid friendly?

Yes!! The flavours in this casserole are very mild and comforting, and what kid doesn’t like when something is covered in cheese? I served this to Baby E for almost a week and he loved it every time! If you want to add some more kick, feel free to add some spicy chili pepper and hot sauce!

Is this gluten-free and low carb friendly? What about keto-friendly?

I love using cauliflower rice, not because it’s low carb or keto-friendly, but because it’s a tasty way to sneak in extra fiber and antioxidants. And it’s now so easy to find it in the freezer aisle at any grocery store. But yes, since cauliflower rice is much lower in calories than traditional rice or grains, this chicken and broccoli casserole is keto friendly and low carb.

Can I make this chicken cauliflower rice casserole ahead of time?

Yes! This casserole makes so much, and I’m just a family of three, so I often keep it in the fridge and rewarm portions of it as I am hungry. If you want to make the casserole ahead of time and then rewarm the entire thing, you absolutely can! I would assemble everything, and then when you’re ready, just top it with the cheese and bake.

What should I serve this casserole with for kids?

Considering that kids need carbs, I suggest serving this cauliflower rice casserole with a nice loaf of crusty bread with butter. It’s a really awesome way to get a balanced meal, but still, sneak in some extra nutrients and fibre with cauliflower rice and introduce them to a potentially less-loved vegetable.

Overhead image of a serving of cauliflower casserole cut out of a baking dish and placed on a plate.

More Recipes You Might Like

  • Cabbage Cheeseburger Casserole
  • Vegetarian Pizza Casserole
  • Vegan Mexican Pasta Casserole
  • Vegan Moussaka with Hummus Bechamel
  • Keto Cabbage Roll Enchiladas

Now tell me, what are some of your family’s favourite casserole dinners? Let me know in the comments below.

Overhead image of a serving of cauliflower casserole cut out of a baking dish and placed on a plate.
Print Recipe
4.47 from 67 votes

Chicken Cauliflower Rice Casserole with Broccoli (Healthy Keto Friendly)

This Chicken Cauliflower Rice Casserole with Broccoli is a perfect baby and toddler friendly family dinner that also is naturally low in carbs, high in fiber and keto-friendly.
Prep Time15 minutes mins
Cook Time45 minutes mins
Total Time1 hour hr
Course: Main Course, Dinner
Cuisine: American
Servings: 12 people
Calories: 342kcal
Author: Abbey Sharp

Ingredients

  • 1 1/2 cups milk
  • 2 tbsp corn starch or tapioca starch
  • 4 cups uncooked cauliflower rice
  • 1 head broccoli cut into very small florets
  • 1 bell pepper finely diced (green if keto)
  • 1 rotisserie chicken shredded
  • 1/2 cup cream cheese lite or regular for keto
  • 1 ½ cup old cheddar cheese shredded, divided
  • 1 ½ cups fresh mozzarella cheese shredded, divided
  • 4 tsp dried oregano
  • 1 tsp dried powdered garlic
  • 2 tsp dried powdered onion
  • 2 tsp sweet paprika
  • 1 tsp chili powder optional and to taste
  • ½ tsp ground pepper
  • 1/2 -1 tsp sea salt omit for children
  • Parsley for garnish

Instructions

  • Preheat oven to 400 F and grease a 13×9” casserole.
  • In a small bowl, mix together the milk and the cornstarch or tapioca starch.
  • In a large bowl, mix together the cauliflower rice, broccoli, bell pepper, chicken, milk and starch mixture, cream cheese, 1 cup cheddar, 1 cup mozzarella, oregano, garlic, onion, paprika, chili if using, pepper and salt.
  • Toss to mix very well and transfer to the casserole dish.
  • Top with the remaining ½ cup of cheddar and ½ cup of mozzarella. Bake for 45 minutes uncovered or until golden brown. Allow to sit for 5 minutes before topping with parsley and enjoying.

Video

Notes

  • Want to freeze this for later? Once you’ve baked the cauliflower rice casserole and allowed it to cool, simply wrap it up tightly with plastic wrap or aluminum foil and transfer to the freezer. When ready to enjoy, allow it to thaw overhead in the fridge overnight before heating it through in the oven.
  • I would suggest shredding your own cheese as pre-shredded cheese have a flour coating on them that prevents them from clumping. However, this makes it grainy when melted. To quickly shred a block of cheese, you can use a food processor.
  • If you do not want to use cooking spray in your baking dish, you can use parchment or tin foil but your dish might still stick to it. You can always grease your pan with butter or olive oil as an alternative to cooking spray.

Nutrition

Calories: 342kcal | Carbohydrates: 12g | Protein: 33g | Fat: 19g | Saturated Fat: 9g | Cholesterol: 116mg | Sodium: 437mg | Potassium: 682mg | Fiber: 3g | Sugar: 5g | Vitamin A: 1310IU | Vitamin C: 84.2mg | Calcium: 271mg | Iron: 1.5mg
Abbey Sharp

Abbey Sharp is a Registered Dietitian (RD), regulated by the Ontario College of Dietitians. She is a mom, YouTuber, Blogger, award winning cookbook author, media coach specializing in food and nutrition influencers, and a frequent contributor to national publications like Healthline and on national broadcast TV shows.
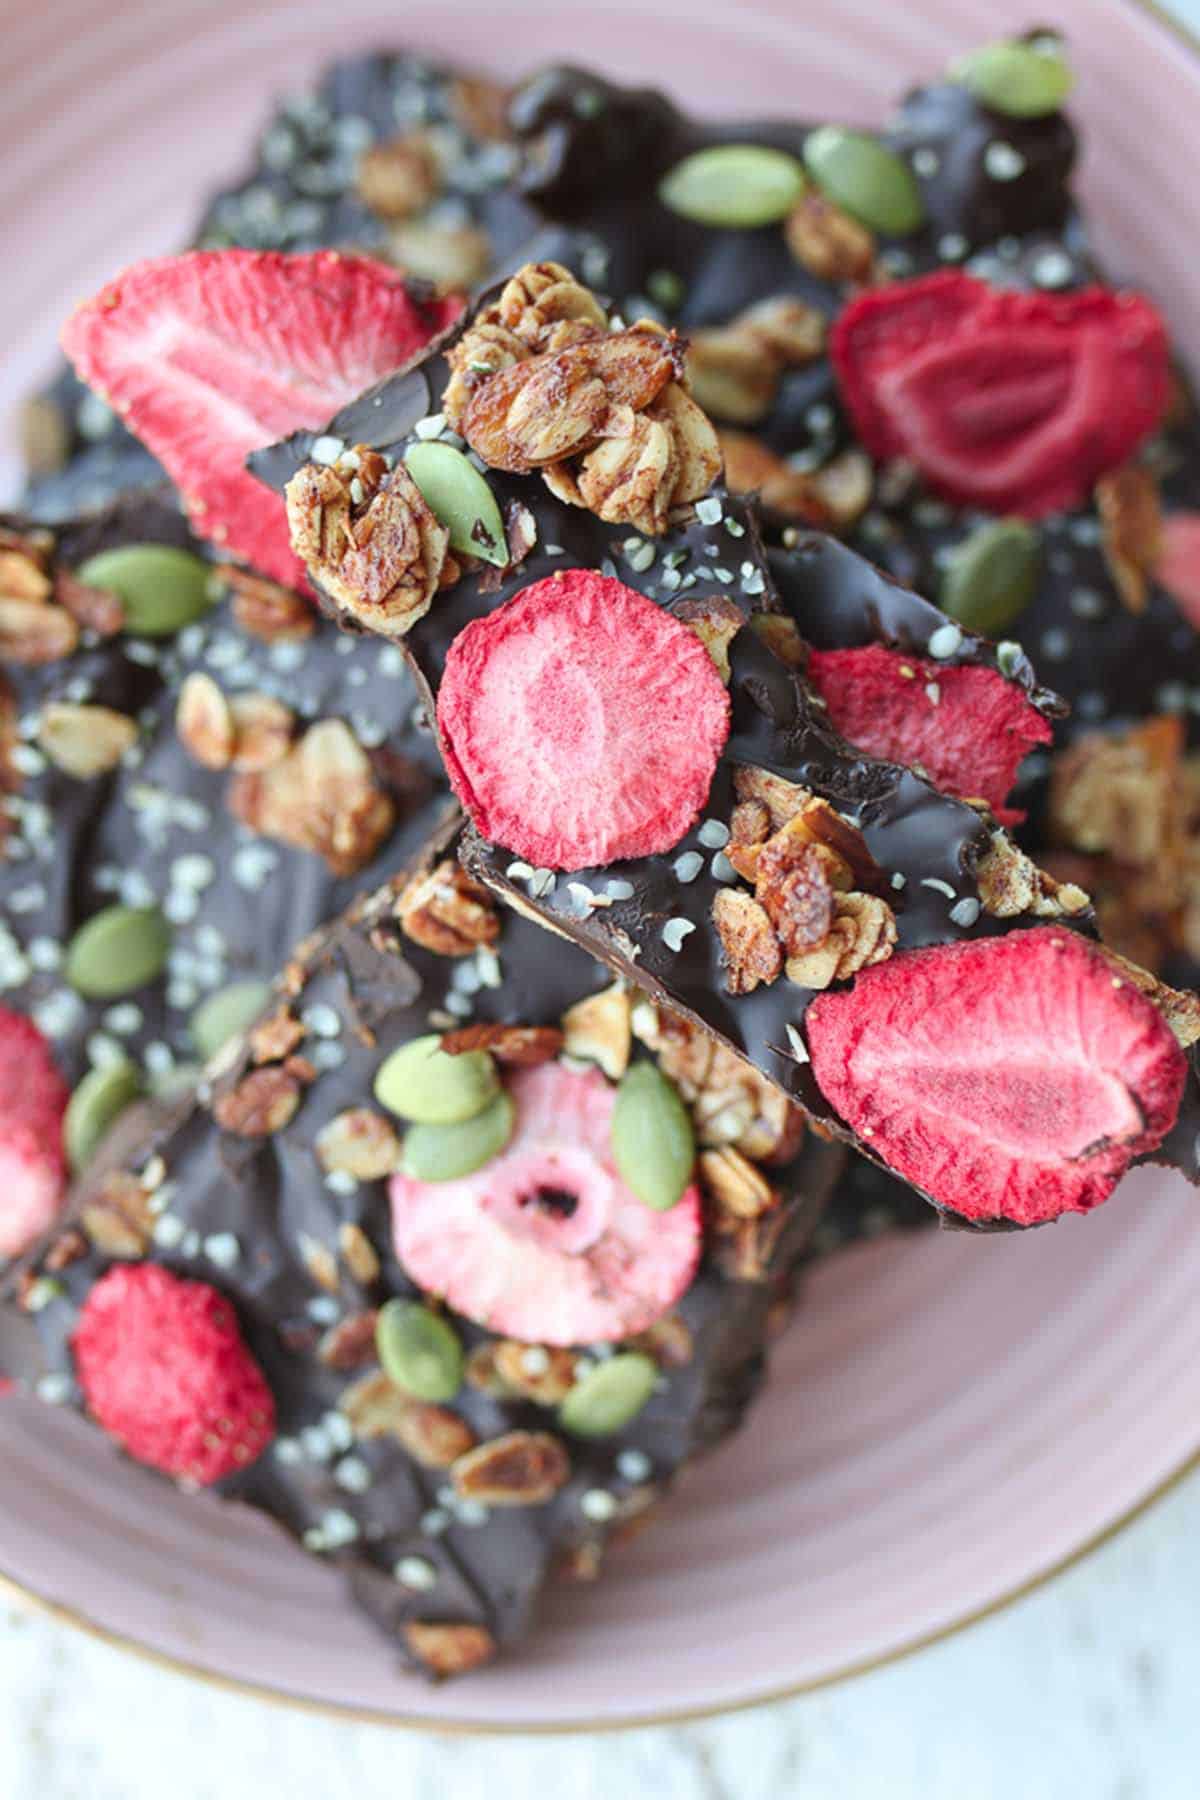
www.abbeyskitchen.com/about-abbey/

Last Updated July 14, 2023. Published July 3, 2023 By Abbey Sharp 6 Comments

Banana Nice Cream Recipe with Pistachios and Green Tea

This banana nice cream recipe with pistachios and green tea makes for a refreshing snack or dessert that is made with just a handful of healthy ingredients and has no added sugar.

Pistachio green tea nice cream topped with fruit next to a bag of pistachios.

Ask me what my all-time favourite dessert is and I would DEFINITELY say ice cream. I would eat ice cream in a BLIZZARD and not complain. And while I have no qualms about a nightly scoop of the real deal, I sometimes need something a little more satiating and balanced for a mid-day or midnight snack. I love this banana nice cream because it combines two of my favourite ice cream flavours – pistachio and green tea into one vibrantly colourful and nourishing treat. It’s legit breakfast, lunch, dinner, snack or dessert approved.

Table of contents

  • Why This Recipe Works
  • Key Ingredients
  • How To Make This Recipe
  • Expert Tips
  • Recipe FAQs
  • More Recipes You Might Like

Why This Recipe Works

This banana nice cream recipe is an amazing balance of sweet and savoury with massive flavour in every bite. Here are a few more reasons why this is one of my favourite nice cream recipes!

  • Has no added sugar
  • High protein (16 grams per serving)
  • Packed with antioxidants, fiber, and healthy fats
  • Can me made in a few minutes!

Key Ingredients

Pistachios– I LOVE using pistachios in this recipe because they have an amazingly satisfying crunch, creamy texture, and rich flavour. Like all pistachios, they also have a winning combination of fibre, protein and fat which helps curb my hunger between meals and at night.

Dragon Fruit– Dragon fruit is one of those fruits I’m always like “what the heck do I do with this ?!”. Even though they are delicious on their own, they pair so well with this recipe and add even more antioxidants and fiber.

Very Ripe Bananas- Using very ripe bananas in this recipe is key to getting the perfect creamy consistency! Overripe bananas are also sweeter due to the starch breakdown but are still packed with vital nutrients.

Pistachio nice cream in a bowl topped with fruit next to a plate of pistachios.

How To Make This Recipe

Step 1: Add the pistachios and oil to a high powdered mini food processor or blender and process until very smooth. Transfer to a bowl.

Step 2: Combine the cottage cheese with the bananas, matcha, agave, or honey to taste if using, and 2 tbsp of the pistachio butter. Process until smooth like frozen yogurt.

Step 3: Top with additional pistachio butter, a sprinkle of matcha, minced pistachios and fruit.

Expert Tips

If you prefer a soft-serve consistency, you can transfer to a bowl and enjoy right away. Otherwise, If you want a scoopable ice-cream like consistency, you can transfer to a container to freeze for a few hours.

Make sure you use a high-powdered blender or food processor to process the pistachios, as we want them to be almost as smooth as butter. Otherwise, you can by-pass this step and use straight up pistachio butter in the banana nice cream, OR if you like a little crunch texture you can blend until minced.

Birds eye view of a bowl of pistachio protein ice cream.

Recipe FAQs

Is this recipe kid friendly?

This banana nice cream recipe uses matcha powder, it contains small amounts of caffeine. So if you do decide to share this recipe with your kiddo, be sure you do so in small amounts.

How long does this keep in the freezer?

This nice cream recipe will keep in the freezer for about 2-3 months in an airtight container. However, keep in mind that it will freeze hard. So if you want a softer consistency when served, be sure to leave it to thaw for about 20 minutes to soften.

How can I make this recipe vegan?

To make this banana nice cream recipe vegan you can swap out the cottage cheese and add extra banana’s. However, keep in mind that it will be lower in protein as a result because cottage cheese is the protein superstar in this recipe. But you can always add protein-rich toppings like pistachios, hemp hearts, and a drizzle of nut butter to give it a boost.

A bowl of banana nice cream topped with fruit.

More Recipes You Might Like

If you enjoyed this banana nice cream recipe, then you absolutely HAVE to try these recipes on the blog:

  • Turmeric Golden Milk Nice Cream Sundae
  • Vegan Unicorn Nice Cream
  • Mini Vegan Frozen S’mores Cupcakes

Now tell me – what is your all-time favourite ice cream flavour? Are you a fan of green tea ice cream or pistachio ice cream? Leave me a comment below with your thoughts and share this with someone who needs a way to get their ice cream fix!

Pistachio green tea nice cream topped with fruit next to a bag of pistachios.
Print Recipe
5 from 4 votes

Banana Nice Cream Recipe with Pistachios and Green Tea

This banana nice cream recipe with pistachios and green tea makes for a refreshing snack or dessert that is made with just a handful of healthy ingredients and has no added sugar.
Prep Time3 hours hrs
Total Time3 hours hrs
Course: Dessert
Cuisine: American
Servings: 2 person
Calories: 492kcal
Author: Abbey Sharp

Ingredients

Pistachio Butter:

  • ½ cup shelled Roasted Unsalted Wonderful Pistachios
  • 3 tbsp pistachio oil or melted coconut oil

Ice Cream:

  • 2/3 cup low sodium 2% cottage cheese
  • 1 cup frozen very ripe bananas
  • 1 tsp matcha powder
  • Agave or honey optional to taste

Garnish:

  • Matcha powder sifted for garnish
  • Roasted Unsalted Wonderful Pistachios shelled and minced
  • Passion fruit raspberries starfruit, or dragon fruit

Instructions

  • Add the pistachios and oil to a high powdered mini food processor or blender and process until very smooth. Transfer to a bowl.
  • Combine the cottage cheese with the bananas, matcha, agave or honey to taste if using, and 2 tbsp of the pistachio butter. Process until smooth like frozen yogurt.
  • Transfer to a container to freeze if you prefer a scoopable ice-cream like consistency, or transfer to a bowl to enjoy right away for a more soft-serve consistency.
  • Top with additional pistachio butter, a sprinkle of matcha, minced pistachios and fruit.

Nutrition

Calories: 492kcal | Carbohydrates: 28g | Protein: 16g | Fat: 38g | Saturated Fat: 20g | Polyunsaturated Fat: 5g | Monounsaturated Fat: 9g | Cholesterol: 12mg | Sodium: 223mg | Potassium: 652mg | Fiber: 5g | Sugar: 13g | Vitamin A: 326IU | Vitamin C: 7mg | Calcium: 95mg | Iron: 2mg
Abbey Sharp

Abbey Sharp is a Registered Dietitian (RD), regulated by the Ontario College of Dietitians. She is a mom, YouTuber, Blogger, award winning cookbook author, media coach specializing in food and nutrition influencers, and a frequent contributor to national publications like Healthline and on national broadcast TV shows.
www.abbeyskitchen.com/about-abbey/

Last Updated July 5, 2023. Published June 30, 2023 By Abbey Sharp 10 Comments

Real Fruit Popsicle Recipe with Kombucha | Vegan Summer Snack!

Homemade popsicles on a bed of ice on a wooden plate.

Cool down this summer with these vegan real fruit popsicles made with kombucha. These popsicles are the perfect healthy summer snack made with no added sugar and will leave your gut happy.

Plate of real fruit popsicles made with kombucha.

I’m a huge kombucha fan. I love it so much that instead of just drinking it, I love finding creative ways to use it in recipes. Since you guys loved my vegan peach melba kombucha float that I made a few summers back, I thought it would be fun to develop another kombucha themed treat to help you cool down this summer with these real fruit popsicles!

Table of contents

  • Why This Recipe Works
  • Key Ingredients
  • How To Make This Recipe
  • Expert Tips
  • Recipe FAQs
  • More Recipes You Might Like

Why This Recipe Works

Hey I love a good ice-cream truck creamsicle as much as the next gal, but when I discovered how easy it was to make my own popsicles at home using real fruit and gut-healthy probiotics, I was pretty stoked.

These kombucha popsicles are designed to meet all of your summer lovin’ needs. You get to pick your favourite kombucha flavour, then pick your favourite fruits and herbs and pop it into popsicles molds to make it your own.

They’re super refreshing and perfect for licking while sunbathing in the backyard with a book. Even Baby E has been caught sucking on one when he was having a bad teething day.

Key Ingredients

Plate of real fruit popsicles.

Kombucha – Kombucha is a fermented tea drink that comes in a ton of flavours. It’s fizzy, subtly sweet, with a slightly acidic undertone. I love it for a lower sugar drink option! You can make it at home or take the much easier route of buying it at the store (like me!).

Fruit and herbs of choice – There’s really no way to go wrong with this. Berries, basil, mango… there are endless combinations to try out. I love making a blueberry basil popsicle with lemony kombucha.

How To Make This Recipe

Step One: Let the kombucha flatten for 5 minutes to just allow the bubbles to subside.

Step Two: Divide up some of the fruit, berries, herbs and flowers between 8 popsicle molds. Cover with the flat kombucha and insert a popsicle stick. Transfer to the freezer until frozen and enjoy!

Expert Tips

If your popsicle mold has a lid, you can try storing the popsicles sideways to freeze. This allows the fruit and herbs to be evenly distributed and not sink to the bottom of the mold.

Recipe FAQs

Can I make these kombucha popsicles without a mold?

Yes definitely! You can make them using a muffin tin, yogurt cups, or even ice cube trays would work. 

What other flavor combos do you like?

I personally prefer to use fruit flavoured kombucha for these popsicles to make a sweet treat, but you can of course experiment with different kombucha flavours and combinations. Here are some of my favourite kombucha and fruit combos that you can experiment with:
Strawberry kombucha + strawberries and basil  
Ginger kombucha + strawberries and peaches 
Strawberry kombucha + strawberries and mango 
Peach kombucha + peach and mint 
Blueberry kombucha + blueberries and blackberries 

Homemade real fruit popsicles on a bed of ice on a wooden plate.

More Recipes You Might Like

If you enjoyed these real fruit popsicles, you’ll love my other summer recipes!

  • Banana Cream Pie Popsicles with Magic Shell
  • Turmeric Golden Milk Nice Cream Sundae
  • Nutella Banana Nice Cream
  • Vegan Banoffee Pie Popsicles
  • Wild Blueberry, Pomegranate and Lemon Popsicle

Now tell me, have you made homemade real fruit popsicles before? Which fruits would you put in these kombucha popsicles? Let me know by leaving a comment below.

Homemade popsicles on a bed of ice on a wooden plate.
Print Recipe
5 from 4 votes

Vegan Kombucha Fruit Popsicles

Cool down this summer with these vegan kombucha fruit popsicles. These popsicles are the perfect healthy summer snack made with no added sugar and will leave your gut happy.
Prep Time3 hours hrs
Total Time3 hours hrs
Course: Dessert
Cuisine: American
Servings: 8 people
Calories: 22kcal
Author: Abbey Sharp

Ingredients

  • 24 oz kombucha of your choice
  • 1/2 cup fruit herbs and flowers of your choice

Instructions

  • Let the kombucha flatten for 5 minutes to just allow the bubbles to subside.
  • Divide up some of the fruit, berries, herbs and flowers between 8 popsicle molds. Cover with the flat kombucha and insert a popsicle stick. Transfer to the freezer until frozen and enjoy!

Nutrition

Calories: 22kcal | Carbohydrates: 4g | Protein: 2g | Fat: 1g | Saturated Fat: 1g | Sodium: 3mg | Potassium: 45mg | Fiber: 1g | Sugar: 4g | Vitamin A: 45IU | Vitamin C: 0.3mg | Iron: 0.1mg
Abbey Sharp

Abbey Sharp is a Registered Dietitian (RD), regulated by the Ontario College of Dietitians. She is a mom, YouTuber, Blogger, award winning cookbook author, media coach specializing in food and nutrition influencers, and a frequent contributor to national publications like Healthline and on national broadcast TV shows.
www.abbeyskitchen.com/about-abbey/

Last Updated July 5, 2023. Published June 26, 2023 By Abbey Sharp 3 Comments

Avocado Salad Dressing Recipe (Vegan & Gluten Free)

close up of avocado dressing in a clear glass

This is the best avocado salad dressing recipe you’ll ever try – it’s vegan, gluten free and loaded with healthy fats and protein.

I am a big salad eater in the summer months, and these days I’ve been craving salads most days REALLY hard. I guess that’s what happens when it’s a HEAT WAVE and you’re chronically dehydrated all day and night. To me a salad is just lettuce without a killer dressing, and this avocado salad dressing recipe never disappoints. Simple, rich, creamy and totally vegan and gluten free, this dressing could make ANY basic lettuce taste amazing. 

Close up of avocado salad dressing in a clear glass.

Table of Contents

  • Why This Recipe Works
  • Key Ingredients
  • How to Make This Recipe
  • Expert Tips
  • Recipe FAQs
  • More Recipes You Might Like

Why This Recipe Works

This avocado salad dressing recipe is creamy from the avocados, cheesy from the nutritional yeast, herbaceous thanks to the fresh basil, tangy from the fresh lemon juice, and is balanced out by a hint of sweetness from the maple syrup.

Not only is it delicious, but it is packed with nutrition as well! Avocados and nutritional yeast make this avocado salad dressing recipe loaded with healthy fats, protein and B vitamins. It is truly the perfect summer salad dressing.

Key Ingredients

Birds eye view of salad served with avocado salad dressing recipe.

Avocados – Rich in monounsaturated fats and fibre, avocados are life. It adds a creamy rich factor so you don’t actually have to add much oil.

Garlic – I love a good garlicky bite in my salad dressing, but feel free to add more or less depending on your preference.

Lemon juice – Pro tip: never use bottled lemon or lime juice. It’s bitter and lacks that sparkle and zip that you’ll get in a real fresh lemon or lime. To get the most juice out of your lemons, you can pop it into the microwave for 10 seconds, then give it a good roll on the counter before slicing in.

Avocado oil – Avocado oil is a great neutral tasting oil that is rich in monounsaturated fats. If you don’t have avocado oil, you can use an olive oil, canola oil, or grapeseed oil!

Fortified nutritional yeast – If you are following a vegan diet, nutritional yeast (affectionately called nooch) is a great source of B12 if you go for the fortified version. It’s also got a cheesy flavour that I absolutely adore, and it’s rich in protein. I don’t believe in superfoods, but I think it’s pretty damn super.

Fresh basil – If you have a bounty crop in your yard, this is how you should use it. Parsley is a great swap in a pinch.

Agave/maple/honey – Whatever you want to use to sweeten this up and balance out the richness works for me.

How to Make This Recipe

Step 1: To a high speed blender or food processor, puree the avocado, garlic, lemon juice, avocado oil, nutritional yeast, basil, agave, and a pinch each of salt and pepper.

Step 2: Slowly add the water in until you reach your desired consistency. Taste again and adjust with salt and pepper.

Step 3: Serve on a fresh summer salad.

Expert Tips

In terms of swaps, you can definitely use lime instead of lemon in this recipe, but I do not recommend using bottled citrus juice for this salad dressing. Honey is also a great replacement for the maple syrup/agave if you are not keeping this salad dressing strictly vegan.

You do want a ripe avocado for this dressing, like you would if you were making guacamole. I suggest looking for a darker green avocado that yields to firm gentle pressure but doesn’t feel mushy to the touch. The skin should be slightly pebbled but have no large indentations. Also if you remove the stem, you’ll want to see green. If it’s brown, it’s already too ripe. To speed up the ripening process, place the avocados in a brown paper bag with a banana or apple until they reach the desired texture.

Making avocado salad dressing recipe using a food processor.

Recipe FAQs

What types of salads would you pair with this recipe?

Great question! Some ideas for salads include:
– Delicate greens with berries and nuts
– Caesar-like salad
– Iceberg wedge salad
– Spinach salad
– Quinoa or grain based salad
– Caprese type salads
– Pasta salad

What else can I use this recipe for?

There’s no reason you can’t drizzle this recipe like a sauce over grilled sweet potatoes, meats, tofu or veggie skewers. It will instantly add a ton of flavour and nutrition.

Can I use dried basil instead of fresh?

I don’t recommend dried basil in place of fresh. There are some herbs that work great when dried, and others (like basil) that don’t. If you don’t have fresh basil, you can use parsley!

How long will this salad dressing recipe last in the fridge?

This will last about 4 days in the fridge in an air-tight container.

Will this salad dressing recipe go brown?

If left for too long with too much air in the container, it can go brown. If you want to keep it’s colour, you can pop a piece of plastic wrap directly on top of the dressing before storing.

Birds eye view of green salad.

More Recipes You Might Like

If you liked this avocado salad dressing recipe, you might enjoy some of salad recipes on the blog!

  • Beet Green Pesto Zoodles
  • Vegan Buffalo Cauliflower Pasta Salad
  • Grilled Avocado & Watermelon Salad
  • Vegan Grilled Broccoli, Carrots & Avocado Salad
  • Pesto Pasta Salad with Pistachios and Parsley
  • Sweet Kale Salad with Squash & Candied Hazelnuts

What are some of your go to salad dressings? Have you tried making this recipe? Leave me a comment below with your thoughts!

close up of avocado dressing in a clear glass
Print Recipe
5 from 3 votes

Avocado Salad Dressing Recipe

This is the best avocado salad dressing recipe you'll ever try – it's vegan, gluten free and loaded with healthy fats and protein.
Prep Time5 minutes mins
Total Time5 minutes mins
Course: dressing
Cuisine: American
Servings: 3 cups
Calories: 579kcal
Author: Abbey Sharp

Ingredients

  • 3 ripe avocados pitted
  • 3 cloves Garlic minced
  • 7 tbsp lemon juice about 2 1/2 lemons
  • 5 tbsp avocado oil
  • 1/4 cup fortified nutritional yeast
  • 1/4 cup tightly packed chopped fresh basil
  • 4 tsp agave or maple or honey for non vegan
  • Salt and pepper to taste
  • ¼ cup plus 3 tbsp water or more depending on how thin you like it

Instructions

  • To a high speed blender or food processor, puree the avocado, garlic, lemon juice, avocado oil, nutritional yeast, basil, agave, and a pinch each of salt and pepper. Slowly add the water in until you reach your desired consistency. Taste again and adjust with salt and pepper.
  • Serve on a fresh summer salad.

Notes

In terms of swaps, you can definitely use lime instead of lemon in this recipe, but I do not recommend using bottled citrus juice for this salad dressing. Honey is also a great replacement for the maple syrup/agave if you are not keeping this avocado salad dressing recipe strictly vegan.
You do want a ripe avocado for this dressing, like you would if you were making guacamole. I suggest looking for a darker green avocado that yields to firm gentle pressure but doesn’t feel mushy to the touch. The skin should be slightly pebbled but have no large indentations. Also if you remove the stem, you’ll want to see green. If it’s brown, it’s already too ripe. To speed up the ripening process, place the avocados in a brown paper bag with a banana or apple until they reach the desired texture.

Nutrition

Calories: 579kcal | Carbohydrates: 28g | Protein: 6g | Fat: 53g | Saturated Fat: 7g | Sodium: 16mg | Potassium: 1117mg | Fiber: 14g | Sugar: 8g | Vitamin A: 399IU | Vitamin C: 35mg | Calcium: 43mg | Iron: 1mg
Abbey Sharp

Abbey Sharp is a Registered Dietitian (RD), regulated by the Ontario College of Dietitians. She is a mom, YouTuber, Blogger, award winning cookbook author, media coach specializing in food and nutrition influencers, and a frequent contributor to national publications like Healthline and on national broadcast TV shows.
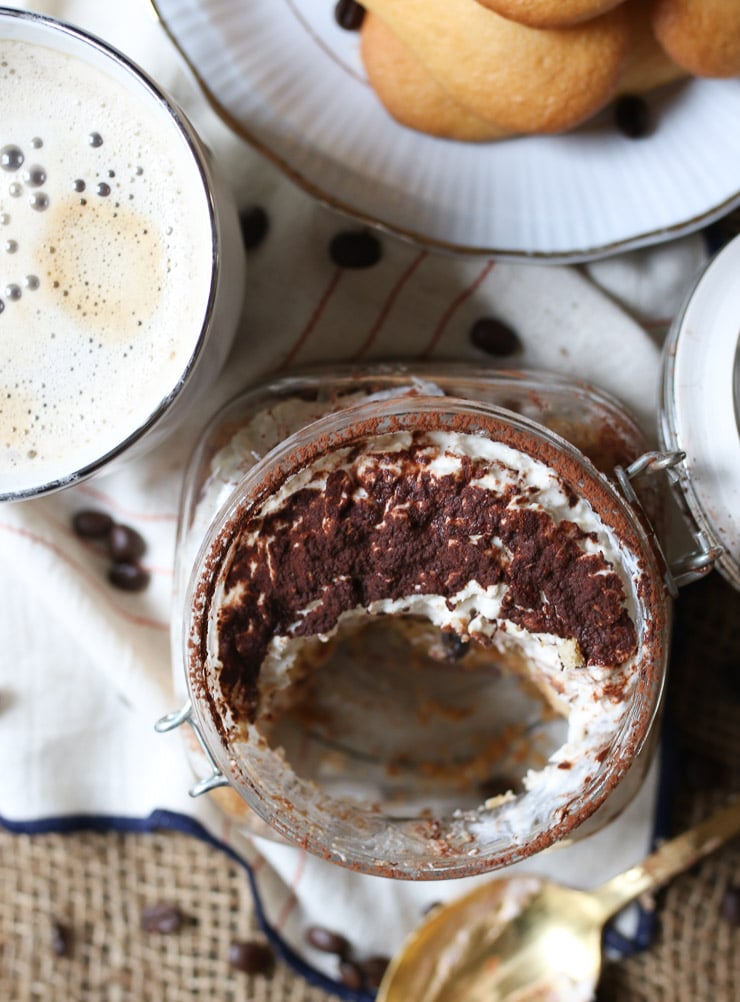
www.abbeyskitchen.com/about-abbey/
  • Previous Page
  • Go to page 1
  • Interim pages omitted …
  • Go to page 16
  • Go to page 17
  • Go to page 18
  • Go to page 19
  • Go to page 20
  • Interim pages omitted …
  • Go to page 89
  • Next Page

Get started with

Eight Free Recipe Books

From the co-founder of Neue Theory and creator of the Hunger Crushing Combo

Sign me up!
Abbey smiling at table
Abbey Sharp

“Foods may never be nutritionally equal. But we can make them morally equal by recognizing that our worth is never determined by what's on our plate.”

— Abbey Sharp, RD About Abbey ◥

Books

  • HCC™
  • Mindful Glow
  • Free E-Books

Blog

  • Nutrition
  • Recipes
  • Motherhood
  • Life

Explore

  • Neue Theory™
  • Bite Back
  • YouTube

Abbey

  • About
  • Coaching
YouTube TikTok Instagram Facebook X Pinterest
Abbey Sharp - The No BS Dietitian From Abbeys Kitchen

© Abbey's Kitchen 2026  All Rights Reserved •  ACCESSIBILITY STATEMENT •  Privacy Policy

This site uses cookies. By continuing to browse the site, you are agreeing to the use of cookies Accept Privacy Policy
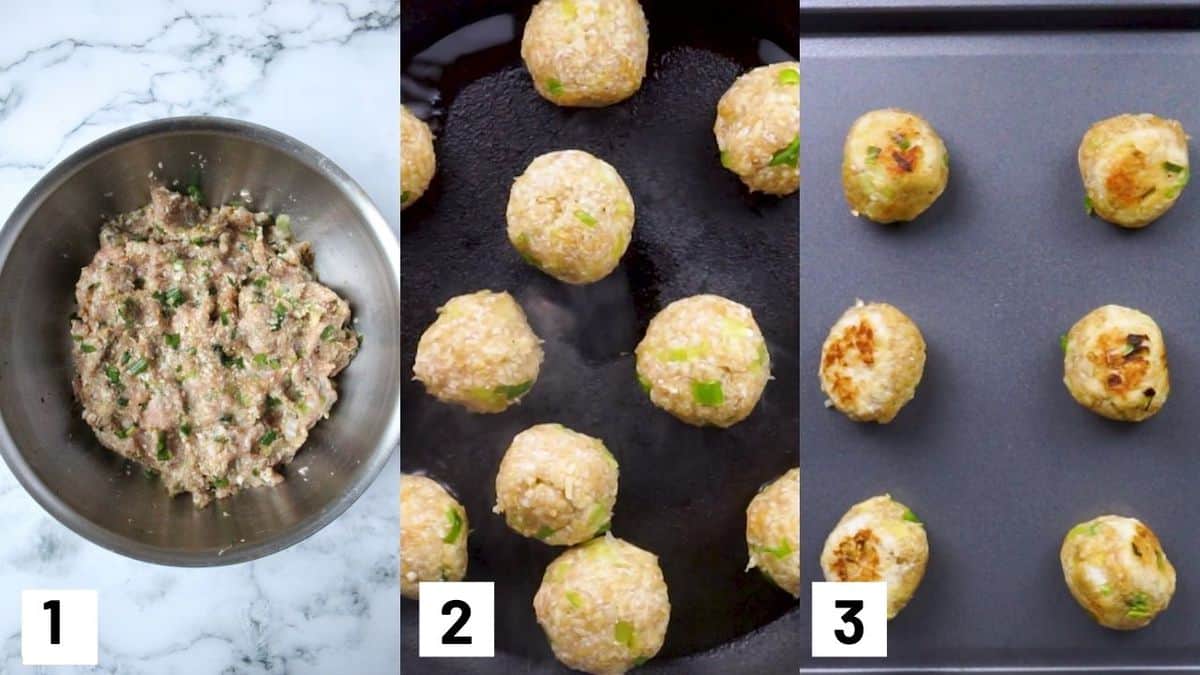
Privacy & Cookies Policy

Privacy Overview

This website uses cookies to improve your experience while you navigate through the website. Out of these, the cookies that are categorized as necessary are stored on your browser as they are essential for the working of basic functionalities of the website. We also use third-party cookies that help us analyze and understand how you use this website. These cookies will be stored in your browser only with your consent. You also have the option to opt-out of these cookies. But opting out of some of these cookies may affect your browsing experience.
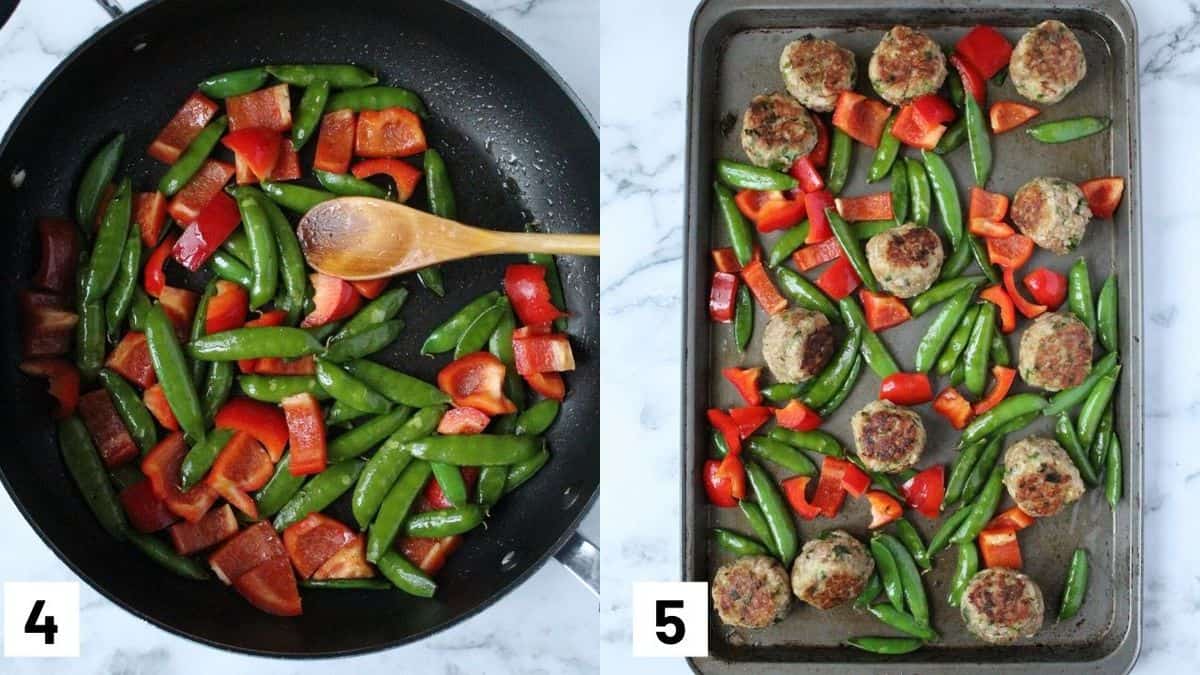
Necessary
Always Enabled
Necessary cookies are absolutely essential for the website to function properly. This category only includes cookies that ensures basic functionalities and security features of the website. These cookies do not store any personal information.
Non-necessary
Any cookies that may not be particularly necessary for the website to function and is used specifically to collect user personal data via analytics, ads, other embedded contents are termed as non-necessary cookies. It is mandatory to procure user consent prior to running these cookies on your website.
SAVE & ACCEPT

Rate This Recipe

Your vote:


A rating is required
A name is required
An email is required