• Skip to main content

Abbey's Kitchen

Healthy Recipes, Nutrition Myth Busting, Healthy Eating Tips

  • Books
    • HCC™
    • The Mindful Glow Cookbook
    • Recipe eBooks
      • Family
      • Hypothyroidism
      • BLW
      • Vegan Week 1
      • Vegan Week 2
      • Vegan Week 3
      • Keto
      • Gluten Free Week 1
      • Gluten Free Week 2
      • Fitness
      • Paleo
  • Blog
    • Nutrition
    • Recipes
    • Motherhood
    • Life
  • Explore
    • Neue Theory™
    • Bite Back With Abbey Sharp
      • Apple Music
      • Spotify
      • Amazon Music
    • YouTube
  • Abbey
    • About
    • Coaching
    • Contact

Abbey Sharp

Last Updated May 21, 2023. Published May 23, 2023 By Abbey Sharp 10 Comments

Shrimp Sheet Pan Dinner with Veggies

My favourite shrimp sheet pan dinner with veggies is perfect for meal prep or freezer-friendly make ahead meals!
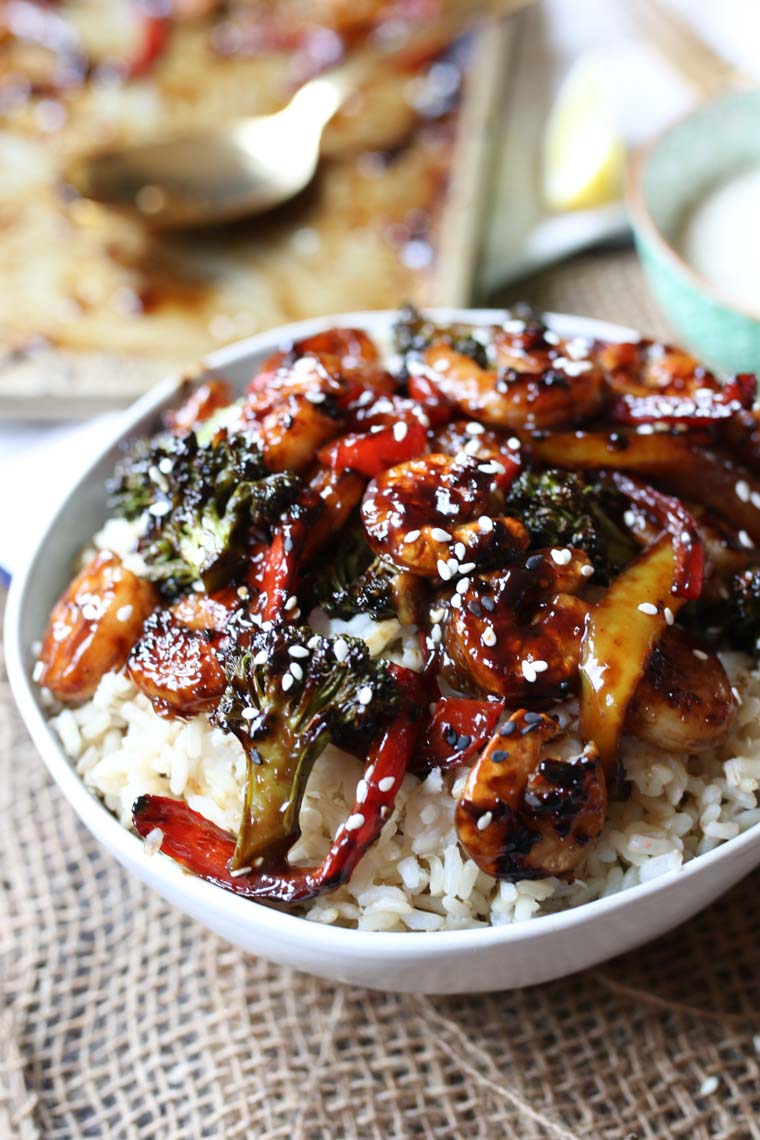
Close up of shrimp sheet pan dinner in a white bowl.

When I’m in a pinch for planning my meals for the week, my ultimate go-to are Sheet Pan meals. You basically set-it and forget-it until the timer goes off and voila! You’re done.

This shrimp sheet pan dinner with tons of veggies has become one of my all-time favourite no-fuss meals, and I’m not just saying that because I’m a totally sleep deprived momma. I still have serious standards when it comes to food no matter how tired I get. So trust me when I say that not only is this recipe super simple, but it is also just so darn delish that you’ll be making it again and again. You’re welcome!

Table of contents

  • Why This Recipe Works
  • Key Ingredients
  • How to Make This Recipe
  • Expert Tips
  • Recipe FAQs
  • More Recipes You Might Like

Why This Recipe Works

This recipe is super simple and is a great way to use up any extra veggies you’ve got lying around your fridge. If you needed more convincing, here are a few more reasons why you are going to LOVE this recipe!

  • Made in under 20 minutes
  • Nutrition-packed
  • Flavourful AF!
  • Gluten-free
  • Easy to modify

Key Ingredients

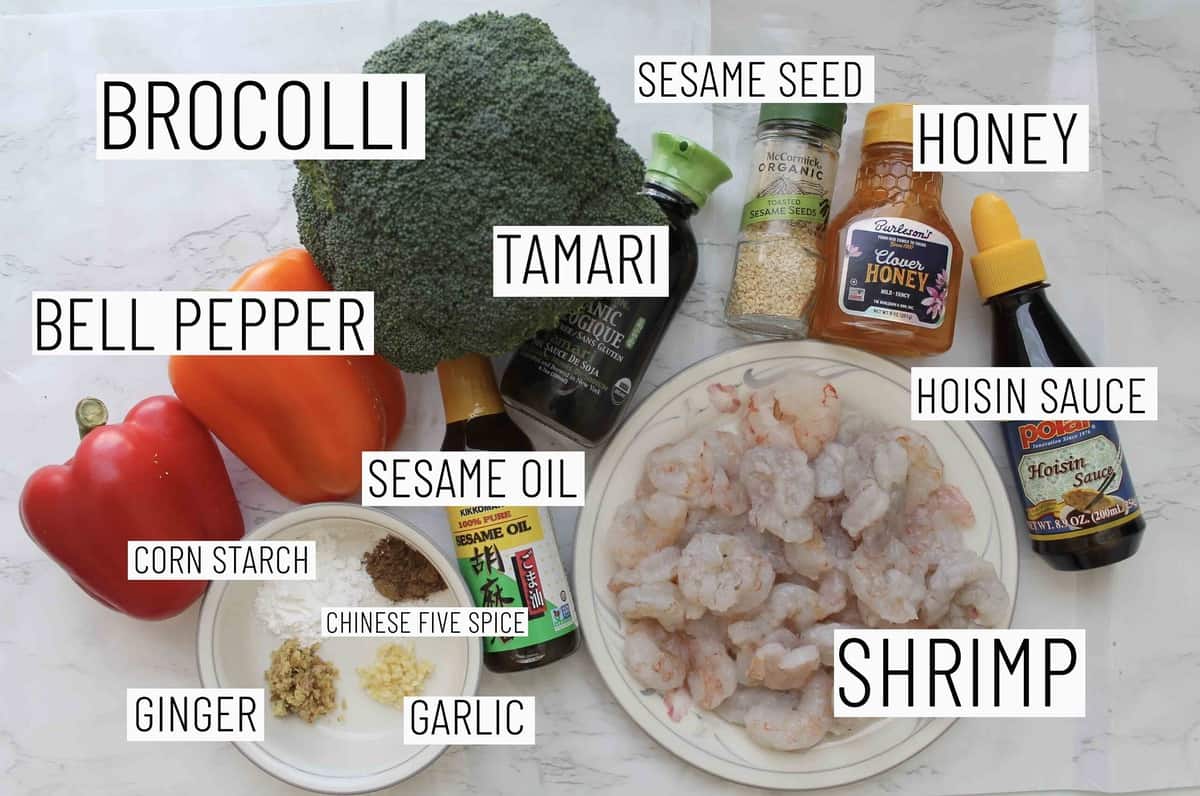
Flat lay image showing portioned recipe ingredients.

Veggies – While you can totally use whatever veggies you have on hand for this sheet pan stir fry, we are using bell peppers and broccoli. But you can also add other stir fry veggies like carrot, mushroom, snap peas, zucchini etc!

Sauce – to make this DELISH stir fry sauce we combine honey, hoisin, soy, ginger, garlic, Chinese five spice, and sesame oil.

Shrimp – the main protein for this recipe is shrimp but you can also switch up the proteins for whatever you feeling!

How to Make This Recipe
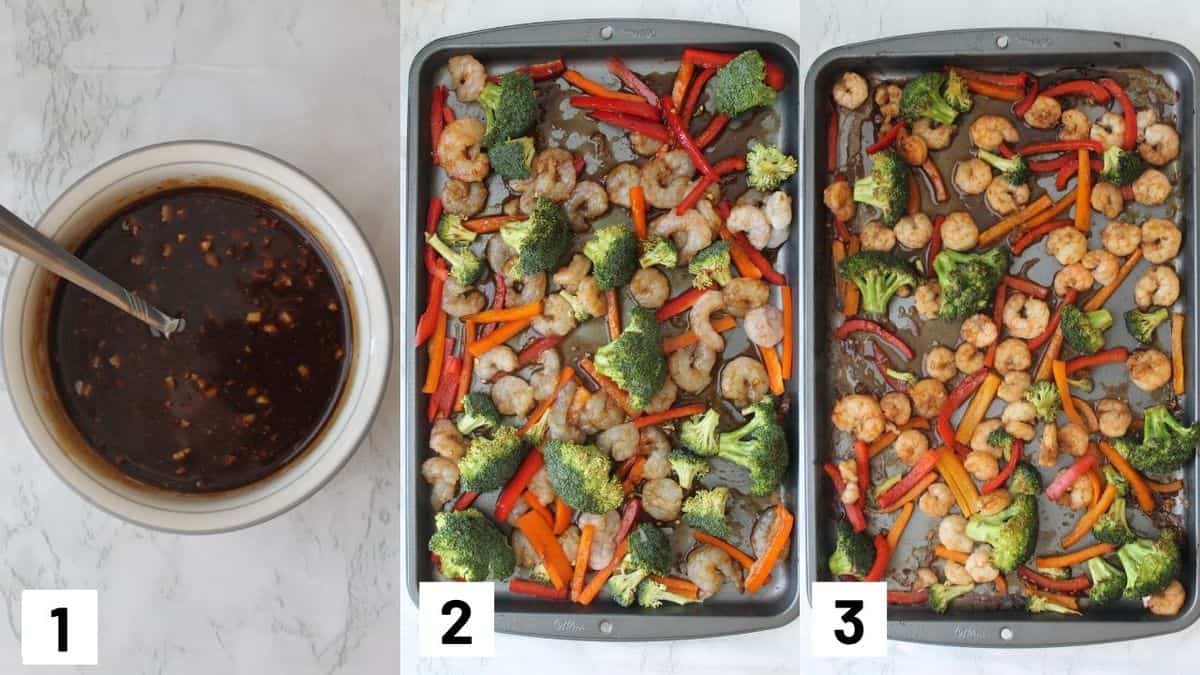
Three side by side images showing how to prepare the sauce and the sheet pan.

Step 1: In a small bowl, mix together the honey, hoisin, soy, ginger, garlic, Chinese five spice, sesame and cornstarch.

Step 2: Grease two sheet pans and divide the veggies, shrimp and sauce. Toss well until coated.

Step 3: Roast for 12 minutes until everything is caramelized and cooked through. Top with white and black sesame seeds and serve with brown rice.

Expert Tips

Feel free to double, triple or quadruple the serving if you’re planning to batch cook and freeze this bad boy.

You can also double up on the sauce and use it with tofu or chicken, as well! It’s delicious either way.

Recipe FAQs

What is Chinese five spice and where can I find it?

You can get it in the spices aisle at the grocery store or any ethnic specialty store. But its basically a blend of fennel, anise seed, ginger, licorice root, cinnamon, and cloves

How long does this keep in the fridge?

This shrimp sheet pan dinner keeps in the fridge for about 3-4 days.

Can I freeze this?

Yes this tends to freeze quite well! Store in an air tight container and consume within a few weeks so that it doesn’t lose its flavour.
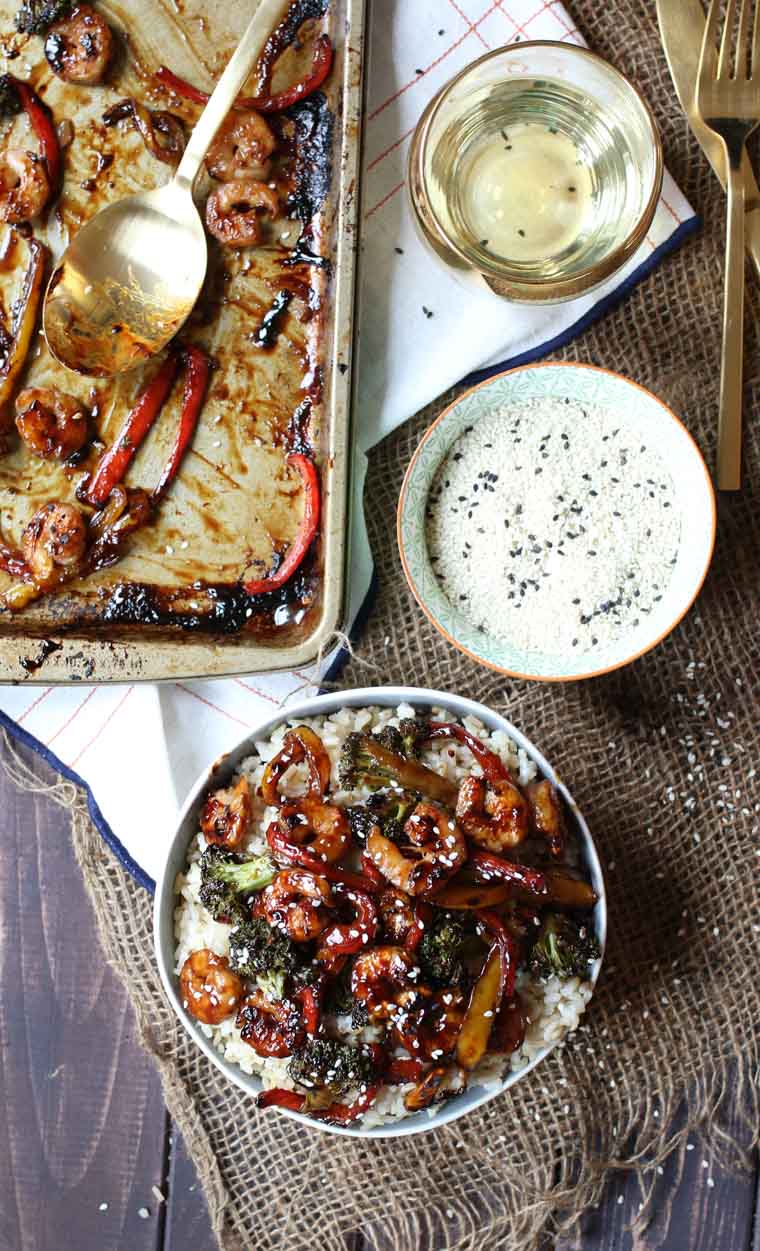
birds eye view of sheet pan stir fry on a pan.

More Recipes You Might Like

If you are obsessed with sheet pan dinners, here are a few more recipes you have to try out!

  • Greek Chicken Sheet Pan Dinner
  • Sheet Pan Balsamic Chicken with Rosemary & Grapes
  • Sheet Pan Gnocchi with Veggies
  • Chickpea Cauliflower Sheet Pan Dinner

Now, I want to know, what are some of your favourite sheet pan dinners? If you’ve tried this shrimp sheet pan dinner, let me know how it went!
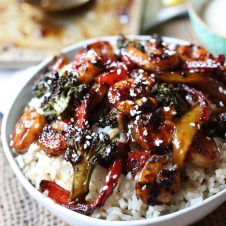
My favourite Gluten Free Chinese Five Spice Shrimp Stir Fry Sheet Pan Dinner, perfect for meal prep or freezer-friendly make ahead dinners!
Print Recipe
5 from 3 votes

Shrimp Sheet Pan Dinner with Veggies

My favourite shrimp sheet pan dinner with veggies is perfect for meal prep or freezer-friendly make ahead meals!
Prep Time5 minutes mins
Cook Time12 minutes mins
Total Time17 minutes mins
Course: Dinner
Cuisine: American
Servings: 4 – 6 people
Calories: 248kcal
Author: Abbey Sharp

Ingredients

Sauce:

  • 2 tbsp honey
  • 2 tbsp gluten free hoisin sauce
  • 3 tbsp reduced sodium tamari
  • 2 tsp grated ginger
  • 1 small clove garlic finely minced
  • 1/2 tsp Chinese Five Spice
  • 1/4 tsp sesame oil
  • 1 1/2 tsp cornstarch

Stir-Fry:

  • 2 bell peppers multi-coloured, thinly sliced
  • 1 small crown broccoli separated into florets
  • 1 lb shrimp shelled and deveined

Garnish:

  • White and black sesame seeds

Instructions

  • Preheat oven to 425 F.
  • In a small bowl, mix together the honey, hoisin, soy, ginger, garlic, Chinese five spice, sesame and cornstarch.
  • Grease two sheet pans and divide the veggies, shrimp and sauce. Toss well until coated.
  • Roast for 12 minutes until everything is caramelized and cooked through.
  • Top with white and black sesame seeds and serve with brown rice.

Nutrition

Calories: 248kcal | Carbohydrates: 28g | Protein: 29g | Fat: 3g | Saturated Fat: 1g | Cholesterol: 286mg | Sodium: 1464mg | Potassium: 748mg | Fiber: 6g | Sugar: 16g | Vitamin A: 2812IU | Vitamin C: 217mg | Calcium: 250mg | Iron: 4mg

Have you tried this sheet pan stir fry? Leave me a comment below with some other ideas for easy batch cooking freezer-friendly options!

Abbey Sharp

Abbey Sharp is a Registered Dietitian (RD), regulated by the Ontario College of Dietitians. She is a mom, YouTuber, Blogger, award winning cookbook author, media coach specializing in food and nutrition influencers, and a frequent contributor to national publications like Healthline and on national broadcast TV shows.
www.abbeyskitchen.com/about-abbey/

Last Updated May 18, 2023. Published May 19, 2023 By Abbey Sharp 23 Comments

Sheet Pan Pancakes with Chocolate Chips, Bananas, and PB (High Protein!)

These Sheet Pan Pancakes with Chocolate Chips, Bananas, and Peanut Butter are an EASY and nutritious way to make pancakes without having stand over the pan to flip each pancake!

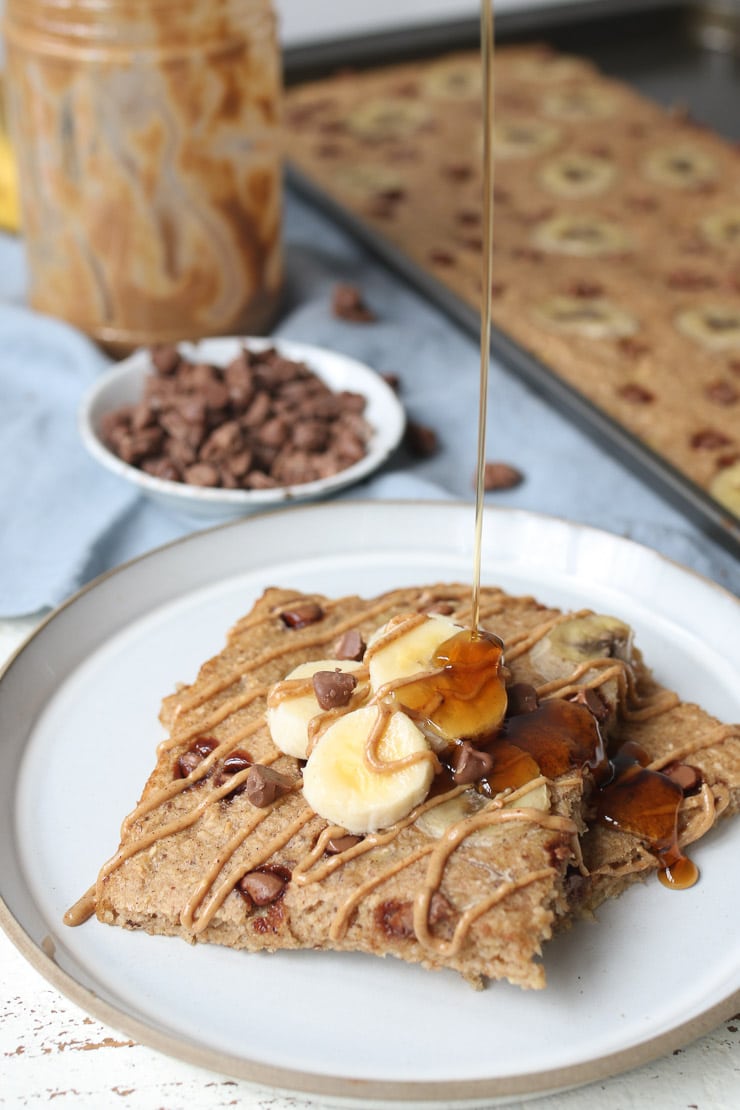
Pancake squares on a white plate topped with bananas and drizzled with maple syrup with the sheet pan in the background.

Guys. I am a freaking genius. Hear me out – you all know I’m obsessed with pancakes. But you know what I hate? MAKING PANCAKES.

The first ones always burn or are undercooked, and you have to stand there carefully babysitting for like 20 minutes until they’re all done. And then, by the time you do finish, the first ones you made are stone cold. It’s definitely not an ideal situation for this pancake lover!

That was until I came up with these sheet pan pancakes. OMG, you will never make pancakes any other way again.

Table of contents

  • Why This Recipe Works
  • Key Ingredients
  • How to Make This Recipe
  • Expert Tips
  • Recipe FAQs
  • More Recipes You Might Like

Why This Recipe Works

Okay so I think we have established that these sheet pan chocolate chip pancakes are the breakfast hack of the century. But if you need a little more convincing to make these pancakes, here are some more reasons why you need to add them to your morning routine STAT!

  • High protein without protein powder
  • Gluten free
  • Made in under 30 minutes
  • Only requires 10 ingredients
  • Kid friendly
  • Uses up pantry staples
  • Super easy to prepare!

Key Ingredients

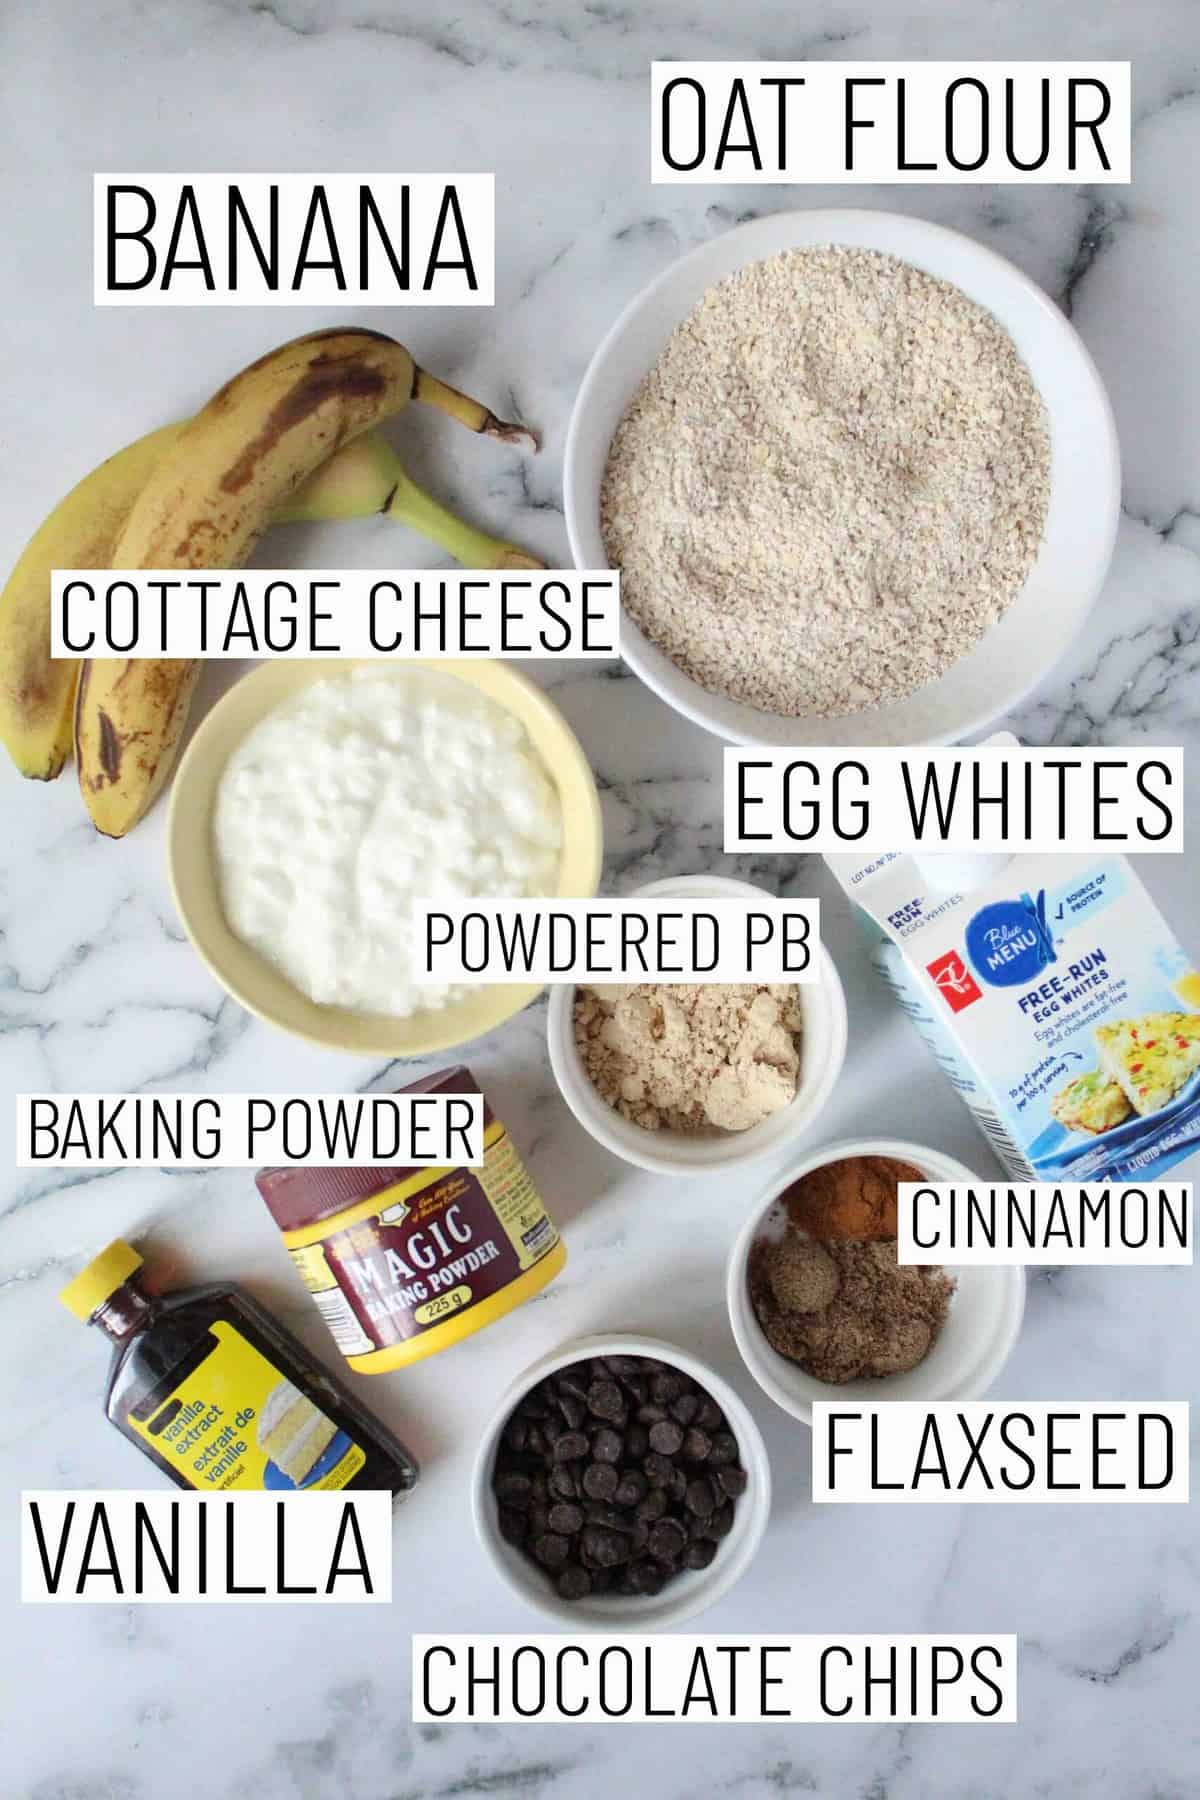
Flat lay image of portioned recipe ingredients including oat flour, bananas, cottage cheese, powdered peanut butter, egg whites, cinnamon, flaxseed, vanilla, chocolate chips, and baking powder.

Oat flour – I like to use oat flour to make these sheet pan pancakes because it adds a bit more fibre to my breakfast. But it’s also because I have such a surplus of oats sitting around my pantry, that making oat flour from scratch is a great way to use them up! Simply pulse the oats in a food processor until fine, and voila. Thats all there is to it!

Powdered Peanut butter – Look at me sharing all my hacks with ya’ll! Powdered peanut butter is one of my favourite ways to add a delicious peanut butter flavour to my baking. Its also easier to work with than regular nut butter.

Ground flax – I don’t remember the last time I DIDN’T add flax seed to baked goods or pancakes, so yes I am definitely throwing in some good ol’ flax seed to the mix for those omega 3 fats!

Cottage Cheese – To make these sheet pan pancakes high in protein without adding protein powder, I add cottage cheese AND egg whites! Not only does it up the protein, but it also makes these pancakes super moist.

Mashed very ripe bananas – Bananas are a great way to add sweetness to these sheet pan pancakes without the need for any added sugar.

How to Make This Recipe

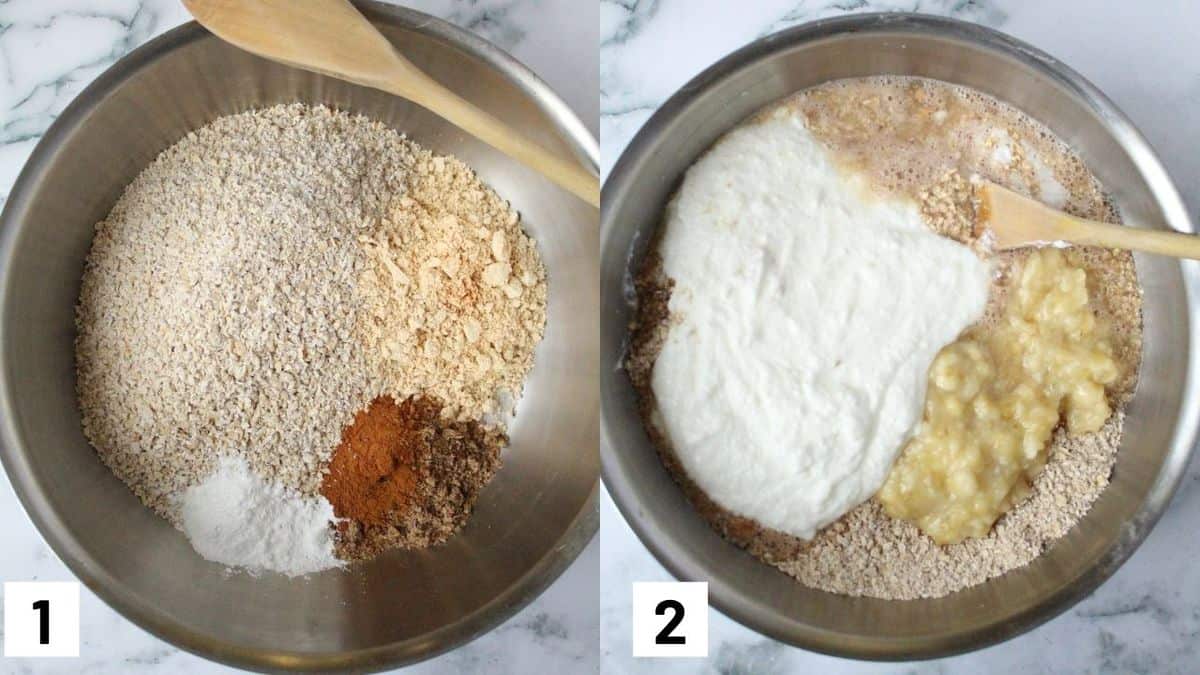
Two side by side images showing how to prepare the pancake batter for the recipe.

Step 1: To a large bowl, mix together the oat flour, powdered peanut butter, baking powder, cinnamon, flax and salt.

Step 2: To a food processor, puree the cottage cheese until very smooth. Add that to the dry ingredients, along with the egg whites, banana and vanilla.

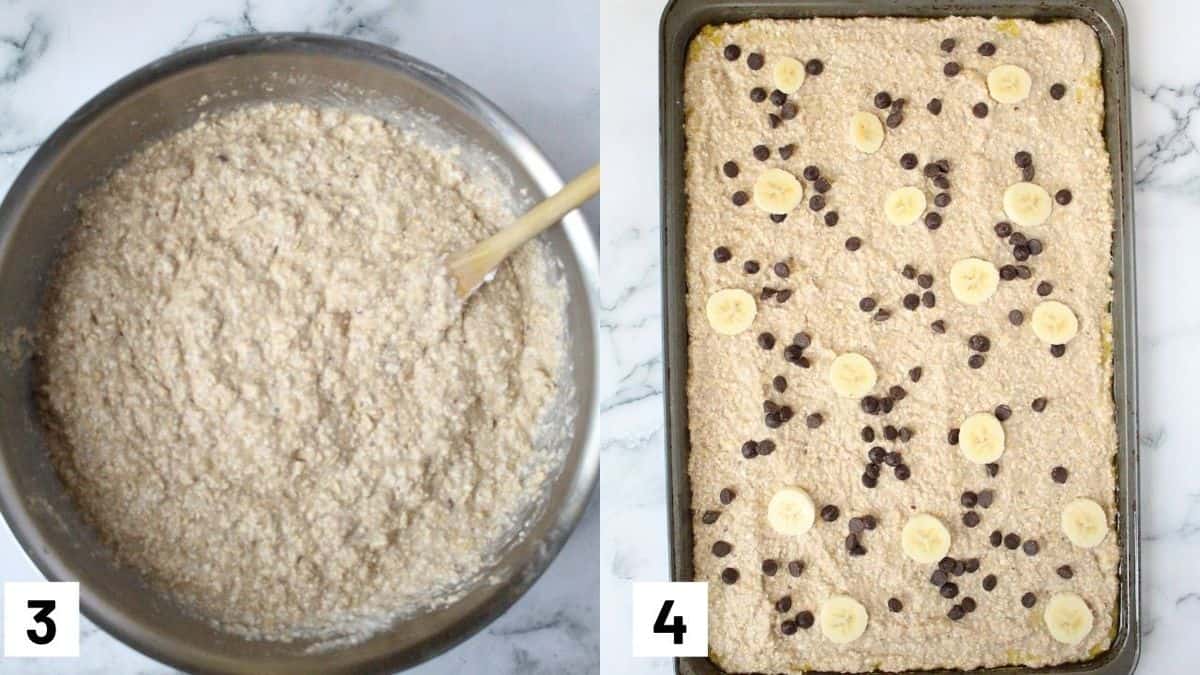
Two side by side images showing final pancake batter and prepared sheet pan prior to being heated in the oven.

Step 3: Mix batter until well combined.

Step 4: Spread into the prepared baking sheet and top with chocolate chips and banana slices. Bake at 425 for 12 minutes, turning the pan around half way through the cooking period to ensure it cooks evenly. Serve with peanut butter, banana, and maple syrup, if desired.

Expert Tips

This recipe is pretty versatile so you can totally switch up the flour and add-in’s to your liking! I’d also suggest making sure that the batter is evenly distributed on the baking sheet to ensure that it is evenly cooked in the oven – you can use a spatula for this.

Depending on your oven, you may need to cook the pancakes a little longer. You can test the doneness the same way you would with any baked good and use a toothpick to ensure that its cooked through. If after 12 minutes in the oven it is still not done, you can keep it cooking in the oven for 3-4 minute intervals until cooked through.

Recipe FAQs

Can I add different fruit to these pancakes?

OMG Yes! Like all pancakes, these sheet pan pancakes are very versatile, and you can throw in any fruit or berries or add ins you want. Heck, you can add sprinkles if it’s a special occasion. You do you!

What makes these pancakes high in protein?

The combination of egg whites and cottage cheese make these pancakes extra high in protein. I have no issue with whole eggs, but if you want to up the protein per pancake, egg whites will yield the best results. This is particularly important if you’re using these protein pancakes as a post workout snack where we want to keep fats low so they don’t interfere with protein absorption.

Is this recipe kid friendly and good for toddlers?

If I could tell you how many of these pancake squares my son ate, it would probably answer your question really well. Now, admittedly, I ate the chocolate chips out of the pancakes before giving them to my son (momma’s treat). But if you have an older kid, a few chocolate chips is totally no biggie.

Can you meal prep these pancakes for the week and freeze leftovers?

The reason I love these sheet pan pancakes (aside from the fact that I don’t have to worry about flipping pancakes), is that they’re so easy to cut into squares and freeze. I cut them into portions and then put them into a freezer bag separated by parchment paper.

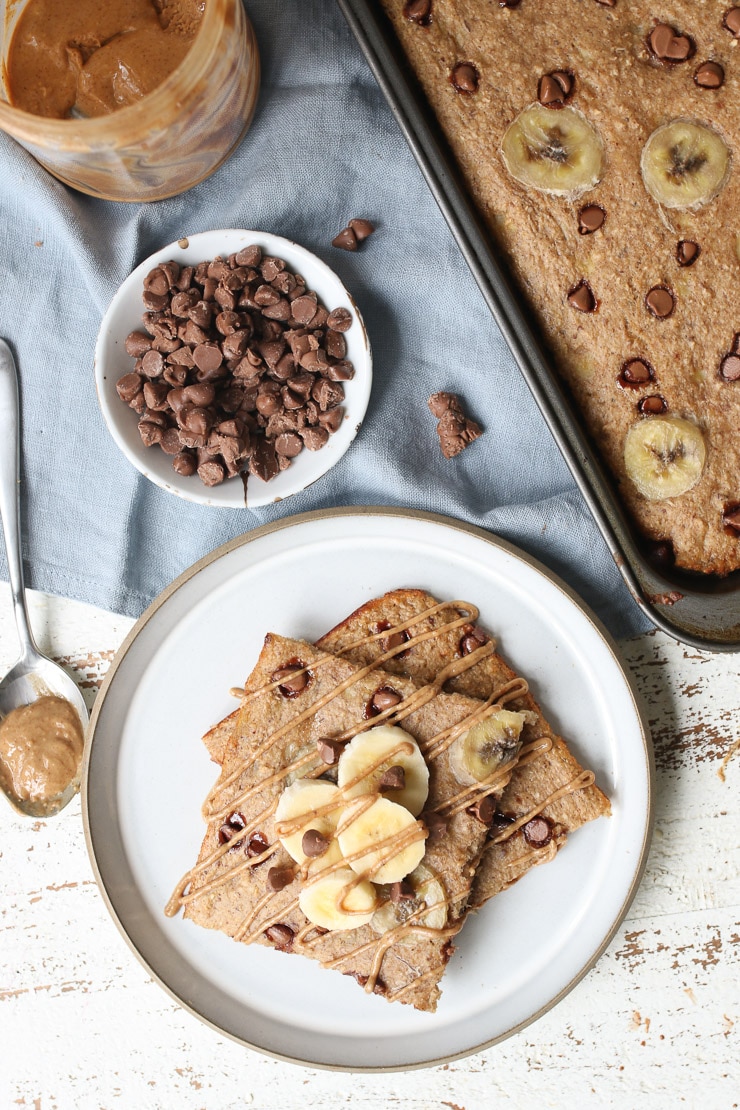
Birds eye view of protein sheet pan pancakes with chocolate chips, peanut butter and sheet pan in the background.

More Recipes You Might Like

Check out some of these favourites – I am totally obsessed with pancakes obviously.

  • BLACK FOREST CAKE CHOCOLATE PROTEIN PANCAKES 
  • NUTELLA PROTEIN PANCAKES 
  • STRAWBERRY CHEESECAKE PROTEIN PANCAKES 
  • CHOCOLATE PEANUT BUTTER BANANA PROTEIN PANCAKES 

What are your favourite pancake hacks lately?

Print Recipe
5 from 13 votes

Sheet Pan Pancakes with Chocolate Chips, Bananas, and PB (High Protein!)

These Sheet Pan Pancakes with Chocolate Chips, Banana, & Peanut Butter are an EASY and nutritious way to make pancakes without having stand over the pan to flip each pancake!
Prep Time10 minutes mins
Cook Time15 minutes mins
Total Time25 minutes mins
Course: Breakfast, Snack
Cuisine: American
Servings: 6
Calories: 315kcal
Author: Abbey Sharp

Ingredients

  • 1 ½ cup oat flour gluten free if needed
  • ¼ cup powdered Peanut butter
  • 2 ½ tsp baking powder
  • 1 tsp cinnamon
  • 1 tbsp ground flax
  • ¼ tsp salt
  • 1 ½ cup low fat cottage cheese
  • 4 tsp vanilla
  • 1 cup egg whites
  • 2 medium mashed very ripe bananas

FOR TOPPING:

  • 1 banana thinly sliced
  • ¼ cup dark chocolate chips
  • Natural peanut butter for serving
  • Maple syrup if desired, for serving

Instructions

  • Preheat oven to 425 F and spray a 19×12 baking sheet with cooking spray.
  • To a large bowl, mix together the oat flour, powdered peanut butter, baking powder, cinnamon, flax and salt.
  • To a food processor, puree the cottage cheese until very smooth. Add that to the dry ingredients, along with the egg whites, banana and vanilla.
  • Spread into the prepared baking sheet and top with chocolate chips and banana slices. Bake at 425 for 12 minutes, turning the pan around half way through the cooking period to ensure it cooks evenly. Serve with peanut butter, banana, and maple syrup, if desired.

Video

Nutrition

Calories: 315kcal | Carbohydrates: 43g | Protein: 19g | Fat: 7g | Saturated Fat: 3g | Cholesterol: 2mg | Sodium: 450mg | Potassium: 709mg | Fiber: 5g | Sugar: 13g | Vitamin A: 78IU | Vitamin C: 5mg | Calcium: 181mg | Iron: 2mg

What do you think about these genius sheet pan chocolate chip pancakes? Leave me a comment below and share this with a pancake lover!

Abbey Sharp

Abbey Sharp is a Registered Dietitian (RD), regulated by the Ontario College of Dietitians. She is a mom, YouTuber, Blogger, award winning cookbook author, media coach specializing in food and nutrition influencers, and a frequent contributor to national publications like Healthline and on national broadcast TV shows.
www.abbeyskitchen.com/about-abbey/

Last Updated May 13, 2023. Published May 17, 2023 By Abbey Sharp Leave a Comment

Sugar Bear Hair Gummies: Do They Work?

We dive into the research on Sugar Bear Hair gummies to see if they work and whether or not they are safe for consumption.

Image of sugar bear hair gummies in a jar.

If you have landed on this blog post, you are probably no stranger to the heavily marketed supplement (and influencer favourite) Sugar Bear Hair. These popular gummy vitamins have been touted by what seems like every celeb and influencer under the sun – including the Kardashian clan, Vanessa Hudgens, and Emily Ratajkowski (the list goes on) . But do Sugar Bear Hair gummies work and are they really to thank for flowy luscious locks? Or is it all just a money grab? We take a deep dive into the research to find out.

Sugar Bear Hair Claims

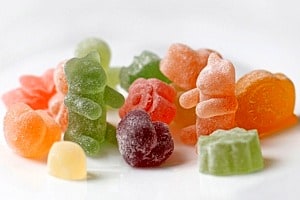
Close up image of several gummy bears.

Let’s start by taking a look at some of the general claims made about the product, taken straight off of their website and a few of my quick and dirty thoughts on each.

“These vitamins do not contain hormones so it will not affect your facial or body hair.”

I’m not sure how they can suggest with absolute certainty that the product will make the hair on your head grow but no where else.  First red flag.

“There is no gelatin, no dairy, no gluten, and no side effects.”

Hmm, I am skeptical that we can make such a bold statement about any supplement, even if it contains only natural vitamins and minerals. This company has no idea what your baseline levels of these vitamins are, or how they may interact with any medication you’re on or any preexisting health conditions you may have. With that in mind, that can’t really guarantee that you won’t experience side effects as there is no one-size-fits-all.

“The gummies are easy to take and are gentle on your stomach.”

In general, gummies are more easily tolerated than really big horsepills. Though I will note that some people do find vitamin C, zinc and folate irritating on the gut, so I don’t think we can say that this is gentle for everyone across the board.

“The vitamins work best taken for a minimum of 3 months, but best results are over 6 months. “

I don’t see any clinical research that would substantiate these claims about how long it takes to see results. While there is a statistic on their website stating that 94% of customers see results after 3 months, we don’t know how many people that’s based on, their research methods, or anything else about this “stat”.

Second, that also means a lot of dough. A months worth of Sugar Bear Hair gummies will ring you in at $30 per bottle. Which means we’re looking at $90 for 3 months of use and $180 for 6 months to MAYBE see some kind of hair results. For a lot of people, that’s a lot of money to spend on a product that’s debatably totally useless (but we’ll get more into that soon).

“Results will vary from person to person and its recommended for people age 13 and older. Anyone under 13 should ask a doctor before use.”

I mean,  I do appreciate the disclaimer that results will vary between individuals, as supplements are often sold as a one-size-fits-all gimmick. But I would argue that it’s actually important for someone of any age to consult a healthcare professional before starting a supplement regime. That suggestion shouldn’t be limited to those under age.

Sugar Bear Hair Gummies Ingredients

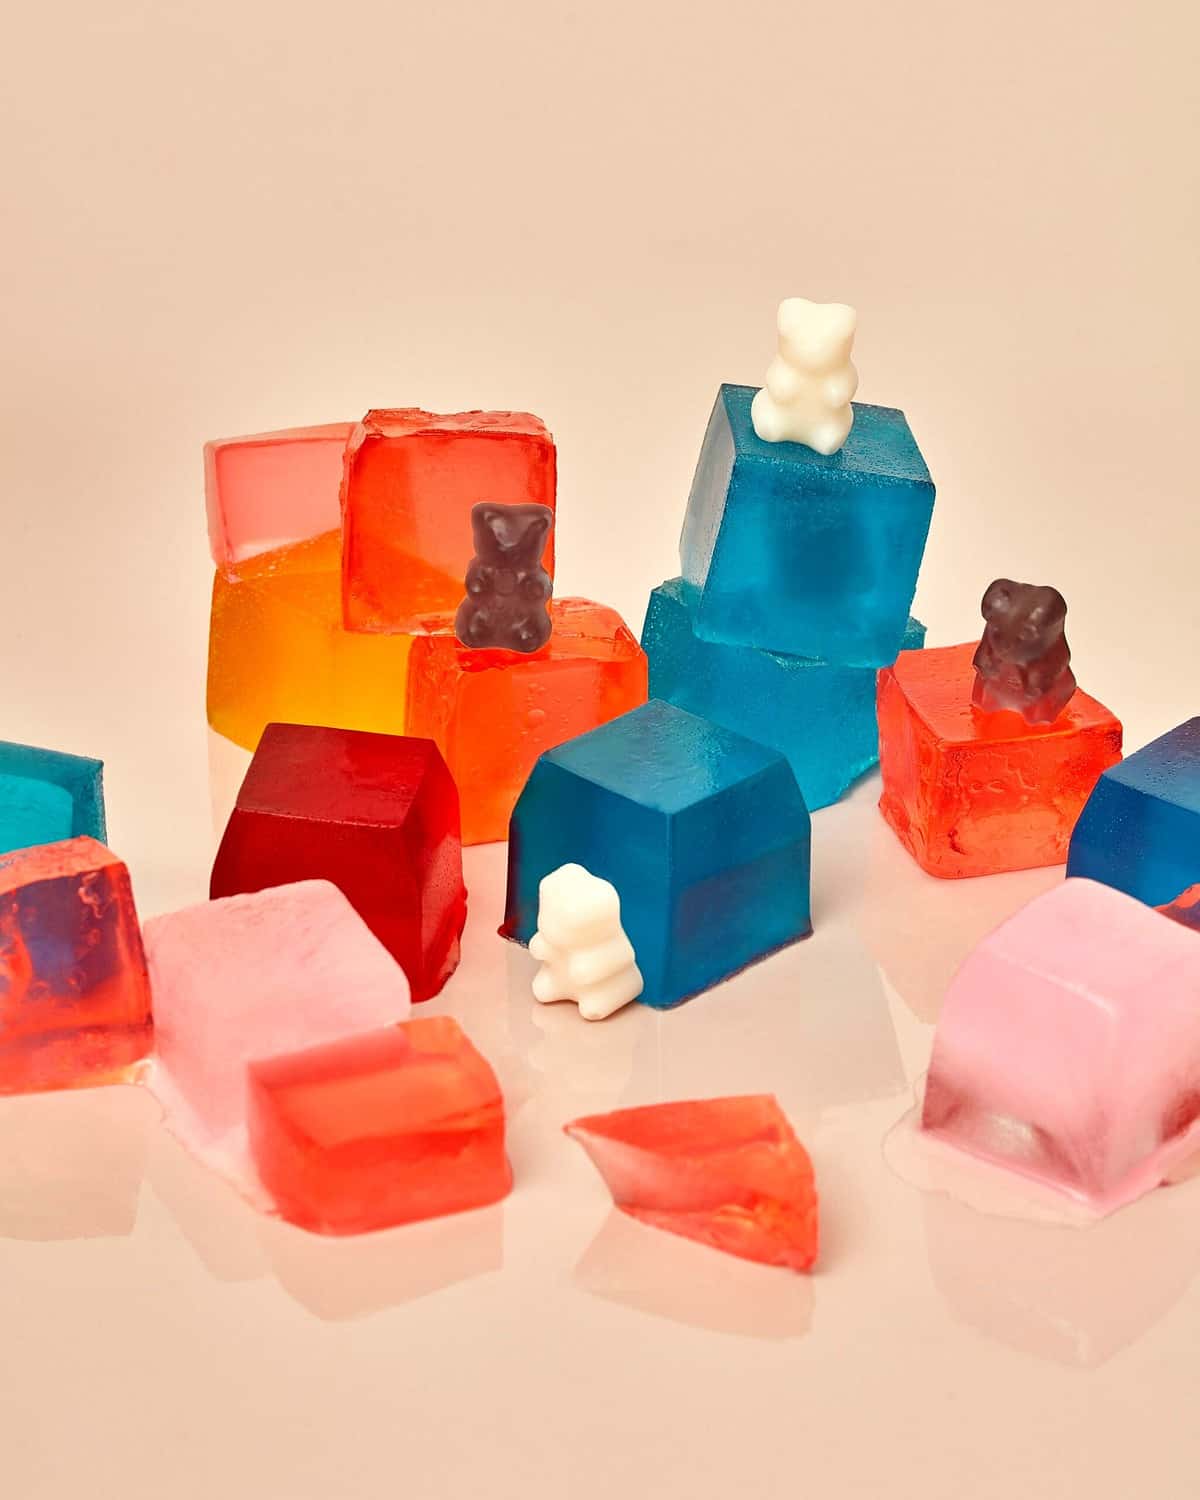
Several gummy bears sitting on jello.

Alright so now that we’ve discussed the general product claims, I thought we could do more of a deep dive into the ingredients in these supplements, and the science behind said claims as it relates to hair volume and growth.

Biotin

Biotin deficiency is associated with alopecia and hair loss, as are a lot of nutrient deficiencies. However, a review of the literature on the use of biotin for hair growth suggested that unless you have an actual deficiency (which is most often linked to a genetic or underlying health cause and really uncommon if you have a generally balanced diet), supplementing with more biotin isn’t going to help your hair.

Biotin is the only B vitamin that is actually produced in the body, and severe deficiency in healthy individuals eating a generally healthy diet is virtually non-existent. It’s just not a thing. Meanwhile, this supplement contains 17,000% of the recommended maximum daily dose of biotin!! While biotin is (thankfully) a water soluble vitamin meaning you’ll likely just pee out excess in the toilet, high levels can mess with blood test results which can result in misdiagnoses. So this is definitely why you want to take up your supplement regime with your doc.

Vitamin B12 and Folate

In the case of vitamin B12 and folate, one study found no significant difference between folate and b12 levels in patients with hair loss and those without. We do, however, have limited research suggesting an association between b12 and folate deficiency and premature greying, but I don’t think that’s an issue that this supplement even promises to address.

Antioxidants (Vitamin A, C, E, D, and Zinc)

First of all, it’s true that getting adequate levels of antioxidants in the diet can fight free radicals involved in skin damage and may help play a role in slowing down age-related hair loss and greying. There was also one very small study involving a hair growth supplement (containing vitamin C, iron, zinc, and biotin) which did seem to help improve some hair growth, but it’s hard to draw conclusions from studies like these because the composition of these nutritional supplements are not disclosed.

Another super small study found that vitamin C helped to promote hair growth but the authors suggested that this was likely due to the Vitamin C’s role in increasing iron absorption which would help mitigate hair loss associated with iron deficiency. It’s also true that Vitamin C plays a role in helping the body develop collagen, which is an important protein found in hair. But the research on collagen itself for hair is ALSO limited, so take this with a grain of salt.

A woman taking sugar bear hair gummies.

One industry funded randomized control trial found that 15 women with self perceived thinning hair who were given a collagen supplement experienced subjective improvements in hair volume, scalp coverage and thickness after 90 days. But again, not only is this evidence pretty weak, but its also assuming that vitamin C supplementation alone will yield similar outcomes. It’s like saying that A (vitamin C) is important for C (healthy hair) when we really only know that B (collagen) is important for C (healthy hair). It’s skipping a vital step.

Then there’s vitamin A. Now, the website’s specifically says that vitamin A increases sebum or oil production in the scalp, however is that research suggests that vitamin A supplementation may actually reduce sebum production, and is therefore used a lot in the treatment of acne. For example, one study found there was a 90% or greater reduction in sebum levels after 6 weeks of supplementation. This is pretty significant and unusual considering that this piece of evidence completely negates the claims about vitamin A on the Sugar Bear Hair website.

With all that said, not only is supplementation generally unnecessary because these nutrients are usually found in sufficient amounts in a balanced diet, but in the case of vitamin A, studies suggest that over-supplementation can actually cause hair loss.

As for the rest, well the rationale for vitamin E is likely also based on deficiency symptoms where low levels of vitamin E have been linked to alopecia. Ditto for vitamin D and zinc.

So What Does This All Mean?

So with all that said, do Sugar Bear Hair gummies work? Well, here’s the truth.

Companies like Sugar Bear (along with so many other supplement companies) rely on small truths or bits of research and then extrapolate this to make major claims about the human body like growing beautiful thick air.

Not to mention, 99.99999% of this alleged “evidence” is very clearly correlation based, and not causation. Most of the significant benefits we see in the literature when it comes to taking supplemental vitamins happen when correcting a deficiency. But if you’re eating a varied diet, its very possible that the top up in a supplement will do little for the cause.

So- imma say it again for the people in the back, if you’re not deficient in these vitamins, you likely don’t need to take more of these vitamins.

But how can they get away with these claims?

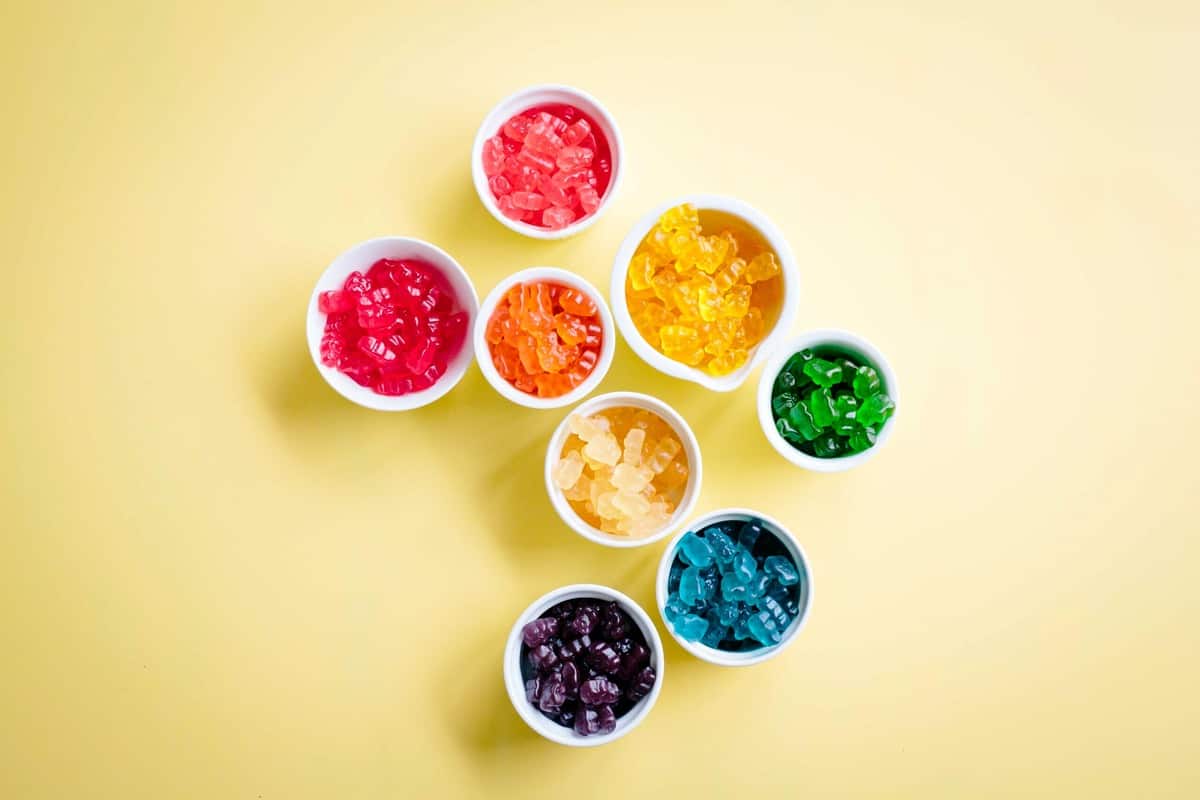
Birds eye view of several portioned sugar bear hair gummies.

Well, first of all, it says right on the website:

“The statements have not been evaluated by the Food and Drug Administration. This product is not intended to diagnose, treat, cure or prevent any disease. The views and nutritional advice expressed by SugarBearHair are not intended to be a substitute for conventional medical service. If you have a severe medical condition, see your physician of choice. Individual results may vary.”

The reality is that the supplement world is kind of the Wild West. In fact, supplement companies can often say almost whatever they want about a product. For example, an FDA rep said this about hair vitamins:

“Since hair growth is a natural human function, you can make the claim the supplement promotes hair growth, but you cannot include a claim about any treatment, such as the product can be used to treat alopecia (hair loss).”

To sum that up, you can make any supplement you want, claim it will do amazing things with no evidence to back that up as long as it does not treat a specific condition. Let that sink in.

Are Sugar Bear Hair Gummies Unsafe?

Not necessarily. But it’s important to note that lot of supplements are not well regulated and can therefore contain contaminants. While the website does state that the product is third party tested, it doesn’t mention by whom or where. When in doubt, you can check your supplements status by looking them up on third party testing websites like labdoor.com.

The other thing I will mention is that while I love gummy vitamins and I take them myself, you do want to be mindful of how many you take. Unlike a big horse pill, its actually really easy to overeat them and pop them back like candy. So just know that these are not meant to be eaten like candy, and you should still not exceed the recommended dose just because they taste great.

Thankfully the one nutrient that this supplement goes overboard on, biotin, is relatively benign. Likely, the worst that could happen with this supplement is that you pee out all that excess (aka pissing away a bunch of money) and maybe it messes with some blood work numbers. Again, this is why its always important that your health care provider be in the loop on your supplement regime.

Bottom Line

In summary, the Sugar Bear Hair products are likely not harmful for most healthy adults – besides the assault they may do to your wallet. However, it’s likely not very necessary or helpful for hair growth unless you have an actual nutrient deficiency and resulting hair loss. In addition, most of these vitamins (especially its star ingredient biotin) are nutrients that most of us get in abundance anyway! Also, if you are experiencing legitimate hair loss, then it’s best to speak to your doctor to rule out a bigger problem. Things like thyroid disease, anemia, protein deficiency, malnutrition, alopecia and anxiety are all legitimate health issues related to hair loss, and these should be thoroughly ruled out and treated by your medical team, not self-treated with a gummy vitamin.

More Blog Posts You Might Like

If you found this blog post interesting, here are some others to read next:

  • Can Collagen Supplements Tighten Skin?
  • Are Supplements Safe? How to Choose the Right Supplement for You.
  • Fertility Supplements and Foods for Getting Pregnant
  • The Unregulated World of Natural Health Supplements | Are they safe or what they claim to be?

Have you tried Sugar Bear Hair gummies or a similar supplement? Did you find that it improved your hair growth? Let me know in the comments!

Abbey Sharp

Abbey Sharp is a Registered Dietitian (RD), regulated by the Ontario College of Dietitians. She is a mom, YouTuber, Blogger, award winning cookbook author, media coach specializing in food and nutrition influencers, and a frequent contributor to national publications like Healthline and on national broadcast TV shows.
www.abbeyskitchen.com/about-abbey/

Last Updated May 21, 2023. Published May 15, 2023 By Abbey Sharp 5 Comments

Creamy Mushroom Soup Recipe | Vegan

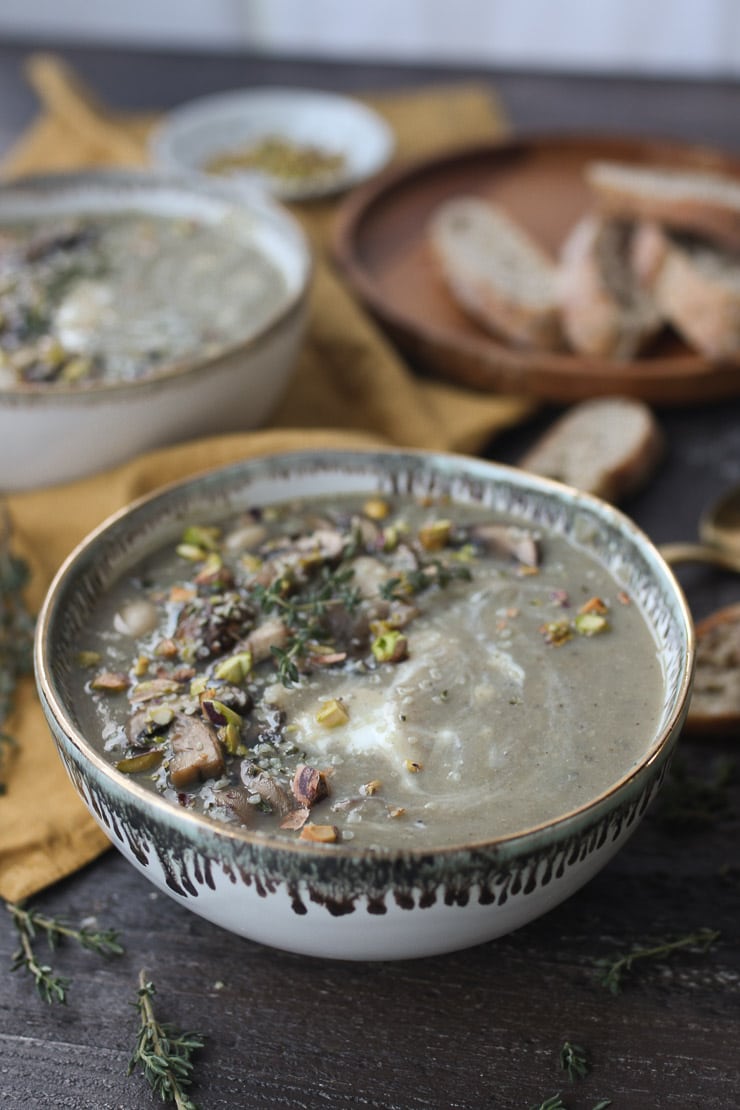
Bowl of mushroom soup topped with nuts and herbs.

This creamy mushroom soup recipe with rosemary white beans is a great plant-based, dairy free and gluten free alternative to canned cream of mushroom soup with extra protein and fibre!

Bowl of mushroom soup.

I don’t care what anyone says – every season is soup season in this household. I was actually inspired to make this creamy mushroom soup recipe after having an amazing mushroom soup from Uber Eats (a place called Carol’s Cheesecake). It was actually completely dairy free, but still strangely creamy.

Table of contents

  • Why This Recipe Works
  • Key Ingredients
  • How To Make This Recipe
  • Expert Tips
  • Recipe FAQs
  • More Recipes You Might Like

Why This Recipe Works

If you love a creamy soup, you’re going to LOVE this creamy mushroom soup recipe. It’s flavor-packed, easy to make, and absolutely delicious. I also love this recipe because it’s

  • Packed with veggies
  • High in protein (18 g per serving)
  • 100% plant-based (Vegan)

Key Ingredients

Mushrooms – Of course we’re going to need mushrooms for this mushroom soup recipe. Mushrooms provide a good source of Vitamin D, fiber , as well as plant based protein!

White Beans (Cannellini Beans) – Not only will white beans add a ton of protein and fibre (making this mushroom soup perfect as a main meal), but they also add body and thicken this soup up without dairy.

Vegetable Stock – Most soups typically use beef or chicken stock, but to keep this recipe plant based vegetable stock is a great and flavorful alternative!

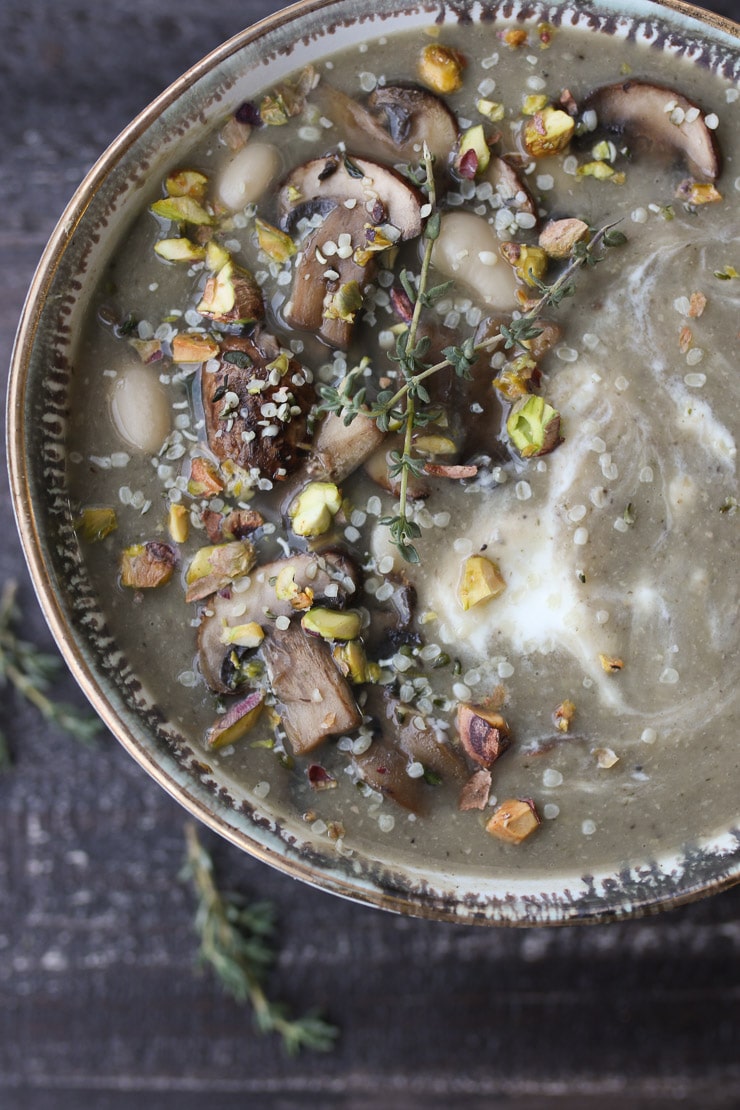
Bowl of mushroom soup topped with nuts and herbs.

How To Make This Recipe

Step 1: Add half of the olive oil to a large saucepot over medium heat. Add in the mushrooms and half the thyme and rosemary. Sautee mushrooms until golden brown. Remove the mushrooms and place in a bowl or plate.

Step 2: Add the rest of the olive oil to the saucepot along with the garlic, onion, parsnips, celery and remaining thyme and rosemary. Saute until the onions start to soften, about 4-5 minutes. Add the white beans, stock, nutritional yeast and half of the mushrooms and cook for 5 minutes.

Step 3: Transfer to a food processor or blender and puree until smooth. Season generously with salt and pepper and stir in the remaining mushrooms. Garnish with vegan sour cream, pistachios, hemp hearts and thyme leaves.

Expert Tips

I like to garnish my soup with a little swirl of vegan sour cream and crushed nuts, but you can serve it just as is.

This soup alone is overall a great balance of carbs, protein, and fat making it a great soup to serve as a meal! But if you’re looking for something extra to pair with this soup I highly recommend a grilled cheese sandwich, roasted broccoli, or a fresh arugula salad!

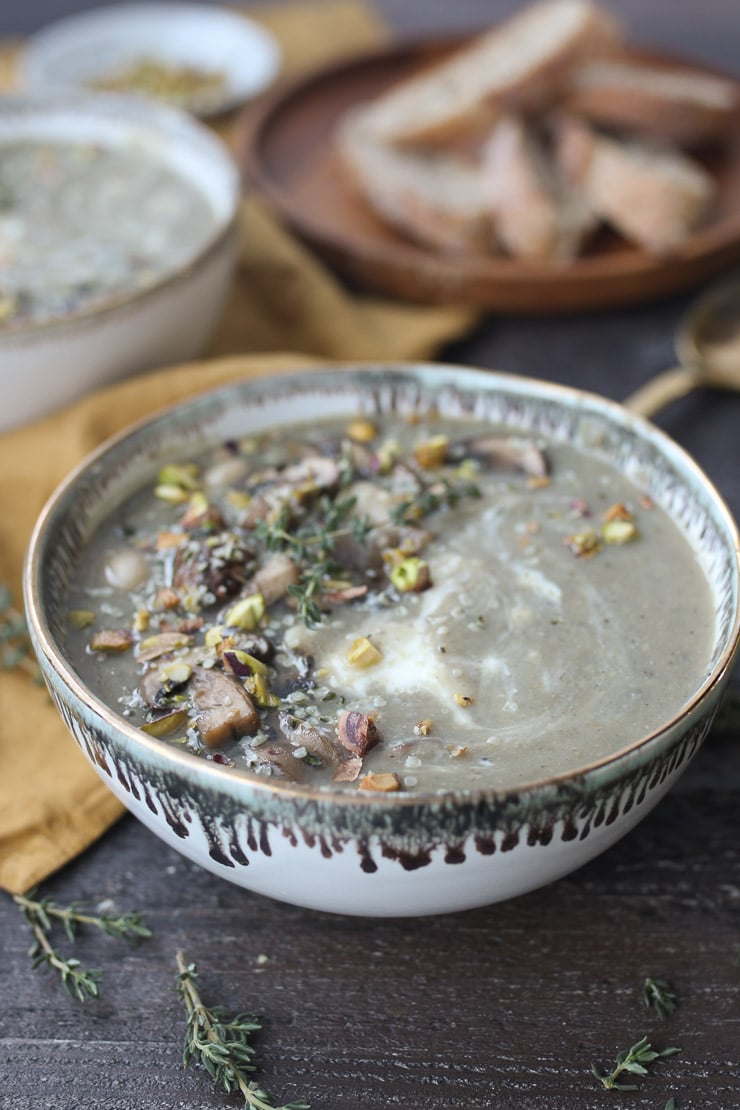
Bowl of creamy mushroom soup.

Recipe FAQs

How much protein is in this recipe?

There is 18 grams of protein in this cream of mushroom vegetarian mushroom soup thanks to the combination of white beans and nutritional yeast.

Can this soup be frozen for cold winter days?

You can definitely freeze this mushroom soup. I recommend letting it cool completely, then transferring it into 2 serving batches in a freezer bag that you lay flat on a baking sheet in the freezer. Once frozen, then you can stack them in the freezer a bit easier.

Can I make this creamy soup in the slow cooker or instant pot?

You can adapt this mushroom soup recipe to the slow cooker or instant pot. I would recommend using a cup less liquid, however, and if you find its too thick, you can always add more after pureeing.

More Recipes You Might Like

Need more delicious soup inspo like this creamy mushroom soup recipe? Check out of my favorite soup recipes on the blog!

  • Yellow Beet Coconut Curry Soup
  • Healthy Pizza Soup
  • Roasted Cauliflower, Parsnip and Chickpea Soup
  • Roasted Fennel Tomato Soup
  • 10 Minute Mexican Chicken Tortilla Soup
Bowl of mushroom soup topped with nuts and herbs.
Print Recipe
4.84 from 6 votes

Creamy Mushroom Soup Recipe | Vegan

This creamy mushroom soup recipe with rosemary white beans is a great plant-based, dairy free and gluten free alternative to canned cream of mushroom soup with extra protein and fibre!
Prep Time10 minutes mins
Cook Time15 minutes mins
Total Time25 minutes mins
Course: Appetizer, Soup, Dinner
Cuisine: American
Servings: 4 people
Calories: 330kcal
Author: Abbey Sharp

Ingredients

  • 2 tbsp Olive oil divided
  • 1 lb mushrooms sliced
  • 1 tbsp thyme leaves only, divided
  • 1 tbsp rosemary leaves only divided
  • 1 onion diced
  • 3 cloves garlic
  • 3 celery stalks minced
  • 3 parsnips minced
  • 2 19 oz cans white beans cannellini beans
  • 6 cups reduced sodium vegetable broth
  • ¼ cup nutritional yeast
  • Lots of cracked black pepper and salt to taste
  • To garnish:
  • Vegan sour cream
  • Pistachios crushed
  • Hemp hearts
  • Thyme leaves

Instructions

  • Add half of the olive oil to a large saucepot over medium heat. Add in the mushrooms and half the thyme and rosemary. Sautee mushrooms until golden brown. Remove the mushrooms and place in a bowl or plate.
  • Add the rest of the olive oil to the saucepot along with the garlic, onion, parsnips, celery and remaining thyme and rosemary. Saute until the onions start to soften, about 4-5 minutes. Add the white beans, stock, nutritional yeast and half of the mushrooms and cook for 5 minutes.
  • Transfer to a food processor or blender and puree until smooth. Season generously with salt and pepper and stir in the remaining mushrooms.
  • Garnish with vegan sour cream, pistachios, hemp hearts and thyme leaves.

Nutrition

Calories: 330kcal | Carbohydrates: 65g | Protein: 18g | Fat: 2g | Saturated Fat: 1g | Sodium: 1501mg | Potassium: 1578mg | Fiber: 16g | Sugar: 13g | Vitamin A: 878IU | Vitamin C: 27mg | Calcium: 167mg | Iron: 6mg
Abbey Sharp

Abbey Sharp is a Registered Dietitian (RD), regulated by the Ontario College of Dietitians. She is a mom, YouTuber, Blogger, award winning cookbook author, media coach specializing in food and nutrition influencers, and a frequent contributor to national publications like Healthline and on national broadcast TV shows.
www.abbeyskitchen.com/about-abbey/

Last Updated May 8, 2023. Published May 12, 2023 By Abbey Sharp 22 Comments

Gluten Free Pasta Salad Recipe with Vegan Buffalo Sauce

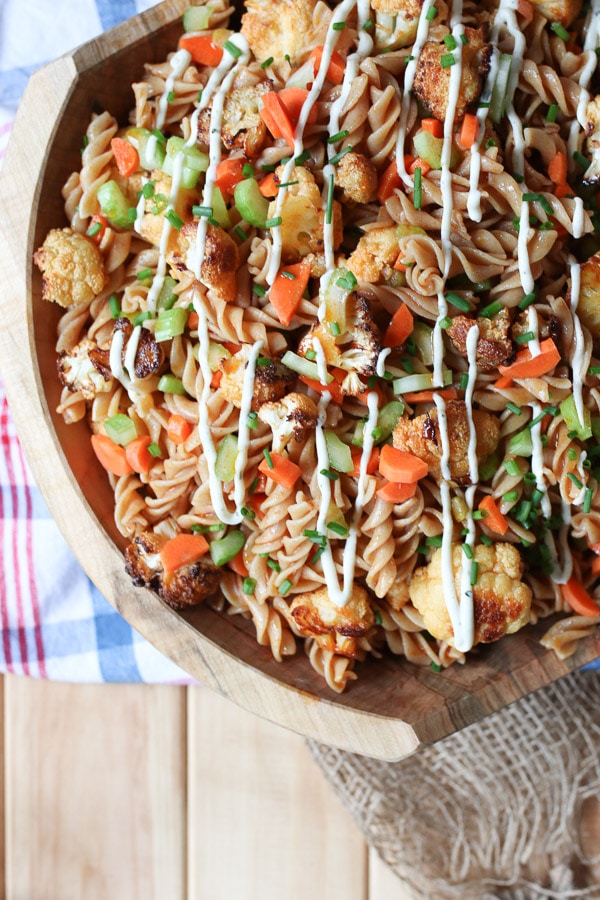
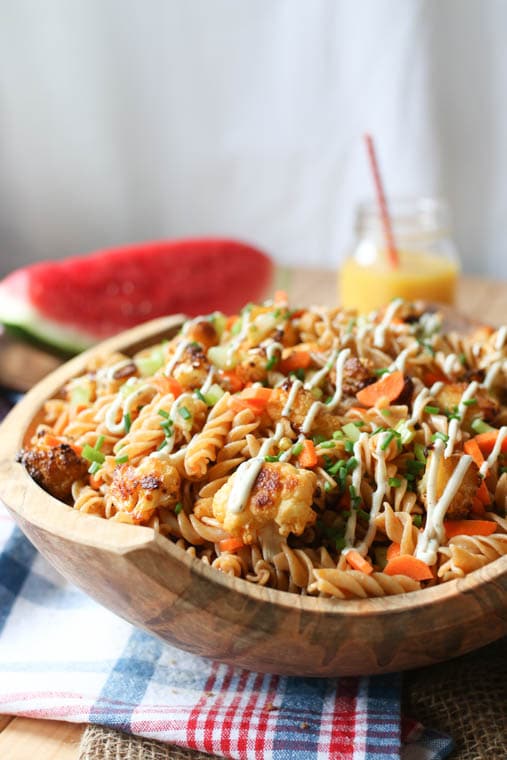
Buffalo cauliflower pasta salad in a wooden bowl.

This Buffalo Pasta Salad is so easy to make! It’s the best gluten free pasta salad recipe, perfect for a potluck or picnic. Even better, it comes together in 30 minutes or less.

Buffalo cauliflower gluten free pasta salad in a wooden bowl.

Recently, I’ve made buffalo chicken fingers, buffalo cauliflower tacos, and buffalo cauliflower steaks and with summer finally approaching, this buffalo pasta salad is perfect to kick off the season. Outdoor picnics, potlucks, or just an easy no-heat lunch for work, this is perfect!

Table of contents

  • Why This Recipe Works
  • Key Ingredients
  • How to Make This Recipe
  • Expert Tips
  • Recipe FAQs
  • More Recipes You Might Like

Why This Recipe Works

This gluten free pasta salad recipe is so delicious and easy to make! Here are a few more reasons why you need to make this recipe ASAP:

  • Veggie packed
  • Sweet but spicy
  • Tastes delicious when chilled, no reheating needed!
  • Gluten free
  • Vegan friendly

Key Ingredients

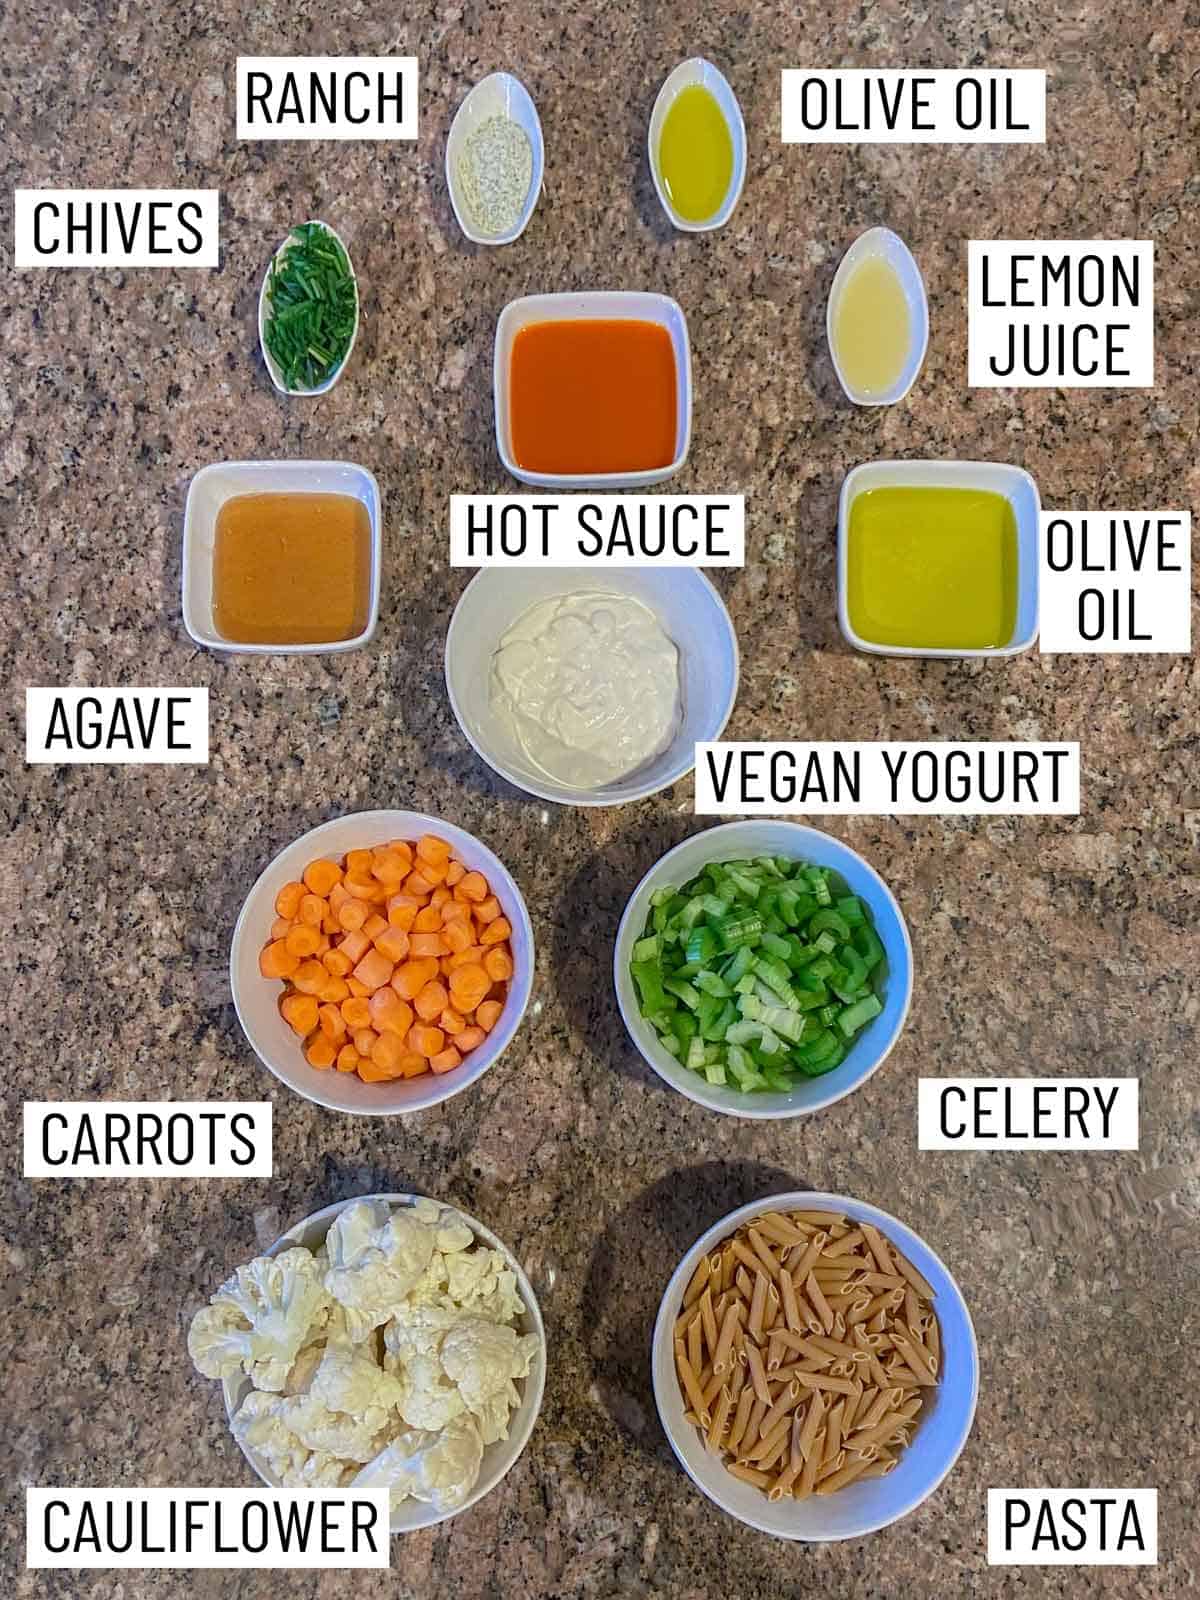
Ingredients needed to make gluten free pasta salad recipe.

Cauliflower — We roast a whole head of cauliflower for this buffalo pasta salad. While you can use frozen cauliflower if you prefer, we highly recommend using fresh cauliflower for roasting as it tends to yield a more caramelized flavour.

Pasta — You can use a gluten-free or whole wheat pasta. It’s up to you!

Hot Sauce — Frank’s hot sauce is recommended but you can use whatever you like. There are different levels of heat so keep that in mind when picking one up!

Ranch Dip Seasoning Mix — While you can DIY this with a variety of spices and seasoning, it’s much more convenient to pick up a packet. We combine this with our vegan yogurt to get a delicious dairy-free vegan-friendly ranch sauce.

How to Make This Recipe

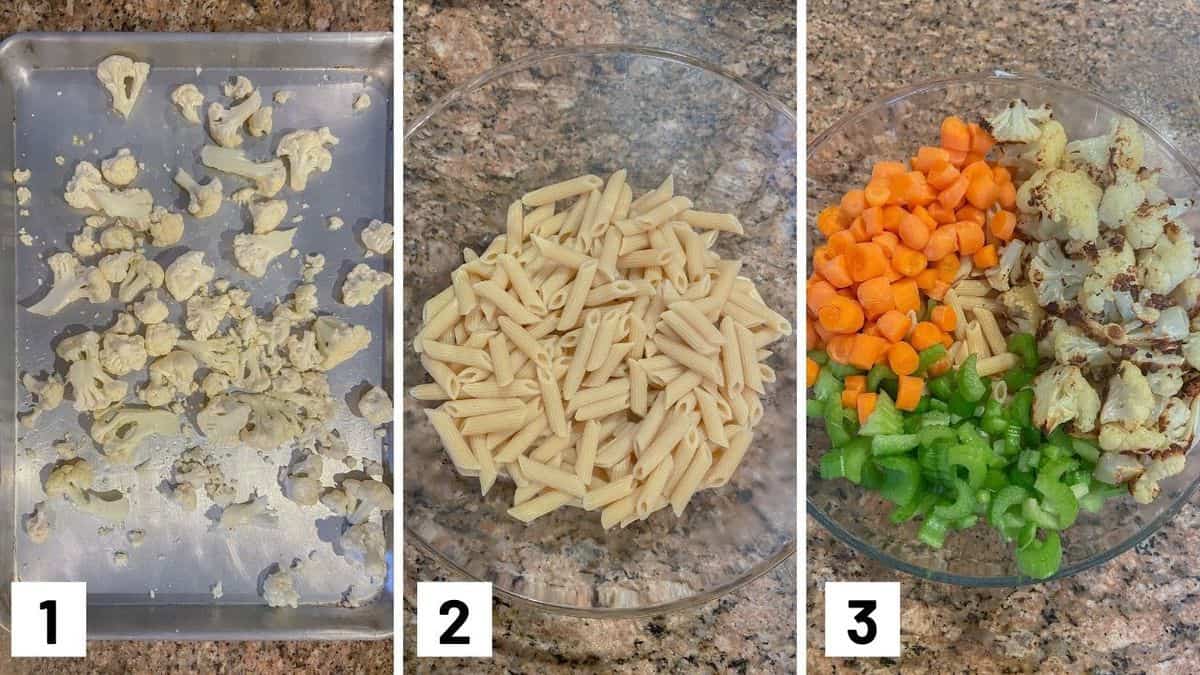
Set of three photos showing cauliflower added to a sheet pan to roast, pasta in a bowl, and vegetables added to the bowl.

Step 1: Preheat oven to 450 F. Spread the cauliflower florets onto a baking sheet with olive oil and roast for 20 minutes, turning and tossing once.

Step 2: Meanwhile, cook the pasta according to the box’s directions. Transfer to a large bowl.

Step 3: Add the carrots, celery, and cauliflower to the pasta.

Set of three photos showing sauce being made, ranch sauce in a bowl, and then the recipe assembled.

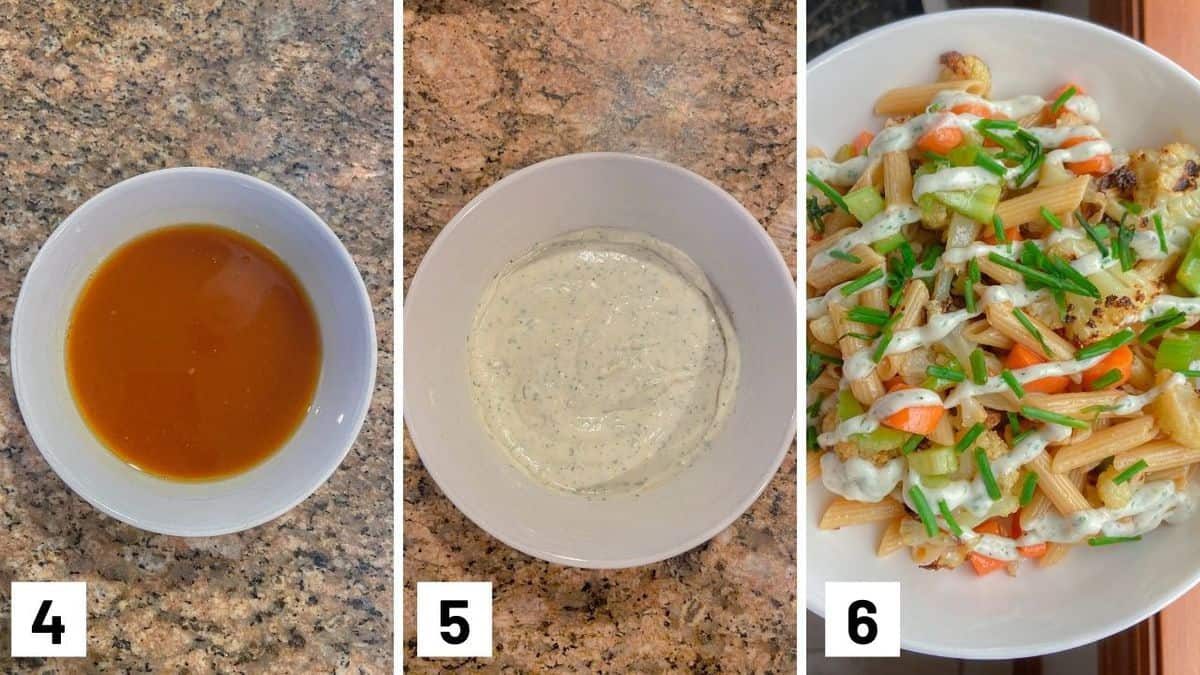
Step 4: In a bowl, mix together the hot sauce, oil, agave, lemon and salt to taste. Toss generously with the pasta salad.

Step 5: In another small bowl, mix together the seasoning mix and yogurt. Transfer to a piping bag.

Step 6: To serve, drizzle the ranch sauce over the buffalo pasta salad and top with the minced chives.

Expert Tips

This gluten free pasta salad recipe is perfect when chilled. It’s even tastier when you’ve gotten the buffalo pasta salad some time for the flavours to mingle in the fridge overnight! It’s the perfect make ahead dish.

Don’t have chives? You can swap for green onions in a pinch.

Don’t have ranch dip seasoning? You can make your own. Try combining half a cup of dry buttermilk with a couple of pinches with some dried parsley, dried chives, garlic powder, onion powder, dried dill, salt, and pepper.

Recipe FAQs

Can I make this non-vegan?

There are a few swaps that you can make to this buffalo pasta salad. You can swap the agave for honey, swap the vegan yogurt for regular yogurt, and you can even add some shredded chicken breasts to the pasta salad. You can top it off with a handful of cheese as well!

What protein can I add?

If you’d like to keep this vegan, you can add some roasted chickpeas, lentils, or crispy tofu to add some additional protein to the pasta salad. So many things go well with this!

How do I store this?

To store this buffalo pasta salad, place it in an airtight container and keep it in the fridge until ready to serve. It can last up to 4 days when stored correctly.

Buffalo cauliflower pasta salad in a wooden bowl.

More Recipes You Might Like

Want more easy vegan recipes like this buffalo pasta salad? Try these ones!

  • Gochujang Soup (Vegan & Gluten Free)
  • Vegan Strata (Healthy, Egg Free)
  • Vegan Fettuccine Alfredo (Gluten free)
  • Vegan Breakfast Sandwich with Tofu

Now lovelies, let me know- what are some of your go-to gluten free pasta salad recipes? Leave me a comment below with your thoughts!

This Vegan Buffalo Cauliflower Pasta Salad is the perfect Gluten Free Summer Potluck Recipe for entertaining friends and family with dietary restrictions!
Print Recipe
5 from 4 votes

Buffalo Pasta Salad with Cauliflower (Vegan & Gluten Free)

This Buffalo Pasta Salad is so easy to make! It's the best gluten free pasta salad recipe, perfect for a potluck or picnic. Even better, it comes together in 30 minutes or less.
Prep Time10 minutes mins
Cook Time20 minutes mins
Total Time30 minutes mins
Course: Salad
Cuisine: American
Servings: 8 – 12 people
Calories: 413kcal
Author: Abbey Sharp

Ingredients

Salad:

  • 2 tbsp olive oil
  • 1 head cauliflower cut into florets
  • 1 lb gluten free or whole grain fusilli or penne
  • 2-4 carrots depending on size, peeled and diced
  • 4 stalks celery diced
  • 3 tbsp chives minced

Sauce:

  • 1/2 cup hot sauce I use Frank’s
  • 1/2 cup extra virgin olive oil
  • 6 tbsp agave or honey
  • 2 tbsp lemon juice
  • Salt to taste

Ranch Sauce:

  • 1/2 pack ranch dip seasoning mix
  • 1 cup vegan plain yogurt

Instructions

  • Preheat oven to 450 F.
  • Spread the cauliflower florets onto a baking sheet with olive oil and roast for 20 minutes, turning and tossing once.
  • Meanwhile, cook the pasta according to the box’s directions. Transfer to a large bowl.
  • Add the carrots, celery, and cauliflower to the pasta.
  • In a bowl, mix together the hot sauce, oil, agave, lemon and salt to taste. Toss generously with the pasta salad.
  • In another small bowl, mix together the seasoning mix and yogurt. Transfer to a piping bag.
  • To serve, drizzle the ranch sauce over the pasta salad and top with the minced chives.

Notes

  • This recipe is perfect when chilled. It’s even tastier when you’ve gotten the buffalo pasta salad some time for the flavours to mingle in the fridge overnight! It’s the perfect make ahead dish.
  • Don’t have chives? You can swap for green onions in a pinch.
  • Don’t have ranch dip seasoning? You can make your own. Try combining half a cup of dry buttermilk with a couple of pinches with some dried parsley, dried chives, garlic powder, onion powder, dried dill, salt, and pepper.

Nutrition

Calories: 413kcal | Carbohydrates: 64g | Protein: 10g | Fat: 15g | Saturated Fat: 2g | Sodium: 475mg | Potassium: 420mg | Fiber: 2g | Sugar: 16g | Vitamin A: 2640IU | Vitamin C: 52.6mg | Calcium: 81mg | Iron: 2.6mg
Abbey Sharp

Abbey Sharp is a Registered Dietitian (RD), regulated by the Ontario College of Dietitians. She is a mom, YouTuber, Blogger, award winning cookbook author, media coach specializing in food and nutrition influencers, and a frequent contributor to national publications like Healthline and on national broadcast TV shows.
www.abbeyskitchen.com/about-abbey/

Last Updated May 7, 2023. Published May 10, 2023 By Abbey Sharp 5 Comments

Best Healthy Snack Ideas for Kids According to Dietitian Moms

We share the best healthy snack ideas for kids according to dietitian moms in categories like the best bars, crackers, cereals and more – plus what should you look for in a healthy snack?

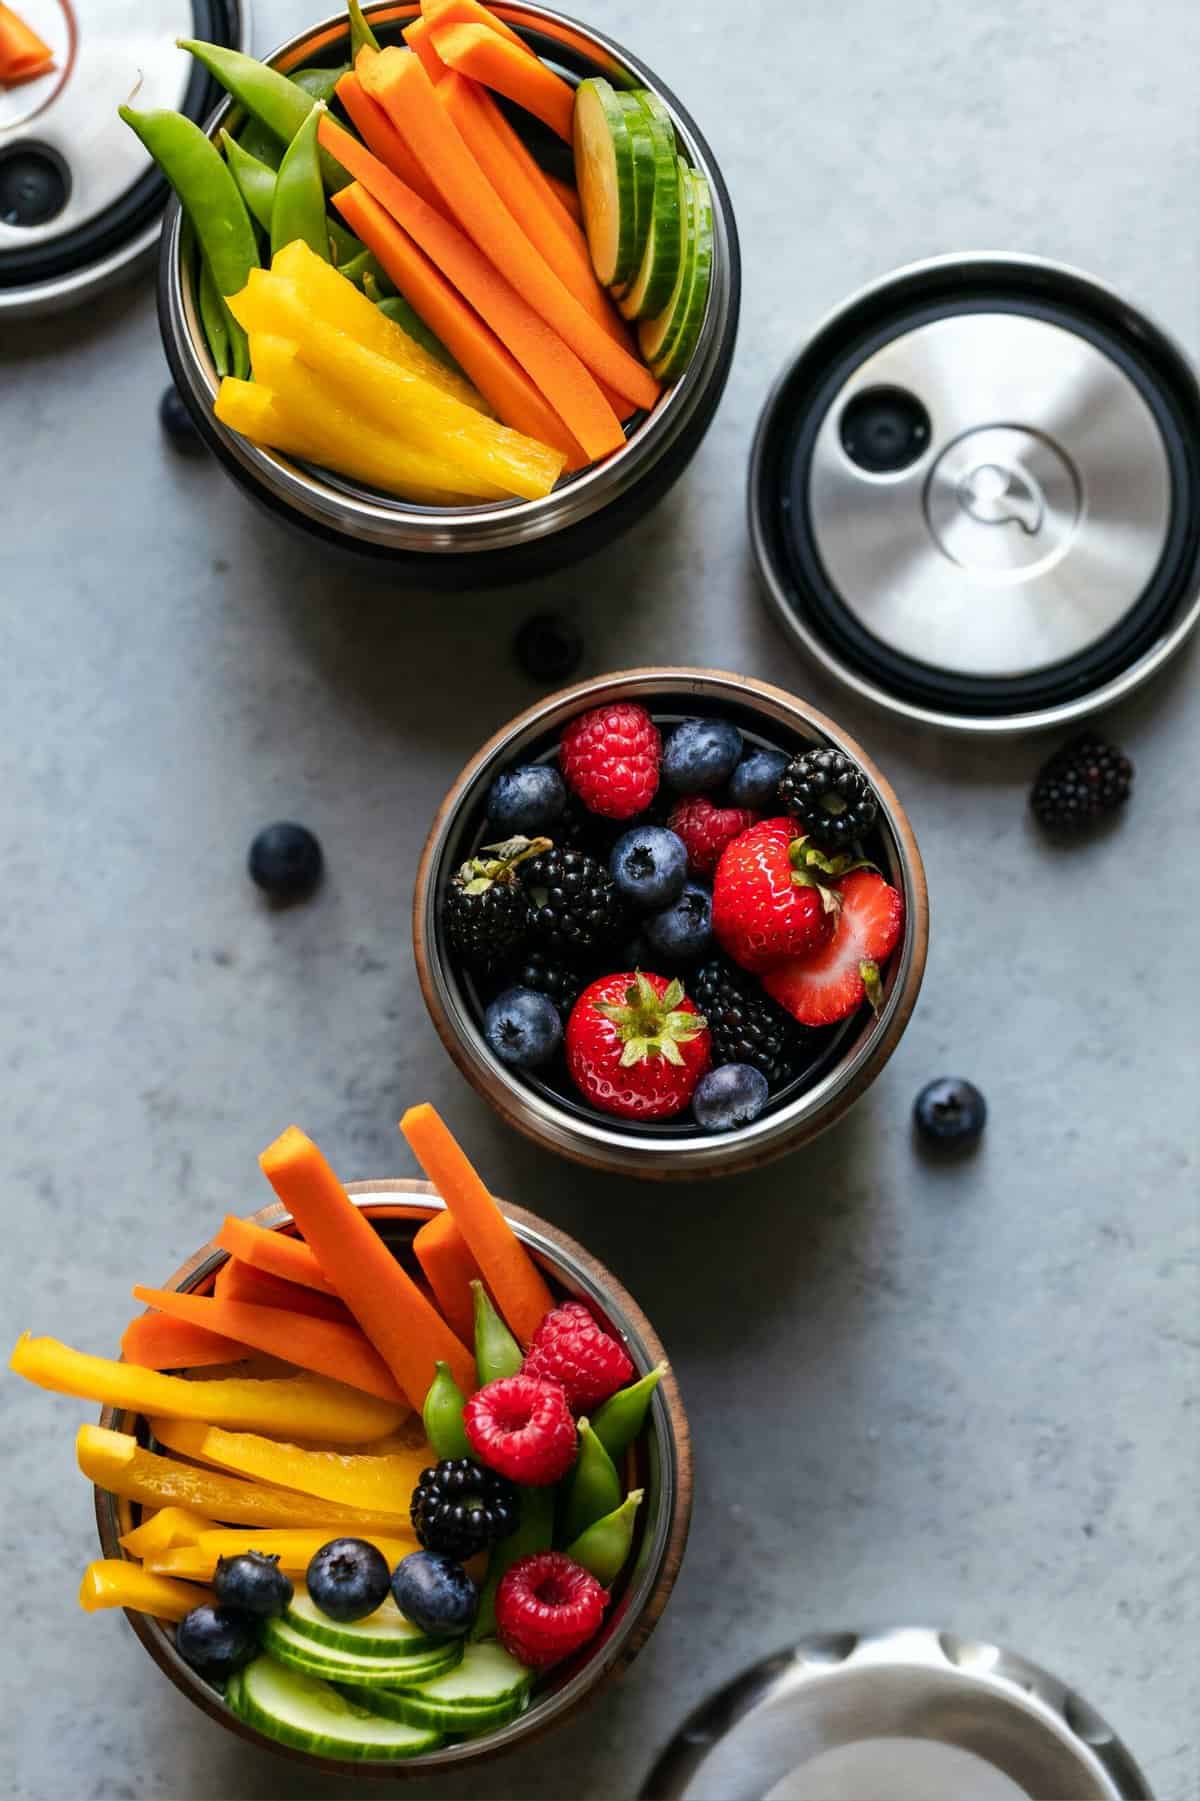
Vegetables and fruits in 3 different canisters from a birds eye view.

Let’s be real, mamas. Sometimes the struggle is REAL when it comes to making sure our kids eat nutritious food. While it’s always great to spend an hour or two making healthy homemade bars or muffins, we get that sometimes, that’s just not realistic. We all need some easy healthy school snacks you can buy in the store and send the kids off with that we actually feel good about. So I chatted with my dietitian mom colleagues about their go-to store healthy snack ideas that they love to feed their kids. 

Table of contents

  • What to Look for in a Healthy Kid’s Snack
  • When Should You Give Kids Snacks
    • Sample eating schedule
  • What is a Snack vs a Treat
  • Best Storebought Kid’s Snacks
    • Snack Bars
    • Dairy Snacks 
    • Savory Snacks 
    • Sweet Snacks 
  • More Blog Posts You May Like

What to Look for in a Healthy Kid’s Snack

When I’m thinking of a healthy snack idea, I try to think of it like a mini meal with a nice balance of carbs, protein and fat. Here are some things you can think about when choosing a healthy packaged snack (but remember, not every snack needs to have ALL of these things!)

  • Two or more food groups (whole grains, protein, dairy, fruit, vegetables)
  • Less than 6 grams of sugar or less per serving
  • Less than 200 mg of sodium or less per serving
  • Source of protein (ideally 2-3 grams)
  • Source of fibre (ideally 2-3 grams)
  • Source of monounsaturated or polyunsaturated fats
  • Trans fat free
  • Low in saturated fats

When Should You Give Kids Snacks

Most children need to eat every three to four hours throughout the day to fuel their growing, active bodies. This usually means 3 main meals and 2-3 snacks each day between them. 

It’s important to stick to a general eating schedule and stay consistent with this on weekdays and weekends. This means ensuring there is adequate time between a snack and a meal rather than just allowing small bites and snacks all day long. Since meal times are generally where new food exposures happen, we want our littles to have enough of an appetite to be enticed to try them.

But if we’re constantly giving little snack handouts all day long, your child will never have time to build up an appetite to try. Here is a sample eating schedule.

Sample eating schedule

  • Breakfast: 7 am 
  • Snack #1: 9:30 am
  • Lunch: noon 
  • Snack #2: 3 pm
  • Dinner: 6 pm 

What is a Snack vs a Treat

Society seems to conflate “snack” with “treat” a heck of a lot, especially when it comes to feeding kids. While I 100% believe in treats, and in fact, I also believe that sometimes we may want to make snacks out of treats (read up on how to deal with sugar and dessert with kids here), they are not the same thing. Instead, we want to think about a snack as a mini meal with the same kind of balance we would give them for a main meal. That means including two or more food groups and two or three of fibre rich carbs, healthy fats, and/or protein. That way, even if your kiddo fills up at snack time and doesn’t eat much at their main meal, you know they got lots of nutrition in regardless!

Best Storebought Kid’s Snacks

Below is a list of amazing healthy snack ideas you can give your children that are dietitian approved! 

Snack Bars

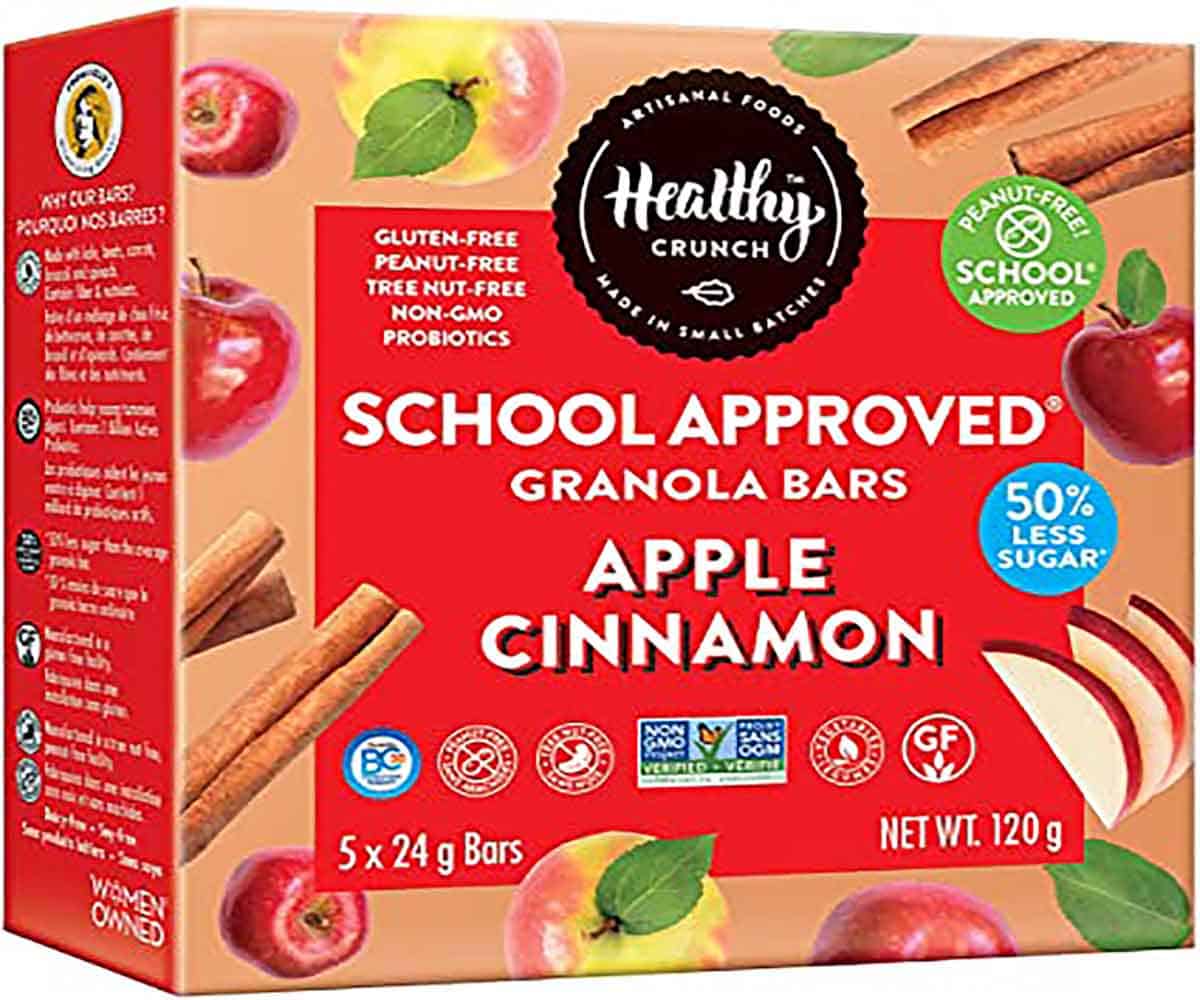
A red box of healthy apple cinnamon granola bars by the brand "Healthy Crunch".

Healthy Crunch Bars

My son loves these bars because they are naturally sweet, but they only have 2 grams of sugar per serving, plus they have 3 grams of protein and 4 grams of fibre! They’re also school safe!

Abbey Sharp, RD  www.Abbeyskitchen.com

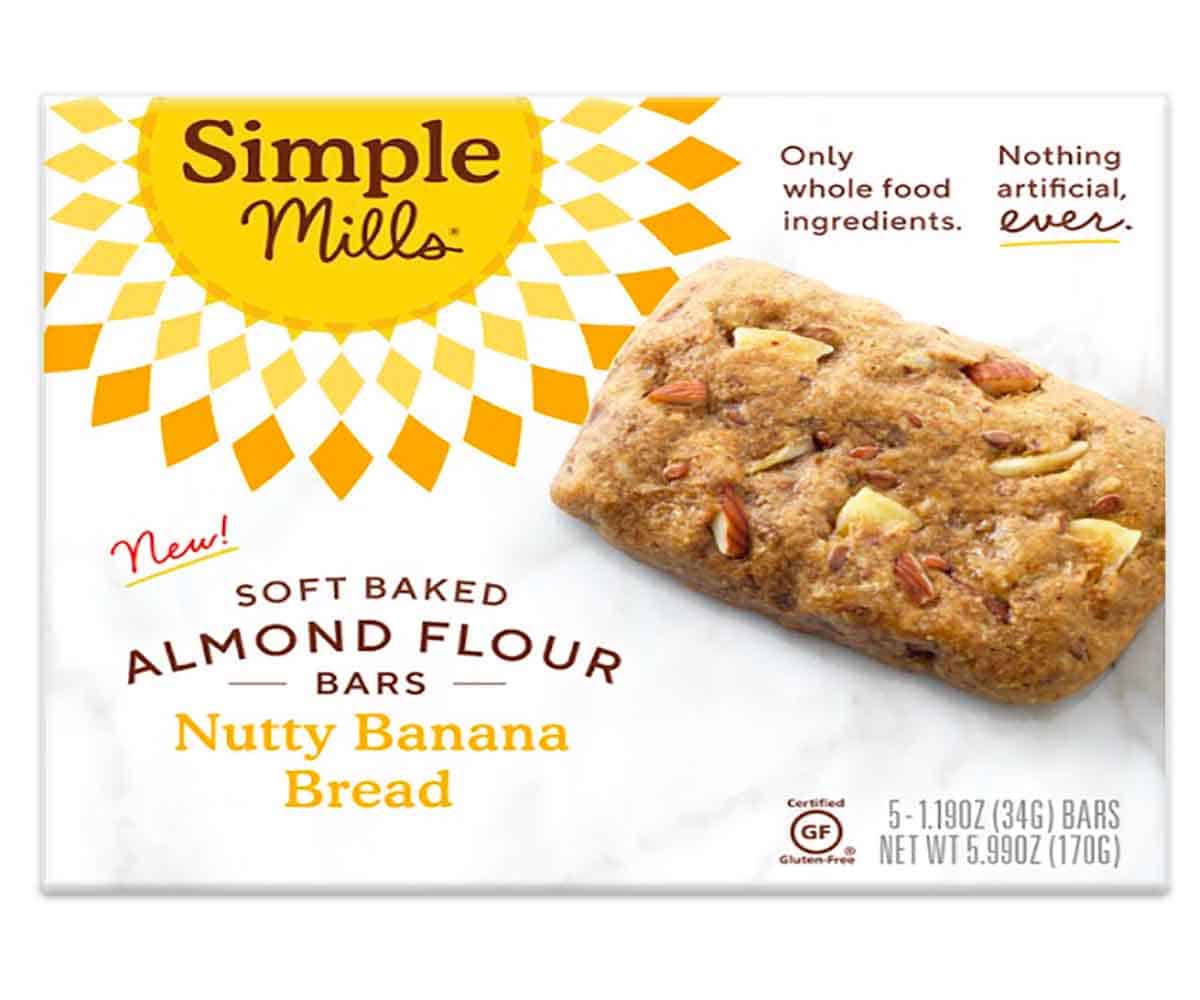
A box of nutty banana bread bars from the brand "Simple Mills".

Simple Mills Bars Nutty banana bread

This soft and nutty granola bar is made from almond flour and coconut flour.  It’s convenient, soft, and feels like you’re eating a slice of banana bread in a bar.  The best part is that it has only 6g of added sugar, so both myself and my daughters eat it for a snack!

 Marina Chaparro, Mom, RD https://www.nutrichicos.com/


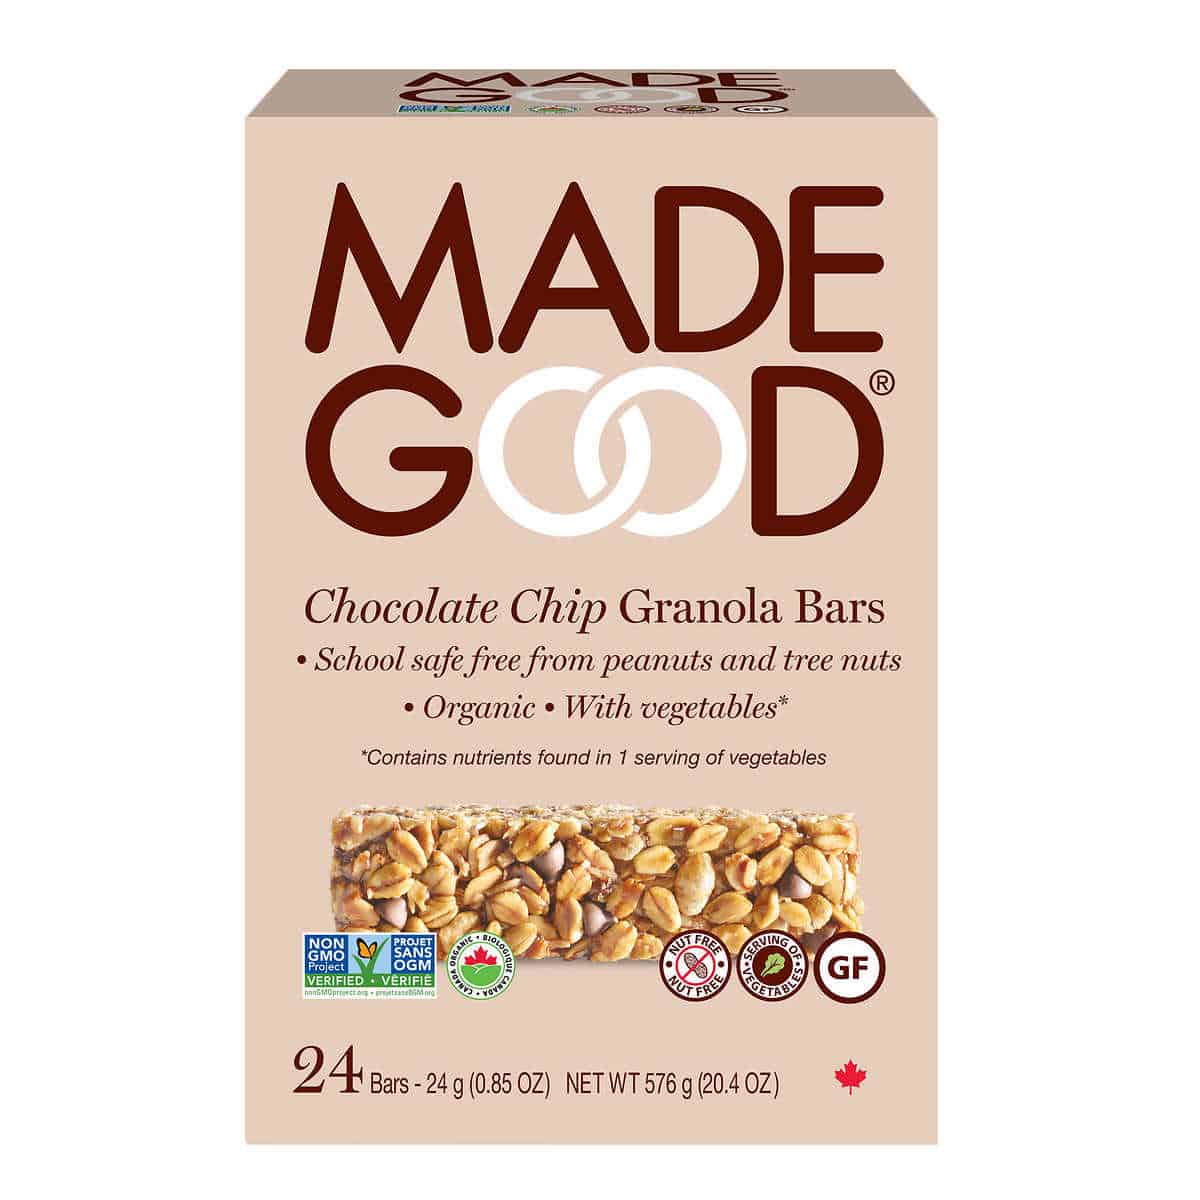
A box of chocolate chip granola bars from the brand "Made Good".

Made Good 

Made Good Chocolate Chip granola bars have 6g of sugar per bar, are fortified with vitamins and are totally free of any allergens – they make a great choice for a school snack.

Veronica La Marca, RD, CDE @eat2grow.kids.nutrition

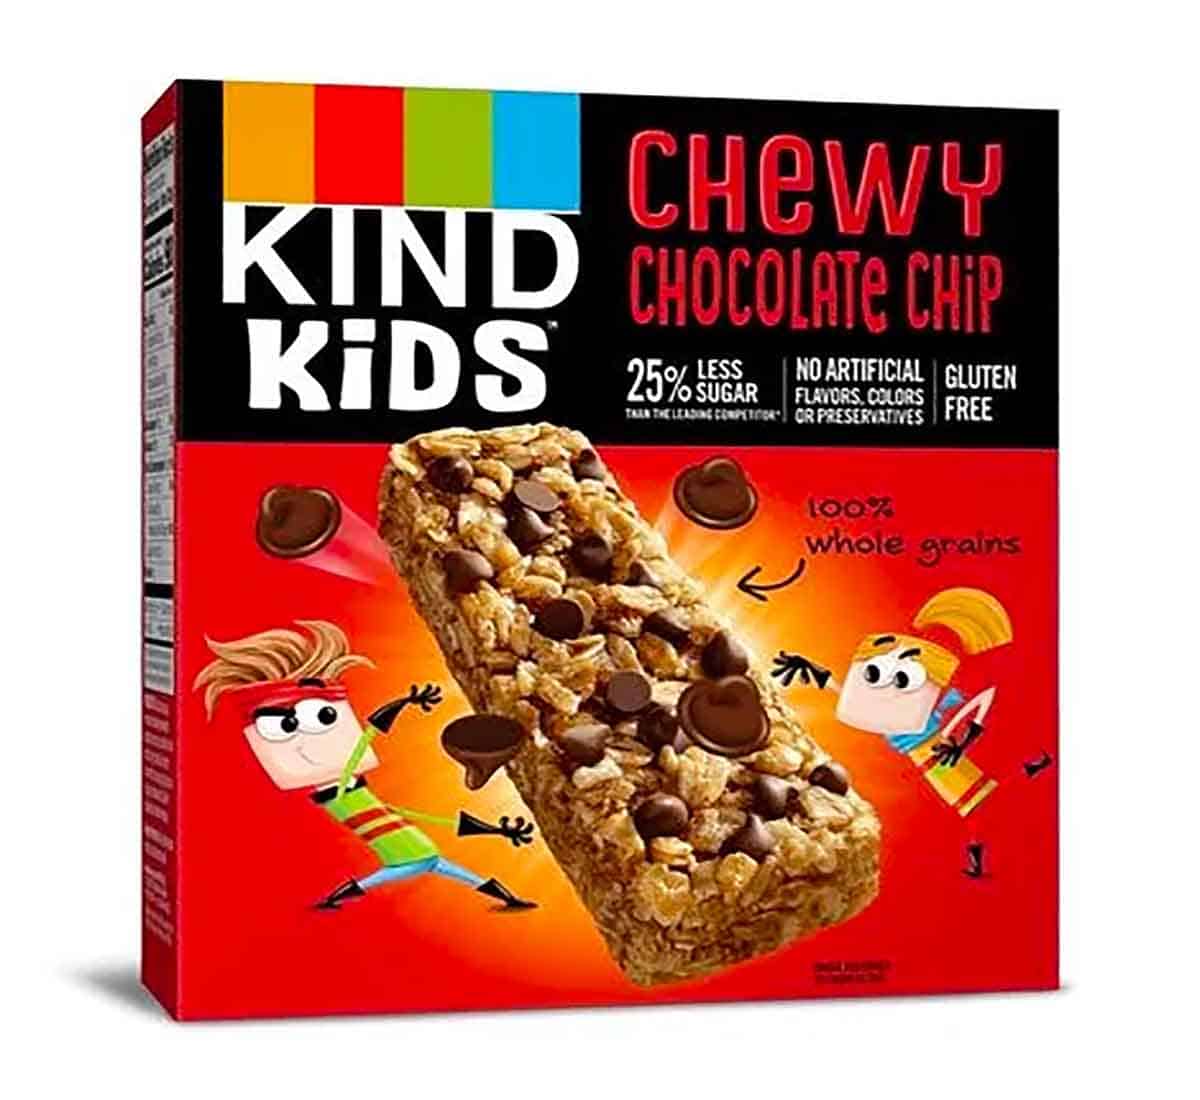
A red box of chewy chocolate chip granola bars by the brand "Kind Kids".

Kind Kids

Kind Kids granola bars are delicious, my kids love them! With 5g of sugar per bar these are a great option for a quick snack on the go.

Veronica La Marca, RD, CDE @eat2grow.kids.nutrition

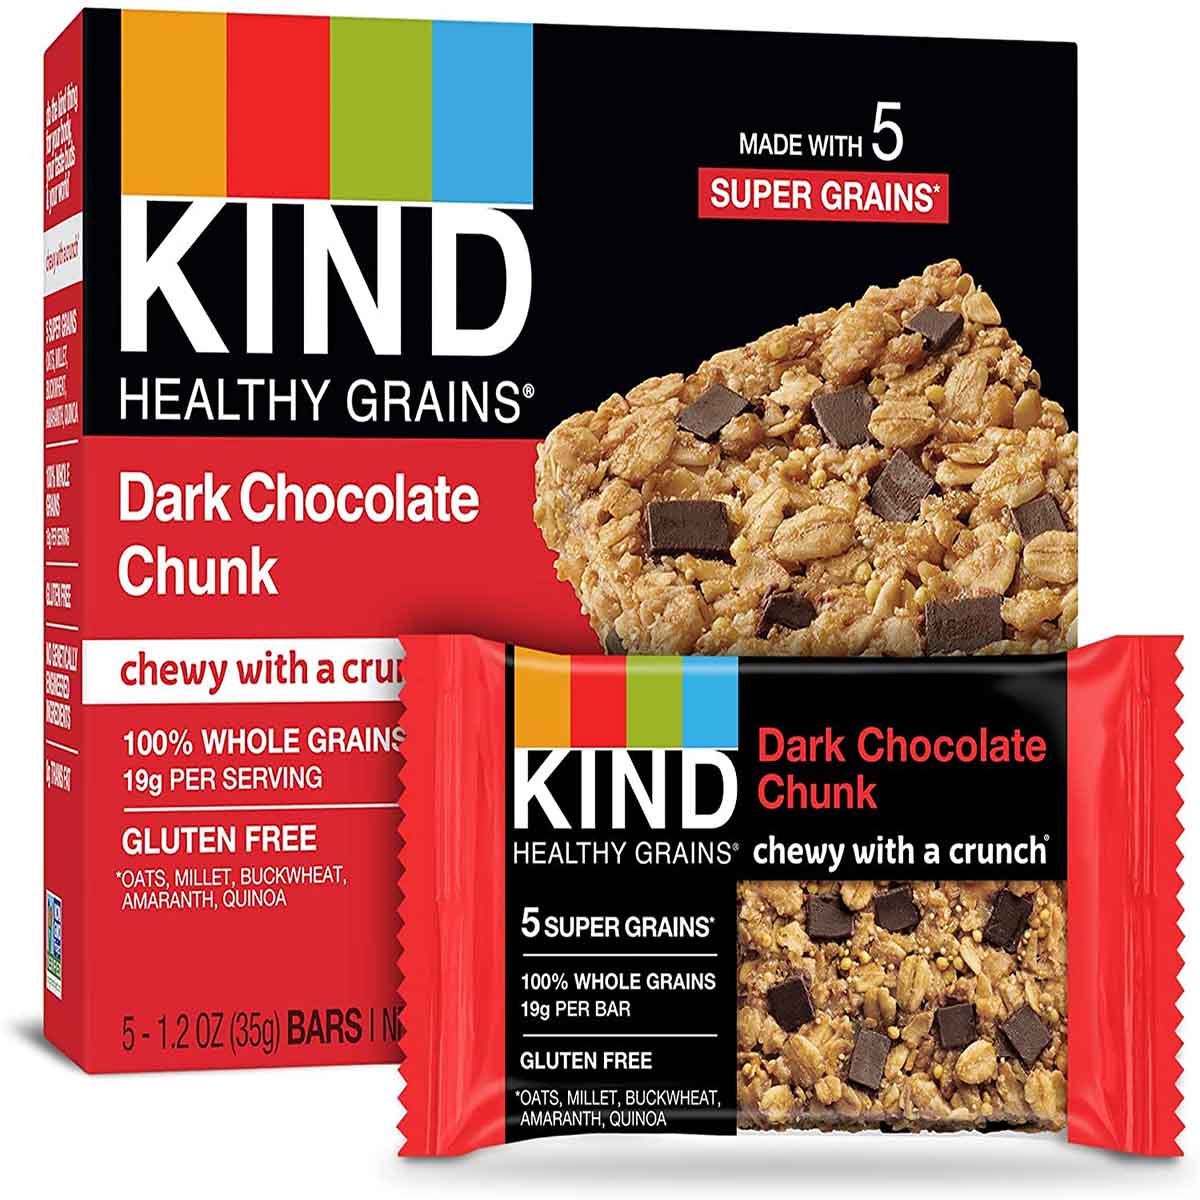
A red box of dark chocolate chunk granola bars from the brand "Kind Healthy Grains".

Kind Healthy Grains 

These snacks are filling (great for when I can’t offer them as part of a balanced snack) and most flavours only contain 6g of added sugar!

Veronica La Marca, RD, CDE @eat2grow.kids.nutrition

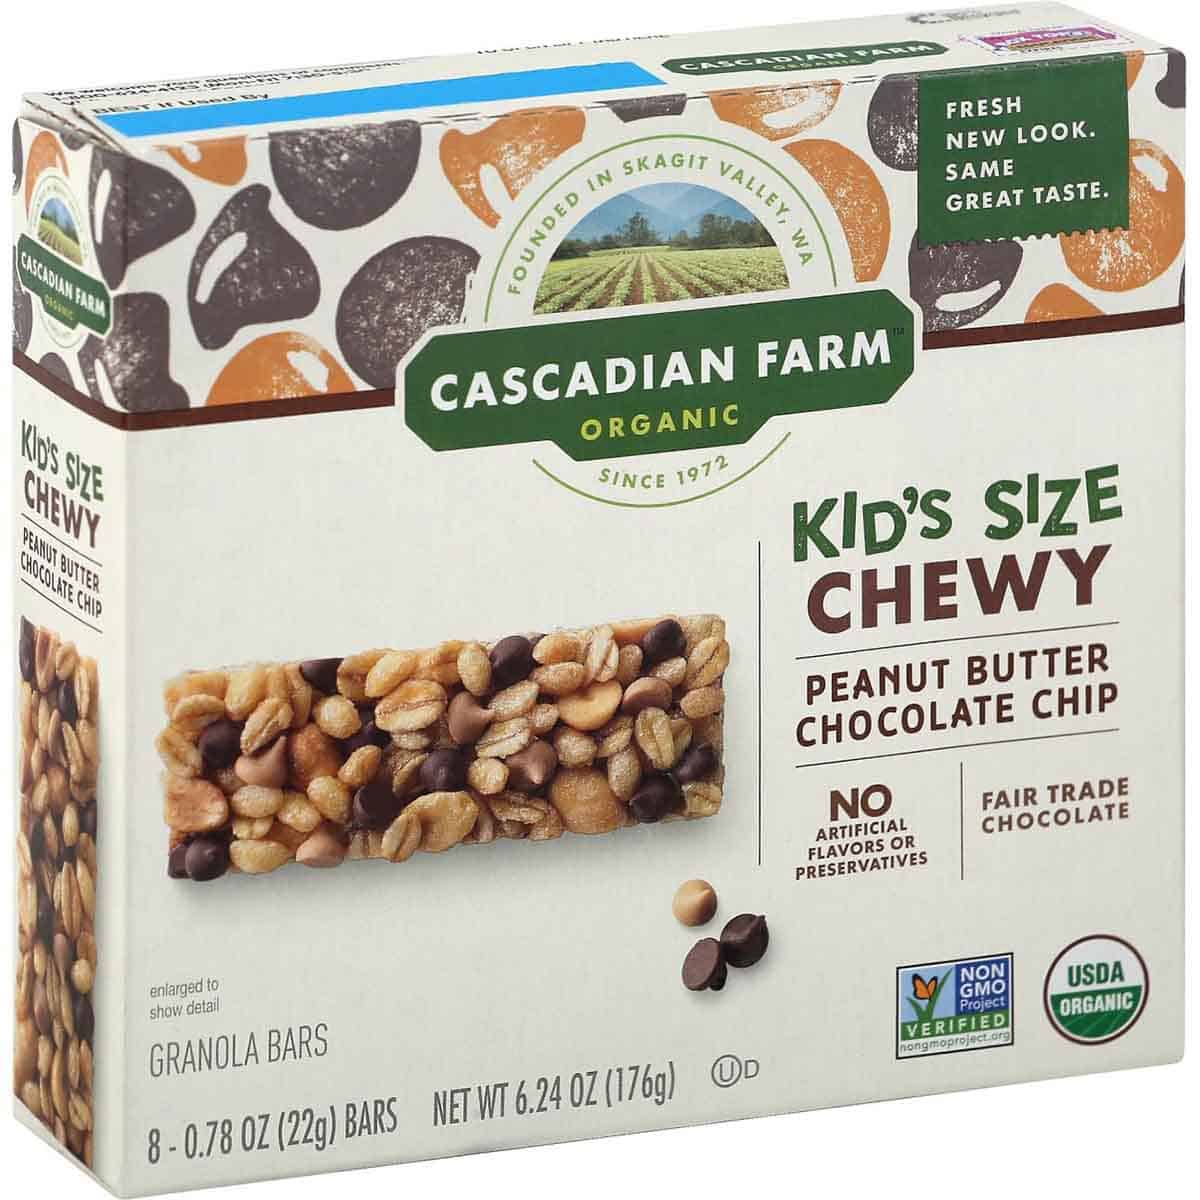
A box of peanut butter chocolate chip bars by the brand "Cascadian Farm".

Cascadian Farms Kid’s Size Chewy 

“The oatmeal raisin flavour are delicious, and contain only 5g of added sugars (which can be hard to come by with granola bars). I also used this flavour to bridge my kids into eating oatmeal with raisins and cinnamon raisin toast!

Veronica La Marca, RD, CDE @eat2grow.kids.nutrition

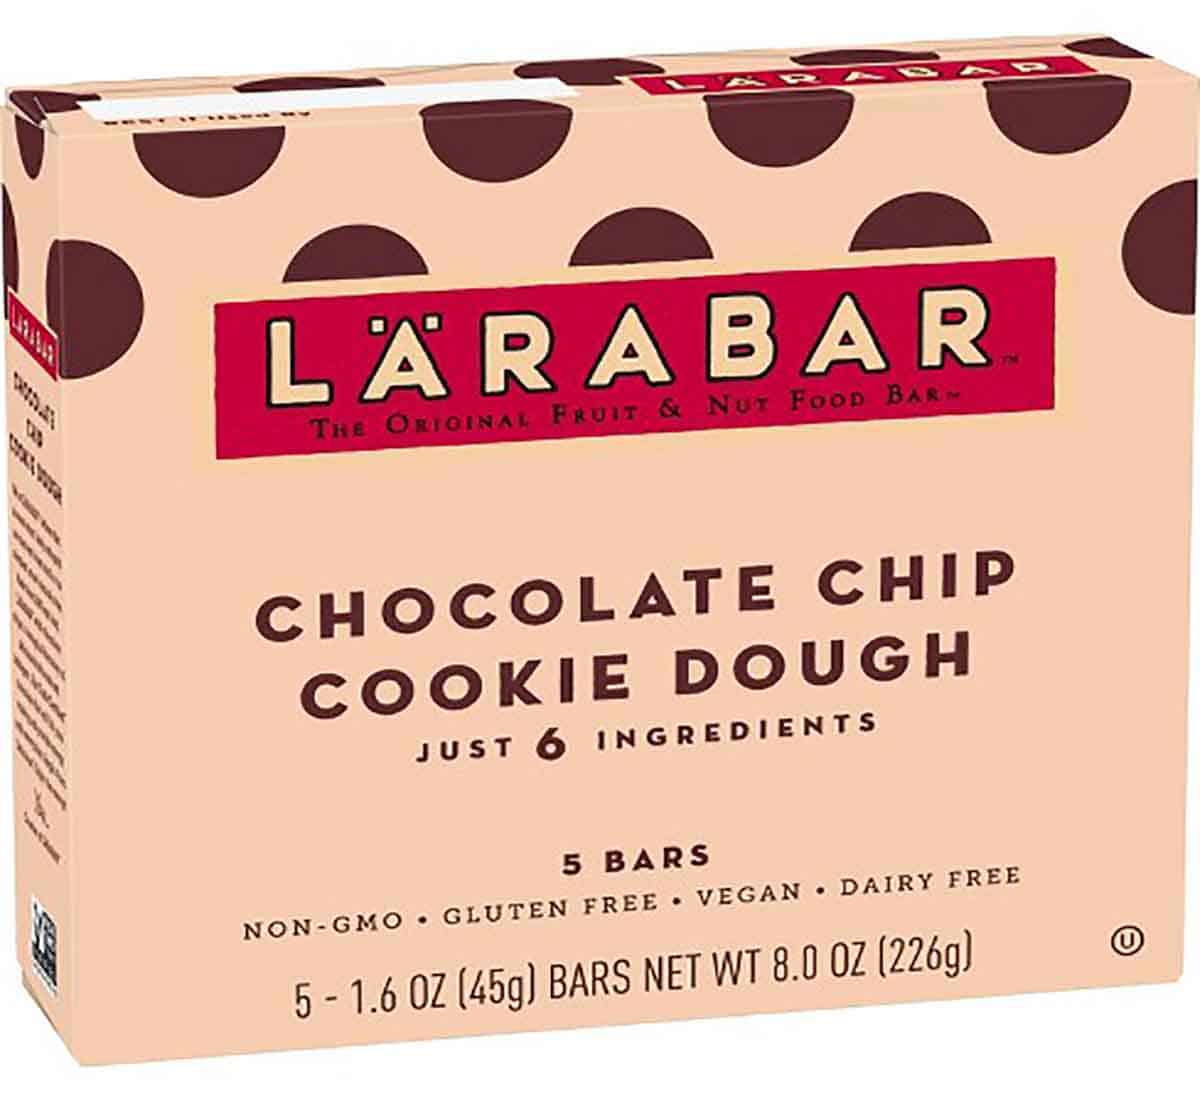
A box of lara bars as an example of a healthy packaged snack.

Lara Bars Pecan Pie

MY 8yr old loves this ONLY 3 ingredients bar dates+almonds+pecans. It is vegan, soy free, gluten free. 

Tejal Pathak, MS, RD, LD, CDCES www.Tejrd.com

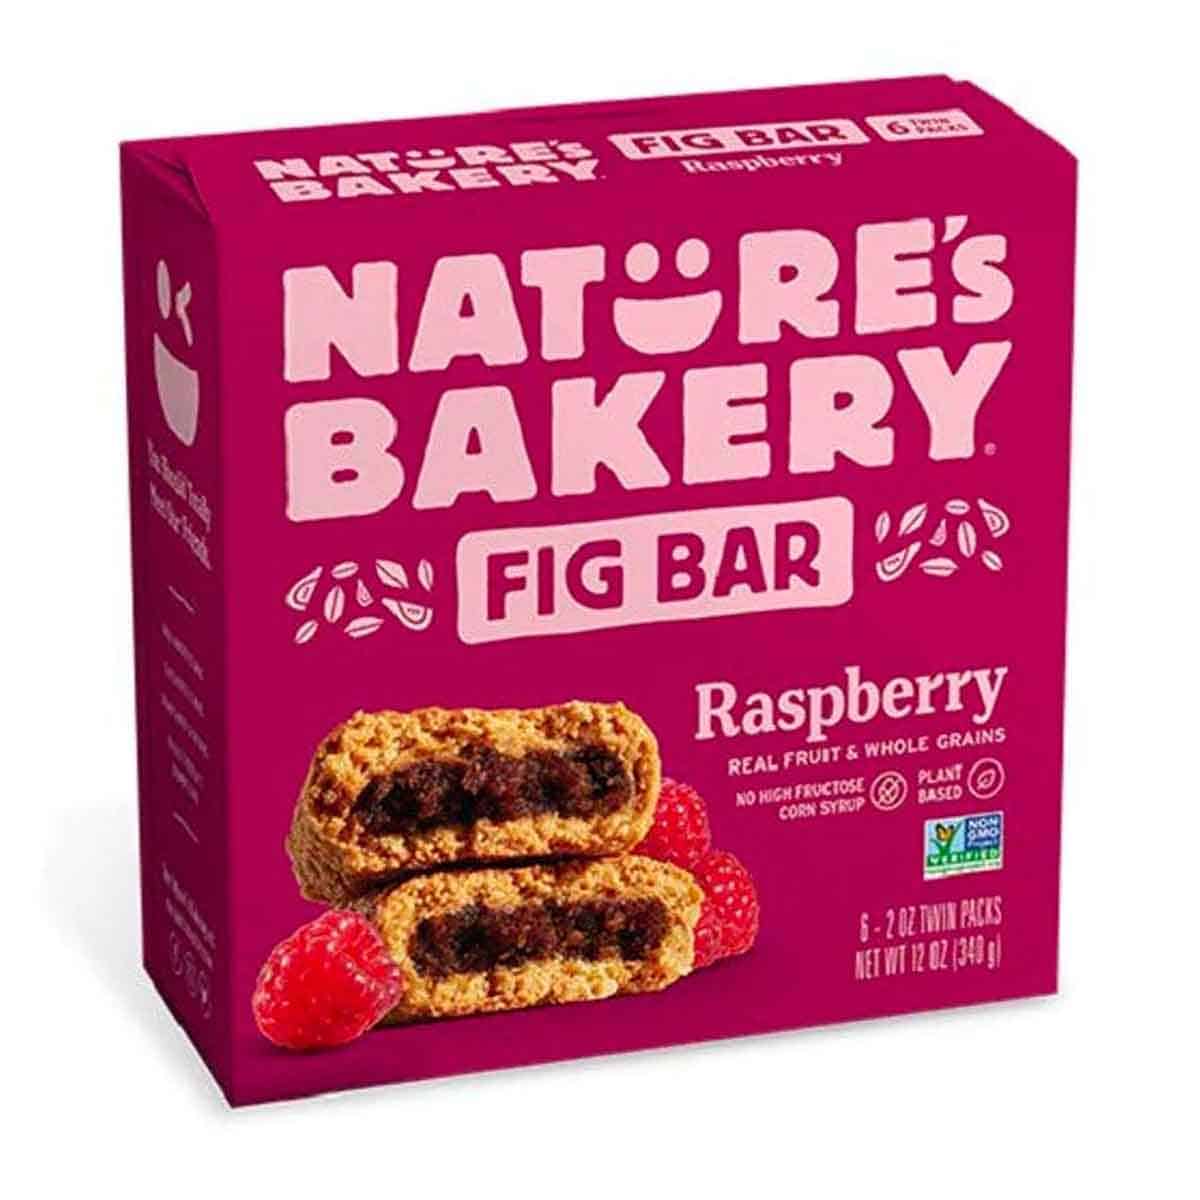
A pink box of raspberry fig bars by "Nature's Bakery".

Whole Wheat Raspberry Fig Bars from Nature’s Bakery

These whole wheat fig bars are a good source of fiber and a soft and safe snack choice when on-the-go with babies and toddlers!

Stacey Mattinson, MS, RDN

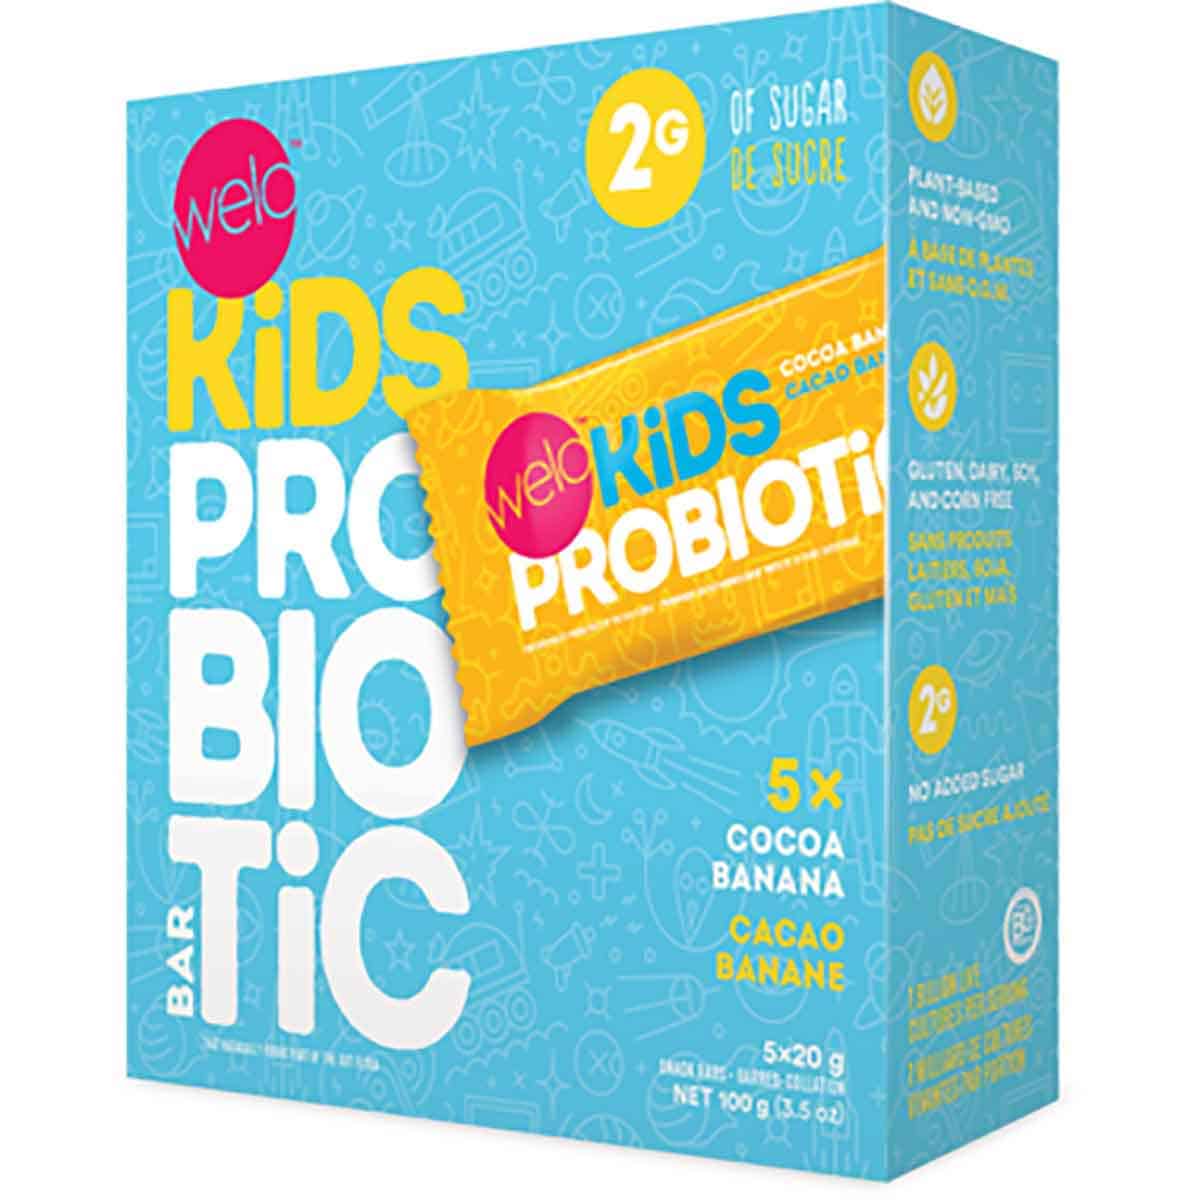
A blue box of kids probiotic bars by the brand "Welo".

Welo Kids Probiotic Bars

These bars have just 2 grams of sugar per bar plus 2 grams of fibre and they come in delicious kid-friendly flavours like chocolate chip!

Abbey Sharp, RD www.abbeyskitchen.com

Dairy Snacks 

A whole piece of babybel cheese.

Babybel

I grew up with the little wax covered cheese and my son thinks it is so much fun to unwrap them! I love that they are relatively low in salt but have 5 grams of protein each and are a good source of calcium!

Abbey Sharp, RD www.abbeyskitchen.com

A package of nano cheese rolls.

IOGO Nano Cheese Rolls

Who doesn’t like to play with their food? My son loves to unwrap these into a long roll. I love that he can bite off little pieces instead of putting a huge chokable chunk in his mouth. Plus, each roll has 4 grams of protein and 35% less salt than most string cheese.

Abbey Sharp, RD www.abbeyskitchen.com


A container of danone yogurt with no added sugar.

Danone No Sugar Added Yogurt

I love that this yogurt has no sugar added, but it has a delicate light fruit flavour that my kid loves. It’s light and creamy and has 4 grams of protein per 100 g serving.

Abbey Sharp, RD www.abbeyskitchen.com

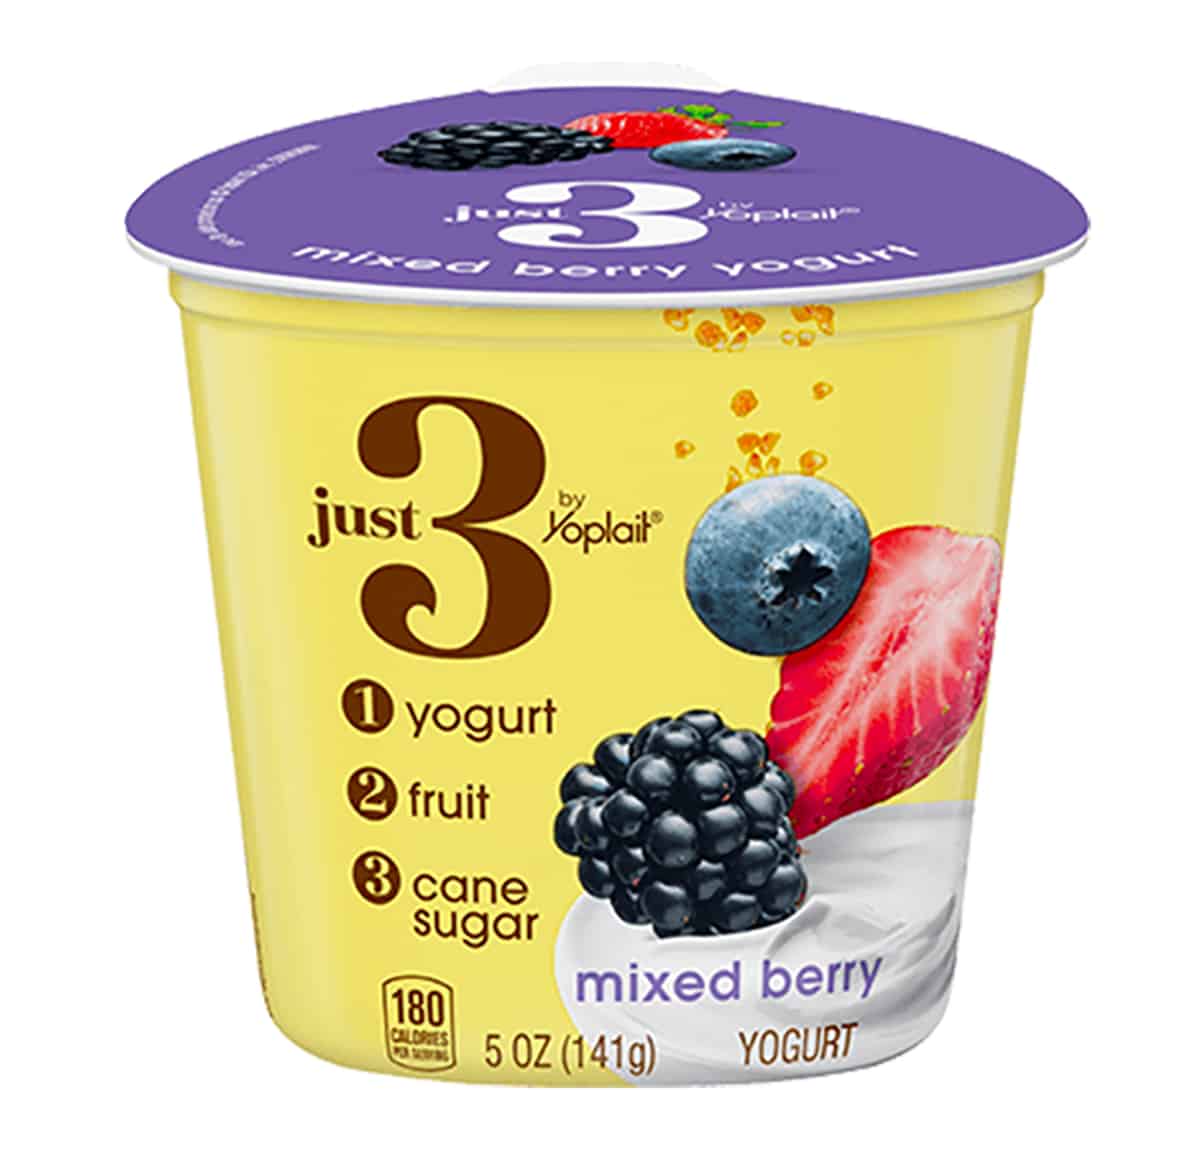
A package of Just 3 Yogurt by the brand yoplait.

Just 3 Yogurt by Yoplait 

Technically not a “kids yogurt,” which is exactly why I love it.  It’s made with just 3 ingredients: cultured milk, real fruit and cane sugar, yet one container has only 6-8g of added sugar, which is way less than traditional kids yogurts which may yield >8g for a 3oz pouch. I also like whole milk products for younger kids. This one is with whole milk, which yields more calories and fat-great for little ones since they need a higher intake of calories from fat.

Marina Chaparro, Mom, RD https://www.nutrichicos.com/

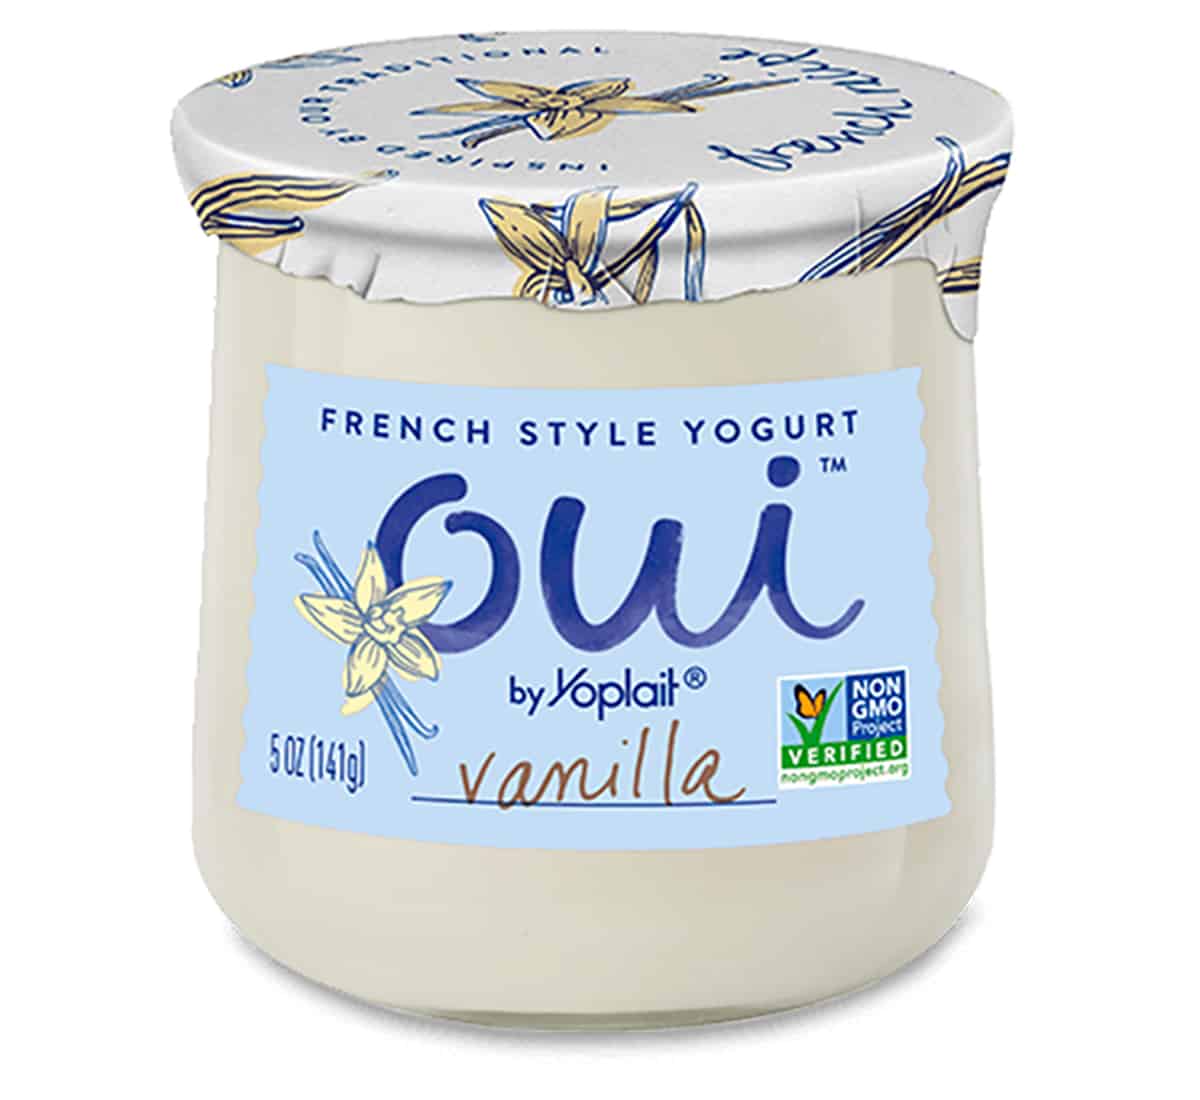
A package of oui yogurt by Yoplait.

Oui by Yoplait 

My kids’ (and my!) my favorite store bought snack is the vanilla flavored Oui by Yoplait French Style Yogurt. I love the custard-like consistency and the fact that it‘s made with very few, simple ingredients. It’s a tasty way to get more probiotics into my kids’ diet, and fun to use different toppings on it (chopped strawberries are a favorite) for a filling snack. And I adore that the glass jars can be reused in a million ways, from storage containers to votive candle holders!

Melissa Nieves, LND,RD,MPH, https://fadfreenutrition.nutricionalgrano.com/ 

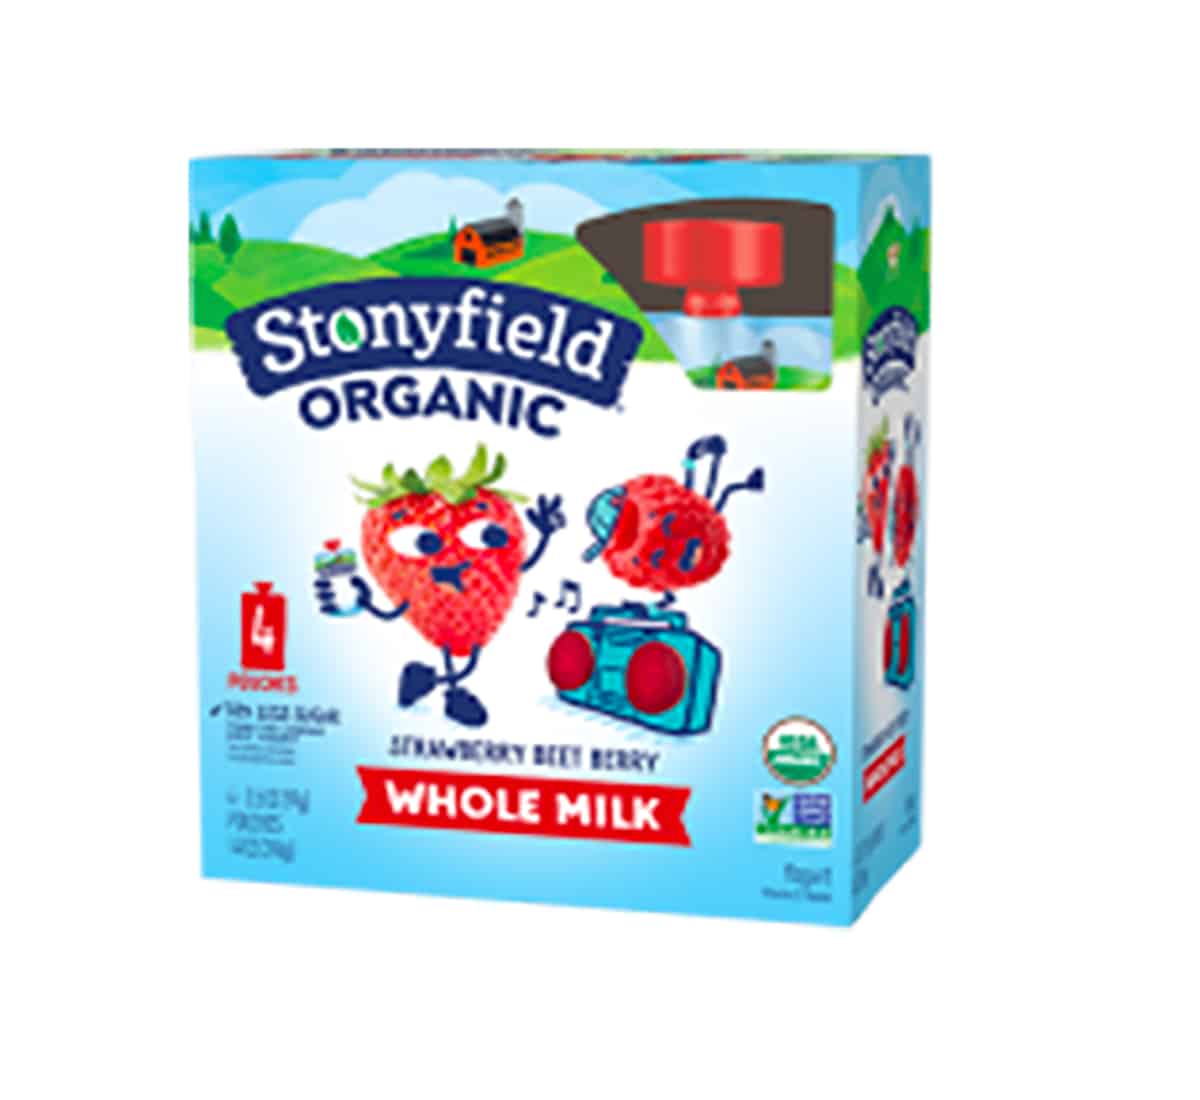
A package of strawberry beet yogurt by Stoneyfield.

Stonyfield Whole Milk Strawberry Beet Yogurt 

One of my favorite ‘convenient’ products that I like to give my 2 year old little girl is the Stonyfield Whole Milk Strawberry Beet Yogurt and their other flavor varieties. This is because it contains less sugar than other flavored kids yogurts at 4 g per pouch, active cultures to support gut health, easy for an on-the-go snack and has added vegetable servings in it to provide fiber along with the calcium and vitamin D found in yogurt.  

Carina Myatt MS, RDN, LD

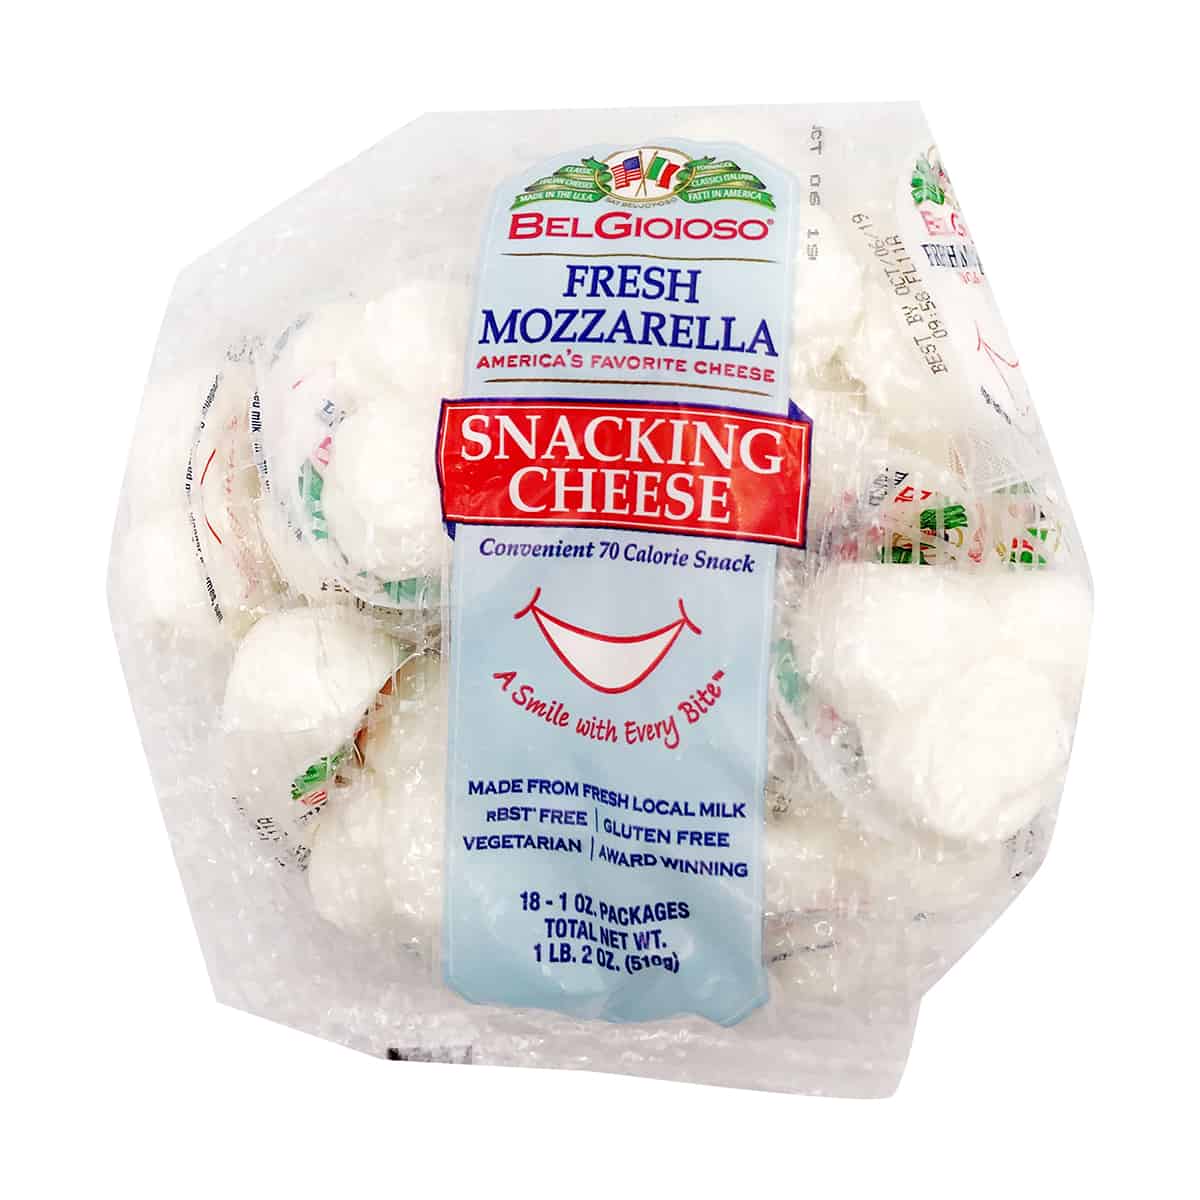
A package of fresh mozzarella snacking cheese.

Mozzarella Snacking Cheese

As a mother of four, finding a convenient snack food everyone can agree on is a blessing. As a dietitian and culinary coach, I love these prepackage servings of mozzarella cheese for their flexibility [taste great with crackers, fruits, nuts, or vegetables] and nutrient density [nice balance of protein and fat].

 Jeanne Petrucci, MS, RDN, www.livingplate.org

Savory Snacks 

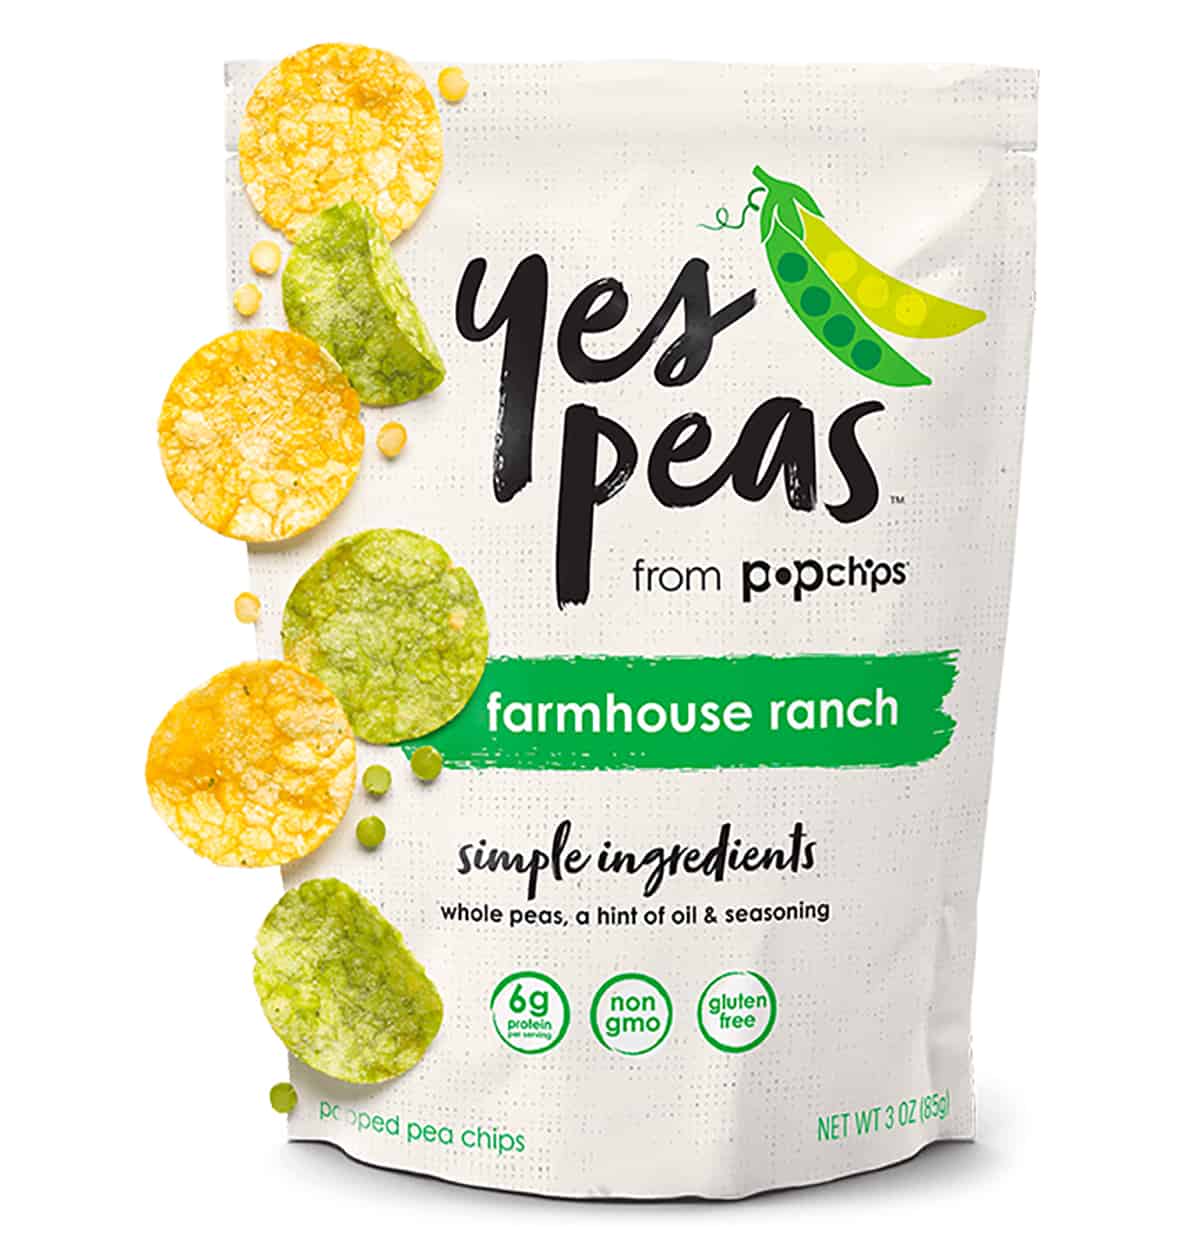
A package of "Yes Peas Pop Chips" as a healthy packaged snack.

Yes Peas from Pop Chips  

It is crunchy and chips that I don’t have to say no to, did I mention healthy too? It has 6gm protein,  3gm fiber and 16gm carbohydrate in 1oz serving. 

Tejal Pathak, MS, RD, LD, CDCES www.Tejrd.com

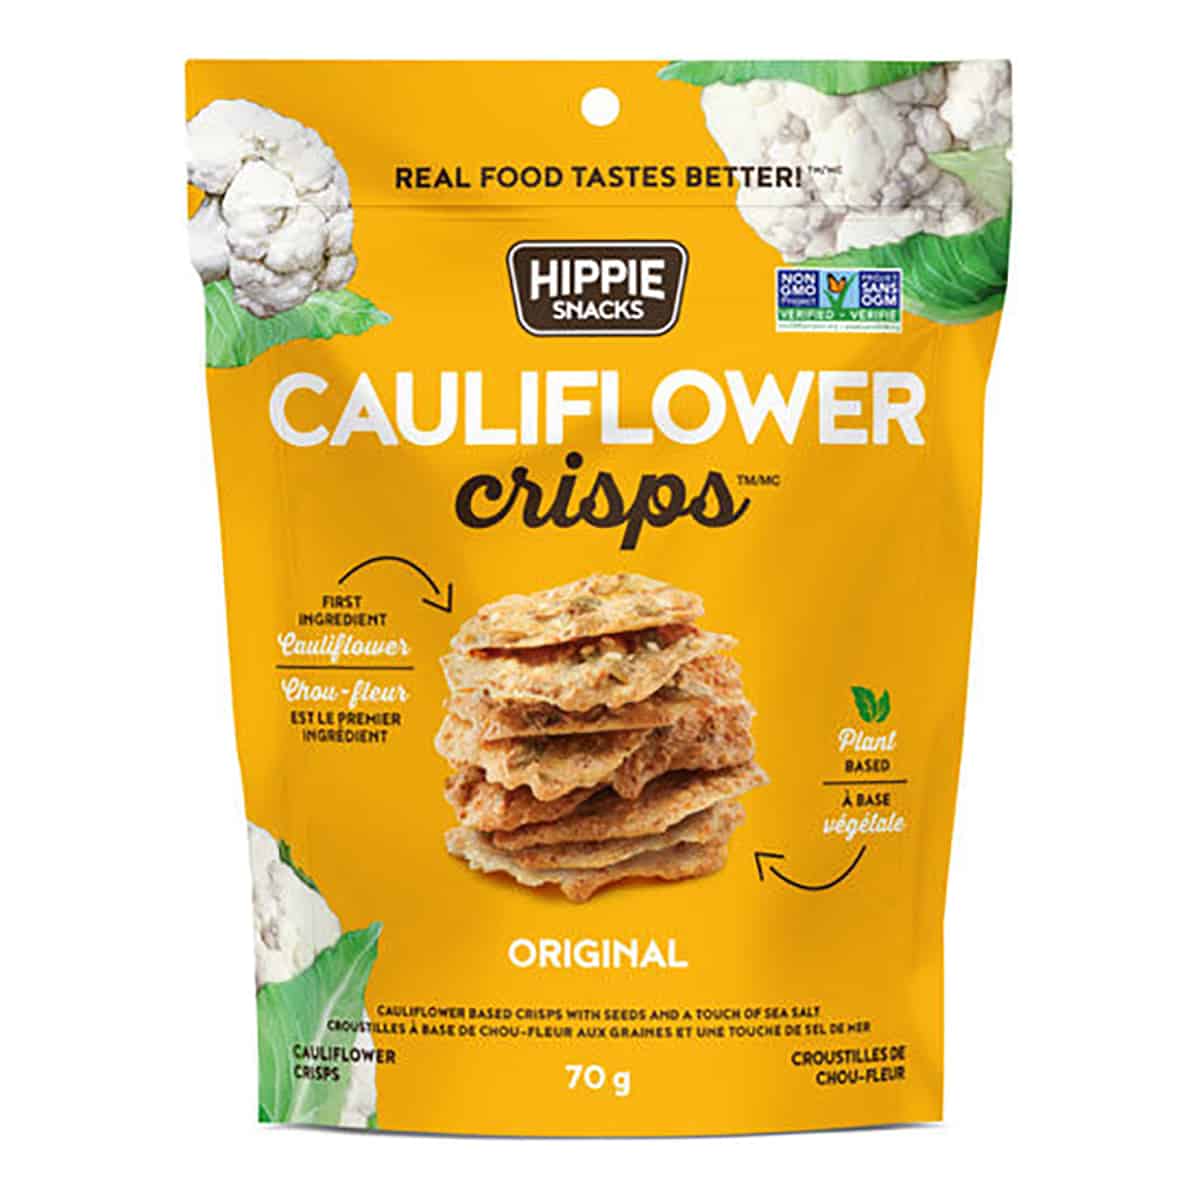
A package of cauliflower crisps from the brand "Hippie Snacks" as an example of a healthy packaged snack.

Hippie Snack Cauliflower Crisps

These crackers are made with cauliflower, seeds and brown rice flour and have 5 grams of protein per serving! They also come in avocado and almond varieties in a bunch of flavours.

 Abbey Sharp, RD www.abbeyskitchen.com

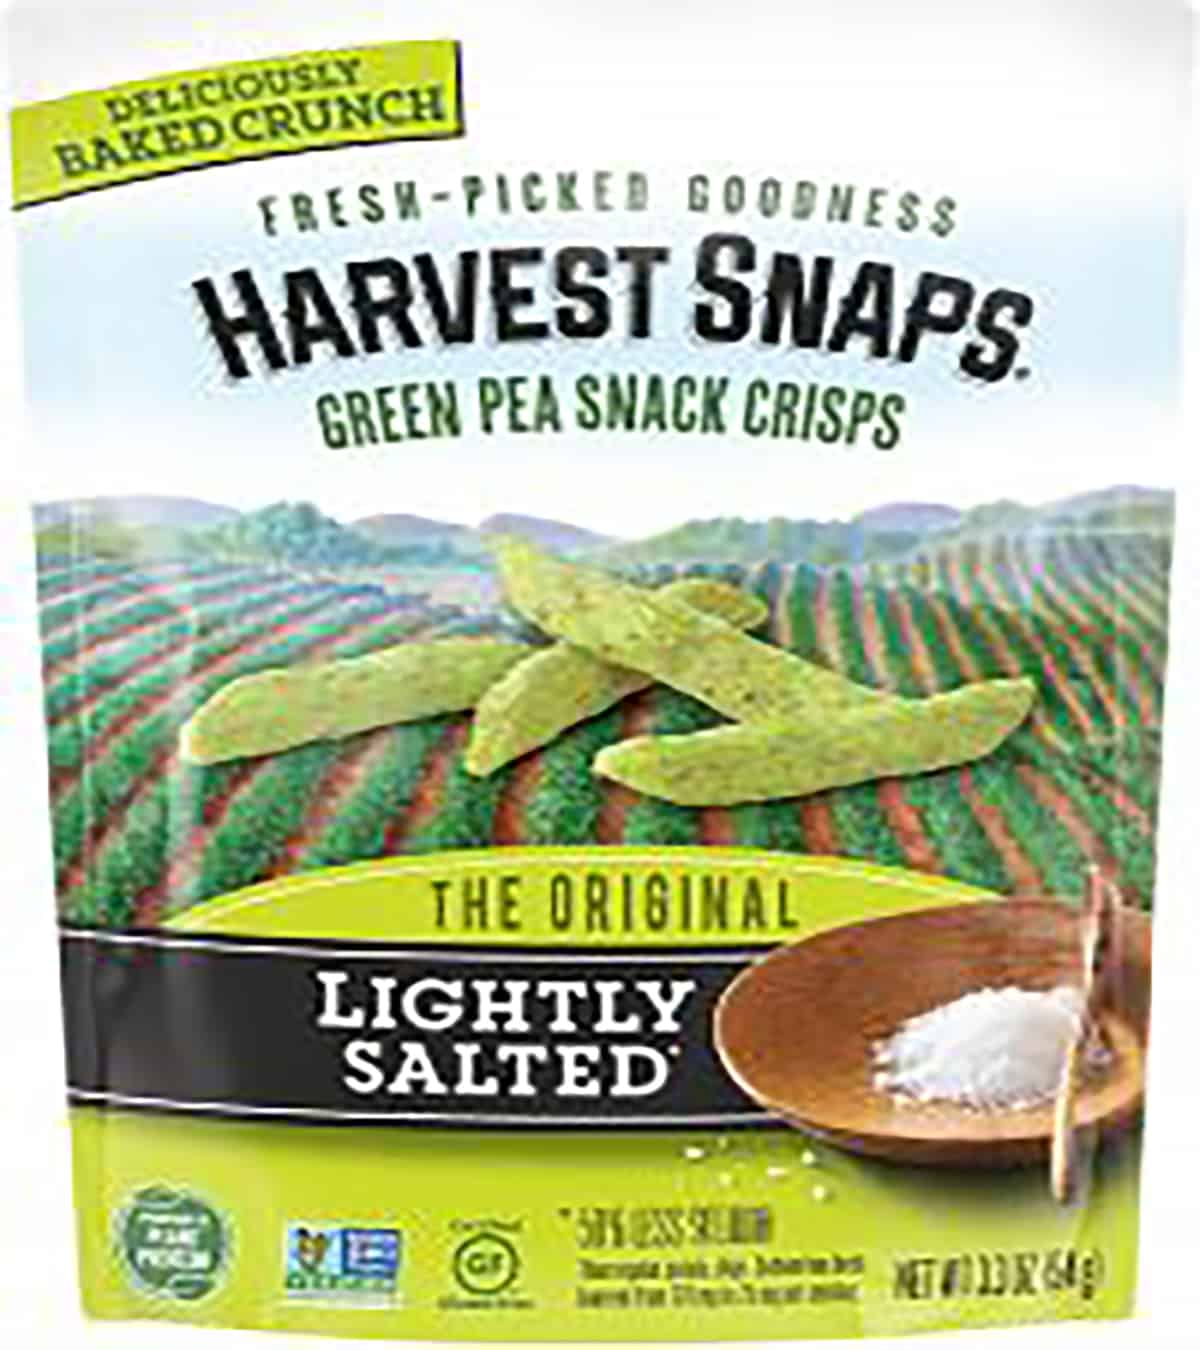
A package of harvest snack green pea crisps.

 Harvest Snaps – Lightly salted

This snap peas flavor tastes good and are a good substitute for regular chips. It has 5gm fiber, 5gm protein and 16gm carbohydrate. It is crunchy and yummy!! 

Tejal Pathak, MS, RD, LD, CDCES www.Tejrd.com

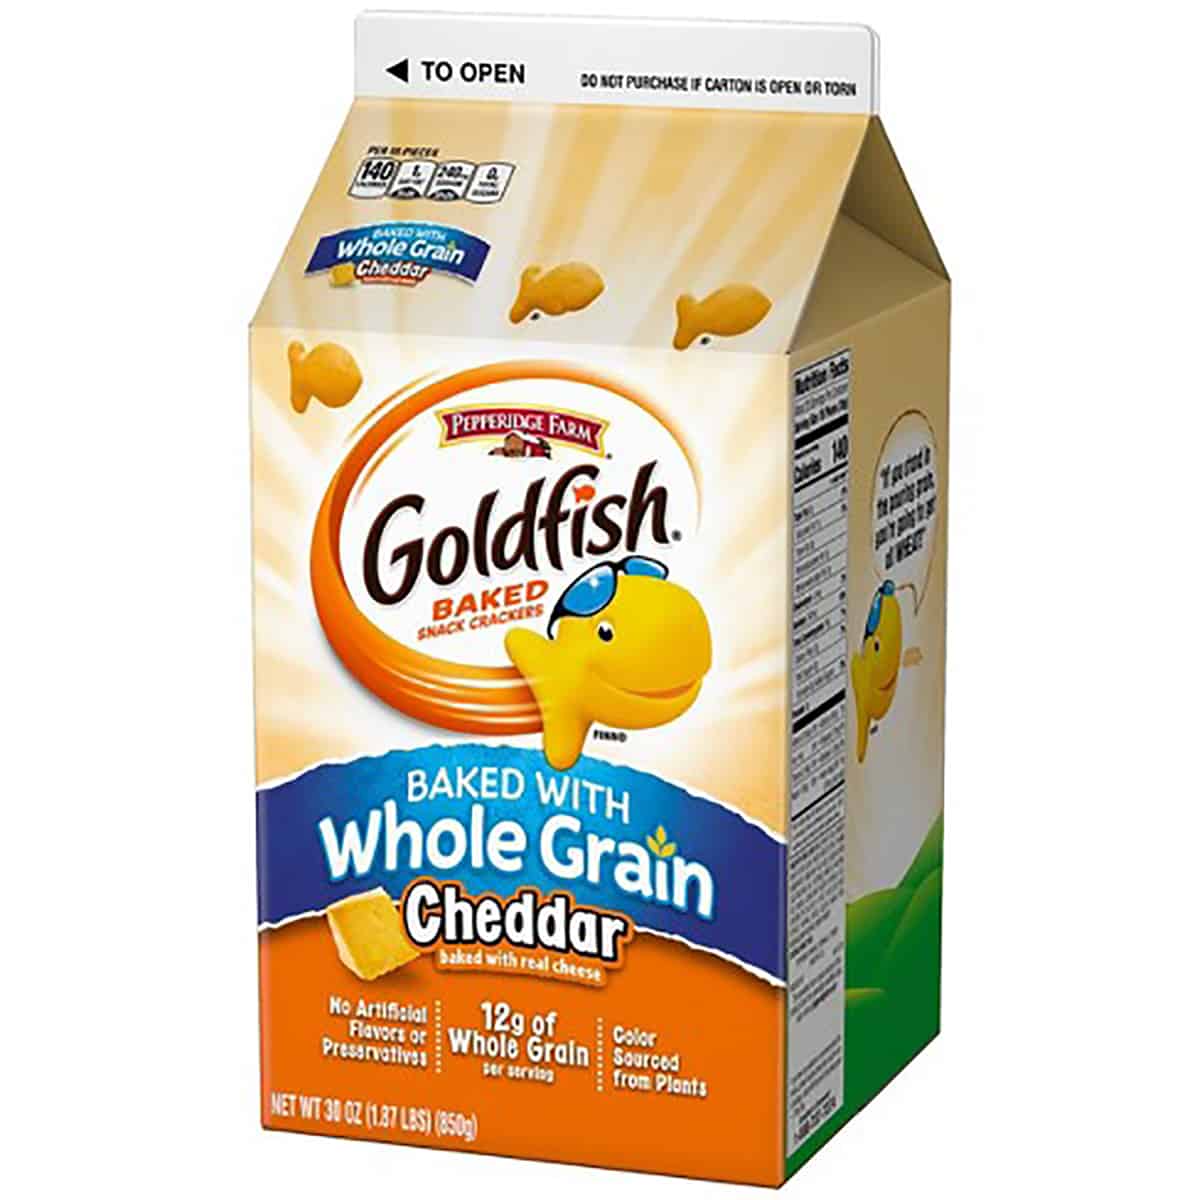
A package of whole grain goldfish crackers as an example of a healthy packaged snack.

Goldfish Baked with Whole Grains

Take every child’s favorite cracker, then add in a little extra fiber using whole wheat flour, and you’ve got goldfish baked with whole grains.

Stacey Mattinson, MS, RDN www.staceymattinson.com

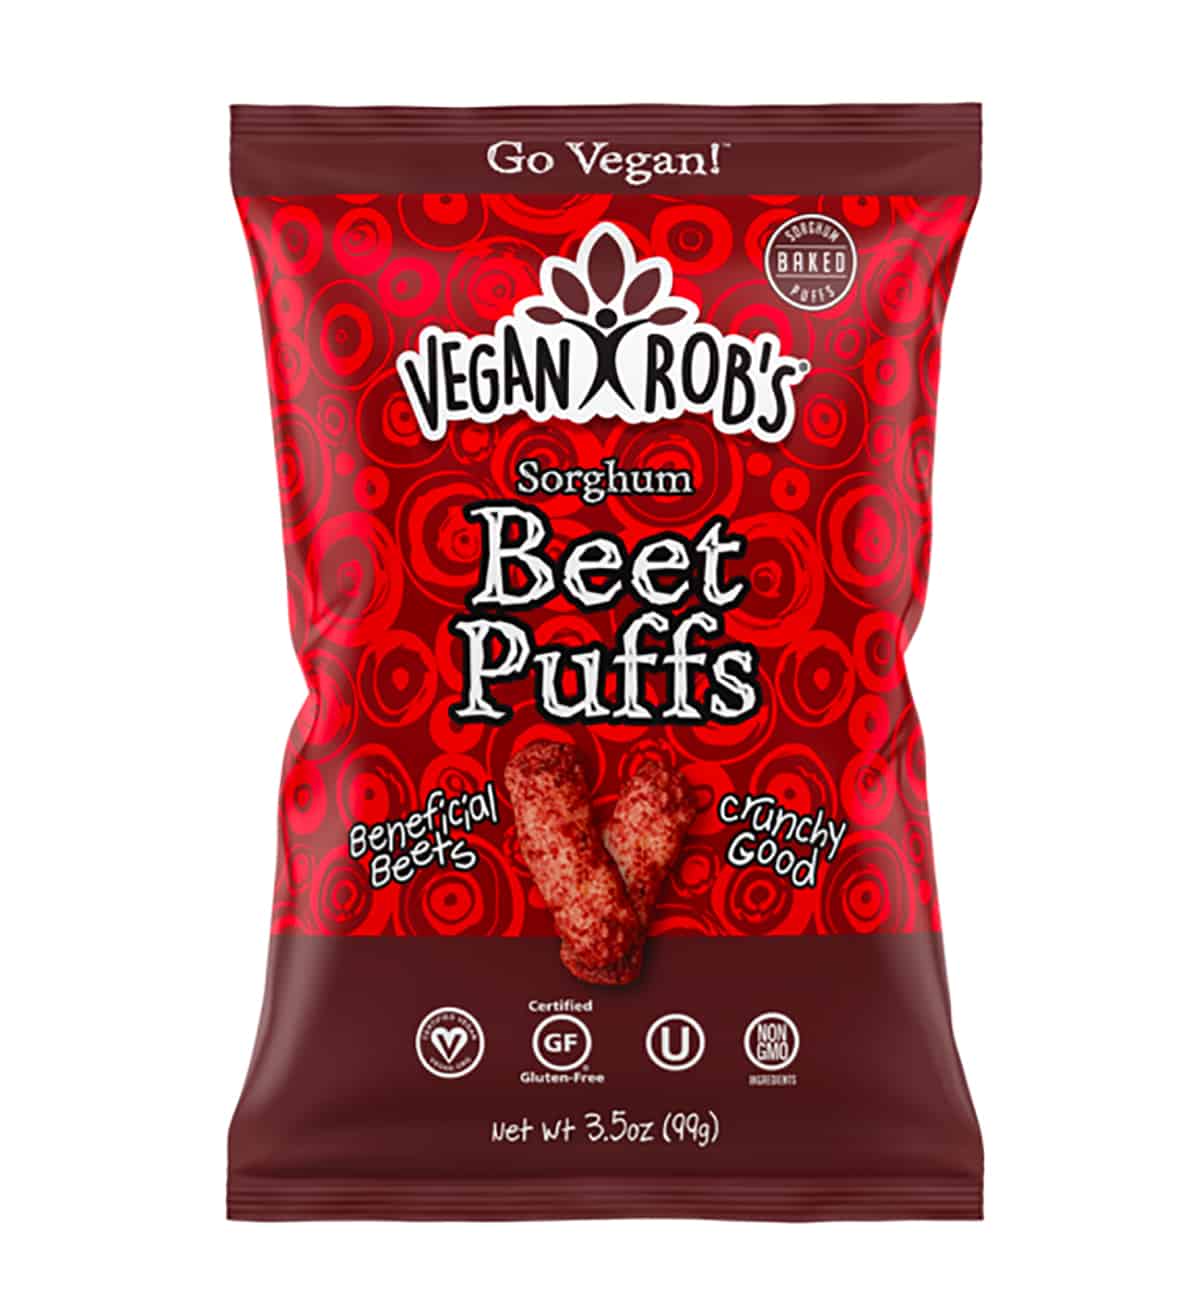
A package of beet puffs from the brand "Vegan Rob's".

 Vegan Rob’s Sorghum Beet Puffs

My son is officially obsessed with these puffs. They have a simple ingredient list and 3 grams of protein per serving, plus they’re relatively low in salt compared to other chips.

Abbey Sharp, RD www.abbeyskitchen.com

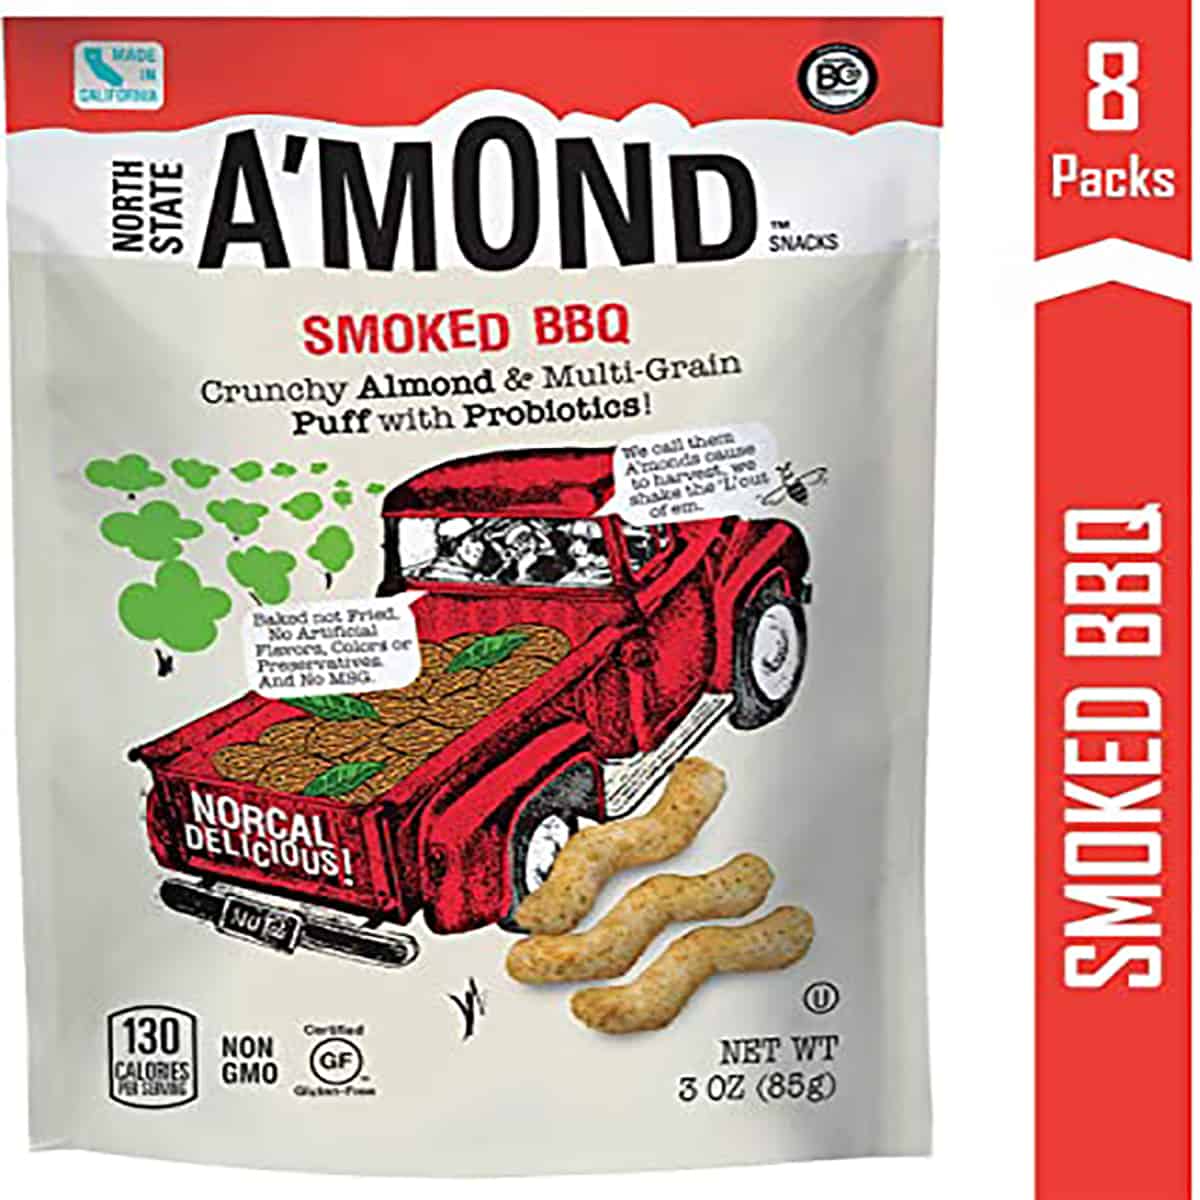
A package of almond puffs by the brand "A'mond".

A’mond Snacks Almond & Multigrain Puffs

These puffs are made with almonds and whole grains that are baked, instead of fried.

Abbey Sharp, RD www.abbeyskitchen.com

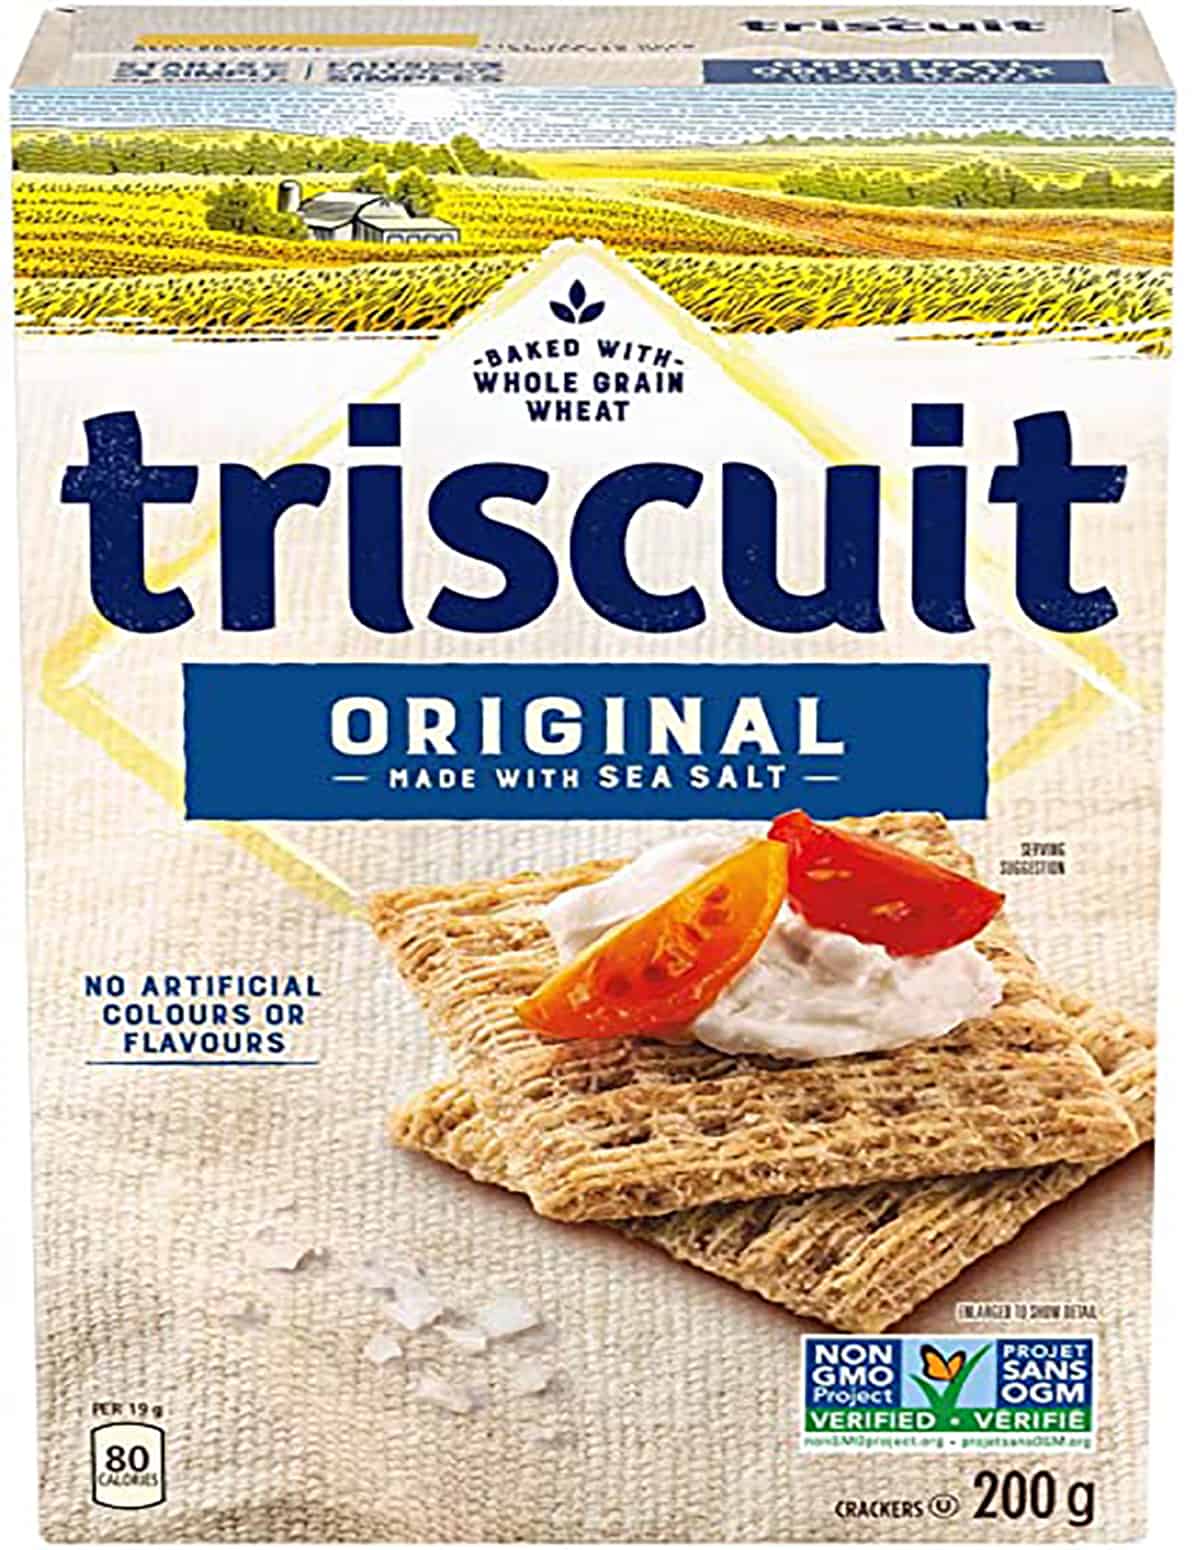
A box of triscuit crackers as an example of a healthy packaged snack.

Triscuit Crackers 

I have 2 teenage girls that snack A LOT. My girls are big fans of Triscuit crackers. They often eat them with a cheese stick or solo. I like them because they’re whole wheat, contain few ingredients and are a decent source of fiber. I also like the variety of flavors. It keeps them both happy.

-Lisa Andrews, MEd, RD, LD www.soundbitesnutrition.com

Sweet Snacks 

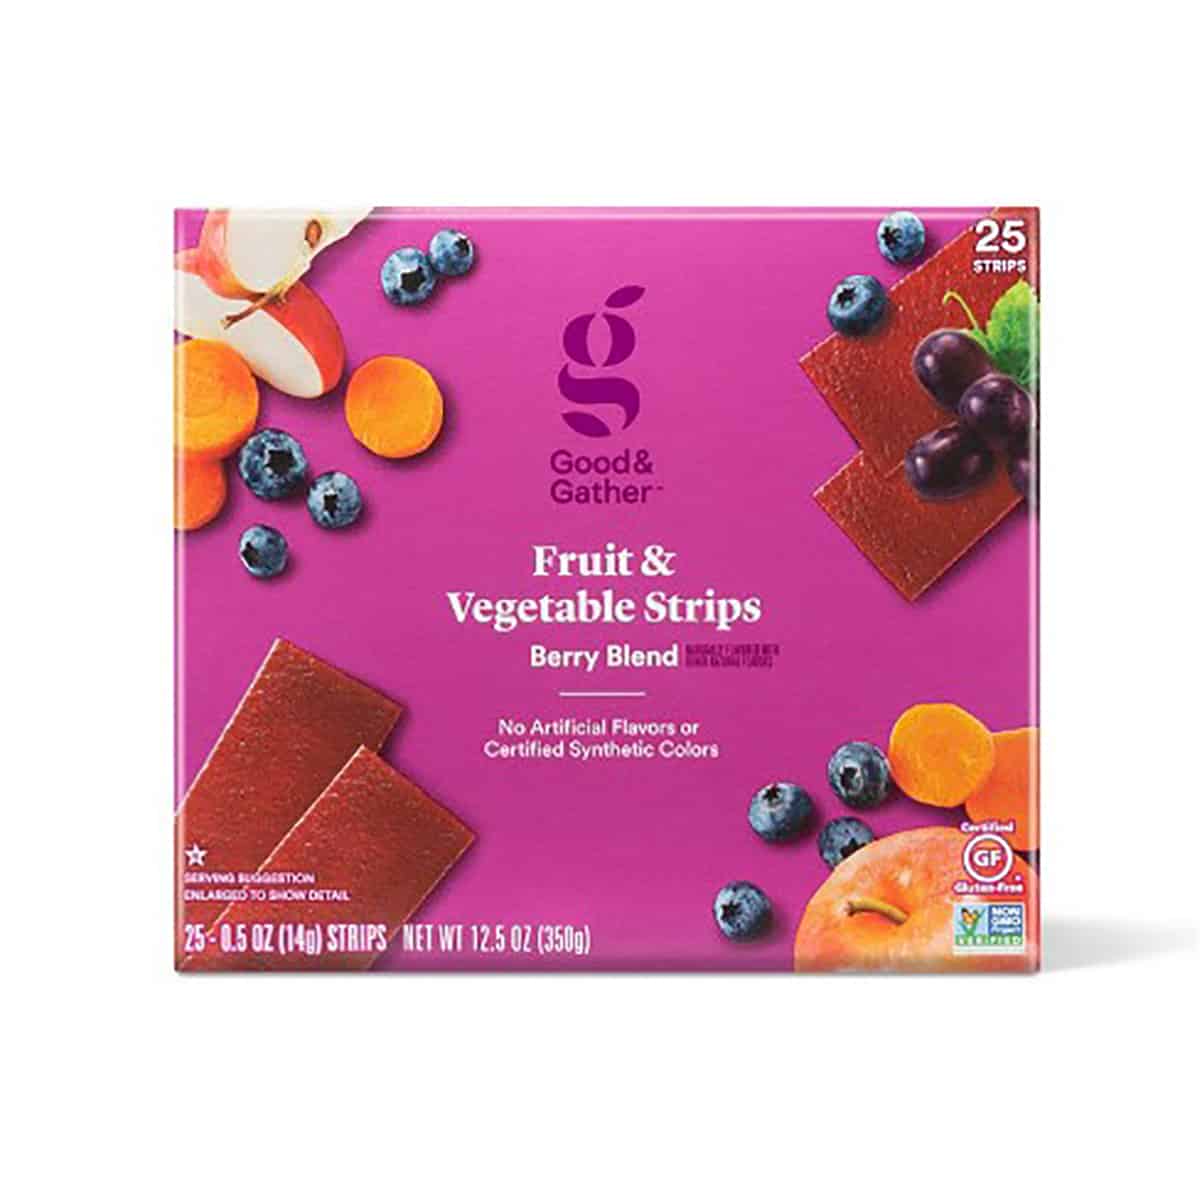
A box of fruit and vegetable strips as an example of a healthy packaged snacks.

Good & Gather Fruit and Vegetable Strips

This product rolled out and created by Target is made 100% of fruit and vegetable purees and juices. 

Stacey Mattinson, MS, RDN


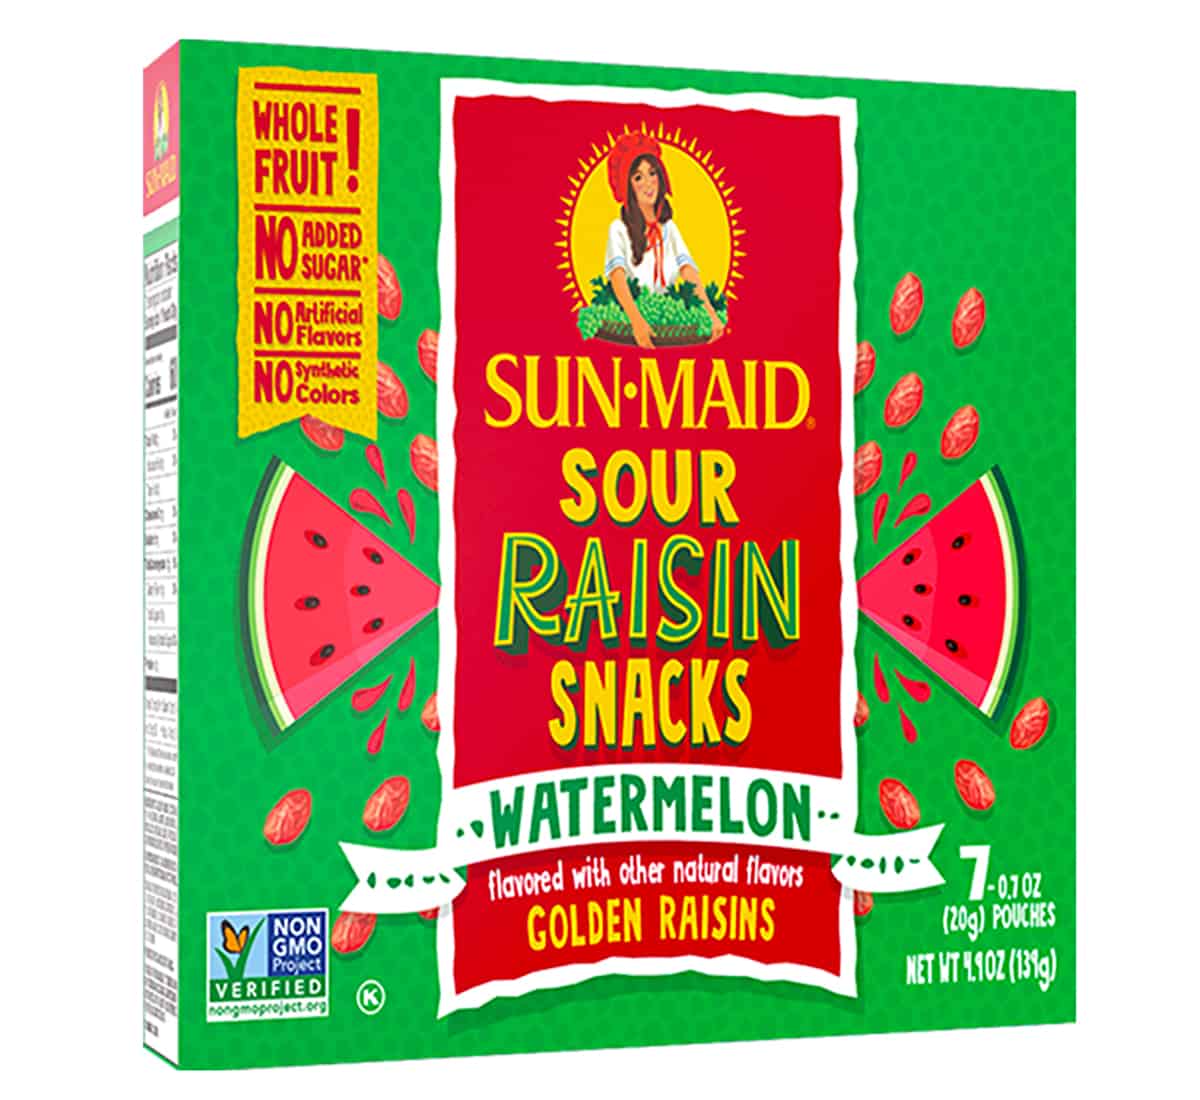
A box of raisin snacks as an example of a healthy packaged snacks.

Sun-Maid Sour Raisin Snacks 

I buy Sun-Maid raisins and sour raisins often for my toddler. With no added sugars or artificial flavorings, they are a naturally sweet and tasty on the go and lunch box option that offer fiber and other micronutrients, like iron.

Sarah Schlichter, MPH, RDN of Bucket List Tummy 

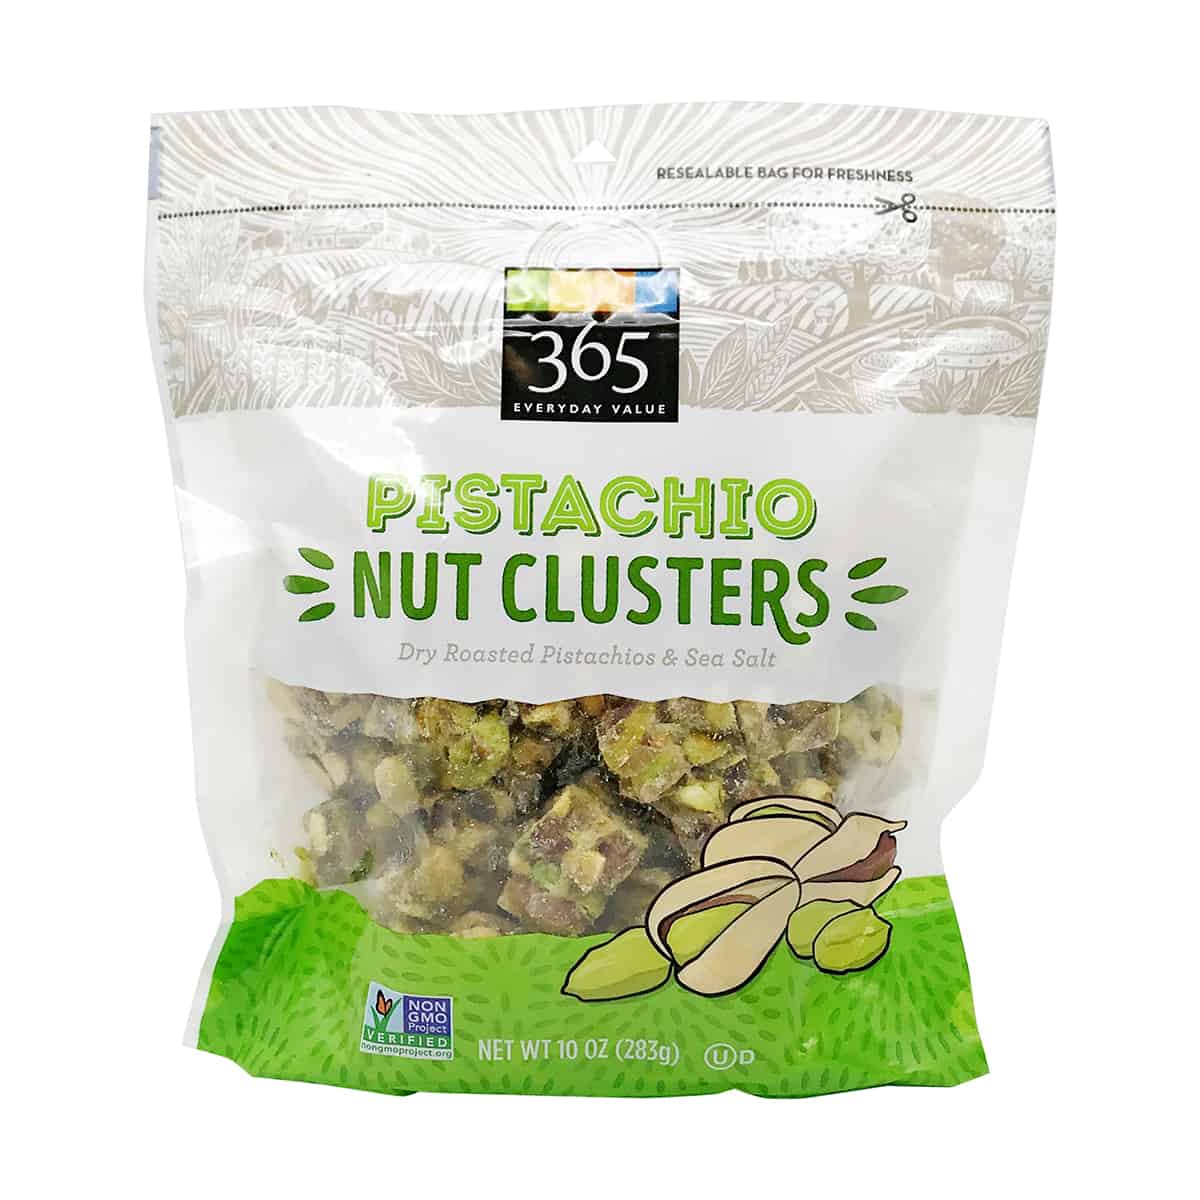
A package of pistachio nut clusters as an example of a healthy packaged snacks.

Pistachio Granola Clusters

With only 6g of added sugar and 4g of plant-based protein per serving, these pistachios clusters are delicious snacks for older kids. Note that these would not be appropriate for kids under 4 due to the whole nuts. 

Marina Chaparro, Mom, RD https://www.nutrichicos.com/

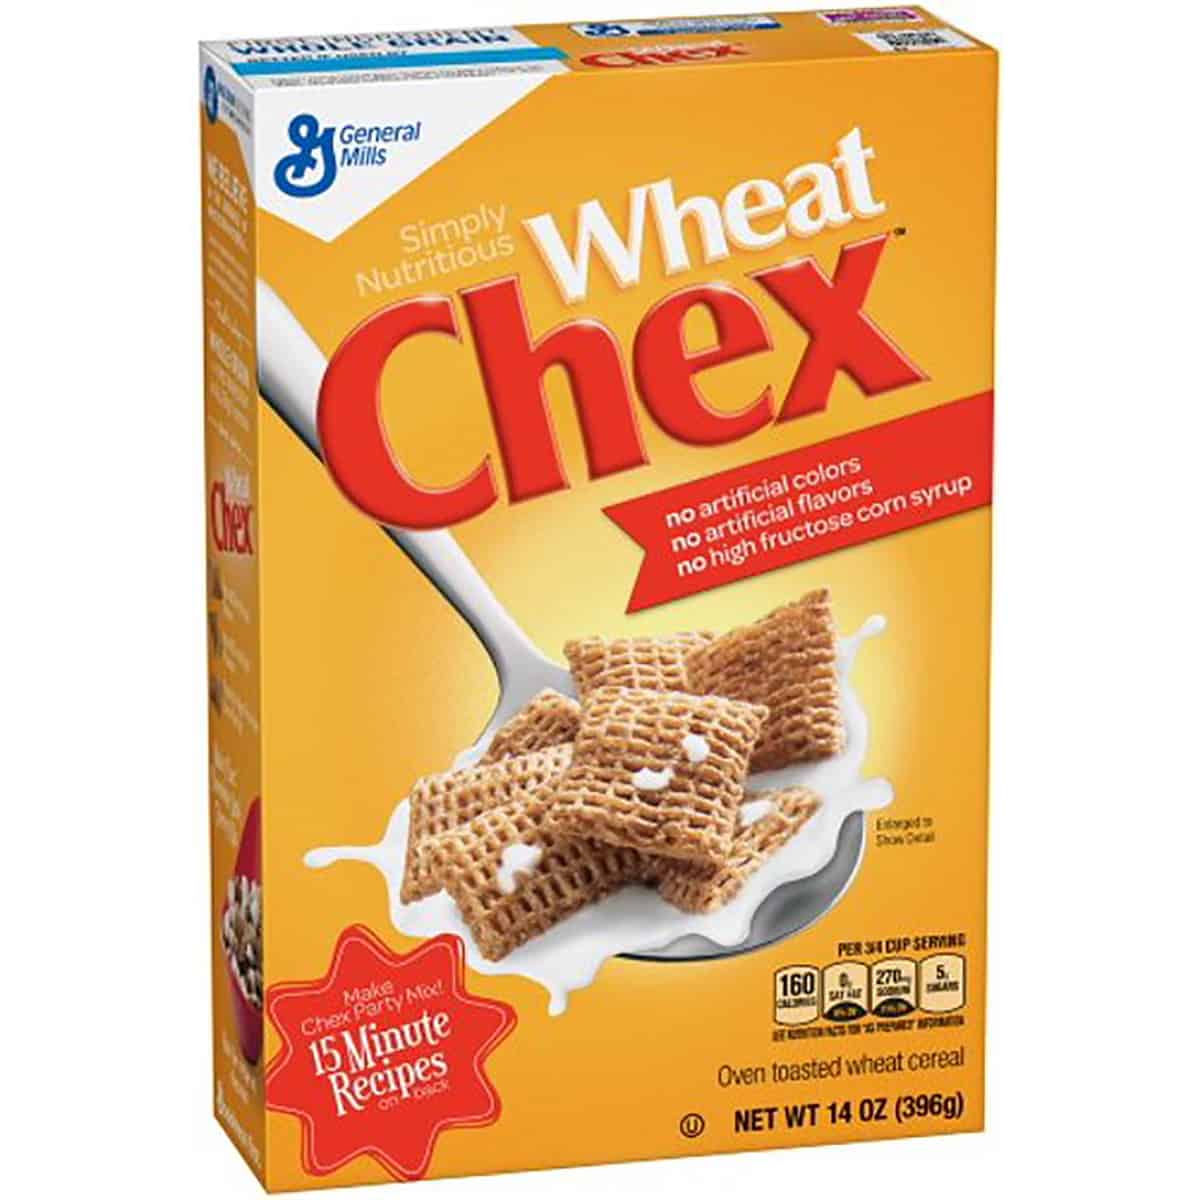
A package of wheat chex cereal.

Wheat Chex Cereal

This cereal can double as breakfast and a snack with an impressive 8 grams of fibre in 1 cup! You can also use it to make your own DIY trail mix with dried fruit, nuts, and seeds!

Marina Chaparro, Mom, RD https://www.nutrichicos.com/

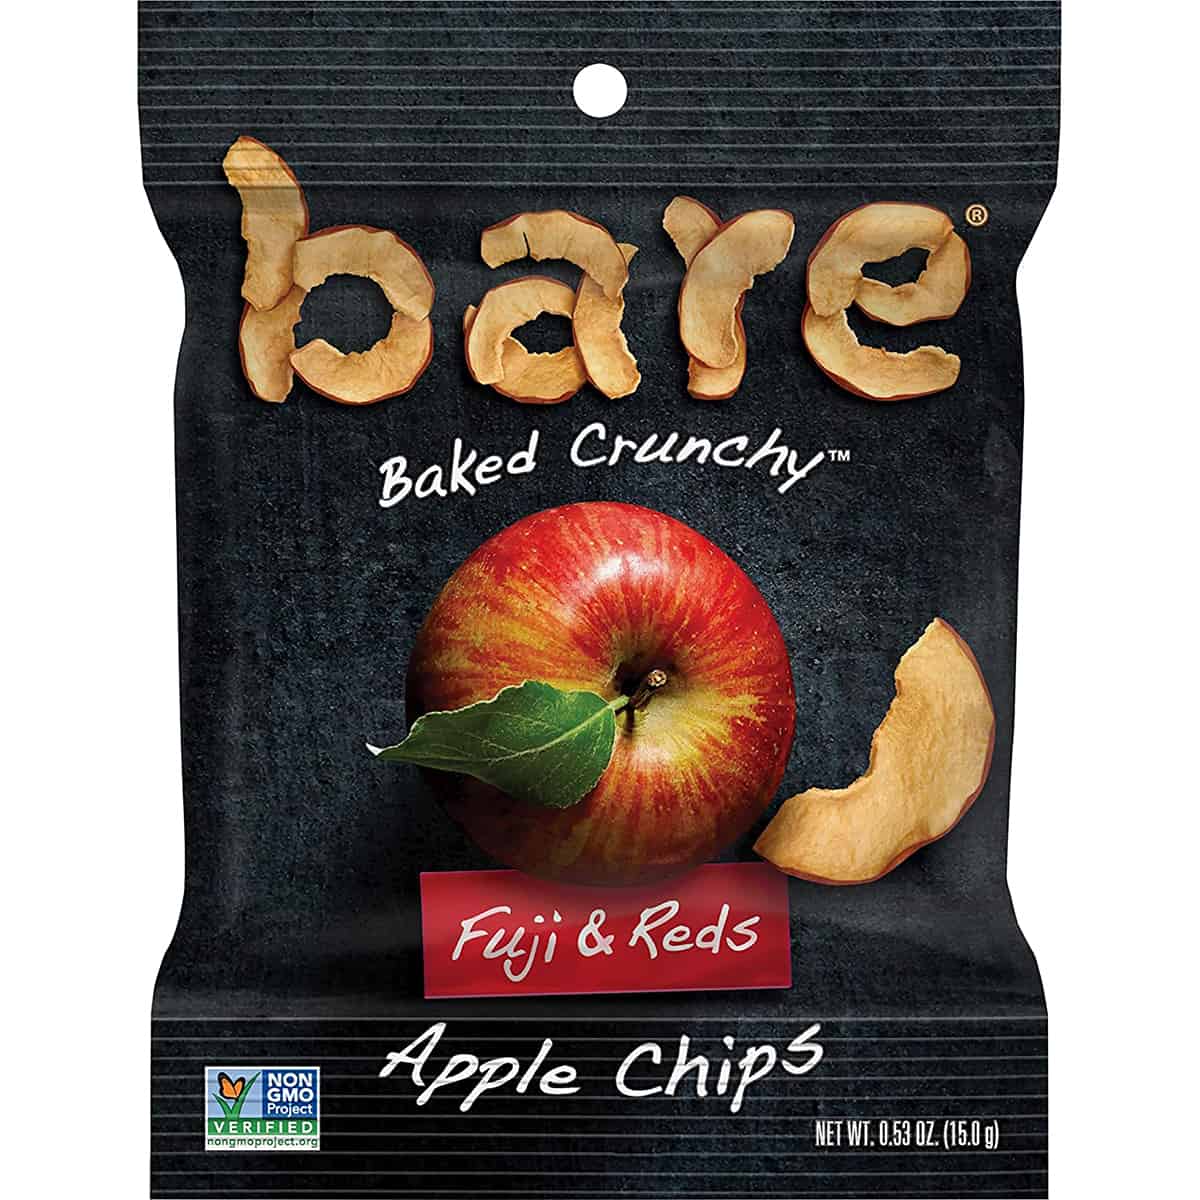
A package of apple chips as an example of a healthy packaged snack.

Bare Baked Crunchy Apples 

With my daughter attending a school that requires sack lunches, Bare Baked Crunchy Apple , are a staple in our pantry. They provide a fruit serving and the crunch of a chip with fiber and flavor that my kiddo loves.  

Carina Myatt MS, RDN, LD

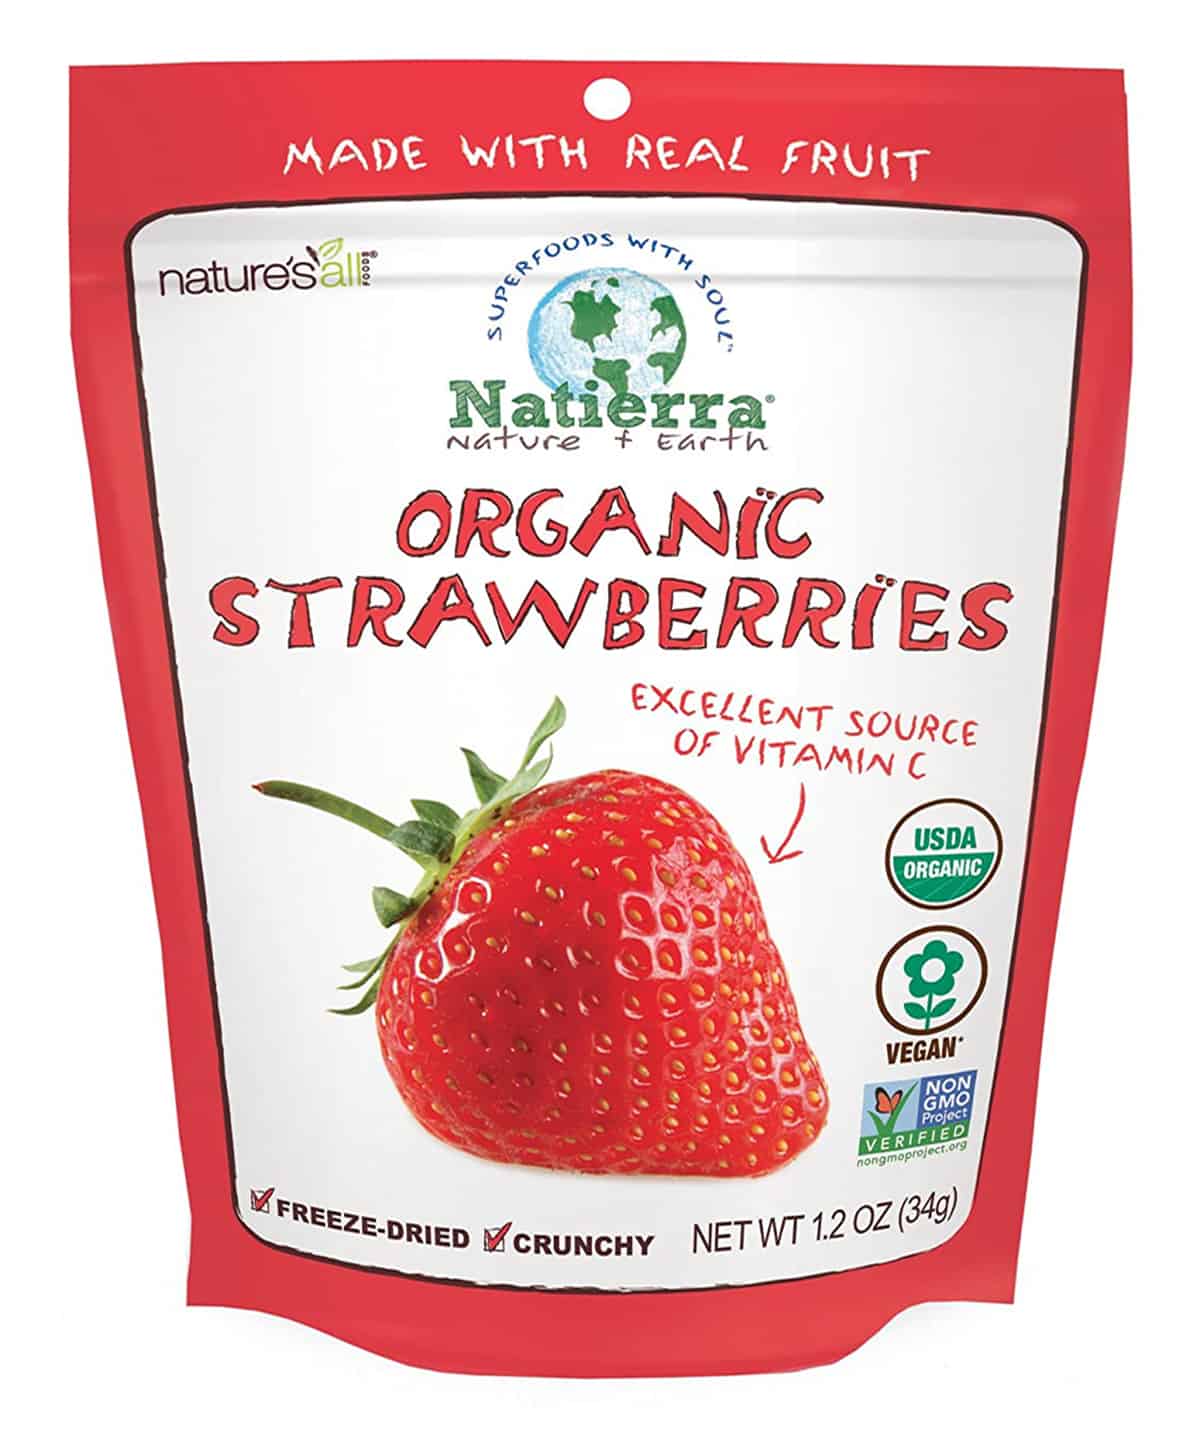
A package of freeze-fried berries as an example of healthy packaged snacks.

Natierra Freeze Dried Berries

If you’re looking for a new fun way to get in your kids’ fruit, these crispy crunchy berries are a great source of fibre and vitamin C with no added sugar!

Abbey Sharp, RD www.abbeyskitchen.com

Snack time does not have to be a daily overwhelming and time consuming, it can be easy and convenient and still be nutrient dense. There are thankfully so many store-bought healthy snack ideas on the market these days, so hopefully some of these ideas were helpful!

More Blog Posts You May Like

Loved this post about healthy snack ideas for kids? I’ve got LOTS of great nutrition blogs for toddlers and kids, check them out here!

  • If you’re looking to start solids, check out our BLW solid starter guide here.
  • If you’re dealing with picky eating, check this out.
  • If you want a refresher on my feeding philosophy, the Division of Responsibility, check this out.
  • And if you want our BLW meal plan, check this out.

If you ever have any questions about healthy snack ideas or whether something is a good snack option please feel free to write a comment and we will get back to you! 


Abbey Sharp

Abbey Sharp is a Registered Dietitian (RD), regulated by the Ontario College of Dietitians. She is a mom, YouTuber, Blogger, award winning cookbook author, media coach specializing in food and nutrition influencers, and a frequent contributor to national publications like Healthline and on national broadcast TV shows.
www.abbeyskitchen.com/about-abbey/

Last Updated May 3, 2023. Published May 8, 2023 By Abbey Sharp 18 Comments

Fresh Spring Rolls with Cashew Dipping Sauce | Vegan!

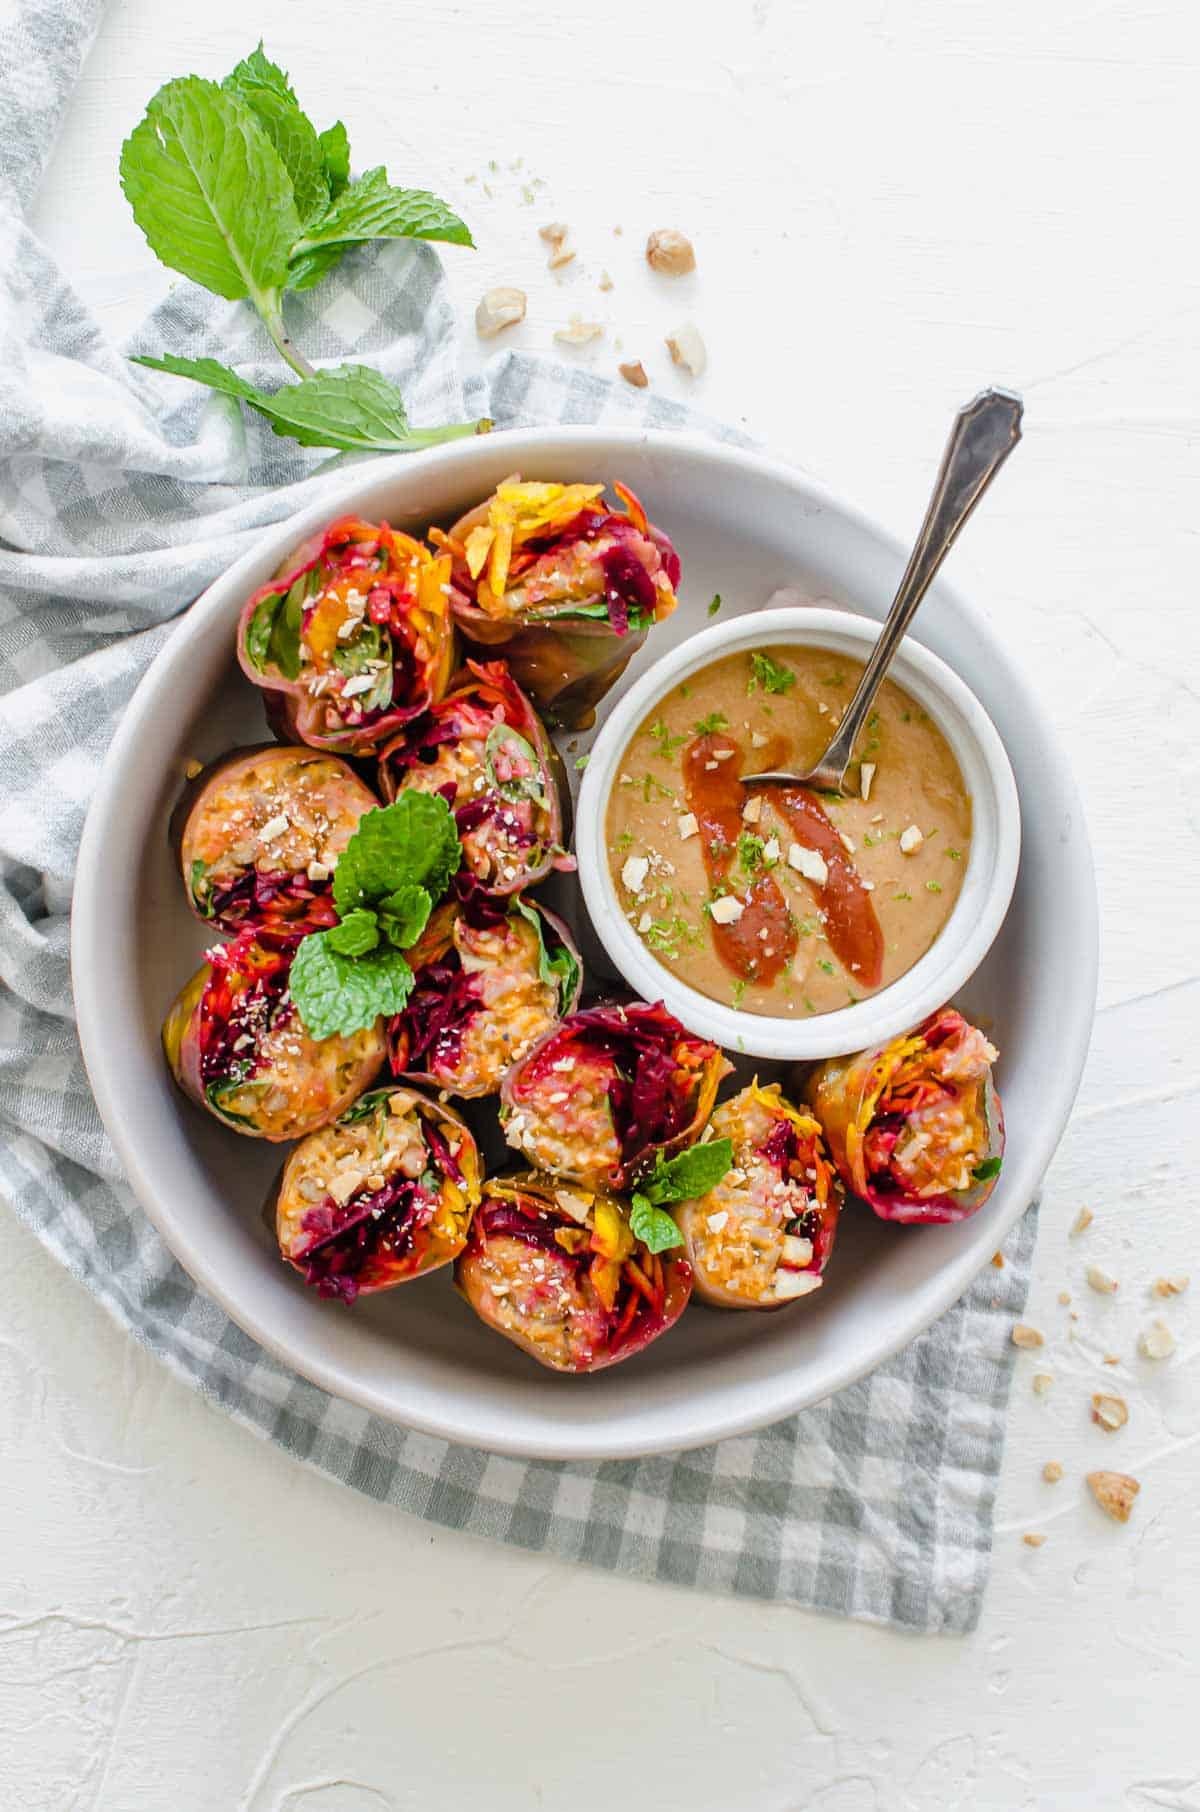
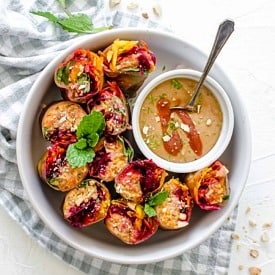
Overhead view of a white bowl of vegetable spring rolls cut in half nestled beside a bowl of homemade cashew sauce with a spoon inside.

You will absolutely love my take on these Fresh Spring Rolls. They are paired with a creamy cashew dipping sauce and packed with a hearty lentil and rice filling, making it an easy fuss-free appetizer or meal for hot summer nights.

Overhead view of a white bowl of fresh spring rolls cut in half nestled beside a bowl of homemade cashew sauce with a spoon inside.

Whenever summer is in full swing, these fresh spring rolls always make an appearance. You might know them as summer rolls but no matter what the name, these rolls are packed with healthy goodness that doesn’t take long to put together, especially if you’ve got leftover ingredients in the fridge. They’re delicious at room temperature or slightly chilled, making them perfect for a hot summer evening.

These are not authentic like the rolls you might find at your local Vietnamese restaurant, but my take on them, packing them with ingredients that are always on hand for me.

Table of contents

  • Why This Recipe Works
  • Key Ingredients
  • How to Make This Recipe
  • Expert Tips
  • Recipe FAQs
  • More Recipes You Might Like

Why This Recipe Works

These fresh spring rolls are perfect for all occasions. They are so pretty and no one ever turns down a roll. Pair it up with my Tofu Pudding with Sweet Potato for the best weeknight dinner! More reasons these rolls work are:

  • Vegan-friendly
  • Gluten-free
  • Paleo-friendly
  • Can be made with pantry staples and leftovers

Key Ingredients

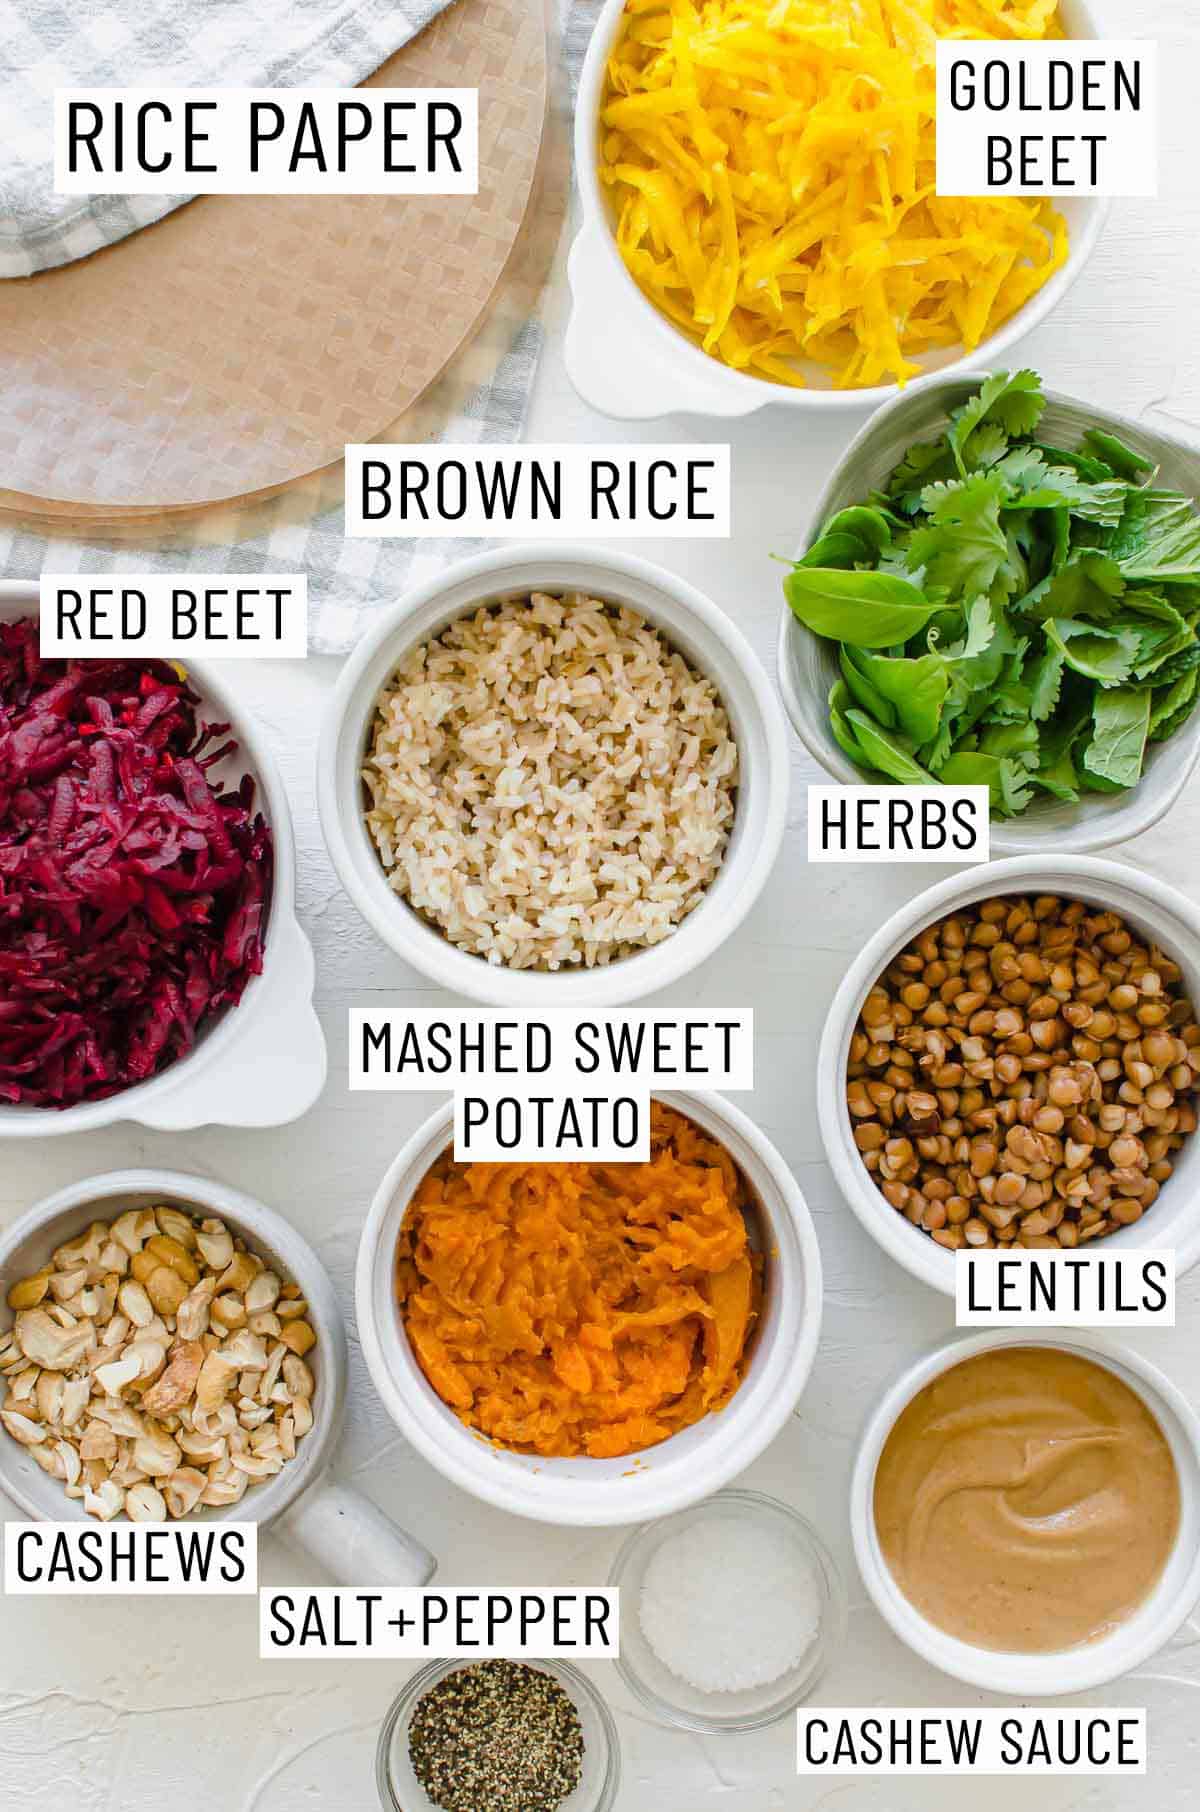
Ingredients needed to make fresh spring rolls.

Cashew sauce — I made a homemade cashew sauce with just a few simple ingredients: cashew butter, coconut milk, tamari, coconut sugar, lime juice, and sriracha. These are usually ingredients found in my kitchen and you probably have them as well! See down below for substitutions.

Rice paper — The packages of rice paper can usually be found in the international aisle at a grocery store. If you cannot find it, it’s also available online! They’re naturally gluten-free!

Lentils — To make these fresh spring rolls more hearty and filling, I use lentils. We always have a bowl or two kicking it in the fridge at the end of the week and these rolls are a great way to use them up. Along with the mashed sweet potato and brown rice, they are the protein base for this meal.

Beets — To liven up the rolls and add a pop of colour, we mix red beets with golden beets! They’re also a source of fibre, folate, manganese, potassium, iron, and vitamin C.

How to Make This Recipe

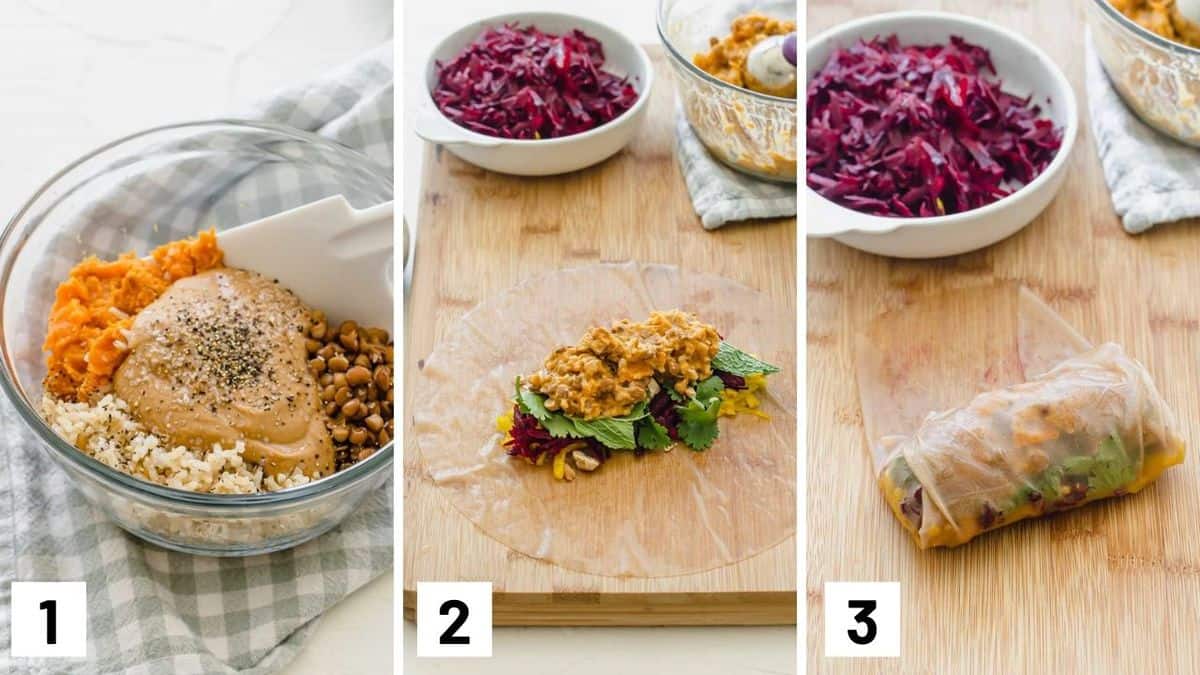
Set of three photos showing cashew sauce being combined with filling ingredients and then the filling added to the rice paper to be wrapped.

If your brown rice is not cooked, do so before starting the fresh spring rolls recipe.

Step 1: Combine the ingredients for the cashew sauce. Then combine half of the cashew sauce with the brown rice, lentils, and sweet potato.

Step 2: Fill a large bowl with warm water. Submerge the rice paper into the warm water for 2 seconds and transfer to a clean board or counter with the smooth side of the paper facing down. To the damp rice paper, add a pinch each of the shredded veggies, herbs and cashews. Top with a generous 1/3 cup or so of the rice and lentil mixture.

Step 3: Fold the left and right edges of the rice paper inwards, then starting at the bottom, roll it up to cover all of the filling. Serve hand held with the remaining cashew sauce.

Expert Tips

If you do not require this to be gluten-free, you can swap the tamari for soy sauce. The coconut sugar can also be swapped for honey.

Make sure the rice paper has been fully submerged and is soaked through. It is not very malleable when dry as well as being not edible. I suggest using a large shallow plate to ensure the whole sheet can be soaked.

Don’t have all of the fresh herbs listed? Feel free to mix it up by using whatever you have at home or replace it with lettuce if you have no herbs. It will change the flavour profile of the fresh spring rolls a bit.

Recipe FAQs

What else can I add to this?

You are welcomed to add whatever ingredients you’d like! Think of it as a salad in a roll form. Try adding bell peppers, carrots, cabbage, avocado, rice noodles, green onions, and more!

What other proteins can I add to this?

Pan fried crispy tofu goes so well with these fresh spring rolls! If you don’t have to keep this vegetable, shredded chicken breasts and steamed shrimp pairs wonderfully as well.

Can I make these ahead of time?

I suggest you enjoy these the day of making them. The rice paper will firm up overnight in the fridge and change the texture. Luckily they don’t take long to put together and you can cook/slice up the components beforehand and then pull them out of the fridge to roll them up for dinner. The sauce can also be made ahead of time.

Can I change the cashew butter?

You can swap the cashew butter for almond butter or peanut butter if you’d like! Use what you have on hand.

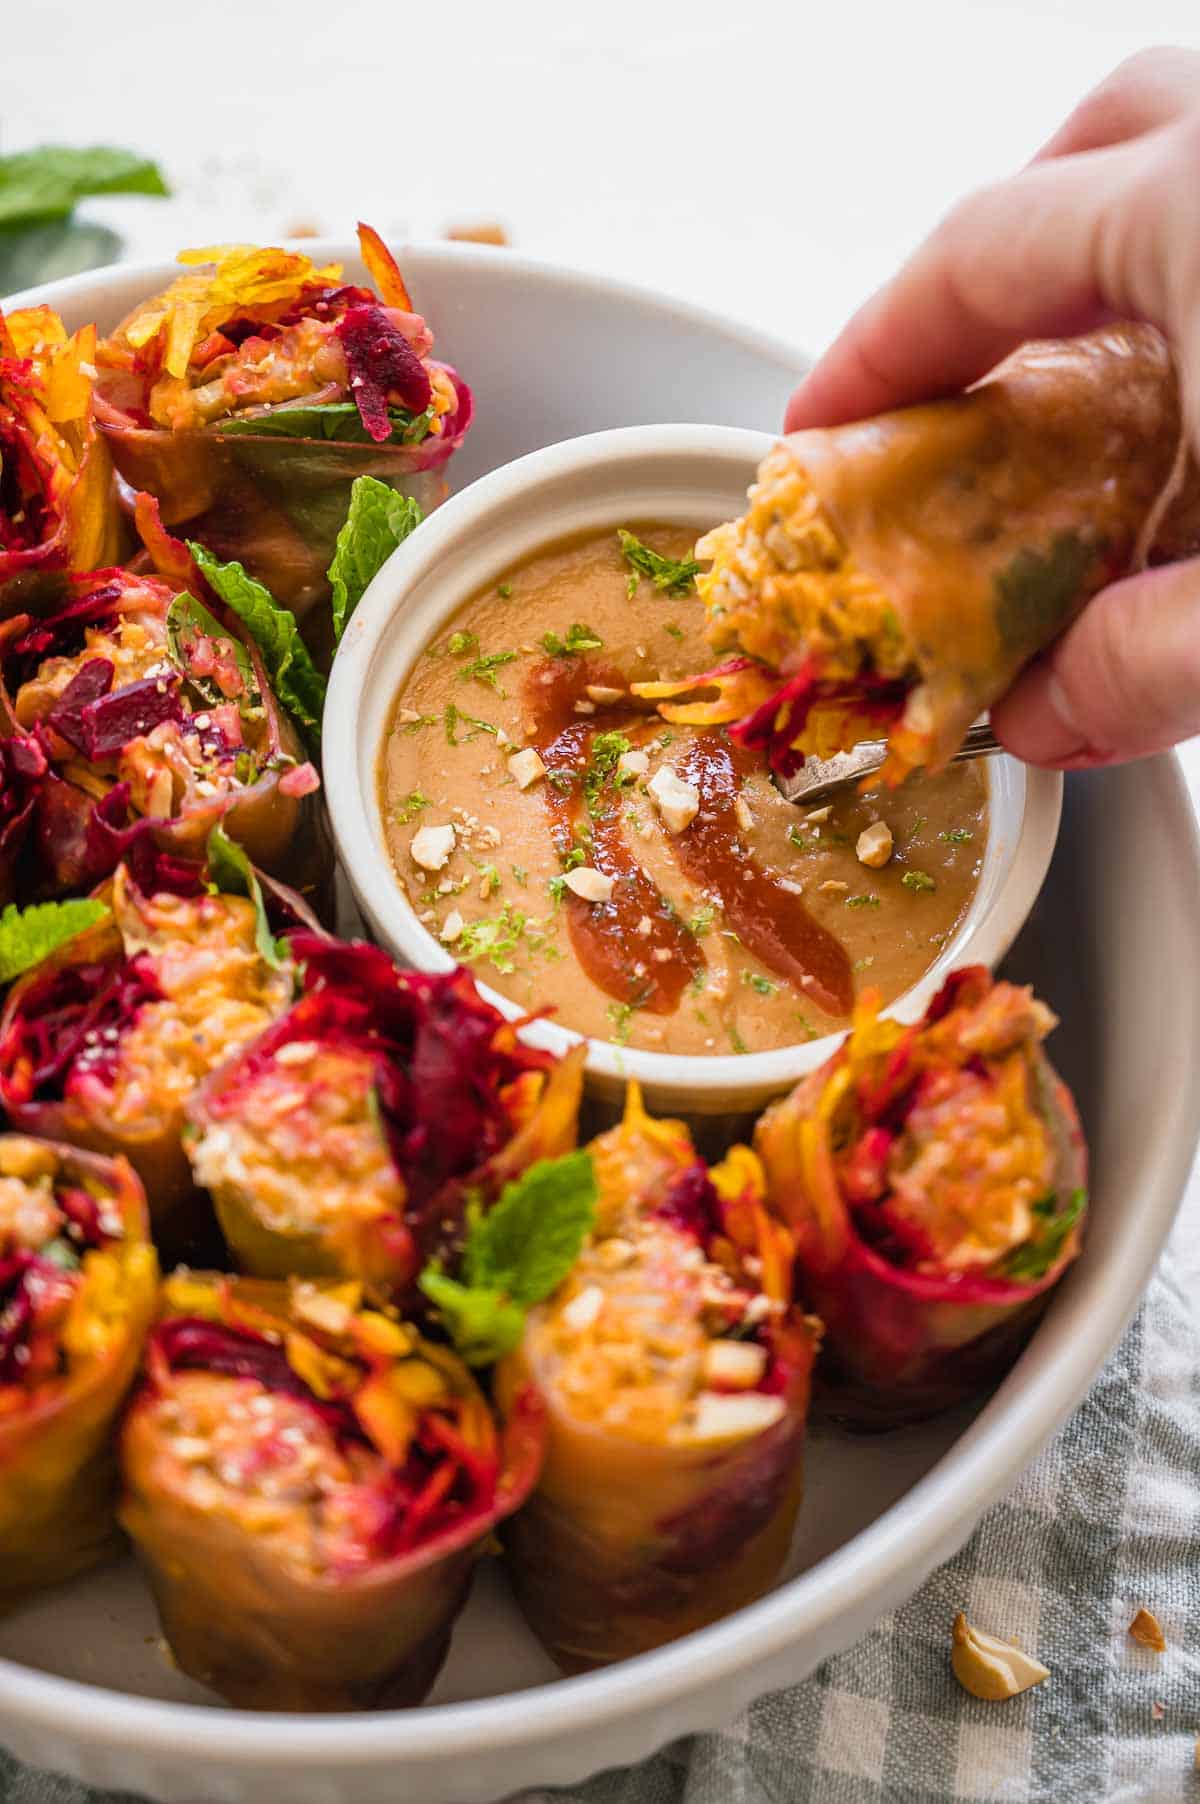
Fresh spring rolls in a bowl, one being dipped into a cashew sauce.

More Recipes You Might Like

Want some more easy weeknight dinners like these fresh spring rolls? Try these ones!

  • Gochujang Soup (Vegan & Gluten Free)
  • Vegan Curry Soup with Yellow Beets
  • Zucchini Lasagna Roll Ups (Low Carb & Keto Friendly)
  • Pizza Soup (Healthy & Keto Friendly)

What are your favourite dinners for hot summer evenings? Leave me a comment below with your favourite combinations!

Overhead view of a white bowl of vegetable spring rolls cut in half nestled beside a bowl of homemade cashew sauce with a spoon inside.
Print Recipe
5 from 6 votes

Fresh Spring Rolls with Cashew Dipping Sauce

You will absolutely love my take on these Fresh Spring Rolls. They are paired with a creamy cashew dipping sauce and packed with a hearty lentil and rice filling, making it an easy fuss-free appetizer or meal for hot summer nights
Prep Time10 minutes mins
Cook Time20 minutes mins
Total Time30 minutes mins
Course: Appetizer
Cuisine: Thai
Servings: 16 rolls
Calories: 192kcal
Author: Abbey Sharp

Ingredients

Cashew Sauce

  • 1/2 cup plus 2 tbsp. natural cashew butter
  • 1/2 cup plus 2 tbsp. lite coconut milk
  • 2 tsp reduced sodium tamari gluten free
  • 2 tbsp coconut sugar
  • 2 tbsp lime juice
  • Sriracha to taste

Rolls

  • 16 round rice papers
  • 1 cup raw brown rice
  • 1 can lentils rinsed and drained
  • 1 cup mashed sweet potato
  • Pinch each of salt and pepper
  • 1 red beet peeled and grated
  • 1 golden beet peeled and grated
  • 1 bunch of mint
  • 1 bunch of basil
  • 1 bunch of cilantro
  • 1/3 cup cashews toasted

Instructions

  • Mix together the cashew sauce ingredients and set aside.
  • Cook the brown rice according to package directions and allow to cool. Mix in the lentils and sweet potato as well as half of the cashew sauce. Season with a pinch each of salt and pepper, to taste.
  • Fill a large bowl with warm water. Submerge the rice paper into the water for 2 seconds and transfer to a clean board or counter with the smooth side of the paper facing down.
  • Towards the bottom quarter of the roll add a pinch each of the shredded veggies, herbs and cashews. Top with a generous 1/3 cup or so of the rice and lentil mixture. Fold the left and right edges of the rice paper inwards, then starting at the bottom, roll it up to cover all of the filling. Serve hand held with the remaining cashew sauce.

Notes

  • If you do not require this to be gluten-free, you can swap the tamari for soy sauce. The coconut sugar can also be swapped for honey.
  • Make sure the rice paper has been fully submerged and is soaked through. It is not very malleable when dry as well as being not edible. I suggest using a large shallow plate to ensure the whole sheet can be soaked.
  • Don’t have all of the fresh herbs listed? Feel free to mix it up by using whatever you have at home or replace it with lettuce if you have no herbs. It will change the flavour profile of the vegetable spring rolls a bit.

Nutrition

Calories: 192kcal | Carbohydrates: 30g | Protein: 5g | Fat: 6g | Saturated Fat: 2g | Cholesterol: 2mg | Sodium: 176mg | Potassium: 235mg | Fiber: 2g | Sugar: 3g | Vitamin A: 3441IU | Vitamin C: 5mg | Calcium: 28mg | Iron: 2mg
Abbey Sharp

Abbey Sharp is a Registered Dietitian (RD), regulated by the Ontario College of Dietitians. She is a mom, YouTuber, Blogger, award winning cookbook author, media coach specializing in food and nutrition influencers, and a frequent contributor to national publications like Healthline and on national broadcast TV shows.
www.abbeyskitchen.com/about-abbey/

Last Updated May 4, 2023. Published May 5, 2023 By Abbey Sharp 10 Comments

Easy No Bake Cheesecake Cups with Nutella

These Vegan Nutella Cheesecake Chocolate Cups are the perfect Valentine's Day Healthy Dessert Recipe to impress your sweetie!

These Easy No Bake Cheesecake Cups with Nutella are the perfect healthy gluten free dessert that is also vegan! Perfect for holidays and bake sales!

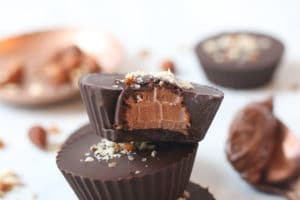
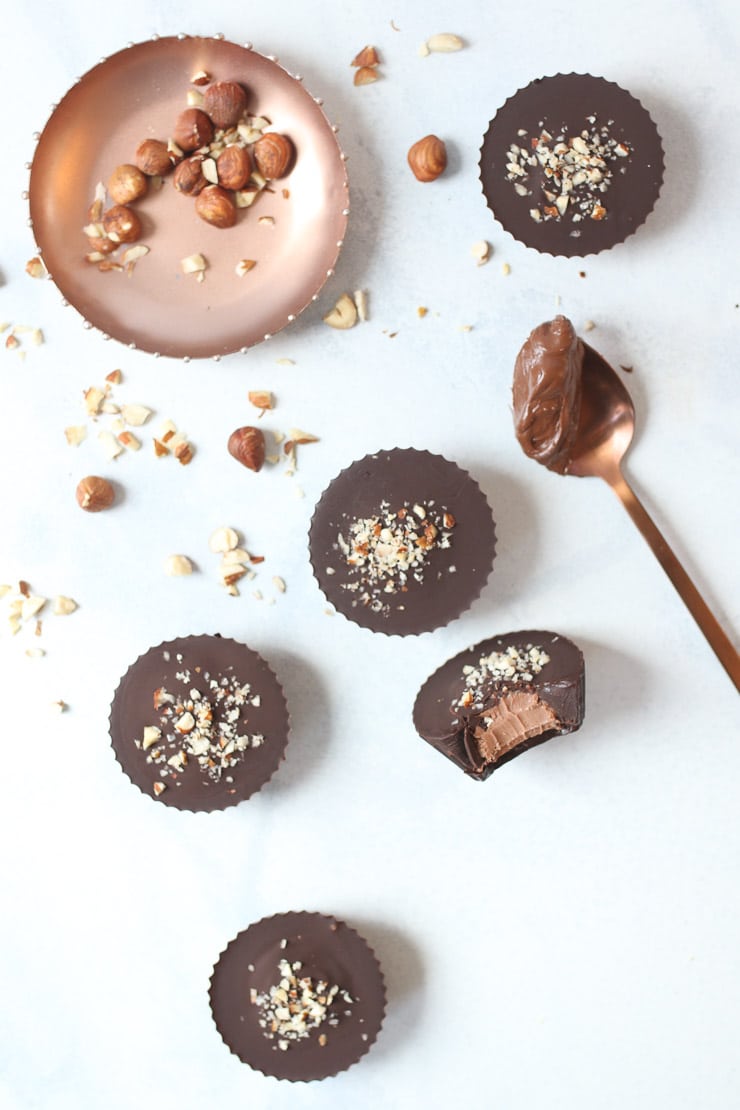
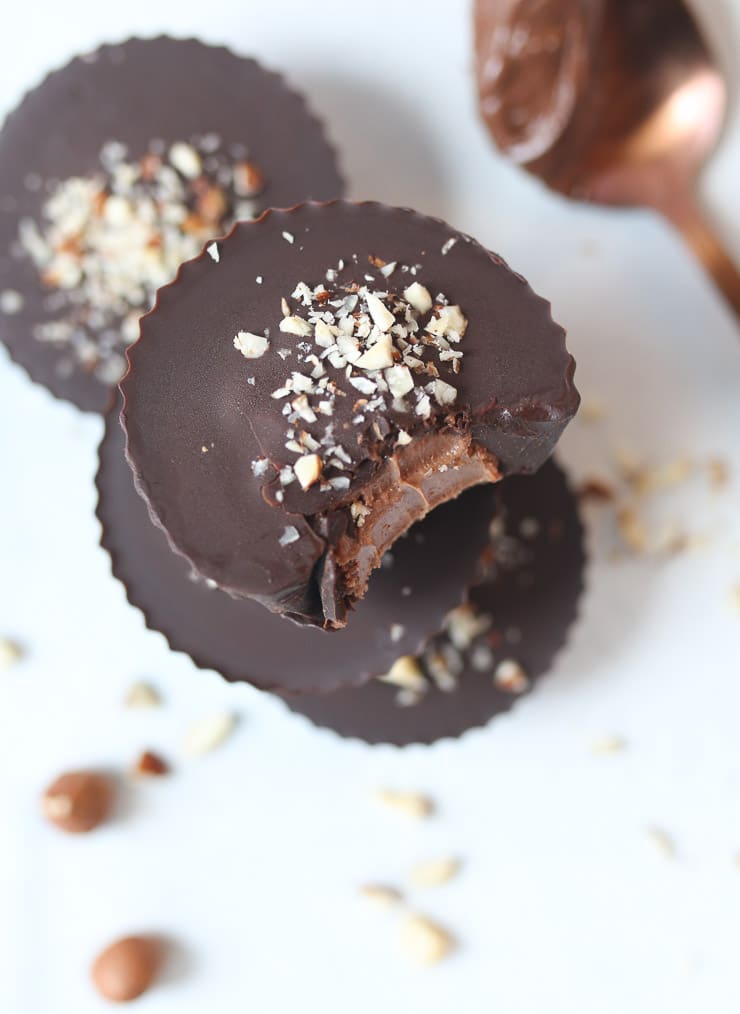
Birds eye view of vegan hazelnut and chocolate cheesecake cups garnished with chopped hazelnuts.

When I first made these easy no bake cheesecake cups, it was to celebrate National Nutella Day but I think that this is the perfect dessert year round. And I know y’all totally agree with me since I had shared a polled on my Instagram stories and Facebook page on what kind of recipes you would like to see and this one was a winner. Are you following me on social media? If not, you totally should! This way you can vote on what recipes I share over here!

Table of contents

  • Why This Recipe Works
  • Key Ingredients
  • How to Make This Recipe
  • Expert Tips
  • Recipe FAQs
  • More Recipes You Might Like

Why This Recipe Works

I love no bake recipes since it really frees up the oven. You can make these easy no bake cheesecake cups while dinner’s in the oven and have it ready to enjoy by the time everyone’s done enjoying their dinner.

I also love how these cheesecake cups are the perfect bite size. No more fighting over who gets the large slice or a corner piece. Everyone gets their own no bake Nutella cheesecake cup (or two) and there’s no need to share!

These are also great for bake sales as well. Make a batch to put in the freezer the night before a bake sale and you don’t have to worry about whipping up a fresh batch of cookies or muffins in the morning.

Key Ingredients

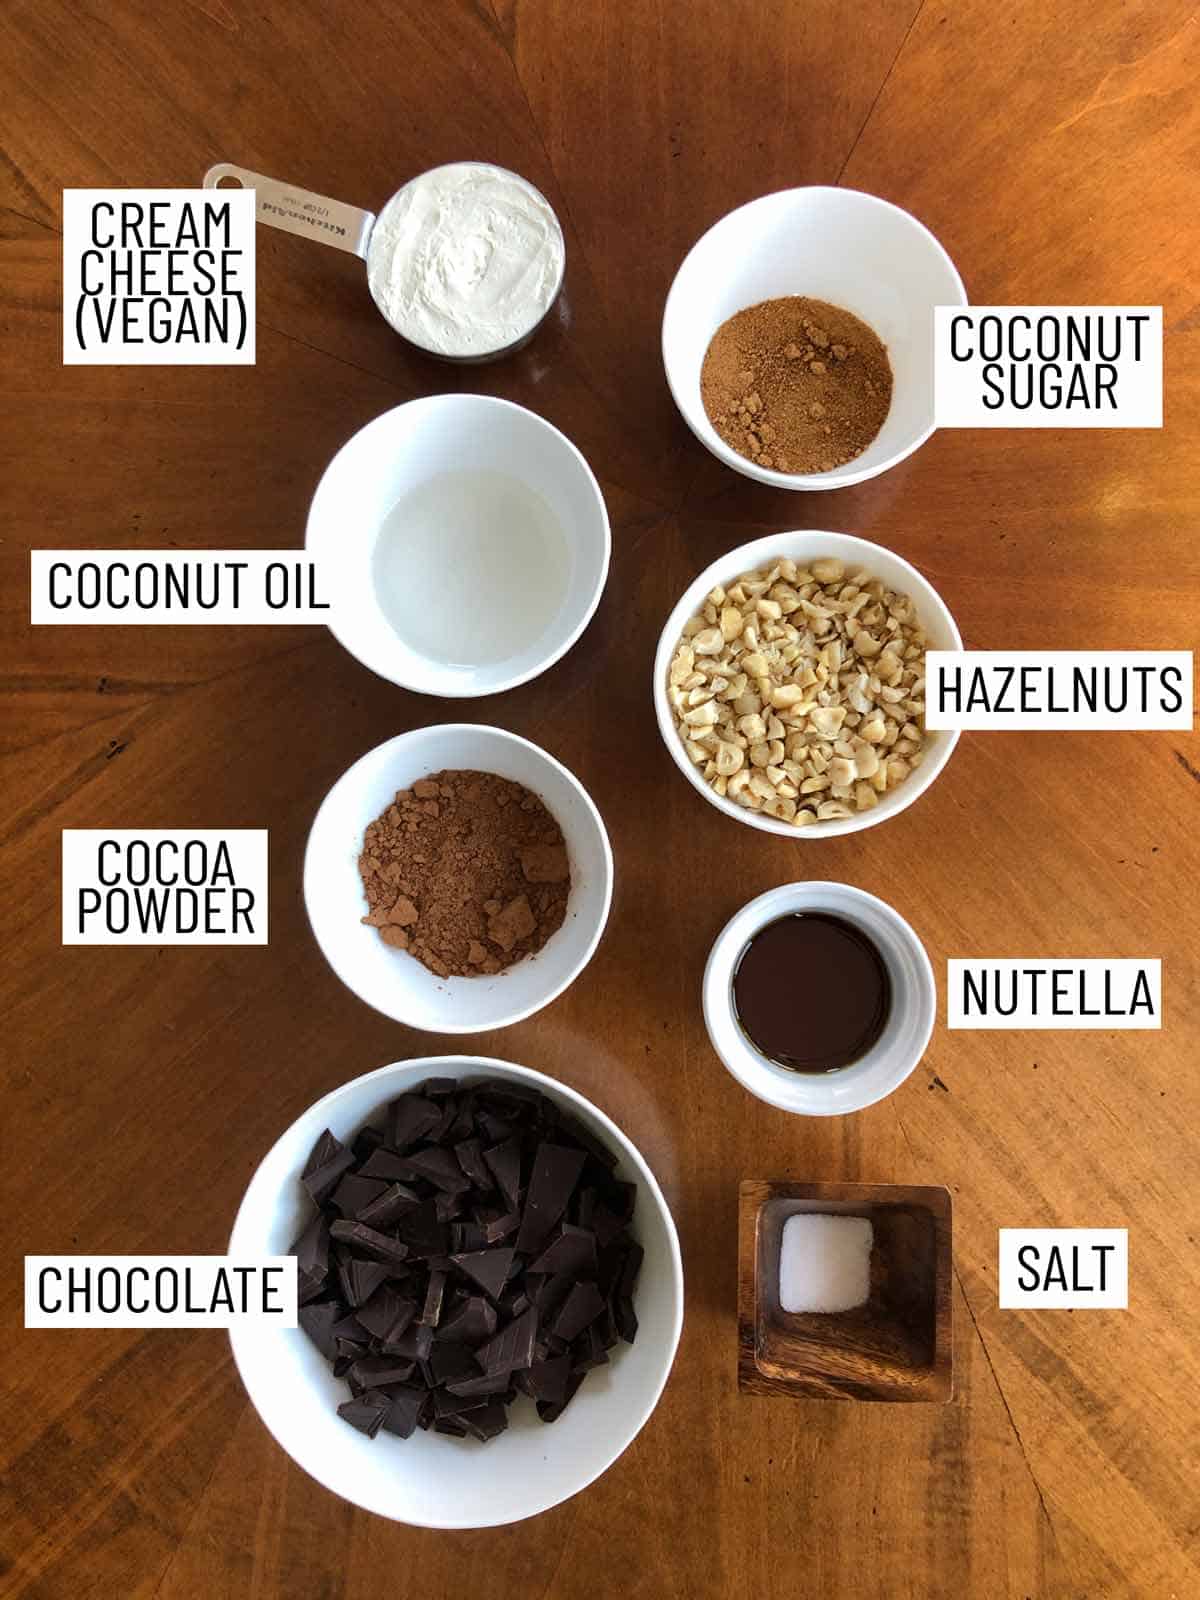
Overhead image of ingredients for no bake nutella cheesecake cups: cream cheese, coconut oil, cocoa powder, chocolate, salt, nutella, hazelnuts, coconut sugar.

Dark dairy free chocolate — I love using dark chocolate for this as I find that milk chocolate can be too sweet when paired with a Nutella based mousse.

Nutella — You can’t make easy no bake cheesecake cups with Nutella …. without Nutella! We love this hazelnut spread and we also pair it with more hazelnuts for more flavour.

Vegan cream cheese — To keep this vegan, we use a vegan cream cheese to make the mousse. Trust me when I say that combining this with the Nutella makes for an amazing mousse. Maybe make extra in case you taste test it a bit too much while assembling the cheesecake cups.

Cocoa powder — Make sure you pick up unsweetened cocoa powder as this recipe is already on the sweeter side.

How to Make This Recipe

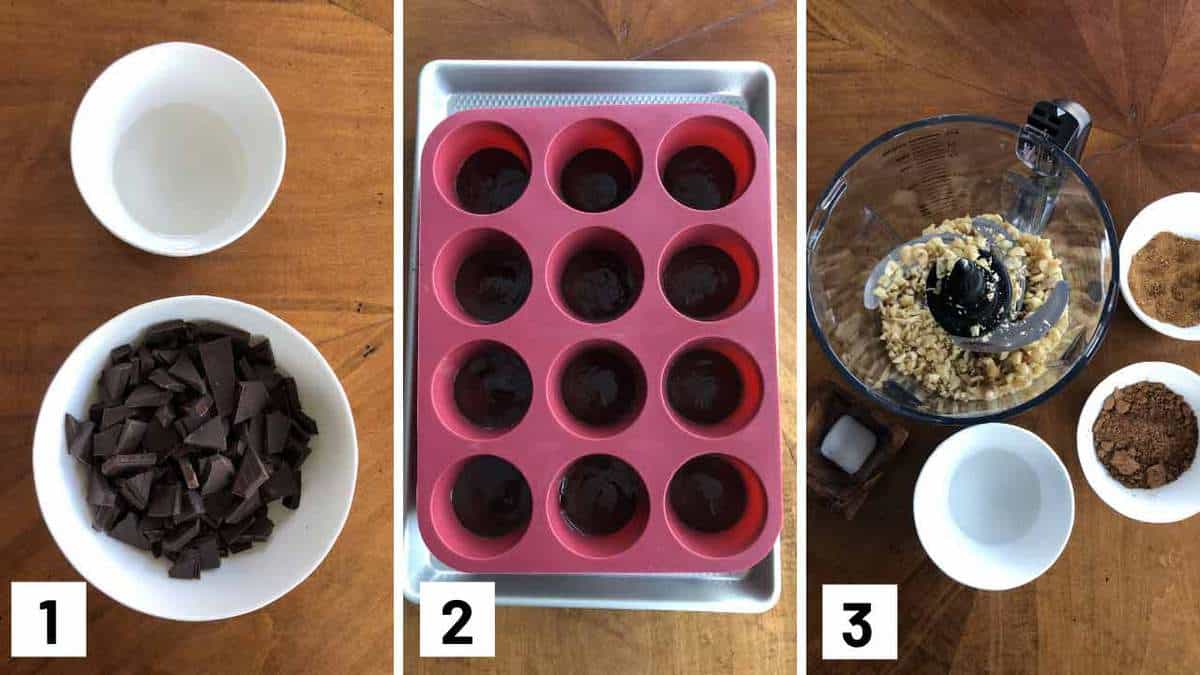
Instruction photos showing which ingredients to melt, coating a silicone muffin tray with chocolate, and then blending together hazel nuts with cocoa powder.

Step 1: In a bowl, microwave the chocolate with the coconut oil on 50% power in 30 second increments until melted, stirring every 30 seconds.

Step 2: Prepare 12 silicon muffin molds on a baking sheet and add a thin layer of chocolate to the bottom of the molds. Place in the freezer for 5-10 minutes.

Step 3: In a high speed blender, puree the hazelnuts with the coconut oil, cocoa powder, sugar, and salt until very smooth. Transfer to a bowl.

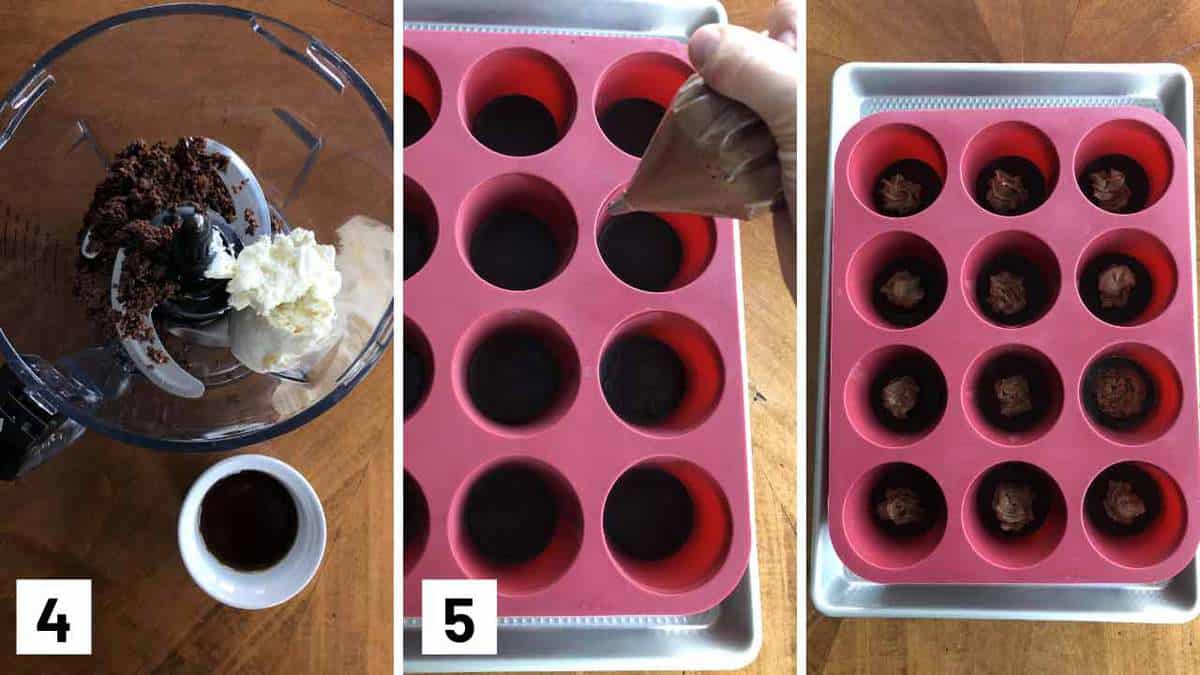
Instructional photos showing cream cheese blended with nutella, then pipping it into the silicone molds.

Step 4: In the blender, puree the cream cheese with 1/3 cup of nutella until smooth. Add maple, to taste, if desired. Transfer to a piping bag.

Step 5: Pipe mounds (that look a bit like poo) onto the frozen chocolate bottom in the muffin tins, being careful not to touch the sides. Cover the mounds with the melted chocolate and top with the chopped hazelnuts before transferring to the freezer to set up for at least an hour. Unmold when ready to eat and enjoy!

Expert Tips

Don’t have a piping bag? No problem! Simply put the filling into a ziploc baggy and then snip off a corner to make a DIY piping bag.

If you don’t have a silicone muffin tray, you can use a regular muffin and line them with silicone muffin cups instead.

This recipe can easily be doubled or tripled for a crowd or cut in half for a small Valentine’s day celebration!

When microwaving chocolate, if it was originally a bar, breaking it up into small pieces will make it melt faster.

I like topping the easy no bake cheesecake cups off with some crushed hazelnuts for a little crunch but you can use whatever topping you’d like.

Recipe FAQs

Can I Use Regular Cream Cheese?

If you don’t need this to be vegan, you can definitely use regular cream cheese.

What If My Filling Touches the Sides?

When piping, you want to avoid touching the sides so you can get a nice clean cup when you unwrap it. Simply use a chopstick or a thin stick of sorts to clean up the sides before you put the melted chocolate on top.

How Long Do These Last?

You can keep these no bake Nutella cheesecake cups for up to 2 months in the freezer (if they aren’t eaten immediately!) Just transfer them to an airtight container and leave them in the freezer.

What Other Toppings Can I Use?

You can top it with some hemp hearts, some whipped cream, you can even melt some white chocolate and drizzle over it! Top with whatever your heart desires!

birds eye view of a stack of vegan nutella cheesecake chocolate cups for valentines day

More Recipes You Might Like

Did you just finished making these easy no bake cheesecake cups with Nutella and want more?? Try these:

  • Cookie Cups (with Healthy Vegan Chocolate Mousse)
  • Chocolate Cups with Chia Jam
  • Tahini Caramel Chocolate Cups (Gluten Free No Sugar Added Chocolate Dessert Vegan)
  • Healthy Homemade Peanut Butter Cups with Banana & Dark Chocolate

How are you celebrating national Nutella day? Leave me a comment below with your thoughts!

These Vegan Nutella Cheesecake Chocolate Cups are the perfect Valentine's Day Healthy Dessert Recipe to impress your sweetie!
Print Recipe
5 from 3 votes

Easy No Bake Cheesecake Cups with Nutella

These No Bake Nutella Cheesecake Cups are the perfect healthy gluten free dessert that is also vegan! Perfect for holidays and bake sales!
Prep Time1 hour hr 10 minutes mins
Cook Time3 minutes mins
Total Time1 hour hr 13 minutes mins
Course: Dessert
Cuisine: French, American
Servings: 12 cups
Calories: 304kcal
Author: Abbey Sharp

Ingredients

Nutella

  • 1 cup blanched hazelnuts toasted and chopped
  • 2 tbsp coconut oil
  • 3/4 tbsp unsweetened cocoa powder
  • 2 tbsp coconut sugar
  • Pinch of salt

Mousse

  • 1/2 cup vegan cream cheese
  • 1/3 cup prepared nutella
  • Maple syrup to taste

Chocolate Cups

  • 300 g dark dairy-free chocolate chopped
  • 4 tsp extra virgin coconut oil
  • 4 hazelnuts toasted and finely chopped for garnish

Instructions

  • In a bowl, microwave the chocolate with the coconut oil on 50% power in 30 second increments until melted, stirring every 30 seconds.
  • Prepare 12 silicon muffin molds on a baking sheet and add a thin layer of chocolate to the bottom of the molds. Place in the freezer for 5-10 minutes.
  • In a high speed blender, puree the hazelnuts with the coconut oil, cocoa powder, sugar, and salt until very smooth.  Transfer to a bowl.
  • In the blender, puree the cream cheese with 1/3 cup of nutella until smooth. Add maple, to taste, if desired. Transfer to a piping bag.
  • Pipe mounds (that look a bit like poo) onto the frozen chocolate bottom in the muffin tins, being careful not to touch the sides. Cover the mounds with the melted chocolate and top with the chopped hazelnuts. Transfer to the freezer to set up for at least an hour.
  • Unmold when ready to eat and enjoy!

Notes

  • Don’t have a piping bag? No problem! Simply put the filling into a ziploc baggy and then snip off a corner to make a DIY piping bag.
  • If you don’t have a silicone muffin tray, you can use a regular muffin and line them with silicone muffin cups instead.
  • This recipe can easily be doubled or tripled for a crowd or cut in half for a small Valentine’s day celebration!
  • When microwaving chocolate, if it was originally a bar, breaking it up into small pieces will make it melt faster.
  • I like topping the no bake Nutella cheesecake cups off with some crushed hazelnuts for a little crunch but you can use whatever topping you’d like.

Nutrition

Calories: 304kcal | Carbohydrates: 25g | Protein: 4g | Fat: 24g | Saturated Fat: 12g | Sodium: 44mg | Potassium: 110mg | Fiber: 4g | Sugar: 18g | Vitamin C: 0.7mg | Calcium: 59mg | Iron: 2.8mg
Abbey Sharp

Abbey Sharp is a Registered Dietitian (RD), regulated by the Ontario College of Dietitians. She is a mom, YouTuber, Blogger, award winning cookbook author, media coach specializing in food and nutrition influencers, and a frequent contributor to national publications like Healthline and on national broadcast TV shows.
www.abbeyskitchen.com/about-abbey/

Last Updated May 1, 2023. Published May 3, 2023 By Abbey Sharp 4 Comments

Beachbody Shakeology: Is It Worth It?

We take a deep dive into controversial Beachbody Shakeology supplement to answer the question: “Is it worth it?” and whether or not the claims live up to the research.

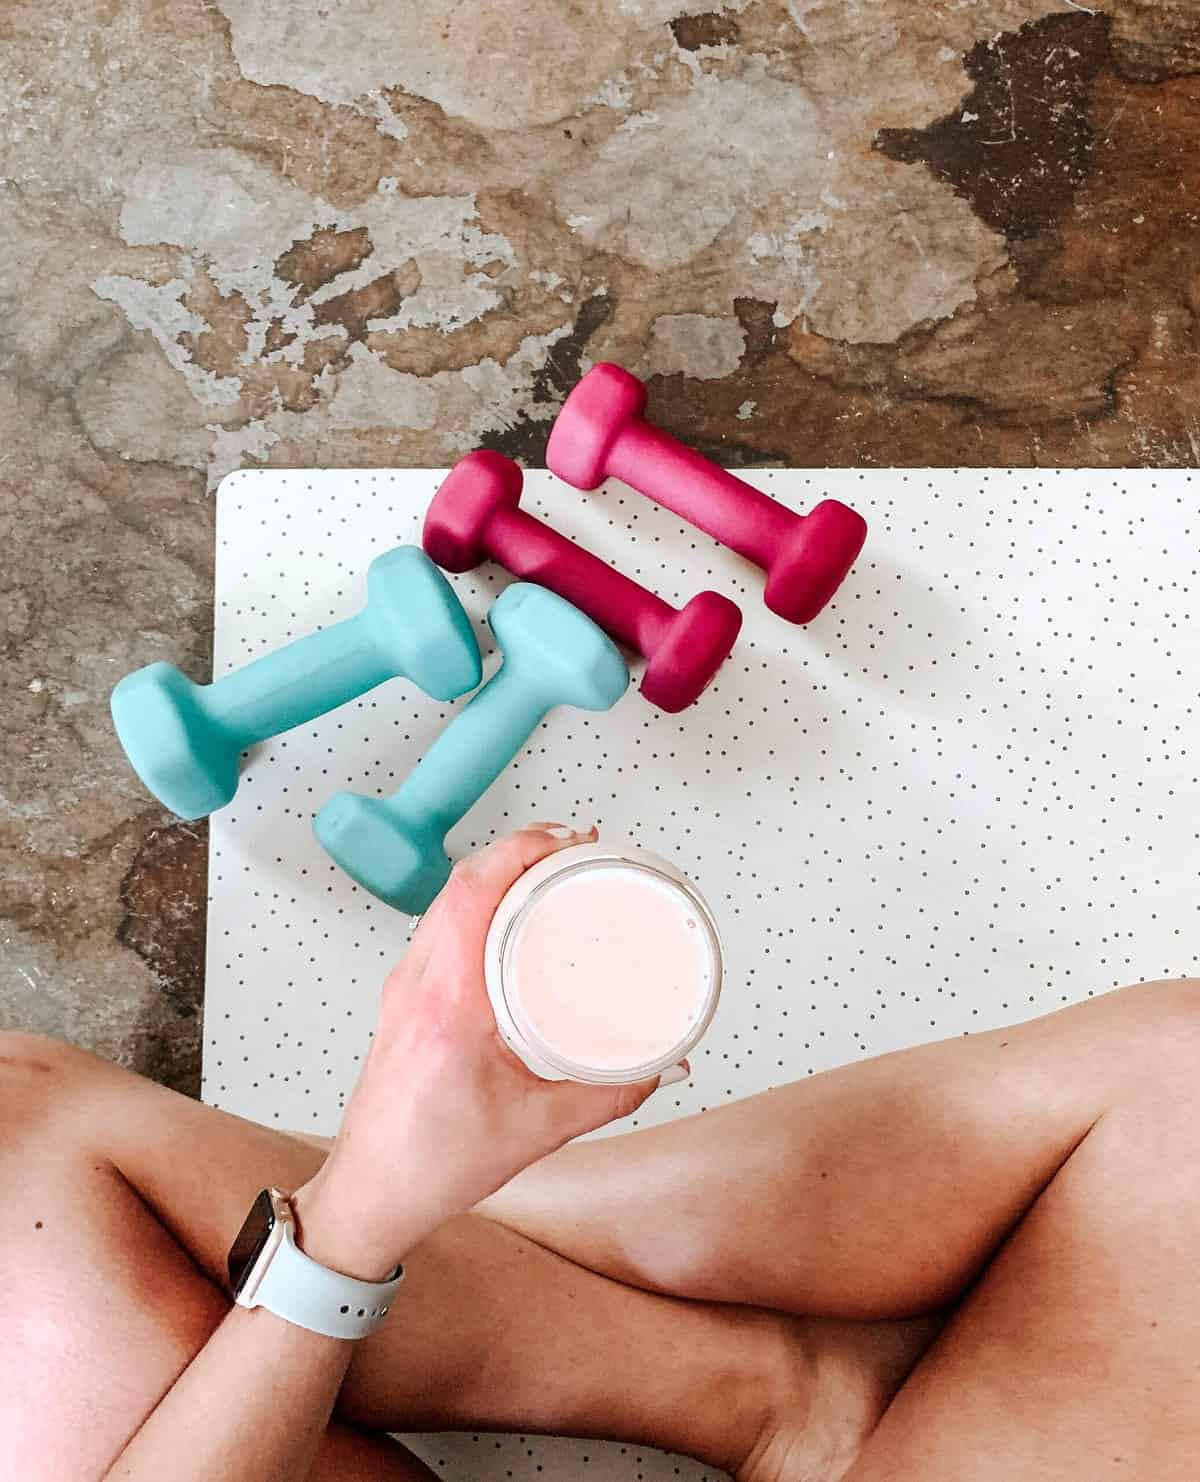
Birds eye view of person holding shakeology drink and surrounded by weights.

If you have been blessed with the great honour of never having heard of Beachbody or Shakeology before, what a wonderful joyous life you must live! Otherwise, you have probably seen at least one social media post from a friend or acquaintance about their fitness “journey” and how much Beachbody Shakeology has “changed their life”, all while sharing photos posing for before and after shots. *insert eye roll here*

Now before I dive into Shakeology, can we just acknowledge how cringeworthy the name “Beachbody ” is? Because *news flash* any body that is sitting on the beach is a “beach body”. Meaning, you don’t have to train, diet, or completely alter your body to gain that title.

Anyways, let’s take a look at the research to figure and answer the question: “Is Beachbody Shakeology worth it?”.

Beachbody Shakeology Healthy Claims

Shakeology’s key message is to encourage people to drink it every. Single. Day. In fact, Beachbody encourages you to log your Shakeology intake and share your “Shakeology streak” with group members to prove that you have been consuming it day after day. And that’s going to get expensive when a month’s supply costs $130 USD.

While they do offer both whey and vegan options and a range of flavours, for the purpose of this blog post, I’ll be focusing on their best selling Chocolate Plant-Based Vegan powder. Let’s take a look at the 6 main claims for this product. 

Claim #1: Satisfies Your Cravings & Healthy Energy

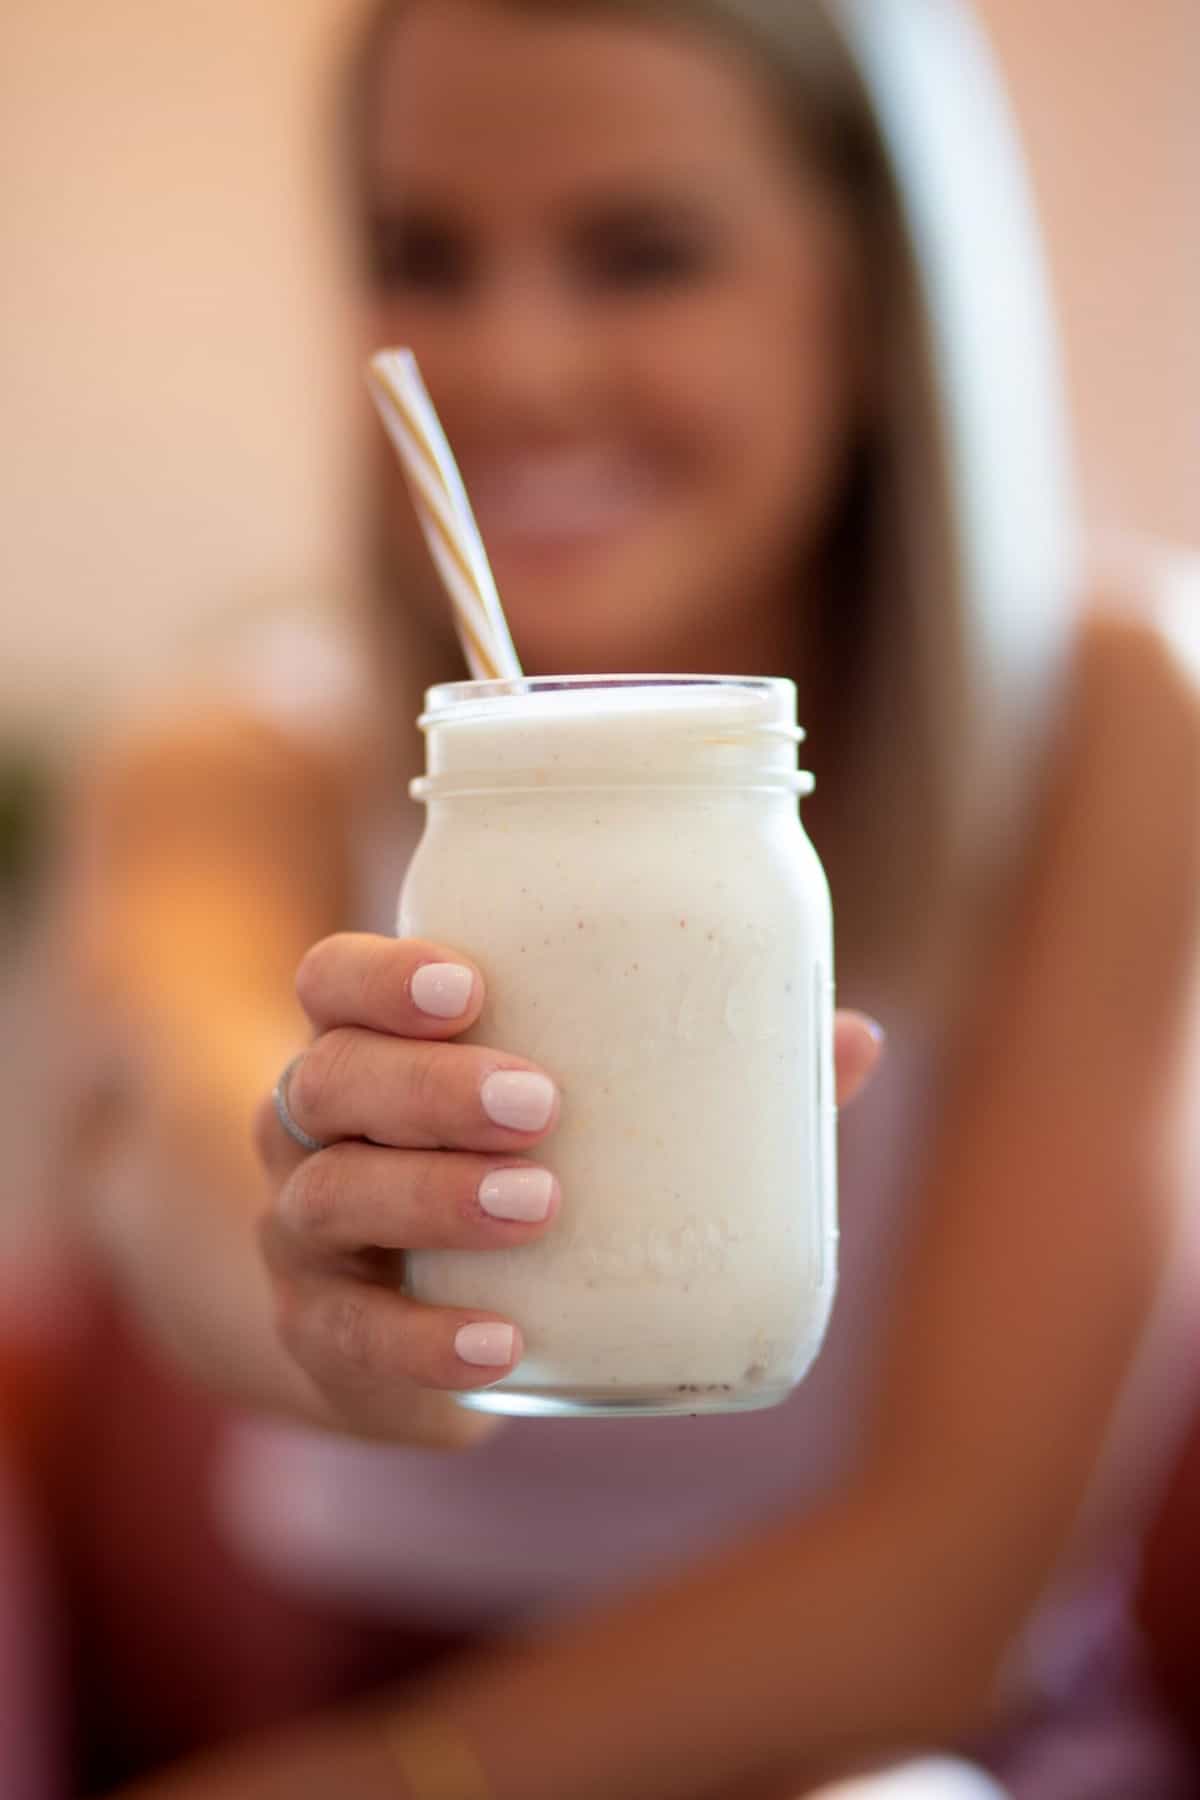
Woman holding up a jar of Beachbody shakeology supplement.

“Protein, fiber, and beneficial carbohydrates help curb cravings and provide healthy energy. Shakeology is a low-glycemic index food. Low-GI foods release carbohydrates more slowly, causing a lower blood-glucose response. Protein and fiber help you feel full so you eat less, which helps support any weight-loss goals.” 

This is not untrue as we want to try to fill our meals and snacks with the hunger crushing combination of fibre, protein and healthy fats. While research suggests that macronutrient composition is more important than the physical state of food in determining subjective appetite and food intake, other research suggests that hunger and appetite tends to be greater after eating a liquid meal compared to a solid one, while hunger hormones are lower after eating the solid meal. 

There’s also evidence that chewing reduces self-reported hunger and food intake, likely due to alterations in gut hormone responses related to satiety. Finally, evidence suggests that eating more mindfully, at a slower pace, and with an enhanced focus on bodily sensations, increases awareness of satiety which in turn can reduce how much you eat, which is a lot easier to do with whole food compared to a drink you can chug back. 

For reference, 1 scoop of Beachbody Shakeology mixed with water contains just 160 calories and 5 grams of added sugar. To compare, this is roughly the same amount of calories, fibre and protein as 6 oz of Greek yogurt with 1 cup of mixed berries and no added sugar. Having said that, even with whole food, there’s only so far that 160 calories will take you. I mean even yogurt and berries will never be more than a snack. So if you actually want to satisfy your craving and boost energy levels, your body might need more fuel. 

Claim #2: Lean Muscle Support

Woman pouring Beachbody shakeology powder in to a shaker.

“Protein also helps you maintain lean muscle mass and support muscle recovery. With 16 g of protein from multiple sources like flax and peas, Shakeology is a well-rounded protein source, providing all 9 essential amino acids.”

Again, this is all important. However, if this is marketed as a post-workout snack to aid in muscle recovery, you actually want to pair it with some carbs. A lot of carbs actually. Research suggests we ideally want a 3:1 carb to protein ratio post-workout to help replenish glycogen stores, and elicit an insulin response that helps drive that protein into the muscle more efficiently. So many of these protein powders are advertised as being so low carb and low calorie but that’s actually not necessarily what your body needs to support lean muscle mass and muscle recovery. Considering this product is currently just a 1:1 ratio of carbs to protein, we could add in some berries or banana to the smoothie to bump it up a bit.

Claim #3: Gut Health Help

A wooden dummy sitting on a toilet.

“Probiotics, prebiotics, fiber, and digestive enzymes help support regularity and healthy digestion. Our formula has 6 g of soluble and insoluble fiber as well as beneficial bacteria.” 

Probiotics

When looking at the ingredient list, it states that it contains Bacillus coagulans MTCC5856 which doesn’t have a lot of research to support its use. It also apparently has 200 million CFUs which is pretty good for a fortified product. However, some studies suggest you may need as much as 10 billion CFUs in a product to help the bacteria survive until the end of its shelf life. So if you’re looking to include probiotics in your diet, most fortified food-like products don’t have much of a clinical dose, so you may be better off adding another supplement to your regime. 

Digestive Enzymes

Shakeology includes digestive enzymes alpha-amylase, glucoamylase and alpha-galactosidase to aid in the breakdown of complex carbohydrates. It also includes lactase and invertase to break down simple carbohydrates, as well as and cellulase to break down cellulose.

You may be familiar with the anti-gas pill Beano (which is alpha-galactosidase) or the magical pill Lactaid (aka lactase) that allows lactose intolerant individuals to consume dairy. While these two supplements have been proven to be beneficial for individuals that lack enzymes to comfortably digest food, there is no evidence to support that digestive enzymes have any benefit to the average individual. There’s also no evidence to support the use of any of these other mixed enzyme supplements.

The truth is that our bodies naturally secrete digestive enzymes starting in the mouth and down again along the digestive tract. Therefore, Shakeology’s claim that the digestive enzymes in the product further breakdown molecules in the drink to more efficiently absorb nutrients into the body has yet to be proven. 

Claim #4: Free-Radical Fighters (Superfoods)

Flat lay image of the inside of a pomegranate.

“Superfoods like camu-camu and pomegranate have antioxidant properties that can help fight free radical damage caused by the daily stresses of modern living.”

It’s definitely true that camu-camu and pomegranate do have antioxidant properties. However, no information is provided about the relative amounts of the ingredients in the product, making it a bit of a hard sell to assume they’ll do anything “super” for your health. In fact, the nutritional pane shows that the only antioxidant listed in significant proportions is vitamin C at 28%, but you could get over 100% of your needs just by eating half of a red pepper or a cup of strawberries or Brussels sprouts. In other words, the “free-radical fighting” properties of the product is really not a huge deal.

Claim #5: System Support

“Vitamins and minerals help your body’s systems run smoothly, while superfoods and phytonutrients such as matcha green tea and kale support vitality.”

I feel like the word “vitality” has become super popular as of late to describe basically nothing concrete or real. It just sounds like something you want, right? I assume it’s just a sexier word for energy, and if that’s the case, any food with calories can give you that. While I’m not sure what the deal is with kale other than that it’s always a good idea to throw kale into the marketing materials, matcha does contain caffeine so I guess the statement makes sense. Having said all of that, if you look at the ingredient list, kale and matcha are both at the very bottom, meaning they’re probably present in undetectable quantities.

Claim #6: Stress Busters

Close up of an ashwagandha herb.

“Adaptogenic herbs and botanicals have traditionally been used to help the body adapt and respond to the effects of stress, whether it’s from your busy lifestyle, the environment, or working out. Our proprietary blend includes unique ingredients like ashwagandha, reishi, and chaga, which you don’t usually get from an ordinary diet.”

While it’s true that you do not normally get adaptogenic herbs in an “ordinary” healthy diet. But do you need to? Eh. While a lot of these mushrooms and herbs have been used for millennia in ancient healing practices, but even with the most studied adaptogen, ashwagandha, the research is still pretty thin.

Two small short term studies did find that using an ashwagandha supplement reduces cortisol levels, but ultimately, we need much larger sample sizes and timelines to understand its long term outcomes.

As for Reishi and Chaga, some preliminary research suggests that these mushrooms may help support the immune system by stimulating white blood cells. However, the research has mainly been conducted on immunocompromised individuals or mice studies. So, it’s really too early to make significant sweeping claims. Also, the dosages of these ingredients are not even listed so the likelihood of you getting a clinical dose in this shake is pretty slim. 

Is Beachbody Shakeology Worth it?

Overall, Beachbody Shakeology is an overhyped protein shake padded with a ton of sensationalized ingredients,. While it does contain some additional nutrients, fibre, antioxidants, and some probiotics, we don’t have any information on doses so it’s hard to be exactly sure what and how much you are drinking.

Personally, I think it is totally fine to drink this as a snack if you like the taste, but it is absolutely not a meal. And it definitely shouldn’t be a meal every single day or multiple times a day. In my opinion, the main benefit to Shakeology is that it can be easily grabbed for a quick snack on the go if you have a super busy day when preparing something more substantial just isn’t going to happen. But, do I think you have to drink it to further progress in Beachbody workout programs or any wellness program? Absolutely not. 

Are there any dangers in taking a supplement like Shakeology?

Not likely in this case, since according to their Website, Shakeology is third party tested on ConsumerLab.com. But it is a good reminder when choosing any supplement or protein powder to check out websites like labdoor.com or nsf.org to check if a product has been third party tested.  

A man drinking from his protein shake.

Beware of Multilevel Marketing

The way that Beachbody is structured is known as an MLM or multi-level marketing company. I have written about MLMs and pyramid schemes on the blog before, but essentially, “coaches” are independent distributors of Beachbody products and they have to sell products directly to people in their community. They also make a commission based on sales made by their recruited downlines (hence the obnoxious facebook posts).

This means that anyone can sign up to be a Beachbody coach. This ALSO means that they are typically unqualified nutrition or fitness individuals pushing Shakeology, Beachbody fitness programs, meal plans and other miscellaneous merch. Not only is it potentially dangerous to be taking nutrition information from a rando online, but because they are literally sales people for just one brand, it’s not exactly unbiased information.

When they make more money for every shake you drink,  of course they are going to tell you that having one or more shakes every single day is vital to reaching your fitness goals (because its vital to reach their commission goals!). So if you are following a Beachbody workout program, please just be weary of this tactic.  

Bottom Line

If you are interested in trying a Beachbody workout program or dietary supplement, I strongly encourage you to talk to a registered dietitian or health care professional first. Please do not seek health advice from “coaches”, because they are not necessarily looking out for your best interest, nor are they likely qualified to be giving out nutrition advice in the first place.

So is Beachbody Shakeology worth it? Ultimately, there is nothing inherently unhealthy about these products, so by all means, enjoy them if you like the flavour and they provide some nutrition for busy days. But they are not a meal, they are not magic, and unless they help you create some kind of caloric deficit, they will not inherently make you lose weight.  

https://www.youtube.com/watch?v=h5r1TSCPnEE&ab_channel=AbbeySharp

More Blog Posts You Might Like

If you found this article helpful, read these next:

  • What is Arbonne? Are These Diet Products Safe?
  • Are Supplements Safe? How to Choose the Right Supplement for You
  • Weight Loss Multilevel Marketing Schemes (How to Spot & Avoid)
  • What To Look For In A Protein Powder

What has your experience been with Beachbody Shakeology? Leave me a comment below!

Abbey Sharp

Abbey Sharp is a Registered Dietitian (RD), regulated by the Ontario College of Dietitians. She is a mom, YouTuber, Blogger, award winning cookbook author, media coach specializing in food and nutrition influencers, and a frequent contributor to national publications like Healthline and on national broadcast TV shows.
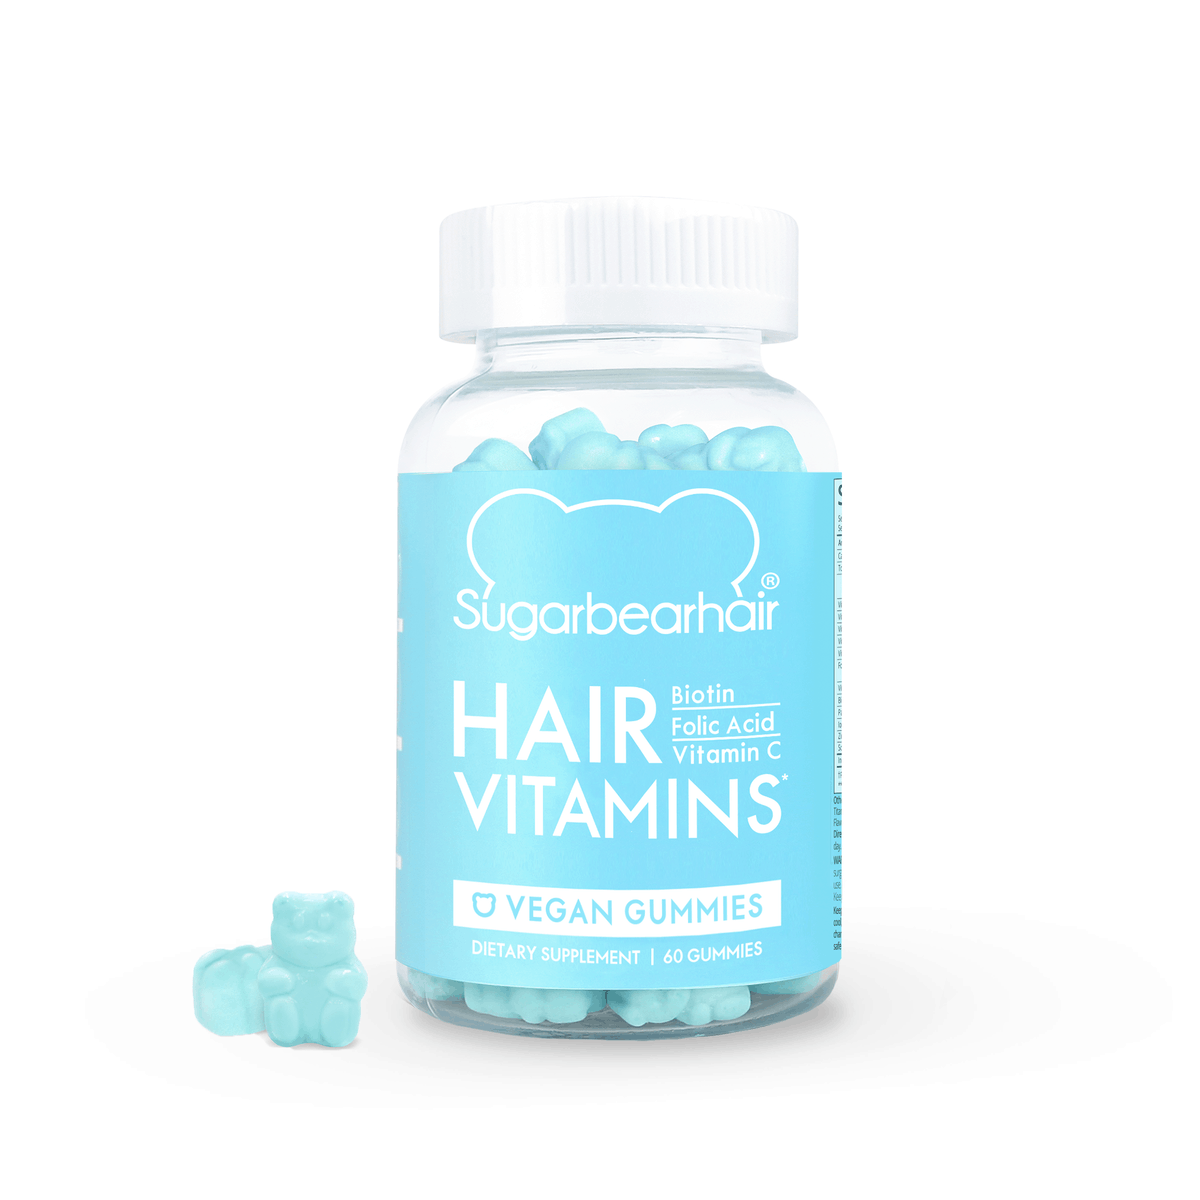
www.abbeyskitchen.com/about-abbey/

Last Updated December 7, 2020. Published May 1, 2023 By Abbey Sharp 46 Comments

BEST Chia Seed Jam (Vegan, Low Sugar, Kid Friendly)

This healthy Cherry Strawberry Chia Jam will quickly become your go-to morning spread because it’s totally vegan, super healthy and low in added sugar!

This healthy chia seed jam with strawberry and cherries will quickly become your go-to morning spread! It is totally vegan, low in added sugar, and kid friendly.

Strawberry chia jam in a jar with a spoon.

By now, we all know about the nutritional powerhouse that is the teeny tiny little chia seed – one tablespoon provides a whopping 5 grams of fibre and 3 grams of protein. Holy moly! Talk about dietitian approved.

Now I love to sprinkle chia seed into my smoothies and yogurt parfaits as much as the next person, but the chia recipe that is the ruler of my little foodie heart? CHIA SEED JAM.

Table of contents

  • Why This Recipe Works
  • Key Ingredients
  • How to Make This Recipe
  • Expert Tips
  • Recipe FAQs
  • More Recipes You Might Like

Why This Recipe Works

If you’ve ever made chia pudding before, you’re probably well aware of chia seeds’ amazing thickening properties. They absorb liquid and make it somewhat jelly-like and thick.

That’s what makes chia seeds ideal for making a thick and delicious jam! Not to mention, one of the biggest advantages of using chia seeds is that it boosts nutrition in a BIG way. Chia seeds are loaded with fibre, protein and healthy omega-3 fats! They’re also vegan so our plant-based friends can get in on the PB&J fun.

Finally, this chia seed jam doesn’t require any sugar to do it’s job – you can basically get away with sweetening your jam or jelly to taste depending on the sweetness of your fruit.

Key Ingredients

Birds eye view of portioned ingredients needed for recipe including strawberries, cherries, maple syrup, lemon, and chia seed.

Fruit – I love to make this chia jam recipe using strawberries and dark cherries. But you can literally use any fruit that you prefer – if you love blueberry jam, use blueberries. If you’re a raspberry jam type of gal, go ham on the raspberries. This recipe is insanely versatile which is why we love it.

Chia Seed – Like I said, chia seeds work their magic in a big way for this recipe. Not only does it boost the nutritional value, but it creates a gel when combined with liquid.

Maple Syrup – I like to sweeten this recipe with a little kiss of maple syrup. But you can choose to omit this or add extra sweetener if you prefer. Either way, this recipe requires no granulated sugar, which makes it an amazing low sugar alternative to most store-bought jellys and jams.

Lemon Juice – The lemon juice gives this chia seed jam recipe a nice little spritz of tartness that really makes the fruit stand out and do the talking.

How to Make This Recipe

Three side by side images showing each step of how to make recipe including boiling down strawberries and cherries and combining with seed in a jar.

Step 1: In a saucepot, heat the cherries and strawberries until they start to bubble and get syrupy.

Step 2: Once super soft, mash them with a potato masher until the mixture is jammy, loose, and with some visible little bits of fruit in it. Add in the lemon juice and maple syrup, and taste.

Step 3: Take the mixture off of the heat, transfer it to a container and add in the chia seeds. Allow the mixture to set for at least 20 minutes, or until it thickens up. Enjoy immediately, or pack away in the fridge to use throughout the week.

Expert Tips

Making this cherry strawberry chia seed jam is pretty much as easy as adding chia seeds to mashed up soft fruit. My two favourite jam flavours are cherry and strawberry, so I decided to combine them into one flavour combo. But you can literally choose any kind of jam-friendly fruit – there are no hard and fast rules and you can totally make this chia jam recipe your own!

This low sugar cherry strawberry chia seed jam is perfect on toast, in thumbprint cookies, swirled through ice cream or layered in breakfast parfaits. You might as well make a huge batch and preserve it – and if you do, I suggest you read my easy to follow post on canning here!

Cherry strawberry chia jam in a small mason jar.

Recipe FAQs

How long does this recipe last in the fridge?

This jam lasts in the fridge for about 2-4 weeks in an airtight container.

Can I use flax seed instead of chia seed?

I have personally never tried making it with flax seed, but flax seed also has gel like properties so it would totally be worth a shot! I’d suggest trying 1.5 tablespoons of flax seed for every 1 cup of fruit.

Can I use honey instead of maple syrup?

If you don’t need to make this chia seed jam vegan then you can definitely use honey or any other sweetener you prefer.

What can I add this jam to besides toast?

You can add it to ice cream, yogurt parfaits, baked goods, oatmeal or just enjoy it alone with some crackers.

More Recipes You Might Like

Here are some of my favourite ways to add chia seed jam to my recipes!

  • Chocolate Cups with Chia Jam
  • Peanut Butter & Jelly Chia Pudding
  • Roasted Fig Chia Pudding and Tahini Date Caramel Parfait
  • Stuffed Sweet Potatoes with PB&J
  • Strawberry Lemonade Poptarts (Vegan)

What are some of your favourite jam flavours for chia seed jam?

This healthy Cherry Strawberry Chia Jam will quickly become your go-to morning spread because it’s totally vegan, super healthy and low in added sugar!
Print Recipe
5 from 28 votes

BEST Chia Seed Jam (Vegan, Low Sugar, Kid Friendly)

This healthy chia seed jam with strawberry and cherries will quickly become your go-to morning spread! It is totally vegan, low in added sugar, and kid friendly.
Prep Time10 minutes mins
Cook Time15 minutes mins
Total Time25 minutes mins
Course: Snack
Cuisine: American
Diet: Diabetic, Vegan
Servings: 2 Cups
Calories: 209kcal
Author: Abbey Sharp

Ingredients

  • 1 1/2 cups pitted dark cherries fresh or frozen
  • 1 1/2 cups sliced strawberries fresh or frozen
  • 2 Tbsp lemon juice or to taste
  • 2 tsp maple syrup or to taste
  • 3 Tbsp chia seeds

Instructions

  • In a saucepot, heat the cherries and strawberries until they start to bubble and get syrupy. Once super soft, mash them with a potato masher until the mixture is jammy, loose, and with some visible little bits of fruit in it.
  • Add in the lemon juice and maple syrup, and taste. Adjust the lemon and maple syrup depending on the sweetness of your fruit.
  • Take the mixture off of the heat, transfer it to a container and add in the chia seeds. Allow the mixture to set for at least 20 minutes, or until it thickens up. Enjoy immediately, or pack away in the fridge to use throughout the week.

Video

Notes

Making this cherry strawberry chia jam is pretty much as easy as adding chia seeds to mashed up soft fruit. My two favourite jam flavours are cherry and strawberry, so I decided to combine them into one flavour combo. But you can literally choose any kind of jam-friendly fruit – there are no hard and fast rules and you can totally make this chia jam recipe your own!
This low sugar cherry strawberry chia jam is perfect on toast, in thumbprint cookies, swirled through ice cream or layered in breakfast parfaits. You might as well make a huge batch and preserve it – and if you do, I suggest you read my easy to follow post on canning here!

Nutrition

Calories: 209kcal | Carbohydrates: 38g | Protein: 5g | Fat: 6g | Saturated Fat: 1g | Sodium: 5mg | Potassium: 468mg | Fiber: 11g | Sugar: 23g | Vitamin A: 66IU | Vitamin C: 77mg | Calcium: 152mg | Iron: 2mg

Have you tried making this cherry strawberry chia jam? Leave me a comment below! I would LOVE to hear your favourite combinations!

Abbey Sharp

Abbey Sharp is a Registered Dietitian (RD), regulated by the Ontario College of Dietitians. She is a mom, YouTuber, Blogger, award winning cookbook author, media coach specializing in food and nutrition influencers, and a frequent contributor to national publications like Healthline and on national broadcast TV shows.
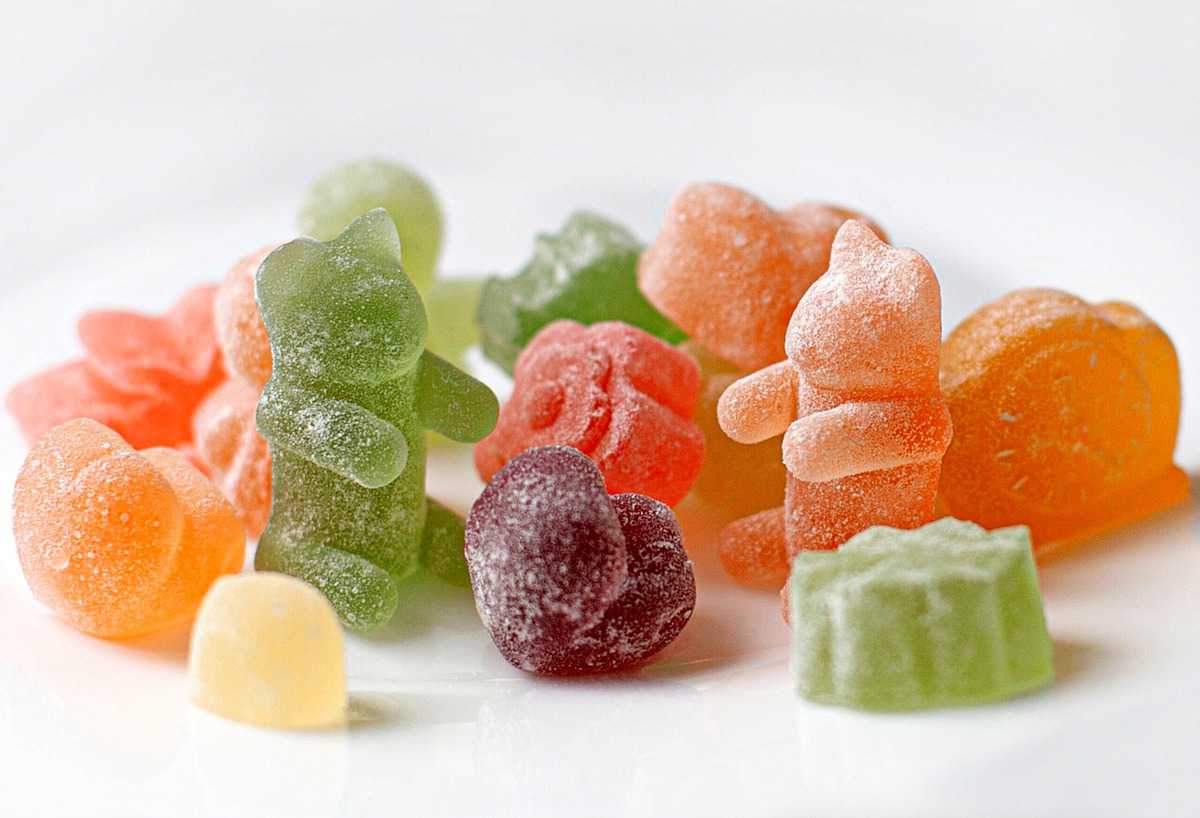
www.abbeyskitchen.com/about-abbey/
  • Previous Page
  • Go to page 1
  • Interim pages omitted …
  • Go to page 18
  • Go to page 19
  • Go to page 20
  • Go to page 21
  • Go to page 22
  • Interim pages omitted …
  • Go to page 89
  • Next Page

Get started with

Eight Free Recipe Books

From the co-founder of Neue Theory and creator of the Hunger Crushing Combo

Sign me up!
Abbey smiling at table
Abbey Sharp

“Foods may never be nutritionally equal. But we can make them morally equal by recognizing that our worth is never determined by what's on our plate.”

— Abbey Sharp, RD About Abbey ◥

Books

  • HCC™
  • Mindful Glow
  • Free E-Books

Blog

  • Nutrition
  • Recipes
  • Motherhood
  • Life

Explore

  • Neue Theory™
  • Bite Back
  • YouTube

Abbey

  • About
  • Coaching
YouTube TikTok Instagram Facebook X Pinterest
Abbey Sharp - The No BS Dietitian From Abbeys Kitchen

© Abbey's Kitchen 2026  All Rights Reserved •  ACCESSIBILITY STATEMENT •  Privacy Policy

This site uses cookies. By continuing to browse the site, you are agreeing to the use of cookies Accept Privacy Policy
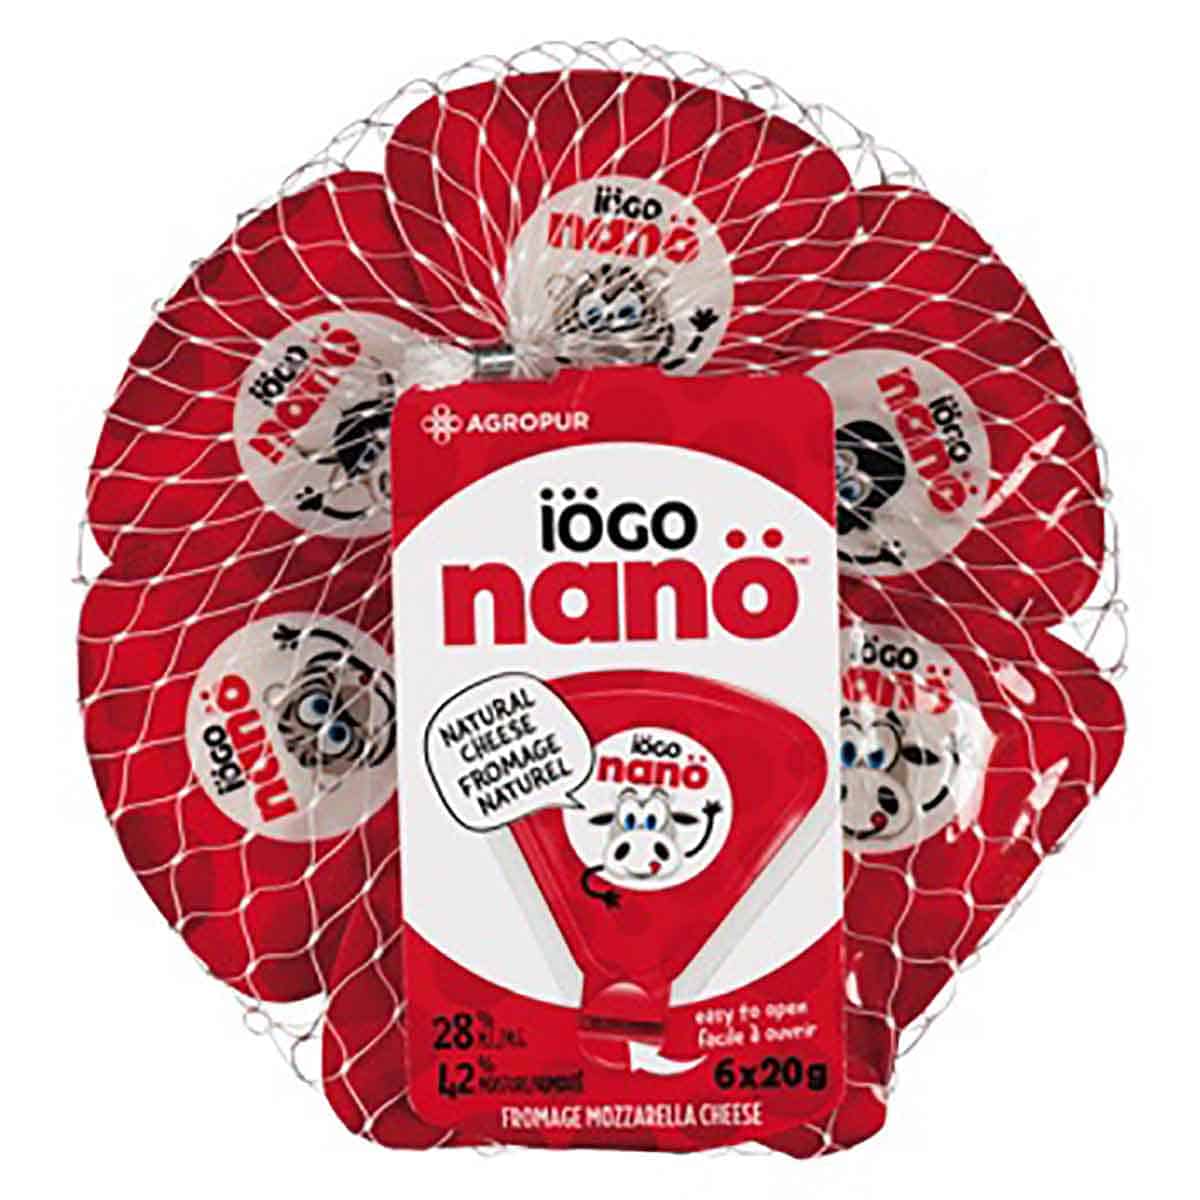
Privacy & Cookies Policy

Privacy Overview

This website uses cookies to improve your experience while you navigate through the website. Out of these, the cookies that are categorized as necessary are stored on your browser as they are essential for the working of basic functionalities of the website. We also use third-party cookies that help us analyze and understand how you use this website. These cookies will be stored in your browser only with your consent. You also have the option to opt-out of these cookies. But opting out of some of these cookies may affect your browsing experience.
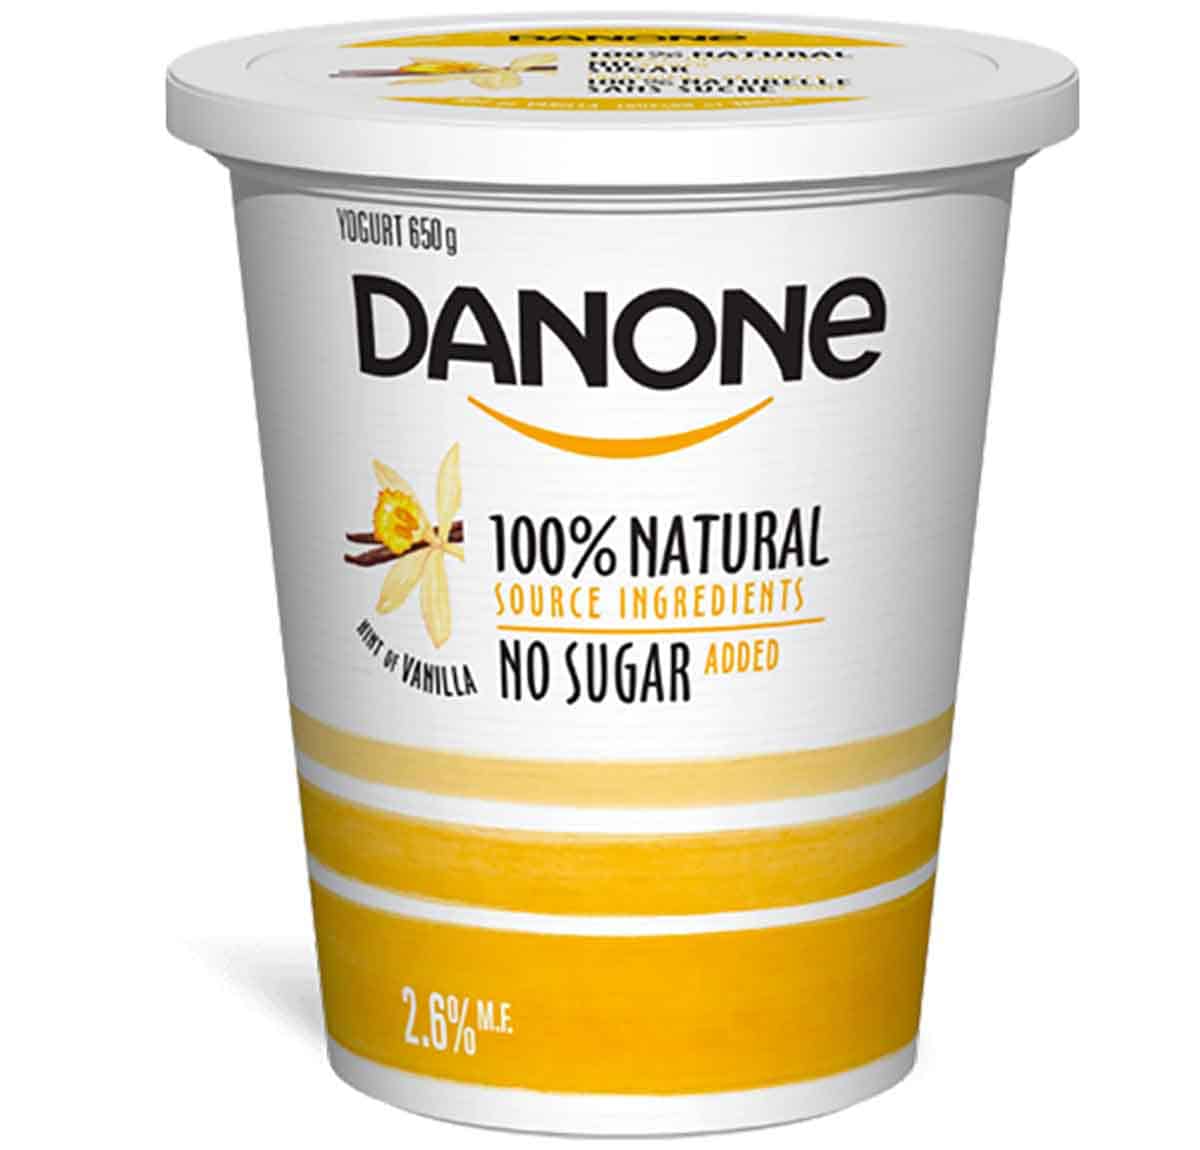
Necessary
Always Enabled
Necessary cookies are absolutely essential for the website to function properly. This category only includes cookies that ensures basic functionalities and security features of the website. These cookies do not store any personal information.
Non-necessary
Any cookies that may not be particularly necessary for the website to function and is used specifically to collect user personal data via analytics, ads, other embedded contents are termed as non-necessary cookies. It is mandatory to procure user consent prior to running these cookies on your website.
SAVE & ACCEPT

Rate This Recipe

Your vote:


A rating is required
A name is required
An email is required