• Skip to main content

Abbey's Kitchen

Healthy Recipes, Nutrition Myth Busting, Healthy Eating Tips

  • Books
    • HCC™
    • The Mindful Glow Cookbook
    • Recipe eBooks
      • Family
      • Hypothyroidism
      • BLW
      • Vegan Week 1
      • Vegan Week 2
      • Vegan Week 3
      • Keto
      • Gluten Free Week 1
      • Gluten Free Week 2
      • Fitness
      • Paleo
  • Blog
    • Nutrition
    • Recipes
    • Motherhood
    • Life
  • Explore
    • Neue Theory™
    • Bite Back With Abbey Sharp
      • Apple Music
      • Spotify
      • Amazon Music
    • YouTube
  • Abbey
    • About
    • Coaching
    • Contact

Abbey Sharp

Last Updated November 30, 2020. Published November 30, 2020 By Abbey Sharp 16 Comments

Egg Roll in a Bowl (Keto Friendly)

This Egg Roll in a Bowl is an easy keto friendly, gluten free, low carb, fast dinner recipe that is loaded with all of the flavours of an egg roll.
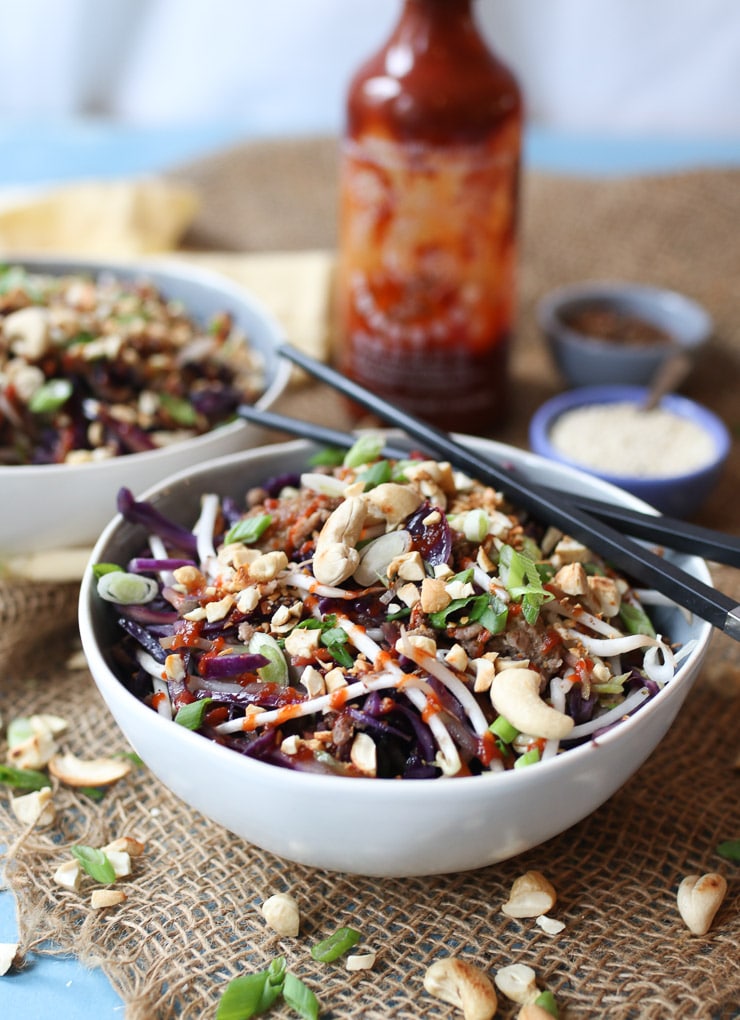
This Egg Roll in a Bowl only takes 20 minutes to make and is an easy keto friendly, gluten free, low carb, fast dinner recipe that is loaded with all of the flavours of an egg roll.

Egg roll in a bowl dinner recipe in a white and grey bowl served with chopsticks and hot sauce.

Bowls are in and for good reason. They’re an easy way to get in your protein and veggies in a totally instagrammable meal. This recipe was inspired by one of my favourite Chinese food take-out staples, the egg roll. Crunchy, meaty, and umami-rich, I cannot NOT get an egg roll when I order in, but I also get that it’s not the most nutritionally balanced option on the menu…

Why This Recipe Works

Enter my egg roll in a bowl. This recipe is keto friendly and gluten free, made with tons of veggies and flavourful ground pork.

It’s super quick and easy to throw together as well as it only takes a total of 20 minutes to make from start to finish.

This recipe of egg roll in a bowl combines all of the usual suspects in an egg roll but without the deep-fried wrapper. It’s basically a stir-fry without the noodles or rice so it keeps it super protein rich and fibre packed. It’s also really flavourful thanks to the ginger, garlic, and sesame oil.

Table of contents

  • Why This Recipe Works
  • Key ingredients
  • How to Make This Recipe
  • Expert Tips
  • Recipe FAQs
  • More Recipes You May Like

Key ingredients

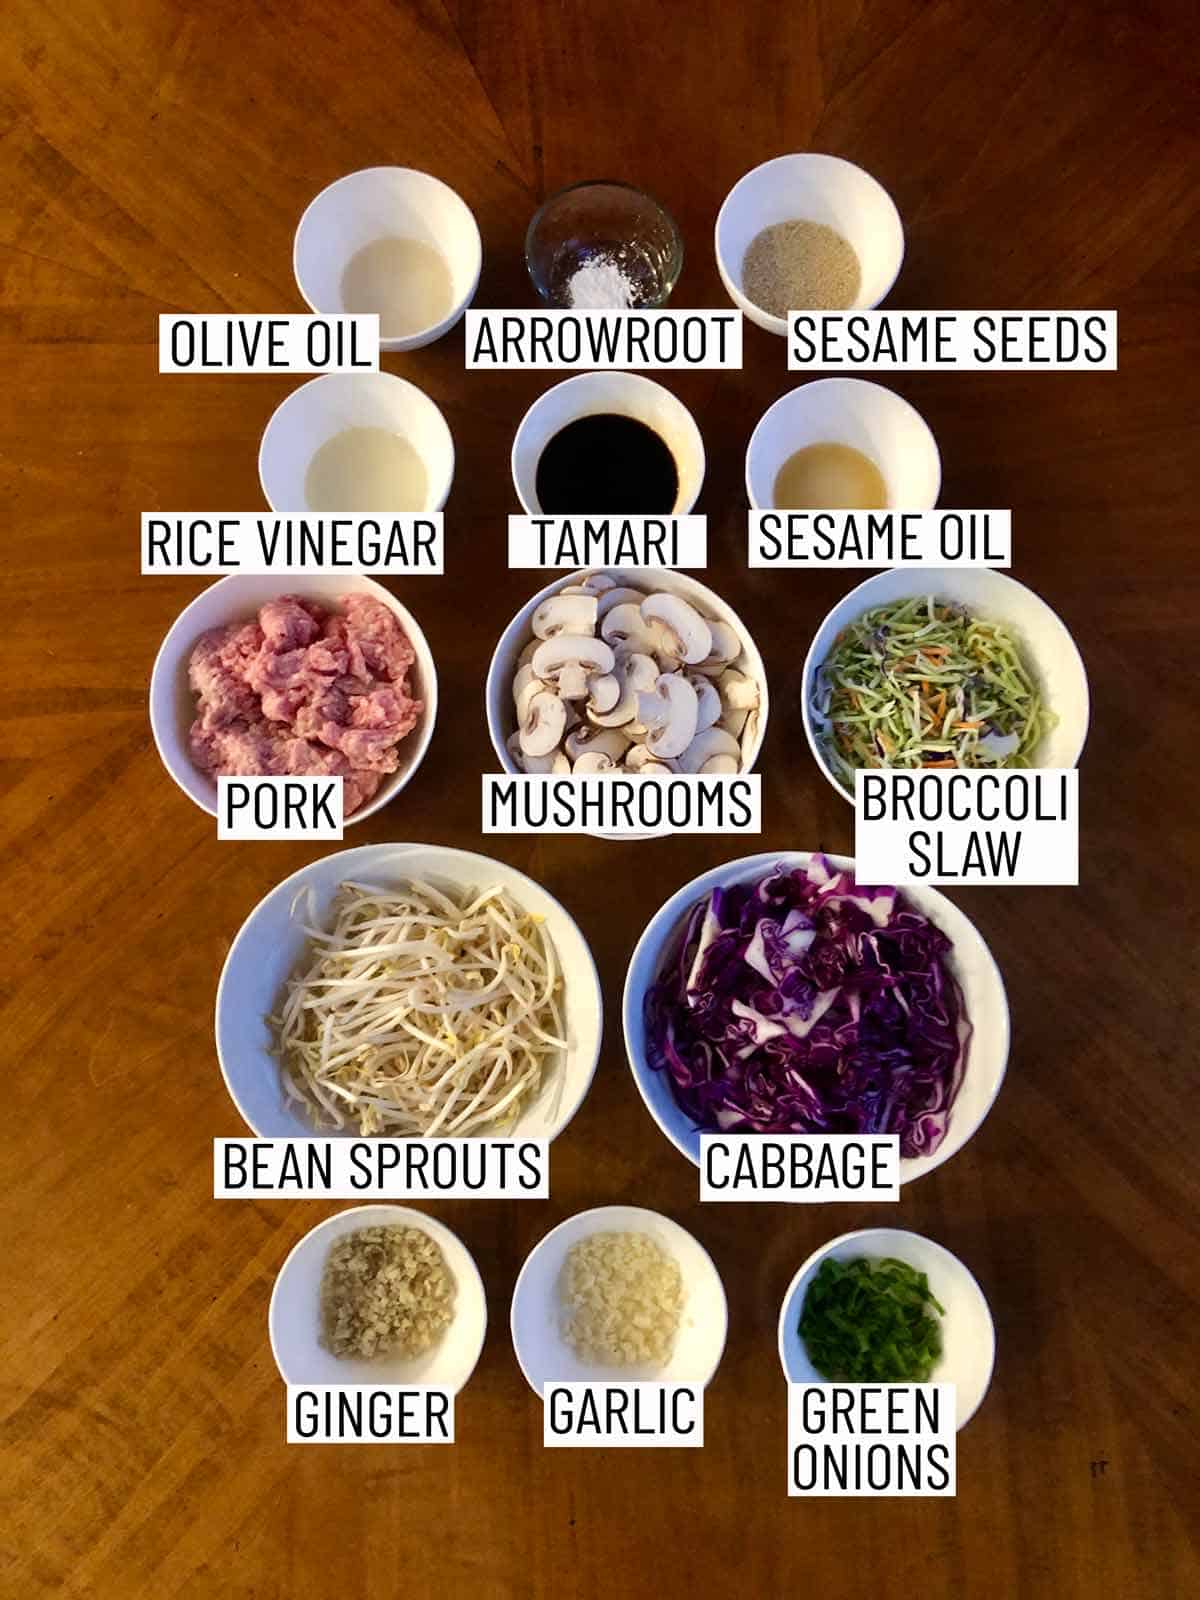
Overhead image of ingredients for egg roll in a bowl: olive oil, arrowroot, sesame seeds, rice vinegar, tamari, sesame oil, pork, mushrooms, broccoli slaw, bean sprouts, cabbage, ginger, garlic, green onions.

Sauce Ingredients – You’ll need sodium gluten free tamari, rice wine vinegar, and sesame oil and then arrowroot flour to thicken the sauce that you’ll use for the egg roll in a bowl.

Ground Pork – You can use extra lean or full fat pork for this recipe! Just make sure when you are cooking it, to drain any extra liquids in the pan.

Vegetables – We use a mix of broccoli slaw, shredded cabbage, cremini mushrooms, and bean spouts.

How to Make This Recipe
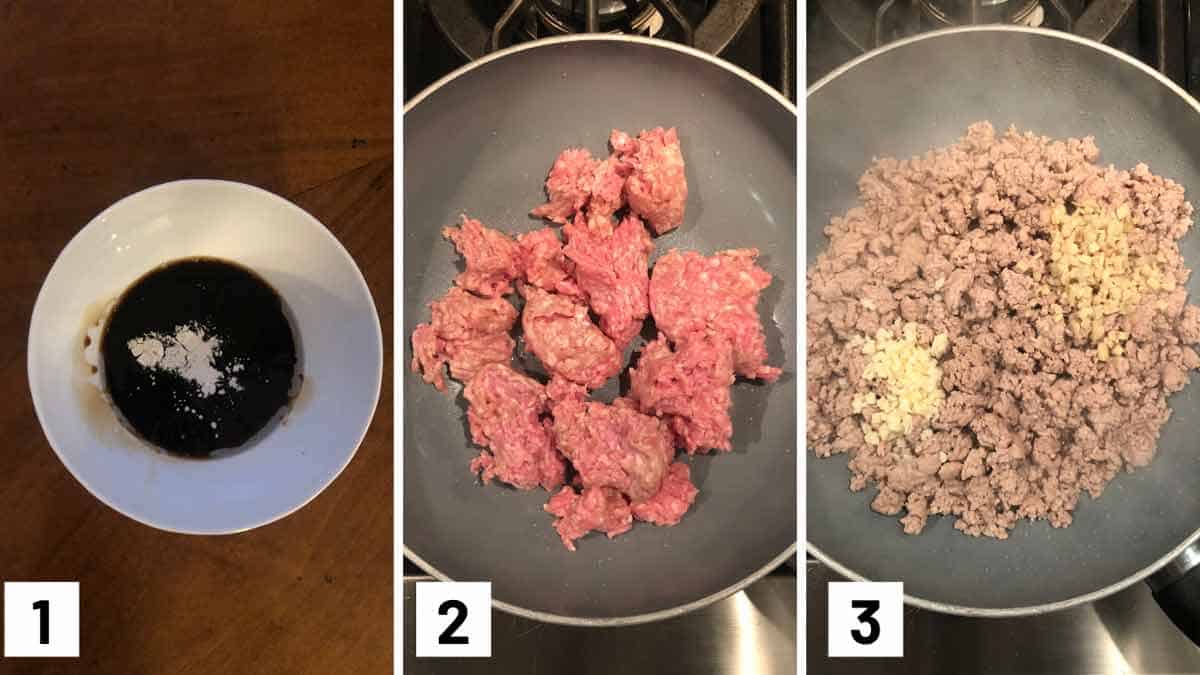
Process shot showing making the stir-fry sauce, browning meat, and adding in garlic and ginger.

Step 1: Mix together the tamari, vinegar, sesame oil and arrowroot flour and set aside.

Step 2: In a large skillet, heat the olive oil over medium high heat and add the pork. Cook until browned.

Step 3: add in the ginger and garlic for 30 seconds.
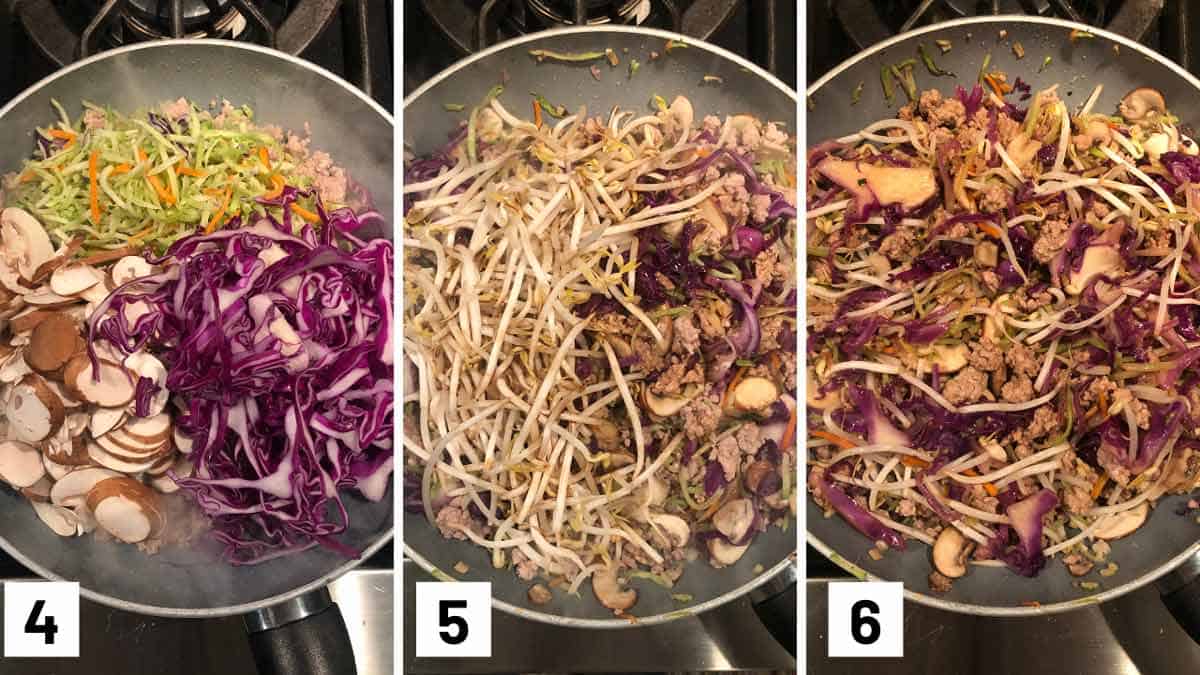
Process photo showing adding broccoli slaw, cabbage, and mushrooms into a pan, stir frying it with sauce, and adding in bean spouts and tossing.

Step 4: Add the broccoli slaw, cabbage, and mushrooms and stir until cooked down.

Step 5: Stir in the reserved sauce and bean sprouts and toss. Season with salt and pepper to taste.

Step 6: Once combined, divide into four bowls and top with sesame seeds and sriracha, to taste.

Expert Tips

I use cabbage, mushrooms, broccoli slaw and bean sprouts in my egg roll in a bowl, but you can totally switch up the veggies to use whatever you have on hand.

I also like ground pork which is a bit more traditional, but you could easily swap in turkey, chicken, beef, or even soy ground meat.

If you like heat, you can add sriracha on top. If you’re not a fan of heat, you can use hoisin sauce instead.

Recipe FAQs

Is this good for meal prepping?

This keto egg roll in a bowl will become one of your easy fast meal prep staples because it re-heats really well, so go ahead and make a double batch for the whole week.

How are the meal preps/leftovers stored?

Make sure you store everything in airtight containers in the fridge.

Can I use store-bought broccoli slaw?

Yes! If you want to cut down on the prep time, you can purchase pre-made broccoli slaw to make this recipe faster.

What else can I add to this egg roll in a bowl?

You can use sliced peppers, match-stick cut carrots, or whatever vegetables you have in your kitchen!
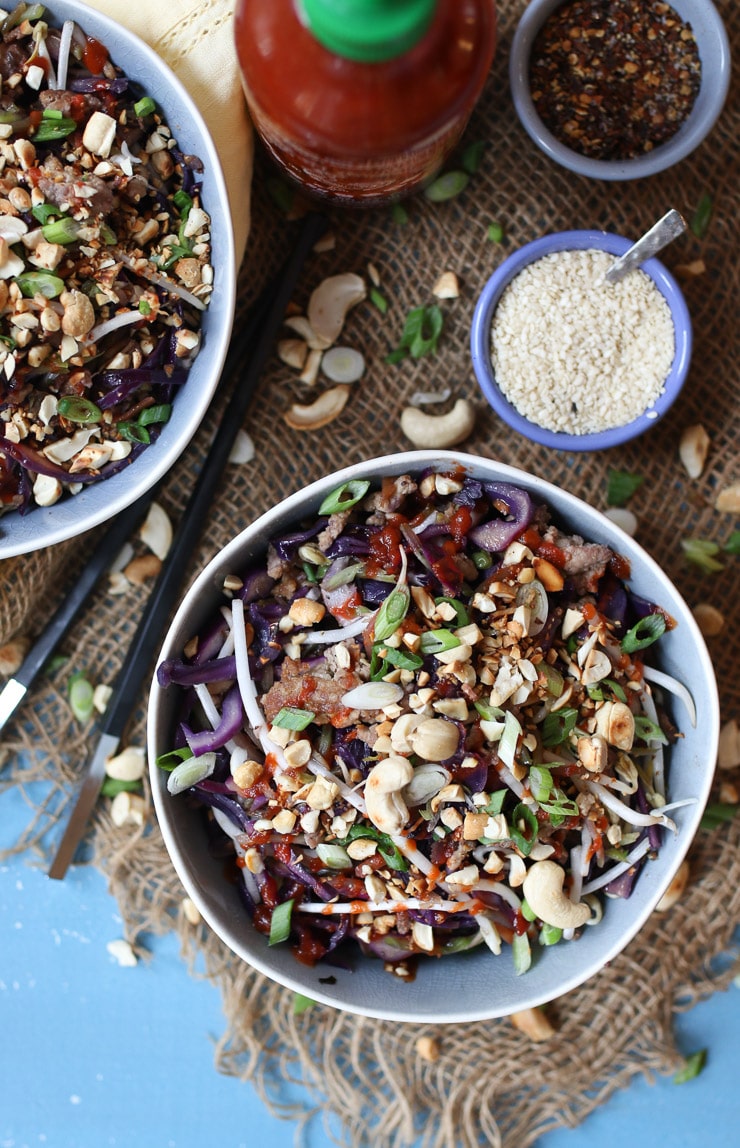
Birds eye view of grey bowl containing keto egg roll in a bowl recipe garnished with cashews and sesame seeds.

More Recipes You May Like

Want more easy keto recipes? Here are a couple of mine that you might like!

  • FLAX FOCACCIA (NO FLOUR OR YEAST FREE BREAD)
  • PIZZA EGG MUFFINS
  • KETO PEPPERONI PIZZA BAGEL BITES
  • BREAKFAST KETO BAGELS WITH EGGS

Now I want to know, have you made my keto egg roll in a bowl?
This Egg Roll in a Bowl is an easy keto friendly, gluten free, low carb, fast dinner recipe that is loaded with all of the flavours of an egg roll.
Print Recipe
5 from 5 votes

Keto Egg Roll in a Bowl

This Egg Roll in a Bowl is an easy keto friendly, gluten free, low carb, fast dinner recipe that is loaded with all of the flavours of an egg roll.
Prep Time5 minutes mins
Cook Time15 minutes mins
Total Time20 minutes mins
Course: Dinner
Cuisine: Asian
Servings: 4 people
Calories: 370kcal
Author: Abbey Sharp

Ingredients

Sauce:

  • 1/4 cup reduced sodium gluten free tamari
  • 1 tsp rice wine vinegar
  • 1/2 tsp sesame oil
  • 1/2 tsp arrowroot flour

Egg Roll Bowl:

  • 1 tbsp olive oil
  • 1 lb ground pork extra lean or full fat
  • 2 tbsp minced ginger
  • 3 large cloves garlic minced
  • 1 bag broccoli slaw about 1 1/2 cups
  • 4 cups shredded green/red cabbage
  • 8 oz cremini mushrooms thinly sliced
  • 2 cups bean sprouts
  • Salt and pepper to taste
  • 3 tbsp green onions sliced
  • Toasted sesame seeds for garnish
  • Sriracha to taste

Instructions

  • Mix together the tamari, vinegar, sesame oil and arrowroot flour and set aside.
  • In a large skillet, heat the olive oil over medium high heat and add the pork. Cook until browned, then add in the ginger and garlic for 30 seconds.
  • Add the broccoli slaw, cabbage, and mushrooms and stir until cooked down.
  • Stir in the reserved sauce and bean sprouts and toss. Season with salt and pepper to taste.
  • Divide into four bowls and top with sesame seeds and sriracha, to taste.

Notes

I use cabbage, mushrooms, broccoli slaw and bean sprouts in my egg roll in a bowl, but you can totally switch up the veggies to use whatever you have on hand.
I also like ground pork which is a bit more traditional, but you could easily swap in turkey, chicken, beef, or even soy ground meat.
If you like heat, you can add sriracha on top. If you’re not a fan of heat, you can use hoisin sauce instead.

Nutrition

Calories: 370kcal | Carbohydrates: 13g | Protein: 25g | Fat: 25g | Saturated Fat: 9g | Cholesterol: 82mg | Sodium: 925mg | Potassium: 843mg | Fiber: 3g | Sugar: 6g | Vitamin A: 113IU | Vitamin C: 35mg | Calcium: 71mg | Iron: 2mg

What are some of your favourite Chinese take out staples?

Leave me a comment below with your thoughts!

Abbey Sharp

Abbey Sharp is a Registered Dietitian (RD), regulated by the Ontario College of Dietitians. She is a mom, YouTuber, Blogger, award winning cookbook author, media coach specializing in food and nutrition influencers, and a frequent contributor to national publications like Healthline and on national broadcast TV shows.

www.abbeyskitchen.com/about-abbey/

Last Updated November 28, 2020. Published November 28, 2020 By Abbey Sharp 2 Comments

Cauliflower Protein Porridge Peppermint Mocha Bowl (Gluten Free, Plant Based, Grain Free)

Festive bowl of oatmeal topped with crushed candy canes.

This cauliflower protein porridge bowl aka. “noats” is loaded with protein and delicious peppermint and mocha flavour! It is also a great recipe for those who are plant based, gluten free, low carb, and grain free!

Birds eye view of protein porridge oats with peppermint surrounded by candy canes.

Raise your hands if you look forward to Starbucks’ holiday drinks?

One of my favourites is their Peppermint Mocha Latte. OMG. That combination of peppermint, coffee and chocolate is legit EVERYTHING I’m living for right now.

So why not put those comforting flavours into a big bowl of peppermint mocha goodness in the morning? YES PLEASE! Introducing this delicious protein porridge with a TWIST. This festive protein porridge ups the fibre content in a serious way by using cauliflower instead of oats.

Table of contents

  • What are “NOATS”?
  • Key Ingredients
  • How to Make This Recipe
  • Expert Tips
  • Recipe FAQs
  • More Porridge Recipes You Might Like

What are “NOATS”?

Noats are a fun play on the words “no oats”. Basically it’s like oatmeal without any oats! Now, I LOVE oatmeal and oats, but I also love the idea of sneaking extra protein, healthy fats and veggies into my morning for satiety.

Key Ingredients

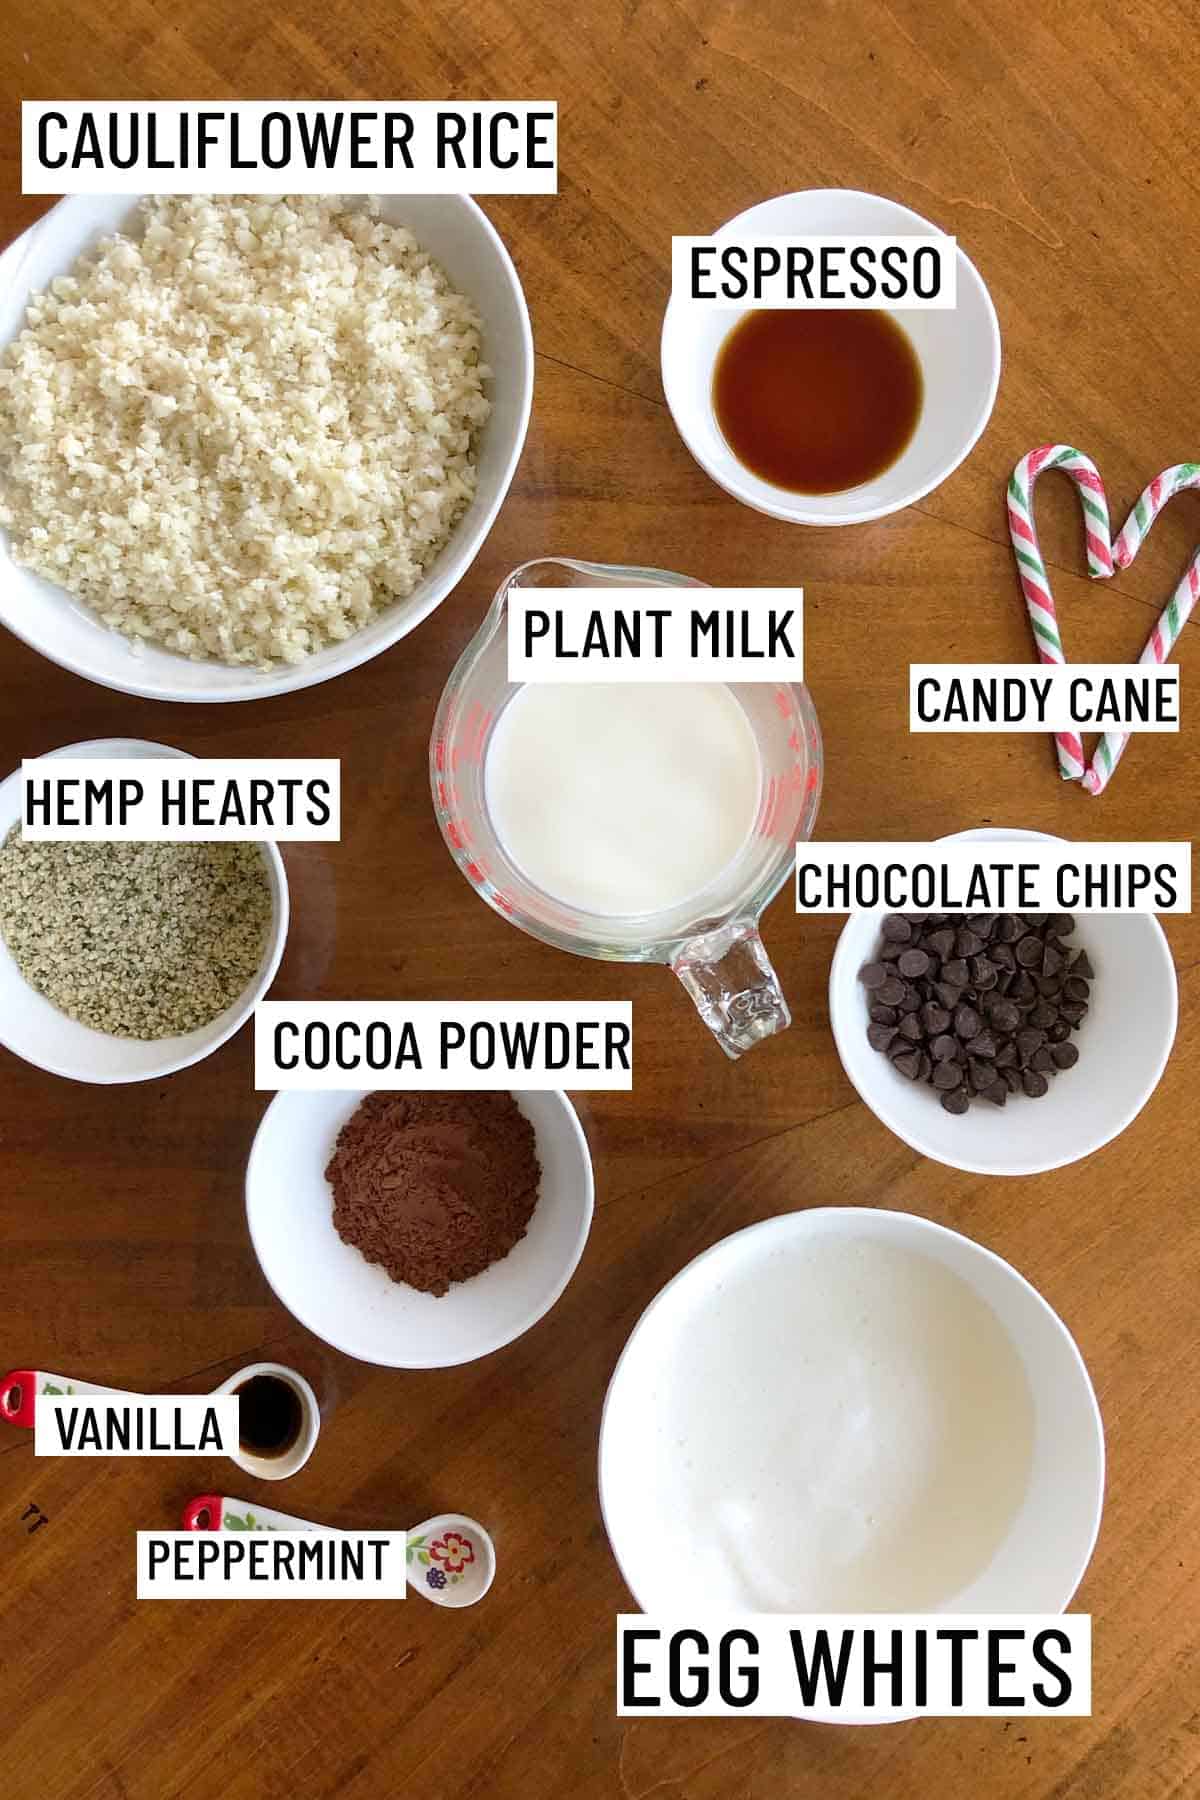
Birds eye view of portioned ingredients to make recipe including espresso, cauliflower rice, hemp hearts, plant milk, chocolate chips, candy canes, cocoa powder, egg whites, vanilla and peppermint extract.

Egg whites – to make this protein porridge chalk full of protein, I whip in eggs whites. Trust me, they don’t alter the flavour in any way and will make this porridge thick and fluffy.

Hemp hearts – hemp hearts are another one of my favourite hacks to add more protein to my meals. Did you know that two tablespoons of hemp hearts provides a whopping 7 grams of protein?

Cauliflower Rice – This is the key to making this “noats” protein porridge. While you can absolutely use oatmeal in this recipe (and trust me, I have), but if you are following a low carb or keto diet, OR you just want to up your veggie intake in a fun and creative way – cauliflower rice is a pretty amazing hack.

Non dairy milk – I like to use coconut milk for this recipe because it adds a natural sweetness. You can also use almond, soy or oat milk if you want to keep it dairy free – or you can go ahead and stick with regular cows milk. It’s really up to your own preference!

Espresso – I prefer to use espresso to make this protein porridge, but you can totally use drip coffee instead. If you want to make this bowl at any other time of the day (like as a festive night time snack), use decaf instead.

How to Make This Recipe

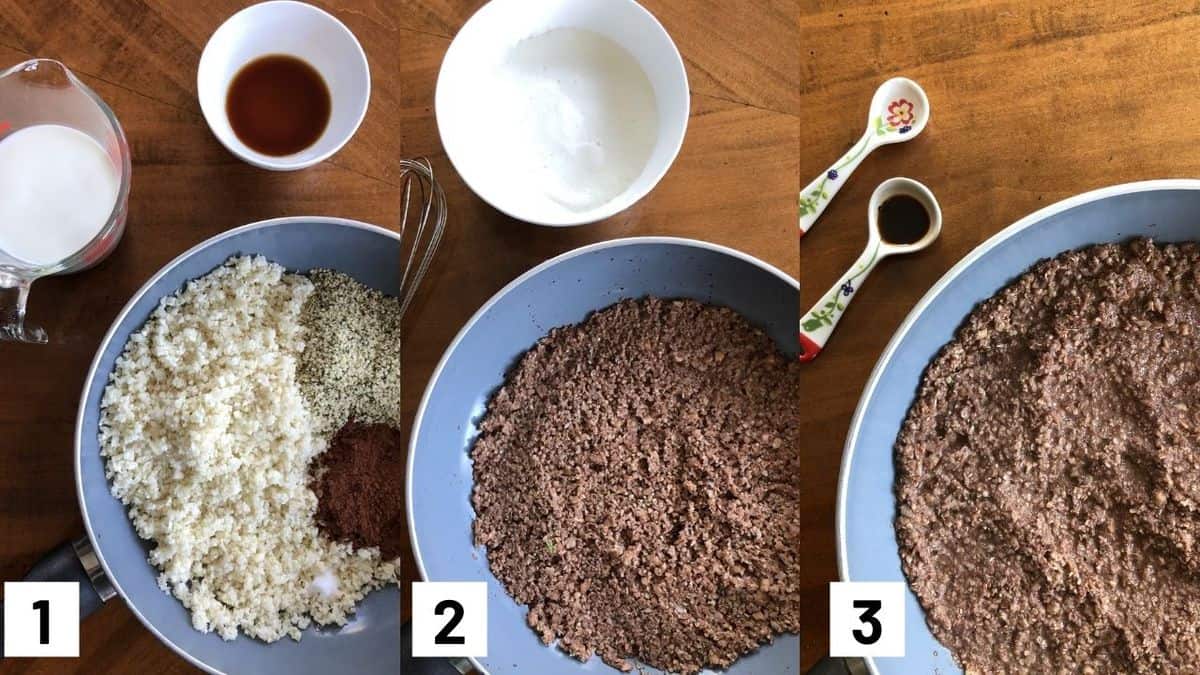
Images of the three steps to make recipe including cooking down the cauliflower, adding in the beaten egg whites, and adding peppermint and vanilla extract.

Step 1: Combine the cauliflower rice, hemp hearts, cocoa, salt, milk, and espresso in a medium sauce pot over medium heat. Stir until the cauliflower thaws and everything mixes together. Continue to cook until the mixture thickens, about 7-8 minutes.

Step 2: Reduce heat to low, and add in the frothy beaten egg whites, whisking continuously for about 30 seconds.

Step 3: Add in the peppermint and vanilla extract, pop the lid on the pot and let sit for 1 minute. Serve as is or top with candy canes, chocolate chips and additional non dairy milk.

Expert Tips

This recipe for oat free protein porridge was kind of the love child of my original protein oatmeal recipe and my cauliflower oats recipe that became popular with my low carb and keto followers.

The idea is that you can whip egg whites until fluffy (like a meringue), and then basically whip them into your oatmeal or no oatmeal base. In this case, the base is a combination of cauliflower rice for some fibre and veggies, and hemp hearts for healthy fats, protein and fibre.

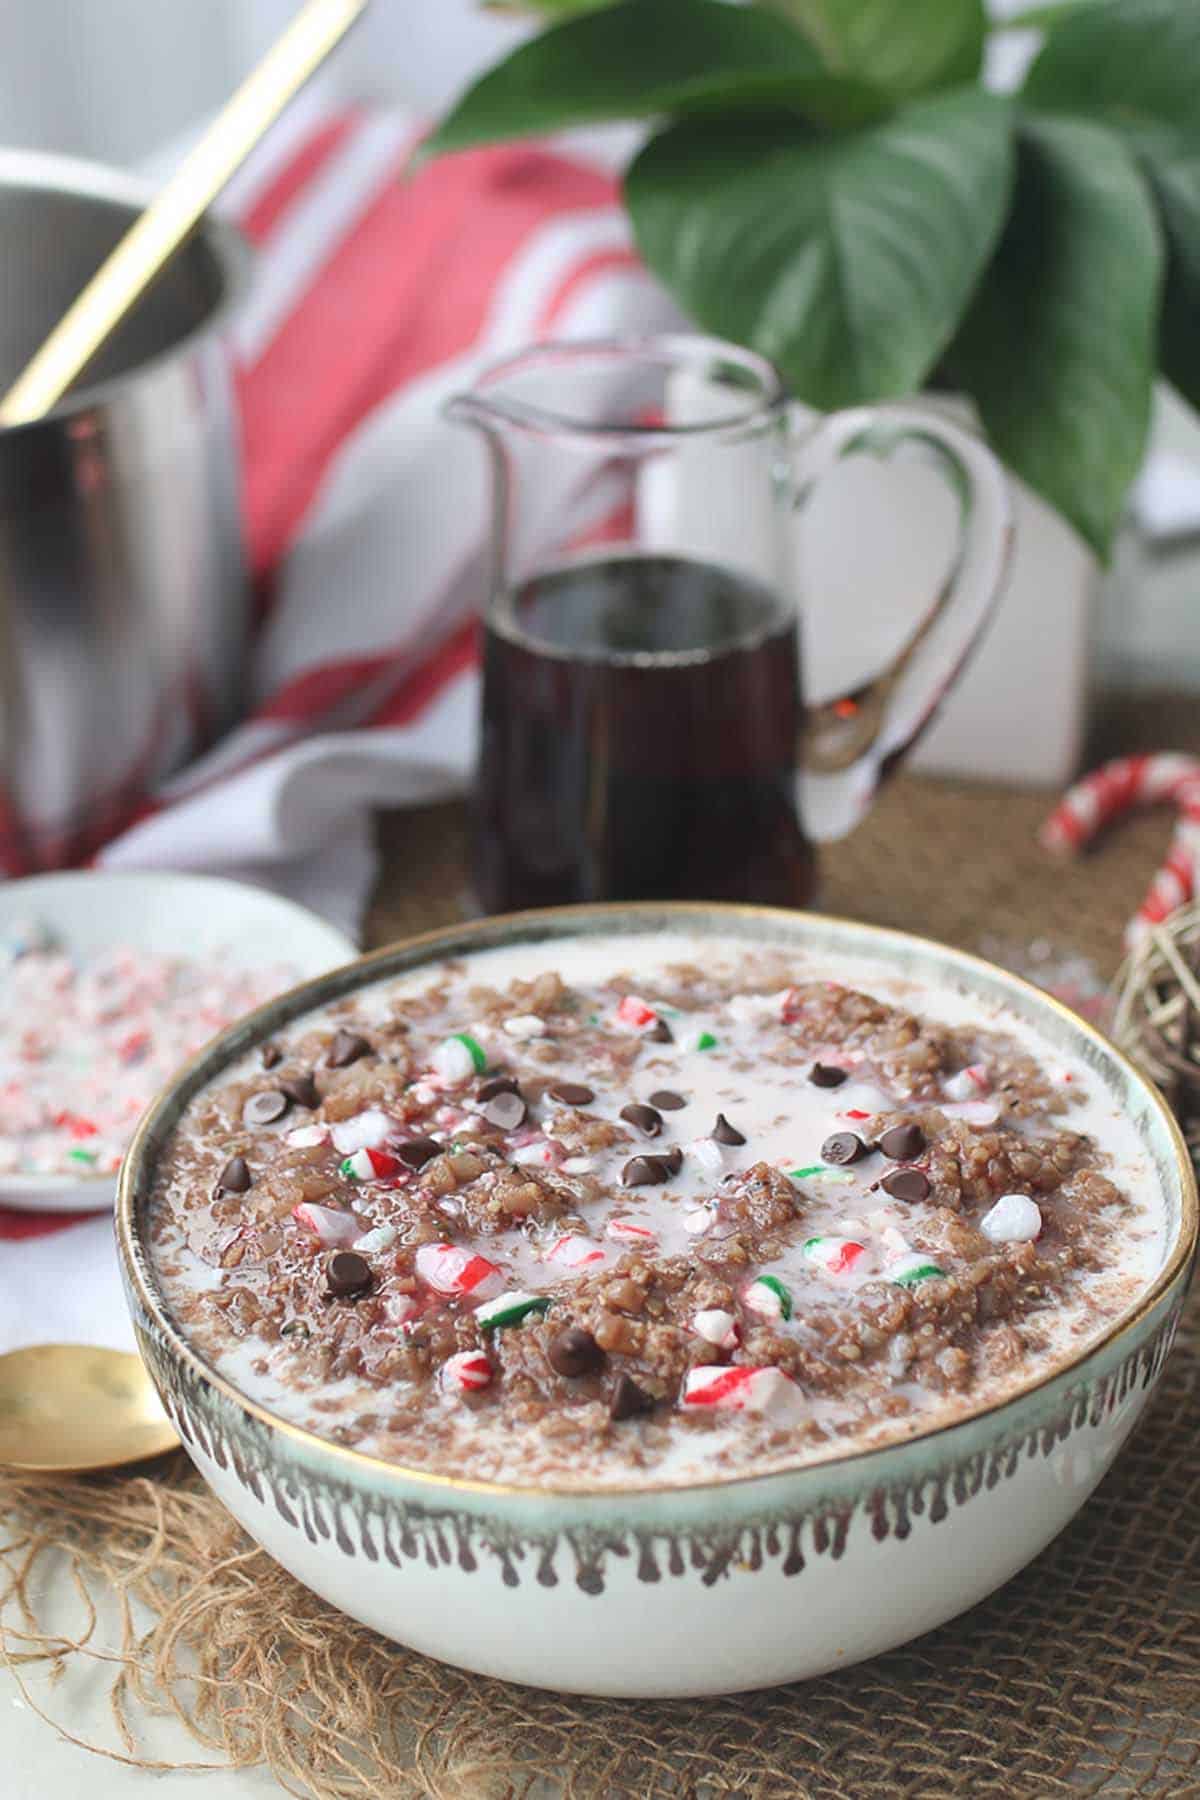
Christmas porridge in a white bowl topped with chocolate chips and candy canes.

Recipe FAQs

Can you make this protein porridge without caffeine?

Absolutely. You can go decaf or you can omit the coffee all together!

Can you use fresh cauliflower rice instead of frozen?

Definitely! it makes no difference, although I do find that fresh cauliflower oats take longer to cook so just be mindful of that.

Is this porridge keto friendly and low carb?

This has only 16 grams of carbs in it so it is low carb and depending on your plan, it also can be keto friendly.

Is this safe for someone on a gluten free diet or with celiac?

This protein porridge is completely gluten free since there is no actual oatmeal or grains in it! So yes, this is safe for people with gluten intolerance and celiac.

Can this be made ahead of time?

You can make a big batch of this protein porridge, cool it in the fridge and then rewarm it whenever you want a quick breakfast.

More Porridge Recipes You Might Like

Tiramisu Protein Overnight Oats

Chocolate Cherry Cobbler Overnight Oats

Peanut Butter Cup Porridge

Chocolate Zucchini Bread Oatmeal

Now loves, tell me – what would you put in your protein porridge?

Festive bowl of oatmeal topped with crushed candy canes.
Print Recipe
5 from 1 vote

Cauliflower Protein Porridge Peppermint Mocha Bowl (Gluten Free, Plant Based, Grain Free)

This Peppermint Mocha Latte Protein Porridge aka. noats is loaded with protein, while also being oatmeal free, dairy free, gluten free, low carb and keto friendly for those following restrictive diets.
Prep Time5 minutes mins
Cook Time10 minutes mins
Total Time15 minutes mins
Course: Breakfast
Cuisine: American
Diet: Diabetic, Gluten Free
Servings: 4 people
Calories: 291kcal
Author: Abbey Sharp

Ingredients

  • 500 g 4-5 cups frozen cauliflower rice
  • 1/2 cup hemp hearts
  • 2 tbsp unsweetened cocoa
  • Pinch salt
  • 1 1/4 cups coconut soy or almond milk
  • 2 tbsp 1 oz brewed espresso
  • 4 egg whites beaten until frothy
  • 1/2 tsp peppermint extract
  • 1 tsp vanilla extract
  • Sugar syrup or sweetener, to taste (optional)
  • Crushed candy canes optional
  • Dairy free mini chocolate chips optional
  • Additional non dairy milk optional

Instructions

  • Combine the cauliflower rice, hemp hearts, cocoa, salt, milk, and espresso in a medium sauce pot over medium heat. Stir until the cauliflower thaws and everything mixes together. Continue to cook until the mixture thickens, about 7-8 minutes.
  • Reduce heat to low, and add in the frothy beaten egg whites, whisking continuously for about 30 seconds.
  • Add in the peppermint and vanilla extract, pop the lid on the pot and let sit for 1 minute.
  • Sweeten to taste, if desired.
  • Serve as is or top with candy canes, chocolate chips and additional non dairy milk.

Video

Nutrition

Calories: 291kcal | Carbohydrates: 14g | Protein: 16g | Fat: 20g | Saturated Fat: 8g | Sodium: 93mg | Potassium: 550mg | Fiber: 6g | Sugar: 4g | Vitamin A: 130IU | Vitamin C: 61mg | Calcium: 69mg | Iron: 5mg

Have you ever tried making porridge without oatmeal? Leave me a comment below with your thoughts!

Abbey Sharp

Abbey Sharp is a Registered Dietitian (RD), regulated by the Ontario College of Dietitians. She is a mom, YouTuber, Blogger, award winning cookbook author, media coach specializing in food and nutrition influencers, and a frequent contributor to national publications like Healthline and on national broadcast TV shows.

www.abbeyskitchen.com/about-abbey/

Last Updated November 30, 2020. Published November 26, 2020 By Abbey Sharp 10 Comments

Beans on Toast (Healthy, Vegan, Easy!)

This Vegan Beans on Toast is an easy take on the classic British recipe. Turn a pantry staple, like canned beans, into an entire meal!

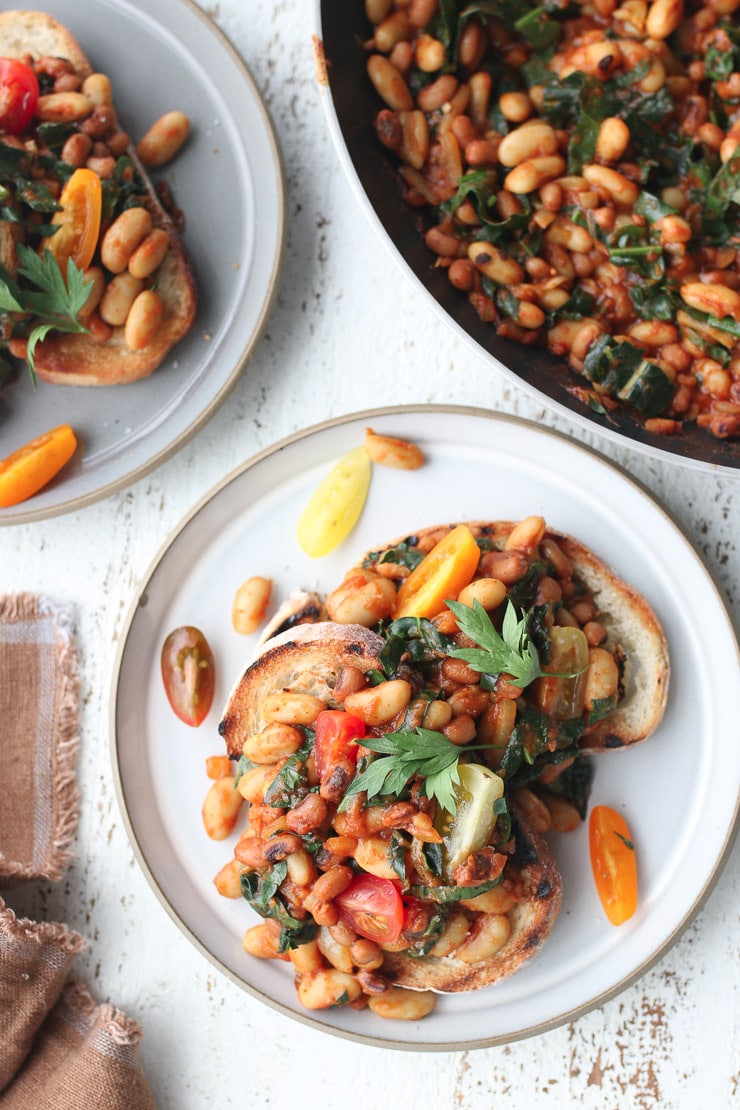
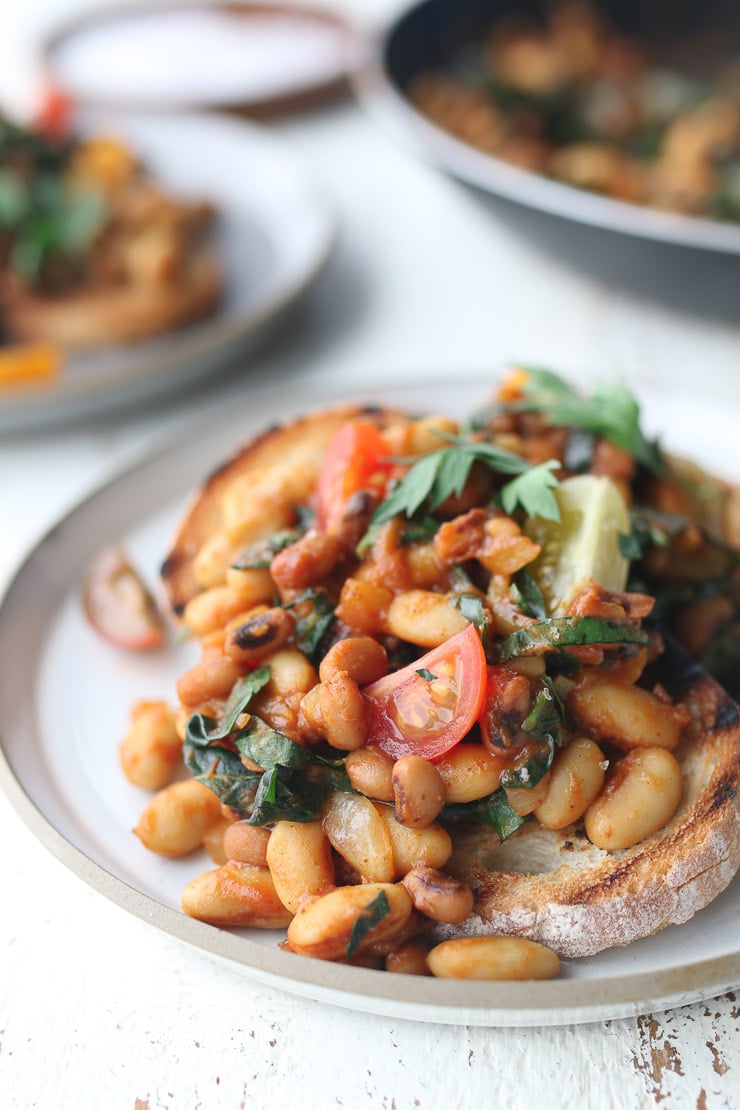
Close up of toast with navy beans and garnished with tomato and parsley.

With a name like Sharp, you can probably guess that I do have a lot of British ancestry and as a result, I was raised in a very meat and potatoes kinda household with lots of simple, comforting meals. One of my favourite meals of all time was canned beans on toast. That’s why I thought of making my own vegan beans on toast using simple pantry staple ingredients and a healthier bread. I love baked beans in general (I have an amazing instant pot baked beans here with no added sugar), but this one on toast is even easier and truly divine as well.

Why This Recipe Works

It could not be easier to make, and is super cheap and cheerful, but admittedly, the canned beans of my childhood were not the healthiest thing in the pantry. If you make it the classic way like my mom did, you would literally just open up a can of sweetened baked beans (Heinz is classic), warm them up and dump them on a piece of toasted white bread. That’s it.

Not a bad meal by any means as you would get some protein in the beans and your carbs in the toast, but the canned baked beans are high in sugar. One half cup would have about 10 or more grams of added sugar, and it would largely be from corn syrup. Again, no biggie in a pinch, but considering how easy (and inexpensive) it is to make your own, I say this vegan version is totally worth it. This version of beans on toast is much healthier has it’s made from scratch but doesn’t cost much more.

So not only is this a healthier version as we decrease the amount of added sugar, we also add in some extra greens in the form of kale to get some extra veggies into the meal.

Table of contents

  • Why This Recipe Works
  • Key Ingredients
  • How to Make This Recipe
  • Expert Tips
  • Recipe FAQs
  • More Recipes You May Like

Key Ingredients

Overhead image of ingredients for beans on toast: mustard, tomato paste, olive oil, minced garlic, onion, chili powder, paprika, maple syrup, garlic powder, bread, apple cider vinegar, soy sauce, beans, and kale.

Aromatics – I use onion and garlic as the base to almost anything, and these baked beans are no exception.

Spices – To get the complexity of the canned version, I use smoked paprika, garlic powder, chili powder.

Sauces – Tomato paste, yellow mustard, soy sauce or tamari, maple syrup, and apple cider get friendly in the pan.

Beans – I use either navy beans, or back eyed peas, but honestly, this would work with any kind of canned beans you have in your pantry.

Greens – To add some veg into the mixture, I like to just throw in some fresh or frozen spinach or kale.

Good bread – My favourite bread is always sourdough, but you could also do a crusty whole grain as well.

How to Make This Recipe

Set of four step by step instructional photo for how to saute ingredients to make beans on toast.

Step 1: Heat the olive oil in a large nonstick skillet over medium heat and add the onion and garlic. Cook for about 3 minutes until fragrant and softened.

Step 2: Add the spices, tomato paste, and mustard, and toss until the onions are coated in the spices and pastes.

Step 3: Add in the soy, maple, apple cider vinegar, beans, and spinach or kale and give everything a toss to combine. Cook until the greens are wilted, and the sauce has thickened and coated all of the beans, about 5-7 minutes.

Step 4: To serve, pile the beans on top of the crusty toasted bread. If desired, top with parsley and cherry tomatoes.

Expert Tips

Make sure you drain and rinse your canned beans before adding them to your nonstick skillet to avoid your beans being soggy.

If you want to use dried beans instead of canned beans, 1/2 cup of dried beans comes out to 15oz canned beans. So just use 1 cup of dried beans and then a little bit extra to substitute.

Once topped, these beans on toasts are best enjoyed right away. If you want to make this ahead of time, store the beans separately in the fridge in an airtight container.

Recipe FAQs

Here are some of the most commonly asked questions about this beans on toast recipe.

How long will the beans last in the fridge?

I would estimate the beans will be good in the fridge for about 4 days, so feel free to make a big batch and enjoy them on toast, on their own or on top of greens.

Is this meal kid-friendly?

Yes, my son loved this and you can easily pull back on the spices if they are sensitive to heat. But because the beans are sweet, it does go over well. If you want a baked bean recipe without any added sugar, try my instant pot version here.

What can I do to make it a heartier meal?

Often, I like to add an egg on top! It’s a nice way to make the beans more savoury, as well. Another thing I like to do if I need a little more in my meal is add a layer of avocado before loading up on the beans.

Is this a breakfast or lunch recipe?

Who cares?! It’s delicious! LOL! But seriously, I really do serve this for breakfast, brunch, lunch or dinner as it’s hearty and very versatile.

Can I make this beans on toast gluten free?

Yes, just make sure you use a gluten free tamari and gluten free bread.

What can I serve with this recipe?

Beans on toast is a hearty meal by itself, but you could also serve it with a nice salad or soup. Here are some suggestions.
Lentil and Butternut Squash Soup
Frozen Veggie and Bean Soup
Broccoli White Bean Soup

Birds eye view of vegan beans on toast on a white plate.

More Recipes You May Like

Here are some more pantry staple recipes we are loving right now!! Check out some of my favourites!

  • VEGAN ENCHILADA BOWL WITH RICE AND BEANS 
  • VEGAN OATMEAL PUDDING 
  • VEGAN BEAN & FROZEN VEGETABLE SOUP 
  • GREEK MEATLOAF MUFFINS 
  • EASY VEGAN PASTA BAKE WITH SAUSAGE, WHITE BEANS AND KALE 

What are some of your go-to easy pantry staple recipes? Leave me a comment below!

Print Recipe
5 from 6 votes

Vegan Beans on Toast

This Vegan Beans on Toast is an easy take on the classic British recipe. Turn a pantry staple, like canned beans, into an entire meal!
Prep Time5 minutes mins
Cook Time10 minutes mins
Total Time15 minutes mins
Course: Breakfast, Main Course
Cuisine: American, British
Servings: 7
Calories: 367kcal
Author: Abbey Sharp

Ingredients

  • 1 tbsp extra virgin olive oil
  • ½ yellow onion finely diced
  • 2 cloves garlic minced
  • 1 tsp smoked paprika
  • ½ tsp garlic powder
  • 1 tsp chili powder
  • 4 tbsp tomato paste
  • 2 tbsp yellow mustard
  • 1 ½ tsp soy sauce or tamari
  • 5 tbsp maple syrup
  • 3 tbsp apple cider vinegar
  • 2 19 oz cans low salt added navy beans or black eyed peas drained and rinsed
  • 2 cups fresh or frozen spinach or kale finely chopped

To serve (optional):

  • 6-8 slices of your favourite sourdough bread toasted
  • 1/4 cup parsley chopped (optional for serving)
  • 1 cup cherry tomatoes halved (optional for serving)

Instructions

  • Heat the olive oil in a large nonstick skillet over medium heat and add the onion and garlic. Cook for about 3 minutes until fragrant and softened.
  • Add the spices, tomato paste, and mustard, and toss until the onions are coated in the spices and pastes.
  • Add in the soy, maple, apple cider vinegar, beans, and spinach or kale and give everything a toss to combine. Cook until the greens are wilted, and the sauce has thickened and coated all of the beans, about 5-7 minutes.
  • To serve, pile the beans on top of the crusty toasted bread. If desired, top with parsley and cherry tomatoes. Enjoy with a fork and knife.

Video

Notes

Make sure you drain and rinse your canned beans before adding them to your nonstick skillet to avoid your beans being soggy.
If you want to use dried beans instead of canned beans, 1/2 cup of dried beans comes out to 15oz canned beans. So just use 1 cup of dried beans and then a little bit extra to substitute.
Once topped, these beans on toasts are best enjoyed right away. If you want to make this ahead of time, store the beans separately in the fridge in an airtight container.

Nutrition

Calories: 367kcal | Carbohydrates: 69g | Protein: 15g | Fat: 4g | Saturated Fat: 1g | Sodium: 458mg | Potassium: 710mg | Fiber: 11g | Sugar: 12g | Vitamin A: 2591IU | Vitamin C: 34mg | Calcium: 142mg | Iron: 5mg
Abbey Sharp

Abbey Sharp is a Registered Dietitian (RD), regulated by the Ontario College of Dietitians. She is a mom, YouTuber, Blogger, award winning cookbook author, media coach specializing in food and nutrition influencers, and a frequent contributor to national publications like Healthline and on national broadcast TV shows.
www.abbeyskitchen.com/about-abbey/

Last Updated October 30, 2021. Published November 20, 2020 By Abbey Sharp Leave a Comment

The Ultimate Vegan Grocery List

We share our exclusive vegan grocery list and our top tips for getting the most out of your plant-based grocery haul.

Get Grocery List

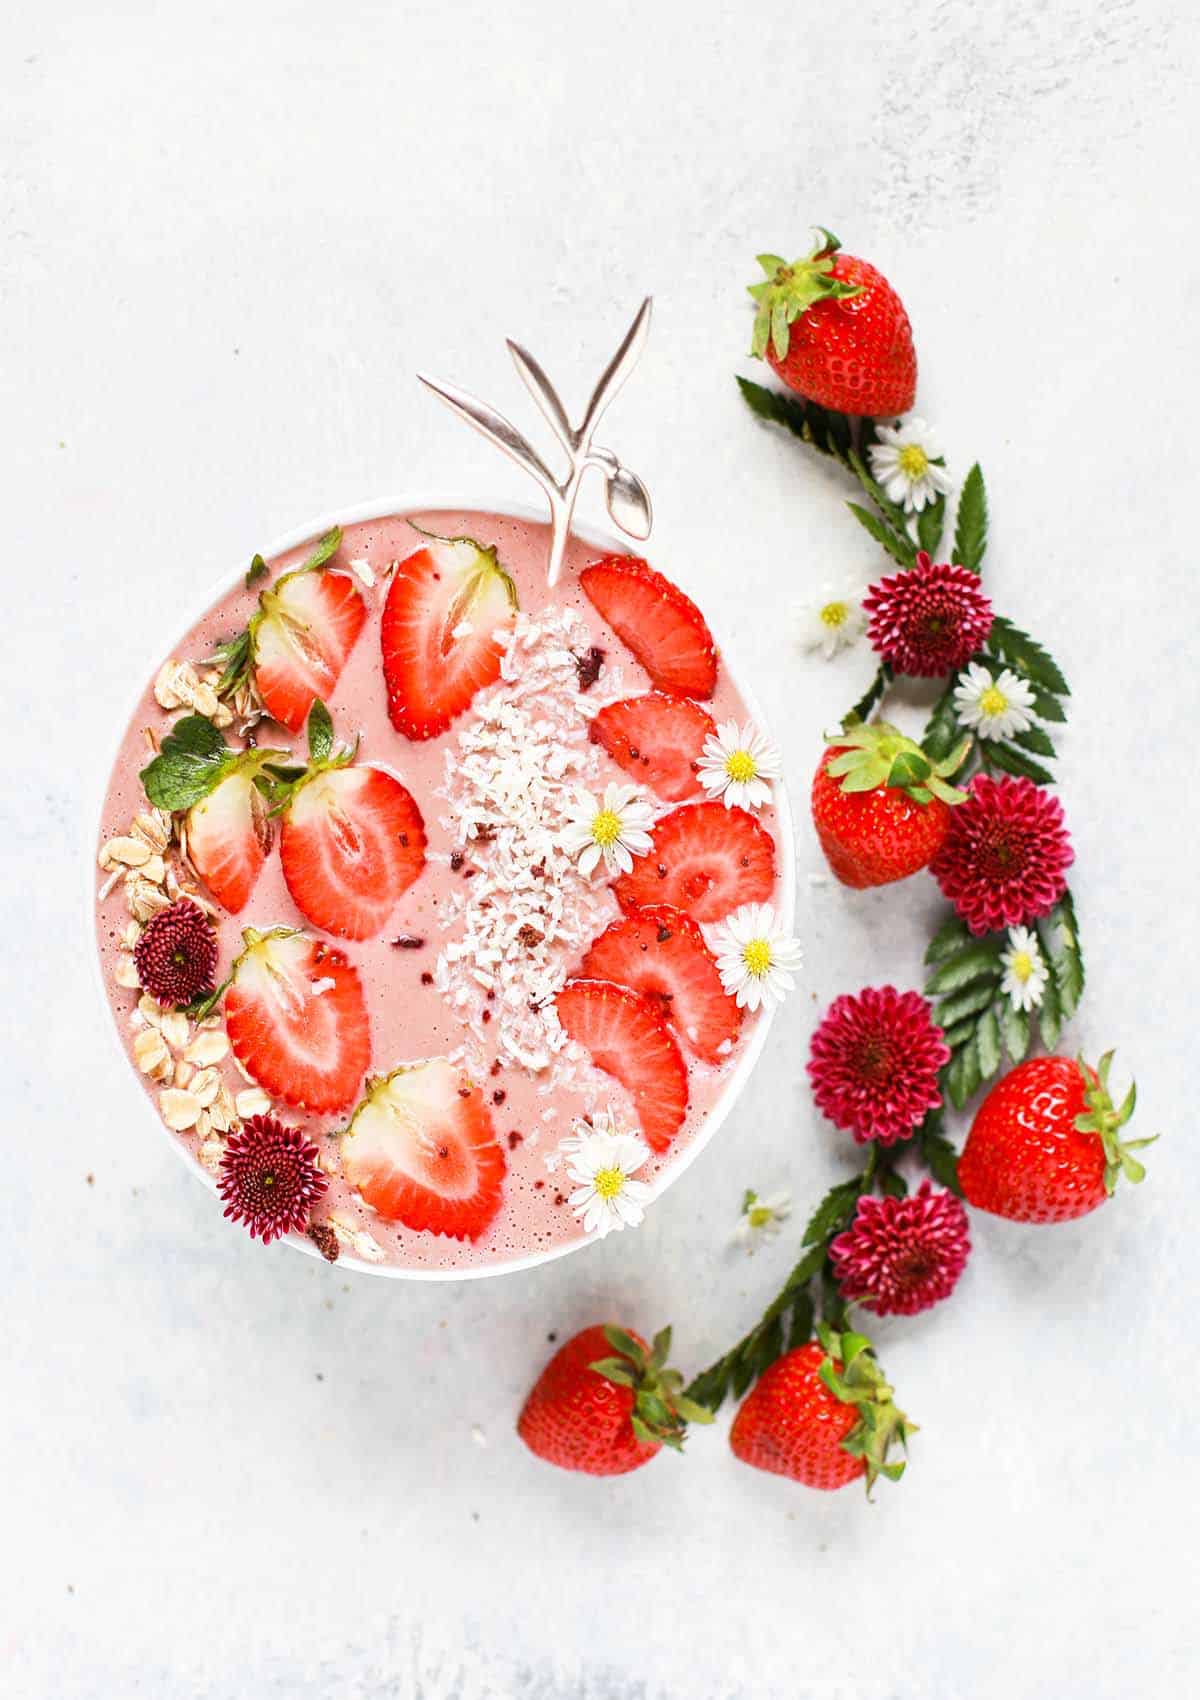
A pink smoothie bowl topped with strawberries, coconut flakes, and oatmeal.

Roaming the aisles of the grocery store may be relaxing for omnivorous foodies, but for those transitioning to a vegan lifestyle, or who are looking to eat more plant-based, it can feel pretty intimating. It might also mean that you may need to modify household staples that you usually have on hand. So we set out to make this transition as easy as possible by providing you with the ultimate vegan grocery list. This printable resource is perfect for both long-time vegans and those new to plant-based eating and will be sure to make your trips to the grocery store easy and no-fuss.

Table of Contents

  • Benefits of Eating Plant-based
  • How To Build A Vegan Grocery List
  • Foods To Avoid On A Vegan Diet
  • Important Nutrients on a Vegan Diet
  • How to Shop Vegan On A Budget
  • Buy in Bulk
  • Buy Seasonal Produce 
  • Home-cooked vs. Pre-made
  • Batch Cook & Freeze
  • Best Online Stores For Vegan Shopping

Benefits of Eating Plant-based

While the vegan diet, by definition, omits all animal products – it doesn’t imply that those looking to pursue this have to subside on grass clippings and rice cakes alone. We know, as positioned in a statement by the Academy of Nutrition & Dietetics, a well-planned vegan diet is healthful, nutritionally adequate, and suitable for all life-stages. Not only that, but a whole-foods plant-based lifestyle is associated with lower all-cause mortality and reduced cardiovascular-related mortality when compared to other diets comprised of animal proteins. That is why we’ve decided to compile a list of plant-powered staples with your nutrient needs, satiety and satisfaction in mind.

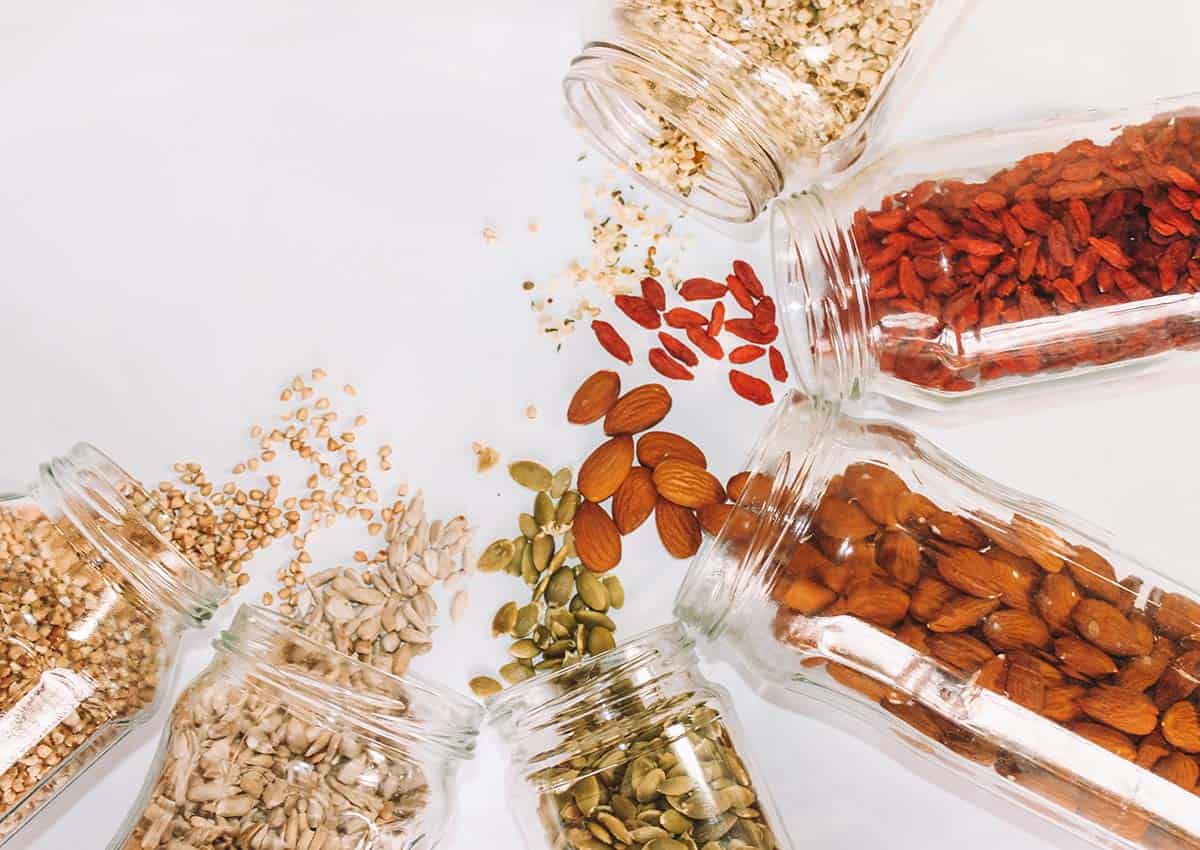
Several jars spilled over with goji berries, almond, sunflower seeds, pumpkin seeds, and other grains included on the vegan grocery list.

How To Build A Vegan Grocery List

When building a comprehensive grocery list, it’s important to note that you may not need to stock up on all these items at once. But you can use this all-encompassing list as a tool to

  • Jog your memory on what items you may be running low on
  • Inspire you to try new plant-based foods
  • Remind you of foods or supplements that are important to include as part of a plant-based diet
  • Help you decipher which products are free of animal-based ingredients.

When filling out your list, consider the main food groups of a healthy plant-based diet such as:

  • Fruits
  • Vegetables
  • Whole grains
  • Plant-based proteins (i.e legumes, tofu, tempeh, edamame)
  • Nuts and seeds

Other categories that may play a part in a plant-based lifestyle include:

  • Cooking/baking ingredients
  • Refined grains
  • Snack foods
  • Condiments
  • Dairy replacements (i.e. plant milks, vegan cheese, plant yogurt)
  • Meat-like products (i.e. pulled jackfruit or seitan)
  • Beverages

Foods To Avoid On A Vegan Diet

While we know that a vegan diet omits all animal-products, some animal-based foods may be more obvious than others. So let’s briefly touch on which foods you would want to avoid purchasing during a vegan grocery haul.

  • Meats (beef, pork, chicken, turkey, & lamb)
  • Seafood, (fish, shrimp, crab, lobster, anchovies, clams & other mollusks)
  • Dairy (cow’s milk, cheese, yogurt, milk powders like whey & casein, heavy cream, butter/ghee, ice cream & other dairy-based treats)
  • Eggs (yolks, whites, quiches, mayonnaise, etc.)
  • Honey, gelatin, collagen, beeswax, lard & more

Important Nutrients on a Vegan Diet

As critical as it is to understand which foods are not included on a plant-based vegan diet, it’s just as important to consider what foods to include to ensure that you are maximizing on your nutrition and not running the risk of any nutrient deficiencies. With that said, let’s direct our focus to a few key nutrients to prioritize on a vegan diet and their sources.

Vitamin B-12 – Critical for red blood cell formation, protein metabolism and a healthy nervous system. Found primarily in supplements, nutritional yeast, as well as fortified products like tofu, soy milk and breakfast cereals.

Omega-3 fatty acids – Reduces inflammation, aids in neurological development, and may reduce the risk of certain conditions like heart disease and Alzheimer’s. Found in algae and yeast-based supplements as well as in small amounts from flax seeds, walnuts, chia seeds and hemp seeds and their respective oils.

Vitamin D – Crucial for bone health, immune function, mood regulation and the absorption of other nutrients such as calcium and phosphorus. We can obtain vitamin D via sun exposure, however this can have its drawbacks as the use of sunscreen, latitudes, and the time of year can impact vitamin D exposure.  Luckily, vitamin D can be obtained in supplemental form as well as from UV-treated mushrooms, fortified juices, and plant-milks.

Calcium – Important for bone and teeth formation, muscle function, and heart health. Found in dark leafy greens, beans, legumes, tahini, citrus fruits, and fortified plant-milks, juices, and breakfast cereals.

Iron – Crucial for the development of healthy blood cells and oxygen transport throughout the body. Found in beans, legumes, whole grains, nuts, dark chocolate, dried fruit, dark leafy greens and certain fortified foods and cereals.

Zinc – Important for immunity and metabolic health. Found in oats, chickpeas, lentils, pumpkin seeds, tofu, and almonds.

Iodine – Necessary for a healthy thyroid and metabolism. Found in iodized salt as well as sea vegetables like dulse, nori, and other edible seaweeds.

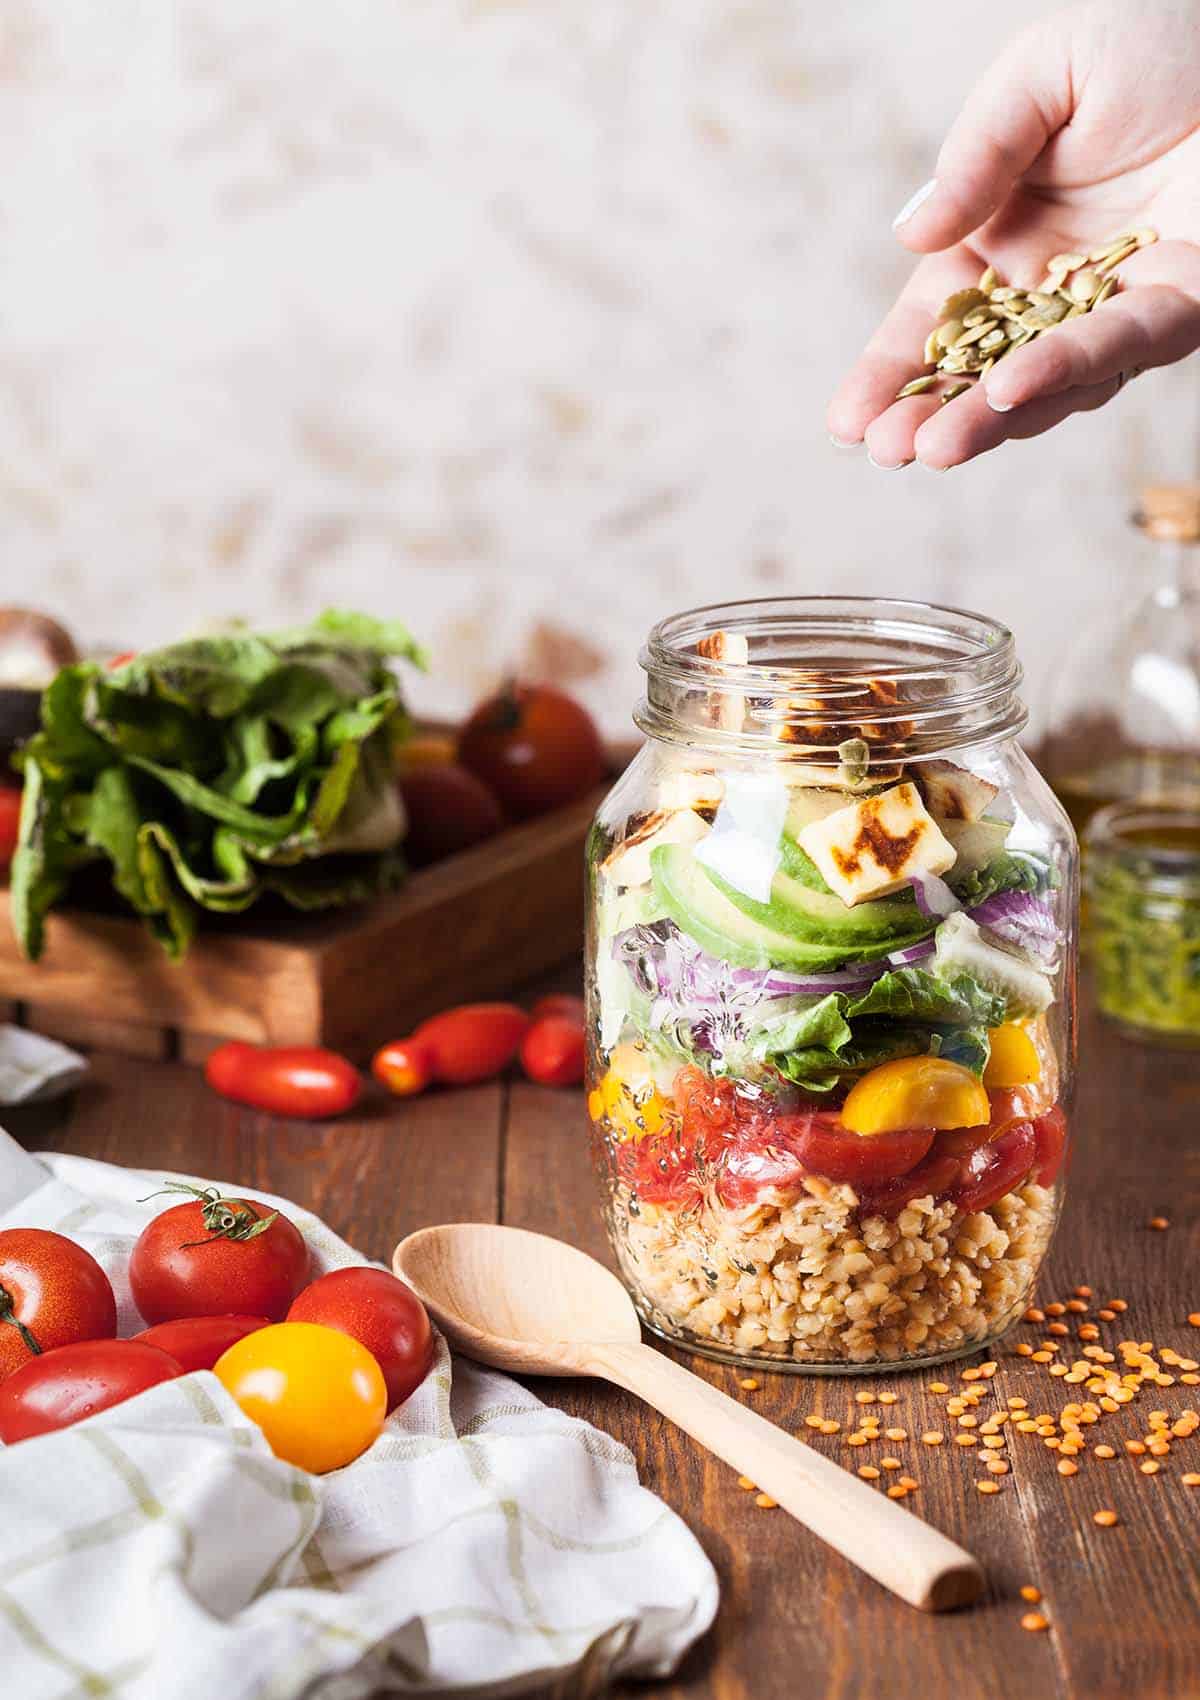
Several salad ingredients in a jar with a hand sprinkling some seeds on top.

How to Shop Vegan On A Budget

Unfortunately, there exists some misconceptions that plant-based diets are expensive due to the higher amount of fresh produce and vegan specialty products. So it’s easy to understand why some people are intimidated by the thought of eating plant-based on a budget. However, it is totally possible to shop vegan on a budget and get the most bang for you buck.

Buy in Bulk

The truth is the staples of a whole-foods plant-based diet are some of the cheapest foods on the planet. Rice, potatoes, lentils, beans – these foods are available in bulk at low prices all across the world. Similarly, nut butters tend to be slightly cheaper than whole nuts and trail mixes, so considering the form of various foods may help you stay within budget too.

Buy Seasonal Produce 

Additionally, focusing on local, seasonal, frozen, or canned produce can help rack up the savings as well. If you do prefer exclusively fresh produce, herbs, and condiments – freezing extra servings of these foods can help reduce food waste so they’re there for you when you need them.

Home-cooked vs. Pre-made

As with any cuisine, restaurant-purchased meals are much more expensive than any home-cooked, batch-prepped alternative. You may also consider preparing staples from scratch such as salad dressings, veggie patties and vegan pastries as this can help to save you a chunk of change in the long run.

Batch Cook & Freeze

Choosing recipes that freeze and thaw well like soups, stews, enchiladas, taquitos, veggie patties, and casseroles can help incentivize batch-cooking as well. If a meal tastes fresh, flavorful and intact after freezing and thawing out on a busy weeknight, you’re much more likely to avoid that late-night Postmates temptation.

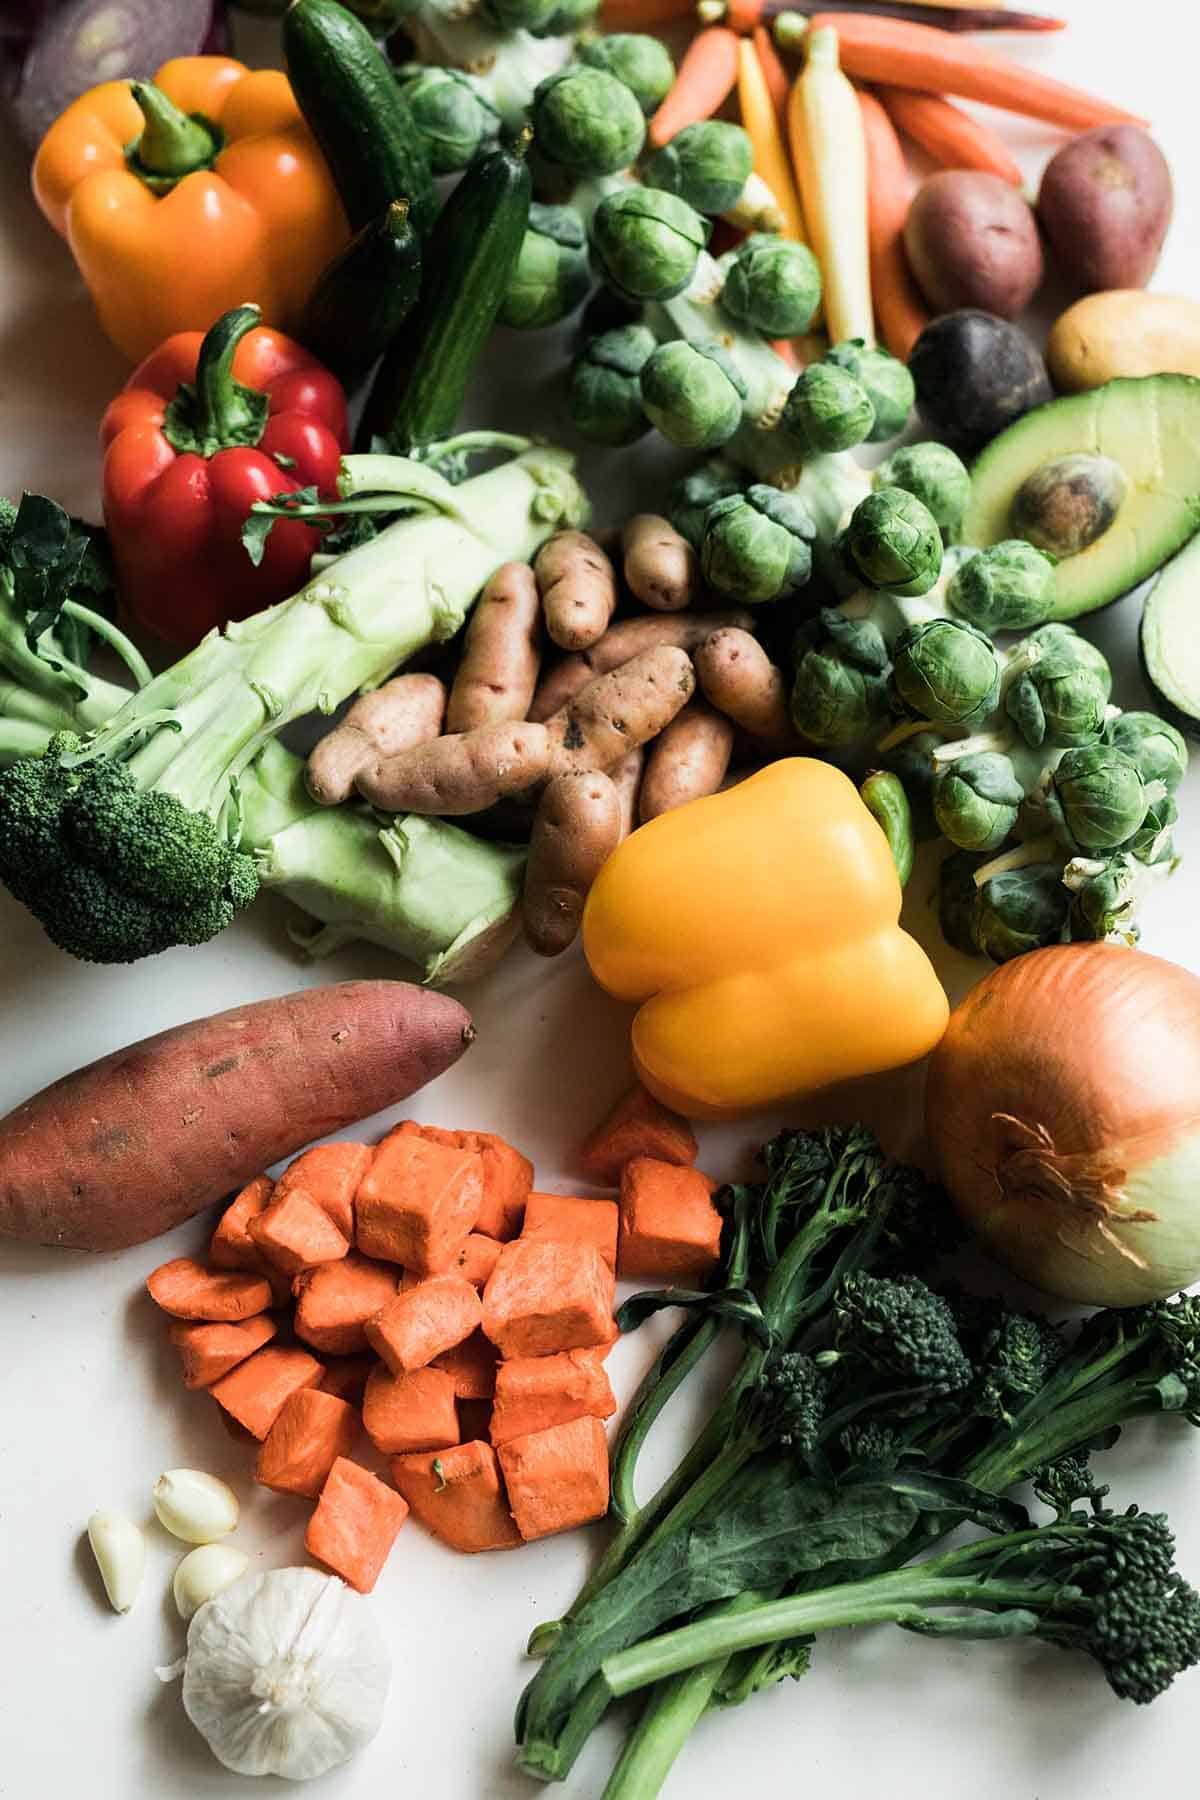
A large spread of colourful vegetables from a vegan grocery list including sweet potato, bell peppers, onion, broccoli, brussel sprouts, carrots, avocado, and zucchini.

Best Online Stores For Vegan Shopping

If you are looking to spice up your meals with the latest plant-based specialty foods, certain online grocers offer lower prices than your local supermarket, with convenient door-to-door delivery services as an added bonus.

Thrive market is an online grocer that offers customers a huge selection of the latest vegan goodies at wholesale prices. It also allows consumers to filter their searches to strictly view products that are “vegan”, “gluten-free”, “organic”, etc. – making shopping for special diets a breeze.

Imperfect Foods is another fantastic brand looking to fight food waste and reduce carbon emissions as a company. The homepage of their website shares startling food waste numbers in an effort to educate consumers on why their brand’s hand-selected produce is not only great for you, but for farmers, producers, and the planet too.

Other grocery delivery services like Costco delivery, Amazon Fresh and Instacart offer competitive prices for vegan specialty products as well – and may ship to a broader range of locations. While not all of these stores are primarily vegan, more and more mainstream grocers are carrying new and delicious varieties of plant-based staples.

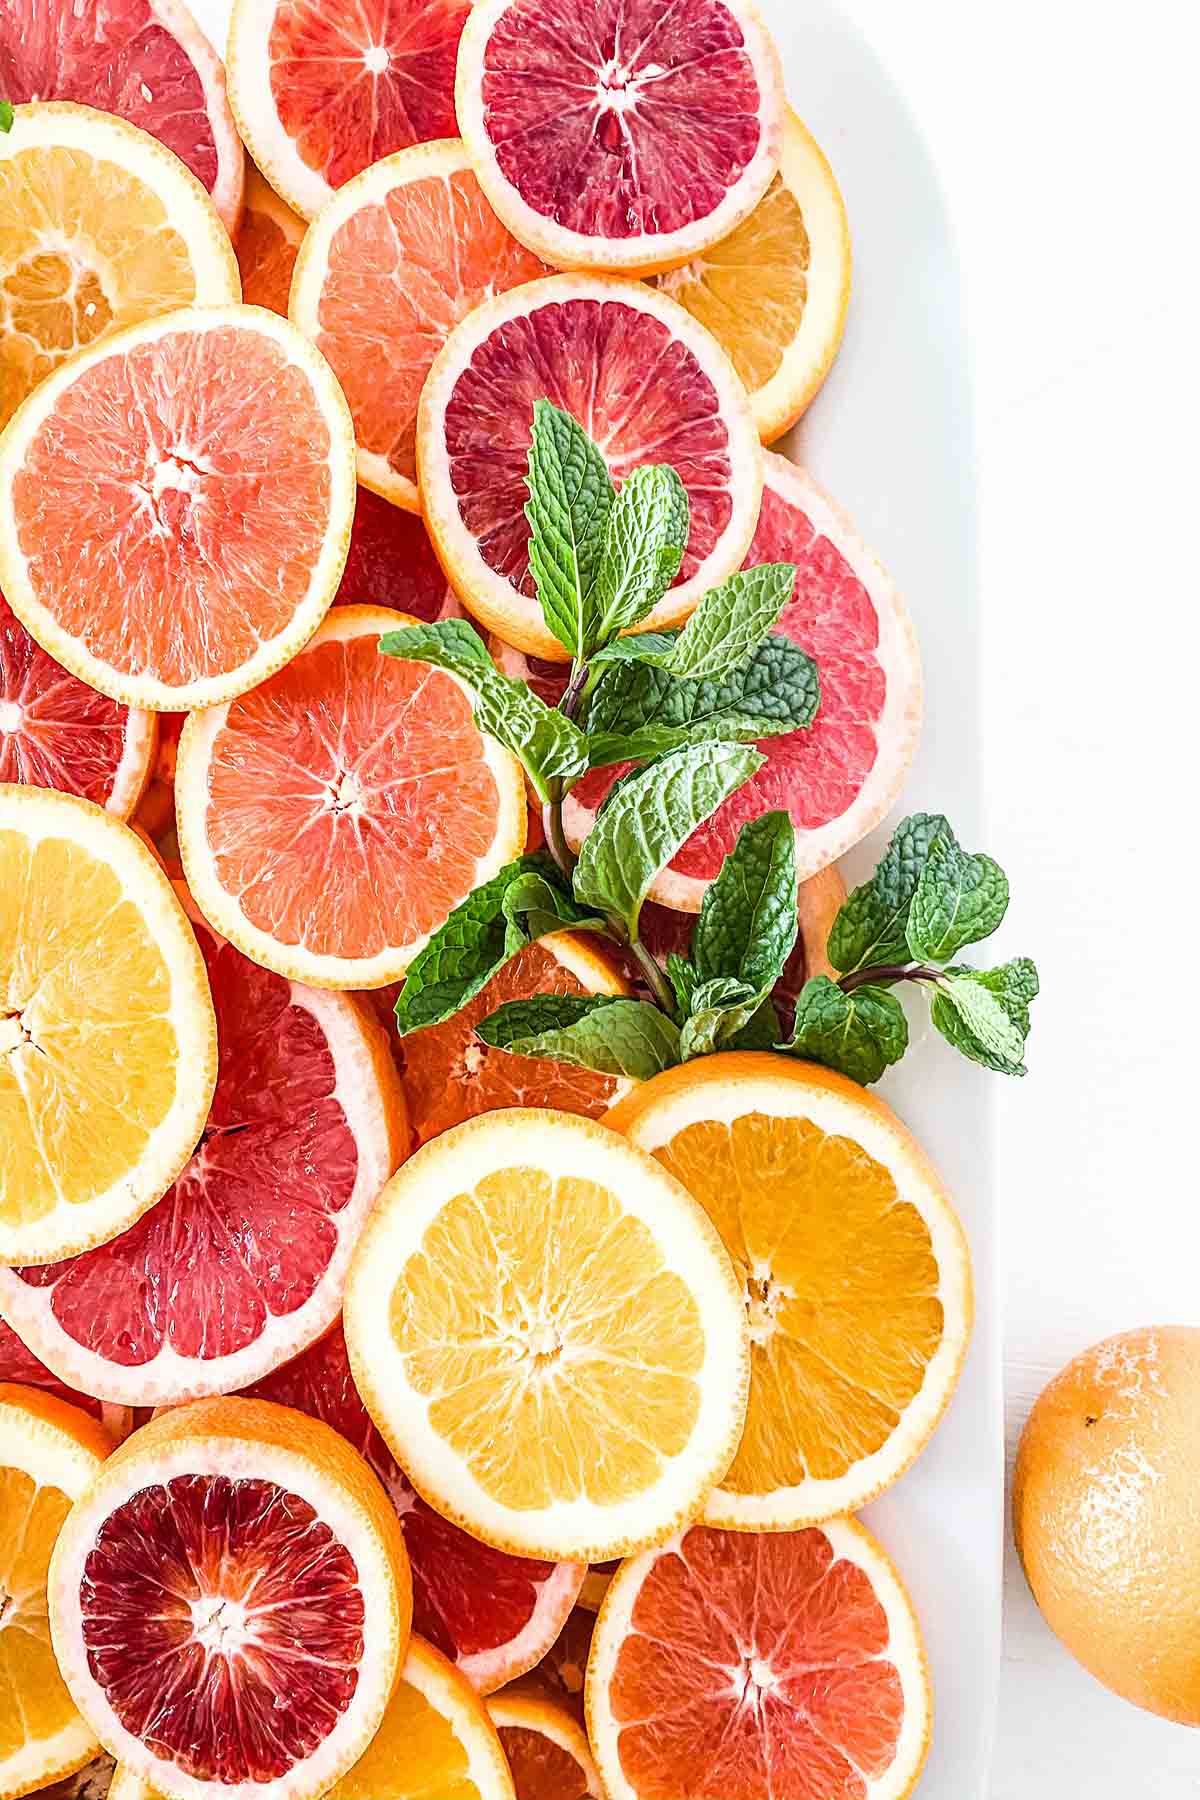
Several slices of citrus fruit on a plater including blood orange, orange, and grapefruit.

With that said, going plant-based in an omnivorous world has never been easier!  While it may seem overwhelming to dive into a vegan lifestyle, or to start incorporating more plant-based foods in your diet, there has never been more resources, delivery services or delicious plant-based products than now. Rest assured there are no flavors, nutrients, or cuisines you have to miss out on if eating more plants is a part of your health goals this year.  Just a little bit of creativity, intentionality, and a hearty appetite can make all the difference. And with a comprehensive grocery lists at your fingertips – you’ll be off the ground running in no time.

Did you find this vegan grocery list helpful? Let me know down in the comments!

Get Grocery List

MORE BLOG POSTS YOU MIGHT LIKE:

If you liked this blog post discussing the ultimate vegan grocery list, then you might also enjoy more blog posts on with meal plans included:

  • Healthy High Protein Vegan Meal Plan (Week 1)
  • Healthy High Protein Vegan Meal Plan (Week 2)
  • Healthy One Week Keto Meal Plan | High Fat Low Carb Recipes
  • Family Meal Plan | One Week of Healthy Family Meal Ideas
  • One Week High Protein Paleo Meal Plan | Healthy Recipes
  • 1 Week Gluten Free Meal Plan To Meet Your Health Goals
  • Free Easy Gluten Free Meal Plan – Week Two of Healthy Family Recipes

Contribution By: Grace Pascale, MS, RDN. Grace Pascale Nutrition.

Abbey Sharp

Abbey Sharp is a Registered Dietitian (RD), regulated by the Ontario College of Dietitians. She is a mom, YouTuber, Blogger, award winning cookbook author, media coach specializing in food and nutrition influencers, and a frequent contributor to national publications like Healthline and on national broadcast TV shows.
www.abbeyskitchen.com/about-abbey/

Last Updated December 1, 2020. Published November 19, 2020 By Abbey Sharp 52 Comments

Sweet and Spicy Brussels Sprouts (Vegan, Gluten Free)

I'm spicing things up for Thanksgiving by serving up my tasty vegan and gluten free sweet chili roasted brussels sprouts side dish.

I’m spicing things up for Thanksgiving this year by serving up my tasty vegan and gluten free sweet and spicy brussel sprouts side dish.

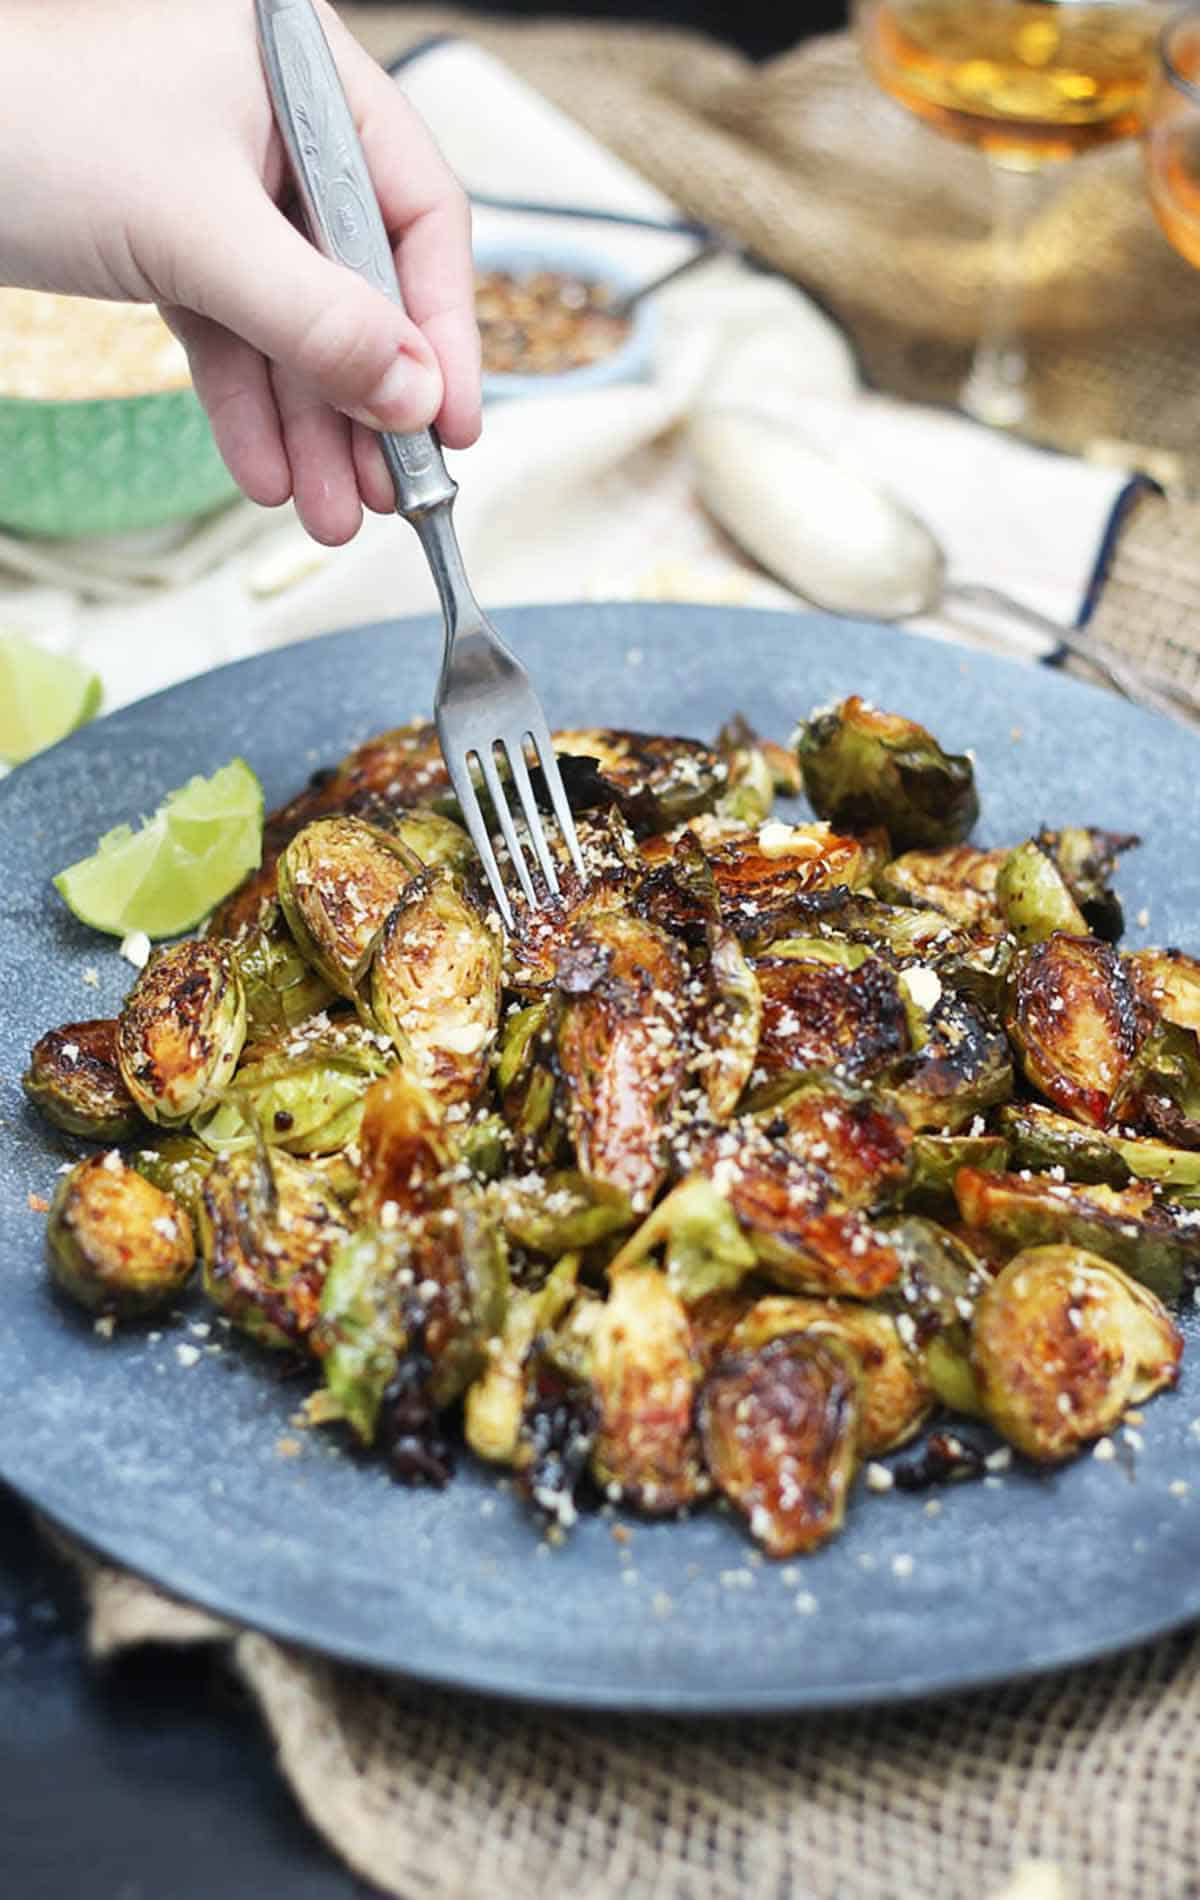
Hand with a fork digging into sweet and spicy Brussel sprouts on a plate.

It’s no secret that I am ADDICTED to Brussel sprouts. Which is why I always get super excited this time of year when this humble veg is back in season so I can find new ways to stuff it into my mouth!

So you bet that this favourite veg or mine always makes an appearance at the Thanksgiving spread. One dish everyone around the table was raving about was my Sweet Chili Roasted Brussels Sprouts side dish. They couldn’t get enough of those Brussels. People were even bypassing the stuffing to get to these gooey sticky sprouts. You know you’ve done good, when guests are asking for MORE of the veg. Music to a dietitian’s ears.

So for all you Americans out there getting ready for Thanksgiving and for the rest of us thinking about Christmas or Hannukah, you’re gonna want to turn whip out this stellar dish at your upcoming holiday feast.

Table of contents

  • Key Ingredients
  • How to Make This Recipe
  • Expert Tips
  • Recipe FAQs
  • More Thanksgiving Side Dishes You Might Like

Key Ingredients

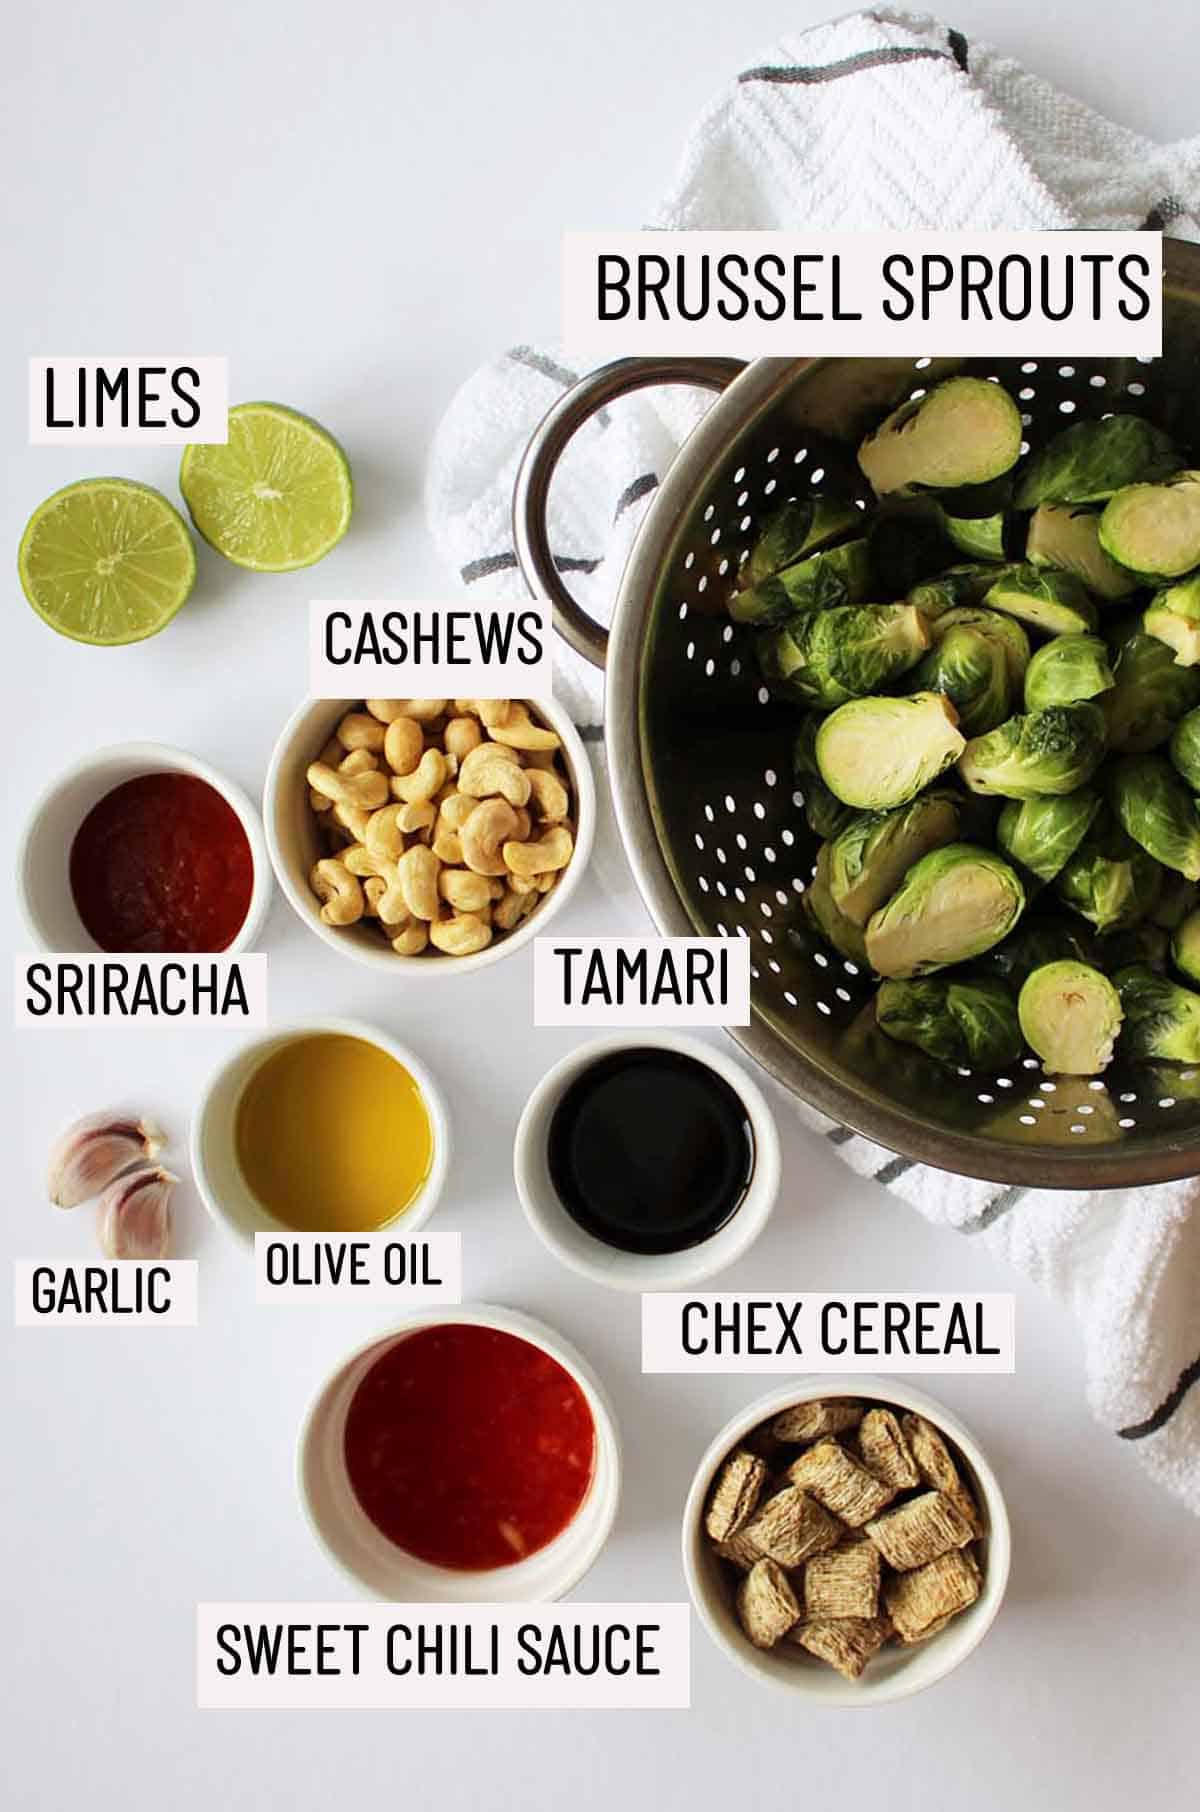
Birds eye view of portioned ingredients to make sweet and spicy brussel sprouts including brussel sprouts, lime, cashews, sriracha, garlic, olive oil, tamari, sweet chili sauce and chex cereal.

Sweet Chili Sauce – Is it just me or does a generous amount of sweet chili sauce make just about anything taste that much better? This stuff is KEY for bringing out the sweet and spicy flavour for these Brussel sprouts.

Sriracha – This will give the sprouts the extra little kick that it needs. If you’re not big on spice, feel free to hold back on the sriracha as the sweet chili sauce already has a bit of a kick to it.

Chex Cereal – To make this recipe gluten free, I use chex cereal instead of panko to make a crumbly topping for extra texture.

Cashews – I also toast up some cashews along with the chex “panko” to add some extra protein and healthy fats.

Limes – This will give the sweet & spicy Brussel sprouts a bit of tanginess that always feels just so right with an asian inspired dish like this. Feel free to add a few more squeezes of juice just before serving.

How to Make This Recipe

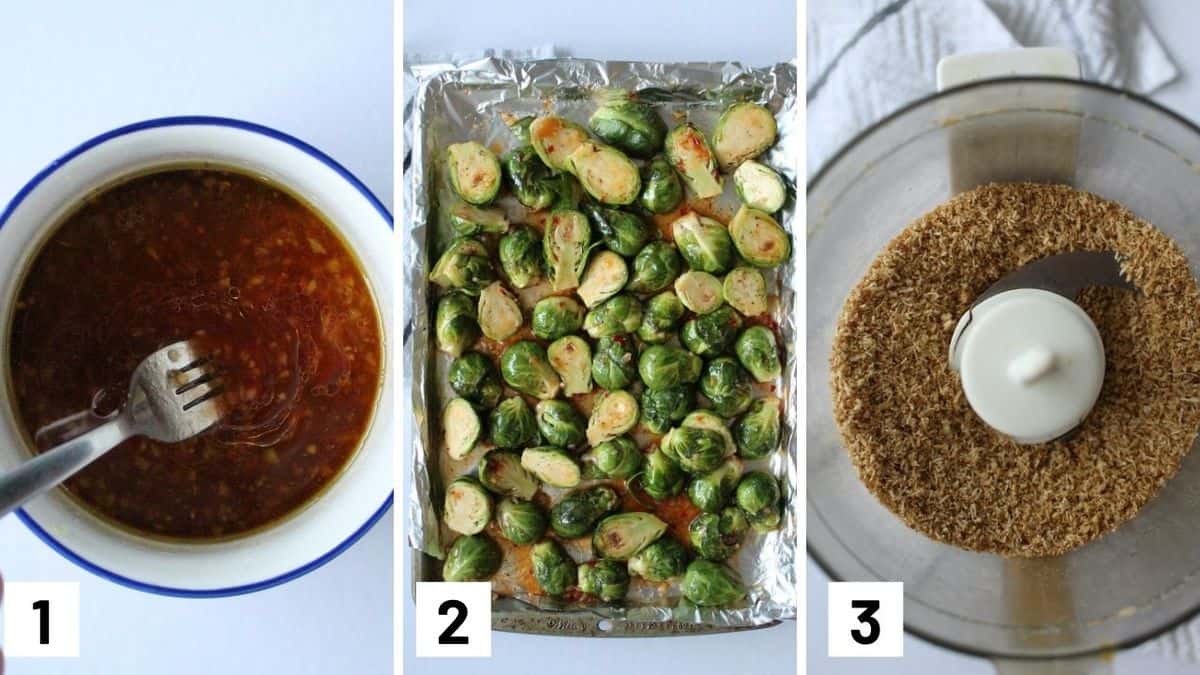
Step by step collage showing how to make brussel sprouts recipe including how to make the sauce and cereal crumble.

Step 1: In a small bowl, whisk together olive oil, sweet chili sauce, sriracha, lime juice, tamari, and garlic.

Step 2: On a large baking sheet, toss Brussels sprouts in sauce until fully coated. Season generously with salt and pepper. Roast in a preheated oven at 425F until slightly charred and tender, 30 to 35 minutes.

Step 3: Pulse the cereal in a food processor until crushed to look like panko bread crumbs. Remove and set aside.

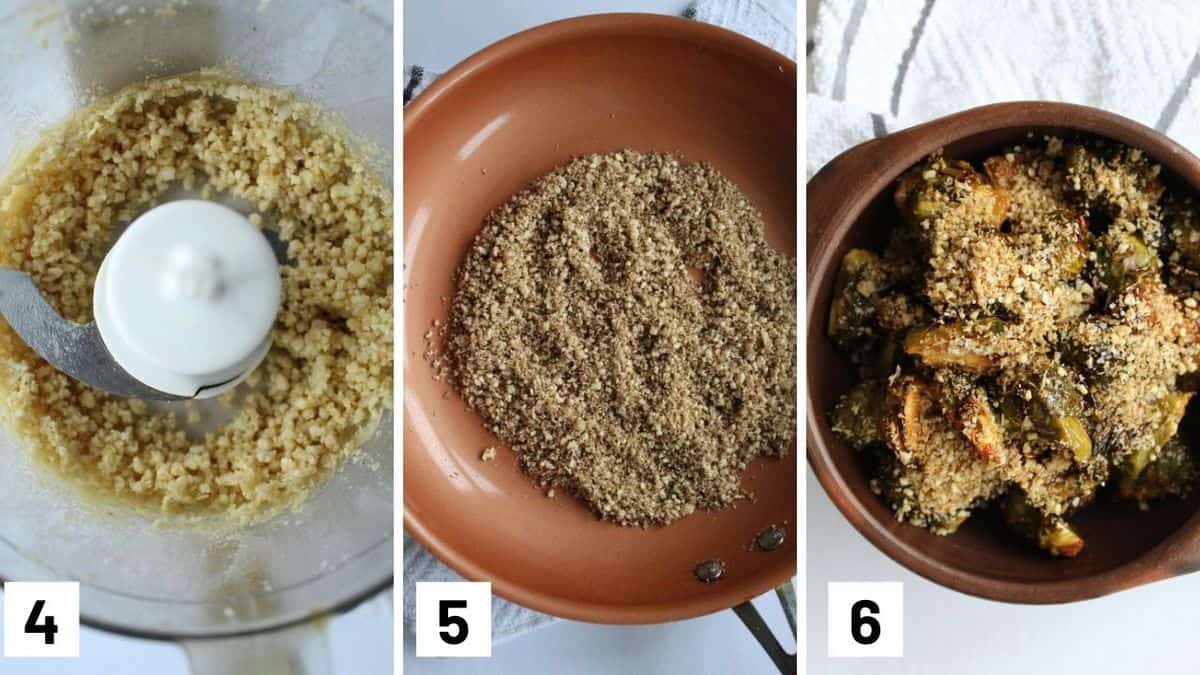
Step by step collage showing steps 4 to 6 including how to process cashews, heading cashews and cereal mixture on a frying pan, and mixing crumble on top of crispy vegetables.

Step 4: Add in the cashews and pulse until they reach crumbs.

Step 5: Add olive oil to a pan over medium heat along with the crushed cereal and cashews. Toast until just golden brown, about 3-4 minutes.

Step 6: Top the crispy sweet and spicy Brussels sprouts with the “panko” nut topping and sprinkle with fleur de sel. Enjoy!

Expert Tips

To make this sweet and spicy Brussel sprouts gluten free, I use tamari instead of soy sauce and make a gluten-free panko by toasting crumbled Chex cereal and cashews. If you don’t need to make this dish gluten-free, you can use soy sauce instead or use regular panko bread crumbs.

This recipe gets its sweet and spicy flavour from a combination of sweet chili sauce and sriracha. Feel free to play around with the ratios of these ingredients if you’d like this dish to taste a bit more spicy, and vice versa. You can also add in a bit of honey for some extra sweetness if you prefer.

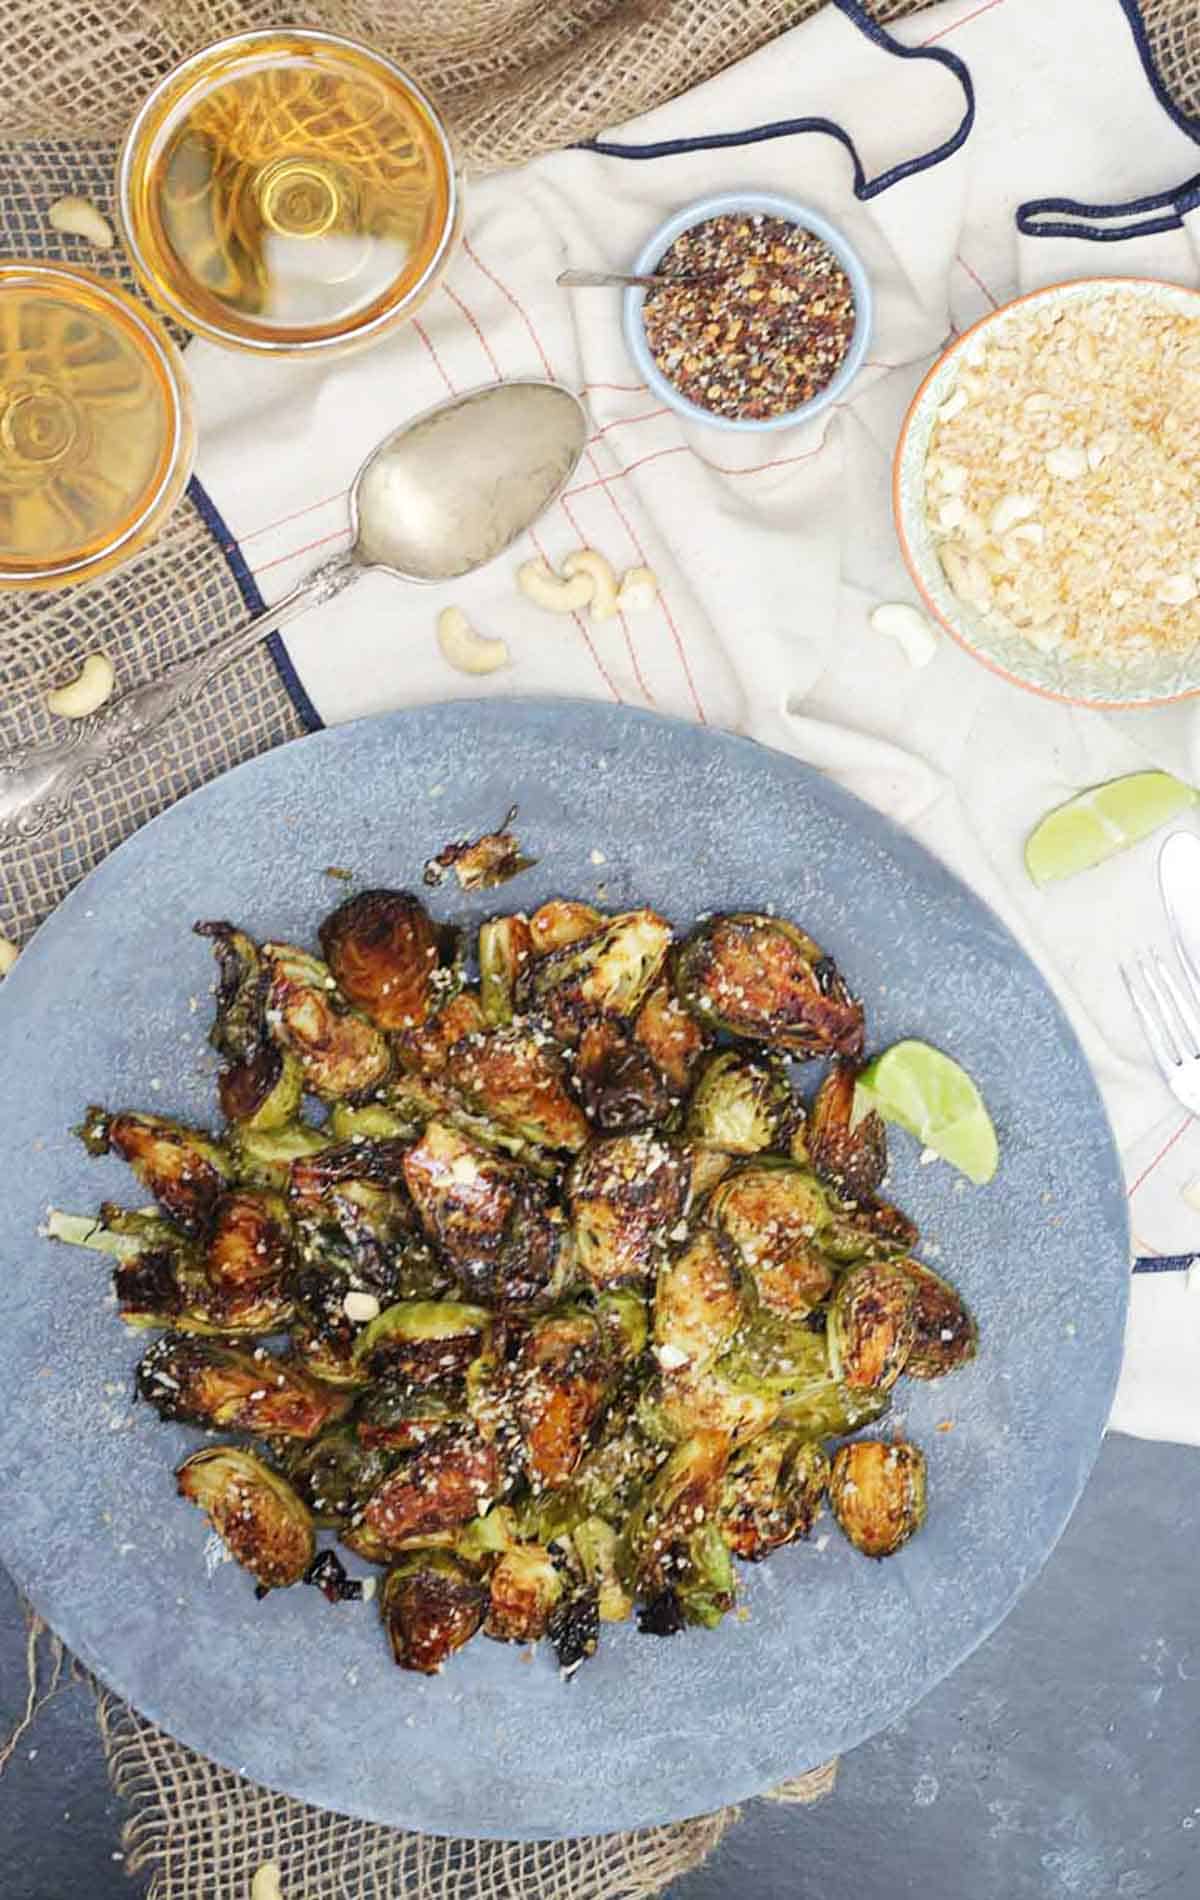
Birds eye view of spicy brussel sprouts on a blue plate with wine, cashews, and spices in the background.

Recipe FAQs

How can I make these less spicy and more sweet?

I’d suggest holding back on the sriracha and adding a few teaspoons of honey or maple syrup to up the sweetness.

What can I use for the crumble instead of chex cereal?

If you don’t need to make this gluten free, you can use regular panko breadcrumbs. Feel free to also experiment with any other unsweetened cereal you have on hand like all bran or corn flakes.

What can I pair this with?

These sweet and spicy brussel sprouts pair well with just about anything! But if you need a few ideas (besides the usual Turkey feast), you can pair it with this apple stuffed chicken, or this air fryer tofu if you want to keep things vegan friendly.

Is this recipe kid friendly?

It depends on your kiddos tolerance to spice. I would suggest holding back on the sriracha, and adding a smaller quantity of the sweet chili sauce. If they don’t tolerate spice well at all, you can omit the sweet chili sauce completely and use honey instead.

More Thanksgiving Side Dishes You Might Like

Hasselback Sweet Potatoes with Streusel Topping

Butternut Squash Risotto (Vegan & Gluten Free)

Roasted Brussel Sprouts with Balsamic, Grapes & Figs

Butternut Squash Mac and Cheese

Now I want to know – what are you making for Thanksgiving this year? What is your go-to Thanksgiving side dish?

I'm spicing things up for Thanksgiving by serving up my tasty vegan and gluten free sweet chili roasted brussels sprouts side dish.
Print Recipe
4.91 from 11 votes

Sweet and Spicy Brussel Sprouts (Vegan & Gluten Free)

I'm spicing things up for Thanksgiving by serving up my tasty vegan and gluten free sweet and spicy brussel sprouts side dish.
Prep Time5 minutes mins
Cook Time39 minutes mins
Total Time44 minutes mins
Course: Side Dish
Cuisine: American, Thai
Diet: Gluten Free, Vegan
Servings: 6 people
Calories: 144kcal
Author: Abbey Sharp

Ingredients

  • 3 tbsp olive oil
  • ¼ cup sweet chili sauce
  • Juice 1 lime
  • 2 tsp sriracha
  • 1 tsp reduced sodium tamari
  • 2 cloves garlic minced
  • 2 lb brussels halved
  • Salt and pepper

Topping:

  • 1/2 cup Chex cereal
  • 1/4 cup cashews
  • 1 tsp olive oil
  • Fleur de sel

Instructions

  • Preheat oven to 425º and prepare two baking sheets with parchment paper.
  • In a small bowl, whisk together olive oil, sweet chili sauce, sriracha, lime juice, tamari, and garlic.
  • On a large baking sheet, toss Brussels sprouts in sauce until fully coated. Season generously with salt and pepper.
  • Roast until slightly charred and tender, 30 to 35 minutes.
  • Meanwhile, pulse the cereal in a food processor until crushed to look like panko bread crumbs. Remove and set aside. Add in the cashews and pulse until they reach crumbs.
  • Add the olive oil to a pan over medium heat along with the crushed cereal and cashews. Toast until just golden brown, about 3-4 minutes.
  • Top the crispy brussels sprouts with the “panko” nut topping and sprinkle with fleur de sel. Enjoy!

Nutrition

Calories: 144kcal | Carbohydrates: 25g | Protein: 7g | Fat: 4g | Saturated Fat: 1g | Sodium: 347mg | Potassium: 643mg | Fiber: 7g | Sugar: 9g | Vitamin A: 1211IU | Vitamin C: 131mg | Calcium: 80mg | Iron: 4mg

Have you tried these sweet and spicy Brussel sprouts? Let me know down in the comments below!

Abbey Sharp

Abbey Sharp is a Registered Dietitian (RD), regulated by the Ontario College of Dietitians. She is a mom, YouTuber, Blogger, award winning cookbook author, media coach specializing in food and nutrition influencers, and a frequent contributor to national publications like Healthline and on national broadcast TV shows.
www.abbeyskitchen.com/about-abbey/

Last Updated November 18, 2020. Published November 18, 2020 By Abbey Sharp 22 Comments

Baked Spring Rolls with Vegan Sweet Potato Stuffing

These sweet potato risotto baked spring rolls make the perfect vegan and gluten free holiday appetizer for entertaining guests with intolerances!

These baked spring rolls with vegan sweet potato risotto stuffing make the perfect vegan and gluten free holiday appetizer for entertaining guests with intolerances!

Several baked spring rolls on a wooden plate.

Real talk: appetizers are my jam! During the holidays, most of the time I’d way rather eat a plate full of appies than limit myself to a single meal.

When it comes to preparing appetizers for holiday functions, I often can’t decide between my favourite go-to’s – do I make a crowd pleasing classic like spring rolls? Or something more on the comforting side like a creamy risotto?

So I thought, why not mash a few of my favourites together and create these sweet potato risotto baked spring rolls? Yep, you heard me correctly. Risotto IN a spring roll wrapper, baked to perfection.

Table of contents

  • Key Ingredients
  • How to Make This Recipe
  • Expert Tips
  • Recipe FAQs
  • More Holiday Appetizers You Might Like

Key Ingredients

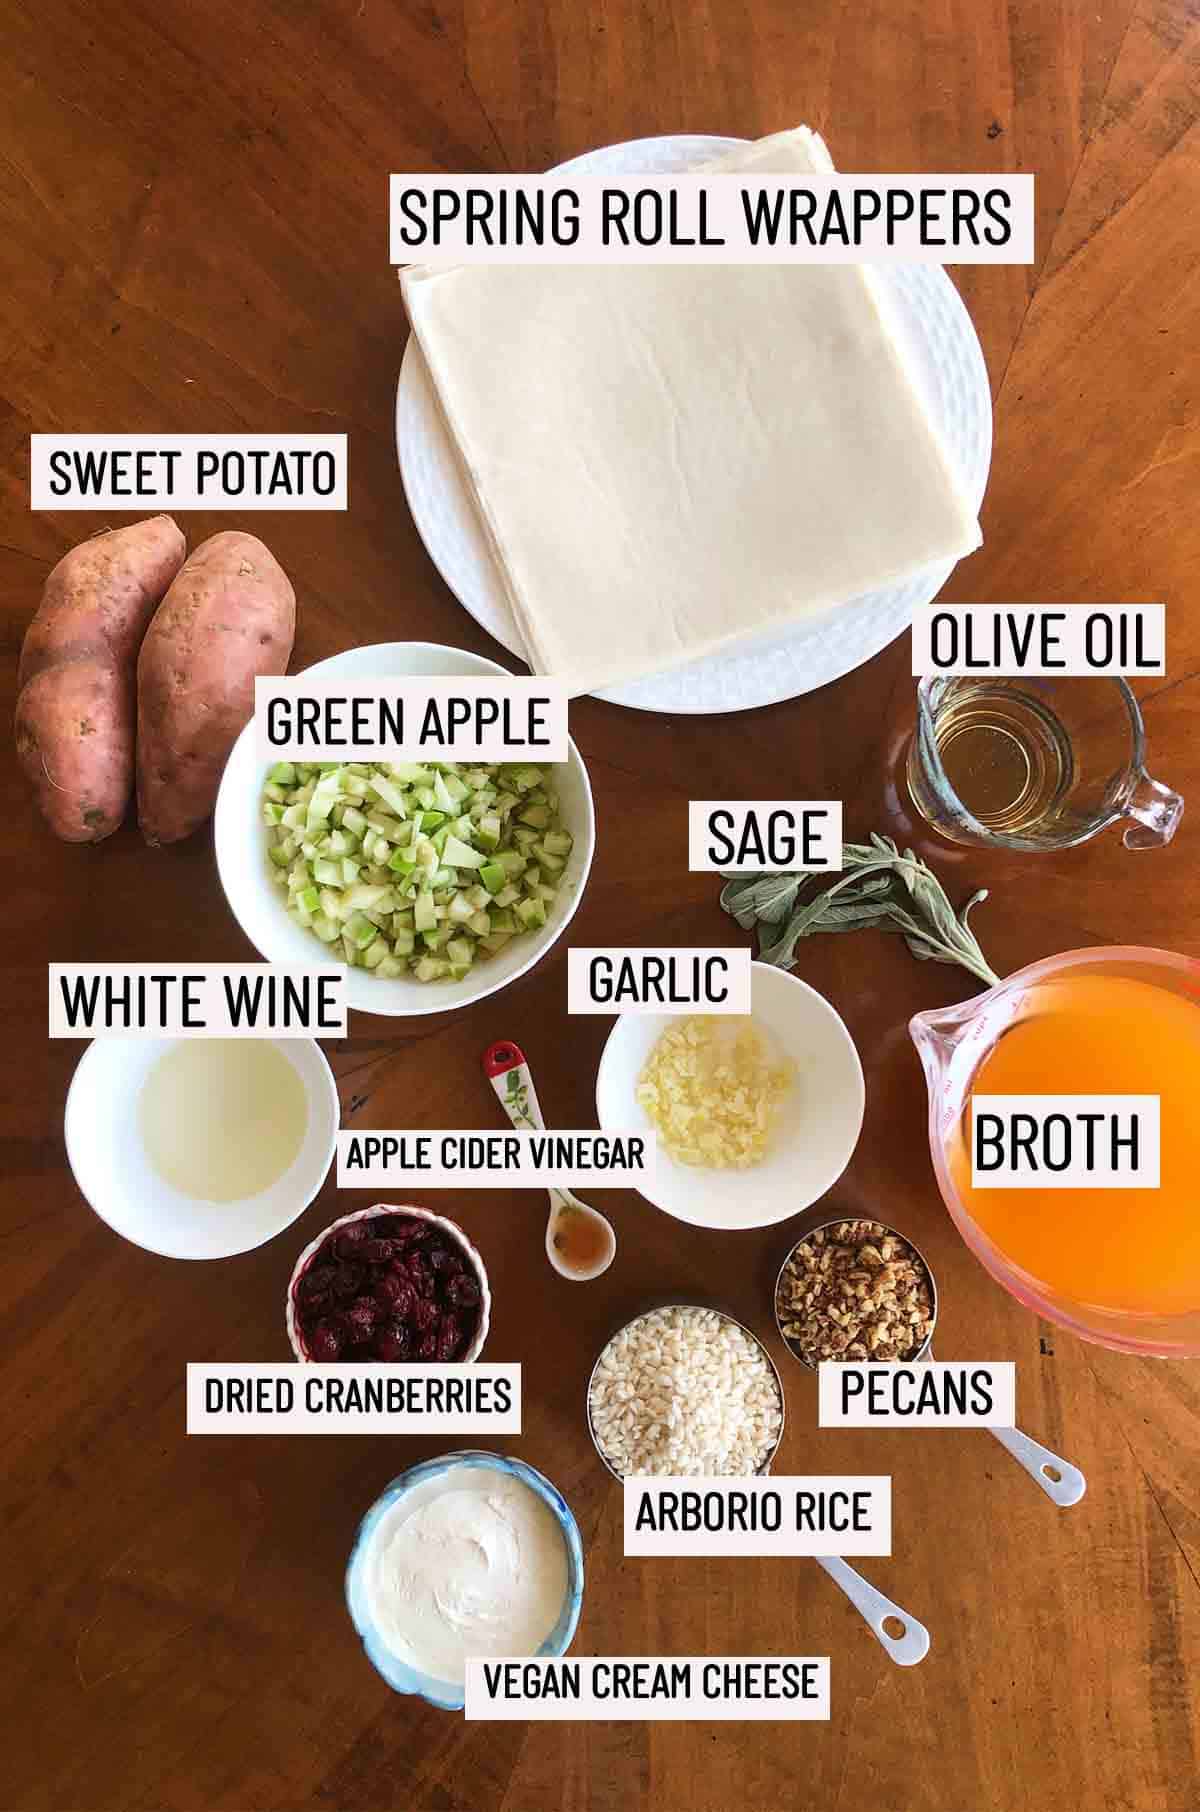
Birds eye view of portioned ingredients needed to make baked spring rolls including cream cheese, arborio rice, pecans, both, dried cranberries, apple cider vinegar, garlic, sage, olive oil, white wine, green apple, sweet potato, and spring roll wrappers.

Arborio Rice – A short- to medium- grain rice, like arborio rice, is ideal for making a creamy risotto because it yield a higher starch content. If you want the risotto less starchy (and less creamy as a result), you can always use a long grain rice instead.

Green Apple – Bet you didn’t expect to see apple on here did ya? There’s something about a sweet and savoury combo that makes things extra delicious for any holiday meal. Plus, considering apple are in season this time of year, why not throw it in the spring rolls for extra fun and surprise sweetness?

Dried Cranberries – In my opinion, the cranberry and green apple combo is essential for really making these spring rolls sing with flavour. If you don’t have dried cranberries on hand, you can totally experiment with any other dried fruit that you prefer.

Sweet Potato – Similar to the green apple, I love to use up fresh produce when its in season – especially sweet potatoes! Not only do the sweet potatoes add in extra nutrition, but they also add natural sweetness and make the risotto extra creamy too.

How to Make This Recipe

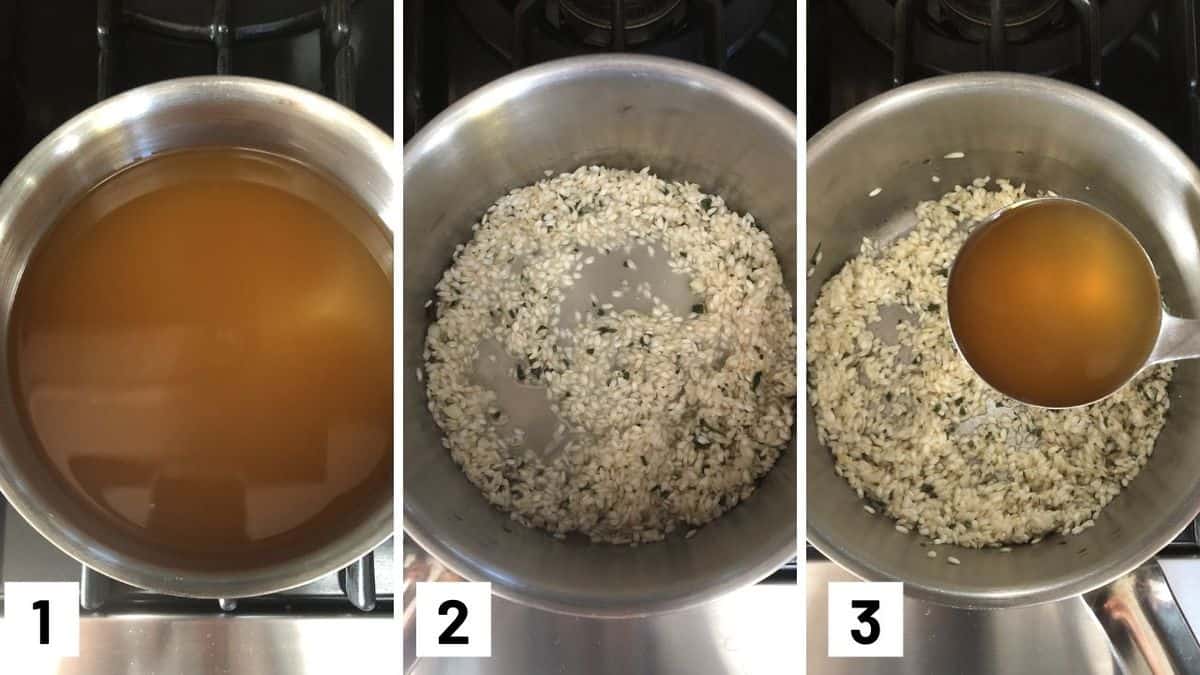
Step 1 – In a small sauce pot heat the stock over medium heat until simmering.

Step 2 – In another medium sauce pot, heat olive oil over medium heat. Add in the garlic and sage and stir for 30 seconds. Add in the rice and stir until coated, then add the wine. Stir until aborbed.

Step 3 – Add in the stock, ladle by ladle, stirring constantly until the liquid is absorbed. Continue until the rice reaches an al dente consistency.

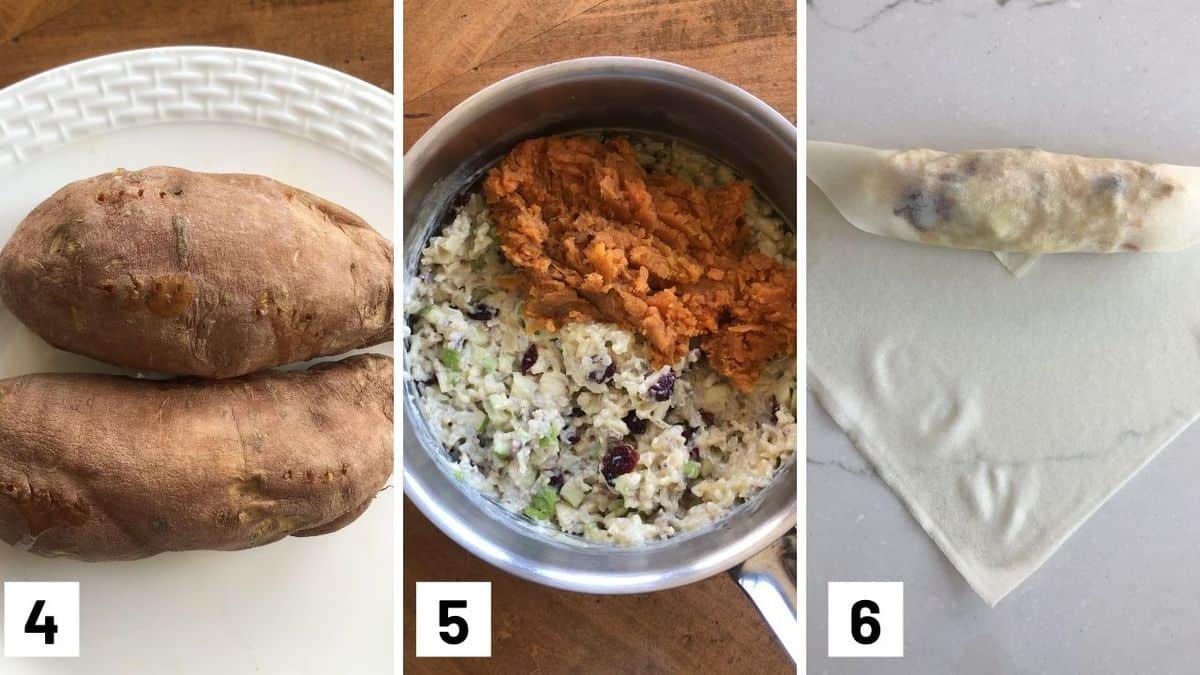
Step 4 – Pierce sweet potatoes a few times with a fork and microwave for 15-20 minutes until very soft. Scoop the flesh out into a bowl and mash well.

Step 5 – Once the risotto is cooked, add in the sweet potatoes, pecans, cranberries, apples, vinegar, and cream cheese. Season with salt and pepper to taste

Step 6 – Working with one roll at a time, place the wrapper  in front of you on a clean counter. Using your finger, brush a bit of water all around the edges in a border, and add about 2-3 tbsp of filling horizontally in the lower third of the spring roll wrapper. Wrap the bottom corner over the filling then brush a little water onto the now exposed edges of the wrapper. 

Step 7 – Fold the sides over tightly in towards the middle.

Step 8 – Roll the egg roll to close tightly. Make sure to seal any openings or gaps using a bit of water as your super glue. Continue with the remaining spring rolls.

Step 9 – Spritz the spring rolls with a little olive oil in an oil atomizer and bake for 10 minutes. Remove from the oven, flip the egg rolls and sprinkle the tops with a touch of sea salt. Bake for an additional 10 to 12 minutes or until super crispy and browned.

Expert Tips

Now I know wrapping these baked spring rolls may seem daunting, but trust me, it’s super easy! Simply lay out your spring roll wrappers, and add a few tablespoons of filling down the middle. Moisten the outsides with some water and roll that bad boy up.

The best part about these baked spring rolls that you can totally play with the flavours. Instead of cranberries, pecans and apple, you could add caramelized onion, mushrooms, celery and walnuts. You could add leftover turkey if you want to add some meat, or some shredded cheese if you’re okay with dairy. You can literally roll anything into a spring roll wrapper and it will be a good time.

I also like to dip my baked spring rolls in homemade cranberry sauce but the canned stuff is just as tasty in a pinch.

Birds eye view of several risotto bring rolls on a wooden plate garnished with fresh sage leaves and pecans.

Recipe FAQs

Where can I find spring roll wrappers?

You can find them at Asian grocery stores in the frozen section.

Can I freeze these?

Definitely. Wait for the baked spring rolls to cool down, then wrap them with cling wrap and place in a freezer bag. When you’re ready to eat, you can reheat them in the oven.

Can I make these nut free?

Of course! To make this recipe allergy friendly, you can simply omit the pecans or replace with pumpkin or sunflower seeds for some crunchy texture.

More Holiday Appetizers You Might Like

Baked Beet Chips with Creamy Orange Dip

Sweet Potato and Cranberry Mousse Bites

Sundried Tomato Sweet Potato Bites

So tell me – what are some of your favourite appetizers for the holiday season?

These sweet potato risotto baked spring rolls make the perfect vegan and gluten free holiday appetizer for entertaining guests with intolerances!
Print Recipe
5 from 4 votes

Baked Spring Rolls with Vegan Sweet Potato Stuffing

These baked spring rolls with vegan sweet potato stuffing make the perfect vegan and gluten free holiday appetizer for entertaining guests with intolerances!
Prep Time15 minutes mins
Cook Time45 minutes mins
Total Time1 hour hr
Course: Appetizer
Cuisine: American
Diet: Gluten Free, Vegan, Vegetarian
Servings: 24 Rolls
Calories: 240kcal
Author: Abbey Sharp

Ingredients

  • 1 tbsp olive oil
  • 2 cloves garlic minced
  • 2 tbsp sage minced
  • 1 cup arborio rice
  • 1/4 cup dry white wine
  • 1 L vegetable stock
  • 2 sweet potatoes
  • 1/2 cup pecans crushed
  • 1/2 cup dried cranberries
  • 1 green apple finely diced
  • 1 tsp apple cider vinegar
  • 1/2 cup vegan cream cheese
  • Salt and pepper to taste
  • 24 small spring roll wrappers
  • Cranberry sauce homemade or store bought for dipping

Instructions

  • Preheat oven to 400 F and lightly grease a baking sheet.
  • In a small saucepot heat the stock over medium heat until simmering.
  • In another medium saucepot, heat the olive oil over medium heat. Add in the garlic and sage and stir for 30 seconds. Add in the rice and stir until coated, then add the wine. Stir until absorbed, then start to add in the stock, ladle by ladle, stirring constantly until the liquid is absorbed. Continue until the rice reaches an al dente consistency.
  • Meanwhile, pierce the potatoes a few times with a fork and microwave for 15-20 minutes until very soft. Scoop the flesh out into a bowl and mash well.
  • Once the risotto is cooked, add in the sweet potatoes, pecans, cranberries, apples, vinegar, and cream cheese. Season with salt and pepper to taste.
  • Working with one roll at a time, place the wrapper  in front of you on a clean counter. Using your finger, brush a bit of water all around the edges in a border, and add about 2-3 tbsp of filling horizontally in the lower third of the spring roll wrapper. Wrap the bottom corner over the filling then brush a little water onto the now exposed edges of the wrapper. Fold the sides over tightly in towards the middle, then roll the egg roll to close tightly. Make sure to seal any openings or gaps using a bit of water as your super glue. Continue with the remaining spring rolls.
  • Spritz the spring rolls with a little olive oil in an oil atomizer and bake for 10 minutes. Remove from the oven, flip the egg rolls and sprinkle the tops with a touch of sea salt. Bake for an additional 10 to 12 minutes or until super crispy and browned. Once finished, transfer to a plate lined with paper towel.
  • Serve with cranberry sauce for dipping and enjoy!

Nutrition

Calories: 240kcal

Have you made these baked spring rolls? Let me know down in the comments below!

Abbey Sharp

Abbey Sharp is a Registered Dietitian (RD), regulated by the Ontario College of Dietitians. She is a mom, YouTuber, Blogger, award winning cookbook author, media coach specializing in food and nutrition influencers, and a frequent contributor to national publications like Healthline and on national broadcast TV shows.

www.abbeyskitchen.com/about-abbey/

Last Updated November 10, 2020. Published November 10, 2020 By Abbey Sharp 51 Comments

Easy Sweet Potato Curry Soup

vegan curried sweet potato soup

This Sweet Potato Curry Soup delicious light appetizer or lunch for cool weather packed with fibre and antioxidants. It’s vegan, dairy-free, and gluten-free as well.

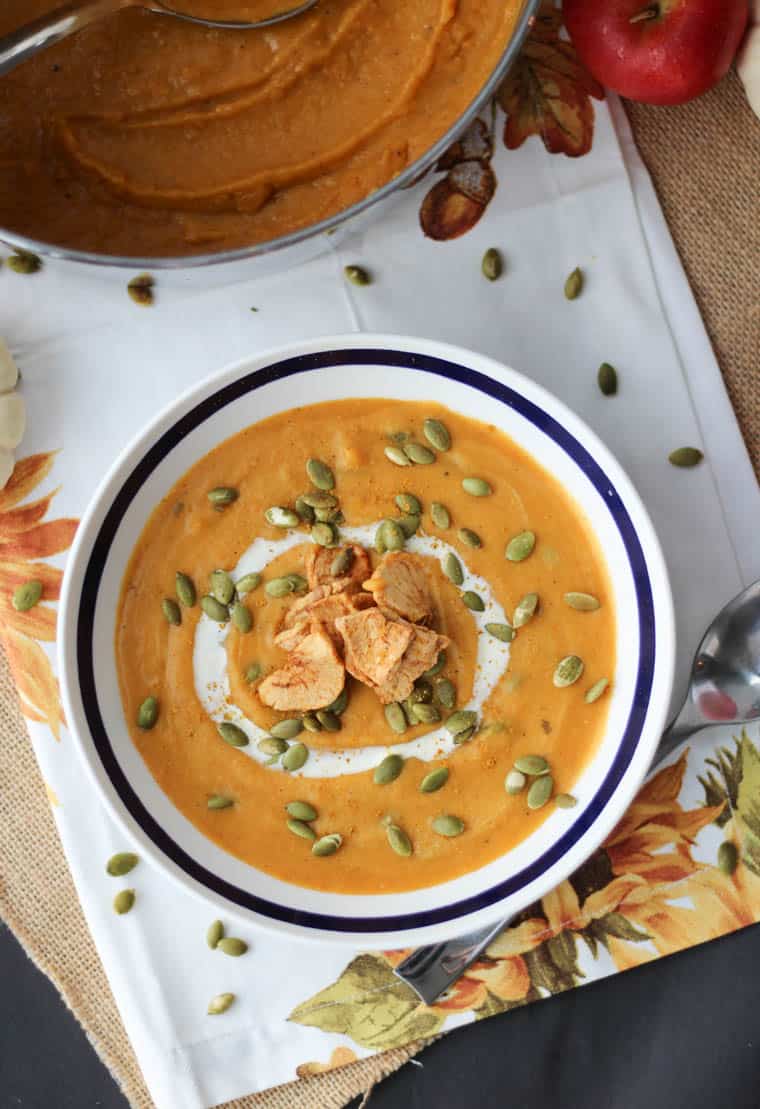
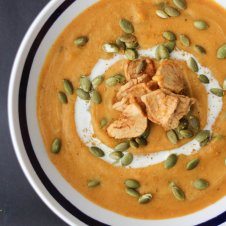
Overhead over of a bowl of sweet potato curry soup with coconut milk drizzled over with pumpkin seeds and baked apple chips sprinkled on top.

If you were to ask me what my favourite kind of dish was to make (other than maybe ice cream), I probably would settle on soup. The possibilities are endless with soup and it’s often as easy as dump, stir and (when you want it to be extra delicious) puree. This vegan sweet potato curry soup has become my go-to comfort food for those cool fall and winter nights.

Why This Recipe Works

This sweet potato curry soup has been on repeat at our house because it is hearty, satisfying, and full of flavour thanks to the spices used.

This soup also combines the sweetness of sweet potatoes and apple cider with the spiciness of curry powder and the light aromatic creaminess of coconut milk.

It doesn’t take a lot of time or effort to make this as you pretty much toss everything in, simmer, and then puree. Plus, if you use a stick blender, then this is an easy one pot recipe. On top of that, it only takes 30 minutes to simmer. If you pre-cut your ingredients ahead of time, it takes seconds to get the soup going on the stove!

Sweet potatoes are also really good for you as they’re packed with vitamins (one sweet potato has 400% of your vitamin A needs) and the apples are packed with dietary fibre, antioxidants, and vitamins.

Table of contents

  • Why This Recipe Works
  • Key Ingredients
  • How to Make this Recipe
  • Expert Tips
  • Recipe FAQs
  • More Vegan Soup Recipes

Key Ingredients

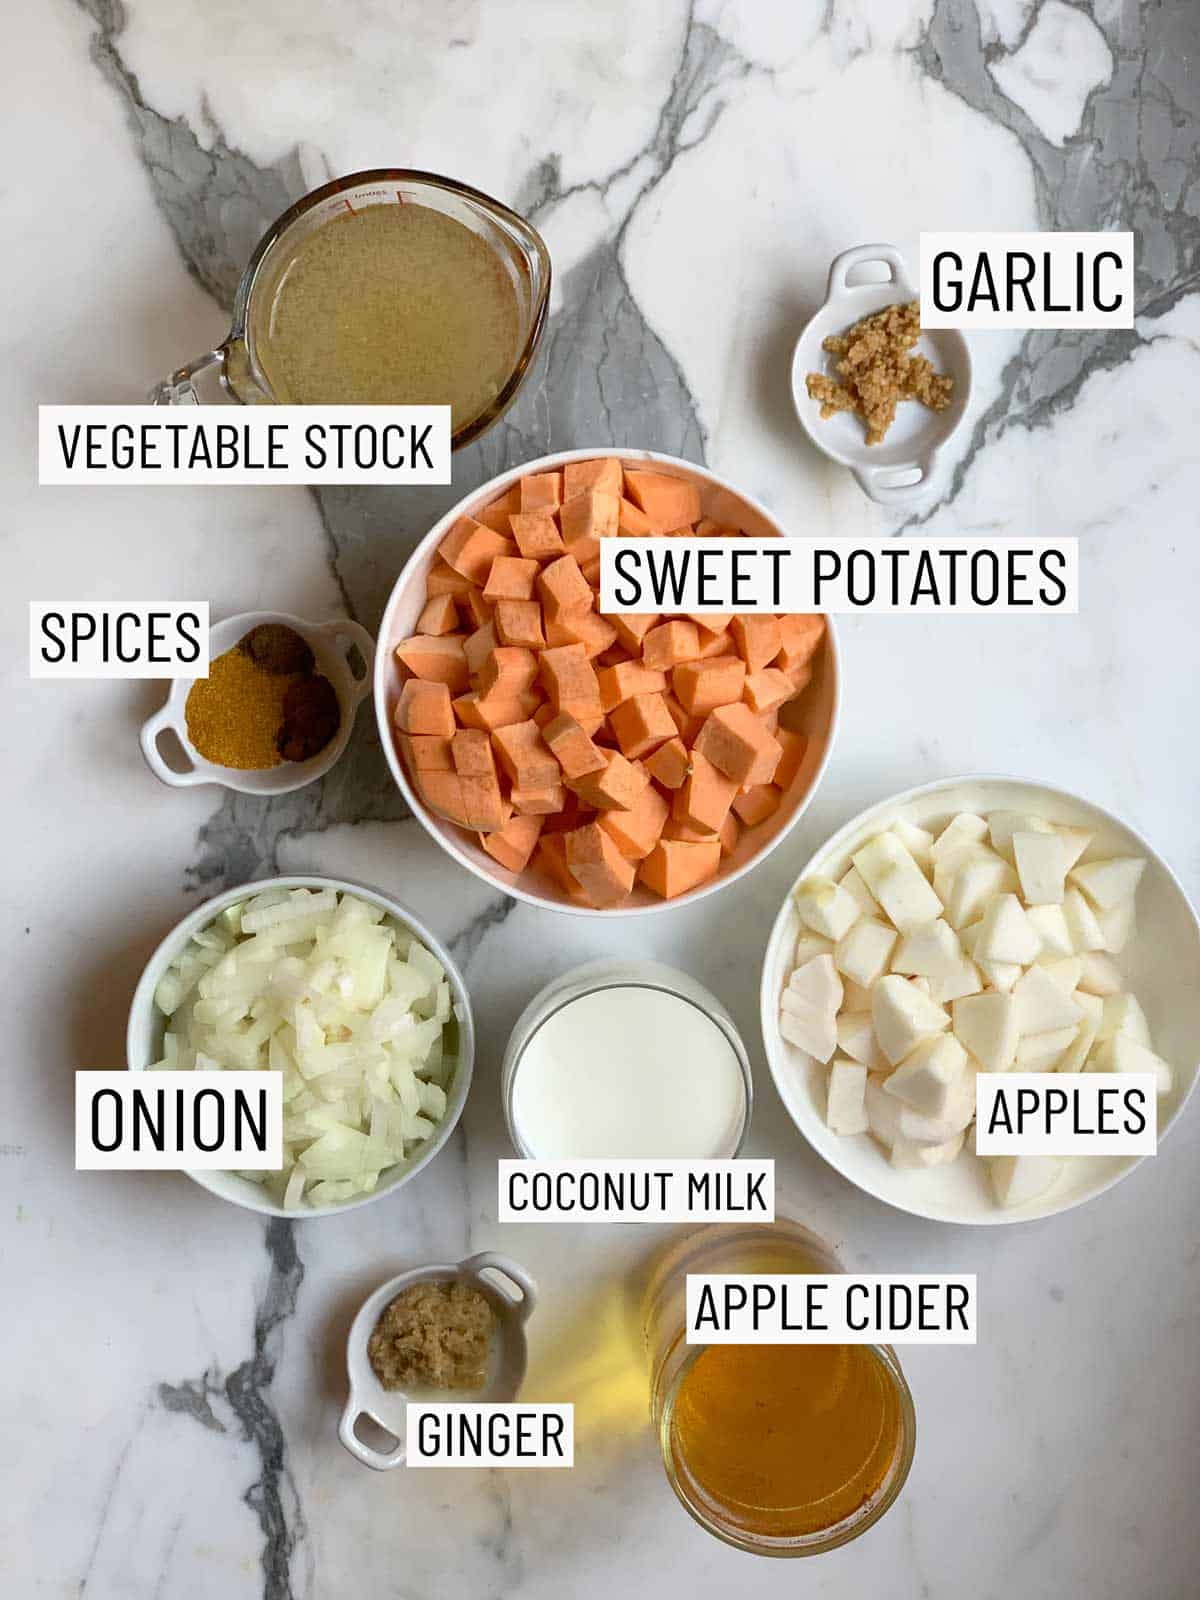
Overhead shot of recipe ingredients: vegetable stock, garlic, sweet potatoes, spices, apples, coconut milk, onion, ginger, and apple cider.

Sweet potatoes – You can’t make sweet potato curry soup without sweet potatoes! Be sure to cut them to similar sized pieces so they cook through at the same rate. The smaller the sweet potatoes are cut, the faster they cook. Also, be sure to peel them as well.

Apples – I use sweet apples such as Gala, Honeycrisp, and Golden Delicious apples to keep the soup tasting sweet. You’ll want to avoid tart apples such as McIntosh, Cortland, or Empire apples.

Apple Cider – Be sure you are using apple cider and not apple cider vinegar. These are not interchangeable!

Spices – The key spices here are nutmeg, cinnamon, and curry powder and I recommend you don’t skip any of them.

How to Make this Recipe

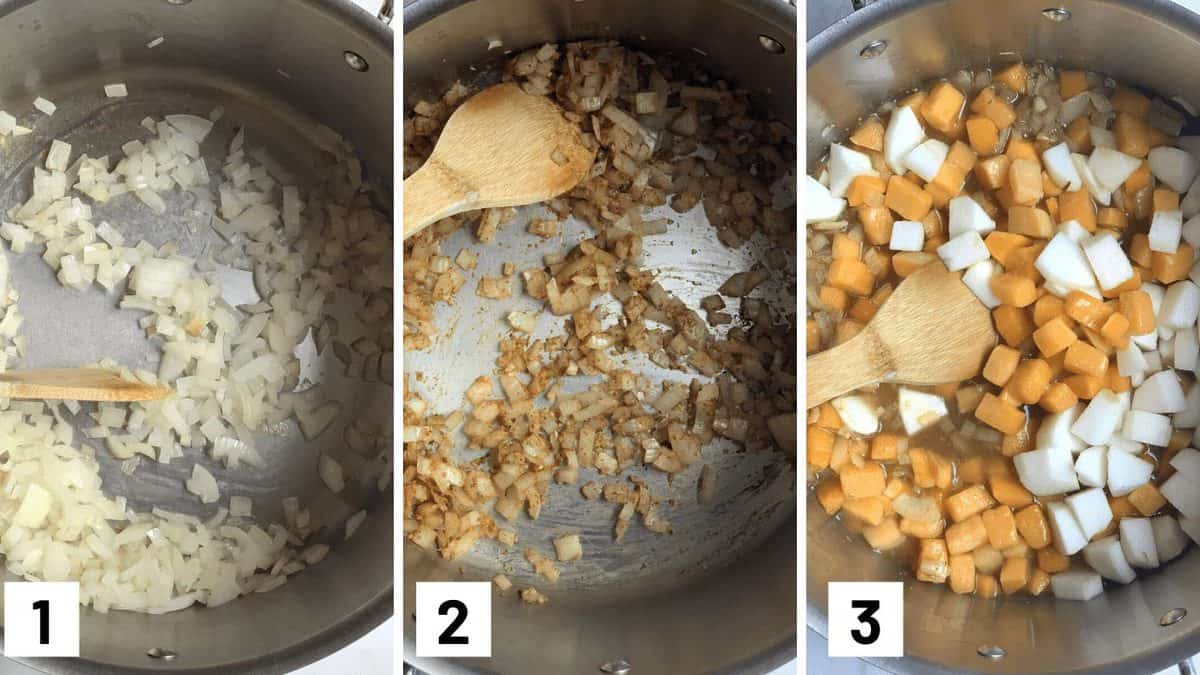
Step by step instructional photos showing how to saute onions, adding in the spices, and then yams and apple.

Step 1: Preheat a large pot over medium high heat and add in the olive oil. Add the onion and sauté until translucent, about 5 minutes.

Step 2: Stir in the garlic, ginger, nutmeg, cinnamon and curry powder and stir until the onion is coated in the spices.

Step 3: Add in the sweet potatoes and sauté until they are coated in the mixture, then add in the apples, cider, and vegetable stock.

Step by step instructional photos showing simmering of the soup, blending it, and then topping it with pumpkin seeds.

Step 4: Cover and simmer on medium heat for about 20-25 minutes until the potatoes and apples are very soft.

Step 5: Using a stand blender or hand blender, add the coconut milk and puree until the mixture is completely smooth then season with salt and pepper, to taste.

Step 6: To garnish, if desired top with the pumpkin seeds, apple chips, a swirl of coconut milk and a pinch of curry powder. Enjoy!

Expert Tips

To make sure your curry soup is super creamy, make sure the sweet potatoes and apples are VERY soft before they get pureed. They basically need to immediately fall apart when you poke them with a fork.

To add texture to this soup, I like to top my soup off with pumpkin seeds and apple chips. You can also add other nuts and seeds as well.

Curry powder comes in many forms, we are using yellow curry powder which is more mild than others. Red and green curry powder is on the spicier side so keep that in mind when you are purchasing the ingredients.

Recipe FAQs

Can I batch prep this soup and freeze it?

This sweet potato curry soup is super easy to batch prep. To freeze this soup, simply allow the soup to cool, then transfer to freezer bags and lay them flat in the freezer until they have frozen.

When ready to enjoy, you can let it thaw overnight in the fridge then transfer it to a bowl to reheat in the microwave or in a pot to reheat in the stove.

Can I substitute the apple cider?

If you do not have apple cider, unsweetened apple juice can work in a pinch. However, I recommend sticking with apple cider.

What type of sweet potatoes do I use?

Be sure to get the orange and red skinned sweet potatoes and don’t accidentally grab yams or purple sweet potatoes.

Can I meal prep this?

Yes! If stored the soup in an airtight container, it will last in the fridge for up to 4 days. Skip the toppings when portioning out the soup.

Overhead over of a bowl of sweet potato curry soup with coconut milk drizzled over with pumpkin seeds and baked apple chips sprinkled on top.

More Vegan Soup Recipes

Want more soup recipes? Try these ones from my blog next!

  • Vegan Butternut Squash Soup with Red Lentils
  • Vegan Creamy Tomato Soup
  • Vegan Broccoli White Bean Soup

Have you tried making this Sweet Potato Curry Soup?

Print Recipe
4.39 from 13 votes

Easy Sweet Potato Curry Soup

This easy sweet potato curry soup with apples and cider is a delicious light appetizer or lunch for cool weather packed with fibre and antioxidants.
Prep Time15 minutes mins
Cook Time30 minutes mins
Total Time45 minutes mins
Course: Soup
Cuisine: American
Servings: 6 people
Calories: 256kcal
Author: Abbey Sharp

Ingredients

Soup:

  • 1 tbsp extra virgin olive oil
  • 1/2 onion chopped
  • 2 cloves garlic minced
  • 1 tbsp ginger grated
  • 1/4 tsp nutmeg
  • 1/2 tsp cinnamon
  • 1 tsp curry powder
  • 4 cups sweet potatoes peeled and finely diced
  • 2 cups sweet apples peeled and diced
  • 2 cups apple cider
  • 1 cup reduced sodium vegetable stock
  • 1 cup lite coconut milk
  • Kosher salt and pepper

Garnish:

  • 1/4 cup Pumpkin seeds toasted
  • 1/2 cup baked apple chips
  • 1/4 cup coconut milk for swirling
  • Pinch of curry for garnish

Instructions

  • Preheat a large pot over medium high heat and add in the olive oil. Add the onion and sauté until transluscent, about 5 minutes.
  • Stir in the garlic, ginger, nutmeg, cinnamon and curry powder and stir until the onion is coated in the spices.
  • Add in the sweet potatoes and sauté until they are coated in the mixture, then add in the apples, cider, and vegetable stock. Cover and simmer on medium heat for about 20-25 minutes until the potatoes and apples are very soft.
  • Using a stand blender or hand blender, add the coconut milk and puree until the mixture is completely smooth then season with salt and pepper, to taste.
  • To garnish, if desired top with the pumpkin seeds, apple chips, a swirl of coconut milk and a pinch of curry powder. Enjoy!

Notes

To make sure your sweet potato curry soup is super creamy, make sure the sweet potatoes and apples are VERY soft before they get pureed. They basically need to immediately fall apart when you poke them with a fork.
To add texture to this soup, I like to top my soup off with pumpkin seeds and apple chips. You can also add other nuts and seeds as well.
Curry powder comes in many forms, we are using yellow curry powder which is more mild than others. Red and green curry powder is on the spicier side so keep that in mind when you are purchasing the ingredients.

Nutrition

Calories: 256kcal | Carbohydrates: 45g | Protein: 3g | Fat: 8g | Saturated Fat: 5g | Sodium: 247mg | Potassium: 526mg | Fiber: 5g | Sugar: 24g | Vitamin A: 12685IU | Vitamin C: 5mg | Calcium: 44mg | Iron: 1.6mg

Do you prefer chunky or pureed soup?

Leave me a comment below with your thoughts!

Abbey Sharp

Abbey Sharp is a Registered Dietitian (RD), regulated by the Ontario College of Dietitians. She is a mom, YouTuber, Blogger, award winning cookbook author, media coach specializing in food and nutrition influencers, and a frequent contributor to national publications like Healthline and on national broadcast TV shows.

www.abbeyskitchen.com/about-abbey/

Last Updated October 29, 2020. Published October 29, 2020 By Abbey Sharp

How to Stop Stomach Cramps and Pain

I discuss the common causes and symptoms of stomach cramps, and share helpful tips and remedies for pain caused by stomach cramps.

Let’s be real, stomach cramps are not fun! I’ve had my fair share of annoying tummy troubles and understand just how inconvenient and painful they can be.

So what exactly is the culprit behind those pesky stomach cramps anyway? Let’s discuss the common causes of stomach pain and some helpful strategies to help get rid of cramps in their tracks.

 What the Heck Are Stomach Cramps?

Stomach cramps are the tightening of the stomach and intestinal muscles. It’s usually intermittent, but can become chronic in some specific conditions. We all know the feeling, and it never feels good.

Common Causes

There are a lot of common reasons for stomach cramps, so it’s important to speak to your family doctor if it becomes a regular occurrence. Here are some of the most common reasons why you might be experiencing stomach cramps.

A pug wrapped up in blanket on sitting on a bed.

You Are Feeling Stressed

The brain interacts with the body through the enteric nervous system (among other systems, of course), which helps regulate our digestion. Stress can disrupt the natural digestive process, causing abdominal pain and cramps. Just another reason why stress totally sucks.

You Need to Up the H2O

When we get dehydrated (especially through sweating, vomiting or diarrhea) we lose a lot of important electrolytes like calcium, potassium, magnesium and sodium. These are all key players in proper muscle contractions, which means that skimping out can cause painful spasms.

You Are Feeling Farty

Hey, everyone farts! Nothing to be ashamed of there. But when you have a lot of gas in your gut, your intestinal muscles tend to spasm and cramp in an effort to get rid of it. Not fun times.

Gastrointestinal issues

If you’ve been diagnosed with an actual digestive issue, like irritable bowel syndrome or inflammatory bowel disease, stomach cramping may become part of your everyday life. Definitely speak to your doctor about a long-term solution if this sounds like you.

You Are Backed Up

When you’re low on water, fibre, or a combination of both, you might find yourself a wee bit constipated. In this situation, your bowels start to cramp up as they try to deal with the built-up pressure inside. It’s bad news bears all around, really. Make sure you’re staying hydrated and getting your 25-38 grams of fibre each day.

You Ate Too Much, Too Fast

Hey, even eating too much salad too fast can cause some gastric distress. When your body has to work extra hard in a short period of time, you can experience some mild cramping so try to chew your food slowly and enjoy every bite.

You Went a Little Crazy on the Fatty Foods

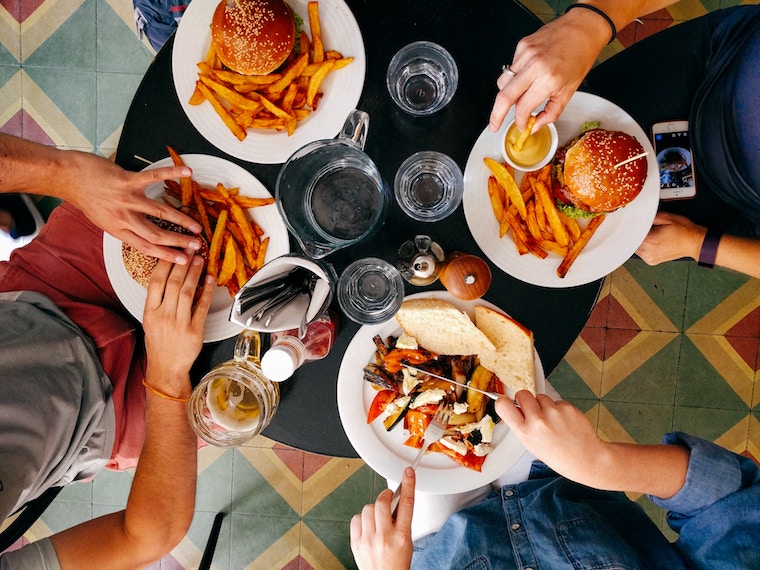
Birds eye few of several friends  sitting at a table and eating burgers and fries.

Dietary fat is harder for our body to digest than carbohydrates and protein. Which means that foods that are higher in fat spend more time in the digestive tract which can cause stomach pain and bloating.

Your Mouth is on Fire

The active component in hot peppers, capsaicin, has a tendency to irritate the stomach lining, perpetuating stomach pains and cramps. If you’re already prone, go easy on the spicy curries and sauces.

You OD’d on Coffee

Birds eye view of coffee in a mug with a stir spoon as a cause for stomach cramps.

Caffeine can increase stomach acid and irritate the stomach lining, both of which can cause abdominal pain and even diarrhea if you’re not used to it. Maybe switch to a gentle camomile tea if coffee isn’t your friend.

You Ate a Little Too Many Sweets

Several colourful holiday cookies laying on a counter which may cause stomach cramps.

While a sweet treat is definitely warranted every now and then, sometimes our stomach may not agree. As sugar is processed through our gut, some of it can get fermented in our lower intestine by bacteria, causing bloating, gas and cramps.

You Got into the Bag of Sugar Free Candies

A variety of gummy candies in individual serving bins.

Sugar free candies may seem like a good idea, especially if you are trying to cut back on sugar while still getting to enjoy the sweetness they provide. However, these candies are typically sweetened with a sugar alcohols like sorbitol which is notorious for causing bloating, cramping and yes, even rampant diarrhea.

You Are Lactose Intolerant and Ate a Tub of B&Js

Considering one in six Canadians are lactose intolerant, abdominal pain can be expected after massive ice cream sundaes. Take a lactase enzyme supplement or pace yourself with smaller amounts of dairy foods.

You Had One Too Many Adult Beverages

Several hands holding up glasses of beer to "cheers.

Alcohol in excess can damage the stomach lining, resulting in pain, cramps, diarrhea and in extreme cases, serious damage.  Always know your limits and stick within it!

How to Stop Stomach Cramps and Pain

Friends, you really don’t have to live in pain with stomach cramps. In addition to avoiding or cut back on some of the aforementioned scenarios, here are a few natural strategies to alleviate stomach pain.

Heat it Up

Heat can help relax your tight spasming tummy by increasing blood circulation, so grab a heating pad or run a warm bath.

Starchy Foods and Grains

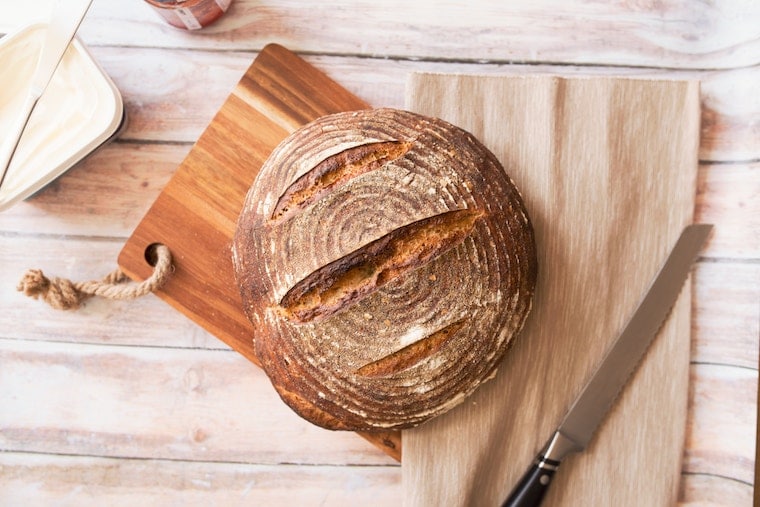
Loaf of bread on cutting board.

Slow burning carbs like starches and whole grains help to coat the lining of the stomach, easing digestion and promoting a soothing effect.

Ginger

There is some research that ginger may be effective for abdominal discomfort and indigestion because it helps to reduce the time it takes for the stomach to empty. Try steeping some fresh ginger in water for a quick tea, or adding grated fresh ginger to stir-fries and juice.

Peppermint Oil

Peppermint is a natural anti-spasmodic, meaning it helps to sooth our intestinal tract and calm muscle contractions that cause cramps. It also helps stimulate the gallbladder to secrete bile used to digest fats so it’s a good pairing for those fattier holiday meals.

Treat Yourself to a Massage

If it’s just a little gas, you may need to work that out so giving yourself a gentle tummy massage may help ease stomach cramps.

Up the Electrolytes

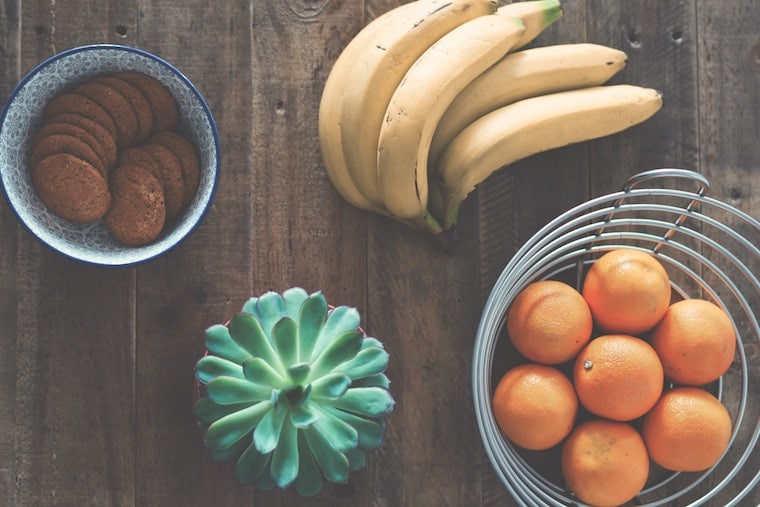
Oranges in a bowl, bananas, and cookies in a bowl on a counter top to increase electrolytes to help relieve stomach cramps.

When we’re experiencing a lot of cramping, it may be a sign that we’re low on electrolytes (like sodium, potassium, calcium and magnesium) since these electrolytes are responsible for muscle contractions. Aim to up your intake with foods like bananas, coconut water, milk, tomatoes, citrus, pumpkin seeds and sea salt.

Easy Exercise

Person running on path to help relieve stomach cramps.

Research suggests that gentle exercise can help calm our gastric tract and reduce bloating, gas and pain. Try to get out every day for a brisk walk or scenic bike ride.

Rest and De-stress

Close up image of a bed with dark grey sheets with an open book laying on a pillow, and a cup of coffee in a mug on top of the bed.

If it’s stress related (and hey, that’s totally common), you might just need to pull back and take a break. Try to get in some extra sleep or just lay down for an hour to see if the stomach cramps disappear.

More Nutrition Posts Like This

Gas and Bloating 101 – 5 Reasons for Tummy Trouble

Are Food Sensitivity Tests BS or Legit?

Tips to Avoid the Holiday Heartburn and Indigestion

Now tell me – what food or scenarios have you found cause stomach cramps for you? What tricks or remedies have you tried that help to stop stomach cramps?

Abbey Sharp

Abbey Sharp is a Registered Dietitian (RD), regulated by the Ontario College of Dietitians. She is a mom, YouTuber, Blogger, award winning cookbook author, media coach specializing in food and nutrition influencers, and a frequent contributor to national publications like Healthline and on national broadcast TV shows.
www.abbeyskitchen.com/about-abbey/

Last Updated October 26, 2020. Published October 26, 2020 By Abbey Sharp 43 Comments

Zoodles Carbonara Pasta (Gluten Free)

zucchini carbonara

This Zoodles Carbonara pasta recipe is gluten free, low carb, keto friendly optional and can be ready in under 30 minutes!

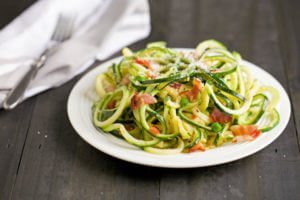
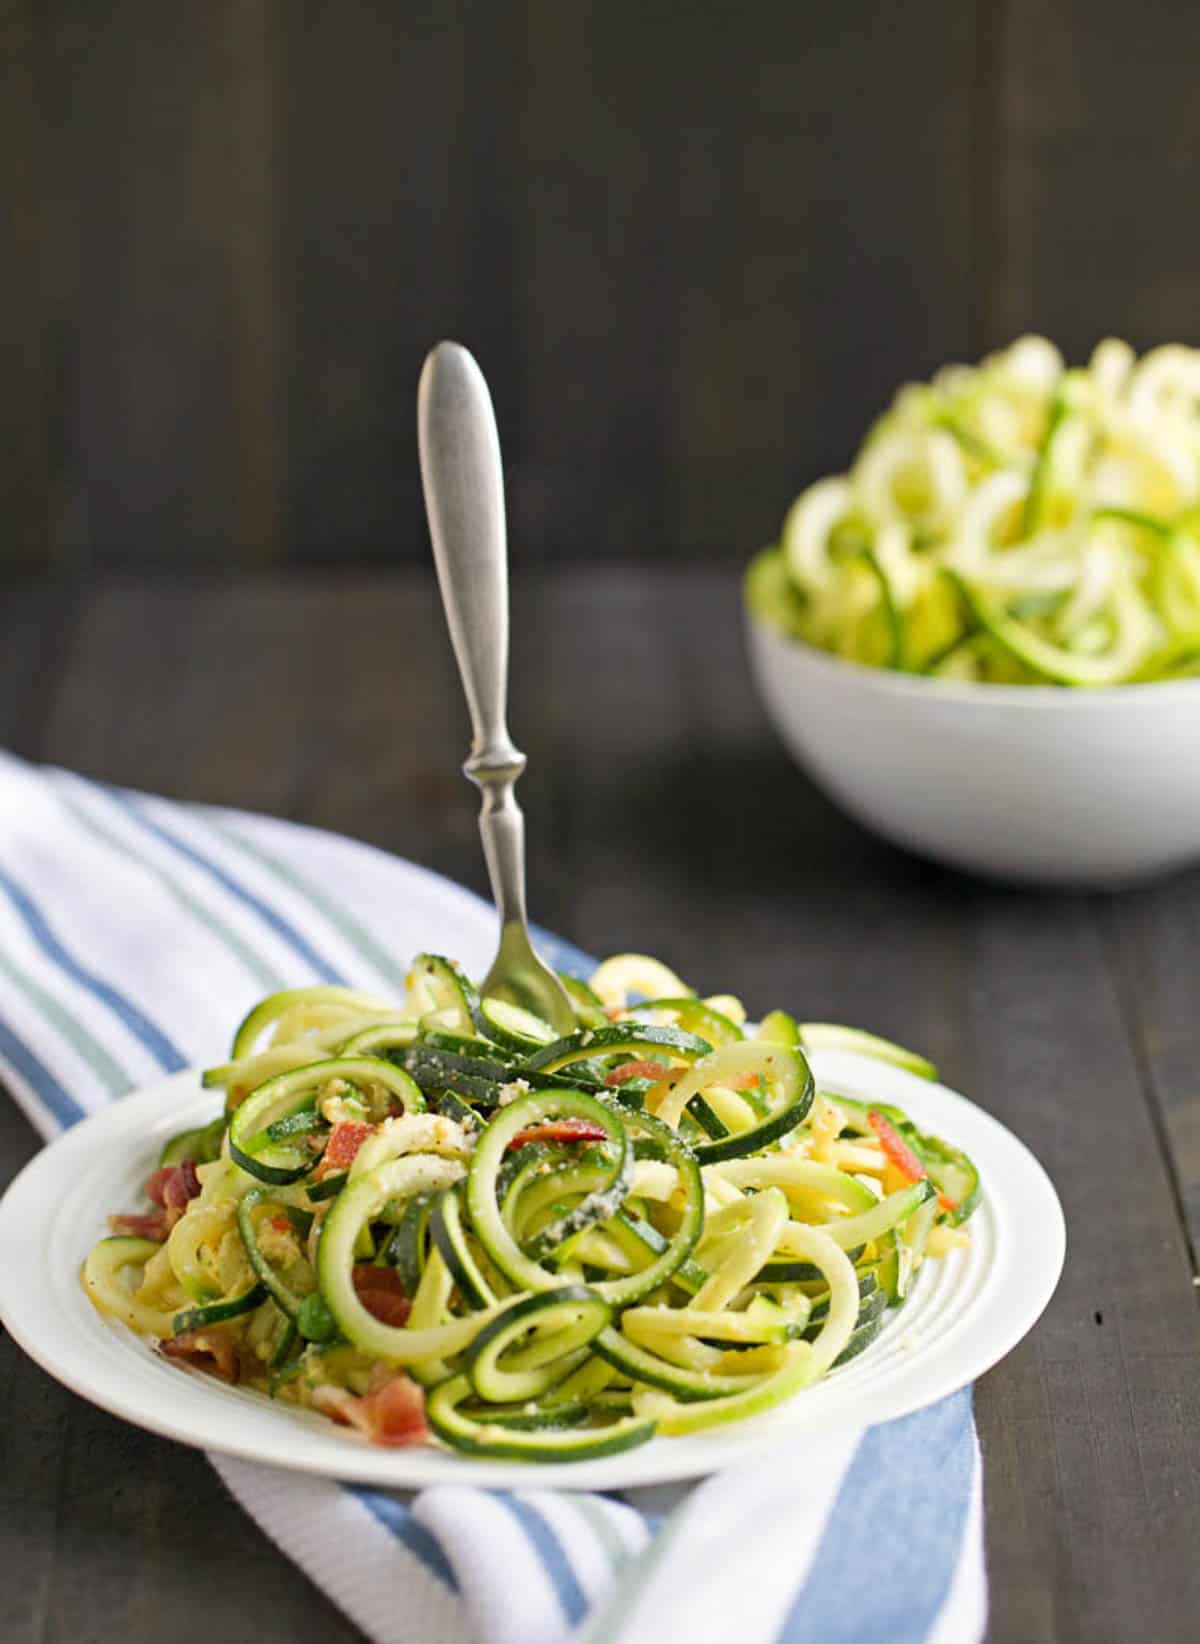
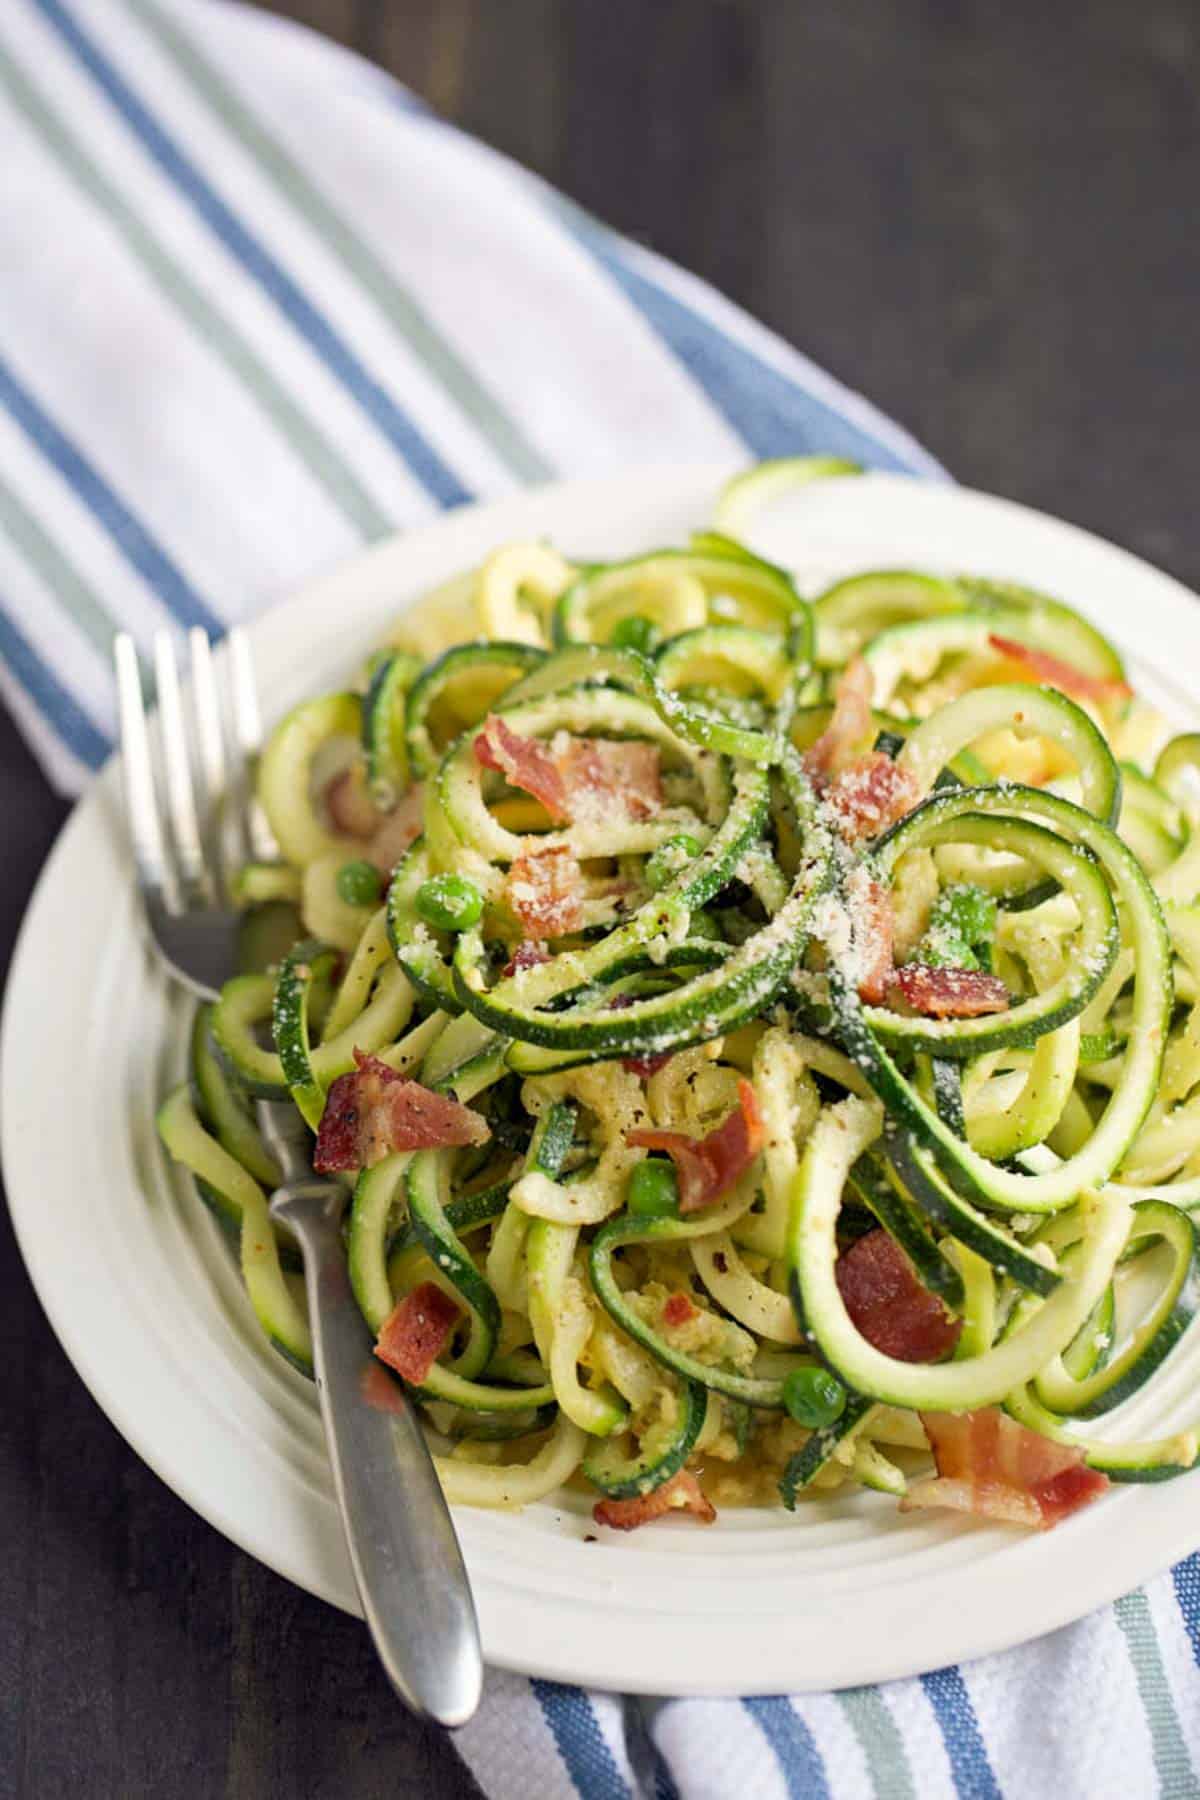
Zoodles carbonara on a white plate with a fork twisting the noodles.

If you were to ask me what was in my top 10 favourite foods of all time – carbonara pasta would definitely be one of them. There is something really satisfying about a big bowl of cheesy, creamy noodles with the salty kick from pancetta or bacon.

It’s probably not an every day dish because carbonara is decadently rich, so I set out to make a version that was a little more weeknight friendly. This zoodles carbonara is a low carb, gluten free option for those who are craving that cheesy goodness. 

Table of contents

  • What is Pasta Carbonara?
  • Key Ingredients
  • Key Equipment
  • How to Make This Recipe
  • Expert Tips
  • Recipe FAQ
  • More Recipes Like This

What is Pasta Carbonara?

Carbonara is basically an Italian pasta dish made with egg yolks, pancetta or bacon, lots of parmesan cheese and pasta. It tastes super creamy, but miraculously, it is completely cream-free! My zoodles carbonara version swaps in zucchini noodles in place of the pasta, and adds a handful of peas in for some extra fibre and veg.

Key Ingredients

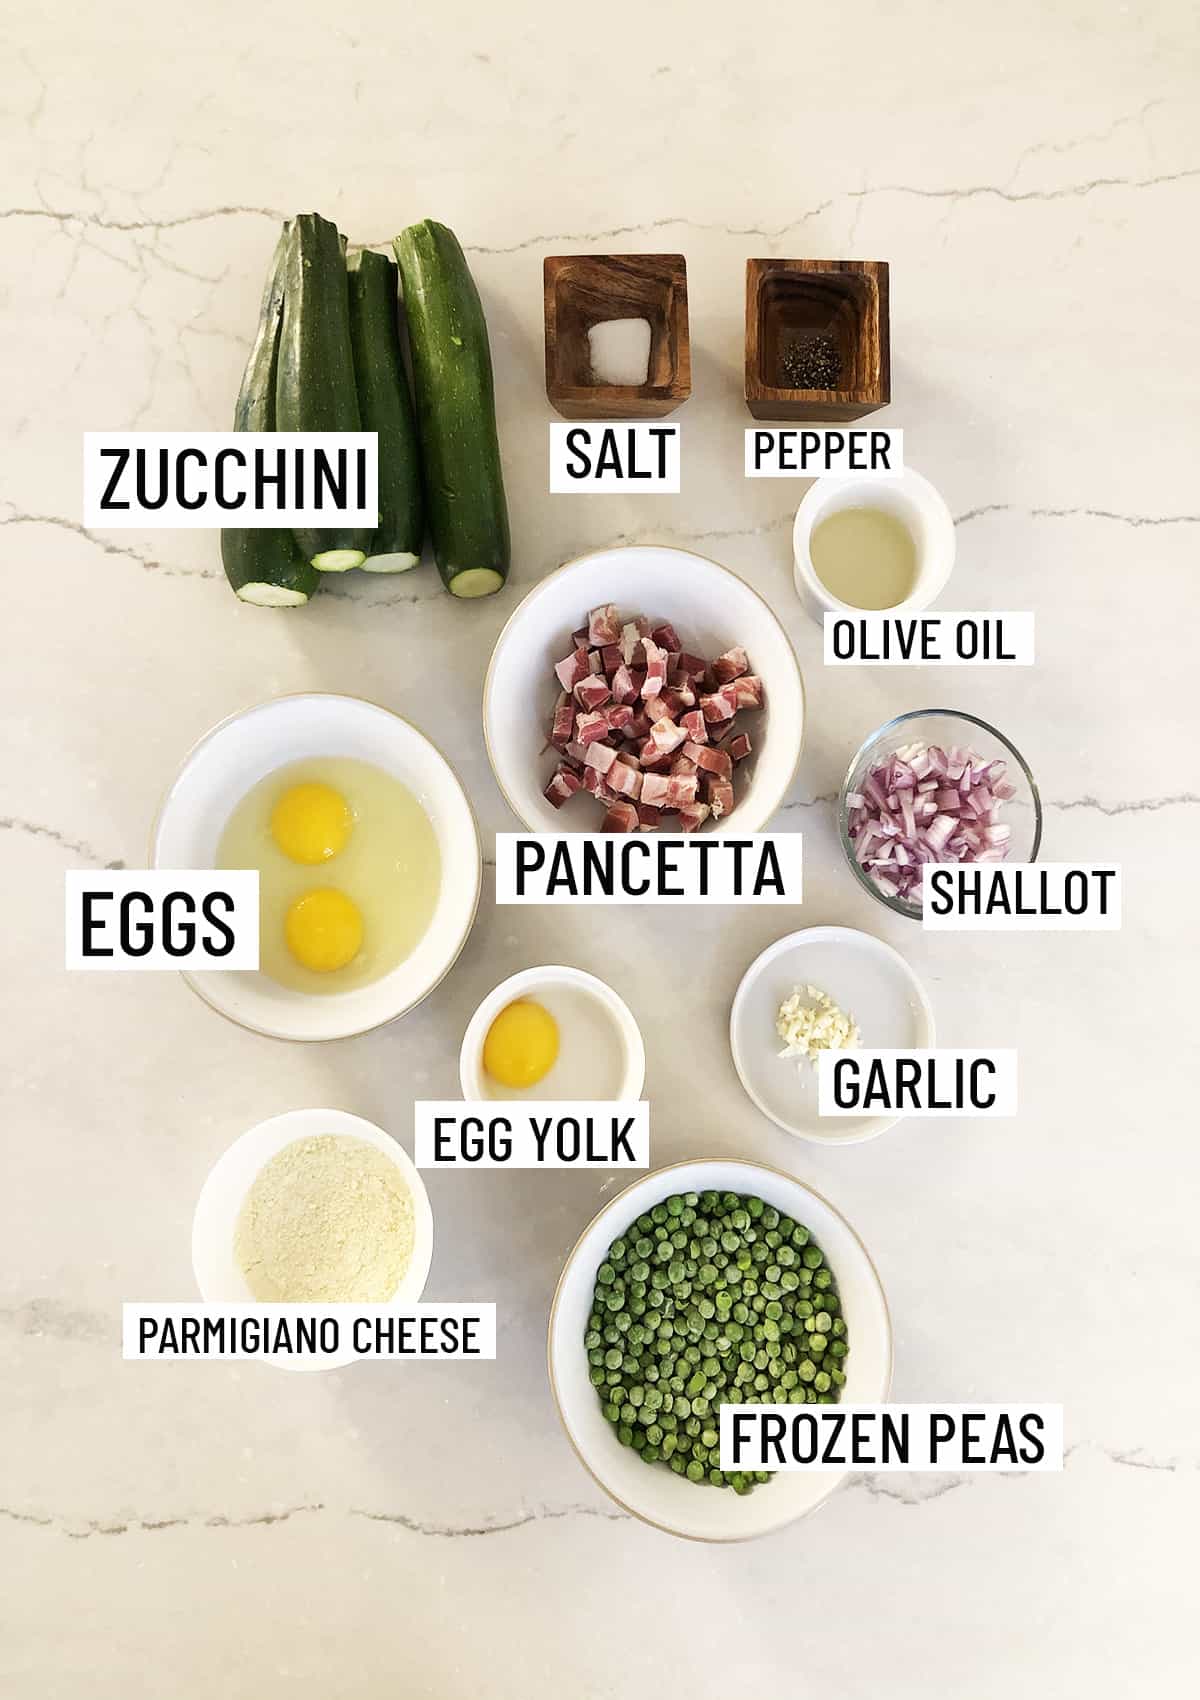
Birds eye view of ingredients for zoodles carbonara portioned out in to individual bowls.

Zucchini – When choosing zucchini, make sure you have one that is very firm, and blemish free. I also prefer smaller thinner zucchini for this recipe since some fat ones won’t fit so well into your spiralizer. I also find that fat zucchini often are more watery, and the key to a good zoodle recipe is to limit moisture. 

Bacon or pancetta– The difference between bacon and pancetta is that pancetta is not smoked the way bacon is and is usually a thicker cut. You can use whichever you can easily find!

Eggs – I prefer to use omega 3 eggs to bump up the healthy fats in this recipe.

Parmesan cheese – Use a good parmesan or asiago cheese and grate it yourself. There are so few ingredients, you want to use the best.

Black pepper– The black pepper is key to balancing out the salt and richness in this recipe. I promise this will not be a spicy recipe, just totally delish.

Key Equipment

All you really need to make this zoodles carbonara is a good spiralizer. I love the Kitchen-aid spiralizer attachment, but a stand alone handheld will work great too. 

I also recommend a good cast iron skillet for cooking the zoodles to keep them really crisp.

How to Make This Recipe

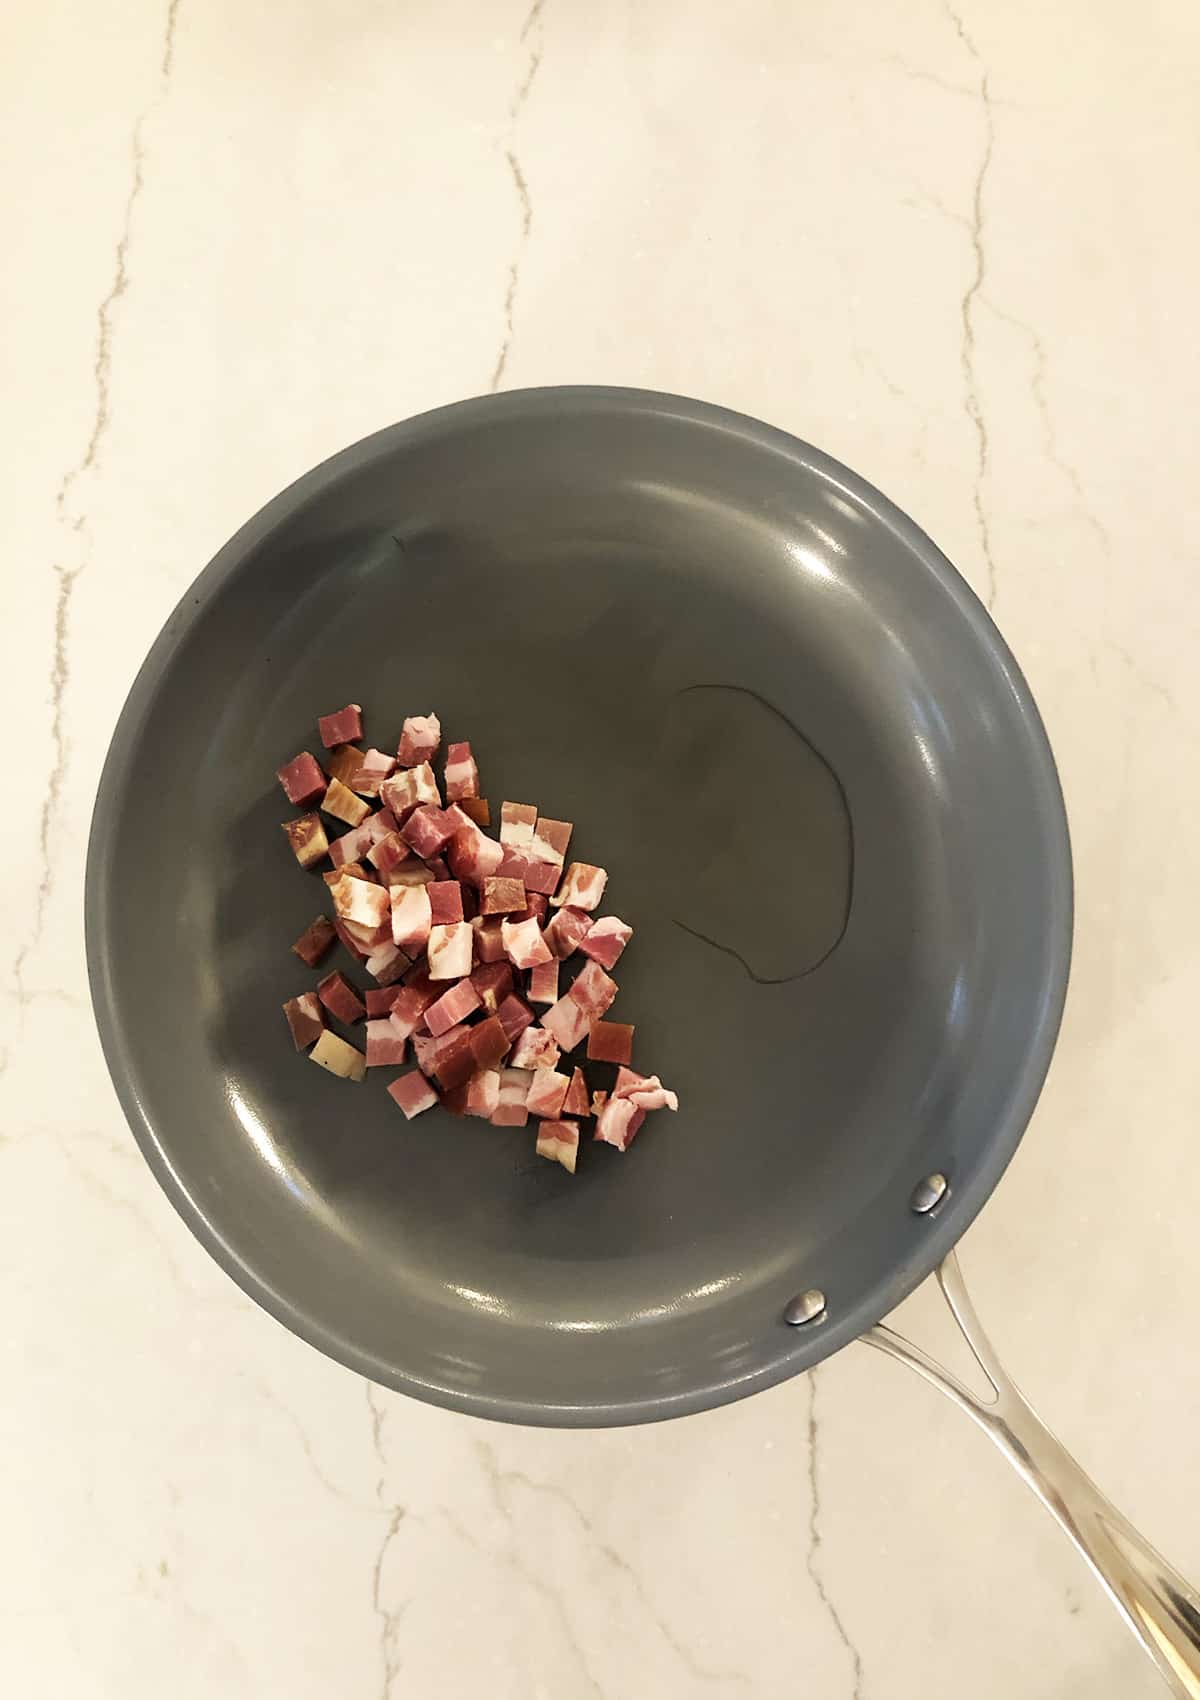
Pancetta cooking on a grey frying pan.

Step 1: Heat a large cast iron skillet over medium heat and add one teaspoon of oil. Add in the pancetta, cook until crisp, then remove the bacon to a small dish.

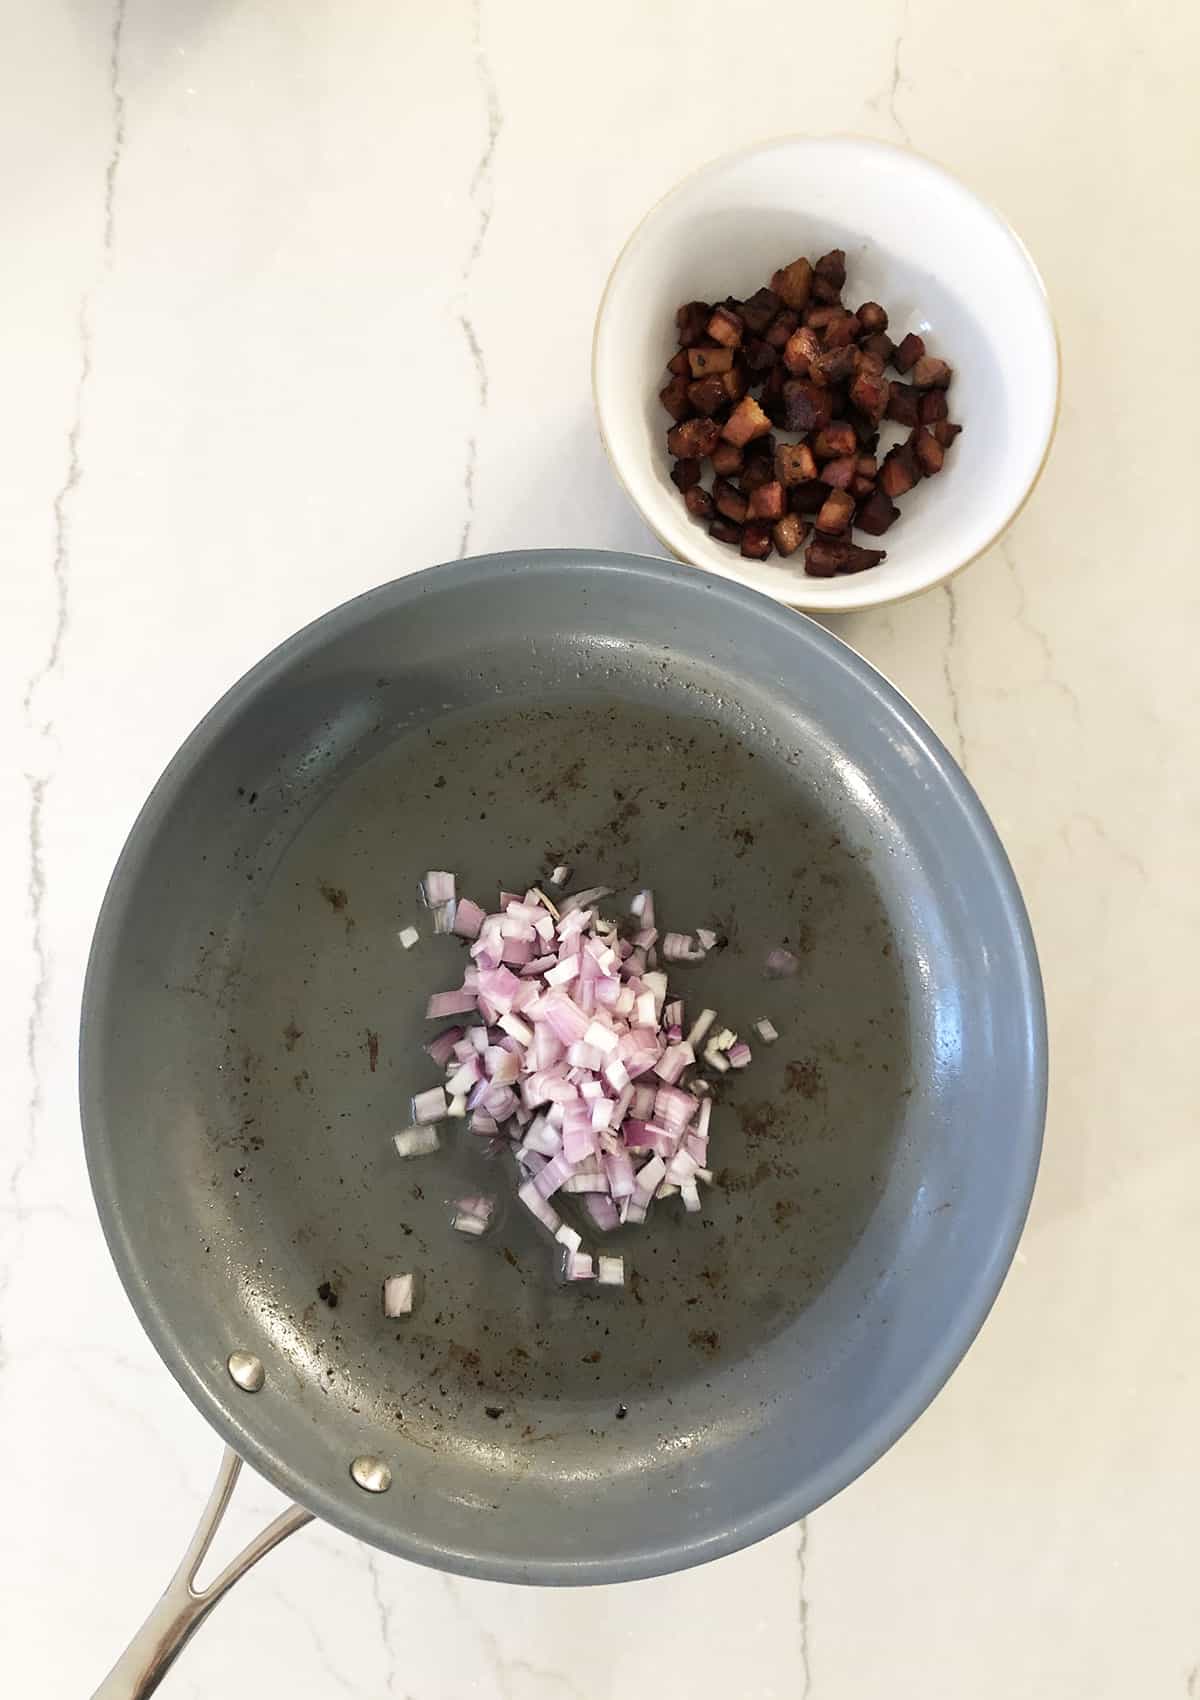
Shallot and garlic sauteed on a frying pan with pancetta on the side in a white bowl.

Step 2: Saute shallot and garlic on medium heat.

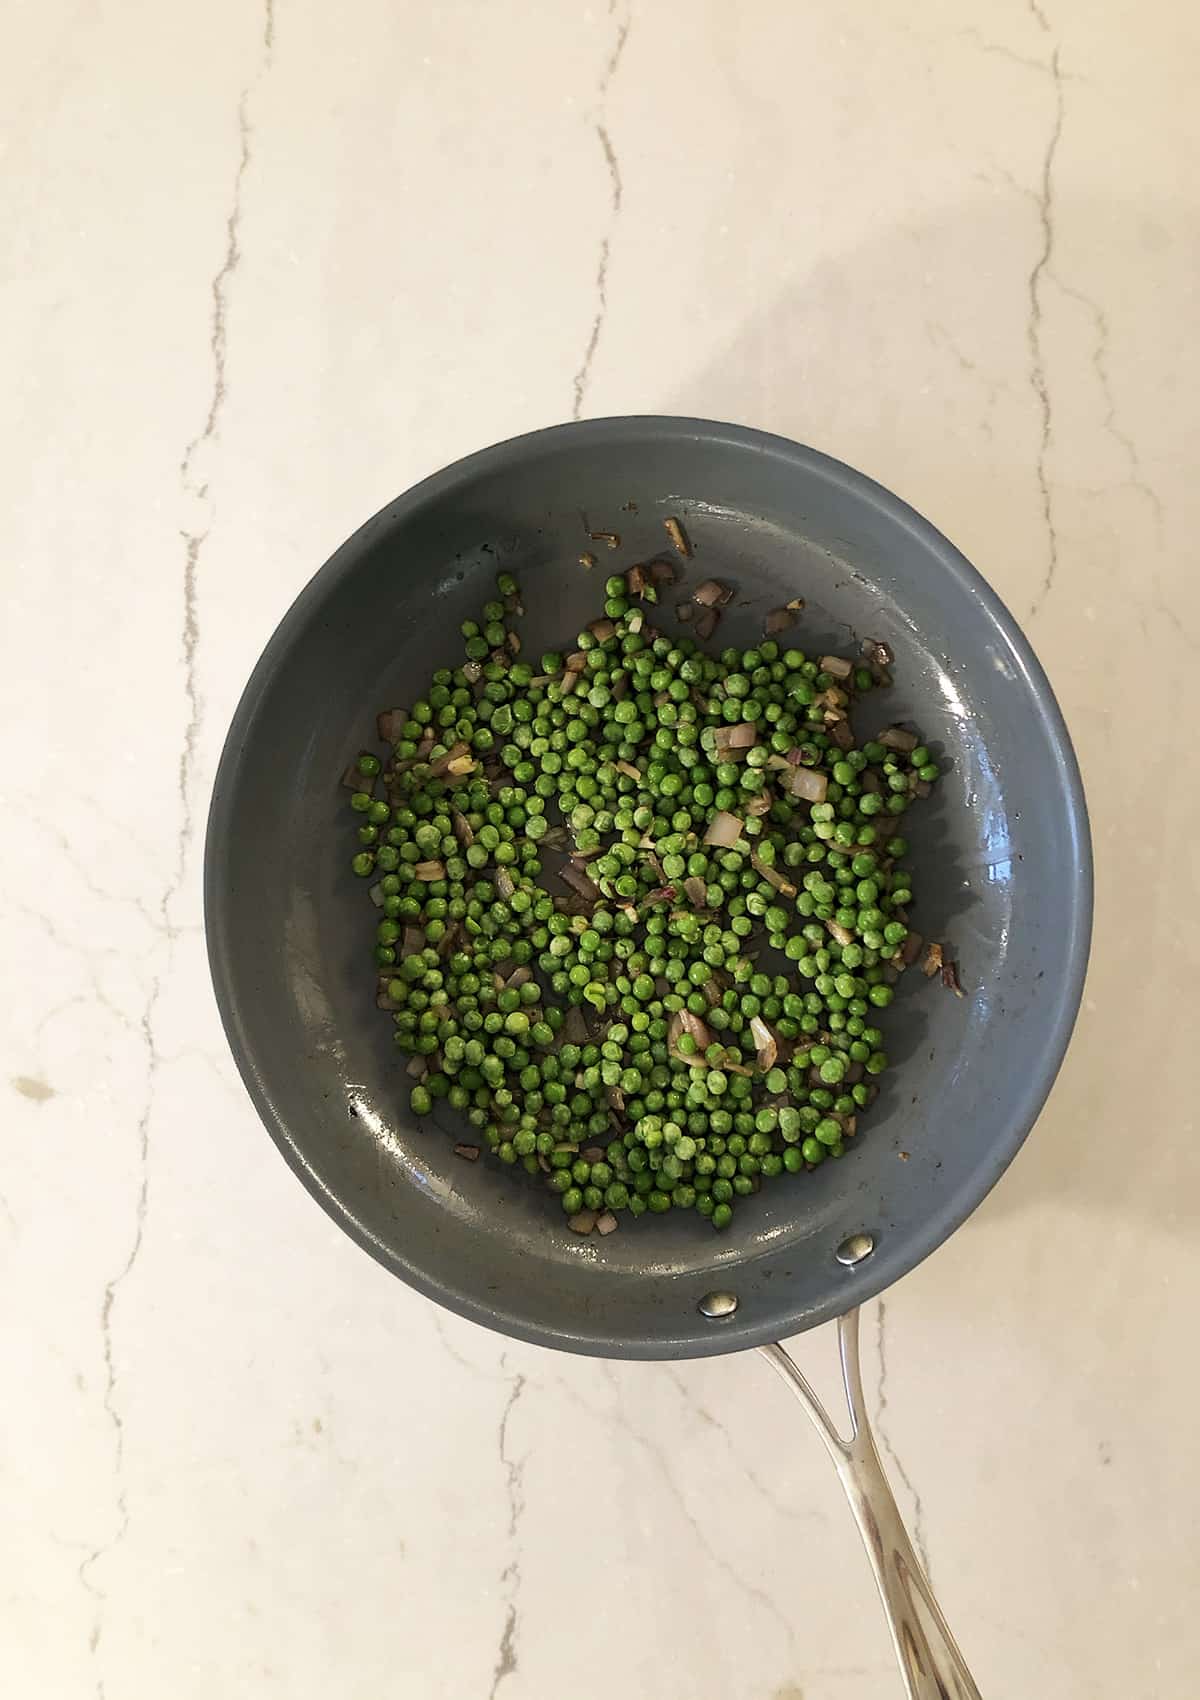
Frozen peas, shallots, and garlic in a gray frying pan.

Step 3: Add peas and stir until thawed through.

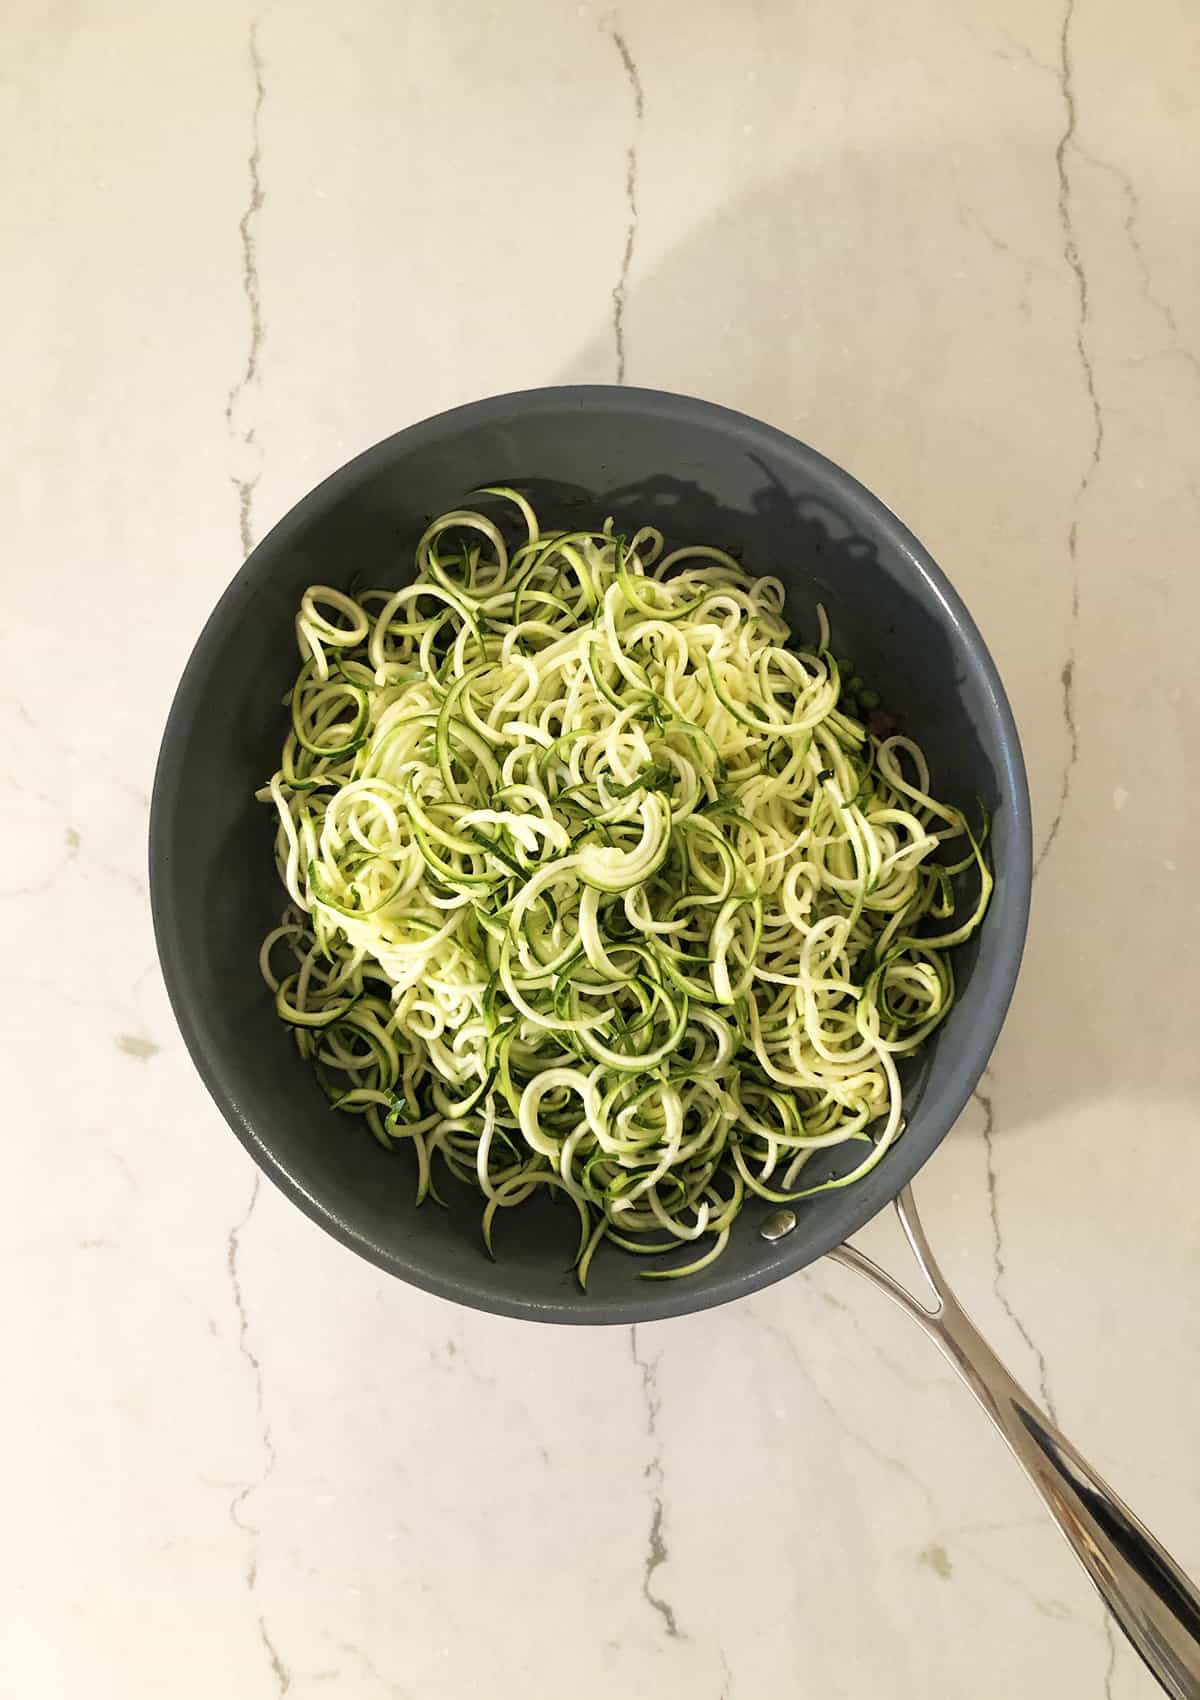
Zucchini zoodles in a frying pan.

Step 4: Add in zucchini zoodles and saute on medium high heat until fully warmed through.

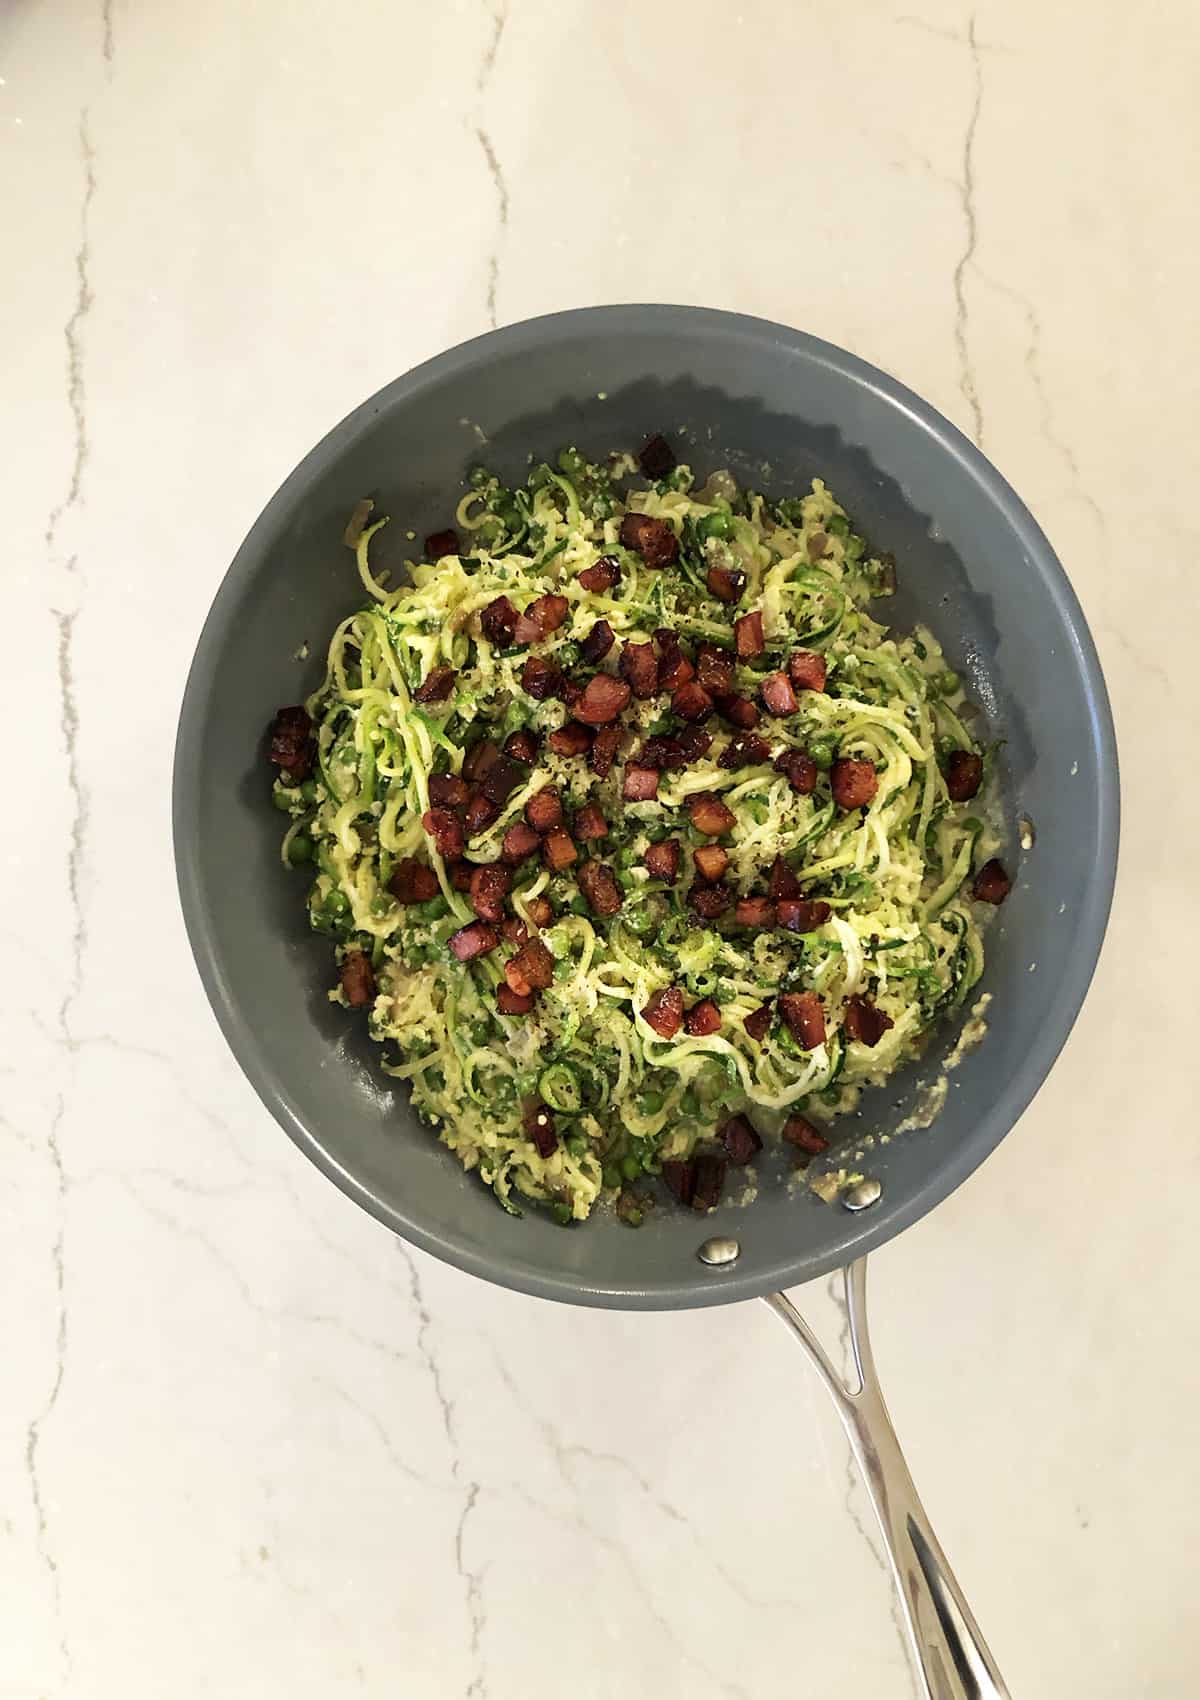
Zucchini zoodles carbonara with pancetta in frying pan.

Step 5: Turn off heat and mix in egg and cheese mixture util coated. Add cooked pancetta and season with freshly cracked black pepper.

Expert Tips

The Key to Non-Soggy Zoodles – Now, this is important. I experimented with this recipe and updated it after some people were having trouble keeping this zoodles carbonara from getting soggy. Ultimately, zucchini are mainly water so you need to find a way to get the excess water OUT. The solution? Basic osmosis.

Lightly sprinkle the zoodles with a bit of salt to dry out the water. Press them into a few sheets of paper towel and let it sit for 10 minutes. Then, I rinse them off with cold water and lay them back on fresh sheets of paper towel to dry. Yes, I know it seems strange to remove water and then add water, but it DOES WORK.

Once you get them super dry, add them to the pan and let them cook ever so quickly. I like mine a little al dente so a quick little dip in the hot pan is all it takes. And there you go, NON SOGGY zoodles carbonara.

Zoodles carbonara pasta on a white plate with a fork on the side and garnished with extra parmesan cheese.

Recipe FAQ

What makes this dish low carb?

The zucchini noodles in place of regular pasta noodles makes this zoodles carbonara dish super low carb while upping the fibre and veg.

What can I use if I don’t have a spiralizer?

If you don’t want to invest in a standard spiralizer, you can pick up an inexpensive handheld version which can be found at the dollarstore. No fancy equipment needed!

Can I make this vegetarian?

Absolutely! You can simply omit the pancetta or replace with another veg of your choice. This zoodles carbonara recipe still has tons of protein even without the pancetta.

Can I freeze leftover zoodles?

Yes you can. Make sure when you thaw them out to squeeze out the excess water before you cooking to prevent the zoodles from getting soggy.

What are your favourite zucchini noodle recipes? Have you tried this amazing zoodles carbonara pasta? Leave me a comment below!

More Recipes Like This

Brown Butter Butternut Squash Noodles

Creamy Pumpkin Zucchini Noodles

Vodka Sauce Zucchini Noodles

Beet Green Pesto Zucchini Noodles

zucchini carbonara
Print Recipe
4.39 from 42 votes

Zoodles Carbonara Pasta (Gluten Free)

This Zoodles Carbonara pasta recipe is gluten free, low carb, keto friendly optional and can be ready in under 30 minutes!
Prep Time20 minutes mins
Cook Time10 minutes mins
Total Time30 minutes mins
Course: Dinner
Cuisine: Italian
Servings: 2 people
Calories: 412kcal
Author: Abbey Sharp

Ingredients

  • 4 medium zucchinis top and bottom sliced off
  • 1/2 tsp Kosher salt
  • 2 slices pancetta diced
  • 3 tsp olive oil divided
  • 1 shallot minced
  • 1 clove garlic minced
  • 1 cup frozen peas
  • 2 eggs beaten
  • 1 egg yolk beaten
  • 1/3 cup finely grated parmigiano cheese plus more for garnish if desired
  • Cracked Black Pepper to taste
  • Salt to taste

Instructions

  • Line a baking sheet with a few layers of paper towel. Lay the zucchini noodles down and sprinkle with salt. Top with another few layers of paper towel, a cutting board and some heavy items like books or pots. Let sit for 10 minutes.
  • After 10 minutes, transfer the noodles to a colander and rinse thoroughly with cold water to remove the salt.
  • Refresh the paper towels on the baking sheet with a few new layers. Gently squeeze and shake the zoodles and lay them down on the paper towel. Top with a few more layers of paper towel, the cutting board and the heavy items. Let dry for 10 minutes.
  • Heat a large cast iron skillet over medium heat and add one teaspoon of oil. Add in the pancetta, cook until crisp, then remove the bacon to a small dish and return the pan to the stove.
  • Add in the remaining olive oil and return the pan to medium heat. Add in the shallot and saute for 2 minutes. Then add in the garlic and stir for 1 minute. Next, add the peas and stir until thawed through, about 2 minutes.
  • Finally, add in the zucchini, increase the heat to medium high, and saute for 2-3 minutes or until fully warmed through.
  • Turn off the heat.
  • Beat together the eggs, egg yolk and cheese then add them to the pasta and toss gently until coated. This should take literally 2 minutes.
  • Add back the bacon and season with freshly cracked black pepper.
  • Divide between two bowls, add additional parmesan if desired, and season with salt to taste.

Video

Nutrition

Calories: 412kcal | Carbohydrates: 27g | Protein: 24g | Fat: 25g | Saturated Fat: 8g | Cholesterol: 282mg | Sodium: 1045mg | Potassium: 1330mg | Fiber: 8g | Sugar: 15g | Vitamin A: 1836IU | Vitamin C: 101mg | Calcium: 314mg | Iron: 4mg
Abbey Sharp

Abbey Sharp is a Registered Dietitian (RD), regulated by the Ontario College of Dietitians. She is a mom, YouTuber, Blogger, award winning cookbook author, media coach specializing in food and nutrition influencers, and a frequent contributor to national publications like Healthline and on national broadcast TV shows.
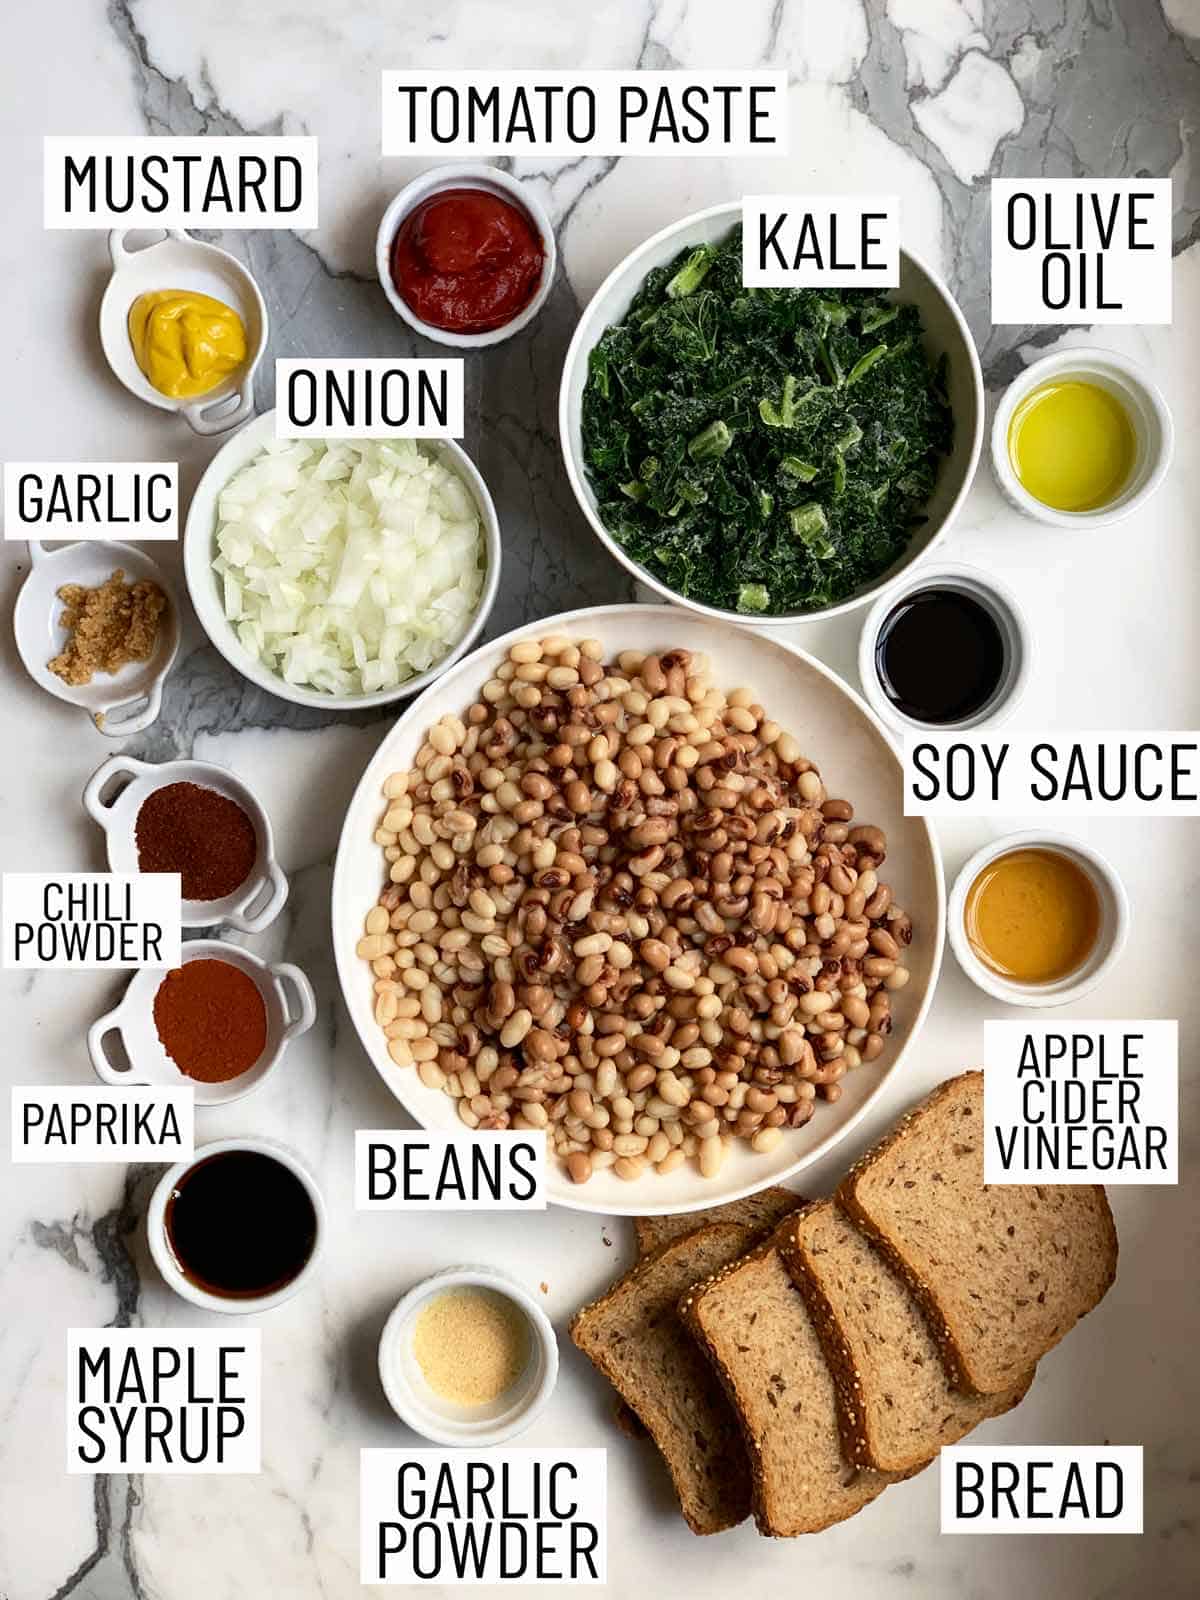
www.abbeyskitchen.com/about-abbey/

Last Updated October 4, 2021. Published October 21, 2020 By Abbey Sharp 1 Comment

Is Lemon Water Good for You?

We answer the age old question – is lemon water good for you by looking at the evidence on metabolism, immunity, digestion, acne and more! 

Lemon water- the supposed holy grail of instagram wellness. The popularity behind lemon water mostly stems from it’s laundry list of alleged health claims including its ability to supposedly boost metabolism, promote clear skin, balance pH, detox the liver, enhance immunity, and even fight cancer (*insert eye roll here*). But can a simple glass of lemon water really optimize health? We take a deep dive to answer the age old question – is lemon water good for you? And should you be drinking it daily?

Birds eye view of a glass of lemon water with a mint sprig.

How to Make Lemon Water

Preparing a glass of lemon water is pretty straightforward and impossible to mess up. You simply add fresh lemon juice (as much or as little as you like) to a glass of hot or cold water and voila! Done. There’s no real science to it and it really just depends on your taste preference. 

With that said, how does lemon water fare nutritionally? Aside from providing a small amount of potassium, lemon juice (as well as all other citrus fruits) is a great source of vitamin C. But, of course, the amount of vitamin C obtained from lemon water will depend on how much lemon juice you choose to add.

So for example:

One tablespoon of lemon juice provides 6 mg vitamin C.

The juice from a whole lemon (roughly 3 tbsp of juice) provides 18 mg of vitamin C.  

When we consider that the recommended amount of daily vitamin C is 75 – 90 mg/day for adults, 1 spoonful of lemon juice would provide around 7% of daily vitamin C while the juice of a whole lemon would provide 20-25% of daily vitamin C. 

With that in mind, any nutritional benefit obtained from lemon water is more than likely attributed to the vitamin C content it provides. But does this mean that the vitamin C from lemon water is really the magic elixir behind all the supposed health claims? Let’s dive a little deeper.

Lemon water with a sliced lemon and two halves of a lemon on the side.

What Is Vitamin C?

Vitamin C is a water-soluble vitamin obtained in the diet that is important for many body functions, such as collagen formation, immune function and enhancing iron absorption. While lemon water may provide around 20-25% of your daily needs for vitamin C, there are a number of food sources that far exceed this amount. 

For example, 1 medium bell pepper provides 8 times the amount of vitamin C from the juice of a whole lemon, while a kiwi provides 4 times the amount, and an orange provides 3 times the amount. Other excellent sources of vitamin C include:

  • Strawberries
  • Cantaloupe
  • Limes
  • Broccoli
  • Cauliflower
  • Bok choy
  • Brussels sprouts

While lemon water may certainly help with meeting our daily recommendation for vitamin C, when we compare the amount of vitamin C in lemon water to other food sources, any “benefit” coming from lemon water would be considered the same if not more from other higher vitamin C sources. So even though lemon water may not be the end all be all of vitamin C sources, there’s no denying that vitamin C has a number of health benefits that a morning glass of lemon water may help to support. 

Health Claims

Let’s examine some of the alleged health claims of drinking lemon water.

Skin Health 

The skin contains high concentrations of vitamin C, which stimulates collagen synthesis and helps protect against UV damage. Research shows that vitamin C levels in the skin respond to increases in vitamin C levels in the blood. In other words, the more vitamin C we consume the more benefit we will likely see in the integrity of our skin.  As for drinking lemon water, it may help to support skin health when combined with a diet already rich in vitamin C. However, relying on lemon water alone will likely not lead to substantially healthier glowing skin.

Cholesterol and Blood Pressure

Due to vitamin C’s antioxidant properties, it has been shown to lower cholesterol by preventing inflammation and hardening of the arteries. Research suggests that 500 mg/day of supplemental vitamin C may promote this cholesterol lowering effect. In addition, vitamin C supplementation of the same amount has also been shown to significantly reduce blood pressure. One explanation is that vitamin C improves nitric oxide production which aids in vasodilation, meaning it relaxes the inner muscles of the blood vessels, causing them to dilate and increase circulation. 

Although these studies show that supplemental vitamin C can lower cholesterol and blood pressure, more research is needed to determine if the same benefit can be obtained from food sources. Even if it can, you would need to drink about 28 glasses of lemon juice, using the whole lemon, to see these positive effects. 

Two Lemons with one cut in half on a pink counter.

Iron Absorption

Vitamin C helps to enhance iron absorption when combined with iron-rich foods which can help to prevent iron deficiency. Some examples of common vitamin C and iron food combinations include:

  • Oatmeal and berries
  • Tofu stir fry with bell peppers
  • Bean chili with a squeeze of lime juice on top

When it comes to the vitamin C found in lemons, one study looked at the effect of lemon versus orange juice on iron absorption and found that lemon juice had a greater effect. The study suggested this was due to the higher citric acid content of lemon juice together with its vitamin C content. 

With that in consideration, squeezing a bit of lemon juice on your iron-rich meal or enjoying a glass of lemon water on the side can help to increase your body’s absorption of iron. However, consuming lemon water in the morning in isolation would not have the same effect. 

Immunity  

Vitamin C also plays a role in immune function by encouraging the production of white blood cells which help protect against infection. However, current research does not support the idea that routine vitamin C intake will improve immunity against the frequency of colds, specifically. However, regular intake of vitamin C supplementation has been shown to reduce the duration and severity of colds when supplements are introduced before the onset of cold symptoms. 

That being said, the studies included in the systematic review ranged from providing participants with 1000 to 2000 mg of vitamin C supplementation per day. When we compare this amount to the 18 mg of vitamin C obtained from the juice of one lemon, the effect of lemon water on the duration and severity of colds are pretty negligible. At best, if you are not obtaining enough vitamin C throughout the day from other food sources or supplements, then it is possible that drinking lemon water may help to supplement your intake. But again, you would have to drink over 55 glasses of lemon water to reap any benefits for immunity. 

Regardless, it is important to drink plenty of fluids when you are sick, so if adding lemon juice to your water helps you drink more fluids, by all means, add it in! And let’s face it, a warm citrusy beverage always feels nice and soothing on your throat when you are feeling under the weather.

Three lemon slices on a white plate.

Cancer Prevention

You may be surprised, but there actually is evidence supporting the role of vitamin C in cancer prevention, although this does not extend to the treatment of patients with advanced cancer. It is important to note that the studies were conducted using 200 mg of vitamin C supplementation. This goes back to vitamin C being an antioxidant which may protect against cancers caused by oxidative damage. However, the research is still extremely limited in this area. 

Again, considering that the juice from one lemon only provides 18 mg of vitamin C, this amount would be negligible when it comes to possible cancer prevention. On the other hand, it would be easier to meet 200 mg of vitamin C from consuming one red bell pepper plus a cup of cauliflower in the day, or a cup of strawberries plus a cup of brussel sprouts. 

Kidney Stones

Studies have shown that increased intakes of fruit and vegetables can help protect against the risk of kidney stone formation. This is true for all fruit and vegetables besides those with high oxalate content, such as beets, cranberries, spinach and sweet potatoes. Lemon juice in particular, as well as other citrus juices, are natural sources of citrate which binds with urinary calcium and helps to prevent kidney stone growth.  In addition, regular consumption of lemon water can increase fluid intake and urine output which can likewise be beneficial for the prevention of kidney stones. 

Mental Clarity

An additional benefit of drinking lemon water daily is that it can help you increase your fluid intake. Studies have shown that dehydration can impair cognitive performance, especially tasks involving attention, executive function, and motor coordination. How to tell if you are dehydrated? The colour of your urine is a good guide. The darker the colour, the more likely you are to be dehydrated so aim for shades of pale yellow. 

Several glasses of water with citrus wedges.

Detoxification

Arguably one of the more popular claims behind drinking lemon water in the morning is its ability to “detox” the body from toxins. But news flash, folks! Our organs (like our kidneys, liver, lungs, and skin) are perfectly capable of handling any cleansing of toxins as necessary. That being said, water is the most important beverage that a person can consume to help our organs filter out any waste products or toxins. However, it’s important to note that this goes for water in general and is not necessarily specific to lemon water. Meaning, whether you are drinking plain ol’ water or lemon water, the impact on the body when it comes to detoxification are virtually the same. 

pH Balance 

Our blood pH is tightly regulated by the kidneys which helps to maintain the blood’s pH in a constant range, between 7.34 and 7.45. This range is critical in order for our cells to function properly. Even though lemon juice is very acidic at a pH of 2, one reason why it has been thought to alter the pH of our blood is because when it is metabolized in the body it becomes alkaline. Although studies have shown that lemon juice may make the pH of our urine more alkaline, this does not have an effect on the pH of our blood. In fact, NO foods have an effect on blood pH, as our kidneys closely regulate this. If our blood pH was to fall outside the normal range, it would be extremely dangerous. With that said, even though our kidneys require water to function properly, lemon water has NO effect on alkalizing the body. 

Weight Loss & Metabolism 

Time and time again, I’ve heard many influencers suggest that lemon water in the morning will “kickstart your metabolism” and promote weight loss. There is some research to support the claim that increasing water consumption before each meal may help to reduce caloric intake by increasing feelings of fullness. But, this is not exclusive to only mornings or only lemon water. 

However, lemon water is a low calorie beverage and provides only 10 calories from the juice of one whole lemon. So, if you were to drink lemon juice in place of other high-calorie beverages, this would naturally reduce calories and possibly aid in weight loss. With that said, lemon water itself has not been proven to boost metabolism in any way. 

A tall pitcher with citrus wedges.

Exercise Performance and Athletic Recovery 

Drinking lemon water will not necessarily enhance exercise performance besides helping to keep you hydrated. However, adding the juice of a whole lemon to your water during a workout can help replace essential electrolytes lost while sweating during exercise, specifically potassium which is important for proper muscle function. The juice of 1 lemon has about 48 mg of potassium, which may seem low compared to the potassium needs for the average adult which is 4700 mg/day.  However, when you compare the potassium content in a standard sports drink it only contains around 65 mg of potassium.  

Lemon water is, therefore, a great alternative to sports drinks especially if you are trying to reduce your sugar intake. You can also add a tiny pinch of salt to boost the sodium content in the lemon water, as sodium is the primary electrolyte lost through sweat and is important for maintaining fluid balance and retaining fluids. Despite lemon water acting as a low sugar alternative to sports drinks, it’s important to still keep in mind that the sugar in sports drinks provides a quick shot of glucose to replenish energy stores. So if you choose to substitute your sports drink for lemon water, you may need to obtain fast acting glucose post-workout from another source. 

Digestion

Another major claim behind the lemon water trend is that it can help relieve digestion and bloating. The main ingredient in lemon water that may have these effects is water. In other words, whether you drink plain water, or lemon water, the effects on digestion would be virtually the same.  This is because constipation is often due to dehydration, so drinking plenty of fluids will help to move things along. When bloating occurs, drinking water may help flush out the excess fluids and help you feel more comfortable. 

Lemons are also touted as a diuretic, meaning that they increase urination and help flush water from your system. However, the research does not support this claim. Water alone can help relieve constipation and bloating, but the lemon juice does not necessarily play a role. 

There are also some claims that drinking lemon water aids in digestive health due to soluble fibre. However, the juice of 1 lemon only contains 0.1 g of fibre and 1 tbsp of lemon juice contains no fibre. This amounts to less than 1% of an individual’s daily fibre needs, which is pretty negligible. 

If you are consuming lemon water for the fibre content, you are much better off getting your fibre needs from other fibre-rich foods like fruits, vegetables, whole grains, nuts and seeds and relying on lemon water (or just plain water) for hydration instead. 

Risks & Concerns 

Are there any potential risks or concerns with drinking lemon water regularly?

Tooth Enamel

Citric acid in lemons can be corrosive and damaging to tooth enamel, which is the covering that protects our teeth, making them more sensitive and prone to cavities. Although the citric acid content of lemon water is fairly diluted, dentists still recommend the following suggestions to avoid damaging tooth enamel: 

  • Swish plain water in your mouth for 30 seconds after finishing your lemon water to make sure the acid does not remain on your teeth
  • Do not brush your teeth for at least 30 minutes after drinking lemon water, as the brushing motion will further agitate your enamel. 
  • If you prefer a stronger lemon flavour, dentists suggest drinking the beverage out of a (reusable) straw, which will bring the lemon water towards the back of your mouth and away from your teeth. 

Canker Sores 

Canker sores are shallow ulcers that develop inside your mouth and they heal on their own within seven to 14 days.  However, citric acid in lemon juice can worsen existing canker sores and may cause you to develop them more often. Avoid drinking lemon water as your canker sore is healing.  

Several lemons with some cut in half.

Bottom Line

So, is lemon water good for you? Well, sure, it’s good for you. It’s water! And while it may help to support some health benefits due to its vitamin C content, it is certainly not the miracle cure-all beverage that it is often touted as. Overall, you can obtain the same (if not more) benefits from any other vitamin C source – whether it be from food or supplements.  But if adding lemon juice to your water helps you increase your fluid intake and is something you enjoy drinking, then by all means drink up!

Contribution by Dietetic Student Christine Jauernig

Abbey Sharp

Abbey Sharp is a Registered Dietitian (RD), regulated by the Ontario College of Dietitians. She is a mom, YouTuber, Blogger, award winning cookbook author, media coach specializing in food and nutrition influencers, and a frequent contributor to national publications like Healthline and on national broadcast TV shows.
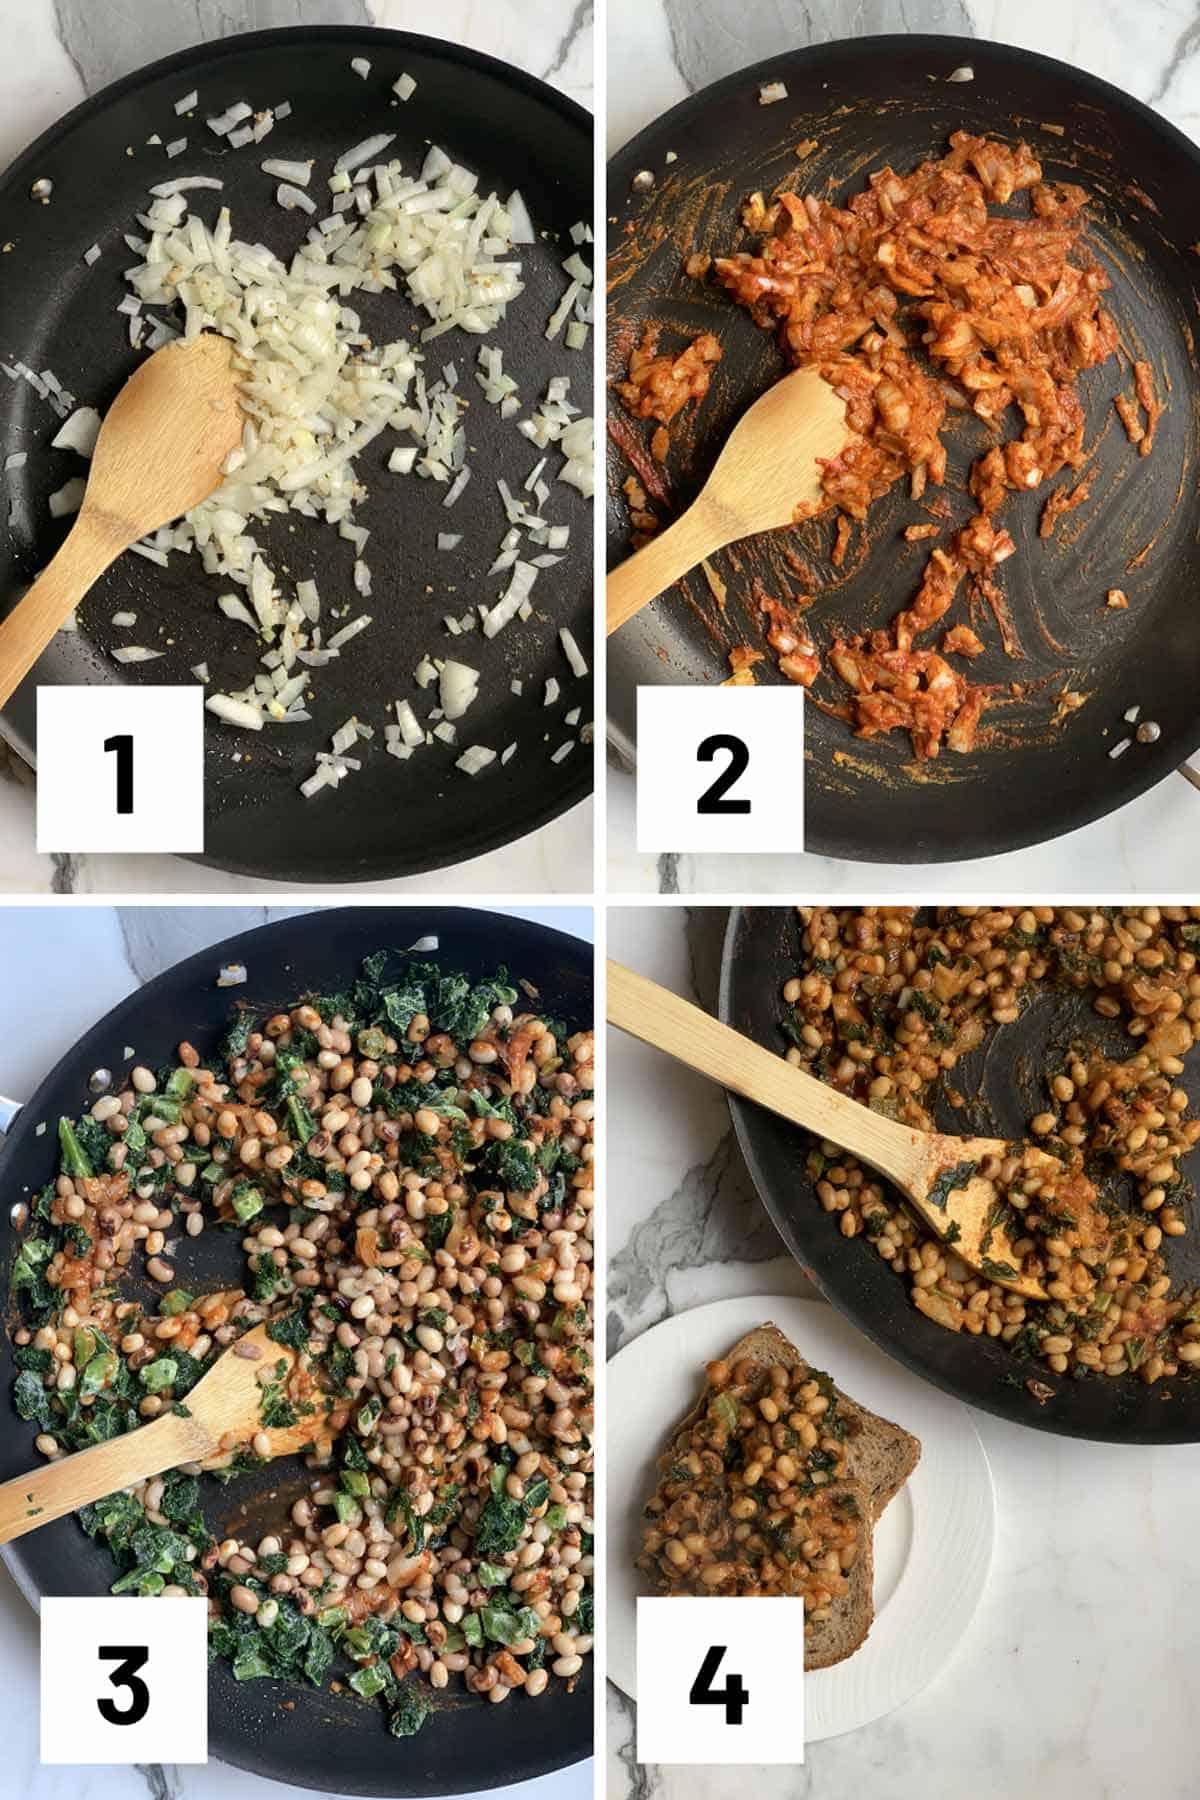
www.abbeyskitchen.com/about-abbey/
  • Previous Page
  • Go to page 1
  • Interim pages omitted …
  • Go to page 39
  • Go to page 40
  • Go to page 41
  • Go to page 42
  • Go to page 43
  • Interim pages omitted …
  • Go to page 89
  • Next Page

Get started with

Eight Free Recipe Books

From the co-founder of Neue Theory and creator of the Hunger Crushing Combo

Sign me up!
Abbey smiling at table
Abbey Sharp

“Foods may never be nutritionally equal. But we can make them morally equal by recognizing that our worth is never determined by what's on our plate.”

— Abbey Sharp, RD About Abbey ◥

Books

  • HCC™
  • Mindful Glow
  • Free E-Books

Blog

  • Nutrition
  • Recipes
  • Motherhood
  • Life

Explore

  • Neue Theory™
  • Bite Back
  • YouTube

Abbey

  • About
  • Coaching
YouTube TikTok Instagram Facebook X Pinterest
Abbey Sharp - The No BS Dietitian From Abbeys Kitchen

© Abbey's Kitchen 2026  All Rights Reserved •  ACCESSIBILITY STATEMENT •  Privacy Policy

This site uses cookies. By continuing to browse the site, you are agreeing to the use of cookies Accept Privacy Policy
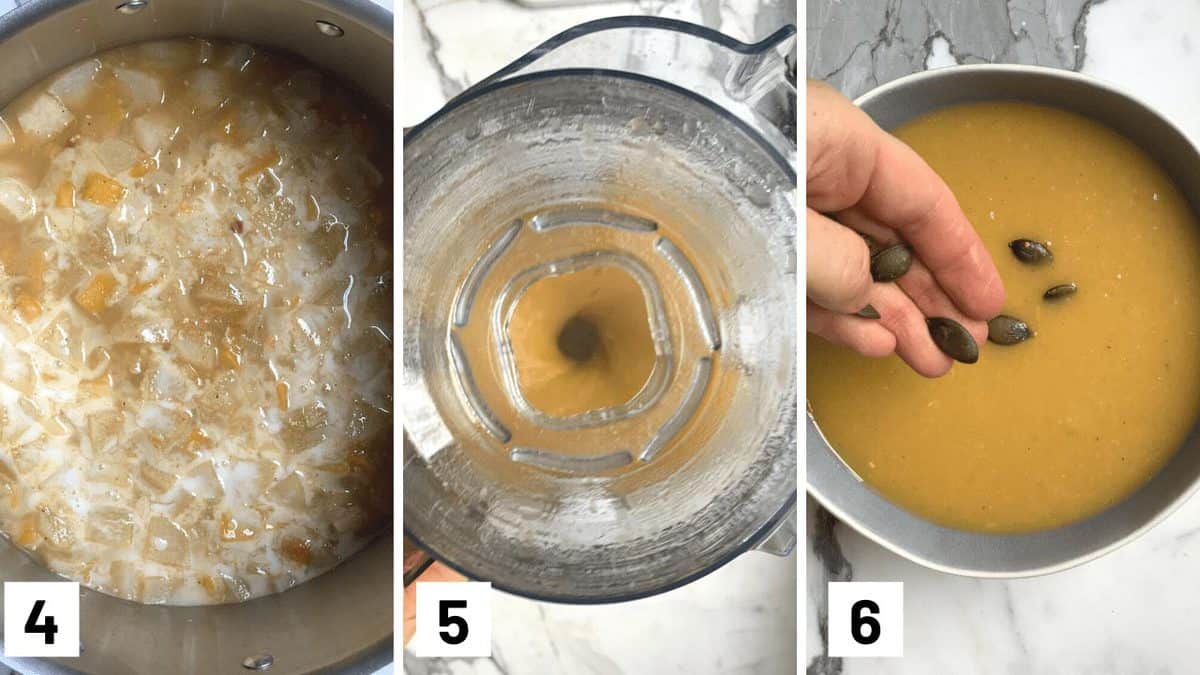
Privacy & Cookies Policy

Privacy Overview

This website uses cookies to improve your experience while you navigate through the website. Out of these, the cookies that are categorized as necessary are stored on your browser as they are essential for the working of basic functionalities of the website. We also use third-party cookies that help us analyze and understand how you use this website. These cookies will be stored in your browser only with your consent. You also have the option to opt-out of these cookies. But opting out of some of these cookies may affect your browsing experience.
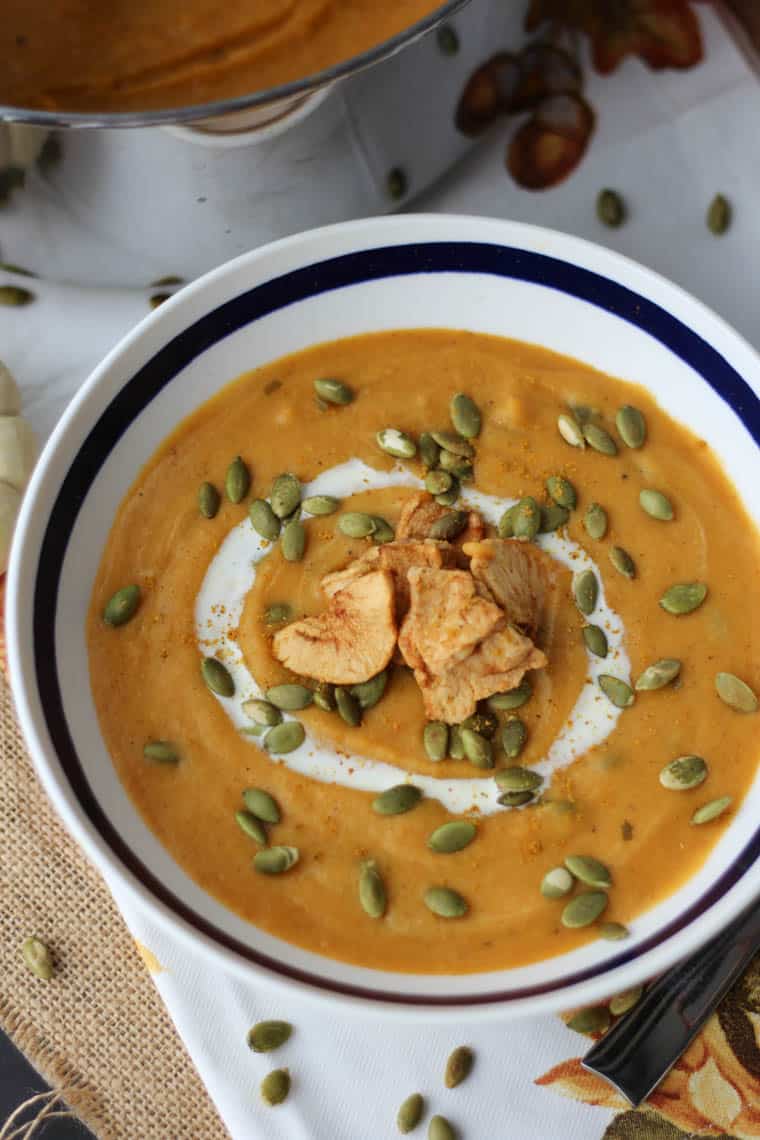
Necessary
Always Enabled
Necessary cookies are absolutely essential for the website to function properly. This category only includes cookies that ensures basic functionalities and security features of the website. These cookies do not store any personal information.
Non-necessary
Any cookies that may not be particularly necessary for the website to function and is used specifically to collect user personal data via analytics, ads, other embedded contents are termed as non-necessary cookies. It is mandatory to procure user consent prior to running these cookies on your website.
SAVE & ACCEPT

Rate This Recipe

Your vote:


A rating is required
A name is required
An email is required