• Skip to main content

Abbey's Kitchen

Healthy Recipes, Nutrition Myth Busting, Healthy Eating Tips

  • Books
    • HCC™
    • The Mindful Glow Cookbook
    • Recipe eBooks
      • Family
      • Hypothyroidism
      • BLW
      • Vegan Week 1
      • Vegan Week 2
      • Vegan Week 3
      • Keto
      • Gluten Free Week 1
      • Gluten Free Week 2
      • Fitness
      • Paleo
  • Blog
    • Nutrition
    • Recipes
    • Motherhood
    • Life
  • Explore
    • Neue Theory™
    • Bite Back With Abbey Sharp
      • Apple Music
      • Spotify
      • Amazon Music
    • YouTube
  • Abbey
    • About
    • Coaching
    • Contact

Abbey Sharp

Last Updated October 4, 2021. Published May 21, 2020 By Abbey Sharp 6 Comments

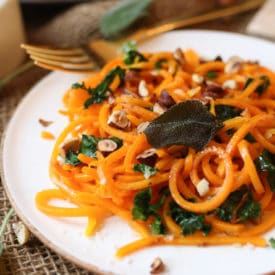
Vegan Brown Butter Butternut Squash Noodles

These Vegan Brown Butter Butternut Squash Noodles are the perfect Gluten Free Plant Based Zoodles recipe for an easy weeknight meal.

These Vegan Brown Butter Butternut Squash Noodles are the perfect Gluten Free Plant Based Zoodles recipe for an easy weeknight meal.

Cold weather calls for comfort food and there is nothing more comforting to me than pasta. And if there was ever a menu descriptor to catch my eye in these winter months it’s brown butter. GAH. Is there anything more luxurious than BUTTER that is caramelized to yield a SWEET and NUTTY flavour? I didn’t think so. But I am all about balance. Sure, I have no qualms about tucking into a big bowl of fresh noods soaking in the OG liquid gold, but for days I want to lighten things up, I go spiralize up some veg and call it a day. Today I wanted to celebrate the natural sweetness of some of my favourite veg by making this dish completely vegan and gluten free. If you’re trying to incorporate more plant based meals into your regime this year, let me make it real easy with these Vegan Brown Butter Butternut Squash Noodles.

key ingredients to make these butternut squash zoodles with brown butter

Sage Leaves – brown butter sauce is quite simply not the same without sage leaves.

Kale – I like to mix some kale into this recipe. But you can certainly use whatever green you have on hand like spinach or arugula.

Hazelnuts – I love the unique flavour of hazelnuts and the lovely crunch that they add to this recipe. But hazelnuts can sometimes be hard to come by so feel free to experiment with other crunchy and nutritious nuts or seeds! Almonds and/or pumpkin seeds in particular would be great in this recipe.

Tip Tips to make these Brown Butter Noodles
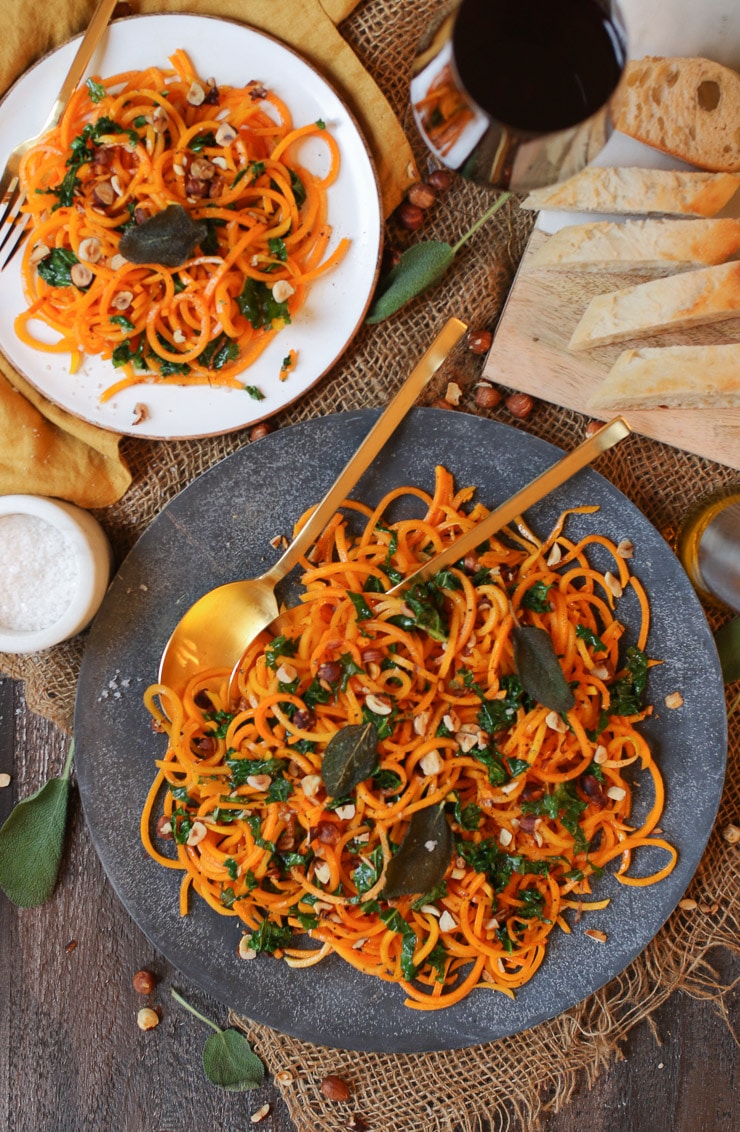
birds eye view of brown butternut squash noodles on a grey plate

Browning butter requires that the milk solids caramelize over a low heat. Its finnicky stuff as butter can go from clear to burnt in the time it takes you to answer a text. I wasn’t sure how it was going to work when trying to brown vegan butter, but with the same level of patience, it can happen!

The key really comes down to the type of vegan butter you use. Most margarine-like butters won’t brown, but if you find a vegan butter made of soy, cashew, almond or another nut, it will caramelize up beautifully.

I recommend browning your vegan butter in a pan with a light coloured bottom since nonstick or cast iron skillets with black bottoms can be hard to read. It’s impossible to see when the colour changes, and by the time you DO see something, it’s likely too late. Let’s not waste that gold!
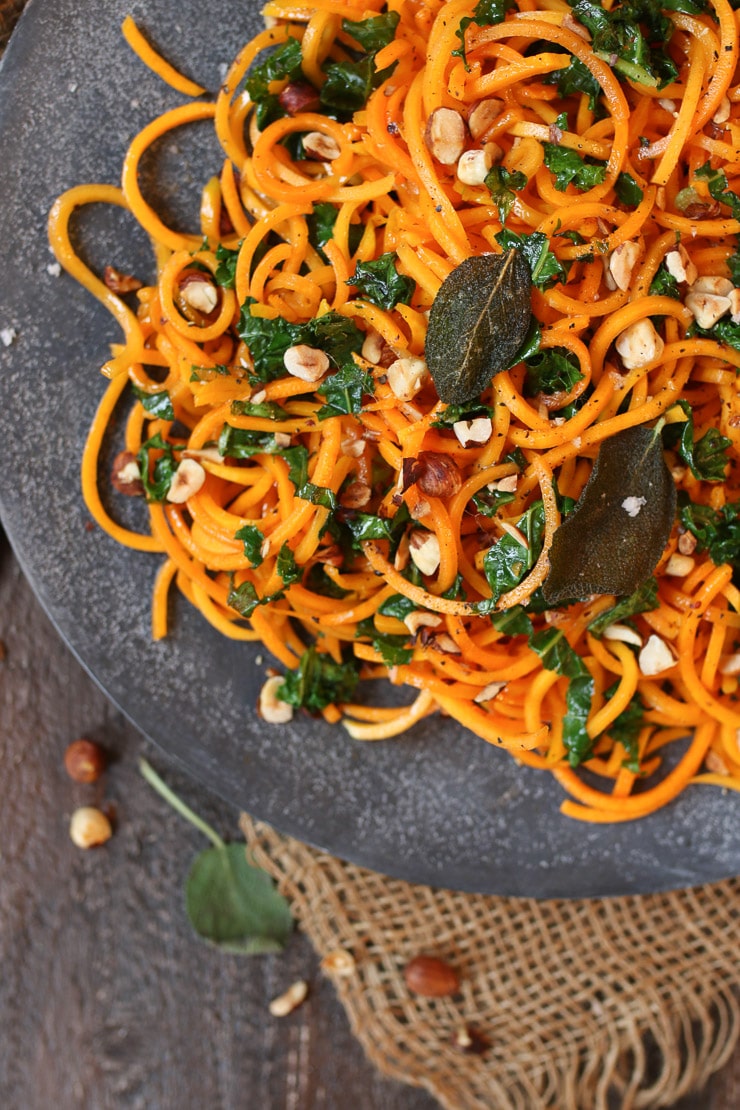
Close up of squash zoodles topped with fried sage leaves and chopped hazelnuts.

faq about this recipe

Here are some commonly asked questions that I get for this recipe.

what else can i pair the vegan brown butter sauce with?

I love pairing these vegan brown butter sauce with butternut squash noodles (or zoodles) but you can totally splurge and serve with a regular or gluten free pasta! It’s delicious with gnocchi, or a squash-filled ravioli too!

what can i use instead of butternut squash noodles?

If you can’t find butternut squash noodles at your local supermarket or you’re not in the mood to spiralize them yourself, you can totally use any other vegetable noodle like zucchini. Otherwise, you can simply use a pasta noodle of choice!

is this recipe gluten free?

It is! However, if you choose to substitute a regular pasta noodle be sure to use a gluten free variety if this is a concern for you.

how long will this recipe last in the fridge?

These butternut squash noodles will last in the fridge for about 3 days.
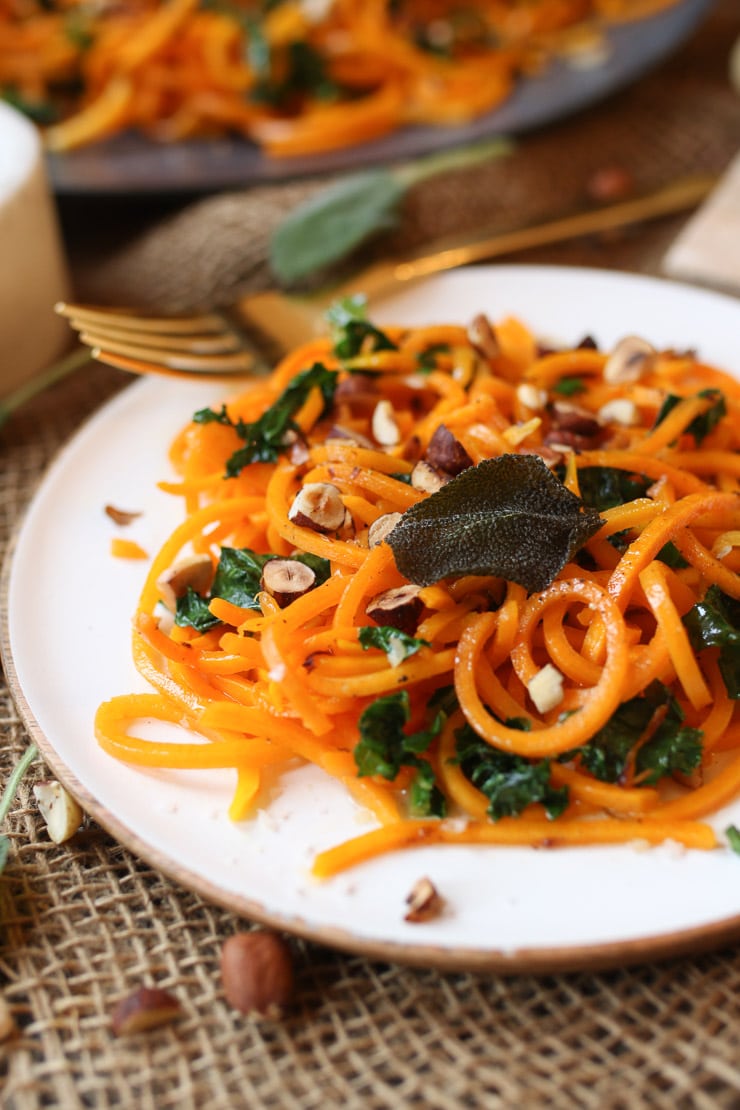
close up of vegan squash noodles with brown butter sauce

do you have any other zoodle recipes?

Oh absolutely I do! Here are some of my favourites on the blog.

HUMMUS PASTA ZUCCHINI NOODLES 

VEGAN AVOCADO ZUCCHINI NOODLES WITH PESTO 

PUMPKIN ZUCCHINI NOODLES 

VEGAN CHOW MEIN WITH ZUCCHINI NOODLES 

ZUCCHINI LASAGNA PINWHEELS 

Now I would love to hear your thoughts – Are you obsessed with brown butter like I am? 
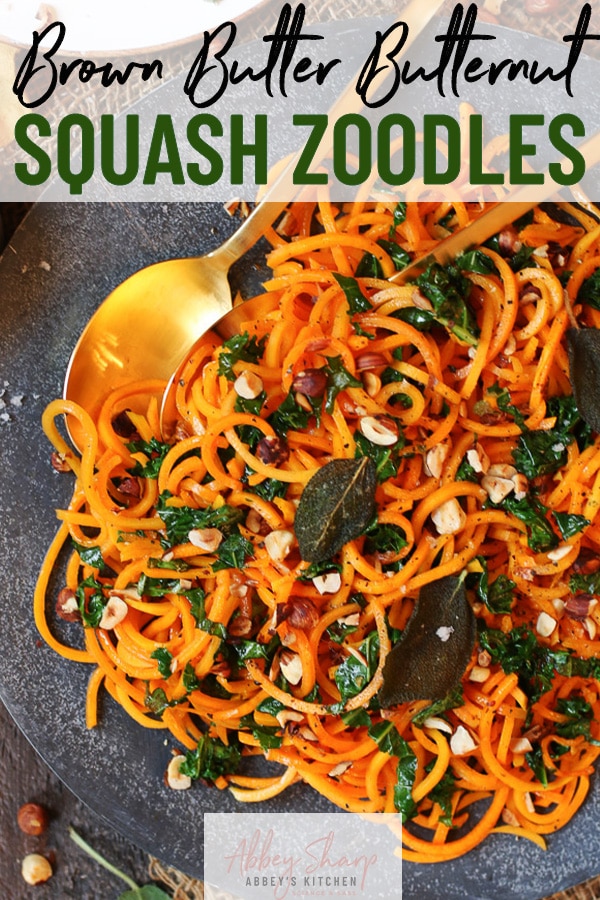
close up shot of vegan brown butter butternut squash noodles on a grey plate with a gold spoon with text overlay

These Vegan Brown Butter Butternut Squash Noodles are the perfect Gluten Free Plant Based Zoodles recipe for an easy weeknight meal.
Print Recipe
4.60 from 5 votes

Vegan Brown Butter Butternut Squash Noodles

These Vegan Brown Butter Butternut Squash Noodles are the perfect Gluten Free Plant Based Zoodles recipe for an easy weeknight meal.
Prep Time10 minutes mins
Cook Time10 minutes mins
Total Time20 minutes mins
Course: Main Dish, Dinner
Cuisine: Italian, American
Servings: 4 people
Calories: 308kcal
Author: Abbey Sharp

Ingredients

  • 1/2 cup vegan butter
  • 1 1/2 lb butternut squash spiralized
  • 1 tbsp olive oil
  • 8 sage leaves
  • 2 cups kale leaves finely shredded
  • 1/4 cup hazelnuts chopped and toasted
  • Fleur de sel and fresh cracked black pepper

Instructions

  • To a pan with a light coloured bottom, heat the vegan butter over medium heat. Swirl the pan frequently and allow it to foam slightly and turn a toasted brown colour. Pour into a small ramekin and set aside.
  • Wipe out the pan, then add a tablespoon of olive oil. Cook the sage leaves until crispy and drain on a piece of paper towel.
  • Add the spiralized squash and saute until lightly softened, then add in the kale leaves and toss until wilted.
  • Pour in the browned butter and season with salt and pepper.
  • To serve, top with the crushed hazelnuts and enjoy.

Nutrition

Calories: 308kcal | Carbohydrates: 24g | Protein: 4g | Fat: 24g | Saturated Fat: 5g | Sodium: 233mg | Potassium: 814mg | Fiber: 4g | Sugar: 4g | Vitamin A: 22505IU | Vitamin C: 76.4mg | Calcium: 140mg | Iron: 2mg

Abbey Sharp

Abbey Sharp is a Registered Dietitian (RD), regulated by the Ontario College of Dietitians. She is a mom, YouTuber, Blogger, award winning cookbook author, media coach specializing in food and nutrition influencers, and a frequent contributor to national publications like Healthline and on national broadcast TV shows.

www.abbeyskitchen.com/about-abbey/

Last Updated August 13, 2020. Published May 20, 2020 By Abbey Sharp 4 Comments

Bariatric Surgery Pre and Post Op Diet for Weight Loss Surgery

In part one of this series on bariatric surgery, we discuss the common types of weight loss surgery, their pros and cons and discuss the pre and post-surgery diet and lifestyle changes.

The following blog post is an introduction to bariatric surgery to set the stage for my follow up blog post on the risks and potential benefits of surgery. This is not intended to be a promotion of weight loss surgery and does not reflect any of my personal or professional opinions on it as a dietitian.

surgery room for bariatric surgery

What is Bariatric Surgery?

Bariatric surgery, also known as weight loss surgery or gastric surgery, involves making changes to the digestive system to help with weight loss. Bariatric surgery is the last resort when a person is unable to lose weight through other methods like dietary changes and exercise. The goal of bariatric surgery is to lose excess weight to reduce a person’s risk of medical problems associated with “obesity”.

Bariatric surgery achieves weight loss in two ways:

  1. Restriction

Bariatric surgery is used to physically limit the amount of food the stomach can hold, which limits the number of calories you can eat.

  1. Malabsorption

Bariatric surgery is used to shorten or bypass parts of the small intestine, which reduces the amount of calories and nutrients the body absorbs.

Who is a Candidate for Bariatric Surgery?

A person must meet a certain criteria to be eligible for any weight loss surgery.

This may vary slightly from clinic to clinic but typically, a person can be a candidate for bariatric surgery if:

  1. Their BMI is equal to or greater than 40 or they are more than 100 pounds overweight
  2. Their BMI is equal to or greater than 35 and have at least one or more obesity-related co-morbidities (Type 2 diabetes, hypertension, sleep apnea, non-alcoholic fatty liver disease, osteoarthritis, gastrointestinal disorders, heart disease)

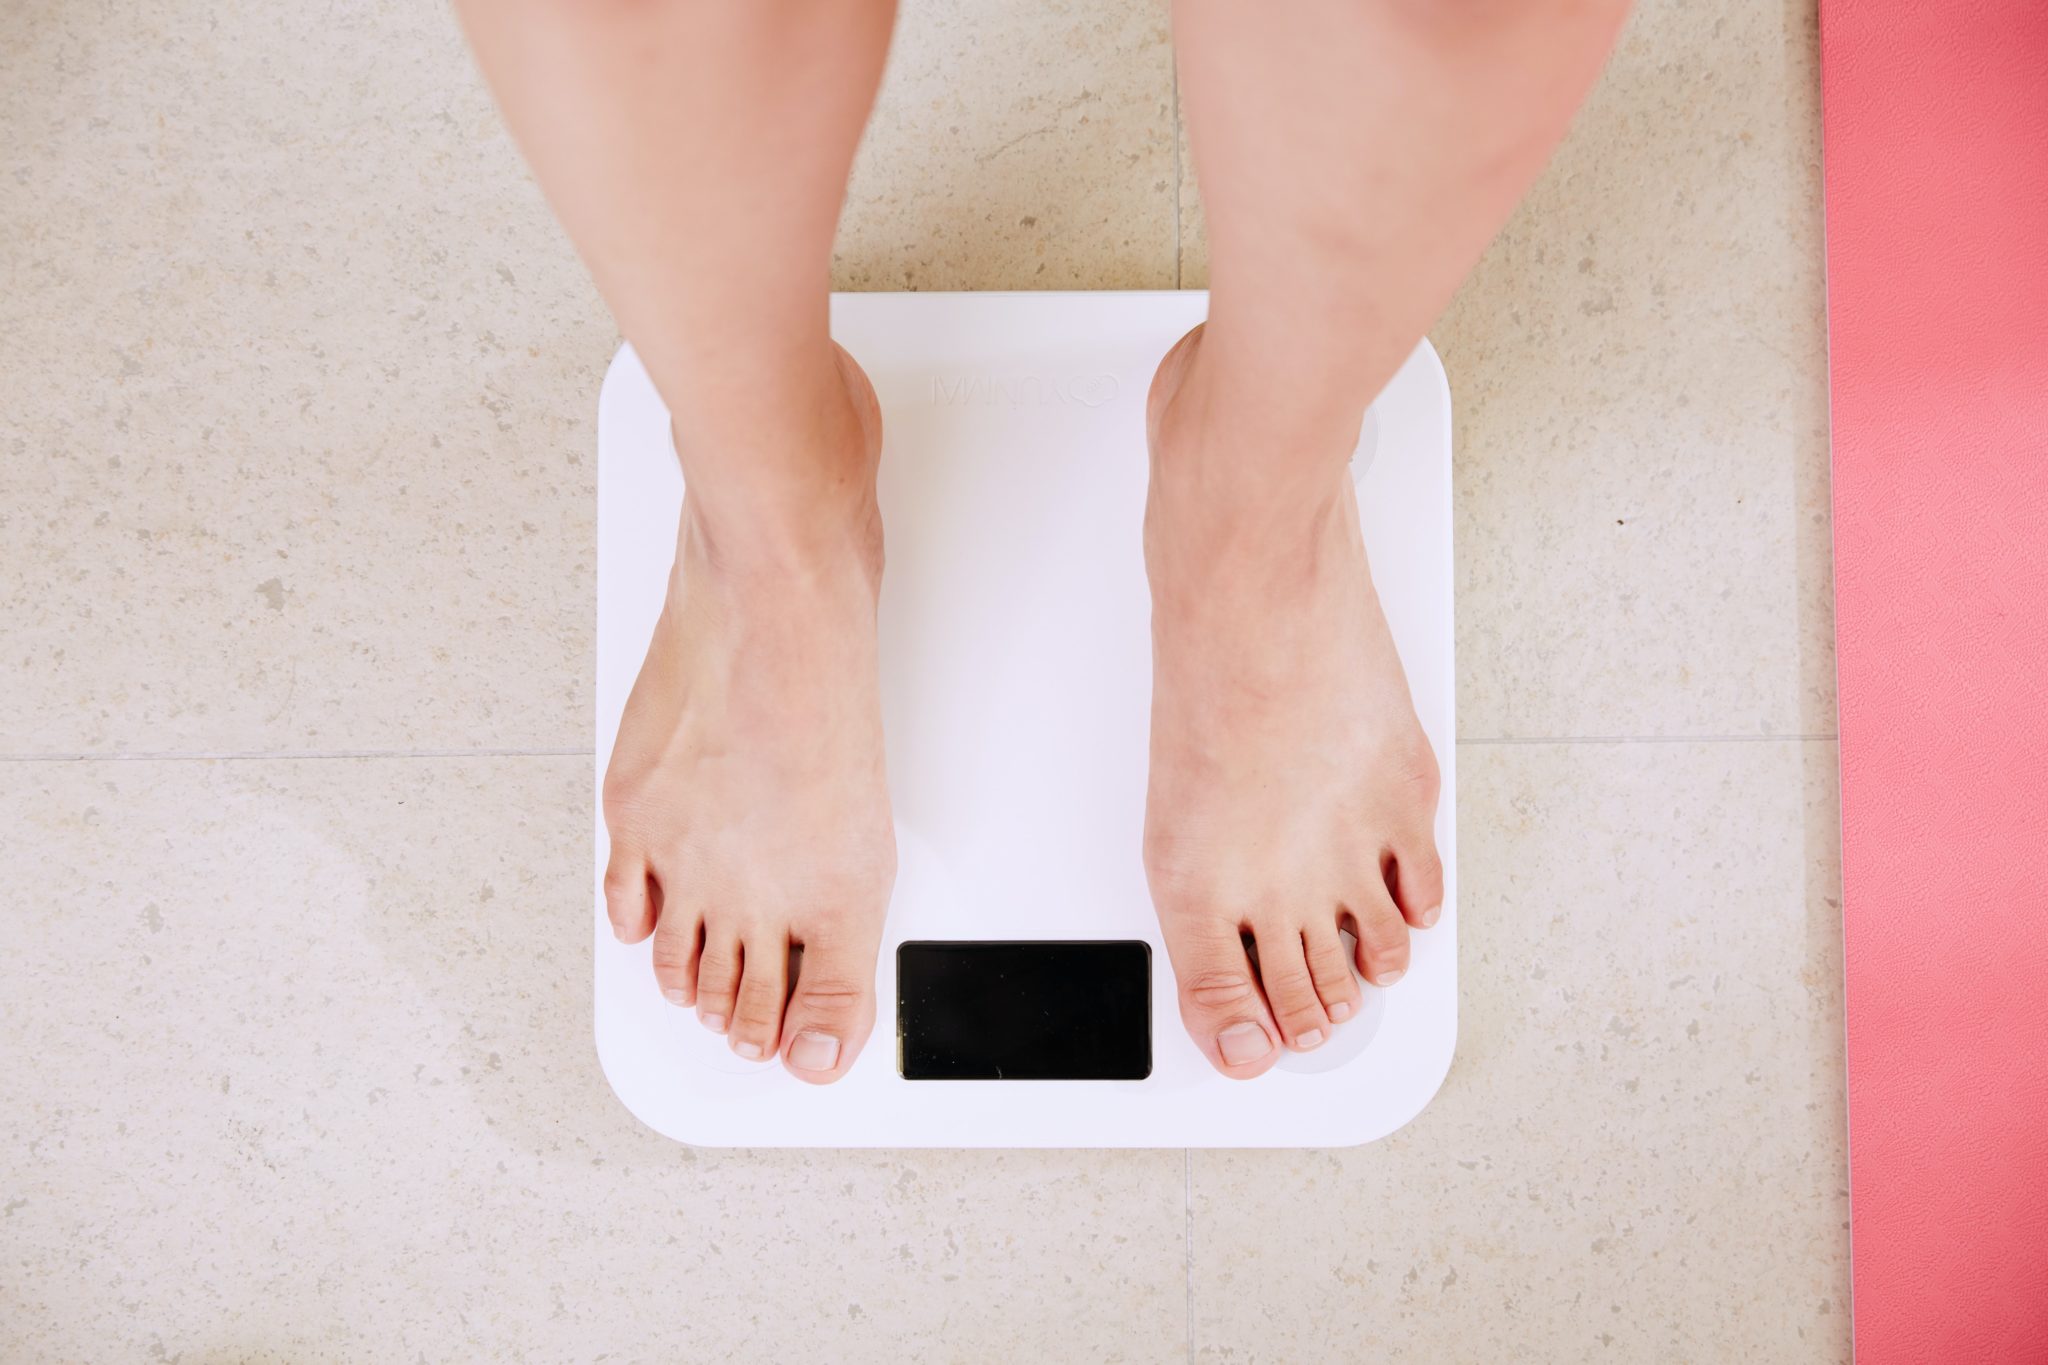
person standing on scale to measure body weight for bariatric surgery

Four Common Types of Bariatric Surgeries

There are four common types of weight loss surgeries and within that list, there are a few that are more popular than others because of their weight loss outcomes and complication rates.

Roux-en-Y Gastric Bypass

According

to the International Federation for the Surgery of Obesity and Metabolic Diseases (IFSO) the Roux-en-Y Gastric Bypass (RYGB) is the most commonly performed procedures. In a RYGB operation, the surgeon separates the upper portion of the stomach from the lower portion. The upper portion of the stomach becomes a small pouch which is the only part of the stomach that receives food. This new stomach pouch limits the amount of foods that you can comfortably eat and drink at one time, so you eat less. Once the small pouch is created, the surgeon then reroutes the digestive system to bypass the larger part of the stomach and instead is connected to the new pouch. Food will then flow directly from the pouch into this new part of the intestine. Because food now bypasses a portion of the small intestine, fewer nutrients and calories are absorbed resulting in your body taking in a lot less energy.

Advantages & Disadvantages of Roux-en-Y Gastric Bypass

The advantages of the RYGB is that it typically provides 60-80% excess weight loss and greater than 50% of excess weight loss is maintained in the long term. The disadvantages of RYGB is that it may result in greater complication rates and can lead to long term vitamin and mineral deficiencies.

Laparoscopic Adjustable Gastric Banding

In this operation, also known as Lap Band, the surgeon wraps a small adjustable silicone rubber band around the upper portion of the stomach. The band decreases the functional size of the stomach, turning it into an hourglass shape. The food you eat quickly fills the pouch and then empties very slowly through the constriction created by the band, just like sand passing through an hourglass. An access port is placed under the skin of the abdomen, where a tube connects the port to the band. A few weeks after surgery, the surgeon will inject saline through the port to inflate the lap band or will remove the fluid to deflate the lap band depending on what’s needed. The gastric band basically restricts the amount of food your body can hold so you feel full sooner. Contrary to the RYGB operation, the Lap Band surgery does not interfere with the digestive system so it does not reduce the absorption of calories and nutrients.

Advantages & Disadvantages of Laparoscopic Adjustable Gastric Banding

The advantages of Lap Band is that it induces excess weight loss of 40-50 %, requires no cutting of the stomach or rerouting of the intestines, it’s reversible, has the lowest rates of postoperative complications and has the lowest risk of vitamin and mineral deficiencies. The disadvantages of Lap Band is that some patients fail to lose at least 50% of excess weight and this procedure has the highest rate of re-operation because of the band slipping or eroding in the stomach.

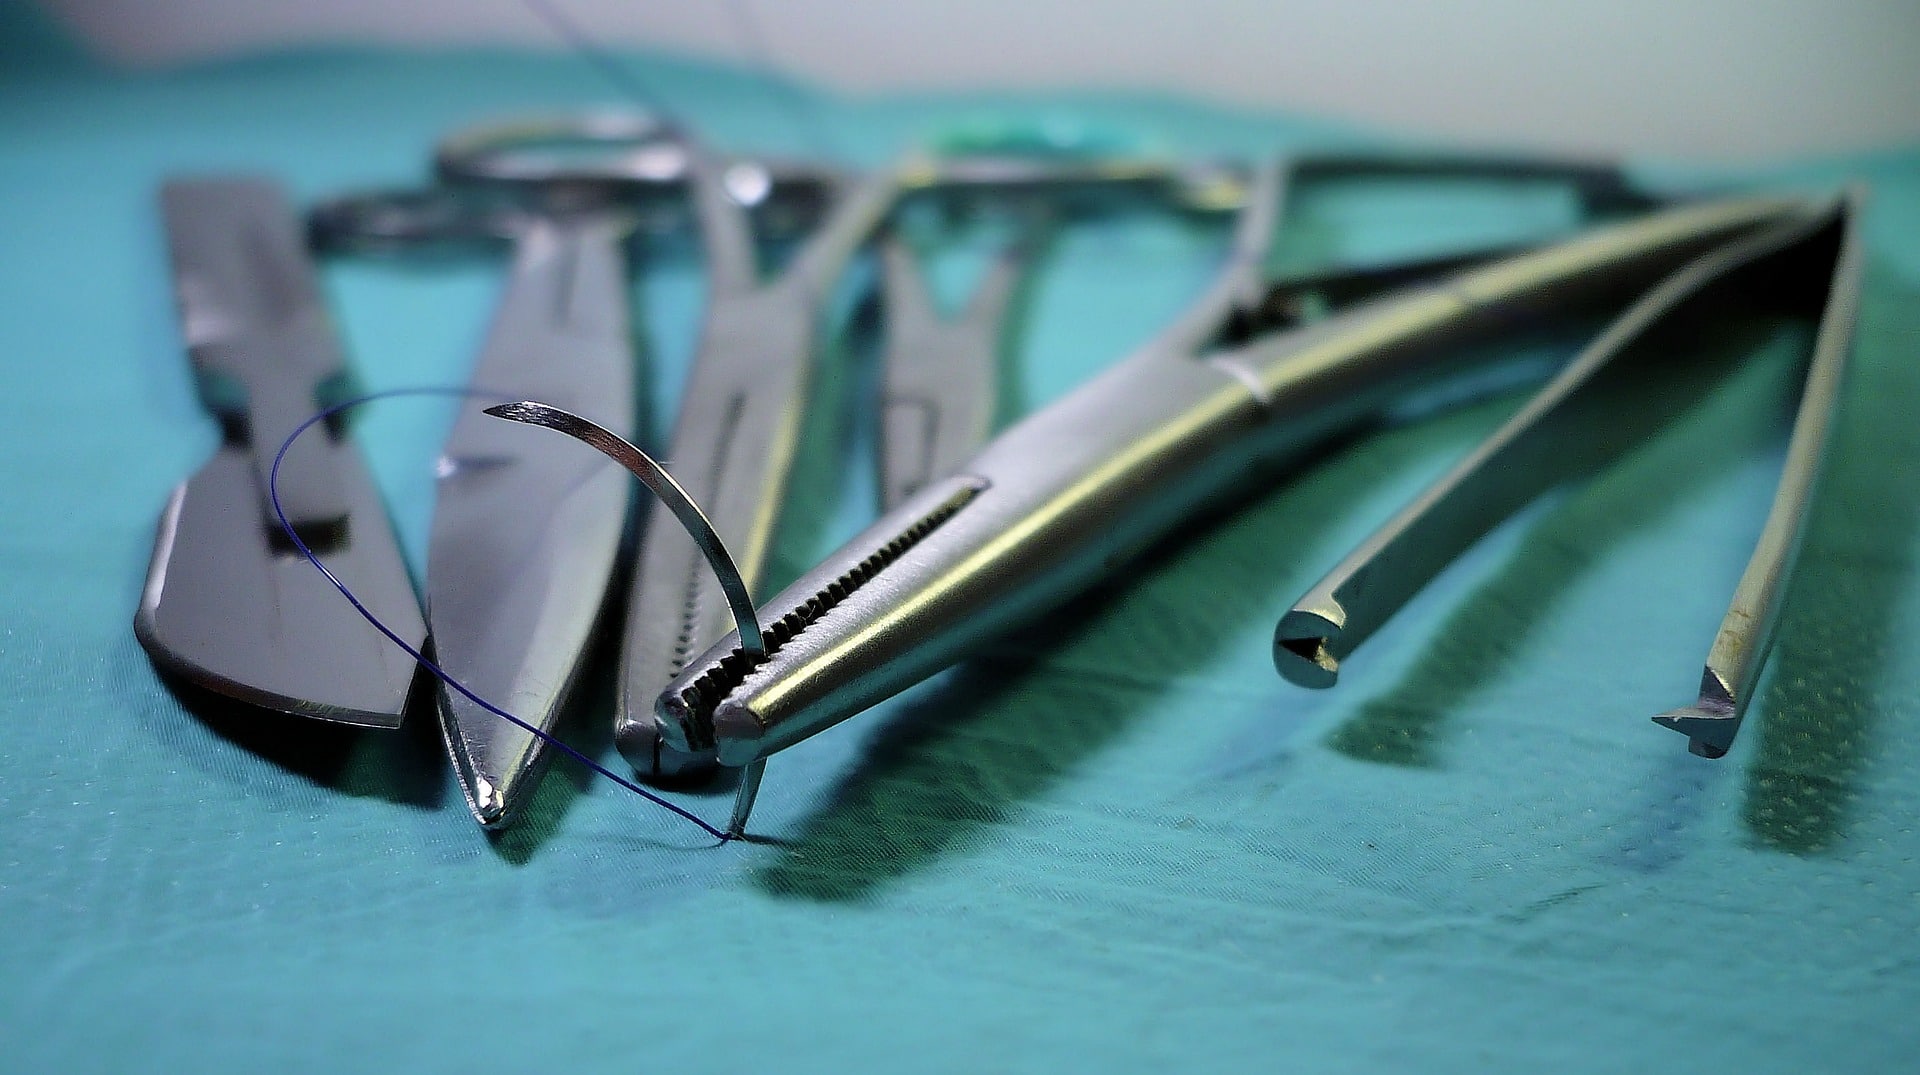
surgical tools used for bariatric surgery

Sleeve Gastrectomy

According

to the International Federation for the Surgery of Obesity and Metabolic Diseases, Sleeve Gastrectomy is the second most commonly performed procedures. In this procedure, a surgeon removes a portion of the stomach, making it roughly the size and shape of a banana. This surgery is seen as a more simpler version of RYGB because it doesn’t involved rerouting or reconnecting the intestines. Since the new banana shaped stomach is a lot smaller, it can’t hold as much food. The surgery also removes the portion of the stomach that produces the hormone, ghrelin, which reduces your desired to eat.

Advantages & Disadvantages of Sleeve Gastrectomy

The advantages of Sleeve Gastrectomy is that it induces rapid and significant weight loss similar to RYGB and greater than 50% of excess weight loss is usually maintained. The disadvantages of Sleeve Gastrectomy is that it’s non-reversible, has higher early complications rate and long term vitamin and mineral deficiencies. 

Biliopancreatic Diversion with Duodenal Switch

This last procedure, also known as the “Duodenal Switch” or “The Switch” is the least common weight loss procedure. This surgery is only performed on people who are seen as severely “obese”, meaning they have a BMI of 50 or higher and haven’t been able to lose weight any other way. In this operation, the surgeon removes one half of the stomach. However, the valve that releases food to the small intestine remains, along with a limited portion of the small intestine that connects to the stomach (the duodenum). Then, the surgeon bypasses the majority of the intestine by connecting the end portion of the intestine to the duodenum near the stomach. This procedure does two things. It limits how much you can eat because of the small stomach size and it reduces the absorption of nutrients because a huge portion of the small intestine is bypassed.

Advantages & Disadvantages of Biliopancreatic Diversion

The advantages of the duodenal switch is that it results in 60-70% excess weight loss and causes changes in gut hormones to reduce appetite and improve satiety. The disadvantages of the duodenal switch is that it has the highest complication rates and risk for mortality compared to all other bariatric surgeries. Also, it has the greatest potential to cause protein, vitamin and mineral deficiencies.

Pre-Operative Dietary & Lifestyle Changes for Weight Loss Surgery

Weight Loss

In most cases, patients must lose some weight before their surgery to reduce the amount of fat in and around the liver and abdomen to prevent complications. If enough weight is not lost before a patient’s surgery, the procedure may be cancelled or postponed. A large scale study found that weight loss of 9.5% before RYGB was associated with a marked reduction in postoperative complications like leakage or infections. Weight loss before surgery has even been shown to shorten the time of the actual surgery. Losing weight prior to surgery is thought to not only improves surgery outcome, but also to prepare the patient for the new way of eating after surgery. 

Establish New Dietary Habits

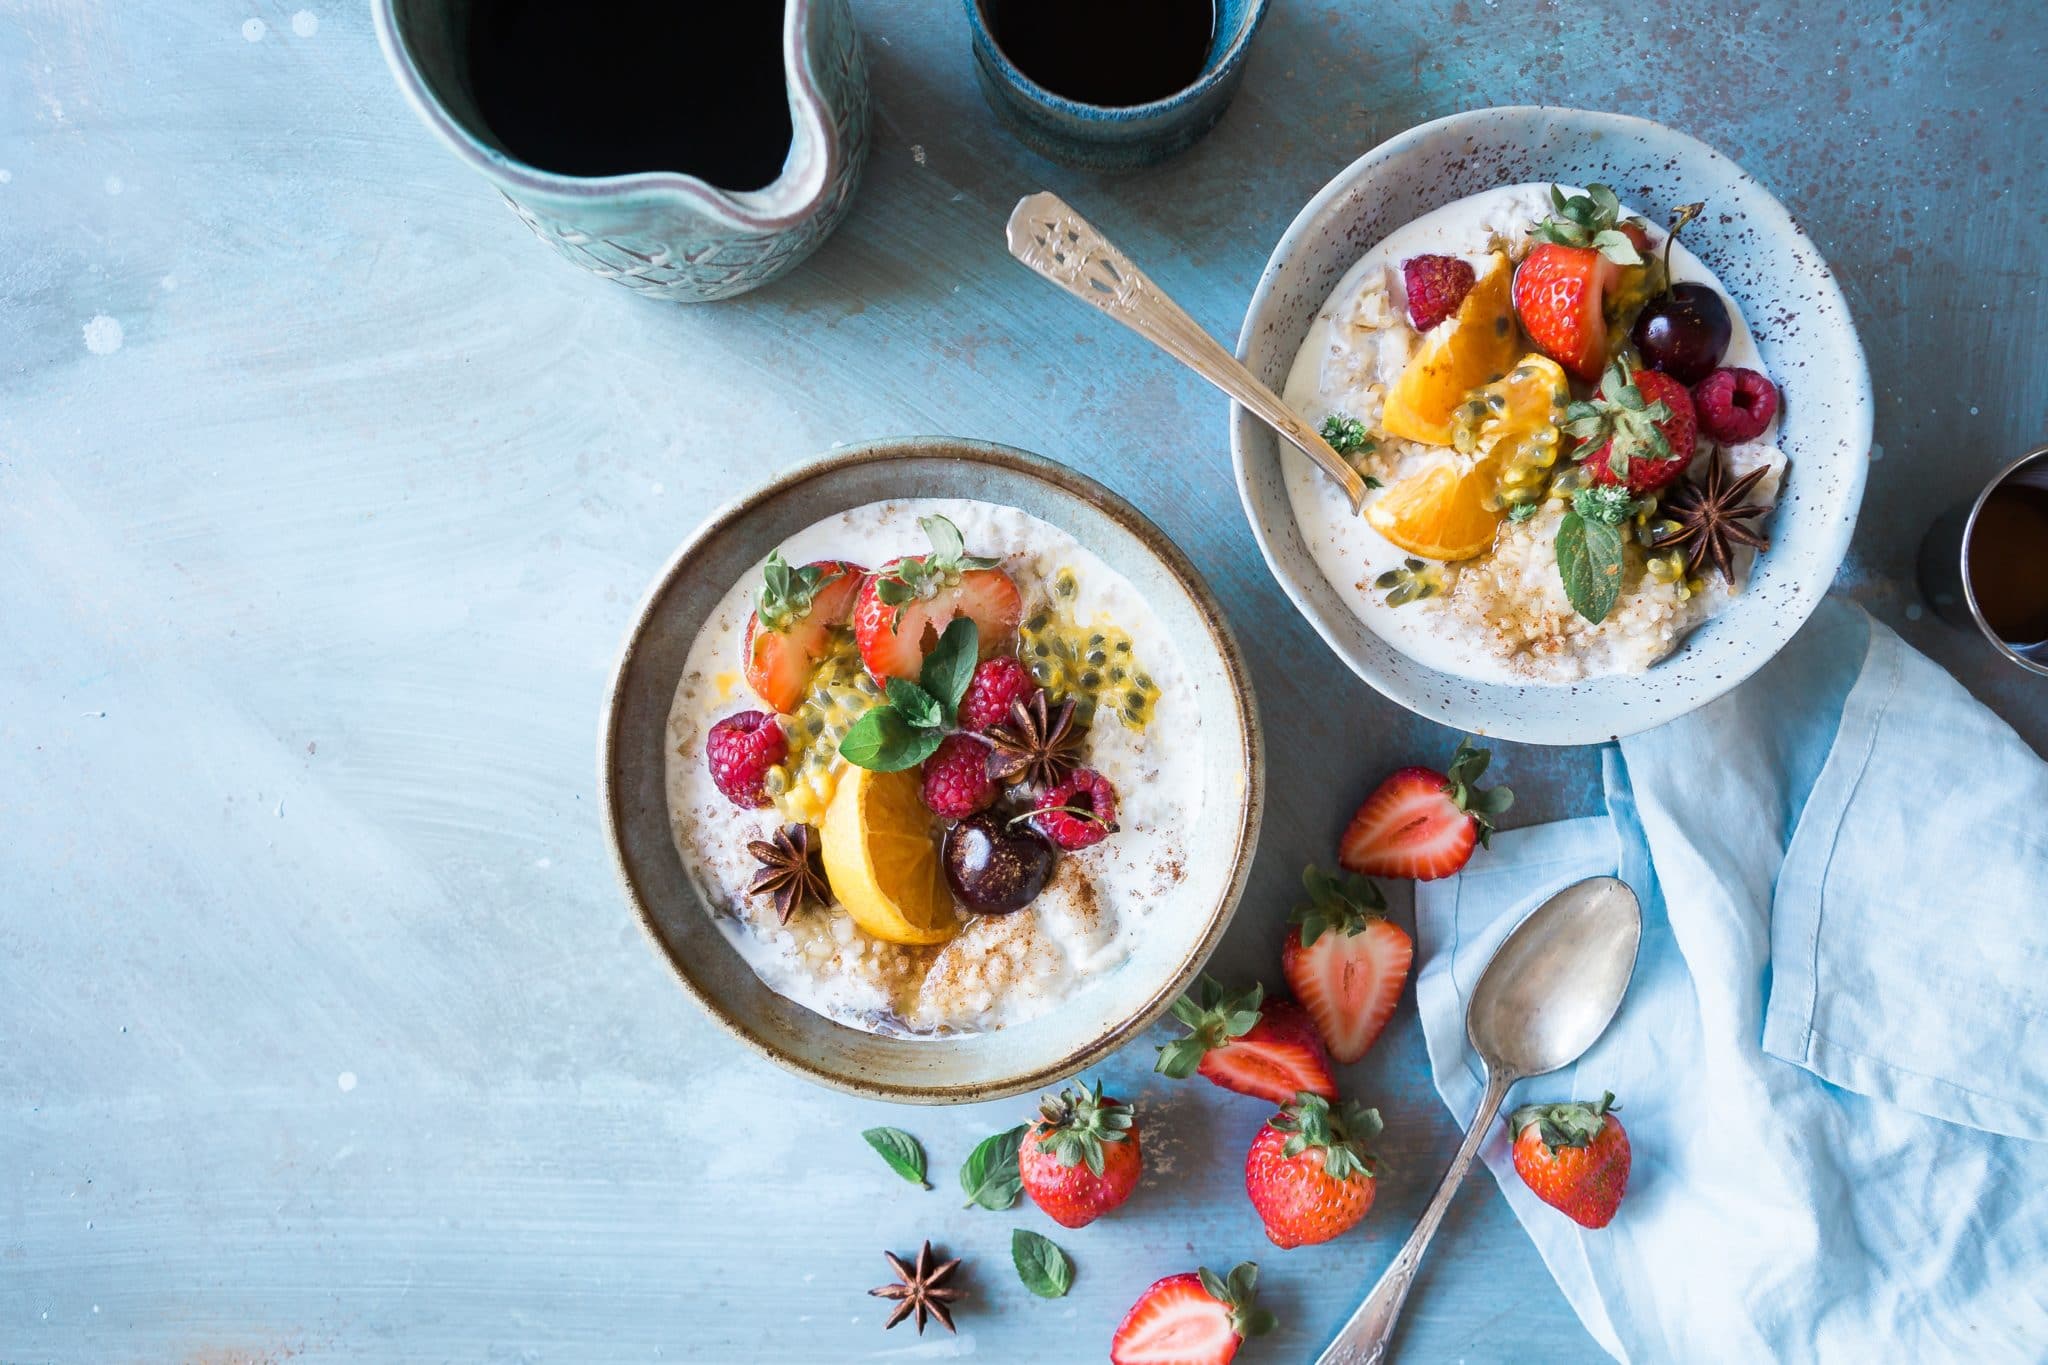
birds eye view of two grey bowls containing porridge and fresh fruit with two silver spoons on a blue background for bariatric surgery diet

To prepare for a patient’s postoperative diet, patients must learn new eating techniques because of structural changes made to their digestive system. There is still no consensus on the duration and the macronutrient distribution of a preoperative diet. Some research has found a low carbohydrate diet is more effective than a low fat diet for short term weight loss, improved insulin sensitivity and a reduction in lipid concentrations, but it is generally a very individual thing.

A common preoperative diet is a very low calorie diet which is approximately 450-800 kcal/day (EEK, that’s dangerously low). Not surprisingly, this very low calorie diet has been associated with a 10% preoperative weight loss, a 9% reduction in BMI and a 15-20% reduction in liver volume. Studies have also shown it to be effective at improving cardiovascular risk factors. However, research also cautions the use of a very low calorie diet for a long period of time because it may induce a catabolic state which could worsen recovery after surgery. There is also a concern that it may permanently damage metabolism, as all low calorie diets and rapid weight loss can do.

According to the American Society for Metabolic and Bariatric Surgery, a preoperative diet should last no more than three months to maintain high compliance rates among patients. While research has seen the benefits of short term weight loss before surgery, there is still not much evidence on the long term outcomes or risks. We can, however, extrapolate it from the general population and assume that there are many serious risks.

Post-Operative Dietary Changes

Stage 1 – Liquid Diet 

For the first week, patients are put on a liquid diet where they’re only allowed to drink a few ounces of clear liquids at a time. Some of these liquids include fruit juice, broths, coffee/tea and flavoured water. Fluid is especially important after surgery for the recovery process because dehydration is one of the most common reasons for patient’s re-admission after surgery.

Stage 2 – Full Fluids

After that, patients must follow a full fluids diet which includes foods like low fat cream soup, Greek style yogurt, pureed vegetable soup, apple sauce, tomato and vegetable juice, cream of rice hot cereal and oatmeal.

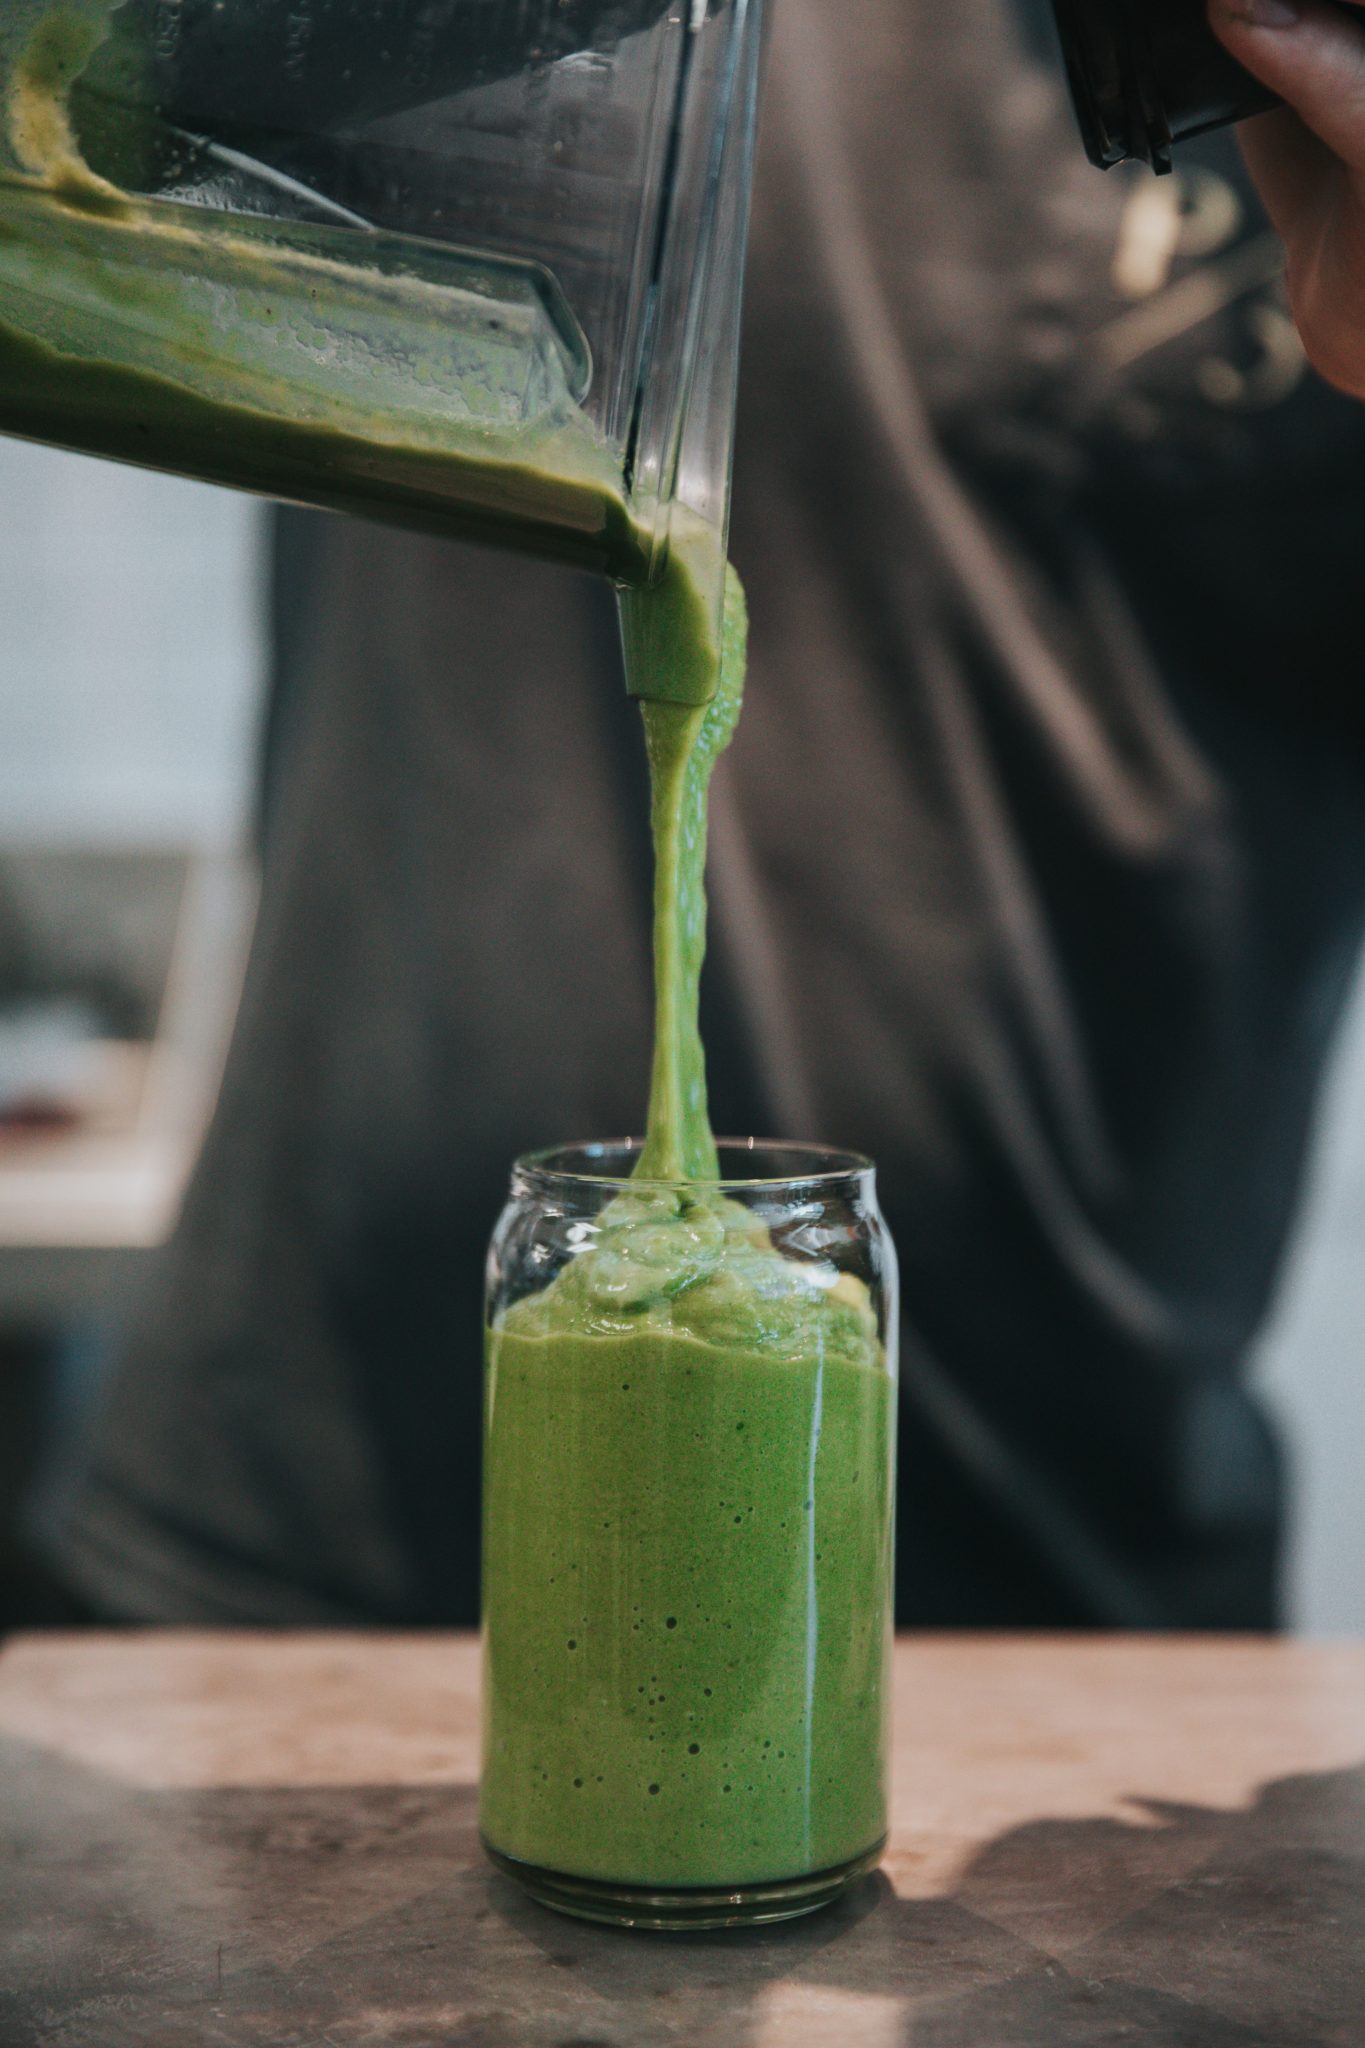
close up of a green smoothie being poured into a tall clear glass from a blender for bariatric surgery diet

Stage 3 – Soft/Regular Diet

Once it’s been one month, patients can start to slowly introduce solids into their diet. It’s important patients keep solids and liquids separate and to always include one protein-rich food serving at each meal and snack. It’s recommended to avoid red meat for the first six months after surgery. It’s also recommended to avoid all raw vegetables for the first three months after surgery. Instead you have to remove the skin and cook vegetables. All fruits should be peeled, cored, baked and pitted.

Stage 4 – Maintenance Diet

This is the final phase of the postoperative diet which is designed to help patients maintain their weight once their weight loss goal is achieved. It’s recommended to drink 1.5-2 liters, eat three small meals and snacks a day and get around 60-80 grams of protein per day for prevent lean muscle loss and protein deficiency.

Other Post-Op Dietary Strategies for Bariatric Surgery Patients

Small Meals and Snacks

To prevent overfilling the stomach pouches, patients can only handle a small amount of food at a time, so it’s recommended they have three small meals and three small snacks a day.

Keep Fluids and Solids Separate

After surgery, patients can’t drink water or fluids at the same time as eating food because it can cause nausea or discomfort. Water and fluids should be avoided for 30 minutes before and after your meal or snack.

Eat Slowly and Chew Thoroughly

To aid in digestion, patients should take small bites and chew each food fully before swallowing.

Choose Low Fat, Low Sugar Foods and Fluids

Patients must avoid foods high in sugar and/or fat because these may cause dumping syndrome (we’ll discuss dumping syndrome in a bit). They’re also generally avoided because they’re high in calories and low in nutrients which can hinder their weight loss goal.

Vitamins & Minerals Supplementations

Depending on the surgery, most patients must take a lifelong daily supplement to prevent vitamin and mineral deficiencies (we’ll discuss this in part two). It’s recommended that patients take a multivitamin and/or other specific vitamins or minerals and get routine blood tests to assess for serious nutritional deficiencies.

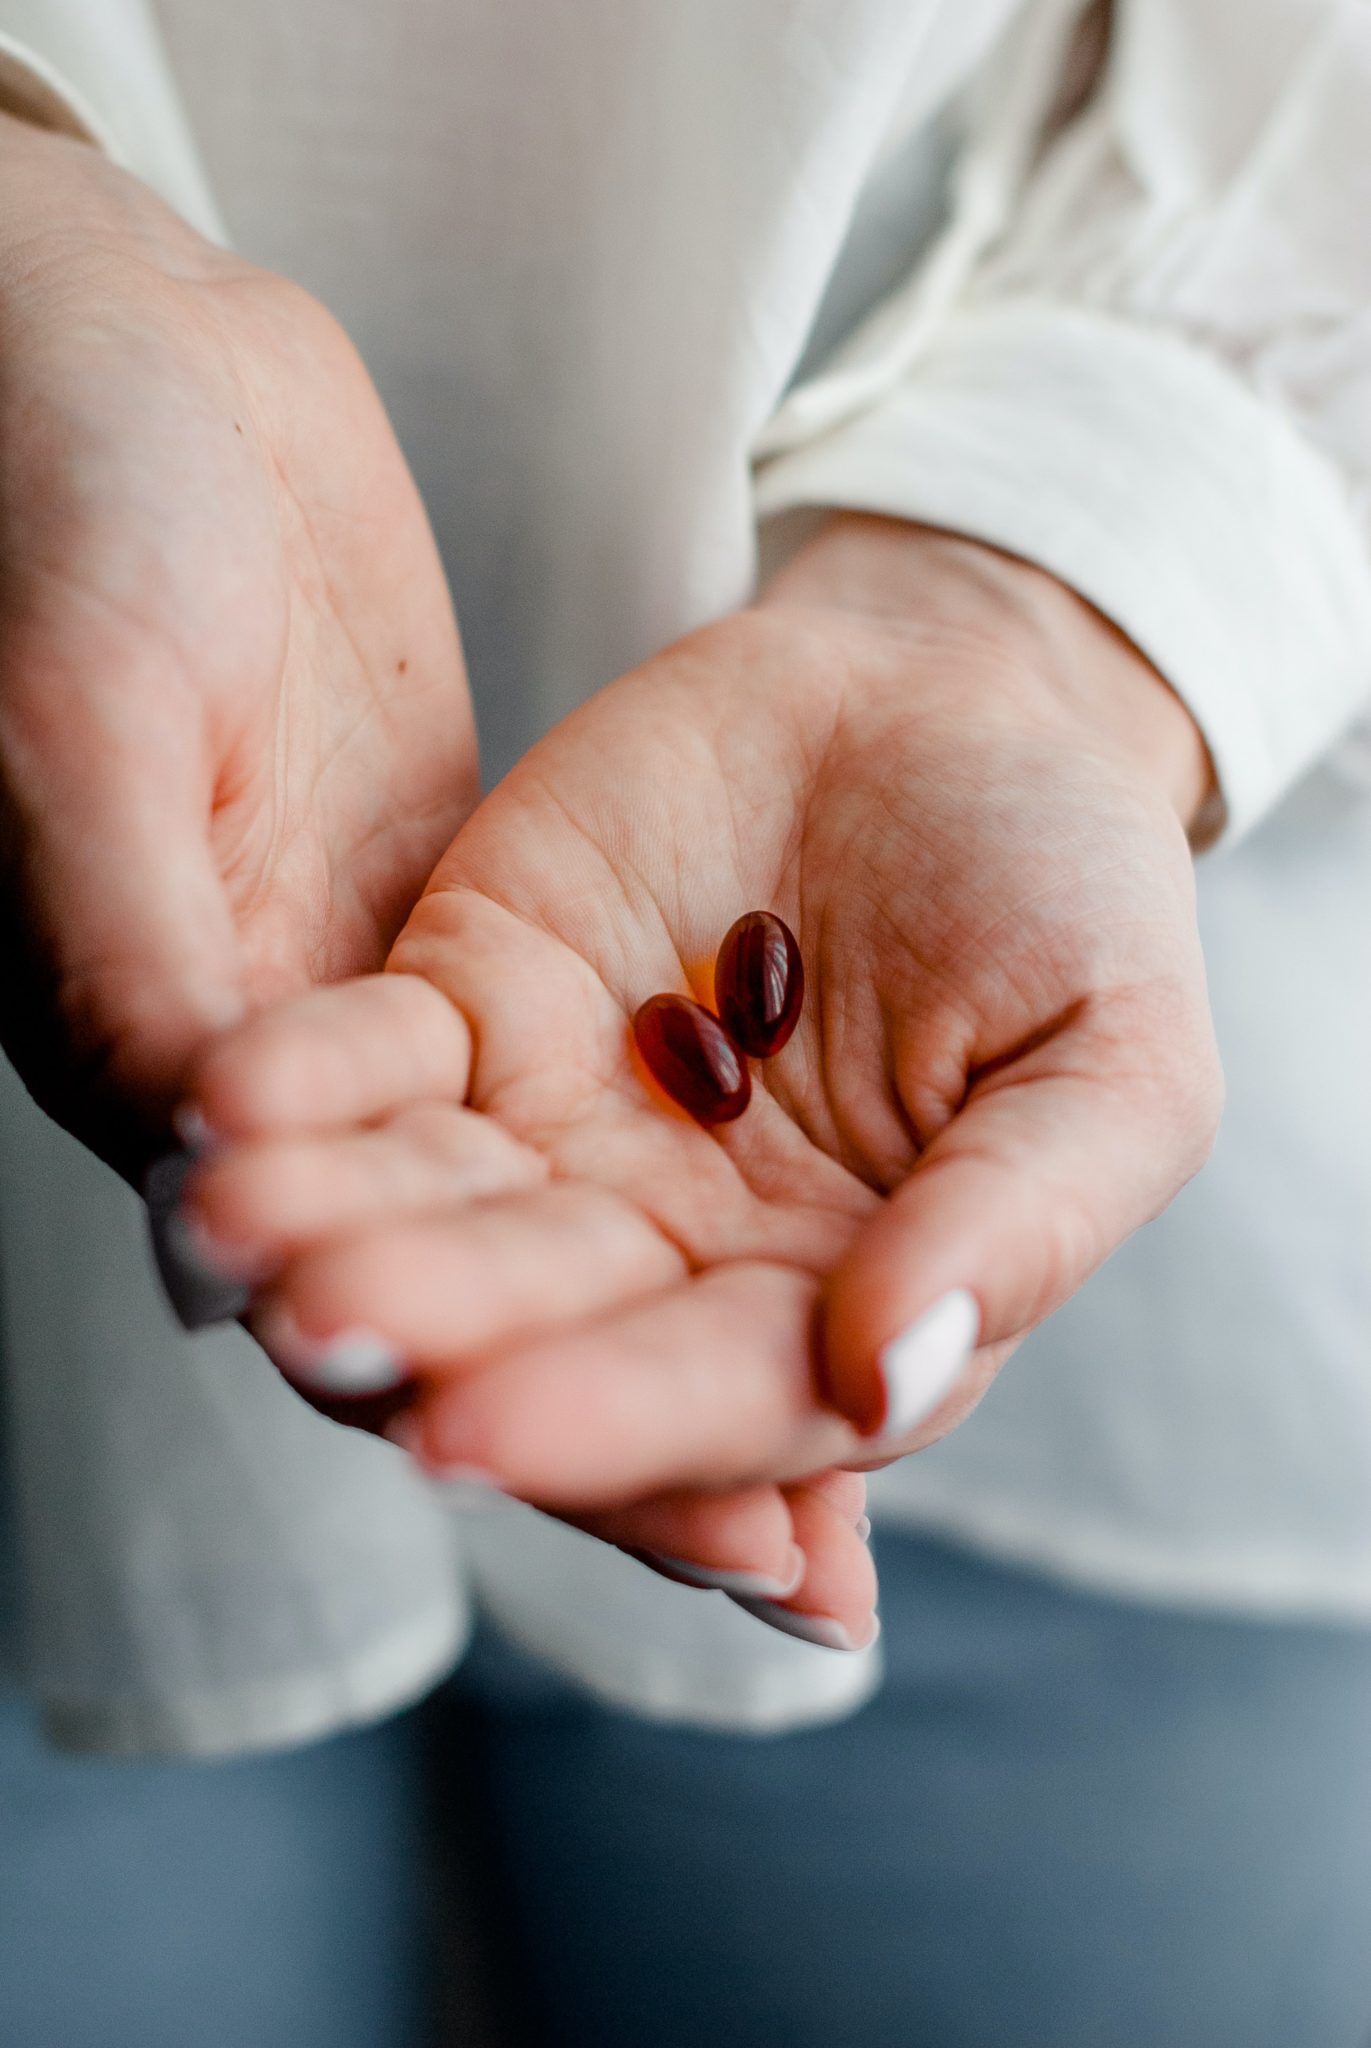
close up of two hands holding two small red pills

Medication Adjustments

Many patients that get bariatric surgery are already living with severe health problems like diabetes, hypertension and/or high blood pressure, so they may require certain medications to manage their condition. After surgery, these drugs may be absorbed differently, depending on the bariatric procedure. Sleeve Gastrectomy and Lap Band surgery usually do not affect absorption, while RYGB and Duodenal Switch result in major changes in absorption. Because of these changes, some medication may need to be taken differently (crushed, injectable or chewable) or their dosages may be changed.

Fitness

Once a patient is fully recovered, it is recommended that they start to slowly incorporate physical activity into their lifestyle. It is recommended they get 150 minutes of moderate activity each week in the form of aerobic and resistance exercise.

Mental Health

Bariatric surgery is considered a major surgery and can have a significant impact on a person’s mental health. While some patients feel more confident in their body, others have difficulty adjusting to the dietary changes and the rapid change in appearance. To mitigate this risk, patients must meet with a psychiatrist or psychologist before surgery and after, if necessary.

close up of measuring tape to measure body before or after bariatric surgery

Concluding thoughts on Bariatric Surgery

As you can see, bariatric surgery is seen as an invasive, often permanent, weight loss surgery that requires significant changes to a person’s diet and lifestyle. It is not a quick fix and it is not without serious (often life threatening) risks. This is not to discourage or shame you from wanting to go down this road, but I do believe that knowledge is power and it’s important to understand everything involved before embarking on such a huge life change. Now that you have a comprehensive understanding of common weight loss surgeries and the strategies for preparing and recovering after surgery, be sure to check out part two of this post where we discuss the potential dangers and long term consequences of bariatric surgeries in more detail.

Contribution By: Sofia Tsalamlal, RD

pinterest image of surgical tools used for weight loss surgery above another image of a person standing on a scale to measure body weight, with text overlay


Abbey Sharp

Abbey Sharp is a Registered Dietitian (RD), regulated by the Ontario College of Dietitians. She is a mom, YouTuber, Blogger, award winning cookbook author, media coach specializing in food and nutrition influencers, and a frequent contributor to national publications like Healthline and on national broadcast TV shows.

www.abbeyskitchen.com/about-abbey/

Last Updated July 21, 2020. Published May 15, 2020 By Abbey Sharp 2 Comments

Vegan Corn Spoonbread | Gluten Free Easy Side Dish for a Crowd

This Vegan Corn Spoonbread is a the best gluten free easy side dish for a crowd that makes a great accompaniment to BBQ or for a savoury breakfast.

I am a very VERY Canadian girl who LOVES Southern food, and one of my all time favourite sides is cornbread. But not like the dry grainy cornbread you often get alongside BBQ chicken or ribs. I prefer a softer spoonbread that can be eaten with a fork or spoon- not with your hands. I mean, you can eat this with your hands, I won’t judge, but that would be semi- savage.

I do know that barbeque staples usually exclude a lot of my plant-based friends, so I wanted to whip up a vegan corn spoonbread that is also gluten free that would be perfect for serving your friends and family all summer long. This also makes REALLY delicious savoury breakfast topped off with a little yogurt.

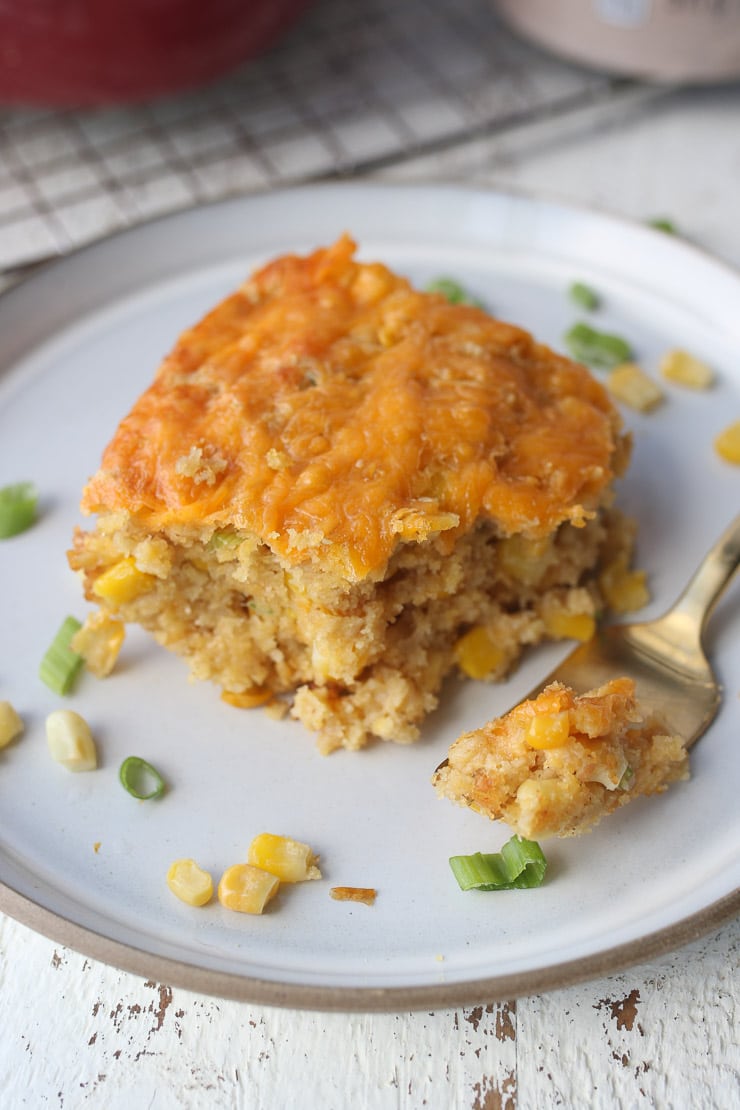
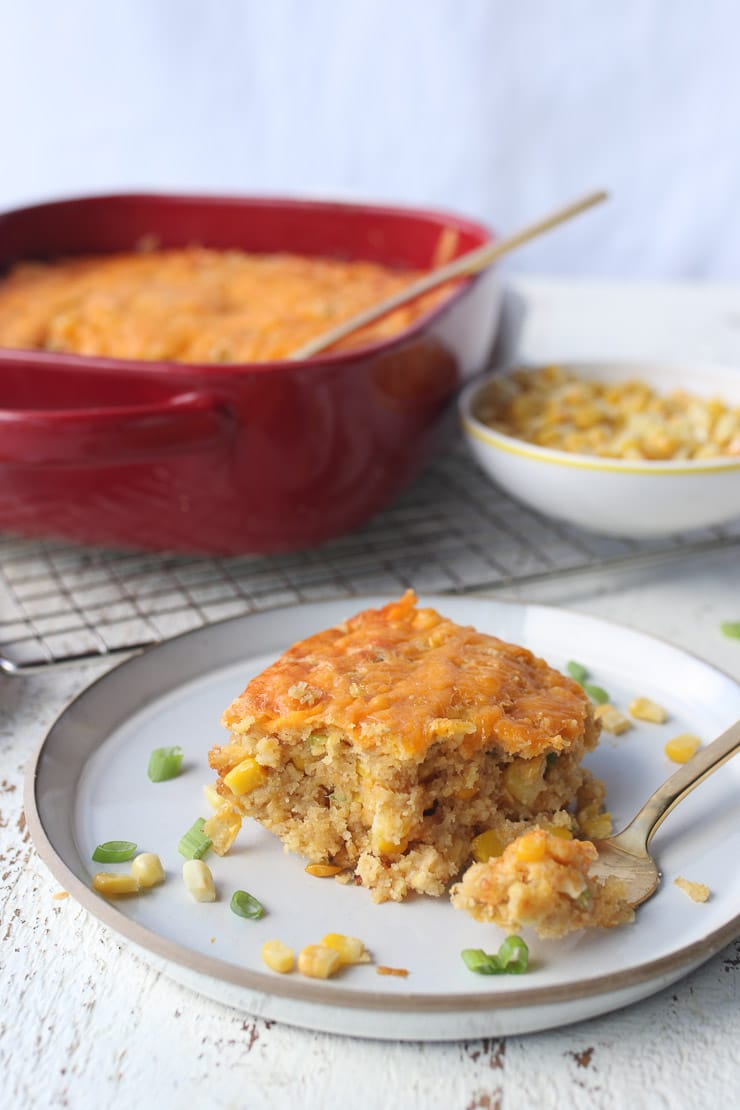
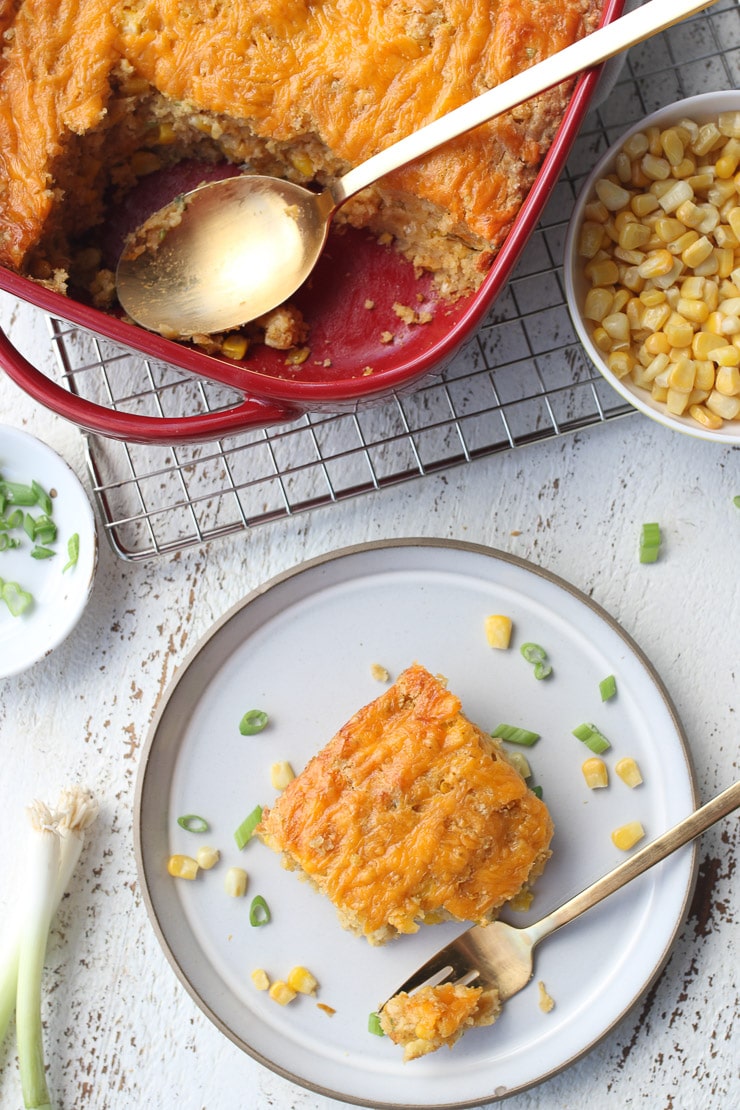
vegan corn spoonbread on a white plate garnished with corn and green onions

key ingredients to make this vegan corn spoonbread

Corn Meal – Cornmeal is the naturally gluten free base for any cornbread or corn muffin. Honestly, I find it so drying that I really do think it needs to be mixed with some other grain to make it palatable. I mean, or you just have to add a LOT of butter.

Gluten Free Oats – You can use regular oats if you prefer and are not gluten free, but it is best to use quick cooking oats which are not as thick as large flake oats.

Creamed Corn – Creamed corn sounds very … umm.. not vegan, but actually, its just pureed corn usually with some salt and a little sugar in it. It’s also incredibly delicious. My kid adores it.

Sweet Corn – You can use fresh, frozen or canned, but since most of us are relying on our pantry staples, I always make sure to have a few cans ready to go.

Green Onions – This is ultimately optional but it does add some nice flavour.

(Vegan) Cheese – Use vegan cheese if you are plant-based, or regular cheddar if you’re not.

(Vegan) Sour Cream – This adds a nice bright acidity to balance the sweetness of the corn.

Maple syrup– I mean, you COULD leave this out, but please don’t. It really is so nice to have that natural sweetness. This is one of the reasons why I love this for breakfast. My kid also adored it for breakfast.

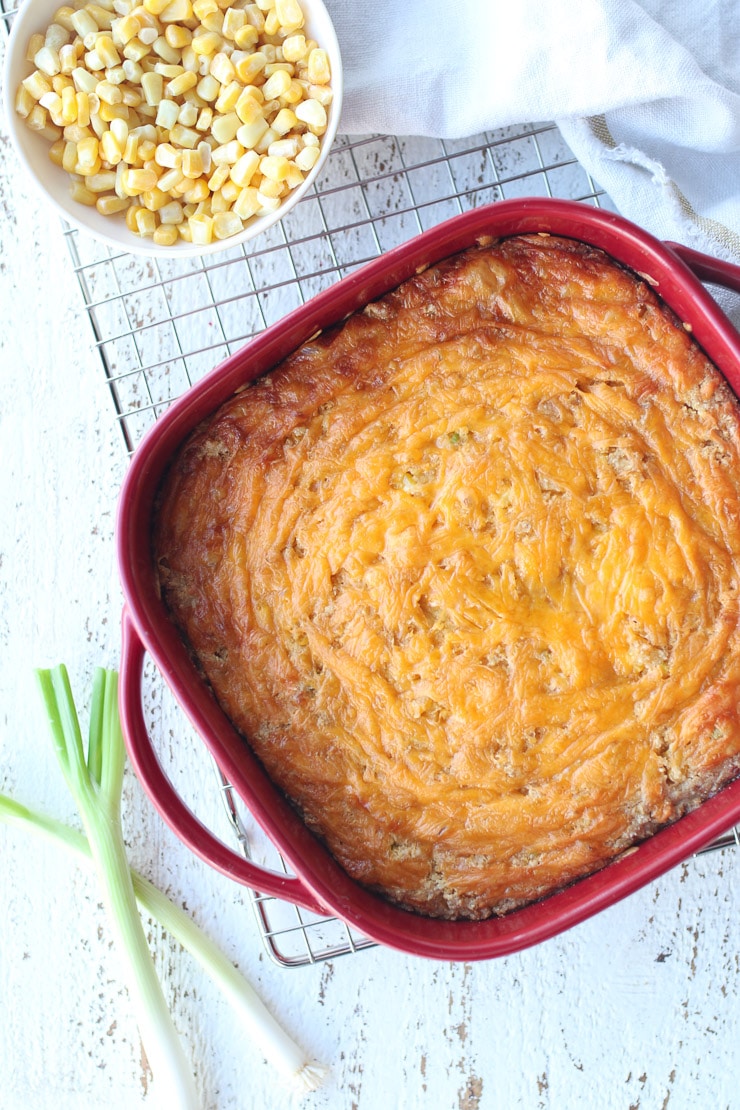
birds eye view of vegan spoonbread made with corn

tips for making this gluten free CREAMY corn BREAD BAKE

This corn spoonbread is unbelievably easy. I would recommend making sure the dry ingredients are well incorporated before adding the wet. This just ensures the cornmeal flavour is well mixed throughout and there are no super “dry pockets” in the spoonbread when you dig in. No one wants a pocket of grainy cornmeal without a good amount of creamy corn there with it.

slice of spoonbread on white plate with red casserole dish and corn in the background

what should i serve with this spoonbread?

This is a fantastic stand-alone breakfast or brunch, but it’s also an amazing side dish for some of your go-to summer mains.

Sriracha Grilled Tofu

Vegan Gluten Free Walnut Quinoa Burgers

Grilled Cauliflower Streaks with Peach Romesco Sauce

Grilled Pizzas

Grilled Marinated Chicken Breasts

faq about this recipe

Here are some of the most commonly asked questions about making this easy Summer recipe.

can i freeze this recipe?

I have tried freezing this recipe and I can tell you that if well wrapped it should last in the freezer for about 3 months. Just make sure you warm it up nicely before you serve it.

is this corn and oat spoonbread recipe kid friendly?

Yes. My son ate this spoonbread every day for 5 days while we had it in the fridge. It’s mild, sweet, cheesy, and creamy. What child wouldn’t love this?

CAN I USE REGULAR CHEESE OR SOUR CREAM INSTEAD OF VEGAN?

Yes, you can swap in whichever you have or use at home. You can also use honey instead of maple syrup if that is your preferred sweetener.

HOW DO I MAKE OAT FLOUR FROM OATS?

This is a hack I always use because I have a lot of oatmeal in the house but never any flour (hello Covid shortages). Just put your oats in a food processor or blender and pulverize until soft and smooth.

CAN I ADD CHILIS AND OTHER ADDITIONS THAT I LIKE IN MY SPOONBREAD or corn bread?

Yes, if you want a little kick of heat, throw some jalapenos in there! My son is obviously not a fan of spicy things so we have been keeping things mild over here!

birds eye view of a white plate containing a piece of vegan corn spoonbread garnished with corn and green onions with a silver fork next to a red casserole dish and an additional bowl of fresh corn

Can i use fresh corn?

You bet! Pretty soon, corn is going to be in season, and I cannot WAIT! I will definitely be making this with fresh corn come August.

Can i make my own creamed corn?

Yes! It’s crazy easy to whip creamed corn up in a flash. Here’s a really great recipe from my friend over at Doesn’t Taste like Chicken.

What are some of your go-to side dishes with Summer staples like corn? Leave me a comment below with your thoughts!

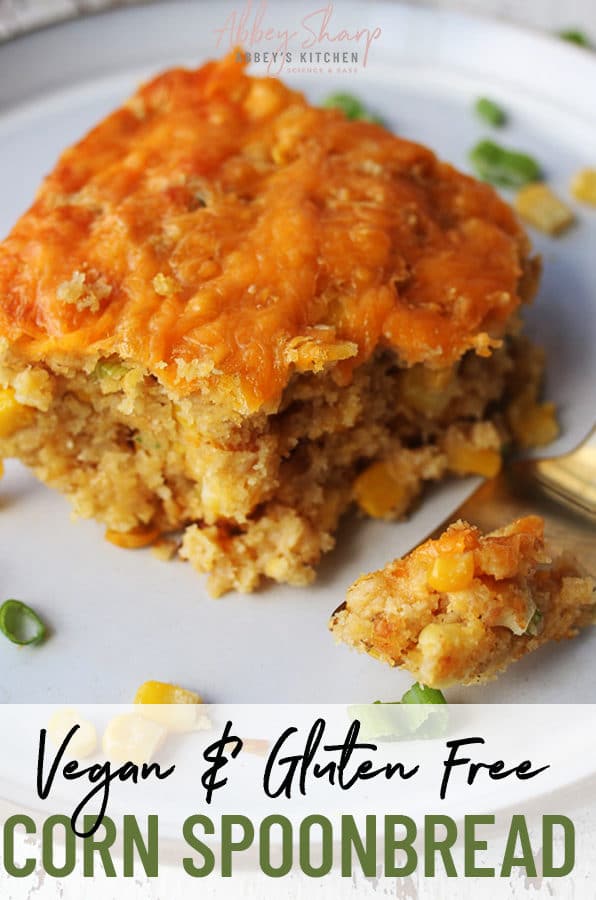
close up image of vegan corn spoonbread garnished with corn and green onions next to a silver fork with text overlay

Print Recipe
5 from 3 votes

Vegan Corn Spoonbread

This Vegan Corn Spoonbread is a the best gluten free easy side dish for a crowd that makes a great accompaniment to BBQ or for a savoury breakfast.
 
Prep Time10 minutes mins
Cook Time1 hour hr
Total Time1 hour hr 10 minutes mins
Course: Appetizer, Side Dish
Cuisine: American
Servings: 8
Calories: 496kcal
Author: Abbey Sharp

Ingredients

  • 1 cup corn meal
  • 1 cup Quaker gluten free quick cooking oats
  • ½ cup oat flour made by pulverizing quick oats in the food processor
  • 1 tbsp baking powder
  • 1 ½ tsp salt
  • ½ cup plus 1 tbsp melted vegan butter
  • 1 398 ml can creamed corn
  • ½ cup plus 1 tbsp vegan sour cream
  • 5 tbsp maple syrup
  • 1/3 cup thinly sliced green onions
  • 1 ½ cups frozen or canned sweet corn
  • 2 cups shredded vegan cheddar cheese divided

Instructions

  • Preheat oven to 350 F and grease a 9” square baking pan.
  • In a large bowl, mix together the cornmeal, oats, oat flour, baking powder and salt.
  • Add in the melted butter, creamed corn, sour cream, maple, onions, whole corn kernels and 1 cup of the cheese. Mix until well incorporated.
  • Spread into the baking dish and top with the remaining cheese. Bake for about 55-60 minutes or until the cheese is melted, and the edges are golden brown. Serve warm for spoonable bread or allow to cool completely if you want to cut it into more uniform pieces. Spoon bread will still be moist and soft.

Nutrition

Calories: 496kcal | Carbohydrates: 68g | Protein: 10g | Fat: 21g | Saturated Fat: 6g | Sodium: 1026mg | Potassium: 413mg | Fiber: 7g | Sugar: 12g | Vitamin A: 694IU | Vitamin C: 5mg | Calcium: 117mg | Iron: 3mg

Abbey Sharp

Abbey Sharp is a Registered Dietitian (RD), regulated by the Ontario College of Dietitians. She is a mom, YouTuber, Blogger, award winning cookbook author, media coach specializing in food and nutrition influencers, and a frequent contributor to national publications like Healthline and on national broadcast TV shows.
www.abbeyskitchen.com/about-abbey/

Last Updated May 12, 2022. Published May 13, 2020 By Abbey Sharp 9 Comments

Probiotics for Kids (The Ultimate Guide)

We answer the big question: are probiotics for kids and babies necessary? We also offer some easy tips on how to choose the right supplement for your infant or child in this ultimate guide to probiotics for families.

At this point, you may be aware that our guts naturally contain both good and bad bacteria and these bacteria are often known as probiotics. The World Health Organization defines probiotics as “live microorganisms which when administered in adequate amounts confer a health benefit on the host.” While these bacteria occur naturally in a wide range of food, we also can find them in supplemental form to help increase the good bacteria in our bodies by balancing or restoring a healthy gut microbiota.

Strains of Probiotics

The supplemental probiotics we find in drug stores often contain a variety of microorganisms. The most common strains of bacteria used in probiotic supplements are Bifidobacteria and Lactobacillus and many probiotics also contain yeast such as Saccharomyces. Some of the probiotic supplements available in stores are single-strains and others are mixed-strains but for general health, research suggests that mixed-strains are more effective.

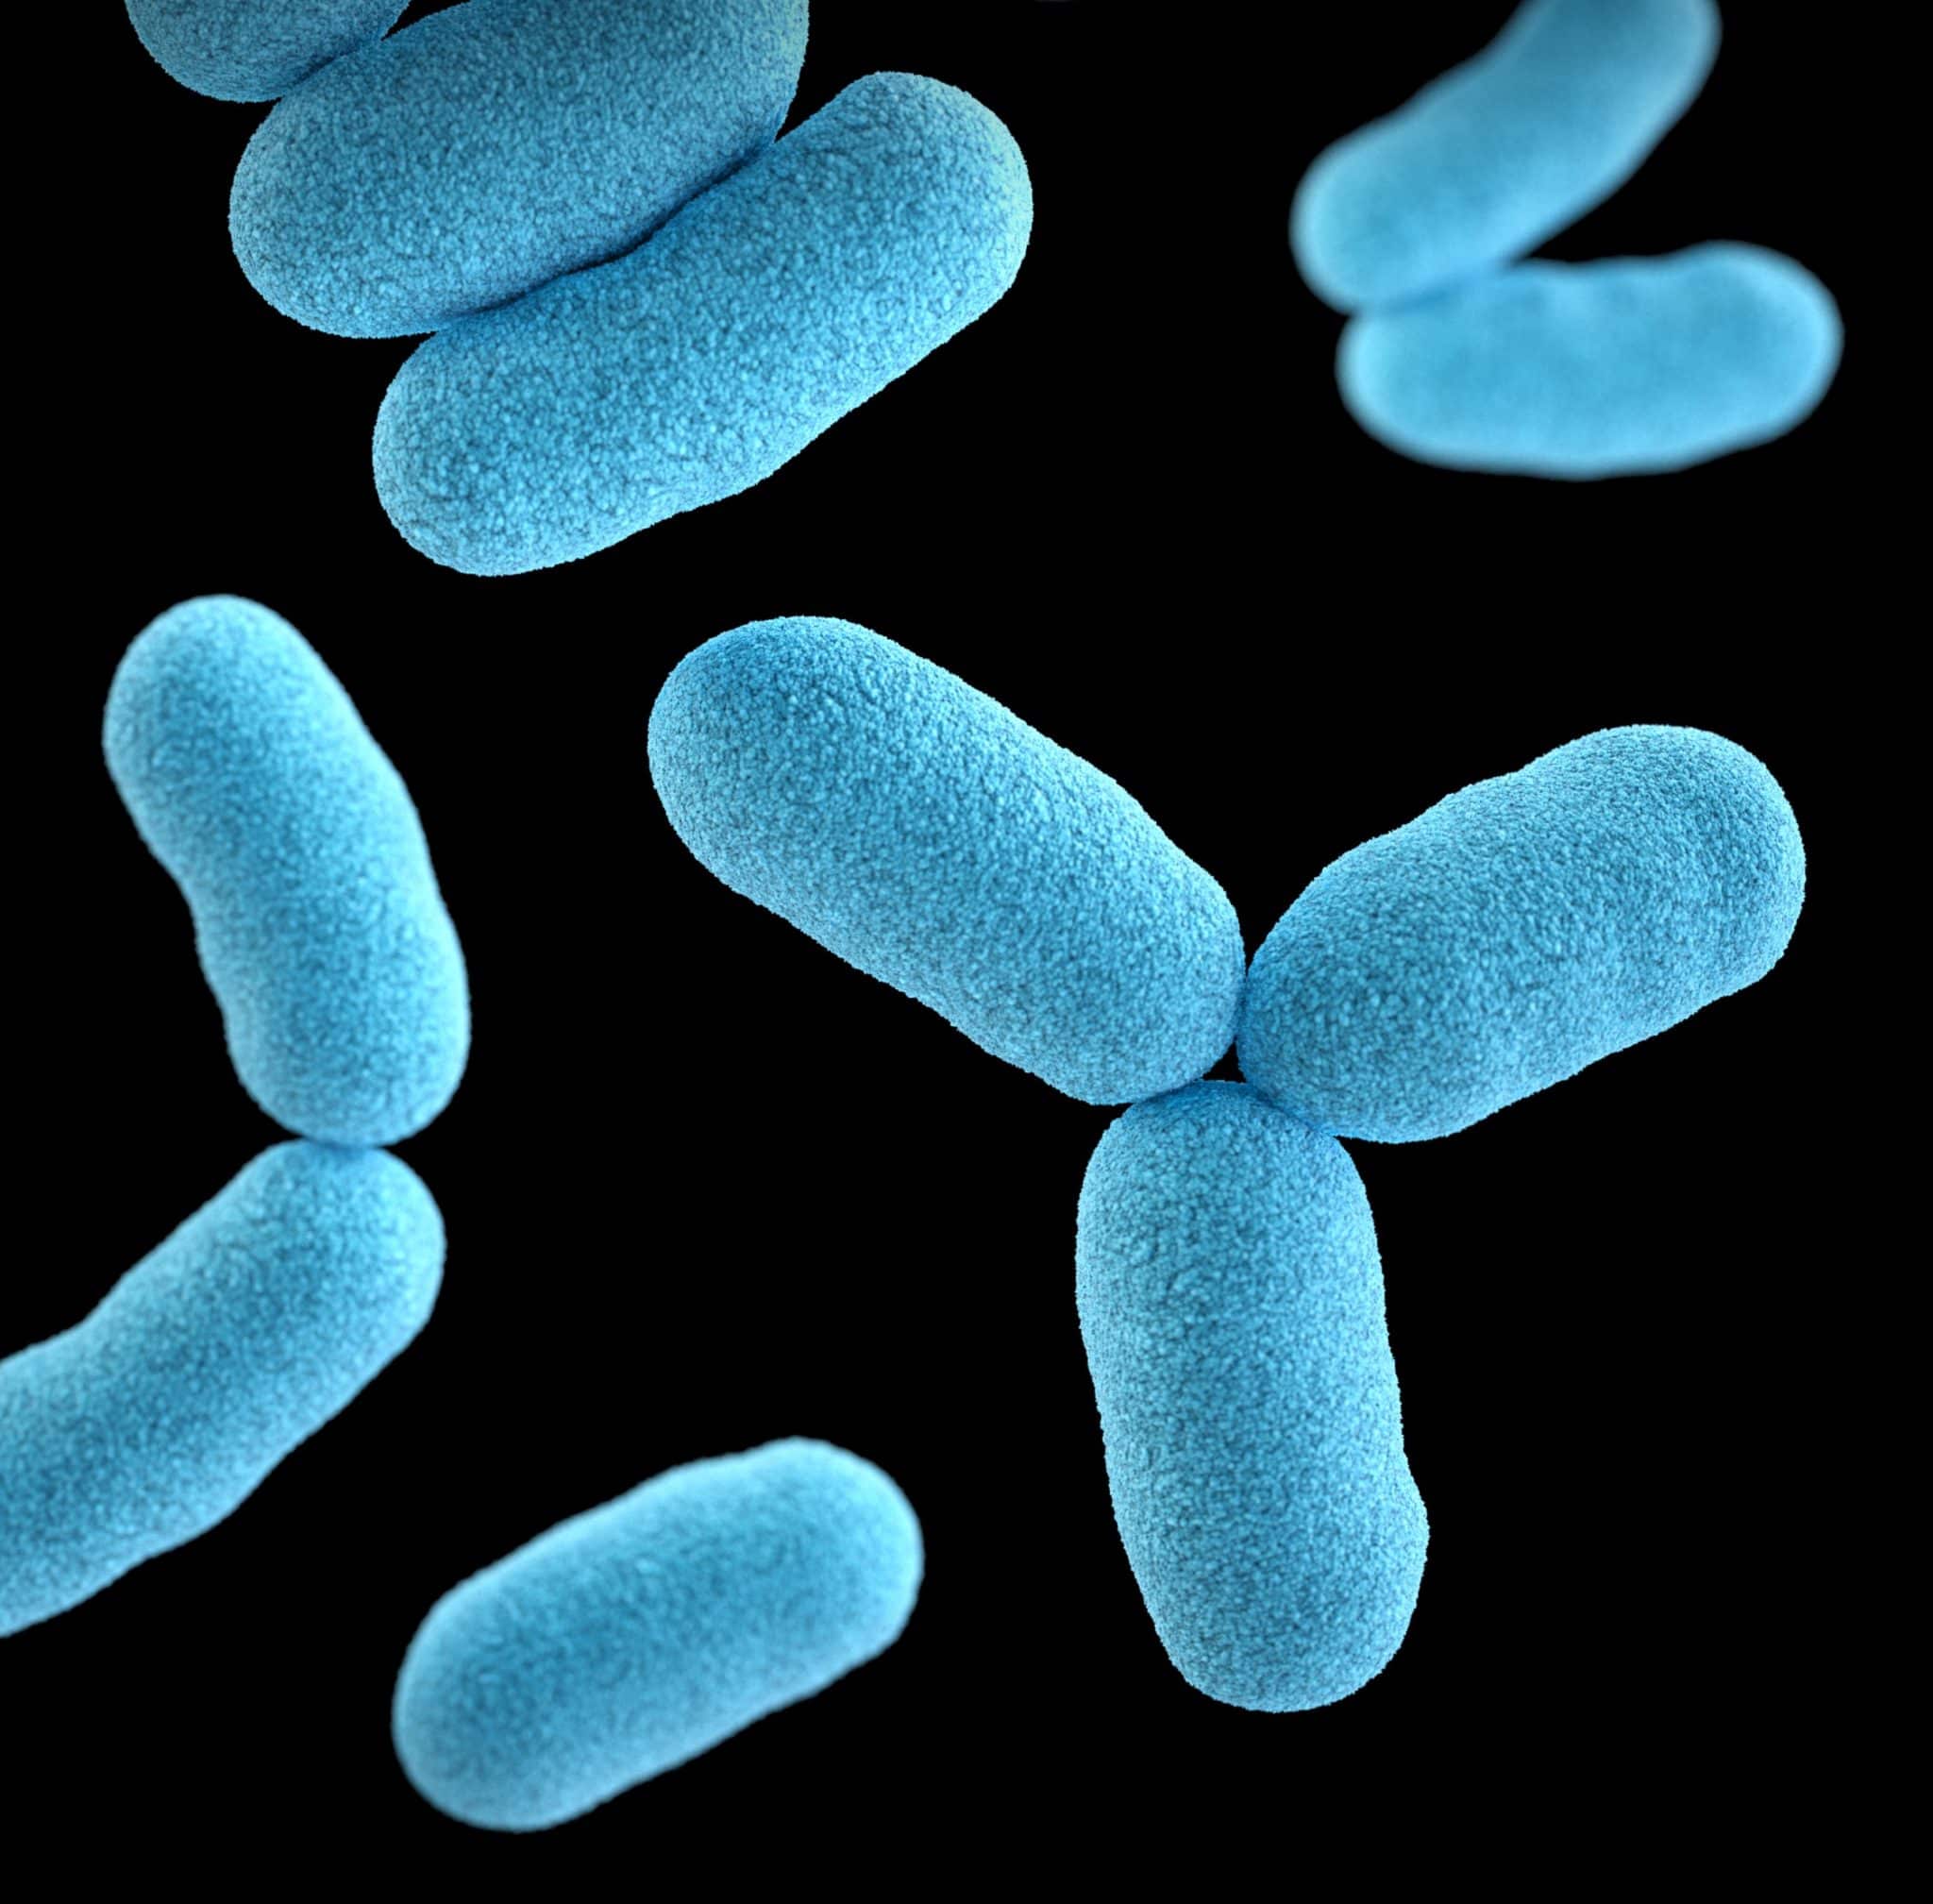
Close up of blue gut bacteria against a black background.

Are Probiotics for Kids and Babies Healthy and Helpful?

A lot of parents are on the lookout for ways to improve the gut health of their babies and children, especially if it means better sleep or less discomfort. Let’s take a look at what the evidence has to say on using probiotics in children and infants for specific conditions.

Colic

A systematic review and meta-analysis published in 2013 looked at whether probiotics could be a solution for infant colic symptoms in infants 3 months or younger. Infant crying was measured as the duration or number of episodes of infant crying and distress. The review found that the strain Lactobacillus reuteri may be effective as a treatment for crying in exclusively breastfed infants with colic. After 21 days of L reuteri supplementation, daily crying time was reduced by 65 minutes per day compared to the placebo group. However, the review study did call for more research to be done to support probiotic use to manage colic, especially in formula-fed infants, or to prevent infant colic.

Example: BioGaia Baby Drops CFU/Dose: 100M/5 drops, Dose: 5 drops (L. reuteri) – approved by Health Canada for listed indication.

Eczema

A systematic review and meta-analysis published in 2015 looked at the prevention of allergic diseases, specifically eczema, asthma and rhinoconjunctivitis, in infants and found that probiotic supplementation may help prevent eczema in babies and infants. The study did not find supporting evidence that probiotics prevented asthma or rhinoconjunctivitis. All but one of the studies analyzed started probiotic supplementation during pregnancy. The one study that administered probiotics to infants of mothers with allergies did so within 48 hours of delivery. The study found that infants in the probiotic group developed fewer cases of eczema compared to those in the control group. Further analysis showed that there was a greater significant effect of probiotics that contained mixtures of Lactobacilli and Bifidobacteria, compared to single strain probiotics, for the prevention of eczema.

A more recent RTC (randomized control trial) study published in 2019 looked at the effect of a probiotic mixture of Lactobacillus rhamnosus and Bifidobacterium lactis administered in late infancy and early childhood on the development of allergic diseases. The study found a significantly lower incidence of eczema in the probiotic group compared to the placebo group.

Example: MetaKids Baby Probiotic CFU/Dose: 1B/6 drops, Dose: 6 drops (L. rhamnosus and B. lactis)

Four children who take probiotics wearing rain boots standing side by side holding hands.

Antibiotic-Associated Diarrhea (AAD)

A systematic review published in 2015 looked at probiotics for the prevention of pediatric antibiotic-associated diarrhea. Antibiotics are frequently prescribed to children for pneumonia, whooping cough, urinary tract infection or strep throat. Antibiotics can alter the microbial balance within the gastrointestinal tract and result in AAD. The review found that among the various probiotics evaluated, Lactobacillus rhamnosus or Saccharomyces boulardii at 5 to 40 billion colony forming units/day may be appropriate for preventing AAD in children receiving antibiotics.

Examples: Culturelle Kids Daily CFU/Dose: 5B/tablets, Dose: 2-4 tablets (L. rhamnosus) – approved by Health Canada for listed indication.

FlorastorKids CFU/Dose: 5B/capsule, Dose: 1-2 capsules (S. boulardii) – approved by Health Canada for listed indication.

Acute Infectious Diarrhea (AID)

A systematic review published in 2010 looked at probiotics for treating acute infectious diarrhea and found that probiotics administered in addition to rehydration therapy resulted in clear reductions in the duration and severity of diarrhea, and were not associated with adverse effects. Interestingly, this review found that studies tested many different probiotics in many different settings, yet, nearly all reported improved diarrhea outcomes for children, although the size of the effect varied considerably between studies. The two most effective probiotics strains in the systematic review that were found to statistically significantly reduce the mean duration of diarrhea were Lactobacillus rhamnosus and Saccharomyces boulardii. There has also been a small Randomized Control Trial published in 2014 that used L. Reuteri bacteria. The study (with 60 children) found that the duration of diarrhea was significantly reduced in the L. reuteri group compared to the control group.

Examples: Culturelle Kids Daily CFU/Dose: 5B/tablets, Dose: 2-4 tablets (L. rhamnosus) – approved by Health Canada for listed indication

FlorastorKids CFU/Dose: 5B/capsule, Dose: 1-2 capsules (S. boulardii)

Little girl on the beach playing with a balloon.

Irritable Bowel Syndrome (IBS)

A systematic review published in 2015 looked at nonpharmacologic treatments, such as probiotics, available for paediatric abdominal pain-related functional gastrointestinal disorders, including IBS. The study found that compared with the placebo, Lactobacillus rhamnosus and VSL#3 were effective in treating children’s symptoms of IBS. VSL#3 is a probiotic mixture of 8 different strains of Bifidobacterium, Lactobacillus and Streptococcus.

There have also been studies on probiotics with Lactobacillus reuteri for treating IBS in children, however, the results are inconclusive. Another systematic review looking at the effectiveness of probiotics in children with IBS found that the evidence supports L. rhamnosus for reducing the frequency and intensity of abdominal pain in children with IBS and that there is no evidence to recommend L. reuteri.

Examples: Culturelle Kids Daily CFU/Dose: 5B/tablets, Dose: 2-4 tablets (L. rhamnosus)

Visbiome CFU: 450B/sachet, Dose: 1-2 sachets (VSL#3) – approved by Health Canada for listed indication

Constipation

While the research on constipation is limited, one Randomized Control Trial published in 2010 found that Lactobacillus reuteri had a positive effect on increasing bowel frequency in infants with chronic constipation. However, improvement in stool consistency was not found.

Example: BioGaia Baby Drops CFU/Dose: 100M/5 drops, Dose: 5 drops (L. reuteri) – approved by Health Canada for listed indication

Regurgitation

A systematic review published in 2014 looked at the efficacy of Lactobacillus reuteri in infants and children. The study included a RCT that found L. reuteri to significantly reduce the number of regurgitation episodes per day compared to the placebo group.

Example: BioGaia Baby Drops CFU/Dose: 100M/5 drops, Dose: 5 drops (L. reuteri) – approved by Health Canada for listed indication

Multiple wooden toothbrushes for children lined up against each other against a white background.

Dental/Oral Health

A systematic review and meta-analysis published in 2016 looked at probiotics for managing dental caries, gingivitis and periodontitis in children. The review concluded that there is not enough evidence to support the use of probiotics to manage dental health. Another study supported this statement, concluding that more research is needed to confirm which probiotic strains are the most effective preventative measures for managing dental health.

Example: BioGaia ProDentis (formerly distributed as GUM PerioBalance) CFU/Dose: 200 M/ lozenge, Dose: 1 lozenge (L. reuteri)- approved by Health Canada for listed indication

Probiotics for Very-Low-Birth-Weight (VLBW) Infants

Many studies have also looked into probiotic use specifically for very low birth weight infants and some of the unique challenges that they may face.

Close up image of an infant's legs lying on white bed sheets.

Necrotizing Enterocolitis (NEC)

NEC is the inflammation of a premature baby’s intestine in response to bacteria invasion. The inflammatory response damages the tissue in the intestine, which can lead to a hole in the intestinal wall and leakage of stool into the infant’s abdomen. NEC is a devastating disease and can result in infection and death.

A meta-analysis and systematic review published in 2017 found that probiotics lead to significant reductions in necrotizing enterocolitis incidence and mortality in VLBW infants. The analysis found that the most effective strains are those containing a mixture of Lactobacillus and Bifidobacterium species. Not surprisingly, since we know breast-milk contains natural probiotics, the findings also suggested that human breast-milk feeding may act synergistically with probiotics to protect against NEC. Another meta-analysis, also published in 2017, found that probiotics with multiple strains are more effective in the prevention of NEC and mortality in preterm VLBW infants.

Example: Renew Life FloraBaby CFU/Dose: 2B/scoop, Dose 1-2 scoops (B. breve, L. rhamnosus, B. Bifidum, B. infantis, B. longum)

Late-Onset Sepsis (LOS)

Preterm infants do not acquire bacteria in their gastrointestinal tract as quickly as healthy term infants. Bacteria of the gastrointestinal tract plays an important role in the development of a healthy immune response. Preterm infants are at greater risk for LOS, which is the presence of bacteria, a virus or a fungus in the blood. LOS is associated with increased mortality and morbidity.

Infant lying on their backs on a white blanket.

A systematic review and meta-analysis published in 2017 looked at preventing late-onset sepsis in VLBW preterm infants with probiotics. Interestingly, the analysis found that probiotics reduced late-onset sepsis incidence in exclusively human milk-fed preterm infants, and not infants receiving formula. Also, only probiotic mixtures, and not single-strain products, were found to be effective. The specific probiotic mixture was not stated.

Are probiotics safe for infants?

The research we have on the topic of probiotics and infant health is still in its infancy, and many of the studies differ vastly in probiotic administration, such as the probiotic strains supplemented, the dose given, duration of therapy and time of initiation. Many of the studies stated that although the outcomes were promising, until further research has been conducted, probiotic use should be avoided in paediatric populations at risk for adverse events. Probiotics appear to be generally safe, but it has been acknowledged that there are some reports about the occurrence of sepsis in preterm newborns potentially linked to probiotic supplementation. There may also be long-term consequences of probiotic supplementation that have not been determined.

Probiotics for kids in a white dish.

Are Probiotics Regulated?

Probiotics are available over the counter, either isolated or mixed in with other products, such as in infant formula. One of the main worries with probiotic use, brought up in various research papers, is that probiotics are considered a “dietary supplement” and not a drug. This means that in some countries, the regulation of probiotics may be inadequate, especially when probiotics are recommended for serious conditions or to vulnerable populations, such as infants and children.

However, in Canada, all natural health products (NHPs), which includes probiotics, are subject to Natural Health Product Regulations. For probiotics to be sold in Canada, they must have a product license. This entails Health Canada reviewing medicinal ingredients, source, dose, potency, non-medical ingredients and recommended uses. Once Health Canada has assessed the probiotic and decided that it is safe, effective and of high quality, it will be given a Natural Product Number (NPN) which can be found on the product label. When choosing a probiotic, look out for the NPN number to know if a product has been assessed by Health Canada.

Research shows that there is a concern about the possible contamination of probiotics with organisms not advertised on the package. One American study published in 2016 found that of the 16 probiotic products they evaluated, only one of the probiotics perfectly matched the label claims. As well, the study found a lot of pill-to-pill and lot-to-lot variation in the probiotic products. Having said that, there are a lot of well-trusted probiotic products on the market, so always speak to your paediatrician before starting your child on a probiotic regime.

How are probiotics for kids and babies given?

Older children and adults typically consume probiotic supplements through capsules. For infants, however, probiotics can be found in infant formulas, food products, supplement powders and liquid drops. For slightly older children, probiotics are also available in lozenges and chewable tablets.

Probiotics in Food

Some foods like kefir, sauerkraut, kimchi, tempeh, miso and probiotic enriched yogurt contain probiotics, both naturally and supplemented. While the probiotic load in food is not nearly as significant as in a supplement, there are a lot of added benefits to eating probiotic-rich foods over taking a supplement, as many of these foods are also rich in vitamins and nutrition. Consider introducing probiotic-rich foods into your baby’s diet after 6 months in lieu of or in conjunction with probiotic supplements.

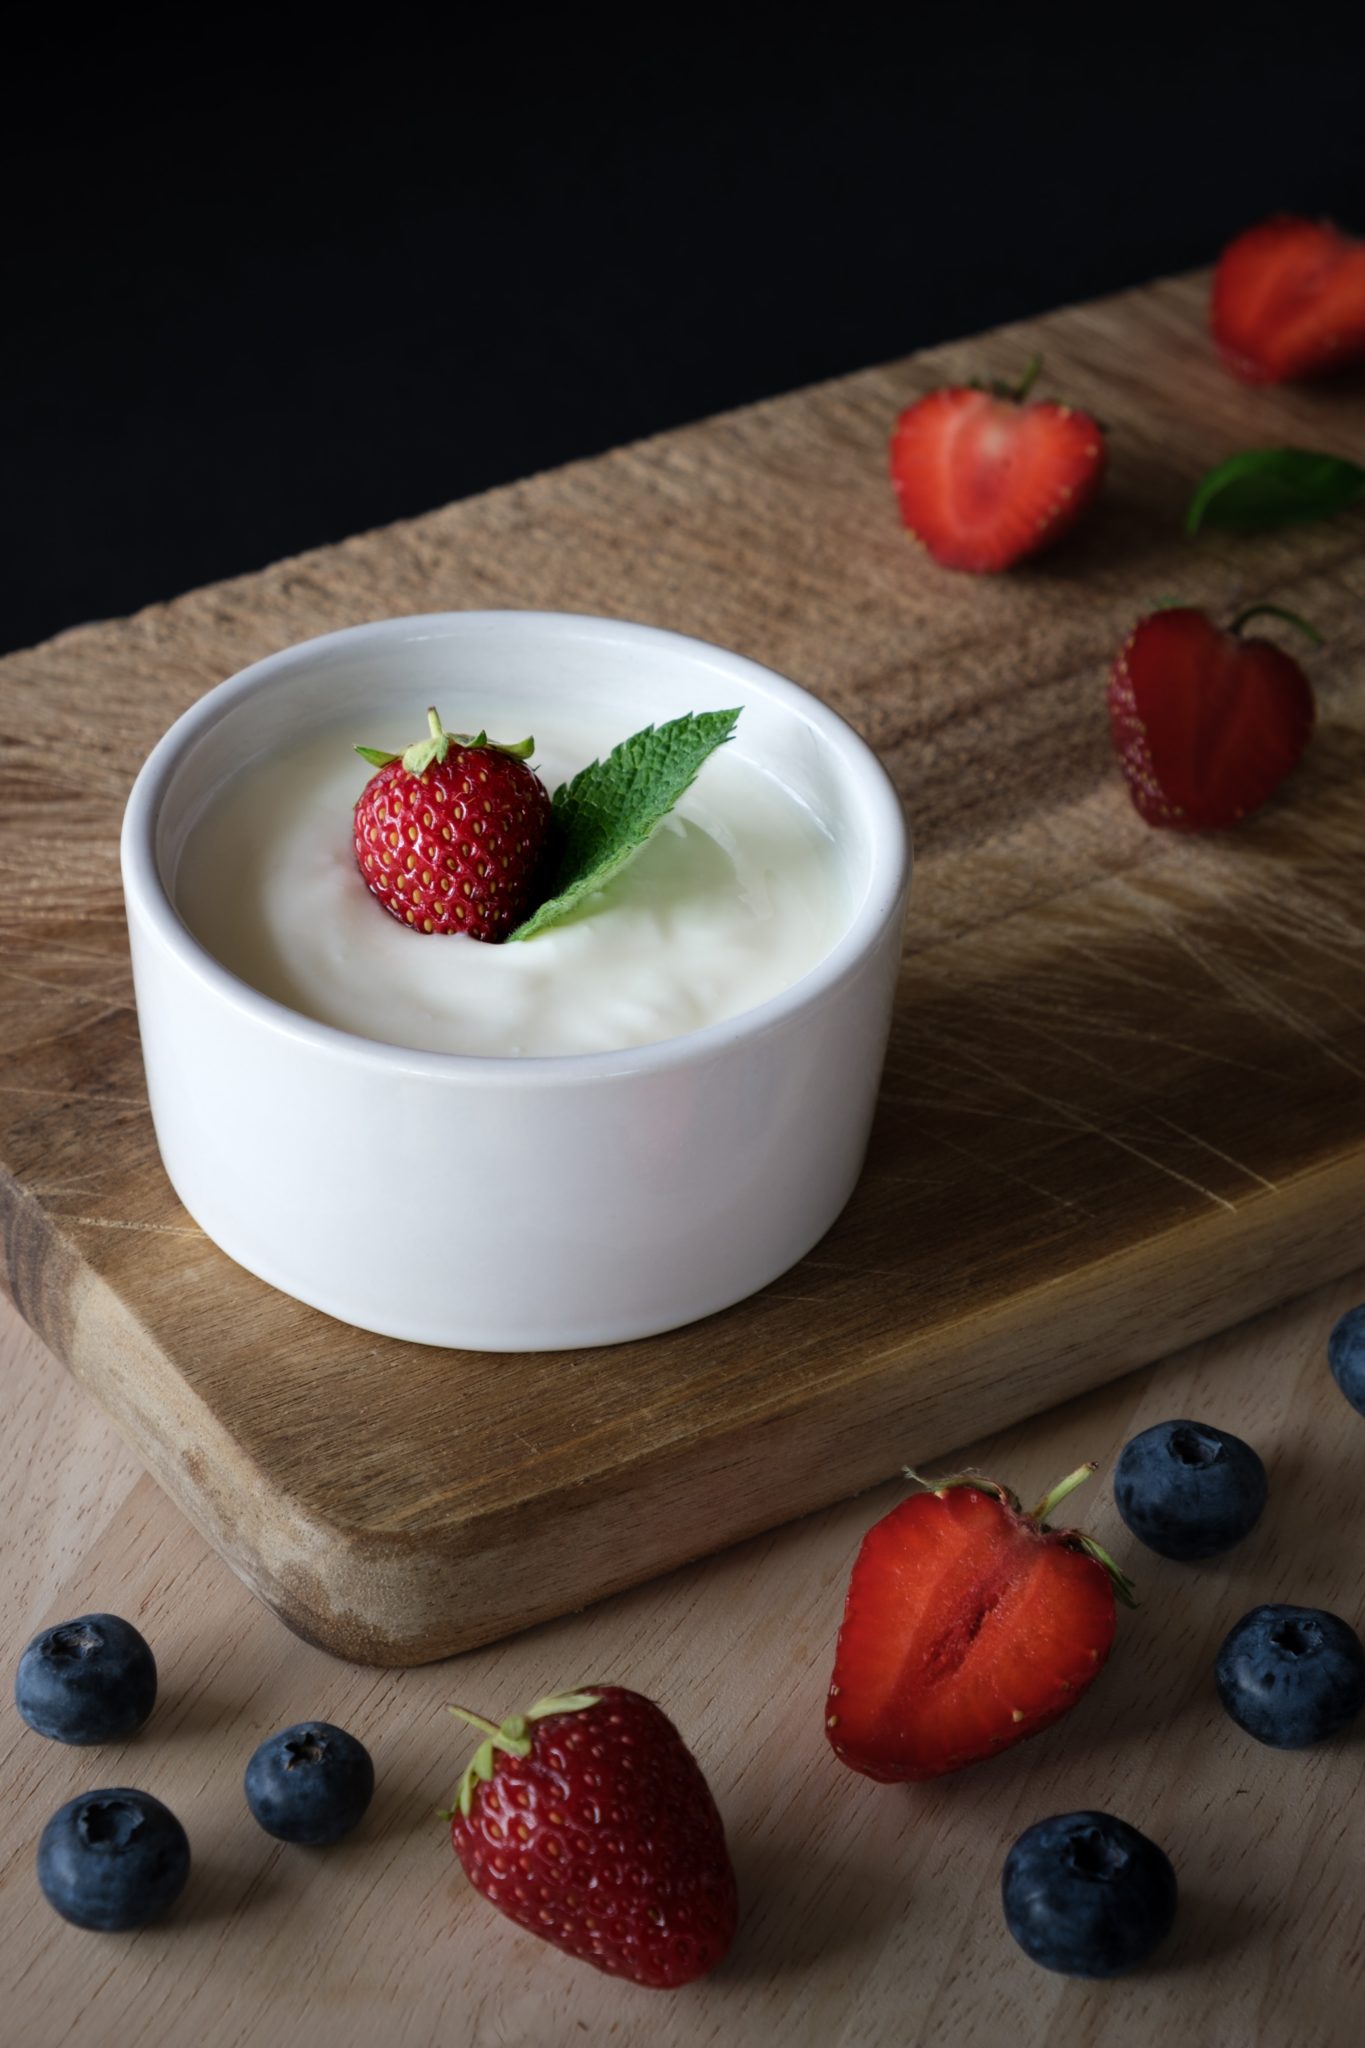
Yogurt that contains probiotics for kids in white bowl with berries.

Bottom line on the safety and use of probiotics for kids and infants

The emerging research on probiotics for infants and kids is promising for a wide range of paediatric ailments including. Like many supplements, however, there are concerns with the regulation of probiotics. So if your child is suffering from one of the conditions purported to be improved by probiotics, always speak to your paediatrician about the best strain and dose for your child.

Have you tried probiotics for kids in your family? Did you find it helped with any of the ailments we discussed? Leave me a comment below with your thoughts!

Contribution by Christine Jauernig

If you liked this post on probiotics for kids you may also like:

  • WHAT DOES THE SCIENCE SAY ABOUT GUT HEALTH?
  • CAN I GET ENOUGH PROBIOTICS FROM YOGURT OR SHOULD I TAKE A PROBIOTIC SUPPLEMENT?
  • BENEFITS OF PROBIOTICS & BEST FERMENTED FOODS RECIPES
Abbey Sharp

Abbey Sharp is a Registered Dietitian (RD), regulated by the Ontario College of Dietitians. She is a mom, YouTuber, Blogger, award winning cookbook author, media coach specializing in food and nutrition influencers, and a frequent contributor to national publications like Healthline and on national broadcast TV shows.
www.abbeyskitchen.com/about-abbey/

Last Updated June 25, 2020. Published May 12, 2020 By Abbey Sharp 13 Comments

Vegan Moussaka with Gluten Free Hummus “Bechamel”

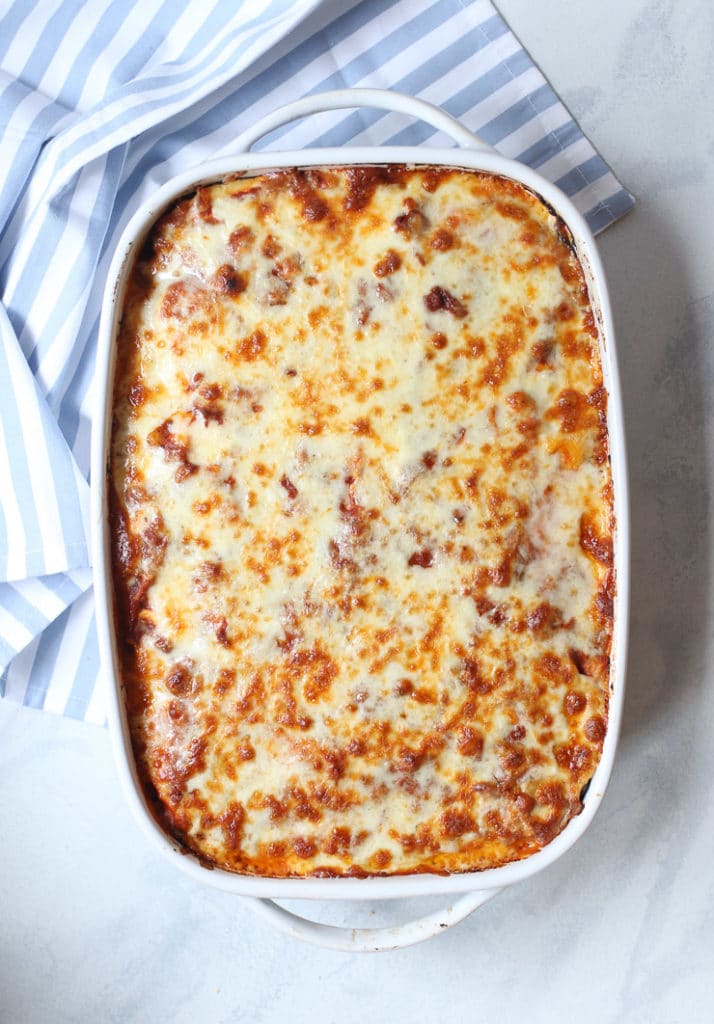
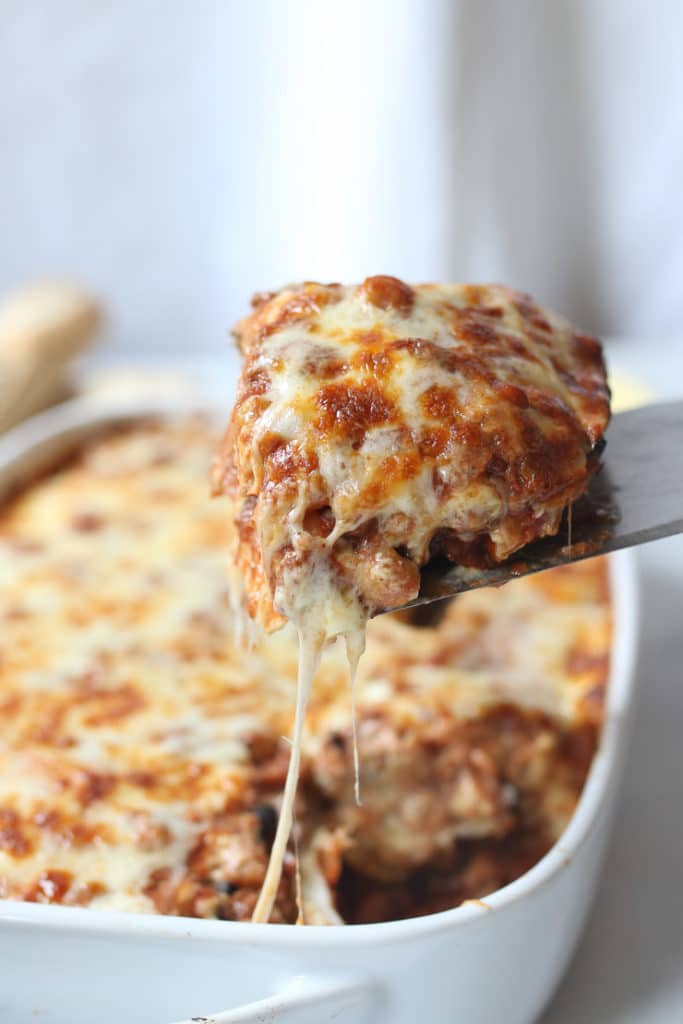
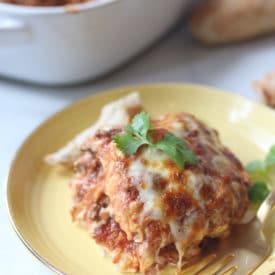
Spatula taking out a serving of cheesy vegan moussaka out of a white casserole dish.

This healthy vegan moussaka with creamy gluten free hummus “bechamel” is an amazing healthy family friendly recipe that can be made with or without meat and dairy!

You’ve asked for it, and I’m delivering. You want more family-friendly recipes that you can serve your family with pride. Well let me tell you, folks, put this on HEAVY rotation because it is a total hit. This healthy vegan moussaka with creamy hummus “bechamel” makes a serious casserole and my itty bitty family of three (including my 13 month old) just devoured it in two days.

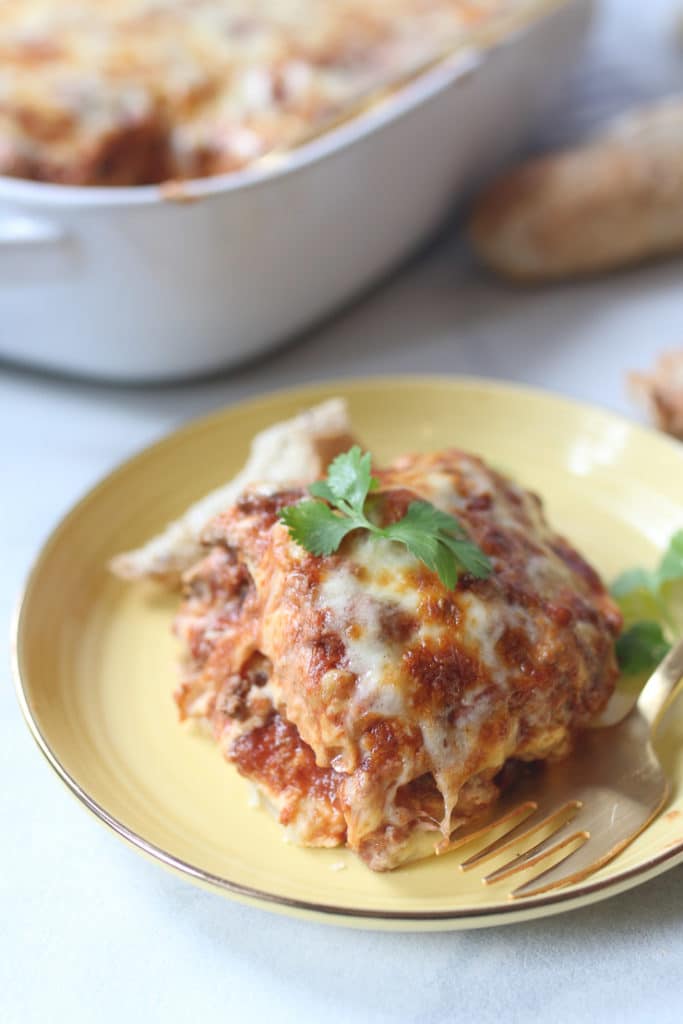
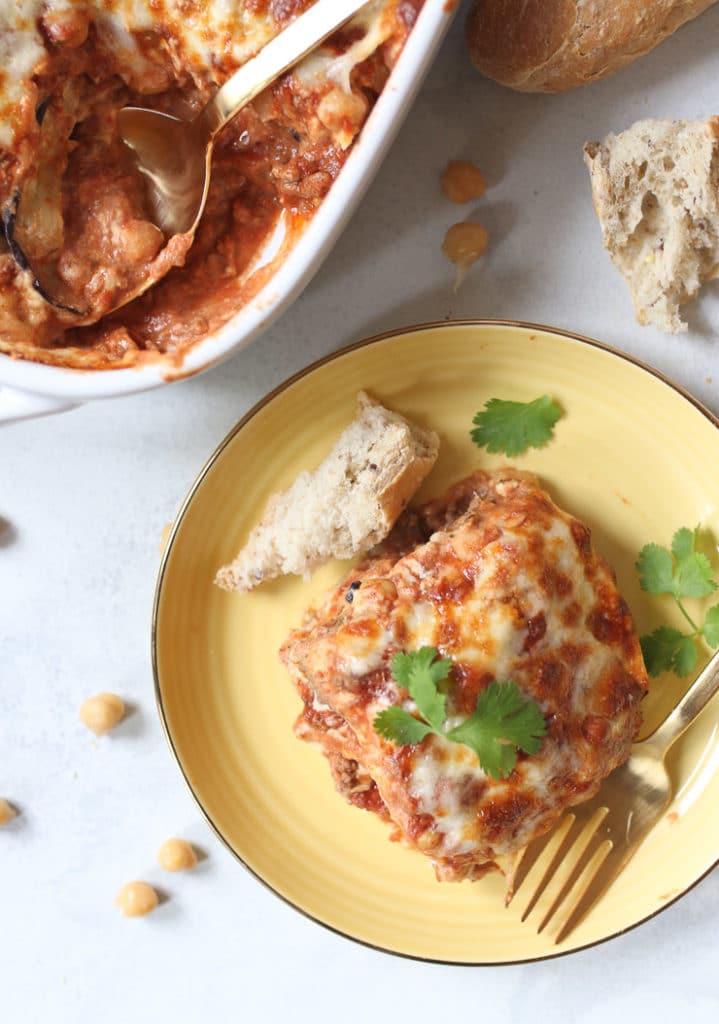
Serving of cheesy vegan moussaka on a yellow plate topped with parsley and a serving of bread.

I’m not going to call this vegan moussaka magic, but IT’S F*CKING MAGIC MAMAS. I don’t think I have EVER seen Baby E eat so much in one go as I have when I served this dish. As a result, he got this legit breakfast, lunch and dinner and somehow didn’t seem to get bored of it. Translation? We will definitely be making this again!

KEY INGREDIENTS FOR THIS MOUSSAKA 

Eggplant – As per any traditional moussaka recipe, this vegan version calls for two large eggplants

Veggie Ground Round – To “veganize” this moussaka, we are using veggie ground round. Not vegan? No problem. Feel free to use a ground meat of your choice. 

Chickpeas – Chickpeas is my “something new” when creating this vegan moussaka. I figured why not add some more plant-based protein to this baby? It also surprisingly adds a really nice texture to the sauce that I wasn’t expecting. 

Crushed Tomatoes – because what goes better with cheesy meaty goodness than crushed tomato? I always use a low sodium variety for this recipe.

Hummus – You can use store bought or homemade hummus. I have a great homemade recipe that you can find here. 

Cheese – You can use your favourite vegan cheese or non-vegan cheese. If you’re making this non-vegan, I would recommend using mozzarella. 

How to Make Healthy Vegan Moussaka with Creamy Hummus “Bechamel”

Cheesy Greek casserole in a white casserole dish.

If you haven’t had real moussaka, it’s a classic Greek dish kinda like their take on lasagna. It’s usually made with ground lamb, bechamel, and eggplant but we’re lightening this up. Rather than using meat and a cream based sauce, I used vegan ground round (you could also easily use extra lean ground beef), and hummus for the creamy factor instead of bechamel. I also boosted the plant-based protein by adding more chickpeas to the sauce which add a really nice unexpected “pop” of texture.

Spatula taking out a serving of cheesy moussaka out of a white casserole dish.

What hasn’t changed, however, is the importance of salting your eggplant. Skipping this step can result in a bitter, watery casserole and nobody has time for that! Basically when you salt your eggplant, it draws out some of the bitter liquid (thanks to osmosis) and helps you cut down on the moisture and sponginess of the eggplant. The result is a silky smooth, sweet vegan moussaka casserole with serious creamy factor.

FAQ ABOUT THIS VEGAN MOUSSAKA RECIPE 

birds eye view of of plant-based moussaka with gluten free hummus "bechamel" sauce served on a yellow plate garnished with fresh herbs

CAN THIS RECIPE STILL BE ENJOYED IF IM NOT VEGAN?

I tested this with both vegan ground round and vegan cheese, as well as real ground beef and cheese and both are equally delish! I promise your family is going to LOVE this naturally gluten free dish.

IS THIS MOUSSAKA RECIPE KID FRIENDLY?

Absolutely. This recipe is 100000% baby E approved! It’s cheesy and totally delish.

IF I DON’T HAVE STORE BOUGHT HUMMUS, CAN I MAKE IT FROM SCRATCH?

Yes definitely. And its super easy too! I have a recipe right here that you can try out .

Do you have any other casserole or lasagna recipes on the blog?

Oh definitely. Casserole might as well be my middle name. Here are some of my favourites

Cheeseburger Casserole

Pizza Casserole

Tuna Noodle Casserole

Zucchini Lasagna Pinwheels

Keto Zucchini Lasagna

Matzo Lasagna

What are some of your family’s favourite meals? Tag someone who LOVES moussaka and someone who needs this lightened up healthy vegan moussaka in their life!

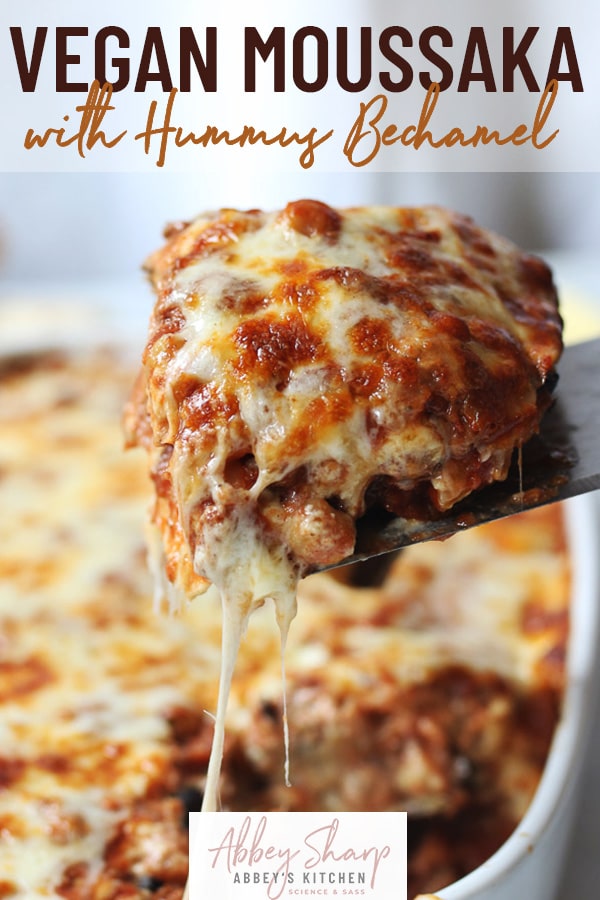
A pin image of vegan moussaka with hummus and cheese pulling.

Serving of cheesy vegan moussaka on a yellow plate topped with parsley and a serving of bread.
Print Recipe
4.34 from 6 votes

Healthy Vegan Moussaka with Gluten Free Hummus "Bechamel"

This healthy vegan moussaka with creamy gluten free hummus "bechamel" is an amazing healthy family friendly recipe that can be made with or without meat and dairy!
Prep Time1 hour hr
Cook Time45 minutes mins
Total Time1 hour hr 45 minutes mins
Course: Dinner
Cuisine: American, Greek
Servings: 10 people
Calories: 737kcal
Author: Abbey Sharp

Ingredients

  • Eggplant:
  • 2 large eggplants cut into 1/4" thick slices lengthwise
  • 1 tbsp coarse kosher salt
  • 2 tbsp extra virgin olive oil
  • Sauce:
  • 1 tbsp extra virgin olive oil
  • 1 onion diced
  • 2 cloves garlic minced
  • 1 lb vegan ground round or ground beef
  • 1 19 oz can chickpeas drained and rinsed
  • 1 28 oz can crushed tomatoes
  • 4 tsp dried oregano
  • 1 1/2 tsp cinnamon
  • 1/4 tsp allspice
  • Salt and pepper
  • 3 cups hummus homemade or store-bought
  • 2 cups shredded vegan cheese or mozzarella cheese optional

Instructions

  • Place the eggplant slices in a colander and sprinkle with kosher salt. Let it sit for an hour. Rinse lightly then pat the eggplant very dry.
  • Preheat oven to 400 F.
  • Toss the eggplant with oil and roast for 20 minutes, flipping half way through.
  • Meanwhile, in a pan, heat the additional tablespoon of oil over medium heat and add in the onion and garlic. Saute until soft, about 5 minutes. Add in the vegan meat or beef. If cooking meat from raw, then continue to saute until cooked through and no longer pink, about another 5 minutes.
  • If not, skip to this step immediately. Add in the chickpeas, sauce, oregano, cinnamon, allspice and salt and pepper to taste. Cook for 5-7 minutes, just to thicken slightly.
  • Add a light layer to the bottom of a 13x9" baking dish. Add a layer of eggplant, then hummus. Repeat layers of sauce, eggplant, hummus. You should have three layers of each, ending with the hummus.
  • Top with cheese, if using.
  • Heat the oven to broil and broil until bubbly and caramelized on top, about 5-6 minutes.
  • Allow to sit for about 5 minutes before slicing and enjoying.

Nutrition

Calories: 737kcal | Carbohydrates: 74g | Protein: 36g | Fat: 37g | Saturated Fat: 7g | Sodium: 2928mg | Potassium: 1439mg | Fiber: 27g | Sugar: 13g | Vitamin A: 405IU | Vitamin C: 17.7mg | Calcium: 206mg | Iron: 12mg
Abbey Sharp

Abbey Sharp is a Registered Dietitian (RD), regulated by the Ontario College of Dietitians. She is a mom, YouTuber, Blogger, award winning cookbook author, media coach specializing in food and nutrition influencers, and a frequent contributor to national publications like Healthline and on national broadcast TV shows.
www.abbeyskitchen.com/about-abbey/

Last Updated July 21, 2020. Published May 11, 2020 By Abbey Sharp Leave a Comment

Vegan Hawaiian Burgers with Easy Lime Aioli

DISCLAIMER: This post was developed in sponsored partnership with Yves Veggie Cuisine, however, as always, all opinions are genuine.

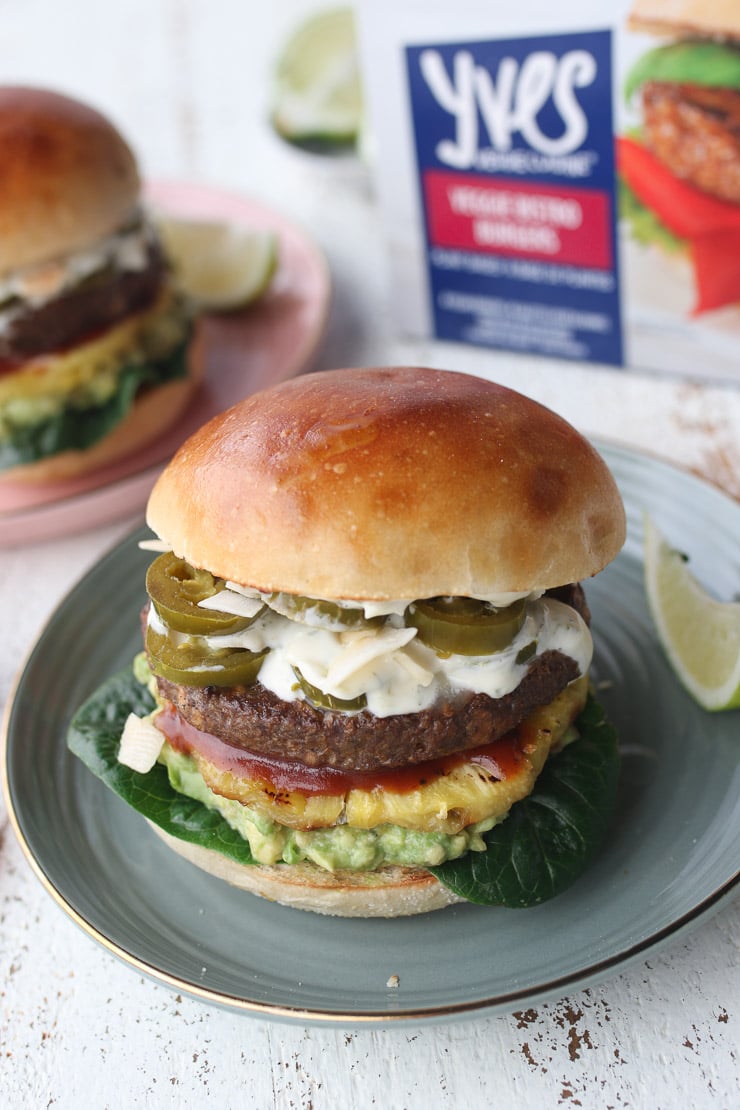
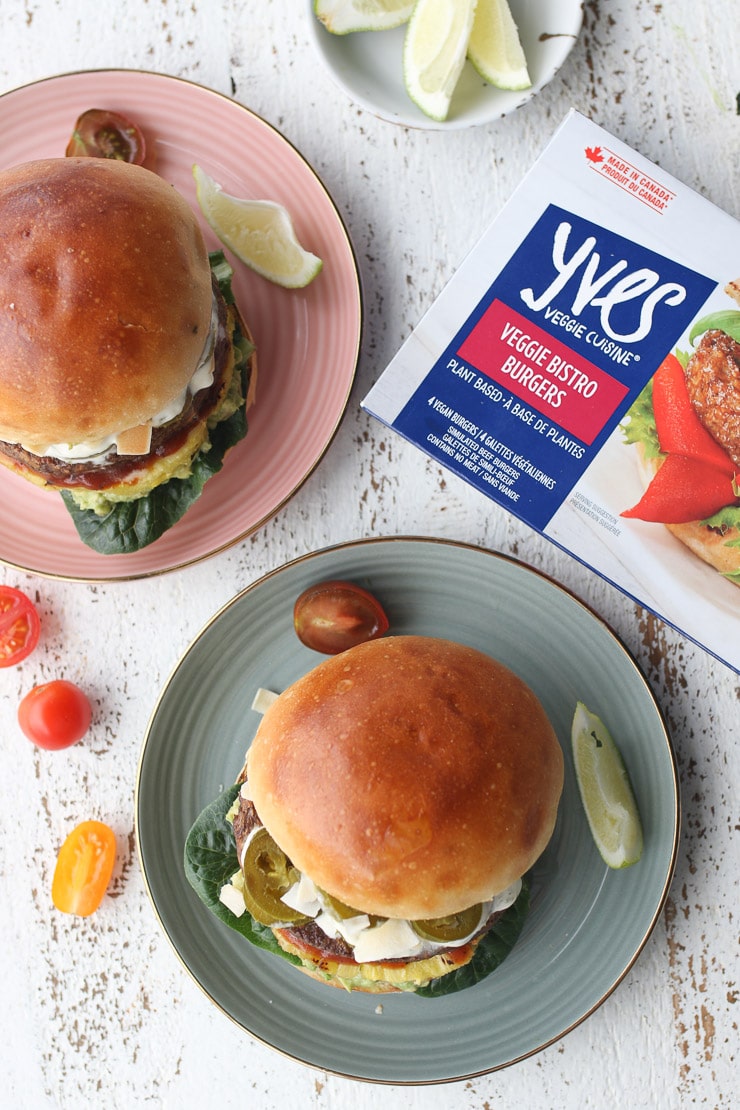
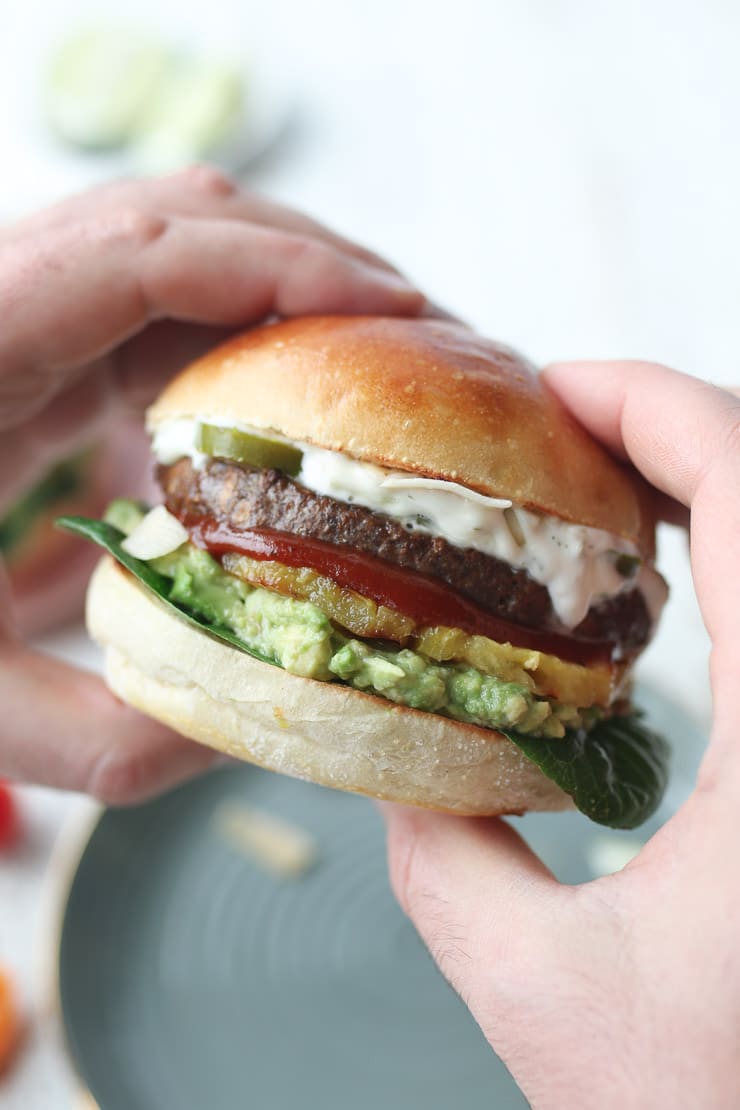
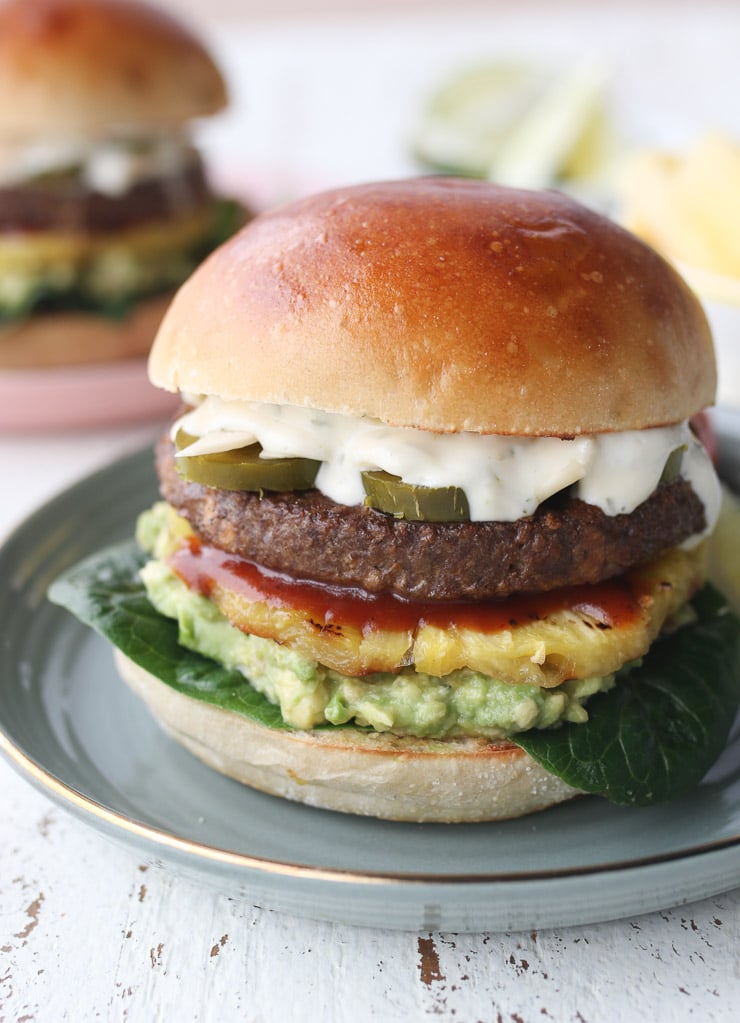
These vegan Hawaiian burgers are served with grilled pineapple and an easy vegan lime aioli and are super fast to prepare!

I am all about keeping things simple on a good day, but since the start of the social isolation, I have found myself even more time starved. At the same time, dinner has literally become my favourite time of the day, so I definitely don’t want to settle for a boring bowl of cereal just because I’m in a rush. With warmer weather finally upon us, I have been busting out the grill and these Vegan Hawaiian Burgers have become my family’s grillable faves.

vegan hawaiian burger on a blue plate garnished with a lime wedge

Key Ingredients for these Vegan Hawaiian Burgers

This recipe can use up some of the ingredients in your fridge for toppings, but you definitely want to make sure you’ve got the basics.

Yves Veggie Bistro Burgers – Obviously, yes you can make your own burger, but like I said, I am all about convenience and I love that these burgers are free of artificial preservatives, colours and flavours and they’re non-GMO project verified. Nutrition wise, one burger patty has just 4.5 grams of fat, an impressive 3 grams of fibre, and 15 grams of plant-based protein. They’ve also got 25% of your iron needs and 60% of your B12! Not a lot of plant-based products can say that! Not to mention, they taste so good that even meat lovers will happily gobble them up.

Burger Buns – I like a nice fluffy burger bun, but of course, choose your favourites. If you want to reduce the carbs (and just fit more in your mouth without getting too messy), I recommend hollowing out the bun a bit so more filling can fit in.

Pineapple – This is what makes it Hawaiian-themed and I absolutely LOVE grilled pineapple. It’s not JUST for dessert!

Pickled Jalapeños- If you don’t want it to be spicy, then you can totally omit this.

Vegan Mayonnaise– This is how we make a super easy cheater aioli without the need to bust out egg yolks and oil and whisk until our arm falls off.

Limes – I love the bright tangy lime flavour in the aioli alongside the sweet pineapple.

two Hawaiian veggie burgers on a plate garnished with a lemon wedge

What Can I Serve with these Vegan Burgers

These Hawaiian themed burgers would go super well with a simple salad or simply grilled corn, or you can try one of these recipes for an upgraded side dish.

Vegan Grilled Sweet Potatoes with Creamy Lime Avocado Sauce

Vegan Grilled Broccoli, Carrot and Avocado Salad with sesame Dressing

Grilled Watermelon and Avocado Salad

two hands holding veggie burger with pineapple, guac, and lime aioli

FAQ and Cooking Tips for this Recipe

Here are some of the most likely common questions about this recipe along with some of my top tips for nailing it every time.

Where do I find Yves burgers in the grocery store?

You can find them in the frozen section. To find out if your grocery store stocks them, use their store locator: http://yvesveggie.ca/en/yves-store-locator/.

What low sugar BBQ sauce do you recommend?

There are a lot of BBQ sauces on the market, so a lot of it depends on your flavour and heat preferences. For a lower sugar option, I like Annie’s BBQ sauce, Bone Doctor’s Carolina Bold, and Stubb’s Original BBQ sauce.

Can I use regular mayonnaise if I am not vegan?

You definitely can! Just use the same amount as what the recipe calls for.

full shot image of hawaiian spiced vegetarian burger with avocado, pineapple, and homemade lime aioli on a grey plate

Can I use yogurt to make a lighter lime aioli?

You also can do that. I prefer the body of mayonnaise, I’m not going to lie. But if you’re calorie counting, or want to just boost the protein, then I recommend using a full fat plain yogurt (ideally Greek if you’re not vegan).

Are these burgers toddler and kid friendly?

They absolutely are! The only recommendation I would have is to omit the jalapeños if your kiddo isn’t a fan of a lot of heat, and to choose a BBQ sauce that is lower in sugar and not too spicy. My son ADORES grilled pineapple and these burgers were a huge hit in our house.

How long will the lime aioli last in the fridge and what else can I do with it?

You can make a big batch of the lime aioli and store it in the fridge for up to 5 days. In the meanwhile, it is delicious slathered in grilled corn, served with quesadillas, or on sandwiches or wraps. You can also turn it into salad dressing by thinning it out with more lime and olive oil until it reaches a pourable consistency.

two vegetarian hawaiian spiced burgers vegarnished with lime aioli and fresh lime served on a red plate

Do you have any other vegan burger recipes on the blog?

I do! With weather getting warmer, I am absolutely looking forward to busting out the grill more often. Here are some of my favourite vegan burger or burger related recipes.

Vegan Walnut Quinoa Burgers

Vegan Hamburger Helper

3 Ingredient Hummus Burgers (can be made vegan using Yves veggie ground round)

30 Best Healthy Burger Recipes

What are you going to be making now that the weather is looking nicer? Leave me a comment below!

Disclaimer: This post was developed in paid partnership with Yves Veggie Cuisine, however all opinions are genuine.

pinterest image of two hands holding a vegan hawaiian burger with homemade lime aioli garnished with avocado, vegetables, and pineapple on a hamburger bun with text overlay

Print Recipe
5 from 1 vote

Vegan Hawaiian Burgers

These vegan Hawaiian burgers are served with grilled pineapple and an easy vegan lime aioli and are super fast to prepare!
Prep Time5 minutes mins
Cook Time10 minutes mins
Total Time15 minutes mins
Course: Main Course
Cuisine: American
Servings: 4
Calories: 373kcal
Author: Abbey Sharp

Ingredients

  • 1 pack 4 Yves Veggie Bistro Burgers
  • 4 ¼ ” rings of sliced pineapple
  • 4 burger buns

Cilantro Lime Aioli

  • ¼ cup vegan mayonnaise
  • Juice and zest of 1 small lime
  • 1 small clove garlic minced
  • 1 tbsp minced cilantro
  • 8 tsp BBQ sauce
  • 1 avocado
  • 1 tsp lime juice
  • Salt and pepper to taste
  • Lettuce for serving
  • ¼ cup coconut chips toasted (optional)
  • ¼ cup pickled jalapeno rings

Instructions

  • Preheat grill to medium high heat.
  • Place the Yves Veggie bistro burger on the grill (frozen) and cook according to package directions.
  • Add the pineapple rings and cook on each side for 3 minutes, or until grill marks form.
  • Toast burger buns, if desired.
  • Meanwhile, mix together the mayonnaise, lime zest, juice, garlic, and cilantro. Set aside.
  • In a small bowl, mash the avocado with the lime juice and a pinch each of salt and pepper.
  • To assemble, put lettuce on the bottom of the bun, add the avocado, grilled pineapple, 2 teaspoons of BBQ sauce, a burger patty, jalapenos, the aioli and a sprinkle of coconut chips. Enjoy!

Nutrition

Calories: 373kcal | Carbohydrates: 46g | Protein: 7g | Fat: 18g | Saturated Fat: 2g | Sodium: 544mg | Potassium: 429mg | Fiber: 6g | Sugar: 15g | Vitamin A: 271IU | Vitamin C: 13mg | Calcium: 93mg | Iron: 2mg

Abbey Sharp

Abbey Sharp is a Registered Dietitian (RD), regulated by the Ontario College of Dietitians. She is a mom, YouTuber, Blogger, award winning cookbook author, media coach specializing in food and nutrition influencers, and a frequent contributor to national publications like Healthline and on national broadcast TV shows.
www.abbeyskitchen.com/about-abbey/

Last Updated October 23, 2020. Published May 5, 2020 By Abbey Sharp 9 Comments

Vegan Chocolate Protein Balls with Peanut Butter

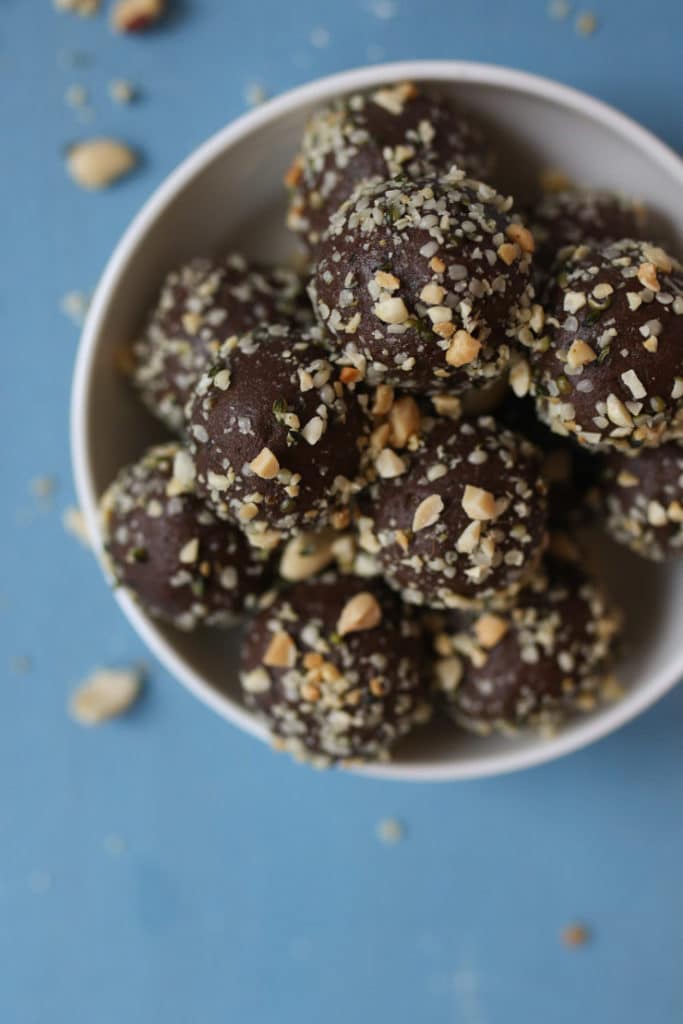
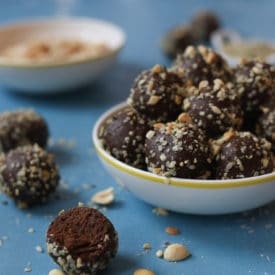
Peanut butter protein balls in a bowl.

This peanut butter chocolate protein balls recipe makes for the perfect keto friendly, vegan, gluten free, low carb, and no bake snack for fuelling tired muscles after a workout!

Take a time machine back to 2017 and you will likely see a slew of energy balls / energy bite recipes filling your Pinterest and Instagram feeds. I know I myself have a few on the blog (like these delish gluten free energy balls with peanuts and cherries.  And while there are definitely times of days when I need a good hit of carbohydrates (like before a workout, or in the morning), I also get that a lot of you have been asking for recipes that are keto friendly and no carb. So I went on a mission to develop an awesome vegan, gluten free, no bake peanut butter chocolate protein balls recipe that is perfect for refuelling tired muscles after a hard workout.

KEY INGREDIENTS FOR THESE PROTEIN BALLS 

Peanut Butter – This recipe uses both natural peanut butter, for texture, and powdered peanut butter,  for extra fibre and protein. I am obsessed with powdered peanut butter and love to add it to my baking and snacks whenever I can. But If you don’t have it on hand, you can certainly stick to regular peanut butter and add in some extra protein powder and flax seed for a fibre boost. 

Chocolate Protein Powder – This recipe uses vegan chocolate protein powder. But if you’re not vegan, you can use any protein powder that you prefer. If you don’t have chocolate protein powder, specifically, you can use whatever protein powder you have on hand and add a teaspoon or two of cocoa powder. 

Almond Flour – Almond flour gives this keto recipe an extra fat and protein boost. If you’re not interested in making these protein balls keto or prefer them to be lower in fat, you can totally eliminate this ingredient all together. 

Flax & Hemp Seed – for those omega 3s baby!! 

How to Make these Vegan Chocolate Protein Balls

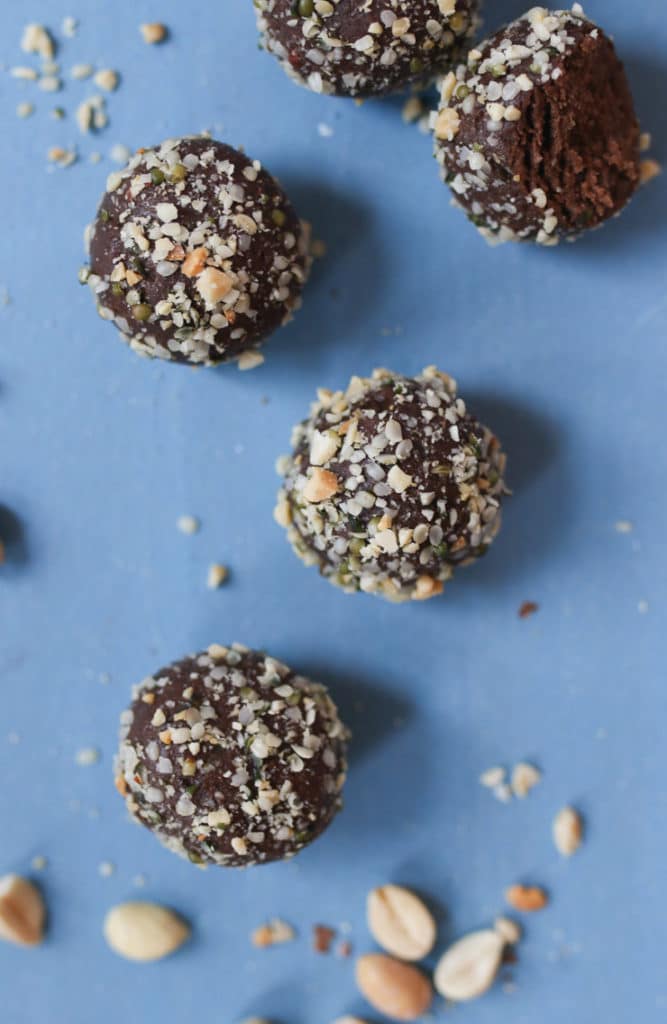
Peanut butter chocolate protein balls scattered on a blue background.

This recipe is surprisingly simple and starts with your favourite protein powder. If you don’t want these protein balls to be vegan, you can totally use a whey based protein powder, but I used a chocolate flavoured vegan option. Feel free to play with the flavours if you have something else in the house!

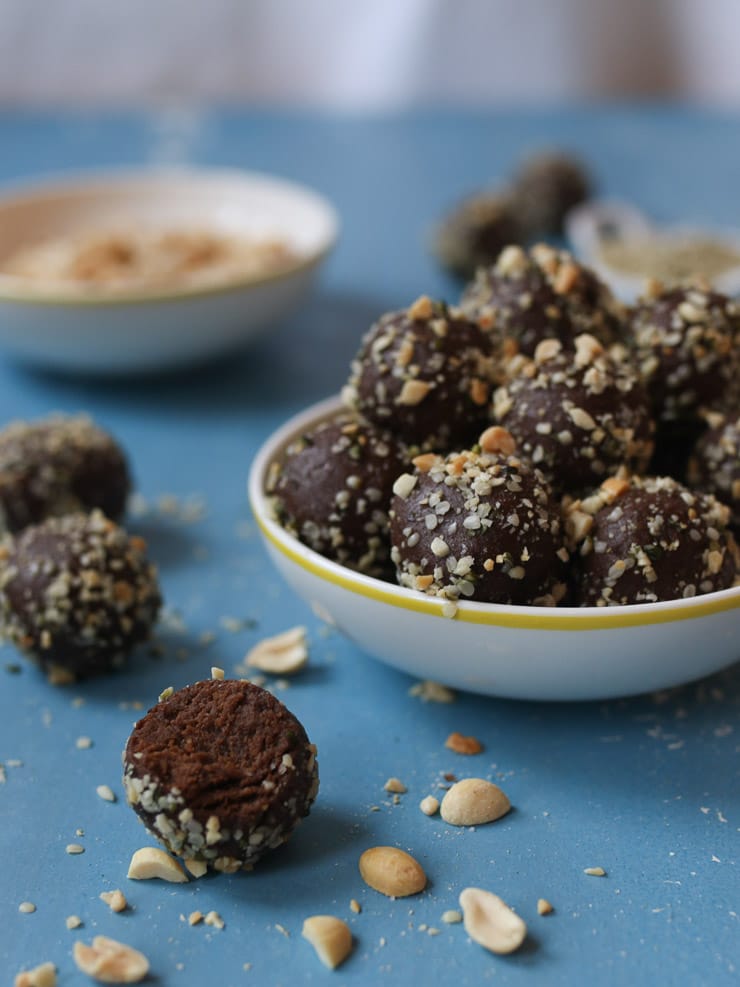
white bowl containing vegan peanut butter chocolate protein balls topped with hemp hearts and chopped peanuts with a white bowl containing additional peanuts in the background on a blue backdrop

I then add in some high fat, high protein almond flour, powdered peanut butter for fibre and protein, natural peanut butter for texture (instead of dates or maple syrup), and some flax and some hemp hearts for Omega 3s. You can also use any kind of nut butter if you prefer, but I do recommend using a natural nut butter with no added salt or sugar. These peanut butter chocolate protein balls come together in legit 10 minutes, and are naturally vegan, gluten free and loaded with high quality protein. I like to keep them in the freezer and then pull out one or two to bring with me to the gym since they will typically thaw out within an hour or so and are totally safe at room temperature for at least a week.

Peanut butter chocolate protein balls in a bowl.

Each energy boosting keto friendly protein ball contains 100 calories, 6.5 grams of healthy fat, 9 grams of protein, and only 4 grams of carbs, making them a super awesome snack to keep on hand for satisfying your hunger and satisfying your sweet tooth.

FAQ ABOUT THIS RECIPE 

Here are some questions I commonly get asked about this protein ball recipe. 

WHAT CAN I USE INSTEAD OF PEANUT BUTTER?

If you’re not a peanut butter stan or if theres an allergy concern, you can substitute for any nut butter you have on hand. Otherwise, you can also try using dates, maple syrup, honey or prunes.

how can i achieve the chocolate flavour if i don’t have chocolate protein powder?

No biggie! You can totally use whatever protein powder you have on hand (if using) and add in some cocoa powder to get the chocolate flavour that we want. If you’re impartial to making them chocolate flavour and would rather have them be on the more peanut butter-y side, you can totally eliminate this ingredient and follow the recipe as it. 

what else can i add to these protein balls?

If you want these chocolate protein balls to have more oomph, you can add to the food processor OR roll the balls in coconut flakes, sesame seeds, chia seed, cacao powder, maca powder, matcha powder. You can honestly roll these suckers in anything that meets your hearts desire! 

Do you have any other post workout snack recipes?

Absolutely! Here are some of my favourites. 

VEGAN PROTEIN BARS 3 WAYS APPLE PIE PROTEIN GRANOLA CUPS 

HIGH PROTEIN AVOCADO TOAST ENERGY BALLS WITH PEANUTS AND CHERRIES 

Now loves, let me know – what are some of your favourite post workout snacks? Leave me a comment below with your thoughts!

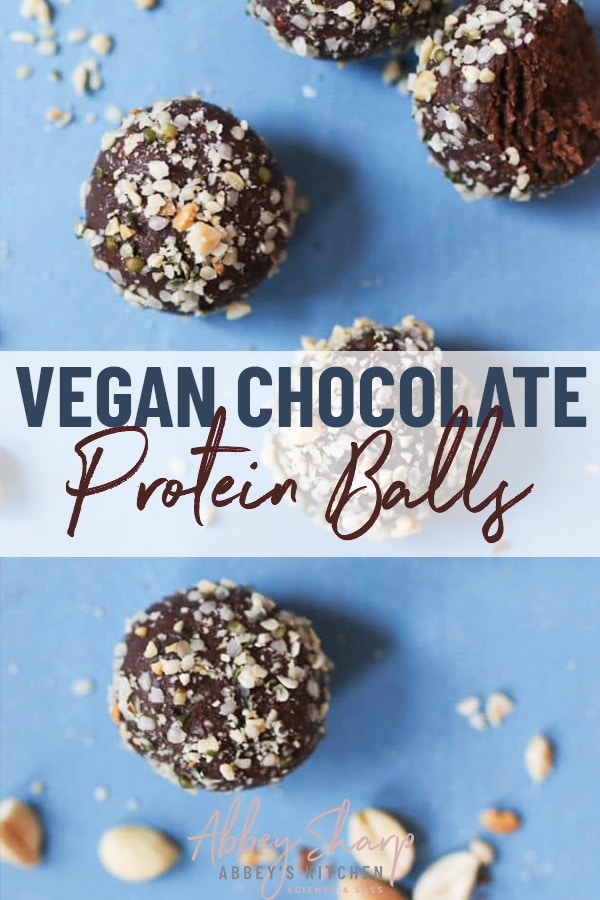
pinterest image of birds eye view of vegan chocolate and peanut butter protein balls rolled in hemp hearts and chopped peanuts on a blue background with text overlay
Peanut butter protein balls in a bowl.
Print Recipe
4.69 from 16 votes

Peanut Butter Chocolate Protein Balls Recipe

This peanut butter chocolate protein balls recipe makes for the perfect keto friendly, vegan, gluten free, low carb, and no bake snack for fuelling tired muscles after a workout!
Prep Time15 minutes mins
Total Time15 minutes mins
Course: Snack
Cuisine: American
Servings: 20 balls
Calories: 74kcal
Author: Abbey Sharp

Ingredients

Balls:

  • 3/4 cup Chocolate protein powder vegan if desired
  • 3/4 cup almond flour
  • 1/2 cup powdered peanut butter
  • 1 tablespoon ground flaxseed
  • 1/2 cup water
  • 1/2 cup natural peanut butter

Topping:

  • 2 tbsp finely chopped peanuts
  • 2 tbsp hemp hearts

Instructions

  • To a food processor, process the protein powder, almond flour, powdered peanut butter, flax, water, and natural peanut butter until it forms a smooth ball.
  • Roll into 20 balls, then roll into the peanuts and hemp hearts. Freeze for long term storage, or keep at room temp for a week.

Nutrition

Calories: 74kcal | Carbohydrates: 4g | Protein: 6g | Fat: 4g | Cholesterol: 4mg | Sodium: 54mg | Potassium: 43mg | Fiber: 2g | Vitamin A: 30IU | Calcium: 44mg | Iron: 0.4mg
Abbey Sharp

Abbey Sharp is a Registered Dietitian (RD), regulated by the Ontario College of Dietitians. She is a mom, YouTuber, Blogger, award winning cookbook author, media coach specializing in food and nutrition influencers, and a frequent contributor to national publications like Healthline and on national broadcast TV shows.
www.abbeyskitchen.com/about-abbey/

Last Updated July 26, 2020. Published April 24, 2020 By Abbey Sharp 4 Comments

Vegan Alphagetti with Hidden Veggies & Pantry Staples

This Vegan Alphagetti is packed with hidden veggies and is made with all of your go-to pantry staples to make getting a family-friendly, kid approved meal on the table fast and easy!

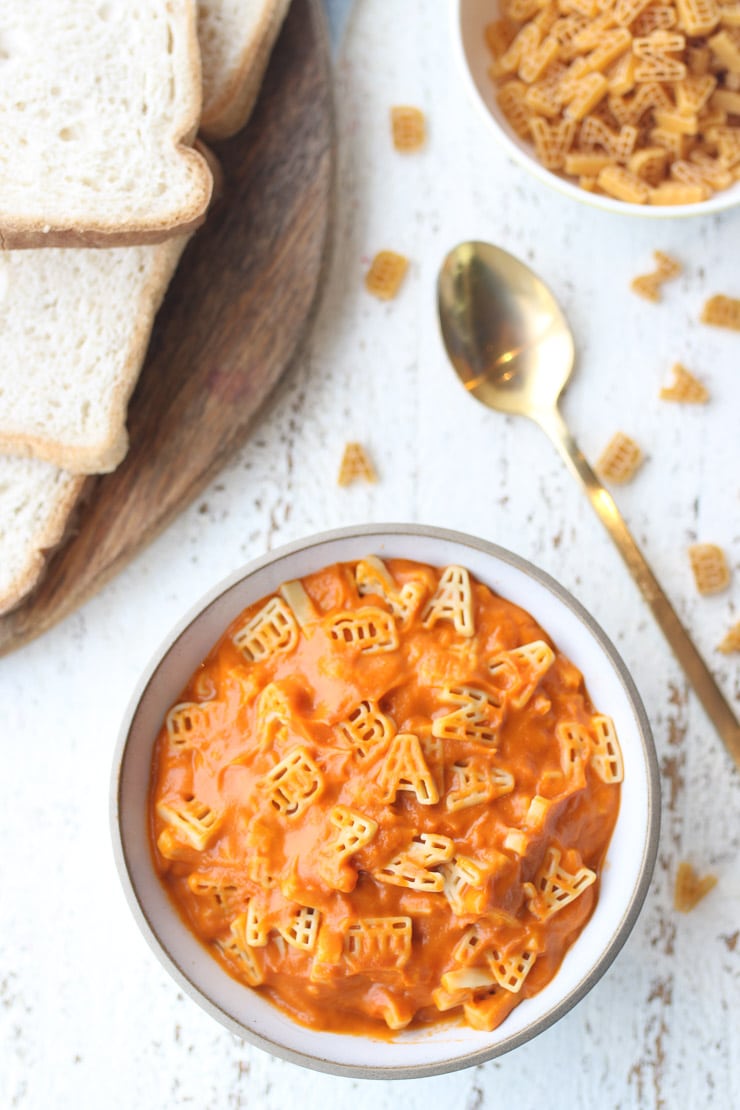
Did anyone else grow up with the nostalgic goodness that was alphagetti? I don’t know if it was the super soft pasta or the semi-sweet tomato sauce, but as a kid, I was totally obsessed. I don’t know what got me thinking about it while here in covid-19 quarantine, but I guess in general I’ve been craving lots of nostalgic comfort foods lately. This homemade copy cat vegan alphagetti recipe is actually really good for you. It’s got protein from chickpea pasta, plus lots of natural sweetness from pureed butternut squash. And no, your kids will not even know that there are extra veggies in there – it simply makes for a sweet and creamy sauce.

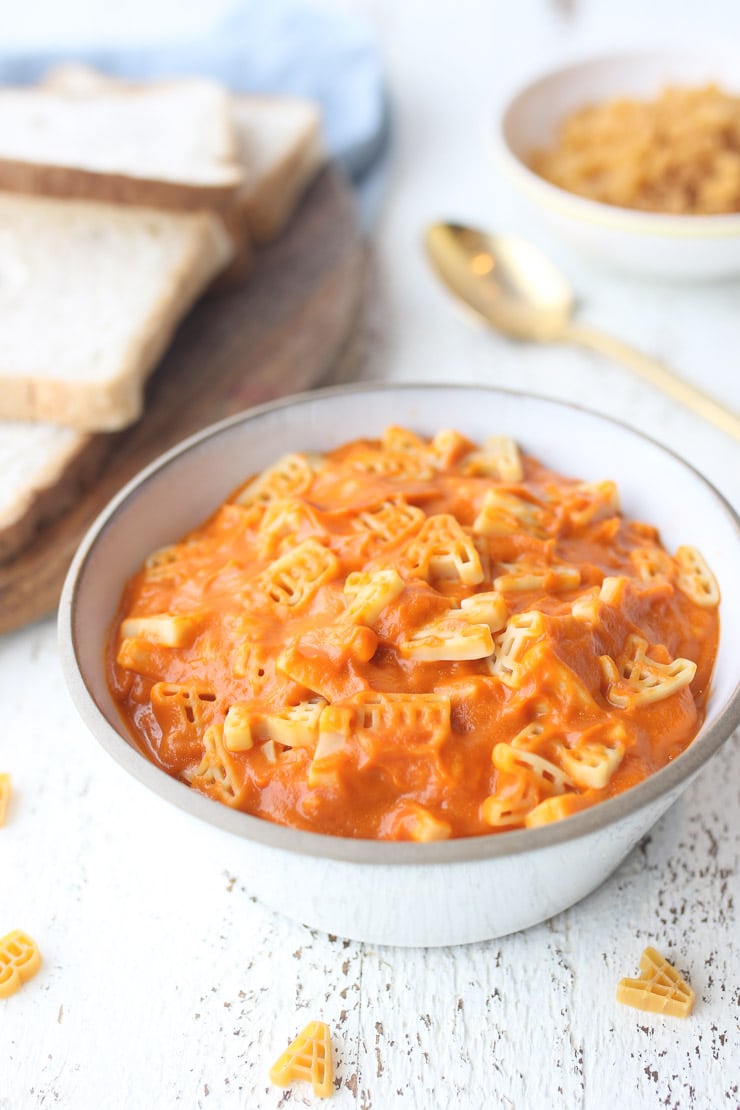
vegan alphagetti in a white bowl with bread and a gold spoon in the background

What is alphagetti?

Honestly, I do not really know if alphagetti is soup or if it’s supposed to be a pasta dish. I kinda see it as somewhere in between because it’s an extra saucy pasta dish. What I do know if that it’s totally delicious, it comes in a can, and I LOVED it when I was growing up.

I also know that the canned version by Heinz has 8 grams of sugar per 3/4 cup and who just eats 3/4 cup?!

Key ingredients to make healthy vegan alphagetti

In my effort to try to make this into a bit more of a balanced meal with protein, fibre and veggies, I made my own homemade alphagetti – AND mine is also vegan and gluten free! The key ingredients include:

Chickpea pasta – I was able to find alphabet chickpea pasta which I love for the extra fibre, and protein! If you can’t find the alphabet version, any short cut chickpea noodle will work.

Tomato sauce – Just plain canned tomato sauce is a pantry staple for me, so I always have lots on hand.

Frozen butternut squash – Definitely a staple in my house for throwing into soups or on salads. I love how easy it is because it’s already cooked.

Nutritional Yeast – This adds the cheesy flavour without any cheese. It’s also got fibre, protein and B12!

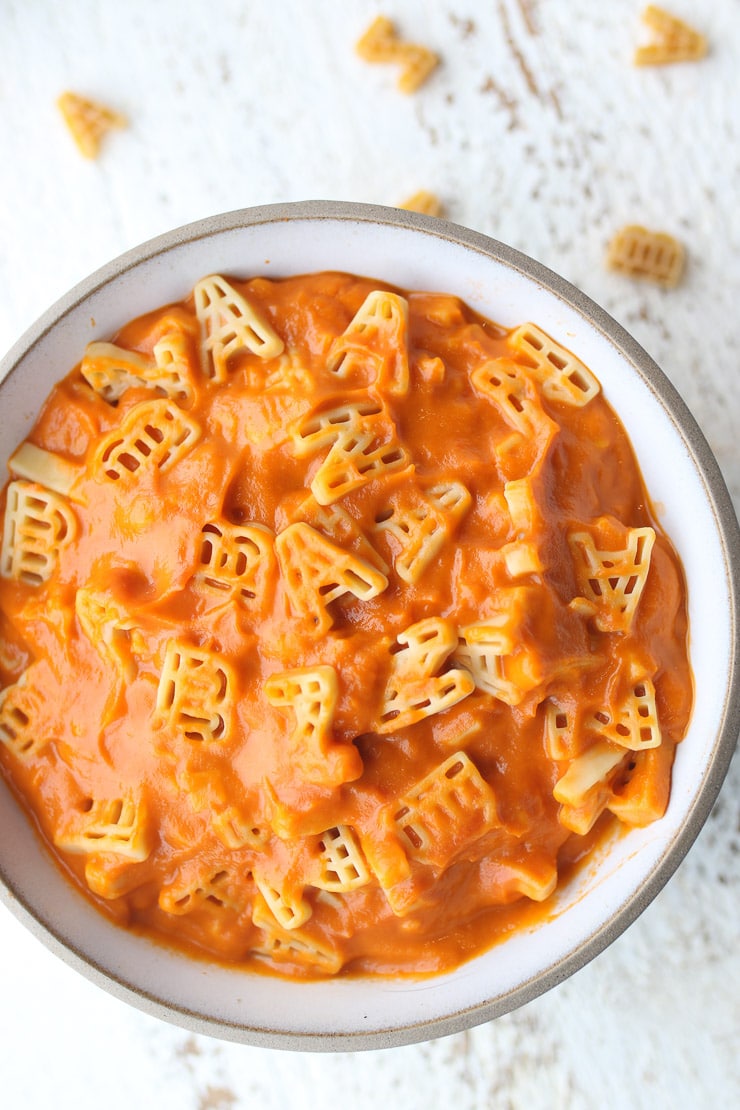
birds eye view of alphaghetti pasta in a white bowl

tips for nailing this recipe

I definitely am a fan of super creamy pasta sauces, so I think a good stand blender will help you achieve that super creamy soft texture.

I also recommend not cooking the pasta anymore once it’s been cooked separately. In other words, just get your sauce nice and hot, then add it in. You don’t want it simmering on the stove for ever or the pasta may fall apart.

faq about this recipe

Here are some commonly asked questions about this copy cat alphagetti recipe.

is this pasta gluten free?

Yes! I use chickpea pasta which is naturally gluten free and is also higher in fibre and protein than regular wheat based pasta.

is this safe for babies and toddlers?

Yes, in fact, my son ADORED it. It’s also very baby friendly because it’s very soft. Just make sure it’s not too hot when you give it to your kiddos.

birds eye view of a white bowl containing vegan alphagetti with hidden veggies and pantry staples next to a gold spoon and slices of toast

is it a good idea to hide vegetables in food?

If you want my honest answer, no I don’t like to be deceitful and not tell kids about vegetables they hate being in foods they like. However, in recipes like this, they aren’t even going to ask because the sauce just tastes like a sweet tomato sauce. If my son were to ask “hey mom, what’s in this?” I would 100% tell him. You don’t want to build a distrustful relationship around food. But my kid can only put like a few words together in short sentences so I think I’m probably okay.

can i freeze this if i batch prep?

Yes, you can freeze the alphagetti once it’s cooled. Simply pop it into a freezer bag, lay flat and put it into your freezer for up to 3 months.

Do you have any other easy recipes using pantry staples?

You bet I do! I have been pumping them out because hey, we all have a lot of pantry and freezer foods to go through. Here are some of my favourites:

TOMATO AVOCADO TUNA MELT 

PIZZA EGG MUFFINS 

VEGAN LENTIL BUTTERNUT SQAUSH SOUP

VEGAN CARROT CAKE BAKED OATMEAL 

What are you making with your pantry staples? Leave me a comment below with your recipe ideas!

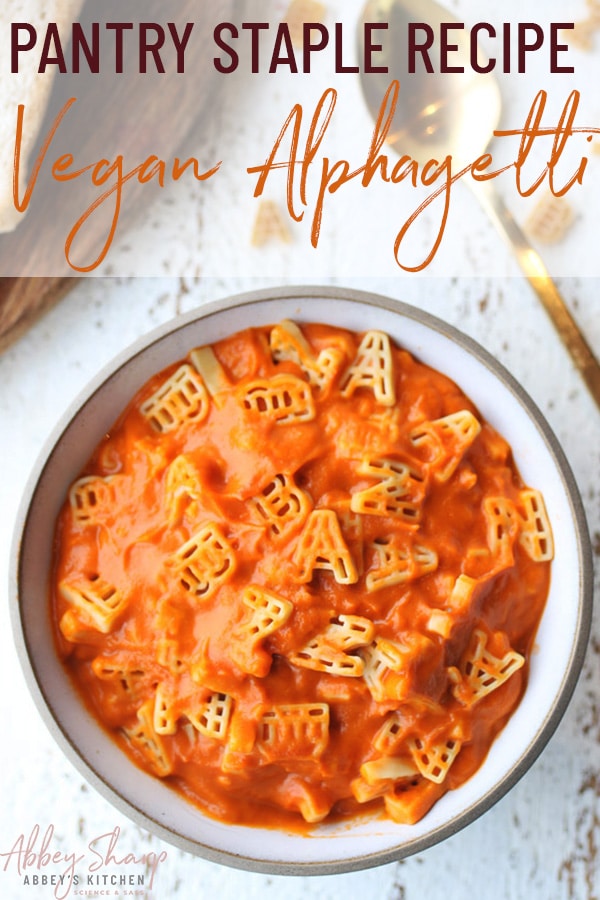
pinterest image of vegan one pot hidden vegetable alphagetti meal in a white bowl next to a gold spoon with text overlay

Print Recipe
5 from 1 vote

VEGAN ALPHAGETTI WITH HIDDEN VEGGIES & PANTRY STAPLES

This Vegan Alphagetti is packed with hidden veggies and is made with all of your go-to pantry staples to make getting a family-friendly, kid approved meal on the table fast and easy!
Prep Time5 minutes mins
Cook Time20 minutes mins
Total Time25 minutes mins
Course: Main Course
Cuisine: American
Diet: Vegan
Servings: 4
Calories: 554kcal
Author: Abbey Sharp

Ingredients

  • 2 cups chickpea alphabet pasta
  • 1 tbsp extra virgin olive oil
  • 1 small onion finely diced
  • 2 cups frozen butternut squash or finely diced squash cooked al dente
  • 2 ½ cups no added salt plain tomato sauce
  • 1 tbsp vegan butter
  • 3 tbsp unsweetened almond milk
  • 2 tbsp nutritional yeast
  • 1 tbsp maple syrup
  • ¼ tsp paprika
  • ¼ tsp salt or to taste

Instructions

  • Cook the pasta according to package directions. Drain and set aside.
  • In a medium saucepot, heat the olive oil over medium heat.
  • Add the onion and saute for 3 minutes, until it begins to soften.
  • Add the squash and tomato sauce, cover and cook on medium low for 15 minutes until the squash is tender enough that when pricked with a fork, it falls apart.
  • Add the butter, almond milk, nutritional yeast, maple, paprika and salt.
  • Transfer to a blender and puree until very smooth.Transfer back to the pot and add in the cooked pasta. Stir until combined. Serve hot.

Video

Nutrition

Calories: 554kcal | Carbohydrates: 90g | Protein: 34g | Fat: 14g | Saturated Fat: 1g | Trans Fat: 1g | Sodium: 1114mg | Potassium: 884mg | Fiber: 22g | Sugar: 23g | Vitamin A: 8300IU | Vitamin C: 27mg | Calcium: 162mg | Iron: 14mg
Abbey Sharp

Abbey Sharp is a Registered Dietitian (RD), regulated by the Ontario College of Dietitians. She is a mom, YouTuber, Blogger, award winning cookbook author, media coach specializing in food and nutrition influencers, and a frequent contributor to national publications like Healthline and on national broadcast TV shows.

www.abbeyskitchen.com/about-abbey/

Last Updated October 4, 2021. Published April 20, 2020 By Abbey Sharp 5 Comments

Vegan Bean & Frozen Vegetable Soup with Pantry and Freezer Staples

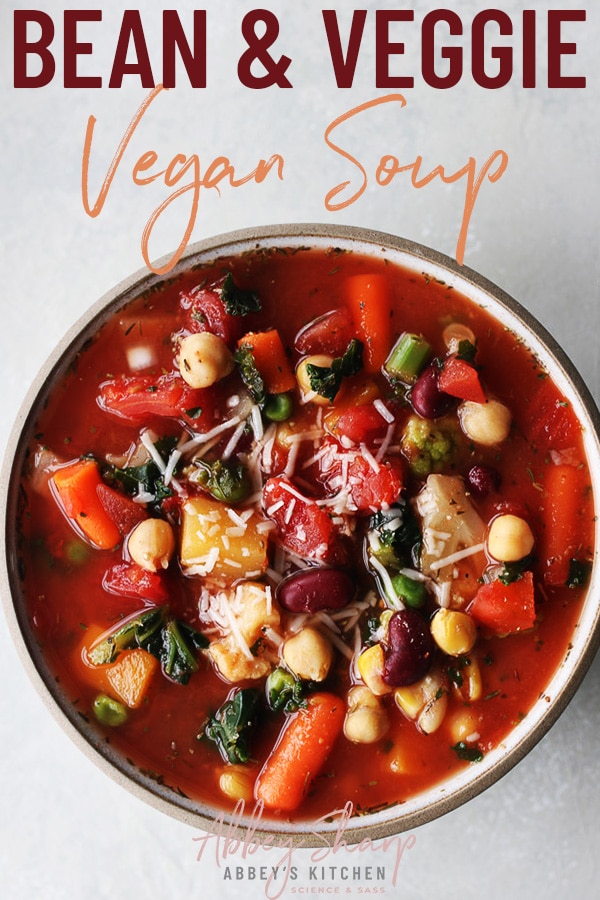
This Vegan Bean & Frozen Vegetable Soup is an easy recipe to use up your pantry and freezer staples for those of you who stocked up for Covid-19 social isolation.

If you’re struggling with meal planning thanks to Coronavirus and social isolation and you’re stuck with a TON of frozen vegetables and canned goods, know that I’ve totally got your back. I myself have a lot of pantry and freezer staples to use up, so I’m constantly trying to figure out what to do with them that will still taste good.

Now canned beans is not a huge problem. Canned beans always taste pretty good to me. But man, frozen vegetables can be a STRUGGLE. I tried first to pan-fry them at a super high heat to get them crispy, but they ended up being a soggy mess. Then I tried to roast them at a super high heat to get them crispy, soggy again. I was really struggling obviously so I figured soup was a safe choice. And, lo and behold, it was! This vegan bean and frozen vegetable soup is crazy simple, nutrient packed and a great way to use up that massive freezer full of frozen veggies.

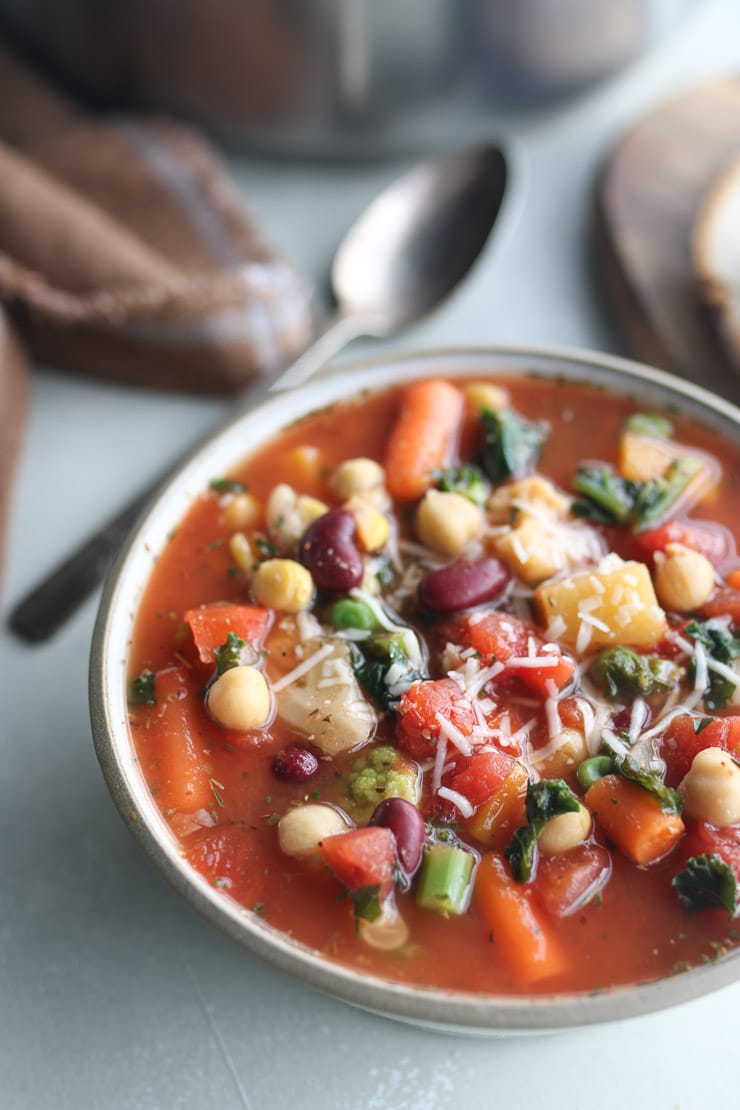
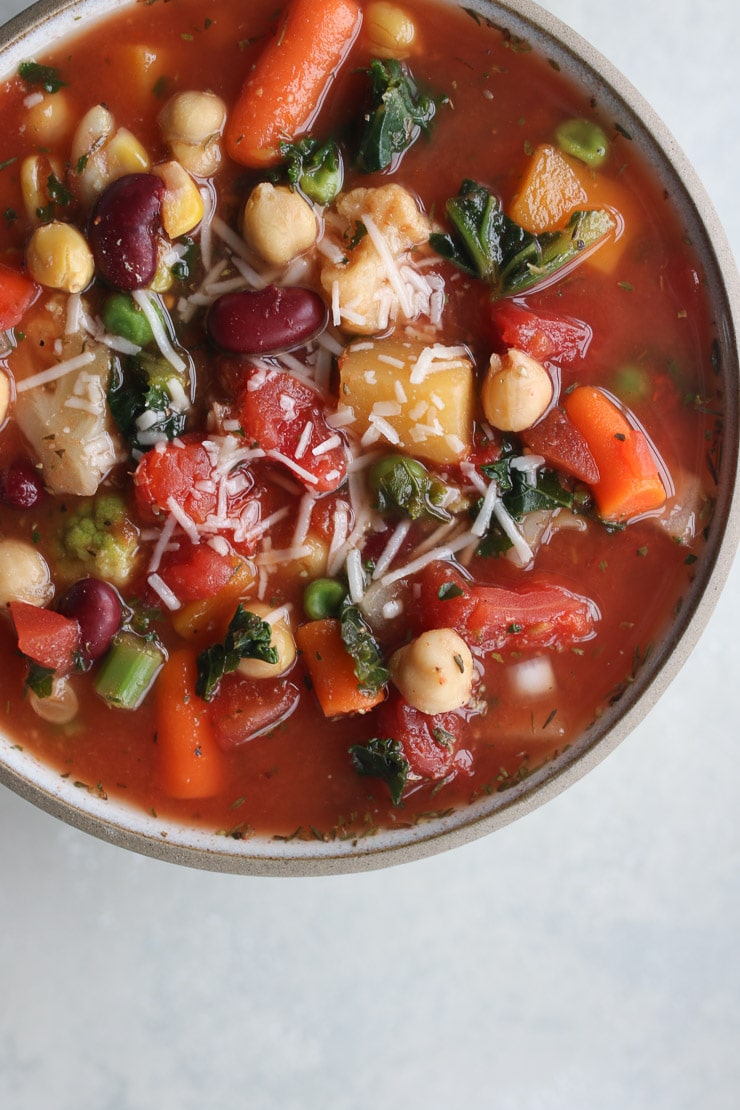
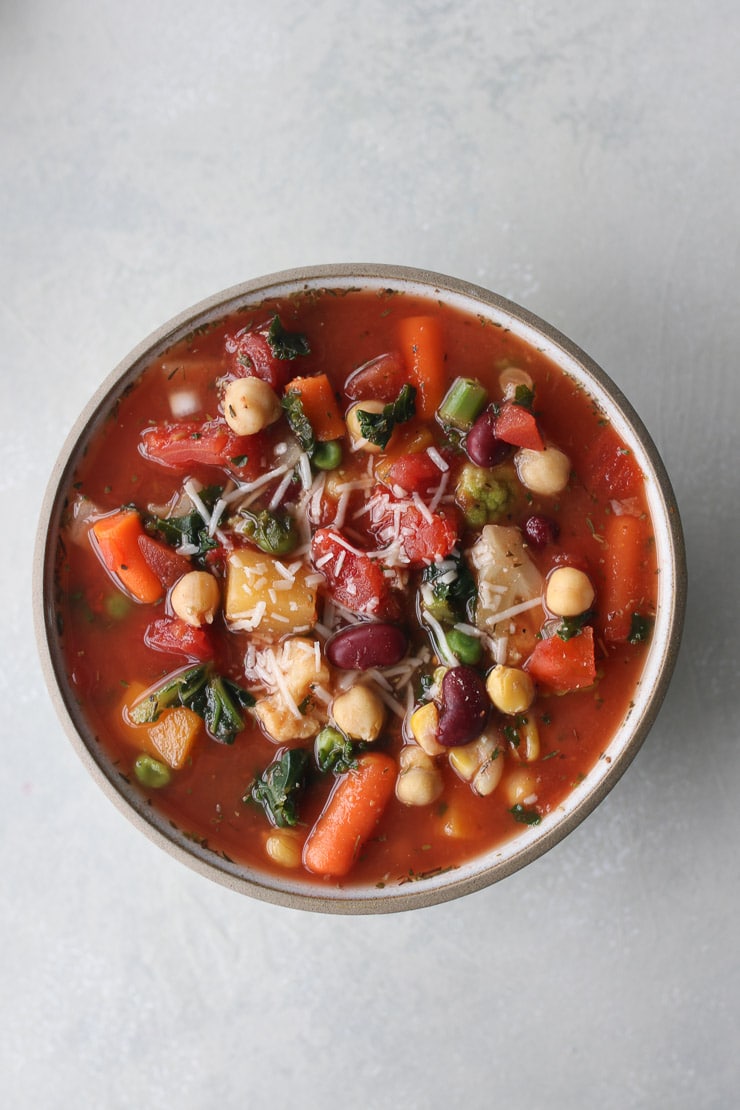
bean & frozen veggie soup in a bowl topped with cheese

Key ingredients for Vegan Bean & Frozen Vegetable Soup

Well, this is going to be an embarrassingly small list, but that’s the beauty of making these crazy easy freezer and pantry staple meals!

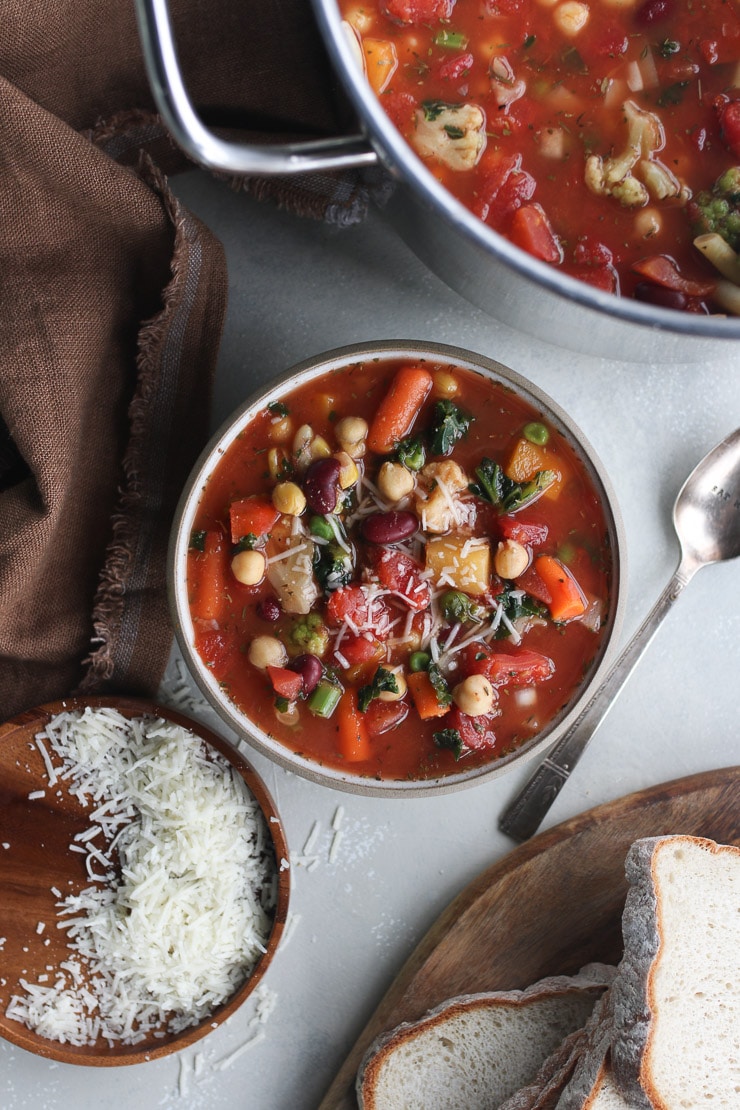
Canned Beans – I used chickpeas and red kidney beans but you can totally use whatever you have on hand.

Frozen Vegetables – I used a bit of cauliflower, peas, corn, squash, carrots, and kale, but again, experiment with what is going on in your freezer right now.

Diced tomatoes – This is to add the tomato flavour without any fresh tomatoes needed.

Vegetable juice – I like using a low sodium variety as some of these veggie juices are really high in salt. I typically have V8 in my pantry, but any tomato based juice will work.

birds eye view of pantry bean & frozen vegetable soup topped with vegan cheese

Top Recipe tips

Whatever you do, make sure your frozen vegetables were stored correctly when they were frozen. If you let frozen vegetables thaw, then freeze them again, they will end up coated in water and moisture which can result in soggy vegetables. BOO.

Also, I strongly suggest choosing frozen vegetables that are around the same size as each other. Feel free to cut up some pieces to make them more uniform in shape. If your vegetables are different sizes, then stagger when you pop them into the pot. Broccoli, cauliflower and larger pieces of carrots should go in first, smaller bits like corn, bean pieces and peas next, and any bits of kale or spinach can go in last.

birds eye view of pantry soup recipe with beans & vegetables in a bowl surrounded by vegan cheese, a spoon, bread, and a pot with soup

faq about this recipe

Here are some of the most likely common questions about this recipe.

what vegetables work best in the soup?

The best is the classic carrot, corn and pea combination, but I also love the cut green beans!

Do any vegetable not work well in this soup?

I would avoid any “Asian style” blends or anything that has bell peppers (these get super soggy) or raw onions (since you’re putting them in without being sautéed in oil.

birds eye view of vegan bean and frozen vegetable soup in a white bowl garnished with vegan cheese

can i freeze this vegetable soup?

Yes, this soup is very freezable.

do you have any other great recipes with pantry or freezer staples?

You bet! I have been pumping them out like crazy! Here’s some favourites:

VEGAN LENTIL BUTTERNUT SQUASH SOUP

KOREAN SAVOURY OATS WITH A RUNNY EGG

MEXICAN CHICKEN TORTILLA SOUP

VEGAN UNSTUFFED CABBAGE ROLLS IN A BOWL

What are you making with your frozen vegetables? Have you tried making this vegan bean & frozen vegetable soup?

pinterest image of vegan soup made with beans and vegetables in a white bowl topped with vegan cheese with text overlay

Print Recipe
5 from 5 votes

Vegan Bean & Frozen Vegetable Soup

This Vegan Bean & Frozen Vegetable Soup is an easy recipe to use up your pantry and freezer staples for those of you who stocked up for Covid-19 social isolation.
Author: Abbey Sharp

Ingredients

  • 1 tbsp extra virgin olive oil1 onion finely diced
  • 3 cloves garlic finely minced
  • 1 28 oz can low sodium diced tomatoes
  • 4 c low sodium vegetable broth
  • 2 cups canned low sodium vegetable juice or tomato juice
  • 1 tsp dried oregano
  • 1 tsp dried thyme
  • 1/4 cup nutritional yeast
  • 4 tsp brown sugar or maple syrup or to taste
  • 8 cups frozen vegetables of your choice
  • 1 19 oz can low sodium chickpeas drained and rinsed
  • 1 19 oz can low sodium red kidney beans drained and rinsed
  • Ground black pepper and sea salt to taste
  • Vegan parmesan style cheese for serving (optional)

Instructions

  • Heat the olive oil in a large soup pot over medium heat. Add the onion and garlic and cook until softened and fragrant, about 3 minutes.
  • Add the diced tomatoes, juice, broth, thyme, oregano..... Allow to cook for 5 minutes.
  • Add in the frozen vegetables, chickpeas, kidney beans and cook for an additional 5 minutes or until all of the vegetables are warmed through and softened.
  • Season with salt and pepper to taste and top with vegan cheese, if desired.
Abbey Sharp

Abbey Sharp is a Registered Dietitian (RD), regulated by the Ontario College of Dietitians. She is a mom, YouTuber, Blogger, award winning cookbook author, media coach specializing in food and nutrition influencers, and a frequent contributor to national publications like Healthline and on national broadcast TV shows.
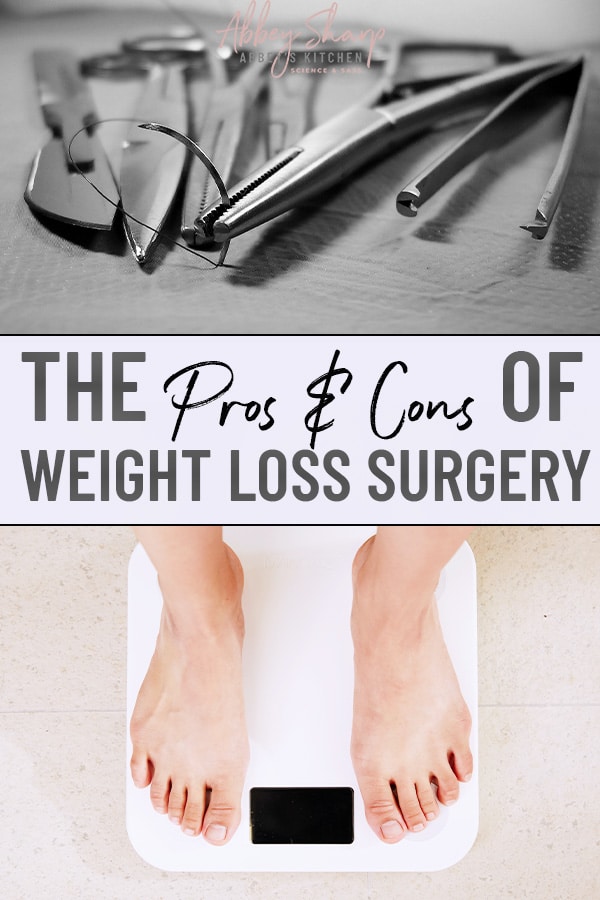
www.abbeyskitchen.com/about-abbey/

Last Updated October 23, 2020. Published April 17, 2020 By Abbey Sharp 2 Comments

Vegan Oatmeal Pudding with Pantry Staples

This Vegan Oatmeal Pudding is no rice take on the classic rice pudding that is naturally gluten free and fibre rich and made with pantry staples!

When I was a kid, my mom used to regularly make me rice pudding since it was a cheap and cheerful way to use up any leftover rice she had made for the week. To this day it remains a real favourite of mine, and I’ve since started making it a lot at home for my family who equally adores the classic treat. But with us all hunkering down for Coronavirus social isolation, I’ve been really focusing in on what ingredients I have an abundance of in the pantry. One of my big staples is definitely oatmeal.

I love oatmeal for breakfast, and baking, but what if we could make a pudding out of oats that was equally comforting and dreamy?

close up of vegan oatmeal pudding on a gold spoon topped with berries and raisins

What makes this vegan oatmeal pudding different than just oatmeal?

It’s all about the double cooking process. The first cooking step yields oatmeal like you would normally have for breakfast. But the second cook yields a SUPER creamy thick pudding like consistency that totally feels like dessert.

Key ingredients for this recipe

This recipe is perfect for those of us socially isolating because it’s literally just all your classic pantry staples.

Lake Flake Oats – You can use quick cook in a pinch but you want a little bit of texture like you would in rice pudding and you get that from the more whole oats. These can definitely be gluten free if you need an option that is safe for gluten intolerance and celiac.

Almond Milk- You can use any non dairy milk or dairy milk if you don’t want this to be vegan.

Raisins – This is optional, but in my books it’s a must!

Cinnamon – I like LOADS of cinnamon on mine.

two dessert cups with rice pudding made with oatmeal topped with berries with syrup and blueberries in the background

FAQ about this recipe

Here are some likely common questions and answers about this super simple pantry recipe.

how long will this last in the fridge?

Depends how many hungry people you’re feeding LOL. No but really, about 5 days.

Can i freeze this pudding?

I don’t recommend freezing it but the recipe is so fast and easy you can totally make it on the fly.

Can i make this chocolate oatmeal pudding?

birds eye view of oatmeal pudding dessert topped with raspberries and blueberries

Definitely, just add a teaspoon or two of cocoa powder or a small handful of dark chocolate chips in while you’re cooking with the almond milk.

do you have any other easy oatmeal dessert recipes?

Yes, as I said, oatmeal is the one ingredient I didn’t need to stock up on for my quarantine because I already had SOOOO MUCH. Check out these recipes for some of my favourites.

PINA COLADA PROTEIN OATMEAL (PROATS)

VEGAN CHOCOLATE ZUCCHINI BAKED OATMEAL

OATMEAL COOKIE CUPS WITH CHOCOLATE MOUSSE

What easy healthy desserts are you making to boost moods while in social isolation? Leave me a comment below with your thoughts!

two dessert cups filled with vegan pantry staple oatmeal pudding with fresh berries and maple syrup in the background and text overlay

Print Recipe
5 from 1 vote

Vegan Oatmeal Pudding with Pantry Staples

This Vegan Oatmeal Pudding is no rice take on the classic rice pudding that is naturally gluten free and fibre rich and made with pantry staples!
Author: Abbey Sharp

Ingredients

  • 1 1/2 cups gluten free large flake oats
  • 2 3/4 cups waterGenerous pinch of salt
  • 1 1/2 cups unsweetened vanilla almond milk
  • 1 tsp cinnamon1
  • ½ tbsp vanilla extract
  • 1/2 cups RaisinsMaple syrup to taste
  • Berries for serving
  • Cinnamon for serving

Instructions

  • Combine the oats, water and salt in a pot and bring to a boil. Reduce to simmer, cover and cook for about 15 minutes until the oats are tender, and the water is absorbed. Allow to cool for 10 minutes in the pot.
  • Add in the almond milk, cinnamon, vanilla, raisins and maple, and bring back to a boil. Reduce to low and cook for another 15 minutes, stirring occasionally until it reaches a soft, tender rice pudding like consistency.
  • Serve topped with berries and an extra sprinkle of cinnamon.
Abbey Sharp

Abbey Sharp is a Registered Dietitian (RD), regulated by the Ontario College of Dietitians. She is a mom, YouTuber, Blogger, award winning cookbook author, media coach specializing in food and nutrition influencers, and a frequent contributor to national publications like Healthline and on national broadcast TV shows.
www.abbeyskitchen.com/about-abbey/
  • Previous Page
  • Go to page 1
  • Interim pages omitted …
  • Go to page 43
  • Go to page 44
  • Go to page 45
  • Go to page 46
  • Go to page 47
  • Interim pages omitted …
  • Go to page 89
  • Next Page

Get started with

Eight Free Recipe Books

From the co-founder of Neue Theory and creator of the Hunger Crushing Combo

Sign me up!
Abbey smiling at table
Abbey Sharp

“Foods may never be nutritionally equal. But we can make them morally equal by recognizing that our worth is never determined by what's on our plate.”

— Abbey Sharp, RD About Abbey ◥

Books

  • HCC™
  • Mindful Glow
  • Free E-Books

Blog

  • Nutrition
  • Recipes
  • Motherhood
  • Life

Explore

  • Neue Theory™
  • Bite Back
  • YouTube

Abbey

  • About
  • Coaching
YouTube TikTok Instagram Facebook X Pinterest
Abbey Sharp - The No BS Dietitian From Abbeys Kitchen

© Abbey's Kitchen 2026  All Rights Reserved •  ACCESSIBILITY STATEMENT •  Privacy Policy

This site uses cookies. By continuing to browse the site, you are agreeing to the use of cookies Accept Privacy Policy
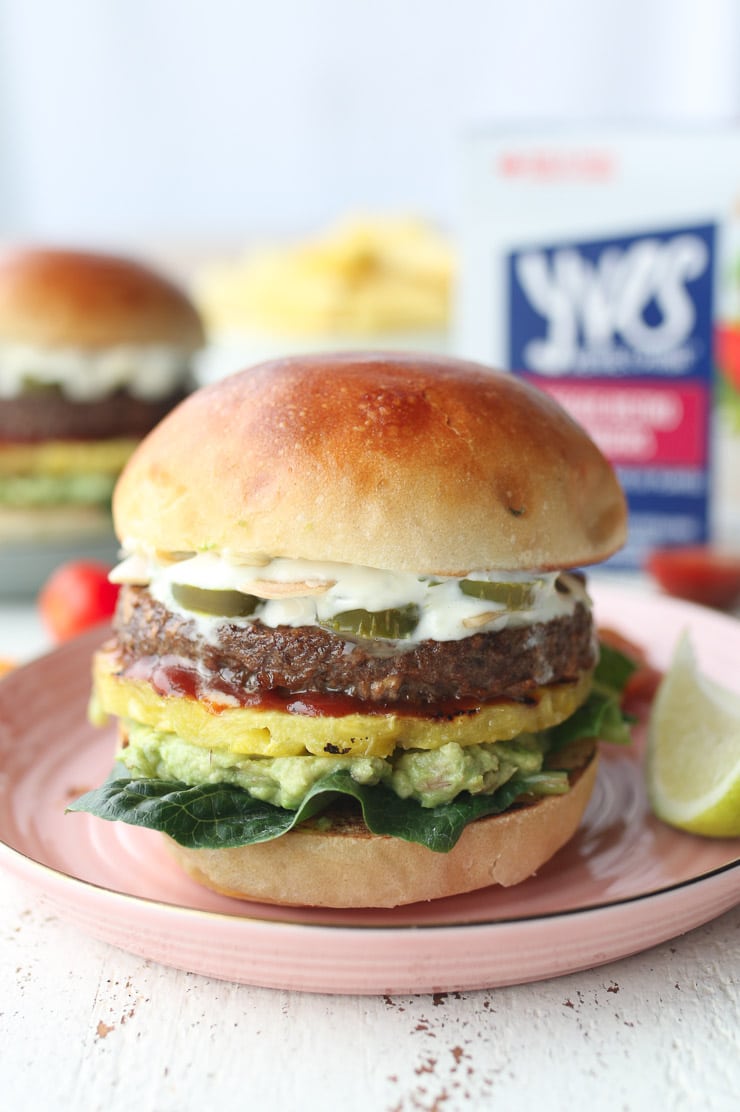
Privacy & Cookies Policy

Privacy Overview

This website uses cookies to improve your experience while you navigate through the website. Out of these, the cookies that are categorized as necessary are stored on your browser as they are essential for the working of basic functionalities of the website. We also use third-party cookies that help us analyze and understand how you use this website. These cookies will be stored in your browser only with your consent. You also have the option to opt-out of these cookies. But opting out of some of these cookies may affect your browsing experience.
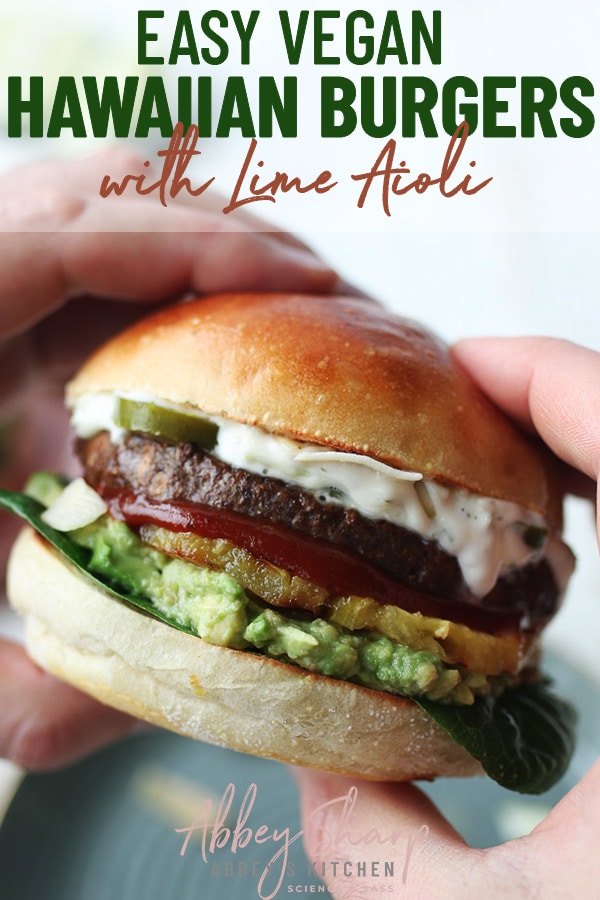
Necessary
Always Enabled
Necessary cookies are absolutely essential for the website to function properly. This category only includes cookies that ensures basic functionalities and security features of the website. These cookies do not store any personal information.
Non-necessary
Any cookies that may not be particularly necessary for the website to function and is used specifically to collect user personal data via analytics, ads, other embedded contents are termed as non-necessary cookies. It is mandatory to procure user consent prior to running these cookies on your website.
SAVE & ACCEPT

Rate This Recipe

Your vote:


A rating is required
A name is required
An email is required