• Skip to main content

Abbey's Kitchen

Healthy Recipes, Nutrition Myth Busting, Healthy Eating Tips

  • Books
    • HCC™
    • The Mindful Glow Cookbook
    • Recipe eBooks
      • Family
      • Hypothyroidism
      • BLW
      • Vegan Week 1
      • Vegan Week 2
      • Vegan Week 3
      • Keto
      • Gluten Free Week 1
      • Gluten Free Week 2
      • Fitness
      • Paleo
  • Blog
    • Nutrition
    • Recipes
    • Motherhood
    • Life
  • Explore
    • Neue Theory™
    • Bite Back With Abbey Sharp
      • Apple Music
      • Spotify
      • Amazon Music
    • YouTube
  • Abbey
    • About
    • Coaching
    • Contact

Abbey Sharp

Last Updated April 28, 2024. Published May 3, 2024 By Abbey Sharp 31 Comments

Granola Cups Recipe with Chia Pudding, Peaches, & Blueberries | Vegan

Close up of a granola cup with fruit on top.

This decadent vegan chia pudding granola cups recipe is packed with the hunger crushing combination of fibre, protein and healthy fats. They make a super satisfying one-bite breakfast that feels like a decadent dessert but is a surprisingly healthy way to start your day.

Overhead photo of multiple chia pudding granola cups.

I’m a busy girl. My mornings start super early and my days end pretty late, so there’s often no time for lengthy, leisurely meals. Having said that, I’m a dietitian. I know how important it is to make time for good nutrition, particularly for a healthy balanced breakfast. How I start the day can literally make or break my mood. Maybe I’m dramatic, but food is that important to me.

Table of contents

  • Why This Recipe Works
  • Key Ingredients
  • How To Make This Recipe
  • Expert Tips
  • Recipe FAQs
  • More Recipes You Might Like

Why This Recipe Works

This Chia Pudding Granola Cups Recipe with Peaches & Blueberries have become the way to kick off any day with a solid smile. I also love these granola cups because

  • They’re high in fiber
  • They’re kid friendly
  • They’re vegan
  • They’re absolutley DELICIOUS

Key Ingredients

Chia Seeds – Chia seeds are one of my “holy grail” foods. They are packed with plant-based protein, fiber, and omega-3 fatty acids. They also have a very neutral taste, making them easy to sneak into recipes like these granola cups.

Bran Cereal – By opting for any plain bran cereal you like, it adds even more fiber to this recipe without adding a ton of calories.

Peaches & Blueberries – This fruit combo is truly iconic! The sweetness from the peaches with the semi-tartness of blueberries just creates a party in my mouth. This also adds a variety of vital micronutrients and antioxidants.

Close up photo of chia pudding granola cups with fresh fruit on top.

How To Make This Recipe

Step 1: In a small bowl, whisk together the coconut almond milk, chia seeds, and maple syrup until combined. Let it sit for 5-10 minutes, then stir to ensure it doesn’t clump together. Cover and chill in the fridge for at least 3 hours, but ideally, overnight.

Step 2: The next day, preheat your oven to 350 F. In the meantime, in a medium bowl, mix together all of the ingredients in the granola cups until thoroughly mixed through.

Step 3: Grease 12 muffin tins with non-stick cooking spray and divide the mixture between the tins. Using the bottom of a cup, press the mixture down to form a flat surface, then use your fingers to gently press down in the centre and press the cereal up the sides of the cups. Make sure there is at least a few millimeters of Kellogg’s® All-Bran Original® on the bottom and all around on the sides.

Step 4: Bake for 10-12 minutes, or until the sides brown nicely. Cool completely for at least 1-2 hours.

Step 5: Once cool, very carefully remove the cups from the muffin tins, loosening them gently with a palette knife.

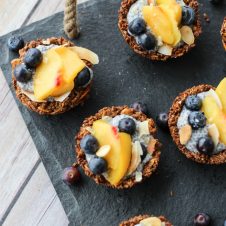
Step 6: Add a few spoonfuls of chia pudding to each cereal cup, then top with the peaches, blueberries, coconut, almonds, and candied ginger. Enjoy at room temperature.

Expert Tips

I personally prep my chia pudding at least one night before but could not be easier to put together. However, if you’re a little more crunched for time, let it chill, covered, in the fridge for 3 hours. It’s also so easy to make, seriously, if you can mix together coconut almond milk with chia seeds and the sweetener of your choice, you can make thick, luscious vegan chia pudding.

Recipe FAQs

Is this granola cups recipe easy to prep?

Absolutely!! I always bake off a bunch of these granola cups on Sunday afternoon so by the time I’m scrambling at 7 AM on Tuesday, I know I can easily get my fix.

Can I make this recipe gluten free?

If you can find a gluten-free bran cereal, that would make this recipe friendly for those with a gluten intolerance/allergy. Also, just double check packaged foods to make sure there are no added gluten products.

How can I personally customize this recipe?

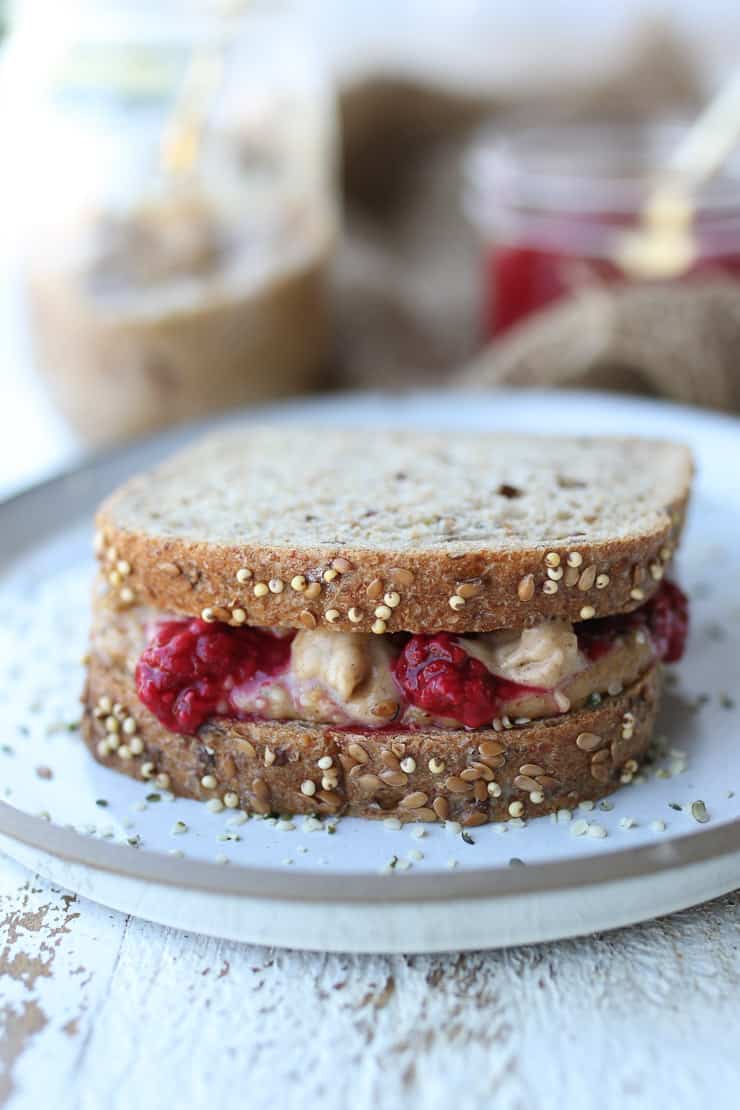
You can totally switch up the fruit in this recipe!! I feel like strawberries or raspberries would also be totally awesome to add on top of these granola cups.

Angled photo of multiple chia pudding granola cups with fresh fruit on top on a black serving platter.

More Recipes You Might Like

If you’re looking for more quick and delicious vegan breakfast recipes, like this granola cups recipe, check out these recipes below –

  • OATMEAL BREAKFAST BARS WITH BERRIES (VEGAN)
  • VEGAN CARROT CAKE BAKED OATMEAL
  • PEANUT BUTTER & JELLY VEGAN BREAKFAST COOKIES
  • VEGAN BREAKFAST CASSEROLE

What are your favourite on the go breakfast recipes? Have you tried making vegan chia pudding? What else would you fill this granola cups recipe with? Leave me a comment below! I would love to hear your ideas!

Overhead photo of multiple chia pudding granola cups.
Print Recipe
4 from 3 votes

Granola Cups Recipe with Chia Pudding, Peaches, & Blueberries | Vegan

These decadent vegan chia pudding granola cups are packed with the hunger crushing combination of fibre, protein and healthy fats. They make a super satisfying one-bite breakfast that feels like a decadent dessert but is a surprisingly healthy way to start your day.
Prep Time20 minutes mins
Cook Time10 minutes mins
Total Time30 minutes mins
Course: Dessert
Cuisine: American
Servings: 6 (2 Cups Each)
Calories: 416kcal
Author: Abbey Sharp

Ingredients

Chia Pudding:

  • 1 cup unsweetened coconut almond milk
  • 3 1/2 Tbsp chia seeds
  • 1 tsp maple syrup or to taste

Cups:

  • 1/4 cup mashed ripe banana
  • 1 Tbsp maple syrup
  • 2 tbsp coconut sugar
  • 1/4 cup coconut oil
  • 1/4 cup natural almond butter
  • 1/2 tsp vanilla
  • 1 tsp cinnamon
  • 1/4 tsp ginger
  • 1/4 tsp salt
  • 2 1/4 cup Bran Cereal
  • 1/2 cup unsweetened coconut
  • 1/2 cup sliced almonds chopped

Topping:

  • 2 peaches peeled and thinly sliced
  • 1/3 cup blueberries
  • 2 tbsp toasted shaved coconut
  • 2 tbsp toasted sliced almonds
  • 1 tbsp candied crystallized ginger finely minced

Instructions

  • In a small bowl, whisk together the coconut almond milk, chia seeds, and maple syrup until combined. Let it sit for 5-10 minutes, then stir to ensure it doesn’t clump together.
  • Cover and chill in the fridge for at least 3 hours, but ideally, overnight.
  • The next day, preheat your oven to 350 F.
  • In a medium bowl, mix together all of the ingredients in the granola cups until thoroughly mixed through.
  • Grease 12 muffin tins with non-stick cooking spray and divide the mixture between the tins. Using the bottom of a cup, press the mixture down to form a flat surface, then use your fingers to gently press down in the centre and press the cereal up the sides of the cups. Make sure there is at least a few millimeters of Kellogg’s® All-Bran Original® on the bottom and all around on the sides.
  • Bake for 10-12 minutes, or until the sides brown nicely. Cool completely for at least 1-2 hours.
  • Once cool, very carefully remove the cups from the muffin tins, loosening them gently with a palette knife.
  • Add a few spoonfuls of chia pudding to each cereal cup, then top with the peaches, blueberries, coconut, almonds and candied ginger. Enjoy at room temperature.

Nutrition

Calories: 416kcal | Carbohydrates: 41g | Protein: 10g | Fat: 29g | Saturated Fat: 13g | Polyunsaturated Fat: 5g | Monounsaturated Fat: 8g | Trans Fat: 1g | Sodium: 172mg | Potassium: 612mg | Fiber: 14g | Sugar: 17g | Vitamin A: 585IU | Vitamin C: 10mg | Calcium: 215mg | Iron: 6mg
Abbey Sharp

Abbey Sharp is a Registered Dietitian (RD), regulated by the Ontario College of Dietitians. She is a mom, YouTuber, Blogger, award winning cookbook author, media coach specializing in food and nutrition influencers, and a frequent contributor to national publications like Healthline and on national broadcast TV shows.

www.abbeyskitchen.com/about-abbey/

Last Updated April 26, 2024. Published May 1, 2024 By Abbey Sharp Leave a Comment

Health Benefits of Black Coffee | A Registered Dietitian’s Review

Close up of black coffee with coffee beans in the background.

Are there any health benefits of black coffee or does it do more harm than good? We take a look at the evidence and break down 10 common health claims of drinking coffee. 

Close up image of black coffee with coffee beans in the background.

Let’s kick things off by discussing my best frenemy and morning routine essential, caffeine. Love it, hate it, need it, or not. There’s a lot to unpack about the health benefits of black coffee. For starters, what is caffeine? 

Caffeine is a natural stimulant that 80% of the world’s population consume via substances like coffee, tea, energy drinks, soft drinks and chocolate. Most of us drink coffee to feel more awake, energized, and alert. Some of us don’t even feel like ourselves without a hit. This is because caffeine works by blocking the neurotransmitter adenosine, which is responsible for making you feel tired while also stimulating our energizing neurotransmitters adrenaline, dopamine and norepinephrine. Love me some neurotransmitter stimulation in the AM.

Now considering the frequency of consumption, it’s no surprise that caffeine is one of the most researched edible substances on the planet, with most authorities suggesting that it is safe to consume up to 400mg of caffeine a day – which is equivalent to about 4 cups of coffee. Why the cap? Well like all substances, its possible to get too much of a good thing. And in wellness culture, theres a lot of chatter about coffee being bad for your health. So today we’re going to break down some common health claims and concerns. 

Claim #1: Coffee Makes you Poop

Most of us can appreciate that too much coffee can have you sneaking out of your morning zoom early. In fact, one study found that 29% of participants needed to drop a deuce shortly after consuming their morning joe. However, while coffee poops are common, it isn’t a universal experience.

It’s also not JUST because of the caffeine or the water, both of which may be playing a role. Both decaf and regular coffee release the hormone gastrin which makes the colon more active. But caffeinated coffee stimulates the bowel 23% more than decaf, and 60% more than plain water so the stimulant in caffeine contracts the bowel muscles to give you that extra urge to go.

And sure, this can be helpful for some folks with occasional constipation, but we don’t want to rely solely on caffeine for motility. Too much and we can be dealing with loose, unformed stools which may ultimately result in dehydration or poor nutrient absorption.

So if you struggle with chronic constipation, focus on better, not faster poops by incorporating more fibre, movement, water and possibly other supportive supplements into your day.

Hands holding a cookie with the poop emoji.

Claim #2: Coffee Supports Our Gut Health 

Jumping off of claim #1, brings me to a more potentially exciting gut related perk – coffee’s role in supporting the microbiome.

Research suggests coffee may improve the presence and metabolic activity of beneficial gut bacteria. One recent study found that caffeine consumers had higher levels of anti-inflammatory gut bacteria and lower levels of potentially “harmful” bacteria, in other words – they had a more favourable microflora for good health. These results were also independent of the participants age or the quality of their diet, which alters the health benefits of black coffee.

Claim #3: Coffee Increases Cortisol Levels 

Cortisol is a stress hormone that is primarily involved in the body’s stress response. While it is natural for our cortisol levels to be higher in the morning and lower when we go to bed at night, prolonged periods of elevated levels can cause headaches, weight gain, insomnia, osteoporosis, immune suppression and more.

Some studies suggest that caffeine can increase cortisol levels, both at rest and during periods of stress, but other research has found no increase in cortisol levels at all. However, its important to note that any effect that caffeine has on cortisol levels seems to diminish with regular caffeine consumption.

In other words, if you regularly drink coffee within an hour of waking up, your body adapts to this habit which significantly blunts the effects on cortisol. So for most people, the effect of a daily cup of coffee on cortisol levels is unlikely to cause long term harm.  

Claim #4: Coffee Is Good for Mental Health

Personally, I know I am just not my best self before I drink my morning cup of coffee, but there is also a scientific reason for this.

As I mentioned earlier, by inhibiting the neurotransmitter in the brain that makes us feel tired, caffeine enhances the feel good hormone dopamine signaling in the brain. Research looking at the impact of caffeine consumption and mood has also found that it may lower the risk of depression by 13-20%. These protective effects have primarily been observed from coffee, and not so much other caffeine-containing beverages, like tea. This is attributed to it being a more concentrated source of antioxidants, like polyphenols, which may reduce inflammation in the nerve cells of the brain associated with depression. 

Person lying on a bed feeling anxious.

However, it’s important to note that the protective effects of caffeine are not universal, as one review found that caffeine consumption may make depression worse in people who suffer from mood disorders like postpartum depression and panic disorder. Plus, folks who are sensitive to caffeine who have anxiety disorders may also be more at risk for it making things worse.

So again, the effects of caffeine and the health benefits of black coffee are highly variable from person to person depending on their sensitivity, genetics, cognitive function, and frequency of consumption. But if you find that it has a positive effect on your mood then I don’t think it hurts to keep it in routine.

Claim #5: It Enhances Cognition

This brings me to another brain benefit – cognition. One review found that 38-450 mg of caffeine, aka somewhere between ½ to 4 cups of coffee depending on the finding and study, could potentially help improve attention, learning, short term recall, and reaction time.

There is also research suggesting that caffeine can increase resting brain entropy, which basically means that the brain is able to process more information. This may be why increased caffeine intake has been associated with a 32-65% reduction in neurodegenerative diseases like Alzheimers and Parkinsons, as well as lower risks of dementia and cognitive decline. As for memory, some studies suggest that it may have a positive effect on short term and long term memory, while other studies report no effect.

Hands pouring a design into a latte.

Claim #6: Coffee Boosts Exercise Performance 

So now that we’ve discussed energy boosting effects of caffeine on the mind, lets talk about the body aka exercise performance. 

Caffeine is a common ingredient in athletic supplements like pre-workouts and improving performance is a big reason for this choice. Research suggests that 5 mg per kg body weight of caffeine so about 340 mg for a 150 lb person can improve performance for endurance exercises by up to 12% and can help reduce fatigue and delay exercise exhaustion by 12%.

We also have some research suggesting its use for improving strength and high-intensity activity, but the research in this area is a little less convincing and mixed. It does appear that its benefit is time-dependent, with most research suggesting that the best time to consume caffeine is about 30-60 min before a workout. But again, variations in how caffeine is metabolized and other side effects like whether or not it gives you the runs, will ultimately determine if its a help or a hindrance, and when to take it. 

Person exercising with dumbbells.

Claim #7: Coffee Supports Heart Health

Many folks are no stranger to the anxiety-inducing effects of drinking one too many cups of coffee. Whether its heart palpitations, jitters, or an increased heart rate, it begs the question of whether coffee is even good for our heart health. Well surprisingly, it might just be. 

According to one large review, participants who drank between 3-5 cups of coffee daily had a 15% lower risk of heart disease compared to those that had zero cups of coffee. Similarly, a large cohort study of over 37,000 women found that 2-3 cups of coffee a day was associated with a 21% reduced risk of heart disease. 

Model of a human heart.

While the general consensus is that regular caffeine intake may be beneficial for heart health, it’s important to note that the health benefits of black coffee may also impact blood pressure levels in some folks. For example, one review of over 34 studies found that about 1-2 cups of coffee a day can temporarily increase blood pressure for about three hours before the effect subsides. However, these increases vary depending on caffeine tolerance. In other words – regular consumers likely won’t experience significant blood pressure spikes compared to those who are more caffeine sensitive. 

Claim #8: Coffee Makes You Live longer

Is coffee the magic elixir of life that can help us to live longer? Well according to a groundbreaking 2018 study with close to half a million participants, it may be the case.

This study found that drinking up to three cups of coffee daily was associated with a 21% lower risk of stroke, 17% lower risk of death from cardiovascular disease, and 12% lower risk of all-cause of death. Similar results were observed in a large multinational study which found that higher levels of coffee consumption were associated with a reduced risk of death from all causes, particularly from circulatory diseases and diseases related to the digestive tract.

While many of us would agree that we simply just CAN’T LIVE without coffee, does this research mean that coffee is the elixir of life? Well, It’s an interesting association, and that’s about all that it is. But It’s one thing to show an association between coffee versus an actual cause and effect.

So even though coffee may have protective effects against disease, we still want to make sure that we are engaging in healthy behaviours in all areas of life to promote longevity. 

Claim #9: Coffee is Dehydrating 

Caffeine has a diuretic effect meaning it makes you pee more. However, this doesn’t necessarily mean that it makes us more dehydrated. The diuretic effect is small and is offset by the actual amount of fluid content of the drink, so you still end up with net hydration.

But is there a set limit on coffee consumption to avoid impacting our hydration status? Well, research suggests that you would need to consume more than 500mg per day or an equivalent  5 cups of coffee to observe a significant diuretic effect. Similarly, one review also found that there was a small diuretic effect seen when drinking 3 cups of coffee per day, but not enough to cause dehydration in an otherwise hydrated individual.

In other words, it takes drinking large amounts of coffee for it to have a significant dehydrating effect. 

Close up of water being poured into a glass.

Claim #10: Coffee Is Bad for Your Bones

One common concern about the health benefits of black coffee is that coffee may cause osteoporosis by impacting calcium absorption. However, many of the studies pointing to caffeine’s impact on bone health are inconclusive, with researchers often reporting conflicting results.

Some studies have even considered coffee to be GOOD for our bone health. For example, some research found that coffee had a minimal negative effect on overall calcium absorption, and that any effect could be offset by adding 1-2 tablespoons of milk to a cup of coffee. Another study found that folks who were habitual coffee drinkers had a higher overall bone density than non-coffee drinkers.

On the other hand though, one recent systematic review found that there MIGHT be a relationship between coffee consumption and hip fracture incidence, but this depends on how much coffee is consumed. So while the impact of coffee on our bones is a pretty mixed picture, we don’t have enough research to suggest that we should completely cut back in an effort to save our bones.

With that said, it may be more beneficial to focus on lifestyle behaviours that we know promote bone health such as strength training/weight bearing exercises and eating lots of bone boosting vitamins and minerals like calcium vitamin D, and vitamin K. 

Coffee being poured into a filter next too a coffee cup.

Bottom Line on the Benefits of Black Coffee

So in conclusion, we have a ton of evidence to support the potential benefits of caffeine consumption and the health benefits of black coffee including improving gut health, exercise performance, and cognition, while also reducing the risk of alzehimers, parkinsons, and depression.

If you don’t “need coffee” in the morning, you find that it gives you the runs, or it triggers uncomfortable anxiety-inducing effects, then it may be best to pass or enjoy it in small amounts. But I know for myself that coffee sets the tone for the day and has a net positive impact on my day-to-day. Ultimately, only you can determine if caffeine is a good or not so good habit for you. 

Research Contribution by Annette Chrzaniecki BASc, MPH

Edited by Giselle Segovia RD MHSc

More Blog Posts You Might Like

If you liked this blog post discussing the health benefits of black coffee, then you might enjoy more posts discussing diet myths:

  • 411 on Intermittent Fasting for Athletes and Exercise: Will It Help or Hinder Your Performance?
  • Intermittent Fasting for Weight Loss? The Evidence Based Pros and Cons
  • Caffeine and Breastfeeding – Is It Safe?
  • Can You Drink Coffee While Intermittent Fasting?
  • Teen Weight Loss – Are Diets Safe for Growing Kids?
  • Is Lemon Water Good For You?

Did you know about these benefits of black coffee? Let me know if you love coffee just as much as me!

Abbey Sharp

Abbey Sharp is a Registered Dietitian (RD), regulated by the Ontario College of Dietitians. She is a mom, YouTuber, Blogger, award winning cookbook author, media coach specializing in food and nutrition influencers, and a frequent contributor to national publications like Healthline and on national broadcast TV shows.

www.abbeyskitchen.com/about-abbey/

Last Updated April 28, 2024. Published April 29, 2024 By Abbey Sharp 4 Comments

Homemade Peanut Butter Recipe | Healthy, Vegan, Gluten Free!

birds eye view of peanut butter and jelly sandwich

This EASY Homemade Peanut Butter Recipe for kids and toddlers is naturally sweet with no added sugar and perfect for making nutrient dense PB&J sandwiches!

close up of homemade peanut butter in a white bowl.

I know kids are stereotypically supposed to be obsessed with peanut butter and jelly sandwiches, or just peanut butter anything, but my kid was never a fan. When he was really little and I was trialing different common allergens, it was always a struggle to get him to eat anything with peanut butter in it because he just didn’t like that much. That’s why I created these PB muffins, but that’s a whole other story.

Table of contents

  • Why This Recipe Works
  • Key ingredients
  • How To Make This Recipe
  • Expert Tips
  • Recipe FAQs
  • More Recipes You Might Like

Why This Recipe Works

I since figured out that he would happily eat the commercial peanut butter, but wasn’t so much a fan of the natural stuff I buy. That’s when I came up with the idea for this power protein packed homemade peanut butter recipe that is naturally sweetened with his favourite fruit, banana. I also love this recipe because it’s

  • Loaded with healthy fats
  • Packed with protein (10 grams) and fibre (5 grams)
  • SO easy to make – only 2 simple steps!
  • Free of added oils, salt, and sugar

Key ingredients

Natural Peanut Butter– Choose a peanut butter that is just peanuts, no salt, sugar, or other oils.

Ripe Banana– This is going to be our natural sweetener and adds some extra nutrients like potassium while we’re at it.

Ground Flax– Flax provides protein, fibre and healthy omega 3 fats, so this really pumps up the nutrition in this peanut butter.

Hemp Hearts – My son calls hemp hearts sprinkles, so he loves them. And I love that they supply protein, fibre and healthy omega 3 fats.

Cinnamon– For a little extra sweet flavour.

Sea Salt– If you want! I usually don’t bother and my kiddos still gobbles this up.

birds eye view of peanut butter in a white bowl with a sandwich on the side .

How To Make This Recipe

Step 1: Mash the banana in a bowl and mix in the peanut butter, hemp, flax, cinnamon and salt.

Step 2: Serve on bread, yogurt, or oatmeal.

Expert Tips

We used to think that giving young children peanut products would cause food allergies, but we now know it’s actually the complete opposite. We now want to expose our kids to the top 8 allergens as soon as we can once they start solids around 6 months. Check out this whole post on peanut allergens, and this BLW meal plan for starting solids to reduce allergens.

Looking for a healthier twist to a traditional PB&J? I suggest a nice high fibre bread, then a smear of this homemade peanut butter on on side, and my famous homemade chia jam on the other. Tada! You’ve got a kid friend and toddler friendly PB&J with no added sugar and a ton of healthy fats, protein and fibre.

close up of peanut butter sandwich

Recipe FAQs

What do you use this naturally sweetened peanut butter for?

This is perfect for putting on oatmeal, swirling into yogurt or cottage cheese, or smearing on rice cakes or toast. It also makes a crazy delicious PB&J Sandwich that is naturally super sweet.

How long will this last in the fridge?

I find that this recipe lasts for about 3 days in the fridge, so I make these small batches frequently throughout the week.

How do you choose a healthy peanut butter?

I recommend looking straight at the ingredients. It should just say peanuts (or almonds, or cashews, or whatever the nut is in question). You can cut back on added sugar and salt in your kids diet by avoiding nut butters that have these products or partially hydrogenated oils in them.

Is this pb vegan and gluten free?

Yep, this is completely safe and healthy for those who stick to a vegan diet or gluten free diet.

Will kids actually like this?

Um, yes? If your kids like ripe bananas (who doesn’t like that sweetness), they will love this homemade peanut butter. And if you haven’t tried my chia jam, you MUST make them together.

close up of PB & J sandwich.

More Recipes You Might Like

Looking for other delicious peanut butter packed recipes for kids? Definitely try some of these below!

  • PEANUT BUTTER AND JELLY COOKIES (VEGAN & LOW SUGAR)
  • SUGAR FREE BISCUITS WITH CHICKPEAS AND PEANUT BUTTER 
  • BANANA AND PEANUT BUTTER CHOCOLATE BARS (VEGAN & GLUTEN FREE)
  • PEANUT BUTTER & JELLY VEGAN WHOOPIE PIE RECIPE

Now tell me what you’re putting this amazing nut butter on! Leave me a comment below if you and your family love this recipe!

birds eye view of peanut butter and jelly sandwich
Print Recipe
5 from 8 votes

Homemade Peanut Butter Recipe | Healthy, Vegan, Gluten Free!

This EASY Homemade Peanut Butter Recipe for kids and toddlers is naturally sweet with no added sugar and perfect for making nutrient dense PB&J sandwiches!
Prep Time10 minutes mins
Total Time10 minutes mins
Course: Snack, Lunch
Cuisine: American
Servings: 2
Calories: 177kcal
Author: Abbey Sharp

Ingredients

  • 1 very ripe banana mashed (about 1/2 cup plus 2 tbsp)
  • 1/4 cup natural peanut butter no sugar or salt
  • 4 tsp hemp hearts
  • 4 tsp ground flax seed
  • 1/8 tsp cinnamon
  • Sea salt if desired (optional)

Instructions

  • Mash the banana in a bowl and mix in the peanut butter, hemp, flax, cinnamon and salt.
  • Serve on bread, yogurt, or oatmeal.

Nutrition

Calories: 177kcal | Carbohydrates: 20g | Protein: 10g | Fat: 8g | Saturated Fat: 1g | Cholesterol: 1mg | Sodium: 96mg | Potassium: 244mg | Fiber: 5g | Sugar: 8g | Vitamin A: 140IU | Vitamin C: 5mg | Calcium: 34mg | Iron: 2mg
Abbey Sharp

Abbey Sharp is a Registered Dietitian (RD), regulated by the Ontario College of Dietitians. She is a mom, YouTuber, Blogger, award winning cookbook author, media coach specializing in food and nutrition influencers, and a frequent contributor to national publications like Healthline and on national broadcast TV shows.

www.abbeyskitchen.com/about-abbey/

Last Updated July 6, 2024. Published April 26, 2024 By Abbey Sharp 25 Comments

Buffalo Cauliflower Taco Recipe with Chickpeas | Vegan & High Protein

These vegan buffalo cauliflower and chickpea hard tacos are loaded with spicy buffalo flavour in buffalo-glazed hard tacos. 

DISCLAIMER: This post was developed in sponsored partnership with Flatout Flatbread, however, as always, all opinions are genuine.

This vegan Buffalo Cauliflower Taco recipe is loaded with spicy buffalo flavour and chickpeas for a meal that your family will love.

Close up of vegan cauliflower and chickpea tacos with avocado and cilantro on a colourful plate.

Let me give you the run down on how this incredible cauliflower taco recipe was born.

As a dietitian, I am always on the mission to include more plant-based meals in my family’s routine. Tacos are a classic- we love walnut cauliflower tacos and tofu tacos with peanut sauce. However, after becoming obsessed with cauliflower wings, I knew that combining the two would be a match made in heaven. Add in some spicy kick and you have the best vegan buffalo cauliflower taco recipe. Now this is a vegan meal that truly delivers.

Table of contents

  • Why This Recipe Works
  • Key Ingredients
  • How To Make This Recipe
  • Expert Tips
  • Recipe FAQs
  • More Recipes You Might Like

Why This Recipe Works

Okay, so let me give you the deets on why I love this buffalo cauliflower taco recipe as a dietitian, foodie and mom:

  • Plant-based protein from the chickpeas
  • High in fibre from the chickpeas, veggies and flatbread
  • A mild kick from the buffalo sauce
  • Customizable, so everyone in the family is happy

Key Ingredients

Close up of vegan buffalo cauliflower taco recipe topped with avocado on a colourful plate.

Cauliflower – This is the veggie we’re using as the base. You can buy the diced florets to save time, or prepare it from the head yourself. Cauliflower is a good source of fibre and vitamin C.

Whole Wheat Flour – We coat the cauliflower in whole wheat flour and spices to form a batter. This allows the sauce to coat the cauliflower, without causing a soggy mess.

Chickpeas – In my house we love to eat plant-based meals a couple times a week. Chickpeas are not only a source of plant-based protein, but contain iron and lots of fibre. They’re a great add-in to plant-based entrees like this buffalo cauliflower taco recipe.

Buffalo Sauce – Go as spicy or mild as you like. I use Frank’s Red Hot Sauce, which has just enough kick for my hubby and I. If you have kiddos, you might need to tone it down a little.

Flatbreads – Use hard taco shells, soft tortillas, or the Flatout 5 Grain Flax Foldit breads like me.

Toppings – I used sliced avocado, fresh cilantro and shredded red cabbage as my toppings of choice. Feel free to use whatever you like. Salsa, cheese or guacamole would also be delicious add-ons.

Cilantro Lime Crema – In my opinion, no tacos are complete without a good drizzle drizzle. I made a dairy-free cilantro lime crema with coconut yogurt, cilantro, lime juice, and some spices. SO good.

How To Make This Recipe

Close up of buffalo cauliflower and chickpea tacos on a colourful plate with lime on the side.

Step 1: Preheat oven to 450 F. Lightly grease two large baking sheets.

Step 2: In a small food processor or blender, puree the cilantro, coconut cream, lime and cumin. Season with salt and pepper to taste and set aside.

Step 3: In a large bowl, mix together the flour, water, garlic powder, salt and pepper. Add the cauliflower florets and toss to coat in the batter. Spread them out onto the baking sheets and bake for about 20- 25 minutes.

Step 4: Mix together the hot sauce, melted vegan butter and maple.

Step 5: Flip the cauliflower, add the chickpeas to the baking sheet and toss everything with the hot sauce mixture. Roast for an additional 10-15 minutes or until everything is crispy and golden.

Step 6: Meanwhile, cut the Flatout Foldits in half (to yield two circles), and brush with hot sauce on one side. Hang each one in the oven over a wire rack so they form taco shells. Bake for 8-10 minutes or until the edges crisp and brown. Remove from the oven and allow to cool.

Step 7: To assemble, layer the taco shells with cabbage, avocado, cilantro and the taco filling. Top with the crema and enjoy!

Expert Tips

Make this cauliflower taco recipe a family event by having everyone assemble their own. Getting your kiddos involved in the kitchen is a great way to teach them about food and health in a positive environment.

I like to plate all the toppings in separate bowls and place them within reach of everyone in the middle. My boys tend to be much more interested in trying new toppings when they see Mom and Dad eating them too.

Recipe FAQs

Can I use a gluten-free flour?

I haven’t tested this with anything other than whole wheat flour. If you give it a shot, let me know how it turned out in the comments.

How spicy is this cauliflower taco recipe?

It really depends on the buffalo sauce you use. If you don’t like super spicy foods, go for a milder sauce.

Vegan buffalo cauliflower and chickpea tacos in a colourful bowl garnished with lime.

Disclaimer: This post was developed in paid partnership with Flatout Flatbread, however, all opinions are genuine.

More Recipes You Might Like

If you loved this buffalo cauliflower taco recipe as much as me, definitely try these next:

  • Spicy Tofu Sticks with Buffalo Sauce
  • Tofu Tacos with Peanut Sauce (Vegan and Gluten Free)
  • Gluten Free Buffalo Sauce Pasta Salad
  • Vegan Cauliflower Wings with “Honey” Garlic Sauce

What does your family like to put on their tacos? Do you do plant-based meals throughout the week? Share some ideas with me in the comments!

With Cinco de Mayo this week, we compiled the tastiest, most innovative and all around best healthy taco recipes on the web.
Print Recipe
5 from 3 votes

Vegan Buffalo Cauliflower and Chickpea Hard Tacos

This vegan Buffalo Cauliflower Taco recipe is loaded with spicy buffalo flavour and chickpeas for a meal that your family will love.
Prep Time20 minutes mins
Cook Time55 minutes mins
Total Time1 hour hr 15 minutes mins
Course: Dinner
Cuisine: Mexican
Servings: 8 people
Calories: 266kcal
Author: Abbey Sharp

Ingredients

Cilantro Lime Crema:

  • 3/4  cup plain dairy-free coconut yogurt
  • 1/4 cup fresh cilantro
  • 1/2 tsp cumin
  • 2 tbsp lime juice
  • Salt and pepper to taste

Taco filling:

  • 1 head cauliflower cut into small florets (about 8 cups)
  • 1 cup whole wheat flour
  • 1  cup water
  • 1 tsp garlic powder
  • 1/4 tsp sea salt
  • ¼ tsp ground pepper
  • 1 (19 oz) can of chickpeas, drained, rinsed and dried
  • 2/3 cup Frank’s red hot sauce
  • 1 tbsp vegan butter melted
  • 2 tsp maple syrup

Taco Assembly:

  • 8 Flatout 5 Grain Flax Foldit breads
  • Avocado sliced
  • Cilantro
  • Purple cabbage shredded

Instructions

  • Preheat oven to 450 F. Lightly grease two large baking sheets.
  • In a small food processor or blender, puree the cilantro, coconut cream, lime and cumin. Season with salt and pepper to taste and set aside.
  • In a large bowl, mix together the flour, water, garlic powder, salt and pepper. Add the cauliflower florets and toss to coat in the batter. Spread them out onto the baking sheets and bake for about 20- 25 minutes.
  • Mix together the hot sauce, melted vegan butter and maple.
  • Flip the cauliflower, add the chickpeas to the baking sheet and toss everything with the hot sauce mixture. Roast for an additional 10-15 minutes or until everything is crispy and golden.
  • Meanwhile, cut the Flatout Foldits in half (to yield two circles), and brush with hot sauce on one side. Hang each one in the oven over a wire rack so they form taco shells. Bake for 8-10 minutes or until the edges crisp and brown. Remove from the oven and allow to cool.
  • To assemble, layer the taco shells with cabbage, avocado, cilantro and the taco filling. Top with the crema and enjoy!

Video

Nutrition

Calories: 266kcal | Carbohydrates: 48g | Protein: 12g | Fat: 4g | Saturated Fat: 1g | Polyunsaturated Fat: 2g | Monounsaturated Fat: 1g | Trans Fat: 0.3g | Sodium: 813mg | Potassium: 518mg | Fiber: 10g | Sugar: 7g | Vitamin A: 57IU | Vitamin C: 40mg | Calcium: 90mg | Iron: 4mg
Abbey Sharp

Abbey Sharp is a Registered Dietitian (RD), regulated by the Ontario College of Dietitians. She is a mom, YouTuber, Blogger, award winning cookbook author, media coach specializing in food and nutrition influencers, and a frequent contributor to national publications like Healthline and on national broadcast TV shows.

www.abbeyskitchen.com/about-abbey/

Last Updated November 3, 2020. Published April 24, 2024 By Abbey Sharp 54 Comments

Baby Led Weaning Meal Plan for 6-12 Month Old Babies | A Dietitian’s Guide

Abbey having a picnic with her baby.

I share my EXCLUSIVE 1 month baby led weaning meal plan for 6-12 month old babies as an easy step-by-step guide for starting solids and reducing food allergies.

Get Meal Plan Join Facebook Group

Abbey and baby E sitting a park on a picnic blanket surrounded by BLW foods like watermelon, strawberries, tomatoes, cherries, and a baguette.

We are currently experiencing technical issues with the guide. If you have not received it after signing up, please email [email protected].

I am a big advocate of baby led weaning (BLW) and have talked a LOT about how to successfully introduce BLW foods and common food allergens to help reduce the risk of allergy in your kids.

In previous posts, we have discussed the recent EAT study which outlined the new guidelines for allergy introduction. It states that we no longer want to wait until 1 year or later to introduce common food allergens like peanuts and eggs. Instead, earlier introduction (around 6 months for most babies) has been shown to help reduce the risk of food allergies.

Table of contents

  • Starting Solids Before One
  • Introducing Common Allergens
    • Frequency of Allergen Introduction
    • When to Trial Allergens
  • How to Know if Baby is Having an Allergic Reaction
  • One Month Baby Led Weaning Meal Plan for 6-12 Month Old Baby
  • More BLW Posts You Might Like

Starting Solids Before One

We know we don’t want to delay allergens when starting solids and BLW foods. Which means that starting solids before one is beneficial for a number of reasons, including:

  • Babies needs for Iron are particularly high after 6 months (11 mg!), and breastmilk or formula alone do not meet these needs.
  • Babies need to learn how to eat solids of different textures and learn how to chew. They actually have a unique window around 6-10 months when they are best able to learn to explore a variety of textures. Research suggests that babies fed exclusively liquid and purees by 9 or 10 months have a more difficult time with picky eating down the road.
  • Setting the stage so that by 12 months, the majority of baby’s calories are coming from solids, rather than milk or formula. Without adequate practice, it’s unlikely they will be able to make this transition overnight.
  • Reducing the risk of common food allergies.

Introducing Common Allergens

The landmark research that the new recommendations were built on specifically looked at peanuts and eggs. However, based on other studies and expert opinion, it’s recommended that we introduce all allergens earlier than later.

Personally, I start with egg and peanut. To me, these are the most “scary” and it is what the evidence is grounded in. If you had an allergy in the family that you were particularly worried about, you could also start there (with your pediatrician’s approval, of course).

Frequency of Allergen Introduction

Abbey and Baby E outside sitting on a picnic blanket as Abbey feeds him a strawberry.

Experts used to recommend being very cautious with introducing allergens by only providing one food and waiting 3 to 5 days to provide another. The reason for this recommendation was that it allowed us to catch an allergy and identify the culprit more easily if you only fed that one food for a period of time.

However, this recommendation is a bit outdated. The reality is that most allergic reactions will surface within minutes, but they can make an appearance up to 2 hours after ingestion. So if there IS a reaction, you’ll know pretty fast – not likely DAYS later.

Plus, following this method of allergen introduction would mean it would take you and your baby a LONG TIME to experience all of the common allergens and start eating full meals with a variety of other important, nutritious foods. Also, who has the time/ energy to be SO deliberate on baby led weaning meal planning- the beauty of BLW foods is that baby can eat what you’re eating!

Ultimately, how quickly you progress with your baby and food allergens is really up to your comfort level. With that said, I get that you may be anxious – and trust me, I was too! Which is why in my meal plan, I have done two days in a row of the same allergen before moving onto the next. This makes it easy for you to keep track!

Keep in mind that we still want to continue to provide these common allergens often, rather than just doing the three trials and forgetting about it. This will help baby maintain tolerance. The recommendation for peanut allergies, specifically, is three feedings per week. So I say just try to regularly incorporate the big allergens into your baby’s meals.

When to Trial Allergens

Abbey and Baby I sitting outside on a picnic blanket surrounded by red fruit.

I recommend giving your allergenic trialing meals earlier on in the day – breakfast or lunch. This way, you have the rest of the day to monitor for any reactions. If you do introduce an allergen around supper time, i’d suggest leaving at least 2 hours before bedtime to monitor.

To keep this simple for you, the meal plan is for one meal a day, and works up toward a more substantial meal as the month progresses. It’s your call how quickly you start adding meals, or snacks once you start solids.

If you’re ready to do two meals right from the get go, you can repeat the items for meal two, split the meal in half, or offer some of the non-allergenic foods at meal two. Keep in mind that it is ideal that allergens are trialed earlier in the day.

How to Know if Baby is Having an Allergic Reaction

Allergy signs and symptoms can typically be mild like a rash, or set of hives, but more severe symptoms can include swelling of the lip, eyes, or face, vomiting, hives all over the body, breathing symptoms like wheezing, or coughing, changing skin colour or sudden limpness.

One Month Baby Led Weaning Meal Plan for 6-12 Month Old Baby

This is just a sample based on some of my son’s favourite BLW foods and some easy ways to incorporate allergens for new eaters, while also loading up on those iron-rich foods. You can swap in whatever your family is serving that night, and remember to have fun! Starting solids shouldn’t be stressful and serving up BLW foods shouldn’t be more work than feeding yourself and the rest of your family.

Teaser image of baby led weaning meal plan featuring BLW foods with the bottom half blurred.

Get Meal Plan Join Facebook Group

More BLW Posts You Might Like

BLW – A Beginners Guide to Starting Solids Without Spoon Feeding

Baby Led Weaning Easy Meal Planner for Babies and Toddlers

How and When to Introduce Food Allergens to Babies with Baby Led Weaning or Spoon Feeding

Moms, dads and caregivers – what were some of your tactics for reducing food allergies and starting solids? Did you find this baby led weaning meal plan helpful?

Leave me a comment below!

Abbey Sharp

Abbey Sharp is a Registered Dietitian (RD), regulated by the Ontario College of Dietitians. She is a mom, YouTuber, Blogger, award winning cookbook author, media coach specializing in food and nutrition influencers, and a frequent contributor to national publications like Healthline and on national broadcast TV shows.

www.abbeyskitchen.com/about-abbey/

Last Updated April 20, 2024. Published April 22, 2024 By Abbey Sharp 11 Comments

Sesame Noodles Recipe with Peanut Butter | BLW Allergen Introduction

These Easy Peanut Butter Noodles are perfect for Baby Led Weaning (BLW) with babies 6 months or older as an easy allergen introduction recipe.

These Sesame Noodles recipe with Peanut Butter are perfect for Baby Led Weaning (BLW) with babies 6 months or older as an easy allergen introduction recipe.

Close up view of the peanut butter sesame noodles in an orange bowl with more noodles on a plate in the background.

When my Big Boy E was still my little Baby E and I just started introducing solids, I was really impressed with his interest in trying new foods. In fact, we made it to over 100 foods at only 9 months old! But if you’re just getting started with baby led weaning and/or introducing solids to your little one, you probably have heard that you want to rule out the top allergens first. In fact, I wrote an entire post about the importance of early introduction of allergens.

Interestingly, new research has suggested that introducing your baby to peanut products early (between 4-6 months) may help reduce the risk of peanut allergies, so if you’re struggling to figure out a tasty BLW way to serve peanut butter, this peanut butter sesame noodles recipe is for you.

Table of contents

  • Why This Recipe Works
  • Key Ingredients
  • How to Make This Recipe
  • Expert Tips
  • Recipe FAQs
  • More Recipes You Might Like

Why This Recipe Works

These peanut butter sesame noodles recipe is a great way to introduce common allergens safely to build tolerance. I also love this recipe because it’s:

  • Family friendly
  • Easy to prepare
  • Uses pantry staples
  • SUPER delicious for kids and parents

Key Ingredients

Close up of peanut butter sesame noodles in an orange small bowl topped with black and white sesame seeds and parsley on a blue surface.

Egg Noodles – Egg noodles contain more eggs in their recipe which makes them different from traditional pasta. You can totally make your own egg noodles, but I personally like to use pre-packaged noodles to make cooking dinner with toddlers a bit easier. It also contains protein and fiber.

Peanut Butter – I love using peanut butter in these sesame peanut noodles because it’s a great way to slowly introduce a common allergen while also creating the most perfect creamy sauce!

Rice Wine Vinegar – Rice wine vinegar is made from fermented rice and adds a small acidic taste to any Asian-inspired recipe!

How to Make This Recipe

Peanut butter sesame noodles in an orange bowl topped with sesame seed and cilantro

Step 1: To a large pot filled with boiling water, cook the noodles until just al dente. Before draining, scoop out about 1/2 cup of the cooking water and set it aside.

Step 2: Add the olive oil to the pan over medium heat. Add the garlic and ginger and saute until fragrant, about 1 1/2 minutes. Take off the heat and add the noodles in, along with the peanut butter, rice vinegar and sesame oil. Start to toss the pasta with the peanut butter while adding the starchy cooking liquid a tablespoon or so at a time. Transfer to a platter and top with white and black sesame seeds, if desired.

Expert Tips

This sesame noodles recipe actually features a number of common allergens  – wheat (noodles), egg (noodles), sesame (sauce), and peanut butter (sauce). For that reason, I wouldn’t make this the FIRST dish you serve to introduce all of these foods because if heaven forbid your little one had a reaction, you wouldn’t know WHICH of the allergens caused it!

In other words, I have trialed Baby E on peanuts and waited a few days. I did sesame and waited. Wheat then waited. Egg then waited etc. Once I was in the clear, I wanted to make sure he didn’t develop an allergy down the road, and these sesame peanut noodles became an awesome dish to do that with. This is a fantastic recipe, however, for maintaining allergen tolerance, which you should make a priority every week after you’ve introduced each of these on their own.

Recipe FAQs

Can I make this recipe gluten-free?

Gluten is typically found in the egg noodles, however, they do make packaged gluten-free egg noodles that would work for this recipe. I only suggest this if an allergy/intolerance to gluten has already been identified.

Can I meal prep these peanut butter sesame noodles?

Yes! Make sure to store in an airtight container in the fridge for 3-4 days.

Can I use another nut butter?

I would suggest sticking with peanut butter. It helps keep the traditional Asian flavoring and the texture makes for the perfect creamy sauce.

Baby's hand reaching out to grab a peanut butter sesame noodle.

More Recipes You Might Like

Want more delicious meals like this sesame noodles recipe? Try these readers’ favourites:

  • Vegan Brown Butter Butternut Squash Noodles
  • Vegan Avocado Zucchini Noodles with Pesto
  • Vegan Mushroom Pasta
  • Creamy Pumpkin Zucchini Noodles with Spiced Pumpkin Seeds

Hey moms and dads, I would love to know what some of your go-to BLW recipes for allergen prevention are! How has baby led weaning gone for you so far? Let me know what your kids are loving and what isn’t working so well for you!

These Easy Peanut Butter Noodles are perfect for Baby Led Weaning (BLW) with babies 6 months or older as an easy allergen introduction recipe.
Print Recipe
5 from 6 votes

Peanut Butter Sesame Noodles

These Peanut Butter Sesame Noodles are perfect for Baby Led Weaning (BLW) with babies 6 months or older as an easy allergen introduction recipe.
Prep Time10 minutes mins
Cook Time10 minutes mins
Total Time20 minutes mins
Course: Main Course
Cuisine: American, Thai
Servings: 4 people
Calories: 182kcal
Author: Abbey Sharp

Ingredients

  • ¼ lb egg noodles
  • 1 tbsp olive oil
  • 2 tbsp ginger grated
  • 2 large cloves garlic grated
  • ½ cup natural Peanut butter
  • 1 tbsp rice wine vinegar
  • 2 tsp sesame oil
  • ½ c starchy cooking water
  • White and black sesame seeds for garnish

Instructions

  • To a large pot filled with boiling water, cook the noodles until just al dente. Before draining, scoop out about 1/2 cup of the cooking water and set it aside.
  • Add the olive oil to the pan over medium heat. Add the garlic and ginger and saute until fragrant, about 1 1/2 minutes. Take off the heat and add the noodles in, along with the peanut butter, rice vinegar and sesame oil. Start to toss the pasta with the peanut butter while adding the starchy cooking liquid a tablespoon or so at a time. Transfer to a platter and top with white and black sesame seeds, if desired.

Nutrition

Calories: 182kcal | Carbohydrates: 26g | Protein: 9g | Fat: 5g | Saturated Fat: 1g | Cholesterol: 24mg | Sodium: 132mg | Potassium: 84mg | Fiber: 3g | Sugar: 2g | Vitamin A: 70IU | Vitamin C: 0.5mg | Calcium: 23mg | Iron: 0.5mg
Abbey Sharp

Abbey Sharp is a Registered Dietitian (RD), regulated by the Ontario College of Dietitians. She is a mom, YouTuber, Blogger, award winning cookbook author, media coach specializing in food and nutrition influencers, and a frequent contributor to national publications like Healthline and on national broadcast TV shows.

www.abbeyskitchen.com/about-abbey/

Last Updated April 15, 2024. Published April 19, 2024 By Abbey Sharp 16 Comments

Buffalo Chicken Strips Recipe | Easy Sheet Pan Dinner

This Gluten Free Buffalo Chicken Fingers Sheet Pan Dinner with Roasted Carrots and Celery is a simple one pan wonder that also make great freezer meals for crazy nights.

This Buffalo Chicken Strips Recipe is such an easy weeknight dinner. These strips of boneless chicken are dipped in a delicious homemade Buffalo sauce, then breaded with a gluten-free panko, so even bite is packed with flavour. Even better, this sheet pan dinner only takes 35 minutes to make!

A white plate with buffalo chicken fingers, carrots, and grain with sauce drizzled on top.

It always seems like there are not enough hours in a day. I’m running on mere moments of broken mediocre sleep, haven’t had a shower in a week, believe that flossing my teeth is a new luxury, and am HANGRY all the time. Man, breastfeeding is brutally hard and exhaustive. The only thing that’s saving my behind right now is batch cooking meals. Cooking ahead of time has been such a time saver and since it’s a sheet pan meal, it’s even better.

Table of contents

  • Why This Recipe Works
  • Key Ingredients
  • How to Make This Recipe
  • Expert Tips
  • Recipe FAQs
  • More Recipes You Might Like

Why This Recipe Works

Sheet pan meals are truly a life saver as everything can be tossed on and if you want to use tin foil beforehand then you’re pretty much only washing your prep bowls and dinner bowls. Are you sold on this yet? Well here are some more reasons to make this:

  • You only need a handful of ingredients
  • The homemade ranch dipping sauce is finger-licking good
  • Gluten-free
  • Easy to make
  • Made in under 30 minutes

Key Ingredients

Ingredients needed for buffalo chicken strips.

Chicken — I use chicken tenders to make this buffalo chicken strips recipe but you can swap for chicken breasts or thighs if that’s what you have on hand.

Buffalo hot sauce dip — To make homemade buffalo sauce dip that the chicken gets dipped in before you bread it, you’ll need melted butter, hot sauce, egg, and garlic.

Panko — I use gluten-free panko to bread my chicken strips with. If you don’t have panko, you can use regular gluten-free breadcrumbs.

Ranch dip — To make the delicious homemade ranch dip, I combine ranch mix powder with yogurt. It’s so tasty and it’s a bit healthier since it’s yogurt based.

How to Make This Recipe

Set of two photos showing how to make buffalo chicken strips.

Step 1: Add panko to one bowl, flour and salt in another, and finally combine the melted butter, with hot sauce, garlic, and egg in the third bowl. Dip the chicken tenders into the flour, then the egg mixture, then the panko, and divide between two greased baking sheets.

Step 2: Toss the carrots and celery with the olive oil and scatter around the chicken. Sprinkle everything with fleur de sel. Bake at 425F for 20 minutes or until the chicken reaches 165 F and is golden brown. When ready, combine ranch dip mix and yogurt in a bowl to serve alongside the buffalo chicken strips.

Expert Tips

I like using two sheet pans to avoid overcrowding my sheet pan. However, if you have a large enough sheet pan to fit everything in, then you’re welcome to use just one.

You can easily double or triple this recipe. Simply continue to dredge the chicken when your first batch is in the oven. When I was prepping for my baby’s arrival, I tripled this buffalo chicken strips recipe (hey, if you’re going to dredge, you might as well dredge all day), so that we could enjoy half a batch for dinner, and then a lot more for later.

Cover the sheet pans with tin foil or parchment paper to save yourself from having to scrub them afterward.

Recipe FAQs

How do I meal prep this?

If you’ve doubled or tripled this recipe for meal prep, store the extra servings in an airtight container for 3 to 4 days.

How do I freeze this?

To freeze this buffalo chicken strips recipe, allow everything to cool, and then flash freeze the sheet pan for an hour or until frozen solid. Then, transfer the frozen chicken strips (and vegetables) to a freezer friendly freezer bag. Store in the freezer for up to 3 months.

How do I reheat this from frozen?

Skip thawing the chicken and place the frozen chicken strips and vegetables onto a sheet pan and bake at 400F for 15-20 minutes or until heated through.

Is this spicy?

The hot sauce in the buffalo sauce does add some heat to this. However, the ranch dipping sauce can help balance the heat out. If you’re concerned that it’ll be too hot, you can decrease the amount of hot sauce.

Can I use non gluten-free ingredients?

You can definitely use whole wheat flour and whole wheat panko breadcrumbs if you don’t need these buffalo chicken strips to be gluten-free.

Can I change the vegetables?

Yes! You can try potatoes, Brussels sprouts, broccoli, cauliflower, and more. Just be sure to cut them accordingly if you change the vegetables to match the cook time. For example broccoli and cauliflower shouldn’t be cut too small or it’ll burn before the chicken is done.

Overhead image of a sheet pan of buffalo chicken fingers and carrots.

More Recipes You Might Like

Want more easy delicious recipes like this buffalo chicken strips recipe? Try these ones:

  • Gluten Free Vegan Chickpea and Cauliflower Sheet Pan Dinner with Pomegranate Harissa Glaze
  • Keto Cabbage Roll Enchiladas | One Pan Dinner
  • Vegan Buffalo Cauliflower and Chickpea Hard Tacos | Healthy, High Protein Tacos
  • Vegetarian Gluten Free Buffalo Cauliflower Steaks

What kind of easy meals would you like turned into a sheet pan dinner? Leave me a comment below with your thoughts!

This Gluten Free Buffalo Chicken Fingers Sheet Pan Dinner with Roasted Carrots and Celery is a simple one pan wonder that also make great freezer meals for crazy nights.
Print Recipe
5 from 5 votes

Buffalo Chicken Strips (Easy Sheet Pan Dinner)

Buffalo Chicken Strips are such an easy weeknight dinner. These strips of boneless chicken are dipped in a delicious homemade Buffalo sauce, then breaded with a gluten-free panko, so even bite is packed with flavour. Even better, this sheet pan dinner only takes 35 minutes to make!
Prep Time15 minutes mins
Cook Time20 minutes mins
Total Time35 minutes mins
Course: Dinner
Cuisine: American
Servings: 4 people
Calories: 410kcal
Author: Abbey Sharp

Ingredients

Chicken:

  • 1 1/4 cup gluten free panko bread crumbs toasted in a pan
  • 1/3 gluten free all purpose flour
  • 1/2 tsp sea salt
  • 1/4 cup melted butter
  • 1/4 cup Frank’s red hot sauce
  • 1 clove garlic finely minced
  • 1 egg beaten
  • 1 lb chicken tenders

Vegetables:

  • 6 stalks celery halved lengthwise and crosswise
  • 3 skinny carrots with tops on trimmed and halved lengthwise
  • 1 tbsp extra virgin olive oil
  • Fleur de sel

Dip:

  • 1/2 pack of Ranch dip mix
  • 1 cup plain 2% greek yogurt

Instructions

  • Preheat oven to 425 F.
  • In one bowl place the toasted panko breadcrumbs.
  • In another bowl, combine the flour and salt.
  • In another bowl, mix the melted butter, with hot sauce, garlic, and egg.
  • Dip the chicken tenders into the flour, then the egg mixture, then the panko and divide between two greased baking sheets.
  • Toss the carrots and celery with the olive oil and scatter around the chicken. Sprinkle everything with fleur de sel. Bake for 20 minutes or until the chicken reaches 165 F and is golden brown.
  • Meanwhile, mix together the ranch dip mix and yogurt.
  • To serve, drizzle with the dip and serve with your favourite grain like rice or quinoa.

Notes

  • I like using two sheet pans to avoid overcrowding my sheet pan. However, if you have a large enough sheet pan to fit everything in, then you’re welcomed to use just one.
  • You can easily double or triple this recipe. Simply continue to dredge the chicken when your first batch is in the oven. When I was prepping for my baby’s arrival, I tripled this buffalo chicken strips sheet pan dinner (hey, if you’re going to dredge, you might as well dredge all day), so that we could enjoy half a batch for dinner, and then a lot more for later.
  • Cover the sheet pans with tin foil or parchment paper to save yourself from having to scrub them afterward.

Nutrition

Calories: 410kcal
Abbey Sharp

Abbey Sharp is a Registered Dietitian (RD), regulated by the Ontario College of Dietitians. She is a mom, YouTuber, Blogger, award winning cookbook author, media coach specializing in food and nutrition influencers, and a frequent contributor to national publications like Healthline and on national broadcast TV shows.

www.abbeyskitchen.com/about-abbey/

Last Updated April 12, 2024. Published April 17, 2024 By Abbey Sharp 5 Comments

What is Weight Set Point Theory? Can Dieting Change Our Set Point?

a tape measure to assess weight gain to set point weight

We explore the science of Weight Set Point Theory and answer questions like how dieting or bariatric surgery impacts set point, and if we can change our set point.

Woman measuring her hips to determine weight set point.

A lot of people ask me about the validity of weight set point theory, variations on set point, and whether or not our weight is set in stone. Today we will get into the science of this popular weight regulation theory and answer some common questions about changing your weight.

What is Weight Set Point Theory?

While Instagram and YouTube influencers may promise you otherwise, our body weight is largely determined by genetic factors and when not manipulated, it’s believed it hovers roughly around a predetermined set point. Weight set point theory is often thought of like a thermostat where temporary increases or decreases in calories will be accompanied by regulatory mechanisms in the body to maintain a genetically preferred weight.  

According to research, our bodies have a set point weight that is encoded into our DNA, or more specifically, encoded in the brain. This hypothesis was tested back in the 1950’s where scientist Gordon C. Kennedy proposed that consuming fat sent messages to the brain to help regulate body expenditure and intake.

Physiological Adaptations to Weight Loss

When we decrease our caloric intake, there are compensatory mechanisms in place that reduce the energy output to “balance” things out. For example, we may push ourselves less hard in the gym (physical activity declines), we may just move or fidget less unconsciously (our non-exercise activity thermogenesis/NEAT declines), we may absorb more calories from food (thermic effect of food decreases), and we weigh less so our body needs fewer calories to sustain that lower weight (resting metabolic rate decreases.)

Specific to body fat, this is often called the “lipostatic model of body fat regulation” which states that no matter the input, the output will remain consistent. The lipostatic model of body fat regulation was further explained when leptin was discovered in the late 1900s.

Leptin, our satiety hormone, is stored in fat stores, so when we lose weight, our fat stores shrink and our normal healthy signals that we’ve had enough to eat become silenced. So, we eat more, and more and more as our body fights to regain its preferred weight.

Ghrelin, our hunger hormone, is inversely related to calorie intake, meaning when we eat fewer calories than what our body needs, this hunger hormone revs up and increases our appetite. Studies show that people who try to lose weight and keep it off end up producing more ghrelin then they did before losing weight. This is our body’s attempt to increase appetite so you eat more and regain the lost fat.

A plate of fruit and vegetables, bowl of oatmeal with fruit, and cup of coffee.

Cortisol, our stress hormone, which is often released under severe caloric restriction or excessive exercise. Increased cortisol can slow metabolism and impair the ability to sustainably lose weight. Some studies have even shown that women who consume low calorie diets have higher cortisol levels and report more feelings of stress compared to women who do not restrict their diet.

Insulin is the hormone responsible for regulating our blood sugar levels by assisting the cells in absorbing glucose for energy. Insulin sensitivity (aka. the degree to which the cells respond to insulin and the uptake of glucose) is negatively associated with cortisol. That means when cortisol increases due to severe caloric restriction, the cells don’t respond as efficiently to insulin. This results in higher blood sugar levels, as glucose is not being absorbed by the cells.

Psychological Adaptations to Weight Loss

Psychological adaptations play a vital role in regards to set point theory, as well. In the very famous Minnesota Starvation Experiment conducted during WW2, lean healthy men were restricted to half of their caloric needs and forced to walk at least 5 miles each day. This semi-starvation experiment took place over a six month time period and not surprisingly resulted in the volunteers losing weight (25% of their baseline) and body fat. The volunteers also experienced extreme fatigue (the body’s attempt to pull back on caloric output), uncontrolled hunger (because their leptin was low), and a total obsession with food. When they were allowed to eat ad libidum again (normally without restriction), they gained the weight back and ended up at a higher weight and body fat percentage than prior to the experiment.

So, to simplify, the evidence suggests that when you cut calories and lose weight, metabolic rate declines, movement declines and hunger signals increases to compensate. Likewise, when you increase calories to gain weight, metabolic rate increases, movement increases and hunger decreases to compensate. This is the general ideology in support of the set point theory.

Unfortunately, it would appear that this isn’t a precise science as metabolism may decline more than what you would expect for the change in body weight. This is most likely a survival mechanism to safeguard against body and fat mass loss and can be supported through results from contestants on a popular reality T.V. show, The Biggest Loser.

When contestants were brought in for their final weight in, not only did they lose an extreme amount of weight, but their leptin levels were also incredibly low and their metabolism was also reduced. When contestants were weighed again 6 years later, they gained back the weight and then some, AND their metabolism and leptin levels were still abnormal for their body weight. In fact, while it would be expected that one’s metabolism would be reduced after their body weight is reduced, they found that the metabolic decline was an additional 500 calories lower than what would be expected.

In other words, if you needed 2500 calories to maintain 150 lbs, and it would be (hypothetically) expected you would need 2000 calories to maintain 130 lbs, they actually found that they could only consume 1500 calories to maintain that 20 lb weight loss. They also were starving all the time so you can imagine how hard it was to keep any amount of weight off.

So to answer hypothesis of the Minnesota Starvation Experiment: “it is possible to conduct a rehabilitation diet without developing added fat deposits?” The current evidence suggests that weight re-gain for a lot of people may be unavoidable.

A tape measure to assess weight gain to set point weight.

Set Point Theory Criticisms

Weight set point theory has been critiqued as it doesn’t explain the increasing prevalence of obesity that we see in westernized societies.

If the biological drive to maintain a particular body weight was so strong, why wouldn’t we weigh what we did as a society 50 years ago? It also doesn’t explain why obesity is greater in lower socioeconomic communities, or after particular life changes (like marriage or going to college).

We also know that there are a lot of physical and psychological disorders that can cause massive weight changes (i.e. depression, eating disorders, cancer, IBD etc.), all of which are not addressed by set point theory.  

Finally, it would seem that while we do have homeostatic mechanisms in place to help us maintain our comfortable weight, it seems to be asymmetrical. In other words, it seems to favour weight gain over weight loss, likely as a survival mechanism to safe guard against a future “famine”. 

Settling Point Theory

Settling point theory, on the other hand, aims to explain the differences between individuals and their body weight and levels of body fat. Developed by obesity researcher James Hill, settling point theory proposes that changes in body weight are more related to the patterns of diet and activity that people “settle into” over time as habits and how that intersects with their genetic dispositions, nutrition knowledge and environment.

Basically, it sees that there is at least one parameter involved that essentially throws the homeostasis off. So being served and eating larger portion sizes of delicious foods, or having tools (like a car) to reduce energy expenditure may impact where the body weight will settle. 

Settling Point Theory Criticisms

The settling point theory is based on the idea of a passive feedback system feedback between the size of the body stores and aspects of expenditure. Passive feedback, unlike a negative and positive feedback, is based on the system of settling at a point, which is based on the level of unregulated boundaries of either the input or output (calorie intake vs expenditure). For example, if an individual’s body fat percentage were to increase due to the increase in caloric intake, the energy expenditure would also increase in order to offset the input.

It should be noted, however, that settling point theory can only work under certain boundaries placed on the input or the output. For example, the input is not always based around caloric intake – it could be based on  physical activity, or a combination.

Another criticism, is that it conflicts with the findings of the Minnesota Starvation Experiment. To recap, normal, healthy individuals were placed on an extremely low calorie diet with high amounts of exercise over a six month period of time. The test subjects had lost over 25% of body weight, which, according to the settling point theory, the subjects should have reached a plateau weight. However, when the subjects were released back to their normal routines prior to the experiment, they rapidly increased body and fat mass. This was thought to be due to the subjects overeating and being inactive. However, when the experiment was later reevaluated, the hyperphagic (overeating) response was likely due to the psychobiological response to being extremely food deprived for so long.

The settling point theory has been critiqued by the very clear homeostatic evidence of research like the Minnesota Starvation Experiment, and others that have tied metabolism shifts to changes in body weight and fat loss. Other studies that were conducted were focused on the basal metabolic rate (BMR), which were analyzed across age and health groups (i.e. children, individuals with eating disorders, overweight individuals on weight-reducing diets etc.) One study found that obese subjects had a higher basal metabolic rate but predictions of BMR were lower than expected, whereas the semi-starved subjects had a lower BMR but predictions of BMR were higher than expected.

Also, the settling point theory does not explain why some people can eat a lot of “high calorie” foods and not gain weight, while others do gain weight if consuming higher calorie foods.

General Model of Intake Regulation

The General Model of Intake Regulation combines these two theories and takes into consideration uncompensated (primarily environmental) and compensated (primarily physiological) factors. Compensated factors have negative feedback loops to control body weight with increased or decreased intake, but uncompensated factors influence intake but are not affected by intake. 

In other words, we may have a strict set point weight or food intake level, but any change in the system can create a new level to defend. It predicts that a sustained long-term change in the environment can trigger a sustained change in body weight, and how much the body changes weight would depend on each individual’s genetic responsiveness to that environmental trigger.

Person sitting on a yoga matt drinking a smoothie.

General Model of Intake Regulation Criticisms

This theory may explain how genetics and environment interact, but it only focuses on intake, not expenditure as compensated factors. This theory has been described as “informative, but incomplete”. Also, behavioral genetic data has shown that there are simply too many independent genetic influences where many factors can influence an individual’s intake.

The Dual Intervention Point Model

The Dual Intervention Point Model suggests we don’t just have one set point, it’s more of a set point range. Outside the upper and lower intervention points, the control mechanisms get switched on, and within the boundaries, there is only weak physiological control. In other words, if your set point range is 120-135 lbs, you can influence where you fall in that range by eating more or less, or moving more or less, but these efforts will be more likely to be thwarted if you try to get down to 100 lbs or up to 160 lb.

Some experts use evolution to explain why we may be better at protecting our lower intervention point but not our upper one since the lower intervention point would help prevent starvation, and our upper one would prevent predation. But nowadays, we don’t really have the same predators our ancestors had, so this drive may not be as strong. The variability in individual’s ability to maintain the upper intervention boundary is built into this model.

This model may help explain why we may easily go up or down 5-10 lbs after a holiday or life event, but we have a hard time maintaining massive changes in weight.  Since everyone’s upper and lower intervention boundaries are different and variable is breadth, it helps explain why some people’s weight seems to be more tightly regulated than others. We all know someone who can eat ANYTHING and stay the same weight, while others have an extra beer on the weekend and gain weight.

Criticisms of the Dual Intervention Point Model

Like the General Model of Intake Regulation, the Dual Intervention Point Model has been described as “incomplete”. Critics suggest that there is no explanation for why the model has a lack of concern to all the states between the different thresholds. For example, one review suggested: “in the dual intervention point model, the animal acts to avoid starvation if the lower threshold is reached, and acts to avoid predation if the upper threshold is reached. In between the thresholds, the animal is indifferent to the level of reserves.” This may not hold true in the real world, as current fat reserves may impact future fat reserves and pose a future threat.

To sum up, the dual intervention point model is deemed incomplete without predicating a more ‘flexible’ situation where any level of fat reserves is of concern.

Person standing on scale.

How Do You Know What Your Weight Set Point Range Is?

Regardless of which theory you subscribe to, we can all appreciate that our weight has at least some genetic component and we may find value in knowing where that natural weight is. If your weight has been relatively stable your adult life, you haven’t engaged in a lot of diet behaviour, and you feel energetic and are in good health, there’s a good chance you are where your body wants to be.

Some signs that you are likely not at your natural or set point weight include:

  • You have food rules or rituals that dictate when you eat and what you eat outside of just listening to your body’s cues.
  • Your weight fluctuates frequently and significantly based on changes to your routine
  • You feel preoccupied with food and guilt for eating something that you feel is “bad”
  • You have symptoms like low libido, fatigue, coldness, low energy, irritability, menstrual irregularity or extreme hunger

Can You Change Your Set Point?

This is definitely up for debate and probably one of the major reasons why there are so many competing theories when it comes to set point weight. There is a lot of evidence to suggest that being able to change your set point dramatically may be difficult. When we look at research on “obese” patients who lose large amounts of weight, it is often found that they are unable to maintain that weight loss.

What is more likely based on the research and based on these statistics, is something closer to the Dual Intervention Point Model, where we are more likely to be able to shift our weight within the upper and lower intervention boundaries, but less likely to be able to jump well below or above that for an extended period of time.

Does Dieting Increase or Decrease Your Set Point?

As we have already discussed, weight loss diets have been shown to decrease metabolism and leptin levels, while increasing ghrelin levels. Therefore, when an individual begins to return to a ‘normal’ eating pattern, weight gain and fat gain is expected. However, research has shown in the Minnesota Starvation Experiment, “that after re-feeding it may take more than a year for the fat mass to decrease to within 5% of the initial value”. Therefore, it is possible that extreme dieting and short-term weight loss may not increase or decrease your set point permanently, however, that it may take some time.

Person eating a salad to change their weight set point.

Can Bariatric Surgery Change Your Set Point?

Body weight has been shown to not only be affected by intake and expenditure, but by biological factors as well. Research has suggested that in order to permanently change one’s set point, a person must change the biological factor that controls their weight.

Bariatric surgery is performed by altering the size or shape of the digestive organs, which of course, will have an impact on caloric intake. But it may also alter the gut hormone levels (like GLP-1) that are in control of hunger and satiety sensations. While we don’t have human research to support this impact, studies where lab mice were both over and underfed after RYGB and sleeve gastrectomy, were shown to fight to defend their lean body mass.

In regard to weight regain post-surgery, bariatric surgery is considered to have the lowest weight regain rates for long-term weight loss. However, while RYGB is considered the “gold standard” of weight-loss surgeries, it comes with a ‘high price’ of weight regain statistics. A long-term study group of patients who had RYBG found that 93% maintained at least 10% weight loss, 70% maintained 20% weight loss, and 40% maintained 30% weight loss after 12 years post-op.  Another study showed that around 59% of patients regain 20% or more of the weight they lost after RYGB surgery.

This would refute the set point changing permanently, because if set point was changed permanently, one would expect no weight regain over time after weight loss surgery.

Bottom Line on Weight Set Point Theory

In summary of the various theories discussed, it’s clear that we have yet to uncover a perfect theory to explain body weight changes over time. What we do know is that body weight clearly has a genetic component and the relative impact of environment, gut microbiome, lifestyle behaviours and other factors is clearly what is up for debate.

Contribution by Brooke Porter

More Blog Posts You Might Like

Did you find this post interesting? To learn more about weight and health, check out these posts:

  • I’ve Maintained My Weight My Whole Adult Life | Habits for Set Point Weight
  • Are Cheat Days Okay? The Truth About Cheat Days and Weight Loss
  • How to Calculate Macros for Weight Loss | Dietitian’s Guide to How Much Protein, Carbs and Fat You Should Eat
  • Why Weight Loss Diets that Work are a Diet Industry Lie (Why Losing Weight Doesn’t Mean Gaining Health)

What theory do you subscribe to when it comes to set point? What do you think about the weight set point theory? Leave me a comment below with your thoughts!

Abbey Sharp

Abbey Sharp is a Registered Dietitian (RD), regulated by the Ontario College of Dietitians. She is a mom, YouTuber, Blogger, award winning cookbook author, media coach specializing in food and nutrition influencers, and a frequent contributor to national publications like Healthline and on national broadcast TV shows.

www.abbeyskitchen.com/about-abbey/

Last Updated April 14, 2024. Published April 15, 2024 By Abbey Sharp 5 Comments

Stuffed Baked Apples with Oatmeal

birds eye view close up of baked apple on a yellow plate

These are the best healthy stuffed baked apples for an easy to make, and nutrient-dense dessert or snack for kids and adults alike. Plus, they’re vegan and gluten-free!

Close up image of healthy baked apples on a yellow plate.

It’s a bit of a mystery where I apparently got my culinary prowess since it’s always been a family joke that my mom hated to cook. As a parent of a toddler now (and another one who keeps me busy), I guess I can’t really blame her. And if cooking is a struggle for a lot of us, baking is just not going to happen. Like all of us, my mom wasn’t much for fussy cake recipes or homemade pie crusts. But she did know how to make a MEAN baked apple. To her, it was probably an easy recipe packed with a ton of nutritious stuff (apples, oats, nuts, etc.) that she would want us to eat. And to us, it was just dessert. Win, win. So I guess you could say I am following in mom’s footsteps and making the best easy healthy stuffed baked apples that the whole family will love.

Table of contents

  • Key Ingredients
  • Expert Tips
  • Recipe FAQs
  • Other Recipes You May Like

Why This Recipe Works

There are so many reasons to love these delicious stuffed baked apples! Some of my favourite reasons are:

  • Vegan-friendly
  • Kid-friendly
  • Easy to make
  • Gluten-Free
  • Packed with healthy goodness

Key Ingredients

Four baked apples in a baking dish.

My bet is that you probably have most of these things in your pantry, and the recipe is so versatile, you can absolutely swap things in and out.

Apples – I recommend using large red apples (larger ones are much easier to carve out and stuff), but you could also do a two smaller ones if that’s what you have.

Instant Oatmeal packets – This makes it so much easier to make the perfect baked apple stuffing volume, but if you don’t have the packets, you can also use 1/3 cup quick cooking oats per serving (so 1 1/3 cups for four people). I have also made this with other packets of flavoured oatmeal like maple & brown sugar or apple & cinnamon and it’s delish. If you opt for that, you can cut out the brown sugar in the filling.

Vegan Butter – To keep this recipe vegan-friendly, find a vegan butter that helps keep the apples and filling moist.

Ground flax– Flax adds omega 3s, protein and fibre, and just ups the whole grain action in these stuffed baked apples. This definitely will ensure your kiddos are getting something really nutrient dense.

Raisins – I get that not everyone is a raisin lover, so feel free to swap in dried cranberries, cherries, or whatever else your family likes.

How to Make This Recipe

Step 1: Slice the top off of the apple so it’s flat and core 2/3 of the way down until you remove all the seeds. Hollow out the apple allowing about 1/4“ of apple. Place in a greased 8×8” square pan.

Step 2: Mix together the oatmeal, sugar, butter, pecans, flax, raisins, cinnamon, and salt. Stuff the apple holes. Drizzle with maple syrup and top with a sprinkle of cinnamon.

Step 3: Pour the apple cider, juice, or water into the bottom of the dish and mix in the extra cinnamon. Cover with foil and bake for 35-40 minutes or until tender when pricked. Uncover and bake for an additional 5-10 minutes to let the tops brown up. Serve with yogurt, whipped cream, or ice cream.

Expert Tips

Birds eye view close up of baked apple on a yellow plate.

If your kids don’t like apple peel, then yes, go ahead and peel them before you bake them. I love the colour of the red baked apples, plus the extra fibre in the peel, but it’s really not a big deal.

You’ll want to use a firm large apple – I like Honeycrisp, Jonagold, Cortland, Empire or Fuji best. But again, this is an easy versatile recipe, so use what you have. It’s mainly important that the apples are all the same size so they cook evenly.

Like I said, there are a lot of ways you can make these stuffed baked apples your own, or just switch things up based on what you have on hand. These need to be an easy weekday dessert, breakfast or snack for you to want to make them regularly (and you’ll want to make them regularly). Here are some ideas on how to modify this recipe.

  • Use flavoured instant oatmeal packets (ie. apple and cinnamon, maple and brown sugar, peaches and cream, etc.)
  • Use regular quick cooking oats (1/3 cup per packet in the recipe)
  • Use honey, maple syrup, coconut sugar, low calorie brown sugar alternative, white sugar, or molasses in place of brown sugar
  • Add almonds, walnuts, cashews, pine nuts, peanuts, pumpkin seeds, sunflower seeds in place of pecans
  • Add a spoonful of nut butter to the filling for extra flavour and healthy fats
  • Use hemp hearts, wheat bran or ground chia seeds instead of flax
  • Use dried cranberries, cherries, minced dates, minced apricots or minced prunes in place of raisins

Recipe FAQs

What can my kids do in the kitchen to help make these stuffed baked apples?

Kids will love getting involved making these apples. I recommend letting an adult do the carving of the apple insides, and then the kids can mix up the filling ingredients and help you stuff them back in.

Are these gluten free?

If you are sure to use gluten free oats, then this recipe is completely gluten free and safe for those with celiac and gluten intolerance.

Are these stuffed baked apples vegan?

Yes, if you use vegan butter, these will be completely vegan.

Can I make these into microwave-baked apples?

To make these stuffed baked apples in the microwave (because let’s be real, we don’t all have time on a Tuesday night to bake them), pop them into a microwave safe dish (so not metal, likely pyrex), and cover the dish with a paper towel. Cook for 6 to 10 minutes, then check to see if they’re cooked through. These won’t get a crunchy bits like they would if baked, but you can always add some nuts on top.

What if I only have small apples?

You may not fit all this filling in 4 small apples, but you can just do more apples and adjust the cooking time a bit. You want a fork to go in easily but for the apples to still hold their shape. The most important thing is that the apples are all the same size.

Will these keep in the fridge if I batch prep some and how do I reheat them?

Yes, we keep them in the fridge for easy healthy breakfasts that will keep for 4 days in the fridge. The topping might not stay crunchy, but you can easily cut them in half and warm pieces up in the microwave for 30-45 seconds and serve them with yogurt.

Birds eye view of baked apples.

Other Recipes You May Like

I am all about making sweets super easy to pull off for family. Here are some of my favourite weeknight desserts.

  • Granola Poached Pears 
  • Coconut Rice Pudding 
  • Easy Fruit Spring Rolls 
  • No Bake Matcha Cheesecake Parfait 

What are your go-to easy weeknight desserts? Leave me a comment below with your thoughts!

Print Recipe
5 from 6 votes

Stuffed Baked Apples with Oatmeal

These are the best easy healthy stuffed baked apples for an easy to make, and nutrient dense dessert or snack for kids and adults alike. Plus, they're naturally vegan and gluten free!
Prep Time10 minutes mins
Cook Time1 hour hr
Total Time1 hour hr 10 minutes mins
Course: Dessert, Snack
Cuisine: American
Servings: 4
Calories: 421kcal
Author: Abbey Sharp

Ingredients

  • 4 large apples
  • 4 packets Regular Instant Oatmeal gluten free, if needed
  • ¼ c brown sugar
  • ¼ c melted vegan butter or regular butter
  • ¼ c crushed pecans
  • 2 tbsp ground flax
  • ¼ c golden raisins
  • 1 tsp cinnamon plus more for on top
  • Pinch salt
  • ¼ c maple syrup
  • ½ cup apple cider juice or water
  • ½ tsp cinnamon

Instructions

  • Preheat oven to 400 F.
  • Slice the top off of the apple so it’s flat and core 2/3 of the way down until you remove all the seeds. Hollow out the apple allowing about 1/4“ of apple. Place in a greased 8×8” square pan.
  • Mix together the oatmeal, sugar, butter, pecans, flax, raisins, cinnamon and salt. Stuff the apple holes. Drizzle with maple syrup and top with a sprinkle of cinnamon.
  • Pour the apple cider, juice or water into the bottom of the dish and mix in the extra cinnamon. Cover with foil and bake for 35-40 minutes or until tender when pricked. Uncover and bake for an additional 5-10 minutes to let the tops brown up. Serve with yogurt, whipped cream or ice cream.

Nutrition

Calories: 421kcal | Carbohydrates: 67g | Protein: 3g | Fat: 19g | Saturated Fat: 3g | Sodium: 145mg | Potassium: 423mg | Fiber: 7g | Sugar: 53g | Vitamin A: 606IU | Vitamin C: 9mg | Calcium: 81mg | Iron: 1mg
Abbey Sharp

Abbey Sharp is a Registered Dietitian (RD), regulated by the Ontario College of Dietitians. She is a mom, YouTuber, Blogger, award winning cookbook author, media coach specializing in food and nutrition influencers, and a frequent contributor to national publications like Healthline and on national broadcast TV shows.

www.abbeyskitchen.com/about-abbey/

Last Updated April 6, 2024. Published April 12, 2024 By Abbey Sharp 15 Comments

Baked Sweet and Sour Chicken Recipe (Gluten Free)

Sticky chicken breast on cabbage and peppers on a wooden plate.

This Sheet Pan Sweet and Sour Chicken recipe is an easy weeknight one-pan meal that is veggie-packed and family friendly! It is also gluten free and minimal mess.

Baked sweet and sour chicken sheet pan dinner with cabbage and peppers.

Bring on the sheet pan dinner recipes, am I right? Honestly, this girl may love to cook but I ABSOLUTELY hate to clean, so if I can get everything appearing on one simple baking sheet I’m a happy girl. And since I’m hearing from you that you’re in the same boat, I came up with this amazingly tasty baked sweet and sour chicken recipe. OMG, it’s good.

Now, if you’re just getting started with the idea of sheet pan dinners, this baked sweet and sour chicken may be just the recipe to make you join the fan club! I don’t know about you but I’m always desperately looking for ways to jazz up basic chicken breast meal prep and this is an awesome lower carb, high protein meal to do it!

Table of contents

  • Why This Recipe Works
  • Key Ingredients
  • How To Make This Recipe
  • Expert Tips
  • Recipe FAQs
  • More Recipes You Might Like

Why This Recipe Works

If you say the word “sheet pan” I am pretty much guaranteed to make it because to me that immediately translates to EASY. But this baked sweet and sour chicken recipe has far more to offer than just being easy to prep! Here are a few more reasons why we LOVE this dinner.

  • Gluten Free
  • High Protein
  • Easy clean up
  • Loaded with veggies
  • Family friendly

Key Ingredients

Flat lay image showing portioned recipe ingredients.

Sweet & Sour Sauce – You need an amazing sticky sauce to make this sheet pan dinner extra tasty, especially since we all know chicken breasts are sometimes a bit bleh. I combine garlic, ginger, honey, ketchup, coconut sugar, rice vinegar, and tamari to get an addictive sweet, sour, and zippy sauce that gets extra sticky when baked in a hot oven.

Veggies – for this baked sweet and sour chicken we opted for carrots, bell peppers and cabbage. But honestly, any colourful crunchy veg will work!

How To Make This Recipe

Three side by side images showing how to prepare recipe.

Step 1: Place the vegetables on a large baking sheet and sprinkle with salt and pepper.

Step 2: In a bowl, mix together the garlic, ginger, honey, ketchup, coconut sugar, rice wine vinegar, and tamari. Place the chicken in a large plastic bag. Add ¼ cup of the sauce to the chicken and toss to combine.

Step 3: Place the chicken on top of the vegetables, sprinkle with a pinch each of salt and pepper, and bake for 20 minutes.

Two side by side images showing how to prepare recipe.

Step 4: Put the rest of the sauce into a saucepan over medium low heat. Combine the water and cornstarch and add it to the sauce. Bring the sauce to a slight boil, then reduce the temperature to a medium low and simmer until it thickens, about 3-4 minutes.

Step 5: Drizzle the chicken and vegetables with the rest of the sauce and bake for an additional 20 minutes, or until the chicken reaches 165 F.

Expert Tips

While this sweet and sour chicken recipe is meant to be super easy and no fuss, I know what you’re thinking – sticky things are messy!! True, my friend, very true. But wouldn’t you rather just pop ONE sticky sheet pan and a small saucepot in the dishwasher instead of cleaning another pan for veggies on the side? Here’s my insider tip: rinse it off while the pan is still hot before the sugars caramelize and cake onto the pan. You’re welcome.

Also, be sure to give the chicken breasts a quick toss in the sauce before adding the rest to a pan – this will help to thicken up the sauce. Then you can drizzle the remaining sauce all over the chicken breasts and the veggies for the last leg of the cooking.

Recipe FAQs

What can I serve this with?

I like to serve these baked sweet and sour chicken breasts on a bed of rice or quinoa, but for my low carb friends you can totally do cauliflower rice or just enjoy the awesome veggies that are caramelized and sticky accompaniments in this sheet pan dinner.

How long does this sweet and sour chicken recipe keep in the fridge?

This should keep in the fridge for about 3-4 days.

Can I freeze this?

You can try, however the sauce may lose its texture and flavour once thawed.

How else can I repurpose the sweet & sour sauce?

You can add the sauce to any protein of your choosing – including tofu, fish, shrimp etc! Its super versatile (and addicting).

Baked sweet and sour chicken recipe on a bed of cabbage and peppers on a wooden plate.

More Recipes You Might Like

If you are a member of the sheet pan fan club, here are some more sheet pan dinners you need in your life!

  • Sheet Pan Stir Fry with Shrimp & Veggies
  • Greek Sheet Pan Chicken (Easy Family Friendly Recipe)
  • Sheet Pan Balsamic Chicken with Rosemary & Grapes
  • Buffalo Chicken Fingers Sheet Pan Dinner

So friends, I would love to know what sheet pan dinners you love! Have you tried this baked sweet and sour chicken recipe? Leave me a comment below with your thoughts!

Sticky chicken breast on cabbage and peppers on a wooden plate.
Print Recipe
5 from 6 votes

Baked Sweet and Sour Chicken Sheet Pan

This Baked Sweet and Sour Chicken Sheet Pan is an easy weeknight one-pan meal that is veggie-packed that the whole family will love!
Prep Time10 minutes mins
Cook Time44 minutes mins
Total Time54 minutes mins
Course: Dinner
Cuisine: American, Asian
Servings: 4 people
Calories: 378kcal
Author: Abbey Sharp

Ingredients

Vegetables:

  • 1/2 head Napa cabbage cut into chunks
  • 2 Red Bell pepper thinly sliced
  • 1 large carrot peeled and cut into julienne sticks
  • Salt and pepper to taste

Chicken:

  • 1 ¼ lb skinless boneless chicken breasts
  • 3 cloves garlic minced
  • 1 tbsp grated ginger
  • 6 tbsp honey
  • ¼ cup ketchup
  • ¼ cup coconut sugar
  • 2 tbsp rice wine vinegar
  • 3 tbsp tamari
  • 2 tbsp water
  • 1 tbsp cornstarch

Garnish:

  • White and black sesame seeds
  • Cilantro

Instructions

  • Preheat oven to 350 F.
  • Place the vegetables on a large baking sheet and sprinkle with salt and pepper.
  • Place the chicken in a large plastic bag.
  • In a bowl, mix together the garlic, ginger, honey, ketchup, coconut sugar, rice wine vinegar, and tamari. Add ¼ cup of the sauce to the chicken and toss to combine.
  • Place the chicken on top of the vegetables, sprinkle with a pinch each of salt and pepper, and bake for 20 minutes.
  • Put the rest of the sauce into a saucepan over medium low heat.
  • Combine the water and cornstarch and add it to the sauce. Bring the sauce to a slight boil, then reduce the temperature to a medium low and simmer until it thickens, about 3-4 minutes.
  • Drizzle the chicken and vegetables with the rest of the sauce and bake for an additional 20 minutes, or until the chicken reaches 165 F.
  • Serve topped with sesame seeds and cilantro, if desired.

Nutrition

Calories: 378kcal | Carbohydrates: 50g | Protein: 31g | Fat: 6g | Saturated Fat: 1g | Cholesterol: 134mg | Sodium: 1061mg | Potassium: 890mg | Fiber: 3g | Sugar: 40g | Vitamin A: 4880IU | Vitamin C: 108.6mg | Calcium: 115mg | Iron: 2.3mg

Abbey Sharp

Abbey Sharp is a Registered Dietitian (RD), regulated by the Ontario College of Dietitians. She is a mom, YouTuber, Blogger, award winning cookbook author, media coach specializing in food and nutrition influencers, and a frequent contributor to national publications like Healthline and on national broadcast TV shows.

www.abbeyskitchen.com/about-abbey/
  • Previous Page
  • Go to page 1
  • Interim pages omitted …
  • Go to page 6
  • Go to page 7
  • Go to page 8
  • Go to page 9
  • Go to page 10
  • Interim pages omitted …
  • Go to page 89
  • Next Page

Get started with

Eight Free Recipe Books

From the co-founder of Neue Theory and creator of the Hunger Crushing Combo

Sign me up!
Abbey smiling at table
Abbey Sharp

“Foods may never be nutritionally equal. But we can make them morally equal by recognizing that our worth is never determined by what's on our plate.”

— Abbey Sharp, RD About Abbey ◥

Books

  • HCC™
  • Mindful Glow
  • Free E-Books

Blog

  • Nutrition
  • Recipes
  • Motherhood
  • Life

Explore

  • Neue Theory™
  • Bite Back
  • YouTube

Abbey

  • About
  • Coaching
YouTube TikTok Instagram Facebook X Pinterest
Abbey Sharp - The No BS Dietitian From Abbeys Kitchen

© Abbey's Kitchen 2026  All Rights Reserved •  ACCESSIBILITY STATEMENT •  Privacy Policy

This site uses cookies. By continuing to browse the site, you are agreeing to the use of cookies Accept Privacy Policy
Privacy & Cookies Policy

Privacy Overview

This website uses cookies to improve your experience while you navigate through the website. Out of these, the cookies that are categorized as necessary are stored on your browser as they are essential for the working of basic functionalities of the website. We also use third-party cookies that help us analyze and understand how you use this website. These cookies will be stored in your browser only with your consent. You also have the option to opt-out of these cookies. But opting out of some of these cookies may affect your browsing experience.
Necessary
Always Enabled
Necessary cookies are absolutely essential for the website to function properly. This category only includes cookies that ensures basic functionalities and security features of the website. These cookies do not store any personal information.
Non-necessary
Any cookies that may not be particularly necessary for the website to function and is used specifically to collect user personal data via analytics, ads, other embedded contents are termed as non-necessary cookies. It is mandatory to procure user consent prior to running these cookies on your website.
SAVE & ACCEPT

Rate This Recipe

Your vote:


A rating is required
A name is required
An email is required