• Skip to main content

Abbey's Kitchen

Healthy Recipes, Nutrition Myth Busting, Healthy Eating Tips

  • Books
    • HCC™
    • The Mindful Glow Cookbook
    • Recipe eBooks
      • Family
      • Hypothyroidism
      • BLW
      • Vegan Week 1
      • Vegan Week 2
      • Vegan Week 3
      • Keto
      • Gluten Free Week 1
      • Gluten Free Week 2
      • Fitness
      • Paleo
  • Blog
    • Nutrition
    • Recipes
    • Motherhood
    • Life
  • Explore
    • Neue Theory™
    • Bite Back With Abbey Sharp
      • Apple Music
      • Spotify
      • Amazon Music
    • YouTube
  • Abbey
    • About
    • Coaching
    • Contact

Abbey Sharp

Last Updated June 19, 2024. Published April 10, 2024 By Abbey Sharp 53 Comments

Best Foods for Morning Sickness | Do Certain Foods Really Help?

Hand holding mug with water and ginger.

We review the latest evidence on the best foods for morning sickness and whether they really work.

Person in a dress holding their baby bump

Confession time: sometimes being a woman can suck. Hear me out. I’ve spoken in the past about women hardships. I’ve spoken about mother nature’s lovely gift that graces us once a month and don’t even get me started on the wage gap and our reproductive rights being thrown around by old white men. Pushing the patriarchy aside, I also want to say that I’m a proud female and it’s never been a more exciting time to be a woman. As a woman we are given a gift of GIVING life. That’s pretty great.

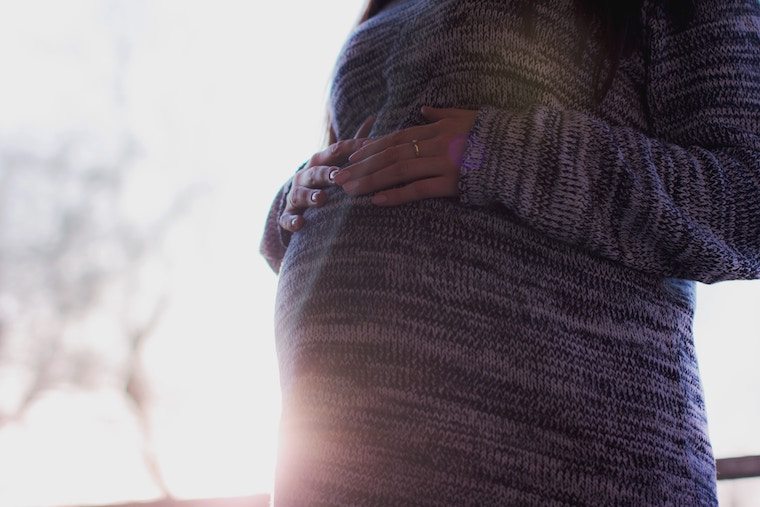
However, like most rewarding things in life, it comes at a price. Yes, pregnancy can have its Kodak moments, but it can also be ugly. Constant pain without relief, body changes, nonstop cravings, and the best of all: morning sickness. Which for people that didn’t know, it doesn’t just happen in the morning. TRUST ME.

Now, there are some lucky woman that don’t experience morning sickness, but that number is super slim. According to the American Pregnancy Association, 85 percent of pregnancy women experience nausea and vomiting, while 60-70 percent deal with the actual throwing up. I don’t like those odds. I myself started my pregnancy off thinking I might have an easy ride, but nope, then it hit me. Hard. And since so many of the important things I do in my job takes place early in the morning, not barfing on the host started to constitute a good day.

There’s no research to suggest we can PREVENT morning sickness, but there is some evidence about the best foods for morning sickness to lessen your symptoms.

Foods That Help with Morning Sickness

Ginger

Hand holding a mug with ginger and water.

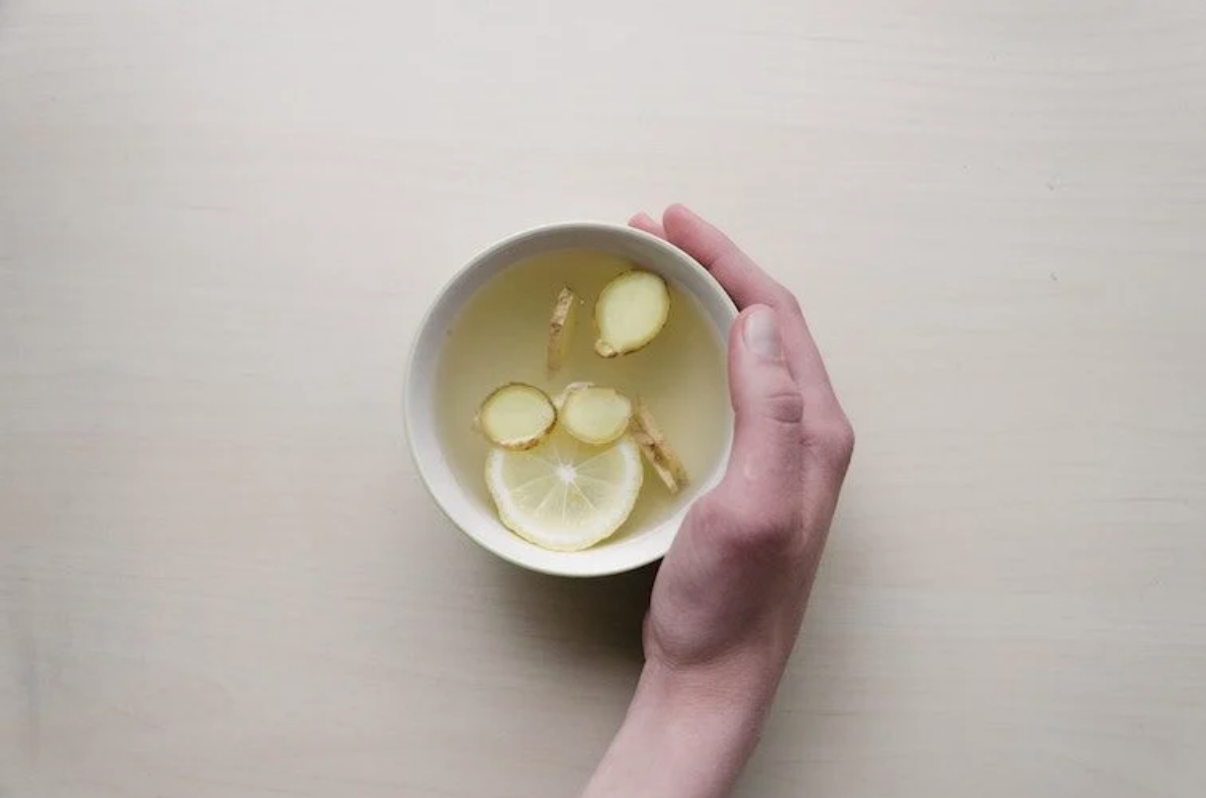
The use of ginger to settle an upset stomach is a common remedy and has been studied quite a bit. Interestingly enough, ginger is the only nonpharmacological intervention recommended by the American College of Obstetrics and Gynecology. Ginger acts on our body by stimulating movement in our gastrointestinal tract, the flow of our saliva, bile and gastric secretions. In a double blind cross over trial, 70 percent of woman treated with 250 mg of powdered ginger root four times a day felt the ginger significantly relieved symptoms compared to the placebo. In another randomized control trial, 70 pregnant women at 17 weeks were given 250 mg of ginger four times a day for four days. Women given ginger experienced significant improvements in nausea symptoms compared with the placebo group.

Tip: Drink flat ginger ale (carbonation may irritate stomach), sniff fresh ginger, sip on singer tea, or eat ginger candies (I basically lived on these for the first 14 weeks).
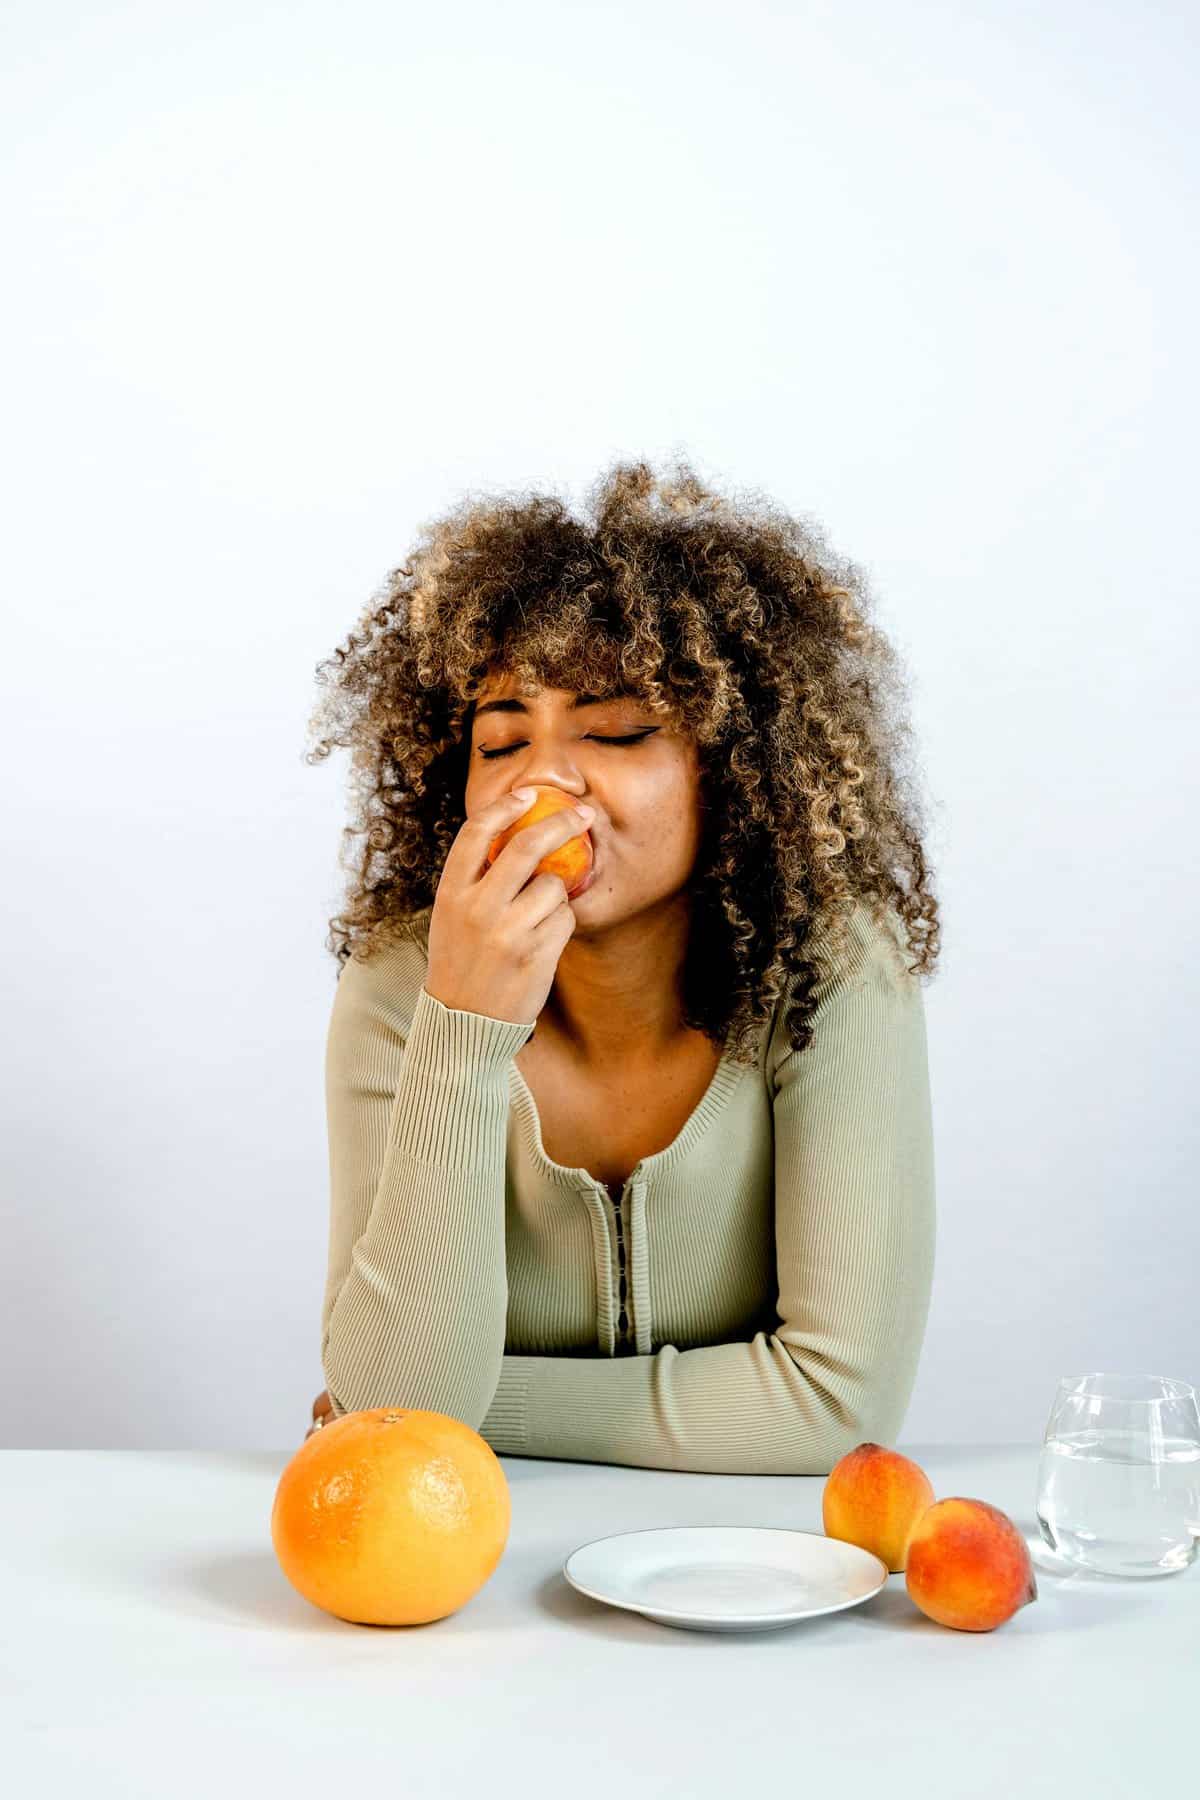
Lemons 

Multiple lemons on a white marble surface.

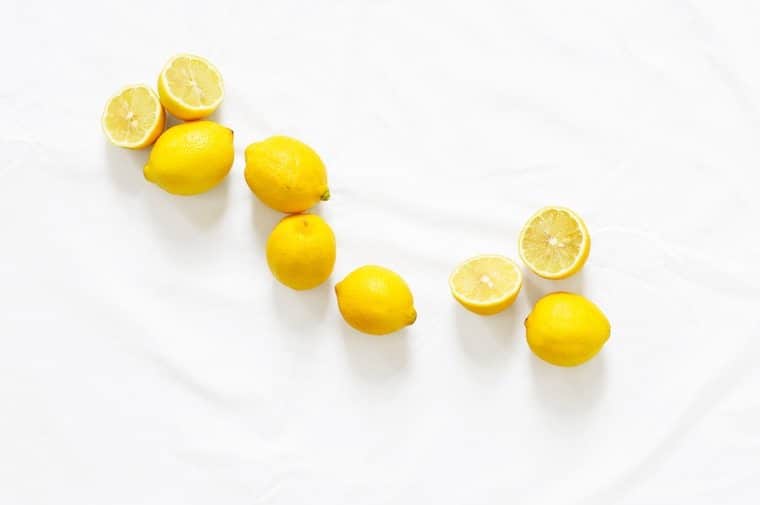
Apparently just the scent of lemons is one of the best foods for morning sickness. In a 2014 randomized controlled clinical trial, 100 pregnant women were asked to inhale either a lemon essential oil or a placebo. The nausea and vomiting intensity in the lemon group were statistically significantly lower than in the control group. Keep in mind, this was a small study and insufficient evidence exists to confirm these findings. Aside from just smelling lemons, according to the National Cancer Institute, sucking on sour lemon candies may also help with nausea. Remember that many of these are anecdotal, but if it works for some, it doesn’t hurt to try!

Tip: Keep fresh cut lemon slices in your kitchen, or squeeze lemon in your water. Suck on sour lemon candies.

Peppermint

Tea pot brewing hot tea.

It’s not clear if peppermint can reduce nausea or is one of the best foods for morning sickness. Much of the evidence around its use is anecdotal, but it doesn’t hurt to try and it may work for you.

Tip: Sip on peppermint tea, or suck on a peppermint candy.

Vitamin B6

Salmon filets on a tray.

Two randomized controlled trials from 1991 and 1995 found that vitamin B6 was more effective than a placebo at improving symptoms of nausea, however whether vomiting was reduced was not proven. A more recent trial from 2014, 135 women given vitamin B6 experienced significantly reduced nausea and vomiting. I admit I did take B6 on days I had an important TV segment, but getting a little every day in your diet is best.

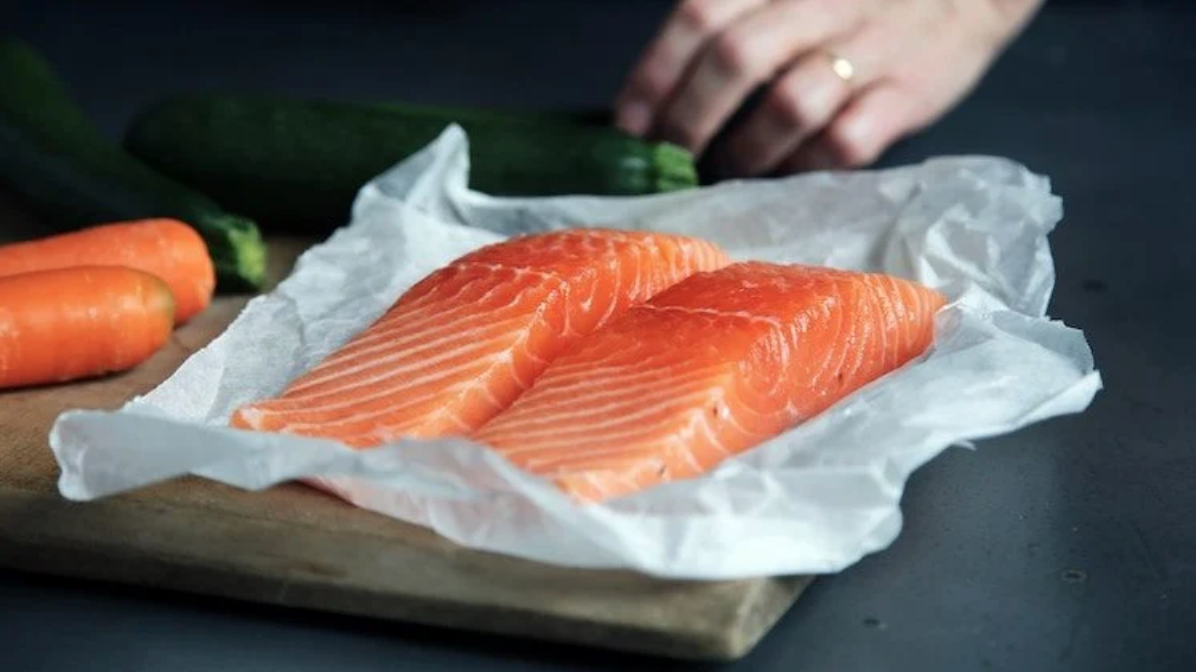
Tip: Look for foods rich in B6 like fish, potatoes and non-citrus fruit.
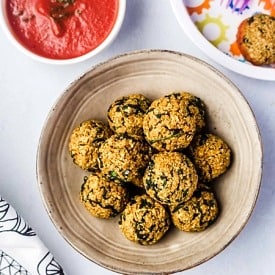
High Carbohydrates

Birds eye view of pasta dish on a white plate.

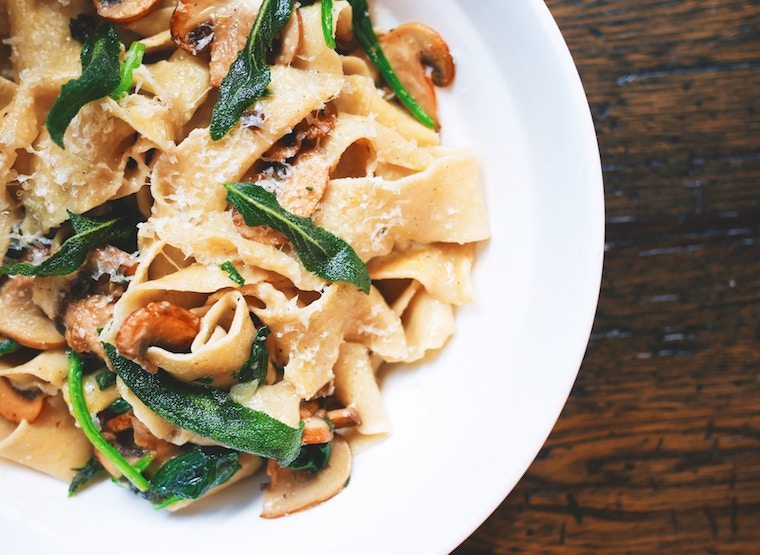
If you’ve ever been pregnant you remember going through packs of saltine crackers every week and keeping them by your bed. Is there any evidence to support this? Honestly, the majority of it is anecdotal or super old studies from the 1900s like this one. At the end of the day, large organizations like the American Institute for Cancer Research or publications like the American Family Physician recommend the consumption of bland foods like breads, crackers and cereals to ease nausea, but very little research proves that it can actually have an impact.

Tip: Choose higher-fibre carbs if you can tolerate them. I found I was eating a LOT of All Bran cereal because it kept my stomach full (and a full tummy is a non-nauseous tummy), wasn’t sweet or strongly flavoured and was a good crunch on top of yogurt or oatmeal.

High Protein

Multiple barrels filled with various beans and legumes.

Evidence has shown that a diet high in protein may actually be much better reduce morning sickness. In a 1999 study, high protein meals reduced nausea and normalized gastric motility. In a more recent 2010 study, women in their first trimester who consumed a diet high in protein experienced less nausea and vomiting, while women who consumed a diet high in carbohydrates experienced more nausea and vomiting.

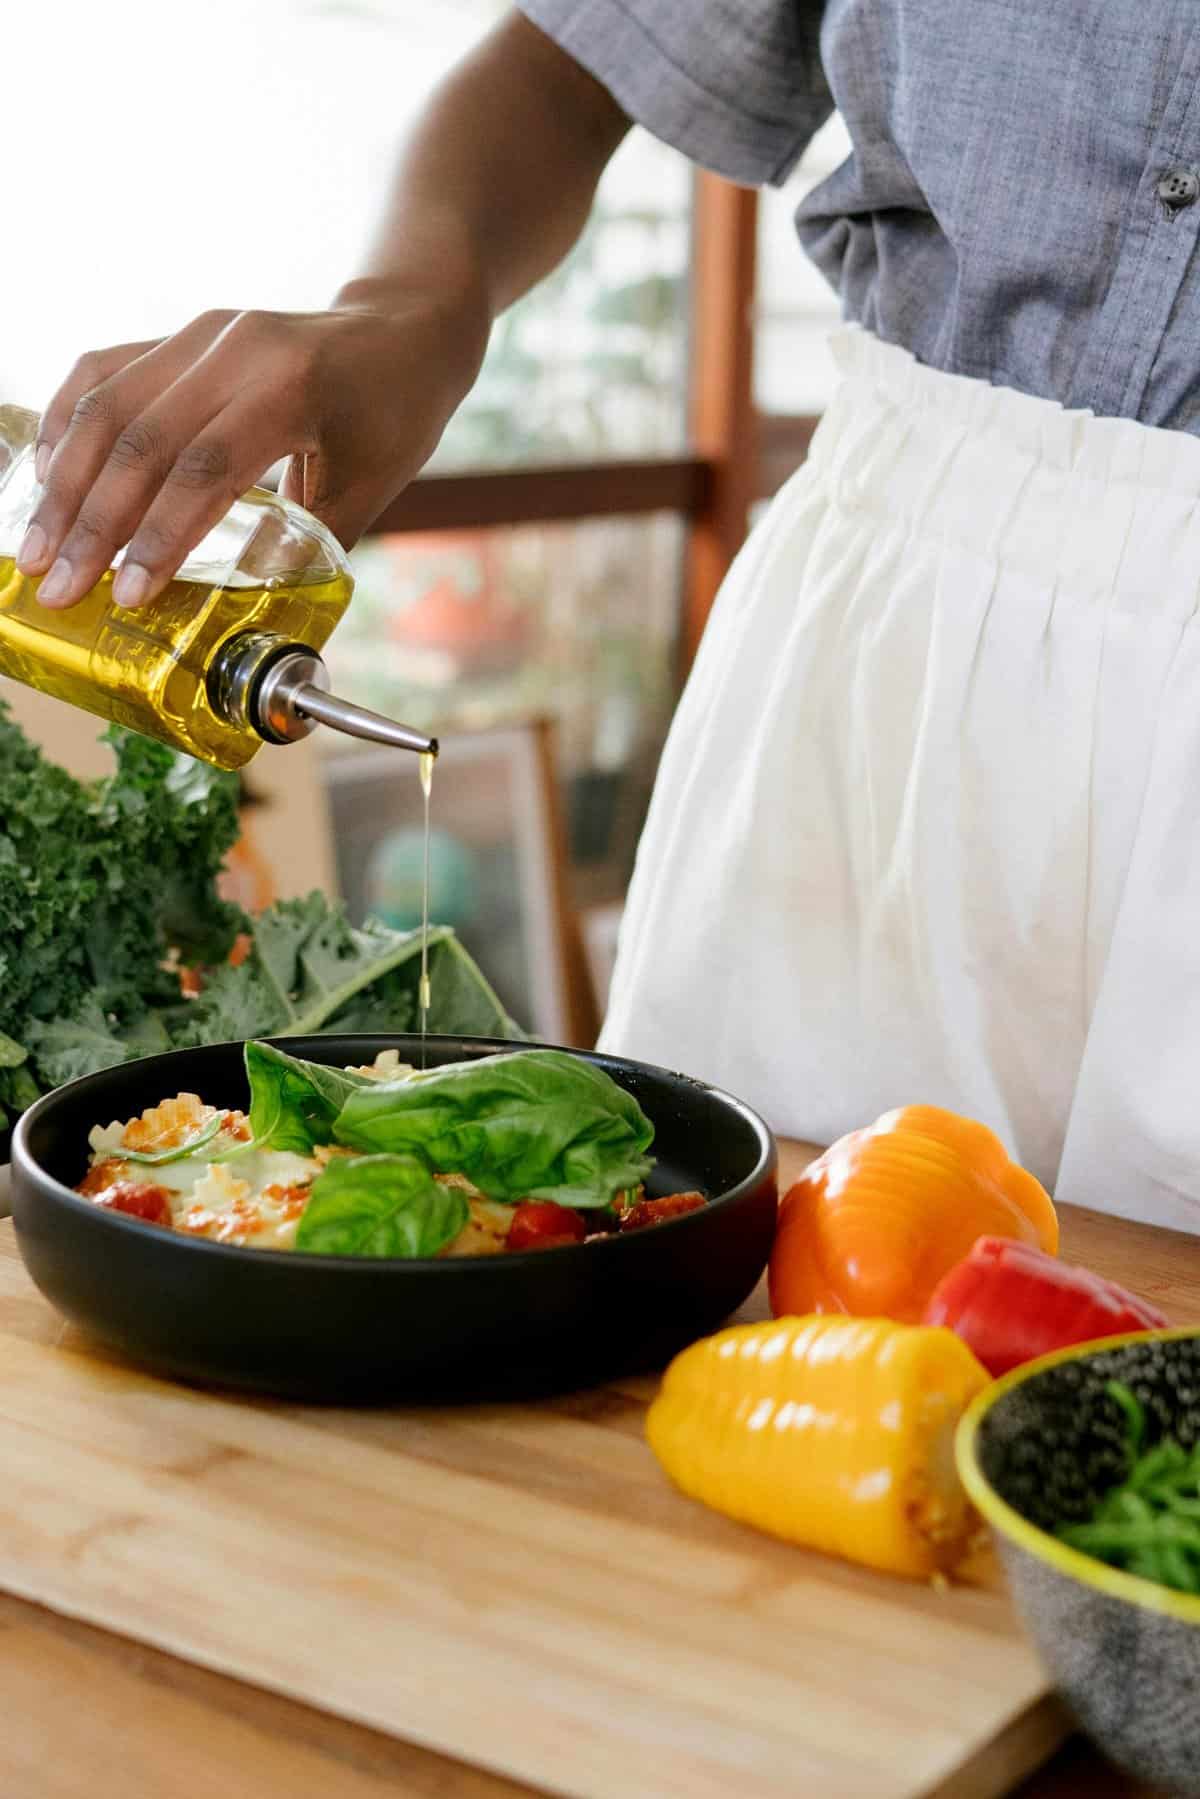
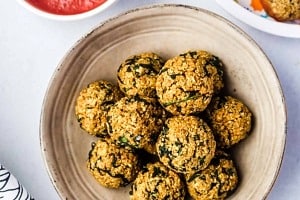
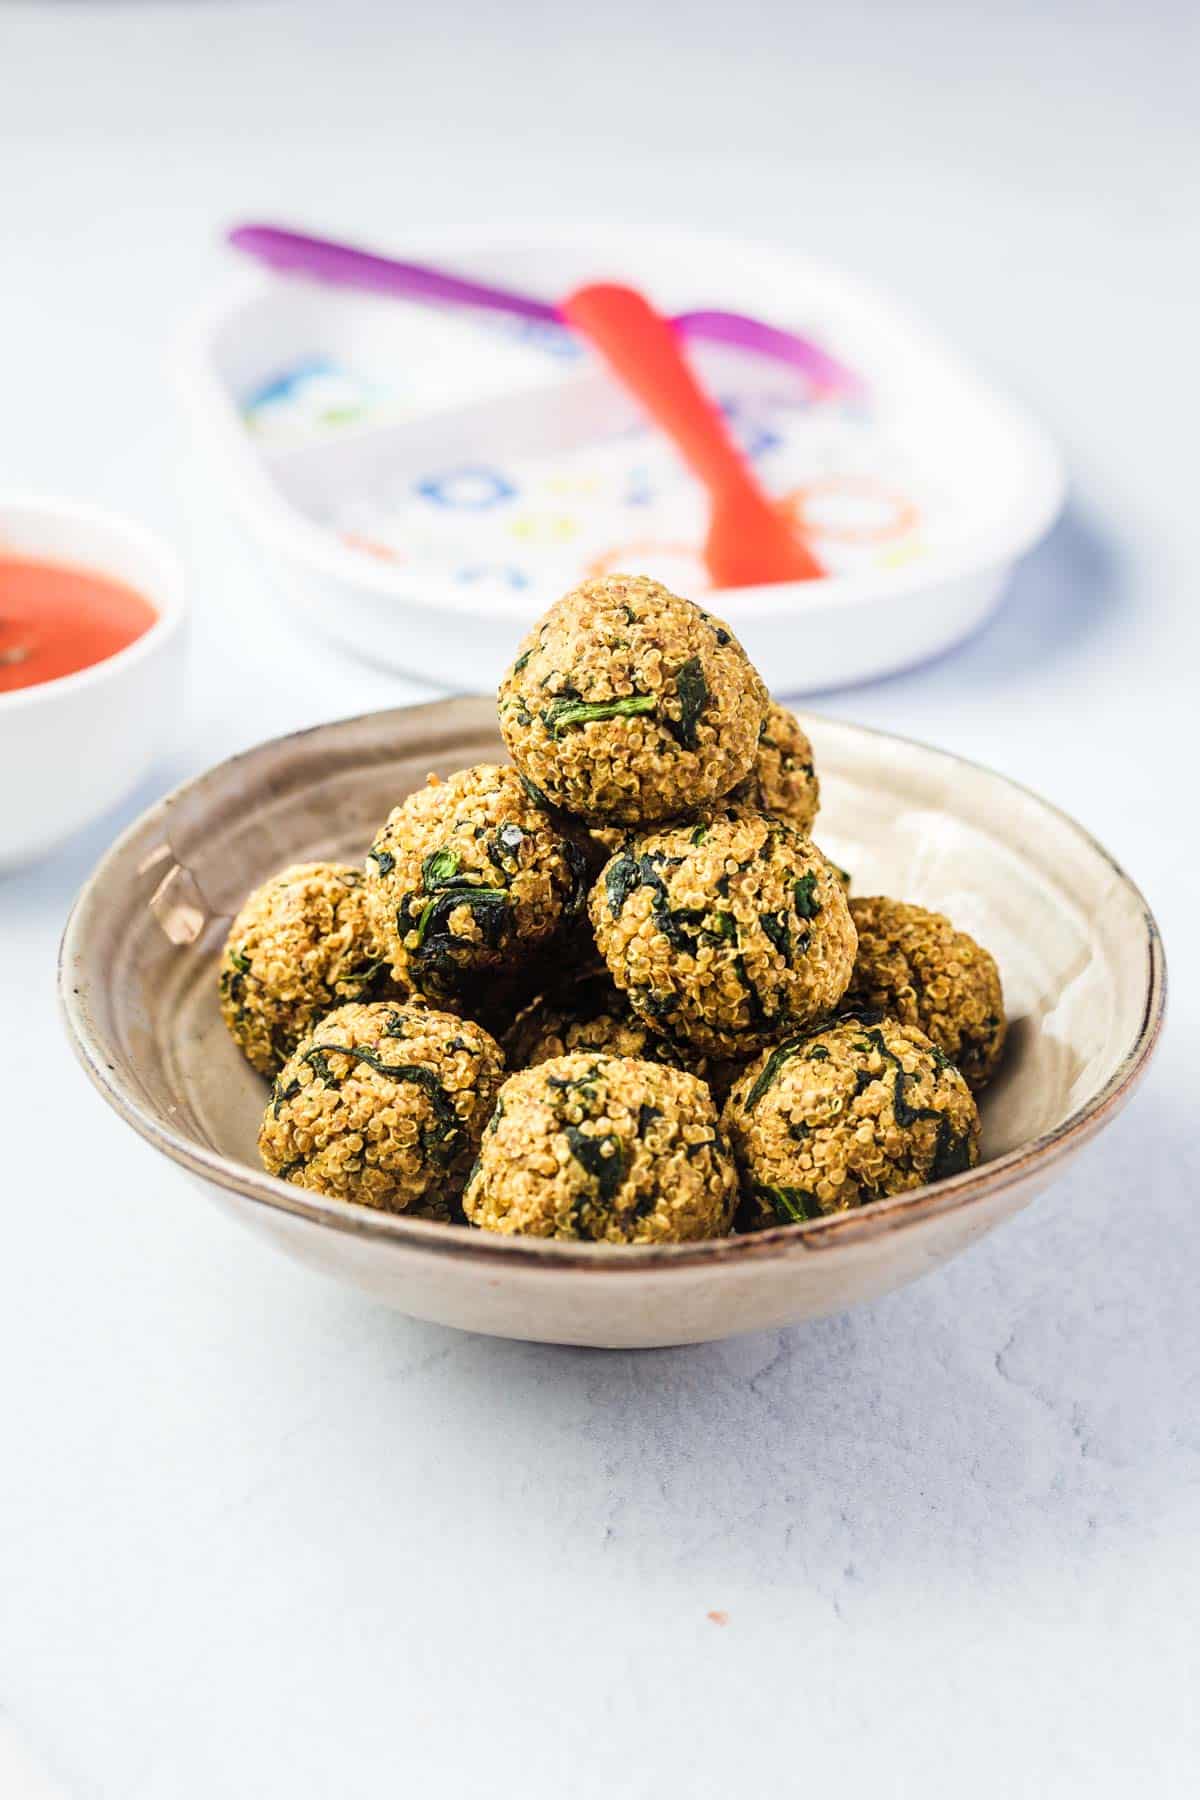
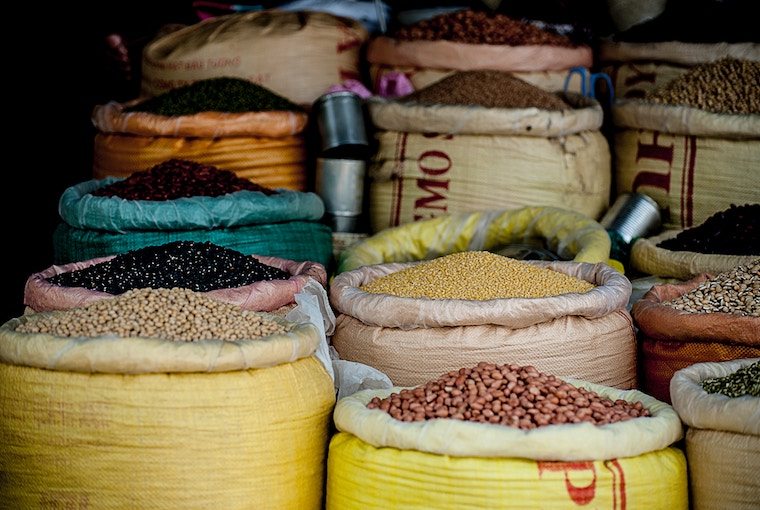
Tip: If you’re like me, you might have aversions to certain meat smells. Consider choosing plant based proteins like soy, edamame or pulses, or letting your meat cool down slightly so the odours are not as strong.

Skip Your Multivitamin and/or Iron Supplements

Close up of a blue pill bottle filled with supplements for morning sickness.

Multivitamins and iron supplements are known to cause nausea and vomiting, but they may still be important to take during your pregnancy.

Tip: Always take your vitamins with a bit of food and drink and try to change up the timing. Split up your vitamins between morning and night. Take your iron at a time when you’re feeling the least sick in the day.

Fluids

Close up a clear class with water and a lemon slice.

It is often recommended to drink fluids to help with nausea, however very little evidence actually backs these claims. The Cleveland Clinic advises the consumption of clear ice-cold drinks and to drink beverages slowly. The consumption of fluids makes sense if you have been vomiting and need to replenish lost fluids and electrolytes, but whether fluids are one of the best foods for morning sickness is up for debate.

Tip: Listen to your body and drink flat (not bubbly) fluids as needed.

Eat Small Meals

Close up of a bowl of fresh blueberries with a silver spoon.

Most women report feeling sick when they get hungry, but getting too full can also trigger the unpleasant response.

Tip: Cut meal size in half but eat more often and regularly. Never letting yourself get too hungry or too full.

Can These Foods Really Help with Morning Sickness?

Sadly, morning sickness is inevitable for many women entering pregnancy. Many dietary recommendations prescribed are fairly weak in nature. Recently, The Society of Obstetricians and Gynaecologists of Canada released new guidelines on treating pregnant women suffering from nausea and vomiting. The new guidelines suggest that there is little evidence to support the idea that certain foods will actually relieve symptoms. Instead they recommend that women should just eat whatever pregnancy-safe foods they want. Honestly, I love this recommendation regarding the best foods for morning sickness. Just eat what you crave!

Bottom Line

Pregnancy is a really amazing time to practice mindful eating because your body is going to tell you exactly what it needs. Your job is just to listen. Most recommendations purely anecdotal and may work on one individual, but not with another because every body is different. Some of the foods mentioned above may have also worked because of the potential for the placebo effect. This is where we believe strongly that it will work, but not really based on any scientific evidence. In terms of the best foods for morning sickness, just do what works for you and find that “happy place” where you’re feeling your best.

Contribution By:

Sofia Tsalamlal, RD, MHSc

More Blog Posts You Might Like:

If you liked this blog post on the best foods for morning sickness, you might also enjoy more blog posts on pregnancy and nutrition:

  • Is a Vegan and Vegetarian Diet Safe During Pregnancy?
  • Dangers of Dieting During Pregnancy on Baby’s Risk of Obesity and Disease in Adulthood
  • 6 Pregnancy Nutrition Myths That Are Total BS: Part 1
  • Even More Pregnancy Nutrition Myths That We’re Sick of Debunking: Part 2
  • Pregnancy Lessons I’ve Learned About My Body, Weight Gain, and Nutrition While Growing a Baby
  • Vegan Pregnancy Diet | Essential Nutrients for a Vegan Pregnancy
Abbey Sharp

Abbey Sharp is a Registered Dietitian (RD), regulated by the Ontario College of Dietitians. She is a mom, YouTuber, Blogger, award winning cookbook author, media coach specializing in food and nutrition influencers, and a frequent contributor to national publications like Healthline and on national broadcast TV shows.

www.abbeyskitchen.com/about-abbey/

Last Updated June 19, 2024. Published April 8, 2024 By Abbey Sharp 2 Comments

Vegan Cheesy Soda Bread Recipe | Healthy No Yeast Bread Recipe!

This cheesy vegan soda bread recipe is one of my new favourite healthy no yeast quick breads because it’s super flavourful, easy to make and doesn’t require any rise time!

A slice of cheesy vegan soda bread.

If you find yeasted breads, challenging, I see you. I’m BUSY and sometimes just can’t be bothered to wait hours for a rise. As a result, I created a yeast free, flour free focaccia recipe on my blog that has been a total hit. I then got experimenting with other non yeast breads and the popular one is a classic Irish Soda Bread. 

Soda bread is a traditional quick bread that doesn’t use any yeast to leaven the bread, but rather, relies on baking soda and buttermilk, instead. I also wanted to make a vegan soda bread recipe. So in lieu of typical buttermilk, I actually use non-dairy almond milk mixed with some apple cider vinegar to “thicken” the milk naturally. I also use a combination of vegan shredded cheese and nutritional yeast to add cheesy flavour instead of using dairy cheese.

Table of contents

  • Why This Recipe Works
  • Key Ingredients
  • How To Make This Recipe
  • Expert Tips
  • Recipe FAQs
  • More Recipes You Might Like

Why This Recipe Works

Let me tell you why this soda bread recipe has been a hit in my house:

  • Completely vegan
  • High in fibre
  • Perfect for pairing with soups or making into sandwiches
  • Kid approved level of cheesiness!

Key Ingredients

Two slices of cheesy soda bread on a yellow plate with butter on top.

Whole Wheat Flour– I like the natural nuttiness this brings, plus of course it boosts up the nutrition.

All Purpose Flour– I do recommend using a combination of whole wheat and all purpose, because I find if you go straight up wheat, the bread can taste a little dry.

Ground Flax – This adds a nice hearty texture and also lots of omega 3, fibre and protein!

Vegan Buttermilk – A simple combination of non-dairy milk and apple cider vinegar (you can swap in lemon juice or rice vinegar) that is allowed to sit for 5 minutes to thicken up like buttermilk. Buttermilk is actually naturally low in fat, it’s just that because of the acid added to it, it’s thick like butter.

Baking Soda – This works with the vegan buttermilk to give the bread a nice rise.

Fortified Nutritional Yeast– This adds a ton of protein and vitamin B12 plus a naturally cheesy flavour.

Vegan Cheese Shreds – This gives you a little colour and also more salty savoury cheesy flavour. 

Vegan Butter– This gives this bread a buttery biscuit like texture. SO SO GOOD.

How To Make This Recipe

close up of soda bread loaf in a red pan with parchment paper underneath

Step 1: Preheat oven to 375 degrees Fahrenheit and place a piece of parchment paper into a round cast iron skillet with high sides or a cake pan.

Step 2: Mix the almond milk and vinegar and let sit for 5 minutes to make “buttermilk”.

Step 3: In a large bowl, mix the whole wheat flour, all purpose flour, flax, nutritional yeast, sugar, baking soda, and salt to a large bowl. Mix together until combined.

Step 4: Cut the vegan butter into the dry ingredients and rub your finger and thumb together to get small pieces of butter coated in the flour.

Step 5: Add buttermilk and cheese and use your hands until they’re well incorporated. This will be a very wet dough.

Step 6: Sprinkle 1/4 cup whole wheat flour to your work surface and turn the dough out onto the surface. Sprinkle another 1-2 tablespoons of flour on top of the dough. Then fold the dough onto itself like a book and add another tablespoon or so of flour as you kneed. Knead for another 5 minutes until it’s no longer super sticky (it will still be a moist flour, but you want it to stop sticking to the surface with every turn.) Fold corners under to make a ball and set the ball in the cast iron. Cut a X on the top of the circle.

Step 7: Bake for about 40-45 minutes, or until golden brown and a toothpick inserted into the middle comes out clean.

Step 8: Remove from oven and place the loaf on a rack to cool. Slice and serve with vegan butter or vegan cream cheese.

Expert Tips

You’ll know it’s time to stop kneading once the dough is smoother with a satiny finish. It will still be pretty moist, but it shouldn’t be a shaggy ball that sticks to the counter with every knead. This ensures the gluten is developed so you have a beautiful bread.

Use a sharp knife or bread lame (fancy term for a razor) to slice the X on top of your bread. You can also get crafty with designs, but the main purpose is to give the bread space to expand.

Recipe FAQs

Can I make this soda bread recipe with regular cheese and butter?

Absolutely. Feel free to use whatever you have on hand.

How do I know if the soda bread is cooked through?

There are a few tell tail signs you can look out for. One is that the X looks dry and no longer wet. Another is that when you stick a toothpick into the centre, it comes out clean (like any good quick bread). I like to get technical and take the bread’s temperature – it should read 205 F.

Is this bread kid-friendly?

Absolutely. My kiddo LOVED this bread’s cheesy flavour and I loved that it had the extra protein, fibre and healthy fats from whole wheat flour, flax and nutritional yeast. I served it simply with a little cream cheese or butter on top, sprinkled with some hemp hearts for even more nutrition.

Two slices of soda bread on a yellow plate with butter spread on top with a gold butter knife.

More Recipes You Might Like

  • Gluten Free Flax Focaccia (No Yeast)
  • Vegan Corn Spoonbread (Gluten Free)
  • Dairy Free Banana Bread with Cherries and Chocolate Chips
  • Healthy Vegan Pumpkin Bread

What are some of your favourite no yeast bread recipes? Have you tried making any soda bread recipes? Leave me a comment below with your thoughts!

Print Recipe
5 from 2 votes

Cheesy Vegan Soda Bread

This cheesy vegan soda bread recipe is one of my new favourite healthy no yeast quick breads because it's super flavourful, easy to make and doesn't require any rise time!
Prep Time20 minutes mins
Cook Time45 minutes mins
Total Time1 hour hr 5 minutes mins
Course: Breakfast, Snack
Cuisine: American
Servings: 12 slices
Calories: 148kcal
Author: Abbey Sharp

Ingredients

  • 1 cup almond milk + 1 tbsp apple cider vinegar
  • 1 cup whole wheat flour plus more for kneeding
  • 3/4 cup all purpose flour
  • ¼ cup ground flaxseed
  • ½ cup fortified nutritional yeast
  • 2 tbsp brown sugar
  • ½ tsp baking soda
  • ½ tsp salt
  • ¼ cup vegan butter cut into pieces
  • ¾ c shredded vegan orange cheese

Instructions

  • Preheat oven to 375 degrees Fahrenheit and place a piece of parchment paper into a round cast iron skillet with high sides or a cake pan.
  • Mix the almond milk and vinegar and let sit for 5 minutes to make “buttermilk”.
  • In a large bowl, mix the whole wheat flour, all purpose flour, flax, nutritional yeast, sugar, baking soda, and salt to a large bowl. Mix together until combined.
  • Cut the vegan butter into the dry ingredients and rub your finger and thumb together to get small pieces of butter coated in the flour.
  • Add buttermilk and cheese and use your hands until they’re well incorporated. This will be a very wet dough!
  • Sprinkle 1/4 cup whole wheat flour to your work surface and turn the dough out onto the surface. Sprinkle another 1-2 tablespoons of flour on top of the dough. Then fold the dough onto itself like a book and add another tablespoon or so of flour as you kneed. Kneed for another 5 minutes until it’s no longer super sticky (it will still be a moist flour, but you want it to stop sticking to the surface with every turn.) Fold corners under to make a ball and set the ball in the cast iron. Cut a X on the top of the circle.
  • Bake for about 40-45 minutes, or until golden brown and a toothpick inserted into the middle comes out clean.
  • Remove from oven and place the loaf on a rack to cool. Slice and serve with vegan butter or vegan cream cheese.

Nutrition

Calories: 148kcal | Carbohydrates: 19g | Protein: 4g | Fat: 7g | Saturated Fat: 1g | Sodium: 279mg | Potassium: 108mg | Fiber: 3g | Sugar: 2g | Vitamin A: 180IU | Calcium: 45mg | Iron: 1mg
Abbey Sharp

Abbey Sharp is a Registered Dietitian (RD), regulated by the Ontario College of Dietitians. She is a mom, YouTuber, Blogger, award winning cookbook author, media coach specializing in food and nutrition influencers, and a frequent contributor to national publications like Healthline and on national broadcast TV shows.

www.abbeyskitchen.com/about-abbey/

Last Updated April 4, 2024. Published April 5, 2024 By Abbey Sharp 4 Comments

Chocolate Covered Dates with Tahini Filling (No Sugar Added)

These Chocolate Covered Dates are the ultimate pantry staples dessert recipe! These sweet treats are also vegan, gluten free, and have no added sugars.

Chocolate covered stuffed dates stacked on a white plate topped with pistachios and sesame seeds.

Between planning meals for the family, sometimes desserts can get the short end of the stick. I always try to have something simple like a frozen pie or grab ingredients for a simple rice pudding but sometimes I’m caught empty handed when those dessert cravings hit. Luckily these delicious chocolate covered dates are only a pantry door away.

Why This Recipe Works

Like I mentioned above, these chocolate covered dates are made out of pantry staples. We almost always have these ingredients on hand so whipping up a batch isn’t difficult.

These chocolate covered dates are also super easy. It only takes a couple minutes to put together. The part that takes the longest is freezing them for 20 minutes and that’s all hands-off work.

These sweet little bites are also gluten free and vegan if you’re looking for an accommodating dessert to serve. There’s also no added sugar as the dates are sweet enough on their own.

Table of contents

  • Why This Recipe Works
  • Key Ingredients
  • How to Make This Recipe
  • Expert Tips
  • Recipe FAQs
  • More Recipes You Might Like

Key Ingredients

Overhead image of ingredients: dates, sesame seeds, salt, chocolate, coconut oil, tahini, and pistachios.

Dates — I do recommend medjool dates because they tend to be the juiciest and softest. Plus you can’t make chocolate covered dates without the dates!

Tahini — This is a pantry staple for me and something I always have WAY too much of since I find all of these tahini containers are HUGE. I love hummus, but man, I don’t eat THAT much of it.

Pistachios — They add crunch, flavour, nutrition (healthy fats) and a pretty colour.

Sesame seeds — This is just a garnish and totally optional.

Fleur de sel — Another garnish but man, does it ever kick these up a notch. I do recommend some salt, even if you just have kosher salt (not table salt).

Dark Chocolate — This is for dipping and keeping the tahini filling sealed in, and yes, it’s mandatory LOL

How to Make This Recipe

Step by step instructions showing dates being sliced opened, mixing together the filling, and then combine them.

Step 1: Carefully pit the dates by opening up a slit but not breaking them fully in half.

Step 2: In a bowl, mix together the tahini and pistachios and a pinch of salt.

Step 3: Using a small teaspoon, stuff the dates with the tahini mixture and close shut.

Step by step photos showing the dates being stuffed, chocolate melted, and the coating the dates with melted chocolate.

Step 4: Transfer to a baking dish lined with parchment paper or a silpat and freeze for 20 minutes.

Step 5: Meanwhile, melt the chocolate and coconut oil in a double boiler or in the microwave. For the double boiler, place the chocolate and oil in a glass bowl over a small saucepot filled one inch high with simmering water over medium heat. Stir until melted and take off the heat. If using the microwave, place the chocolate and oil in a microwave safe dish and microwave for 60 seconds on 50%. Stir, then put it back in the microwave for another 30 seconds. Stir and repeat until melted. Set aside.
Place the sesame seeds, finely minced pistachios and salt in three bowls.

Step 6: Remove the dates from the freezer and dip 2 or 3 at a time into the chocolate. You don’t have to fully immerse them if you don’t want to, the important thing is you cover up the slit where the tahini was put in. Place back on the baking sheet and quickly sprinkle with the sesame, pistachios and salt. Continue with the remaining dates. The chocolate should firm up very quickly but if you go too slow and the dates are no longer cold, then you can pop them in the fridge or freezer for a few minutes until the chocolate is fully set. Keep the chocolate covered dates refrigerated until ready to eat.

Expert Tips

My biggest tip for nailing these chocolate covered dates is to dig to the bottom of your tahini jar so that you get mainly the more firm part of your tahini, not so much the oil on the top. Too much oil from the tahini and you’re going to end up with a huge mess and not a lot of tahini filling.

As for reducing the mess in general, I suggest when you’re dipping the dates in the chocolate to designate one hand for dipping, and the other clean hand for sprinkling with the toppings.  I recommend dipping and sprinkling just 2-3 at a time and having a little assembly station ready so you can get the toppings on before the chocolate dries.

I also would suggest avoid leaving these chocolate covered dates at room temperature for too long. You want to serve them chilled and leave them in the fridge if you’re not enjoying them straightaway.

If you’ve got a small freezer, try using a quarter sheet pan to freeze your stuffed dates on as they take up less room.

Recipe FAQs

Can I freeze these stuffed dates?

Yes, in fact they are DELICIOUS slightly frozen. I recommend placing them on a baking sheet lined with parchment until frozen before you transfer them to a freezer bag.

Can I use milk chocolate if that’s what I have?

Totally, this is the most versatile recipe of life. Use milk chocolate, white chocolate, chocolate chips, chocolate bars, whatever you’ve got in your pantry!

Could I use peanut butter instead of tahini?

Yes, and in fact, I’ve made them that way too. It’s a different flavour, and reminds me a bit of my peanut butter cup recipe, but equally delicious so go for it!

Will almonds or another nut work instead of pistachios?

Absolutely use whatever nuts you want for sprinkling and stuffing for these chocolate covered dates.

Can my toddler or kids have these for dessert?

Kids would definitely love these as a no added sugar treat. A toddler could also enjoy these with some precautions — I would make sure they’re not frozen, and I would probably cut them into smaller pieces so they’re easier and safer for them to eat. Dried fruit (especially with a sticky filling) is a choking hazard so I would only give these in slices to my toddler.

How long will these last in the fridge?

I would think these would be fine in a sealed container for up to a week, but after that, I would transfer them to the freezer for longer storage. There’s no way they would last that long in my house though.

Can I use this as an activity for my kids?

You bet! Kids will love helping with the dipping and sprinkling, and even with the filling if they have good dexterity. Note: You will have a mess, and a lot of chocolatey fingers, but messes are fun when you’re a kid.

More Recipes You Might Like

If you’re looking for more sweet treats like these chocolate covered dates, try some of my favourites down below!

  • No Bake Nutella Cheesecake Cups (Vegan & Gluten Free)
  • Vegan Oreo Cheesecake (Gluten Free)
  • Raw Vegan Cheesecake with Caramel Apples
  • Easy Chocolate Covered Espresso Beans (Vegan & Gluten Free)
Chocolate covered dates on a baking sheet topped with pistachios.

What sweet treats have you made with your pantry staples? Leave me a comment below with your thoughts!

Print Recipe
5 from 4 votes

Chocolate Covered Dates with Tahini Filling (No Sugar Added)

These Chocolate Covered Dates are the ultimate pantry staples dessert recipe! These sweet treats are also vegan, gluten free, and have no added sugars.
Prep Time10 minutes mins
Cook Time20 minutes mins
Total Time30 minutes mins
Course: Dessert
Cuisine: Canadian
Servings: 1 dozen
Author: Abbey Sharp

Ingredients

  • 1 dozen medjool dates
  • 3 tbsp tahini trying not to get too much oil from the jar
  • 2 tbsp minced shelled pistachios
  • 4 oz dark chocolate dairy free, no added sugar if desired, finely chopped
  • 1 tsp coconut oil

Toppings:

  • Fleur de sel or sea salt
  • Sesame seeds
  • Finely minced shelled pistachios

Instructions

  • Carefully pit the dates by opening up a slit but not breaking them fully in half.
  • In a bowl, mix together the tahini and pistachios and a pinch of salt.
  • Using a small teaspoon, stuff the dates with the tahini mixture and close shut.
  • Transfer to a baking dish lined with parchment paper or a silpat and freeze for 20 minutes.
  • Meanwhile, melt the chocolate and coconut oil in a double boiler or in the microwave. For the double boiler, place the chocolate and oil in a glass bowl over a small saucepot filled one inch high with simmering water over medium heat. Stir until melted and take off the heat. If using the microwave, place the chocolate and oil in a microwave safe dish and microwave for 60 seconds on 50%. Stir, then put it back in the microwave for another 30 seconds. Stir and repeat until melted. Set aside.
  • Place the sesame seeds, finely minced pistachios and salt in three bowls. Remove the dates from the freezer and dip 2 or 3 at a time into the chocolate. You don’t have to fully immerse them if you don’t want to, the important thing is you cover up the slit where the tahini was put in. Place back on the baking sheet and quickly sprinkle with the sesame, pistachios and salt. Continue with the remaining dates. The chocolate should firm up very quickly but if you go too slow and the dates are no longer cold, then you can pop them in the fridge or freezer for a few minutes until the chocolate is fully set. Keep refrigerated until ready to eat.

Notes

  • My biggest tip for nailing these chocolate covered dates is to dig to the bottom of your tahini jar so that you get mainly the more firm part of your tahini, not so much the oil on the top. Too much oil from the tahini and you’re going to end up with a huge mess and not a lot of tahini filling.
  • As for reducing the mess in general, I suggest when you’re dipping the dates in the chocolate to designate one hand for dipping, and the other clean hand for sprinkling with the toppings.  I recommend dipping and sprinkling just 2-3 at a time and having a little assembly station ready so you can get the toppings on before the chocolate dries.
  • I also would suggest avoid leaving these chocolate covered dates at room temperature for too long. You want to serve them chilled and leave them in the fridge if you’re not enjoying them straightaway.
Abbey Sharp

Abbey Sharp is a Registered Dietitian (RD), regulated by the Ontario College of Dietitians. She is a mom, YouTuber, Blogger, award winning cookbook author, media coach specializing in food and nutrition influencers, and a frequent contributor to national publications like Healthline and on national broadcast TV shows.

www.abbeyskitchen.com/about-abbey/

Last Updated June 16, 2024. Published April 3, 2024 By Abbey Sharp 6 Comments

Does NOOM Really Work for Weight Loss?

Does NOOM really work? We take a look at the new NOOM app for weight loss and eating behavioural change to determine the pros, cons and if you should try it.

A person navigating the noom app on their smart phone.

As I am sure you have seen, through the bombardment of recent social media ads (regrettably many of which have ended up on MY YouTube channel – ugh), there is a newly re-popularized weight-loss app on the scene called Noom. The app has been on the market since 2012, but only recently seems to be gaining in momentum and popularity – probably thanks to the massive marketing campaign. Noom claims to fill the gaps of so many other quick fix diets, offering long-term weight loss results through “motivation and guidance to make a true lifestyle change”. They position themselves as a “wellness program”, less so a “diet”, sneaky language that is super problematic for reasons we will discuss in more detail throughout this post. Noom’s app makes reference to several studies that seem to support their claims for sustainable weight loss, which we will delve into a little later.

But does Noom really work? I’m breaking down the pros, cons and if it’s worth trying.

Setting Up Your NOOM Account

For now, let’s start at the beginning – upon downloading the app and setting up an account the first thing it asks you is “how much weight do you want to lose?”. This isn’t all that surprising, considering that this app’s main purpose is to assist in weight loss. Moving along, the second prompt poses a concerning sliding scale where you get to pick what animal represents the weight loss speed you desire: your choices are turtle, rabbit, or cheetah. In case it needs to be said, I just want to start off with the simple fact that we are humans, not animals, and we cannot simply choose or will ourselves to lose weight at a particular speed (if we can even “will ourselves” to lose weight at all).

Weight loss speed feature on the noom app showing a turtle, rabbit, and cheetah.

With that being said, there are aspects of the Noom platform that have proven helpful for some users; so throughout this post, I will aim to breakdown what the app offers, it’s food philosophies, as well as the benefits and drawbacks of downloading and using it. Let’s go!

What does the NOOM app provide?

The Noom weight-loss app offers a “personalized health plan” from an online (supposedly human) health coach, as well as 24/7 support and motivation from the said coach. Like similar apps, it encourages you to log your meals and exercise. Unlike other apps, each day when you open Noom, you are met with a fresh platform filled with new “articles” and quizzes designed to “test your knowledge” on things like: portion control, calorie budgeting, eating less calorically dense foods, ways to hack your sweet tooth, breaking “bad” habits, and Noom’s “colour system” (spoiler: it is a traffic light system – WW Kurbo is that you?).

By reading these daily “articles” and completing the quizzes, in combination with your personalized coaching support, the app claims to create behaviour change for sustainable weight loss. This is the whole selling point of Noom, behaviour change over restriction. In theory, this is a great plan since the research suggests that restricting calories through dieting often does more harm than good in the long run.

Now, as mentioned before, Noom positions themselves as a “wellness program”, allowing you to choose from two options: I want to “get fit for good” or “lose weight for good” when you set up your app. However, I am seriously confused by these supposedly personalized options, because regardless of which one you click you are guided through the EXACT same set of questions with prompts about weight loss. Apparently Noom views getting fit as a synonym for losing weight. *Le sigh*

Anyway, after just a short time navigating the app, I started seeing a lot of mixed messages. For example, one minute you may be quizzed on the hypothetical scenario of having 100 calories left in your caloric “budget” and are forced to choose which item would best help you feel satisfied. While a Big Mac (at 563 calories) would potentially leave you more satisfied if you were hungry, the perfectly 100 calorie portion of 1/2 fresh mango was the right answer. Surprise surprise. Meanwhile, we see the seemingly supportive, non-judgemental and “non-diety” heads up that it’s unrealistic to just eat “healthy” foods all the time. So instead, they recommend a specific breakdown for “low calorie”, “moderate calorie”, and “high calorie” foods to enjoy! Spoiler alert, dichotomizing foods like this and giving specific percentages of how much you can enjoy is just another diet rule you need to follow.

a screen shot of the noom app showing a pie chart indicating that the majority of food consumed should be "green"
A screen shot of the Noom weight loss app showing a quiz about what to eat to meet caloric budget.

Why is NOOM supposed to work?

Does Noom really work because of the 24/7 online coaching it offers? The idea behind this is that there is immediate feedback and validation for following through with entering your meals and completing the readings/quizzes. However, through reading different users’ reviews of their experience with the app, it seems as if the jury is still out over whether or not these coaches are actually humans (or bots posing as humans). In other words, this may or may not be 2020’s diet culture version of Westworld.

Some users reported that they were left without responses from their coaches, or that their responses and messages seemed automated and not personalized for them. That can’t be a good feeling when you are paying into something with the understanding that there will be another person there for you at all times, to offer sound and sensible nutrition and diet advice.

What are the suggested foods to eat and avoid on NOOM?

Noom uses a traffic light system to categorize food, which is exactly what it sounds like: red foods “are the most calorie-dense and should be eaten less frequently and in smaller portions”, yellow foods “have more calories and/or less healthy nutrients per serving than green foods, and should be incorporated [into] your diet in moderate portions”, and lastly, green foods “are the least calorie-dense and should make up the bulk of your diet”.

Unsurprisingly, green foods include vegetables, most fruit, and whole grains; yellow foods include lean meats, legumes, and low-fat dairy products; and red foods include “red meats and desserts”, as well as full-fat dairy products, nuts, seeds, and their butter and oils.

Essentially, this system depends solely on caloric density to classify foods into their respective colours, which can be problematic if taken out of context. While I agree fully that some foods that are more nutritionally dense than others, and that balance is important for overall health, classifying foods solely by caloric density can cause potential problems.

The app does specify that no foods are “off-limits” and that the light system is just there to help with recognizing which foods are more and less calorically dense. However, it doesn’t take much of a stretch of the imagination to recognize that people could easily begin to try and avoid the “red” foods, as they can be linked to “bad” or “unhealthy” options.

When logging your “red” foods, if you go over at all, you are met with a scary red warning sign to limit your portions. Conversely, you are seemingly praised (both from the app platform and online coaches) when you are eating mostly “green” foods. In my mind, the concern with people developing the belief that avoiding the “red” foods is “good” is a strong possibility, since many of the daily readings are centered around breaking “bad” habits surrounding “junk foods” and hacking your sweet tooth with “healthy swaps”. For example, instead of eating that crème brûlée you’ve been craving, doesn’t broiling a banana sounds like an appetizing alternative? Hmm – yah, no.

a screen shot of the noom weight loss app showing how to limit portions
a screen shot of the noom weight loss app showing healthy swaps for cheesecake, ice cream, and creme brulee

So, while Noom steps forward from other diets and weight loss apps with the premise that “no foods are off-limits”, I am left wondering if that really is the case. If so, and people find themselves feeling motivated and not triggered by the premise of these categories, then I think Noom could be a good educational tool for understanding the caloric density of different foods. But that’s about it.

Does NOOM really work for weight loss?

As mentioned before, there are several studies reviewing Noom which support the claims that using the app faithfully does result in weight loss.

One study published back in 2016 reviewed all the data inputted into the app and compared baseline weights with end weights for those users that consistently recorded their meals, exercise, and weigh-ins for 6 months. In other words, these were the hard core “successful” users. Interesting that there were over 10 million people who had downloaded the app, but only 0.36% actually used it consistently. I mean, I would quit too if it wasn’t “working” for me. But anyyyyyyway let’s look at the stats.

What they found were that 31% of the users reported less than a 5% decrease in body weight, around 24% lost 10% of their weight, and 22% lost more than 20%. That’s pretty significant, IF the weight were to be kept off. At follow up at just a year after starting the program, they only had data on half of the participants and found that just 14% were able to maintain at least a 10% body weight loss. This study is constantly cited – without the follow up data – saying that 77% of app users lose weight using the app. That sounds pretty good. What sounds not so appealing is the reality that 99% of users don’`t stick to the app for more than 6 months. So yah, I see why they sell it like they do.

The truth is, even if the weight maintenance results were really fantastic at one year, one year is not even enough time to make the claim that the app helps you lose weight and keep the weight off for “life”. We would want to see follow up at 5, 10, 15 years down the road to see how these users are doing. Also, it’s also important to note that this is all self-reported data, and when you’re being scrutinized by a seemingly REAL human on the other end of the app, wouldn’t you be motivated to fudge the numbers just a bit? It’s hard to tell if Noom really works based on this limited info.

A blue plate with the words "weight loss" spelled out in white tiles.

Another study that Noom references in support of their app was done on a much smaller scale. The study took place with 43 overweight and “prediabetic” participants within one office setting, though by the end of the study though only 36 participants followed through with consistent reporting on the app. This study was done with a very specific population (all participants were confirmed to be at a high risk of developing diabetes) and each was assigned a “virtual Centers for Disease Control and Prevention-recognized master’s level coach”, meaning translating the findings of this study to the generalized population may not be so realistic. This is because the average user will not be paired up with a specialized coach, and, they likely will not have the unique “motivation” of being diagnosed as “prediabetic” prior to using the app.

However, they did find that 64% of the users who completed the app’s online coaching and committed to the consistent use of the app lost over 5% of their body weight. Again, this weight reduction was only reported for the time they were actively using the app – without any follow up to verify if the weight was kept off in the long term.

Both of these studies found that when users were more engaged in actively inputting their meals and exercise regularly, their weight loss was more successful. As mentioned above, both studies did show a significant weight loss during the time the participants were using the app (but did not report if there were any long-term changes). However, both of these studies were published in 2016, and they are still the two that Noom references most often. If Noom claims to offer long-term weight loss, then shouldn’t there be updated research to prove these participants kept their weight off after they stopped using the app?

No, because this long-term data doesn’t exist. And if it did, it probably wouldn’t be that flattering to their brand. It would not be surprising though for the majority of the participants to regain their weight after the diet, as weight loss interventions typically do result in early weight loss, followed by a plateau and then progressive regain. It is also known that after periods of dieting our bodies often undergo physiological changes, including alterations in our satiety and hunger hormones, as well as our metabolic rate, all of which aim to push our bodies back to our initial pre-diet weight.

As much as many people want to believe that this is their body failing them, that simply isn’t the case. It is believed that we all have our own individual “set point”, where our bodies are most comfortable (so to speak). So, even if that number lands you higher on the scale then you may want it to – it is because your body knows where it functions best (not because it is spiting you for failing to comply to restrictive diet rules).

In a sense, our metabolisms can be somewhat of a Motherly figure; even though it may hear what you want, it actually knows what is best for you. In short, despite your valiant (and often painful) efforts for weight loss, Mother metabolism often gets the last say.

Are there benefits to the NOOM app?

All criticism aside, there are some aspects of this app that I can get behind. For example, its uses of realistic goal setting, psychological principles, and the emphasis on self-efficacy.

Encourages SMART GOALS

SMART goals are Specific, Measurable, Attainable, Realistic, and Timely. Research has shown that goals set without such a framework are less likely to be attained. Therefore, SMART goals are central to accomplishing effective and sustainable changes. While I like that the app makes use of the framework and encourages the setting of smart goals, I do worry that in practice, the app doesn’t exactly walk the talk. I will discuss this in more detail shortly, but if does, for example, allow you to make outrageous goals like losing 100 lbs in a month without flagging that hey, that’s not SMART!

A day planner with a list of goals and a cup of coffee sitting on top.

Considers Eating Psychology

This app also makes use of several aspects of psychology, such as untangling common cognitive distortions (unhealthy thinking patterns). Some of these unhealthy thinking patterns include “all or nothing thinking”, “mind-reading”, “exaggerated thinking”. All or nothing thinking refers to our tendencies to think of certain situations in extreme black-or-white categories (“I will either be perfect and succeed 100% or I will be a complete failure and give up”). Sound familiar?

Addressing these unhealthy thinking patterns can be hugely beneficial for our overall health and well-being. However, the mention of these cognitive distortions does seem more like tokenism then a real tool to help people begin to understand and alter their thought patterns. Essentially, instead of diving deep enough into these thought processes to make a real difference, they scratch the surface with basic definitions and examples of how they may play out in your diet journey. Like, cool, yah, all or nothing is definitely a problem – BUT NOW WHAT THE F DO I DO ABOUT IT?

Focuses on Self-Efficacy

Self-efficacy (the belief in our own ability to succeed) seems to be an important part of the app’s success. Developing a strong sense of self-efficacy can be highly predictive of behaviour change and motivation. Because of this, if the app really were to help its users foster a stronger self-efficacy, successful behaviour change would be more likely. However, their take of self-efficacy seems to be more of a requirement of success for the app, rather than a tool to develop it. Placing the success of one’s weight loss journey solely on their own self-efficacy is also concerning, as it is setting them up for internalized judgment if (or when) the diet fails them.

A screen shot of the noom app which talks about the importance self efficacy for goal setting.

So, while I believe that the above aspects of the app could be strengths and benefits for its use – I do want to state that the mechanism for their use does not seem to be focussed on the user’s growth of a healthy relationship with food or themselves. Rather, for the overarching goal of weight loss (which may not actually be a healthy use of these tools).

Downsides of the NOOM App

It’s Still a Diet

Does Noom really work for the healthy weight loss it preaches? At the end of the day, this app is still promoting diet culture and weight loss through cutting calories. There just isn’t any way that this app can be used without implementing food rules and restrictive behaviour.

One concerning way that they do this is through food categories (the traffic light system) and food/calorie “budgeting”. As we know, restricting calories through dieting simply isn’t as cut and dry as it sounds. Our bodies adapt to these diets, by compensating for the calorie loss with changes in metabolism and hormone production, and can also trigger orthorexic tendencies as well. Because of this, as is with any diet, the costs of putting our bodies through such restriction will very likely not be worth it in the long run.

A sign that says "DIET" as an acronym for "Did I Eat That?".

Calories are not Everything

As eluded to previously, dichotomizing foods according to their caloric density (by using the traffic light system) is also a concern. This is because it solely uses the calories that the foods provide to categorize them as “good” or “bad”, “eat” or “avoid”.

This largely overlooks the most important nutritional aspect of our foods: the micro- and macronutrients that they provide to give us energy and to keep us functioning throughout the day! Here’s an example: Noom categorizes almonds as a red food, simply because they’re higher in calories compared to fruits and vegetables. This is true! However, this is NOT a bad thing!

Almonds are packed with healthy fats to keep our brain functioning properly, protein to keep our muscles and bones strong, fibre to keep us regular and satisfied, as well as a variety of vitamins and minerals to help us maintain our overall health and a robust immune system! Avoiding almonds, or any nuts/seeds for that matter, because they are classified as a “red” food would be a huge missed opportunity for the incorporation of these healthy, and delicious, powerhouse foods!

Unqualified Coaches

Another concern with the app is the possibility of unqualified coaches giving diet advice to users. While Noom’s website does state that their coaches are all put through “Noomiversity” (whatever that means), there is no specific mention of the coaches being required to be qualified Registered Dietitians (RDs) or nutrition experts of any kind.

A lot of user reviews also mentioned feeling like their coach was not personalizing any information for them. This generalized format of all people receiving feedback from an online coach, who doesn’t seem to take the time to understand their individual needs and/or potential triggers, just doesn’t seem like something I would put my money into. Instead, finding a (human) dietitian and seeking their advice and guidance through whatever journey you are on, seems like a much safer way to go about this. Many dietitians offer virtual counselling – so if you are really set on doing this from home, you can at least have the guarantee that there is a qualified human on the other side of the line.

A woman wearing a blue shirt using her smart phone.

Doesn’t Flag for Disordered Eating

For a supposed anti-diet app, I’m shocked that there is no screening done for disordered eating. There is also a real serious potential for the app to promote the underconsumption of calories and nutrients.

For myself, I inputted my current (healthy) weight and selected my (UNattainable) goal weight to be 30 pounds less than my current. The app saw no problem with this (even telling me it was a “great goal to work towards”). I chose the cheetah as my speed for weight loss, and the app told I would meet my goal within 3 months! That would mean losing 10 pounds per month, an unhealthy and unrealistic feat.

As a result of the data I inputted, it generated my recommended intake of calories to be 1200 (this was also after indicating I had an active lifestyle). This calorie “budget” would have been far too low to feasibly consume an adequate amount of nutrients and calories to sustain my health over time.

To put this into perspective, here is a “perfect” day on Noom’s recommended 1200 calorie “budget”:

Breakfast (261 calories) – 1 small banana, ½ cup oatmeal (with water), ½ cup low fat yogurt

Morning snack (0 calories) – water

Lunch (366 calories) – 2 carrots, ½ cup brown rice, 1 tbsp soya sauce, 1 small fillet of salmon

Afternoon snack (95 calories) – 3 stalks of celery, 3 tbsp hummus

Dinner (288 calories) -1 cup whole grain pasta, 3 spears of broccoli, ½ block of tofu

Evening snack (190 calories) – 1 small apple, 1 tbsp of peanut butter

 I am not sure how many people would really be able to follow such a restrictive diet for long; I know I certainly wouldn’t be able to. I am hungry just looking at that sad breakdown!

Daily Weigh-Ins

A person standing on a scale to weigh themselves.

Another red flag that stood out for me is their promotion of DAILY weigh ins. Noom encourages its users to overcome their “scale anxiety” and learn to “love their scale”, which is highly concerning given the fact that research tells us to do the exact opposite.

One literature review, reviewing 20 articles, found a negative relationship between frequent weigh-ins and phycological outcomes. They found that self-esteem, body evaluation, and eating behaviours were all negatively impacted by engaging in regular self-weighing. The reason this is such a red flag for me is because Noom claims to offer its user’s the exact opposite of this – a supportive experience for healthy behaviour changes. And while they cite research of their own, it is important to note that this particular study actually concluded that “frequent self-weighing, at the very least, seems to be a good predictor of moderate weight loss” and that more research was needed. The thing is, yes, weighing in might very well increase your chances of losing weight – but at what physical and psychological cost?

Bottom Line: Does NOOM really work?

Do not be mistaken – Noom is still a diet, and if you have tried different diets in the past without achieving the results you were looking for, this will likely not be any different.

If you are truly seeking a positive behaviour change for a healthier lifestyle, there are much better (and free) ways to go about it. For example, eating plenty of fruit and vegetables, choosing quality protein sources, and choosing whole grain starches more often than refined ones.

Also, if you feel that logging your meals is an effective tool for you and you don’t see any benefit to the daily readings/quizzes – other free apps will do the trick. And if you feel drawn to the promise of a greater attention to the psychological aspects of eating and behaviour change as the Noom app promises, I would encourage you to reach out to a health professional like an dietitian, who can work with you to understand your unique emotional triggers and strategies.

All in all, if following the highlighted food rules, calorie budgets, and speaking virtually to a bot (oops, I mean health coach) doesn’t seem like the right path for you – I would not recommend Noom.

Contribution by Amber Whittemore

More Blog Posts You Might Like

  • Why The WW Kurbo App for Children and Teens Will Do More Harm than Good
  • Are Cheat Days OK? The Truth About Cheat Days and Weight Loss
  • Dietitian Reviews Celebrity Health and Wellness Brands
  • The Truth About Ozempic: A Registered Dietitian’s Perspective

In your opinion, does Noom really work or is it a bust? Let’s discuss below!

Abbey Sharp

Abbey Sharp is a Registered Dietitian (RD), regulated by the Ontario College of Dietitians. She is a mom, YouTuber, Blogger, award winning cookbook author, media coach specializing in food and nutrition influencers, and a frequent contributor to national publications like Healthline and on national broadcast TV shows.

www.abbeyskitchen.com/about-abbey/

Last Updated March 31, 2024. Published April 1, 2024 By Abbey Sharp 4 Comments

Easy Vegan French Toast Recipe | Low Carb, Gluten Free

birds eye view of tofu french toast

This easy vegan french toast recipe is a great way to sneak in some protein in the morning, and a unique new way to enjoy tofu that isn’t savoury! Kids will love this breakfast too! It’s vegan, gluten-free, and so easy to make.

birds eye view of tofu french toast.

I can’t tell you how many requests I get for more recipes that are high in protein for breakfast that don’t include eggs or greek yogurt. It can feel like a challenge sometimes, especially to find vegan breakfast recipes that are high in protein that doesn’t rely on protein powder! So if you’re not feeling like a vegan tofu scramble, and are more of a sweet breakfast person, you’re going to LOVE this easy vegan french toast recipe.

Table of contents

  • Why This Recipe Works
  • Key Ingredients
  • How to Make This Recipe
  • Expert Tips
  • Recipe FAQs
  • More Recipes You Might Like

Why This Recipe Works

I am obsessed with this easy vegan french toast recipe and I can’t wait for you to try it!

  • It’s kid-approved/family-friendly.
  • It’s packed with healthy, wholesome ingredients.
  • It’s vegan, gluten-free, and low carb.
  • It’s so delicious!

Key Ingredients

Ingredients needed to make vegan low carb french toast.

Extra firm tofu — It’s important to use extra firm because soft tofu will be too wobbly and watery to hold its shape in the pan. It will make you reallllllly frustrated if it keeps falling apart. Trust me.

Almond flour — Almond flour is rich in monounsaturated fats and adds a nice nutty flavour. It also adds the crunchy crust for this tofu!

Cinnamon — French toast is all about flour and I do believe cinnamon is key. Feel free to add in whatever other yummy spices you enjoy like nutmeg or ginger.

Brown Sugar — I like using brown sugar because it’s a “dry” sugar while maple or honey tends to inhibit the crispy coating and just gets in the way.

How to Make This Recipe

Set of two photos showing tofu cut and pressed.

Step 1: Cut the tofu in quarters lengthwise and then in half on the diagonal to yield 8 triangles.

Step 2: Lay a few paper towels or a kitchen towel down on a baking dish. Add the tofu triangles, some more towels, and then top with heavy things. Allow them to sit for 1 hour to press out the moisture.

Set of three photos showing the crust ingredients mixed together, tofu added, then pan seared.

Step 3: In a pie plate or dish, mix together the almond flour, cinnamon, sugar, and salt.

Step 4: Heat the coconut oil in a large nonstick skillet over medium heat and generously dip the tofu pieces into the almond flour mixture until well coated.

Step 4: Place in the pan and cook until golden brown on each side, about 3 minutes per side. Serve this vegan french toast recipe with berries, maple syrup, or powdered sugar if desired.

Expert Tips

The key to a crispy vegan french toast is first to really squeeze that liquid out by pressing the tofu. I use towel or paper towel on a cookie sheet, put the tofu down, then add more towel and a bunch of really heavy items. You should find the towels are pretty wet about 20 or so minutes. 

You can press the tofu before or after cutting it. It’s a little faster when you’ve cut it first as they’re more manageable pieces but if you have a tofu press and want to use it on a whole block first, go for it!

The almond flour breading also really helps keep these low carb french toasts super crispy. Do not skip it!

Recipe FAQs

What should I serve with this french toast recipe ?

Of course, the classic pairing is maple syrup (I am Canadian after all), but since I am partial to serving my french toast with fruit, I also love to serve this with my homemade easy chia jam. Check out this recipe (there’s a reason why it’s so popular). You could also serve this alongside a brunch salad or my vegan maple sausages.

Is this recipe keto and low carb?

Since this recipe does not use any bread, just tofu, and uses almond flour in place of regular wheat flour, this is low carb and may be appropriate for those on a low carb diet. Of course, if you add a lot of fruit, jam, or maple syrup, and use real brown sugar in place of a non-sugar alternative, then you will see the carbohydrate content rise.

Is this kid-friendly?

If you’re struggling to get your kiddo to get enough protein or iron in their day, they will LOVE this take on french toast. I mean, who doesn’t like french toast?

Can I make this ahead of time and batch prep?

You can, however, be aware that it will lose its crispy exterior so I recommend rewarming it in a 400 F for 10 minutes to perk back up.

Is this gluten free and safe for celiac?

Yes, this is not only vegan but it is also naturally gluten free and therefore safe for those with celiac and gluten intolerance since we are relying on soy, not bread for the french toast.

close up of french toast made from tofu on a white plate topped with berries

More Recipes You Might Like

Want more protein rich breakfast recipes like this easy vegan french toast recipe? Try these household favourites:

  • Sheet Pan Protein Pancake Fingers 
  • Eggs and Cheese Savoury Protein Waffles 
  • PB&J Stuffed Sweet Potatoes 
  • Keto Egg Cups 5 Ways 

What do you think about making french toast out of tofu without TOAST?! Leave me a comment below with your thoughts!

birds eye view of tofu french toast
Print Recipe
4.63 from 8 votes

Easy Vegan French Toast Recipe | Low Carb, Gluten Free

This easy vegan french toast is a great way to sneak in some protein in the morning, and a unique new way to enjoy tofu that isn't savoury! Kids will love this breakfast too! It's vegan, gluten-free, and so easy to make.
Prep Time1 hour hr
Cook Time10 minutes mins
Total Time1 hour hr 10 minutes mins
Course: Breakfast, brunch
Cuisine: American
Servings: 2
Calories: 428kcal
Author: Abbey Sharp

Ingredients

  • 350 g pack extra firm tofu
  • 1 cup almond flour
  • 1 tsp cinnamon
  • 2 tsp brown sugar or low sugar alternative
  • Pinch salt
  • Coconut oil for cooking
  • Berries for serving (optional)
  • Maple syrup for serving (optional)
  • Powdered sugar for serving (optional)

Instructions

  • Cut the tofu in quarters lengthwise and then in half on the diagonal to yield 8 triangles.
  • Lay a few paper towels or a kitchen towel down on a baking dish. Add the tofu triangles, some more towels and then top with heavy things. Allow to sit for 1 hour to press out the moisture.
  • In a pie plate or dish, mix together the almond flour, cinnamon, sugar and salt.
  • Heat the coconut oil in a large nonstick skillet over medium heat and generously dip the tofu pieces into the almond flour mixture until well coated. Place in the pan and cook until golden brown on each side, about 3 minutes per side.
  • Serve with berries, maple syrup or powdered sugar if desired.

Notes

  • The key to a crispy vegan french toast is first to really squeeze that liquid out by pressing the tofu. I use towel or paper towel on a cookie sheet, put the tofu down, then add more towel and a bunch of really heavy items. You should find the towels are pretty wet about 20 or so minutes. 
  • You can press the tofu before or after cutting it. It’s a little faster when you’ve cut it first as they’re more manageable pieces but if you have a tofu press and want to use it on a whole block first, go for it!
  • The almond flour breading also really helps keep these low carb french toasts super crispy. Do not skip it!

Nutrition

Calories: 428kcal | Carbohydrates: 20g | Protein: 25g | Fat: 31g | Saturated Fat: 2g | Sodium: 111mg | Potassium: 270mg | Fiber: 7g | Sugar: 7g | Calcium: 185mg | Iron: 4mg
Abbey Sharp

Abbey Sharp is a Registered Dietitian (RD), regulated by the Ontario College of Dietitians. She is a mom, YouTuber, Blogger, award winning cookbook author, media coach specializing in food and nutrition influencers, and a frequent contributor to national publications like Healthline and on national broadcast TV shows.

www.abbeyskitchen.com/about-abbey/

Last Updated March 23, 2024. Published March 29, 2024 By Abbey Sharp 5 Comments

Hummus Pasta Sauce with Zucchini Noodles | Vegan & Gluten Free

This Hummus Pasta Sauce with Zucchini Noodles is vegan, protein packed, gluten free, and EASY. Perfect for those busy weeknight dinners on the go.

Hummus pasta sauce and zucchini noodles topped with a basil leaf on a wooden plate.

This delicious hummus pasta sauce recipe was developed while I was pregnant because I was craving nothing but pasta! But of course, I wanted to add balance to my bowl of noods. I’ll never eat a plate of zucchini noodles and pretend it’s pasta, but I love mixing it with actual pasta for some fibre and veggie action.

Why This Recipe Works

We love zucchini noodles (zoodles) and high protein chickpea pasta with this hummus pasta sauce. I love that I can get my serving of veggies AND some extra protein in while enjoying a super flavourful meal that is a breeze to pull off.

This hummus pasta sauce is also SO easy. All you need to make this delicious creamy sauce is hummus and pasta water! That’s it! Since we use store-bought hummus, it takes little to no time. If you’ve got some time on your hands, you can always make your own.

While we can just leave it at the zoodles and chickpea pasta, we add extra healthy goodness to this recipe with some sundried tomatoes and olives to make this recipe even more delicious!

Most of these ingredients are fridge and pantry staples, making it a super easy recipe to pull off on the fly. It’s also a great recipe if you have leftover hummus or zoodles lying around the fridge.

Key Ingredients

Overhead photo of ingredients for hummus pasta including basil, lemon, olives, shallots, garlic, hummus, chickpeas, sun dried tomatoes, breadcrumbs, spiralized butternut squash, spiralized zucchini, and pasta.

Chickpea pasta — Using chickpea pasta adds a ton of protein and fibre to the hummus pasta. They are definitely a great alternative to regular pasta.

Zoodles — We use spiralized zucchini and butternut squash for this pasta. If you want, you can spiralize your own or you can purchase them spiralized. It’s an easy to to add additional veggies to your diet and your kiddos won’t even notice them snuck in!

Hummus — You can make hummus pasta sauce without hummus! Since hummus comes in all kinds of flavours, we are using just regular plain hummus.

Aromatics — Shallots and garlic combined makes for an aromatic pasta! Make sure you go low and slow to not burn it.

Breadcrumbs — For an extra crunch, we toast up some gluten free breadcrumbs to add to the pasta. Trust when I say, it’s worth the extra step!

How to Make This Recipe

Instruction photos showing spiralized vegetables in a sheet pan, next photo showing shallots and garlic in a pan, and finally hummus being added to the pan.

Step 1: Spread out the zucchini and squash noodles onto a baking sheet lined with paper towel or a kitchen towel. Salt liberally and then cover with more paper towel or kitchen towel. Place some heavy items on top and let sit for 20 minutes. Wipe the salt off of them and set aside.

Step 2: Cook the chickpea pasta according to package directions, scooping out a cup of cooking water at the end of the cooking process. Heat the oil in a large nonstick skillet, and add in the garlic and shallots. Saute until softened and fragrant, about 2 minutes,

Step 3: Next, add in the hummus, lemon juice, and zest. Slowly stir in the cooking water, ¼ cup at a time. We found we needed ¾ cup of cooking water total, but if your sauce reduces down a lot more, you can add more to thin it out.

Step 4: Add the zoodles and toss in the sauce until they soften slightly and cook through, another 5 minutes.

Step 5: Add the spaghetti, sundried tomatoes, olives and chickpeas and toss until coated. Season with salt and pepper, to taste if needed.

Step 6: Meanwhile, heat the oil for the breadcrumbs in a nonstick skillet over medium heat and add the garlic and breadcrumbs. Toss over medium heat until golden brown. To serve, top the hummus pasta with basil leaves and toasted breadcrumbs and serve with nice bread.

Instructional photo showing zucchini and butternut squash noodles added to the hummus sauce, then a photo of pasta, chickpeas, sun dried tomatoes, and olives added to the pan, and finally breadcrumbs being toasted.

Expert Tips

Do not skip the first step! This is key. I can’t tell you how many people make zucchini noodles and it turns into a big soggy mess. I am all about getting those veggies in AND making it taste amazing, so you need to follow this very important step of pulling the water out of the zoodles by salting it and patting it dry.

Want to change up the flavour? There are many hummus flavours in stores so you can use any of them to change things up. Roasted garlic hummus is a great choice, and so is sweet and smoky BBQ hummus!

If you’ve got extra leftover veggies lying around your fridge, you can totally toss it into this hummus pasta recipe. It’s a great way to use up leftovers.

You can also spiralize carrots, cucumbers, bell peppers, parsnips, and more!

Recipe FAQs

What if I don’t have breadcrumbs?

If you don’t have breadcrumbs, you can use panko. If you don’t have panko, then you can skip it. Although you’ll miss that delicious crunch you get from the breadcrumbs.

Can I make this without any zucchini noodles or squash noodles?

Yes! You can totally just go for regular pasta and skip the zucchini noodles. It’s your call! I do, however, like chickpea pasta because it has extra protein and fibre, but you could also easily use regular whole wheat spaghetti as well.

What hummus do you use?

There are so many brands of hummus, I actually really love Trader Joes hummus, but Sabra is also a tasty stand by.

Do you have a favourite homemade hummus recipe online?

I don’t even have a classic hummus recipe on my blog because I often freestyle it or use this recipe. I have an amazing peanut hummus which is in Mindful Glow, but the peanut version wouldn’t work in this recipe per se.

Can I meal prep this?

Yes, you can meal prep this hummus pasta sauce. Be sure to store it in an airtight container in your fridge.

Birds eye view of vegan hummus pasta sauce with zucchini noodles on a wooden plate.

More Recipes You Might Like

Want more zucchini noodle recipes? Try these ones!

  • VEGAN AVOCADO ZUCCHINI NOODLES WITH PESTO
  • VEGAN VODKA SAUCE ZUCCHINI NOODLE PASTA 
  • ZUCCHINI NOODLE PASTA CARBONARA
  • ZUCCHINI NOODLES STIR FRY WITH HOISIN ASIAN PORK TENDERLOIN

What do you do with extra hummus? Leave me a comment below with your thoughts on this recipe!

Print Recipe
5 from 4 votes

Hummus Pasta with Zucchini Noodles (Vegan & Gluten Free)

This Hummus Pasta with Zucchini Noodles is vegan, protein packed, gluten free, and EASY. Perfect for those busy weeknight dinners on the go.
Prep Time5 minutes mins
Cook Time25 minutes mins
Total Time30 minutes mins
Course: Main Course
Cuisine: American
Servings: 7
Calories: 429kcal
Author: Abbey Sharp

Ingredients

  • 1 ½ cups spiralized zucchini 1 zucchini
  • 1 ½ cups spiralized butternut squash
  • 1 tsp kosher salt
  • 8 oz chickpea spaghetti
  • 1 tbsp extra virgin oil
  • 2 cloves garlic minced
  • 3 shallots minced
  • 1 ¼ cup plain store-bought or homemade hummus
  • Juice and zest of ½ lemon
  • ¾ cup starchy cooking water
  • ¼ cup sundried tomatoes thinly sliced
  • ¼ cup black olives thinly sliced
  • 1 19 oz can no salt added chickpeas drained and rinsed
  • ¼ cup basil leaves

Breadcrumbs:

  • 1 tbsp extra virgin olive oil
  • 1 clove garlic minced
  • ½ cup gluten free breadcrumbs

Instructions

  • Spread out the zucchini and squash noodles onto a baking sheet lined with paper towel or a kitchen towel. Salt liberally and then cover with more paper towel or kitchen towel. Place some heavy items on top and let sit for 20 minutes. Wipe the salt off of them and set aside.
  • Cook the chickpea pasta according to package directions, scooping out a cup of cooking water at the end of the cooking process.
  • Heat the oil in a large nonstick skillet, and add in the garlic and shallots. Saute until softened and fragrant, about 2 minutes, then add in the hummus, lemon juice, and zest. Slowly stir in the cooking water, ¼ cup at a time. We found we needed ¾ cup of cooking water total, but if your sauce reduces down a lot more, you can add more to thin it out.
  • Add the zoodles and toss in the sauce until they soften slightly and cook through, another 5 minutes. Add the spaghetti, sundried tomatoes, olives and chickpeas and toss until coated. Season with salt and pepper, to taste if needed.
  • Meanwhile, heat the oil for the breadcrumbs in a nonstick skillet over medium heat and add the garlic and breadcrumbs. Toss over medium heat until golden brown.
  • To serve, top the pasta with basil leaves and toasted breadcrumbs and serve with nice bread.

Notes

  • Do not skip the first step! This is key. I can’t tell you how many people make zucchini noodles and it turns into a big soggy mess. I am all about getting those veggies in AND making it taste amazing, so you need to follow this very important step of pulling the water out of the zoodles by salting it and patting it dry.
  • Want to change up the flavour? There are many hummus flavours in stores so you can use any of them to change things up. Roasted garlic hummus is a great choice, and so is sweet and smoky BBQ hummus!
  • If you’ve got extra leftover veggies lying around your fridge, you can totally toss it into this hummus pasta recipe! It’s a great way to use up leftovers.
  • You can also spiralize carrots, cucumbers, bell peppers, parsnips, and more!

Nutrition

Calories: 429kcal | Carbohydrates: 63g | Protein: 20g | Fat: 13g | Saturated Fat: 2g | Sodium: 615mg | Potassium: 964mg | Fiber: 14g | Sugar: 8g | Vitamin A: 3424IU | Vitamin C: 19mg | Calcium: 119mg | Iron: 6mg
Abbey Sharp

Abbey Sharp is a Registered Dietitian (RD), regulated by the Ontario College of Dietitians. She is a mom, YouTuber, Blogger, award winning cookbook author, media coach specializing in food and nutrition influencers, and a frequent contributor to national publications like Healthline and on national broadcast TV shows.

www.abbeyskitchen.com/about-abbey/

Last Updated March 23, 2024. Published March 25, 2024 By Abbey Sharp 2 Comments

Tofu Cheesecake Recipe with Chocolate and Oreos | Vegan Dessert

Chocolate cake on a plate with raspberries.

This tofu cheesecake recipe with chocolate and Oreos is a delicious no-bake dessert option that is perfect for making with the kids.

Birds eye view of chocolate tofu cheesecake with chocolate and oreos on a plate with raspberries.

Is there anything better in the summer than an easy no-bake recipe? This tofu cheesecake recipe is not only tasty, vegan and gluten-free friendly, but it is also perfect for making the day before an event. I promise, your friends will not be able to tell the difference between a real cheesecake and this vegan option!

Table of Contents

  • Why This Recipe Works
  • Key Ingredients
  • How to Make This Recipe
  • Expert Tips
  • Recipe FAQ
  • More Recipes You May Like

Why This Recipe Works

This tofu cheesecake recipe is creamy, chocolate-y, sweet, and oh so delish. Starting at the bottom, we’ve got a buttery Oreo crust (fun fact – Oreos are vegan in most countries!) that is both sweet and salty. Next we’ve got the “cheese” layer, that is so creamy and packed with chocolate flavour. Just in case that wasn’t enough chocolate, next we pour on a chocolate ganache that is rich thanks to our friend coconut milk.

Although it might sound odd at first, the tofu is what gives this “cheesecake” it’s creamy and cheese-like texture! When combined with your favourite non-dairy cream cheese, I guarantee that no one at your table will be able to tell that this cheesecake is plant-based.

Key Ingredients

Oreos – I personally believe that Oreos are the superior store-bought cookie. They are so delicious on their own, but their crumbly texture, combined with the melted vegan butter, makes them the perfect option for a chocolate-y crust recipe.

Dark Chocolate – The dark chocolate in the cheese layer of this cheesecake is essential for giving this recipe not only it’s chocolate flavour, but it’s rich texture as well.

Tofu – What’s a tofu cheesecake without the tofu? As I said before, don’t knock it until you try it. Because tofu has such a naturally neutral taste, it makes a perfect substitute for the creamy cheese layer of this cake.

Coconut milk – Any plant-based eater knows that coconut milk is a nearly 1:1 swap for traditional heavy cream thanks to it’s rich and creamy texture. When poured onto the chocolate chips, these two truly make the most glossy and delicious chocolate ganache!

How to Make This Recipe

Process shots for vegan tofu cheesecake.

Step 1: Place Oreos in a food processor and pulse until crushed. Add the melted butter and salt and pulse until it forms a crumb. Transfer the crumbs to a prepared springform pan.

Step 2-3: To a clean food processor, add the cream cheese, silken tofu, maple syrup, vanilla, melted chocolate, and cocoa. Mix until smooth and creamy. 

Process shots for chocolate cheesecake.

Step 4: To the springform pan, pour the cheese cake mixture over top of the Oreo crust and smooth it out with spatula. Chill in the refrigerator for a minimum of 4 hours or overnight to allow it to set. 

Step 5: To serve, top the cheesecake with ganache and fresh raspberries.

Expert Tips

Although this tofu cheesecake recipe is completely vegan, it is also a great option if you eat dairy and are looking for a lighter dessert option! You can swap the vegan cream cheese for regular cream cheese and it will still taste great with the tofu. You could also opt to use regular butter, instead of vegan butter, in the crust! Both options will be delicious for this tofu cheesecake recipe.

I also suggest serving this tofu cheesecake with some garnishes on top of the ganache. My personal favourite is raspberries, but any kind of berries would be delicious, or even bananas would be very tasty. If fruit is not your thing, you could also top your cheesecake with coconut flakes, nuts, or dusted cocoa powder. The possibilities are endless!

Recipe FAQ

Is this tofu cheesecake recipe gluten free?

This recipe can be made completely gluten free! Just be sure to buy certified gluten free chocolate sandwich cookies, as regular Oreo cookies are not gluten free.

Can I make this recipe the day before I want to serve it?

Not only is this tofu cheesecake great for making ahead of time, it is also the perfect recipe to make with kids!

Should I use light or full fat coconut milk to make the chocolate ganache?

I would suggest using full fat coconut milk to make the chocolate ganache, as this variety will have the most similar consistency to heavy cream.

Vegan tofu cheesecake on a white tray with raspberries.

More Recipes You May Like

If you liked this recipe for vegan tofu cheesecake with chocolate and Oreos, then you might also enjoy some of the other dessert recipes on the blog:

  • Caramel Apple Raw Vegan Cheesecake
  • Frozen Vegan Peanut Butter Pie
  • Gluten Free No Bake Pumpkin Pie
  • Rainbow No Bake Brownies
  • Vegan Coconut Rice with Mango & Kiwi 
  • Gluten Free Ginger Pear Crisp 

Have you ever tried a tofu cheesecake recipe before? What’s your favourite vegan dessert recipe? Leave me a comment below with your thoughts!

Chocolate cake on a plate with raspberries.
Print Recipe
5 from 1 vote

Tofu Cheesecake with Chocolate and Oreos (Vegan Dessert Recipe)

This tofu cheesecake with chocolate and Oreos is a delicious no-bake dessert option that is perfect for making with the kids.
Prep Time1 hour hr
Cook Time4 hours hrs
Total Time5 hours hrs 15 minutes mins
Course: Dessert
Cuisine: Amecian
Diet: Gluten Free, Vegan, Vegetarian
Servings: 10 people
Calories: 572kcal
Author: Abbey Sharp

Ingredients

For the crust:

  • 22 Gluten Free Oreos
  • 1/4 Cup Vegan Butter
  • 1/4 Tsp Salt

For the filling:

  • 1.5 Cups Vegan Dark Chocolate
  • 1/2 Cup Maple Syrup
  • 1 Package Silken Tofu (454g or 1lb)
  • 1 Cup Vegan Cream Cheese (250g)
  • 2 Tbsp Cocoa Powder
  • 1/4 Tsp Salt

For the ganache:

  • 1 Cup Vegan Dark Chocolate Chips
  • 1 Cup Coconut Milk
  • 1 Tsp Vanilla

Instructions

Prepare the crust:

  • Line the bottom of an 8 inch springform pan with parchment.
  • Place Oreos in a food processor and pulse until it is crushed. Add in the melted butter and salt and pulse until it forms a crumb.
  • Transfer the crumbs to your prepared springform pan and spread it evenly with a spatula. Press into a flat layer using the back of a cup or tall glass. Keep in the fridge to chill while you prepare the filling.

Prepare the cream cheese filling:

  • Melt the chocolate chips in a double boiler. Alternatively, place the chocolate chips in a microwave safe bowl. Melt in a microwave in 30 second increments stirring between each increment until the chocolate melts and is smooth.
  • To a food processor add the cream cheese, silken tofu, maple syrup, vanilla, melted chocolate, and cocoa. Mix until smooth and creamy.
  • Pour the chocolate cheesecake mixture over the crust and smooth with spatula. Chill in the refrigerator for a minimum of 4 hours or overnight to set.
  • Pop the cheesecake in the freezer for 15 minutes before serving, this makes it easier to remove it from the springform pan. Then, run a knife along the edge of the cheesecake and gently ease it out of the springform pan onto a plate or a cake stand.

Prepare the ganache:

  • Top the cheesecake with ganache just before you plan to serve it. Add the dark chocolate chips to a bowl. In a small saucepan, heat the coconut milk until bubbles start to appear along the edges and you notice steam rising (it should not be boiling). Remove it from the heat and add it to the chocolate. Let it stand for a few minutes, allowing the chocolate to melt. Whisk or stir the chocolate and coconut milk mixture until smooth and glossy.
  • Drizzle the ganache (or spread it depending on the consistency).
  • Pop the cheesecake in the freezer for 15 minutes before eating. This will help it ease out of the springform pan easily. Top with raspberries and serve.

Notes

Although this recipe is completely vegan, it is also a great option if you eat dairy and are looking for a lighter dessert option! You can swap the vegan cream cheese for regular cream cheese and it will still taste great with the tofu. You could also opt to use regular butter, instead of vegan butter, in the crust! Both options will be delicious.
I also suggest serving this tofu cheesecake with some garnishes on top of the ganache. My personal favourite is raspberries, but any kind of berries would be delicious, or even bananas would be very tasty. If fruit is not your thing, you could also top your cheesecake with coconut flakes, nuts, or dusted cocoa powder. The possibilities are endless!

Nutrition

Calories: 572kcal | Carbohydrates: 55g | Protein: 7g | Fat: 38g | Saturated Fat: 20g | Polyunsaturated Fat: 3g | Monounsaturated Fat: 8g | Trans Fat: 1g | Cholesterol: 1mg | Sodium: 370mg | Potassium: 466mg | Fiber: 6g | Sugar: 34g | Vitamin A: 13IU | Vitamin C: 0.3mg | Calcium: 117mg | Iron: 8mg
Abbey Sharp

Abbey Sharp is a Registered Dietitian (RD), regulated by the Ontario College of Dietitians. She is a mom, YouTuber, Blogger, award winning cookbook author, media coach specializing in food and nutrition influencers, and a frequent contributor to national publications like Healthline and on national broadcast TV shows.

www.abbeyskitchen.com/about-abbey/

Last Updated March 14, 2024. Published March 22, 2024 By Abbey Sharp 2 Comments

Vegan Butter Chicken Recipe with Tofu (Gluten Free)

Overhead view of a plate of rice with a bowl of tofu butter chicken alongside garnishes.

You are in for a surprise when you make this Vegan Butter Chicken Recipe! This classic recipe is made with tofu and cashews instead but is still so rich and creamy!

Overhead view of a plate of rice with a bowl of tofu butter chicken alongside garnishes.

This vegan butter chicken recipe is adapted from the popular Indian butter chicken recipe and I think it’s safe to say that I nailed the flavour profile! The sauce is rich, creamy, and flavourful and you won’t believe how easy it is to throw together. Seasoned to perfection, I can bet everyone will be reaching for seconds.

Table of contents

  • Why This Recipe Works
  • Key Ingredients
  • How to Make This Recipe
  • Expert Tips
  • Recipe FAQs
  • More Recipes You Might Like

Why This Recipe Works

This vegan butter chicken recipe is absolutely finger licking good. Not only that but this recipe is also:

  • Gluten-free
  • Made with pantry staples
  • Made in just a little over an hour
  • So easy to make
  • Freezer friendly

Key Ingredients

Ingredients needed to make vegan butter chicken.

Extra firm tofu — Tofu is a great source of protein as well as iron and calcium. It is also naturally gluten-free and low in calories while being super filling!

Passata sauce — Tomato passata is not the same as tomato sauce. Passata is simply a pureed tomato liquid, usually with no extra flavouring added to it. In this recipe, I used the brand Mutti for the tomato puree, but you could also use anything else like Hunts tomato puree. Make sure its puree and not paste.

Spices — I use garam masala, curry powder, coriander, turmeric, cinnamon, salt, and pepper to season this vegan butter chicken. They should be relatively easy to find at your local grocery store.

Cashew — Instead of making the tofu butter chicken with cream, we soak the cashews to make a thick and delicious cashew cream. Cashews are also packed with nutrients and fibre!

How to Make This Recipe

Set of two photos showing tofu crumbled beside the seasoning and then being marinated in a bowl.

Step 1: Press tofu for a minimum of 30 minutes. Break up the tofu into nugget size pieces when done.

Step 2: Marinate the tofu with olive oil, cornstarch, garam masala, curry powder, salt, and pepper for 15 minutes. While the tofu is marinating, take cashews and almond milk, and puree until creamy and smooth. You can also use a blender here as well.

Set of two photos showing pan fried tofu and a pot of tofu butter chicken.

Step 3: Fry the tofu on a pan over medium high heat until crispy. About 10 minutes. Remove the tofu from the pan and set aside and then in the same pan, add the ginger, garlic, and onion. Sautee until soft and fragrant. The onions should be almost transparent. About 5 minutes.

Step 4: Next, add vegan butter, tomato puree, maple syrup, garam masala, curry powder, and cinnamon, as well as the cashew cream. Mix until combined. Cook for 3 more minutes. This should form a light yellow-orange sauce. Lastly, add the tofu back in to combine the sauce and the “nuggets”.

Expert Tips

I pressed my tofu by wrapping the tofu in a cloth and putting it on top of a plate. I placed a heavy marble cutting board on top for about an hour. There are also kitchen gadgets that will do this for you as well. When pressing tofu, try and find anything that is about 5-10 lbs to press down on the tofu. (Cast iron, cutting board, etc)

If you don’t have tofu, you can use chickpeas, cauliflower florets, or even mock chicken instead. It’s up to you!

If you are short on time, you could skip pressing the tofu or do it for half the time. Just be sure you are using extra firm tofu and not firm tofu.

If you don’t have time to soak the cashews overnight, at least try to soak them for a minimum of 3 hours before blending. 

Recipe FAQs

What can I serve this with?

Try serving this vegan butter chicken recipe with some Jasmine rice, Basmati rice, brown rice, quinoa, naan, or bread of your choice.

How do I store leftovers?

Keep any leftover tofu butter chicken stored in an airtight in the fridge for 3 to 4 days. Reheat on the stovetop or in the microwave.

How do I freeze this?

This can be frozen for up to 2 months. I like to freeze them in single servings so I can pull one out for lunch as needed. Thaw the frozen serving overnight in the fridge and then reheat on the stovetop or microwave.

Is this spicy? Is it kid-friendly?

This is not super spicy so kids can definitely enjoy this dish alongside the adults. If you’d like for this to be spicy, you can add some cayenne pepper to the sauce.

Where do I find passata?

Passata can be found at most major grocery stores now. They usually come in glass jars so you should be able to spot them easily. If not, it’s also available online.

Overhead view of a bowl of butter chicken with a plate of rice beside it with a small bowl of garnish nearby.

More Recipes You Might Like

If you loved this vegan chicken butter recipe, you should check out these vegan recipes as well!

  • Tofu Pudding with Sweet Potato
  • Vegan Cauliflower Wings with “Honey” Garlic Sauce
  • Vegan Breakfast Sandwich with Tofu
  • Vegan Sloppy Joes with Roasted Portobello Mushroom

Now tell me lovelies, how do you vegan-ize your favourite recipes?

Overhead view of a plate of rice with a bowl of tofu butter chicken alongside garnishes.
Print Recipe
5 from 8 votes

Vegan Butter Chicken Recipe with Tofu (Gluten Free)

You are in for a surprise when you make this Vegan Butter Chicken Recipe! This classic recipe is made with tofu and cashews instead but is still so rich and creamy!
Prep Time30 minutes mins
Cook Time25 minutes mins
Total Time55 minutes mins
Course: Main Course
Cuisine: Indian
Servings: 4 servings
Calories: 341kcal
Author: Abbey Sharp

Ingredients

For the Tofu Nuggets:

  • 16 oz Extra firm tofu
  • 1 tbsp olive oil
  • 1 tbsp cornstarch
  • ½ tsp garam masala
  • ¼ tsp curry powder
  • pinch of salt and pepper

For the Sauce:

  • ½ cup plain cashews soaked overnight
  • ½ cup almond milk
  • 1 tbsp ginger
  • 1 tbsp garlic
  • ½ white onion diced
  • 2 tbsp vegan butter
  • 24 oz passata (tomato puree)
  • 1 tbsp maple syrup
  • 1 tsp Garam Masala
  • 1 tsp curry powder
  • 1 tsp ground coriander
  • ½ tsp turmeric
  • ½ tsp cinnamon

Instructions

  • Press tofu for a minimum 30 minutes.
  • Break up the tofu into nugget size pieces
  • Marinate the tofu with olive oil, cornstarch, garam masala, curry powder, salt, and pepper for 15 minutes.
  • While the tofu is marinating, take cashews and almond milk, and puree until creamy and smooth. You can also use a blender here as well.
  • Once the tofu is done marinating, fry the tofu on a pan over medium high heat until crispy. About 10 minutes.
  • Remove the tofu from the pan and set aside.
  • In a pan over medium heat, add the ginger, garlic, and onion. Sautee until soft and fragrant. The onions should be almost transparent. About 5 minutes.
  • Next, add vegan butter, tomato puree, maple syrup, garam masala, curry powder, and cinnamon, as well as the cashew cream. Mix until combined. Cook for 3 more minutes. This should form a light yellow-orange sauce.
  • Lastly, add the tofu back in to combine the sauce and the “nuggets”. Cook for about 2 minutes.
  • Serve with jasmine rice and garnish with cilantro

Notes

  • I pressed my tofu by wrapping the tofu in a cloth and putting it on top of a plate. I placed a heavy marble cutting board on top for about an hour. There are also kitchen gadgets that will do this for you as well. When pressing tofu, try and find anything that is about 5-10 lbs to press down on the tofu. (Cast iron, cutting board, etc)
  • If you don’t have tofu, you can use chickpeas, cauliflower florets, or even mock chicken instead. It’s up to you!
  • If you are short on time, you could skip pressing the tofu or do it for half the time. Just be sure you are using extra firm tofu and not firm tofu.
  • If you don’t have time to soak the cashews overnight, at least try to soak them for a minimum of 3 hours before blending. 

Nutrition

Calories: 341kcal | Carbohydrates: 31g | Protein: 15g | Fat: 19g | Saturated Fat: 3g | Polyunsaturated Fat: 5g | Monounsaturated Fat: 10g | Trans Fat: 1g | Sodium: 210mg | Potassium: 1099mg | Fiber: 5g | Sugar: 14g | Vitamin A: 875IU | Vitamin C: 20mg | Calcium: 132mg | Iron: 6mg

Abbey Sharp

Abbey Sharp is a Registered Dietitian (RD), regulated by the Ontario College of Dietitians. She is a mom, YouTuber, Blogger, award winning cookbook author, media coach specializing in food and nutrition influencers, and a frequent contributor to national publications like Healthline and on national broadcast TV shows.

www.abbeyskitchen.com/about-abbey/

Last Updated May 20, 2024. Published March 20, 2024 By Abbey Sharp Leave a Comment

The Frugivore Diet | A Registered Dietitian’s Review

Purple smoothie bowl topped with various fruits, surrounded by an arrangement of colourful fruit.

Are frugivore diets the secret to health and weight loss? A dietitian reviews this “Raw till 4” high carb, low fat diet to see if eating only fruit is healthy.

Purple smoothie bowl topped with various fruits, surrounded by an arrangement of colourful fruit.

If you’re an OG Abbey’s Kitchen fan, you’ll recall me debunking the frugivore diet way back in 2018. It was a time when I was receiving hundreds of messages and emails and DMs from young girls following this diet and suffering from horrendous outcomes: hair loss, raging blood sugars, acne, severe IBS flairs, muscle wasting, amenorrhea, and more.

Unfortunately I’ve seen a resurface of the frugivore diet, with influencers sharing their “healthy diets” made of 90% bananas, watermelon and juices. So this blog post feels a bit like a passing of the torch to the next generation of raw vegan frugivores- as a dietitian, I’m here to debunk some myths and answer common questions about this fruit-based diet.

What is the Frugivore Diet?

Also know as the frutarian diet or frutarianism, the frugivore diet is pretty much what it sounds like: lots and lots of fruits and vegetables. Essentially, the frugivore diet is a more restrictive version of veganism. Along with no animal products, frugivores typically eat very mostly raw produce and may include limited amounts of nuts, seeds, and grains. Similarly, the Raw till 4 diet is a type of frugivore diet, with only raw fruits and greens eaten before 4pm.

Hey, as a dietitian I love fruit. But I’m not sure I could live off fruit and raw veggies alone. A girl can only drink so many green smoothies in a day. Still, there are lots of claims made by various frugivores, so let’s address.

Debunking Common Frugivore Diet Claims

Brown coconut bowl with kiwi, berries, watermelon, grapefruit and other various fruits.

Eat Whatever You Want Without Worrying About Weight Gain

Now this is a dangerous and frankly just incorrect assertion. It doesnt matter what kind of diet you want to follow- keto, weight watchers, calorie counting, or Raw till 4. Weight loss or gain comes down to calories, and that’s just a simple fact of thermodynamics. And if the frugivore “works” for some, it’s because they’ve been able to create a calorie deficit. Not because it’s super satiating or has any magical nutrient.

In fact, despite this diet being made up of only fruit and vegetables, it’s super low in Hunger Crushing Compounds. Fruits and veggies are amazing sources of fibre, water and micronutrients, but not so much protein or fat. Even our “higher protein” vegetables like broccoli only contain 2.8 grams protein per 100 gram weight. That means you’d have to eat almost 900 grams to hit at least 25 grams of protein per meal. My stomach hurts just thinking about that.

So I would argue that most people would not feel very full at all on a diet like this. And if you did, it would be because of the sheer volume or low caloric density of the foods.

You Can Eat Double the Volume of Food as an Average American

The fact that eating 8 lbs of food is treated as a flex is already a red flag to me. Now I’m not diagnosing frugivores with anything, this is just from my own experience as a dietitian and someone who also had an eating disorder. But bragging about my massive portions was exactly what I used to do to hide my eating disorder. To be honest, it did work because people saw me eat a lot so they were thrown off on any suspicions that something was wrong.

But eating massive amounts of ultra low calorie foods in an attempt to stretch the vagus nerve, and trick my body into thinking it was truly nourished, was a clear sign of my eating disorder. I wanted so badly to feel FULL, and the only way to do that without gaining weight was to eat massive amounts of lettuce, broth, and water-rich fruit .

Obviously there is some merit to consuming more high volume foods when on a weight loss diet. We do have research to support that. But I think it’s important to remind ourselves that even if you can hack your brain into thinking it’s “full” by filling your gut with water and fibre, the likelihood of feeling truly satisfied is slim.

Oil is a Waste of Calories

Woman pouring olive oil onto a salad.

Folks on the frugivore diet love to tout their “oil-free” lifestyle, because apparently oil is empty calories with sit in your stomach without filling it up. But here’s my take on oils and fats while trying to lose weight.

Fats contain more calories per gram than protein or carbs. With that said, they are also slow digesting so they stabilize insulin levels and keep you feeling fuller longer. When weight loss is the goal, I do think we want to get the bulk of our healthy fats from whole food sources where they are bundled up in other Hunger Crushing Compounds. For example, avocado is rich in healthy fats AND fibre. Nuts have healthy fats, protein and fibre. Salmon has healthy fats and protein. And so on.

Oils are just pure fat, aka only one Hunger Crushing Compound. But that doesn’t mean they don’t contribute to fullness or satisfaction. On the contrary, research suggests that added oil does reduce appetite, and hunger hormones when added to meals. It also makes food taste better which is important for the satisfaction piece. I would so miserable eating dry lettuce with no dressing, so you bet I would be face planting into the family sized chips.

At the end of the day, it’s finding a balance between emotional satisfaction and nutrition goals that works for you.

It’s Easier to Convert Dietary Fat into Body Fat

When I heard this frugivore claim, I was pretty amused because it’s simply not true. To sum it up, some on the frugivore diet claim that when compared to carbohydrates, our body readily converts fat from foods into body fat. They claim this is because dietary fat is already fat. At first glance that makes sense, until you grasp any basic human physiology.

Now that is not how weight gain works. Carbs may be our body’s preferred fuel for immediate energy, but that doesn’t mean they can’t be converted to fat. In fact, if you want to get down to the nitty gritty, you could argue that foods that increase insulin or promote insulin resistance (aka carbs) may preferentially promote fat storage.

But if that’s what weight gain actually came down to, carbs would actually be a bigger culprit, particularly low fibre, high sugar carbs like bananas, grapes, watermelon etc. But ultimately, the research shows that what matters is calories. It doesn’t matter what the energy source is- if you have more calories than what you need, that substrate will be stored as fat. Even if those calories come from carbs.

Frugivore Diets Have the Perfect Macro Split

Apparently, following a frugivore diet allows you to naturally fall into the “perfect macro split” of 80% carbohydrates, 10% fat and 10% protein. Fact or fiction? Spoiler, it’s probably fiction.

Assuming calories are appropriate, North Americans pretty consistently consume 15% of calories from protein. There’s actually a really interesting concept called the protein leverage hypothesis that suggests that protein intake is more strongly regulated than the intake of carbohydrates and fats. And when we reduce our protein intake below 15%, we compensate by increasing our calories until we reach that 15%. So if you’re not also carefully controlling calories and just going hog wild on the fruit, there is a pretty good chance you’re not going to end up in a calorie deficit. 

I talked about optimal macros for weight loss in this post, but fat loss increases 4 fold when we go from 10-15% of calories from protein to 20-30%. Yet even if fat loss is not the goal, 10% protein isn’t even enough for baseline bare minimum health. The lowest of the low recommendations for protein is 0.8-1 g per kg of body weight. And that’s like bottom of the barrel basic, not if we’re trying to lose weight or build muscle. For a 120 lb person, that would be 43-54 grams of protein. It’s really so little in my professional opinion and yet, some frugivore diets don’t even provide that. Poor protein intake can result in muscle wasting, reduced energy digestibility and fatty liver, and these effects can persist well beyond quitting the diet.

Ditto for the low fat. We know that fat intakes below 20% can result in hormone dysregulation- low testosterone in men and low estrogen in women, which obviously can affect fertility. That’s not something we want to mess with. So I’d say that this “perfect macro split” attained by a frugivore diet is actually far from ideal.

Final Thoughts on the Frugivore Diet

You know, I keep thinking that debunking content like this is like captain obvious. But when I see people who legitimately think the frugivore diet will solve all their health problems, it just makes me genuinely said. Truly, I have soo much empathy for the vulnerable individuals who are following this. When something credible looking makes a strong argument on TikTok, it’s pretty easy to get sucked in. And while of course there will always be anomalies who will thrive on a diet like this, it’s a pretty slippery slope for like everyone else. 

So bottom line? Fruit is amazing, fruit is nutritious, and I love fruit. But a girl cannot thrive on fruit alone, even if you throw in some potatoes. Don’t forget about protein and healthy fats, because those are important too.

Woman eating an orange on the frugivore diet.

More Blog Posts You Might Like

Want to learn more about different vegan diets? I debunk more myths and share the science here:

  • Raw Till 4 Review | The Hard Truth on this Extreme Vegan Diet
  • Is Vegetable Oil Bad for You? The Vegan Oil Free Diet
  • Vegan Diet and Bloating | How to Improve Gut Health
  • Is a Vegan or Vegetarian Diet Safe for Pregnancy?

Now I want to hear from you: what claims have you heard about the frugivore diet?

Abbey Sharp

Abbey Sharp is a Registered Dietitian (RD), regulated by the Ontario College of Dietitians. She is a mom, YouTuber, Blogger, award winning cookbook author, media coach specializing in food and nutrition influencers, and a frequent contributor to national publications like Healthline and on national broadcast TV shows.

www.abbeyskitchen.com/about-abbey/

Last Updated March 14, 2024. Published March 18, 2024 By Abbey Sharp 7 Comments

Quinoa Balls Recipe | Vegan, BLW Friendly

Birds eye view of quinoa balls on a plate, served with marinara sauce.

This quinoa balls recipe is a delicious high-iron recipe for baby led weaning and toddlers. It is also vegan, gluten free, and a recipe that the whole family can enjoy!

Stack of quinoa balls in a beige bowl.

If you know me, you know I love a good baby led weaning recipe. While my little boys are (sadly) not so little anymore, luckily they have not outgrown their love for mama’s BLW recipes and have become expert recipe testers in the process. This quinoa balls recipe with marinara sauce are one of my new favourites to come out of my kitchen and I can confirm that they are toddler approved. Not only are they a handy make-ahead recipe for future snacks, but they’re especially delicious when paired with a homemade marinara sauce. And a little dietitian tip: pairing your iron sources with vitamin C can substantially increase absorption, which is why we have added spinach and tomato sauce to this these quinoa balls to give it a nutrition and flavour boost!

Why This Recipe Works

If you still need convincing to try this quinoa balls recipe, here are some more reasons we love this recipe:

  • Vegan
  • BLW-friendly (practice that pincer grasp!)
  • High in iron
  • High in protein and fibre (2 g of each per ball)
  • Easily made gluten-free
  • Freezer and meal prep friendly

Key Ingredients

Birds eye view of ingredients, including quinoa, flax egg, seasoning, tomato puree, spinach, dates, garlic, and oats.

Quinoa – Unlike most grains, quinoa is a plant-based protein that contains all essential amino acids. In fact, one cup contains 8 grams of protein. They also bind really well making it easy to form BLW-sized balls.

Spinach – Spinach is very neutral in taste, making it an easy veg to add to these quinoa balls while also adding a bit of colour and iron.

Rolled oats – We use gluten-free rolled oats to bind the quinoa balls together and keep them gluten free. But if you don’t need to make these gluten free, you can use breadcrumbs instead.

Flax egg – To make a flax egg we combine 1 tbsp of ground flax and 3 tbsp of water, and let it sit in the fridge for a couple of minutes until it forms a gel. If you don’t need to make this vegan you can substitute the flax egg for a regular egg.

Dates – I love using dates as a natural sweetener and it also helps to lower the acidity of the marinara sauce.

Seasoning – To season these quinoa balls, we use nutritional yeast, garlic powder and Italian seasoning.

How to Make This Recipe

Process shots of spinach being sauteed, ingredients being mixed, and BLW bites rolled on a tray.

Step 1: In a small skillet sauté the spinach in a little oil until it is wilted, about 2 minutes. 

Step 2: In a large bowl, combine quinoa, flax egg, wilted spinach, nutritional yeast, garlic powder, Italian seasoning and rolled oats. 

Step 3: Shape into 12 balls, lightly coat with oil, and bake for 25 minutes at 400 F.

Process shots of marinara sauce being made, and finished BLW bites served with marinara sauce.

Step 4: While the quinoa balls are baking, make the marinara sauce. Bring a saucepan to medium heat and add oil and garlic. Sauté until garlic is fragrant, about thirty seconds. 

Step 5: Add the tomato puree and dates and simmer for a few minutes. Use an immersion blender to puree the mixture. 

Step 6: Add chopped basil and serve along with quinoa balls.

Expert Tips

If you don’t have time to pulse your oats in the food processor, you can also use oat flour or quick oats instead! Quick oats are typically cut down a little more, allowing you to skip a step.

Another way I like to make this meal more exciting for my kiddos is by switching up the dip/sauce I serve! When they aren’t feeling the marinara, sometimes we go for my homemade ketchup or another one of my staple toddler dips.

Birds eye view of quinoa balls on a plate, served with marinara sauce.

Recipe FAQs

Can I freeze these quinoa balls?

Yes, these quinoa balls are super freezer-friendly. I like to batch-prep and freeze them on a cookie sheet. Then, I transfer into a freezer-safe bag and store for up to 3 months.

How can I make this gluten-free?

Both quinoa and oats are naturally gluten-free, however it is best to buy products labelled “gluten-free” to minimize the risk of cross-contamination.

What makes this recipe BLW-friendly?

They are the perfect size for your child to hold themselves. You can even try adjusting the size so they can practice their pincer grasp! The soft texture also lends itself to baby-led weaning.

Will adults enjoy this quinoa balls recipe too?

Of course! They make a great appetizer, side, or snack. When I’m making them for the grown-ups, I like adding a pinch of salt and some parmesan cheese.

Can I use store-bought marinara sauce?

You bet. Store-bought marinara has saved me many times in a pinch. But when I have extra time, this homemade marinara sauce is so delicious.

More Recipes You Might Like

If you liked this quinoa balls recipe, I have so many other great baby-led weaning recipes on the blog!

  • Baby Meatballs for Baby-Led Weaning
  • Fish Cakes with Quinoa (Gluten Free BLW Recipe)
  • Salmon Fritters with Sweet Potato (Baby-Led Weaning Recipe)
  • Protein Muffins for BLW with Chicken and Spinach

Parents, I want to know your favourites for baby-led weaning. Have you tried this quinoa balls recipe yet with your kiddos? Leave me a comment below!

Birds eye view of quinoa balls on a plate, served with marinara sauce.
Print Recipe
5 from 4 votes

Quinoa Balls Recipe | Vegan BLW Recipe

These quinoa balls are a delicious high-iron recipe for baby led weaning and toddlers. They are also vegan, gluten free, and a recipe that the whole family can enjoy!
Prep Time15 minutes mins
Cook Time25 minutes mins
Total Time40 minutes mins
Course: Appetizer, snacks
Cuisine: American
Diet: Vegan
Servings: 12 Balls
Calories: 50kcal
Author: Abbey Sharp

Ingredients

  • 2 handfuls chopped spinach
  • 1 teaspoon avocado oil
  • 1 cup cooked quinoa
  • 1 flax egg 1 tablespoon flax mixed with 3 tablespoon water
  • 3 tablespoon nutritional yeast
  • ½ teaspoon garlic powder
  • ½ teaspoon Italian seasoning
  • ¼ cup rolled oats pulsed a few times in the food processor

Marinara sauce

  • ½ cup tomato puree
  • 1 – 2 dates chopped
  • 1 teaspoon olive oil
  • 1 garlic clove
  • Chopped basil

Instructions

  • Preheat the oven to 400 F and line a baking tray with parchment paper and set aside.
  • In a small skillet sauté the spinach in a little oil until it is wilted, about 2 minutes.
  • In a large bowl combine quinoa, flax egg, wilted spinach, nutritional yeast, garlic powder, Italian seasoning and rolled oats.
  • Shape into balls, lightly coat with oil and bake for 25 minutes
  • While the quinoa balls are baking, prepare the marinara sauce.
  • Bring saucepan to medium heat, add oil, garlic and sauté until garlic is fragrant, about thirty seconds.
  • Add tomato puree and dates and simmer for a few minutes. Use an immersion blender and puree the mixture. Add chopped basil and serve along with quinoa balls.

Notes

This recipe is also great for school-age kids and adults, simply add a little salt to both the quinoa balls and marinara sauce.

Nutrition

Calories: 50kcal | Carbohydrates: 7g | Protein: 2g | Fat: 2g | Saturated Fat: 0.2g | Polyunsaturated Fat: 1g | Monounsaturated Fat: 1g | Sodium: 9mg | Potassium: 158mg | Fiber: 2g | Sugar: 1g | Vitamin A: 527IU | Vitamin C: 3mg | Calcium: 15mg | Iron: 1mg
Abbey Sharp

Abbey Sharp is a Registered Dietitian (RD), regulated by the Ontario College of Dietitians. She is a mom, YouTuber, Blogger, award winning cookbook author, media coach specializing in food and nutrition influencers, and a frequent contributor to national publications like Healthline and on national broadcast TV shows.

www.abbeyskitchen.com/about-abbey/
  • Previous Page
  • Go to page 1
  • Interim pages omitted …
  • Go to page 7
  • Go to page 8
  • Go to page 9
  • Go to page 10
  • Go to page 11
  • Interim pages omitted …
  • Go to page 89
  • Next Page

Get started with

Eight Free Recipe Books

From the co-founder of Neue Theory and creator of the Hunger Crushing Combo

Sign me up!
Abbey smiling at table
Abbey Sharp

“Foods may never be nutritionally equal. But we can make them morally equal by recognizing that our worth is never determined by what's on our plate.”

— Abbey Sharp, RD About Abbey ◥

Books

  • HCC™
  • Mindful Glow
  • Free E-Books

Blog

  • Nutrition
  • Recipes
  • Motherhood
  • Life

Explore

  • Neue Theory™
  • Bite Back
  • YouTube

Abbey

  • About
  • Coaching
YouTube TikTok Instagram Facebook X Pinterest
Abbey Sharp - The No BS Dietitian From Abbeys Kitchen

© Abbey's Kitchen 2026  All Rights Reserved •  ACCESSIBILITY STATEMENT •  Privacy Policy

This site uses cookies. By continuing to browse the site, you are agreeing to the use of cookies Accept Privacy Policy
Privacy & Cookies Policy

Privacy Overview

This website uses cookies to improve your experience while you navigate through the website. Out of these, the cookies that are categorized as necessary are stored on your browser as they are essential for the working of basic functionalities of the website. We also use third-party cookies that help us analyze and understand how you use this website. These cookies will be stored in your browser only with your consent. You also have the option to opt-out of these cookies. But opting out of some of these cookies may affect your browsing experience.
Necessary
Always Enabled
Necessary cookies are absolutely essential for the website to function properly. This category only includes cookies that ensures basic functionalities and security features of the website. These cookies do not store any personal information.
Non-necessary
Any cookies that may not be particularly necessary for the website to function and is used specifically to collect user personal data via analytics, ads, other embedded contents are termed as non-necessary cookies. It is mandatory to procure user consent prior to running these cookies on your website.
SAVE & ACCEPT

Rate This Recipe

Your vote:


A rating is required
A name is required
An email is required