• Skip to main content

Abbey's Kitchen

Healthy Recipes, Nutrition Myth Busting, Healthy Eating Tips

  • Books
    • HCC™
    • The Mindful Glow Cookbook
    • Recipe eBooks
      • Family
      • Hypothyroidism
      • BLW
      • Vegan Week 1
      • Vegan Week 2
      • Vegan Week 3
      • Keto
      • Gluten Free Week 1
      • Gluten Free Week 2
      • Fitness
      • Paleo
  • Blog
    • Nutrition
    • Recipes
    • Motherhood
    • Life
  • Explore
    • Neue Theory™
    • Bite Back With Abbey Sharp
      • Apple Music
      • Spotify
      • Amazon Music
    • YouTube
  • Abbey
    • About
    • Coaching
    • Contact

Abbey Sharp

Last Updated January 19, 2024. Published January 22, 2024 By Abbey Sharp 88 Comments

Toddler Meatball Recipe with Hummus | Iron Rich + BLW Friendly

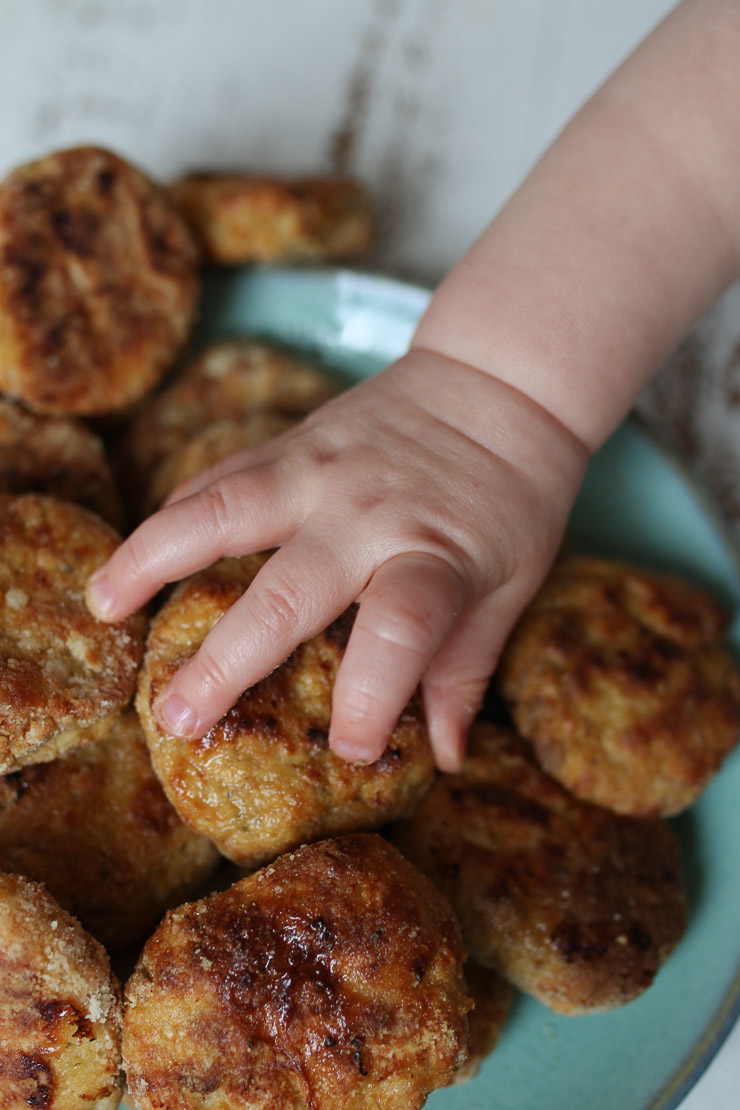
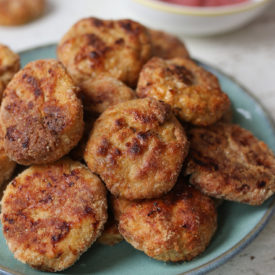
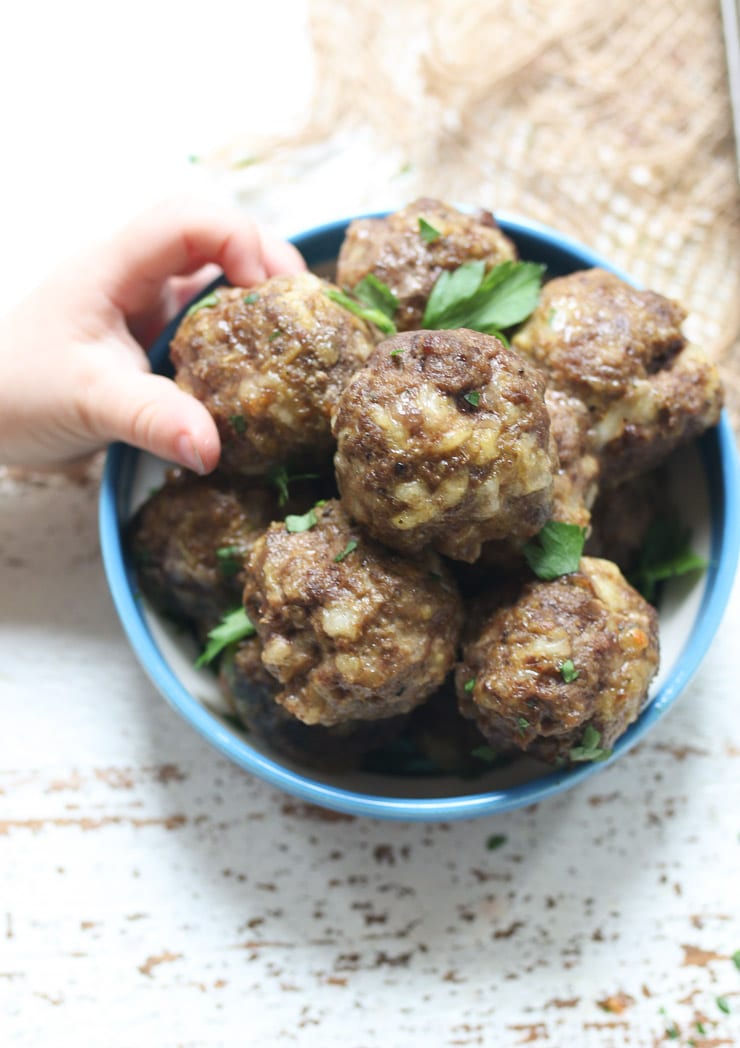
This toddler meatball recipe is cheesy, high iron and perfect for BLW and families. It’s an easy way to sneak in extra iron!

Baby grabbing toddler meatballs.

After a baby transitions off breastmilk or formula, I think one of parents biggest fears is that they’re not getting enough iron. I created a comprehensive guide about iron before 1, and I heard a lot of feedback that there was NO WAY your kid was getting enough. If you haven’t seen the guide, check it out here.

Here’s the thing- these numbers are averages based on babies also getting iron from less well absorbed sources (like plant based foods), so if you’re including animal protein in your baby’s diet, there’s a good chance they actually need significantly less than that magic 11 mg number.

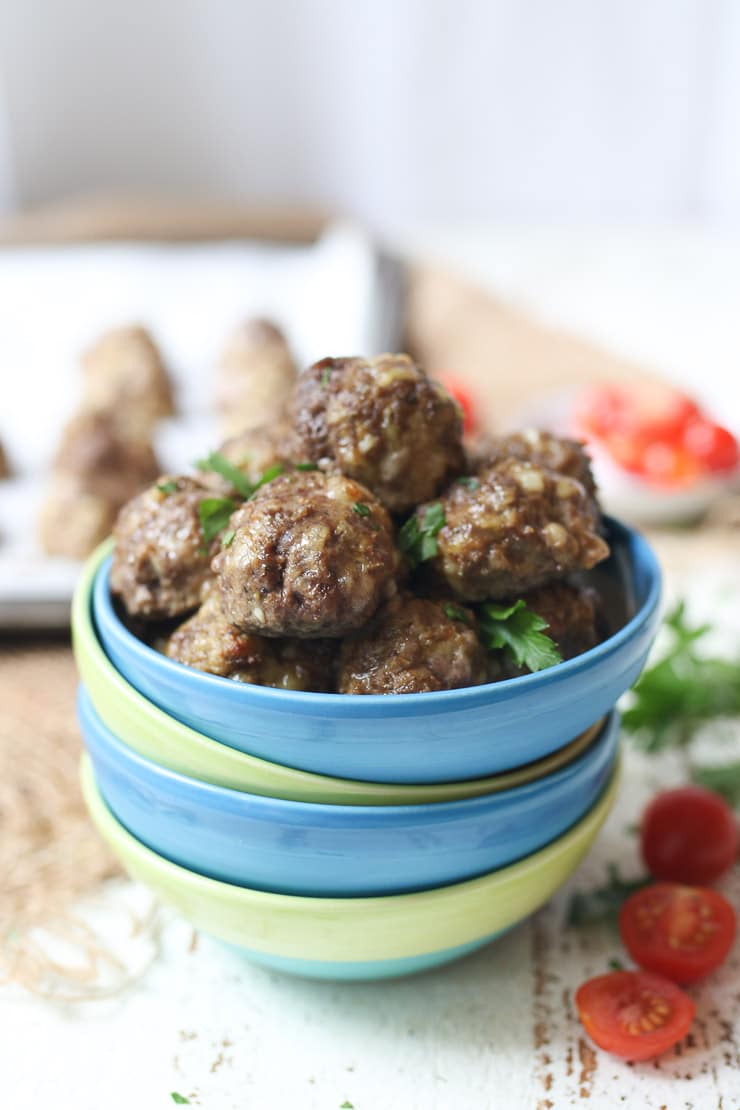
This cheesy toddler meatball recipe for baby led weaning was one of my secret weapons for those days when I’d thinking our iron intake had been a little low. They’re flavourful, packed with iron and tasty enough that the whole family will love them. Even though my kids are a bit older now, we still come back to this recipe- not just for toddlers and babies!

Table of contents

  • Why This Recipe Works
  • Key Ingredients
  • How to Make This Recipe
  • Expert Tips
  • Recipe FAQs
  • More Recipes You Might Like

Why This Recipe Works

These cheesy toddler meatballs are ideal for BLW and toddlers, because they’re tender enough even for a new beginner eater to enjoy. Here are a few more reasons why this toddler meatballs recipe is a family favourite.

  • High in protein and iron
  • Requires less than 10 ingredients
  • Only takes 35 minutes to prepare
  • Family friendly

Key Ingredients

Flat lay image of portioned recipe ingredients including ground meat, pepper, salt, oregano, baby cereal, egg, milk, and cheese.

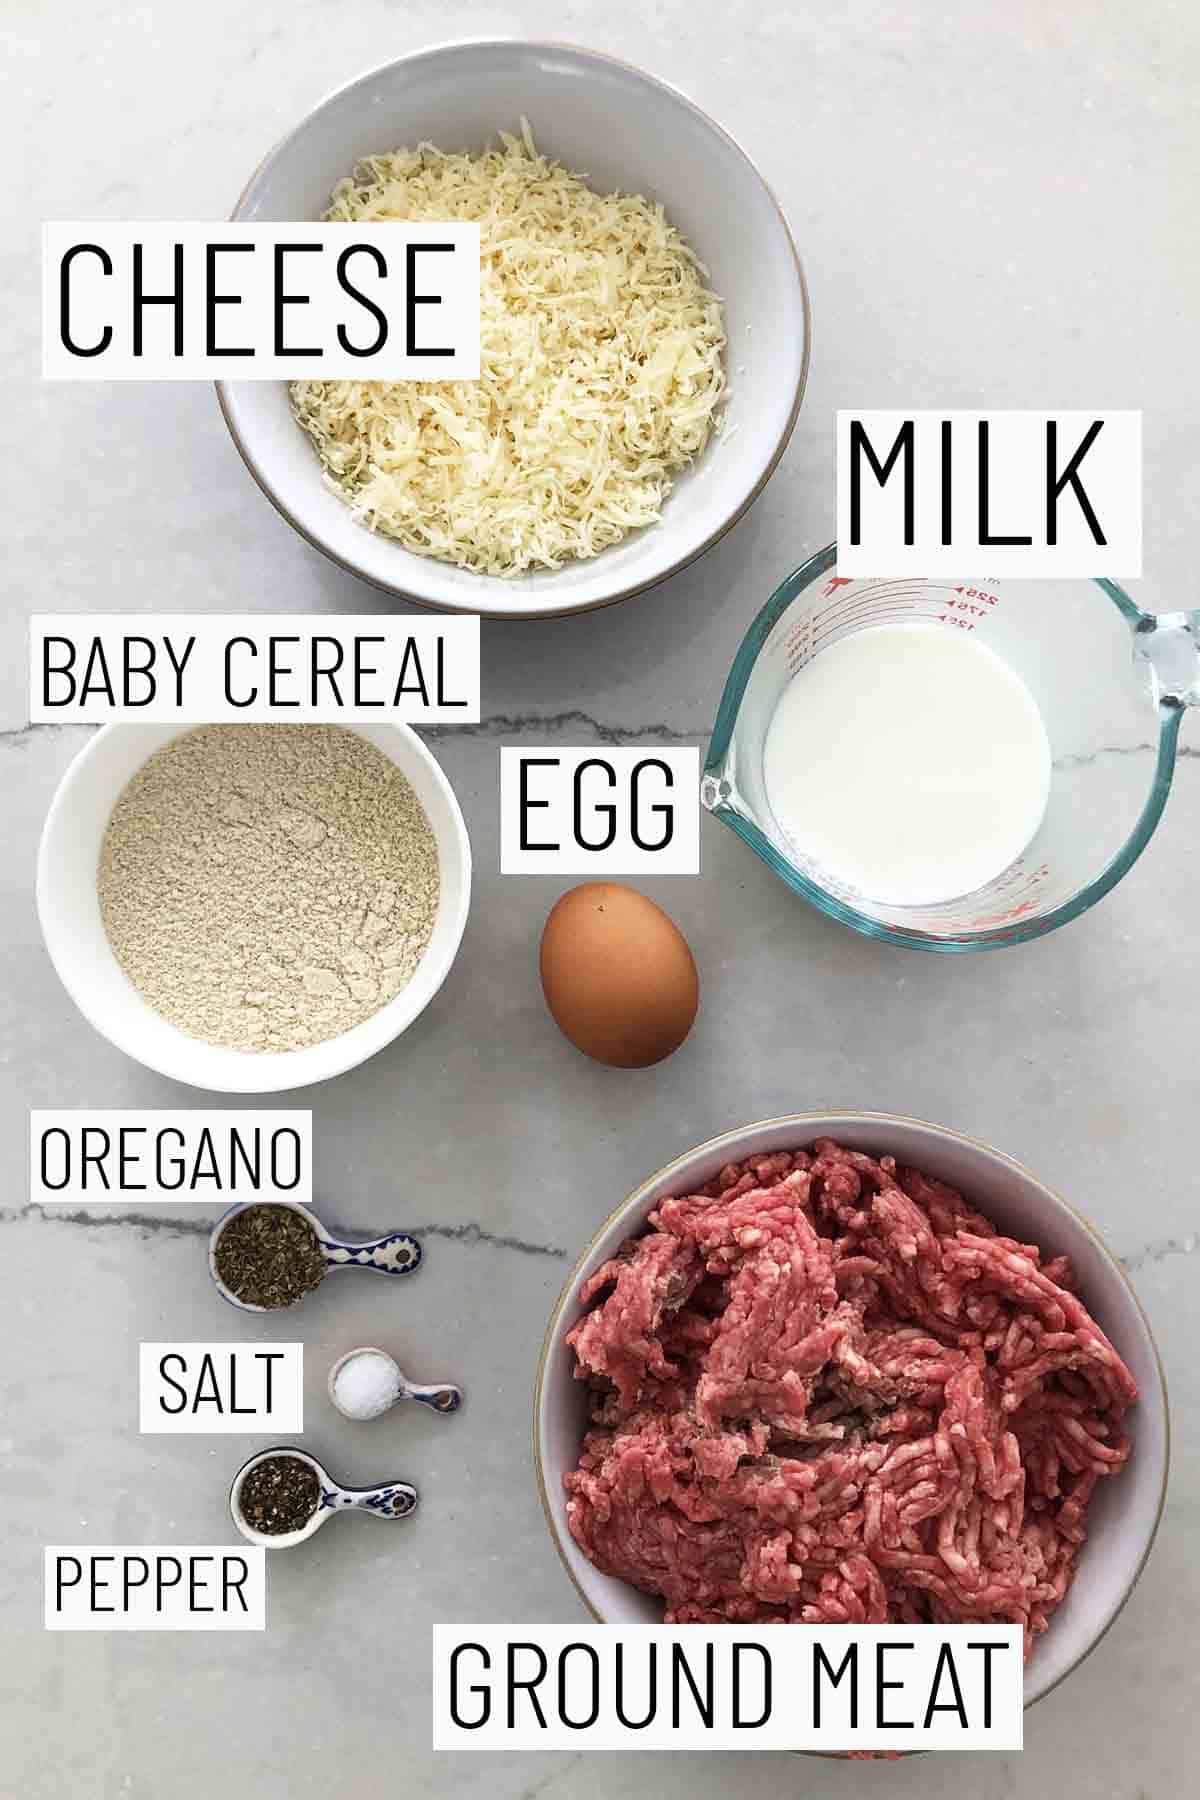
Iron fortified baby cereal – this will add an extra iron boost to the toddler meatballs and will also act as a binder to bring the meatballs together.

Breastmilk – I like to combine breastmilk with the baby cereal to add moisture and an extra nutrition boost. Instead of breastmilk, you can use any milk of your choosing.

Ground beef – I prefer to use ground beef for these meatballs because they add a healthy dose of iron, but feel free to use any other ground meat of your choosing (like pork, chicken, or turkey).

Cheese – I use aged white cheddar or mozzarella cheese because they are a nice low sodium option that’s super melty and delish.

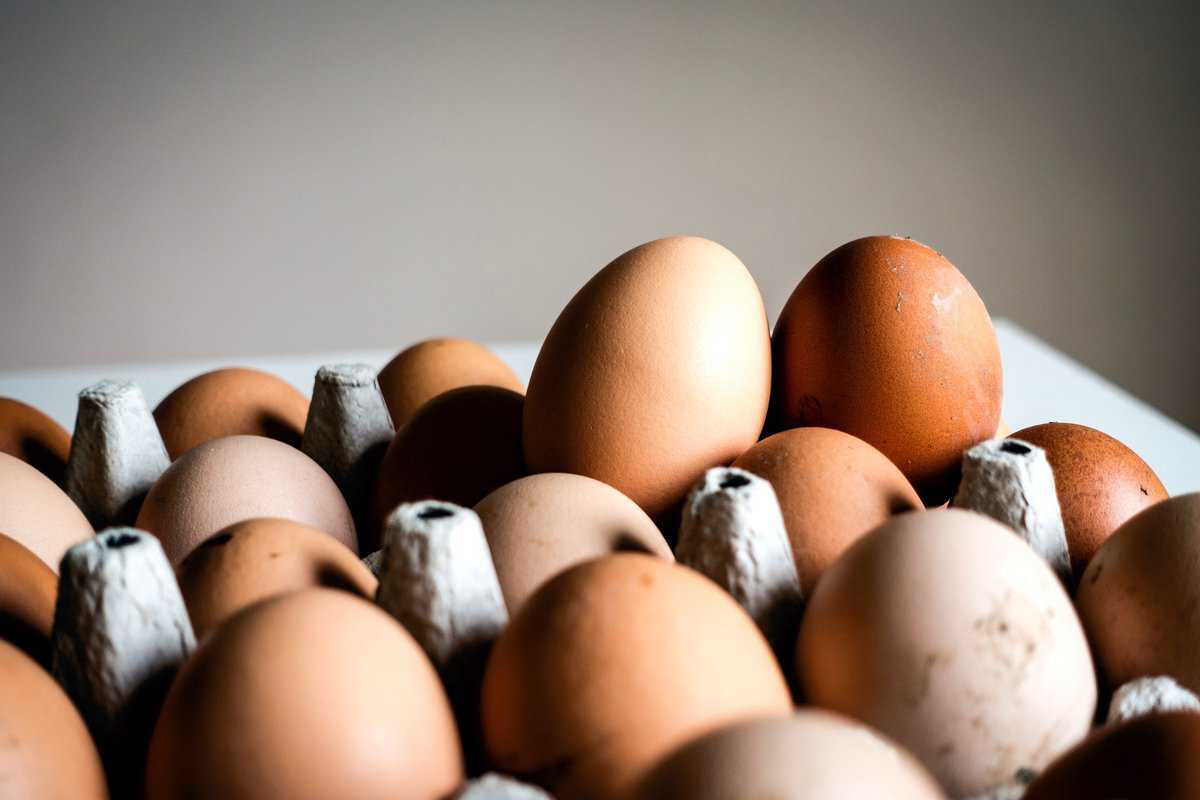
Egg – this will also act as a binder to help the meatballs stick together and also adds an extra iron boost.

How to Make This Recipe

Three side by side images showing how to prepare toddler meatball recipe.

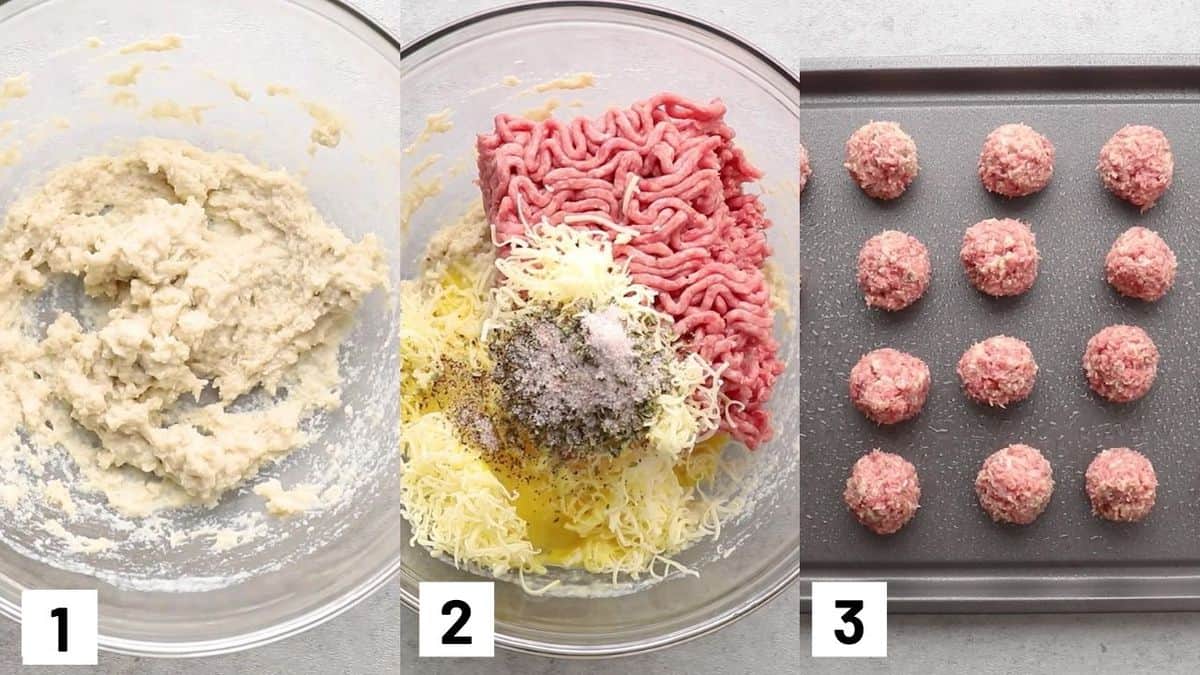
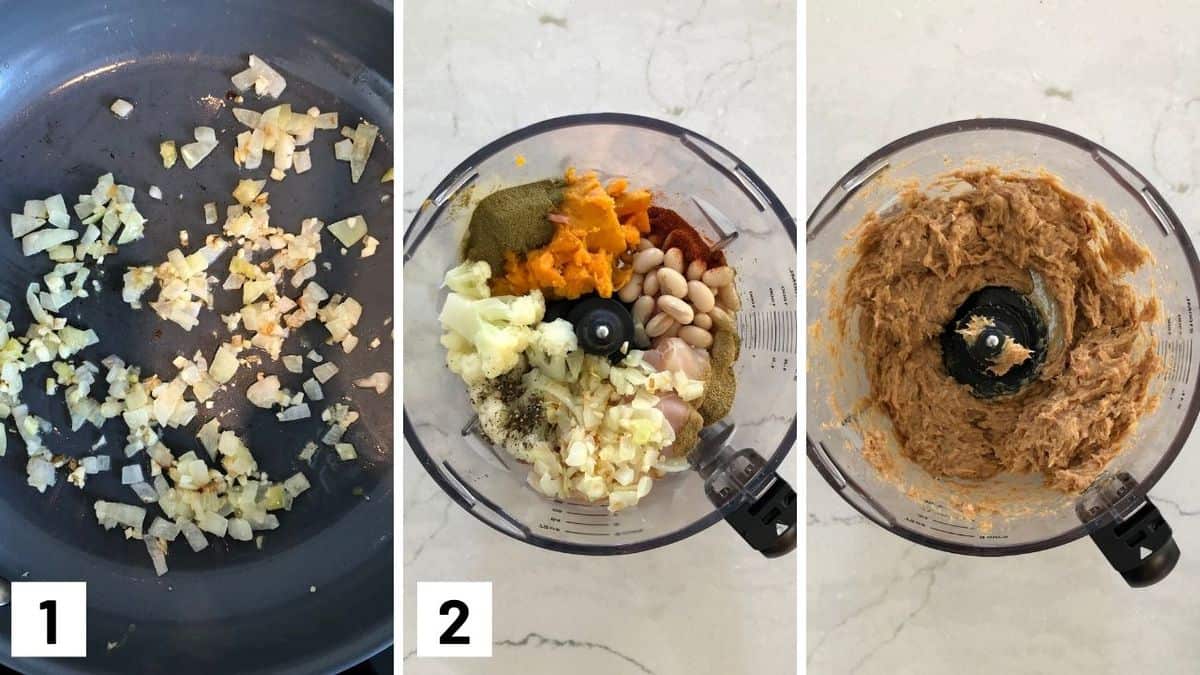
Step 1: In a large bowl, mix together the baby cereal and milk and allow it to sit for 10 minutes.

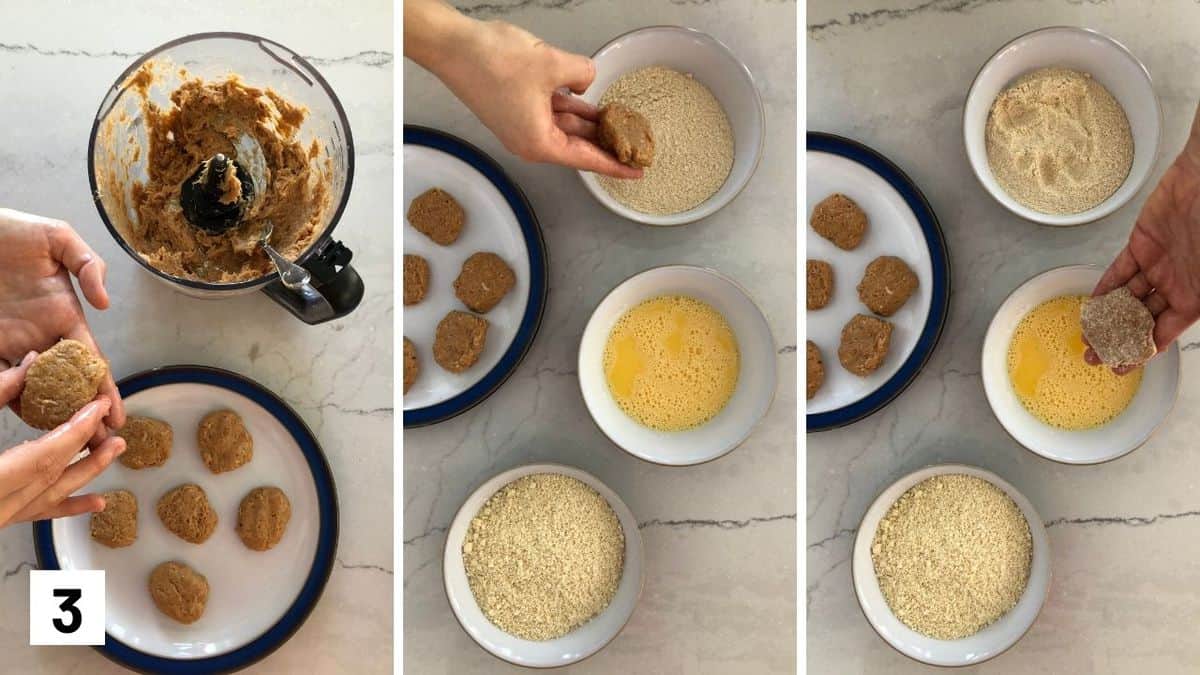
Step 2: Add in the meat, cheese, egg, oregano, pepper, and salt (optional). Mix until combined then roll into 1 tbsp meatballs.

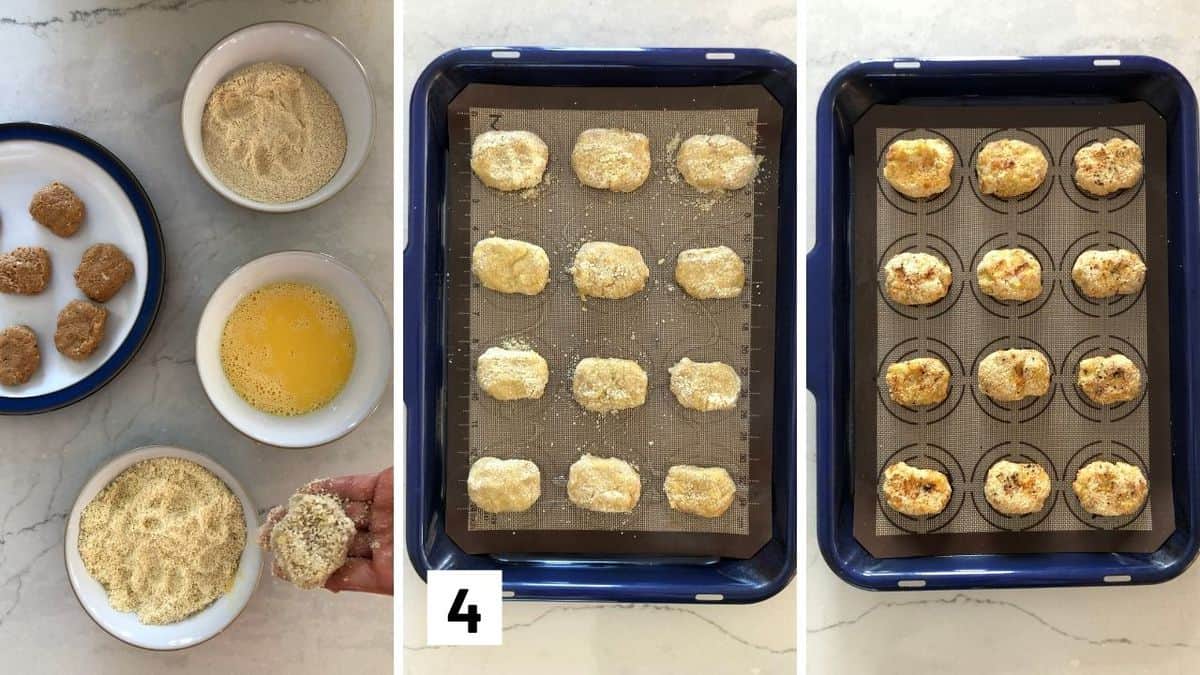
Step 3: Grease the baking sheet. Place on the baking sheet and spritz with a bit more oil in an oil atomizer. Bake for 15 minutes or until it reaches 165 F, flipping once half way through. Allow to cool slightly before serving to baby, or transfer to a freezer bag for later eating.

Expert Tips

This toddler meatball recipe is meant to be moist for baby led weaning so your little one can easily suck on the juice of the meatball. However, if you are having trouble forming them into balls, you can add more baby cereal one table spoon at a time until they are able to hold together.

Recipe FAQs

What makes these meatballs high in iron?

There’s lots of iron sources in this toddler meatball recipe. We have the iron fortified cereal, the egg, and the ground beef (one of nature’s best sources of iron!) You can easily swap in ground turkey or chicken if you prefer, but go for the dark meat which is higher in iron and good fats for baby’s growing brain.

Can I make these toddler meatballs for adults?

Totally! If you want to put half aside and add salt to the adult portion before cooking, that is a great way to ensure you also can enjoy the same meal as your baby/toddler without having to give the little ones too much salt.

Can I freeze these?

You bet! I make a big batch of these toddler meatballs, letting them cool to room temperature on a cooling rack. Then I flash freeze the meatballs on a baking tray before I transfer to freezer bag for 3 months. They never last that long, but these meatballs are perfect for the nights when my hubby and I want to have something for dinner that’s not so baby friendly (ie. spicy food!)

Is this recipe gluten free?

Yes! Assuming you use a gluten free grain, these are gluten free.

What allergens are in these meatballs?

The main allergens in this toddler meatball recipe are dairy, and egg, and possibly wheat depending on what kind of cereal you use. You can check out my amazing allergen introduction guide here!

Cheesy toddler meatballs in a bowl.

More Recipes You Might Like

We LOVE baby led weaning recipes here at Abbey’s Kitchen. Here are a few of our favs:

  • Gluten Free Hummus Baby Meatballs
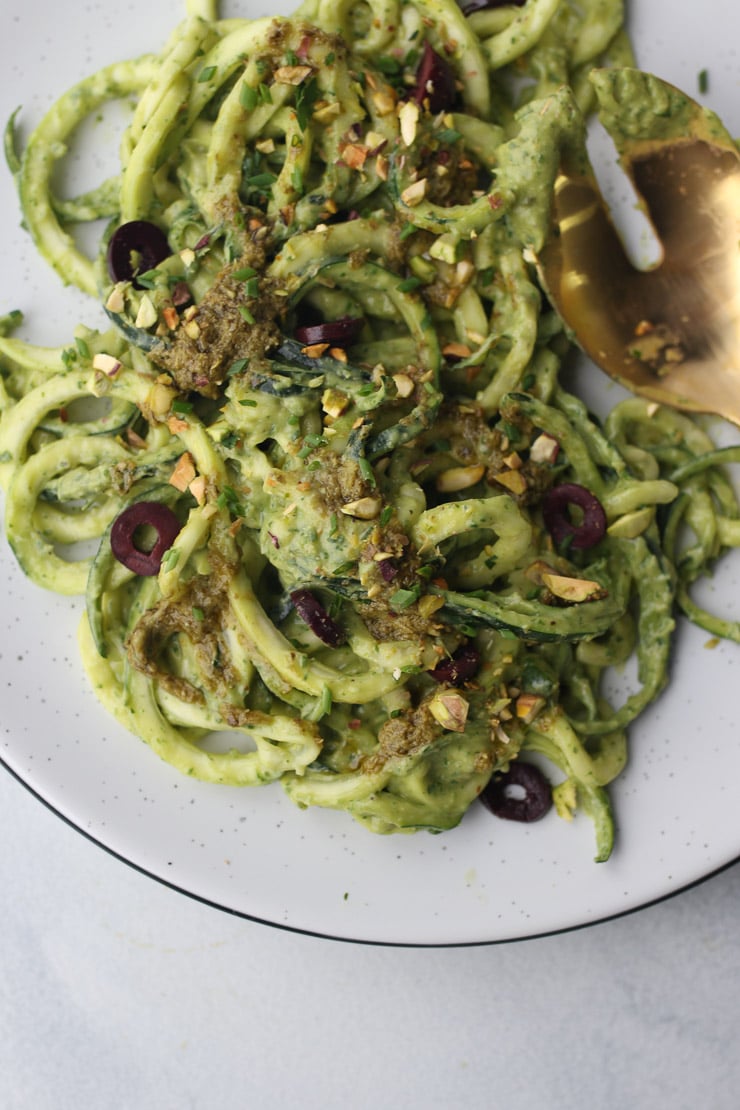
  • High Iron Avocado Pasta 
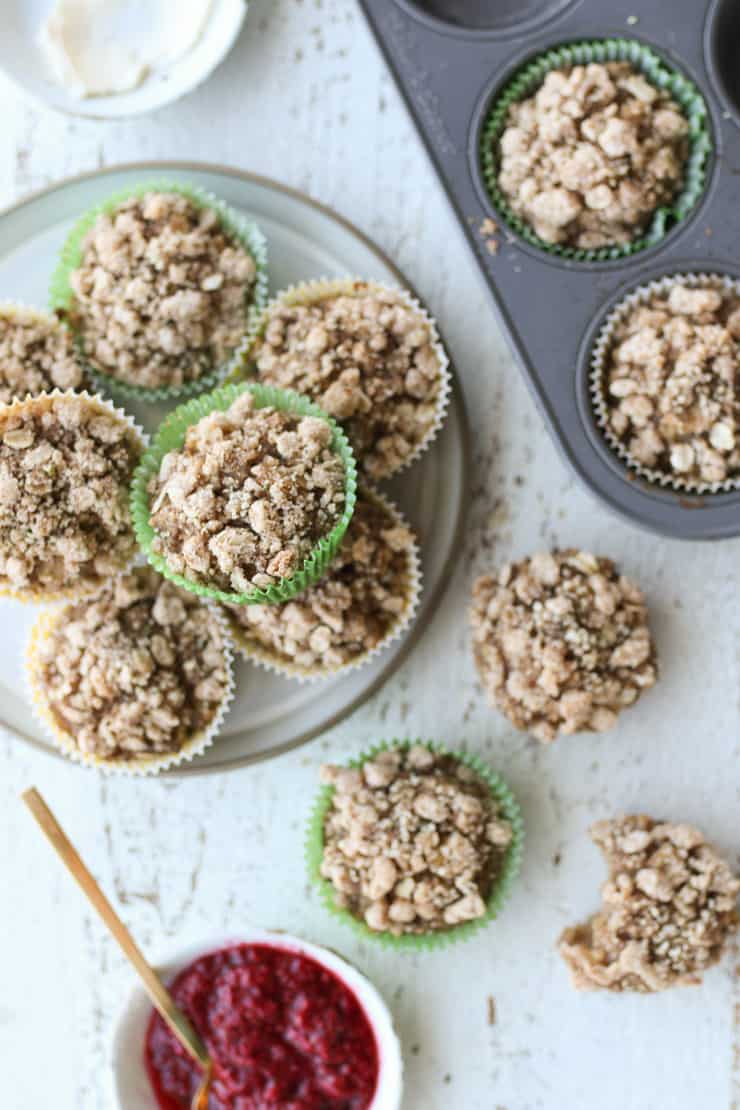
  • Sweet Potato Apple Muffins 
  • Sweet Potato Lentil Fritters 
  • Healthy “Better Than McDonalds Chicken Nuggets”
  • Salmon Sweet Potato Fritters

So moms and dads, tell me- what are some of your favourite meals and snacks for sneaking iron into your baby and toddlers’ diet? Leave me a comment below with your thoughts!

Cheesy meatballs in a bowl
Print Recipe
5 from 102 votes

Baby Meatballs for Baby Led Weaning (High Iron)

These Cheesy High Iron Baby Meatballs are perfect BLW, Toddlers & Families as an easy way to sneak more iron in!
Prep Time15 minutes mins
Cook Time20 minutes mins
Total Time35 minutes mins
Course: Snack
Cuisine: American
Servings: 12 of 3 meatballs
Calories: 165kcal
Author: Abbey Sharp

Ingredients

  • 1/2 cup iron fortified baby oat or ancient grain cereal
  • ½ cup breastmilk or milk
  • 1 ¼ lb medium ground beef
  • 1 cup good quality aged white cheddar or mozzarella cheese finely grated
  • 1 egg beaten
  • 1 tsp dried oregano
  • ½ tsp ground pepper
  • ¼ tsp salt optional for adults

Instructions

  • Preheat oven to 400 F and put the baking sheet in the oven to preheat.
  • In a large bowl, mix together the baby cereal and milk and allow it to sit for 10 minutes.
  • Add in the meat, cheese, egg, oregano, pepper, and salt (optional). Mix until combined then roll into 1 tbsp meatballs. Grease the baking sheet. Place on the baking sheet and spritz with a bit more oil in an oil atomizer. Bake for 15 minutes or until it reaches 165 F, flipping once half way through.
  • Allow to cool slightly before serving to baby, or transfer to a freezer bag for later eating.

Video

Nutrition

Calories: 165kcal | Carbohydrates: 2g | Protein: 11g | Fat: 12g | Saturated Fat: 5g | Cholesterol: 56mg | Sodium: 154mg | Potassium: 153mg | Fiber: 1g | Sugar: 1g | Vitamin A: 177IU | Vitamin C: 1mg | Calcium: 72mg | Iron: 1mg
Abbey Sharp

Abbey Sharp is a Registered Dietitian (RD), regulated by the Ontario College of Dietitians. She is a mom, YouTuber, Blogger, award winning cookbook author, media coach specializing in food and nutrition influencers, and a frequent contributor to national publications like Healthline and on national broadcast TV shows.

www.abbeyskitchen.com/about-abbey/

Last Updated January 16, 2024. Published January 19, 2024 By Abbey Sharp 5 Comments

Easy Sushi Bake Recipe (Family Friendly)

This easy sushi bake recipe puts a delicious and family friendly spin on your favourite California sushi roll. Enjoy as a budget friendly weeknight dinner!

Close up of portioned sushi bake on top of nori sheets and garnished with green onion with chop sticks on the side.

I LOVE a good sushi take out night – It’s affordable, tasty, and always hits the spot. While I appreciate the simplicity of ordering sushi when I am in a pinch for dinner, it suddenly dawned on me that I can stretch the yummy goodness of my favourite California roll in a big way If I take all the basic ingredients and prepare it into casserole form. And voila! Just like that this California roll inspired easy sushi bake recipe came alive and I can’t look back.

Table of contents

  • Why This Recipe Works
  • Key Ingredients
  • How to Make This Recipe
  • Expert Tips
  • Recipe FAQs
  • More Recipes You Might Like

Why This Recipe Works

If you are also obsessed with California rolls, then this sushi bake is about to be on HEAVY rotation in your life, and here are a few reasons why:

  • No rolling matt or fancy equipment required
  • Easy to prepare
  • Budget friendly
  • Perfect for sushi lovers
  • Super flavourful

Key Ingredients

Flat lay image of portioned recipe ingredients.

Sushi Rice – To make this easy sushi bake recipe we use brown sushi rice, but you can also use regular sushi rice as well. If you can’t find sushi rice, any short or medium grain rice will do.

Crab Meat – For this sushi casserole we were inspired by the classic California roll which is why we are using crab meat. However, if you don’t want to use crab meat you can easily substitute for any seafood that you prefer including shrimp, salmon, or tuna.

Toppings – This is the fun part! To really up the sushi vibes we like to top this sushi casserole with cucumber, avocado, sesame seeds, and nori strips.

How to Make This Recipe

Three side by side images showing how to prepare sushi rice and crab mixture.

Step 1: Prepare sushi rice according to instructions. Once cooked, combine 3 cups of sushi rice with the sesame oil.

Step 2: Tightly pack sushi rice into a 15in x 10in baking dish.

Step 3: In a bowl, mix imitation crab, mayo, lime juice, sriracha, and green onion until well combined.

Three side by side images showing how to layer casserole dish.

Step 4: Layer crab mixture on top rice layer in casserole dish.

Step 5: Top with sesame seeds, thinly sliced nori, salt, and a drizzle of soy sauce.

Step 6: Bake for 15-20 minutes or until top is golden brown. Layer with thinly sliced cucumber and avocado. Serve on top of a nori sheet, and enjoy!

Expert Tips

To make the perfect sushi rice for this easy sushi bake recipe, be sure to thoroughly rinse your rice before cooking to remove the excess starch. This will help to eliminate any resulting gummy texture.

For a more flavourful sushi rice, you can also toss the rice with a few teaspoons of rice wine vinegar along with the sesame oil.

If you can’t find any sushi rice, any short or medium grain rice will do! But avoid using long grain rice as these varieties don’t have enough starch to create that sticky texture.

Recipe FAQs

Can I make this gluten free?

If you want to make this gluten free make sure to purchase gluten free sushi rice and use tamari instead of soy sauce.

How long does this last in the fridge?

This should last for about 3 days in an air tight container.

What is the best way to reheat leftovers?

You can reheat in the microwave for about 1-2 minutes until heated through. Be sure to add the cucumber and avocado after it has already been heated so it doesn’t get all mushy.

What type of seaweed should I use?

I like to use the small nori sheets like these one here. You can purchase them at your local grocery store in the ethnic food aisle or online.

Birds eye view of sushi bake topped with avocado and cucumber.

More Recipes You Might Like

If you love a good easy casserole dinner on a weeknight, you’re going to love these family favourites!

  • Easy Pizza Casserole with Quinoa
  • Cauliflower Rice with Chicken and Broccoli
  • Mexican Pasta Casserole (Vegan)
  • Taco Casserole (Vegan)

Did you enjoy this easy sushi bake recipe? Let me know your thoughts down in the comments below!

Print Recipe
4.86 from 7 votes

Easy Sushi Bake Recipe (Family Friendly)

This easy sushi bake recipe puts a delicious and family friendly spin on your favourite California sushi roll.
Prep Time20 minutes mins
Cook Time20 minutes mins
Total Time40 minutes mins
Course: Main Course, Dinner, Lunch
Cuisine: Japanese, American
Servings: 8
Calories: 444kcal
Author: Abbey Sharp

Ingredients

  • 1 lb imitation crab or cooked shrimp
  • 3 cups cooked brown sushi rice
  • 2 tbsp sesame oil
  • ¾ cup mayo
  • 2 tbsp sriracha
  • Juice of half a lime
  • ½ cup thin sliced green onion
  • 2 tbsp sesame seeds
  • 2 tbsp soy sauce or tamari

Toppings

  • 3 avocados
  • 3 cucumbers
  • Package of nori sheets
  • Pinch of salt

Instructions

  • Preheat oven to 375 degrees F.
  • Prepare sushi rice according to instructions. Once cooked, combine 3 cups of sushi rice with the sesame oil.
  • Tightly pack sushi rice into a 15in x 10in baking dish.
  • In a bowl, mix imitation crab, mayo, lime juice, sriracha, and green onion until well combined.
  • Layer crab mixture on top rice layer in casserole dish.
  • Top with sesame seeds, thinly sliced nori, salt, and a drizzle of soy sauce.
  • Bake for 15-20 minutes or until top is golden brown.
  • Layer with thinly sliced cucumber and avocado. Serve on top of a nori sheet, and enjoy!

Nutrition

Calories: 444kcal | Carbohydrates: 34g | Protein: 8g | Fat: 32g | Saturated Fat: 5g | Trans Fat: 1g | Cholesterol: 15mg | Sodium: 801mg | Potassium: 570mg | Fiber: 8g | Sugar: 5g | Vitamin A: 272IU | Vitamin C: 15mg | Calcium: 53mg | Iron: 1mg
Abbey Sharp

Abbey Sharp is a Registered Dietitian (RD), regulated by the Ontario College of Dietitians. She is a mom, YouTuber, Blogger, award winning cookbook author, media coach specializing in food and nutrition influencers, and a frequent contributor to national publications like Healthline and on national broadcast TV shows.

www.abbeyskitchen.com/about-abbey/

Last Updated April 1, 2024. Published January 17, 2024 By Abbey Sharp 1 Comment

Simple Life Changing Health and Wellness Tips from a Registered Dietitian

Abbey standing in a garden smiling.

I share the top health and wellness tips that make me healthier in my 30s. These are the secrets I wish I knew in my 20s!

Abbey standing in a garden smiling.

I recently passed the halfway point of my 30s and it’s made me reflect a lot on life. The past few years have been incredible, and I don’t just mean money or career wise. Even though I’m out of my 20s, I have never felt more confident and at peace with myself. My body, mind and spirituality all seem to finally be in a really good place.

I didn’t get to this place overnight. It took working through anxiety, two pregnancies and battling an eating disorder to finally reach the balance that brings me peace. With that being said, I’ve picked up some valuable insight, as well as health and wellness tips that I wanted to share. If someone had told me these secrets in my 20s, I probably could have made it here years sooner!

Mental Health Medication

A woman screaming in black and white.

Honestly, this has probably been one of the most important action items that has impacted literally every area of my life. It’s more than a simple health and wellness tip because it was practically lifechanging.

I resisted psych medication for so long, despite suffering from crippling insomnia for years, in addition to an anxiety disorder, OCPD and as I recently learned, ADHD. Unfortunately, mental health stigma, especially around medication, is still extremely prevalent. I’ve talked about pill shaming before, but this did make me pretty scared to even consider medication due to the stigma. There is such a toxic narrative in the wellness community that food is medicine, and if you take drugs, you’re taking the easy way out.

It took a lot of inner work to understand that mental health medication can be the right decision, and taking medication for my sleep and anxiety has changed every aspect of my life. Sleeping better has helped improve my tolerance for stressful situations, improved my relationships, helped me be a more compassionate parent, and made me more efficient at my job. Health-wise, it’s helped improve my immune system, gut health, and helped manage cravings and even set point weight. The same goes for anxiety meds.

I’m not going to tell you whether or not to take medication – that’s between you and your doctor. But I want you to know that if you chose to, you’re not any less of a person.

Making Peace With Food

Plate of salad, rice noodles and chicken to show the perfect diet.

The second huge breakthrough for me has been making peace with not having a perfect diet.

My 20s were without a double my worst era, and a lot of that was due to my struggle with orthorexia. I spent way too much of my time in the past obsessing over diet perfection, whether that be meeting specific amounts of protein, omega 3s or calories. Eventually, it just became too hard for me to count up calories or nutrients in different meals every day, so I just ended up basically eating the exact same breakfast, lunch, dinner and snacks every single day without any variation whatsoever. Not only did this take the joy out of eating, but it greatly reduced the diversity of my diet, likely impacting my health.

What I’ve learned over the past decade is that our diet doesn’t need to be perfect to be healthy. Our body is incredibly resilient. If we’re getting a variety of different proteins, fats, grains, fruits, and veggies over time, along with enough calories, we’re very likely to meet our needs.

A well planned supplement routine was also crucial in filling in those gaps, so I don’t have to stress about dietary perfection everyday. As a dietitian, of course we push for a food-first approach, but I’m also not afraid to have a protein shake if that takes off stress for a perfect diet and allows a more relaxed relationship with food.

Respect Your Body

Woman in a workout outfit looking at her body in the mirror.

The biggest health and wellness tip I learned how how to respect my body, something that 20 year old Abbey wouldn’t even be able to process.

In my 20s, not only did I hate my body (and by association hate myself), but I had zero regard for its needs. I was either eating pizza, wings, and an ice cream sundae to the point of sickness, or I was starving myself on a bowl of steamed vegetables. Nothing about my relationship with my body in my 20s was respectful.

Looking back, I wish that I learned what that respecting my body could look like eating dinner before a night out drinking, then to try to save calories for shots. Respecting that it felt better to have regular balanced meals throughout the week rather than to starve oneself and then binge.

Now, I respect my body enough to pay attention to how different foods makes it feel. If I avoid something, it’s out of self care and not restriction. This looks like intentionally not eating a huge piece of cake with sugary cocktails on a Tuesday night, because I know it will physically give me the ick. I also know that if I don’t have any vegetables at dinner, I wont feel great the next day. So I intuitively make more nutritious choices, without there being a sense of restriction and rebound binge- all because I respect my body.

Stopping Exercise I Hate

Close up of a woman running.

If you search for health and wellness tips online, you’ll come up with dozens of ab routines, treadmill workouts, and HIIT classes. I’m here to tell you that you actually don’t have to do any of that if you don’t like it. The health and wellness tip that will actually stick? It’s finding exercise and movement that you love.

In my 20s, I had a lot more time to kill. The result was an expectation where I would drag myself through a lot of hardcore exercise that I hated, like high intensity spin classes or running. This made me really hate exercise for a while, because it just didn’t feel good to my body.

These days, I have a much healthier relationship with movement where I literally have given up anything and everything I hate. Spinning, bye. Running, definitely bye. I’ve basically rediscovered all of the things about movement that I love and refuse to drag myself through exercise that I don’t. So I go on walks, do strength training sessions a week with my trainer, and have taken up tennis which is super fun. Not only has this been amazing for my mental health, but I’m in much better physical shape now than in my 20s.

Stop Living For Others’ Approval

Abbey lying in a ball pit.

My last health and wellness tip is to stop living for others’ approval.

Struggling with your self identity and confidence is a part of life, but a lot of my struggle has been related to being told I was “different”. Labels like anxious, too sensitive, unstable, weird, perfectionist, gladiator temperament, highly sensitive person, an orchid, neurodivergent, gifted etc. People didn’t understand me and would act like I was acting crazy.

This is partially why my ADHD diagnosis was so freeing. I finally felt like I understood my brain, how it can be used in unique extraordinary ways, and could look back on all of those years with compassion instead of shame. It truly opened the doors for me to do great things in my work, marriage, parenting and health. I feel like I can proudly say this is who I am, and I love that person.

This confidence means I’m not overanalyzing every interaction, or going down a shame spiral every time someone says something mean. It doesn’t mean I’m cocky or closed off to feedback, only that I know my worth and can love myself even through my imperfections and quirks.

Bottom Line On My Health and Wellness Tips

Most of these health and wellness tips may not have been what you were expecting. A lot of them were mindset shifts I had to learn, but they truly were instrumental in improving my physical and mental wellness. I’m in the best shape and health of my life, and I do attribute it to these life lessons.

Some say your 20s are the best years of your life, but I’d like to change that narrative. Life is what you make of it, and from what I learned? It just gets better as you learn more.

More Blog Posts You Might Like

If you found these health and wellness tips useful, I share more here:

  • I’ve Maintained My Weight My Whole Adult Life | Tips for Set Point Weight
  • My Daily Nutrition Recommendations Wellness Influencers Don’t Want You To Know
  • Sustainable Gentle Nutrition Tips
  • Wellness Tips and Mistakes to Avoid from a Registered Dietitian

What health and wellness tips would you tell your 20 year old self? Share them below!

Abbey Sharp

Abbey Sharp is a Registered Dietitian (RD), regulated by the Ontario College of Dietitians. She is a mom, YouTuber, Blogger, award winning cookbook author, media coach specializing in food and nutrition influencers, and a frequent contributor to national publications like Healthline and on national broadcast TV shows.

www.abbeyskitchen.com/about-abbey/

Last Updated January 6, 2024. Published January 12, 2024 By Abbey Sharp 38 Comments

Healthy Chicken Nuggets (BLW & Toddler Friendly)

Better than McDonalds chicken nuggets on a turquoise plate.

Inspired by McDonalds, these healthy chicken nuggets are a delicious and fun recipe for toddlers and baby led weaning. Salt free and iron rich, these nuggets are a great alternative to store-bought!

Healthy chicken nuggets on a turquoise plate.

Growing up, I had my fair share of children nuggets. My mom had two very busy girls, was a business owner (Montessori school), and we had activities literally every night.

My mom told me stories of how many parents were really strict about banning things like McDonalds chicken nuggets. She told me how if you ban something, those kids will want it more. She saw how the kids in her school who weren’t ever allowed to have fast food like McDonalds chicken nuggets, they would go CRAZY the second they were invited to a birthday party.

Just like adults do when faced with strict diet rules, the kids couldn’t help themselves but binge in fear that they would never get the alleged “bad” food again. So I always keep it in mind when feeding my kiddos. They can have a little bit of everything so they can learn that there’s no need to binge on “forbidden” foods. We go to McDonalds every once in a while, but these homemade healthy chicken nuggets are a big hit on the nights we stay in.

And if your family is plant-based, I didn’t forget about you! Try my vegan tofu nuggets and join in on the fun.

Table of contents

  • Why This Recipe Works
  • Key Ingredients
  • How to Make This Recipe
  • Expert Tips
  • Recipe FAQs
  • More Recipes You Might Like

Why This Recipe Works

Kids love nuggets so it’s easy to see why this recipe works. We’ve packed it with extra healthy ingredients that they won’t even notice is in it!

  • Easy to prepare
  • Perfect size for toddlers to munch on
  • Salt-free
  • Baked, not fried
  • High in iron
  • Perfect for picky eaters

Key Ingredients

Overhead image of ingredients needed for healthy chicken nuggets.

Chicken — We use a food processor to grind up chicken breasts so the texture is similar to the store-bought version. Perfect for toddlers who may not like the texture of regular chicken.

Veggies — Blending up the vegetables with the chicken is an easy way to get some veggies into your toddler’s meal without them even noticing there’s vegetables!

The Coating — To make a crispy coating like the store-bought nuggets, these healthy chicken nuggets are coated in baby cereal, then the eggs, and then into the almond flour.

Seasoning — These healthy chicken nuggets for BLW are seasoned with garlic, paprika, cumin, thyme, and pepper. No salt needed!

How to Make This Recipe

Set of three photos showing onion and garlic in a pan and then ingredients in the food processor.

Step 1: Preheat oven to 450 F and grease two nonstick baking sheets. At the same time, heat a small nonstick skillet over medium high heat with 1 tbsp of oil. Add the onion and sauté until lightly browned, about 5-7 minutes. Add the garlic and sauté for another minute.

Step 2: In a food processor, puree the ground chicken with the sweet potato, cauliflower, onion, beans, thyme, paprika, pepper, cumin and 1 tbsp oil until smooth.

Set of three photos showing shaping the chicken nuggets and then breading them.

Step 3: Form into small nuggets, dip then dip into the baby cereal, then the eggs, and then into the almond flour. Continue with the remaining nuggets and spritz generously with the olive oil.

Step 4: Bake for 17-20 minutes until they reach an internal temperature of 165 F. Serve with your baby’s favourite fruity baby puree for dipping.

Set of three photos showing the breading process and then baking the nuggets on a sheet pan.

Expert Tips

Let’s talk a dipper. Dry meat is a choking hazard for baby, and we all know that chicken breasts aren’t the most juicy fatty meat options. So having some kinda dip on hand for meat is always my recommendation. Rather than a super sugary plum sauce, ketchup or sweet and sour sauce like they serve at McDonalds, I usually just bust out one of E’s favourite puree pouches and let him dip it in that. You could even do a plum flavoured puree (with no added sugar!), my healthy homemade ketchup, or one of my toddler dips.

Chicken is a rich source of iron, but considering most of my son’s food ends up on the floor, I like to be budget conscious and stretch his meat allowance with other cheaper sources of iron. So these chicken nuggets also contain sweet potato, white beans, eggs and fortified baby cereal for iron, plus almond flour for a healthy dose of good fats. So don’t skip these ingredients for your healthy chicken nuggets! If you’re low on chicken, feel free to add a little bit more of these other iron rich ingredients.

Want to make these chicken nuggets into fun shapes? You can use a cookie cutter to mold the chicken nuggets into fun shapes like hearts, stars, and etc! Like store-bought but better.

This recipe is great if you have leftover ingredients. If you don’t, you can always cook your sweet potato and cauliflower a few days ahead of time and store it in an airtight container until you make your healthy chicken nuggets.

Recipe FAQs

How do I make these into healthy FROZEN chicken nuggets?

This toddler chicken nuggets recipe are easy to make ahead, freeze and pull out throughout the week for an easy fast meal for baby led weaning and toddlers. To freeze, simply lay them flat on a baking sheet and freeze for one hour, then transfer to a freezer bag for up to three months. 

How can I make these chicken nuggets gluten free?

They technically are actually! Unlike in real McDonalds chicken nuggets, I like to use a rice-free baby cereal made of oats or quinoa, in which case these would also be gluten free.

Can I air fry these?

You can definitely air fryer these healthy chicken nuggets instead of baking them. You still get that crispy exterior without using a ton of oil with deep frying. Air fryers will cook up your nuggets a little faster than the oven.

How do I know my chicken nuggets are done?

Your toddler friendly healthy chicken nuggets are good to go when the internal temperature has reached 165° Fahrenheit (75° Celsius). I recommend an instant-read thermometer to check the temperature.

Baby's hand holding better than McDonalds chicken nuggets.

More Recipes You Might Like

Want more BLW recipes or toddler friendly recipes? Here are a few that my family loves!

  • Cheesy High Iron Baby Meatballs
  • Baby Cereal Protein Pancakes
  • Hummus Baby Meatballs
  • Chickpea Peanut Butter Baby Biscuits
  • Kale Pepper Baby Frittata Fingers

Now tell me parents, will you be trying these healthy chicken nuggets?

Better than McDonalds chicken nuggets on a turquoise plate.
Print Recipe
4.61 from 23 votes

Healthy Chicken Nuggets (BLW & Toddler Friendly)

Inspired by McDonalds, these Healthy Chicken Nuggets are a delicious and fun toddler-friendly and baby led weaning friendly recipe. Salt free and iron rich, these nuggets are a great alternative to store-bought!
Prep Time15 minutes mins
Cook Time22 minutes mins
Total Time37 minutes mins
Course: Main Course
Cuisine: American
Servings: 12 – 18 nuggets
Calories: 238kcal
Author: Abbey Sharp

Ingredients

  • 2 tbsp extra virgin olive oil
  • ½ cup diced onion
  • 2 cloves garlic minced
  • 1 lb chicken boneless chicken breast, cut into chunks
  • ½ cup cooked sweet potato
  • ½ cup steamed cauliflower cooked until soft
  • ½ cup cannellini beans white beans
  • 2 tsp dried thyme
  • 1 tsp sweet paprika
  • ¼ tsp pepper
  • ½ tsp cumin
  • 3 eggs beaten
  • 1 cup fortified baby cereal
  • 1½ cup almond flour
  • Extra virgin olive oil in an oil atomizer
  • Your favourite baby puree for dipping

Instructions

  • Preheat oven to 450 F and grease two nonstick baking sheets.
  • Heat a small nonstick skillet over medium high heat with 1 tbsp of oil. Add the onion and sauté until lightly browned, about 5-7 minutes. Add the garlic and sauté for another minute.
  • In a food processor, puree the ground chicken with the sweet potato, cauliflower, onion, beans, thyme, paprika, pepper, cumin and 1 tbsp oil until smooth.
  • Form into small nuggets, dip then dip into the baby cereal, then the eggs, and then into the almond flour.
  • Continue with the remaining nuggets and spritz generously with the olive oil.
  • Bake for 17-20 minutes until they reach an internal temperature of 165 F. Serve with your baby’s favourite fruity baby puree for dipping.

Video

Notes

  • As a dip, I usually just bust out one of E’s favourite puree pouches and let him dip it in that. You could even do a plum flavoured puree (with no added sugar!)
  • These chicken nuggets also contain sweet potato, white beans, eggs and fortified baby cereal for iron, plus almond flour for a healthy dose of good fats. If you’re low on chicken, feel free to add a little bit more of these other iron rich ingredients.
  • Want to make these chicken nuggets into fun shapes? You can use a cookie cutter to mold the chicken nuggets into fun shapes like hearts, stars, and etc! Like store-bought but better.
  • You can cook your sweet potato and cauliflower a few days ahead of time and store it in an airtight container until you make your healthy chicken nuggets.

Nutrition

Calories: 238kcal | Carbohydrates: 16g | Protein: 13g | Fat: 15g | Saturated Fat: 1g | Cholesterol: 79mg | Sodium: 110mg | Potassium: 254mg | Fiber: 4g | Sugar: 3g | Vitamin A: 2250IU | Vitamin C: 6.8mg | Calcium: 77mg | Iron: 3.9mg
Abbey Sharp

Abbey Sharp is a Registered Dietitian (RD), regulated by the Ontario College of Dietitians. She is a mom, YouTuber, Blogger, award winning cookbook author, media coach specializing in food and nutrition influencers, and a frequent contributor to national publications like Healthline and on national broadcast TV shows.

www.abbeyskitchen.com/about-abbey/

Last Updated July 29, 2024. Published January 10, 2024 By Abbey Sharp 15 Comments

Protein 101 | Protein Intake Recommendations

Let’s talk about protein: its role in our body, health benefits, and how much you should be eating for your goals. Download my free handout on protein intake recommendations!

Get Your Free Protein 101 Guide

Hunger Crushing Combo pyramid with logo.

We are currently experiencing technical issues with the guide. If you have not received it after signing up, please email [email protected].

Protein is one of the three macronutrients and a key part of Abbey’s Hunger Crushing Combo™. It plays a structural role in our body, forming blood cells, skin, hair, nails, hormones, enzymes and more. Without protein, our body would not be able to maintain acid-base balance, fluid status, or build the tissues we need to survive. 

In this post, we’ll be discussing in-depth about the role of protein, protein intake recommendations for weight loss and muscle growth, plant-based diets, and more.

Why Is Protein Important?

Beyond basic physiological functions, there are a couple of key reasons why we might want to prioritize protein in our diet.

Woman looking at measuring tape to measure weight loss.

Muscle Growth

One of protein’s most well known uses is muscle protein synthesis. When we eat protein-rich foods, the protein is broken down in the body and recombined to form new proteins. Muscle protein synthesis is a process that occurs when our body is in a state of positive protein balance and begins to build muscle. In order for this to be possible, we need to be eating adequate protein and ideally, combining this with resistance training. 

Weight Loss

High protein intake is also a key pillar of sustainable weight loss. There are several factors at play that may explain why:

  1. Protein improves satiety and decreases appetite by reducing our hunger hormone, ghrelin, and increasing our satiety hormone, peptide YY. When we replace other foods with protein, it helps us feel full without intentionally reducing our plate volume. 
  2. Protein increases metabolism. It takes our body longer to digest protein than carbs and fat, and muscle protein synthesis is an exertive process. Additionally, protein supports the growth of muscle tissues, which are very metabolically active in the body. These different components cumulate to increase calories burned, thereby contributing to weight loss.
  3. Adequate protein intake prevents muscle loss when trying to lose weight. We want to minimize muscle breakdown during weight loss, so this is an important consideration.

We’ll talk about specific protein intake recommendations for weight loss later on.

Aging and Bone Health

As we age, we begin to experience shifts in body composition and a decline in muscle mass. Along with this, we see an increase in osteoporosis, falls and fractures. When consumed with adequate calcium, research shows that protein may have a supportive effect on bone health. Additionally, focusing on muscle strength and mass can help maintain mobility and strength, thereby decreasing fall risk.

Eating enough protein as we age is crucial for bone health, slowing muscle loss, and staying healthy.

Illness and Injury Recovery

When we get sick or hurt ourselves, our body enters an inflammatory state and begins breaking down proteins. Although specific disease states may require protein restrictions, our body generally has higher protein requirements during an acute illness, injury, or traumatic event. For example, we know that patients with burns or skin wounds have very high protein needs, as their bodies are rapidly breaking down protein in the acute state. In the rehabilitation phase, protein is required to support healing.

Protein Intake Recommendations

Protein intake recommendations are typically expressed as a percentage of total calories, or the grams of protein needed per kilogram of body weight. Your recommendations will vary based on age, sex, activity level and more, however there are general guidelines based on your goals.

Woman doing a sit up.

Maintenance

Nutrition guidelines recommend that 10-35% of total calories should be from protein. Looking at body weight, the daily recommended allowance (DRI) is at least 0.8 g/kg of protein, but this is the bare minimum to prevent disease and malnutrition.

With that being said, we know how protein has additional benefits aside from basic physiological functions. Research supports at least 1.2 g/kg of protein for optimal health. This is around 15% of total calories. 

Weight Loss

We discussed the role protein plays in sustainable weight loss, so it makes sense that people with this goal will have higher protein needs. In fact, research has shown that a high protein intake has a 3x greater effect on fat loss when going from 10-15% protein to a diet of 20-30% protein. Generally, the higher your energy deficit, the more protein is recommended. 

For most people, a sustainable rate of weight loss is around 0.5-1.5 lbs per week, allowing for the least amount of muscle loss. This coincides with about a 20% deficit and at least 1.8 g/kg of protein, or 30% of calories from protein. 

Weight Gain and Muscle Growth

Research has shown that optimal muscle growth comes with a protein intake of 1.6-2.2 g/kg, or around 20% of your total calories. It may seem counter-intuitive that there is a lower amount recommended for weight gain compared to weight loss, however that’s because carbohydrates. When aiming for weight gain, you need the energy from carbs to perform well in workouts and support muscle growth.

Sports Nutrition

For athletes, protein intake recommendations can have a wide range depending on the sport and expenditure. Let’s break it down between endurance vs non-endurance sports.

Endurance sports (think running, cycling, and swimming) that involve training for 2 hours at a high intensity have a much higher caloric need, meaning they also need a higher protein intake. One study found that endurance athletes need  ~1.85 g/kg of protein per day in order to maximize protein synthesis post exercise.

As for non-endurance athletes (think baseball, volleyball, and short distance track/field), we have a wider range depending on what the athlete’s goal is. To sum it up, in order maximize muscle protein synthesis for these athletes, consuming 1.3-1.8 g/kg of protein per day is ideal.

Amino Acids

Close up of eggs in a carton.

Next up, we’re talking going even deeper into specific amino acids. Amino acids are the building blocks that make up proteins. In addition to supporting growth and maintenance, they also aid in metabolic pathways, reproduction, and immunity.

Amino acids can be categorized into essential vs. non-essential amino acids. Essential amino acids cannot be made in our body, so we must consume them in our diet. A good way to remember this is “essential amino acids are ESSENTIAL to our diet!”. The essential amino acids include valine, methionine, phenylalanine, histidine, isoleucine, leucine, threonine, tryptophan, and lysine. As for the non-essential, our body can synthesize the following amino acids on its own: glutamine, glycine, alanine, arginine, cysteine, glutamic acid, serine, proline, asparagine, tyrosine, and aspartic acid​​

To break it down even further, we also have a group of amino acids called branched chain amino acids (BCAAs), These help build protein in muscle and may even reduce muscle breakdown. The BCAAs include leucine, isoleucine, and valine which can be found in eggs, meat products, tofu, lentils, and more.

Leucine

One up-and-coming amino acid to keep our eyes on is leucine. The evidence has shown that leucine plays a key role in stimulating muscle protein synthesis as well as preventing deterioration as we get older. Further research is still being completed, but it doesn’t hurt to start adding to our diets.

Current evidence suggests that 2.5g of leucine is the optimal dose to include in meals and snacks. Leucine can be found in foods such as meat/poultry, cheese, nuts/seeds, protein powder, and eggs.

Protein and Plant-Based Diets

Close up of salad with chickpeas for plant-based protein.

Something I often get asked about is if animal and plant-based protein provide the same thing- the answer is yes, but no.

While you absolutely can get enough protein in as a vegetarian or vegan, the main protein intake recommendation is to focus on variety in the diet. Even though plant-based protein does contain some of the same amino acids as meats, we would need to pair them with other plant-based protein sources to ensure you’re reaching all of the 9 essential amino acids.

This website does a great job of breaking down this information and I love referring to their chart on how to pair plant based proteins together to consume all of the essential amino acids. 

My downloadable handout and this high protein vegan meal plan have tons of examples of plant-based proteins, so check those out.

Timing and Dosing of Protein

Not only do we need to think about the kinds of protein we eat, we also need to consider the amount at each meal for maximum muscle protein synthesis.

Instead of trying to consume all of your protein for the day in 1-2 meals, consider spacing it out throughout the day to ensure greater amino acid oxidation. One review found that one would need to consume 0.4 g/kg/meal across 4 meals in order to reach 1.6 g/kg/day of protein. However, to hit the upper daily limit, ~0.55 g/kg/meal would be needed.

In summary, space out your protein. Here is a great sample schedule of how you could meet these needs across 3 meals + 2 snacks throughout the day: 

  • Breakfast: 20 grams of protein
  • Snack: 10 grams of protein
  • Lunch: 35 grams of protein
  • Snack: 15 grams of protein
  • Dinner: 30 grams of protein
  • Total = 110 grams of protein for the day
Plate of veggies with chicken breast to meet protein intake recommendations.

Bottom Line on Protein

Now that we’ve done a deep dive into protein, hopefully you have a better understanding of why and how to incorporate it into your daily diet. Lucky for you, I’ve provided a downloadable Protein 101 guide that summarizes all of these protein intake recommendations so you can keep on hand if you ever need a quick glance.

More Posts You Might Like

If you found this scientific insight into protein useful, read these next:

  • What to Look For in a Protein Powder
  • Protein for Weight Loss and Metabolism
  • Best Postworkout Snacks and Swaps
  • How Much Protein Do We Need?

Now, I’d love to hear from you: How do you incorporate protein in your meals and snacks? Have you noticed any health benefits? Share below!

Abbey Sharp

Abbey Sharp is a Registered Dietitian (RD), regulated by the Ontario College of Dietitians. She is a mom, YouTuber, Blogger, award winning cookbook author, media coach specializing in food and nutrition influencers, and a frequent contributor to national publications like Healthline and on national broadcast TV shows.

www.abbeyskitchen.com/about-abbey/

Last Updated January 6, 2024. Published January 8, 2024 By Abbey Sharp 35 Comments

Chickpea Salad Sandwich with Avocado | Vegan

Hand holding two veggie sandwich halves

This vegan chickpea salad sandwich is loaded with a ton of colour, crunch and nutrition making it the perfect chicken salad swap!

Close up of vegan chickpea salad sandwich on a white plate.

Chicken salad, egg salad, tuna salad or whatever other mayo-laden salad you could dream up were staples growing up. I was always a bit skeptical of them all because the texture weirded me out, but as an adult, I can’t help but totally love them all.

SO I set out to make a “lightened up” vegan chicken salad swap – the vegan chickpea salad sandwich. Seriously, if you say chickpea salad sandwich fast enough, no one will even know the difference.

Table of contents

  • Why This Recipe Works
  • Key Ingredients
  • How To Make This Recipe
  • Expert Tips
  • Recipe FAQ
  • More Recipes You Might Like

Why This Recipe Works

This avocado chickpea salad sandwich is so simple to pull off and really comes together with whatever veg you’ve got in your fridge. I mix together mashed ripe avocado with canned chickpeas, lemon and a little hot chili. It’s kind of like a lazy guacamole.

We’ve got protein and fibre in the chickpeas, healthy fats from the avocado, more fibre and complex carbs in the bread, and tons of micronutrients from all the extra veg. What more could we want for lunchtime?

Key Ingredients

Chickpeas – Chickpeas are the star of the show in this recipe and the main protein. I prefer using a can of chickpeas with no added salt, just for convenience sake. But you can certainly cook up some dry chickpeas, just soak them overnight and cook for 1 hour.

Avocado – Avocado is used in place of mayo in this recipe and adds healthy fats and fibre to the chickpea salad. I just love the creamy texture when combined with the chickpeas! So delish.

Lemon – Avocado is not the same without a squeeze of citrus, in my opinion. So a bit of lemon juice really brings out the flavour and freshness. If you don’t have lemons on hand, you can definitely use lime juice instead.

Bread – I use whole grain sprouted bread, but thats my own personal preference. Use whatever whole grain bread you have on hand.

Veggie Toppings – I love to make this sammy as colourful and nutrient dense as possible! So I like to add heirloom tomato, microgreens, shredded carrot, and shredded beets. But any veg would go well with this avocado chickpea salad sandwich.

How To Make This Recipe

Step 1: In a bowl, mash the avocado until fairly smooth, add in the lemon juice, hot chili pepper, and chickpeas. Season with salt and pepper.

Step 2: To assemble the sandwich, layer the slices of tomatoes on one slice of bread, add the microgreens, the beets, the chickpea salad and the carrots. Slice into the bad boy and enjoy!

Expert Tips

This vegan chicken salad swap is awesome all on its own, but let’s not stop there. I load this avocado chickpea salad sandwich right up. Sliced ripe heirloom tomato, microgreens, shredded cooked beets and shredded carrots. Seriously – could you imagine a more beautiful sandwich?

Now, if you’re in the mood for chicken salad, will this do the trick? Probably not. It’s really not the same, just a take on the concept. But I kind of like the supple texture of the chickpeas with the creamy mildly sweet flavour of the avocado. It’s lighter, brighter and holy hell, it’s good with all the fixins’.

Recipe FAQ

You got questions and I’ve got answers. Here are some common questions I get asked about this recipe.

What other beans can I use instead of chickpeas?

I have never tried using any other bean besides chickpeas. But I would suggest white beans as a good alternative as they have a mild flavour and texture that is similar to chickpeas to get that same effect.

Is this sandwich recipe gluten free?

It definitely can be! Just use your favourite gluten free bread and you are good to go!

If I don’t have avocado on hand, what else can I use to get the same creamy texture?

If you’re impartial to using mayo or cheese, you can definitely substitute avocado for a vegan mayo or cottage cheese. If you’re not vegan, of course, you can try with regular mayo and cottage cheese to make this sandwich super creamy and dreamy. Otherwise, if you don’t want to use a mayo or a cheese, you can try just using chickpeas on their own and blend them up with a little olive oil or tahini to give it a bit of a creamy hummus-like texture.

Birds eye view of two hands holding vegan sandwich with chickpea and avocado.

More Recipes You Might Like

If you liked this vegan chickpea salad sandwich recipe, you might enjoy some of other sandwich recipes on the blog!

  • EVERYTHING BAGEL AVOCADO WHITE BEAN SANDWICH 
  • ROASTED VEGGIE, HUMMUS, AND HALLOUMI SANDWICH
  • MOROCCAN CHICKPEA SALAD WRAP
  • HUMMUS QUESADILLA WITH POMEGRANATE AND FETA

What would you put on your chickpea salad sandwich? What are your favourite loaded sandwich recipes? Leave me a comment below with your favourite sandwich toppers!

Hand holding two veggie sandwich halves
Print Recipe
4.86 from 7 votes

Vegan Chickpea Salad Sandwich with Avocado

This vegan chickpea salad sandwich is loaded with a ton of colour, crunch and nutrition! It's the perfect chicken salad swap!
Author: Abbey Sharp

Ingredients

  • 1 can no salt added chickpeas drained and rinsed
  • 1 large ripe avocado1
  • ½ tbsp lemon juice
  • ½ tsp hot chili pepper finely minced
  • Salt and pepper
  • 4 slices whole grain sprouted bread
  • 1 large heirloom tomato sliced
  • ½ cup sweet microgreens
  • ½ cup shredded carrot
  • ½ cup cooked and shredded beet

Instructions

  • In a bowl, mash the avocado until fairly smooth, add in the lemon juice, hot chili pepper, and chickpeas. Season with salt and pepper.
  • To assemble the sandwich, layer the slices of tomatoes on one slice of bread, add the microgreens, the beets, the chickpea salad and the carrots. Slice into the bad boy and enjoy!

Notes

This vegan chicken salad swap is awesome all on its own, but let’s not stop there. I load this avocado chickpea salad sandwich right up. Sliced ripe heirloom tomato, microgreens, shredded cooked beets and shredded carrots. Seriously – could you imagine a more beautiful sandwich?
Now, if you’re in the mood for chicken salad, will this do the trick? Probably not. It’s really not the same, just a take on the concept. But I kind of like the supple texture of the chickpeas with the creamy mildly sweet flavor of the avocado. It’s lighter, brighter and holy hell, it’s good with all the fixins’.
Abbey Sharp

Abbey Sharp is a Registered Dietitian (RD), regulated by the Ontario College of Dietitians. She is a mom, YouTuber, Blogger, award winning cookbook author, media coach specializing in food and nutrition influencers, and a frequent contributor to national publications like Healthline and on national broadcast TV shows.

www.abbeyskitchen.com/about-abbey/

Last Updated January 4, 2024. Published January 5, 2024 By Abbey Sharp 5 Comments

Chai Cookies Recipe | Vegan & Gluten Free

This chai cookies recipe is packed with warm spices and is the perfect snack or dessert to enjoy after a long day. They are also vegan and gluten-free, making them a great option for those with dietary restrictions!

Several chai cookies on a plate on top of a cooling rack with a glass of milk in the background.

One of my go-to Starbucks drinks is an iced chai tea latte (add soy milk and a pump of cinnamon dolce, trust me). The flavor of chai is the perfect blend of warm spices, so I had a lightbulb moment to create this nutrient-packed chai cookies recipe with inspiration from one of my favorite drinks.

Why This Recipe Works

I absolutely love the flavor combination of the spices, dried fruit, and pecans. Here are a few more reasons why these are about to be your new favorite treat:

  • Vegan
  • Gluten free
  • Contains 4 grams of protein and 3 grams of fiber
  • Super delicious

Key Ingredients

Birds eye view of portioned recipe ingredients including almond flour, maple syrup, tahini, ground ginger, black pepper, ground cinnamon, baking powder, salt, baking soda, vanilla, rolled oats, dried fruit, cardamom, flax meal, and pecans.

Tahini – Tahini essentially functions the same way that nut butter does in baking by adding a rich flavor and thick texture to the batter. Tahini is also loaded with healthy fats!

Flax meal – By combining flax meal with water, it creates the perfect plant-based egg substitute that contains protein and fiber.

Dried fruit – For this chai cookies recipe, we used a combination of raisins, sultanas, and cranberries. Try mixing a few different fruits for a variety of vitamins and minerals.

Spices – The combination of ginger, cinnamon, and cardamom is what gives this chai cookies recipe the perfect kick of warm spice.

How to Make This Recipe

Three side by side images showing how to make the cookie batter for the chai cookies and how to assemble on a baking sheet.

Step 1: To a large bowl add all the dry ingredients rolled oats, almond flour, baking powder, baking soda salt, and all the spices (cardamom, ginger, cinnamon, and black pepper)

Step 2: In a medium bowl mix all the wet ingredients tahini, maple syrup, and vanilla. Pour the wet ingredient into the dry, mix everything using a silicone spatula till the mixture resembles a cookie dough. Mix in chopped nuts and dried fruits. Taste the dough, add more spices if desired. 

Step 3: Refrigerate the cookie dough for 15-20 minutes. Using an ice cream scoop, divide the dough to form 18 cookies spacing them about an inch apart.

Two side by side images of the chai cookies first on a baking tray then transferred to a cooling rack.

Step 4: Bake for 12-15 minutes, until the cookies are golden in the bottom but still chewy in the center.

Step 5: After about 5 minutes transfer the cookies to a cooling rack and let them cool completely. The cookies will firm up slightly as they cool.  Store them in an airtight container on the counter for 2-3 days.

Expert Tips

Tahini needs to be runny, so ensure when you open a jar you give it a good stir so that there is no oil floating on top.

To make this chai cookies recipe gluten-free, I use almond flour instead of a wheat-based flour which is made from ground almonds. I love using almond flour because not only is it naturally gluten-free, but it is also more nutrient-dense and lower in carbs than most flours – like wheat flour or coconut flour. Keep in mind that almond flour and almond meal are not the same. Almond meal is much coarser. This was not tested with the almond meal but if you try it, please let me know how it goes in the comments down below!

While creating the dough, it may stick to your hand, but lightly wet your hands and it should do the trick!

Recipe FAQs

How do I store these chai cookies?

Store them in an airtight container on the counter for 2-3 days (if they last that long that is).

Is this chai cookies recipe chewy or crispy?

These are definitely chewy oatmeal based cookies, which is my preference. The pecans do add a bit of a crunch factor, but if you want them to be more crispy, you could flatten them out even more until they’re pretty thin, and bake them a bit longer.

What makes this recipe vegan?

By using plant-based ingredients, such as flax meal to create an egg substitute, this chai cookies recipe makes the perfect vegan snack or dessert.

Birds eye view of several chai cookies on a cooling rack.

More Recipes You Might Like

  • Vegan Tahini Cookies
  • Vegan Peanut Butter Cookies
  • Best Banana Oatmeal Cookies
  • Salted Toffee Cookies
  • Lemon Poppyseed Vegan Lactation Cookies

What is your current go-to vegan cookie recipe? Let me know in the comments below!

Print Recipe
5 from 8 votes

Chai Cookies Recipe | Vegan & Gluten Free

This chai cookies recipe is packed with warm spices and is the perfect snack or dessert to enjoy after a long day. They are also vegan and gluten-free, making them a great option for those with dietary restrictions!
Prep Time40 minutes mins
Cook Time20 minutes mins
Total Time1 hour hr
Course: Dessert, Snack
Cuisine: Indian, American
Diet: Gluten Free, Vegan
Servings: 18 cookies
Calories: 183kcal
Author: Abbey Sharp

Ingredients

  • 2 tablespoon flax meal mixed in 6 tablespoon water
  • 1 1/2 cups rolled oats 149 g
  • 1 cup almond flour 96 g
  • ½ teaspoon baking powder
  • ½ teaspoon baking soda
  • ½ teaspoon salt
  • 1 teaspoon freshly ground cardamom from about 8 -10 pods
  • ½ teaspoon ground ginger
  • ½ teaspoon cinnamon
  • A pinch of black pepper
  • 3/4 cup tahini
  • ½ cup maple syrup
  • 2 teaspoon vanilla
  • ½ cup chopped pecans
  • ½ cup dried fruits raisins, sultanas or cranberries

Instructions

  • Preheat the oven to 350F/ 180C. Line two baking trays with parchment paper.
  • In a small bowl prepare the flax egg by mixing 2 tablespoon flax meal with 6 tablespoon water. Let it sit for 15 minutes till it becomes thick and gelatinous.
  • To a large bowl add all the dry ingredients including rolled oats, almond flour, baking powder, baking soda salt and all the spices (cardamom, ginger, cinnamon, and black pepper)
  • In a medium bowl mix all the wet ingredients tahini, maple syrup and vanilla.
  • Pour the wet ingredient into the dry, mix everything using a silicone spatula till the mixture resembles a cookie dough. Mix in chopped nuts and dried fruits. Taste the dough, add more spices if desired.
  • Refrigerate the cookie dough for 15-20 minutes. Using an ice cream scoop, divide the dough to form 18 cookies spacing them about an inch apart. Alternatively, lightly wet your hands and measure out about 2-3 tablespoons and shape the dough into round using your hands. Lightly flatten each cookie with your hand (you don’t want to completely flatten it).
  • Bake for 12-15 minutes, until the cookies are golden in the bottom but still chewy in the centre. After about 5 minutes transfer the cookies to a cooling rack and let it cool completely. The cookies will firm up slightly as they cool. Store them in an airtight container on the counter for 2-3 days (if they last that long that is ;))

Notes

Tahini needs to be runny, so ensure when you open a jar you give it a good stir so that there is no oil floating on top. 
The dough may stick to hand, but lightly wet your hands and it should do the trick.

Nutrition

Calories: 183kcal | Carbohydrates: 18g | Protein: 4g | Fat: 11g | Saturated Fat: 1g | Polyunsaturated Fat: 3g | Monounsaturated Fat: 3g | Sodium: 101mg | Potassium: 155mg | Fiber: 3g | Sugar: 6g | Vitamin A: 9IU | Vitamin C: 1mg | Calcium: 51mg | Iron: 1mg

Abbey Sharp

Abbey Sharp is a Registered Dietitian (RD), regulated by the Ontario College of Dietitians. She is a mom, YouTuber, Blogger, award winning cookbook author, media coach specializing in food and nutrition influencers, and a frequent contributor to national publications like Healthline and on national broadcast TV shows.

www.abbeyskitchen.com/about-abbey/

Last Updated March 12, 2024. Published January 3, 2024 By Abbey Sharp Leave a Comment

My Daily Nutrition Recommendations that Wellness Influencers Don’t Want You to Know

Abbey sitting at the counter with a berry smoothie.

Sharing my top daily nutrition recommendations for the New Year! No BS, just actionable tips to optimize your health and wellness from a Registered Dietitian.

Abbey sitting at the counter with a berry smoothie.

It’s the start of a new year, which means the gyms get busy and everyone’s on a new diet. As you guys know, I’m not a weight loss dietitian, but I do believe in body autonomy and respect those whose New Year resolution may be weight loss. Hey, if it improves your physical and mental health than I’m all for it.

With that being said, I wouldn’t generally recommend any juice cleanses, low carb diets, or only one meal a day. I would way rather see people make more gentle evidence-based daily nutrition recommendations than any crazy changes you’ll ditch by Valentine’s Day.

I know most of us place weight loss as an end goal, but at the end of the day, it’s not something we are 100% in control of. On the other hand, we can control our lifestyle and behaviours, with weight loss being a side effect. So today I’m going to share some tangible actionable behaviours, hacks, and my favorite daily nutrition recommendations that you can integrate TODAY to improve your overall health.

And before we dive into it, friendly reminder to take what works for you and leave what doesn’t. If it feels overly restrictive or doesn’t fit with your lifestyle, no biggie. All of these are suggestions for gentle nutrition habits to experiment with.

Prioritize Protein at Meals and Snacks

Mexican chicken and corn served on a plate.

Protein is king in the satiety hierarchy which is why it’s at the top of the Hunger Crushing Combo™ triangle. We know how important maintaining lean muscle mass is for metabolism, weight management, and longevity as we age. We also know that focusing on protein is really important when in a calorie deficit. Research suggests that people spontaneously consumed 400 calories less when their protein intake went from 15 to 30% of calories.

The thing is, we can only utilize 0.3 g protein per kg of body weight per meal or snack for muscle protein synthesis. With that in mind, one of the most important daily nutrition recommendations you can get into today is to prioritize protein at every meal, ideally around 20-35 g per meal and 10-15g per snack. Adding protein helps provide longer lasting stable satiety, energy and blood sugar levels and increases the chances of weight loss success without scarcity or restriction.

I know high protein meals can seem overwhelming, but it doesn’t have to be all chicken breast and salmon. This is your opportunity to get creative- don’t be afraid to try recipes like my high protein oatmeal or protein pancakes!

No Phones at Meals

Woman eating a cookie while scrolling on her phone.

This is one of the daily nutrition recommendations I fail at 50% of the time, but 50% to me is a huge win.

We know that distractions like phones, tablets and TVs make it really hard to listen to your body’s hunger and fullness cues. Research suggests eating while on your phone increases caloric consumption by 15%, largely because we aren’t even registering emotionally that we ate.

We’re stripping food of its sensual satisfaction and interfering with the social benefit of a family meal. So try to make a rule to have no phones at the dinner table. I like to keep them off or charging in another room where we’re not tempted my constant scrolling and notifications. 

Bulk Up Refined Carbs with Fibre Rich Vegetables

Zucchini noodles in creamy green sauce on a white plate.

So you know I have an additive approach to nutrition, which is why I like to stretch refined carbs by mixing them with fibre-rich veg. So that may mean adding zucchini ribbons to pasta, or adding finely diced veg to rice. You don’t have to swap ALL your rice for cauliflower rice, but maybe try 30% and see if you notice it.

Not only does this add another layer of flavour and texture, but it turns a lower fibre meal into one that is far more satiating and nutritious. Even if you don’t change the portion of pasta on your plate at all, there’s a good chance you won’t need as much of it because the added fibre from the veggies adds volume and promotes satiety. Both of which help aid in weight management, which is another reason why my Hunger Crushing Combo™ works.

Choose Fats with Purpose

A couple of avocados, one sliced in half.

I will never suggest you shouldn’t use oils for cooking or in salad dressing. If fact, you absolute should- these make naturally nourishing foods a lot more delicious.

But when I say fats with purpose, I mean choosing whole food fat sources that have dual Hunger Crushing Combo™ citizenship; foods that have fat and fibre, or fat and protein. Avocado is a great example because its got 22g of satiating fats, 3g of protein and a whopping 10 grams of fibre each, making it more satiating than an equivalent amount of fat in oil. Likewise, whole peanuts have 14g fat, 7.5g of protein and 2.5g of fibre. These foods offer more volume, flavour and hunger crushing compounds than straight oils or fats, so you’re getting more bang for your buck.

This could look like using avocado can be used as a sandwich spread, and drizzling a peanut sauce on dishes. 

Drink Water as Soon as You Wake Up

Person holding out a glass of water.

After a night of sleep, you have just gone 8 or more hours without any hydration. It’s important to capitalize on the morning thirst by working water into your coffee ritual.

The moment you wake up, before you check your phone, drink a full glass of water. Then, while you’re preparing your morning coffee or tea, drink another one. This healthy habit is really important for regularity, bloating, energy metabolism, cognitive performance, and joint mobility.

Limit Phone and Screen Time Before Bed

Woman scrolling on her phone before bed.

Use parental lock functions to limit phone use before bed. Yes, I’m suggesting that some of us need to parent ourselves a little to limit our phone use before bed. And let me tell you why.

We know that screens before bed significantly interfere with circadian rhythms and sleep, and poor sleep impacts appetite, food cravings, blood sugars, weight gain, cognition and attention, immunity defenses and much more.  There are actual parental safeguards and locks you can put into play to lock you out of social media before or after a certain time in the day, and if you’re the type to stay up late strolling, resulting in poor sleep, it might be time to use them.

Trust me, The Bachelor is nowhere near as important as restorative sleep and your resulting health.

Take Calls or Virtual Meetings on a Walk

Woman walking while on a call.

Exercise doesn’t have to be “intentional” or sweaty for it to count. In fact, you’re less likely to compensate by “rewarding yourself” with more food when movement is framed as fun or leisurely than it is as exercise.

So if you have to listen in on a boring Zoom conference call, turn that camera off, pop your headphones on and take it while getting some fresh air and movement. The same goes if you’re on hold with an airline or bank, because it makes the elevator music a hell of a lot more bearable.

This is a bonus tip for my ADHDers, but you might even find that you can concentrate much better at what’s being said while simultaneously moving your body. The best part is, it’s a healthy habit that isn’t eating into your busy day.

Try a New Fruit or Vegetable

White mesh bag with oranges and fruits.

I’m big on the importance of variety, because a varied diet is the most likely diet to meet all your nutrient needs. Our gut bacteria also thrives on diet diversity. But food right now is expensive, so most of us can’t afford to eat three different fruits and three different vegetables each day of the week.

So make an intentional point to switch up which varieties you buy from week to week. If this week is apples and broccoli, make next week kiwis and cauliflower. If this week you’re making salads with spinach, next week do kale. This not only helps prevent “healthy eating” recipe ruts, reducing the risk of you throwing in the towel, but it’s a foolproof way to ensure greater nutrient variety over time.

Plan 3 Different Breakfasts Every Week

These Tiramisu Protein Overnight Oats are one of my favourite healthy make ahead breakfast recipes for busy mornings when I'm craving something sweet.

Speaking of variety, try planning three mindless breakfasts to rotate with different variations.

Unless you’re a wellness influencer, no one has the mental energy to come up with a new fancy breakfast recipe every day of the week. Plus mornings are hectic enough, so if breakfast takes too much mental bandwidth, you’re much more likely to just grab a croissant or bacon sandwich on the go.

See tip 1 about the importance of protein – especially in that morning meal. Research suggests that having a protein rich breakfast significantly reduces appetite throughout the day and results in fewer calories consumed at the next meal. So I suggest having three simple protein rich breakfast concepts that you always have the ingredients for, and always have time to pull off, and then add slight variations with different toppings. So my three are protein oatmeal, protein smoothie bowl, and cottage cheese or yogurt parfait. I do my best to switch things up every week with different fruit, berries, nuts, seeds, cereals and other crunchy toppings depending on my mood. 

Mix Sugary Cereal with High Fibre Cereal

Bowl of cocoa pebbles with the word "fun" spelled out on the spoon.

On the vibe of breakfast one of my personal favorite tips is to mix high sugar cereal with high fibre whole grain cereal. I do this all the time because sometimes I just feel like a little frosted flake action, but I know this isn’t going to hold me very long. I also know that I’m getting older and starting my day with a bowl of sugar doesn’t feel super great for me or my gut.

So rather than putting sugary cereal up on a pedestal and telling myself I can never have it again, I add it to a bowl of high fibre cereal like bran flakes or my oats. And I love a little Lucky Charm moment on protein oats. Trust me, if you’re a sugary cereal lover this hack will change your life. 

Use Fruit as a Sweetener

Bowl of strawberries.

I’m never going to tell you not to put honey in your oatmeal, or make cookies without sugar. But don’t underestimate the natural sweetness of fruit.

Ripe mashed banana is amazing in oatmeal, yogurt and baked goods. Freeze dried berries, either ground up or whole, also add a ton of flavour, antioxidants and natural sweetness. Again, this is an additive approach to nutrition- by adding a ripe banana to your oatmeal, we not only cut back on the need for a lot of brown sugar, but we add volume and a ton of satiating nutrition that keeps us fuller longer. 

Drink Two Sips of Water Per Sip of Alcohol

Pink cocktail with a lime and thyme sprig.

I refuse to tell myself that I can never have a cocktail or glass of wine again. But drinking too much too fast is not only damaging to your long term health, but has immediately unpleasant consequences.

Alcohol affects quality sleep which we already established is bad news for our health. It also causes constipation, bloating, dehydration, puffiness and other hangover symptoms. Looking at nutrition, alcohol lowers inhibitions which increases the likelihood of overeating. And of course, it adds excess calories without providing much useful nutrition, so we do see an increased risk of obesity in heavy drinkers.

The new guidelines suggest limiting alcohol to two drinks per week, and if you drink more than that, to limit to no more than two drinks per sitting. To accomplish that (and prevent the dreaded hangover), one of the healthy habits I practice is taking a minimum of two big sips of water between each sip of alcohol. This will slow you down, prevent overconsumption, and keep you hydrated to mitigate some of the aftermath effects.

Start Your Meals with Veggies

People eating a salad appetizer at a restaurant.

When dining out, always start with a vegetable based appetizer or salad.

Yes, there’s a lot of diet websites that will insist you fill up on plain salad or a broth based soup before you eat your main to reduce your calorie consumption when dining out. And honestly, that suggestion is evidence based. Research has found that starting a meal with a salad reduces meal caloric intake by 12%. But its not the reason why i make this suggestion.

This is my suggestion to encourage more fibre intake, which is generally lacking in restaurant food, and can be important to counteract the digestion slowing effects of a lot of excess sugars, fats and alcohol. Starting with veggies also helps prevent an all or nothing mentality when dining out. Folks who have heavily restricted calories most of their life tend to get into a last supper mentality when “off” their diet in a restaurant where they feel the need to eat the fried appetizer, and the creamy cheesy pasta, and the bread, and the cheesecake, and a bottle of wine because DIET STARTS AGAIN TOMORROW. But by starting with something nutritious like salad, you’re automatically kicked out of that all or nothing trap and can make more balanced choices that feel good to your body and still satisfy cravings.

Prep Meal Building Blocks

Cutting vegetables to batch prep meal building blocks.

We’ve all seen those beautiful overhead shots of 20 different meal prep boxes for the week. Meal prep is one of the greatest healthy habits, but the traditional style isn’t for me. I don’t know about you, but I don’t have time for that AND I’d get sick of eating the same thing for 7 days straight. If you’re not excited about your meal, you’re more likely to “accidentally” leave it at home and buy something on the go.

So I suggest making big batches of meal components that can be reassembled into a variety of different meals throughout the week. So grill a bunch of chicken breasts or tofu, cook a big pot of quinoa or rice, and pan roast a couple types of veg. From there, you can do salads, sandwiches, soups, stir fries, bowls, tacos and more.

Store Prepped Fruits and Vegetables in Clear Containers

Organized fridge full of fruits and vegetables.

Our food choices often come down to marketing and convenience. So we kind of have to be good marketers for nutritious foods.

One of my favourite ways to do this is spending 30 minutes after I do groceries to wash and prep all the produce. I put everything into clear containers so I can visually see what’s in them and pop them into the fridge at eye level. Not hidden behind the milk or leftovers. Front and center. So when you get home from a long day and you’re ready to eat whatever you see first, those pre-chopped fruits and veggies will be starring at you as the most intuitive choice. Make the daily nutrition recommendations the easy ones!

Add a Handful of Greens While Reheating Leftovers

Whenever you do reheat leftovers, homemade or from a restaurant, throw a handful or two of spinach or leafy greens with a pinch of salt on the bottom of the bowl. As your meal reheats, it will wilt the greens and marinate them in whatever sauces or seasoning your leftovers contain, adding extra volume, fibre and nutrients without any additional effort. 

Bowl of spinach.

Well folks, I hope these actionable gentle nutrition habits can replace the more lofty abstract weight loss goals as we go into New Year’s resolution season. Remember that incorporating daily nutrition recommendations will take time, but they should be sustainable. It’s a marathon, not a sprint.

More Blog Posts You Might Like

For more dietitian approved daily nutrition recommendations and tips:

  • Intuitive Eating for Weight Loss? Advice from a Registered Dietitian + Common FAQs
  • Sustainable Gentle Nutrition Tips
  • I’ve Maintained My Weight My Whole Adult Life | Habits for Set Point Weight
  • Bikini Body Guide | No-Diet Approach to Bikini Body Mentality

Which one of the daily nutrition recommendations are you trying? Got any you do everyday? Share them below!

Abbey Sharp

Abbey Sharp is a Registered Dietitian (RD), regulated by the Ontario College of Dietitians. She is a mom, YouTuber, Blogger, award winning cookbook author, media coach specializing in food and nutrition influencers, and a frequent contributor to national publications like Healthline and on national broadcast TV shows.

www.abbeyskitchen.com/about-abbey/

Last Updated December 30, 2023. Published January 1, 2024 By Abbey Sharp 4 Comments

Oatmeal Muffin Recipe with Apples and Cinnamon | Vegan

stack of three apple muffins

This oatmeal muffin recipe with apples and cinnamon is easy, healthy, and packed with nutritious ingredients, perfect for adults and kids. Make extra and freeze them for later!

birds eye view of vegan apple oatmeal muffins on a white plate with chia jam on the side

I’m just going to go out and call this the year of the snack. If you’re working from home, or off work, have kids at home, or don’t, a lot of us are constantly wondering “what can I have for snack?” I have taken up a real love of baking during covid times, and making muffins for my son and I has become a real favourite past time. These muffins are as wholesome and nutritious as they are easy and delicious, packed with lots of really tasty ingredients that are super good for you and your family, too.

Table of contents

  • Why This Recipe Works
  • Key Ingredients
  • How to Make This Recipe
  • Expert Tips
  • Recipe FAQs
  • More Recipes You Might Like

Why This Recipe Works

There are so many reasons to love this delicious oatmeal muffin recipe! Some of my favourite reasons are:

  • Vegan-friendly
  • Kid-friendly
  • Easy to make
  • Freezer-friendly
  • Moist on the inside, crispy on the outside
  • Packed with healthy goodness

Key Ingredients

Ingredients needed for apple oatmeal muffins.

Apples – Obviously you need some kind of apple to make this oatmeal muffin recipe. I like a tart apple like granny smith, but any firm apple like gala, fuji or honeycrisp will hold its shape.

Maple syrup – I love maple syrup with apples, but you can also use honey.

Whole wheat flour – Whole wheat flour definitely adds a bit more fibre, but feel free to use all purpose if that’s what you have.

Rolled (large flake) oats – This is key to getting that oat-like flavour and of course for the oatmeal crispy streusel on top.

Ground flax – I love adding flax to my baked goods for some extra fibre, protein, and healthy fats.

Hemp hearts – Hemp hearts are a great way to add fibre, protein and healthy fats as well while also adding a nutty crunch.

Vegan melted butter– This is a relatively low fat muffin, but the bit of melted vegan butter does help carry the flavour and keep them moist.

Unsweetened applesauce – We use applesauce both as an egg substitute and in place of some of the butter.

Unsweetened vanilla oat milk – Feel free to use whatever non dairy milk you like.

Apple cider vinegar– This reacts with the baking soda to give the muffins rise without the need to use an egg.

How to Make This Recipe

Set of two photos showing apples being cooked in a sauce pan and the dry ingredients for the muffins in a bowl.

Step 1: In a small saucepan over medium heat, saute the apples with maple syrup and cinnamon for about 5 minutes until softened and lightly caramelized. Set aside.

Step 2: Stir together the whole wheat flour, oats, flax, cinnamon, salt, baking powder, and baking soda in a mixing bowl.

Set of two photos showing batter added to a muffin tin and then baked and topped with strudel.

Step 3: Add in the maple syrup, applesauce, melted butter, vinegar, vanilla, and milk. Stir until just moistened. Fold in chopped apple and raisins. Divide the batter between 12 prepared muffin cups in a muffin tray.

Step 4: To make the streusel, mix together the flour, sugar, oats, salt, cinnamon, and hemp hearts. Then work in the vegan butter to yield coarse crumbs. Sprinkle on top of the muffins. Bake the muffins for about 18 minutes in a 370F oven.

Expert Tips

Don’t allow the batter to sit around for too long. The oats will soak up the liquid ingredients.

Be sure to use real maple syrup and not pancake syrup. The maple syrup adds sweetness as well as a ton of flavour.

Make sure to dice the apples into small even pieces so they cook and bake evenly in this oatmeal muffin recipe.

Recipe FAQs

What are the nutrient benefits of using oatmeal in muffins?

Oatmeal adds soluble fibre to baked goods which has been shown to help lower cholesterol, provide satiety and improve digestion. In other words, if your kiddo is backed up, oats can definitely help. When paired with whole wheat flour, flax, hemp hearts, and apple, these are some pretty nutrient-dense vegan muffins.

Can I make these with a different fruit?

I honestly haven’t tried making them with another fruit, but your best bet would be with pears since they have a very similar consistency. You can also try with softer fruits like cherries or blueberries, but you may need to bake them a little bit longer to accommodate for the extra moisture.

Are these muffins school safe and nut-free?

Yes, because there are no nuts in this recipe (including the non dairy milk), these muffins are safe for taking to school and daycare (if we ever get to go to school or daycare).

Are these muffins blw friendly and safe for babies?

Absolutely. If you’re looking for a safe, nutrient-dense muffin that your kids, babies and you will all love, these muffins are just that. If you’re making these for babies under one, you may want to omit the streusel just to reduce the sugar even further. You can also check out some of my recipes for BLW Muffins like this one here.

Can I skip the streusel topping?

Absolutely. If you want to make these even lower in sugar, you can omit the streusel topping, but it does give a nice crunch to these.

Can I make these gluten free muffins?

I haven’t actually tried to make these gluten free, but you could experiment with a gluten-free blend flour and of course, just make sure to use gluten-free oats. Your best bet might be using the 1:1 gluten-free flour. I do have a great gluten free oatmeal muffin on the blog though if you’re looking for inspiration.

How can I batch prep these muffins and freeze them?

Feel free to double or triple this recipe and freeze the muffins. I suggest allowing them to cool, then transferring them with their muffin liners to a baking sheet to freeze solid, then popping them into a freezer bag. These will last 6 months in the freezer. When you’re ready to eat, just pull them out and pop them into the fridge for a few hours to thaw out.

Can I use regular butter or milk?

Absolutely, if you’re not dairy free or vegan you can absolutely use regular butter and milk for this oatmeal muffin recipe.

a bite taken out of oatmeal muffin

More Recipes You Might Like

Want more delicious muffin recipes like this oatmeal muffin recipe? Try these reader favourites!

  • Spinach Muffins 
  • PB & J Banana Mini Muffins 
  • Peanut Butter Banana Mini Muffins 
  • Chocolate Cherry Almond Muffins 

Now tell me friends, have you made these vegan muffins? Leave me a comment below with your go-to muffin recipe!

stack of three apple muffins
Print Recipe
5 from 6 votes

Oatmeal Muffin Recipe with Apples and Cinnamon | Vegan

This oatmeal muffin recipe with apples and cinnamon is easy, healthy, and packed with nutritious ingredients, perfect for adults and kids. Make extra and freeze them for later!
Prep Time15 minutes mins
Cook Time30 minutes mins
Total Time45 minutes mins
Course: Snack
Cuisine: American
Servings: 12 Muffins
Calories: 238kcal
Author: Abbey Sharp

Ingredients

Caramelized apple:

  • 2 apples finely diced
  • 1 tbsp maple syrup
  • ½ tsp cinnamon
  • Pinch salt

Muffins:

  • 1 cup whole wheat flour
  • ½ cup rolled large flake oats
  • ¼ cup ground flax
  • ½ tsp cinnamon
  • ½ tsp salt
  • 2 tsp baking powder
  • ½ tsp baking soda
  • ¼ cup maple syrup
  • ⅓ cup vegan melted butter
  • ½ cup unsweetened applesauce
  • ⅓ cup unsweetened vanilla oat milk
  • 2 tsp apple cider vinegar
  • 1 tsp vanilla
  • ¼ cup raisins

Streusel:

  • ½ cup whole wheat flour
  • ¼ cup brown sugar
  • ¼ cup old-fashioned rolled oats
  • ⅛ teaspoon salt
  • 1 teaspoons ground cinnamon
  • 2 tsp hemp hearts
  • 4 tablespoons cold vegan butter cut into small pieces

Instructions

  • Preheat oven to 375ºF. Grease muffin cups or line with muffin liners.
  • In a small saucepan over medium heat, saute the apples with maple syrup and cinnamon for about 5 minutes until softened and lightly caramelized. Set aside.
  • Stir together the whole wheat flour, oats, flax, cinnamon, salt, baking powder, and baking soda in a mixing bowl. Add in the maple syrup, applesauce, melted butter, vinegar, vanilla and milk. Stir until just moistened. Fold in chopped apple and raisins. Divide the batter between 12 muffin cups.
  • To make the streusel, mix together the flour, sugar, oats, salt, cinnamon and hemp hearts. Then work in the vegan butter to yield coarse crumbs. Sprinkle on top of the muffins.
  • Bake for about 18 minutes in the preheated oven, or until a toothpick comes out clean. Allow to cool before eating.

Notes

  • Don’t allow the batter to sit around for too long. The oats will soak up the liquid ingredients.
  • Be sure to use real maple syrup and not pancake syrup. The maple syrup adds sweetness as well as a ton of flavour.
  • Make sure to dice the apples into small even pieces so they cook and bake evenly in the apple oatmeal muffins.

Nutrition

Calories: 238kcal | Carbohydrates: 35g | Protein: 4g | Fat: 10g | Saturated Fat: 2g | Sodium: 251mg | Potassium: 277mg | Fiber: 4g | Sugar: 14g | Vitamin A: 213IU | Vitamin C: 2mg | Calcium: 83mg | Iron: 1mg
Abbey Sharp

Abbey Sharp is a Registered Dietitian (RD), regulated by the Ontario College of Dietitians. She is a mom, YouTuber, Blogger, award winning cookbook author, media coach specializing in food and nutrition influencers, and a frequent contributor to national publications like Healthline and on national broadcast TV shows.

www.abbeyskitchen.com/about-abbey/

Last Updated January 5, 2021. Published December 28, 2023 By Abbey Sharp 33 Comments

Vegan Stuffed Pasta Shells with Butternut Squash

Plate with three stuffed shells with sauce drizzled overtop.

These vegan stuffed pasta shells are made with a melt in your mouth sage cashew cream sauce and is the perfect plant-based main that the whole family will love!

Plate with three stuffed pasta shells with sauce drizzled overtop.

As the winter season starts to sneak up on us, I wanted to share a recipe you can easily whip up for any of your vegan and vegetarian friends that is perfect for the holiday season. These vegan stuffed pasta shells with sage cashew cream sauce are UNBELIEVABLY good. So good, I happily ate them all week long even though a) I am definitely NOT vegan and b) it is definitely NOT the holidays.

Seriously, it’s the best recipe for fall and winter, when squash is constantly on sale.

Table of contents

  • Why This Recipe Works
  • Key Ingredients
  • How to Make This Recipe
  • Expert Tips
  • Recipe FAQs
  • More Recipes You Might Like

Why This Recipe Works

I love this recipe because everything can be made ahead! The holidays are busy enough as it is so having a recipe like these vegan stuffed pasta shells that can be made ahead of time, is such a life saver.

While it’s a delicious main dish, you can also use it as a side dish instead. It’s a very versatile dish that everyone will love, especially when paired with a sweet kale salad.

Despite being a very comfort meal-ish dish, this stuffed shells recipe is actually packed with good for you ingredients! Your friends and family won’t even notice it’s stuffed with butternut squash and spinach.

Table of contents

  • Why This Recipe Works
  • Key Ingredients
  • How to Make This Recipe
  • Expert Tips
  • Recipe FAQs
  • More Recipes You Might Like

Key Ingredients

Overhead image of ingredients for stuffed shells including butternut squash, olive oil, cashews, pasta shells, almond milk, vegan cheese, lemon juice, spinach, maple syrup, cinnamon, nutmeg, garlic, and sage.

Butternut Squash — You can use fresh or frozen butternut squash for this stuffed shell recipe. Butternut squash is a great source of fibre and is packed with vitamins A, C, E and B!

Spinach — Spinach is such a great source of manganese, magnesium, iron and vitamin B2! Again, no one will even noticed how this recipe is full of healthy ingredients.

Pasta Shells — We use large pasta shells for this butternut squash stuffed shells. If you’re unable to find the larger ones, you can use smaller ones but it’ll just take more time to stuff them individually.

Cashews — To make a vegan cream sauce, we use cashews to keep it vegan friendly.

Flavour Boosters — This vegan stuffed pasta shells recipe is packed with flavour thanks to the cinnamon, nutmeg, maple syrup, garlic, and sage.

How to Make This Recipe

Instructional photos showing how to make the stuffing for the recipe: pureeing the sauce, sauteing the spinach, and combining them.

Step 1: Preheat oven to 375 F and cook the pasta 1 minute short of the directions on the package and allow to cool just until you can handle it. Then, in a high speed blender, puree the cashews until grainy, then add in the milk, lemon and butternut squash and puree until very smooth before transferring to a large bowl.

Step 2: In a large nonstick skillet, add the olive oil along with the garlic and sage. Saute until fragrant, about 30 seconds, then add in the spinach until it wilts. Transfer to the bowl containing the butternut squash mix.

Step 3: In the bowl, mix in 1 cup of the cheese, and season with salt, pepper, cinnamon and nutmeg.

Instructional photos of four showing how to stuff the pasta shells, placing them in a baking dish, blending up cashews, and making the sauce in a pan.

Step 4: Transfer the filling to a piping bag and fill the shells with the filling.

Step 5: Place in a greased 13×9″ baking dish and top with the shredded remaining cheese. Bake for 20-25 minutes until bubbling and golden.

Step 6: Meanwhile, to make the sauce, puree the cashews until grainy, then add in the milk and lemon and puree until smooth.

Step 7: Heat the oil in the skillet over medium heat and add the garlic and sage for the sauce. Once fragrant, reduce the heat to medium low and add in the cashew liquid, maple, and season with salt, pepper, cinnamon and nutmeg. Simmer just until warm. Then serve the hot shells with the sauce and enjoy.

Expert Tips

This luscious creamy sage-spiked sauce that will make you totally swoon. It’s amazing on everything from tofu, chicken, fish, veggies but obviously takes this pasta to the next level. So I like to make extra on the side to serve alongside other dishes.

Want to change things up? You can swap the spinach with kale, collard greens, or even finely chopped broccoli.

To make stuffing the shells easier, we like to use a piping bag. If you don’t have one, you can use a ziploc bag and cut off a corner tip. Alternatively, you can use a tablespoon to scoop the mixture into the pasta shells.

I like to add in some vegan cheese for the holiday vibe, but if you want to omit that (or use regular, of course, if you’re not vegan) then it’s divine either way.

Recipe FAQs

What if I don’t have butternut squash?

I love the sweetness of butternut squash but if you don’t have any, you can totally pull this off with canned pumpkin or even acorn squash.

How do I make this ahead of time?

You can prepare and freeze the butternut squash mixture, or refrigerate it for up to 2 days in advance. You can also stuff the shells, place them in the dish, cover with plastic wrap, and refrigerate it it a day in advance and bake the next day.

How do I reheat leftovers?

Cooked stuffed pasta shells can be stored in the fridge in an airtight container for up to 5 days.

Can I freeze this recipe?

You can freeze this two ways: freeze it before baking or freeze them after you bake them. You can thaw the stuffed pasta shells in the fridge overnight before baking it.

Butternut squash stuffed pasta shells on a plate cut in half.

More Recipes You Might Like

If you want more delicious fall and winter recipes, try these favourites from my blog!

  • Vegan Creamy Mushroom and Caramelized Onion Pasta
  • Sweet Chili Roasted Brussels Sprouts
  • Vegan Hasselback Sweet Potatoes with Streusal Topping
  • Vegan Stuffed Acorn Squash with Wild Rice, Apples and Caramelized Onions
 

Now, I want to know: what is your go-to vegan or vegetarian dishes for entertaining?

Plate with three stuffed shells with sauce drizzled overtop.
Print Recipe
5 from 10 votes

Vegan Stuffed Pasta Shells with Butternut Squash

These vegan stuffed pasta shells are topped off with a melt in your mouth sage cashew cream sauce and is the perfect plant-based Thanksgiving, Christmas or holiday main that the whole family will love!
Prep Time10 minutes mins
Cook Time30 minutes mins
Total Time40 minutes mins
Course: Dinner
Cuisine: American
Servings: 8 people
Calories: 578.59kcal
Author: Abbey Sharp

Ingredients

Shells:

  • 1 lb large pasta shells
  • 2 cups cashews soaked in water in the fridge overnight
  • 1/2 cup unsweetened almond milk
  • 5 tsp lemon juice
  • 1 2/3 cups diced frozen thawed or cooked butternut squash
  • 1 tbsp olive oil
  • 2 cloves garlic minced
  • 1 tbsp. fresh sage minced
  • 2 cups spinach chopped
  • 1 1/2 cups vegan cheese divided
  • 1/2 tsp cinnamon
  • Salt and pepper to taste
  • Pinch nutmeg

Sauce:

  • 1 cup cashews, soaked in water overnight
  • 1 cup unsweetened almond milk
  • 1 tsp lemon juice
  • 1 tbsp olive oil
  • 2 tbsp sage minced
  • 2 gloves garlic minced
  • 1 tsp maple syrup
  • Pinch each salt pepper, cinnamon and nutmeg

Instructions

  • Preheat oven to 375 F.
  • Cook the pasta 1 minute short of the directions on the package and allow to cool just until you can handle it.
  • In a high speed blender, puree the cashews until grainy, then add in the milk, lemon and butternut squash and puree until very smooth. Transfer to a large bowl.
  • In a large nonstick skillet, add the olive oil along with the garlic and sage. Saute until fragrant, about 30 seconds, then add in the spinach until it wilts. Transfer to the main bowl.
  • Mix in 1 cup of the cheese, and season with salt, pepper, cinnamon and nutmeg.
  • Transfer the filling to a piping bag and fill the shells with the filling. Place in a greased 13×9″ baking dish and top with the shredded remaining cheese. Bake for 20-25 minutes until bubbling and golden.
  • Meanwhile, to make the sauce, puree the cashews until grainy, then add in the milk and lemon and puree until smooth.
  • Heat the oil in the skillet over medium heat and add the garlic and sage for the sauce. Once fragrant, reduce the heat to medium low and add in the cashew liquid, maple, and season with salt, pepper, cinnamon and nutmeg. Simmer just until warm.
  • Serve the hot shells with the sauce and enjoy.

Video

Notes

  • This luscious creamy sage-spiked sauce that will make you totally swoon. It’s amazing on everything from tofu, chicken, fish, veggies but obviously takes this pasta to the next level. So I like to make extra on the side to serve alongside other dishes.
  • Want to change things up? You can swap the spinach with kale, collard greens, or even finely chopped broccoli.
  • To make stuffing the shells easier, we like to use a piping bag. If you don’t have one, you can use a ziploc bag and cut off a corner tip. Alternatively, you can use a tablespoon to scoop the mixture into the pasta shells.
  • I like to add in some vegan cheese for the holiday vibe, but if you want to omit that (or use regular, of course, if you’re not vegan) then it’s divine either way.

Nutrition

Calories: 578.59kcal | Carbohydrates: 67.97g | Protein: 17.91g | Fat: 27.62g | Saturated Fat: 5.53g | Sodium: 318.85mg | Potassium: 596.63mg | Fiber: 5.33g | Sugar: 5.74g | Vitamin A: 3803.69IU | Vitamin C: 10.31mg | Calcium: 139.94mg | Iron: 4.9mg

Have you tried these vegan stuffed shells? Leave me a comment below with your thoughts!

Abbey Sharp

Abbey Sharp is a Registered Dietitian (RD), regulated by the Ontario College of Dietitians. She is a mom, YouTuber, Blogger, award winning cookbook author, media coach specializing in food and nutrition influencers, and a frequent contributor to national publications like Healthline and on national broadcast TV shows.

www.abbeyskitchen.com/about-abbey/
  • Previous Page
  • Go to page 1
  • Interim pages omitted …
  • Go to page 10
  • Go to page 11
  • Go to page 12
  • Go to page 13
  • Go to page 14
  • Interim pages omitted …
  • Go to page 89
  • Next Page

Get started with

Eight Free Recipe Books

From the co-founder of Neue Theory and creator of the Hunger Crushing Combo

Sign me up!
Abbey smiling at table
Abbey Sharp

“Foods may never be nutritionally equal. But we can make them morally equal by recognizing that our worth is never determined by what's on our plate.”

— Abbey Sharp, RD About Abbey ◥

Books

  • HCC™
  • Mindful Glow
  • Free E-Books

Blog

  • Nutrition
  • Recipes
  • Motherhood
  • Life

Explore

  • Neue Theory™
  • Bite Back
  • YouTube

Abbey

  • About
  • Coaching
YouTube TikTok Instagram Facebook X Pinterest
Abbey Sharp - The No BS Dietitian From Abbeys Kitchen

© Abbey's Kitchen 2026  All Rights Reserved •  ACCESSIBILITY STATEMENT •  Privacy Policy

This site uses cookies. By continuing to browse the site, you are agreeing to the use of cookies Accept Privacy Policy
Privacy & Cookies Policy

Privacy Overview

This website uses cookies to improve your experience while you navigate through the website. Out of these, the cookies that are categorized as necessary are stored on your browser as they are essential for the working of basic functionalities of the website. We also use third-party cookies that help us analyze and understand how you use this website. These cookies will be stored in your browser only with your consent. You also have the option to opt-out of these cookies. But opting out of some of these cookies may affect your browsing experience.
Necessary
Always Enabled
Necessary cookies are absolutely essential for the website to function properly. This category only includes cookies that ensures basic functionalities and security features of the website. These cookies do not store any personal information.
Non-necessary
Any cookies that may not be particularly necessary for the website to function and is used specifically to collect user personal data via analytics, ads, other embedded contents are termed as non-necessary cookies. It is mandatory to procure user consent prior to running these cookies on your website.
SAVE & ACCEPT

Rate This Recipe

Your vote:


A rating is required
A name is required
An email is required