• Skip to main content

Abbey's Kitchen

Healthy Recipes, Nutrition Myth Busting, Healthy Eating Tips

  • Books
    • HCC™
    • The Mindful Glow Cookbook
    • Recipe eBooks
      • Family
      • Hypothyroidism
      • BLW
      • Vegan Week 1
      • Vegan Week 2
      • Vegan Week 3
      • Keto
      • Gluten Free Week 1
      • Gluten Free Week 2
      • Fitness
      • Paleo
  • Blog
    • Nutrition
    • Recipes
    • Motherhood
    • Life
  • Explore
    • Neue Theory™
    • Bite Back With Abbey Sharp
      • Apple Music
      • Spotify
      • Amazon Music
    • YouTube
  • Abbey
    • About
    • Coaching
    • Contact

Abbey Sharp

Last Updated November 11, 2023. Published November 13, 2023 By Abbey Sharp 6 Comments

Hasselback Sweet Potatoes (Vegan & Healthy!)

Try my Vegan Gluten Free Hasselback Sweet Potatoes with Streusal Topping as a holiday side dish. #abbeyskitchen #sweetpotatoes #hasselbackpotatoes #streusal #holidaysidedish #holidays #holidaydinner #vegansidedish #glutenfreefood #potatoes #healthysidedish

These Hasselback Sweet Potatoes are a delicious vegan, gluten free holiday & Thanksgiving side dish for entertaining a crowd!
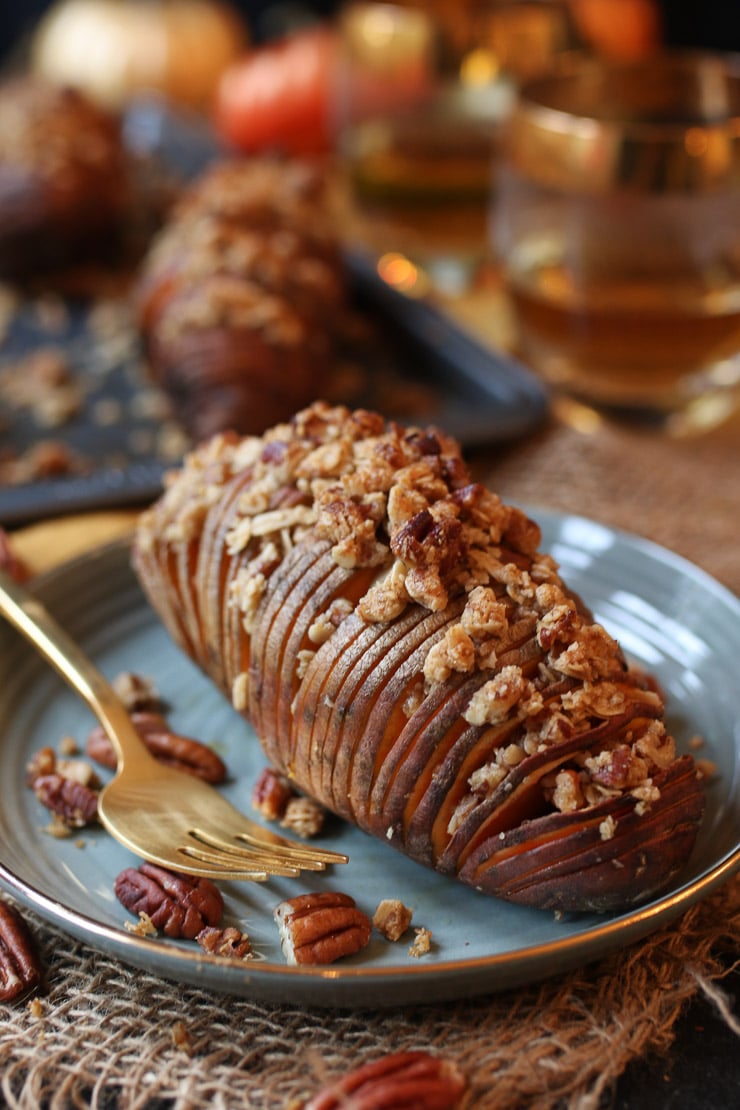
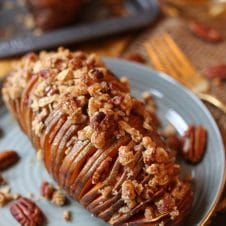
Image of vegan hasselback sweet potatoes with streusel topping on a grey plate with a fork.

I never really got the whole marshmallow topped sweet potato thing that a lot of my American followers consider a traditional Thanksgiving side dish. I mean, I love sweet potatoes (check out the amount of sweet potato recipes I have!). I also love marshmallows. I get that all Holiday sweet potato side dishes are pretty much dessert masquerading as a veggie side and I’m okay with that! But I believe we can still get that classic Thanksgiving vibe, if you find the OG too sweet like me.

Table of contents

  • Why This Recipe Works
  • Key Ingredients
  • How to Make This Recipe
  • Expert Tips
  • Recipe FAQs
  • More Recipes You Might Like

Why This Recipe Works

These hasselback sweet potatoes can be served with absolutely anything. They are vegan and gluten-free so if you are entertaining guests with a variety of dietary restrictions, this side works for everyone!

This is also a very budget friendly side dish. Ingredients for holiday dinners can add up real quick so having 2-3 budget friendly sides help keeps the costs down.

These vegan hasselback sweet potatoes are also SO damn beautiful despite not taking a lot of effort to make, they will quickly become a holiday staple that all of your friends and family will ask for each year.

Key Ingredients
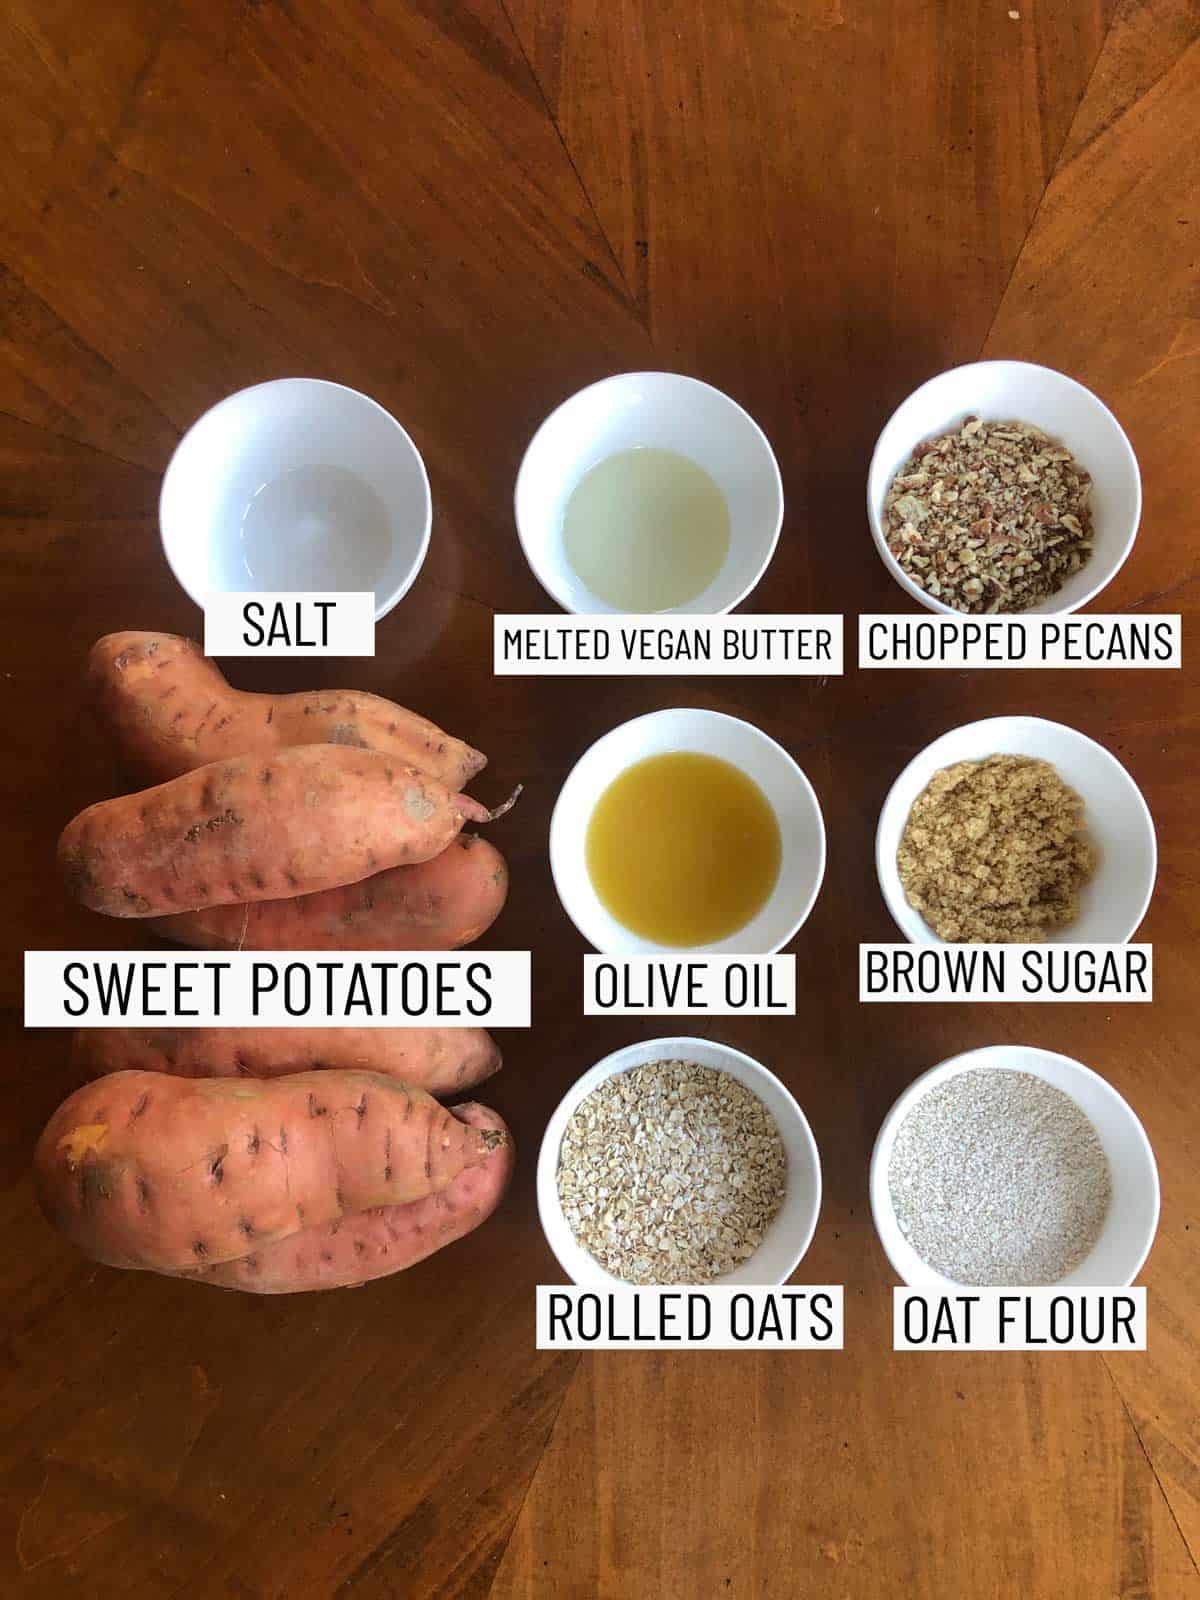
Overhead shot of ingredients to make hasselback sweet potatoes: salt, melted vegan butter, chopped pecans, sweet potatoes, olive oil, brown sugar, rolled oats, and oat flour.

Sweet Potatoes – For these hasselback sweet potatoes, make sure you purchase sweet potatoes of a similar size. The best ones are when they’re not too thin or too long as you want them to be able to hold up the streusel topping!

Streusel Topping – The streusel topping is made by combining the oats, oat flour, pecans, brown sugar, salt and butter.

How to Make This Recipe
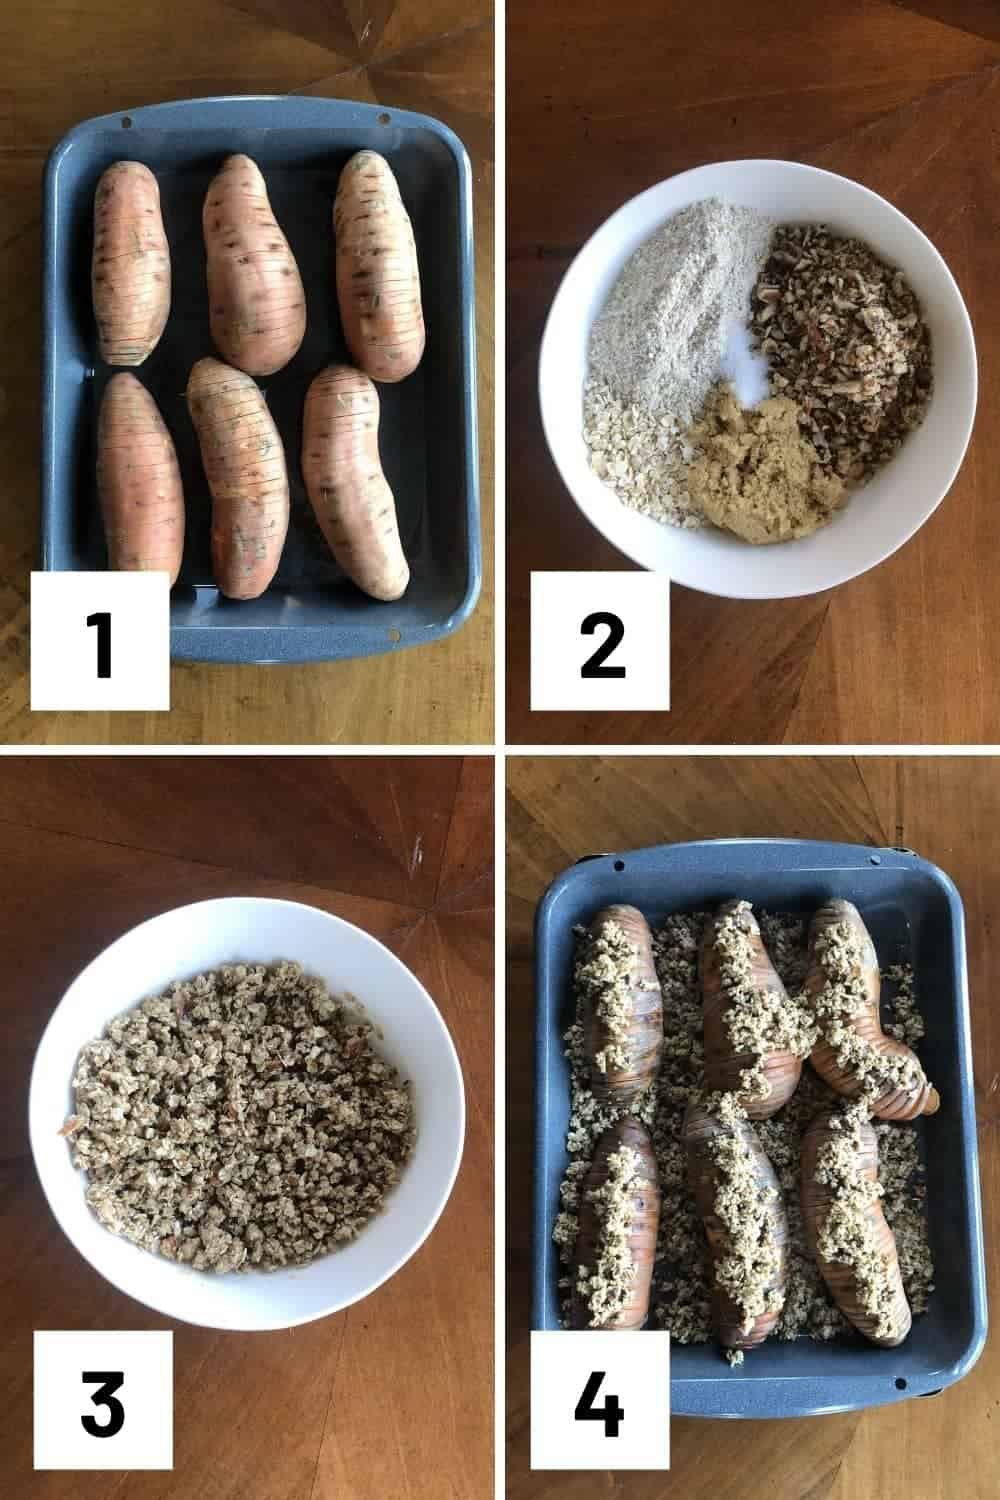
Instruction step by step photo showing sliced sweet potatoes, mixing the streusel mixture, then layering it onto the baked sweet potatoes.

Step 1: Preheat oven to 425 F. Slice 3/4 of the way through the sweet potatoes in slits 1/8th inch apart before placing them in a greased baking sheet and drizzle with oil. Sprinkle with salt and bake uncovered for 15 minutes.

Step 2/3: Gather your streusel topping ingredients (oats, oat flour, pecans, brown sugar, salt and butter) and mix them together. It should form small clumps.

Step 4: Mound the streusel on top of the potatoes and place back in the oven to continue to bake until lightly browned, about 10 minutes.

Expert Tips

You can place two chopsticks or wooden dowels parallel to your sweet potatoes to help prevent accidentally slicing through your sweet potatoes will cutting them.

When topping off the hasselback sweet potatoes with the streusel topping, making sure to spread the slits of the sweet potato to ensure you are getting your streusel to stay on your sweet potatoes.

Always make sure to give your sweet potatoes a good scrub and wash before baking it. As we are keeping the skin on, you’ll want to make sure it is clean. Sweet potato skins are quite nutritious so you want to keep them on!

Recipe FAQs

What size sweet potatoes should I use?

It doesn’t matter what size you use for this hasselback sweet potato. You just need to make sure they are of the same size so the bake time doesn’t vary too much.

Can I substitute the pecans?

Feel free to use your nut of choice or whatever you have on hand. This recipe is very customizable.

Can I make this ahead of time?

You can bake the sweet potatoes ahead of time, store it in an airtight container, then when you are ready to serve them, add on the streusel topping and pop them into the oven.
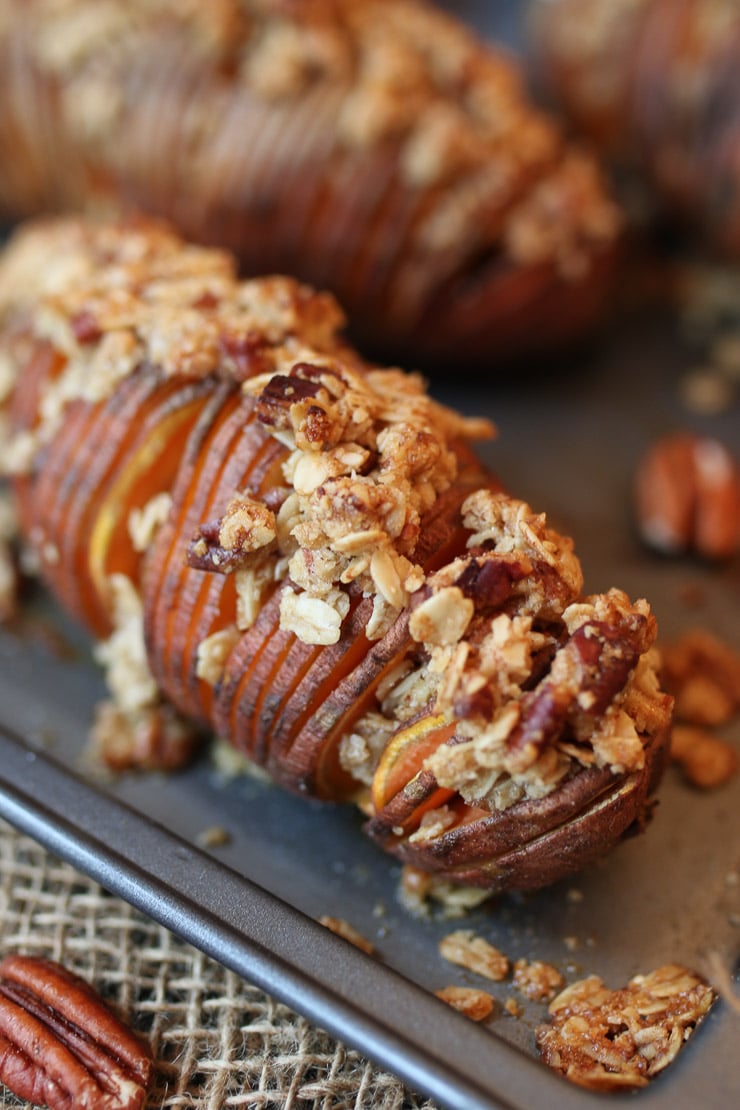
Close up of hasselback sweet potatoes on a sheet pan.

More Recipes You Might Like

Need more holiday recipes? Here are a couple of my favourites!

  • Massaged Kale Salad with Israeli Couscous, Butternut Squash & Maple Vinaigrette
  • Vegan Maple Roasted Persimmons and Figs
  • Vegan Baked Beet Chips with Creamy Orange Dip

So lovelies, what are some of your traditional side dishes for Thanksgiving and the holidays?
Try my Vegan Gluten Free Hasselback Sweet Potatoes with Streusal Topping as a holiday side dish. #abbeyskitchen #sweetpotatoes #hasselbackpotatoes #streusal #holidaysidedish #holidays #holidaydinner #vegansidedish #glutenfreefood #potatoes #healthysidedish
Print Recipe
5 from 3 votes

Vegan Hasselback Sweet Potatoes

These vegan Hasselback Sweet Potatoes with streusel topping is such a versatile recipe. These Hasselback Sweet Potatoes are perfect for a delicious gluten free holiday & Thanksgiving side dish for entertaining a crowd or as a weeknight side!
Prep Time10 minutes mins
Cook Time55 minutes mins
Total Time1 hour hr 5 minutes mins
Course: Side Dish
Cuisine: American
Servings: 6 people
Calories: 442kcal
Author: Abbey Sharp

Ingredients

  • 6 medium sweet potatoes scrubbed
  • 1 tbsp extra virgin olive oil
  • 1/2 cup gluten free rolled oats
  • 1/2 cup gluten free oat flour
  • 1/2 cup finely chopped pecans
  • 1/4 cup light brown sugar
  • 1/2 tsp salt
  • 1/4 cup vegan butter melted

Instructions

  • Preheat oven to 425 F.
  • Slice 3/4 of the way through the sweet potatoes in slits 1/8th inch apart. Place on greased baking sheet and drizzle with oil. Sprinkle with salt and bake uncovered for 15 minutes.
  • Meanwhile, mix together the oats, oat flour, pecans, brown sugar, salt and butter. It should form small clumps.
  • Mound the streusel on top of the potatoes and place back in the oven until lightly browned, about 10 minutes.

Video

Notes

Cooking time may vary depending on the size of sweet potato. Adjust cooking time accordingly. 
You can place two chopsticks or wooden dowels parallel to your sweet potatoes to help prevent accidentally slicing through your sweet potatoes will cutting them.
When topping off the hasselback sweet potatoes with the streusel topping, making sure to spread the slits of the sweet potato to ensure you are getting your streusel to stay on your sweet potatoes.
Always make sure to give your sweet potatoes a good scrub and wash before baking it. As we are keeping the skin on, you’ll want to make sure it is clean. 

Nutrition

Calories: 442kcal | Carbohydrates: 67g | Protein: 7g | Fat: 17g | Saturated Fat: 3g | Polyunsaturated Fat: 5g | Monounsaturated Fat: 9g | Trans Fat: 1g | Sodium: 381mg | Potassium: 874mg | Fiber: 9g | Sugar: 19g | Vitamin A: 32068IU | Vitamin C: 6mg | Calcium: 91mg | Iron: 2mg

Have you tried these Vegan Hasselback Sweet Potatoes with Streusel Topping?

Leave me a comment below with your thoughts!

Abbey Sharp

Abbey Sharp is a Registered Dietitian (RD), regulated by the Ontario College of Dietitians. She is a mom, YouTuber, Blogger, award winning cookbook author, media coach specializing in food and nutrition influencers, and a frequent contributor to national publications like Healthline and on national broadcast TV shows.

www.abbeyskitchen.com/about-abbey/

Last Updated November 4, 2023. Published November 8, 2023 By Abbey Sharp 4 Comments

Postpartum Anxiety | How Becoming a Mom Actually Reduced My Anxiety

Mother holding her baby.

In this tell all, I discuss postpartum anxiety and how becoming a mom actually surprisingly reduced my anxiety and stress!

Woman holding her baby to discuss postpartum anxiety.

I recently wrote about my experience taking anti-anxiety medication during pregnancy in a world that doesn’t prioritize mother’s mental health. That post actually was born when I started to write this post, and I felt I had to take it back a few steps to give you some context.

Well, now that you know that I’ve struggled my whole life with anxiety – which at times in my life has been debilitating – you might be wondering how I fared with postpartum anxiety and stress. I mean, of all the experiences I’ve had in my life that have made me anxious – school, work, pregnancy, marriage, food (read about it here: orthorexia) – parenthood is arguably the most legitimately stressful one. Becoming and being a mom means a complete shift in identity, priority, and routine – all of which are particularly anxiety promoting for this Type A girl.

Becoming a mom is also is a hell of a lot of responsibility. I mean, I’m responsible for another human being’s life. Every choice I make seemingly has implications for who my son is going to grow up to be – or even if they grow up (aka. survive!) at all. Eek, let’s not think about that.

Anticipating Postpartum Anxiety and Stress During Pregnancy

Women holding her pregnant belly.

During pregnancy, I had a lot of anxiety about all of these changes that come with motherhood. I also had anxiety about just the thought of having postpartum anxiety, stress and depression. I worried that with my mental health history, I was a prime candidate for some serious struggles ahead that would cloud my ability to enjoy motherhood and successfully co-parent with my husband. I hear these same worries from fellow mommas-to-be every day, even those who have had no prior issues with anxiety themselves. And it’s a totally legitimate concern. According to experts, 10% of women will experience postpartum anxiety and stress. And that’s just the ones who acknowledge it and get help. I wouldn’t be surprised if the real number was MUCH higher than that.

If you’re reading this, and expecting, or are thinking of having kids one day, but are (rightfully) worried about your mental health – I hope that sharing my story helps ease your concerns.

Believe it or not, but somehow, motherhood actually reduced my anxiety and stress.

Things I Would Be Anxious About Before Motherhood

Writing in a journal.

First of all, let me give you some examples of the types of things that would send me into an anxious spiral before I became a mom.

Interruptions to my Schedule and To-Do List

Before motherhood, I would wake up every morning with an itinerary on my desk. I would create a to-do list for the week, and an even more detailed to-do list for each and every day. Type A? You bet. As a self-made entrepreneur who works almost exclusively from home, I’ve always found that having a strict schedule and list of what I need to accomplish each day would help prevent me from getting distracted and gave me a sense of calm. Heck, you can’t tell me it doesn’t feel good to scratch things off a written to-do list! But on any occasion where I was thrown a curve ball and my precious to-do list get unexpectedly prioritized, I would feel a mini panic inside. My schedule was disrupted. My plan was thrown aside. What the ACTUAL F was I going to do?

Not Having a Plan

If I’m not ahead, I’m behind – that was literally the motto I lived by. Before motherhood, I was always looking ahead and planning for the future so that I knew I had something to work towards and look forward to. Before a holiday was over, I was already booking flights and making restaurant reservations for the next one. Spontaneity was not in my wheelhouse, and I made sure every moment of our social calendar was accounted for each and every day. The thought of having “nothing to do” was foreign, uncomfortable and quite honestly, just so boring, that I wouldn’t dare leave any moment open. I also would bend over backwards to make plans work, even when something came up that made them no longer convenient or enjoyable for me. If it was in the plan, it was going to happen no-matter-what.

Close up image of a yearly planner.

People’s Opinions of Me

Before motherhood, I let other people’s perceived opinions of me really keep me up at night. I would get butterflies reading the troll comments on my Instagram or Youtube channel when they attacked my content, position, or *gasp* called me fat. I would replay an even mildly confrontational conversation or text message exchange all night in my head to the point that I would literally have to drug myself to sleep. I would take any critique of my work to heart and worry that I wouldn’t be hired again. On a personal note, any disagreement I had with family or friends about how I planned to raise my not-yet-born babe (whether related to vaccines, feeding methods, sleep training etc.) would leave me reeling for weeks. I hate to admit that I cared so much about other people’s beliefs and judgement of me, but I couldn’t help but want to please.

Not Being Perfect

Before experiencing postpartum anxiety, I worried endlessly about disappointing myself and others if something didn’t turn out perfectly. I would get nervous before a media interview that I wouldn’t deliver the messages in the exact words I had planned. When writing the Mindful Glow Cookbook, I insisted on testing every recipe again, and again, and again, and would wake up at 2 AM thinking about a new permutation to explore. I mean, it made for an amazing selection of recipes (that you totally need if you don’t already have it), but it also made me a crazy bitch for 2 years. I planned, practiced, rehearsed and staged almost every part of my life because being prepared made me feel calm. And when anything interfered with that order, I would (not surprisingly) not know how to cope.

Person walking on an outdoor path.

The Surprising Ways Motherhood Reduced my Postpartum Anxiety

So now that you know all of that about me, you’re probably totally understanding how and why I was always so concerned about postpartum anxiety. I’ve often heard motherhood be described as an uncomfortable coming of age transition, much like adolescence is. And while the greatest gift in this journey has been the overwhelming love I have for my sweet son, the unexpected side effect has been that it shifted my priorities in ways that actually reduced my stress in more ways than one.

I Pulled Back on the Schedule and To-Do List

The first few months after giving birth brought a HUGE disruption to my perfectly scheduled life – enter postpartum stress. I was cluster feeding on-demand, and was trying to get teeny tiny unpredictable moments of rest, work, meals and showers while my son took fleeting naps. One day, I might have “breakfast” at 10 AM, the next might have been at 5 AM and I honestly didn’t even know what time, day or week it was because the days just felt fluid and endless. At first, I fought it. I tried so hard to get Baby E on a feeding and sleeping schedule that I read about in my baby books. But like his dad, he much preferred to fly by the seat of his pants. He is, after all, a free-spirited Aries.

Laptop, phone, and schedule on a wooden table.

It wasn’t until we sleep trained at 4 months that I saw any predictable schedule emerge (which let’s be real, would change as soon as we got in the groove). But if I wanted to survive to see my son crawl, I had to adapt. I quickly learned to thrive in the uncertainty. Over time, I figured out how to “go with the flow”, and expect that different days would yield completely different experiences. All because I was at the mercy of a teeny tiny human’s biological schedule- not my fabricated, controlled one. Don’t get me wrong, I will always choose order over chaos, but I’m not having a postpartum anxiety induced panic attack every time my to-do list has to get recalibrated.

Plans? Ha! Why Bother

Here’s the thing I’ve learned about babies and kids. The second you think you’ve “got them” and are starting to understand their quirks, needs and schedules, they do a 180. So I’ve learned not to plan too far in advance in case the little bean decides to switch things up. For example, around Christmas I signed him up for swim lessons after the holidays which we were excited about because the kid LOVES the water. Well the week they were slated to start, he dropped one of his naps and his entire day shifted so that he would now be sleeping during the class. So I’ve now paid the $250 and we haven’t been to a single class – #parentingfail. My old self would have tried to fit the square peg in the round hole even if it meant dealing with a miserable kid all class. I honestly would have just felt so terrible about my precious plans falling through, I wouldn’t have been able to accept it not working out. But now, I’ve learned to cut my losses, take it as a learning opportunity, expect the unexpected and move on. I mean, don’t get me wrong, I hate wasting money, but I hate being any more exhausted than I already am just for the sake of keeping plans. The same happens when I make brunch or dinner plans with friends. If one of my sons skips their nap and is a raging whiny nightmare, or if I wake up a little tired or with an aching back, I’m okay to suggest a rain check and not feel guilty at all.

Table set with places for a dinner party.

There’s Room For Varying Opinions

Moms judging moms is basically an Olympic sport and a ruthless one, at that. My former self would have found the non-stop opinions and judgements absolutely exhausting and debilitatingly upsetting. But today, I’m much better at just listening to an alternative opinion, saying “thank you very much” and leaving it at that. I mean, even just being in Facebook mom groups where I am seeing posts recommending raw milk to babies, and abstaining from life-saving vaccines, I’ve learned that disagreeing doesn’t need to mean anyone is suggesting the other party is a bad parent. People are always going to have opposing ideas about the best way to feed babies, encourage sleep, treat illness, and more. I’m confident enough in my own abilities that I know what I’m doing is right for me. And truth – I’m just too damn tired anymore to let postpartum anxiety keep me up at night.

I’m Not Perfect, But My Children Don’t Care

To my fellow Type A moms be prepared for nothing to go the way you imagined. Letting go of my motherhood ideals has been both the most challenging and freeing experience of my life. Starting with a totally botched birth plan, to a miserable breastfeeding and pumping journey, I learned really damn fast that it doesn’t matter how well you’re prepared, you’re going to fall flat on your face and you better learn to relish on those humble moments. I guess I figured out how to just be okay winging it, because over-preparing would prove futile again and again when some little teeny tiny blob would laugh in your face at your picture perfect plan. I like to think that I didn’t get lazier, I actually got smarter, which reduced my postpartum anxiety!

Mom smiling and feeding child ice cream to relieve postpartum anxiety.

Amazingly, my confidence and comfort in living in the uncertainty of daily life with an infant translated into my work and relationships. I started to be able to “go with the flow” more often when a family member or friend did something with one of my sons that I wouldn’t have wanted to do myself (like fed him French fries at 8 months- whatev!). I started to really exude power and confidence in my media work. I started to sleep better at night not having a non-stop rolodex of worries and concerns due to postpartum anxiety and stress.

Bottom Line on Postpartum Anxiety and Stress

It’s a pretty well-known fact that Abbey Sharp has a chronic busy body. I don’t know how to lay on the beach for more than 5 minutes. I don’t like massages unless I can be answering emails on my phone. I can’t even watch TV without simultaneously working out, cooking dinner, or otherwise, doing something “productive”. But motherhood has softened those traits. I don’t know if I’m just tired AF or if my priorities have changed in a way that have afforded me a new perspective on what actually is worth stressing over. Protecting my son from disease, or death – that’s worth my mental space. Not whether or not we make it to our 7 pm reservation 20 minutes late or if some rando on the internet says I’m “dumb”. Becoming a mom has given me more than a full heart and reduced postpartum anxiety and stress. It’s given me a little more space in my brain for the things that count.

MORE BLOG POST YOU MIGHT LIKE

If you enjoyed this blog post discussing postpartum anxiety and stress, you might enjoy some more posts discussing pregnancy and motherhood:

  • Can You Diet While Pregnant?
  • What I Did to Get Pregnant with Thin Uterine Lining & Miscarriage History
  • Activities & Foods to Avoid When Breastfeeding & Pregnant That I’m Totally Doing Now
  • Sh*t You Should Never Say to Pregnant Women About Their Bodies
  • Low Carb Pregnancy: Can it Cause Birth Defects?
  • Mom Guilt | My Breastfeeding Failure Story

Can you relate to my story about how becoming a mom reduced my anxiety? Has it helped or made you worry more about things? Let me know in the comments!

Abbey Sharp

Abbey Sharp is a Registered Dietitian (RD), regulated by the Ontario College of Dietitians. She is a mom, YouTuber, Blogger, award winning cookbook author, media coach specializing in food and nutrition influencers, and a frequent contributor to national publications like Healthline and on national broadcast TV shows.

www.abbeyskitchen.com/about-abbey/

Last Updated November 2, 2023. Published November 6, 2023 By Abbey Sharp 2 Comments

Roasted Glazed Carrots with Za’atar & Creamy Hummus Sauce

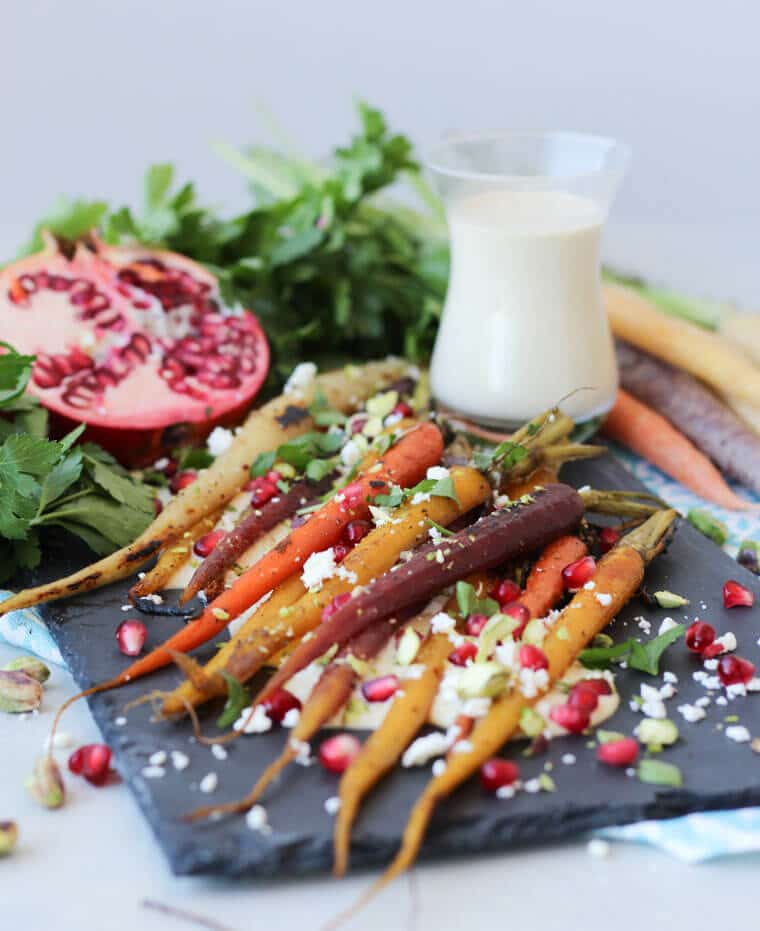
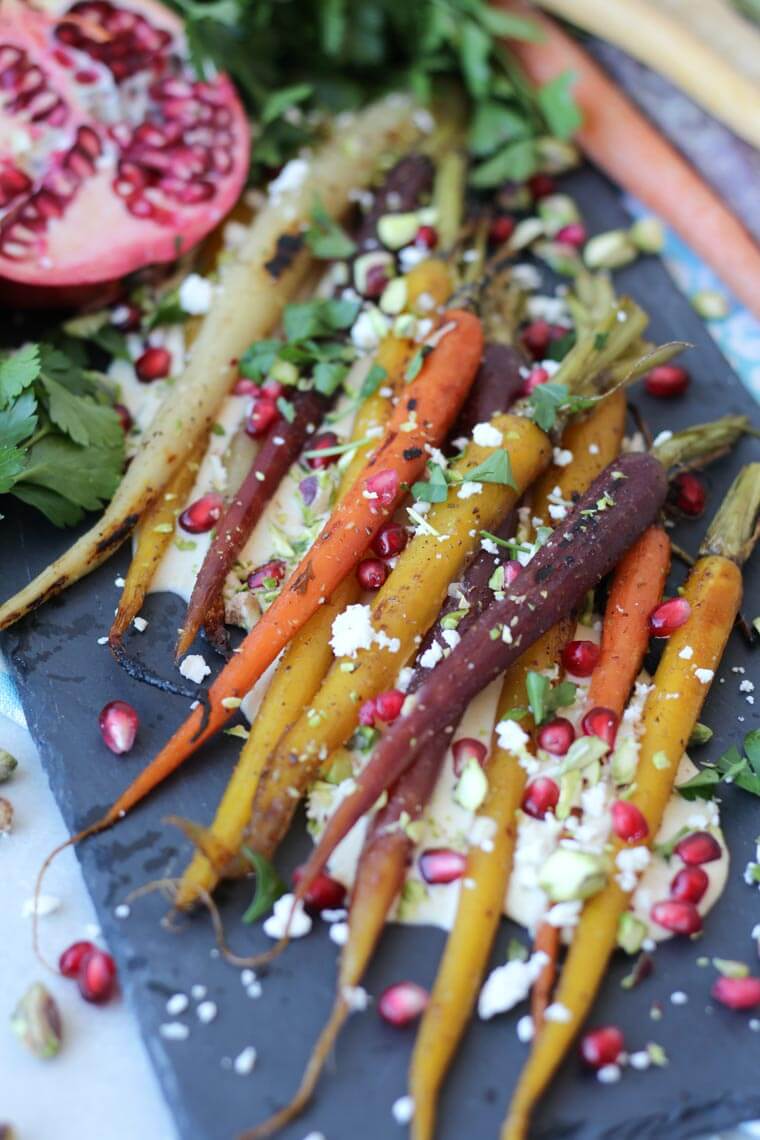
A close up of roasted carrots with pomegranate seeds and cheese sprinkled on top.

These Roasted Glazed Carrots with Za’atar & Creamy Hummus Sauce is a gluten free side dish that’s light and balanced, yet a real show stopper for your guests.

Za’atar Honey Roasted Carrots on a black serving plate topped with pomegranate and parsley.

I’ve never met a human that doesn’t like carrots. They’re naturally sweet, are vibrantly colourful, have a satisfying crunch when raw, and pack a smooth tender bite when cooked. This gave me a delicious idea-  my Za’atar Honey Roasted Carrots with Creamy Hummus Sauce!

Table of contents

  • Why This Recipe Works
  • Key Ingredients
  • How to Make This Recipe
  • Expert Tips
  • Recipe FAQs
  • More Recipes You Might Like

Why This Recipe Works

These Roasted Glazed Carrots will quickly become your family’s new go-to side dish. Roasted in cumin and lemony za’atar with a sticky sweet honey glaze, they’re like candy but made of vegetables. VEGETABLE CANDY. I also love this recipe because it’s

  • Quick and easy to make
  • Gluten Free & Vegetarian – perfect for those with dietary restrictions
  • Easy to pair with a variety of main dishes
  • A great light and balanced side dish!

Key Ingredients

Colored Carrots – By incorporating a variety of colored carrots, you’re actually incorporating a variety of nutrients! For example, purple carrots contain a healthy antioxidant called anthocyanins which give them the deep purple color!

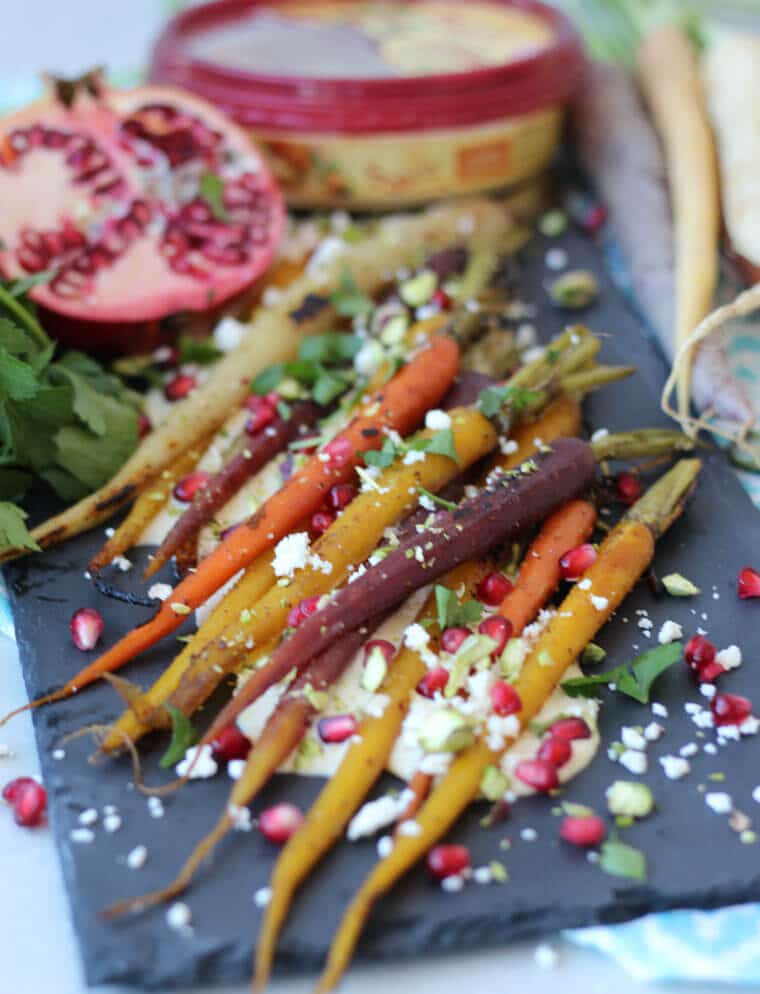
Hummus – Hummus is one of the best dips to pair with carrots, especially when it’s made into my creamy hummus sauce. It’s completely plant based, and high in fiber & healthy fats. I personally like to use this brand!

Garnish – The garnish is completely customizable depending on what you like! I personally like to use crumbled feta, pomegranate, crushed pistachios, and minced parsley to jazz my roasted glazed carrots.

A close up of roasted carrots with pomegranate seeds and cheese sprinkled on top.

How to Make This Recipe

Step 1: Preheat oven to 425 F. In the meantime, combine the carrots with the oil, butter, cumin and za’atar in a baking dish or baking sheet.

Step 2: Roast the carrots for 20 to 23 minutes, or until the carrots are crisp tender, so that a fork inserted into the middle of one yields a little bit of resistance.

Step 3: Remove the pan and drizzle the carrots with honey. Return the baking dish to the oven for an additional 5 to 7 minutes, or until the carrots are tender and gently caramelized. Sprinkle with fleur de sel. Keep warm.

Step 4: Meanwhile, in a small saucepan, mix together the Sabra Classic Hummus, coconut milk, cumin, lemon juice and salt and pepper. Stir on medium low heat until smooth and warm.

Step 5: When ready to serve, smear some of the sauce onto the bottom of a serving platter or tray. Top with the carrots. Garnish with the feta cheese, pomegranate arils, pistachios, and parsley and serve the remaining sauce on the side.

Expert Tips

Yes, these roasted glazed carrots would be tasty all on their own, but entertaining is all about presentation and that’s where the creamy hummus sauce comes into play. Since entertaining at the holidays is already so busy and stressful, I start with a container of hummus for the base of my creamy hummus sauce. I personally love Sabra’s deliciously smooth consistency, authentic recipe and simple ingredient list. It’s already got all the flavour. so all it really needs is a little loosening up with coconut milk and some complimentary aromatics like cumin and lemon.

Recipe FAQs

How can I make this recipe vegan?

You can easily make this recipe vegan by swapping the butter for a vegan alternative, the honey for agave, and then omit the feta crumble for the garnish!

Do I have to use colored carrots?

Nope! You can totally use whatever carrots you can find at the store or farmer’s market.

Can I make this recipe ahead of time?

I would suggest making this recipe the day of just so the carrots stay fresh and the consistency you are wanting! I would avoid making days in advance, especially if drizzling the hummus sauce on top.

Honey roasted carrots on top of a bed of creamy hummus sauce topped with pomegranate.

More Recipes You Might Like

Looking for more yummy side dishes like these roasted glazed carrots? I have tons! Here are some of my favourites.

SWEET CHILI ROASTED BRUSSEL SPROUTS 

BALSAMIC ROASTED BRUSSEL SPROUTS WITH GRAPES & FIGS 

PISTACHIO PARSLEY VEGAN PESTO SALAD 

ZA’ATAR ROASTED RADISHES WITH PEA PUREE, RAISINS & PINE NUTS

Have you tried making this Za’atar Honey Roasted Carrots with Creamy Hummus Sauce? How do you like to serve your carrots? Leave me a comment below and don’t forget to share this post with friends!

A close up of roasted carrots with pomegranate seeds and cheese sprinkled on top.
Print Recipe
5 from 5 votes

Roasted Glazed Carrots with Za’atar & Creamy Hummus Sauce

These Za’atar Roasted Glazed Carrots with Creamy Hummus is a Gluten Free side dish that’s light and balanced, yet a real show stopper for your guests.
Prep Time5 minutes mins
Cook Time30 minutes mins
Total Time35 minutes mins
Course: Side Dish
Cuisine: Middle Eastern
Servings: 4 people
Calories: 219kcal
Author: Abbey Sharp

Ingredients

  • 1 lb multi coloured carrots large ones cut into ½” thick pieces, peeled
  • 1 tbsp extra virgin olive oil
  • 1 tbsp unsalted butter melted
  • 1 tsp cumin
  • ½ tsp za’atar
  • 1 tbsp honey
  • Pinch of fleur de sel

Coconut Hummus Sauce

  • 1 container of Sabra Classic Hummus
  • ½ cup lite coconut milk
  • ½ tsp cumin
  • Juice of ½ lemon or to taste
  • Salt and pepper to taste

Garnish

  • 3 tbsp crumbled feta cheese
  • 3 tbsp pomegranate arils
  • 3 tbsp pistachios shelled and crushed
  • 3 tbsp parsley minced

Instructions

  • Preheat oven to 425 F.
  • Combine the carrots with the oil, butter, cumin and za’atar in a baking dish or baking sheet.
  • Roast the carrots for 20 to 23 minutes, or until the carrots are crisp tender, so that a fork inserted into the middle of one yields a little bit of resistance.
  • Remove the pan and drizzle the carrots with honey. Return the baking dish to the oven for an additional 5 to 7 minutes, or until the carrots are tender and gently caramelized. Sprinkle with fleur de sel. Keep warm.
  • Meanwhile, in a small saucepan, mix together the Sabra Classic Hummus, coconut milk, cumin, lemon juice and salt and pepper. Stir on medium low heat until smooth and warm.
  • When ready to serve, smear some of the sauce onto the bottom of a serving platter or tray. Top with the carrots. Garnish with the feta cheese, pomegranate arils, pistachios, and parsley and serve the remaining sauce on the side.

Video

Nutrition

Serving: 1serving | Calories: 219kcal | Carbohydrates: 21g | Protein: 4g | Fat: 14g | Saturated Fat: 6g | Polyunsaturated Fat: 1g | Monounsaturated Fat: 5g | Trans Fat: 1g | Cholesterol: 19mg | Sodium: 249mg | Potassium: 490mg | Fiber: 4g | Sugar: 12g | Vitamin A: 19376IU | Vitamin C: 12mg | Calcium: 122mg | Iron: 2mg

Abbey Sharp

Abbey Sharp is a Registered Dietitian (RD), regulated by the Ontario College of Dietitians. She is a mom, YouTuber, Blogger, award winning cookbook author, media coach specializing in food and nutrition influencers, and a frequent contributor to national publications like Healthline and on national broadcast TV shows.

www.abbeyskitchen.com/about-abbey/

Last Updated November 1, 2023. Published November 3, 2023 By Abbey Sharp 15 Comments

Baked Vegan Quesadilla | Healthy School lunch Idea

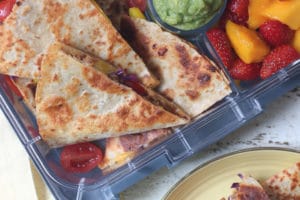
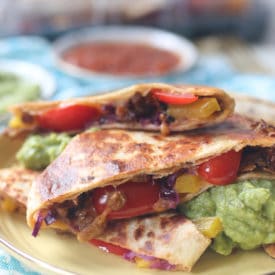
Quesadilla in a lunch box and served on a yellow plate.

DISCLAIMER: This post was developed in sponsored partnership with Yves Veggie Cuisine, however, as always, all opinions are genuine.

This Baked Vegan Quesadilla is one of my favourite healthy kids school lunch box ideas that’s packed with iron, protein and veggies.

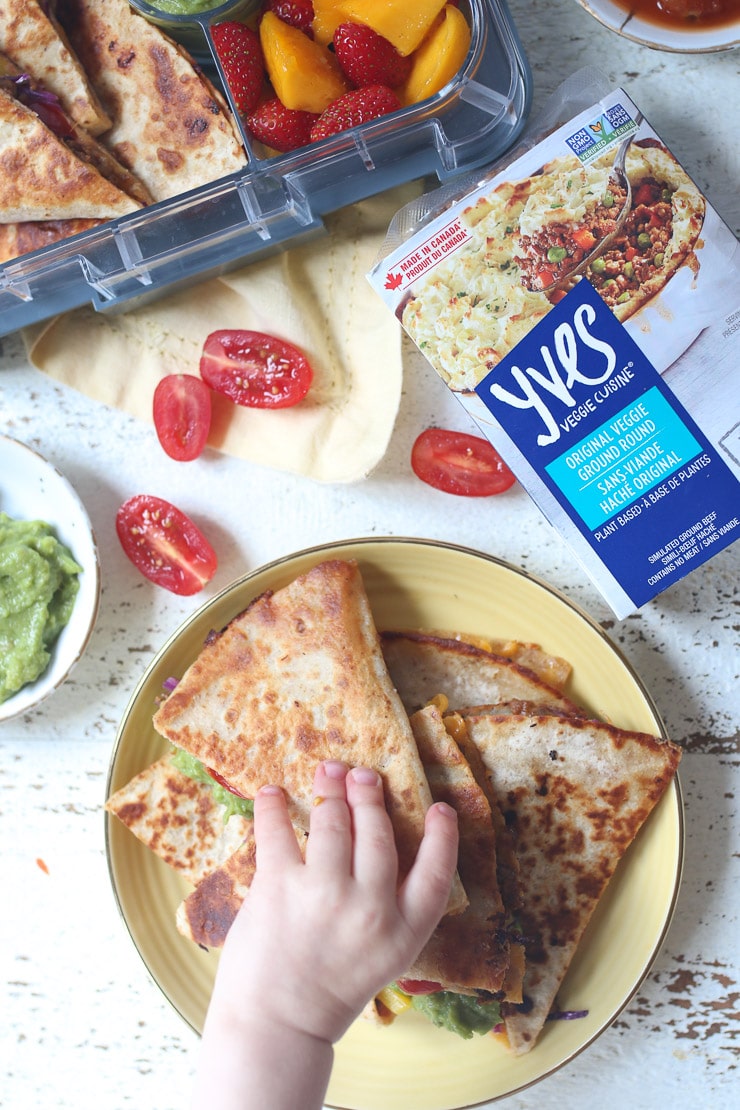
Toddler hand reaching for vegan baked quesadillas from a yellow plate.

School is in full swing so, mamas and dads, and you’ve probably already hit a bit of a lunch box inspiration plateau. I got you. If the kiddos are super DONE with sandwiches and wraps, slide this vegan quesadilla into their lunch boxes and get ready to get it back EMPTY.

Table of contents

  • Why This Recipe Works
  • Key Ingredients
  • How To Make This Recipe
  • Expert Tips
  • Recipe FAQs
  • More Recipes You Might Like

Why This Recipe Works

Now, I totally get your skepticism about serving your kiddos vegan food. But this vegan quesadilla is super “meaty” tasting and yet will absolutely fit the bill for your next Meatless Monday. I also love this recipe because it’s

  • High in protein, ~11 grams of plant based protein!
  • Customizable – add whatever veg your kids love inside!
  • Quick to make as it only requires 5 simple steps

Key Ingredients

Whole Wheat Tortillas – I prefer to use whole wheat tortillas to add a little fibre boost, but feel free to use any tortilla you have on hand. 

Veggie Ground Round – To make these quesadillas vegan, I use veggie ground round to add some plant-based protein. You can also use black beans or baked tofu. If you don’t need to make these vegan, you can use ground meat or grilled chicken, as well. 

Yellow Bell Pepper -This gives the vegan quesadilla a delicious and healthy crunch. You can also use red or green bell pepper in this recipe and/or any veggies you have on hand that you need to use up!

Tomato – in my opinion, you just can’t make a vegan quesadilla without some tomatoes. I use cherry tomatoes in this recipe but you can use any tomato variety instead. 

Shredded Cabbage –  this will also add some extra veggies and texture to the quesadilla 

Vegan Cheese – because what is a quesadilla without some deliciously melted cheese?

Salsa – for dipping and extra flavour! 

How To Make This Recipe

Step 1: Preheat oven to 400 and grease a large baking sheet with olive oil. Allow the pan to heat up while you assemble.

Step 2: Divide the veggie grounds, bell pepper, tomatoes, cabbage and cheese between the four tortillas (onto one side only). Fold over.

Step 3: Transfer the quesadillas to the baking sheet and spritz with olive oil. Bake for 10 minutes.

Step 4: Carefully flip them over and bake for another 10 minutes.

Step 5: Cut into triangles and serve with guacamole and salsa.

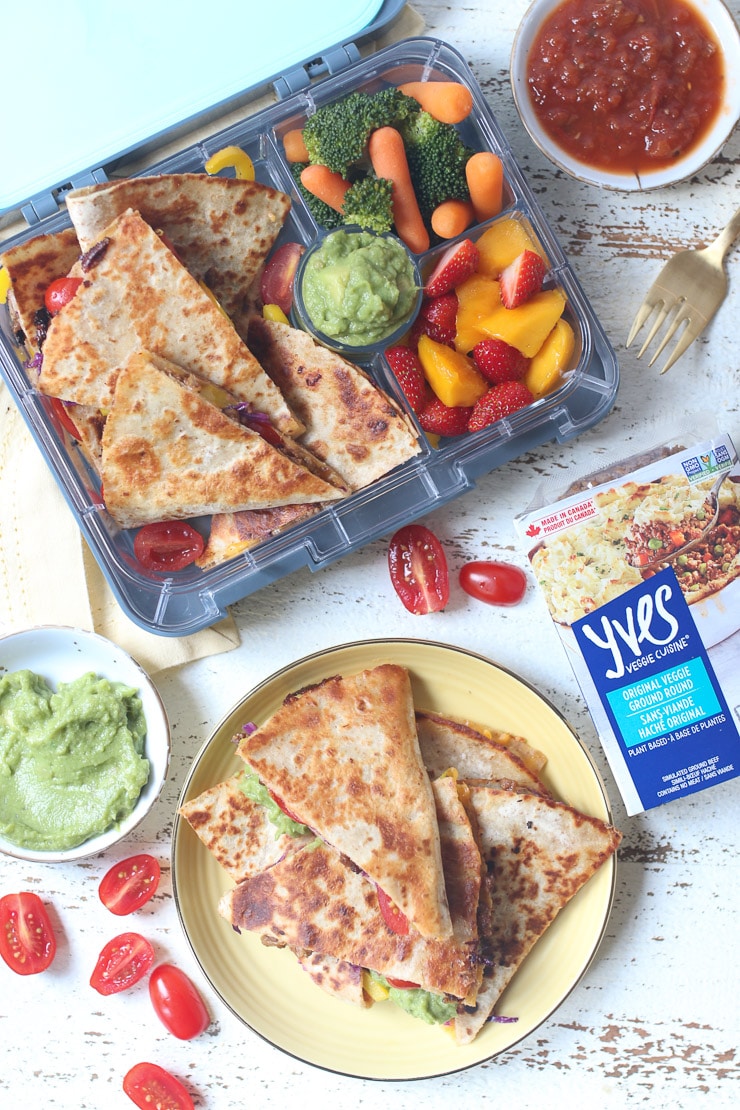
Quesadillas on a yellow plate next to a lunch box with veggies.

Expert Tips

The best news of all….you CAN make this vegan quesadilla crispy without pan-frying them, saving you calories and a HUGE headache. I don’t know about your quesadilla flipping skills in an awkward frying pan but the struggle is REAL. Simply heat your oven to 400 F, grease the baking sheet with olive oil, and let it sit in the oven while you assemble the quesadillas. Then once it hits the pan, the vegan baked quesadilla will get a nice crispy crust immediately! I also give them a little spritz with olive oil in an oil atomizer.

Recipe FAQs

Can You Pan-Fry this Vegan Quesadilla?

Of course! I’m just such a pan-frying struggler – all of the filling always falls out and I end up with a crazy mess (and burnt fingers) crying to re-assemble it.

Can You Make this Vegan Quesadilla in Advance?

Yep! I bake off a big batch and they will last in the fridge for two days, stacked in a lunch box with parchment between the layers.

Can You Make this recipe Vegetarian?

Of course! If you eat cheese, simply use cow’s milk cheese!

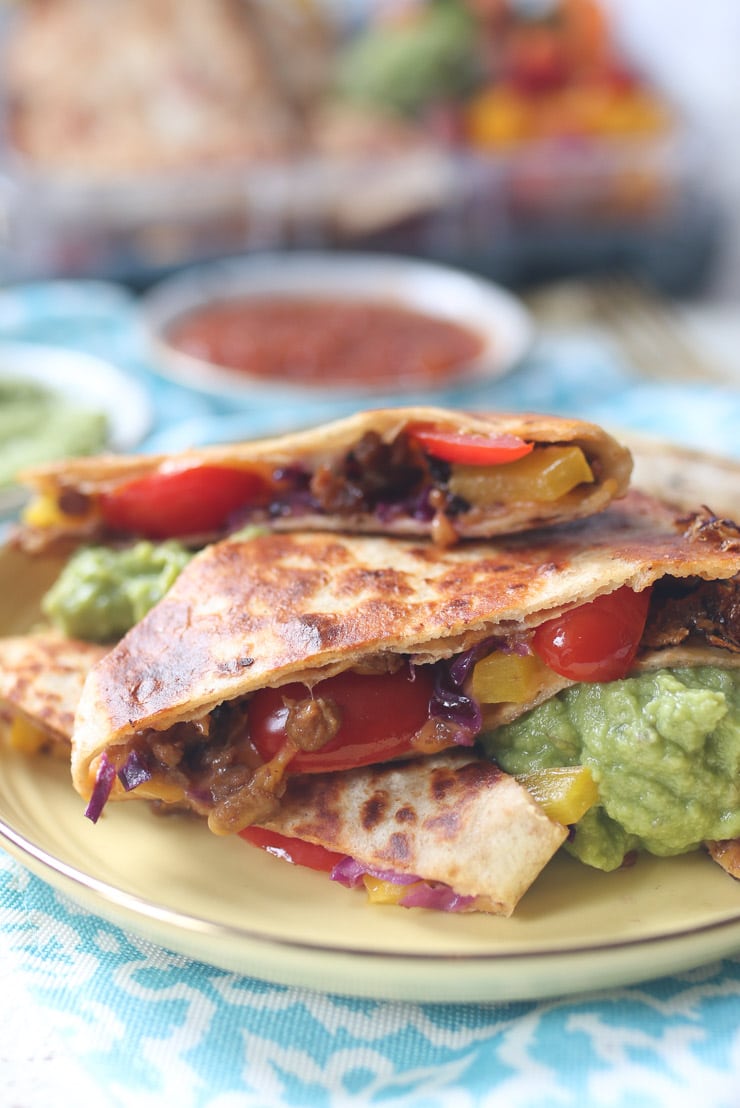
Vegan baked quesadillas on a yellow plate.

More Recipes You Might Like

Looking for more fun lunch recipes like this vegan quesadilla recipe? Check out some of my favorites on the blog!

  • 25 Kid Friendly Healthy School Lunches 
  • Vegan Everything Bagel Avocado Sandwich 
  • Mini Fried Rice Cups 

What are your go-to healthy lunches for back to school? Have you made these crispy vegan quesadilla recipe before? Let me know in the comments below. 

Vegan quesadilla on a yellow plate.
Print Recipe
5 from 5 votes

Baked Vegan Quesadilla | Healthy School Lunch Idea

This baked vegan quesadilla one of my favourite healthy kids school lunch box ideas that’s packed with iron, protein and veggies.
Prep Time10 minutes mins
Cook Time20 minutes mins
Total Time30 minutes mins
Course: Lunch, Dinner
Cuisine: Mexican, American
Servings: 8 people
Calories: 203kcal
Author: Abbey Sharp

Ingredients

  • 4 large whole grain flour tortillas
  • 1/2 package Yves Veggie Ground Round
  • 1 yellow bell pepper diced
  • 1 cup grape tomatoes halved
  • 1 cup finely shredded cabbage
  • 2 cups shredded vegan cheese
  • Extra virgin olive oil for greasing Guacamole, for serving
  • Salsa for serving

Instructions

  • Preheat oven to 400 and grease a large baking sheet with olive oil. Allow the pan to heat up while you assemble.
  • Divide the Yves Veggie Ground Round, bell pepper, tomatoes, cabbage and cheese between the four tortillas (onto one side only). Fold over.
  • Transfer the quesadillas to the baking sheet and spritz with olive oil. Bake for 10 minutes.
  • Carefully flip them over and bake for another 10 minutes.
  • Cut into triangles and serve with guacamole and salsa.

Nutrition

Calories: 203kcal | Carbohydrates: 22g | Protein: 11g | Fat: 7g | Saturated Fat: 2g | Polyunsaturated Fat: 0.4g | Monounsaturated Fat: 0.3g | Sodium: 396mg | Potassium: 121mg | Fiber: 5g | Sugar: 4g | Vitamin A: 309IU | Vitamin C: 36mg | Calcium: 106mg | Iron: 3mg
Abbey Sharp

Abbey Sharp is a Registered Dietitian (RD), regulated by the Ontario College of Dietitians. She is a mom, YouTuber, Blogger, award winning cookbook author, media coach specializing in food and nutrition influencers, and a frequent contributor to national publications like Healthline and on national broadcast TV shows.

www.abbeyskitchen.com/about-abbey/

Last Updated December 30, 2023. Published November 1, 2023 By Abbey Sharp 11 Comments

Natural Metabolism Boosters | How to Speed Up Metabolism

Looking to speed up your metabolism? I cover natural metabolism boosters and explain what actually works, from a Registered Dietitian.

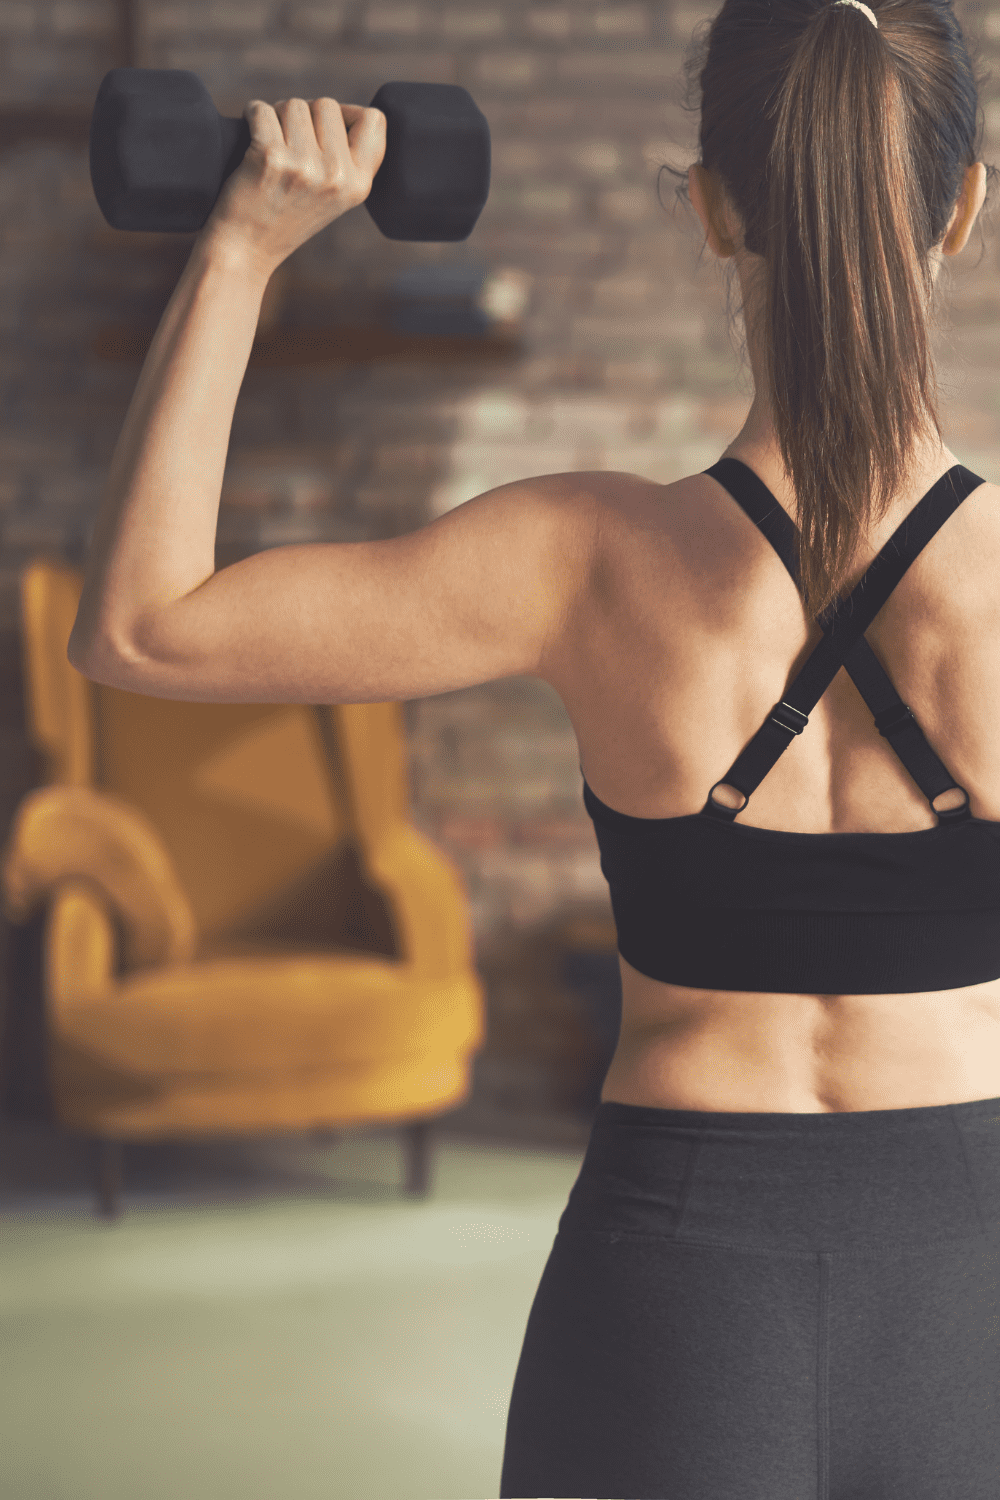
Woman lifting weights.

If I were to ask 10 people what they want to know about health, I guarantee a lot of them would want to know the best natural metabolism boosters to speed up their metabolism.

Just think back to your diet during your teenage years. When I was 16, I would get up and have a little Lucky Charms before I left home, get to school early (to watch the boys play B-Ball of course), and enjoy a healthy breakfast of chocolate milk and sour skittles (sometimes instead of skittles I would have a chocolate cookie from our cafeteria the size of my head). At lunch time, we had some additional options. Sometimes I would have a supersize fry from McDonalds (this I knew wasn’t the best choice). Other days I thought I was being healthy when I went for the Chinese Lo Mein, because hey, there were vegetables there. My super healthy days featured a foot long Italian meat and cheese sub and I would split a large order of spicy fries with my friend. Then I would power through a few more hours of class, before I’d go to my boyfriend’s house and make a big platter of nachos with cheese. Soon after, of course, it was dinner time, so mom would pick up pizza or some other crap and have a little nosh before the evening’s events.

Today I don’t eat ANYTHING like that, yet I could never maintain my 17-year old weight. And that’s what an extra decade does to the old metabolism, folks. This is clearly why we all want to know how to speed up metabolism and the best metabolism boosters.

So I know, I know, I’m being super pessimistic. I actually love getting older and wouldn’t trade my experiences for any aspect of my younger self, but man, to be young and able to bounce back from seemingly anything…

As a dietitian and a woman, people constantly ask me how to speed up metabolism – that is, the amount of calories they burn doing nothing at all. There are a lot of bogus claims out there (a lot of which you’ve probably heard from Dr. Oz or some unqualified blogger), so I decided to investigate some of the most popular natural metabolism boosters.

Natural Metabolism Boosters

Weight Training

So many women skip the weight room in favour of cardio, but I say incorporate resistance training when you can. You may not know this, but muscle is one of the best natural metabolism boosters.

Muscle is much more metabolically active then fat mass- burning 6 calories per lb vs 2 calories per lb, respectively. It’s therefore become pretty commonly accepted knowledge that the higher the muscle mass, the higher your metabolism. Boosting muscle mass while cutting calories to lose weight is considered one of the best ways to lose weight without damaging your metabolism.  Aim to add in at least 1-2 weight training sessions at the gym to help maintain or build muscle mass so your metabolism doesn’t slow with age.

Eat When You’re Hungry

Eating pasta when hungry as a natural metabolism booster.

A lot of us have heard that waiting long stretches between meals can have the negative effect of slowing down metabolism, so it’s often recommended that you eat every 2-4 hours to boost it up. I would agree.

The research (here, here and here) suggests that having regular small meals every few hours is a good way to keep that fire burning all day long. Having said that, I would never recommend eating even though you’re not hungry so I don’t believe in setting a strict schedule of when to snack and eat, and forcing yourself through a meal you’re not ready for. I also do believe that one of the reasons why people don’t eat more often is not because they are not hungry in between snacks (I know they are by the ravenous state they’re in by the time they get to a main meal)- it’s because they don’t take the time to ask their body, “hey, am I hungry enough to eat?” If you gave your body the opportunity to be nourished regularly, you would be more in tune with your regular hunger, would then feed that hunger more regularly, your metabolism would kick up, and you would even more easily be able to feel that hunger.

High Intensity Interval Training

Man doing high intensity interval training for a natural metabolism booster.

The first time my trainer told me I may be doing myself more harm than good by jogging on the treadmill, I didn’t want to listen. I didn’t want to change my routine- I had worked my way up to be able to jog for a long time and ultimately, I was comfortable!

But when I pushed myself to try interval training (sprinting for a short period of time and then resting for at least as long), I not only was able to cut my work-outs down in time but I saw an immediate improvement in my body shape. I actually started to see a reduction in fat and maintenance of muscle. I also noticed I was so much more hungry after a workout, assumedly it was due to what they call the “afterburn” effect. In other words, my metabolism was speeding up. 

Research suggests that compared with more moderate or low intensity steady-state training, HIIT induces far greater fat loss and a more substantial boost in metabolic rate following the exercise session. That means you can spend less time in the gym for a better body outcome. Yes, this is a great natural metabolism booster.

Getting Enough Protein

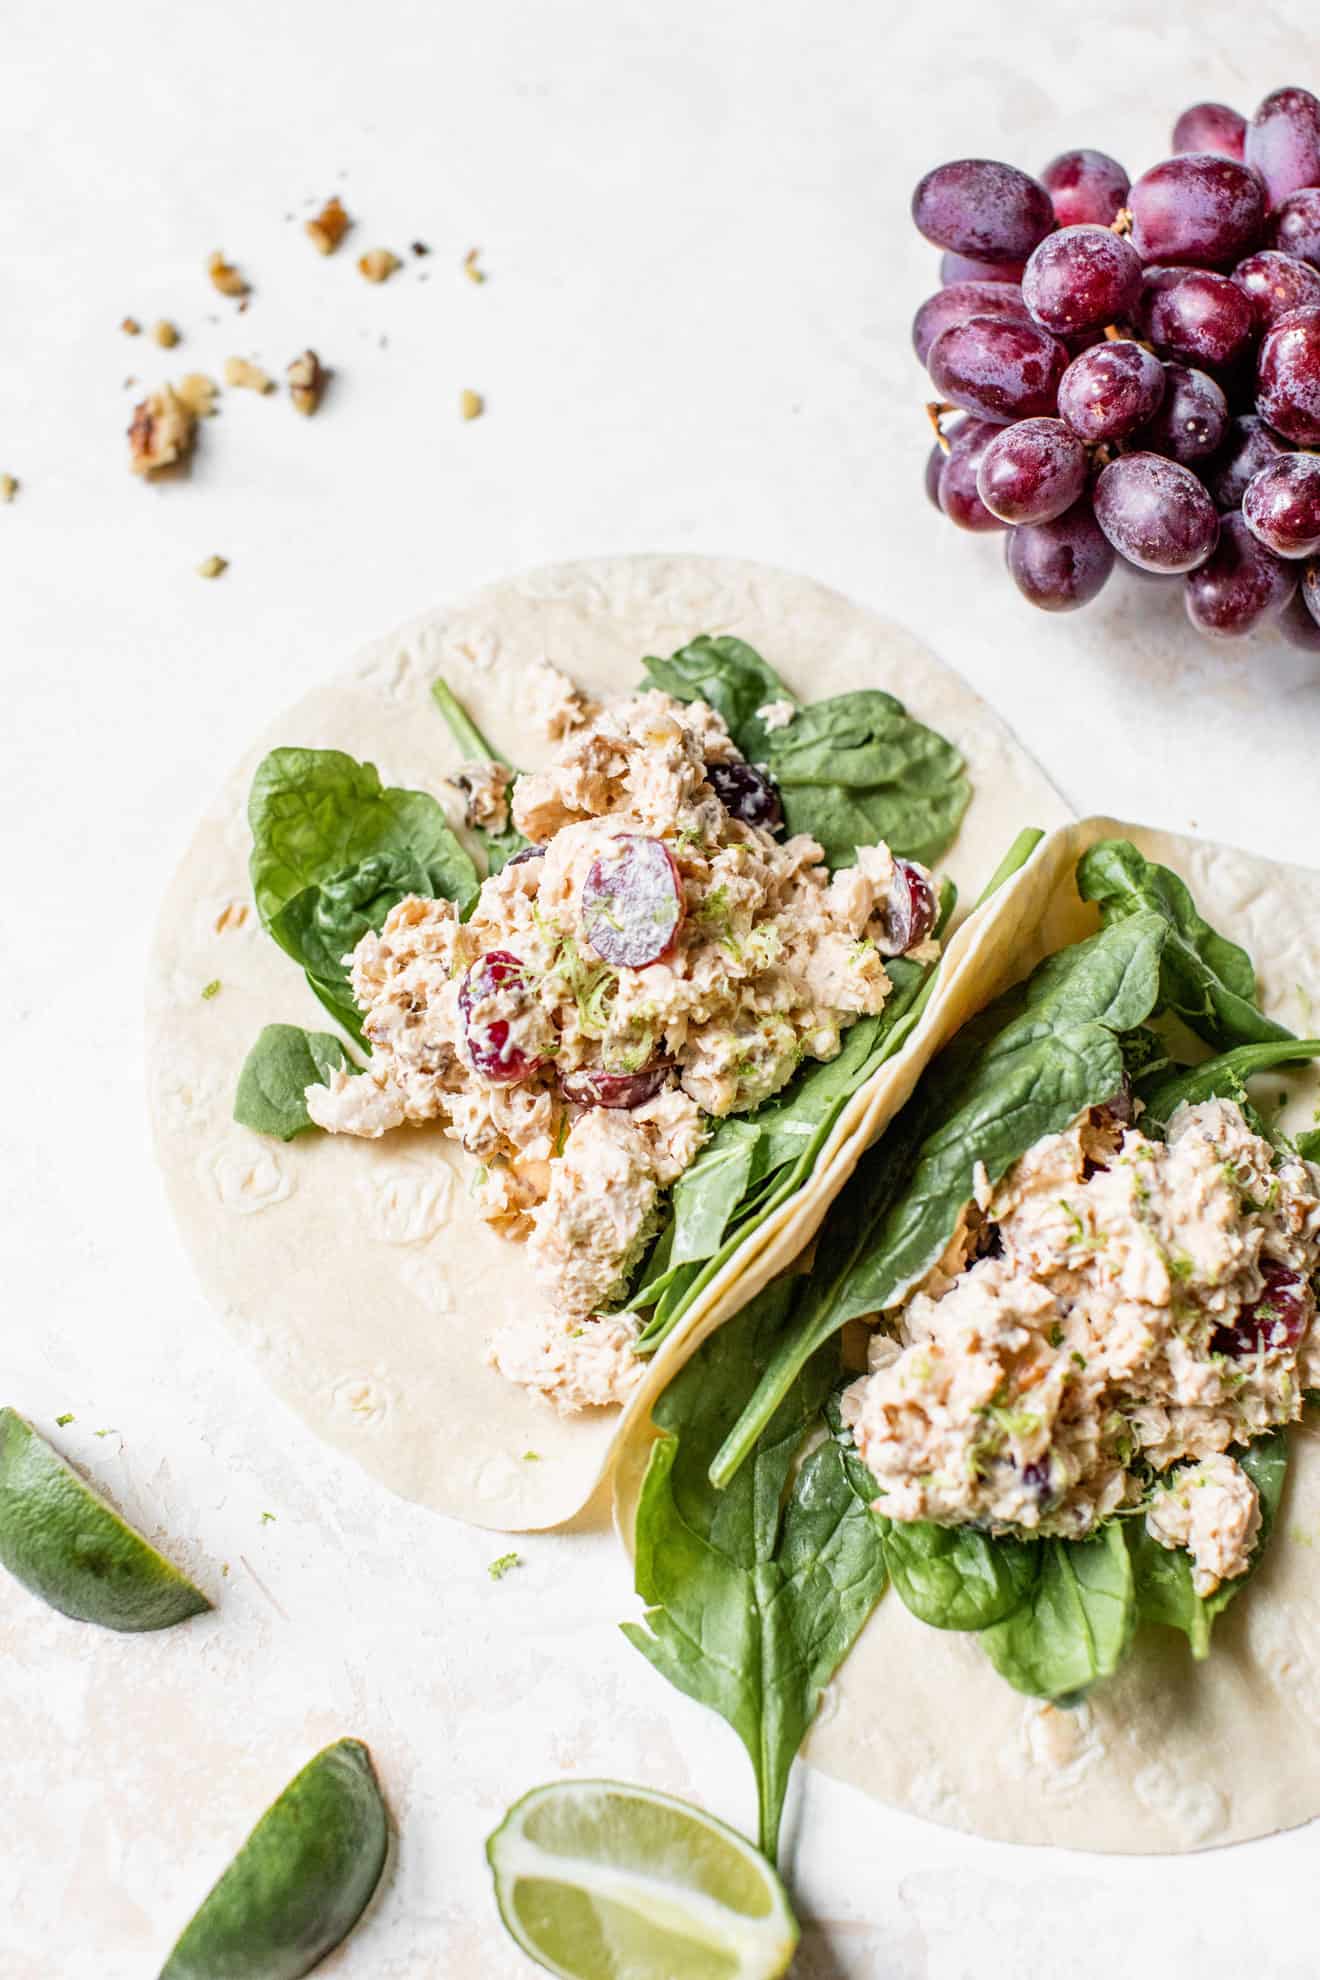
Eating a high protein chicken salad wrap as a natural metabolism booster.

While adding protein to your diet will not add muscle (so protein foods are not in themselves metabolism boosters), protein is essential for supporting muscle mass. So this point goes part and parcel with the weight-training message. That is, you want to make sure you’re eating enough protein to support your activity needs – somewhere around 1.6-2.2 g/kg, or ideally, 30 grams of protein/ meal for those you are weight training and/or trying to lose fat.

On top of that, there is also a fair bit of research to support the fact that protein has a much greater “thermogenic” effect (that is, it takes energy to process in the body) than carbohydrates or fat, which for a diet made up of 30% of calories from protein, may create a caloric deficit between 22-60 calories a day. Yes, that’s a small deficit at a high protein intake (most Canadians get about 15-17% of calories from protein), but I feel adopting a new dietary pattern like getting more protein (rather than removing or adding an isolated food or compound like caffeine) is easier to do long term. Hey, over a year, that could mean a difference of 2.5-6 pounds!

Drinking More Cold Water

Glass of cold water.

The theory here is that cold water takes energy to warm up, and that energy essentially burns calories. While a small study in the Journal of Endocrinology and Metabolism did find an increase in metabolic rate by 30% following the consumption of 2 cups of water, the researchers concluded that it would really only burn off an additional few calories a day. In other words, don’t think your cold water can compensate for the box of Tim Bits you just scarfed down.

Having said that, water is extremely important to health and/or weight loss in general because it’s calorie free, essential for all metabolic processes and can help you feel more satiated before or during a meal. So in conclusion, it may not be the strongest natural metabolism booster but you should still aim to get at least 2 L each day (cold or otherwise).

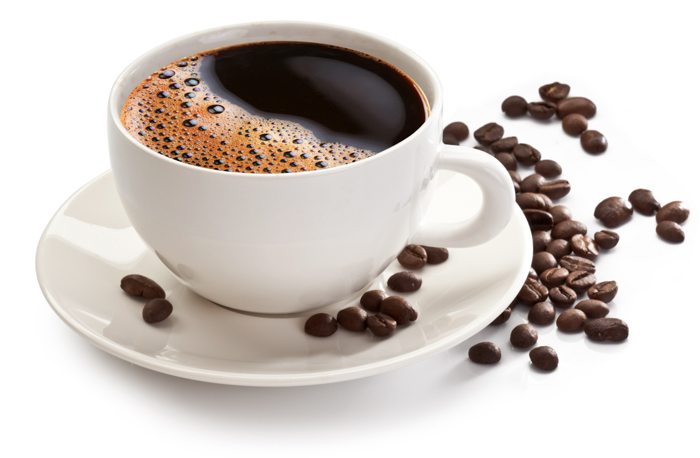
Coffee

Cup of black coffee on a saucer.

This has actually been studied quite a lot but most of the studies are done with very small sample sizes and like the water, show negligible effects when the coffee is consumed at normal (healthy) amounts. The most significant findings I have seen was a 5% increase over 24 hour energy expenditure which would amount to somewhere around the 75-100 calorie/ day mark. That would be pretty awesome, but I would like to see this study replicated continuously on a larger sample with greater controls for dietary confounders.

It’s also worth noting that if you put sugar and cream in your coffee, you’ll definitely cancel out any possible metabolic gains. So.. this is probably not how to speed up metabolism, folks.

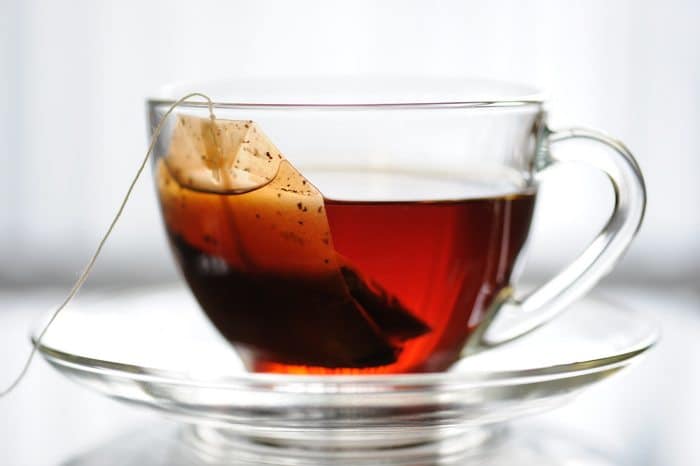
Tea

Drinking tea as a natural metabolism booster.

Like coffee, it’s been speculated that the most popular drink in the world, tea, may be a natural metabolism booster. Some researchers have wanted to prove that it’s not just the caffeine that has a calorie-burning power, but rather, that the catechins in green tea may have other thermogenic properties, as well. While they did find a modest boost in metabolism (probably to the amount of about 50-60 calories/ day), again, sample sizes have been small so I don’t expect this to be a magic pill. Having said that, if you love tea, by all means, go for it! Green tea is calorie free and a wide range of health properties for general good health but may not be how to speed up metabolism.

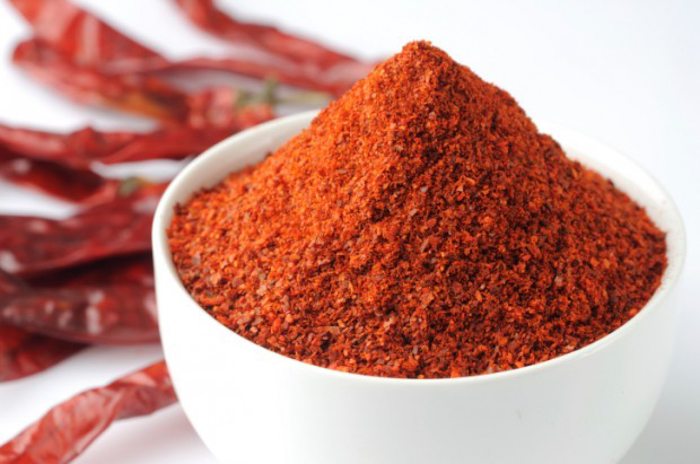
Capsaicin

Bowl of chili powder.

Capsaicin is the compound that makes hot chili peppers spicy and has been thought to have metabolism boosting properties. While the research on humans is still young, a small study in the Journal of Nutritional Science and Vitaminology found that eating a little over a gram of red chili pepper could help counteract the metabolism-slowing effect of a 20% reduction in consumed calories.  Others have echoed this by demonstrating small impacts on post-meal energy expenditure (here and here), fat burning and carbohydrate oxidation.  All that said, large good quality research is still very limited and what impacts we do see are relatively small. So if you like heat, go for it- add all the chili you can, but I wouldn’t ruin your eating experience for the sake of a potential small rise in metabolism.

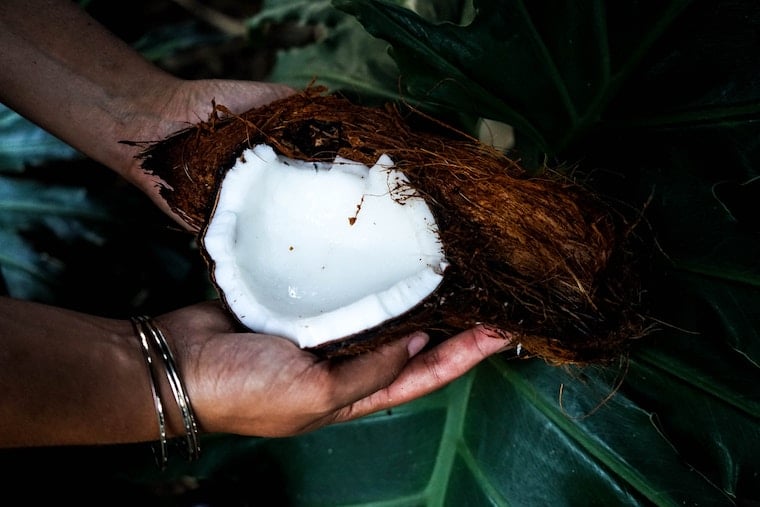
Medium Chain Fatty Acids (MCTs)

Two hands holding a coconut.

The diet world has recently gone crazy for products like coconut oil due to their levels of Medium-Chain Fatty acids. These are saturated fats that emerging research suggests may be processed and stored with less efficiency than other fats. This leads to speculation about their role as metabolism boosters. While there are some small studies (here and here) to support an increased thermogenic effect when compared with other saturated fats, the samples are so small and the impact so negligible, it’s likely not worth fussing about.

Bottom line, if you want to substitute some of the butter or vegetable oil in your diet with coconut oil, go for it. Personally, I love the subtle coconut flavour. But it still has about 100 calories per tablespoon so don’t go downing the stuff expecting it to miraculously boost your metabolism! Ultimately, is it how to speed up metabolism? Probably not.

Eat Breakfast

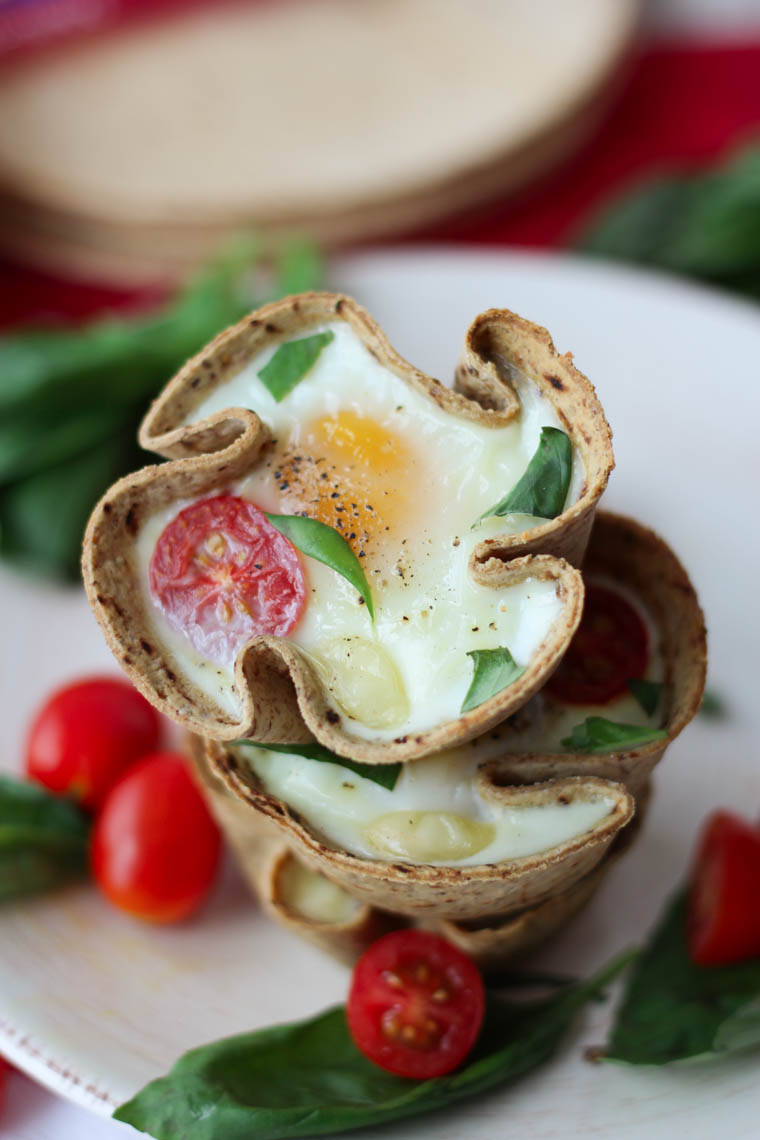
Close up of a stack of veggie egg muffins with tomatoes and basil.

You’ve been told that breakfast is the most important meal of the day for years because it supposedly jump starts metabolism after an overnight fast. We’ve pretty much all accepted this as gospel, but what does the literature say? Well, honestly, it’s confusing to say the least. A meta-analysis in the American Journal of Clinical Nutrition looked at various studies that made claims linking breakfast skippers to obesity, and found that in general, findings were riddled with bias and research lacking probative value. It seems that so many of us have been socialized to believe that breakfast is the key to dieting success, we’ve failed to question how and if this is really true. While this research is still in its infancy, a small randomized control trial recently found that eating breakfast doesn’t actually have a significant impact on resting metabolism. It might not even impact how much you eat later on in the day as is often assumed as the mechanism for the fasting and obesity link. Even though the research isn’t convincing, I still believe some breakfasts may be metabolism boosters if we link this concept to the previous idea of eating more frequent meals vs. binging on one big meal. Furthermore, I think there are plenty of good reasons you should try to fit in a morning meal, including more stable blood sugars, better daytime performance, and more mindful meal choices later in the day.  Ultimately, though, we do need more research to say this is how to speed up metabolism.

Fibre

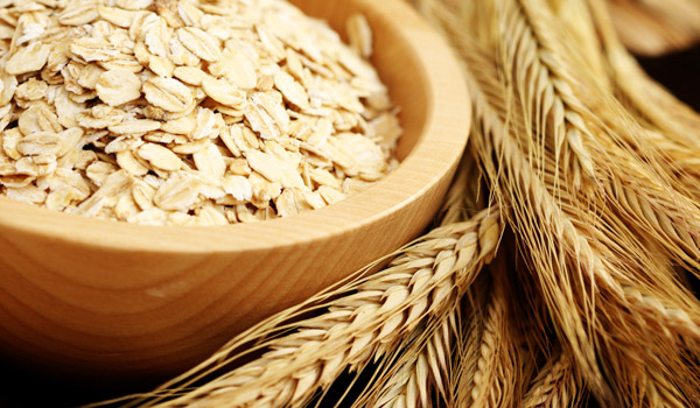
Bowl of oats and wheat grains.

I’ve read in many places that fibre will increase metabolism but the research just doesn’t support this theory at all. I am pretty hardcore about recommending a high fibre diet because it has been repeatedly shown to enhance satiety (so you eat less) but two studies (here and here) actually found it decreased post-meal metabolism slightly. Again, super small sample size here, folks, so I wouldn’t think much of it either way. Bottom line- eat more fibre to feel full, not to burn calories.

Getting Enough Sleep

Toddler sleeping peacefully.

There are a number of studies that have looked at the impact of sleep on the appetite hormones leptin and ghrelin which brings up questions about how to speed up metabolism with sleep. Leptin is a hormone that reduces appetite and increases energy expenditure- you want this to go up. Ghrelin, on the other hand, is a hormone that increases appetite and reduces energy expenditure- you want this to go down. 

Studies consistently show that a poor sleep (4-5 hours) reduces leptin and increases ghrelin, resulting in an increase in hunger and spike in cravings for salty carbohydrates. Others confirm the relationship, including a very large meta-analysis totally over 600,000 participants, which showed that an increased BMI was associated with short sleepers.  

Research also shows that poor sleep patterns may alter glucose metabolism to look like that of someone with Type 2 diabetes. That is, it decreased the patient’s sensitivity to insulin (requiring more of it to metabolize glucose), and lowered levels of thyroid stimulating hormone (which in turn may lower metabolism).

I did find small one study that found that short sleepers burned more calories in the day (about 100 more), but this is possibly because they were more active (and not asleep) and those calories were more than compensated for by a raging appetite. We definitely need more research on metabolism and sleep, but in the meantime, there are plenty of good reasons to clock in some serious ZZZs.

Bottom Line on Natural Metabolism Boosters

I know, I know, there aren’t any magic pills or easy answers on how to speed up metabolism. But the truth is, weight loss- both initial and maintenance – is never an easy feat. Turning back the hands of time on your metabolism can take a fair bit of effort and time, but ultimately, supporting a healthy metabolism with some of these strategies (especially weight training) is a great tactic to help you reach your long-term weight and health goals.

More Blog Posts You Might Like

If you want to learn more about maintaining a healthy metabolism, read these posts next:

  • Best Metabolism Booster | Can Food and Exercise Boost Our Metabolism?
  • Protein for Weight Loss and Metabolism
  • How to Fix a Slow Metabolism (Reverse Dieting vs. All In)
  • Tips to Gain Weight from a Registered Dietitian | How to Deal with a Fast Metabolism

Do you have natural metabolism boosters you’re curious about? Leave me a comment below and I will happily investigate!

Abbey Sharp

Abbey Sharp is a Registered Dietitian (RD), regulated by the Ontario College of Dietitians. She is a mom, YouTuber, Blogger, award winning cookbook author, media coach specializing in food and nutrition influencers, and a frequent contributor to national publications like Healthline and on national broadcast TV shows.

www.abbeyskitchen.com/about-abbey/

Last Updated October 29, 2023. Published October 30, 2023 By Abbey Sharp 12 Comments

Crustless Chicken Pot Pie Recipe | Low Carb

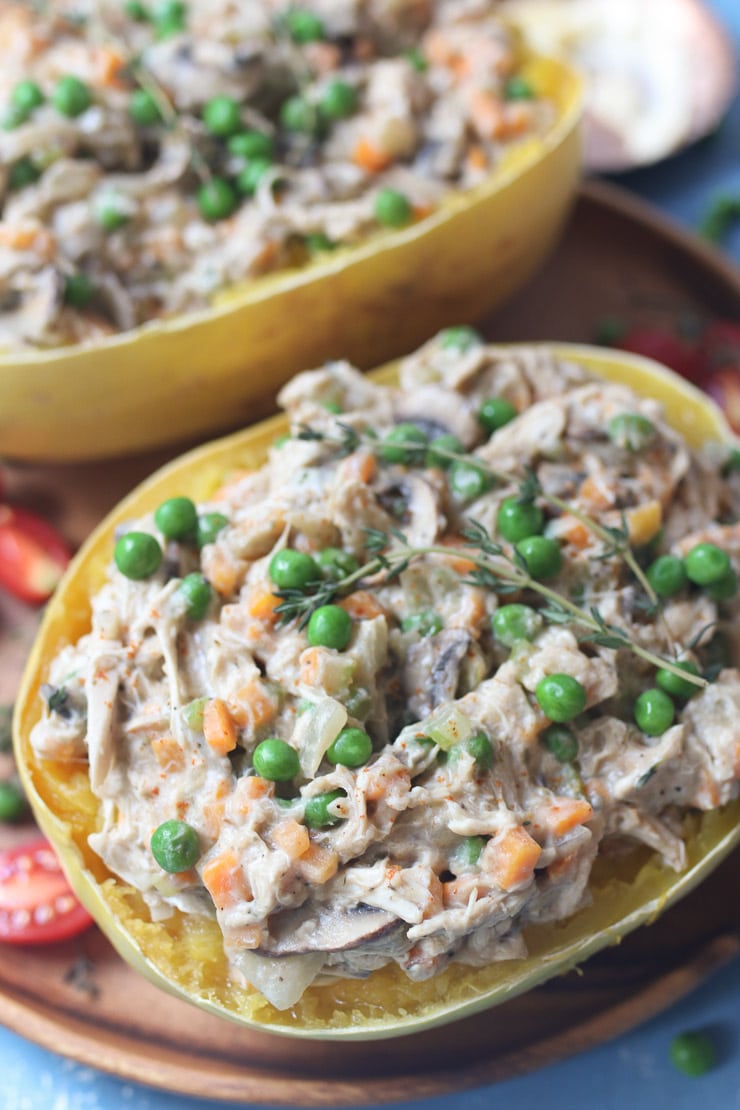
Squash stuffed with chicken pot pie.

 This Crustless Chicken Pot Pie Recipe is a tasty and easy family friendly dinner that’s dairy free and gluten free that tastes like the classic meat pie everyone loves.

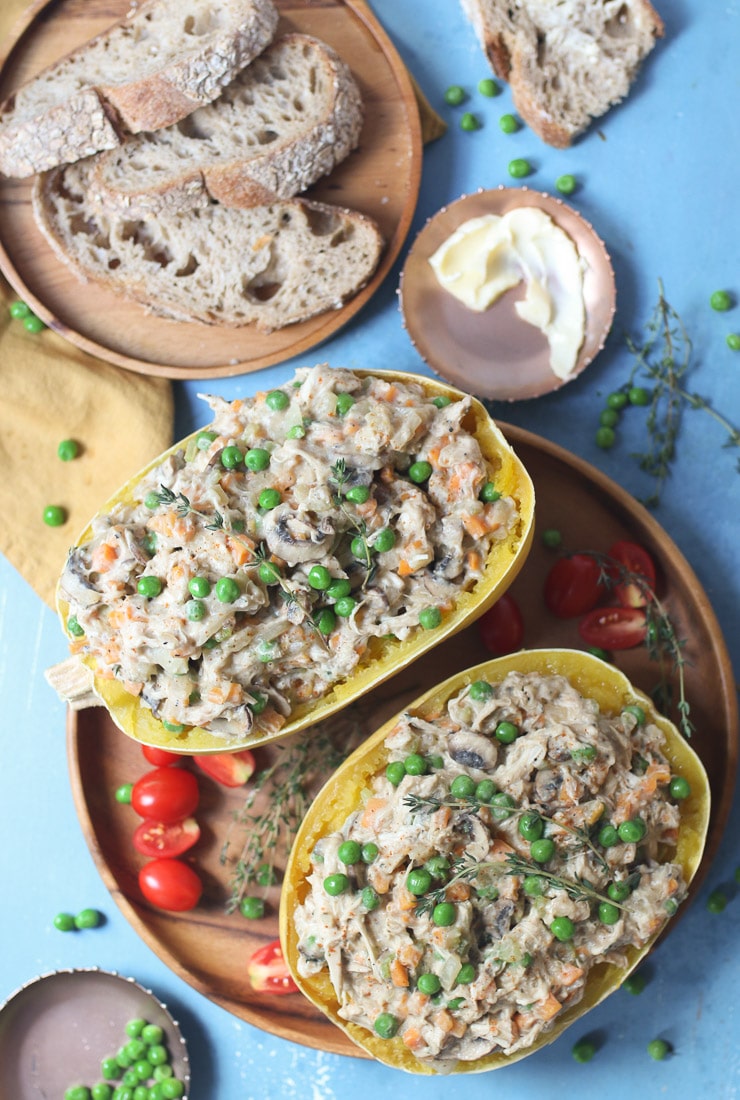
Spaghetti squash bowl served on a wooden plate next to bread.

I grew up eating a lot of chicken pot pie. I mean, it wasn’t made from scratch. My mom used a rotisserie chicken and a can of soup with frozen veggies and stuffed it into a frozen puff pastry shell, but MAN it was good.

Well this week I was craving a taste of nostalgia, so I wanted to reinvent the classic chicken pot pie but lighten it up, and pile it onto a nutrient rich veggie- spaghetti squash! Update – it was SO. GOOD.

Table of contents

  • Why This Recipe Works
  • Key Ingredients
  • How to Make This Recipe
  • Expert Tips
  • Recipe FAQs
  • More Recipes You Might Like

Why This Recipe Works

This crustless chicken pot pie recipe is full of healthy goodness. I love this recipe for my family because

  • It’s packed with vegetables and even its own “bowl” is a vegetable!
  • It’s dairy free – we skip using any canned soup by making our own version.
  • It’s very easy to customize – you can easily use whatever vegetables you have in your fridge!

Key Ingredients

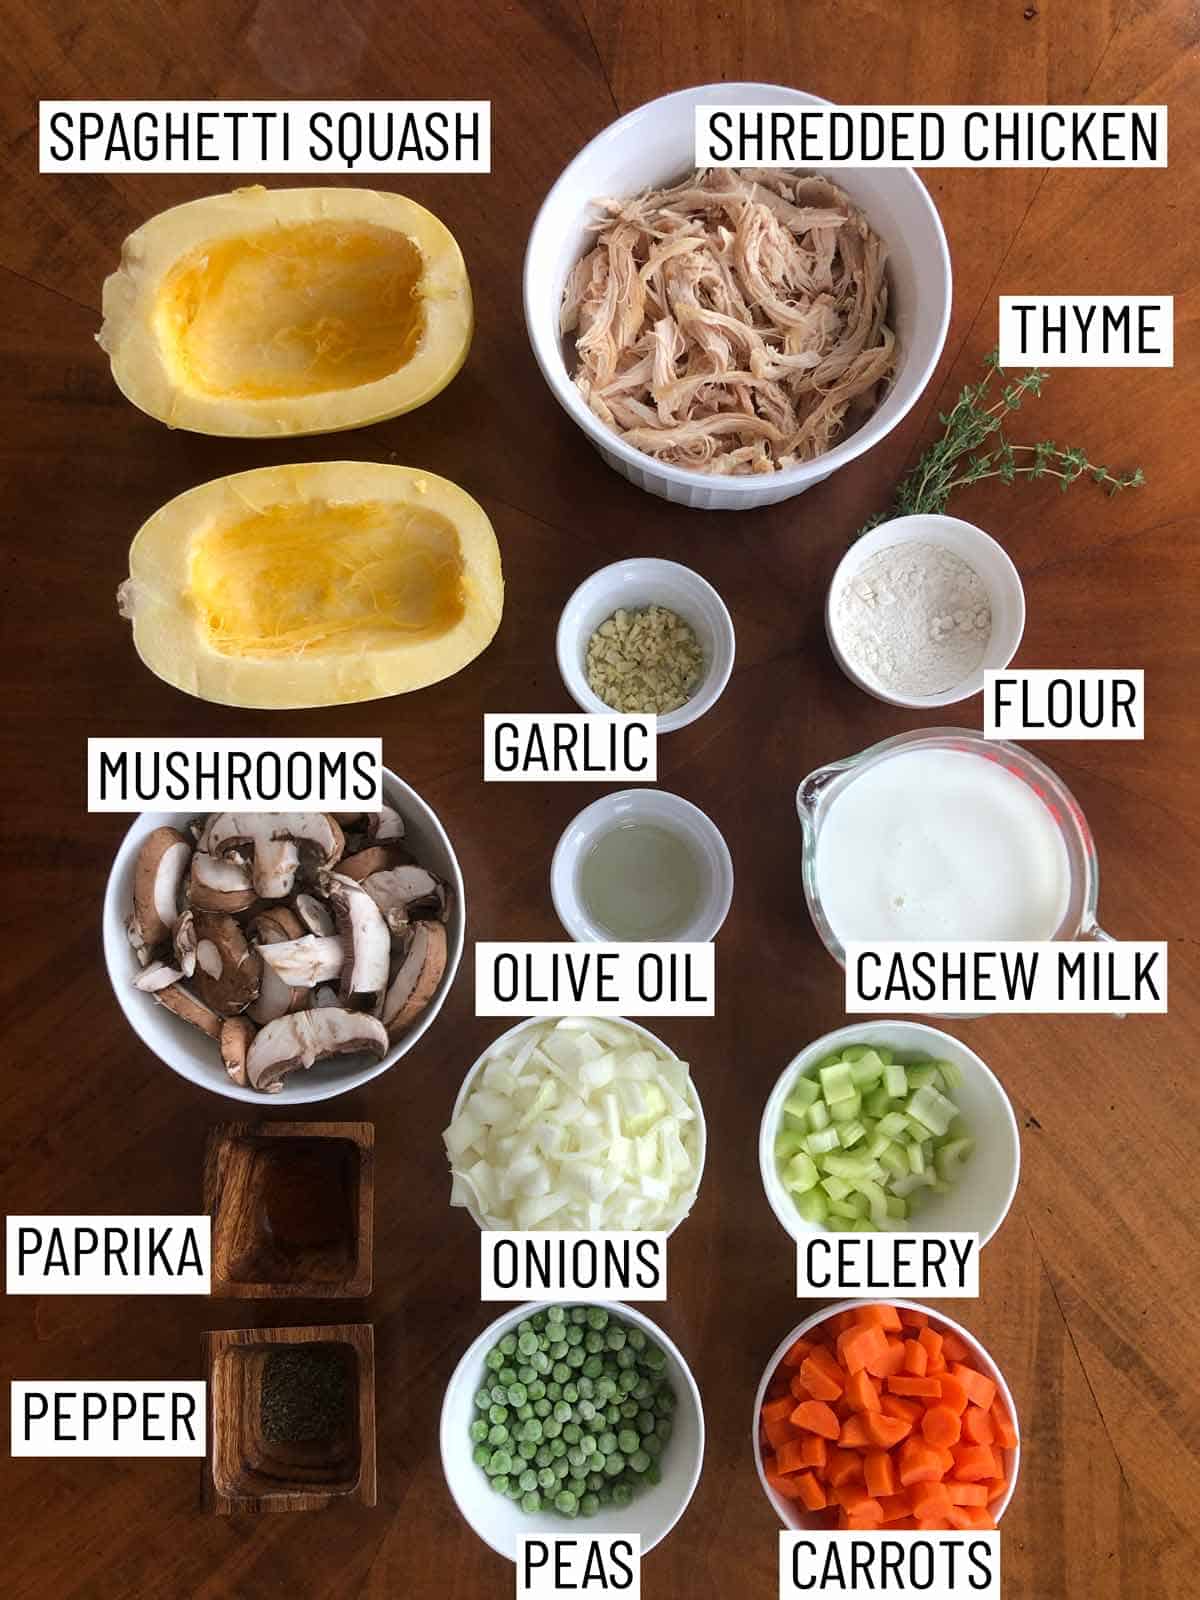
Overhead ingredients needed for Spaghetti Squash Chicken Pot Pie.

Spaghetti Squash — This will add extra fibre and veggies to the classic chicken pot pie (and also give it a fun lil twist!).

Mirepoix — Aka carrots, onion, and celery. They keep the dish well balanced so don’t skip out.

Thyme Leaves — This will give the chicken pot pie the earthy and herby flavour. 

Cremini Mushrooms — We love adding mushrooms for more earthy flavour and extra veggies! 

Smoked Paprika — Smoked paprika will add some zesty flavour to the pot pie if you like a little bit of a kick. But if you are sensitive to spice, feel free to omit this ingredient. 

Unsweetened Cashew Milk — Instead of cream, this recipe uses cashew milk. I prefer it over soy or almond milk because I find it yields a much creamy texture. 

Gluten Free Flour — The flour will combine with the cashew milk to make a delicious dairy free roux (without the cream) so you can skip the canned stuff!

Chicken — You can make your own shredded chicken or you can buy a rotisserie chicken and shred it up for this low carb chicken pot pie. Whatever you find to be easier.

Frozen Peas -— Since no classic pot pie can go without green peas! I like to use frozen because it makes it super easy to add in.  

How to Make This Recipe

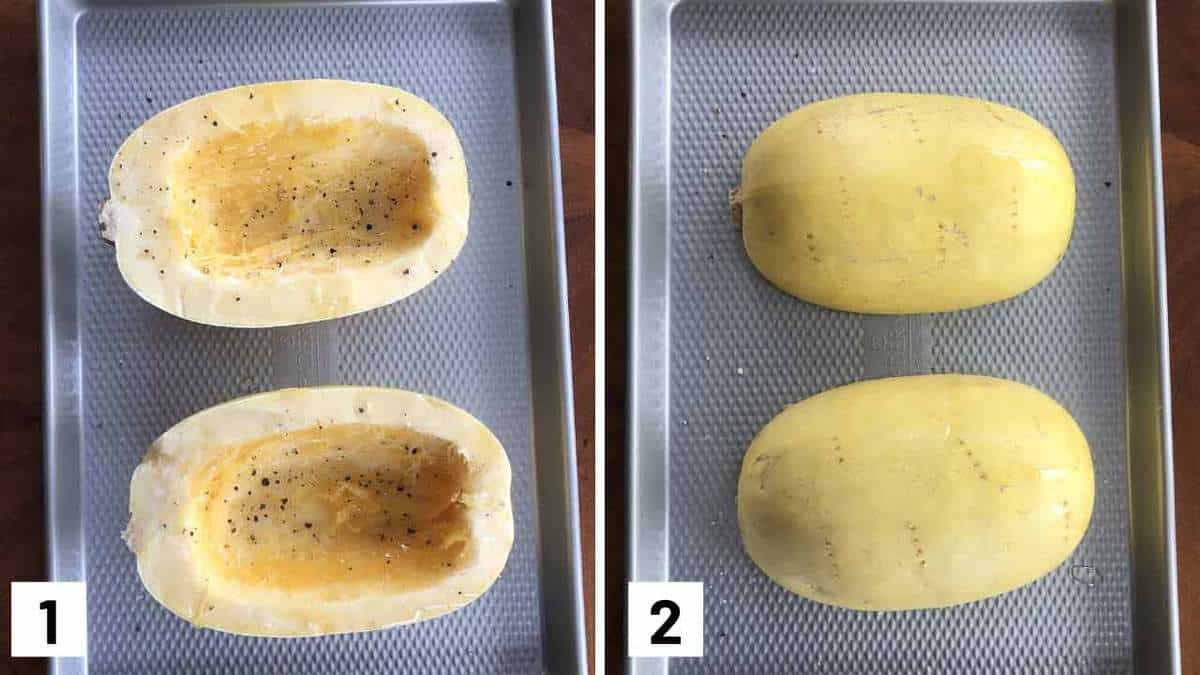
Step by step photo showing halved spaghetti squash on a sheet pan to be roasted.

Step 1: Preheat oven to 400F. Slice the squash in half lengthwise and scoop out the seeds. Drizzle the insides of the squash with olive oil and sprinkle with salt and pepper.

Step 2: Place the squash cut side down on the baking sheet and poke a few holes in the top. Roast for 30-45 minutes or until its fork tender. Remove and allow to slightly cool, then shred the insides with a fork. Set aside.

Step by step photos showing ingredients being added to a pan, coated with flour, then simmered with milk.

Step 3: Meanwhile, heat the oil in a large nonstick skillet over medium heat. Add the onion, carrots, celery, garlic, mushrooms, thyme, paprika, and oregano and cook until the vegetables soften, about 7 minutes.

Add in the flour and stir until it coats the vegetables.

Add the cashew milk and cook over medium low heat until the sauce thickens.

Step by step photo showing shredded chicken and peas added to a pan and then combining it into the hallowed spaghetti squash.

Step 4: Add in the chicken, peas and then season with salt and pepper, to taste.

Step 5: Serve on top of the pulled spaghetti squash and garnish with thyme leaves and enjoy this low carb chicken pot pie.

Expert Tips

This crustless chicken pot pie recipe stays low carb because they don’t have a pastry shell. If you’re missing that crunch factor, you can serve with some low carb crackers if you desire.

Additional vegetables you can add are corn, broccoli florets, cauliflower florets, bell peppers and more! Just be such to cut them up so they’re bite sized pieces. Add what you have on hand!

If you want to chop up all your ingredients quickly and finely, I suggest using the chop function of a food processor. Super easy!

Recipe FAQs

Can I Make this Crustless Chicken Pot Pie Recipe with Dairy or Gluten?

Of course! You can simply use regular milk in place of the cashew milk, and regular flour in place of gluten free flour in the roux.

Can I Microwave the Spaghetti Squash?

Yep! Just place cut side down on a plate, cover with plastic wrap and cook on high for about 7-10 minutes, checking every few minutes until it’s tender enough to pull.

Could I Make this Chicken Pot Pie Vegan?

I had a few people ask me if they could make the filling vegan! It wouldn’t exactly be chicken pot pie, but you could use jackfruit or any fake chicken meat. I would just throw it in at the last minute while you’re finishing the sauce to warm through.

Could I Meal Prep This Recipe?

You can definitely make this ahead of time and reheat it when you’re ready to enjoy it!

Squash stuffed with chicken pot pie.

More Recipes You Might Like

Want more spaghetti squash or veggie noodle recipes like this low carb crustless chicken pot pie recipe? Here are some of my favs: 

  • Vegan Curry with Spaghetti Squash Noodles 
  • Spaghetti Squash Burrito Bowl 
  • Vegan Avocado Zucchini Noodles with Pesto 
  • Vegan Hummus Pasta with Zucchini Noodles 

Now friends tell me- did you grow up eating chicken pot pie? How did your mom make it? Have you tried this gluten free, dairy free, lower carb version?

Squash stuffed with chicken pot pie.
Print Recipe
5 from 6 votes

Crustless Chicken Pot Pie Recipe | Low Carb

This Crustless Chicken Pot Pie Recipe is a tasty and easy family friendly dinner that's dairy free and gluten free that tastes like the classic meat pie everyone loves.
Prep Time15 minutes mins
Cook Time1 hour hr 5 minutes mins
Total Time1 hour hr 20 minutes mins
Course: Main Dish, Dinner, Main Course
Cuisine: American
Servings: 4 people
Calories: 206kcal
Author: Abbey Sharp

Ingredients

  • 1 Spaghetti squash halved lengthwise
  • 1 tbsp extra virgin olive oil
  • ½ onion finely diced
  • 1 ½ cup carrots finely diced
  • ½ cup sliced celery finely diced
  • 2 cloves garlic minced
  • 227 g package cremini mushrooms thinly sliced
  • 1 tbsp thyme leaves
  • ½ tsp sweet smoked paprika
  • 1 ½ tsp dried oregano
  • ¼ cup gluten free flour
  • 2 ¼ cups unsweetened cashew milk
  • 2 rotisserie chicken breasts shredded
  • ½ cup frozen peas
  • Thyme leaves for garnish
  • Salt and pepper to taste

Instructions

  • Preheat oven to 400 F. Slice the squash in half lengthwise and scoop out the seeds. Drizzle the insides of the squash with olive oil and sprinkle with salt and pepper.
  • Place the squash cut side down on the baking sheet and poke a few holes in the top. Roast for 30-45 minutes or until its fork tender. Remove and allow to slightly cool, then shred the insides with a fork. Set aside.
  • Meanwhile, heat the oil in a large nonstick skillet over medium heat. Add the onion, carrots, celery, garlic, mushrooms, thyme, paprika, and oregano and cook until the vegetables soften, about 7 minutes. Add in the flour and stir until it coats the vegetables. Add the cashew milk and cook over medium low heat until the sauce thickens.
  • Add in the chicken, peas and then season with salt and pepper, to taste.
  • Serve on top of the pulled spaghetti squash and garnish with thyme leaves.

Video

Notes

  • This low carb chicken pot pie stays low carb because they don’t have a pastry shell. If you’re missing that crunch factor, you can serve with some low carb crackers if you desire.
  • Additional vegetables you can add are corn, broccoli florets, cauliflower florets, bell peppers and more! Just be such to cut them up so they’re bite sized pieces. Add what you have on hand!
  • If you want to chop up all your ingredients quickly and finely, I suggest using the chop function of a food processor. Super easy!

Nutrition

Calories: 206kcal | Carbohydrates: 35g | Protein: 6g | Fat: 7g | Saturated Fat: 1g | Cholesterol: 1mg | Sodium: 181mg | Potassium: 703mg | Fiber: 8g | Sugar: 12g | Vitamin A: 8710IU | Vitamin C: 21mg | Calcium: 105mg | Iron: 2mg
Abbey Sharp

Abbey Sharp is a Registered Dietitian (RD), regulated by the Ontario College of Dietitians. She is a mom, YouTuber, Blogger, award winning cookbook author, media coach specializing in food and nutrition influencers, and a frequent contributor to national publications like Healthline and on national broadcast TV shows.

www.abbeyskitchen.com/about-abbey/

Last Updated October 24, 2023. Published October 24, 2023 By Abbey Sharp 22 Comments

How Much Candy is Too Much? Should We Provide Our Kids Sugar Free Halloween Candy?

Girl holding pumpkin.

How much candy is too much? We’re going to discuss a Dietitian’s guide to Halloween candy rules and sugar in your kids’ diet, plus how to use Halloween as a learning opportunity to help your kids hone their intuitive eating skills.

Multiple types of candy.

I can’t believe I’m writing this but Halloween is on its way, folks. That means it’s time to hit up the Value Village and stock up on Halloween candy. While I know a lot of parents get totally freaked out about their kids binging on sugar and wondering how much candy is too much, but I actually think we should think of it as a learning opportunity to help our kids work on their intuitive eating skills.

Should you let your kids eat all their Halloween candy? Should We Only offer sugar-free candy?

The simple answer to the first question is, sure! If that’s what their body tells them to do, the likelihood of them going on a week-long Halloween candy bender is slim to none. That is, IF we approach the sugar without fear.

According to Ellyn Satter, a Family Therapist and Pediatric Dietitian, we can naturally teach our children to manage Halloween candy intake without rules or restrictions (example: only offering sugar free candy). In fact, she recommends allowing your child to have candy as part of your meal and occasionally unlimited at snack times. Now, before you think this is crazy, hear me out.

Normalizing Halloween Candy

When we tell our children that certain foods are “good” (sugar free candy) or “bad” (traditional Halloween candy), we are telling them that the “bad” food is something that should be rare. And if we know anything about diet culture, we know that restricting foods and making them a rarity hardly ever works.

Instead, if we normalize candy (e.g., that mini Halloween chocolate bar as opposed to sugar free candy) and allow our children to enjoy these at meals and snacks, then they will have a more relaxed view on these foods, making them no more special than a piece of bread or cheese.

Conversely, if we teach our children that candy and “junk” food are so special they must be limited, they will likely go overboard any time they get it. Why? Because they know it’s not going to be there forever, it’s exciting, and they better “stock up” (read: binge) while they can.

Unfortunately, when children create this “stock up” mentality, it makes it difficult for them to cope with their food environment when they reach adulthood. Think about pizza for a second. For some people, pizza is a rare “treat”. As a result, they’ll overindulge because they feel it’s a special occasion and they won’t be able to have it again for a while. For others, it’s just another meal that they can have whenever, wherever, making it less tempting to overdo.

If we can have these experiences, imagine if we taught this to our kids while they are young and impressionable! Kids love exciting things. They love new, shiny stuff. By normalizing candy and treats, instead of obsessing over how much candy is too much, they aren’t so special and shiny anymore; and just like that birthday present you bought them a year ago – they’ll be over it pretty damn fast.

But won’t the sugar and Halloween candy cause behaviour problems? Do I need to buy sugar free candy for Halloween?

Kids playing.

Actually according to research, no it won’t, and you do not need to be purchasing sugar free candy for Halloween.

Despite common belief, multiple research studies (here, here, and here) have shown that sugar consumption is not associated with hyperactivity or behavioural problems in children. If your child gets “hyper” after eating sugar, it’s likely due to the excitement around them and the fact they just got a treat that they rarely ever get!

While sugar is not a super nutrient dense food per se, it’s not the worst thing either. And if we’re really going to focus on sugar as the villain, let’s take a look at some common “healthy” kid snacks and compare them to the Halloween treat sizes.

“Healthy” Kid Snacks vs Halloween Treats

Bear Paws Banana Bread

 One pack:

12 grams of sugar

Chobani Drinkable Yogurt

One container:

15 grams of sugar

Raisin Bran 

One cup (no milk):

14 grams of sugar

Kit Kat Treat Size

6 grams of sugar

Reese’s Peanut Butter Cup Treat Size

8 grams of sugar

Fuzzy Peaches Treat Size

9 grams of sugar

What most people don’t realize is that A LOT of “healthy” kids snacks contain added sugar. Sometimes just as much or more than the Halloween candy. I really don’t think any of it is a big deal, and that there are still nutritional benefits to getting yogurt in even if it has sugar. But I just point it out because parents don’t seem to turn their nose up at these “healthy” snacks, but freak out about the sugar in Halloween candy. It’s actually all okay in moderation. Sugar free candy shouldn’t be forced. Sugar doesn’t have to be feared. It’s just one more tool in the mom chef’s tool box.

What is interesting to note, however is that because we don’t talk about yogurt like we talk about candy, kids don’t binge on it in secret. There isn’t that moral value attached to it, and it just isn’t special or a rare “treat”. It’s just food. Halloween Candy can also be just food.

A Dietitian’s Guide to Halloween Candy Rules & Sugar Free Candy in Your Kids’ Diet

Girl holding pumpkin.

Here’s my strategy for dealing with Halloween candy, and how not to spend your night worrying about how much candy is too much in your kiddos’ diet.

Step 1: Walk the Streets!

Okay, so this is a step before we even have to deal with the candy “dilemma” but I want to mention it anyway. Halloween is a great opportunity to teach kids about intuitive eating and also a great way to be active as a family. If your living arrangement allows, avoid driving your kid from neighbourhood to neighbourhood for the “good candy”. Instead explore your own neighbourhood by showing them a fun way to stay active. Honestly, what can be a more exciting way to exercise then to get delicious food!

Step 2: Offer Unlimited Candy (not just sugar free candy) on Halloween Night!

At the end of the night when your kids are sorting through their candy stock and bragging to their siblings, they will inevitably want a taste of their own supply. So let them enjoy it! Don’t tell them how many pieces of candy they’re allowed to eat or try to restrict them by only offering sugar free candy. Let them use this opportunity to tune into their innate body wisdom. If they’re not used to having a lot of sweets in the house, they might eat (what you perceive to be) a lot of candy! That’s okay.

This freedom is essential for helping your kids learn how food (certain food, or amounts of food) make them feel. Maybe they have a belly ache, and maybe it’s a good time to help them understand that sometimes when we eat a lot this happens! No judgement. No disappointment. Just observe and move on. Other kids (especially those who have not previously been restricted) may have a very moderate approach to their Halloween candy. They may already trust that there will be something delicious for them tomorrow, and the next day, too.

Step 3: Offer Unlimited Candy for 2-3 Days (again, not just sugar free candy).

The fun is not over – yet. One night is an experiment, but we need to follow through with some consistency for our kiddos to really trust that a) the goodies are not gone forever and b) their body signals are always right if they tune in.

Allow your kids a total of 2-3 days of “unlimited” access and full control over their candy stash. It can stay in their possession and they can eat whatever they want from their bag. Here we are teaching our kids that candy is actually not that special or novel. It’s not worth hiding or binging ,and you won’t have to wait another 365 days to have a treat. Sure it tastes good, but it doesn’t carry the same forbidden excitement factor anymore that makes it nearly impossible not to overeat. It also helps demonstrate that sugar free candy doesn’t hold a higher moral value to traditional candy.

After 3 days, a few things often happen. One, the excitement wears off. It becomes just another food. And two, our kids (even young ones) may start to be able to make the connection that eating a lot of sugar may not make us feel very good. They will very quickly start to eat less and less Halloween candy without any prompting or restricting, and often by the fourth day, they’ve forgotten about their stash all together.

Step 4: Strategically Plan for Candy in Meals and Snacks.

By now, we have neutralized the moral power of Halloween candy. It’s getting boring, and maybe doesn’t even feel so good to eat. Our kids trust us, and they trust their body to guide their hunger and fullness cues. By the fourth day, we can start to implement a Halloween candy strategy similar to the way you manage sugar the rest of the year.

Again, it is VERY important that you don’t dump out the loot (unless that’s what your kid says they want to do) or swap it all now for sugar free candy. It’s also important that we don’t jump to the other end of the spectrum and put our kids on a Halloween candy “detox” without any sweets. However, we can put some structure into the day without interfering with the work we’ve done.

Remember the division of responsibility. We’re in charge of the what, when and where, the kids are in charge of how much, and if they eat. Every parent has their own way they want to organize meals and snacks, but my suggestion is to serve candy at designated meals and snacks. Here are some ideas:

  • Allow your child to choose 1-2 candies to pack into their lunch box to enjoy with a balanced meal. They can eat it first, last, somewhere in the middle or not at all.
  • Allow your child to choose 1-2 pieces of candy as dessert to enjoy with a balanced dinner. Again, in whatever order they want.
  • Occasionally (maybe once a week or so), put out an “unlimited” selection of candy at snack time. Ensure this snack is far enough away from lunch or dinner so that they’re actually hungry for their meal. This occasional treat buffet will give the occasional reinforcement and reminder that sugar is not forbidden, bad or something to be coveted or binged on. There will always be another opportunity for something sweet.

Step 5: Continue to Offer Balanced, Healthy Meals and Snacks.

It’s always a good idea to provide other nutritious options with meals and snacks. Provide a glass of milk with their candy snack to give your child a good source of protein and calcium. Serve their candy dessert with a balanced meal of roast chicken, broccoli and potatoes. Your kid will not live off sugar for life, so try to just be as relaxed about the process as possible.

Final thoughts on Regular Halloween Candy vs Sugar Free Candy

Halloween is a very exciting time for children. It’s a time when kids can be whoever they want without anyone telling them it’s impossible. They get to explore their unreal imagination and genuinely believe that they saw a walking Frankenstein. AND they get a treat! As a parent, you have the ability to create amazing memories of Halloween. Use it as a teaching opportunity to discuss candy and sugar in general. Or, you can nudge them down a road towards an unhealthy relationship with food.

Yes, Halloween is supposed to be about fear, but it shouldn’t be about food fear.

Contribution By: Katey Davidson, RD from Taste Of Nutrition

More Blog Posts You Might Like:

If you liked this blog post discussing how much candy is too much & dealing with excess sugar and kids then you might also enjoy more blog posts about Halloween:

  • Healthy Halloween Treats for Kids (Plus Meal & Snack Ideas Too!)
  • Healthy Dirt Cups (Vegan, Halloween and Kid Friendly)
  • Pumpkin Smoked Salmon Halloween Sandwiches
  • Halloween Banana Ghosts and Clementine Pumpkins | Vegan, Gluten Free Trick or Treat Recipes
  • Halloween Apple and Almond Butter Alien Smiles | Gluten Free Healthy Halloween Halloween Snacks for Kids
  • Healthy Halloween Dessert Dip | Edible Graveyard | Vegan Reduced Sugar Dessert!
Abbey Sharp

Abbey Sharp is a Registered Dietitian (RD), regulated by the Ontario College of Dietitians. She is a mom, YouTuber, Blogger, award winning cookbook author, media coach specializing in food and nutrition influencers, and a frequent contributor to national publications like Healthline and on national broadcast TV shows.

www.abbeyskitchen.com/about-abbey/

Last Updated October 21, 2023. Published October 23, 2023 By Abbey Sharp 7 Comments

Homemade Twix Bars | Halloween Recipe!

These Vegan Twix Bars are the perfect gluten free dairy free healthier Halloween candy that you can feel good about serving your kids or yourself any day of the year!

These healthy homemade Twix Bars are the perfect way to celebrate Halloween. They are also vegan, gluten free, and dairy free!

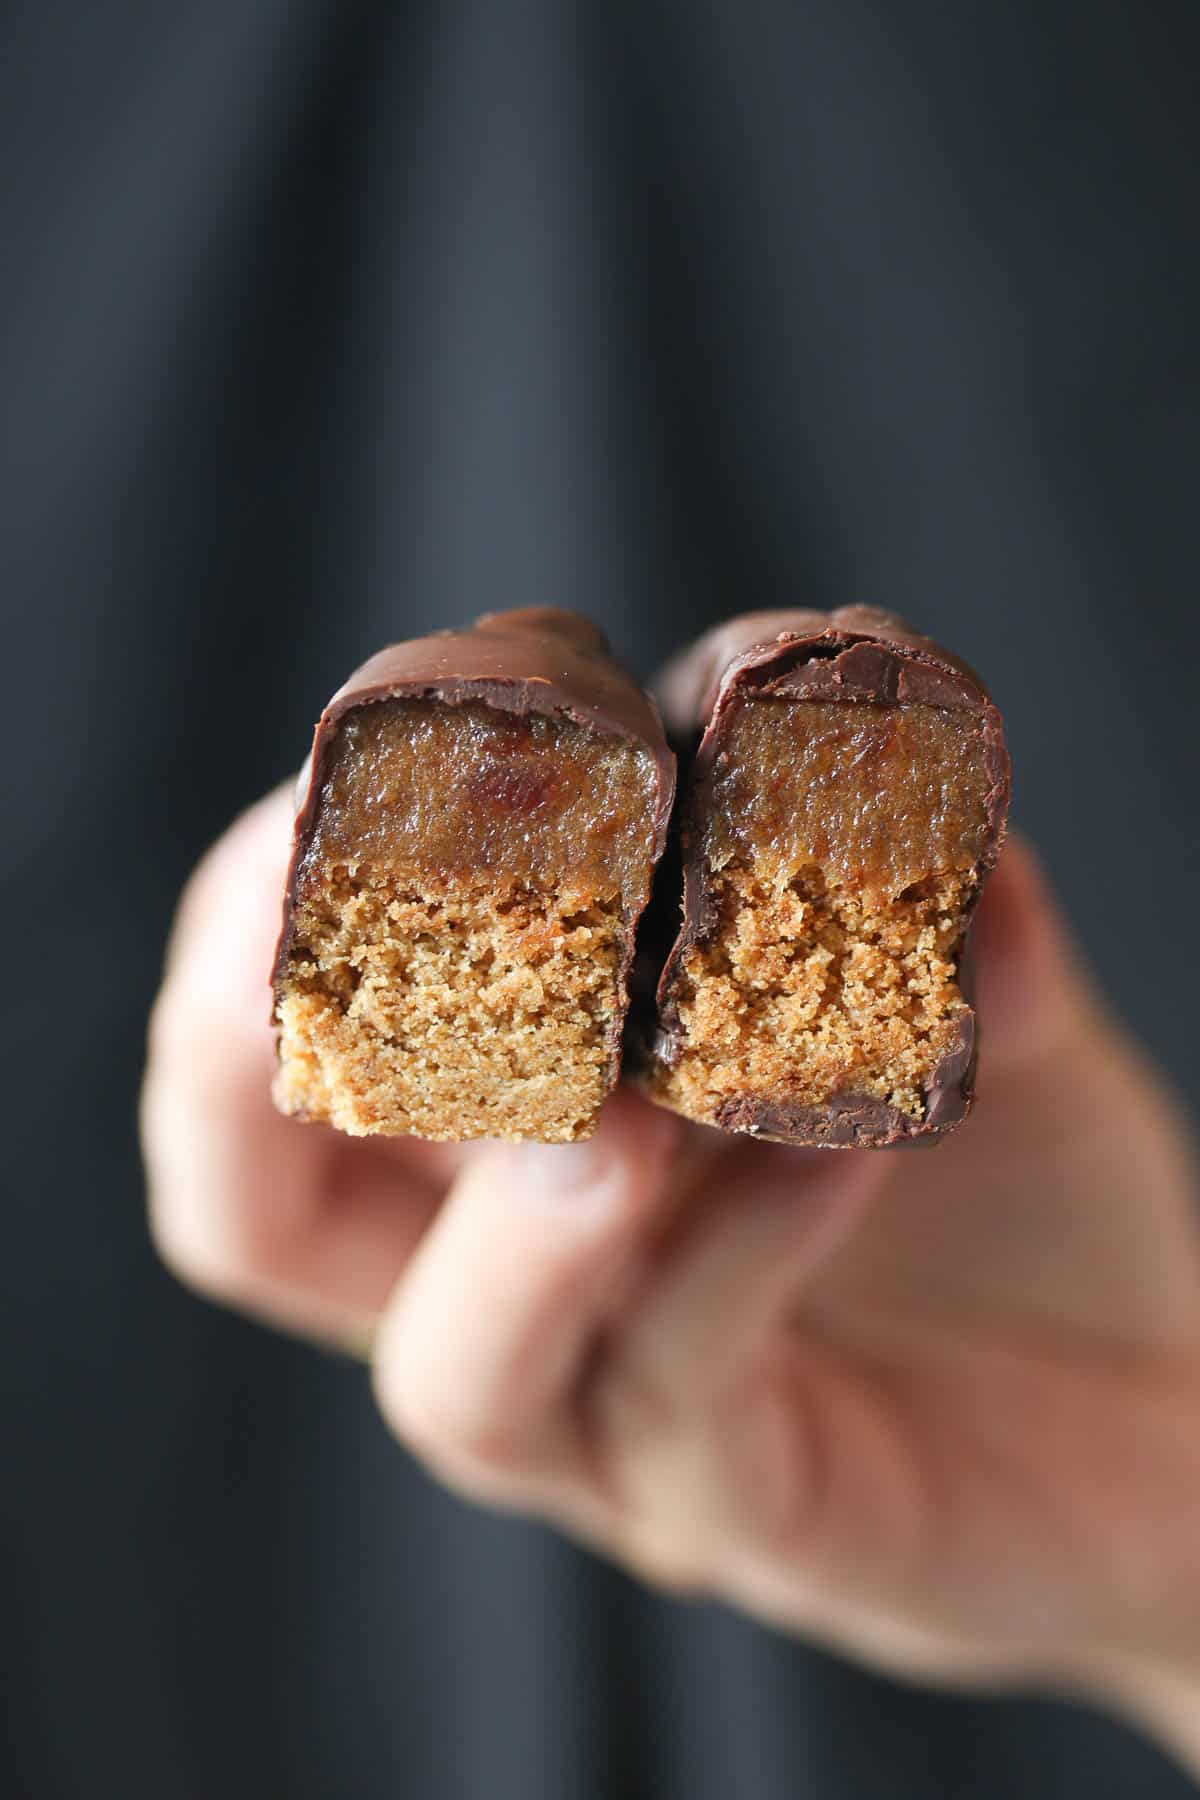
A hand holding up two pieces of a homemade Twix bars.

Okay, so if you missed my Ode to “Fun Size” Halloween chocolate bars, you definitely are going to want to check that out here where I shared my recipe for Vegan Snickers Bars. While Snickers do hold the number one spot in my heart, a lot of my followers wrote to me to tell me how much they dig Twix as well. I mean, I’m down for legit ANYTHING with a healthy layer of caramel on it, so obviously the homemade Twix bars were coming next. I also like that Twix bars traditionally come as a pair, so you can have a little somethin’ now, and a little somethin’ later. Spreading the love around, you know!

Judging by how quickly these vegan Twix bars disappeared in my house, I can assure you that no one will mind trading in their packaged goodies for these. They’re also perfect little bars to put out on a dessert platter, serve as part of a cookie exchange, or to bring over as a hostess gift any time of year.

Table of contents

  • Why This Recipe Works
  • Key Ingredients
  • How to Make This Recipe
  • Expert Tips
  • Recipe FAQs
  • More Halloween Chocolate Recipes

Why This Recipe Works

But why are homemade Twix bars better than store-bought?

  • Gluten-free and vegan so everyone can enjoy them!
  • Made from ingredients in your pantry
  • 5g of fibre per bar
  • A fun Halloween activity to do with your kids

Trust me, these are fun to make and even more fun to eat!

Key Ingredients

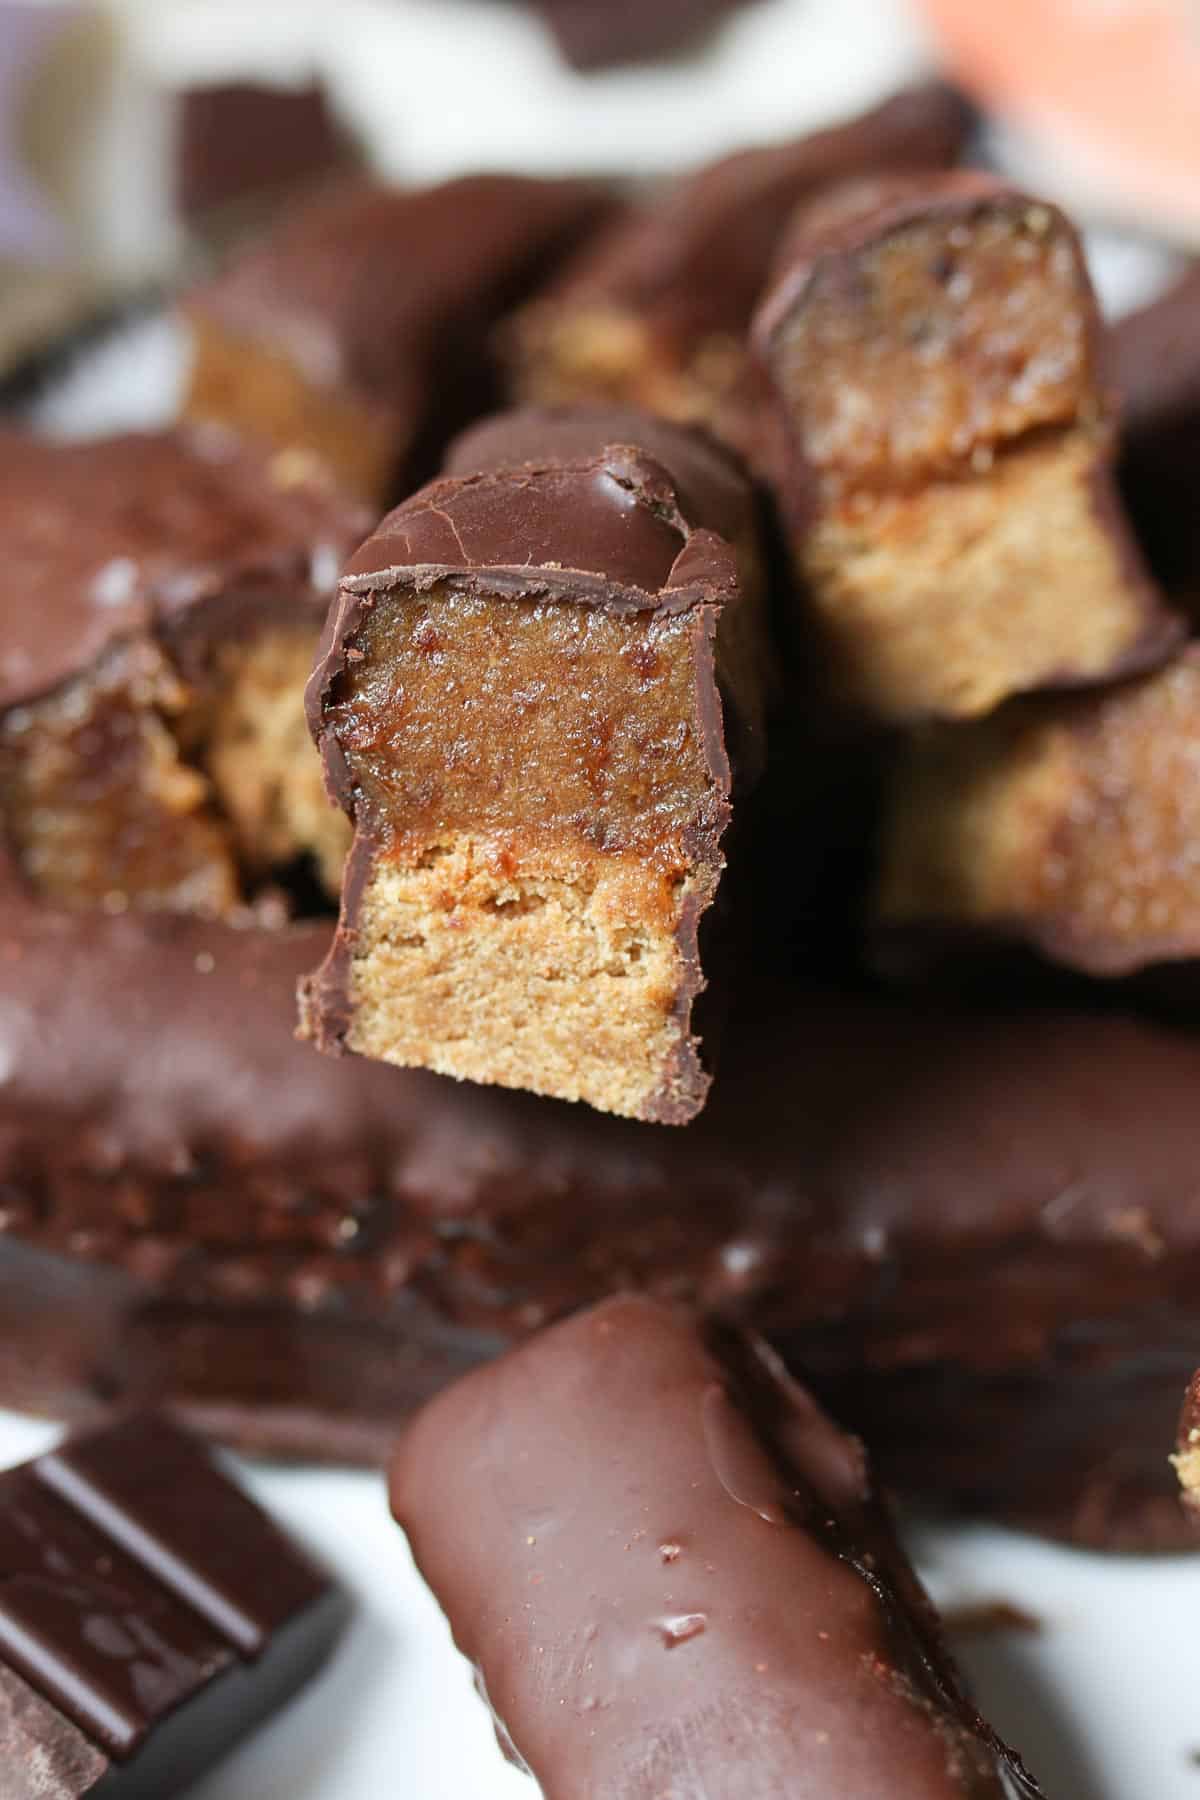
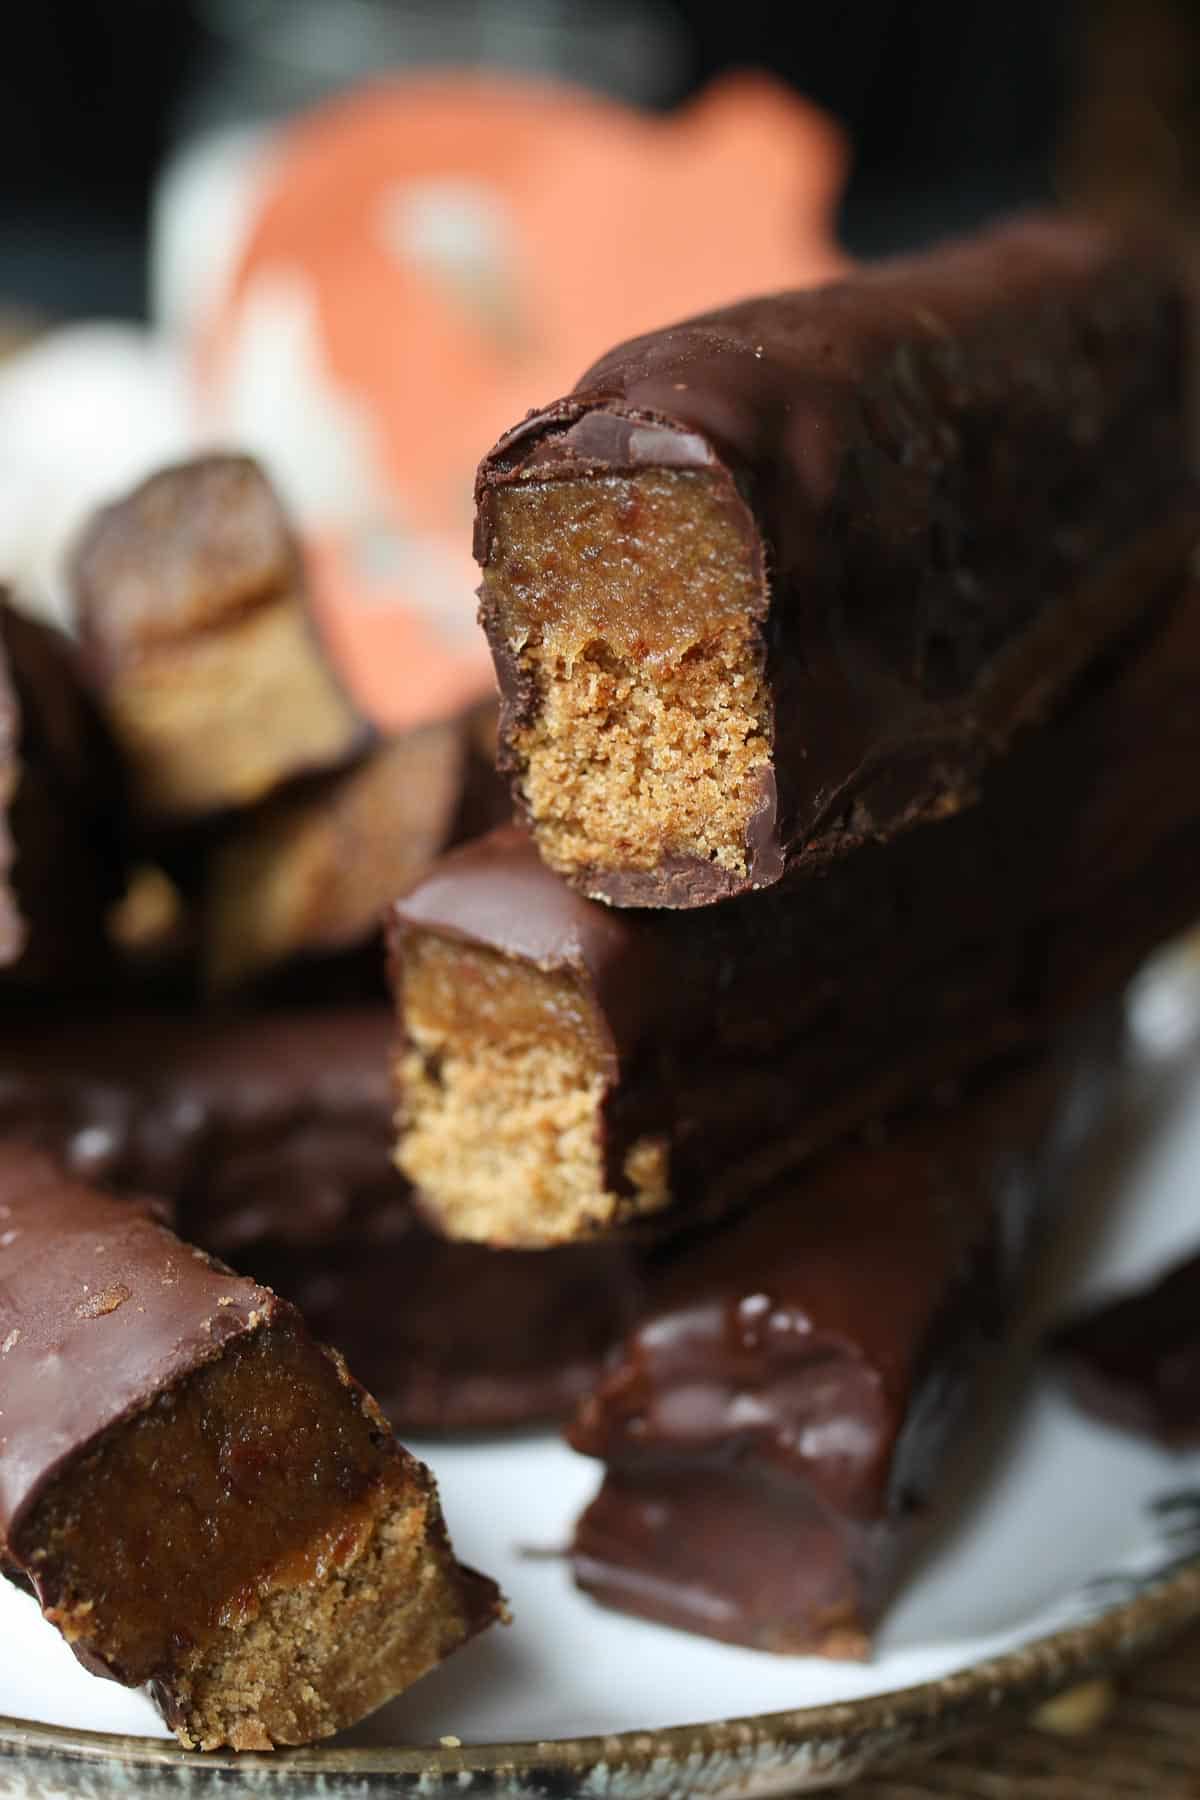
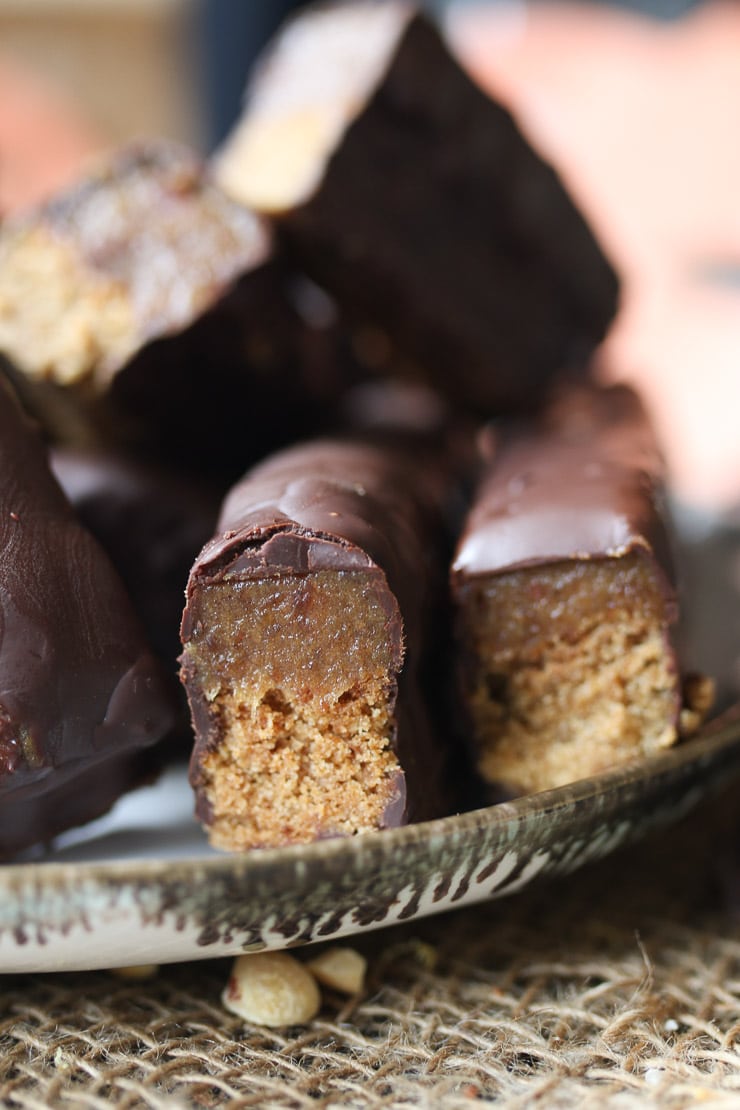
Several homemade Twix chocolate bars stacked on top of one another.

Shortbread Cookie Base – this is super easy to make and all you will need is some vegan butter, coconut sugar, gluten free all purpose flour, and vanilla extract. If you are neither vegan or gluten free feel free to use regular butter and flour, respectively.

Caramel – the caramel is by far the most important element of any Twix bar and making it from scratch is easier than you think! To make this recipe vegan, I use dates and maple syrup for natural sweetness and a bit of coconut cream to create a smooth caramel-like texture.

Coating – some dark chocolate and a little bit of coconut oil is all you need to make an easy and rich chocolate coating that tastes super decadent.

How to Make This Recipe

Multiple homemade Twix bars stacked on top of one another on a white plate.

Step One: Preheat oven to 300 F. Line a loaf pan with parchment paper on both sides making wings.

Step Two: To a food processor, add the vegan butter, coconut sugar, flour and vanilla and pulse until pea-shape pieces of the butter appear in the flour mixture. Press into the loaf pan and bake for 30-35 minutes, or until golden brown. Allow to cool fully.

Step Three: Meanwhile, place the dates, maple and coconut cream in a sauce pot and simmer until bubbling. Transfer to the food processor and puree until very smooth. Layer on top of the cooled cookie layer and place in the freezer for 2 hours.

Step Four: Meanwhile, melt the chocolate and coconut oil in the microwave on 50% in 30 second intervals until smooth, stirring between each 30 seconds.

Step Five: Using a greased knife, carefully remove the parchment from the sides of the bars and cut into 12 bars.

Step Six: Prepare a baking sheet lined with a silpat.

Step Seven: Dip the bars into the chocolate until fully coated and place on the silpat. Refrigerate or freeze for 10 minutes. Enjoy!

Expert Tips

Be mindful that you’re not over-microwaving the chocolate. It’s super easy to accidentally leave it in there and end up with a burned mess, so keep an eye on it and stir often to distribute the heat.

Recipe FAQs

Are these homemade Twix bars allergy friendly?

Yes definitely. This recipe is great for all eaters because not only is it dairy free and gluten free, but it contains no nuts. It’s a great allergy-friendly treat to throw into your little one’s lunch box.

How long do these stay fresh?

Store these homemade Twix bars in an air tight container in a cool dark place and they should stay fresh for about 2-3 weeks. You can also try freezing them in a freezer bag and they can stay fresh for up to a year.

What can I use if I don’t like dark chocolate?

If you’re not a fan of the more bitter flavour of dark chocolate, feel free to use whatever chocolate you prefer – whether that’s milk chocolate, cacao powder, or even white chocolate.

Can I use regular flour, butter and chocolate chips if I’m not vegan or gluten free?

For sure! It works fine.

Plate with homemade twix bars.

More Halloween Chocolate Recipes

Halloween treats are underway at my house. If you liked these homemade Twix bars, try my other Halloween recipes!

  • Homemade Vegan Snickers Bar
  • Easy No Bake Nutella Cheesecake Cups
  • Healthy Dirt Cups for Kids
  • Caramel Truffles with Tahini and Dates
  • Healthy Halloween Edible Graveyard Dip

Have you tried to make homemade Halloween candy before? Let me know your favourite Halloween chocolate bars in the comments below!

These Vegan Twix Bars are the perfect gluten free dairy free healthier Halloween candy that you can feel good about serving your kids or yourself any day of the year!
Print Recipe
5 from 3 votes

Homemade Twix Bars (Gluten Free and Vegan)

These Vegan Twix Bars are the perfect gluten free dairy free healthier Halloween candy that you can feel good about serving your kids or yourself any day of the year!
Prep Time2 hours hrs 10 minutes mins
Cook Time40 minutes mins
Total Time2 hours hrs 50 minutes mins
Course: Dessert
Cuisine: American
Servings: 12 bars
Calories: 337kcal
Author: Abbey Sharp

Ingredients

Shortbread cookie base:

  • 1/2 cup plus 2 tbsp vegan butter cold and diced
  • 1/2 cup coconut sugar
  • 1 cup 3 tbsp gluten free all purpose flour
  • 1/2 tsp vanilla extract

Caramel:

  • 3 cups medjool dates pitted and diced
  • 1/3 cup maple syrup
  • 1/4 cup coconut cream

Coating:

  • 150 g dark chocolate chopped
  • 1 tbsp coconut oil

Instructions

  • Preheat oven to 300 F. Line a loaf pan with parchment paper on both sides making wings.
  • To a food processor, add the vegan butter, coconut sugar, flour and vanilla and pulse until pea-shape pieces of the butter appear in the flour mixture. Press into the loaf pan and bake for 30-35 minutes, or until golden brown. Allow to cool fully.
  • Meanwhile, place the dates, maple and coconut cream in a sauce pot and simmer until bubbling. Transfer to the food processor and puree until very smooth. Layer on top of the cooled cookie layer and place in the freezer for 2 hours.
  • Meanwhile, melt the chocolate and coconut oil in the microwave on 50% in 30 second intervals until smooth, stirring between each 30 seconds.
  • Using a greased knife, carefully remove the parchment from the sides of the bars and cut into 12 bars.
  • Prepare a baking sheet lined with a silpat.
  • Dip the bars into the chocolate until fully coated and place on the silpat. Refrigerate or freeze for 10 minutes. Enjoy!

Nutrition

Calories: 337kcal | Carbohydrates: 53g | Protein: 3g | Fat: 15g | Saturated Fat: 7g | Cholesterol: 1mg | Sodium: 78mg | Potassium: 382mg | Fiber: 5g | Sugar: 37g | Vitamin A: 420IU | Vitamin C: 0.2mg | Calcium: 49mg | Iron: 2.3mg
Abbey Sharp

Abbey Sharp is a Registered Dietitian (RD), regulated by the Ontario College of Dietitians. She is a mom, YouTuber, Blogger, award winning cookbook author, media coach specializing in food and nutrition influencers, and a frequent contributor to national publications like Healthline and on national broadcast TV shows.
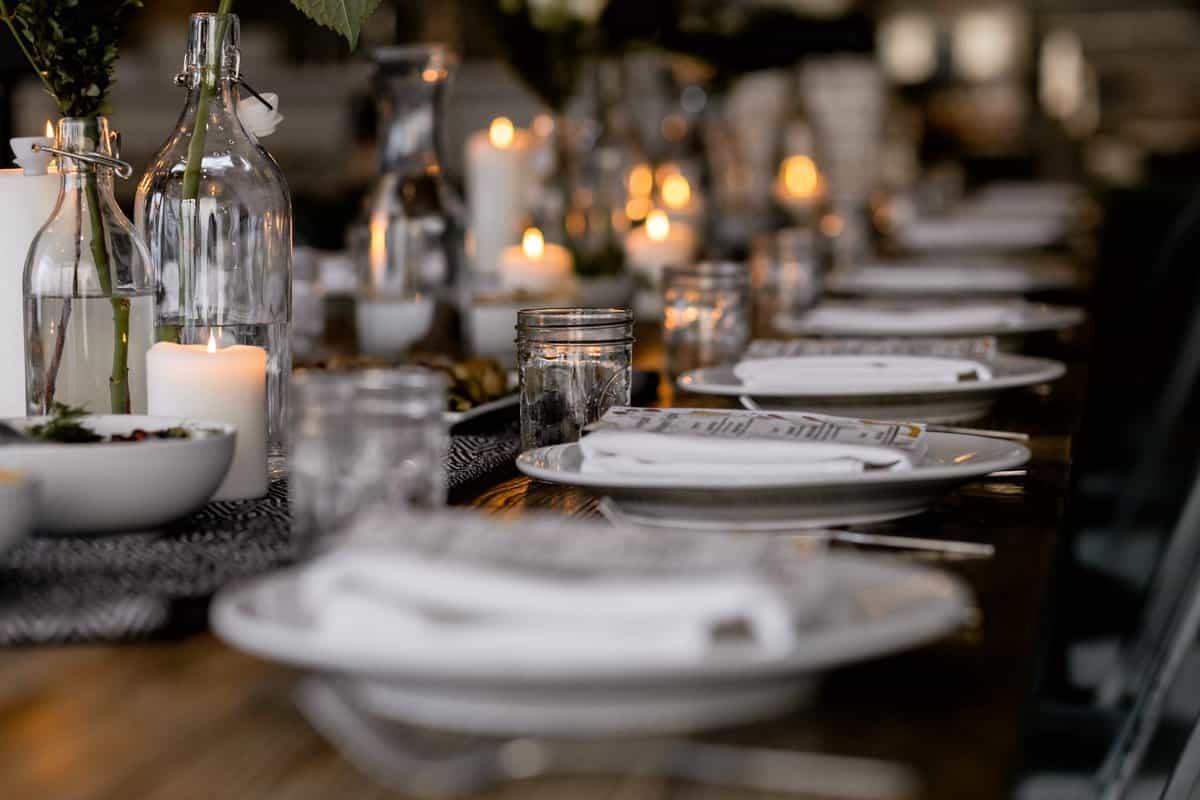
www.abbeyskitchen.com/about-abbey/

Last Updated October 19, 2023. Published October 20, 2023 By Abbey Sharp Leave a Comment

Dirt Cups for Kids | Healthy & Vegan

halloween dirt cup with pumpkin in the background

Make these fun vegan dirt cups for kids with gummy worms, Oreo soil, and chocolate avocado mousse to celebrate Halloween with the kids this year!

image of halloween dirt cups with gummy worms on top.

Raise your hand if you remember making those iconic Oreo dirt cups as kids. I know we made them every Halloween at my grandparents with my cousins because it was a SUPER easy treat we always loved. There was something just so fun about digging for gummy worms in a bed of rich chocolate pudding with crispy Oreo crumbles throughout. YES PLEASE. And with Halloween approaching soon, I have lots of Halloween recipes on my blog (perfect for toddlers and adults, alike), and these dirt cups for kids have become a favourite.

Table of contents

  • Why This Recipe Works
  • Key Ingredients
  • How to Make This Recipe
  • Expert Tips
  • Recipe FAQs
  • Other Recipes You Might Like

Why This Recipe Works

It’s not a Halloween party without fun Halloween treats! These dirt cups for kids are perfect for the occasion, not to mention they’re absolutely adorable. I also love this recipe because it’s

  • Super easy to make – only 4 quick steps!
  • A great way to get the kids involved in the kitchen!
  • Plant-based (vegan)
  • A healthier alternative to a traditional dessert

Key Ingredients

Avocados– Make sure they’re buttery and ripe or else they won’t blend nicely. If the avocado yields to firm gentle pressure, has a dark colour, and feels soft but not too mushy, it’s good to go. 

Oreo cookie crumbs– Did you know that Oreos are naturally vegan? Woo hoo! If you can’t find oreo cookie crumbs, you can also just eat the cream filling middle out of the cookies and crush up some crumbs with a rolling pin in a plastic bag. Win, win right? 

Chia seeds– I like ground chia for this recipe as it makes little specs similar to the cookie crumbs (so that’s exactly what kids will think it is).

Gummy worms– You can use regular, sour, or vegan ones (yes, there’s such thing as vegan gummy worms). If you’re not vegan, we love these gummies made with organic fruit juice and natural ingredients.

Birds eye view of halloween cups with colourful gummy worms on top.

How to Make This Recipe

Step 1: In a food processor or blender, puree the avocado, cocoa powder, melted chocolate, almond milk, vanilla, salt and maple syrup until smooth. Adjust sweetness if desired (but keep in mind the cookie layer does add sweetness).

Step 2: In another bowl, mix together the yogurt, cookie crumbs, vanilla and chia seeds.

Step 3: To make the tombstones, put the melted chocolate into a piping bag and snip a tiny hole in the corner. Break the graham crackers lengthwise into a long piece (not in half widthwise). Write R I P vertically and allow to harden in the fridge.

Step 4: Meanwhile, layer some oreo crumbs with the chocolate pudding and cookies and cream yogurt, ending with the oreo cookie crumbs. Insert the tombstone and add gummy worms on top. Enjoy!

Expert Tips

If you don’t have maple syrup on hand, feel free to use honey or agave if you prefer (and you’re not vegan).

Regarding yogurt – almond, soy, and coconut would all be great vegan options, or a nice plain Greek yogurt if you’re not vegan.

birds eye view of halloween dessert cup with a variety of different gummy worms on top.

Recipe FAQs

Are these dirt cups gluten free?

The oreo cookie crumbs are not gluten free, but you could make this gluten free by getting gluten free chocolate cookies and crushing those up for the “dirt”.

If I can’t find vegan gummy worms what else can I use?

I love the idea of using vegan licorice as the “worms”! Or just add in some other vegan candies or even just some little plastic shovels.

How long will these last in the fridge?

I recommend making the components (the yogurt and the pudding) up to 3 days ahead, then assembling everything when it’s time to eat.

Can I make this into a large “graveyard”?

Yes! If you don’t want to plate these into little cups, you could also serve this as a larger dessert in a small 8 or 9″ square casserole dish and let everyone serve themselves.

close up of halloween dirt cups with a graham cracker and gummy worms on top.

Other Recipes You Might Like

Here are some other great Halloween themed recipes that you can bust out for your Halloween party this year!

  • Halloween Blood & Guts Chocolate Cups 
  • Snickers Bars (Vegan)
  • Candy Corn Overnight Oats (Vegan)
  • Banana Ghosts & Clementine Pumpkins 
  • Apple & Almond Butter Alien Smiles 

What snacks and treats are you making for Halloween? Have you tried these dirt cups for kids yet? Leave me a comment below!

Print Recipe
5 from 6 votes

Dirt Cups for Kids | Healthy & Vegan

Make these vegan healthy dirt cups and gummy worms with Oreo soil  and chocolate avocado mousse to celebrate Halloween with the kids this year!
Total Time25 minutes mins
Course: Snack
Cuisine: halloween, American
Servings: 8 small cups
Calories: 226kcal
Author: Abbey Sharp

Ingredients

Avocado Chocolate Pudding Layer:

  • 2 large ripe avocados
  • 1/2 cup unsweetened cocoa powder
  • 1/2 dark chocolate chips melted
  • 1/2 cup unsweetened vanilla almond milk
  • 1 tbsp vanilla extract
  • 1/4 tsp salt
  • 2-4 tbsp maple syrup or more to taste

Cookies & Cream Layer:

  • 1 cup plain yogurt vegan or Greek, if desired
  • 1 tsp vanilla extract
  • 1 tbsp Oreo cookie crumbs
  • 1 tbsp black chia seeds
  • Maple syrup if desired (optional)
  • graham Cracker Tomb stone
  • 1/4 cup dark chocolate chips melted
  • 2-4 full Graham cracker sheets

To assemble:

  • 1/3 cup Oreo cookie crumbs
  • Gummy worms vegan, if desired

Instructions

  • In a food processor or blender, puree the avocado, cocoa powder, melted chocolate, almond milk, vanilla, salt and maple syrup until smooth. Adjust sweetness if desired (but keep in mind the cookie layer does add sweetness).
  • In another bowl, mix together the yogurt, cookie crumbs, vanilla and chia seeds.
  • To make the tombstones, put the melted chocolate into a piping bag and snip a tiny hole in the corner. Break the graham crackers lengthwise into a long piece (not in half widthwise). Write R I P vertically and allow to harden in the fridge.
  • Meanwhile, layer some oreo crumbs with the chocolate pudding and cookies and cream yogurt, ending with the oreo cookie crumbs. Insert the tombstone and add gummy worms on top. Enjoy!

Nutrition

Calories: 226kcal | Carbohydrates: 25g | Protein: 5g | Fat: 14g | Saturated Fat: 4g | Cholesterol: 4mg | Sodium: 181mg | Potassium: 447mg | Fiber: 6g | Sugar: 11g | Vitamin A: 104IU | Vitamin C: 5mg | Calcium: 105mg | Iron: 2mg
Abbey Sharp

Abbey Sharp is a Registered Dietitian (RD), regulated by the Ontario College of Dietitians. She is a mom, YouTuber, Blogger, award winning cookbook author, media coach specializing in food and nutrition influencers, and a frequent contributor to national publications like Healthline and on national broadcast TV shows.

www.abbeyskitchen.com/about-abbey/

Last Updated February 17, 2021. Published October 18, 2023 By Abbey Sharp 10 Comments

What is the Healthiest Flour for Baking? A Dietitian’s Review

We compare common and specialty flours to determine what is the healthiest flour to bake with, along with tips and tricks for their use.

Get the Healthy Flour Cheat Sheet
A bag of flour.

Flour is a pantry staple that is found in pastries, cakes, sauces, desserts and breads. But with so many varieties to choose from, it’s hard to know which one to choose and for what purpose. Here we shed some light on what is the healthiest flour by breaking down the components of a variety of healthy flours, taking a look at their pros and cons, and how to best use them to showcase their properties.

What is the Healthiest Flour?

For starters, flour is created when a dry grain is pulverized into a powdery substance. This process is called milling. The most common and traditional type of flour is made from wheat, however any grain can be made into flour.  New and trendy flours have recently come into the picture, many of which offer additional benefits like being gluten free or higher in fibre. But what are these flours as ”healthy” as everyone claims? Let’s find out what is the healthiest flour for you!

Whole Wheat Flour

Whole wheat flour is made by grinding the entire grain (endosperm, bran, and germ). It has a strong, nutty flavour and produces a heavier, denser bread compared to all-purpose flour. 

Wheat has a high gluten content compared to other grains and it yields a very elastic dough. Wheat flour is best when baking yeast breads like brioche, flatbreads like pits, or sourdough. 

Pros

  • Contains more nutrients compared to all-purpose flour depending on how refined it is. These nutrients include B vitamins, higher levels of protein (mainly gluten), and lignans which is a category of antioxidant. 
  • Whole grains may help to lower your risk of heart disease.

Cons

  • Whole-wheat flour is not optimal for high-rising breads and tender baked goods. 
  • Wheat flour can be difficult for some people to digest. 
  • It is not gluten free

Tips

  • Use less whole wheat flour when baking because it is more dense and higher in weight compared to white flour. Substitute 1 cup of white flour for ¾ cup of whole wheat flours.  
  • Add a bit more liquid when baking with whole wheat flour because the flour tends to absorb liquid more slowly. Add an extra teaspoon of liquid for each cup of whole wheat flour. 
Birds eye view of cookies cooling on a cooling rack.

Coconut Flour

Coconut flour is a soft, gluten and grain free flour that is produced by drying out coconut meat at a low temperature. It is then ground until it creates a soft fine powder. Coconut flour has a mild, sweet taste that is fairly distinct. Be aware that it can make your final product have a faint coconut taste. 

Pros

  • It is high in protein and fibre (1 cup of coconut flour contains 16 grams of protein and 40 grams of fibre!)
  • Coconut flour is low in carbohydrates compared to other flours making it a good option those that are following a keto, low carb,  paleo, grain-free, or gluten free diet. 
  • It is rich in manganese, which is an essential nutrient that our bodies need for the normal functioning of our brain, nervous system, and many of the body’s enzyme systems. 
  • Contains other minerals such as iron, potassium, phosphorus, selenium, and vitamin B6.

Cons

  • Coconut flour can be gritty and soaks up much more liquid compared to regular flour, which can dry out your final product
  • Coconut flour is also significantly more expensive than regular flour. 

Tips

  • Use additional liquid because coconut flour is very absorbent. 
  • Use more eggs in the recipe because it will give the baked good a better structure and more moisture
  • Substitute coconut flour for all-purpose flour at a 1:4 ratio, and remember to add 1 egg for every ¼ cup of coconut flour. 

Almond Flour

Almond flour is typically made by using blanched almonds with no skins and grinding them up into a fine consistency. Almond flour gives a sweet, nutty aroma to baked goods without giving an overwhelming almond taste. 

Pros

  • Almond flour is  gluten free. 
  • Almond flour is rich in vitamin E, which is a fat-soluble vitamin that acts as an antioxidant in your body. 
  • A great source of magnesium is found in almond flour. Magnesium is needed for many functions in the body and the benefits include improved blood sugar control, reduced insulin resistance and lower blood pressure. 

Cons

  • Causes baked goods to be more flat and dense compared to wheat flour because there is no gluten in almond flour, which helps stretch and trap air allowing the baked good to rise. 
  • Almond flour is slightly higher in calories than wheat flour. It contains 163 calories for 28 grams, compared to wheat flour which contains 102 calories 

Almond flour is easy to bake with and in most recipes you can replace regular wheat flour with almond flour. It can also be used in savoury dishes and can be used in place of breadcrumbs to coat fish, chicken, and beef. 

Tips

  • Baked goods made with almond flour tend to be extremely soft and delicate when they first come out of the oven. To avoid having your product break or crumble, let them cool in the baking pan or sheet for 10-30 minutes before transferring them to a cooling rack.
  • Due to the high fat content of almond flour, the texture of baked goods made with almond flour usually yields a more tender and cake-like product rather than being crunchy and crispy. In order for your product to be more crunchy, you can use almond flour in combination with other gluten-free flours. 
Eggs being mixed with flour in a mixing bowl.

Oat Flour

It is made from ground oats and has a superfine and fluffy texture. It gives off a sweet and neutral taste and is great for sweet and savoury dishes. 

Oat flour has a 1:1 ratio for regular flour and is great to use when making pancakes, muffins, waffles, and cakes. 

Pros

  • Oat flour is a whole grain and gluten-free flour. 
  • High amount of protein and fiber compared to regular flour (1 cup of oat flour yields 21 grams of protein and 12 grams of fibre) 
  • High amounts of minerals are found in oat flour such as manganese, phosphorus, magnesium, copper, iron, zinc, and B vitamins. 
  • Cheap to buy and very easy to make at home. You simply place rolled oats in a blender or food processor and blend until they form a fine flour. 

Cons

  • If oat flour is used alone, baked goods will not rise or hold together well the same way that wheat flour does. You will need to use extra baking powder, yeast or another leavening agent to ensure the proper rise of your end product. Try adding 2.5 tsp of baking powder per cup of oat flour. 

Tips

  • When substituting oat flour for wheat flour, substitute by weight and not volume. Oat flour tends to be lighter when using measuring cups so you would be missing some of the flour that could potentially affect your end product. 
  • Let the batter rest because it gives time for the oats to absorb the liquid and will lead to a more moist product. 
Birds eye view of baking ingredients including eggs, flour, and wooden spoons and spatulas.

Chickpea Flour

Chickpea flour is made from ground dried chickpeas and has a fairly neutral, slightly nutty, slightly bean-y flavour. It is a naturally dense flour which leads to baked goods having a sturdy and tender texture when mixed with other gluten-free flours. Chickpea flour is a staple of India, Pakistani, and Bangladeshi cuisines. 

Chickpea flour is a great binder for baking or for dishes that need a little extra stability. 

Pros

  • Great source of folate for the diet. 
  • Chickpeas contain beneficial antioxidants called polyphenols. 
  • Chickpea flour is filled with fiber (10 g per 1 cup). 
  • You can easily make chickpea flour at home and all you need is dried chickpeas, a baking sheet, food processor, and a sifte. 

Cons

  • Having too much can cause digestion problems for some people. Beans contain a category of sugar called oligosaccharides. The types you find in chickpeas are reffinos, ciceritol, and stachyose and unlike grains, these can be hard for some people to digest and can lead to the production of gas. 

Tips

  • It is a great thickener and can be used instead of cream, or wheat flours in sauces, soups, and curries. It helps thicken and prevent the dish from curdling. 
  • Chickpea flour works well in dense cakes, biscuits, or brownies
  • It is very absorbent and can be used as an egg replacer when cooking.  Mix equal parts water and chickpea flour to replace an egg (1 egg = ¼ cup chickpea flour + ¼ cup of water). 
A small child making gingerbread cookies and dusting hand with flour.

Rice Flour

Rice flour is a form of flour that is made from finely milled rice. Rice flour has a very neutral flavour and the consistency is close to wheat flour and produces a cake-like consistency. 

Rice flour is great as a thickening agent for soups, stews, gravies, sauces, and roux. It is also a great substitute for wheat flour when baking cakes and biscuits. 

Pros

  • Rice flour, especially the brown rice flour variety, is an excellent source of fibre, which is great for digestion. 
  • Great gluten-free option
  • Easily available and inexpensive

Cons

  • Contains less folate compared to whole wheat flour
  •  Cancer-fighting phytonutrients called lignans is found in both rice flour and whole wheat flour, however whole grain flour has 30% more. Foods that contain lignans may help lower the risk of cardiovascular disease, cancer, and lower cholesterol levels.  
  • Gives baked goods an unappealing, translucent-white colour. 

Tips

  • Rice flour contains less yeast and when baking you will need to add more baking soda to help your product rise more.  
  • You should store rice flour in an airtight container and to help extend the freshness and storage life, you can place the flour in the refrigerator. 

Buckwheat Flour

Buckwheat flour is naturally gluten-free and has a nutty, earthy, and a little bitter taste. The flavour can be a bit intense for some people. The flour has a light and very soft texture and gives the baked goods a darker toasted brown colour. 

Buckwheat flour can be fun to experiment with because it can really impact the flavour of a recipe. Buckwheat flour pairs nicely with toasty flavours such as chocolate, coffee, caramel, nuts, and spices. It also pairs well with earthy flavours such as mushrooms, parsnips, and squash. 

Pros

  • This grain is very low on the glycemic index which means that the carbohydrate content is absorbed slowly into the bloodstream and provides your body with a steady flow of energy. 
  • Great source of dietary fiber. One cup of buckwheat flour provides 12 grams of fiber. Dietary fiber helps to keep food moving smoothly in the digestive tract and may help you feel fuller for longer. 
  • Rich in manganese, magnesium, and phosphorus. 

Cons

  • This flour has very different properties to whole wheat flour and it is important to remember that this flour will not rise and cook  the same way as regular wheat flour.  

Tips

  • Baking with 100% buckwheat flour can be challenging. Try 15-25% buckwheat flour combined with wheat flour to help make the dough less crumbly. 
  • If you are using it in a cake then it may result in a heavy or crumbly product because it doesn’t have the same binding properties of gluten. Combine buckwheat flour with a starchy flour like rice flour or almond flour, which will produce a light and fluffy texture. 
Freshly baked banana bread cut into slices.

Quinoa Flour

Quinoa flour is made by grinding quinoa seeds to a fine powder like consistency. This flour has a bold flavour, almost grass-like and a tad bitter and can sometimes overpower a recipe. Also, it may make your final product taste and feel a tad grainy. 

Pros

  • Great source of fiber as well as protein. In one cup of quinoa flour there is 8.8 g of fibre and 16 g of protein! 
  • The soluble fibre in this grain helps to reduce total blood cholesterol as well as LDL cholesterol in your body. This can help reduce the risk of atherosclerosis, clogged arteries, and other heart diseases. 
  • Quinoa flour is a good source of potassium, which is a key nutrient to help lower blood pressure. 

Cons

  • Quinoa flour can be quite expensive. 
  • The taste of the flour may be a bit overpowering for some and is an acquired taste. It might take some getting used to. 

You can easily incorporate quinoa flour to a broad range of baking recipes from desserts to muffins and breads. You can substitute this flour for ½ of the all-purpose flour in many recipes or completely replace wheat flour in cakes and cookie recipes. 

Tips

  • To keep the flour as fresh as possible, store in an airtight container in your refrigerator or freezer. 
  • If you find the taste of this flour to be a  bit bitter, you can toast it in a pan for a few minutes before using it in recipes. This will help remove the bitter aftertaste.
  • You can easily make this flour at home by rinsing your dry quinoa under cold water, then blending it in a high speed blender until a flour like consistency forms. 
Close up of chocolate chip cookies.

Cassava Flour

Cassava is a root vegetable and the flour comes from grinding the cassava root. This flour is white in colour, has a neutral taste, and a fine texture making it a great baking substitute. 

Due to cassava flour’s smooth and powder-like consistency, this flour is ideal for baking traditionally more dense treats, such as brownies or cookies. 

Pros

  • Cassava is gluten, grain, and nut-free, as well as vegan, vegetarian and paleo.
  • Cassava is a source of resistant starch, which can boost a person’s gut health by helping nurture gut bacteria. Resistant starches remain relatively unchanged when it passes through the digestive tract. 
  • Has a higher water content, lower fat content, and less calories compared to other gluten-free flours, such as almond or coconut flour. 

Cons

  • Processing cassava by cooking, peeling, and chopping can significantly reduce its nutritional value. 
  • Cassava contains antinutrients which are plant compounds that may interfere with digestion and inhibit the absorption of vitamins and minerals in the body. These aren’t a concern for most healthy people, but if you want to learn more about the effects of anti-nutrients I break it down in my blog post here. 

Tips

  • A recipe might say you can substitute a cup for a cup, however. Cassava flour soaks up a lot of water and therefore is more dense than other flours. You may end up needing to use slightly less cassava flour than you may think. If a recipe asks for 2 cups of flour, first add one cup and slowly add the second cup. Do not pour it in all at once because your baked goods might turn out dry. Anywhere between 2-5 tbsp of cassava flour can be eliminated from the original recipe. 
  • This flour leaves a bit of a nutty flavour so you may want to keep that in mind for the final taste of your product. 

Bottom Line: What is the Healthiest Flour?

As you can see, it totally depends on the use, dietary intolerances, flavor and consistency.

While it can totally be easy to feel overwhelmed by the wide variety of flours, we hope that this guide helped to break down what is the healthiest flour for you and your family. Experimenting with different flours is a great way to switch up the all purpose flour and add nutrition into your favourite baked goods like coconut flour cookies or almond flour muffins.

Contribution by: Gila Gross

More Blog Posts You Might Like

  • How to Cook Eggs – The Ultimate Guide to This Nutritious Staple
  • Are Probiotics for Kids and Babies Healthy or Unnecessary
  • A Beginners Guide to Baby Led Weaning
  • The Best Healthy Packaged Snacks According to Dietitian Moms

What is the healthiest flour for you family? Leave me a comment below with your thoughts!

Abbey Sharp

Abbey Sharp is a Registered Dietitian (RD), regulated by the Ontario College of Dietitians. She is a mom, YouTuber, Blogger, award winning cookbook author, media coach specializing in food and nutrition influencers, and a frequent contributor to national publications like Healthline and on national broadcast TV shows.
www.abbeyskitchen.com/about-abbey/
  • Previous Page
  • Go to page 1
  • Interim pages omitted …
  • Go to page 12
  • Go to page 13
  • Go to page 14
  • Go to page 15
  • Go to page 16
  • Interim pages omitted …
  • Go to page 89
  • Next Page

Get started with

Eight Free Recipe Books

From the co-founder of Neue Theory and creator of the Hunger Crushing Combo

Sign me up!
Abbey smiling at table
Abbey Sharp

“Foods may never be nutritionally equal. But we can make them morally equal by recognizing that our worth is never determined by what's on our plate.”

— Abbey Sharp, RD About Abbey ◥

Books

  • HCC™
  • Mindful Glow
  • Free E-Books

Blog

  • Nutrition
  • Recipes
  • Motherhood
  • Life

Explore

  • Neue Theory™
  • Bite Back
  • YouTube

Abbey

  • About
  • Coaching
YouTube TikTok Instagram Facebook X Pinterest
Abbey Sharp - The No BS Dietitian From Abbeys Kitchen

© Abbey's Kitchen 2026  All Rights Reserved •  ACCESSIBILITY STATEMENT •  Privacy Policy

This site uses cookies. By continuing to browse the site, you are agreeing to the use of cookies Accept Privacy Policy
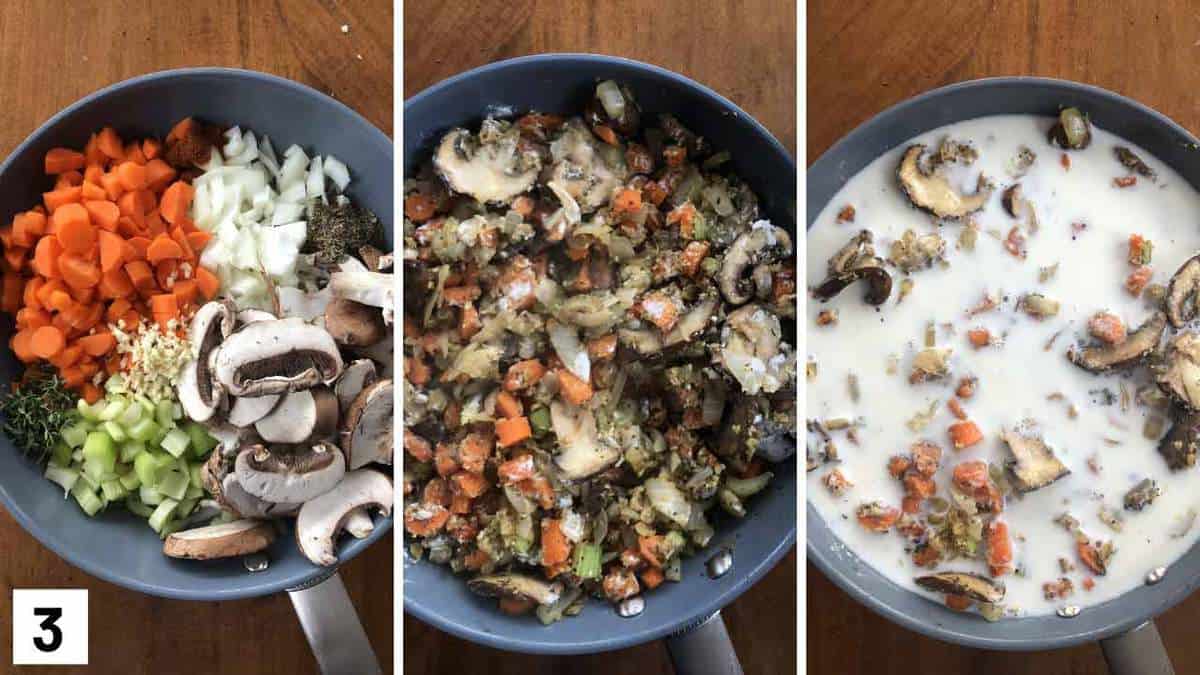
Privacy & Cookies Policy

Privacy Overview

This website uses cookies to improve your experience while you navigate through the website. Out of these, the cookies that are categorized as necessary are stored on your browser as they are essential for the working of basic functionalities of the website. We also use third-party cookies that help us analyze and understand how you use this website. These cookies will be stored in your browser only with your consent. You also have the option to opt-out of these cookies. But opting out of some of these cookies may affect your browsing experience.
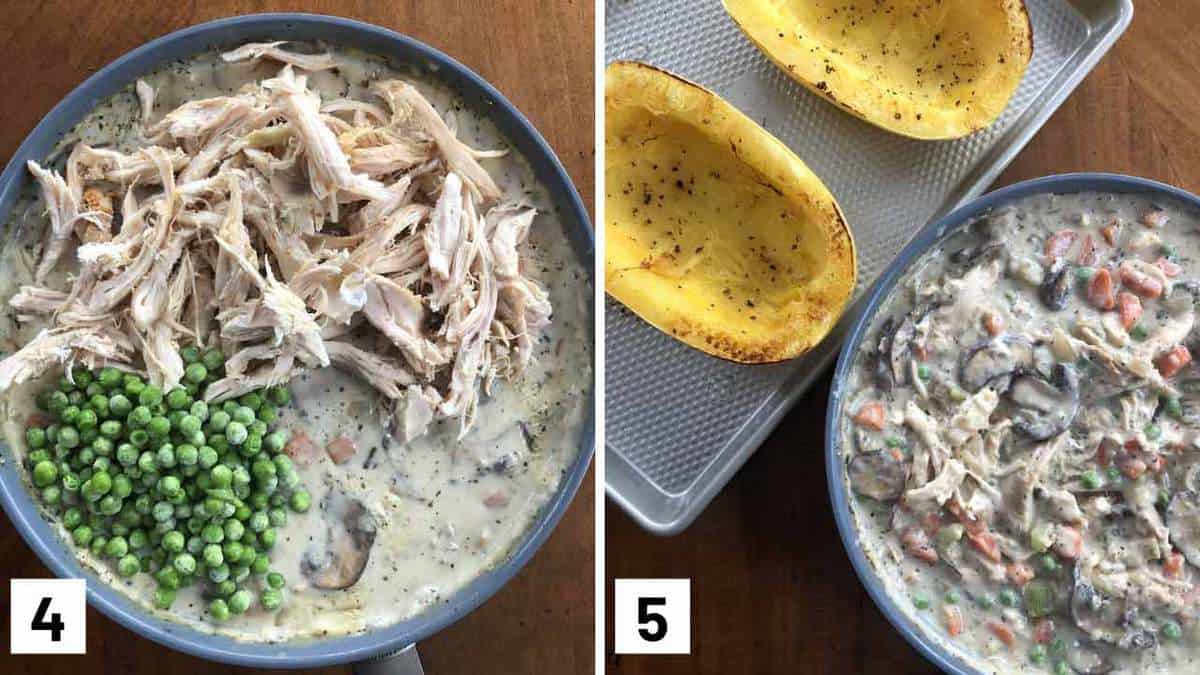
Necessary
Always Enabled
Necessary cookies are absolutely essential for the website to function properly. This category only includes cookies that ensures basic functionalities and security features of the website. These cookies do not store any personal information.
Non-necessary
Any cookies that may not be particularly necessary for the website to function and is used specifically to collect user personal data via analytics, ads, other embedded contents are termed as non-necessary cookies. It is mandatory to procure user consent prior to running these cookies on your website.
SAVE & ACCEPT

Rate This Recipe

Your vote:


A rating is required
A name is required
An email is required