• Skip to main content

Abbey's Kitchen

Healthy Recipes, Nutrition Myth Busting, Healthy Eating Tips

  • Books
    • HCC™
    • The Mindful Glow Cookbook
    • Recipe eBooks
      • Family
      • Hypothyroidism
      • BLW
      • Vegan Week 1
      • Vegan Week 2
      • Vegan Week 3
      • Keto
      • Gluten Free Week 1
      • Gluten Free Week 2
      • Fitness
      • Paleo
  • Blog
    • Nutrition
    • Recipes
    • Motherhood
    • Life
  • Explore
    • Neue Theory™
    • Bite Back With Abbey Sharp
      • Apple Music
      • Spotify
      • Amazon Music
    • YouTube
  • Abbey
    • About
    • Coaching
    • Contact

Abbey Sharp

Last Updated January 7, 2022. Published January 7, 2022 By Abbey Sharp 18 Comments

Healthy Tortilla Soup with Chicken (Easy 10 Minute Recipe)

Tortilla soup in a large bowl topped with avocado and cabbage.

This easy Healthy Tortilla Soup with Chicken is made in just ten minutes with all of your go-to pantry staples & grocery store shortcuts to make dinner a total breeze!
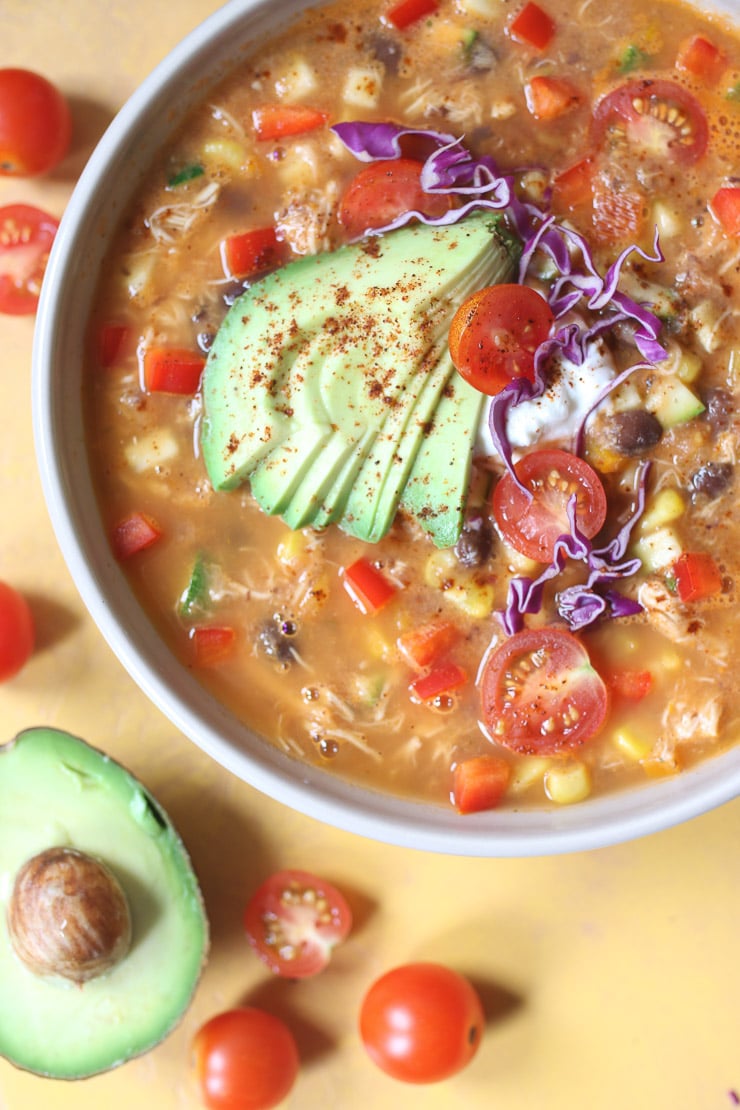
Birds eye view of healthy chicken tortilla soup in white bowl garnished with fresh vegetables and avocado slices on a wooden table sitting next to half of an avocado

I’m a huge soup fan, especially once it’s cooler out, and I’m an even bigger fan when making said soup is not a full day event. Mama don’t have time for that. So this week I busted out a variety of household staples to make the EASIEST 10-minute healthy tortilla soup you EVER put in your mouth.

Table of contents

  • Why This Recipe Works
  • Key Ingredients
  • How to Make This Recipe
  • Expert Tips
  • Recipe FAQs
  • More Recipes You Might Like

Why This Recipe Works

What’s not to like about a quick and easy soup!? This healthy tortilla soup with chicken is currently one of my go-to’s thanks to these reasons!

  • It’s simple
  • You can add whatever you have on hand
  • It’s family friendly
  • It’s freezer friendly
  • Uses pantry staples

Key Ingredients

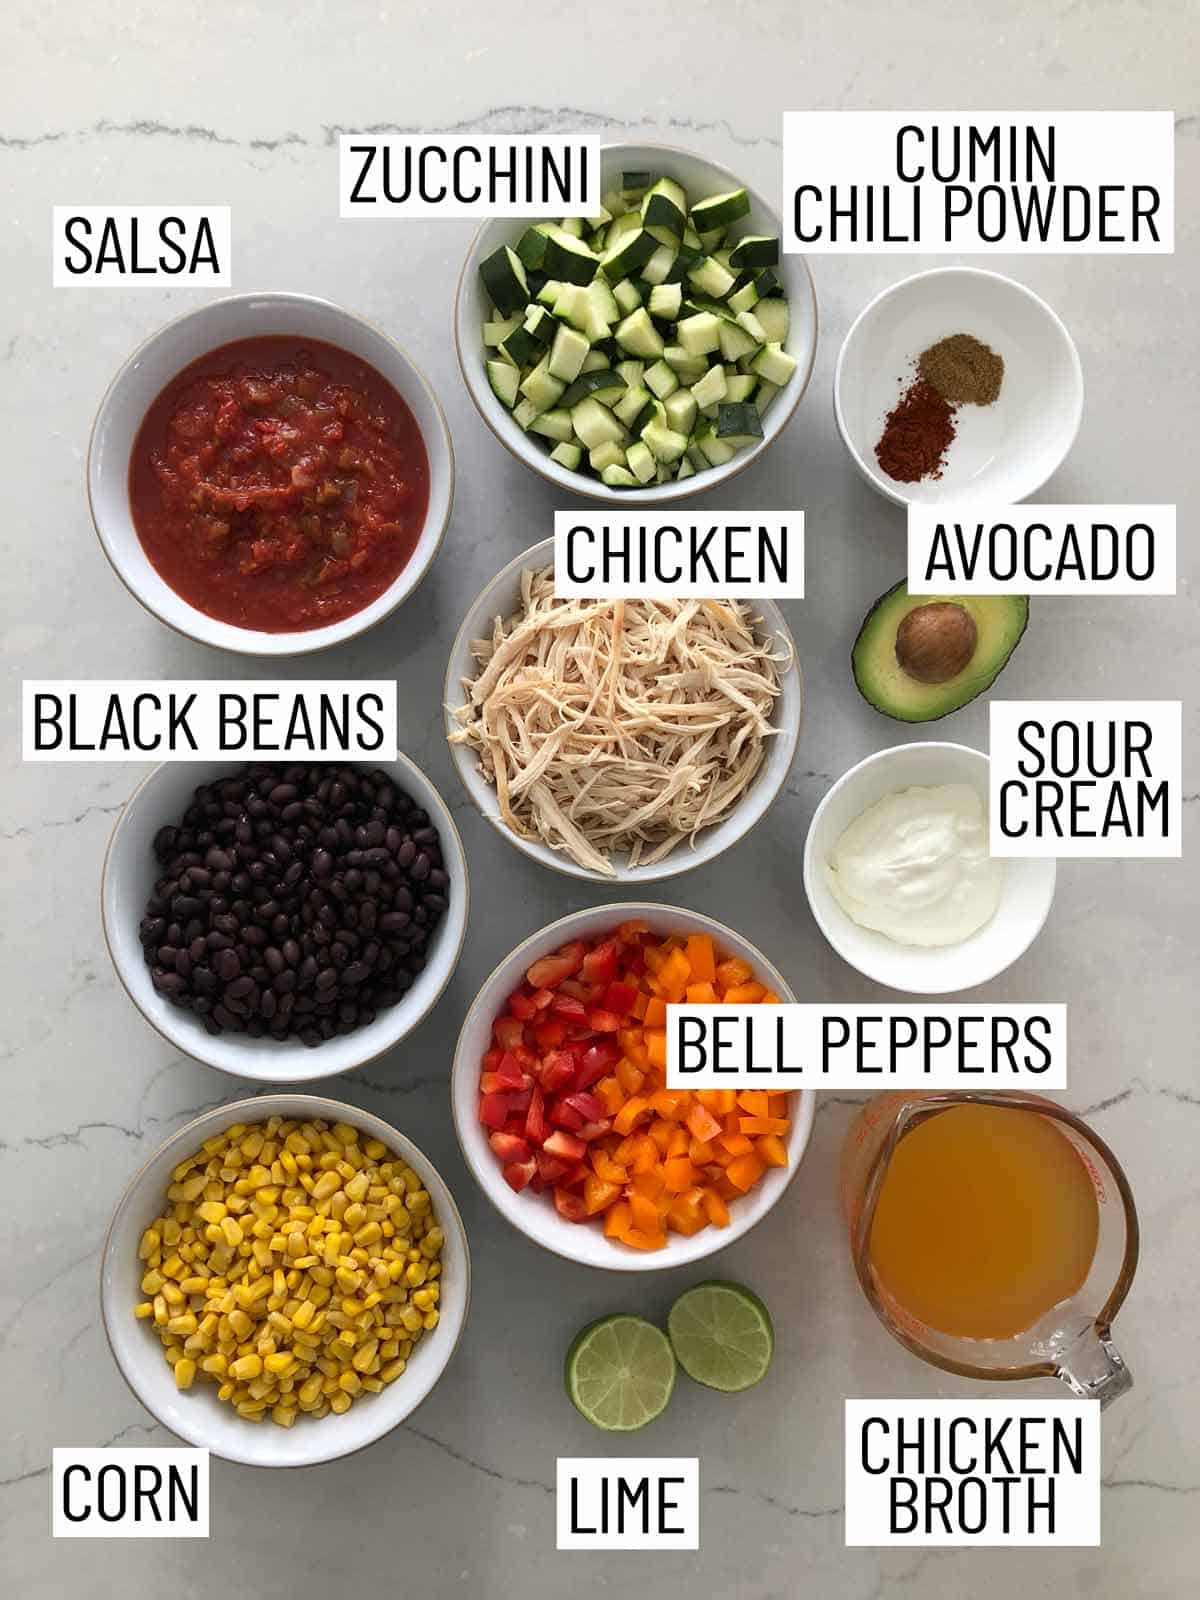
Overhead view of ingredients needed for tortilla soup.

Beans — Black beans are the base of this recipe. We blend up half of it to get this healthy tortilla soup nice and thick and the other half is added in afterwards. If you cant find canned black beans at the store and have an extra hour to spare, dry black beans will certainly do.

Salsa — We use jarred salsa for this soup but you can use homemade salsa or pico de gallo instead. When using homemade, add tomato paste to the soup to amp up the flavour.

Veggies — We’ve got bell peppers, zucchini, and corn as our veggies for this soup. If you have extra veggies in your fridge, add them in!

Spices — to stay true to the Mexican flavour that we want, this recipe uses cumin and chilli powder but feel free to add in any other spices that you like!

Chicken — To make life easier, we use rotisserie chicken. It saves us the time and effort of making the chicken and you can hold onto the bones to make broth later!

Tortilla — because, duh! It wouldn’t be called a tortilla soup without this key ingredient now would it? I personally like to use tortilla strips, but any tortilla type of chip crushed up definitely works. Just add them on top when you’re done!

How to Make This Recipe
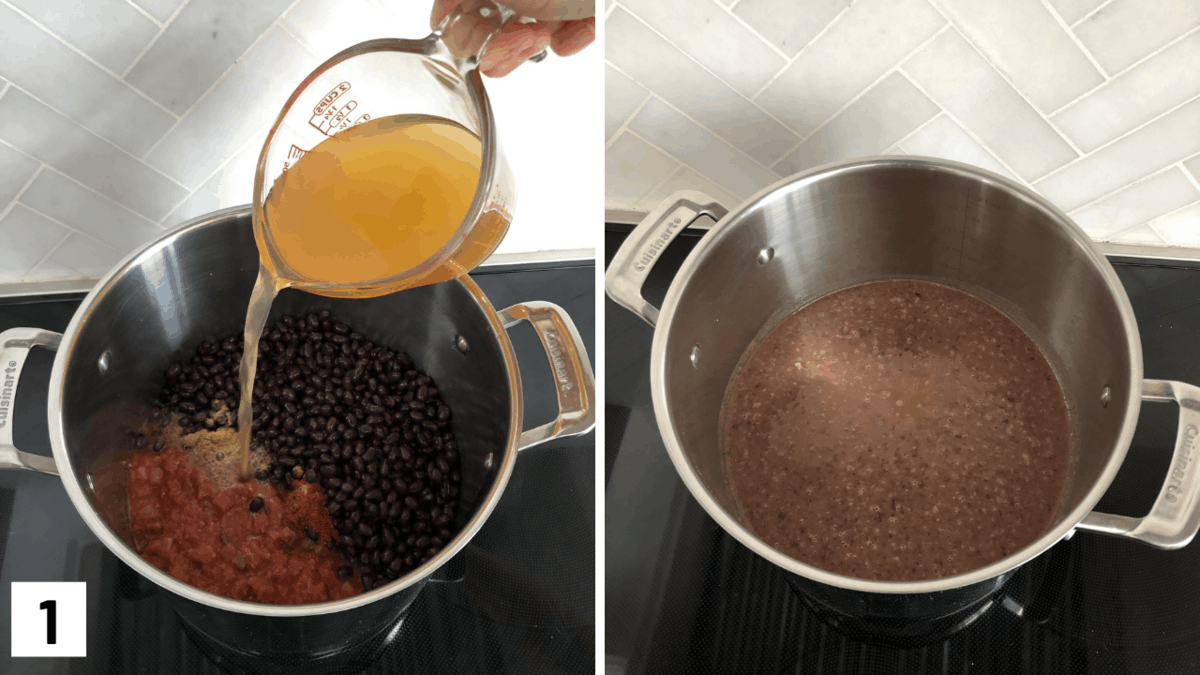
Set of two photos showing beans, tomatoes, and broth added to a pot and blended.

Step 1: To a large pot, combine one can black beans, salsa, stock, cumin, chili, lime, and tomato paste, if using.

If you’re using homemade salsa or pico de gallo that is more fresh and less flavourful, then I recommend adding tomato paste. How much lime and tomato paste you use will depend on the salsa you use. Puree using an immersion blender or just add everything to a stand blender and puree before adding to the pot.
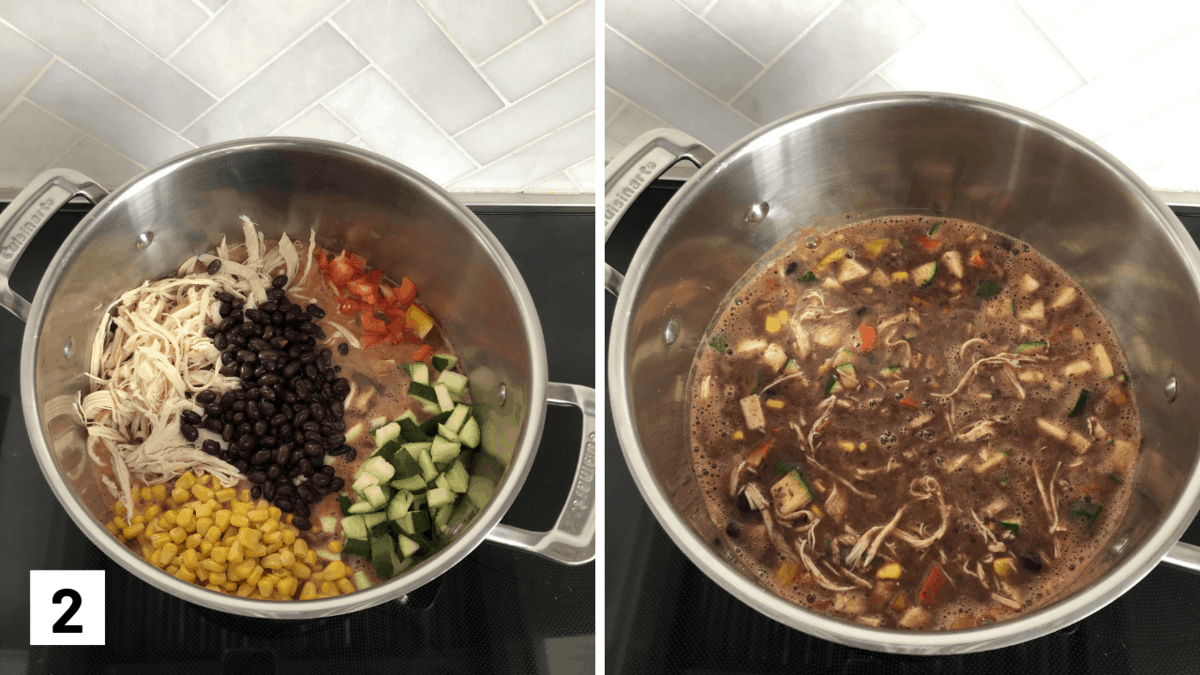
Set of two photos showing beans, chicken, corn, zucchini, and bell peppers added to the pot and then simmered.

Step 2: Heat over medium heat until simmering, then add in the bell peppers, zucchini, corn, chicken, and residual black beans. Adjust seasoning (depending on your salsa’s flavour) by adding more lime, tomato paste, chili, cumin, and salt and pepper. Cook for 10 minutes until the vegetables have softened and the soup is hot. Serve with tortilla chips, avocado, sour cream and cilantro.

Expert Tips

This Mexican Chicken Tortilla soup is more of a guide than a full on recipe since a lot of this depends on the shortcuts you use. When I’ve made it with fresh pico de gallo, I have found it needed more tomato paste to add depth. When I’ve made it with salsa, it might need a little lime. And if I make it with medium or hot salsa it needs less spices than if I make it with mild.  Different brands have different flavours, too! Some are smoky, some are pretty bland so they might need a little more help. But if you start with a product you really like, you’re going to make a tasty soup.

If you have frozen vegetables instead of fresh, you can totally sub them into this healthy tortilla soup. It’s a such flexible recipe, use what you have!

This soup is so flavourful and is done in 10 minutes but if you want to toss everything in and leave the house for errands throughout the day, you can always make this in the slow cooker. Instead of simmering for 10 minutes, set the slow cooker for LOW for 4 to 5 hours and you can have this soup ready for dinner time.

Recipe FAQs

Can I make this healthy tortilla soup vegan?

Sure!! Just omit the chicken, and add another can of beans (maybe switch it up and do kidney or chickpea for variety). You can also try adding tofu or veggie ground round to your tortilla soup base. Make it your own!

Is this soup gluten free?

It definitely can be! You’ll just have to make sure you use most tortilla chips are gluten free but just make sure to double check.

Can I freeze this healthy tortilla soup?

Yep! I got a batch of this tasty stuff hanging out in the freezer right now just waiting for a rainy day when I just don’t have time to make anything. Simply transfer it to a freezer bag on a baking tray and let it freeze flat (rather than a big clump), then transfer to your freezer until you’re ready to eat it.

Is this soup spicy?

Its not too spicy but if you’re not a spice person than I would definitely recommend opting for a mild salsa and holding back a bit on the cumin and chilli powder, or season to your own preference.

How do I store leftovers?

Store your leftover soup in an airtight container in the fridge for up to 5 days.
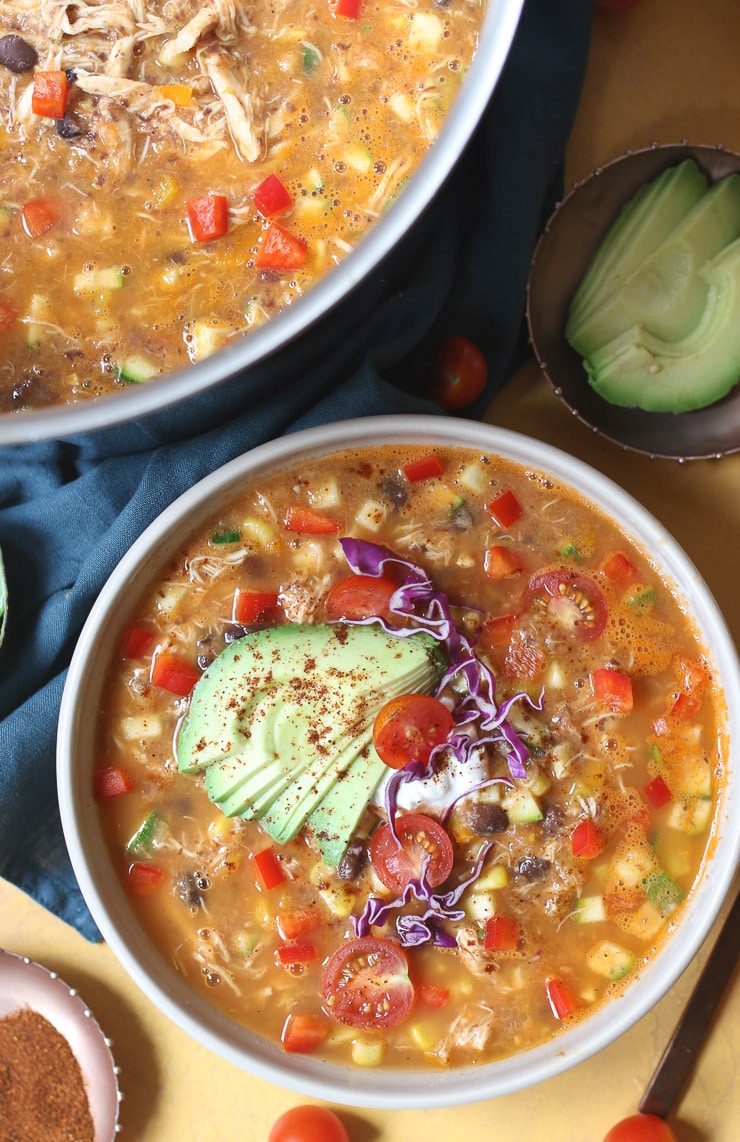
Tortilla soup in a large bowl topped with avocado and cabbage.

More Recipes You Might Like

Want more delicious soup recipes like this healthy tortilla soup? Try these readers’ favourites:

  • VEGAN BROCCOLI WHITE BEAN SOUP
  • HEALTHY PIZZA SOUP
  • VEGAN FLORIDA OJ SWEET POTATO SOUP
  • VEGAN PEA, MINT, AND COCONUT SOUP 

Now friends, tell me — what’s your favourite pantry staple recipe lately? Leave me a comment below with your thoughts!
Tortilla soup in a large bowl topped with avocado and cabbage.
Print Recipe
5 from 9 votes

Healthy Tortilla Soup with Chicken (Easy 10 Minute Recipe)

This easy Healthy Tortilla Soup with Chicken is made in just ten minutes with all of your go-to pantry staples & grocery store shortcuts to make dinner a total breeze!
Cook Time10 minutes mins
Total Time10 minutes mins
Course: Soup
Cuisine: American, Mexican
Servings: 5 servings
Calories: 368kcal
Author: Abbey Sharp

Ingredients

  • 2 cans no salt added black beans 19 oz per can, drained and rinsed and divided
  • 15.5 oz salsa or pico de gallo mild, medium, or hot
  • 4 cups no salt added chicken broth
  • 1 tsp cumin or to taste (optional)
  • 1 tsp chili powder or to taste (optional)
  • 2 tbsp tomato paste optional
  • Juice of 1 lime or to taste (optional)
  • 2 bell peppers diced
  • 2 zucchini diced
  • 340 grams canned corn
  • 1/2 rotisserie chicken shredded
  • Salt and pepper to taste

To serve:

  • Avocado
  • Sour Cream
  • Tortilla Chips
  • Cilantro garnish
  • Purple Cabbage garnish

Instructions

  • To a large pot, combine one can black beans, salsa, stock, cumin, chili, lime, and tomato paste, if using. (If you're using homemade salsa or pico de gallo that is more fresh and less flavourful, then I recommend adding tomato paste. How much lime and tomato paste you use will depend on the salsa you use.) Puree using an immersion blender or just add everything to a stand blender and puree before adding to the pot.
  • Heat over medium heat until simmering, then add in the bell peppers, zucchini, corn, chicken, and residual black beans. Adjust seasoning (depending on your salsa’s flavour) by adding more lime, tomato paste, chili, cumin, and salt and pepper. Cook for 10 minutes until the vegetables have softened and the soup is hot. Serve with tortilla chips, avocado, sour cream and cilantro.

Notes

  • This Mexican Chicken Tortilla soup is more of a guide than a full on recipe since a lot of this depends on the shortcuts you use. When I’ve made it with fresh pico de gallo, I have found it needed more tomato paste to add depth. When I’ve made it with salsa, it might need a little lime. And if I make it with medium or hot salsa it needs less spices than if I make it with mild.  Different brands have different flavours, too! Some are smoky, some are pretty bland so they might need a little more help. But if you start with a product you really like, you’re going to make a tasty soup.
  • If you have frozen vegetables instead of fresh, you can totally sub them into this healthy chicken tortilla soup. It’s a such flexible recipe, use what you have!
  • This soup is so flavourful and is done in 10 minutes but if you want to toss everything in and leave the house for errands throughout the day, you can always make this in the slow cooker. Instead of simmering for 10 minutes, set the slow cooker for LOW for 4 to 5 hours and you can have this soup ready for dinner time.

Nutrition

Calories: 368kcal | Carbohydrates: 48g | Protein: 31g | Fat: 8g | Saturated Fat: 2g | Cholesterol: 58mg | Sodium: 1694mg | Potassium: 1233mg | Fiber: 13g | Sugar: 8g | Vitamin A: 2307IU | Vitamin C: 96mg | Calcium: 94mg | Iron: 4mg
Abbey Sharp

Abbey Sharp is a Registered Dietitian (RD), regulated by the Ontario College of Dietitians. She is a mom, YouTuber, Blogger, award winning cookbook author, media coach specializing in food and nutrition influencers, and a frequent contributor to national publications like Healthline and on national broadcast TV shows.
www.abbeyskitchen.com/about-abbey/

Last Updated December 2, 2020. Published January 4, 2022 By Abbey Sharp 115 Comments

No Bean Chili Recipe (Vegan)

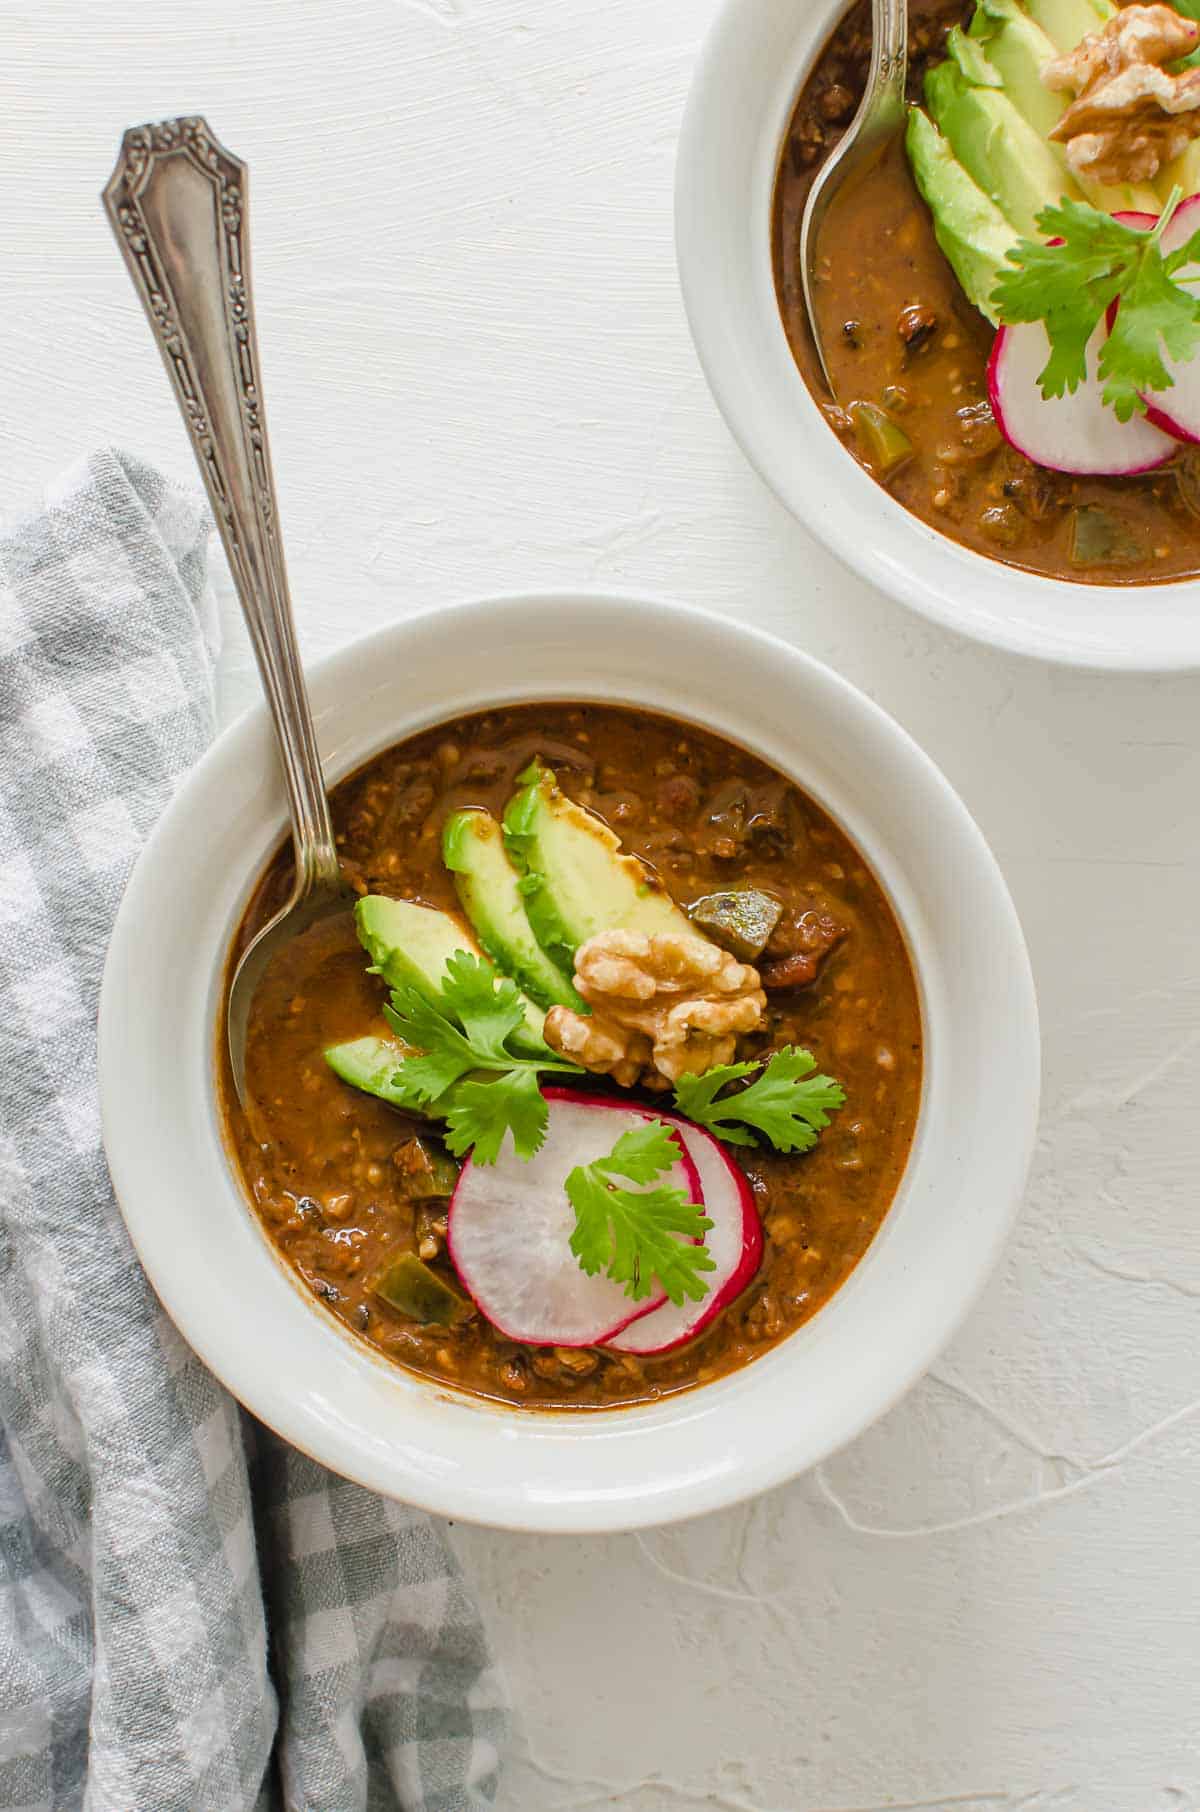
This healthy no bean chili recipe is a delicious gluten free, high protein, low carb dinner recipe that vegans and carnivores alike will want to grab seconds of!

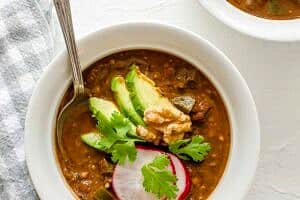
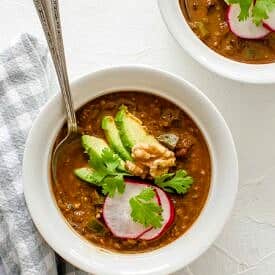
Overhead photo of a white bowl containing a no bean chili topped with avocado, radish, and cilantro.

So winter has always been a real doozy here. I’m sure if you’re reading this from your balcony in LA you’re probably like “WTF is this chick talking about?” but for the rest of us east coasters or Canadians, the struggle is REAL. Honestly, sometimes the only thing that gets me through the cold nights is a warm meal (sorry salad, you’re out). This is where this delicious no bean chili recipe comes into play.

Table of contents

  • Why This Recipe Works
  • Key Ingredients
  • How To Make This Recipe
  • Expert Tips
  • Recipe FAQs
  • More Recipes You May Like

Why This Recipe Works

While a lot of vegan chili recipes rely on beans to bulk it up, this is a no bean chili recipe as I know some people aren’t a fan of beans or can’t have too much beans in their diet. So this no bean chili recipe helps hit that craving without sacrificing that thick, hearty texture.

There is so much flavour in this beanless chili. You’ll never even guess that this is vegan. It tastes even better than a traditional chili.

This recipe also makes for the best leftovers. Some recipes tastes even better when reheated and this is definitely one of them.

Key Ingredients

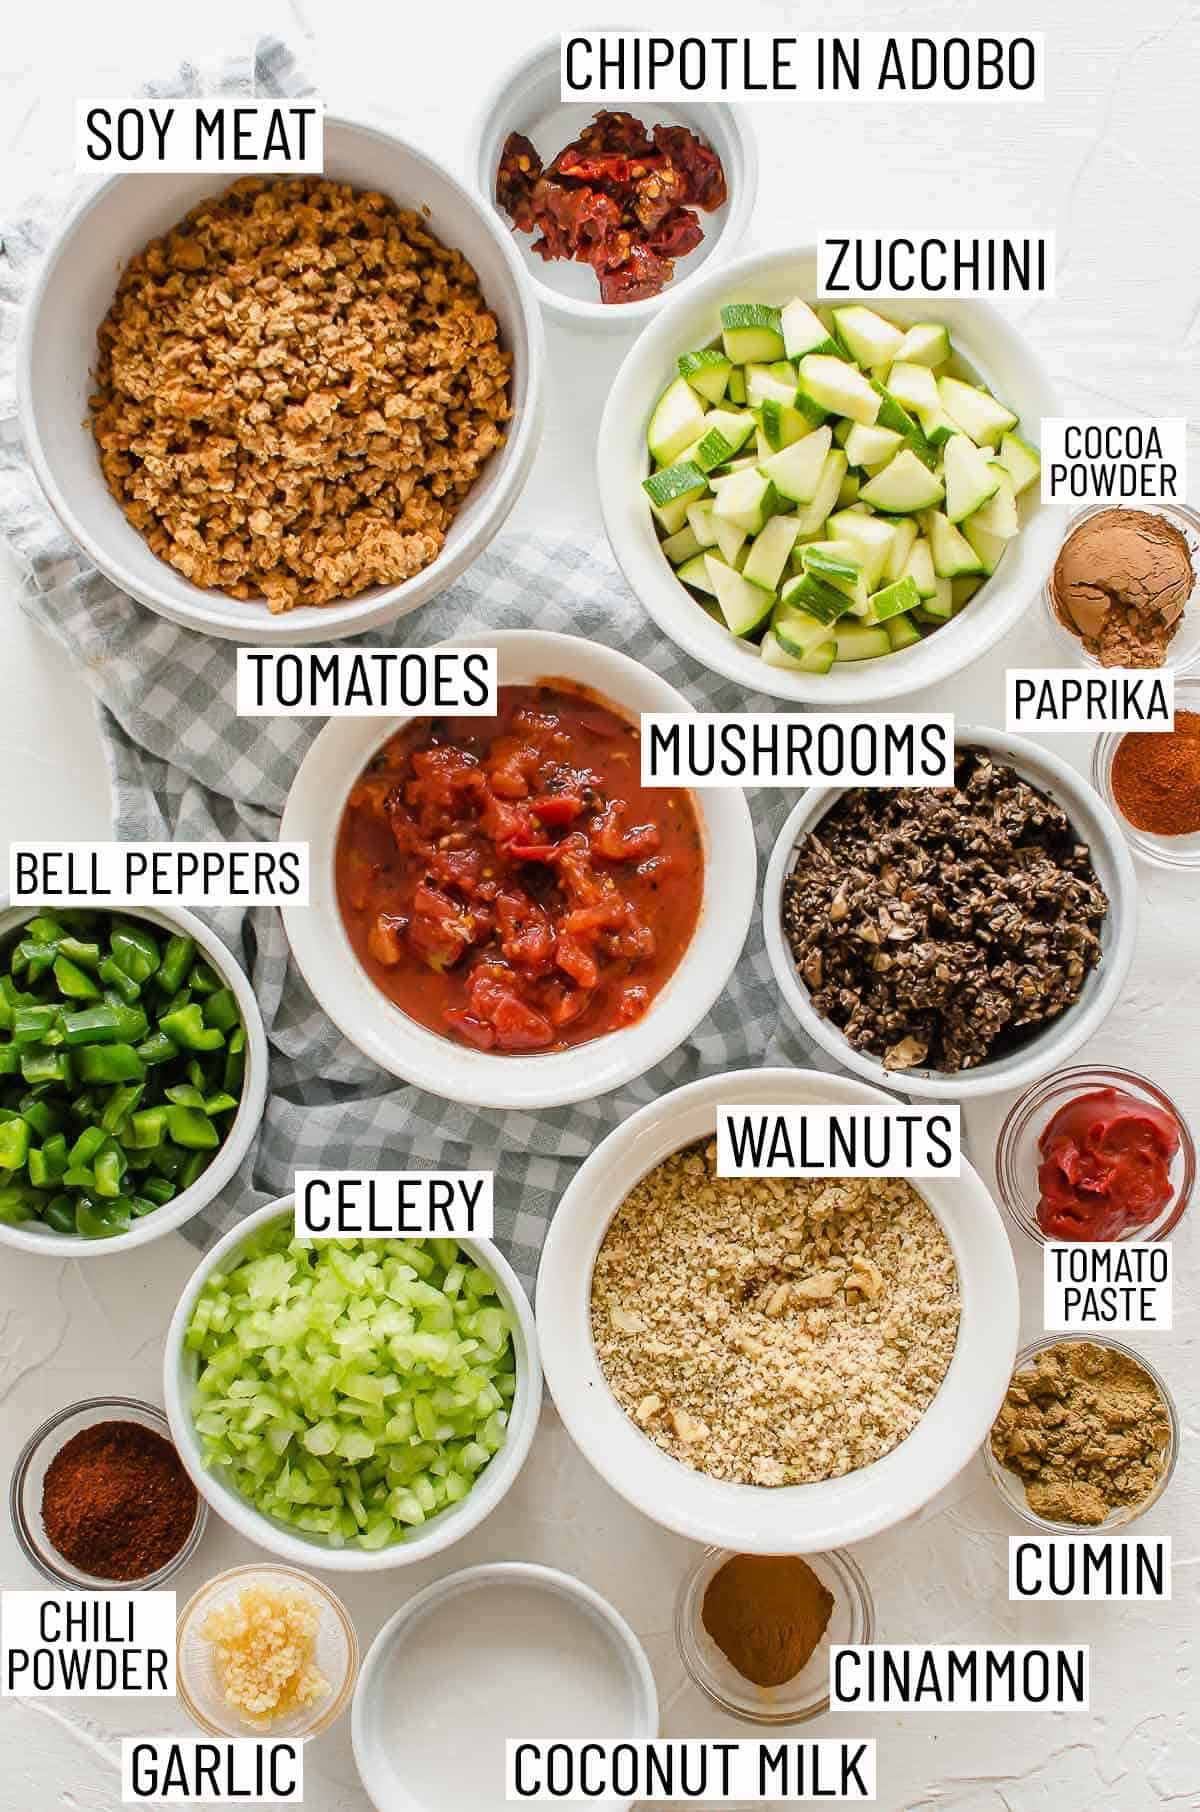
Overhead image of the ingredients required to make a no bean chili laid out in bowls.

Flavour boosters – We’ve got garlic, cinnamon, chili powder, ground cumin, smoked paprika, chipotle in adobo, and unsweetened cocoa powder to make this the most flavourful no bean chili recipe you’ll ever have!

Vegetables – In this vegan chili, we use celery, zucchini, green bell peppers, mushrooms, and diced tomatoes. These extra vegetables really help bulk up the chili and give them that hearty and thick texture. Plus, tomatoes and bell peppers are rich in lycopene which is an amazing antioxidant.

Soy Meat – Soy meat is another ingredient to give our chili that cozy hearty feel to it. Your meat loving family or friends won’t even taste a difference!

Walnuts – Walnuts are such a heart healthy ingredient, since they have about twice as many antioxidants as other nuts, and they pack both monounsaturated fats and omega 3s. When crushed really fine, walnuts actually have a similar texture as ground beef but without the saturated fat!

How To Make This Recipe

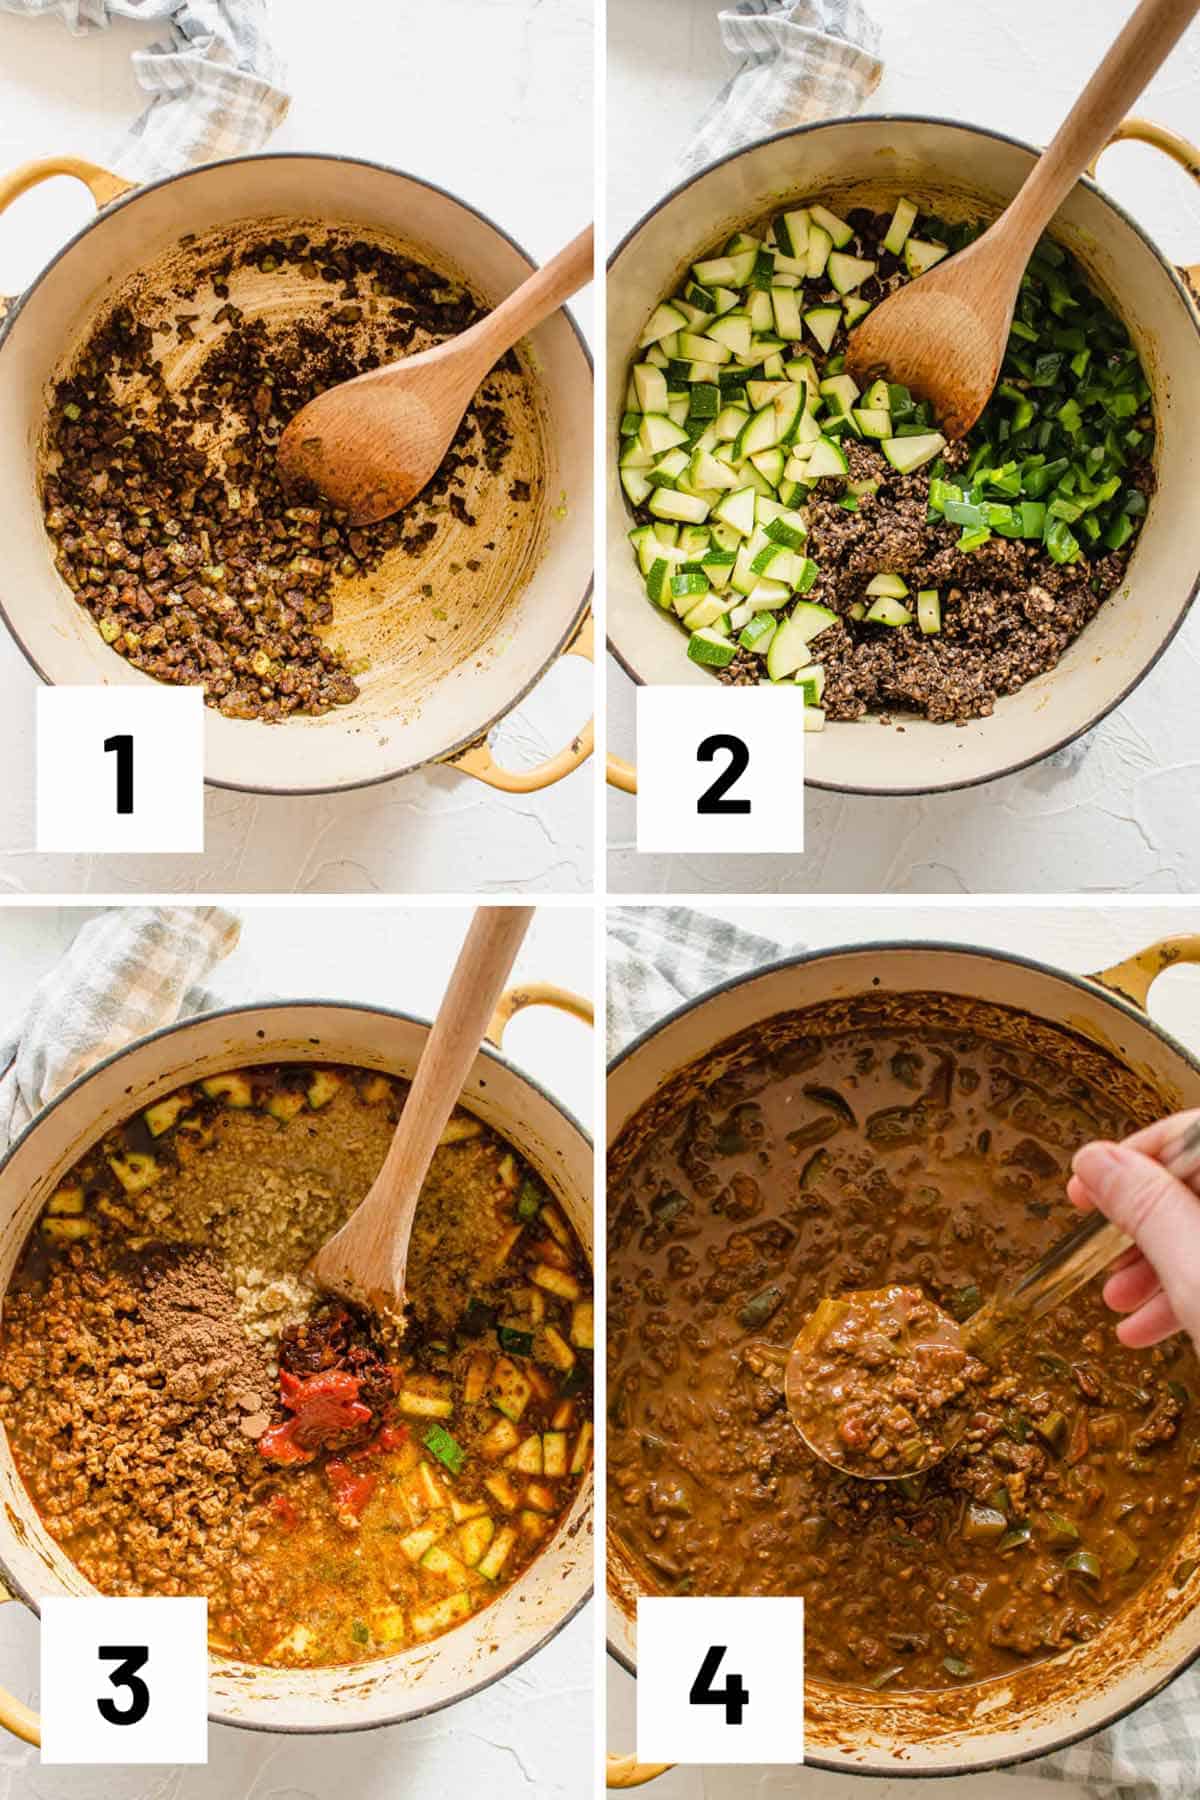
Set of 4 instructional photo showing how to saute the ingredients, adding in the vegetables and liquid, and then a pot filled with vegan chili with a ladle scooping out a serving.

Step 1: Heat the oil in a large pot over medium heat. Add the celery and cook for 4 minutes. Add in the garlic, cinnamon, chili powder, cumin, and paprika and stir until fragrant, about another 2 minutes.

Step 2: Add the bell peppers, zucchini, mushrooms and cook for 5 minutes. 

Step 3: Add the chipotle, tomato paste, tomatoes, water, coconut milk, soy meat, walnuts, and cocoa powder. Reduce the heat to medium-low and simmer for about 20-25 minutes until thick and the vegetables are soft.

Step 4: Season with salt and pepper, to taste. Top the no bean chili with avocado, radishes, and cilantro.

Expert Tips

Adding chocolate to chili might be an odd thought at first but it actually adds a lot of depth and richness to our no bean chili recipe, making it both more savoury.

This chili has 10 grams of net carbs, 28 grams of fat, and 353 calories per serving making it the perfect high protein low carb vegetarian keto recipe. If you’re looking to substitute any ingredients, keep in mind that it’ll change up the end result.

This chili tastes amazing when reheated, making it great for meal prepping. When reheating the chili, due to how thick it is, I recommend giving it a stir at the halfway mark to help the chili reheat evenly.

A heavy bottomed pot such as a Dutch oven is my go-to for making chili in as it distributes heat evenly.

Recipe FAQs

What kind of toppings go well with this no bean chili recipe?

I use avocado, radishes, and cilantro. You can also add tortilla chips, shredded (vegan) cheese, (vegan) sour cream, red onions, jalapeno peppers, and more!

Can I freeze this vegan chili?

You can! Simply let the no bean chili cool and then transfer to an airtight freezer safe container before freezing. When ready to eat, allow the chili to fully thaw in the fridge before reheating it in the microwave or stovetop.

What can I serve this low carb chili with?

You can serve chili with whatever you please! Typically chili is served with a starch, like quinoa, rice, cornbread, or tortilla chips but you can also serve it with a hearty salad such as a healthy lentil salad or tofu.

How do I meal prep this?

You can either make a double batch (one to enjoy now and one to enjoy throughout the week for lunch) and store the extra in meal prep containers in the fridge for the next 4 days or just make a single batch for the week!

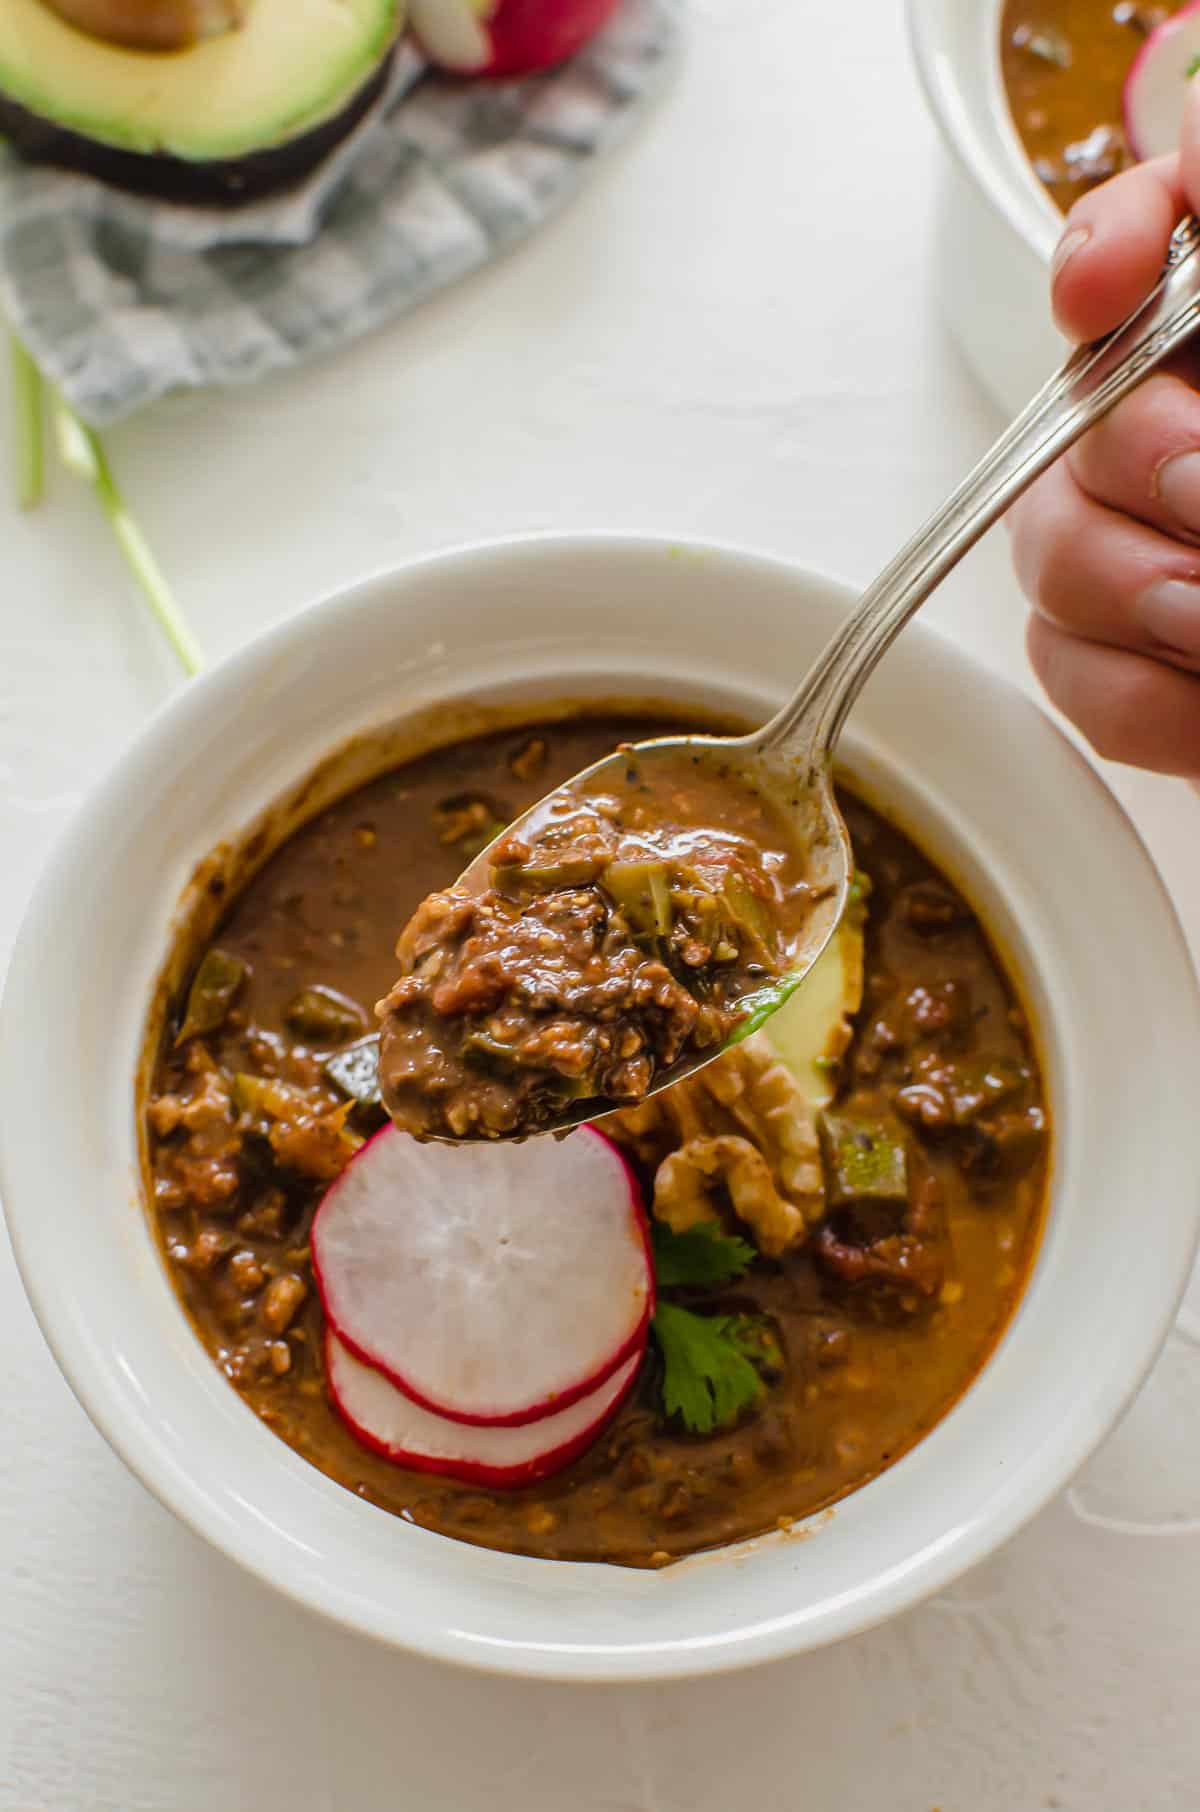
Close up image of a spoon filled with chili.

More Recipes You May Like

If you liked this no bean chili recipe, you may like:

  • HEALTHY PIZZA SOUP
  • VEGAN ROASTED CAULIFLOWER SOUP WITH PARSNIPS
  • VEGAN YELLOW BEET COCONUT CURRY SOUP
  • VEGAN ROASTED FENNEL TOMATO SOUP

What’s your favourite meal for staying warm this winter?

 
Print Recipe
4.08 from 117 votes

No Bean Chili Recipe (Vegan)

This delicious No Bean Chili Recipe is a delicious gluten free, high protein, low carb dinner recipe that vegans and carnivores alike will want to grab seconds of!
Prep Time10 minutes mins
Cook Time31 minutes mins
Total Time41 minutes mins
Course: Main Course
Cuisine: American
Servings: 6 – 8 people
Calories: 353kcal
Author: Abbey Sharp

Ingredients

  • 2 tbsp extra virgin olive Oil
  • 5 stalks celery finely diced
  • 2 cloves garlic minced
  • 1 1/2 tsp ground cinnamon
  • 2 tsp chili powder
  • 4 tsp ground cumin
  • 1 ½ tsp smoked paprika
  • 2 peppers large chipotle in adobo minced
  • 2 green bell peppers finely diced
  • 2 zucchini diced
  • 8 oz cremini mushrooms minced in a food processor
  • 1 1/2 tbsp tomato paste
  • 1 15 oz can diced tomatoes
  • 3 cups water
  • 1/2 cup coconut milk
  • 2 1/2 cups soy meat crumbled
  • 1 cup raw walnuts minced
  • 1 tbsp unsweetened cocoa powder
  • Salt and pepper to taste

To serve:

  • 2 tbsp Fresh cilantro leaves
  • 1 Avocado sliced
  • 2 tbsp Sliced radishes

Instructions

  • Heat the oil in a large pot over medium heat. Add the celery and cook for 4 minutes. Add in the garlic, cinnamon, chili powder, cumin and paprika and stir until fragrant, about another 2 minutes.
  • Add the bell peppers, zucchini, mushrooms and cook for 5 minutes. 
  • Add the chipotle, tomato paste, tomatoes, water, coconut milk, soy meat, walnuts and cocoa powder. Reduce the heat to medium-low and simmer for about 20-25 minutes until thick and the vegetables are soft.
  • Season with salt and pepper, to taste. Top with avocado, radishes, and cilantro.

Video

Notes

Adding chocolate to chili might be an odd thought at first but it actually adds a lot of depth and richness to our no bean chili, making it both more savoury.
This chili has 10 grams of net carbs, 28 grams of fat, and 353 calories per serving making it the perfect high protein low carb vegetarian keto recipe. If you’re looking to substitute any ingredients, keep in mind that it’ll change up the end result.
This chili tastes amazing when reheated, making it great for meal prepping. When reheating the chili, due to how thick it is, I recommend giving it a stir at the half way mark to help the chili reheat evenly.
A heavy bottomed pot such as a Dutch oven is my go-to for making chili in as it distributes heat evenly.

Nutrition

Calories: 353kcal | Carbohydrates: 18g | Protein: 13g | Fat: 28g | Saturated Fat: 6g | Sodium: 224mg | Potassium: 891mg | Fiber: 8g | Sugar: 5g | Vitamin A: 960IU | Vitamin C: 49.3mg | Calcium: 75mg | Iron: 5.1mg
Abbey Sharp

Abbey Sharp is a Registered Dietitian (RD), regulated by the Ontario College of Dietitians. She is a mom, YouTuber, Blogger, award winning cookbook author, media coach specializing in food and nutrition influencers, and a frequent contributor to national publications like Healthline and on national broadcast TV shows.
www.abbeyskitchen.com/about-abbey/

Last Updated November 26, 2020. Published December 31, 2021 By Abbey Sharp 5 Comments

Egg Strata with Apples & Caramelized Onions

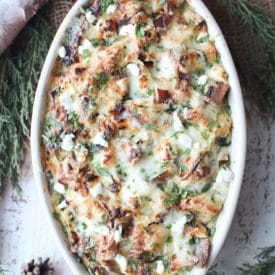
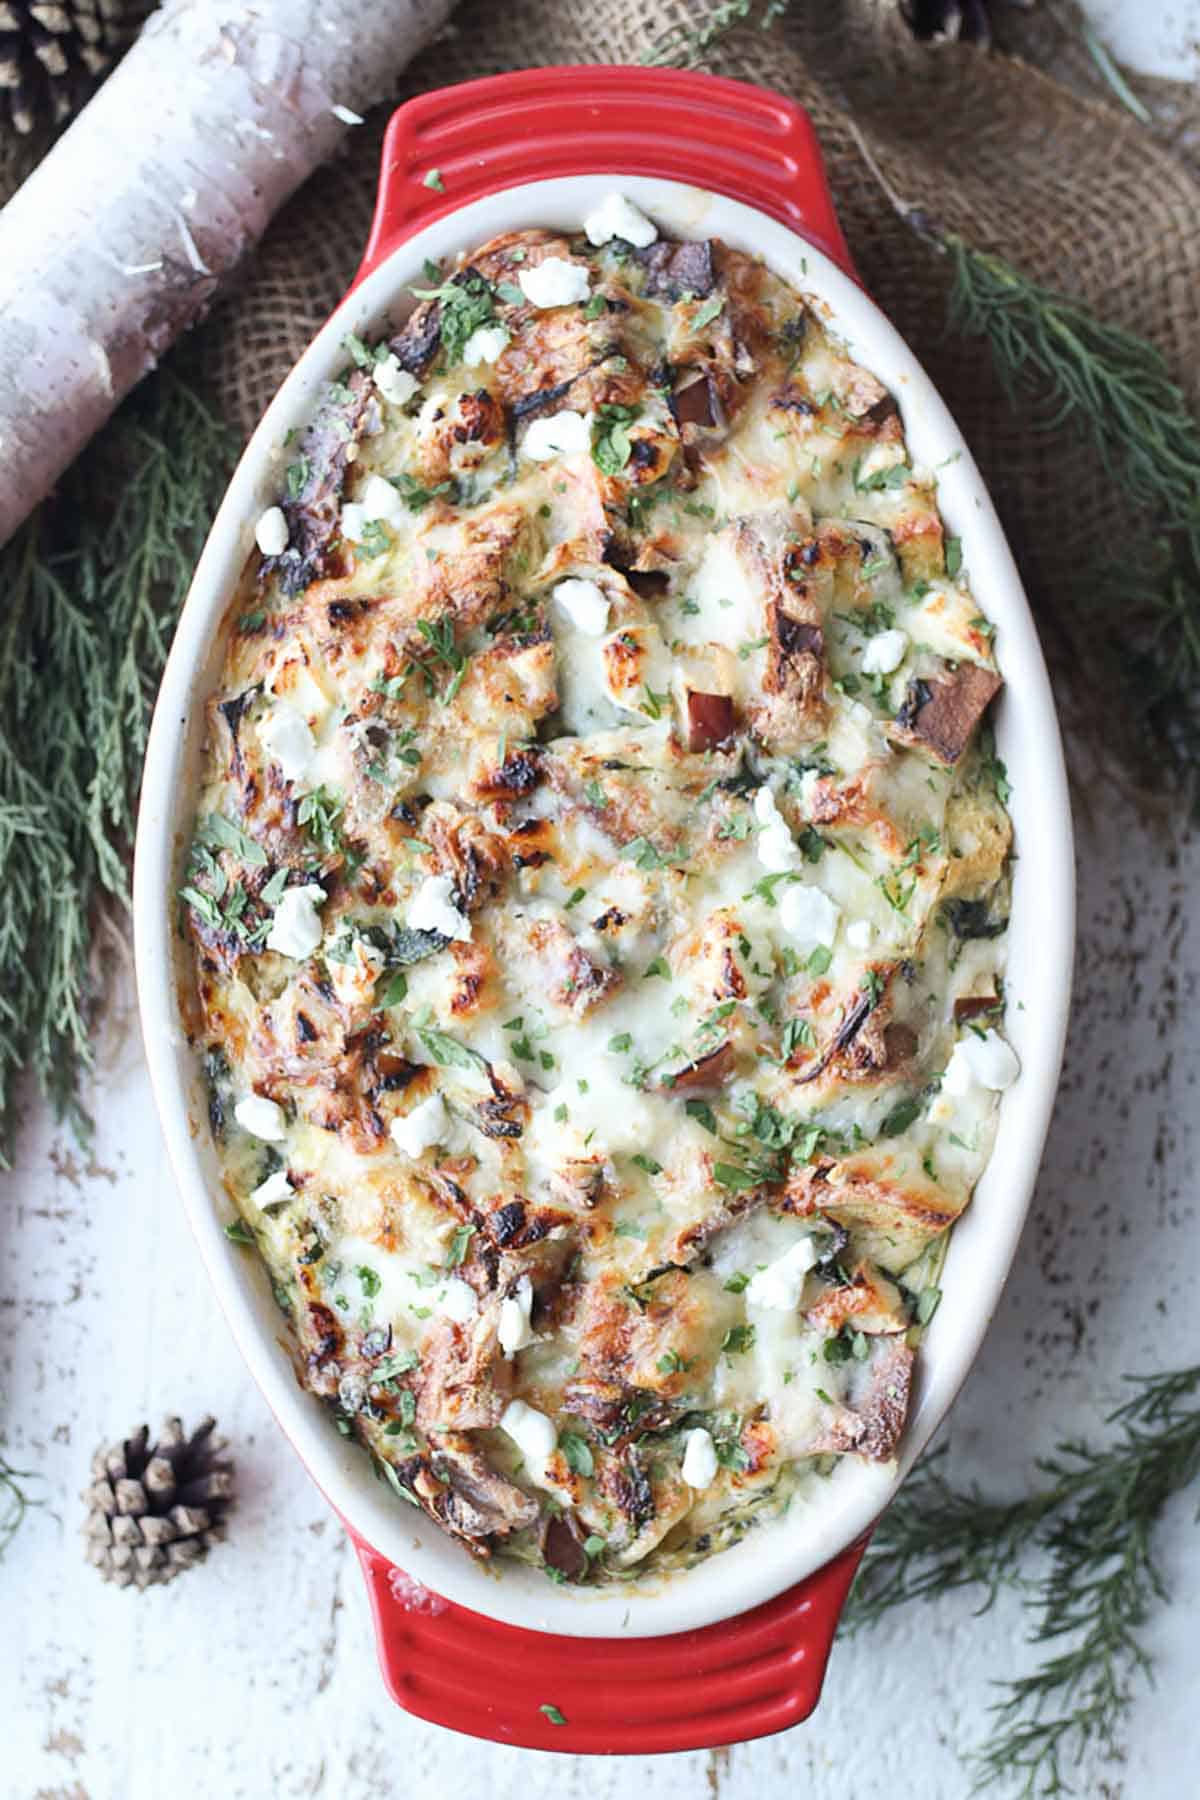
Strata in a casserole dish.

This egg strata with caramelized onions and apples is a perfect holiday worthy brunch or breakfast option that is also gluten free and great for those with dietary restrictions.

Birds eye view of strata in a red casserole dish topped with parsley.

Tis the season for making drool worthy holiday meals. Now, dreaming up delicious meals for the holidays can be exhausting and stressful – especially if there are a lot of different dietary restrictions at the table. But brunch meals always feel more manageable and more relaxed, so that’s always where I like to start first.

When I’m in charge of hosting a family brunch or breakfast for the holidays, my typical menu is:

  • Green Salad
  • Fruit salad
  • Yogurt and granola
  • Coffee (obvs)
  • Bagels & Lox (#Jewishmother)
  • Baked french toast
  • This epic egg strata

There you go, you’re welcome.

Table of contents

  • What Is a Strata?
  • Key Ingredients
  • How to Make This Recipe
  • Expert Tips
  • Recipe FAQs
  • More Holiday Worthy Brunch Recipes

What Is a Strata?

A strata is simply a casserole made predominantly out of eggs and bread, where you can add any veggies, meats, nuts, fruit or other goodies inside. It’s easy to pull off (with whatever you have on hand), and it’s also an inexpensive meal you can enjoy any time of day.

Key Ingredients

The best part of making this vegetarian egeg strata is that there really are no rules. For this cold weather, I like the comfort food combination of apples, caramelized onions and chevre, but you can totally throw in whatever you want. Here’s my current love list to make a solid vegetarian egg strata:

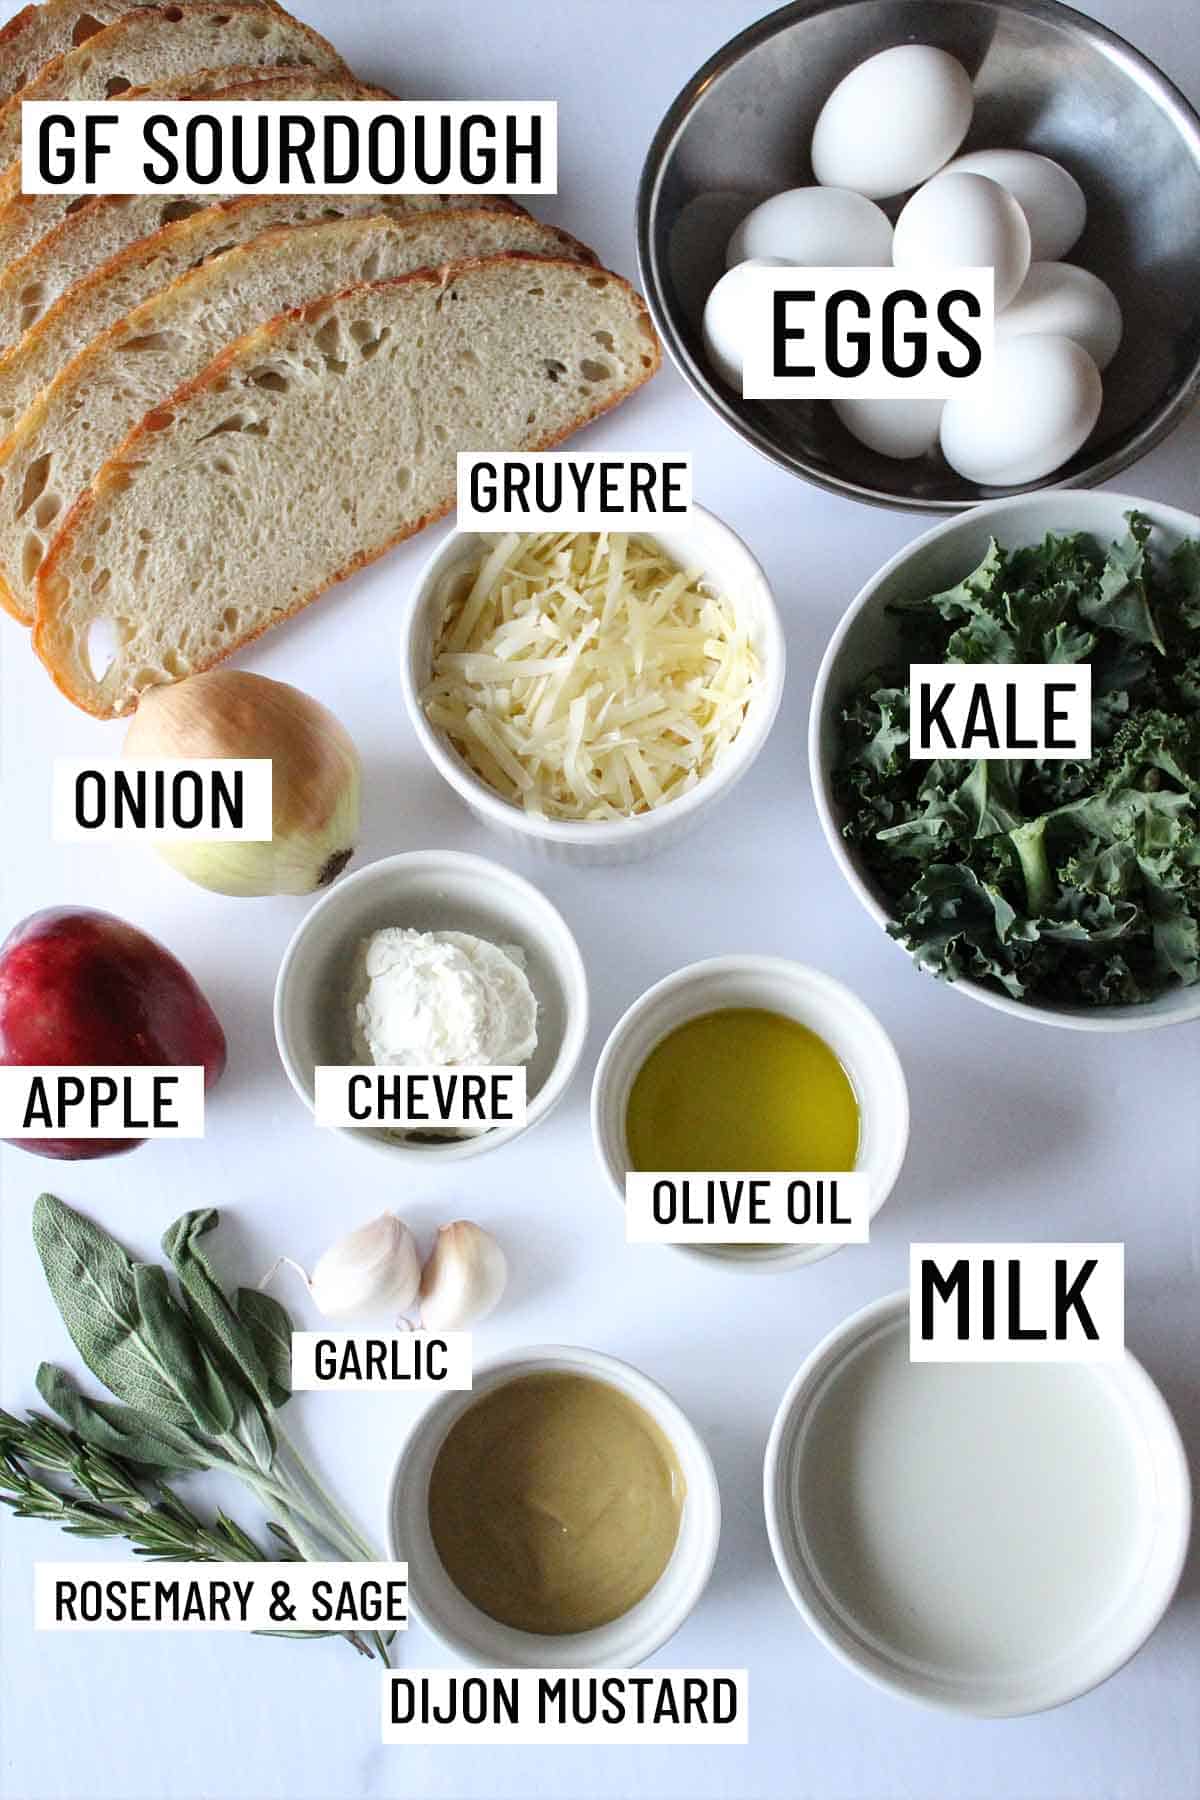
Birds eye view of strata ingredients including eggs, bread, kale, garlic, herbs, mustard, olive oil, onion, apple, and cheese.

Again, if you don’t have or don’t like some of these ingredients, don’t worry about them! Swap in whatever you have on hand.

Gruyere – Gruyere is a type of swiss cheese that is known for its easily melting and is typically used for fondues. If you don’t have Gruyere on hand, any type of swiss cheese will do.

Bread – We use gluten-free sourdough bread for this recipe, but you can use any bread that you have on hand. Try using whole grain bread to up the fiber content!

Apple – By adding apples into this recipe, not only are we incorporating extra fiber, vitamins, and minerals, it also adds the perfect amount of sweetness to this egg strata.

How to Make This Recipe

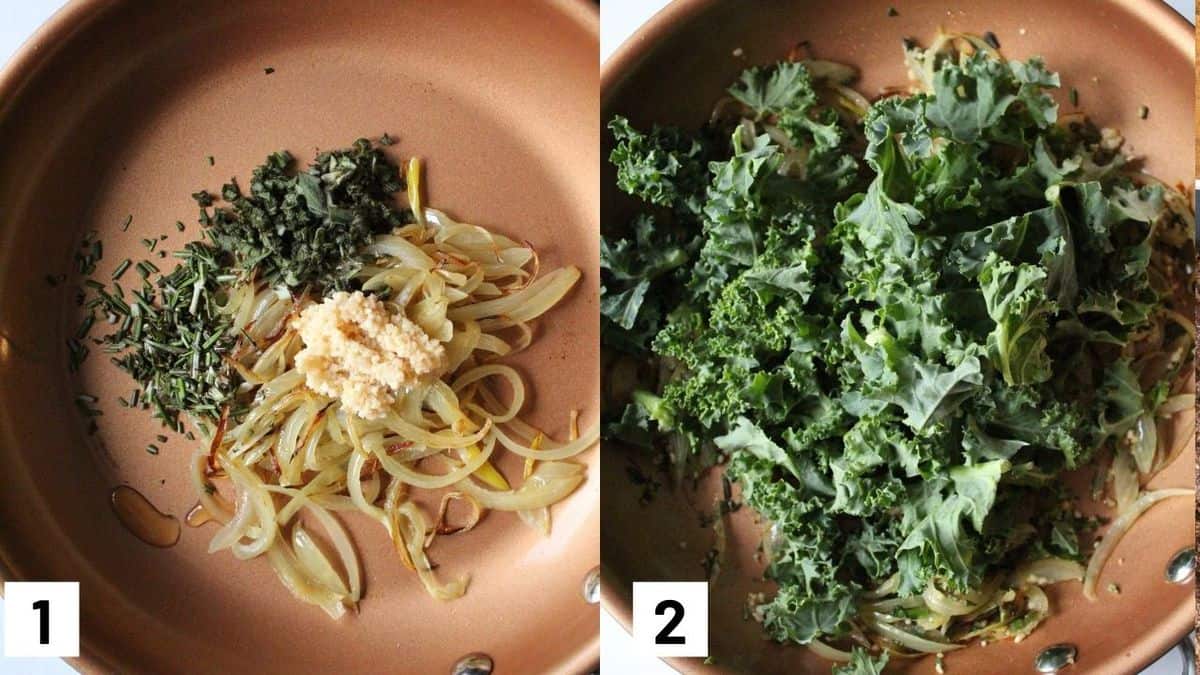
Images of the first two steps of vegetarian strata recipe including caramelizing onions, and cooking garlic, kale, and herbs in a pan.

Step 1: Add oil to a large nonstick skillet over medium high heat, and add in the onions and cook on a medium low heat until golden brown, about 30 minutes. Then stir in the garlic, sage, and rosemary. Cook until fragrant.

Step 2: Add in the kale and a pinch each of salt, pepper and nutmeg.

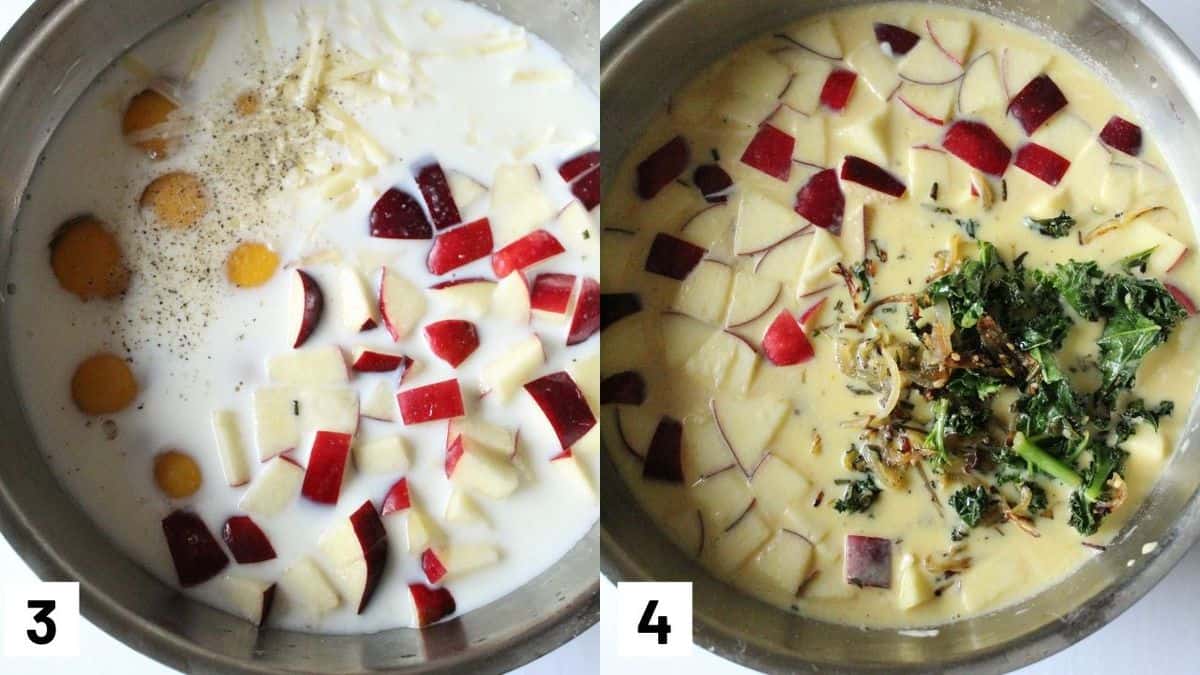
Two side by side images of eggs, apples, and cheese mixture in bowl combined with kale and onion mixture from the first two steps.

Step 3: In another bowl, mix together the eggs, milk, mustard, apple, 1/4 cup of cheese and a pinch each of salt and pepper.

Step 4: Add in kale and onion mixture and combine.

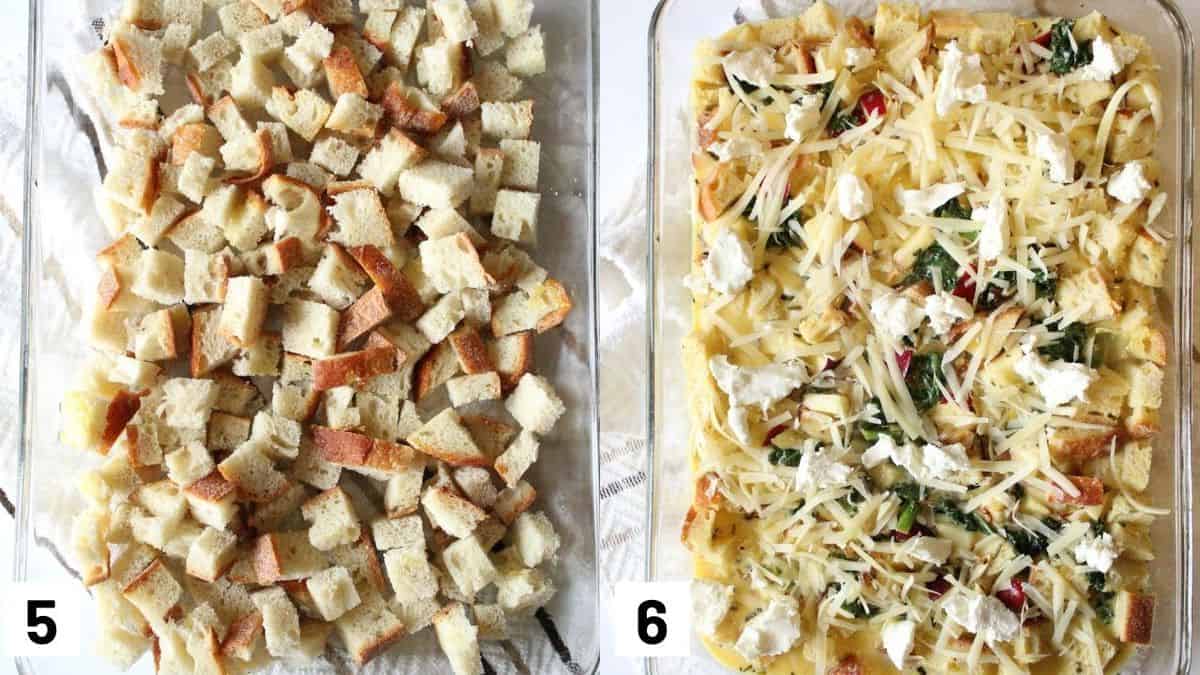
Images of the last two steps of the recipe including arranging the diced bread in casserole dish and adding egg mixture on top and topping off with cheese.

Step 5: Arrange bread into a casserole dish.

Step 6: Top with the milk and egg mixture. Finish with the remaining gruyere and chevre.

Expert Tips

I’ve made a lot of egg strata’s in my day, and here’s what I’ve learned.

  • Use day old bread if you can! It will soak up the egg better and not get soggy
  • Put the cheese into the casserole and on top!
  • Let the strata rest for 5-10 minutes before you cut and serve it.

I also like to cover and refrigerate for 1 hour or up to overnight. This is why this vegetarian egg strata is sooooo amazing for entertaining – because all of the work can happen the day before! An hour before guests arrive, I preheat my oven and bake it off until golden brown and voila! Done.

While we love to use gruyere in this recipe for its super melty consistency and nutty flavour, some vegetarians may wish to avoid this option as gruyere has rennet which technically makes it non-vegetarian. Swiss cheese, on the other hand, is a great fully vegetarian friendly option and is just as delicious!

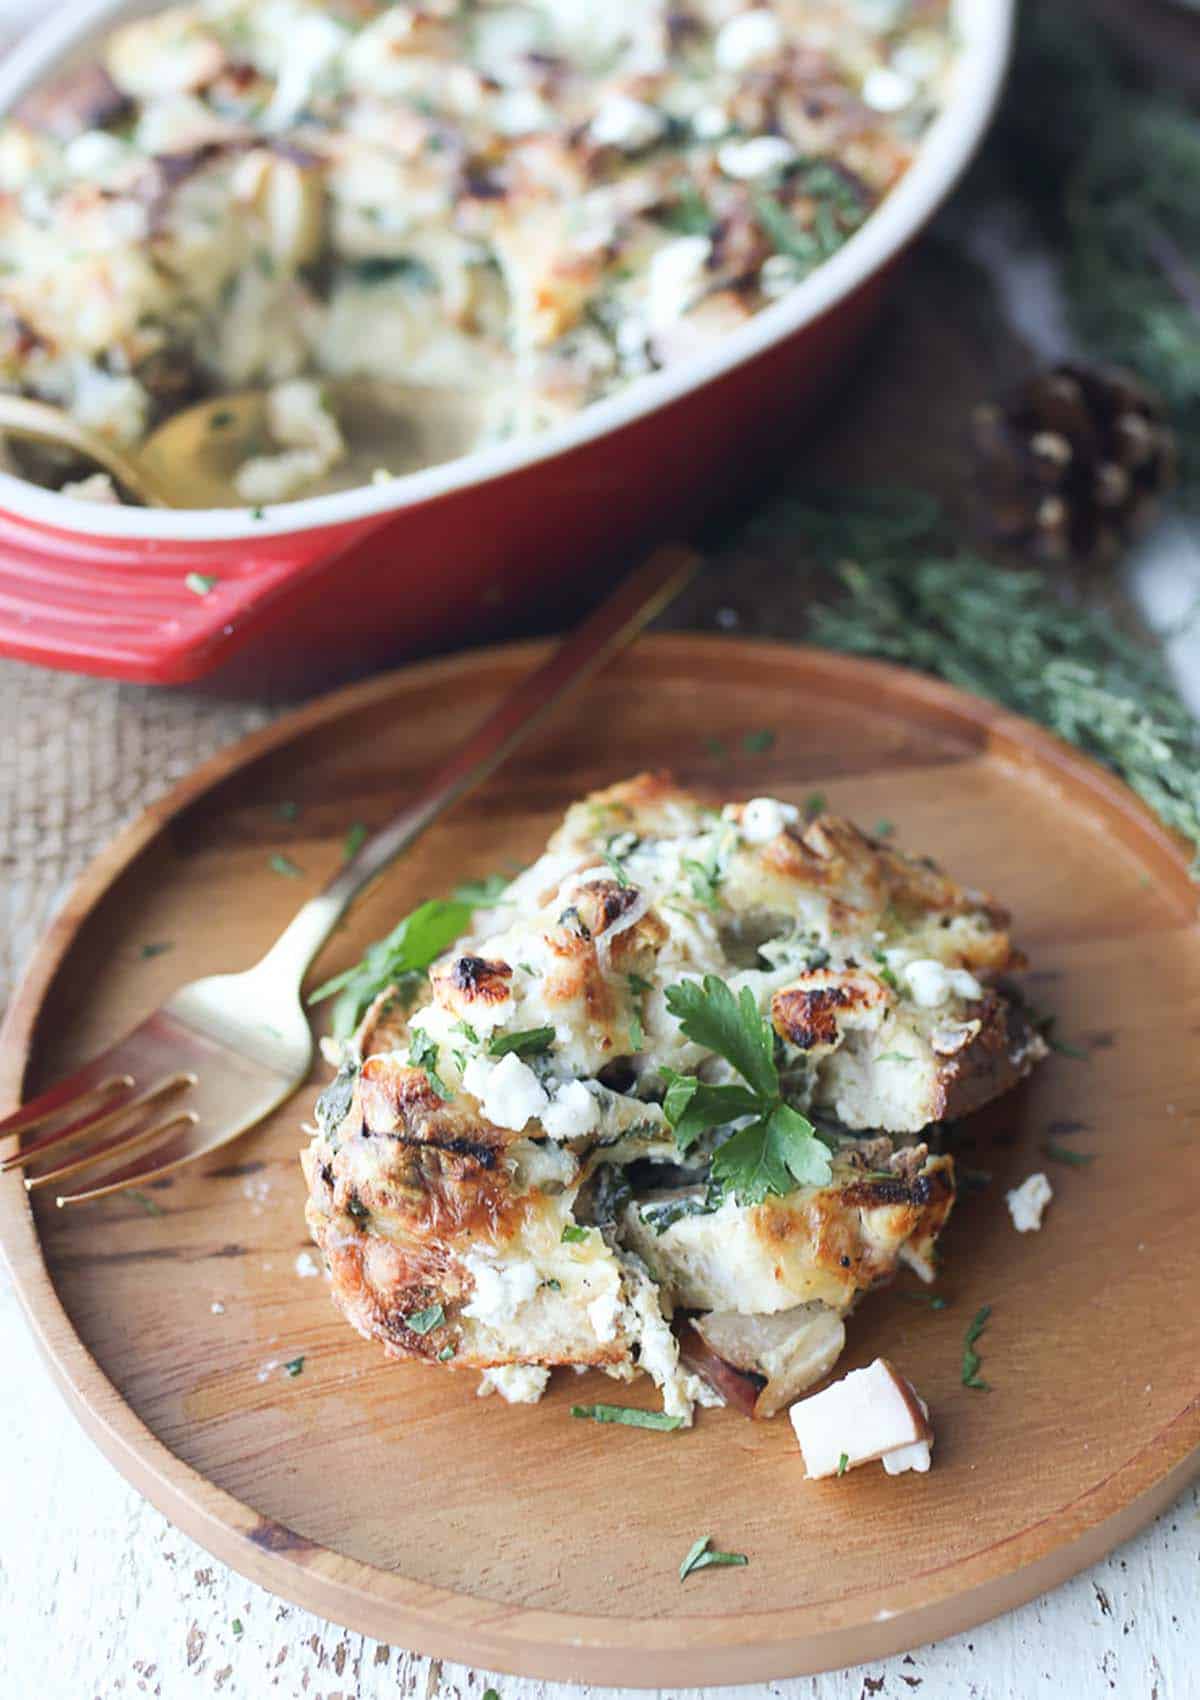
A serving of vegetarian strata on a brown wooden plate with a fork on the side, topped with parsley.

Recipe FAQs

Can I make this vegetarian egg strata not gluten free?

The only ingredient with gluten in this vegetarian egg strata is the bread, so if you don’t have any gluten free guests, then definitely use regular sourdough bread. I also really do love the flavour of sourdough but if you have another tasty bread at your house, go with that.

Can I add other ingredients to this?

Totally! You can add whatever veggies or cheese you want, and if you don’t want it to be vegetarian, you can also add in some breakfast sausage, bacon or leftover chicken.

Could this be made ahead of time for entertaining?

I recommend prepping it the day before and then baking it off an hour before guests arrive. However, you can bake it the day before or at home and then just reheat it at 250 F for 20 minutes until warm.

More Holiday Worthy Brunch Recipes

Gluten Free Orange Berry Dutch Baby

Vegan Breakfast Sausage with Maple and Apple

Orange Poppyseed Waffles

Pistachio Crusted Vegan French Toast with Tahini and Figs

Berry Buckwheat Crepes with Avocado Chocolate Mousse

What will you be making for the holidays this year? Have you tried making an egg strata before? Leave me a comment below with your thoughts!

Strata in a casserole dish.
Print Recipe
4.86 from 7 votes

Egg Strata with Apples & Caramelized Onions

This vegetarian egg strata with caramelized onions and apples is a perfect holiday worthy brunch or breakfast option that is also gluten free!
Prep Time1 hour hr 10 minutes mins
Cook Time1 hour hr 25 minutes mins
Total Time2 hours hrs 35 minutes mins
Course: Breakfast
Cuisine: American
Diet: Gluten Free, Vegetarian
Servings: 6 people
Calories: 400kcal
Author: Abbey Sharp

Ingredients

  • 1  Tbsp  extra virgin olive oil
  • 1/2  onion thinly sliced
  • 2 cloves garlic minced
  • 1 tbsp minced fresh sage
  • 1 tbsp minced fresh rosemary
  • 2 cups baby kale sliced
  • Pinch each of salt pepper and nutmeg
  • 1 red apple diced
  • 8  large eggs
  • 1 3/4  cups 1% or 2% milk
  • 2  tbsp  Dijon mustard
  • Pinch each of salt and pepper
  • 5 cups gluten free sourdough bread diced
  • 3/4  cup  swiss or gruyere cheese  grated and divided
  • 2 tbsp  chevre

Instructions

  • Lightly grease a 9×13 inch casserole or gratin dish.
  • Add the oil to a large nonstick skillet over medium high heat, and add in the onions and cook on a medium low heat until golden brown, about 30 minutes. Then stir in the garlic, sage, and rosemary. Cook until fragrant. Add in the kale and a pinch each of salt, pepper and nutmeg.
  • In another bowl, mix together the eggs, milk, mustard, apple, 1/4 cup of gruyere cheese and a pinch each of salt and pepper. Add in kale and onion mixture and combine.
  • Arrange the Promise gluten free sourdough bread into a casserole dish, and top with the milk and egg mixture. Finish with the remaining gruyere and chevre. Cover and refrigerate for 1 hour or up to overnight.
  • Preheat oven to 350 F.
  • Bake uncovered for 45-50 min or until golden brown.

Notes

I’ve made a lot of egg strata’s in my day, and here’s what I’ve learned.
  • Use day old bread if you can! It will soak up the egg better and not get soggy
  • Put the cheese into the casserole and on top!
  • Let the strata rest for 5-10 minutes before you cut and serve it.
I also like to cover and refrigerate for 1 hour or up to overnight. This is why this dish is sooooo amazing for entertaining – because all of the work can happen the day before! An hour before guests arrive, I preheat my oven and bake it off until golden brown and voila! Done.
While we love to use gruyere in this recipe for its super melty consistency and nutty flavour, some vegetarians may wish to avoid this option as gruyere has rennet which technically makes it non-vegetarian. Swiss cheese, on the other hand, is a great fully vegetarian friendly option and is just as delicious!

Nutrition

Calories: 400kcal | Carbohydrates: 25g | Protein: 22g | Fat: 23g | Saturated Fat: 10g | Cholesterol: 265mg | Sodium: 393mg | Potassium: 361mg | Fiber: 2g | Sugar: 9g | Vitamin A: 3084IU | Vitamin C: 29mg | Calcium: 504mg | Iron: 2mg
Abbey Sharp

Abbey Sharp is a Registered Dietitian (RD), regulated by the Ontario College of Dietitians. She is a mom, YouTuber, Blogger, award winning cookbook author, media coach specializing in food and nutrition influencers, and a frequent contributor to national publications like Healthline and on national broadcast TV shows.
www.abbeyskitchen.com/about-abbey/

Last Updated December 23, 2021. Published December 23, 2021 By Abbey Sharp 4 Comments

Cherry Crisp Recipe with Chocolate Chips (Vegan & Gluten Free)

This cherry crisp recipe with chocolate chips is an easy vegan and gluten free weeknight dessert using pantry staples and frozen fruit. It is also a great dessert option for the holidays, entertaining, and other special occasions!

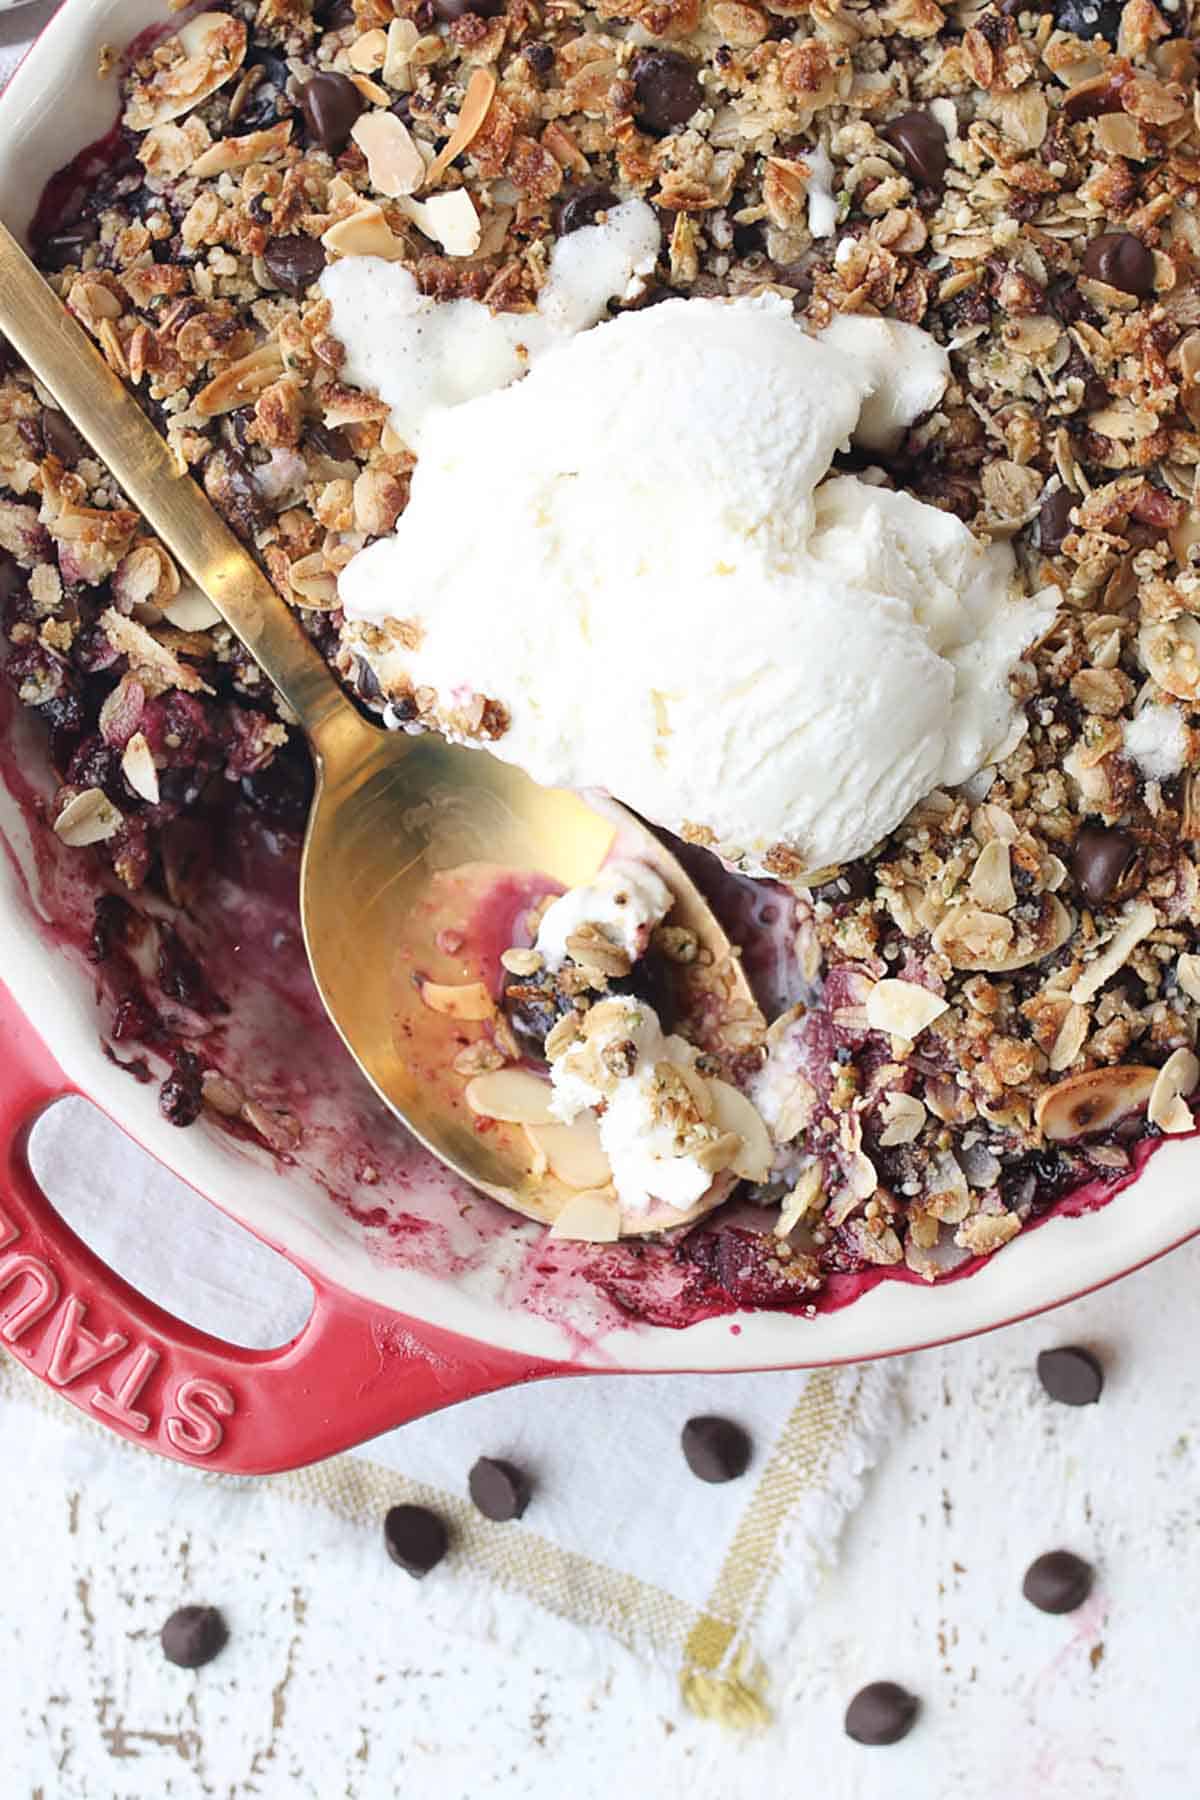
Close up of gluten free cherry crisp topped with ice cream.

Whenever I am in a pinch to put together an easy and crowd pleasing dessert recipe, a fruit crisp is always a go-to! I love it because it uses pantry staples and I can throw in whatever frozen fruit I have on hand. Simple, easy, and always 100% delicious.

This time, I had a surplus of frozen cherries and chocolate chips in the pantry that needed to be used up and alas! This cherry crisp recipe with chocolate chips was born. This cherry crisp is healthy enough for breakfast or brunch, but decadent enough to serve as dessert. It’s also made it pretty much exclusively with all of the ingredients I have in my pantry and freezer, so there’s no need to make special trips out for the ingredients.

Table of contents

  • Why This Recipe Works
  • Key Ingredients
  • How to Make This Recipe
  • Expert Tips
  • Recipe FAQs
  • More Recipes You Might Like

Why This Recipe Works

Most crisp recipes you will find are already plant-based, as it is easy to swap traditional better in recipes with other ingredients, such as oil or vegan butter. However, in order to make this crisp recipe gluten free, we are using a combination of gluten-free oats, corn starch and almond flour – all naturally gluten-free ingredients. Plus, the oats provide fibre and complex carbs, while the almond flour delivers a nice dose of healthy fats to this recipe. It’s a win-win!

I also chose frozen cherries to use in this cherry crisp recipe instead of fresh, as frozen cherries can be found pretty much anytime of year or season. However, if you don’t like cherries, feel free to use any frozen fruit you have on hand that you think pairs well with chocolate. Raspberries and strawberries would both be delicious. Plus, is there any dessert that isn’t better with a bit of extra chocolate? Not in my books!

Key Ingredients

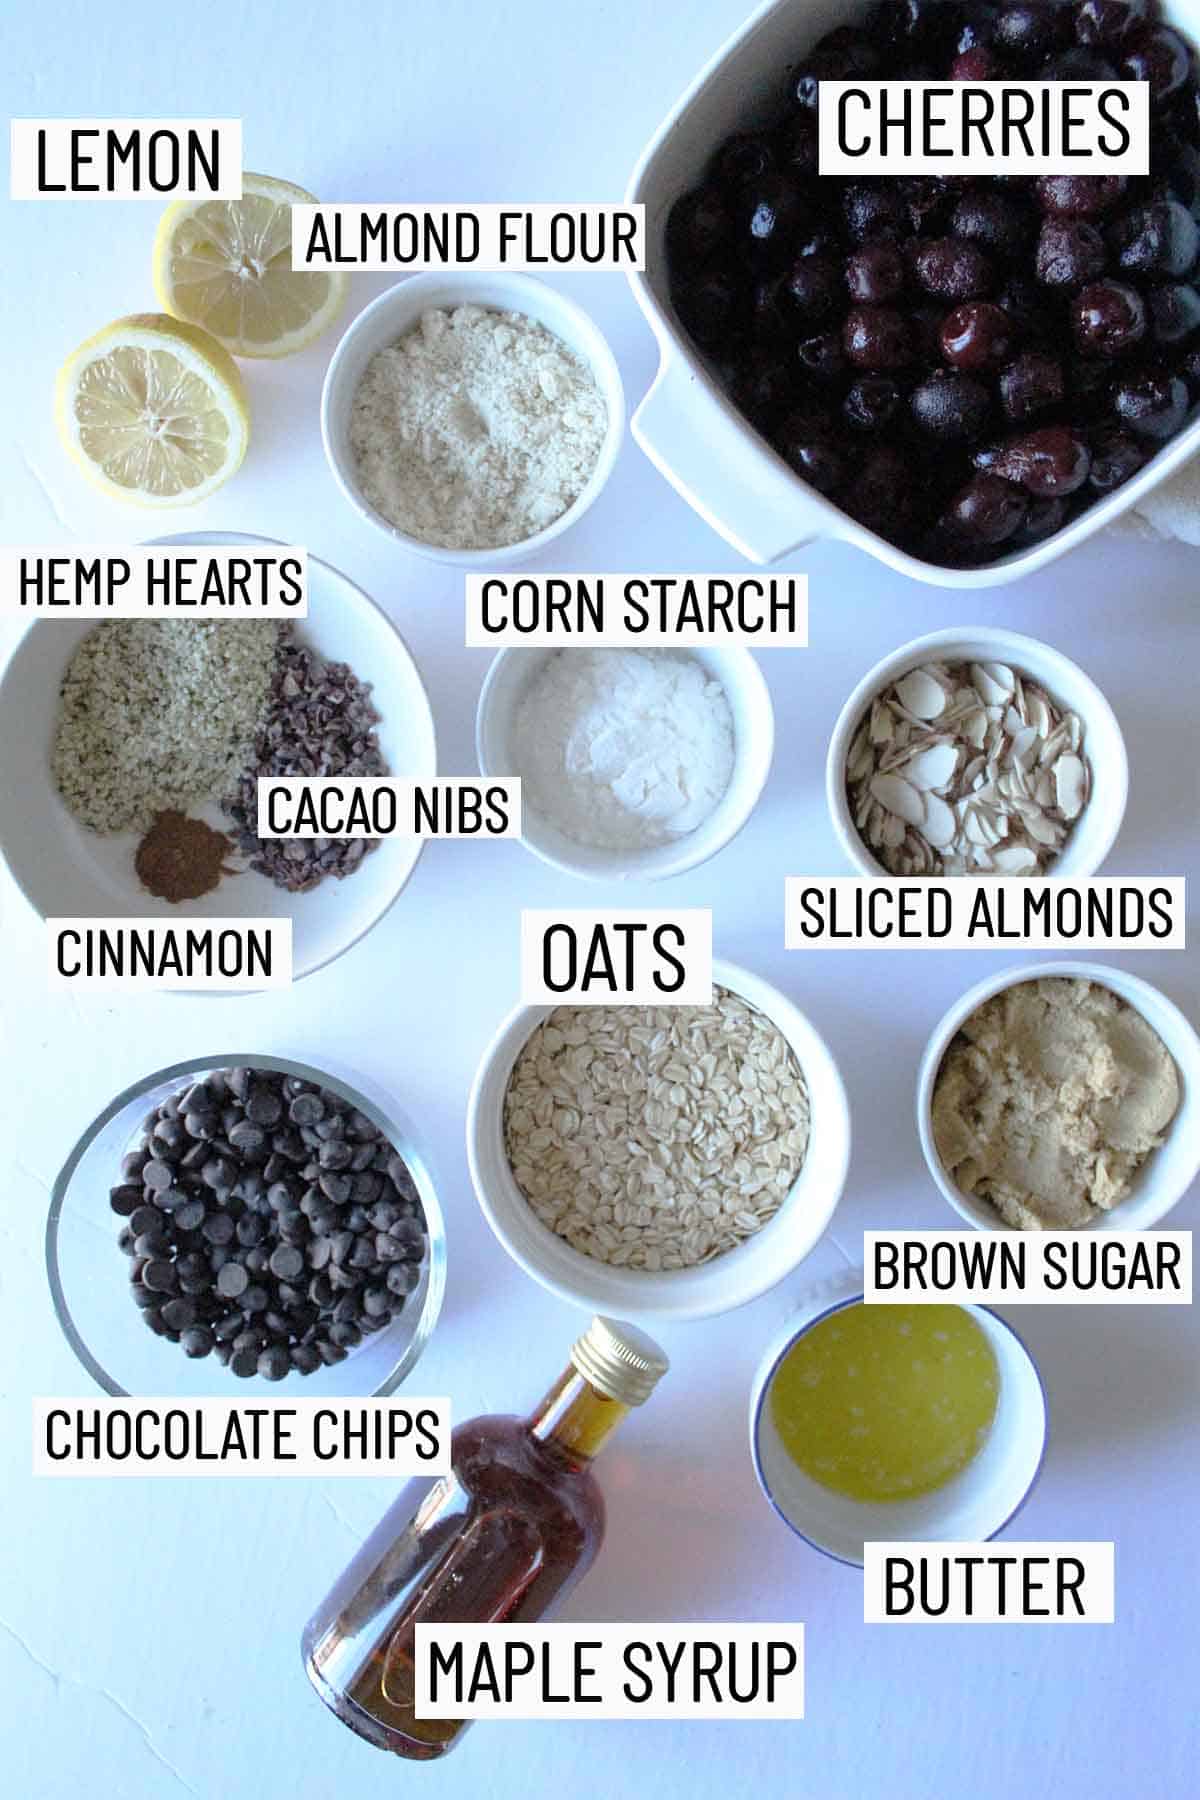
Flat lay of portioned recipe ingredients including brown sugar, butter, chocolate chips, oats, cacao nibs, cinnamon, hemp hearts, lemon, corn starch, almond flour, and cherries.

Large Flake Rolled Oats –I like to use the large flake for a little more texture, but you can definitely use quick oats if that is what you have. If you need them to be gluten free, of course always check the package.

Almond Flour – I love the nutrition and nutty flavour of almond flour. Plus, almonds and cherries are a natural pairing.

Dark Chocolate Chips – This is a staple in my grocery order. No joke. I’m using them for all sorts of things right now.

Frozen Cherries – Another staple for me right now. I am using a lot of frozen fruit for smoothies, chia jam, and baking.

Vegan Butter- You can definitely use regular butter if you’re not vegan or dairy free.

Brown Sugar – This is really key for making the crisp like topping!

How to Make This Recipe

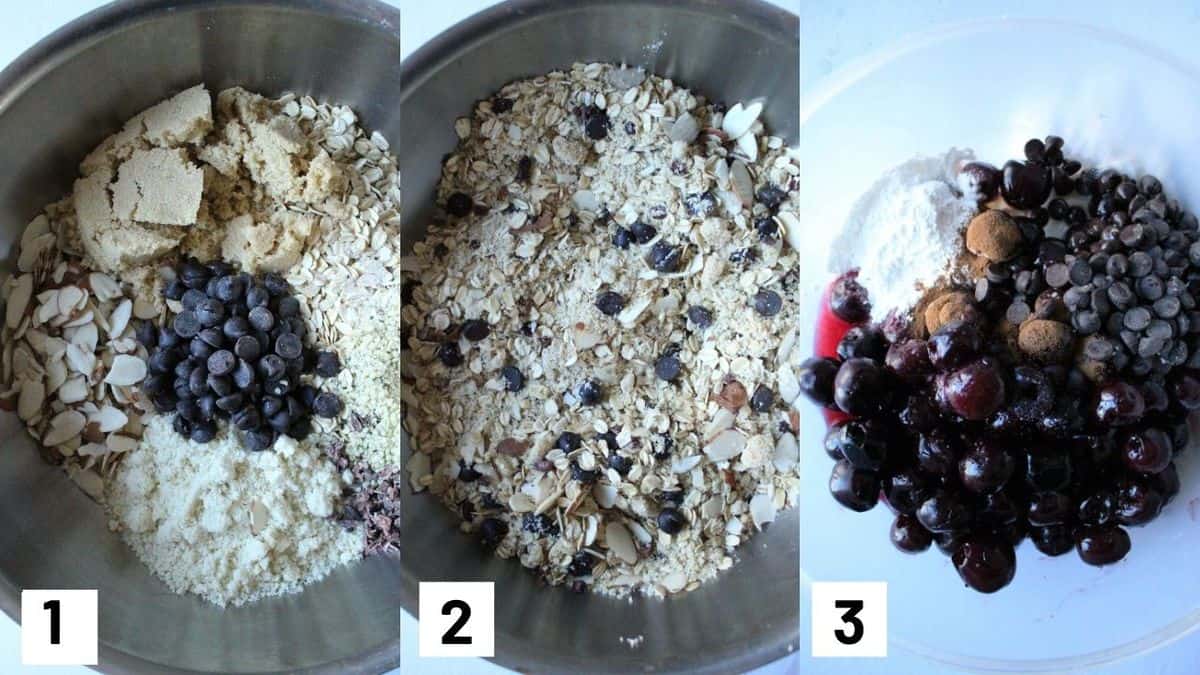
Three side by side images showing chocolate cherry crisp mixture including the granola mixture and cherry base.

Step 1: In a bowl, mix together the oats, almond flour, almonds, hemp hearts, cacao nibs, chocolate chips, brown sugar, and salt.

Step 2: Add in the melted butter and toss just until everything is coated.

Step 3: In another bowl, mix together the cherries, maple, cornstarch, lemon juice, cinnamon, salt and chocolate.

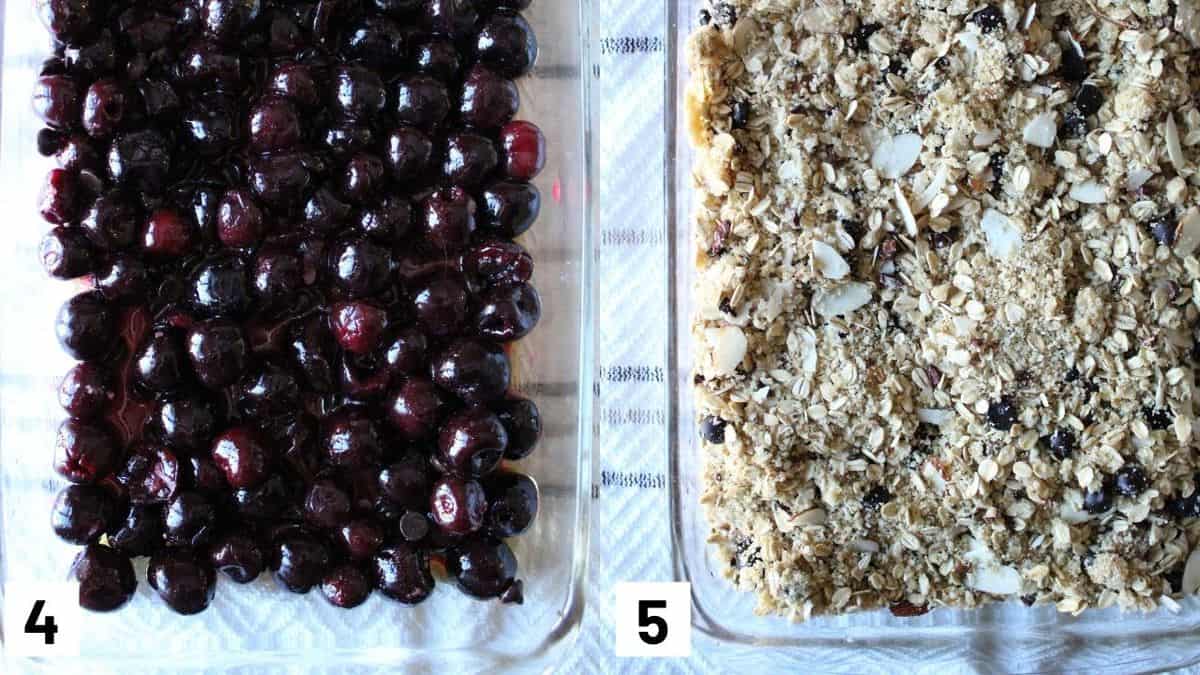
Two side by side images showing the first layer of cherries in a baking dish and topped with the granola mixture.

Step 4: Add cherry mixture to the pie dish.

Step 5: Top with the crisp topping and bake for about 40-45 minutes or until the filling is bubbling and thee topping is nicely browned.

Expert Tips

Do not skip the starch. Frozen berries and (and frozen fruit in general) pack a little more moisture than fresh. So I find that if you don’t add enough tapioca or cornstarch to the fruit, it will yield a very watery base. I have tested this a number of times and this is the amount that worked best for my cherries. Having said that, if you find yours is runny,  if you let this set after it’s hot (aka. once it’s cooled down), it will thicken. And honestly, who really cares – it’s so delicious no matter what.

If you want more of a crispier topping, you can broil the cherry crisp for about 5 minutes or so but be sure to keep an eye on it! Broiling can quickly go from perfectly browned to burnt in a matter of seconds. But usually 5 minutes is all it really takes.

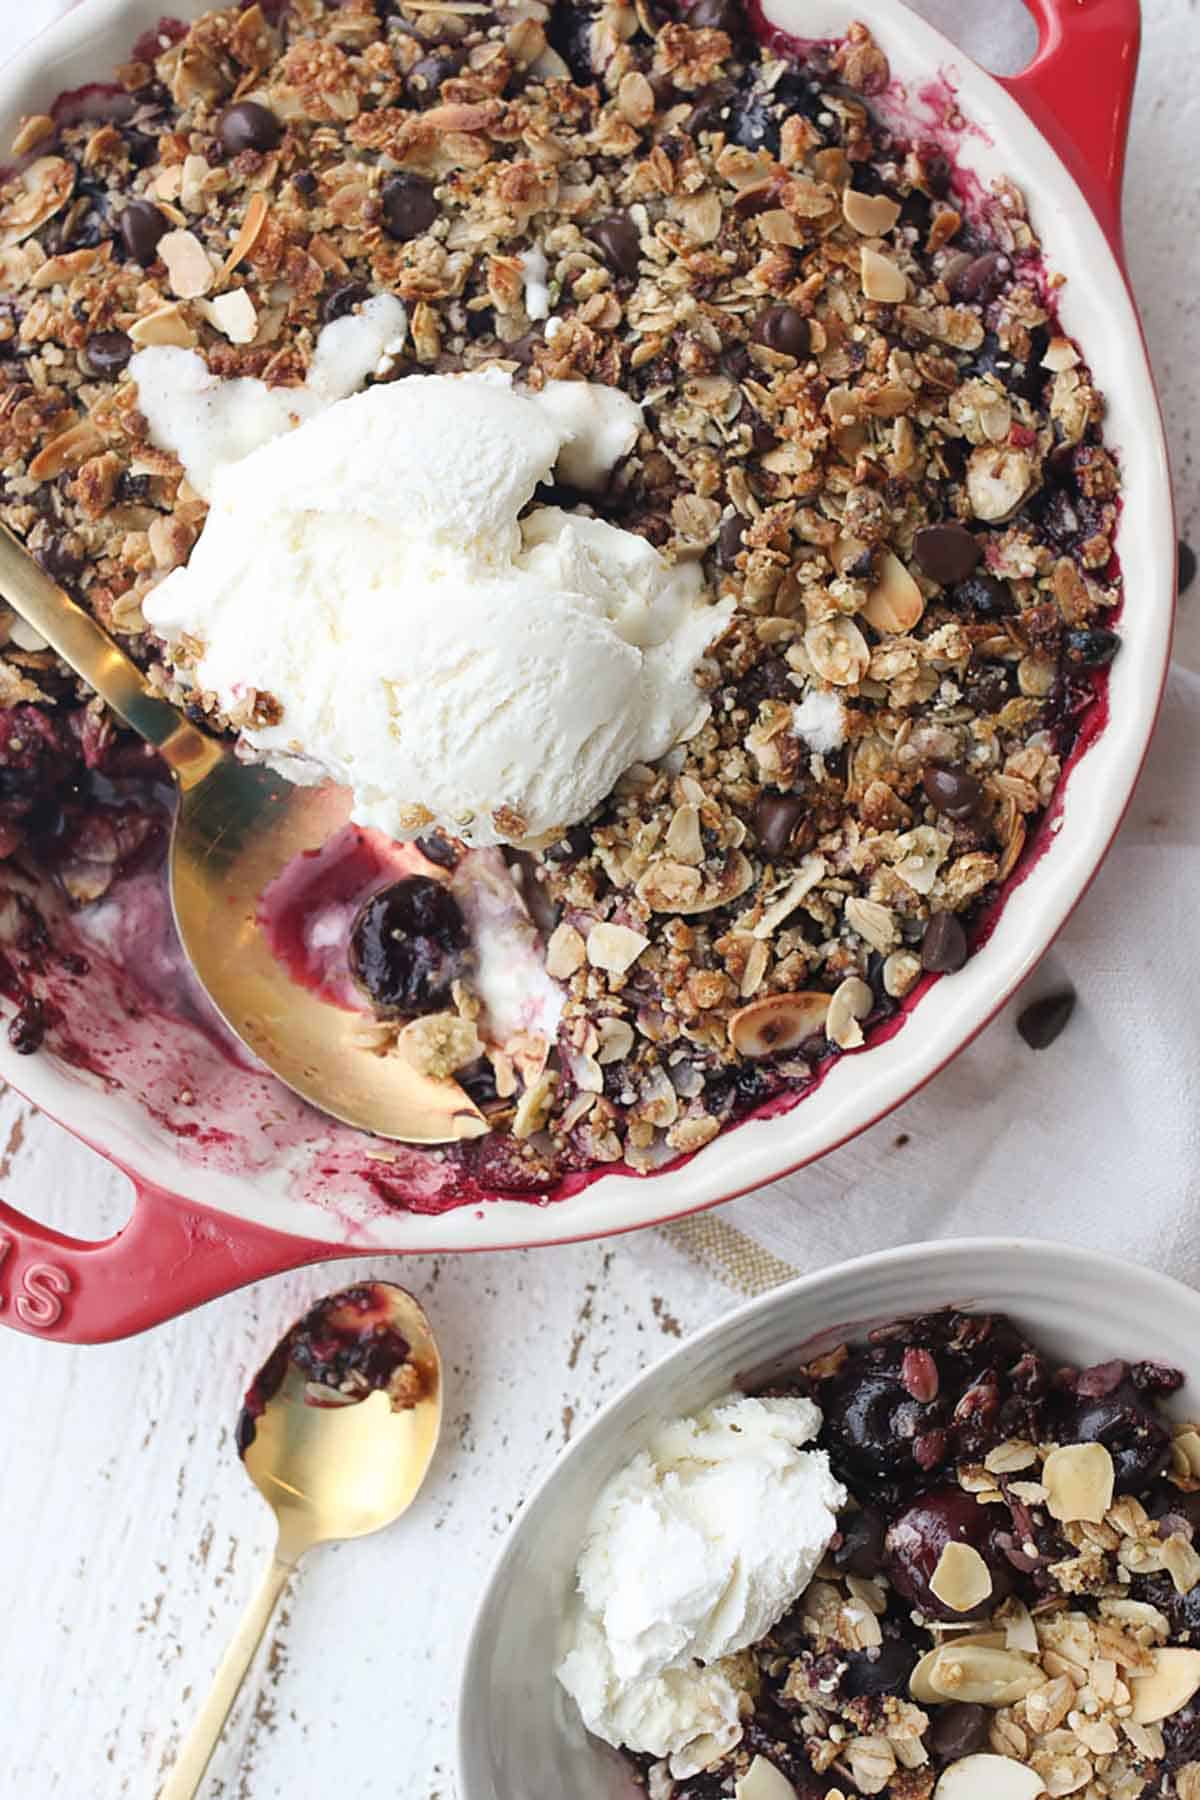
Birds eye view of chocolate cherry crisp in a round red baking dish topped with ice cream, with a serving bowl of crisp on the side.

Recipe FAQs

Can I use a different fruit if i don’t have frozen cherries?

Absolutely. This is also delicious with raspberries or strawberries!

How long will this last in the fridge?

You can definitely make this cherry crisp recipe ahead of time but I recommend eating it within 4 days. It will not last that long, I can promise you that.

Can I use regular butter and chocolate if I’m not vegan?

Yes, it’s very easy to swap in whatever chocolate you have or regular butter. If you don’t have chocolate chips, you can also mince up a chocolate bar!

How do you recommend reheating the crisp?

If it has been cooled and refrigerated, pop it into a 375 F oven for about 15-20 minutes (uncovered) to let the crisp get nice and golden again.

More Recipes You Might Like

If you liked this recipe, check out some more of my favourite easy crisp and crumble recipes.

  • Ginger Apple Crisp with Granola Crumble
  • Vegan and Gluten Free Ginger Pear Crisp
  • Slow Cooker Vegan Blueberry Peach Crisp
  • Vegan Sweet Potato Apple Crisp
  • Peach Melba Crumble Overnight Oats

What are your go to easy weeknight desserts lately? Do you also love a good crisp recipe?

Print Recipe
4 from 10 votes

Cherry Crisp Recipe with Chocolate Chips (Vegan & Gluten Free)

This cherry crisp recipe with chocolate chips is an easy vegan weeknight dessert using pantry staples and frozen fruit. It is also a great dessert option for the holidays, entertaining, and other special occasions!
Prep Time15 minutes mins
Cook Time45 minutes mins
Total Time1 hour hr
Course: Dessert
Cuisine: American
Servings: 12
Calories: 223kcal
Author: Abbey Sharp

Ingredients

  • 2/3 cup large flake rolled oats
  • 1/3 cup almond flour
  • 1/4 cup sliced almonds
  • 3 tbsp hemp hearts
  • 4 tsp cacao nibs
  • 3 tbsp dark chocolate chips dairy free
  • 1/4 cup light brown sugar packed
  • Pinch of salt
  • 1/4 cup vegan butter melted

Filling:

  • 5 cups frozen cherries
  • 1/4 cup maple syrup
  • 3 tbsp cornstarch or tapioca starch
  • 1 1/2 tbsp lemon juice
  • 1/4 tsp cinnamon
  • Pinch salt
  • 1/4 cup dark chocolate chips dairy free, if needed
  • Oat ice cream for serving

Instructions

  • Preheat oven to 350 F and grease a 8″ round pie dish.
  • In a bowl, mix together the oats, almond flour, almonds, hemp hearts, cacao nibs, chocolate chips, brown sugar, and salt. Add in the melted butter and toss just until everything is coated.
  • In another bowl, mix together the cherries, maple, cornstarch, lemon juice, cinnamon, salt and chocolate. Add this mixture to the pie dish. Top with the crisp topping and bake for about 40-45 minutes or until the filling is bubbling and thee topping is nicely browned. Serve with dairy free ice oat cream.

Notes

Do not skip the starch. Frozen berries and (and frozen fruit in general) pack a little more moisture than fresh. So I find that if you don’t add enough tapioca or cornstarch to the fruit, it will yield a very watery base. I have tested this a number of times and this is the amount that worked best for my cherries. Having said that, if you find yours is runny,  if you let this set after it’s hot (aka. once it’s cooled down), it will thicken. And honestly, who really cares – it’s so delicious no matter what.
If you want more of a crispier topping, you can broil the cherry crisp for about 5 minutes or so but be sure to keep an eye on it! Broiling can quickly go from perfectly browned to burnt in a matter of seconds. But usually 5 minutes is all it really takes.

Nutrition

Calories: 223kcal | Carbohydrates: 29g | Protein: 4g | Fat: 11g | Saturated Fat: 4g | Cholesterol: 1mg | Sodium: 41mg | Potassium: 227mg | Fiber: 3g | Sugar: 19g | Vitamin A: 236IU | Vitamin C: 5mg | Calcium: 61mg | Iron: 1mg

Did you make this cherry crisp recipe with chocolate chips? Leave me a comment below with your thoughts!

Abbey Sharp

Abbey Sharp is a Registered Dietitian (RD), regulated by the Ontario College of Dietitians. She is a mom, YouTuber, Blogger, award winning cookbook author, media coach specializing in food and nutrition influencers, and a frequent contributor to national publications like Healthline and on national broadcast TV shows.
www.abbeyskitchen.com/about-abbey/

Last Updated December 10, 2021. Published December 10, 2021 By Abbey Sharp Leave a Comment

Easy Chocolate Covered Espresso Beans (Vegan & Gluten Free)

Combining melt in your mouth chocolate with beloved caffeine, these chocolate covered espresso beans makes for a great pick me up snack or as a holiday gift!

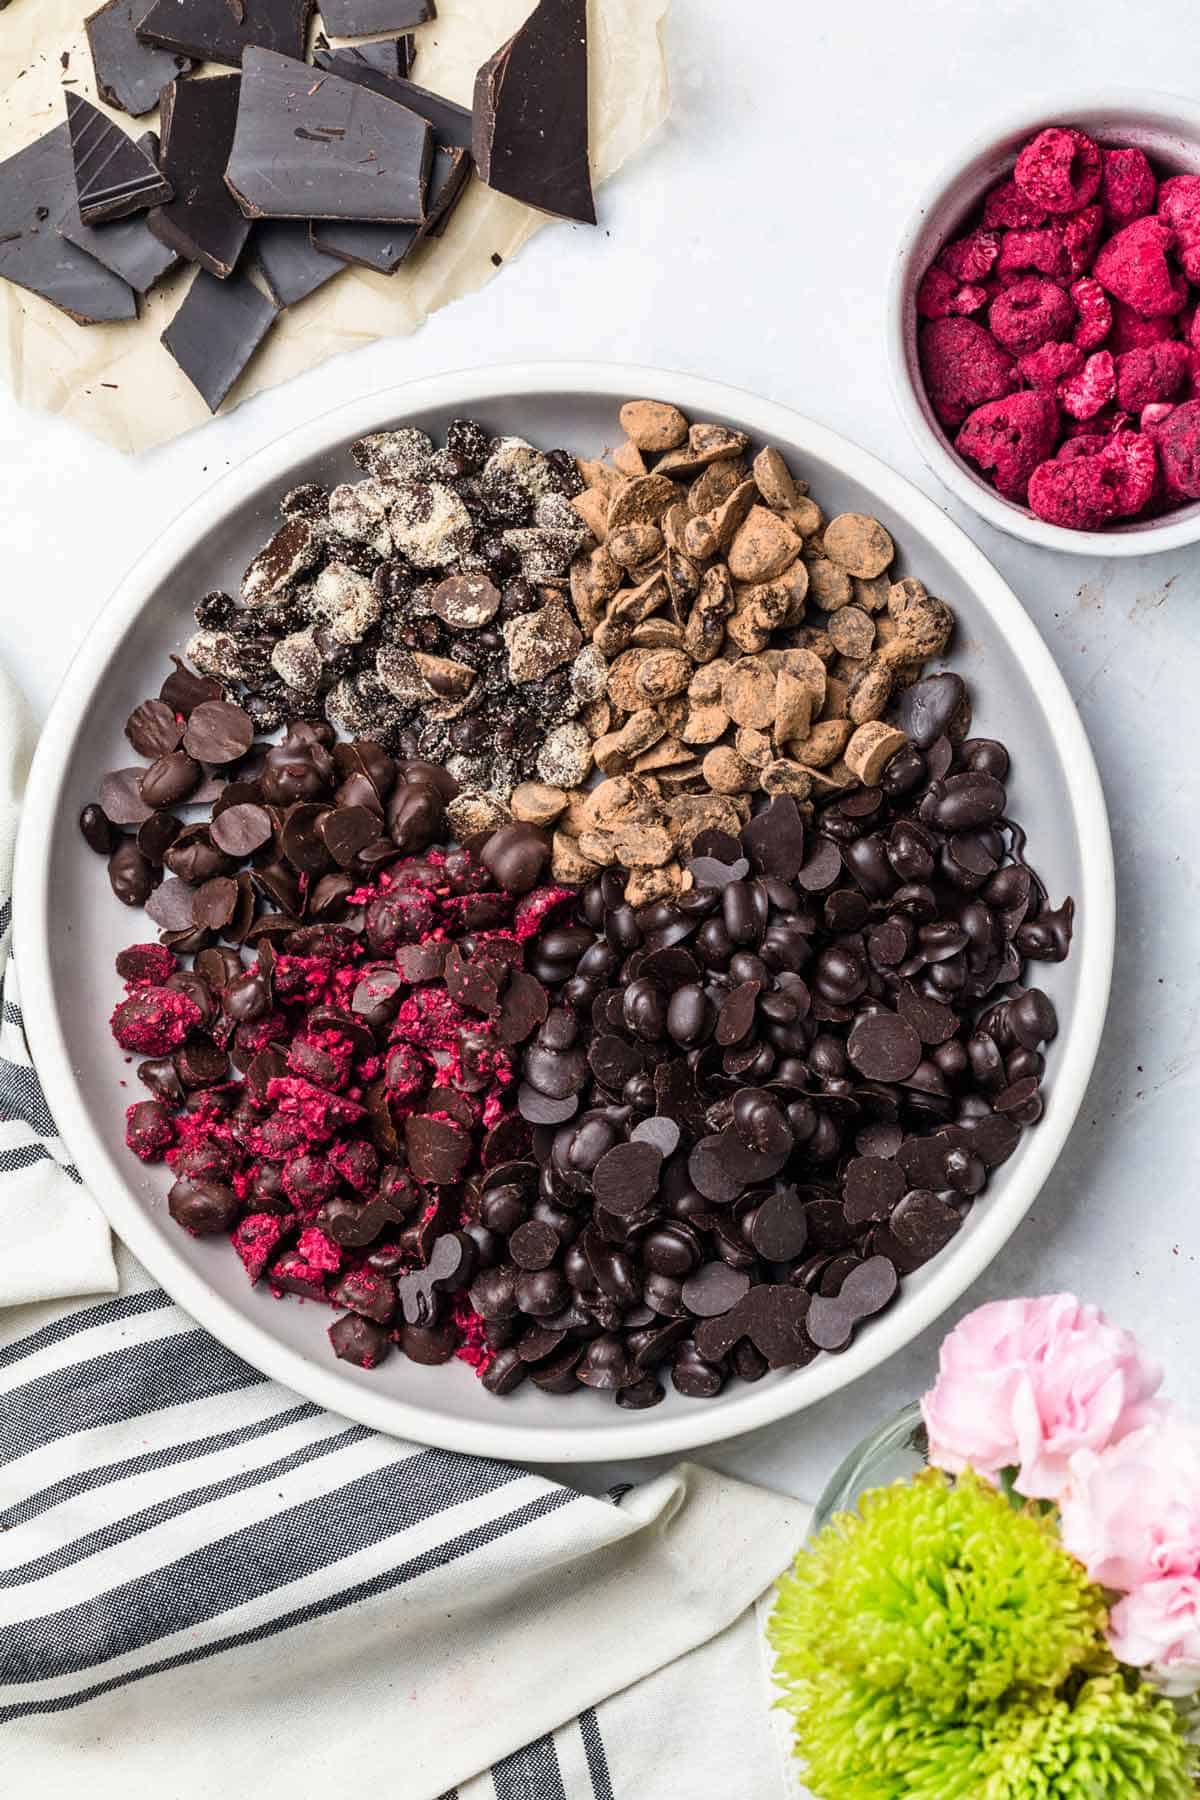
A white plate containing multiple chocolate covered espresso beans with a variety of toppings such as crushed berries and cacao powder.

Is there really anything better than chocolate and coffee? These delicious and easy chocolate covered espresso beans combine those two things together, giving us the perfect melt in your mouth treat. These flavours go so well together and making your own is made so easily that you can even make a game out of it with your kids! Surprise the coffee-lover in your life with a bag of these as a gift or enjoy them all yourself!

Table of contents

  • Why This Recipe Works
  • Key Ingredients
  • How to Make This Recipe
  • Expert Tips
  • Recipes FAQs
  • More Recipes You Might Like

Why This Recipe Works

It really only requires three ingredients to make and there’s a good chance you already have it in your pantry. Toppings are optional but they do add a nice pop of colour and variety if you are serving these to guests or gifting it to friends.

This homemade treat is vegan and gluten-free! A lot of the store-bought versions of these treats don’t use vegan chocolate and aren’t certified gluten-free so making it yourself allows you to be accommodating to anyone who is unable to enjoy the store-bought ones.

Both dark chocolate and espresso is high in antioxidants so these chocolate covered espresso beans are technically a good for you treat!

Key Ingredients

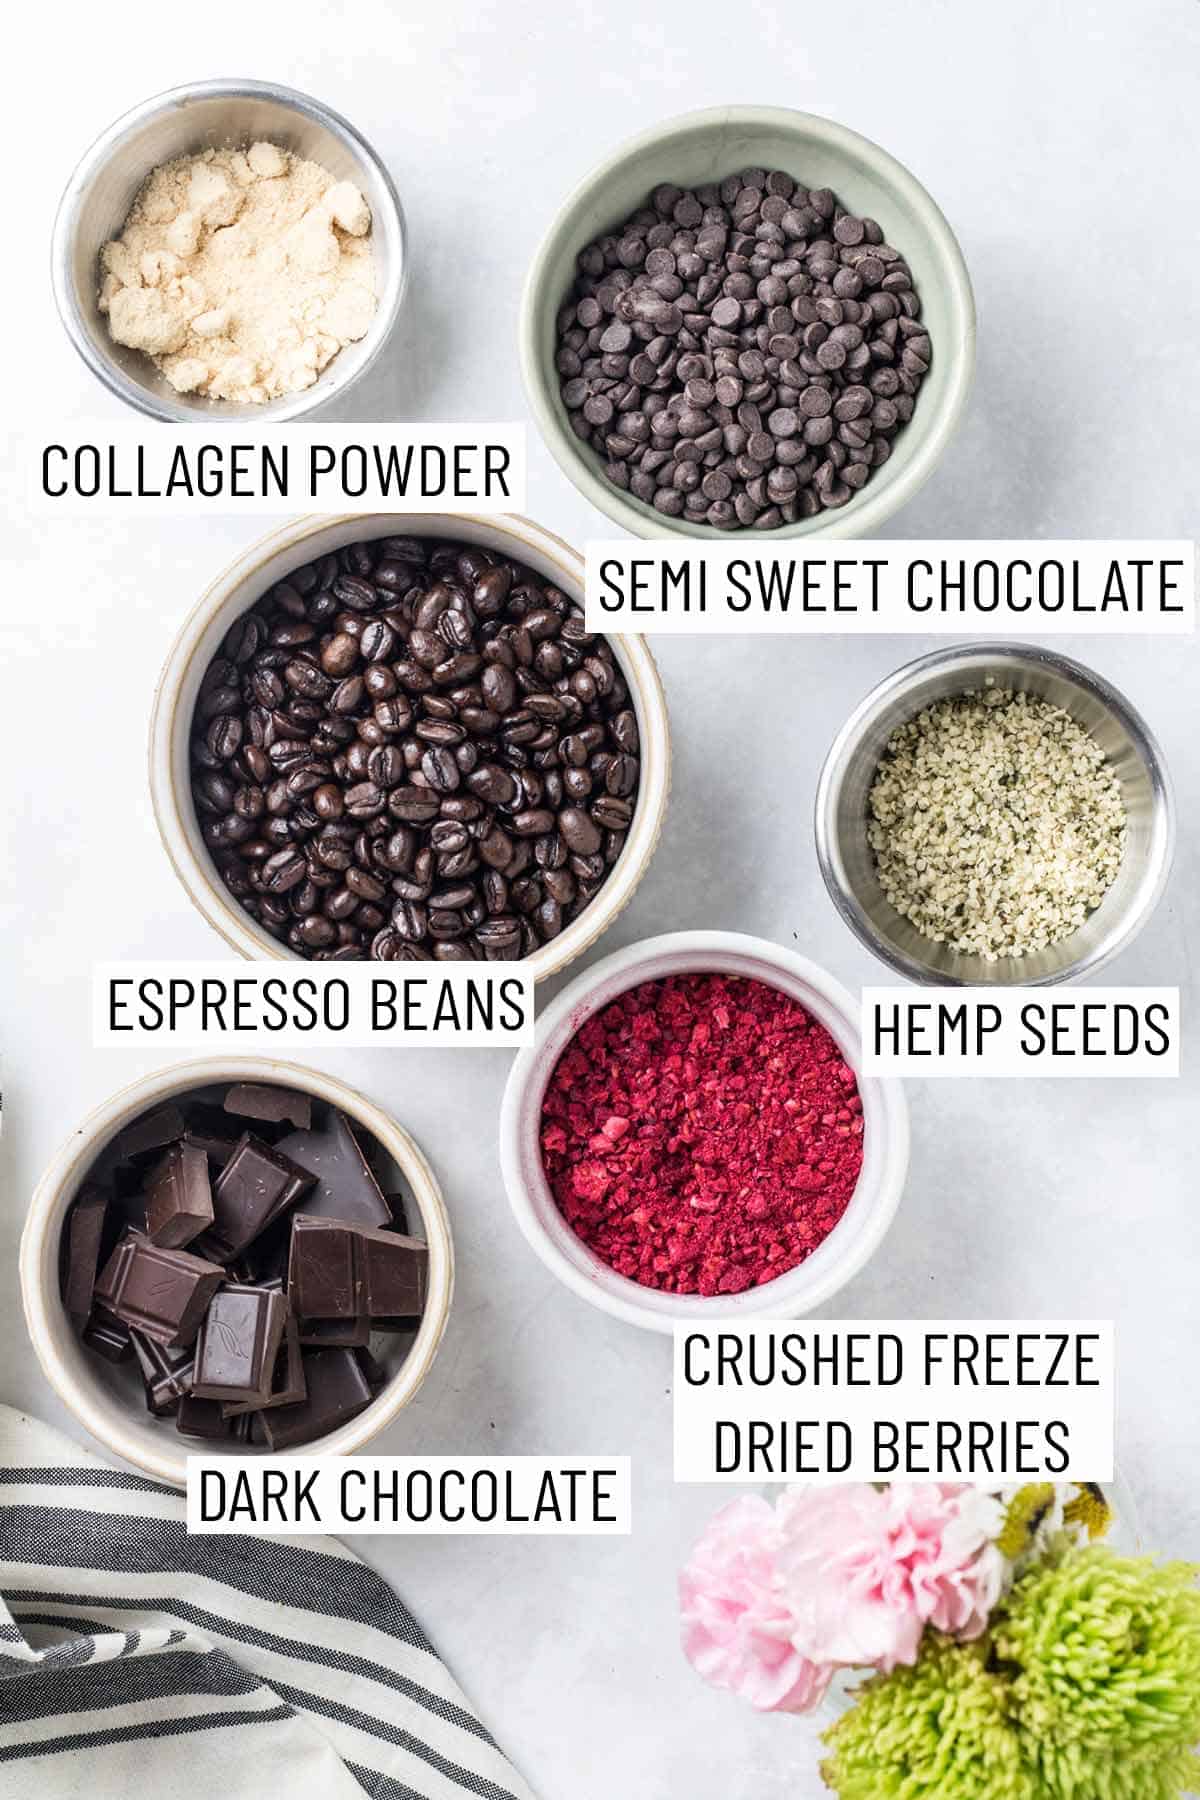
Ingredients for making homemade chocolate covered espresso beans as well as bowls of topping options.

Coffee Beans — We suggest that you use Espresso Beans or Dark Roasted Beans. No need to be concerned about any bitterness from coffee beans as the chocolate balances out the flavours.

Chocolate — We use a combination of both dark chocolate and semi sweet chocolate for these chocolate covered espresso beans. If you prefer to use a different chocolate, you are welcome to!

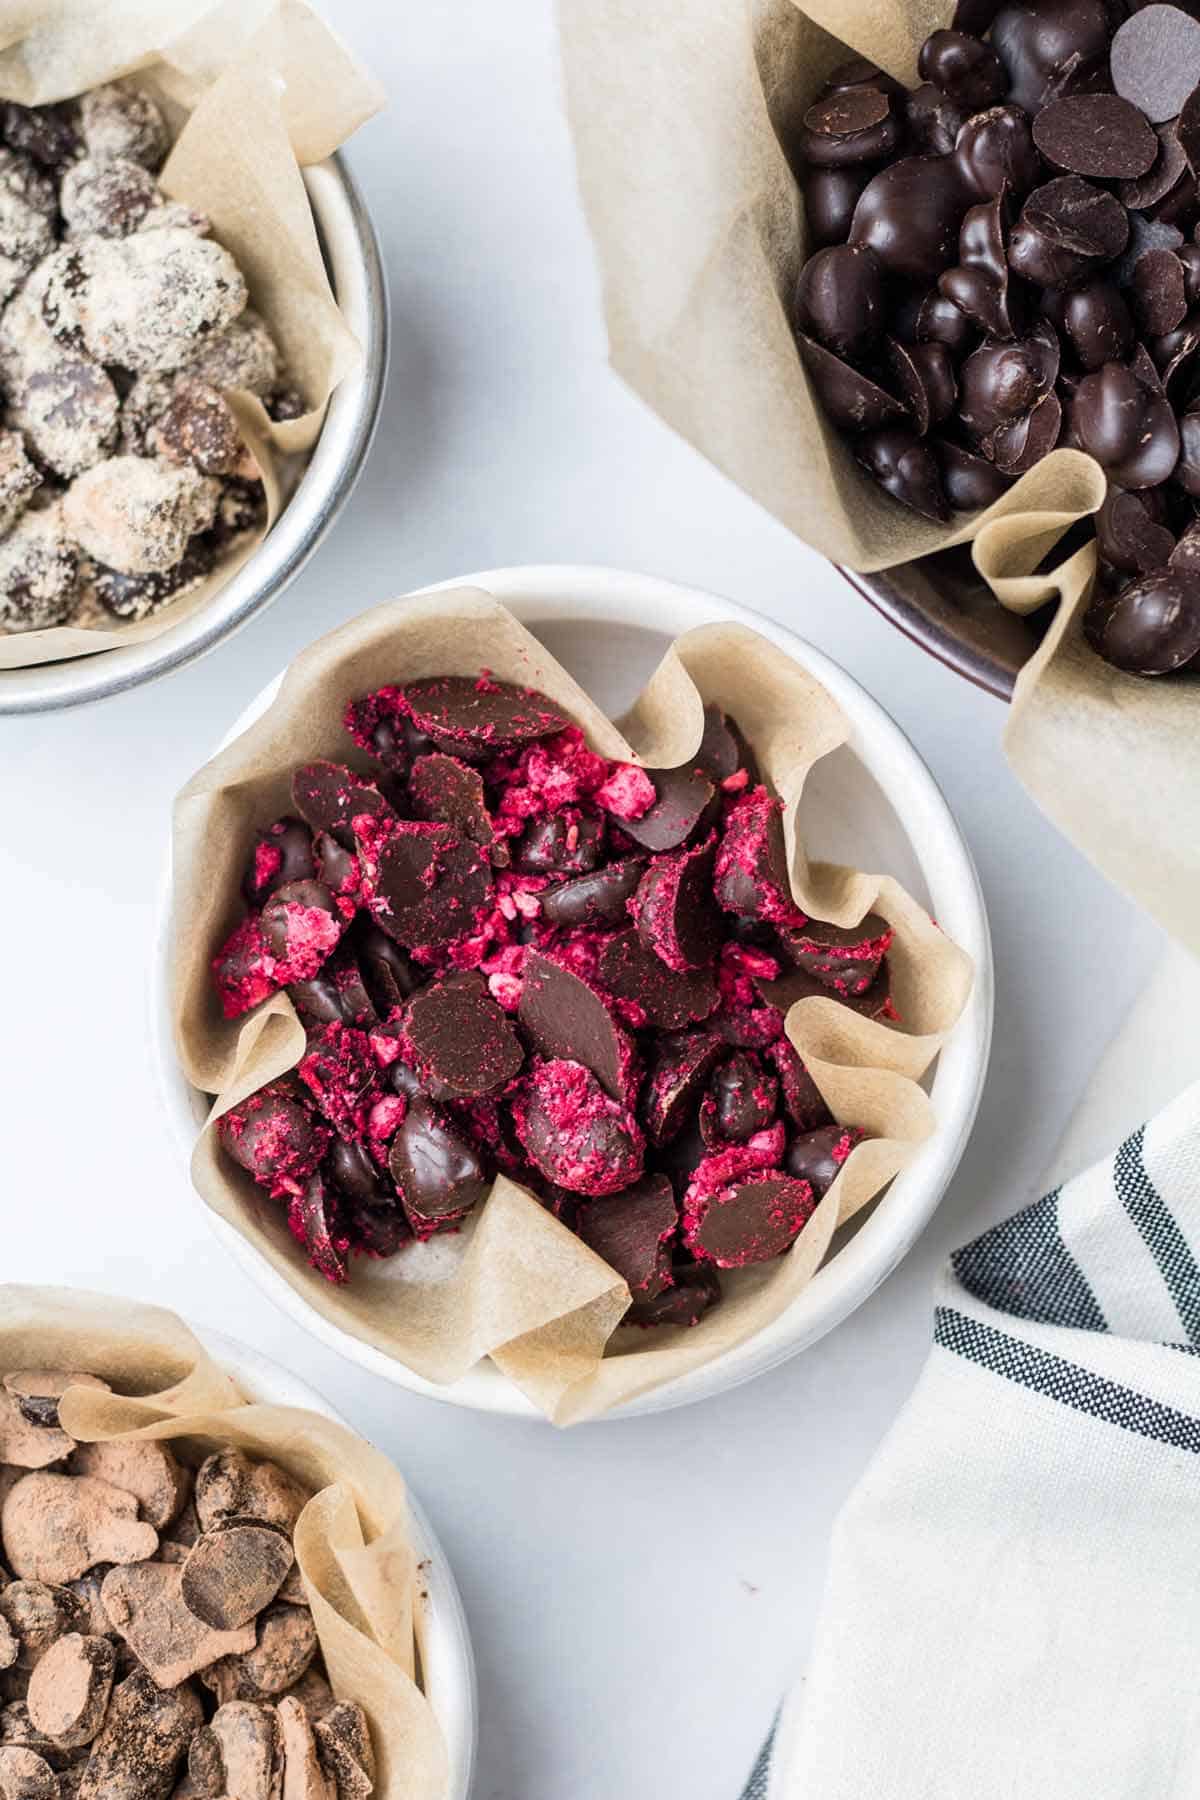
Toppings — The possibilities for toppings for these chocolate beans are endless! Some of our favourites are cacao powder, crushed freeze-dried raspberries or strawberries, hemp seeds, peanut butter powder, flavoured collagen powder, and flaky sea salt.

How to Make This Recipe

Three side by side images showing how to melt dark chocolate in a bowl.

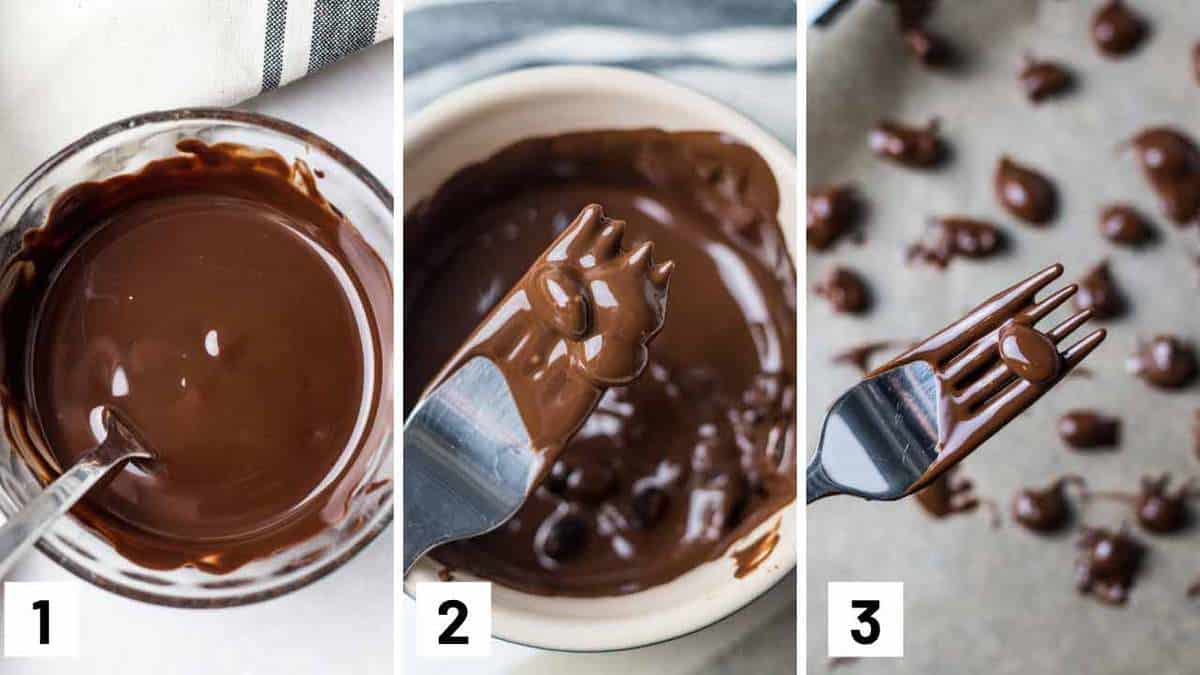
Step 1: Temper the chocolate by either melting it in the microwave or on the stovetop. The easiest way to melt it is in the microwave: place the chocolate in a heat-safe bowl. Place the chocolate in the microwave for 20-25 seconds. Remove the bowl from the microwave and gently give it a stir. It won’t be very melted at this point, but stirring it makes sure all pieces of the chocolate warm up a bit. Microwave the bowl for another 20 seconds and repeat. Microwave one more time for about 15 seconds and stir. The chocolate should be just nearly melted with a few small pieces of chocolate chips/chunks remaining. These will continue to melt as you stir.

Step 2: Once your chocolate is melted, drop ½-1 tablespoon of espresso beans into the bowl of chocolate.

Step 3: Using one or two forks, carefully coat each of the espresso beans in chocolate and lift them one or two at a time out of the chocolate.

Three side by side images showing how to cover espresso beans with chocolate.

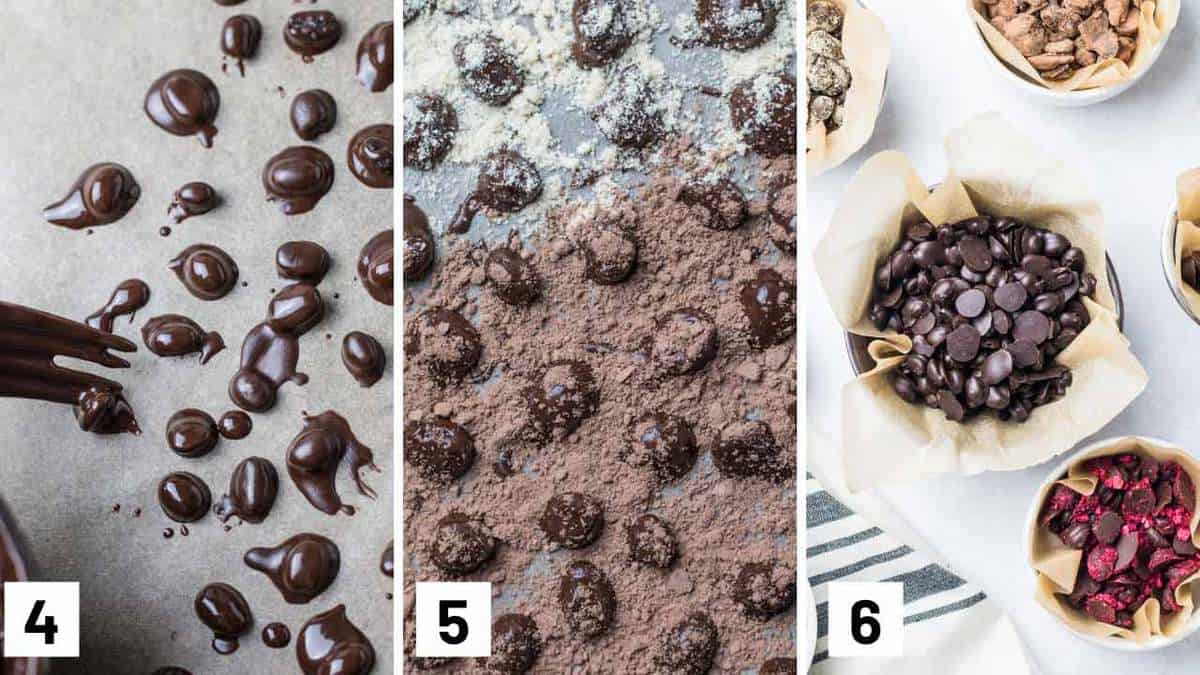
Step 4: Tap the fork on the side of the bowl to get rid of any extra chocolate, and then place the chocolate covered bean on a parchment covered sheet pan. Repeat until you’ve covered all of the espresso beans currently in the bowl.

Optional Step 5: If you wish to coat the beans with any toppings, make sure to do so while the chocolate is still liquidy and soft. If you wait until the chocolate firms up, some of the toppings may not stick. Sprinkle on the cacao powder, freeze dried fruit, hemp seeds, PB powder, collagen powder or sea salt. 

Step 6: Once you complete a sheet of chocolate covered beans, place the sheet pan in the fridge for a few minutes to help the chocolate firm up. If you’ve properly tempered your chocolate, the chocolate will look shiny and hard, and stay solid even at room temperature.

Expert Tips

When melting the chocolate, if you’re using a bar, cut it or break it into small pieces first so it melts evenly and quickly.

When dipping the beans into the chocolate, you’ll have to work quickly as the chocolate will stiffen up over time. To fix that, microwave the chocolate for 8-10 seconds or so between every few batches as the chocolate stiffens. I also recommend only adding a little of beans to the melted chocolate at a time so you don’t end up having your beans in your mixture as it stiffens.

If you don’t have a microwave, you can melt your chocolate on the stove by placing a heat safe bowl over a pot of water, making sure the bowl isn’t touching the water. Place the chocolate in the bowl and bring the water up to a boil, stirring the chocolate until it has melted.

For a super chocolatey espresso bean, you can also coat the espresso beans in chocolate two times. Simply repeat the steps in the instructions, then re-dip the beans in small batches back into the chocolate. Keep in mind that you will need more chocolate in order to coat them a second time.

Recipes FAQs

Do I need to use chocolate chips or bars?

Chips or bars of chocolate will work for this recipe. If you are using bars of chocolate, make sure to chop the chocolate or break it into small pieces to make the tempering process easier. We used a combination of dark and milk chocolate to make a variety of flavours, but you can certainly use one type of chocolate only if you’d prefer.

How do I store this recipe?

Store in the fridge in an airtight container and enjoy cold! You don’t want to leave them out for too long as the fridge helps keeps them tasting fresh!

What else can I do with these chocolate covered beans?

Other than enjoying it yourself, you can gift them to friends and family. You can also add them to trail mix or top off a smoothie bowl with a couple!

Can these be frozen for later?

While we haven’t tried, I don’t see why not! However, the texture and taste of the coffee beans might change when thawing. It’s really up to you.

Multiple small parchment lined bowls of chocolate covered espresso beans with each bowl containing different toppings.

More Recipes You Might Like

If you love chocolate like I do, here are some more chocolate desserts you might like!

  • Best Almond Chocolate Bark with Granola Crunch
  • Chocolate Cups with Chia Jam
  • Vegan Banana Peanut Butter Chocolate Bars
  • Vegan Tahini Stuffed Dates with Salted Chocolate
  • Vegan Cookie Cups with Chocolate Mousse
  • No Bake Nutella Cheesecake Cups

So lovelies, have you tried chocolate covered espresso beans before?

Print Recipe
5 from 1 vote

Easy Chocolate Covered Espresso Beans (Vegan & Gluten Free)

Combining melt in your mouth chocolate with beloved caffeine, these chocolate covered espresso beans makes for a great pick me up snack or as a holiday gift!
Prep Time15 minutes mins
Cook Time30 minutes mins
Total Time45 minutes mins
Course: Snack
Cuisine: American
Diet: Gluten Free, Vegan
Servings: 6 servings
Calories: 177kcal
Author: Abbey Sharp

Ingredients

  • ¾-1 cup Coffee Beans Espresso Beans or Dark Roasted Beans
  • 90 g dark chocolate bar or chips
  • 90 g milk or semi-sweet chocolate bar or chips

Topping ideas:

  • Cacao powder
  • Crushed freeze-dried raspberries or strawberries
  • Hemp seeds
  • Peanut butter powder
  • Flavored collagen powder
  • Flaky sea salt

Instructions

  • Temper the chocolate by either melting it in the microwave or on the stovetop. The easiest way to melt it is in the microwave: place the chocolate in a heat-safe bowl. Place the chocolate in the microwave for 20-25 seconds. Remove the bowl from the microwave and gently give it a stir. Microwave the bowl for another 20 seconds and repeat. Microwave one more time for about 15 seconds and stir. The chocolate should be just nearly melted with a few small pieces of chocolate chips/chunks remaining. These will continue to melt as you stir.
  • Once your chocolate is melted, drop ½-1 tablespoon of espresso beans into the bowl of chocolate.
  • Using one or two forks, carefully coat each of the espresso beans in chocolate and lift them one or two at a time out of the chocolate.
  • Tap the fork on the side of the bowl to get rid of any extra chocolate, and then place the chocolate covered bean on a parchment covered sheet pan. Repeat until you’ve covered all of the espresso beans currently in the bowl.
  • Optional: If you wish to coat the beans with any toppings, make sure to do so while the chocolate is still liquidy and soft. If you wait until the chocolate firms up, some of the toppings may not stick. Sprinkle on the cacao powder, freeze dried fruit, hemp seeds, PB powder, collagen powder or sea salt.
  • Once you complete a sheet of chocolate covered beans, place the sheet pan in the fridge for a few minutes to help the chocolate firm up. If you’ve properly tempered your chocolate, the chocolate will look shiny and hard, and stay solid even at room temperature.

Notes

  • When melting the chocolate, if you’re using a bar, cut it or break it into small pieces first so it melts evenly and quickly.
  • When dipping the beans into the chocolate, you’ll have to work quickly as the chocolate will stiffen up over time. To fix that, microwave the chocolate for 8-10 seconds or so between every few batches as the chocolate stiffens. I also recommend only adding a little of beans to the melted chocolate at a time so you don’t end up having your beans in your mixture as it stiffens.
  • If you don’t have a microwave, you can melt your chocolate on the stove by placing a heat safe bowl over a pot of water, making sure the bowl isn’t touching the water. Place the chocolate in the bowl and bring the water up to a boil, stirring the chocolate until it has melted.
  • For a super chocolatey espresso bean, you can also coat the espresso beans in chocolate two times. Simply repeat the steps in the instructions, then re-dip the beans in small batches back into the chocolate. Keep in mind that you will need more chocolate in order to coat them a second time.

Nutrition

Serving: 6servings | Calories: 177kcal | Carbohydrates: 15g | Protein: 2g | Fat: 12g | Saturated Fat: 7g | Cholesterol: 1mg | Sodium: 5mg | Potassium: 192mg | Fiber: 3g | Sugar: 9g | Calcium: 20mg | Iron: 3mg
Abbey Sharp

Abbey Sharp is a Registered Dietitian (RD), regulated by the Ontario College of Dietitians. She is a mom, YouTuber, Blogger, award winning cookbook author, media coach specializing in food and nutrition influencers, and a frequent contributor to national publications like Healthline and on national broadcast TV shows.
www.abbeyskitchen.com/about-abbey/

Last Updated December 10, 2021. Published December 10, 2021 By Abbey Sharp 2 Comments

Sugar Snap Peas with Guacamole (Hunger Crushing Combo™ Snack #8)

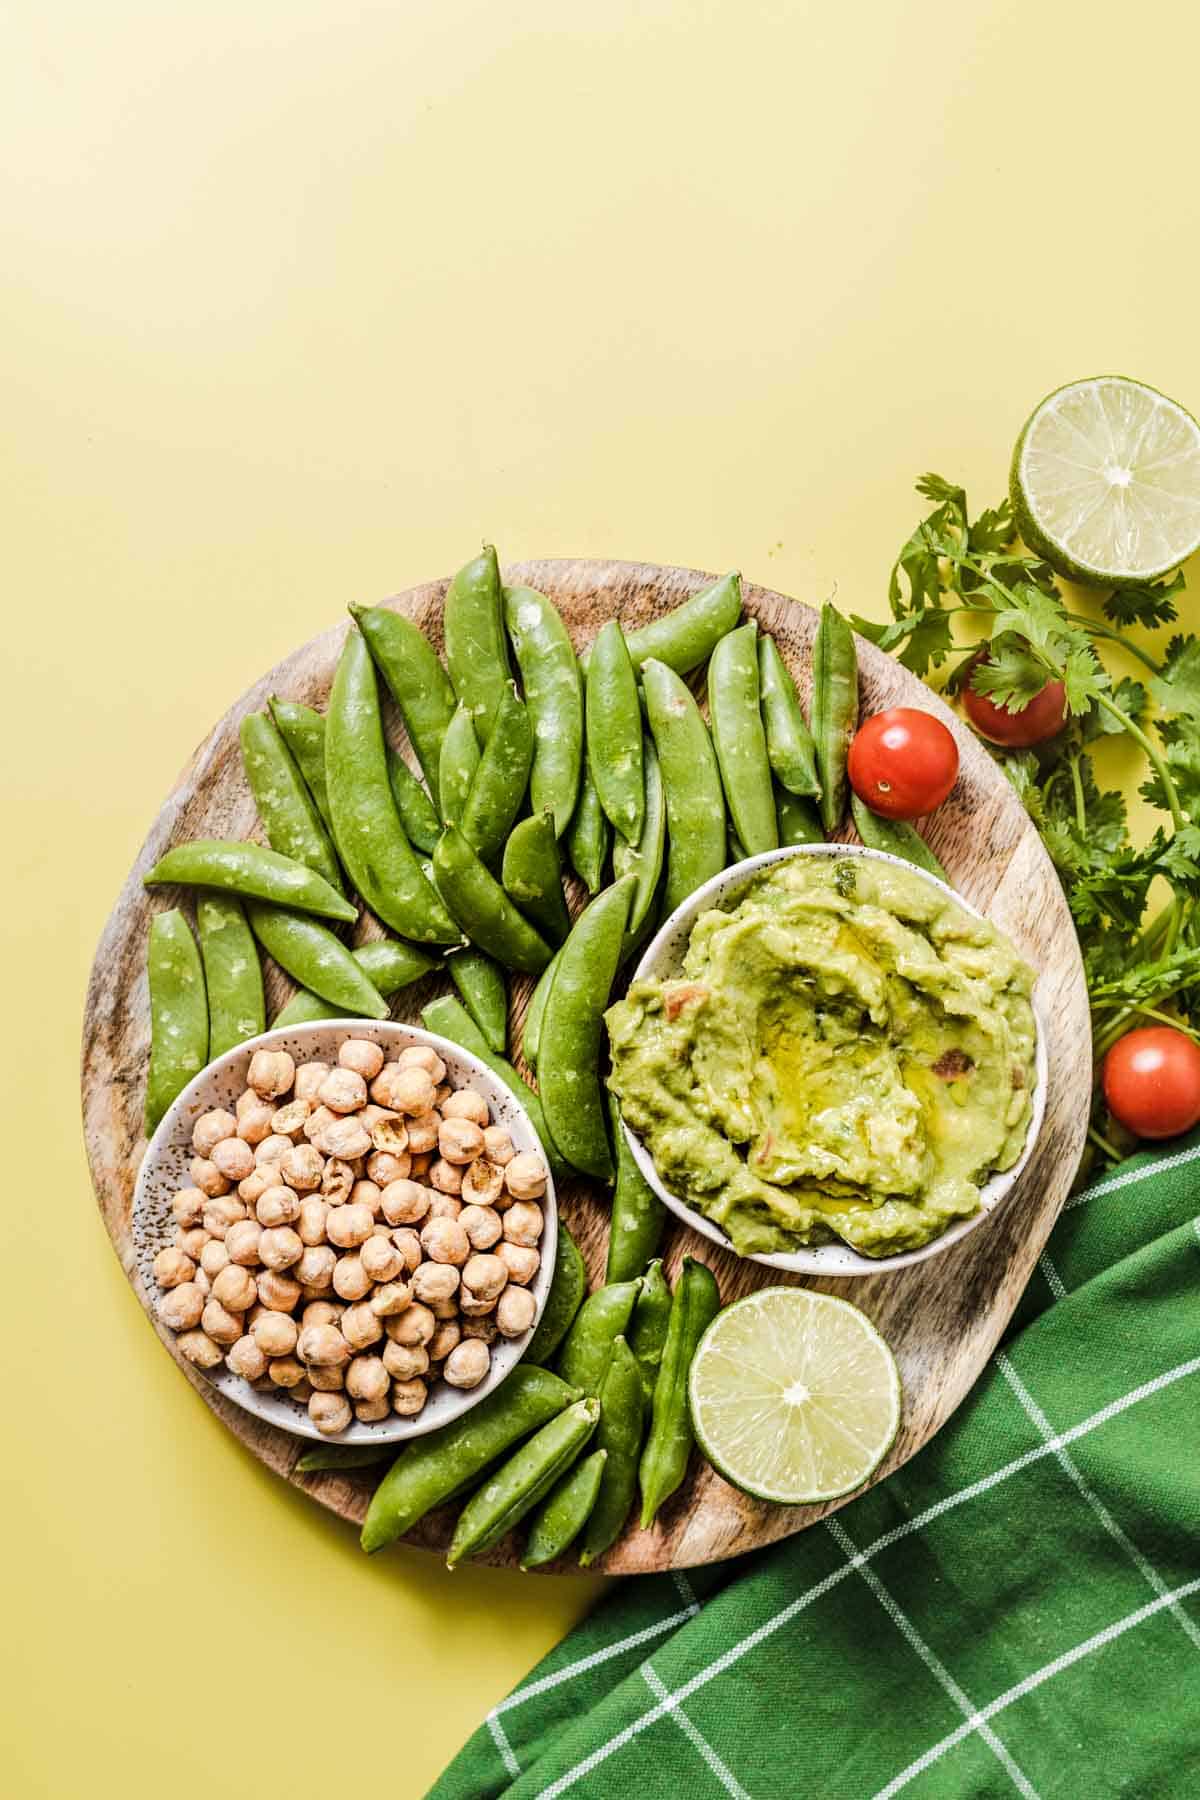
These sugar snap peas with guacamole and roasted chickpeas make for a delicious and refreshing plant-based snack that is balanced with hunger crushing compounds like protein, fat, and fiber.

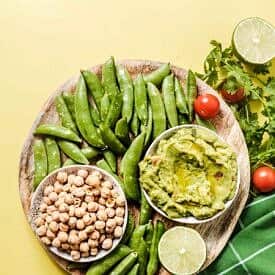
Birds eye view image of sugar snap pea snack on a wooden plate with roasted chickpeas in a white bowl and guacamole in another white bowl.

Sugar snap peas have quickly become one of my favourite raw veggies to snack on. With the perfect combination of crunch to sweetness, it doesn’t take long before I finish a whole bag in one sitting. So to stretch out my sugar snap pea obsession to keep me fuller for longer, I make sure to pair it with a source of protein and fat to make it a Hunger Crushing Combo™.

What Makes Sugar Snap Peas with Guac a Balanced Snack?

One of my favourite ways to balance sugar snap peas as a snack is by pairing it with some guacamole for a dose of healthy fats and some roasted chickpeas for protein. In total, this snack provides a whopping 12 grams of protein and 10 grams of fiber. Which means we have all the flavour, all the crunch, and all the hunger crushing compounds invited to the party to keep you feeling full and satisfied between meals.

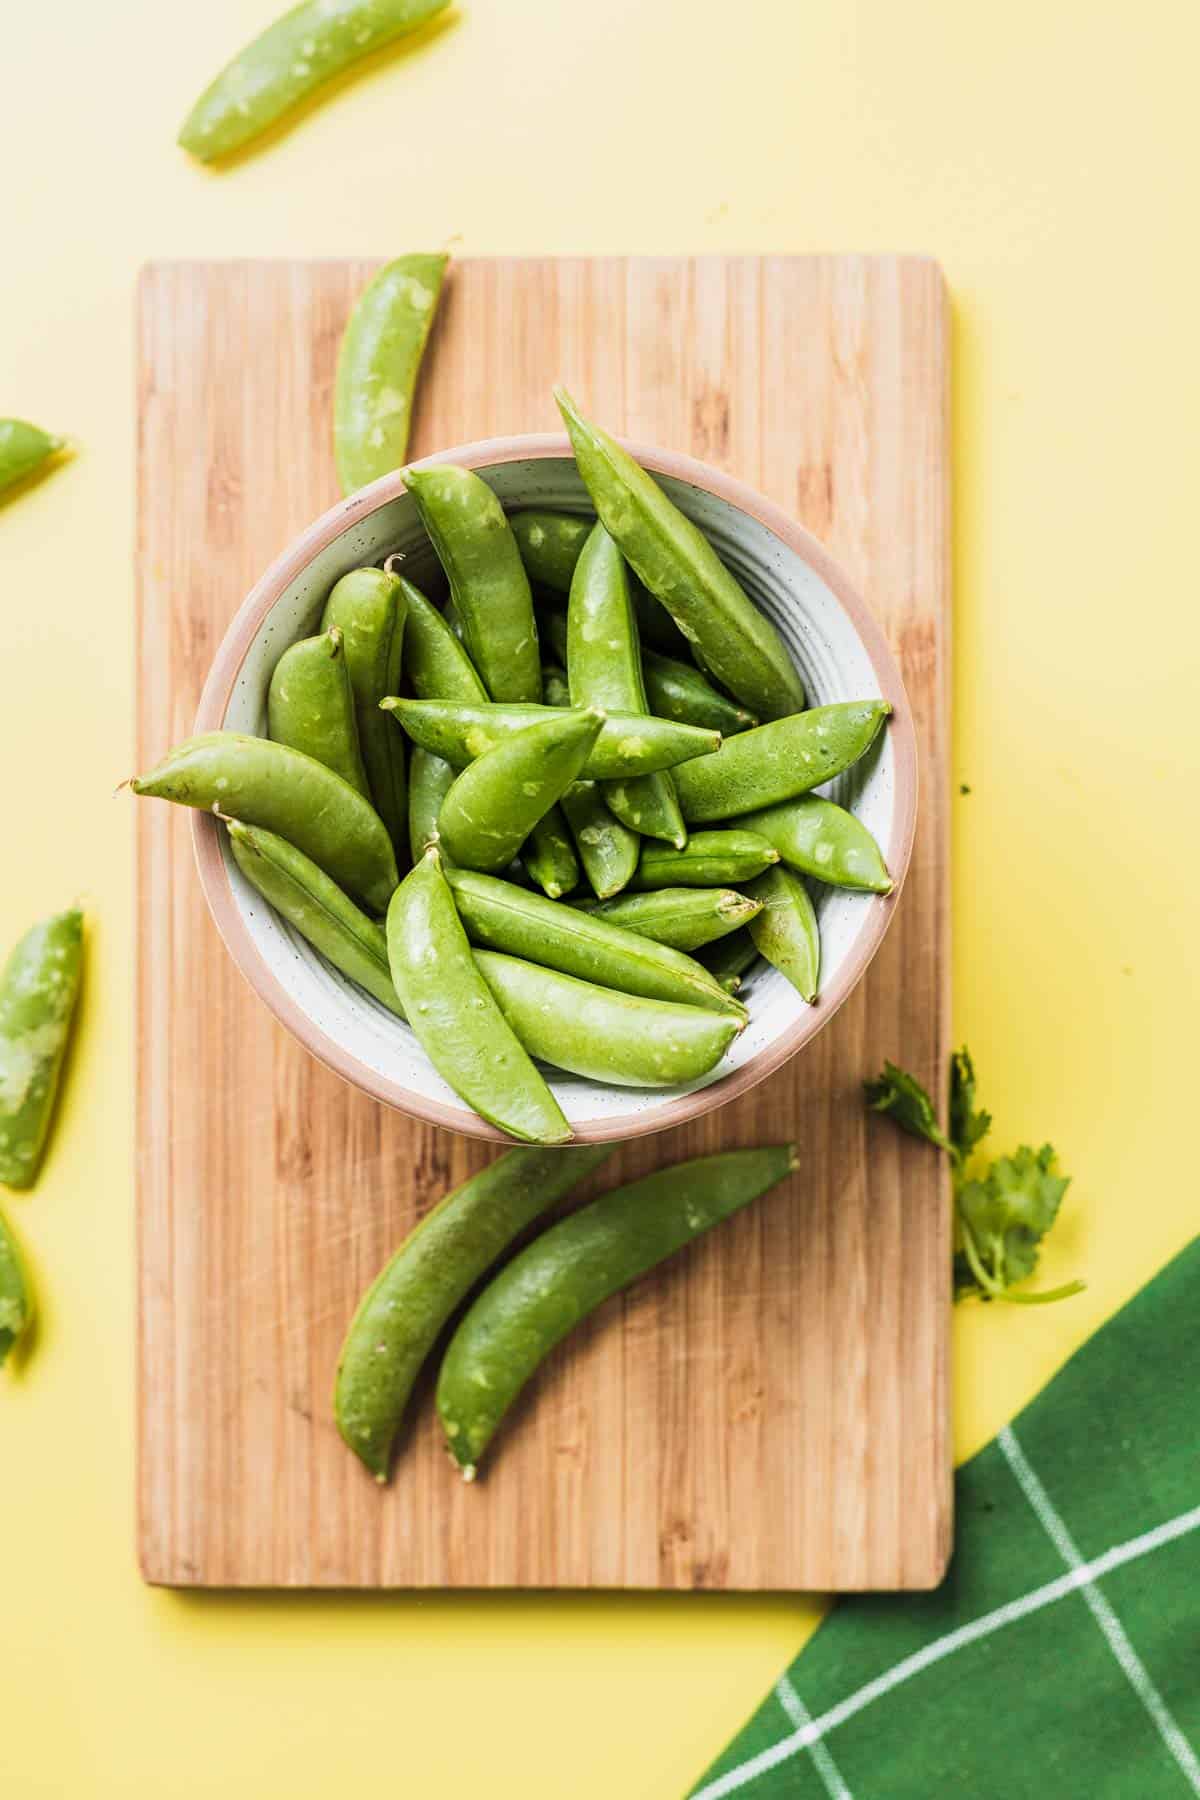
Sugar Snap Peas

Birds eye view of sugar snap peas in a white bowl.
  • Provides 1-2 grams of fiber per 1 cup serving
  • Can be interchanged with snow peas but snap peas have a sweeter flavour profile
  • You can also substitute or combine with other raw veggies like carrot or celery sticks

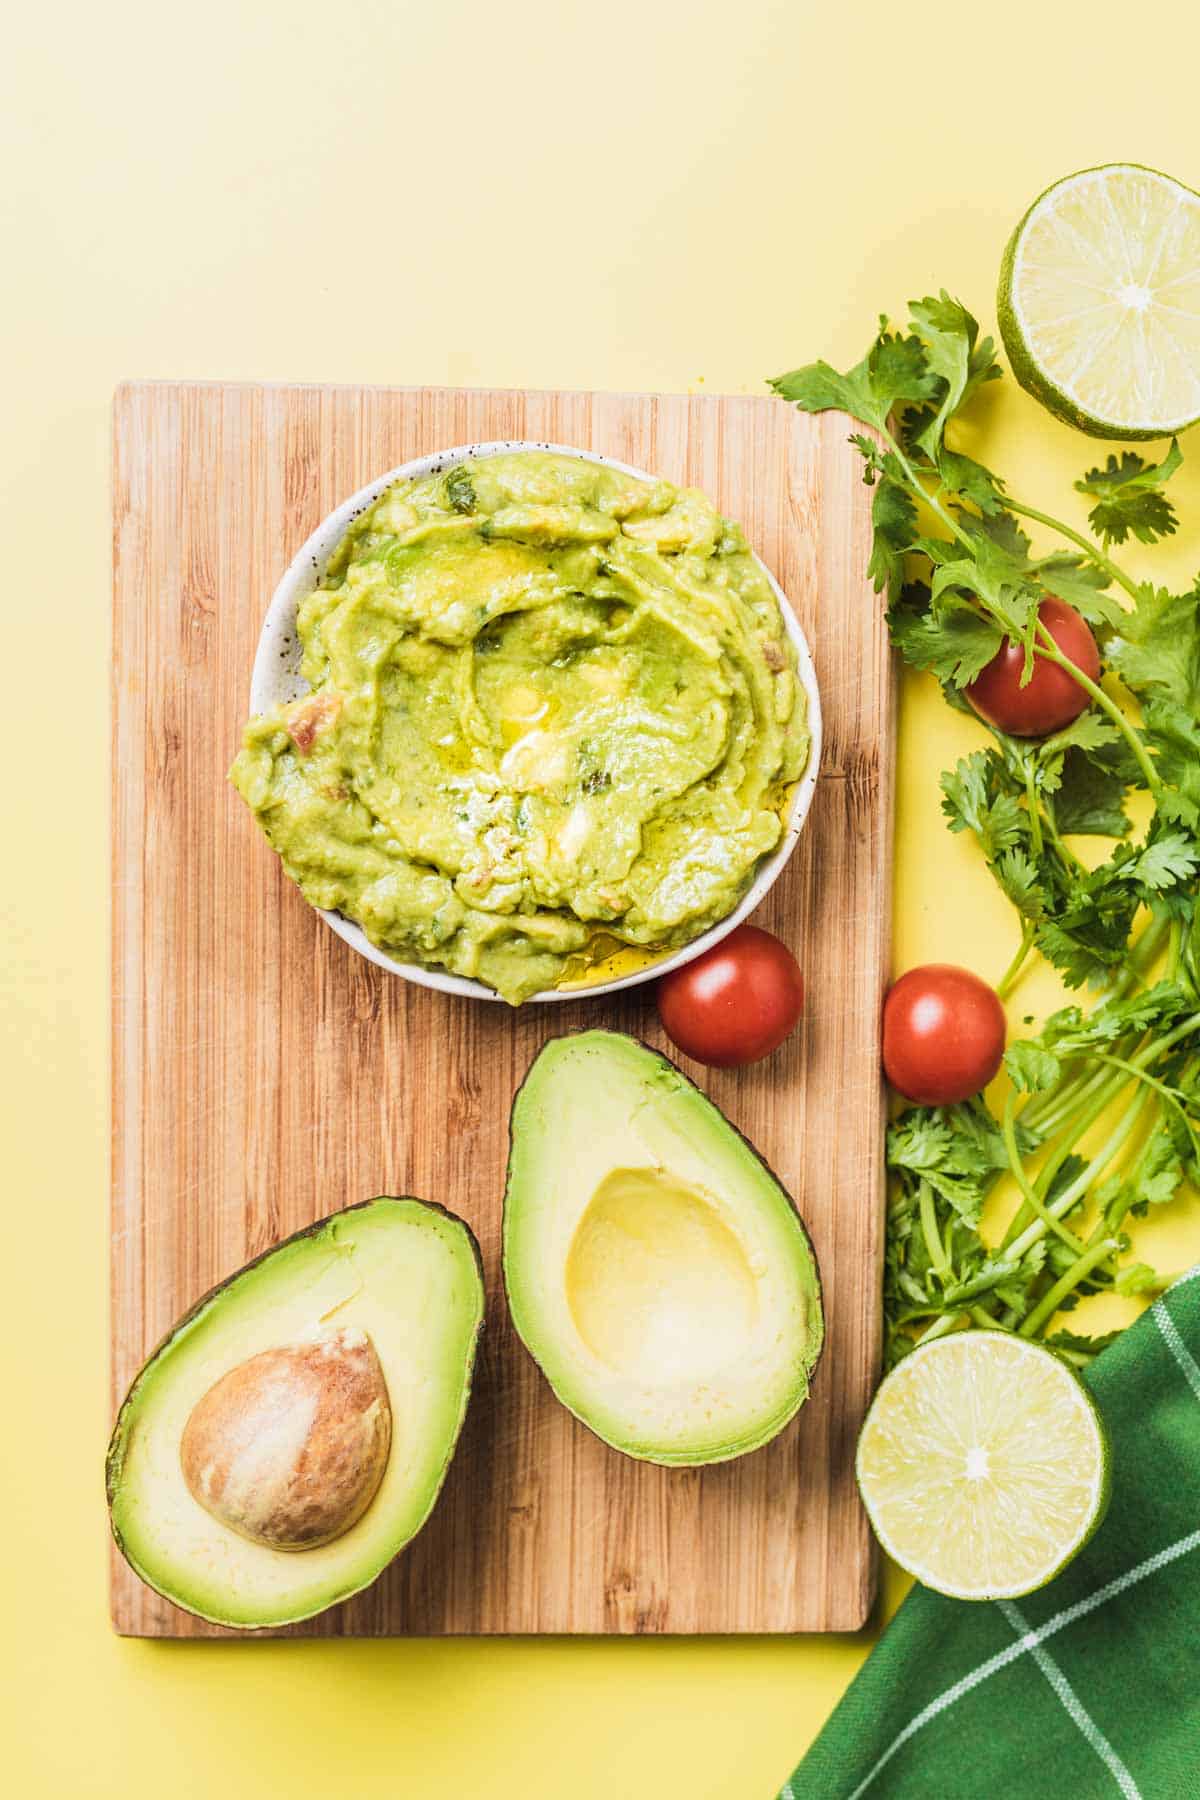
Guacamole

Birds eye view of guacamole in a white bowl.
  • Avocado is loaded with healthy monounsaturated fat
  • 1/2 an avocado provides 7 grams of fiber which is equal to 25% of your daily fiber needs
  • You can make guacamole from scratch or buy pre-prepared options
  • To prevent your guacamole from going brown in the fridge, you can squeeze lemon juice overtop to prevent oxidization and store in an air tight container

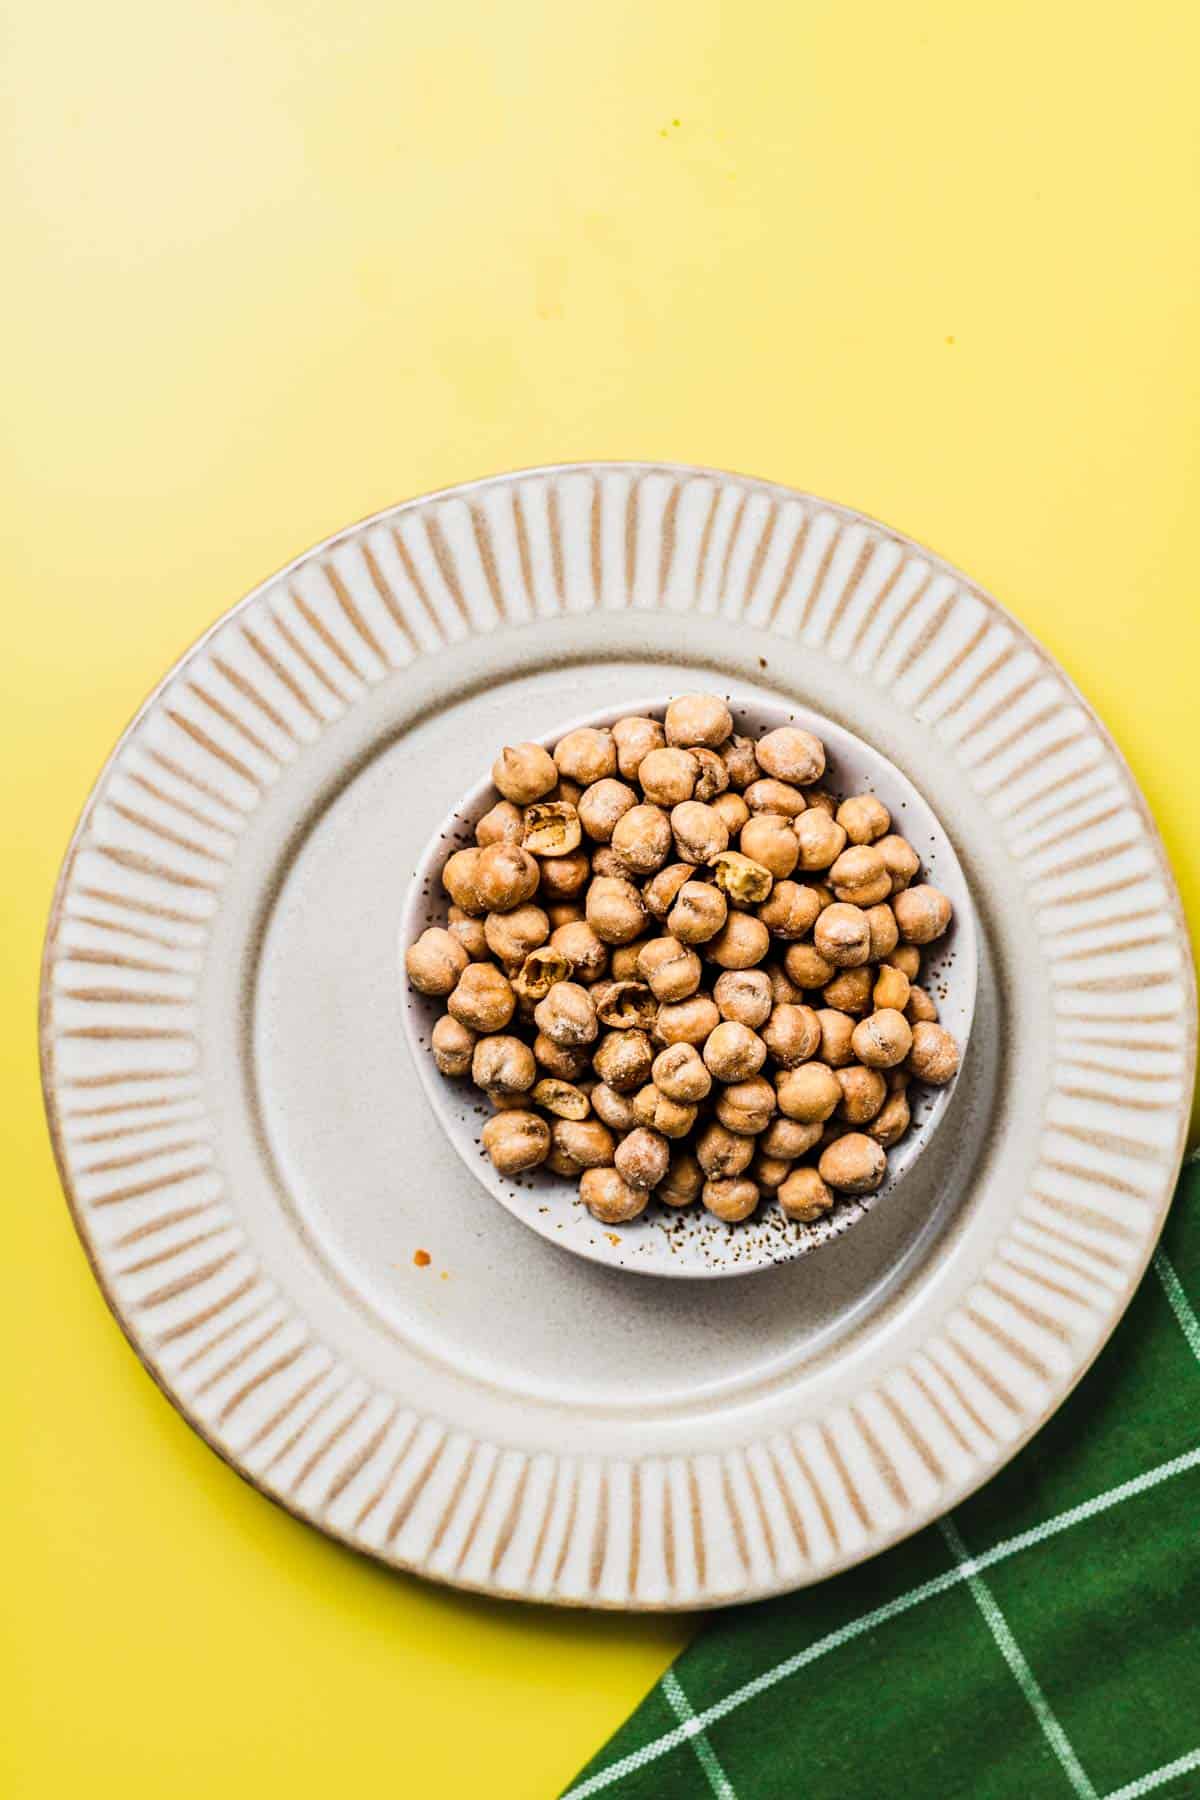
Roasted Chickpeas

Birds eye view of roasted chickpeas in a white bowl.
  • Chickpeas are an excellent source of plant-based protein
  • Provides 7 grams of protein and 6 grams of fiber per 1/2 cup serving
  • You can make roasted chickpeas from scratch or buy them pre-made

MORE HUNGER CRUSHING COMBO™ SNACKS YOU MIGHT LIKE

If you liked this sugar snap pea snack combo, then you are going to love more of these balanced snack ideas:

  • Hard Boiled Egg Snack with Veggies & Olives
  • Popcorn Mix with Nuts & Jerky
  • Edamame Snack with Fruit & Nuts

Did you enjoy these sugar snap peas with guacamole and roasted chickpeas?
What other veggies would you dip in this Hunger Crushing Combo™?
Let me know your thoughts down in the comments below.

Print Recipe
5 from 4 votes

Sugar Snap Peas with Guacamole (Hunger Crushing Combo™ Snack #8)

These sugar snap peas with guacamole and roasted chickpeas make for a delicious and refreshing plant-based snack that is balanced with hunger crushing compounds like protein, fat, and fiber.
Prep Time5 minutes mins
Course: Snack, snacks
Cuisine: American
Servings: 1
Calories: 333kcal
Author: Abbey Sharp

Ingredients

  • 1 cup sugar snap peas
  • 1/4 cup roasted chickpeas
  • 1/3 cup guacamole

Instructions

  • Portion guacamole, roasted chickpeas, and sugar snap peas in a bowl or plate.
  • Serve and enjoy!

Nutrition

Calories: 333kcal | Carbohydrates: 41g | Protein: 12g | Fat: 15g | Saturated Fat: 2g | Polyunsaturated Fat: 2g | Monounsaturated Fat: 8g | Sodium: 26mg | Potassium: 956mg | Fiber: 10g | Sugar: 4g | Vitamin A: 1326IU | Vitamin C: 68mg | Calcium: 141mg | Iron: 5mg
Abbey Sharp

Abbey Sharp is a Registered Dietitian (RD), regulated by the Ontario College of Dietitians. She is a mom, YouTuber, Blogger, award winning cookbook author, media coach specializing in food and nutrition influencers, and a frequent contributor to national publications like Healthline and on national broadcast TV shows.
www.abbeyskitchen.com/about-abbey/

Last Updated December 9, 2021. Published December 9, 2021 By Abbey Sharp 3 Comments

Hard Boiled Egg Snack with Veggies (Hunger Crushing Combo™ #7)

This hard boiled egg snack with veggies and olives will give you another reason to love your snack break! Balanced with protein, healthy fats, and fiber, this snack is about to crush your hunger in a major way.

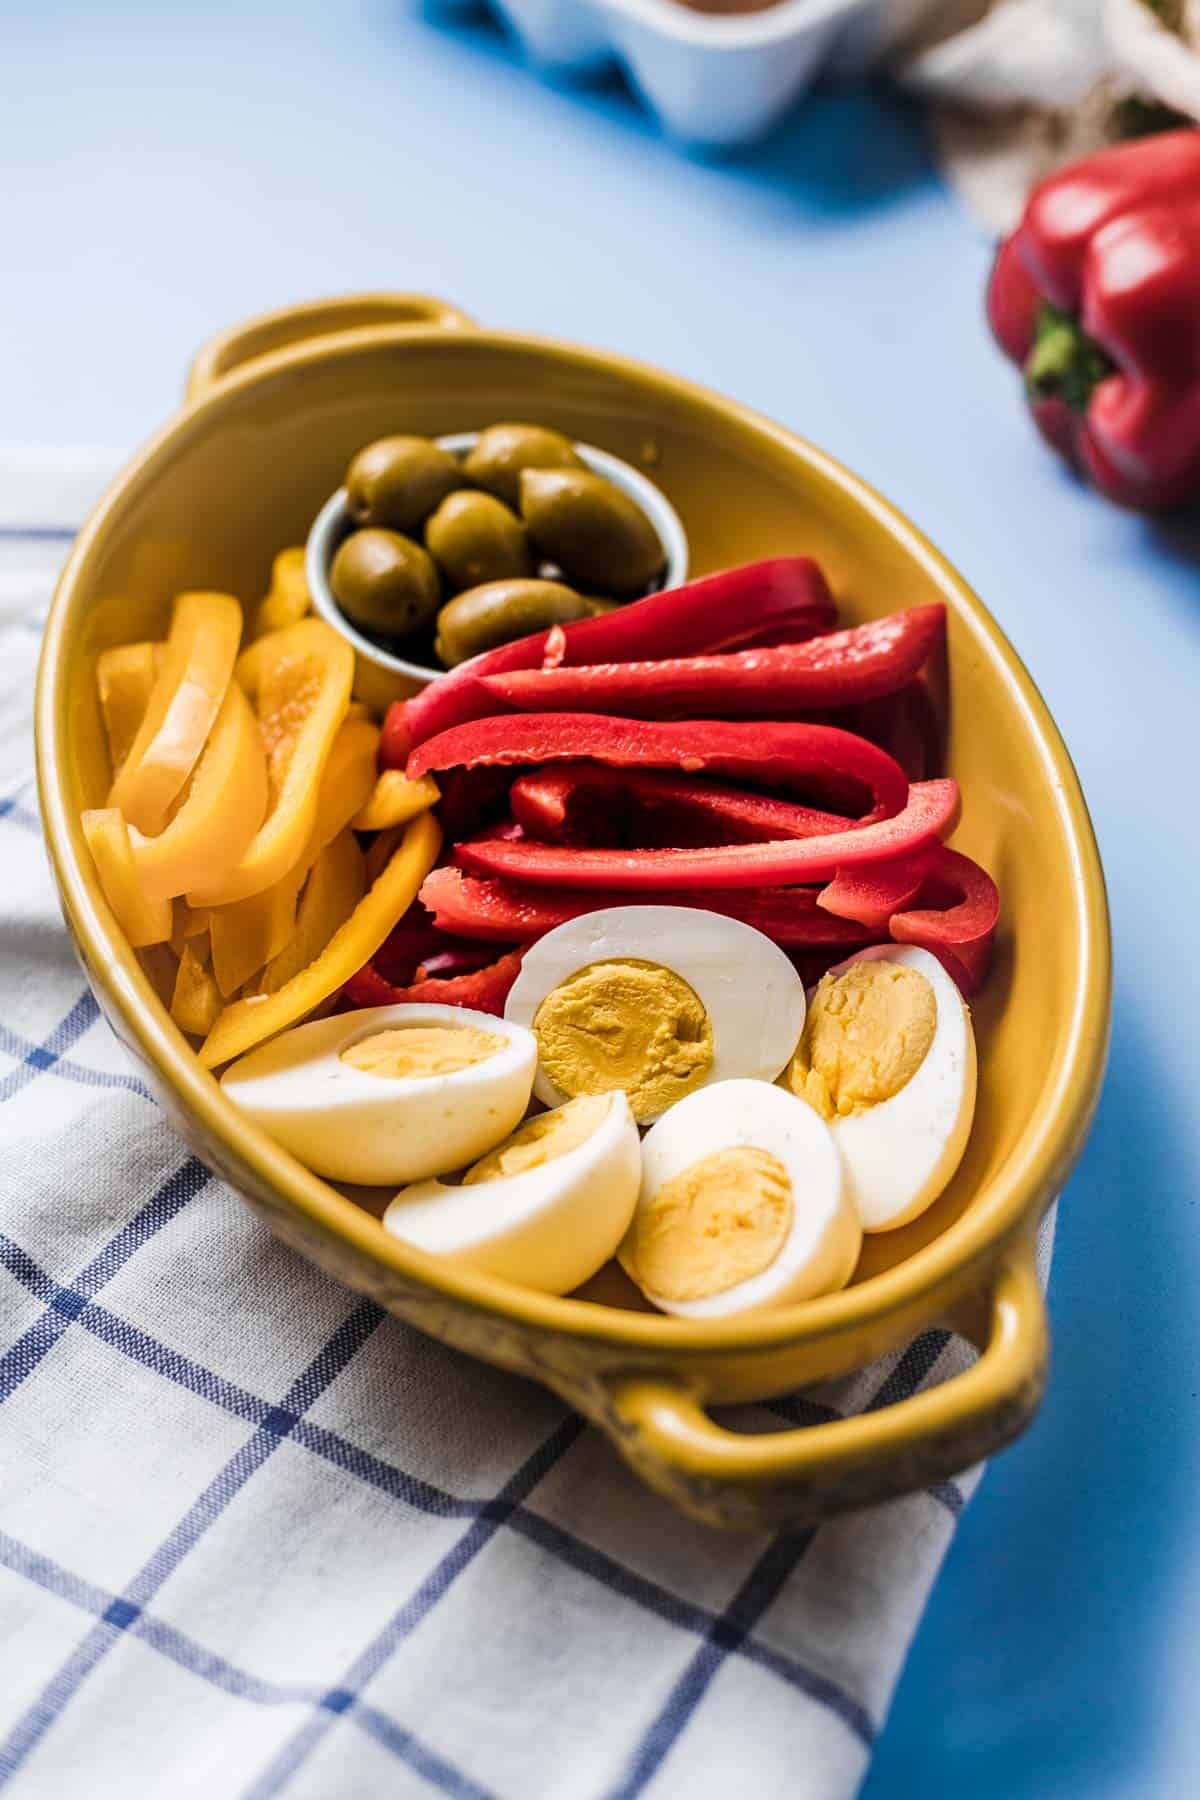
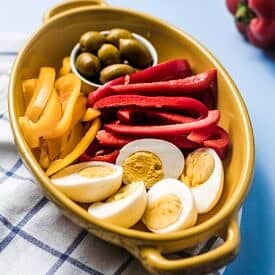
Close up of hard boiled egg snack in a yellow shallow bowl with sliced bell peppers and olives in a white ramekin.

If you are the type to meal prep hard boiled eggs at the beginning of the week (or even if you aren’t) then this hard boiled egg snack with veggies and olives was made for you. While I love a good hard boiled egg as an easy grab-and-go hunger crusher, pairing it with sliced bell peppers and olives give it that little extra *oomph* to keep me feeling satiated for longer. We also eat with our eyes, so adding a bit of colour and variety to this hard boiled egg snack makes it that much more appetizing as a workday pick-me-up!

Why is this hard boiled egg snack with veggies balanced?

This hard boiled egg snack provides 13 grams of protein, 5 grams of fiber, and is loaded with healthy fats! And if you are familiar with my Hunger Crushing Combo™ philosophy, then you know that this makes for the perfect balanced snack to keep your energy levels even keeled between meals.

Hard Boiled Eggs

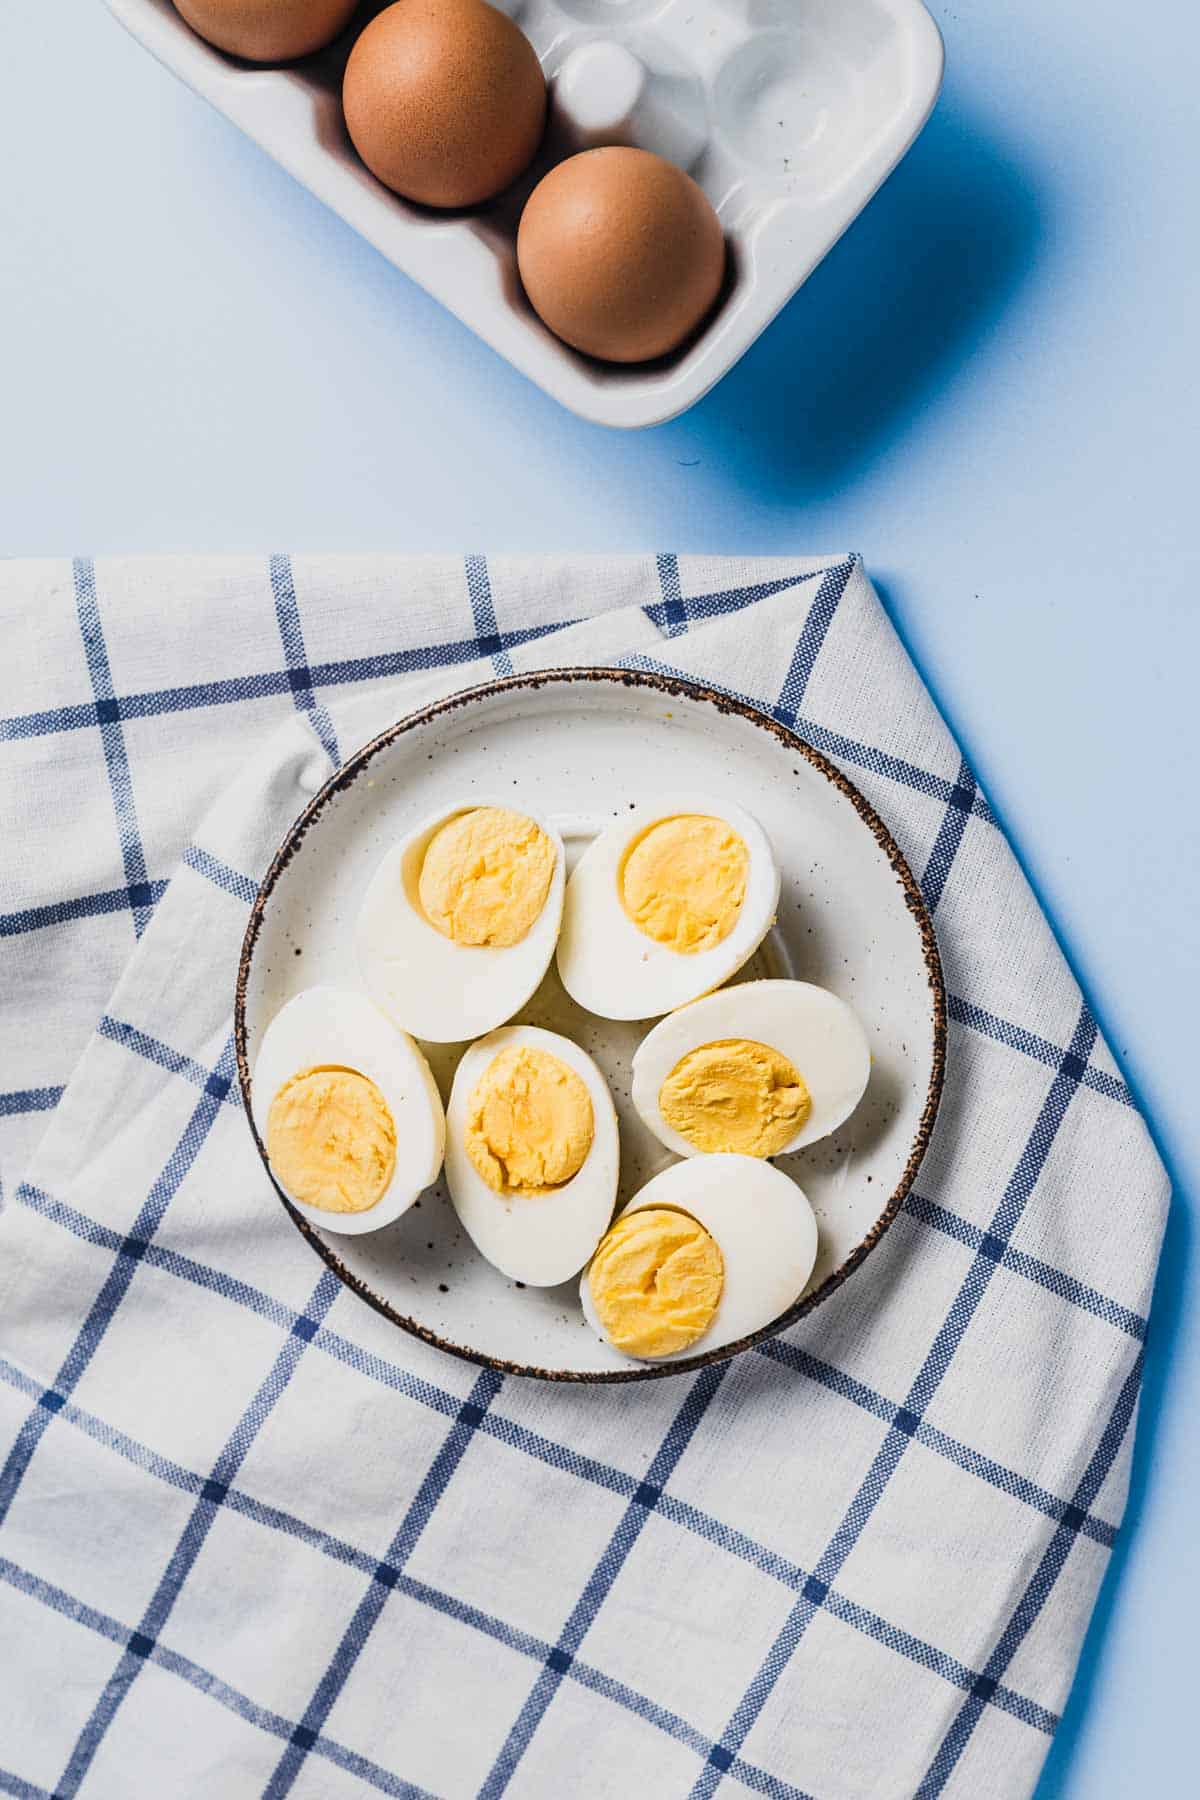
Birds eye view of 3 hard boiled eggs cut in half on a white plate.
  • Provides 12 grams of protein for every 2 eggs
  • Eggs are packed with nutrients including Vitamin A, Vitamin D, Choline, and Iron
  • Hard boiled eggs can be batch prepped ahead of time and enjoyed all week as an easy protein for snacks and meals
  • Worried about the cholesterol in eggs? We break down the research and discuss this common health myth.

Bell peppers

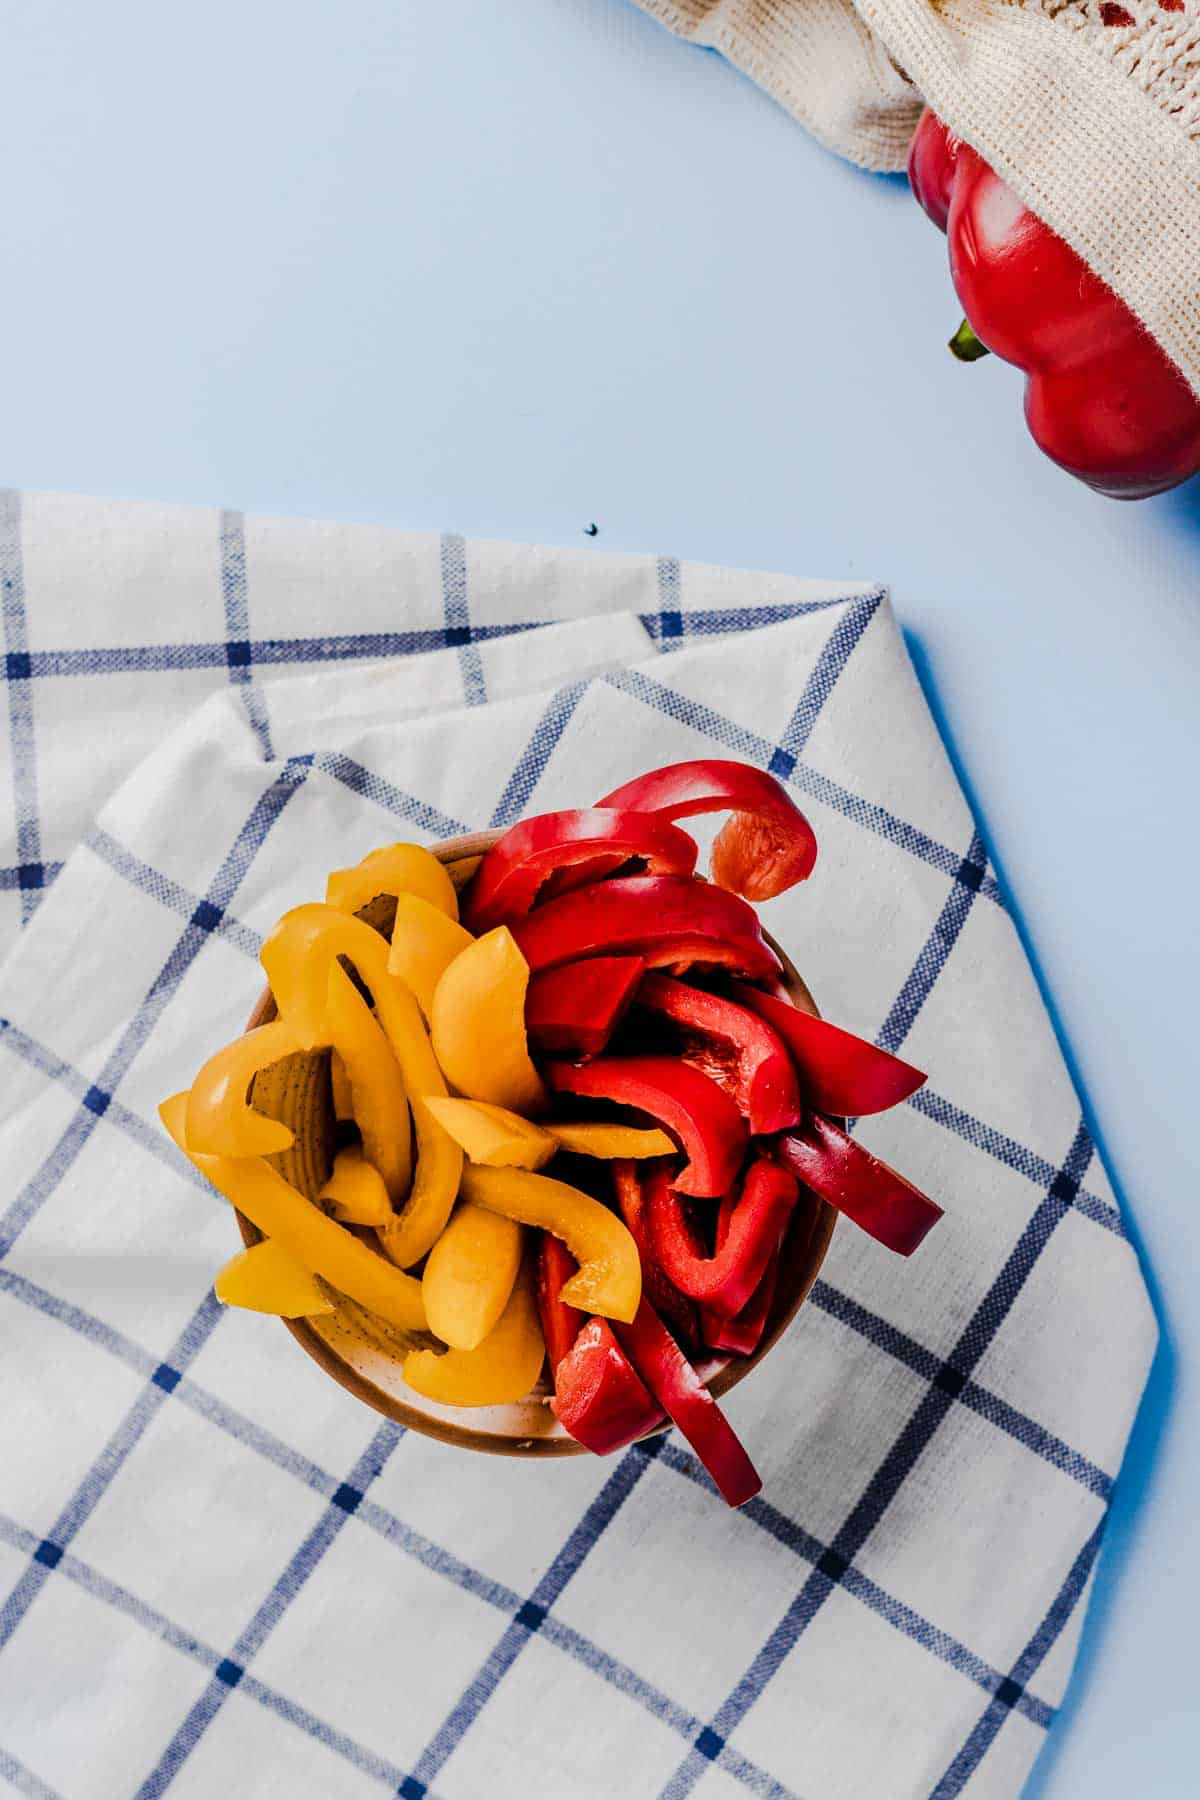
Birds eye view of sliced red and yellow bell peppers in a small bowl.
  • 1 medium bell pepper provides 2 grams of fiber
  • One of the richest sources of vitamin C (1/2 a medium bell pepper provides 100% of your daily recommendation)
  • If you like sweeter bell peppers choose red, yellow, or orange

Olives

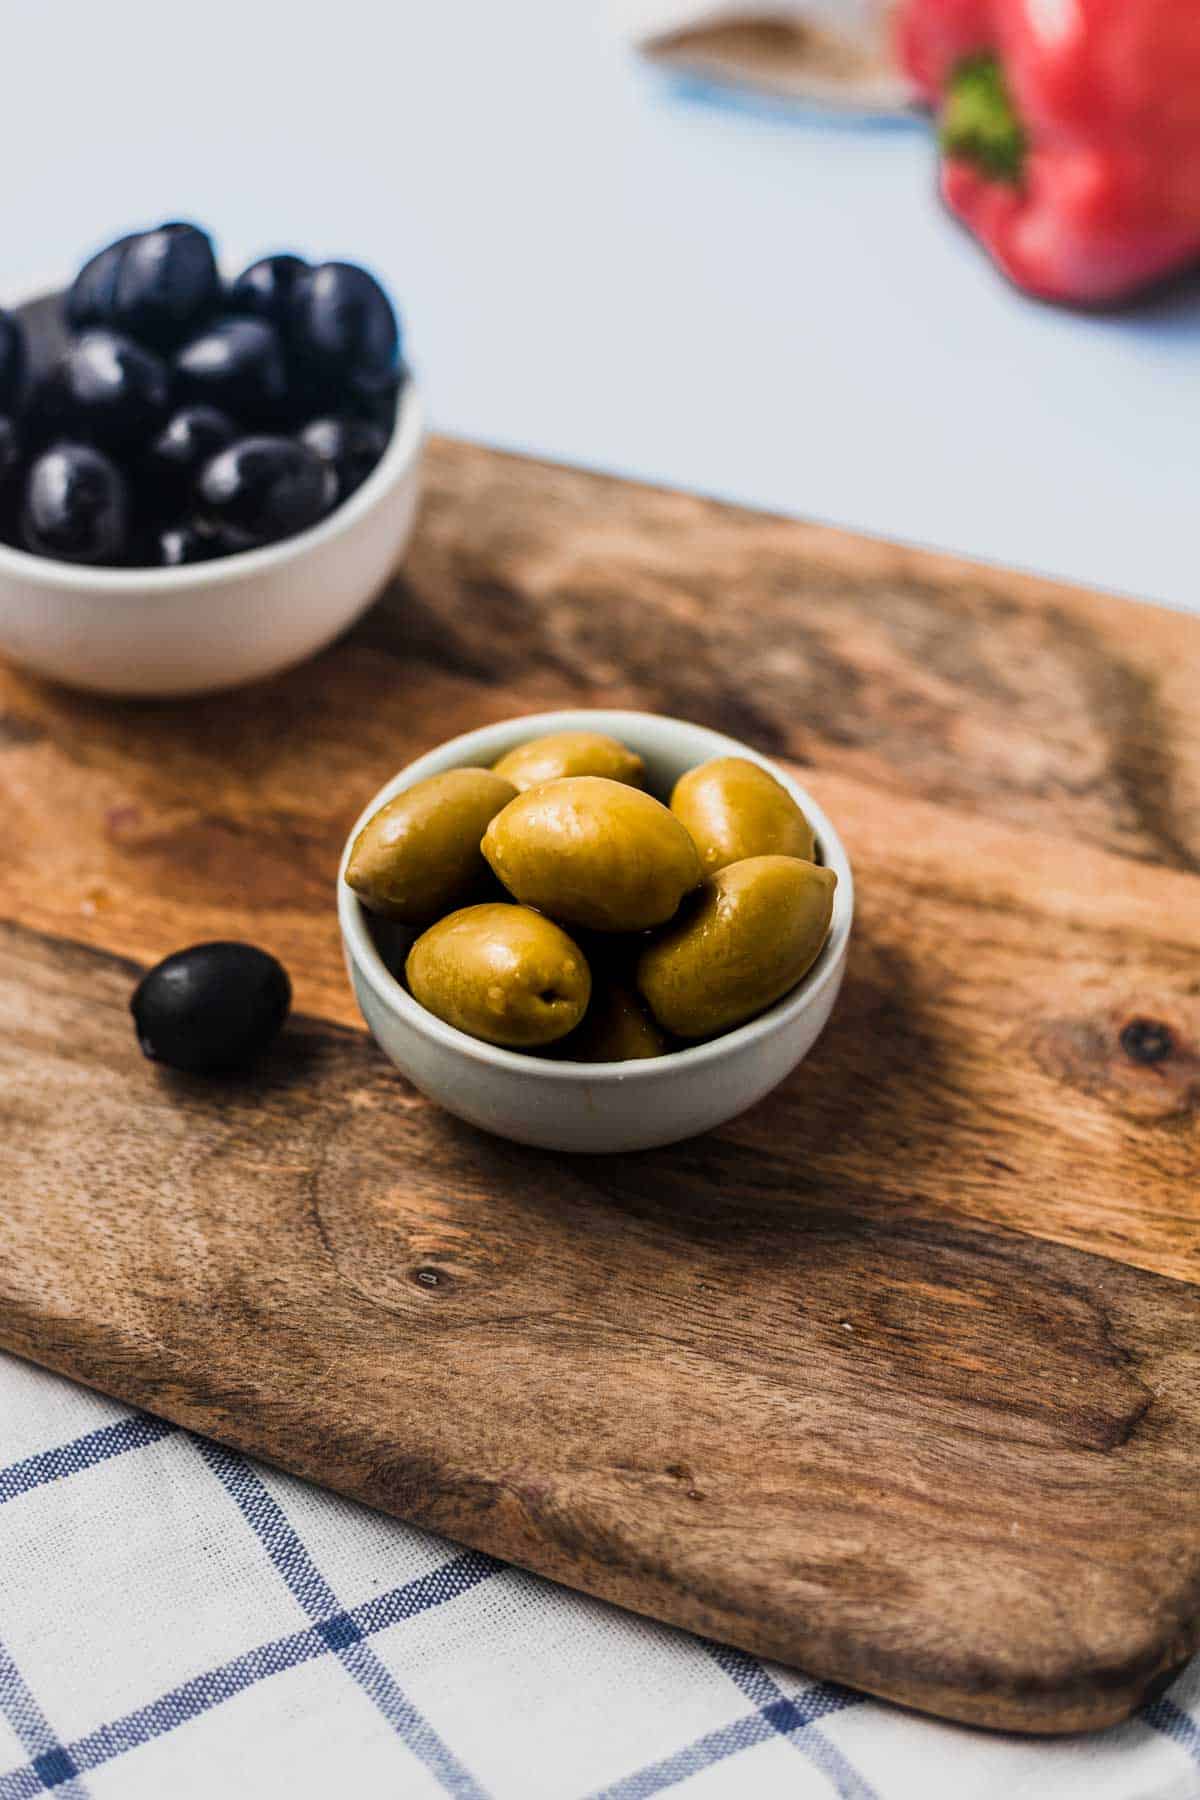
Close up of green olives in a small white ramekin.
  • An excellent source of healthy monounsaturated fats
  • Provides 3 grams of fiber for every 1/2 cup serving
  • Rich in antioxidants like Vitamin E
  • If you don’t like the bitterness of green olives, black olives contain less bitter compounds
  • Canned varieties often contain high amounts of sodium so be sure to rinse them with cold water to reduce sodium intake

More Hunger Crushing Combo™ Snacks You Might Like

If you enjoyed this hard boiled egg snack with veggies, then you are also going to love more of our favourite hunger crushing snacks!

  • Edamame Snack with Fruit & Nuts
  • Popcorn Mix with Nuts & Jerky
  • Carrots and Cheese Plate with Turkey

Have you tried making this hard boiled egg snack?
Let me know down in the comments below!

Print Recipe
5 from 3 votes

Hard Boiled Egg Snack with Veggies (Hunger Crushing Combo™ Snack #7)

This hard boiled egg snack with veggies and olives will give you another reason to love your snack break! Balanced with protein, healthy fats, and fiber, this snack is about to crush your hunger in a major way.
Prep Time5 minutes mins
Course: Snack, snacks
Cuisine: American
Servings: 1
Calories: 270kcal
Author: Abbey Sharp

Ingredients

  • 2 eggs hard boiled
  • 1 cup bell peppers sliced
  • 1/2 cup olives

Instructions

  • Combine egg, olives, and bell peppers on a plate.
  • Serve and enjoy!

Nutrition

Calories: 270kcal | Carbohydrates: 12g | Protein: 13g | Fat: 19g | Saturated Fat: 4g | Polyunsaturated Fat: 3g | Monounsaturated Fat: 11g | Trans Fat: 1g | Cholesterol: 327mg | Sodium: 1181mg | Potassium: 464mg | Fiber: 5g | Sugar: 7g | Vitamin A: 5406IU | Vitamin C: 190mg | Calcium: 95mg | Iron: 3mg

Abbey Sharp

Abbey Sharp is a Registered Dietitian (RD), regulated by the Ontario College of Dietitians. She is a mom, YouTuber, Blogger, award winning cookbook author, media coach specializing in food and nutrition influencers, and a frequent contributor to national publications like Healthline and on national broadcast TV shows.

www.abbeyskitchen.com/about-abbey/

Last Updated December 9, 2021. Published December 9, 2021 By Abbey Sharp Leave a Comment

Popcorn Mix with Nuts (Hunger Crushing Combo™ Snack #6)

This popcorn mix with pistachios and jerky is the perfect savoury snack that you can prep ahead of time and enjoy all week long!

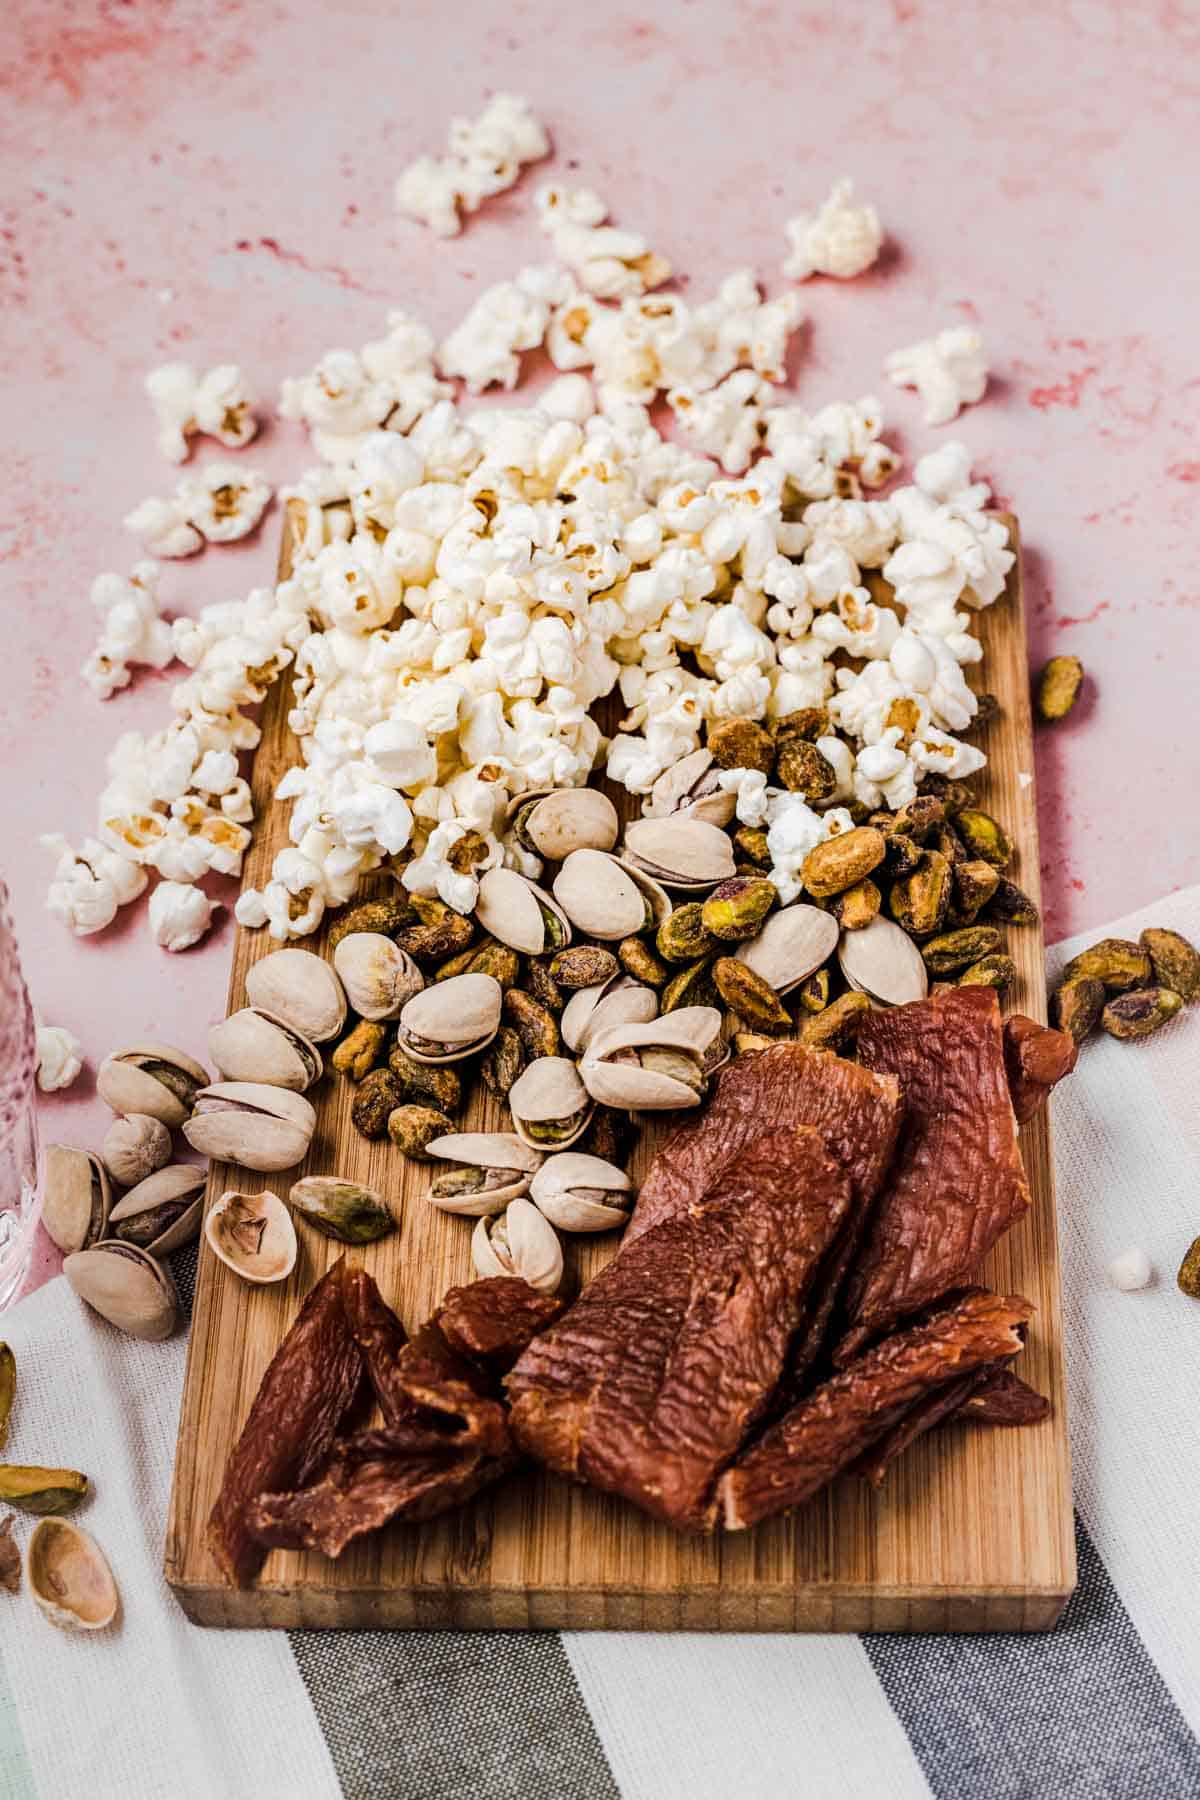
Close up of popcorn mix on a wooden cutting board.

Whether you are trying to fight off the 3pm energy slump or need an accompaniment to your movie night, this popcorn mix with pistachios and jerky is about to up your popcorn game in a major way. This Hunger Crushing Combo™ snack not only provides a balance of protein, fat, and fiber, but it also makes for the perfect crunchy savoury make-ahead snack that you can enjoy all week long.

Why is this popcorn mix a great balanced snack?

This popcorn mix provides 8 grams of protein and 5 grams of fiber, along with some extra special flavour and texture add-ins thanks to the pistachios and jerky. This popcorn mix can also easily be made vegan friendly by substituting a vegan beef jerky alternative.

Popcorn

Close up of popcorn in a bowl.
  • 1 1/5 cups of air popped popcorn provides 2 grams of fiber
  • For added flavour you can sprinkle with some herbs & spices (i.e everything but the bagel seasoning) or nutritional yeast for an extra boost of protein and cheesy flavour

Pistachios

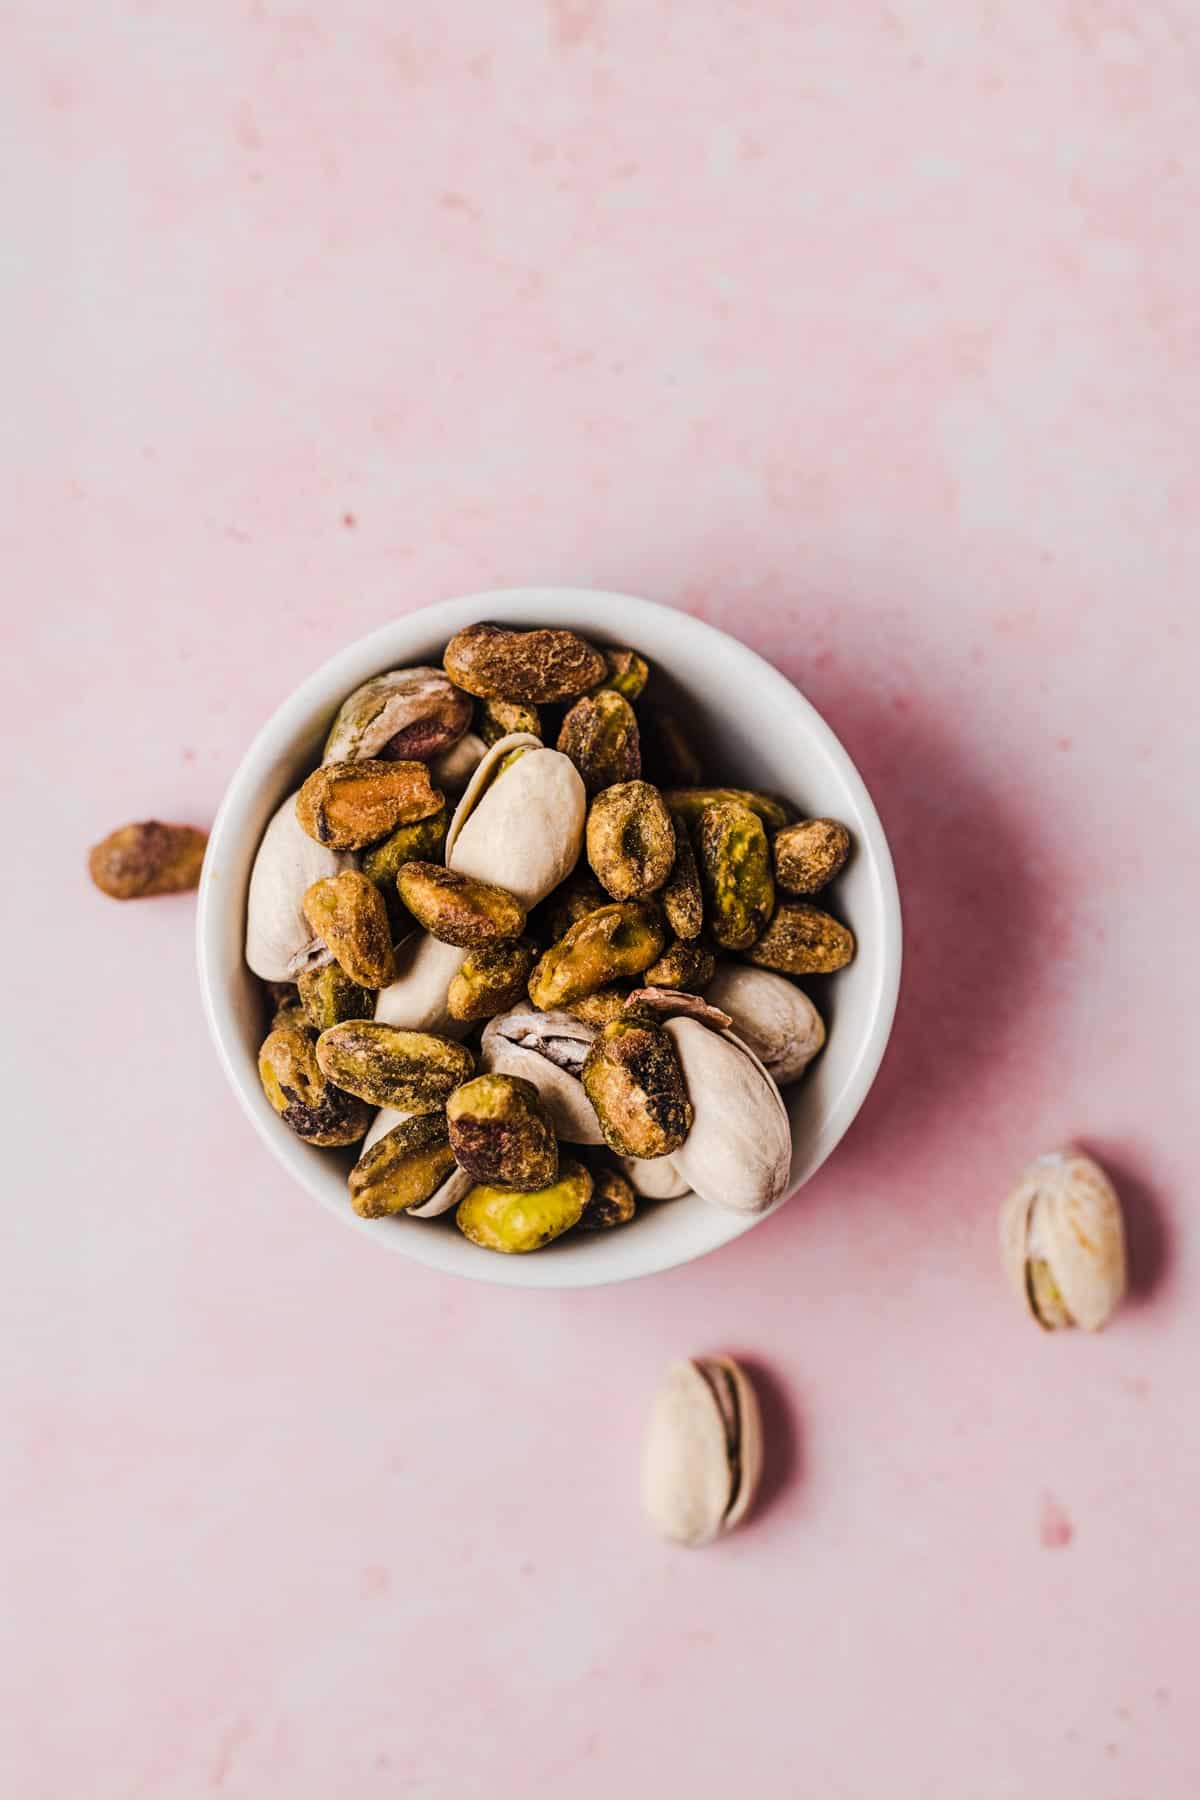
Birds eye view of pistachios in a white bowl.
  • Provides 6 grams of protein and 3 grams of fiber for every 1/4 cup serving
  • Rich in healthy unsaturated fats and antioxidants (like lutein and zeaxanthin)
  • Choose dry roasted and unsalted pistachio’s when available
  • If you don’t have pistachios, you can swap with any nut of your choosing (i.e. almonds, cashews, walnuts)

Jerky

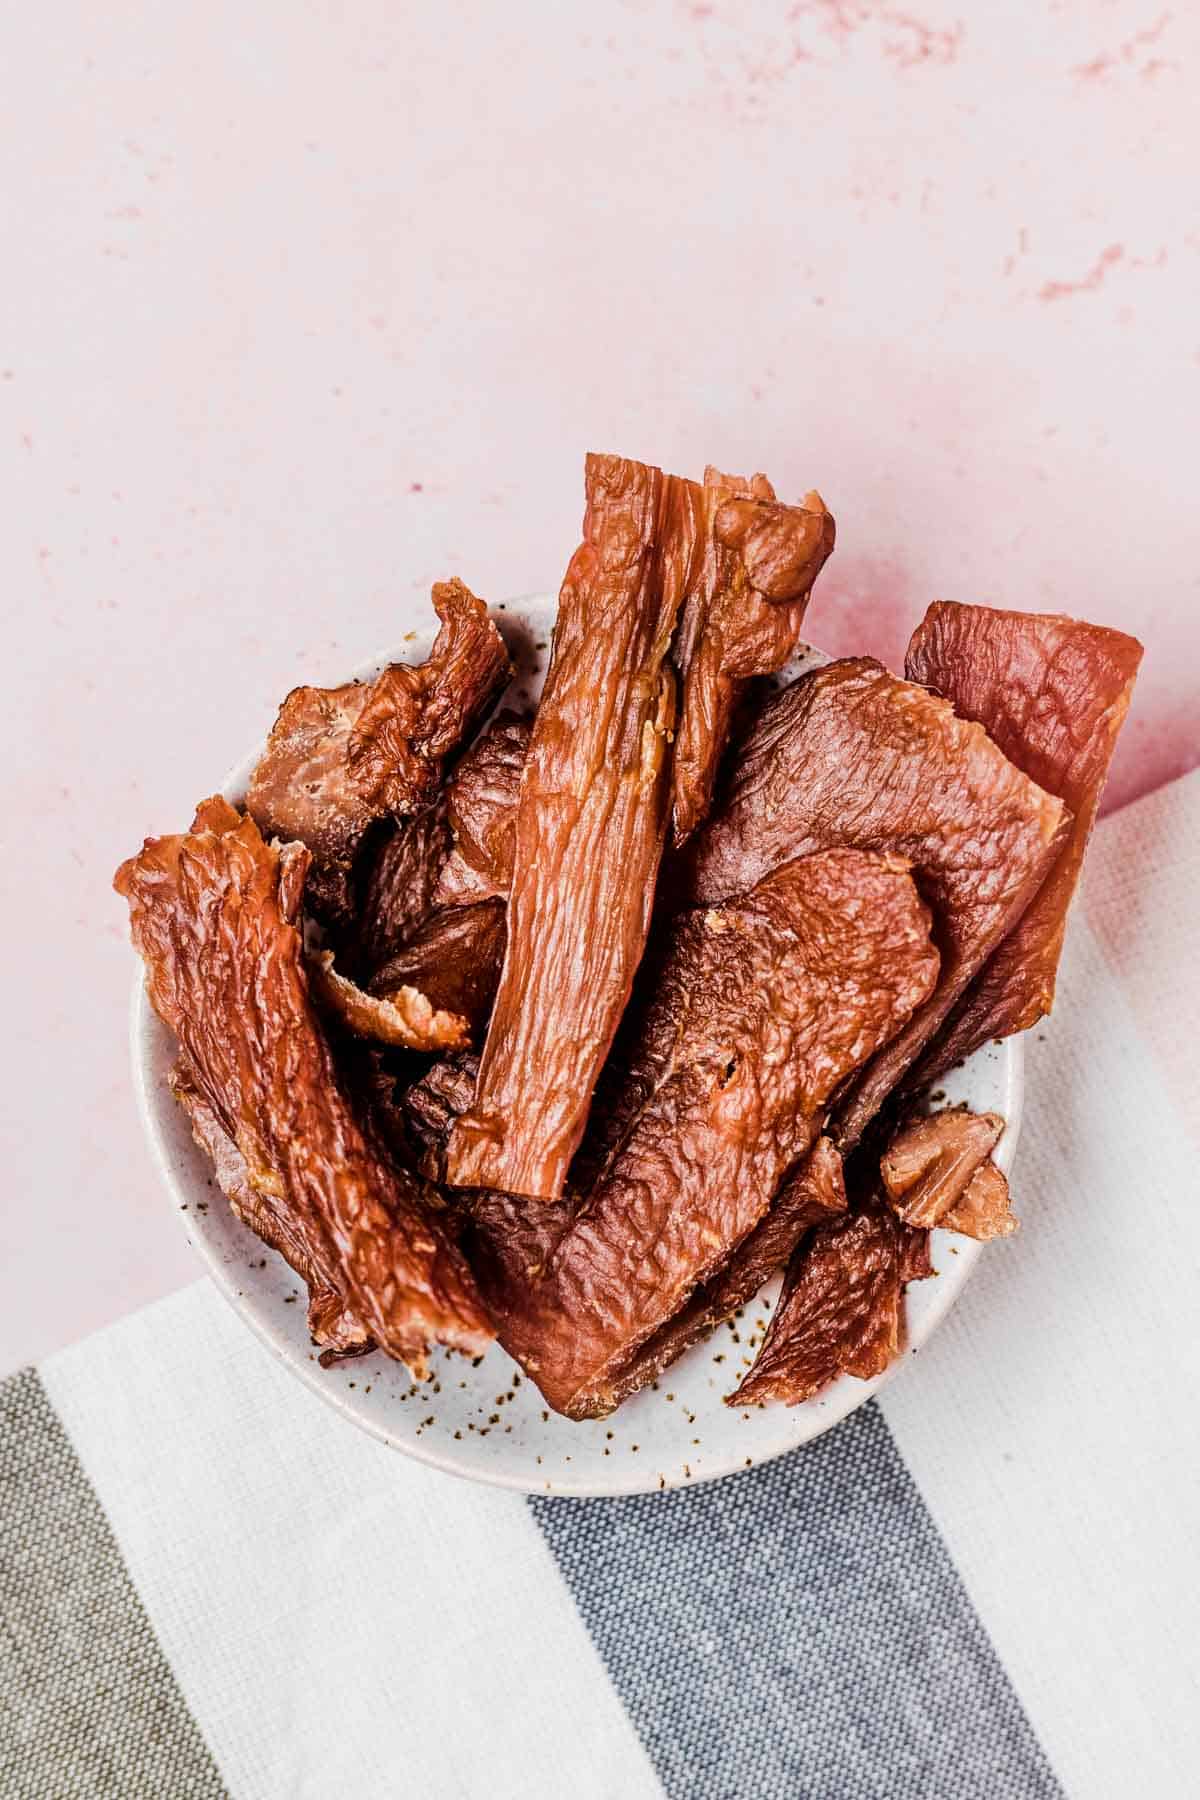
Birds eye view of jerky in a bowl.
  • Provides 13 grams of protein for every 2 stripes of jerky
  • You can choose turkey or beef jerky, or vegan jerky if you need to make this plant-based
  • Choose low or reduced sodium varieties when available

More Hunger Crushing Combo™ Snacks You Might Like

If you loved this popcorn mix and want to try some more snack combos to crush your hunger, you can give these ones a try!

  • Edamame Snack with Fruit & Nuts
  • Sliced Apple with Almond & Yogurt Dip
  • Carrot and Cheese Plate with Turkey

Does this popcorn mix with nuts deserve a 5 star rating?
Let me know your thoughts down in the comments below along with your favourite Hunger Crushing Combo™ snack so far!

Print Recipe
5 from 1 vote

Popcorn Mix with Nuts (Hunger Crushing Combo™ Snack #6)

This popcorn mix with pistachios and jerky is the perfect savoury snack that you can prep ahead of time and enjoy all week long!
Prep Time5 minutes mins
Total Time5 minutes mins
Course: Snack
Cuisine: American
Servings: 1
Calories: 269kcal
Author: Abbey Sharp

Ingredients

  • 1.5 cup popcorn
  • 1/4 cup pistachio shelled
  • 2 -4 jerky strips

Instructions

  • Portion popcorn, pistachios, and jerky in a bowl.
  • Serve and enjoy!

Nutrition

Calories: 269kcal | Carbohydrates: 18g | Protein: 8g | Fat: 20g | Saturated Fat: 4g | Polyunsaturated Fat: 5g | Monounsaturated Fat: 9g | Trans Fat: 1g | Cholesterol: 1mg | Sodium: 160mg | Potassium: 398mg | Fiber: 5g | Sugar: 3g | Vitamin A: 157IU | Vitamin C: 2mg | Calcium: 36mg | Iron: 2mg
Abbey Sharp

Abbey Sharp is a Registered Dietitian (RD), regulated by the Ontario College of Dietitians. She is a mom, YouTuber, Blogger, award winning cookbook author, media coach specializing in food and nutrition influencers, and a frequent contributor to national publications like Healthline and on national broadcast TV shows.
www.abbeyskitchen.com/about-abbey/

Last Updated December 9, 2021. Published December 9, 2021 By Abbey Sharp 2 Comments

Edamame Snack with Fruit & Nuts (Hunger Crushing Combo™ Snack #5)

This edamame snack with mandarin orange slices and cashews is packed with plant-based protein, fiber, and antioxidant action making it an excellent Hunger Crushing Combo™ snack to add to your repertoire.

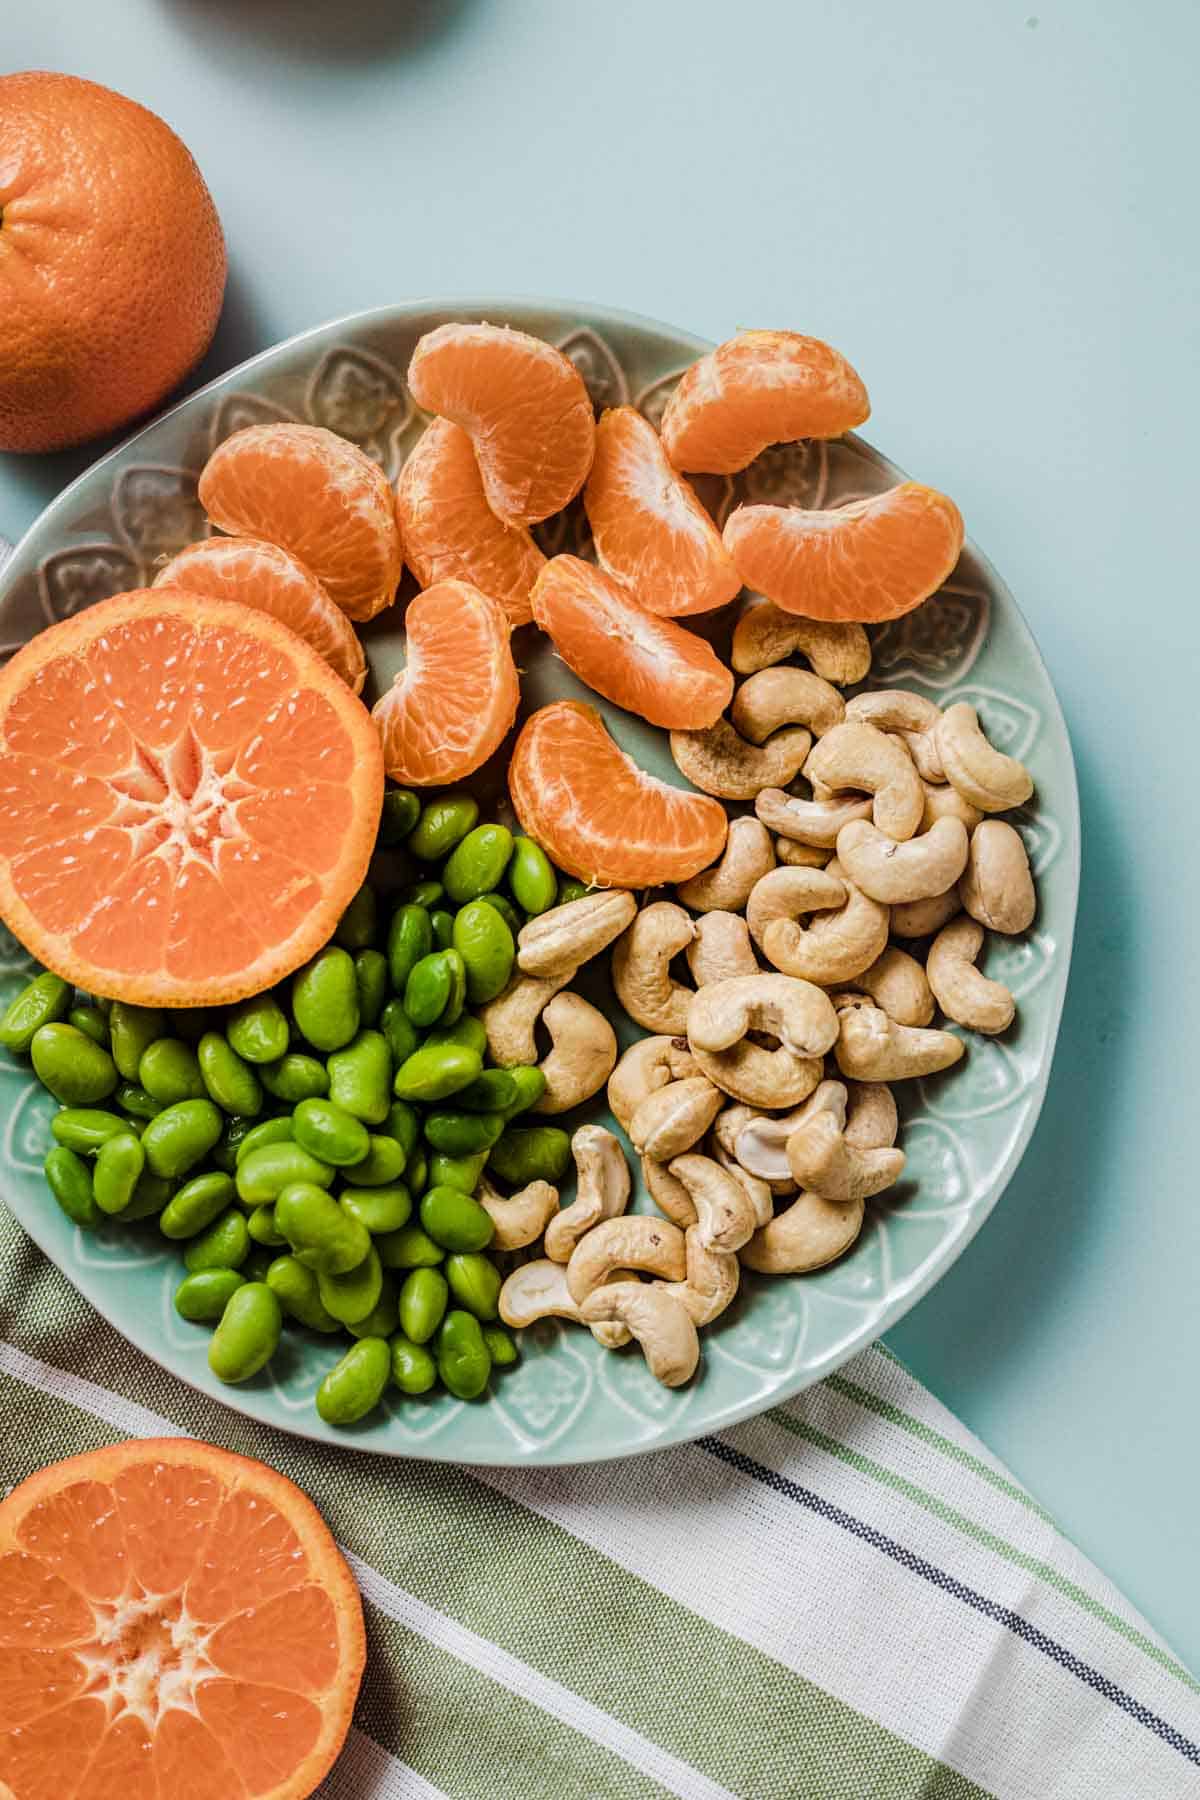
Close up of edamame snack with fruit and nuts on a blue plate.

This edamame snack is a plant-based lovers dream! Not only is the vibrant colour combination easy on the eyes, but it is also vegan friendly, balanced, easy to whip up in a flash, and a great way to integrate edamame into your snack game. Interested in learning more about my Hunger Crushing Combo™ philosophy? We break down the research for why you should be combining protein, fiber, and fats at every snack and meal.

Why is this Edamame Snack a Balanced Option?

This edamame snack provides 11 grams of protein and 5 grams of fiber, along with some antioxidant action for good measure. This Hunger Crushing Combo™ snack is a great way to give your snack a bit of Asian flare in the most balanced and delicious way.

Shelled Edamame

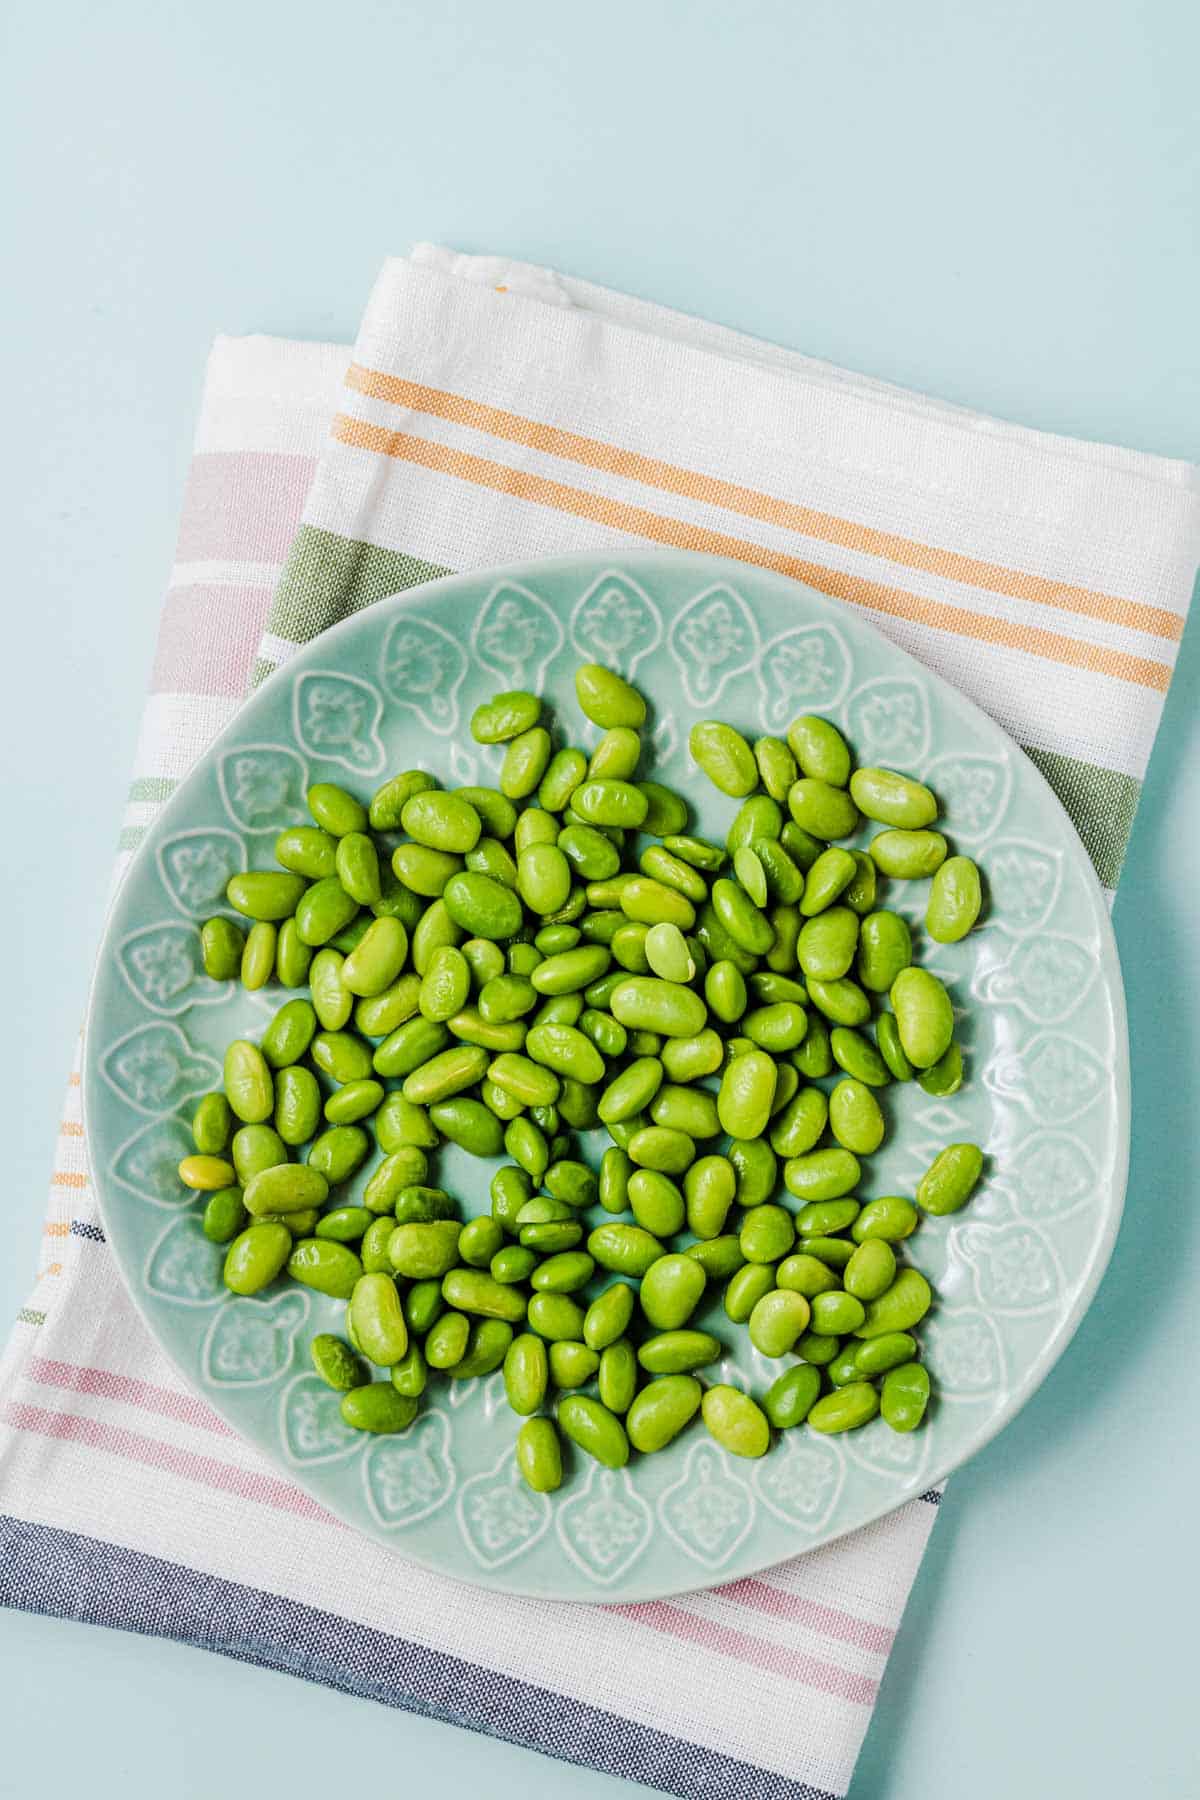
Birds eye view of edamame on a blue plate.
  • Provides 5 grams of protein and 2 grams of fiber per 1/4 cup serving
  • A complete plant-based protein (i.e. it contains ALL amino acids) making it an excellent protein option for vegans and vegetarians
  • Can be steamed, microwaved, panfried or roasted
  • If you want to eliminate the extra prep work, you can opt for pre-made roasted edamame
  • Research has shown that regular consumption of soy protein (i.e. edamame) can reduce cholesterol levels
  • Worried about the alleged health risks of eating soy? Then you’ll want to read my breakdown of the research where I debunk this common health myth

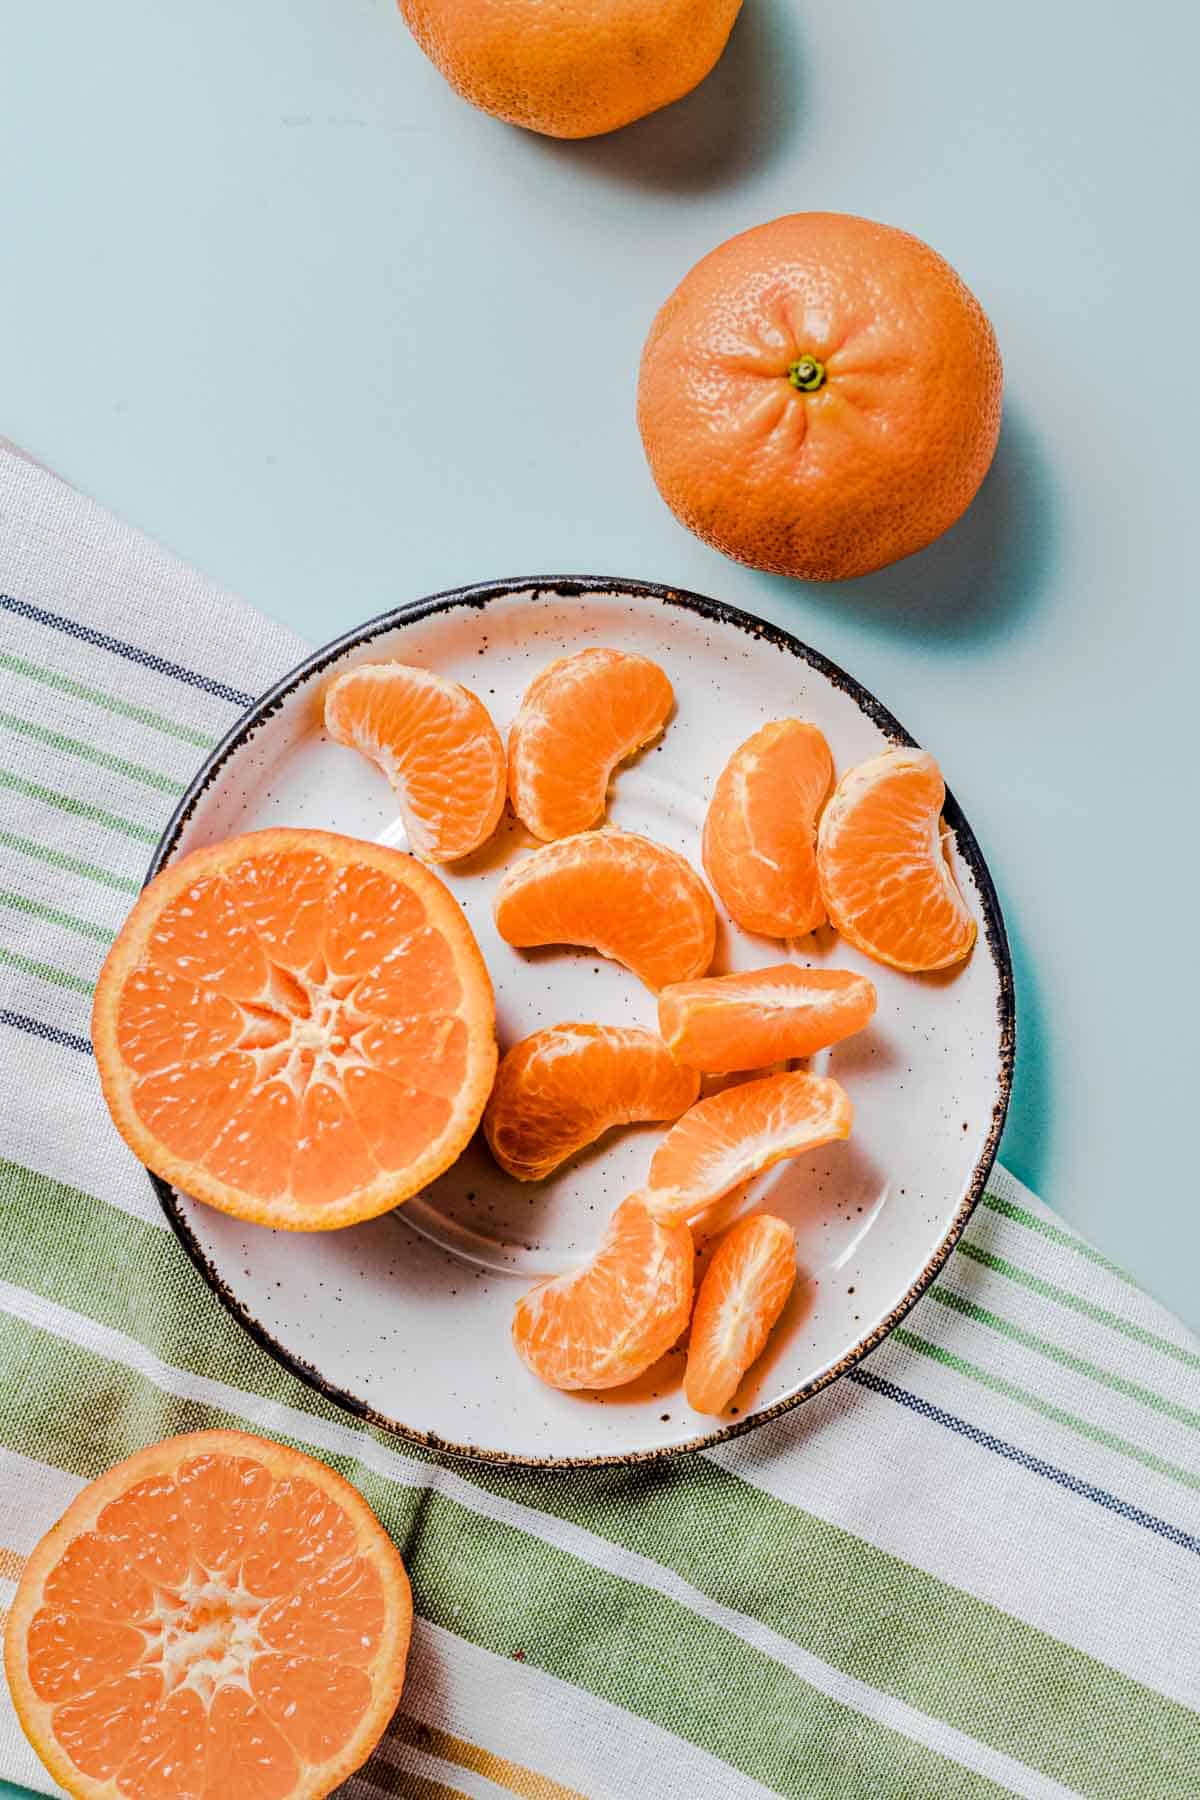
Mandarin Orange Slices

Birds eye view of mandarin oranges on a white plate.
  • 2 small mandarin oranges provides 3 grams of fiber
  • An excellent source of vitamin C (54% of your daily recommendation)
  • Can be stored at room temperature for up to 1 week, or in the fridge for 6 weeks

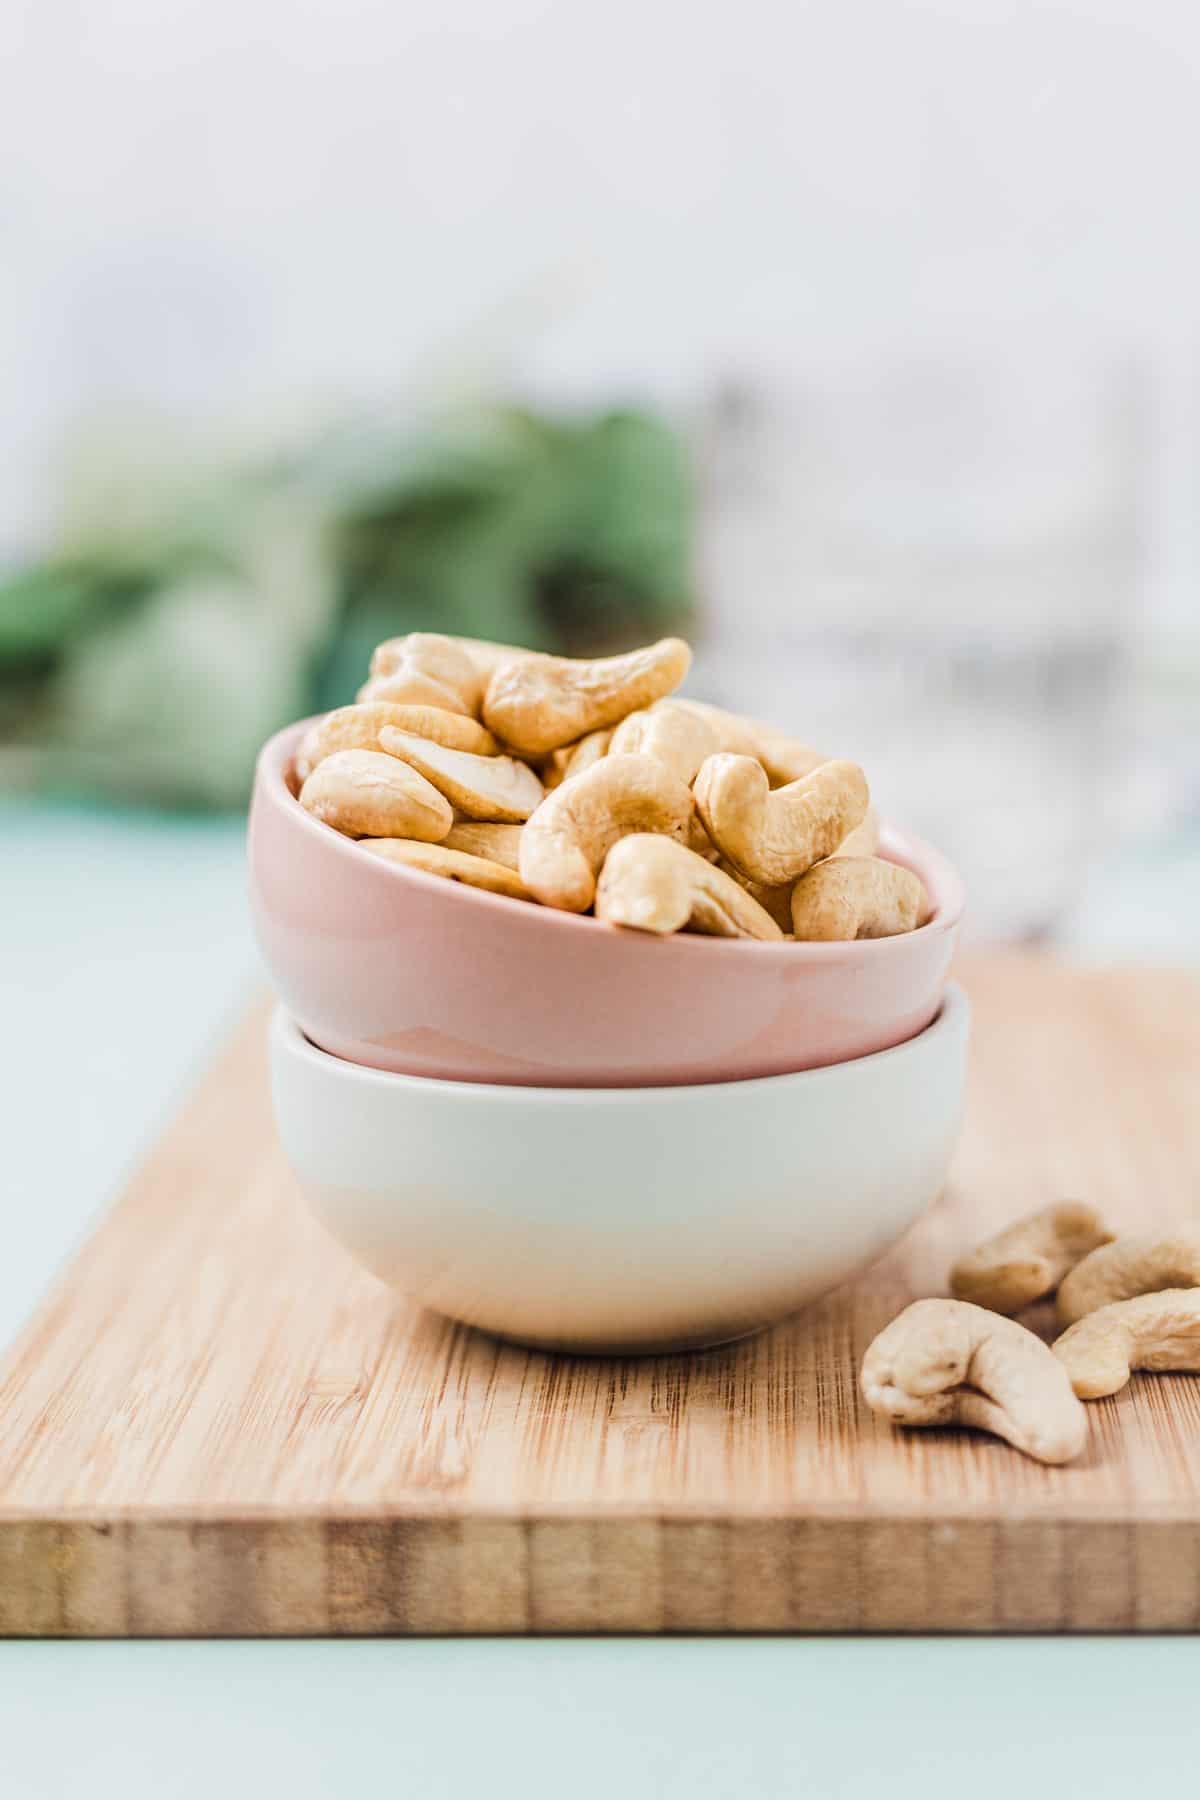
Cashews

Cashews in a small pink bowl.
  • A 3-in-1 combo of protein, fiber AND healthy fats
  • Provides 7 grams of protein and 1 gram of fiber for every 1/4 cup serving
  • A source of healthy monounsaturated fats
  • Rich in antioxidants like polyphenols and carotenoids
  • Choose dry roasted or raw unsalted cashews more often

More Hunger Crushing Combo™ Snacks You Might Like

If you enjoyed this edamame snack and are itching for more inspo, then these snacks may satisfy your needs:

  • Sliced Apple with Almond & Yogurt Dip
  • Tomato and Cheese Plate with Olives
  • Cottage Cheese Bowl with Fruit & Nuts

Did you enjoy this edamame snack?
What fruit and nut combinations would you try?
Let me know down in the comments below!

Print Recipe
5 from 4 votes

Edamame Snack with Fruit and Nuts (Hunger Crushing Combo™ Snack #5)

This edamame snack with mandarin orange slices and cashews is packed with plant-based protein, fiber, and antioxidant action making it an excellent Hunger Crushing Combo™ snack to add to your repertoire.
Prep Time5 minutes mins
Total Time5 minutes mins
Course: Snack
Servings: 1
Calories: 272kcal
Author: Abbey Sharp

Ingredients

  • 1 -2 mandarin orange
  • 1/4 cup cashews
  • 1/4 cup edamame

Instructions

  • Portion mandarin orange, edamame, and cashews on a plate.
  • Serve and enjoy!

Nutrition

Calories: 272kcal | Carbohydrates: 25g | Protein: 11g | Fat: 16g | Saturated Fat: 3g | Polyunsaturated Fat: 3g | Monounsaturated Fat: 8g | Sodium: 8mg | Potassium: 528mg | Fiber: 5g | Sugar: 12g | Vitamin A: 599IU | Vitamin C: 26mg | Calcium: 69mg | Iron: 3mg
Abbey Sharp

Abbey Sharp is a Registered Dietitian (RD), regulated by the Ontario College of Dietitians. She is a mom, YouTuber, Blogger, award winning cookbook author, media coach specializing in food and nutrition influencers, and a frequent contributor to national publications like Healthline and on national broadcast TV shows.
www.abbeyskitchen.com/about-abbey/

Last Updated December 9, 2021. Published December 9, 2021 By Abbey Sharp Leave a Comment

Sliced Apples with Almond & Yogurt Dip (Hunger Crushing Combo™ Snack #4)

This sliced apple with almond & yogurt dip is packed with protein, fiber, and flavour and will elevate your fruit snack to hunger crushing proportions.

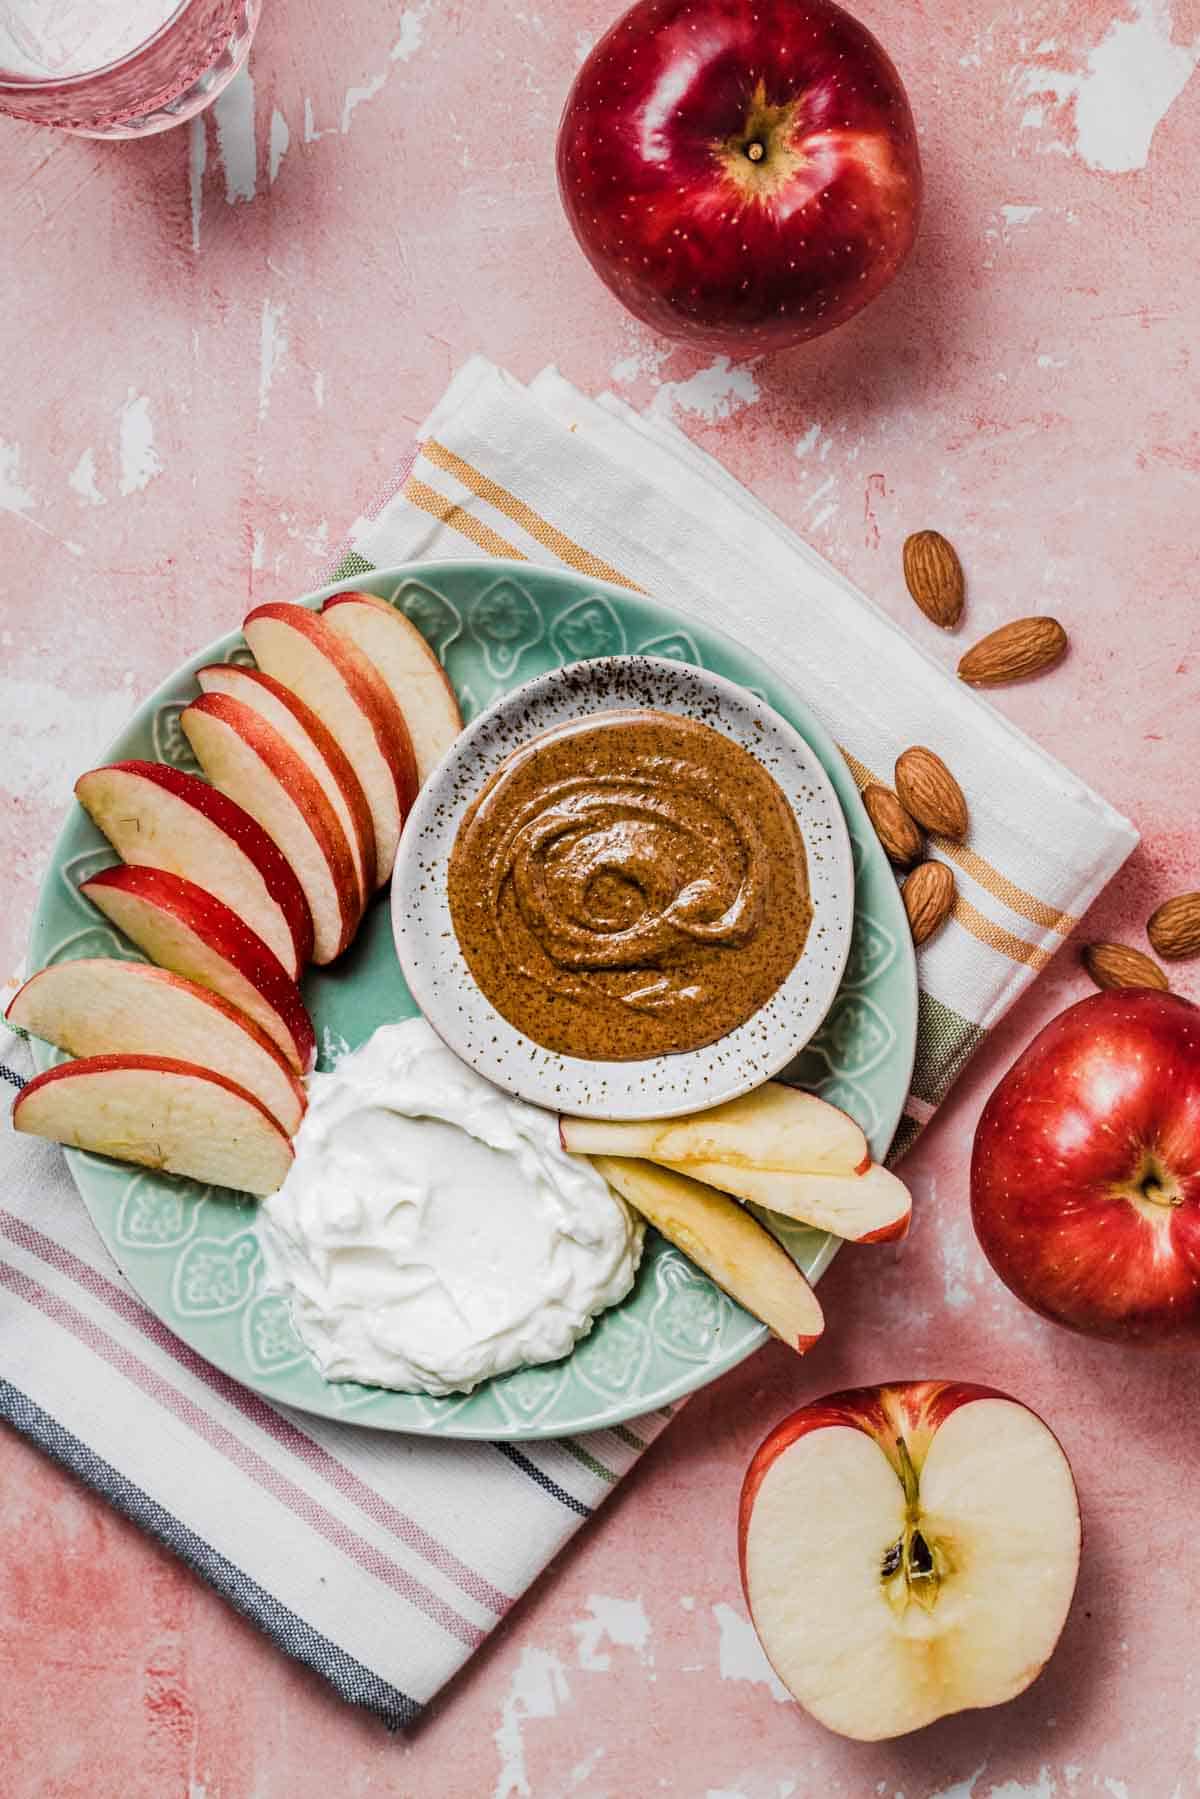
Birds eye view of sliced apple with almond butter and Greek yogurt dip on the side.

Fruit is arguably the easiest most portable snack I can think of. Need a snack in a pinch? You grab an apple or banana and you go on your merry way. While fruit on its own is a great snack that provides energizing carbs, fiber, and micronutrients, why not stretch out the staying power by pairing it with some protein? Enter this sliced apple snack with almond and yogurt dip. The protein and fats from the almond butter and yogurt make this snack Hunger Crushing Combo™ approved (and also a little more exciting).

Why is this Sliced Apple with Dip a Balanced Snack?

This sliced apple snack with almond & yogurt dip provides 14 grams of protein and 8 grams of fiber, making it the perfect Hunger Crushing Combo™ to keep your energy levels up and take you from one meal to the next. This snack is also super versatile as you can switch out the fruit based on what you have on hand, sub in your choice of nut butter (or choose one that is allergy friendly), and play around with your favourite yogurt varieties.

Greek Yogurt

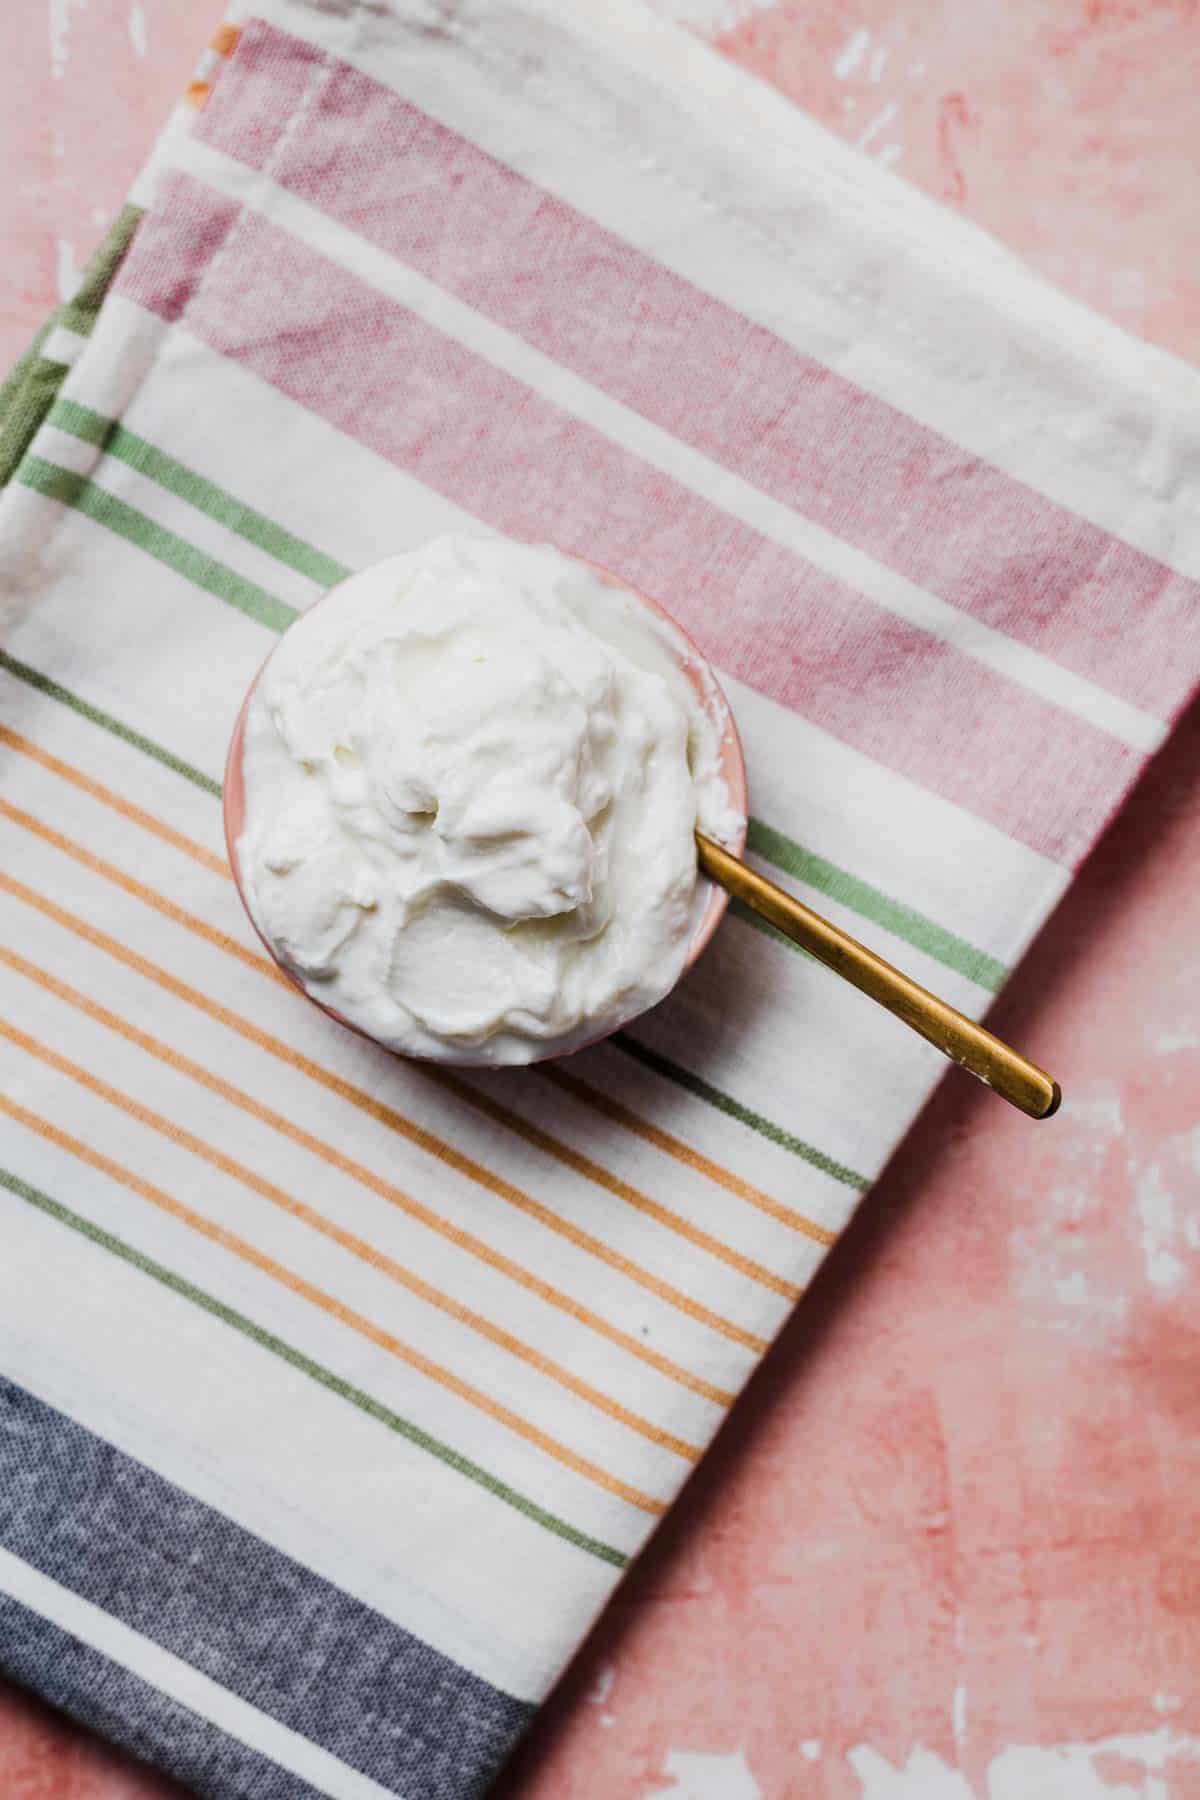
Close up of a bowl of Greek yogurt.
  • A source of both protein and fat
  • Greek yogurt provides 7 grams of protein for every 1/3 cup serving
  • A great source of calcium, vitamin D, and gut healthy probiotics
  • Overwhelmed with what Yogurt option is best for you? We shared our tips for choosing the best yogurt for you as well as their nutritional benefits

Apple Slices

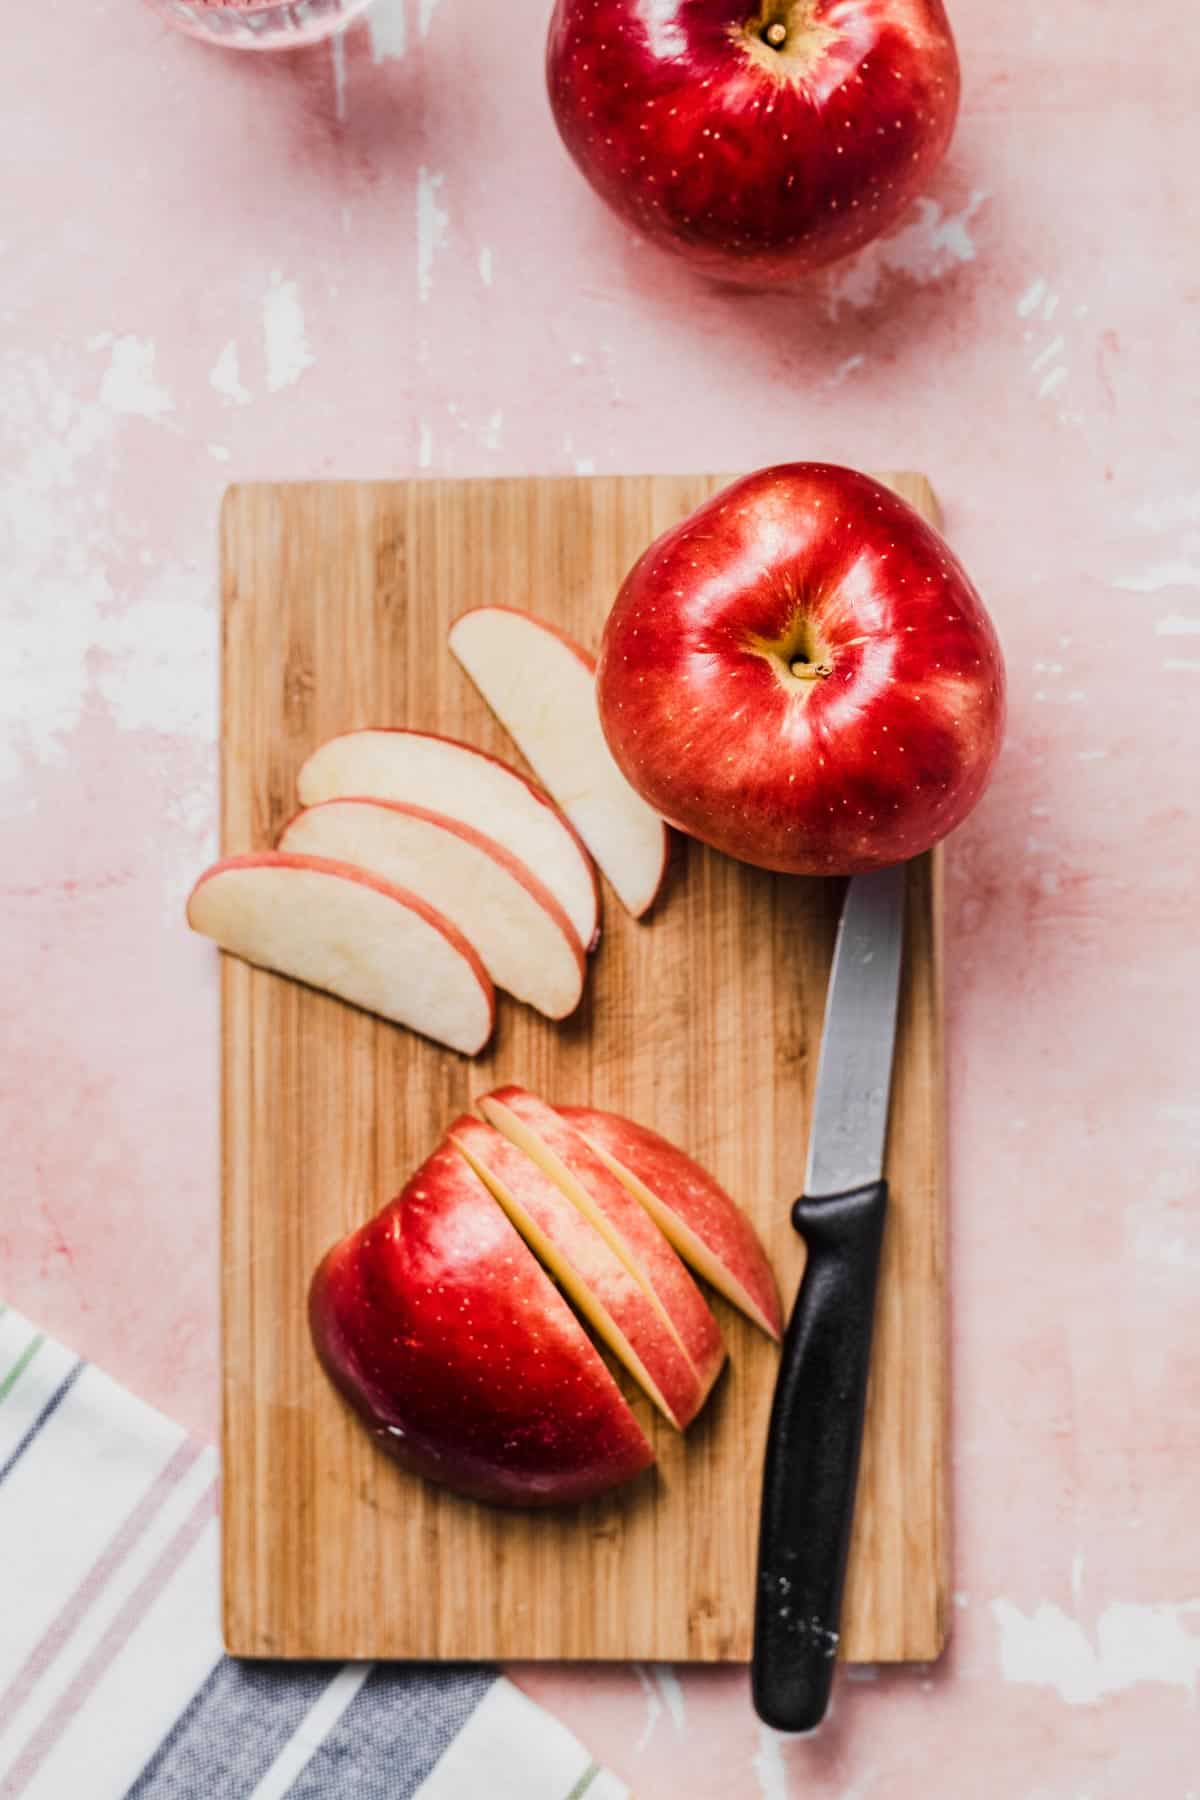
Birds eye view of sliced apple on a cutting board.
  • 1 medium apple provides 2-4 grams of fiber
  • A great source of vitamin C, potassium, and antioxidants
  • You can combine with other dippable fruit options for added variety (i.e. strawberries, banana, pineapple)

Almond Butter

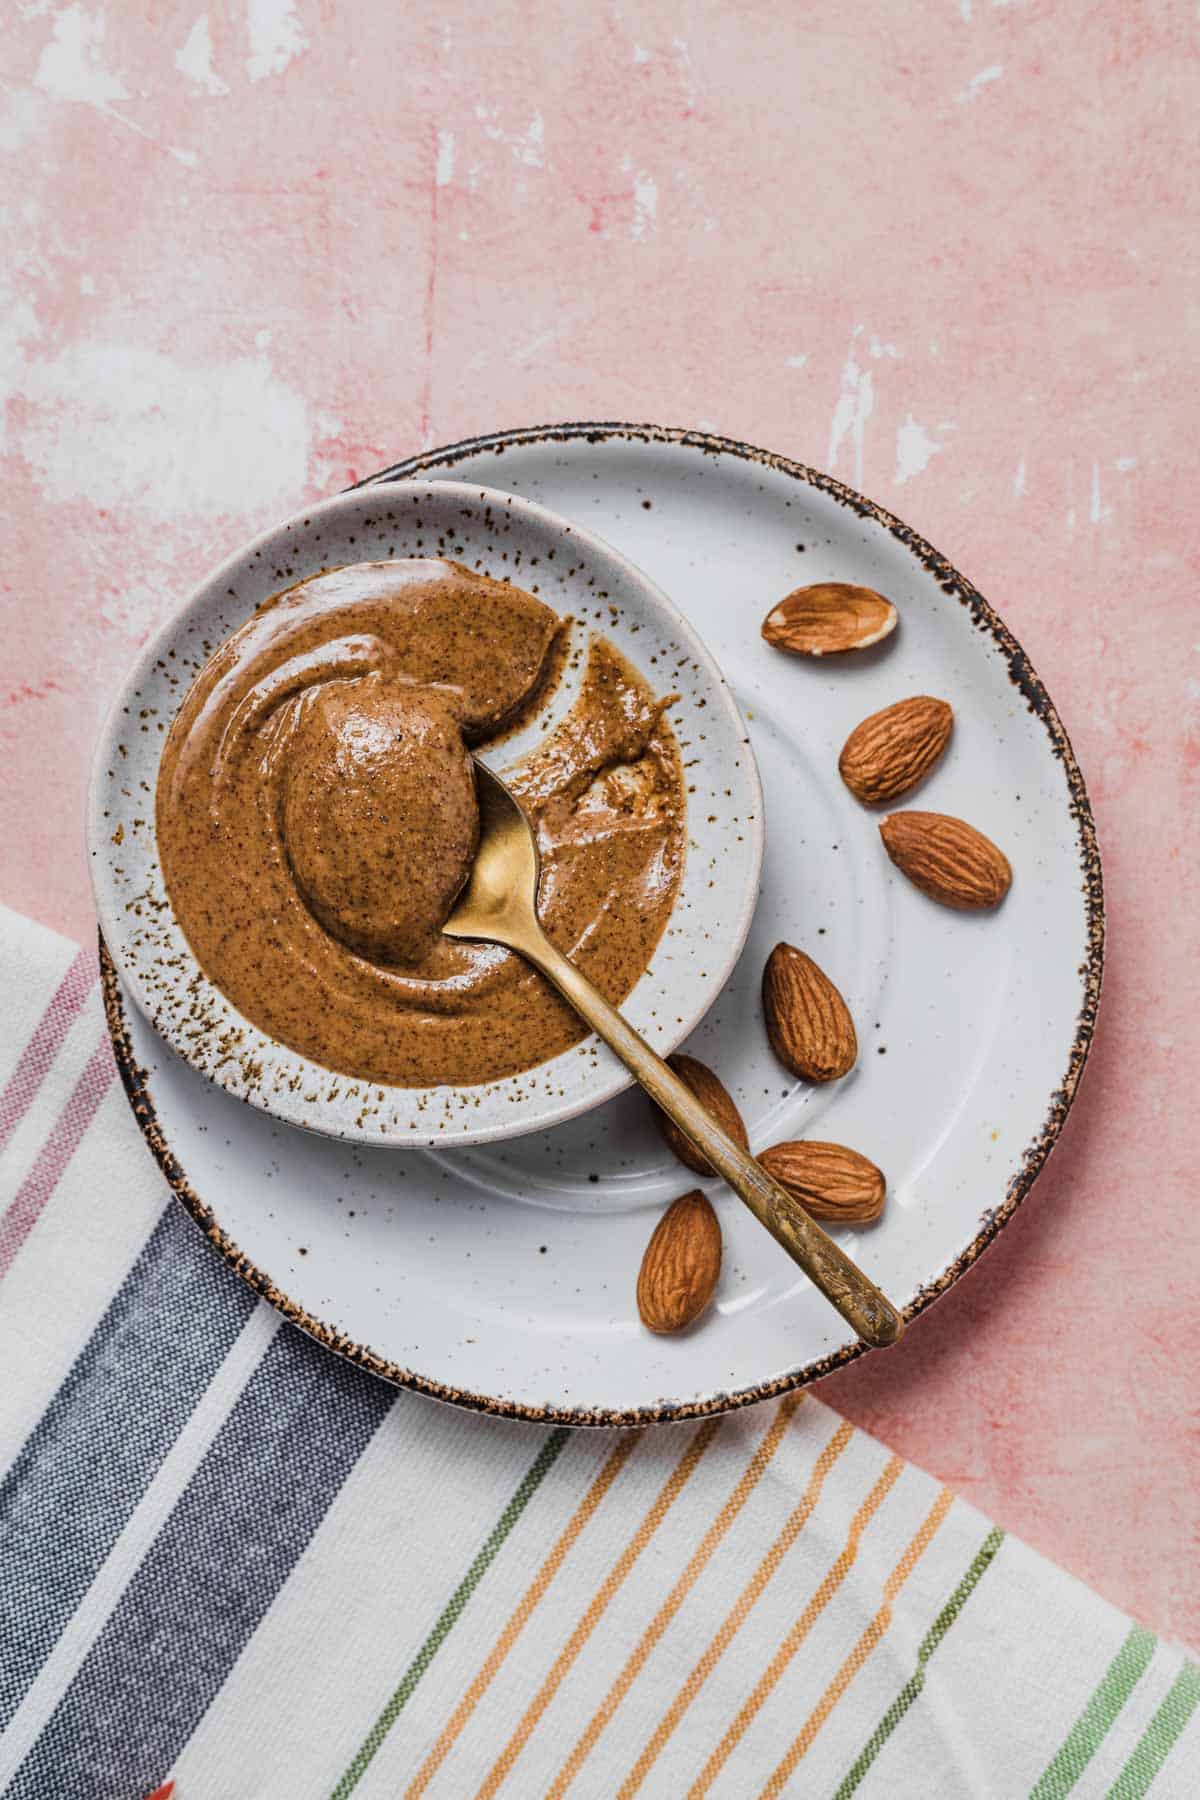
Birds eye view of almond butter.
  • A 3-in-1 combo of protein, fat, AND fiber
  • Provides 5 grams of protein and 2 gram of fiber per 2 tablespoons
  • You can swap in any nut butter of your choice including peanut, cashew, or walnut butters
  • If you don’t have any nut butter on hand, you can also take a few spoonfuls of powdered peanut butter and mix it into the Greek yogurt to create a delicious peanut butter flavoured mousse
  • If you have a peanut allergy, you can substitute with Sun Butter (made from sunflower seeds), or WOW butter (made from soy)

MORE HUNGER CRUSHING COMBO™ SNACKS YOU MIGHT LIKE

  • Tomato and Cheese Plate
  • Cottage Cheese Bowl with Fruit & Nuts
  • Carrot and Cheese Plate with Turkey

What are your thoughts on this dippable sliced apple snack?
What are some other high protein dips that you can think of to make this hunger crushing combo™ approved?
Let me know your thoughts down in the comments below!

Print Recipe
5 from 2 votes

Sliced Apple with Almond and Yogurt Dip

This sliced apple with almond & yogurt dip is packed with protein, fiber, and flavour and will elevate your fruit snack to hunger crushing proportions.
Prep Time5 minutes mins
Total Time5 minutes mins
Course: Snack
Servings: 1
Calories: 330kcal
Author: Abbey Sharp

Ingredients

  • 1 apple
  • 1/3 cup Greek yogurt
  • 2 tbsp almond butter

Instructions

  • Portion sliced apple, Greek yogurt, and almond butter on a plate.
  • Serve and enjoy!

Nutrition

Calories: 330kcal | Carbohydrates: 34g | Protein: 14g | Fat: 18g | Saturated Fat: 1g | Polyunsaturated Fat: 4g | Monounsaturated Fat: 10g | Cholesterol: 3mg | Sodium: 28mg | Potassium: 528mg | Fiber: 8g | Sugar: 22g | Vitamin A: 101IU | Vitamin C: 8mg | Calcium: 195mg | Iron: 1mg
Abbey Sharp

Abbey Sharp is a Registered Dietitian (RD), regulated by the Ontario College of Dietitians. She is a mom, YouTuber, Blogger, award winning cookbook author, media coach specializing in food and nutrition influencers, and a frequent contributor to national publications like Healthline and on national broadcast TV shows.
www.abbeyskitchen.com/about-abbey/
  • Previous Page
  • Go to page 1
  • Interim pages omitted …
  • Go to page 29
  • Go to page 30
  • Go to page 31
  • Go to page 32
  • Go to page 33
  • Interim pages omitted …
  • Go to page 89
  • Next Page

Get started with

Eight Free Recipe Books

From the co-founder of Neue Theory and creator of the Hunger Crushing Combo

Sign me up!
Abbey smiling at table
Abbey Sharp

“Foods may never be nutritionally equal. But we can make them morally equal by recognizing that our worth is never determined by what's on our plate.”

— Abbey Sharp, RD About Abbey ◥

Books

  • HCC™
  • Mindful Glow
  • Free E-Books

Blog

  • Nutrition
  • Recipes
  • Motherhood
  • Life

Explore

  • Neue Theory™
  • Bite Back
  • YouTube

Abbey

  • About
  • Coaching
YouTube TikTok Instagram Facebook X Pinterest
Abbey Sharp - The No BS Dietitian From Abbeys Kitchen

© Abbey's Kitchen 2026  All Rights Reserved •  ACCESSIBILITY STATEMENT •  Privacy Policy

This site uses cookies. By continuing to browse the site, you are agreeing to the use of cookies Accept Privacy Policy
Privacy & Cookies Policy

Privacy Overview

This website uses cookies to improve your experience while you navigate through the website. Out of these, the cookies that are categorized as necessary are stored on your browser as they are essential for the working of basic functionalities of the website. We also use third-party cookies that help us analyze and understand how you use this website. These cookies will be stored in your browser only with your consent. You also have the option to opt-out of these cookies. But opting out of some of these cookies may affect your browsing experience.
Necessary
Always Enabled
Necessary cookies are absolutely essential for the website to function properly. This category only includes cookies that ensures basic functionalities and security features of the website. These cookies do not store any personal information.
Non-necessary
Any cookies that may not be particularly necessary for the website to function and is used specifically to collect user personal data via analytics, ads, other embedded contents are termed as non-necessary cookies. It is mandatory to procure user consent prior to running these cookies on your website.
SAVE & ACCEPT

Rate This Recipe

Your vote:


A rating is required
A name is required
An email is required