• Skip to main content

Abbey's Kitchen

Healthy Recipes, Nutrition Myth Busting, Healthy Eating Tips

  • Books
    • HCC™
    • The Mindful Glow Cookbook
    • Recipe eBooks
      • Family
      • Hypothyroidism
      • BLW
      • Vegan Week 1
      • Vegan Week 2
      • Vegan Week 3
      • Keto
      • Gluten Free Week 1
      • Gluten Free Week 2
      • Fitness
      • Paleo
  • Blog
    • Nutrition
    • Recipes
    • Motherhood
    • Life
  • Explore
    • Neue Theory™
    • Bite Back With Abbey Sharp
      • Apple Music
      • Spotify
      • Amazon Music
    • YouTube
  • Abbey
    • About
    • Coaching
    • Contact

Abbey Sharp

Last Updated April 2, 2023. Published April 28, 2023 By Abbey Sharp 37 Comments

Vegan Black Bean Burger with Quinoa and Walnuts (Gluten-Free)

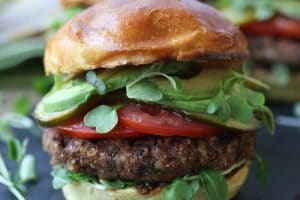
A close up photo of a burger.

This gluten-free Vegan Black Bean Burger is the perfect plant-based meal for summer entertaining, long weekends, Memorial Day, and Father’s Day! They’re easy, healthy, and packed with protein!
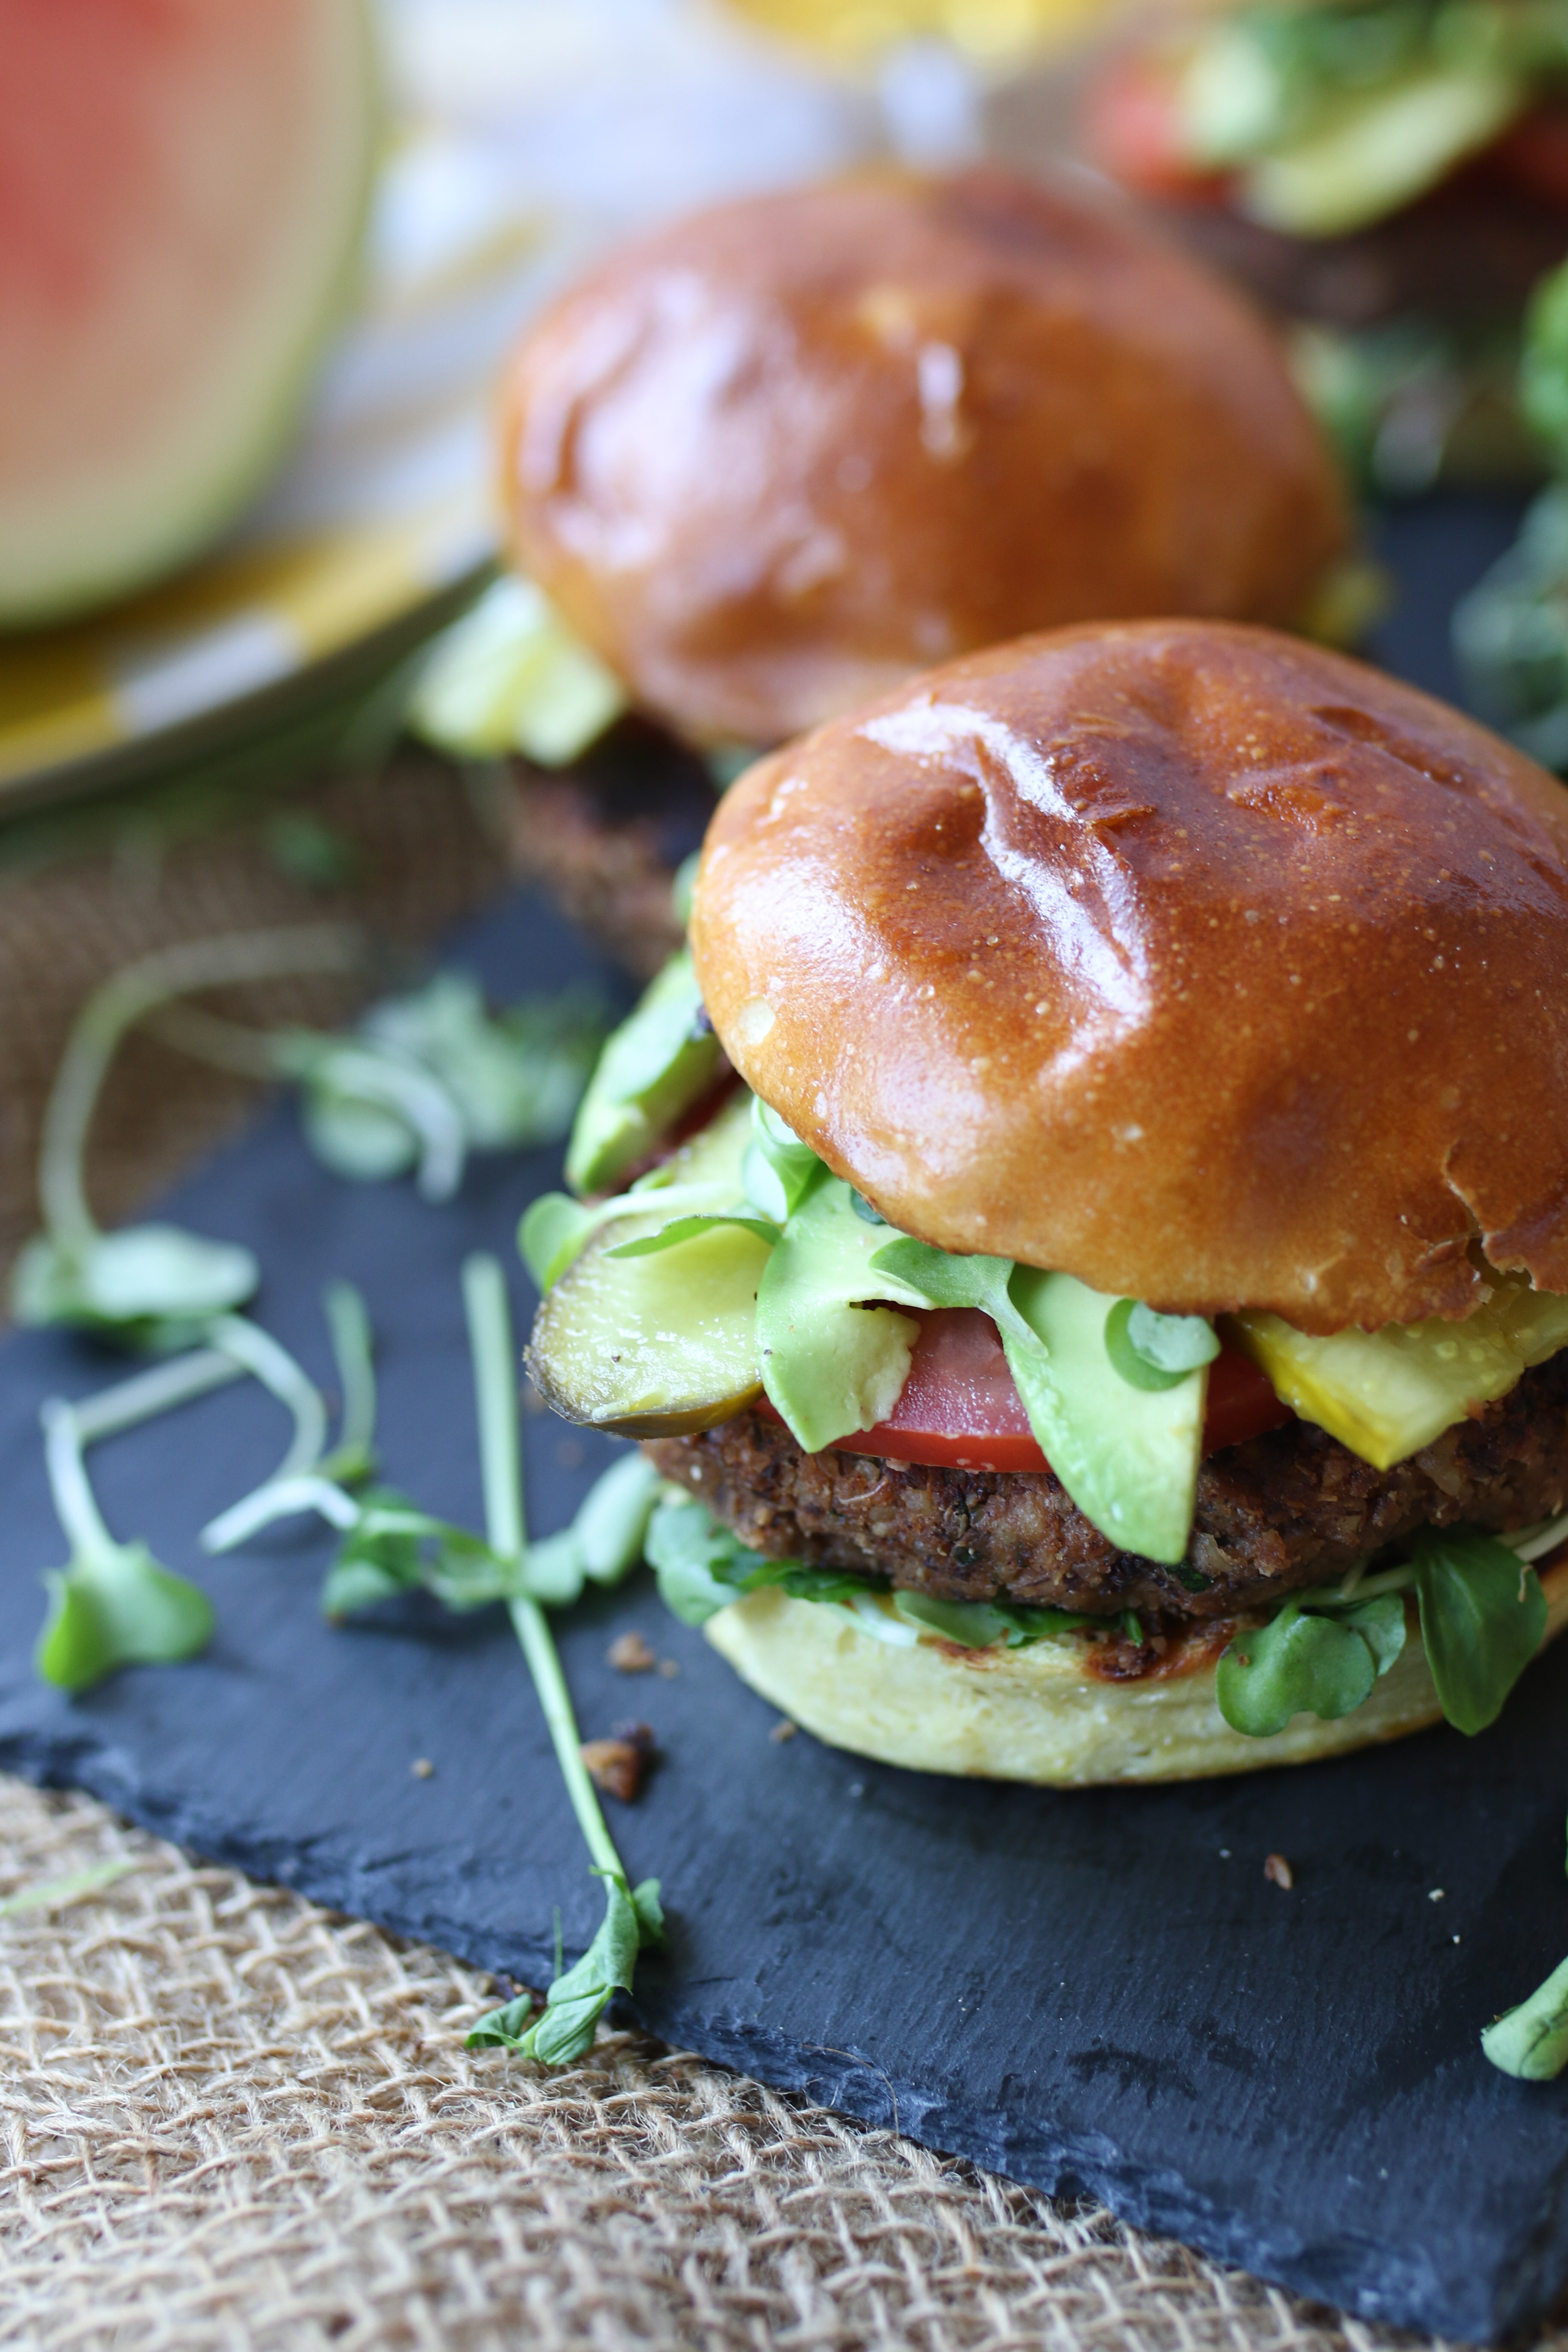
An angle photo of a vegan black bean burger on a serving platter.

The summer is officially HERE and I am living for mid-day patio drinks on the weekends. While I have no qualms about biting into a big bad ass juicy beefy burger, I figure if we lighten things up we’ve got a little wiggle room for summer cocktails or dessert. So to celebrate summer, I came up with this vegan black bean burger.

Table of contents

  • Why This Recipe Works
  • Key Ingredients
  • How to Make This Recipe
  • Expert Tips
  • Recipe FAQs
  • More Recipes You Might Like

Why This Recipe Works

You won’t believe how delicious this vegan black bean burger is! On top of that, it is also:

  • Satisfying and hearty
  • Gluten-free
  • Packed with fibre
  • Packed with protein

Key Ingredients

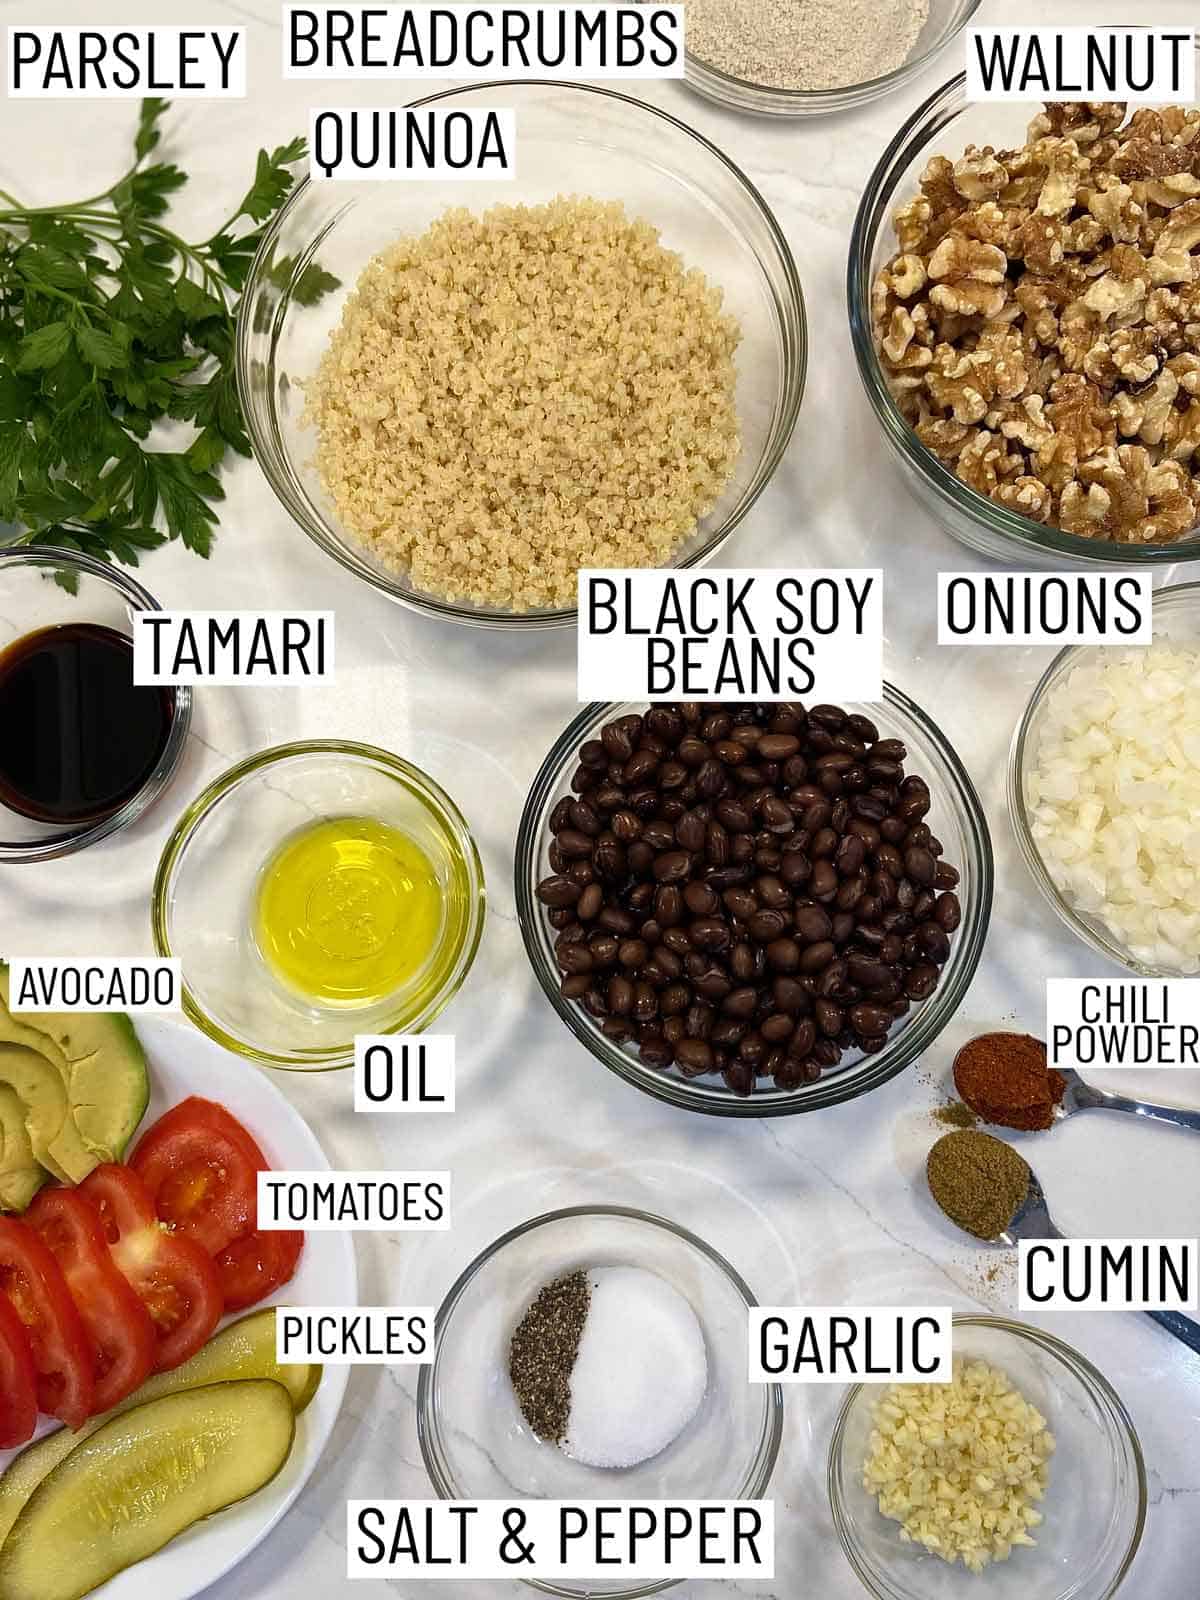
Ingredients needed to make vegan black bean burgers.

Black soy beans — A darker variety of soy beans, black soy beans are high in fibre and are a great source of nutrients like iron, calcium, magnesium, and manganese. If you’re using canned beans, be sure to rinse and drain.

Walnuts — Walnuts are a great ingredients to add to your regular meals as they are packed with healthy fats, fiber, vitamins, and minerals! They also contribute to making the quinoa burger more hearty and satisfying as they have a meaty-like texture.

Quinoa — I use regular quinoa and it’s a great source of plant-based protein and fibre. If you want more flavour added, you can use play around with the liquid you use to cook it.

Seasoning — I use a combination of chili powder, cumin, salt, and pepper but feel free to change it to fit your personal preference.

How to Make This Recipe
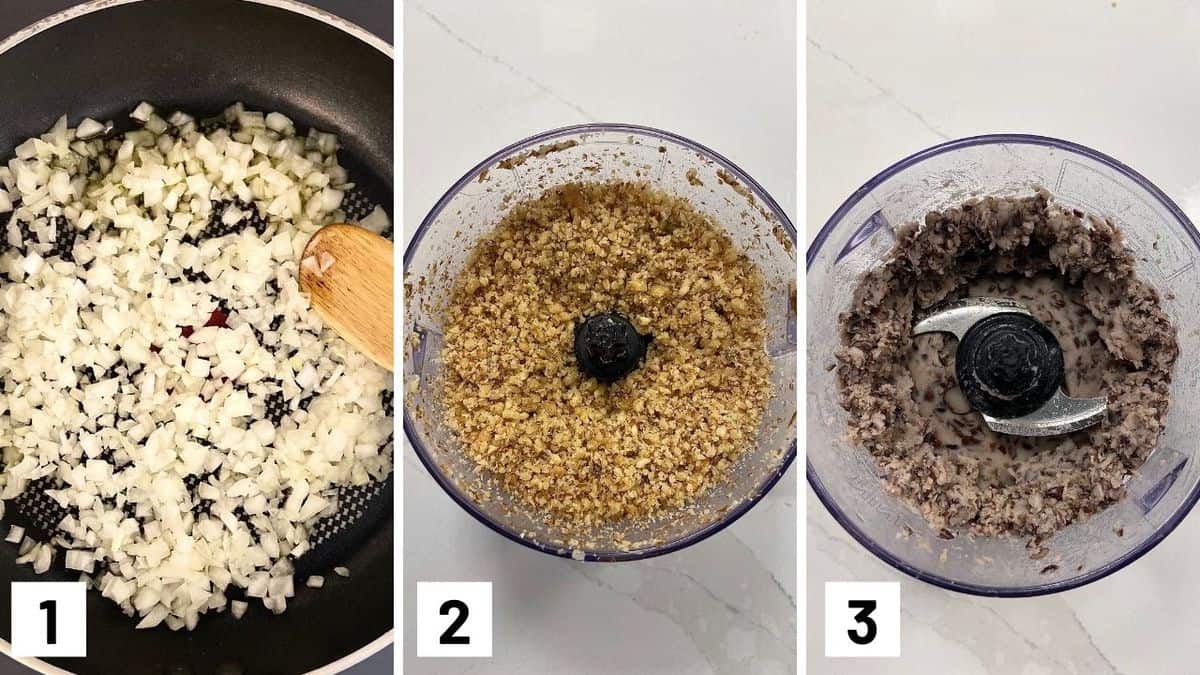
Set of three photos showing onions being sauted in a pan, walnuts pulsed in a food processor, and then beans pulsed.

Step 1: In a medium nonstick skillet over medium heat, add the olive oil. Add the onion and sautee until softened, about 8 minutes. Add the garlic and saute for an additional 30 seconds. Set aside in a large bowl.

Step 2: In a food processor, pulse the walnuts until they reach a crumb-like consistency. Add to the bowl.

Step 3: Add the black soy beans and puree until smooth. Add to the bowl.
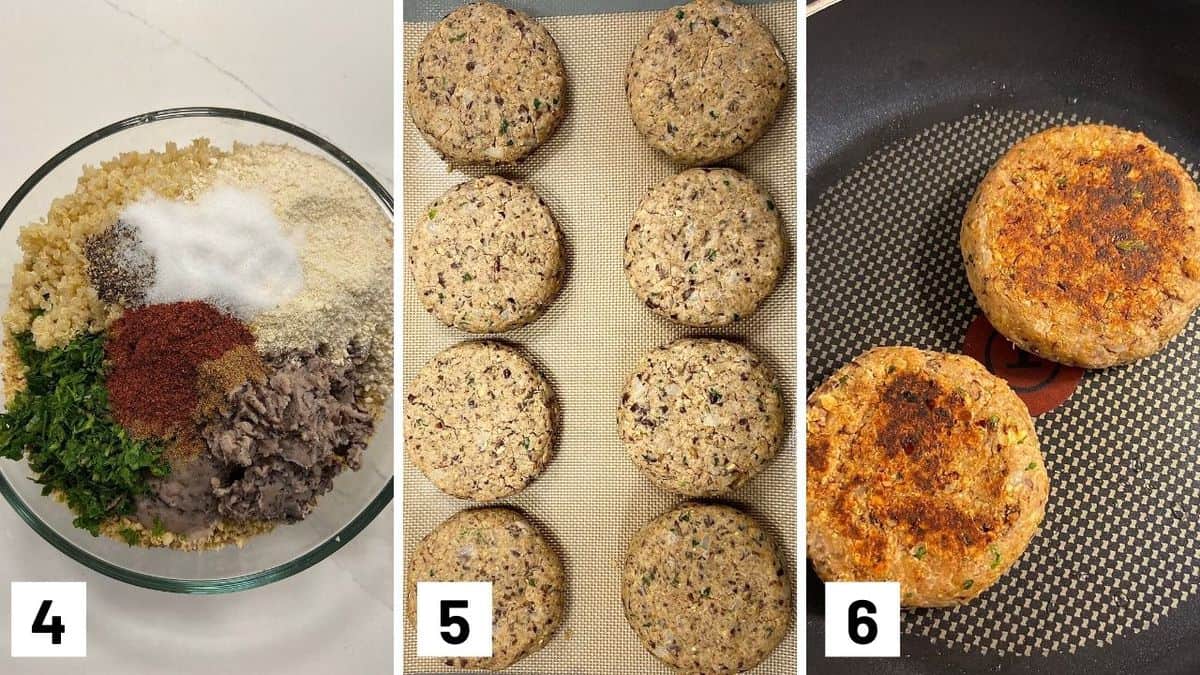
Set of three photos showing patty ingredients in a bowl, formed into a patty, and then cooked in a skillet.


Step 4: Add in the quinoa, tamari, parsley, chili, cumin, breadcrumbs, salt, and pepper to the bowl.

Step 5: Form into 8 patties and place on a baking sheet lined with a silpat. Refrigerate for an hour.

Step 6: When ready to cook, preheat the grill to medium high heat. Add the quinoa burgers and cook until brown on both sides. Layer your bun with pickles, tomatoes, avocado, and microgreens, and enjoy!

Expert Tips

For more flavourful quinoa, try cooking it in vegetable broth, mushroom broth, or even juice!

Want to use red quinoa or tri-coloured quinoa? Go for it! The type of quinoa you use won’t affect the texture or flavour of the burgers.

Need to be doing something else in the kitchen? You can bake the patties instead! Simply bake them for 15 to 20 minutes in a 400F oven and you’ve got your hands free to work on something else.

Recipe FAQs

Can I use different beans?

You can! You can swap black soy beans for regular soy beans, black beans, pinto beans, kidney beans, and more! Just be sure to rinse and drain them if you are using them from a can.

Can I make these vegan black burgers ahead of time?

You can prepare the burger patties a day ahead of time and leave them in the fridge, covered, until you are ready to cook them. Cooked black bean burgers will keep well for up to 4 days, just store them without assembling them in an airtight container in the fridge.

Can I freeze this recipe?

These vegan black bean burgers can be frozen for up to 3 months before cooking them. Flash freeze them on a lined baking sheet before transferring them to a freezer-safe container or bag. Thaw them overnight in the fridge before cooking them. You can also freeze them after they’ve been cooked. Freeze them the same way and thaw overnight to reheat.
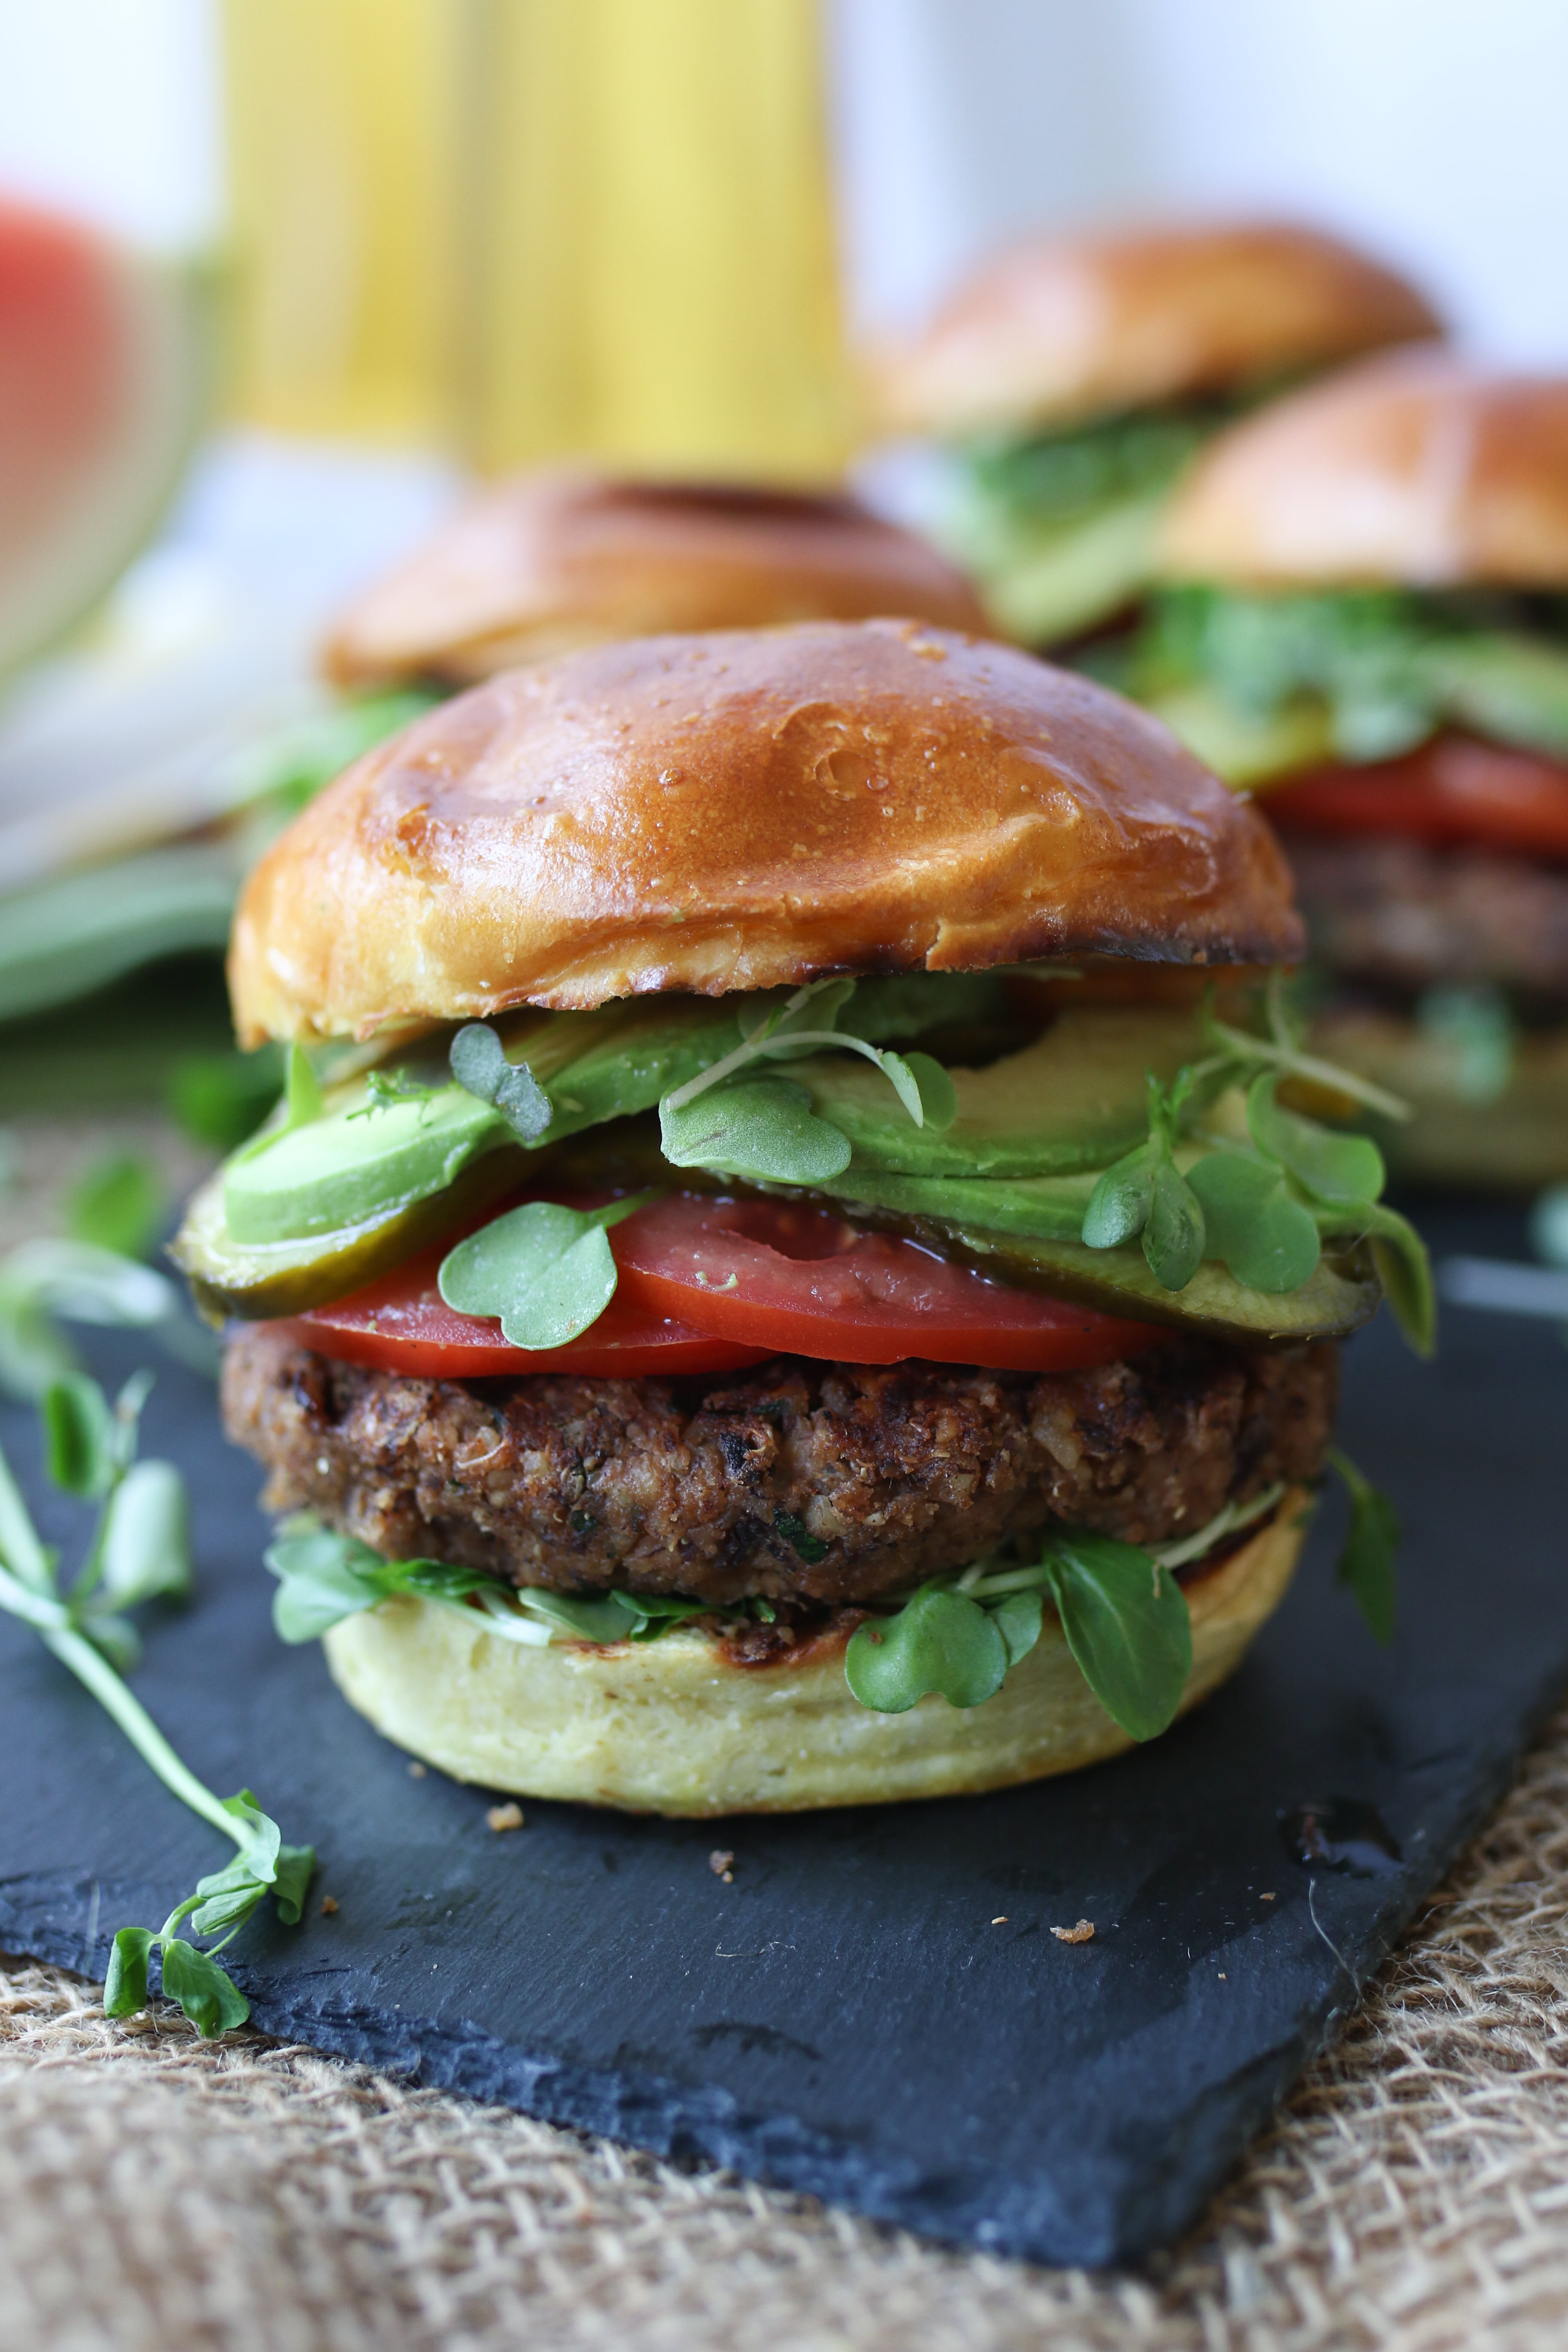
A close up photo of a vegan black bean burger.

More Recipes You Might Like

Want more plant-based recipes like these black bean burgers? Try these ones:

  • Walnut Tacos with Cauliflower and Pickled Beets (Vegan)
  • Vegan Buffalo Cauliflower & Chickpeas Tacos
  • Tofu Tacos with Vegan Peanut Sauce (Grilled)
  • Vegan Buffalo Cauliflower and Chickpea Hard Tacos | Healthy, High Protein Tacos

Have you tried this gluten-free vegan walnut quinoa burger? Leave me a comment below with your thoughts!
This Gluten Free Vegan Walnut Quinoa Burgers is the perfect Plant Based BBQ Veggie Burgers for summer entertaining, long weekends, Memorial Day and Father's Day!
Print Recipe
4 from 21 votes

Vegan Black Bean Burger with Qunioa and Walnuts (Gluten-Free)

This gluten-free Vegan Black Bean Burger is the perfect plant-based meal for summer entertaining, long weekends, Memorial Day, and Father's Day! They're easy, healthy, and packed with protein!
Prep Time15 minutes mins
Cook Time15 minutes mins
Total Time30 minutes mins
Course: Dinner
Cuisine: American
Servings: 8 people
Calories: 546kcal
Author: Abbey Sharp

Ingredients

  • 1 tbsp olive oil
  • 1 sweet onion minced
  • 3 cloves garlic minced
  • 2 cup cooked quinoa
  • 4 cups walnuts
  • 3 cups black soy beans drained and rinsed
  • 1/4 cup parsley minced
  • 2/3 cup gluten free breadcrumbs
  • 2 tbsp tamari
  • 2 tsp chili powder
  • 2 tsp cumin
  • 2 tsp salt
  • 1/2 tsp pepper

To Serve:

  • Gluten free buns toasted
  • Pickles
  • Tomato sliced
  • Avocado sliced
  • Microgreens

Instructions

  • In a medium nonstick skillet over medium heat, add the olive oil. Add the onion and sautee until softened, about 8 minutes. Add the garlic and saute for an additional 30 seconds. Set aside in a large bowl.
  • In a food processor, pulse the walnuts until they reach a crumb-like consistency. Add to the bowl.
  • Add the black soy beans and puree until smooth. Add to the bowl.
  • Add in the quinoa, tamari, parsley, chili, cumin, breadcrumbs, salt and pepper.
  • Form into 8 patties and place on a baking sheet lined with a silpat. Refrigerate for an hour.
  • When ready to cook, preheat the grill to medium high heat. Add the patties and cook until brown on both sides.
  • Layer your bun with pickles, tomatoes, avocado and microgreens and enjoy!

Video

Notes

  • For more flavourful quinoa, try cooking it in vegetable broth, mushroom broth, or even juice!
  • Want to use red quinoa? Go for it! The type of quinoa you use won’t affect the texture or flavour of the quinoa burgers.
  • Need to be doing something else in the kitchen? You can bake these quinoa burger patties instead! Simply bake them for 15 to 20 minutes in a 400F oven and you’ve got your hands free to work on something else.

Nutrition

Calories: 546kcal | Carbohydrates: 38g | Protein: 17g | Fat: 40g | Saturated Fat: 4g | Sodium: 870mg | Potassium: 586mg | Fiber: 10g | Sugar: 4g | Vitamin A: 375IU | Vitamin C: 5.6mg | Calcium: 97mg | Iron: 4.1mg
Abbey Sharp

Abbey Sharp is a Registered Dietitian (RD), regulated by the Ontario College of Dietitians. She is a mom, YouTuber, Blogger, award winning cookbook author, media coach specializing in food and nutrition influencers, and a frequent contributor to national publications like Healthline and on national broadcast TV shows.
www.abbeyskitchen.com/about-abbey/

Last Updated May 1, 2023. Published April 26, 2023 By Abbey Sharp 2 Comments

What is the Best Milk for Babies? Does Dairy Cause Colic, Allergies, & Disease?

Small cup of milk.

We look at the debate around the best milk for babies and examine the research on whether or not dairy causes colic, allergies, digestive disease and more.

Join any mom group on Facebook, or hit up any mid-day mom and tot music class with your little, and you’ll likely hear some chatter about what is the best milk for babies. First, it starts with the breast milk vs formula debate, and by 12 months, there’s a whole lot of shaming happening about what you’re putting into that baby bottle (or cup) next. I recently saw a YouTube video by a local nutritionist that sparked a huge discussion in the pediatric dietitian community about why she doesn’t give her daughter cow milk to drink. This isn’t the first time I’ve heard arguments against cow milk in favour of goat or sheep milk and there are a ton of claims on the internet fueling the goat milk vs cow milk debate. So we decided to get to the bottom of it in this post and help you make the decision about what kind of milk is best for your baby.

Claims About Goat Milk vs Cow Milk vs Sheep Milk for Babies

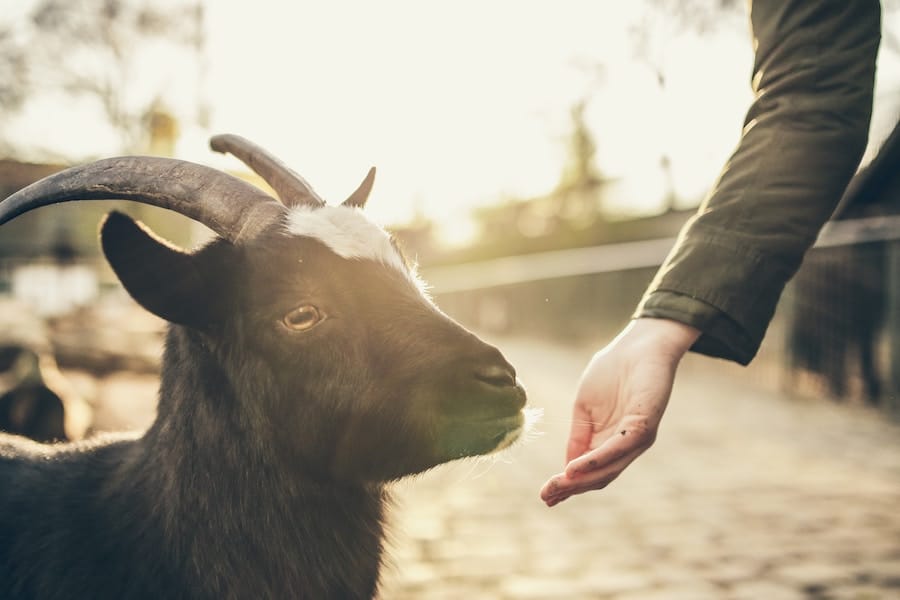
Hand feeding goat.

Before getting started looking at some of the popular goat milk or cow milk claims, I want to remind everyone that it is recommended by most pediatric groups that you can introduce milk as an ingredient as early as 4-6 months, however it is not advised to replace breast milk or infant formula with dairy milk completely until after one year of age. We talk about this in more depth here.

So what are people saying about the best milk for babies? Is goat milk, cow milk or sheep milk preferred?

Goat Milk vs Cow Milk on Improved Digestion

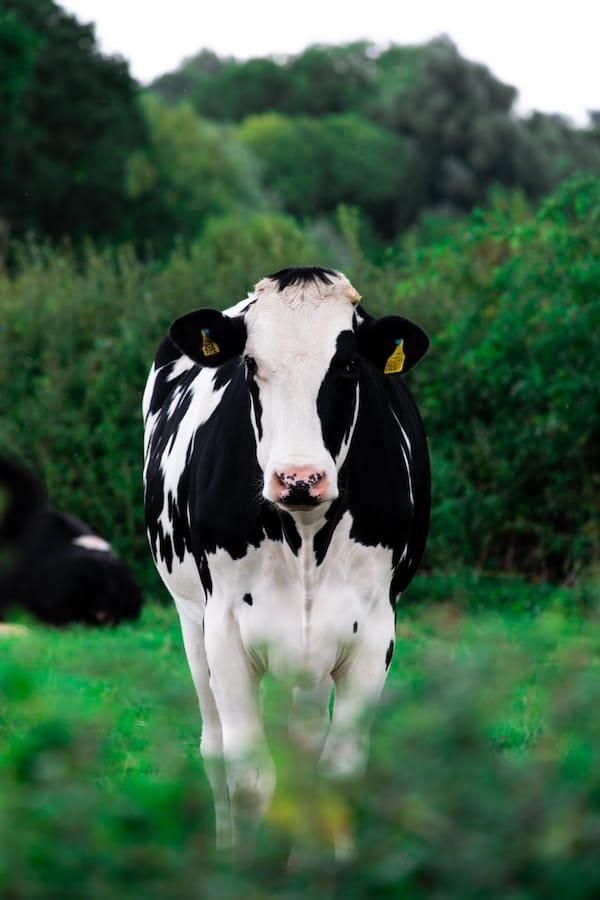
Black and white cow in a fied.

One of the most common cited benefits of choosing goat milk for baby is that it is apparently easier to digest than cow milk. Unfortunately, there isn’t a lot of research out there to compare how babies handle goat milk and cow milk compared with gold standard human breast milk, partly because current recommendations are to avoid giving infants under one year of age non-human milk or formula. It’s also super unethical to use babies as test subjects. However, there is some interesting research that has used simulated digestive tracts. One study used simulated digestive tracts to compare goat milk and cow milk and found that their proteins are actually digested pretty similarly. Another study compared different infant formulas (goat based and cow based) with human breast milk in simulated baby tummies, and found that the proteins in goat milk-based infant formula were digested a little bit more like the proteins in human breast milk. Not a huge difference, but it appears that the experience of drinking goat milk may be slightly more aligned with that of breast milk.

Now, let’s talk about what happens after a baby drinks milk – they poop. Examining your baby’s poop is often seen as a good way to determine how well foods (or in this case, milk) is being digested. While one study found no difference in the poop consistency of babies fed cow milk formula vs goat milk formula, and another found no differences in GI disturbances (like diarrhea) between babies fed goat milk formula compared with cow milk formula, one 200-participant study reported slightly more bloody baby bowel movements in babies fed goat milk formula group compared with cow milk formula. Overall, the number of bloody poops were pretty low, so it isn’t clear if this is a finding worth fretting over.

Goat Milk vs Cow Milk on Reduced Colic Symptoms

This is a common rationale I hear for why moms avoid dairy. In fact, this begins well before a baby is ready to drink milk themselves, with a lot of nursing mamas cutting out dairy in their own diets in an effort to improve their baby’s colic symptoms. But alas, that deserves a whole other post. While some moms may anecdotally SWEAR by removing cow dairy from their baby’s diet, research suggests that there’s no difference in how long baby cries or how easily they settle when comparing goat milk vs cow milk for babies.

Goat Milk vs Cow Milk on Improved Gut Microbiome

baby lying on their back

Sorry folks, we’re going to talk about poop again. In one study, some brave researchers decided to collect a bunch of poop from babies being fed either goat milk or cow milk formulas to study the bacteria in their poop. The researchers found that compared with babies fed cows milk formula, the profile of the bacteria in babies fed goat milk based formula was more similar to that of the breastfed babies. Translation? It’s possible that goat milk formulas inoculate the intestines with a colony of good bacteria more similar to that which you might see in breast milk fed babies.

Goat Milk vs Cow Milk on Iron Absorption

Small cup of milk.

One of the major concerns about giving dairy milk to your baby before he or she turns one is that it might be replacing iron rich foods while supplying a high amount of calcium (which interferes with iron absorption). This, in turn, can put baby at risk for iron deficiency anemia. Well, compared with cow milk, one recent 2017 rodent study found that goat milk didn’t have the same interference with iron absorption. In fact, anemic rats given goat milk saw an increase in iron absorption, improved digestion and better metabolism of calcium. Of course, we need to use caution when applying these findings to humans, because, well, we’re not rats. So even if goat milk does slightly aid increasing iron absorption, the more important variable is how often we’re offering iron rich foods from 6 months onward. Check out this awesome article for some helpful tips on starting your baby on solids.

Goat Milk vs Cow Milk on Immune Health

While you probably already know that breast milk can play an amazing role in the development of an infant’s immune system, some moms claim that goat milk can do the same due to its sialic acid content. Sialic acid is a component in mammal milk that helps activate the immune system and also helps with brain development, memory and digestion. Interestingly, the content of sialic acid in milk actually changes as time goes on. In human colostrum (mom’s first milk) there can be concentrations of sialic acid of up to 2000mg/L, and then it declines to about 200-300mg/L within just a few weeks. Although sialic acid is found in goat, cow and sheep milk, it is found in MUCH HIGHER levels in human milk. So the claim that goat or cow milk will help turn your Tiny Tim into Megamind doesn’t carry much evidence to support.

Sheep Milk vs Goat Milk vs Cow Milk on Kidney Health and Protein Content

When it comes to kidneys, there’s a lot of claims circulating around about cow milk putting too much strain on our baby’s kidneys. Goat milk and cow milk have about the same amount of protein (3-4% of every glass), while breast milk has significantly less (about 1%). Sheep milk comes in at a whopping 6% protein, which to us protein-obsessed adults sounds amazing, but too much protein might actually be dangerous for our little ones. MIGHT is the key here. It’s important to note that because it’s unethical to experiment on babies, we don’t actually know for sure how much is too much. Another challenge with this topic is that a lot of the research is now 10-20 years old and since goat milk and sheep milk have only recently become trendy, we don’t yet have a ton of the research to assess their safety.

One thing we can comment on is cow or goat milk-based formula since formulas are designed to mimic the nutrient profile of breast milk as closely as possible. As far as protein quality is concerned, there doesn’t seem to be any difference between goat milk and cow milk-based formulas. There is some evidence to suggest that the protein in goat formulas might be digested a little more like human milk as we previously discussed, but not enough to warrant tossing out any cow milk formulas you might have in the house.

Goat Milk vs Cow Milk on Allergies

Baby lying on their back in diaper.

When it comes to allergies, there’s a whole lot of information to cover. So much, in fact, that it’s probably better to leave most of it to some of our other blog posts (like this one and this one). In a nut shell (pun very much intended), current evidence seems to recommend introducing allergenic foods relatively early in your solids journey- somewhere between about 4-7 months of age (depending on your baby’s risks).

The evidence (here and here) also seems to suggest that most infants who are allergic to cow milk are also allergic to goat milk. This dispels the claim that goat milk is “less allergenic” than cow’s milk, and it is NOT a safe alternative when it comes to allergies. This allergy cross-over extends to infant formulas, too. Meaning, it would not be appropriate to give a child with a cow milk allergy a goat-milk based formula instead.

Goat Milk vs Cow Milk on Growth and Development

When it comes to physical growth, there doesn’t seem to be ANY difference between goat milk infant formula and cow milk infant formula and how well babies grow over the first six months of life. So, no, you don’t need to stress that little Charlie might not grow up to be a star in the NBA because you picked the “wrong” kind of formula.

One thing to note, however, is that in Canada and the United States, cows milk is fortified with vitamin D. Vitamin D is one of the really important reasons why we recommend cows milk for babies after 1! Since fortification of goats milk is not mandatory, not all goats milk products contain adequate vitamin D, so you will want to make sure you choose one that is fortified or you continue to supplement your baby’s diet with other cows milk dairy products, or other forms of vitamin D.

Why Do These Claims around Goat Milk vs Cow Milk Even Exist?

Is It The Lactose?

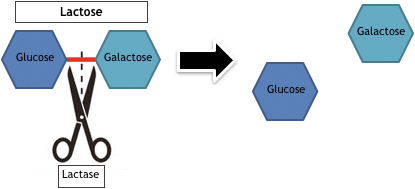
The first thing that comes to mind for me when I think about milk and digestion is “lactose”. Lactose is a kind of sugar that is found in milk and is made up of two smaller sugars called glucose and galactose. When we drink milk, an enzyme known as “lactase” cuts the tie between glucose and galactose to allow us to digest and mobilize the sugars.

Here”s a visual to help:

chart breaking down milk

People who have lactose intolerance are lacking in the enzyme lactase, resulting in gas, bloating or diarrhea. It is therefore often suggested that the lactose content of milk can affect their baby”s tolerance and their risk for lactose intolerance. When we compare the lactose content of milks, we see that human breast milk contains around 7% lactose, while goat, cow and sheep milk contains around 4-5% lactose.

Babies are designed to live exclusively off breast milk or formula for the first 6 months, so lactose intolerance in infancy is very rare. It’s not until our enzyme lactase activity begins to decrease during our mid childhood (around five years of age) that we typically see this emerge. So since goat, cow and sheep milk all have lactose levels lower than breast milk, the lactose concern isn’t really a valid argument. At least not until mid-childhood, anyway.

Is it the fat globules?

One of the reasons people claim goat milk is easier to digest is because it contains smaller fat particles than cow milk, so it takes less effort for our bodies to break the fat up to use it.

Women holding her baby close to her chest.

The average diameter of milk fat globules in goat milk is 2.6 um, while average diameter in cow milk is 3.5 um. When we look at human breast milk, their fat globule average diameter clocks in to about 4 um and can actually increase in size throughout lactation. It is true that the fat globules of goat milk are smaller than those of cow milk and some scientists have speculated that these smaller fat globules might make it easier for our bodies to break down, I don’t think it’s a big enough difference (in light of the size of breast milk globules) to play a problematic role.

Is it the casein?

Another prominent argument against cow milk is that goat milk is easier to digest is because it contains more beta-casein and kappa-casein protein. Let’s explain what this means.

Milk is broken down into two proteins: whey and casein. Casein contains three sub proteins known as: alpha, beta and kappa which are found in different amounts depending on the species of animal.

chart breaking down milk proteins

Goat milk, for example, has more kappa and beta-casein compared to cow milk, which some say may be why goat milk is better digested. When we look at breast milk, we find that beta-casein is the major protein. This may be why some infants digest the protein in goat milk-based formulas better than cow milk formula since its protein composition is closer to that of human breast milk.

Let’s also discuss the rest of the diagram featured above, which is the different types of beta-casein: A1 and A2.

The main difference between A1 and A2 is a single amino acid (protein building blocks) which results in them being broken down differently. Interestingly, depending on their genetics, some cows produce milk with more A1 and others with more A2. Most milks on grocery shelves contain milk from a variety of cows so likely contain A1 and A2 and is likely labelled as A1 milk.

In the 90s it was suggested that A1 milk increased a person’s risk of developing cardiovascular disease and type 1 diabetes however there is NO convincing evidence that A1 beta-casein plays a role in the development of these conditions. Because of this fear mongering, some dairy producers are now developing A2 milk for purchase.

It is also suggested that A2 milk is better tolerated by people with intolerance to cow milk but at this time, there has only been a few small clinical trials in humans comparing A1 and A2. The takeaway message from this research is that A2 milk MIGHT produce less gastrointestinal symptoms in people with self-perceived milk intolerance, but we really need more research to know for sure.

Is it the pH?

lemons on a table.

Finally, a lot of people also make claims related to the pH of goat milk vs cow milk and suggest that goat milks is closer in pH to that of breast milk. It’s then further hypothesized that this pH has an impact on gastrointestinal disease. Unfortunately, it’s really hard to compare the pH of milks because their pH is constantly changing. To give you an idea, the pH of human breast milk actually changes as baby grows and the weeks of lactation progress and that pH is individual to each mother (confusing, I know). But because no one likes when I’m vague, here are some averages to examine.

Average pH of human breast milk: 7.0 – 7.4
Average pH of sheep milk: 6.7
Average pH of cow milk: 6.69
Average pH of goat milk: 6.34

By comparing these milks, you can see that goat milk is actually the furthest from human breast milk when it comes to pH, so to make the claim that goat milk eases digestion because its pH is close to breast milk actually holds no weight.

But, does pH have an impact on gastrointestinal infections?

A baby’s internal pH varies from the baby’s mouth to its stomach, and varies based on the length of its intestines, the presence/absence of food and the baby’s age (according to research here and here.) On top of that, the human body is actually really good at regulating our internal pH, if it wasn’t we would die from eating a lemon! So although the pH of the stomach affects digestion, we don’t yet have enough evidence to say if the pH of foods coming into baby’s stomach would influence infection rates.

Bottom Line on Goat Milk vs Cow Milk vs Sheep Milk for Babies

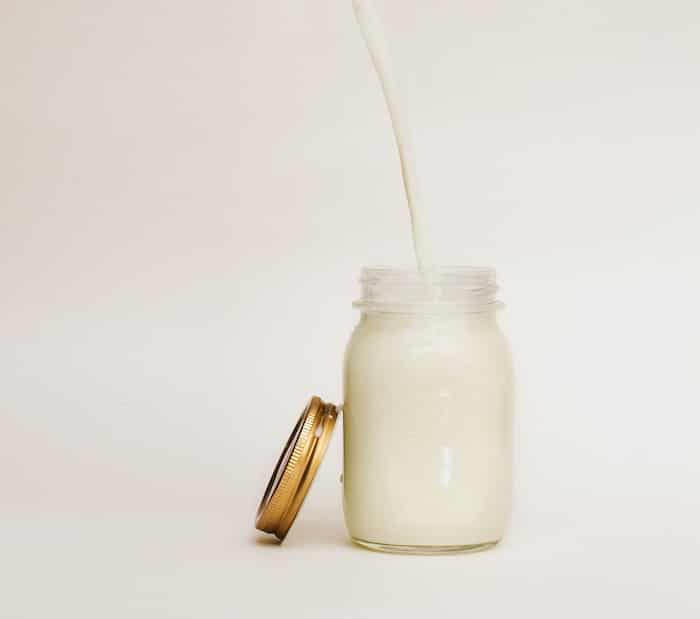
Milk being poured in a mason jar.

There have been a number of claims surrounding the superiority of goat milk over other milks, but the majority of these claims have very little sound evidence.

Whether goat milk actually improves digestion is still unclear. Some of the proteins in goat milk may be digested similarly to human breast milk, however studies have not found any difference in a baby’s poop depending on the milk and it did not reduce colic symptoms.

When it comes to gut health, some studies have shown that goat milk formula may populate a babe’s gut with good bacteria more like that of human breast milk.

An interesting study did find that goat milk may help to increase iron absorption, but most of those studies only contained rats so it’s not fair to generalize those effects in human babies.

Some people claimed that the sialic acid in goat milk can aid in the development of a baby’s immune system, however it’s found in much higher levels in human breast milk.

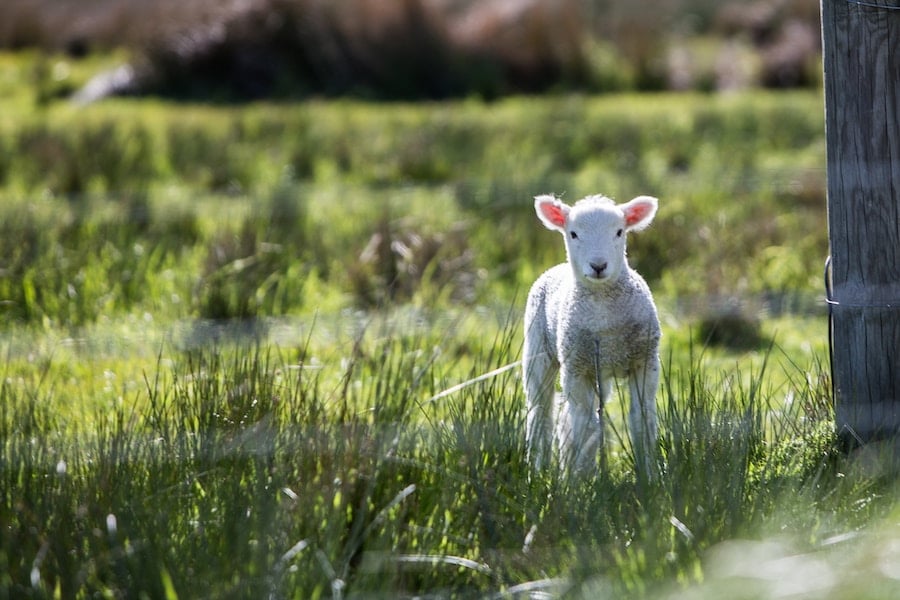
Baby sheep in a field.

Finally, there doesn’t seem to be any difference between goat milk and other milks when it comes to how well babies grow over the first six months of life.

Bottom line is that cow milk is considered safe and nutritious for healthy babies over 1, and we have the most research to support its use compared with other milks. It’s also a lot more economical and easy to find compared with goat milk or sheep milk. Personally, my son is drinking breastmilk until the supply runs dry, and then I have no qualms about switching him to whole cows milk (assuming he likes it). Ha, my hubby (who LOVES whole milk) is very excited to have more of it in the fridge. Either way, you should speak to a RD or your pediatrician about what you’re going to feed baby after you ween.

Hopefully this article has helped clear up some of the questions you had about the best milk for babies. Ultimately, though, the decision to choose what to feed your baby is deeply personal and it’s up to you to decide what you feel is best for you, your baby, and your family.

More Blog Posts You Might Like

If you liked this post talking about the best milk for babies, you might like:

  • ARE VEGAN MILK SUBSTITUTES SAFE FOR PLANT BASED BABIES WHO DON’T DRINK COW’S MILK?
  • DO BABIES NEED COW’S MILK?
  • HOW AND WHEN TO INTRODUCE FOOD ALLERGENS TO BABIES WITH BABY LED WEANING OR SPOON-FEEDING
  • ARE BPA AND OTHER ENDOCRINE DISRUPTORS IN PLASTIC CONTAINERS AND BABY PRODUCTS SAFE?
  • WHEN IS THE BEST TIME FOR BABY TO START SOLIDS? THE 4 MONTHS VERSUS 6 MONTHS DEBATE UNRAVELLED
  • BABY CONSTIPATION RELIEF! BEST FOODS FOR CONSTIPATED NEWBORNS, TODDLERS AND KIDS

Contribution By:

Karen Hutchinson, Dietetic Practicum Student
Edited By Sofia Tsalamlal, RD, MHSc Nutrition Communication


Abbey Sharp

Abbey Sharp is a Registered Dietitian (RD), regulated by the Ontario College of Dietitians. She is a mom, YouTuber, Blogger, award winning cookbook author, media coach specializing in food and nutrition influencers, and a frequent contributor to national publications like Healthline and on national broadcast TV shows.
www.abbeyskitchen.com/about-abbey/

Last Updated July 22, 2020. Published April 24, 2023 By Abbey Sharp 28 Comments

BEST Lactation Cookie Recipe | Salted Chocolate Chip (Vegan)

These Salted Chocolate Almond Vegan Lactation Cookies are perfect gluten free plant-based breastfeeding snacks for nursing moms!

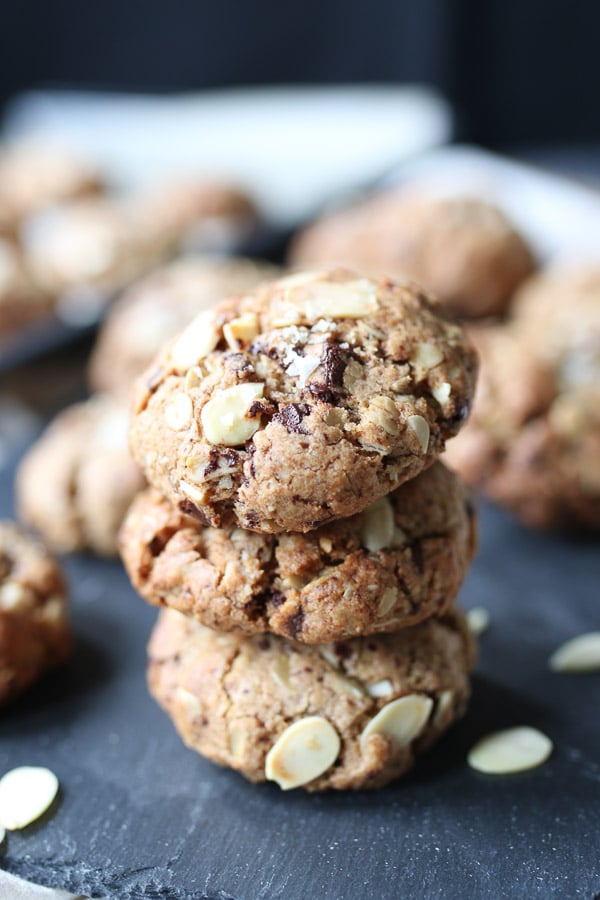
These Salted Chocolate Chunk Cookies are the best lactation cookie recipe. Gluten-free, plant-based, and filled with almonds, these cookies make for a great breastfeeding snacks for nursing moms!

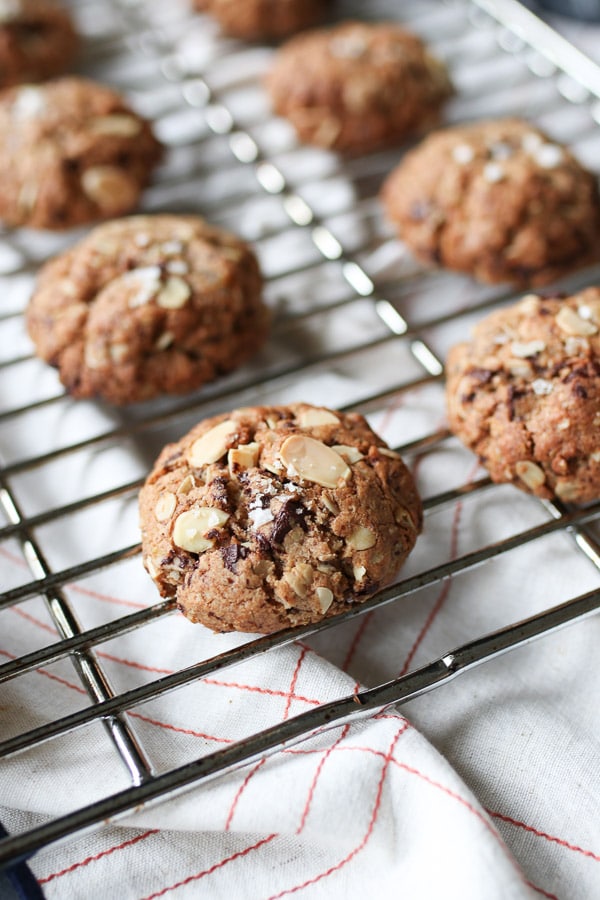
Cookies from the best lactation cookie recipe stacked on a serving dish.

If you read my recent post about my struggles breastfeeding and with my milk supply, you probably understand the inspiration for this post. I need more milk to feed my hungry, hungry hippo of a son.

After speaking with my doula and lactation consultant, I was given a list of the top foods to really increase in my diet in an effort to up my milk. In an effort to add more of those foods into my diet, I came up with these salted chocolate chunk cookies. These are legit the BOMB DOT COM.

Table of contents

  • Why This Recipe Works
  • Key Ingredients
  • How to Make This Recipe
  • Expert Tips
  • Recipe FAQs
  • More Recipes You Might Like

Why This Recipe Works

Hey, I have to eat anyway, might as well make choose foods with boobie benefits. And while I have no qualms about eating oatmeal for breakfast every day (LOVE it anyway), or steeping ginger in my tea, the idea that I can eat delicious lactation cookies throughout the day and night for the same effect definitely got me excited. Here’s why this is the best lactation cookie recipe that you need to try:

  • They’re so tasty
  • Not just for new moms. Everyone will love these!
  • Packed with healthy goodness
  • Vegan friendly

Key Ingredients

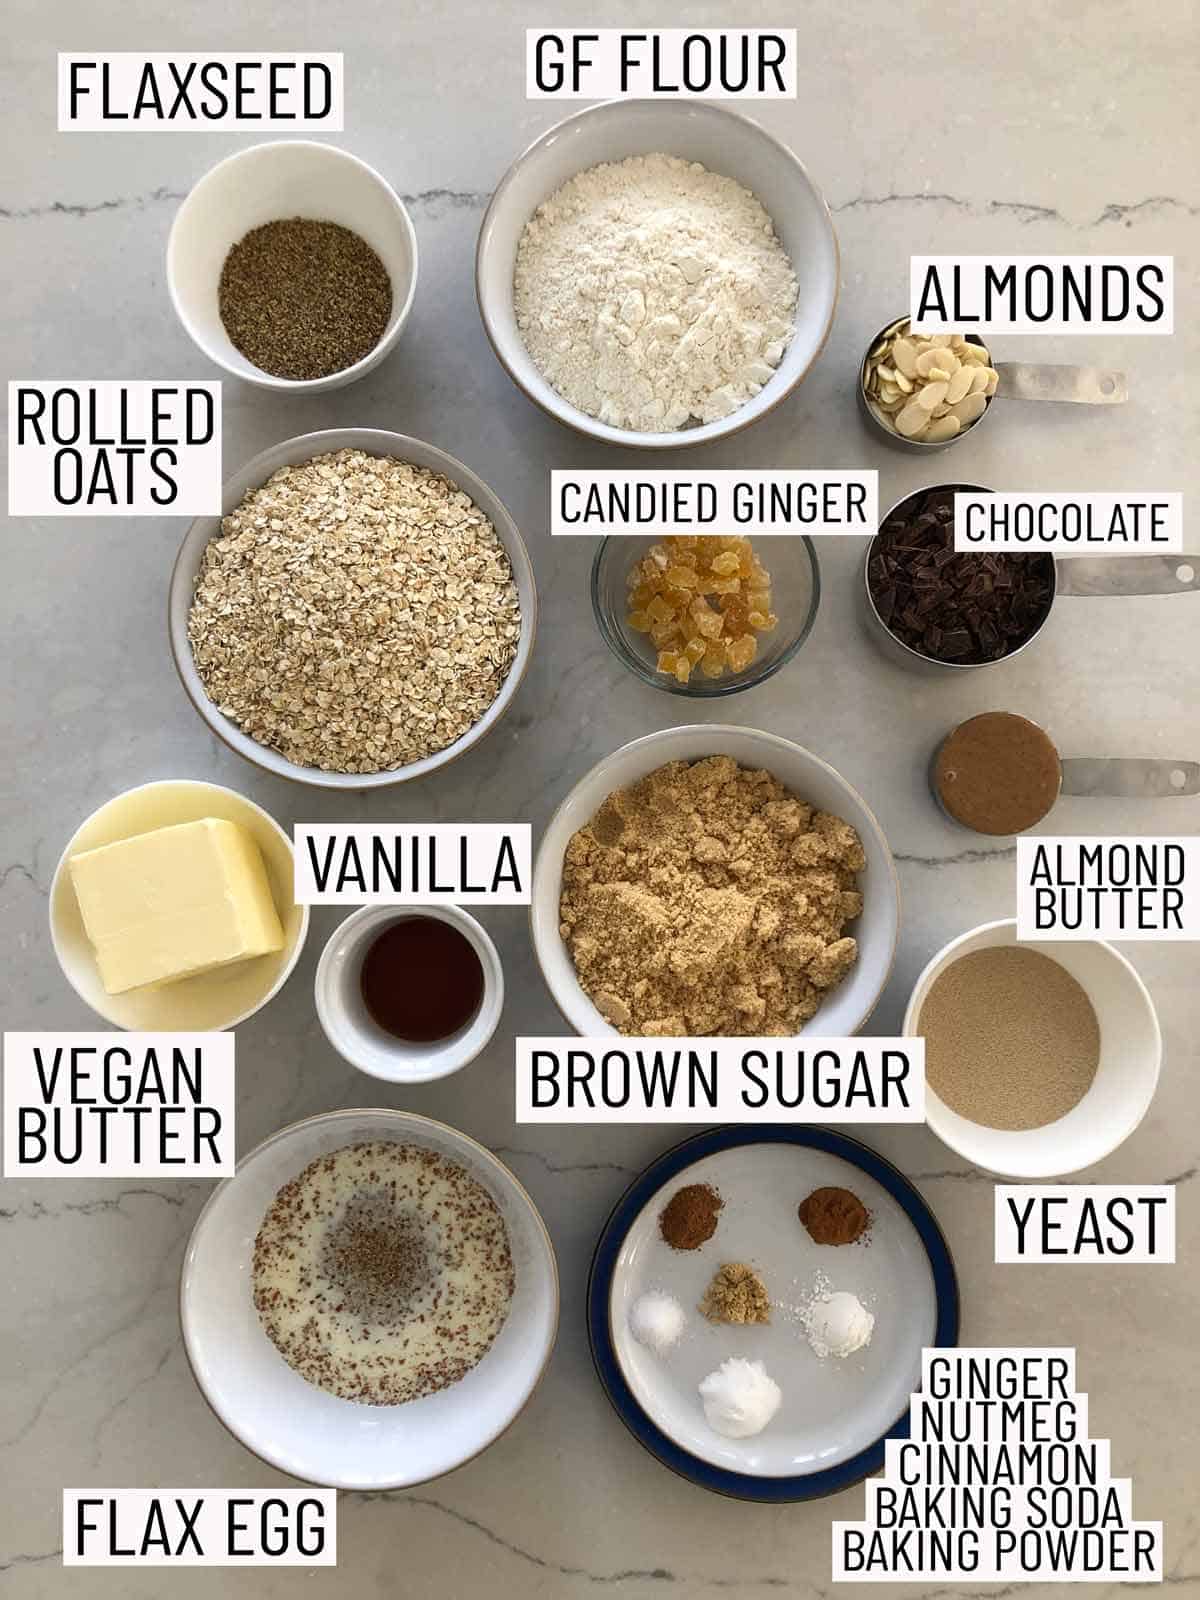
Overhead photo of ingredients for the best lactation cookie recipe.

Oatmeal — This helps keep our cookies gluten-free and packed with healthy goodness.

Flaxseed — Flaxseed has vitamins and minerals on top of protein, fiber and omega-3 fatty acids! We use it for the cookies and to make an egg substitutes.

Ginger — Ginger is believed to help increase breast milk production so we’re adding candied ginger and ground ginger to our salted chocolate chunk cookies.

Almonds and Almond Butter — To help bind the cookies, we add almond butter and the almonds also add a nice dose of healthy fats.

How to Make This Recipe

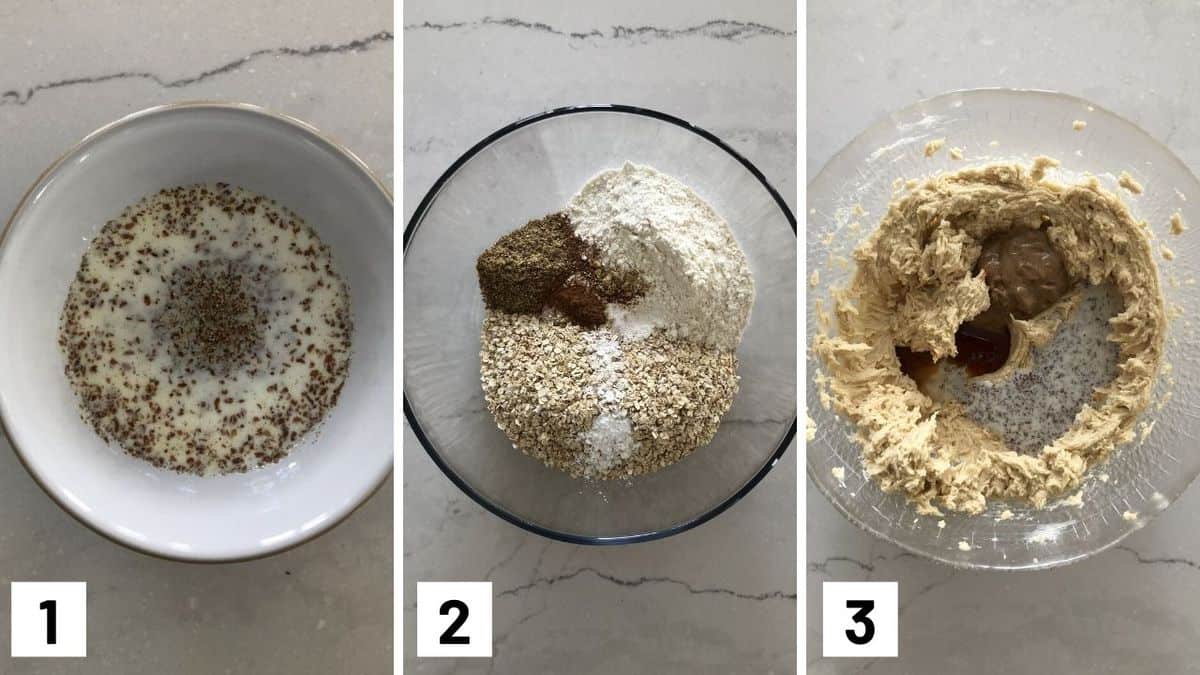
Set of three photos showing cookie ingredients being mixed together.

Step 1: Preheat the oven the 350 degrees F and line three baking sheets with parchment paper or a silpat. Prepare the flax eggs by combining 2 tbsp of flaxseed with 5 tbsp unsweetened vanilla almond milk. Refrigerate for 10-15 minutes until it looks thick and gloopy.

Step 2: In a large bowl, mix together the oats, gluten free flour, brewer’s yeast, flaxseed, baking powder, soda, cinnamon, nutmeg, ginger and salt.

Step 3: In another bowl (or your stand mixer), beat the vegan butter until softened. Add in the sugar and beat until it looks smooth and fluffy. Add in the almond butter, flax eggs, and vanilla and beat until mixed.

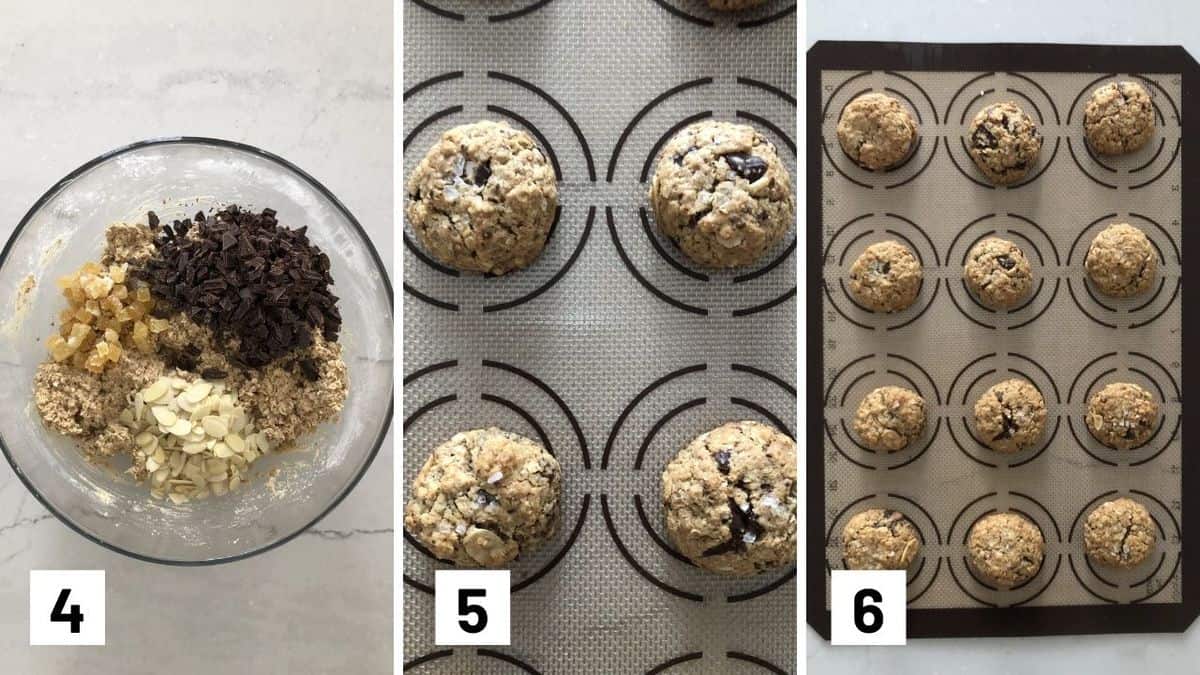
Set of three photos showing cookie batter mixed, rolled into balls, and baked.

Step 4: Stir the wet ingredients into the dry and then fold in the chocolate, almonds and ginger.

Step 5: Roll into balls about 1 1/2 inches in diameter and place on the baking sheet with about 2 inches between them (12 per baking sheet).

Step 6: Sprinkle generously with fleur de sel and bake for 20 minutes until the bottoms and sides turn golden brown. Allow the salted chocolate chunk cookies to cool for at least 5 minutes before picking up.

Expert Tips

Want more cookies? Simply roll these salted chocolate chunk cookies smaller!

I put in vegan dark chocolate that I’ve cut into small pieces. You’re welcome to use whatever chocolate you have on hand! Try some caramel chips! You can also cut up some larger chunks to put on top of the cookies.

When the cookies are cool to touch (5 minutes), transfer them to a cooling rack to finish cooling. Since the pan is hot, the residual heat will continue to cook the cookies if they stay on.

Recipe FAQs

How long do these lactation cookies last for?

Store in an air tight container for up to 5 days, or in the freezer for 6 months. Simply place a piece of parchment between cookies or freeze them flat on a sheet pan before transferring to a bag so they don’t stick together and you can take out one cookie at a time to thaw.

Is this a family friendly treat?

After we spent an afternoon baking these up, my hubby came home from work and inhaled three of them hot off the baking sheet. So yes, if you’re wondering, they’re totally safe for dads and won’t make my non-mom friends leak milk if you’re not breastfeeding. I’ve since served these gluten free salted chocolate almond vegan lactation cookies to friends with and without kids, and EVERYONE agrees they’re absolutely delicious. You know it’s the best lactation cookie recipe when it’s approved by the kids too.

Can I make this non-vegan?

You most definitely can! Swap flax egg for regular egg and vegan butter for regular unsalted butter.

What is brewer’s yeast?

While brewer’s yeast is used for the production of beer and bread, it is also used as a nutritional supplement. It is a a source of B vitamin and considered a probiotic.

Chocolate almond vegan lactation cookies on a cooling rack.

More Recipes You Might Like

Want more lactation cookies like my Salted Chocolate Chunk Cookies? Try these ones!

  • Salted Toffee Vegan Lactation Cookies (Gluten Free!)
  • Lemon Poppyseed Vegan Lactation Cookies
  • Vegan Carrot Cake Lactation Cookies (Gluten Free)

Moms who struggled with milk supply and breastfeeding, what were your secrets? Would you agree with me that this is the best lactation cookie recipe ever?! Leave me a comment below!

These Salted Chocolate Almond Vegan Lactation Cookies are perfect gluten free plant-based breastfeeding snacks for nursing moms!
Print Recipe
4.77 from 13 votes

Salted Chocolate Almond Vegan Lactation Cookies

These Salted Chocolate Chunk Cookies are the best lactation cookie recipe. Gluten-free, plant-based, and filled with almonds, these cookies make for a great breastfeeding snacks for nursing moms!
Prep Time20 minutes mins
Cook Time20 minutes mins
Total Time40 minutes mins
Course: Snack
Cuisine: American
Servings: 36 – 48 cookies
Calories: 179kcal
Author: Abbey Sharp

Ingredients

  • 3 cups gluten free rolled oats
  • 1 1/2 cups gluten free all purpose flour
  • 6 tablespoons brewers yeast
  • 3 tablespoons ground flaxseed
  • 1/2 teaspoon baking powder
  • 1/2 teaspoon baking soda
  • 1/2 teaspoon cinnamon
  • ¼ tsp nutmeg
  • ½ tsp ground ginger
  • 1/4 teaspoon salt
  • 1 cup vegan butter
  • 1 1/2 cups light brown sugar
  • 1/4 cup natural almond butter
  • 2 flax eggs 2 tbsp ground flaxseed with 5 tbsp unsweetened vanilla almond milk
  • 2 teaspoons vanilla extract
  • 1 cup vegan dark chocolate cut into small bits
  • 1/3 cup sliced almonds
  • 1/4 cup candied ginger minced
  • Fleur de sel for garnish

Instructions

  • Preheat the oven the 350 degrees F and line three baking sheets with parchment paper or a silpat.
  • Prepare the flax eggs by combining 2 tbsp of flaxseed with 5 tbsp unsweetened vanilla almond milk. Refrigerate for 10-15 minutes until it looks thick and gloopy.
  • In a large bowl, mix together the oats, gluten free flour, brewer’s yeast, flaxseed, baking powder, soda, cinnamon, nutmeg, ginger and salt.
  • In another bowl (or your stand mixer), beat the vegan butter until softened. Add in the sugar and beat until it looks smooth and fluffy. Add in the almond butter, flax eggs, and vanilla and beat until mixed.
  • Stir the wet ingredients into the dry and then fold in the chocolate, almonds and ginger.
  • Roll into balls about 1 1/2 inchs in diameter and place on the baking sheet with about 2 inches between them (12 per baking sheet).
  • Sprinkle generously with fleur de sel and bake for 20 minutes until the bottoms and sides turn golden brown. Allow to cool for at least 5 minutes before picking up. Store in an air tight container for up to 5 days, or in the freezer for 6 months.

Video

Notes

  • Want more cookies? Simply roll these salted chocolate chunk cookies smaller!
  • I put in vegan dark chocolate that I’ve cut into small pieces. You’re welcome to use whatever chocolate you have on hand! Try some caramel chips! You can also cut up some larger chunks to put on top of the cookies.
  • When the cookies are cool to touch (5 minutes), transfer them to a cooling rack to finish cooling. Since the pan is hot, the residue heat will continue to cook the cookies if they stay on.

Nutrition

Calories: 179kcal | Carbohydrates: 22g | Protein: 4g | Fat: 9g | Saturated Fat: 2g | Cholesterol: 1mg | Sodium: 83mg | Potassium: 174mg | Fiber: 3g | Sugar: 11g | Vitamin A: 240IU | Calcium: 34mg | Iron: 1.7mg

Abbey Sharp

Abbey Sharp is a Registered Dietitian (RD), regulated by the Ontario College of Dietitians. She is a mom, YouTuber, Blogger, award winning cookbook author, media coach specializing in food and nutrition influencers, and a frequent contributor to national publications like Healthline and on national broadcast TV shows.
www.abbeyskitchen.com/about-abbey/

Last Updated April 16, 2023. Published April 21, 2023 By Abbey Sharp Leave a Comment

Veggie Omelette Recipe (Toddler and BLW Friendly)

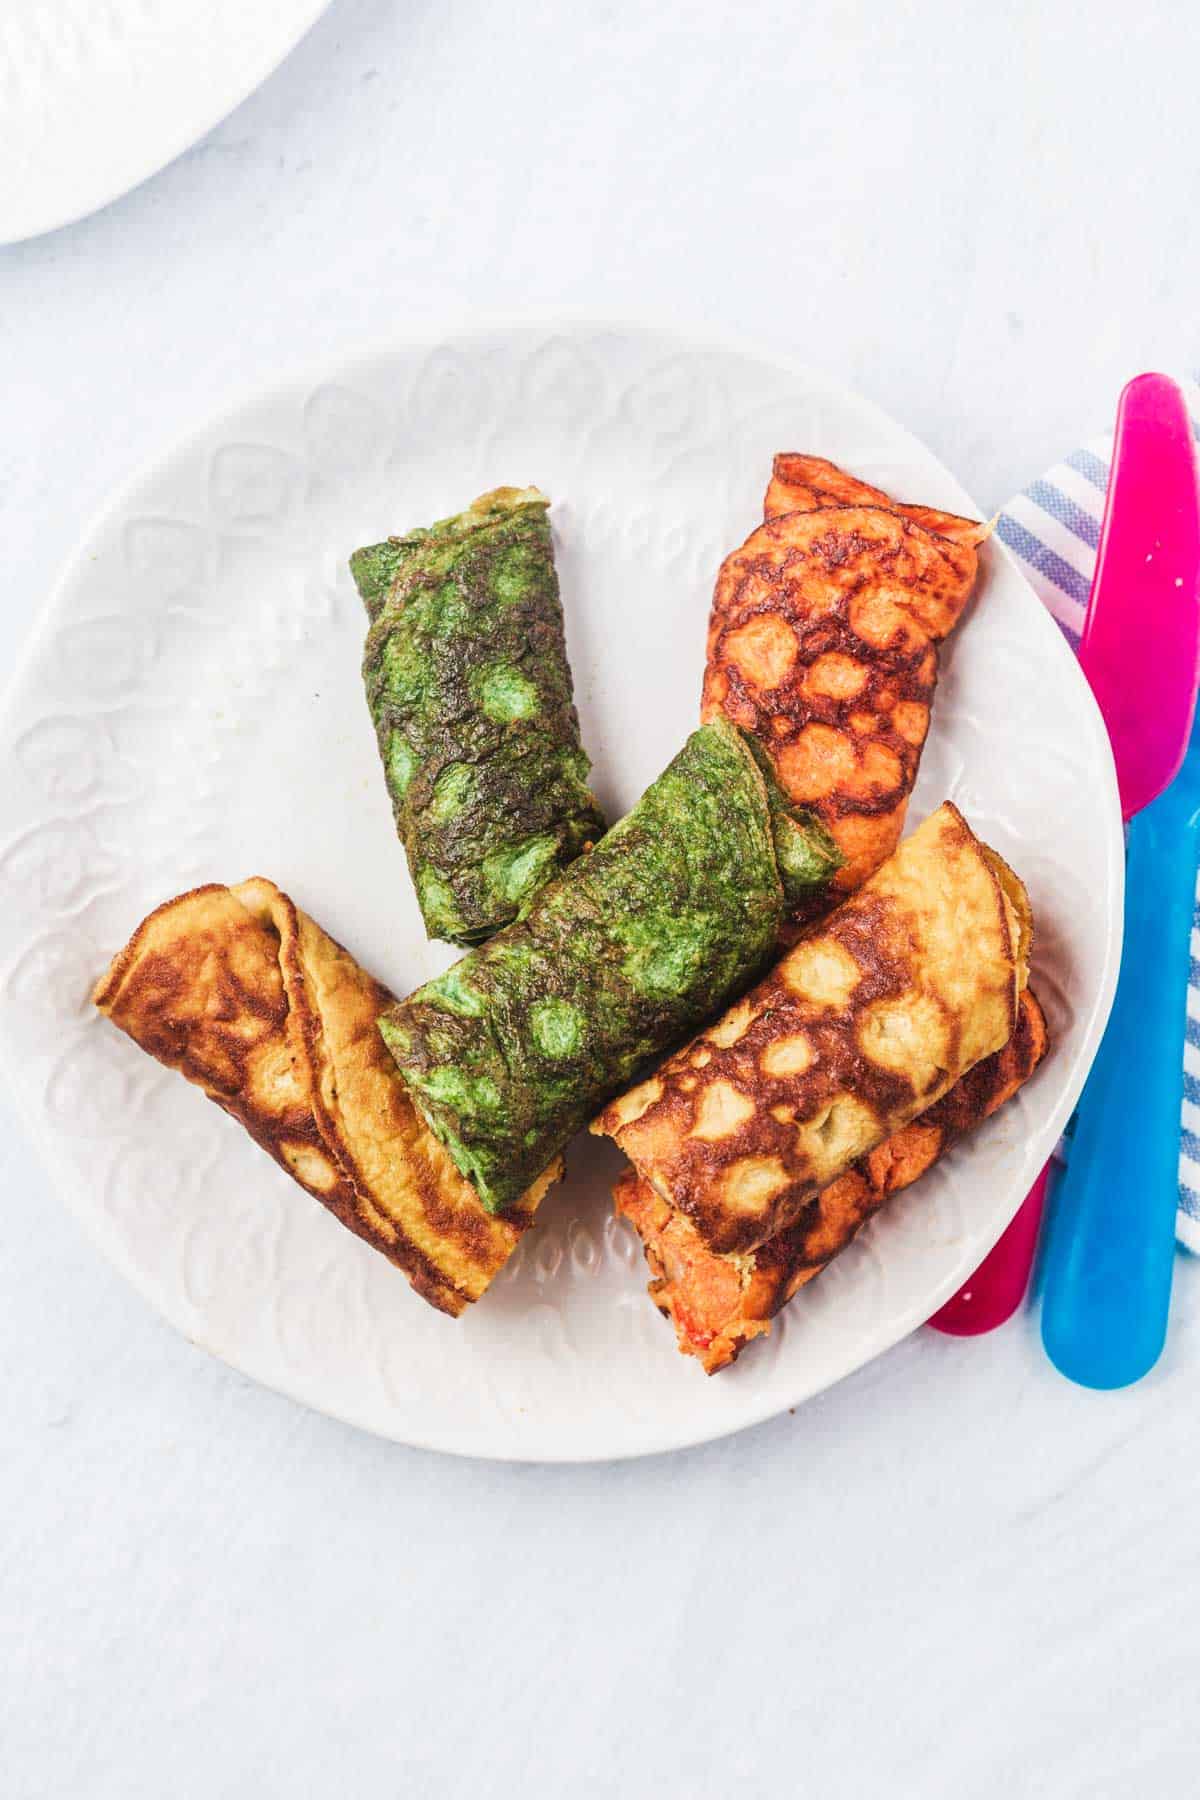
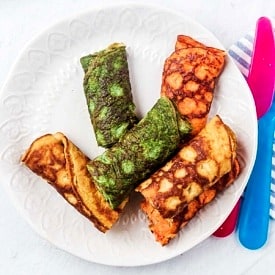
A plate with multiple coloured egg rolls on a white plate.

This veggie omelette recipe is an easy and delicious toddler breakfast idea that will disappear in a flash! Not only are they eye-catchingly colourful, they’re packed with nutrients that your little ones will gobble up.

A plate with multiple coloured egg cheese omelette on a white plate.

This cheesy veggie omelette recipe may look fancy (such pretty colours!) but they are so easy to make. This has been my go-to toddler breakfast idea lately takes to how easy it is to make and how it uses up leftovers hanging around the fridge. They are perfect for baby led weaning, toddlers, and you too!

Table of contents

  • Why This Recipe Works
  • Key Ingredients
  • How to Make This Recipe
  • Expert Tips
  • Recipe FAQs
  • More Recipes You Might Like

Why This Recipe Works

It can be challenging to figure out new toddler breakfast ideas on a regular basis. Trust me, it feels like they can eat the same thing every day and then suddenly change their minds. But this veggie omelette recipe, it’s perfect since it’s:

  • Easily customizable with different vegetables that can be pureed.
  • Easy to make.
  • Packed with healthy goodness.
  • Perfect for baby led weaning.
  • Easy grab-and-go breakfast.

Key Ingredients

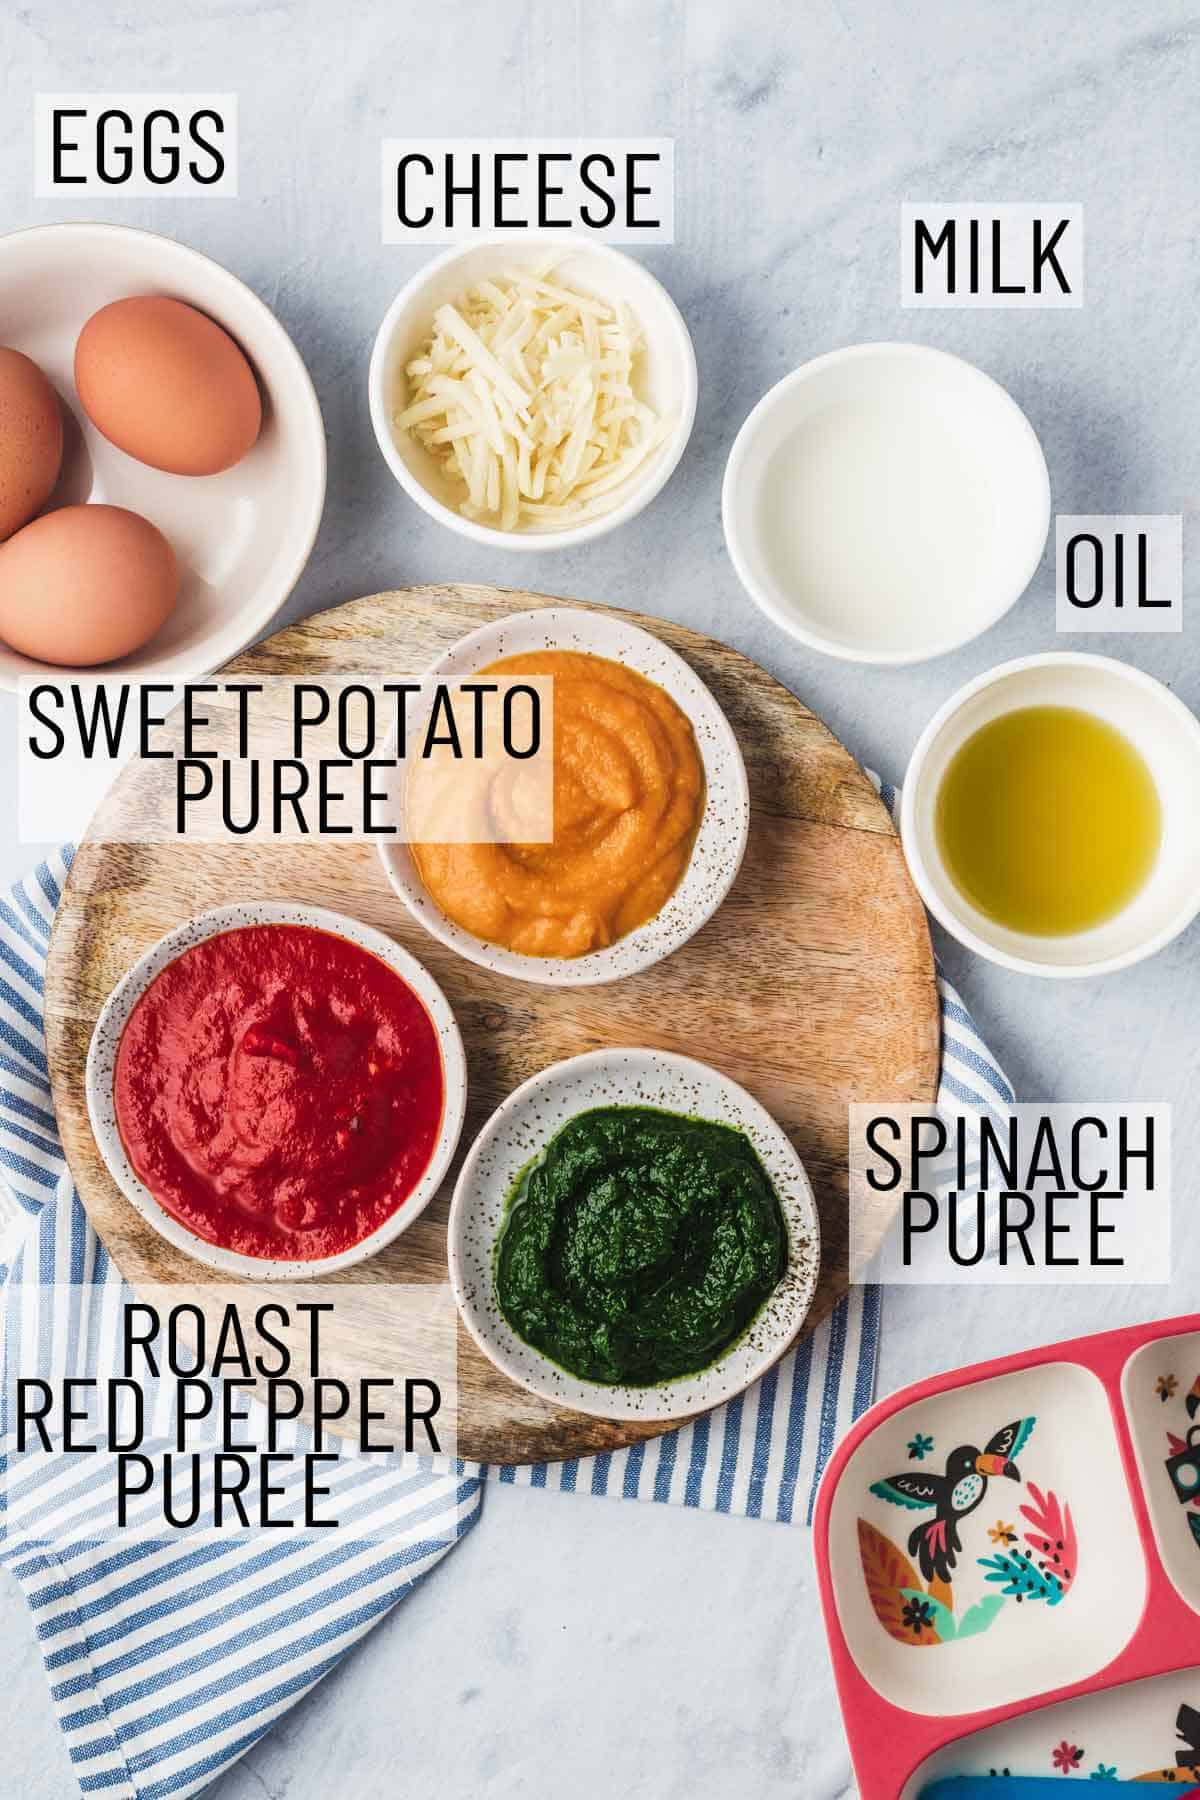
Ingredients needed to make BLW omelette.

Eggs — Eggs are pretty inexpensive and are packed with nutrition. So if your baby chucks half of their cheese omelette on the ground like mine often does, it hurts the wallet less.

Milk — You can use any milk of your choice.

Spinach puree — To make spinach puree, blanch a few handfuls of spinach and grind with a teaspoon of water to form a smooth puree with a food processor.

Roasted red pepper puree — For roasted red pepper puree, use 1 roasted red pepper from a jar and puree it with little water. 

Sweet potato puree — To make sweet potato puree peel and cook a sweet potato and puree with a little water till smooth.

How to Make This Recipe

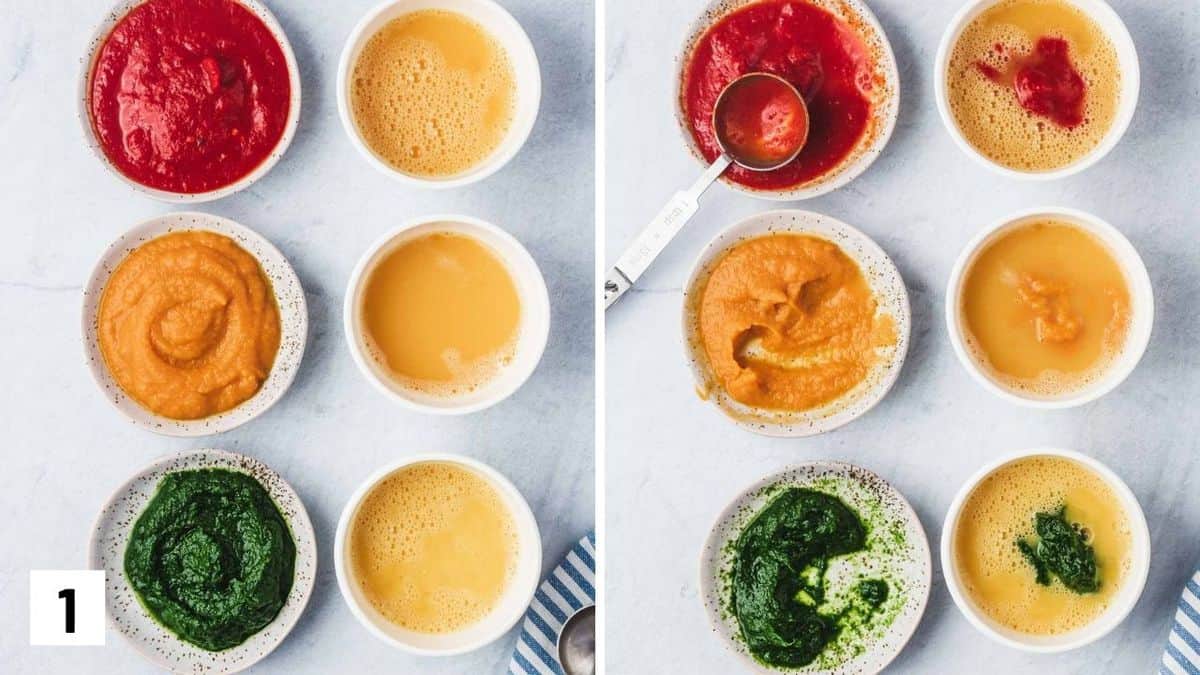
Set of two photos showing purees added to egg mixture.

Step 1: Pre-heat a small non-stick pan over medium-low heat. Add ½ teaspoon coconut oil or butter or olive oil. In a small bowl, whisk the eggs and milk together. Divide it equally into three bowls. To one bowl add the spinach puree, to the second bowl add roasted red pepper puree and to the third bowl add sweet potato puree.

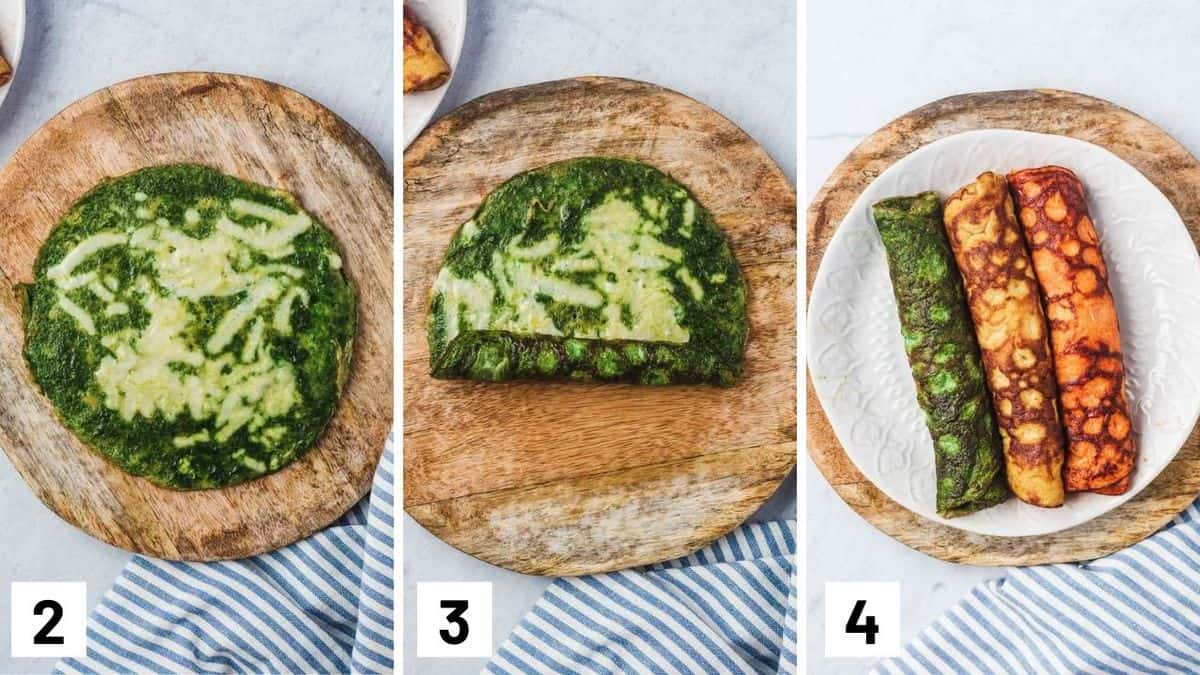
Set of three photos showing the egg wrap on a board then rolled.

Step 2: Toss one bowl of the egg mixture into the pan and cook for 2 minutes. Sprinkle a tablespoon of cheese on top of the eggs, cover the pan with a lid, and cook for 2 more minutes. Carefully slide the egg onto a cutting board or a plate. Let it cool for a minute.

Step 3: Then starting on one side of the disc roll the egg into a neat log.
Place the seam side down and let it cool, as it cools the eggs will hold their shape.

Step 4: Repeat the process with the remaining egg mixture. You will have green, red and yellow cheese omelettes that are the perfect toddler breakfast idea.

Expert Tips

You want to ensure the vegetable purees are smooth and not too thin or the veggie omelette recipe may turn out too watery. 

Avoid placing the pan on too high of heat as the egg will quickly burn and the egg rolls will look brown and not colourful.

Allow the egg rolls to cool before serving them to your little ones. The inside of the roll can hold onto steam and make the rolls too hot.

Recipe FAQs

Are these BLW cheesy egg rolls school-safe?

Yes! This toddle breakfast idea is totally nut-free so you can absolutely send it with your kids to school or daycare!

Are these baby egg rolls gluten-free? What about dairy?

These cheesy egg rolls have no gluten in them. You can use non-dairy milk in place of cows milk if you prefer.

Can I make them ahead of time and store them?

After your egg rolls have cooled to room temperature, transfer them to an airtight container and store them in the fridge for up to 5 days. Simply reheat them in the microwave when ready to eat!

What other vegetables can I use?

You can puree any extra vegetables you have on hand! Try peas, carrots, pumpkins, beets, French beans, and more for these cheese omelettes!

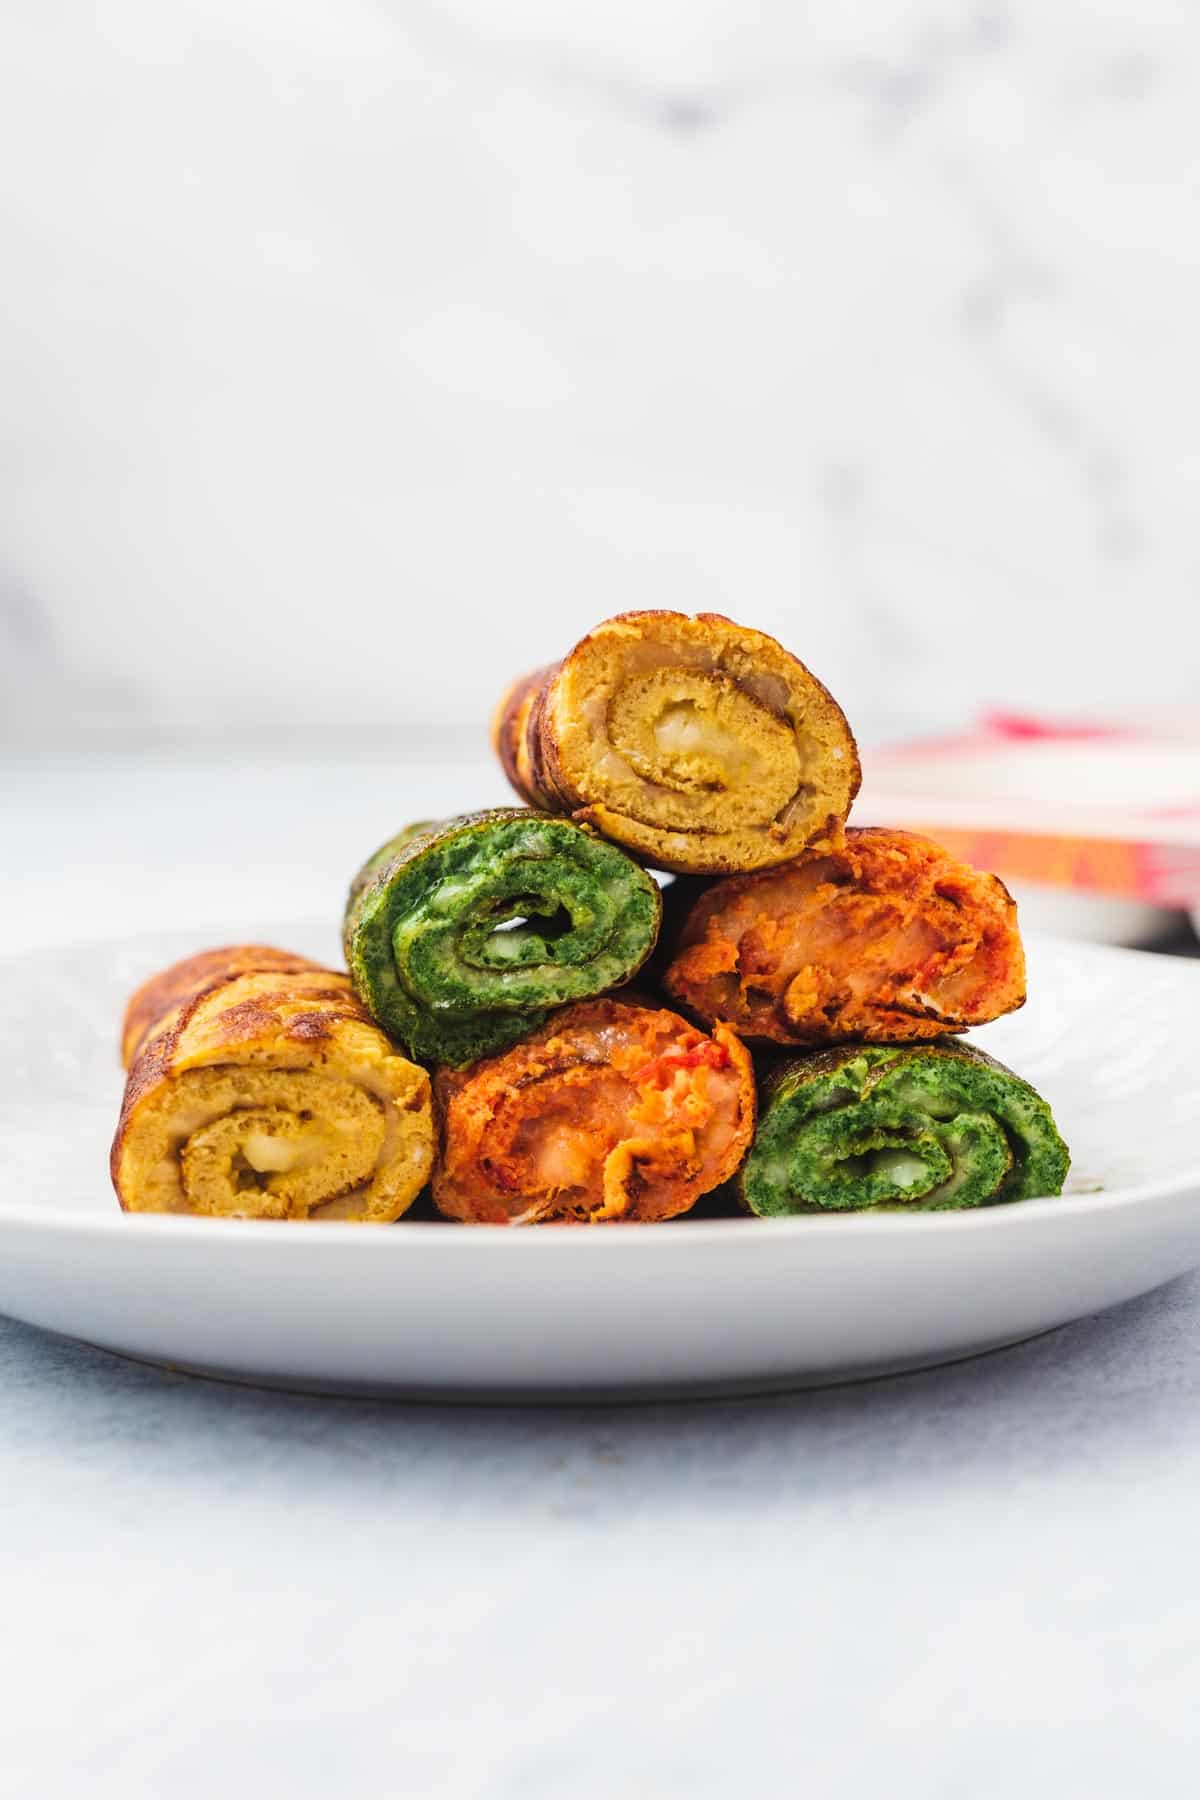
Side view of a stack of cheese omelette placed like a pyramid.

More Recipes You Might Like

Want more toddler breakfast ideas like my veggie omelette recipe? Try these ones:

  • Mini Egg Muffins with Cheese & Broccoli (BLW & Toddler Friendly)
  • Spinach Chicken Muffins
  • Broccoli and Cheese Egg Muffins
  • Peanut Butter Banana Mini Muffins

Tell me lovelies, what are your go-to breakfast recipes for your toddlers?

A plate with multiple coloured egg rolls on a white plate.
Print Recipe
5 from 3 votes

Veggie Omelette Recipe (Toddler and BLW Friendly)

These Cheese Omelette with Veggies are an easy and delicious toddler breakfast idea that will disappear in a flash! Not only are they eye-catchingly colourful, they're packed with nutrients that your little ones will gobble up.
Prep Time10 minutes mins
Cook Time15 minutes mins
Total Time25 minutes mins
Course: Breakfast
Cuisine: Canadian
Servings: 4 servings
Author: Abbey Sharp

Ingredients

  • 3 eggs
  • 1 tbsp milk
  • 3 tbsp cheddar cheese shredded
  • 1½ tsp coconut oil or butter or olive oil
  • 2 tbsp spinach puree
  • 2 tbsp roasted red pepper puree
  • 2 tbsp sweet potato puree

Instructions

  • Pre-heat a small (8 inch) non-stick pan over medium-low heat. Add ½ teaspoon coconut oil or butter or olive oil.
  • In a small bowl, whisk the eggs and milk together. Divide it equally into three bowls. To one bowl add the spinach puree, to the second bowl add roasted red pepper puree and to the third bowl add sweet potato puree. This way you will end up with green, red and orange egg rolls
  • Toss one bowl of the egg mixture into the pan and cook for 2 minutes.
  • Sprinkle a tablespoon of cheese on top of the eggs, cover the pan with a lid, and cook for 2 more minutes.
  • Carefully slide the egg onto a cutting board or a plate. Let it cool for a minute. Then starting on one side of the disc roll the egg into a neat log.
  • Place the seam side down and let it cool, as it cools the eggs will hold their shape.
  • Repeat the process with the remaining egg mixture.

Notes

  • You want to ensure the vegetable purees are smooth and not too watery. 
  • Avoid placing the pan on too high of heat as the egg will quickly burn and the egg rolls will look brown and not colourful.
  • Allow the egg rolls to cool before serving them to your little ones. The inside of the roll can hold onto steam and make the rolls too hot.
Abbey Sharp

Abbey Sharp is a Registered Dietitian (RD), regulated by the Ontario College of Dietitians. She is a mom, YouTuber, Blogger, award winning cookbook author, media coach specializing in food and nutrition influencers, and a frequent contributor to national publications like Healthline and on national broadcast TV shows.

www.abbeyskitchen.com/about-abbey/

Last Updated February 20, 2024. Published April 19, 2023 By Abbey Sharp 1 Comment

Best Foods for Heart Health | Top 10 Foods According to a Dietitian

DISCLAIMER: This post was developed in sponsored partnership with General Mills, however, as always, all opinions are genuine.

In celebration of heart health month, I share the best foods for heart health according to a food loving dietitian.

We probably all know someone who is affected by heart disease – it is the number one cause of death globally! According to the World Health Organization, 17.9 million people die every year from cardiovascular disease, an estimated 31% of all deaths world-wide. It’s really serious stuff. Personally, pretty much everyone on my mom’s side of the family has died of some form of cardiovascular disease. So as my parents (and me) age, I have been making extra effort to take care of our heart health and encourage a heart healthy diet.

So in celebration of heart health month, I have compiled the top 10 best foods for heart health to make this easier than ever.

What are the major components of a heart healthy diet?

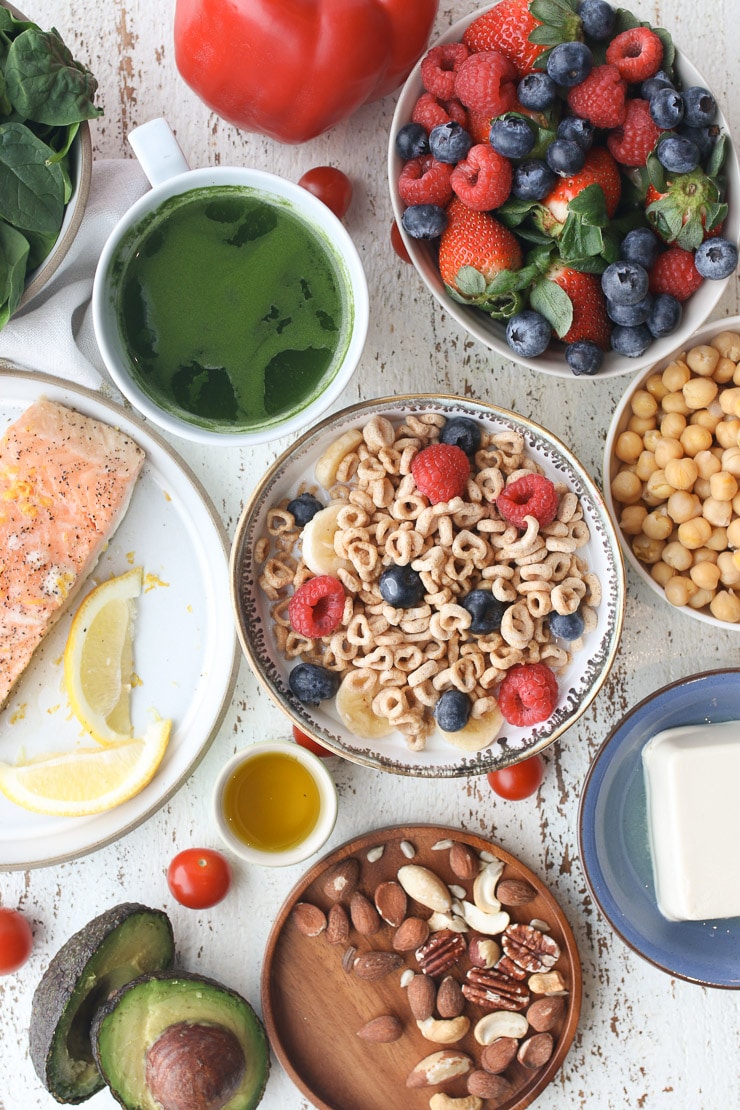
Birds eye view of the best foods for heart health.


You all know I’m not about quick fixes and fad diets, but research has given us some general guidelines on what a heart healthy diet looks like. A lot of these suggestions are based on research on the Mediterranean diet and the DASH diet, aka. Dietary Approaches to Stop Hypertension. Here are some of the general components of a heart healthy diet uncovered from this research and other studies like it:

  1. Limit foods that are high in sugar, salt and saturated fats and avoid adding a lot of excess salt to your foods.
  2. Fill at least half of your plate with colourful fruit and vegetables.
  3. Choose mainly plant based protein sources like nuts, seeds, beans and legumes, fatty fish like salmon, and smaller amounts of lean poultry and low fat dairy.
  4. Choose higher fibre whole grains and other fibre-rich foods.
  5. Choose unsaturated plant-based fats like olive oil or avocado often.

Best Foods for Heart Health

With some of these general recommendations in mind, let’s go over my top 10 best foods for heart health.

Whole Grains

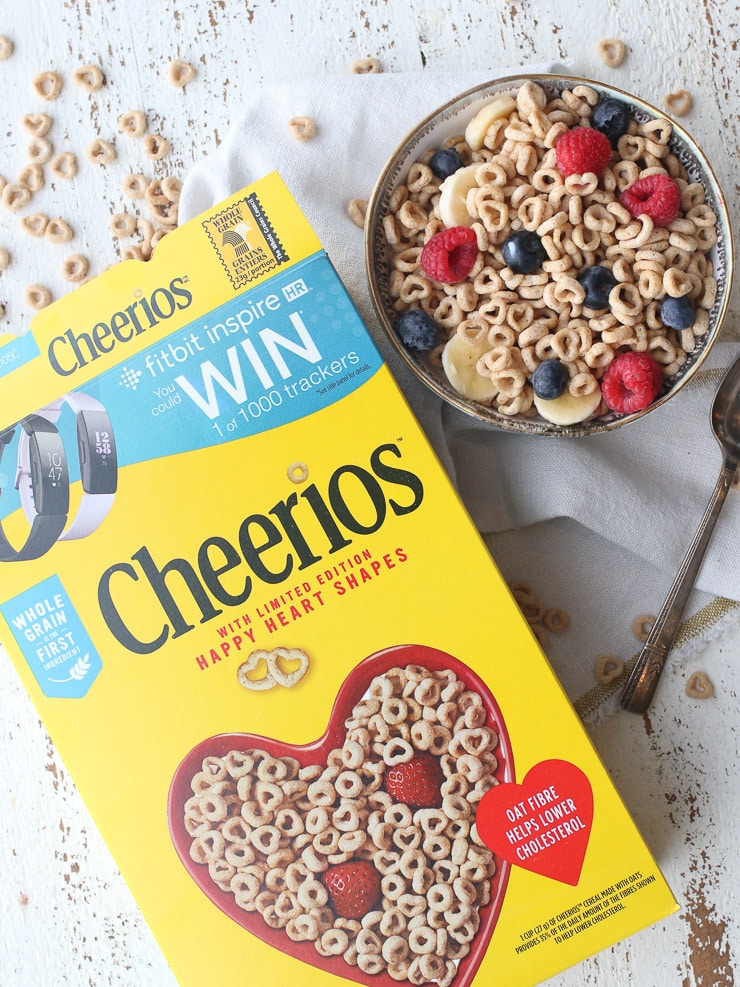
Birds eye view of cheerios box and bowl of cheerios with berries for a heart healthy diet.

There’s a reason why Canada’s Food Guide recommends choosing whole grains more often than refined – the evidence indicates they’re important for protecting against heart disease and other chronic diseases. Whole grains deliver fibre, which studies show may help reduce cholesterol and reduce the risk of heart disease. One meta-analysis, for example, showed that eating just 3 or more servings of whole grains daily was associated with 22% reduced risk of heart disease. That’s just a cup of whole grain cereal and a piece of whole grain toast! Easy! In my house we are big fans of original Cheerios cereal because it’s made with whole grain oats and has just 1 gram of sugar per serving. And if you’re unsure how to tell if something is whole grain, you want to look for the words “whole grain” at the top of the ingredient list. General Mills also now has an easy to read blue label on the front of the package to make it even easier to identify a whole grain option.

Berries

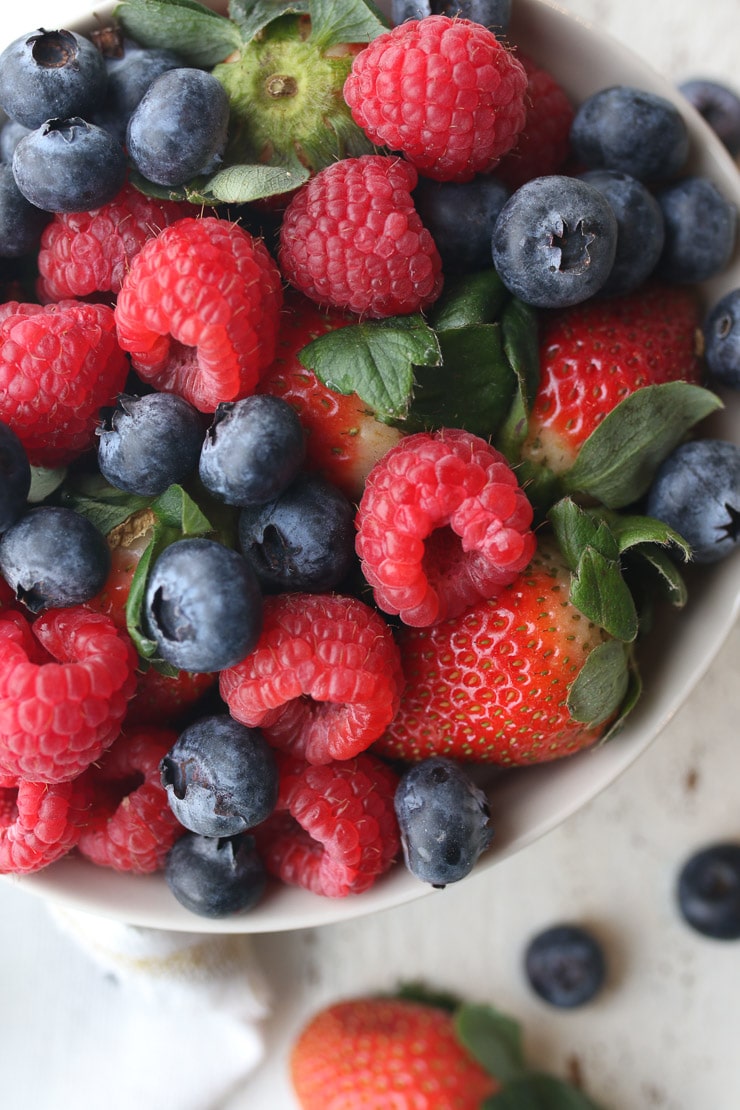
Close up image of mixed berries.

A naturally sweet source of heart-healthy polyphenols, vitamin C and fibre, numerous studies have demonstrated the power of berries for heart health. One study found that the anthocyanins responsible for the blue or purple colour in blueberries and blackberries, for example, helped reduce oxidative stress, thus lowering the risk of heart disease. Another meta-analysis found that berry consumption was significantly associated with reductions in LDL cholesterol (that’s the “bad” stuff), and blood pressure. Whether you prefer strawberries, blueberries, blackberries, raspberries, cranberries or cherries, you can use these fruits to add natural sweetness to your morning cereal, as a nutritious dessert with cream or yogurt, or as a delicious sweet snack all on their own.

Leafy Greens

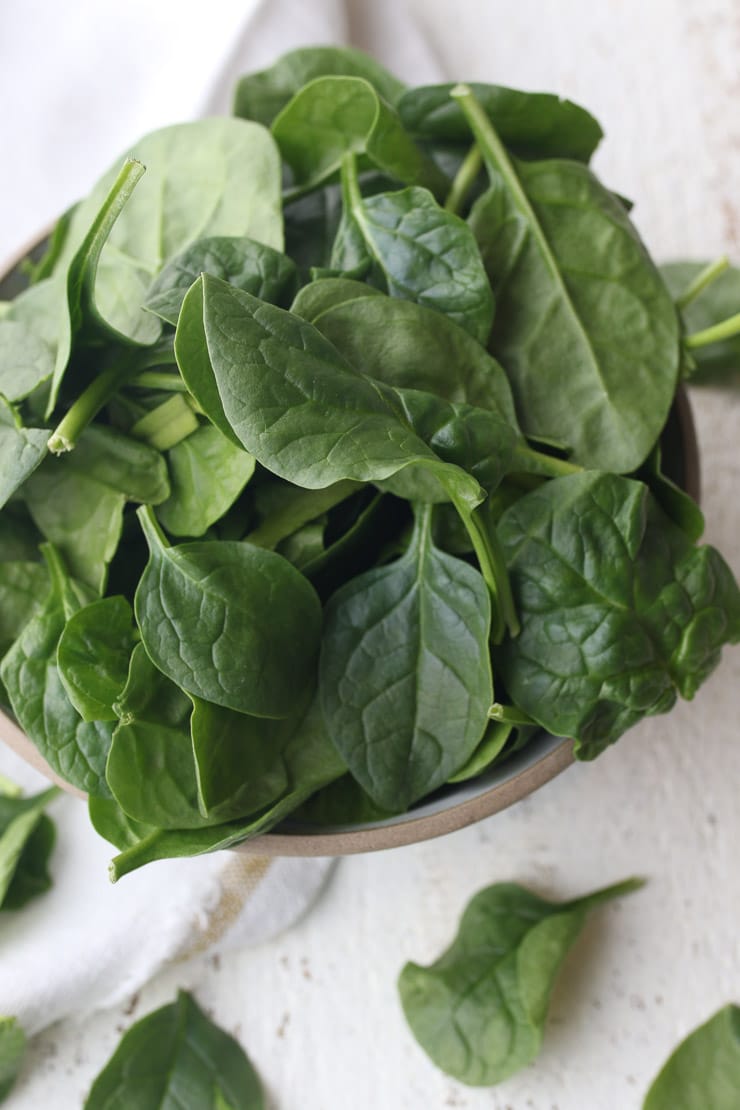
Birds eye view of leafy greens in a white bowl.

Rich in vitamin K to protect your arteries, and fibre, there are so many reasons to make sure you’re seeing green in most of your meals. One meta analysis even found that increasing ones intake of leafy greens was associated with a 16% lower risk of heart disease. Options like spinach, kale, collard greens and mustard greens can be thrown into soups, salads, casseroles, smoothies and pastas to add a powerful punch of green.

Fatty Fish

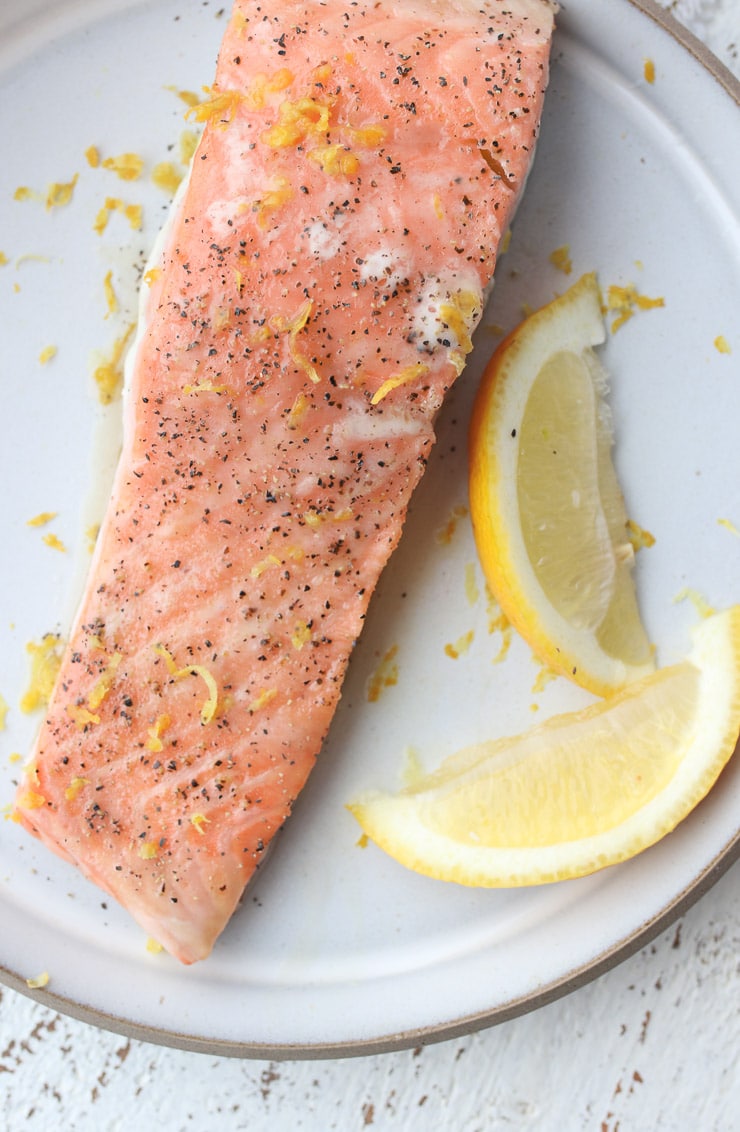
Pink salmon on a white plate garnished with lemon zest.

You’ve probably heard about omega-3 fats (found naturally in fatty fish and oils extracted from those fish) and how important they are for helping to reduce inflammation and in turn, protect our heart. One study found that eating salmon regularly for just 8 weeks significantly reduced blood pressure. Another analysis of the research found that fish eaters were less likely to have a heart attack than non-fish eaters. When choosing fish, look for one that is higher in omega 3 fats like salmon, trout, mackerel, or sardines, and serve them baked, broiled, or grilled without a batter or deep-frying.

Beans and Legumes

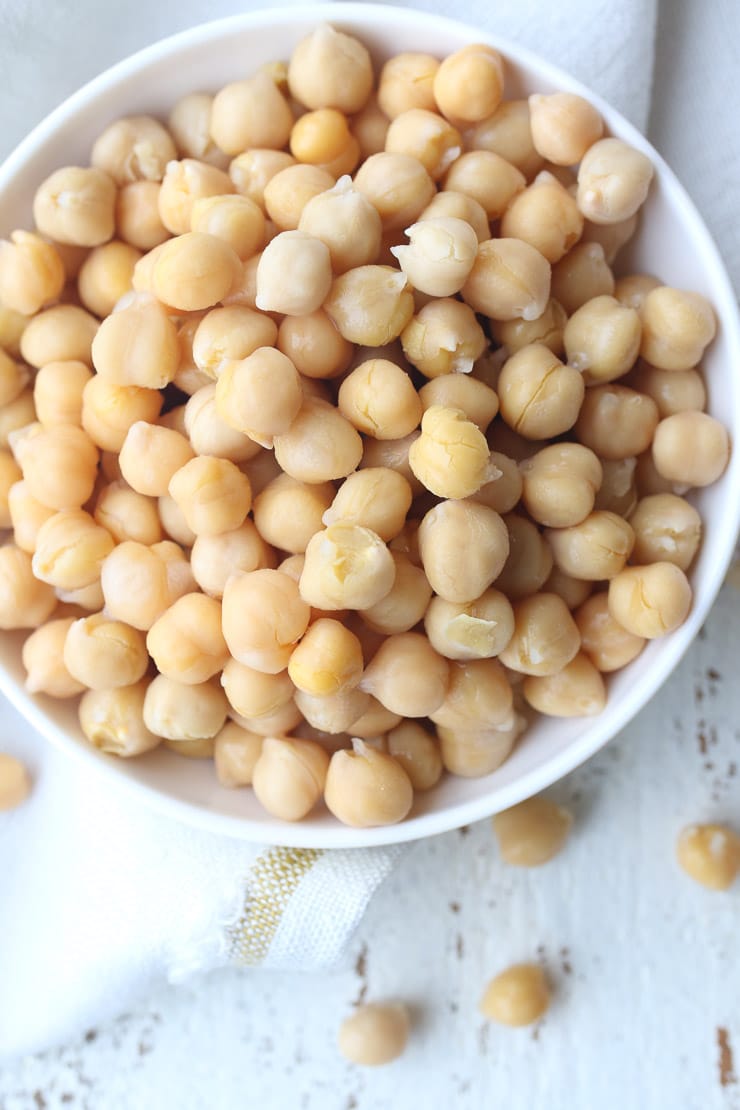
Birds eye view of chickpeas in a white bowl.

Beans, beans, they’re good for your heart! The more you eat, the more you – well, you know the rest. They truly are some of the best foods for heart health. Beans and other pulses are not only a great plant-based protein, but they’re rich in resistant starch and fibre, which research suggests may help reduce “bad” LDL cholesterol. Throw a handful of chickpeas into your salad, white beans in your soups, black beans in your taco, and lentils in your curry for a heart-healthy (and money conscious) meal!

Nuts and Seeds

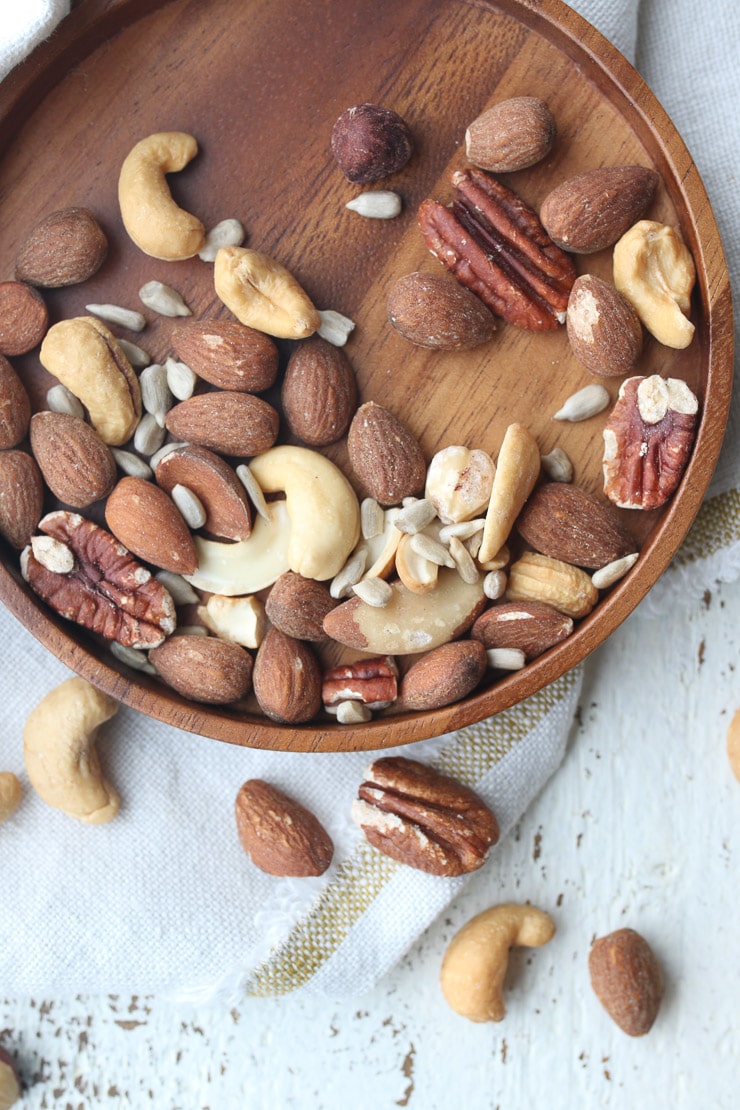
Mixed nuts on a wooden plate as part of a heart healthy diet.

As a fantastic source of monounsaturated fats and fibre, nuts and seeds can be your heart healthy BFF. Some nuts and seeds, like walnuts, flax or hemp hearts, even have plant-based omega-3s as well! Research has found that eating nuts on the regular is associated with lower risk of heart disease, so choose your favourite (almonds, walnuts, pistachios, hemp hearts, sunflower seeds, flax, or chia are a few of our go-tos), and toss them into salads, on stir-fries, pastas, or eat them on their own as a snack.

Red, Orange & Yellow Veggies

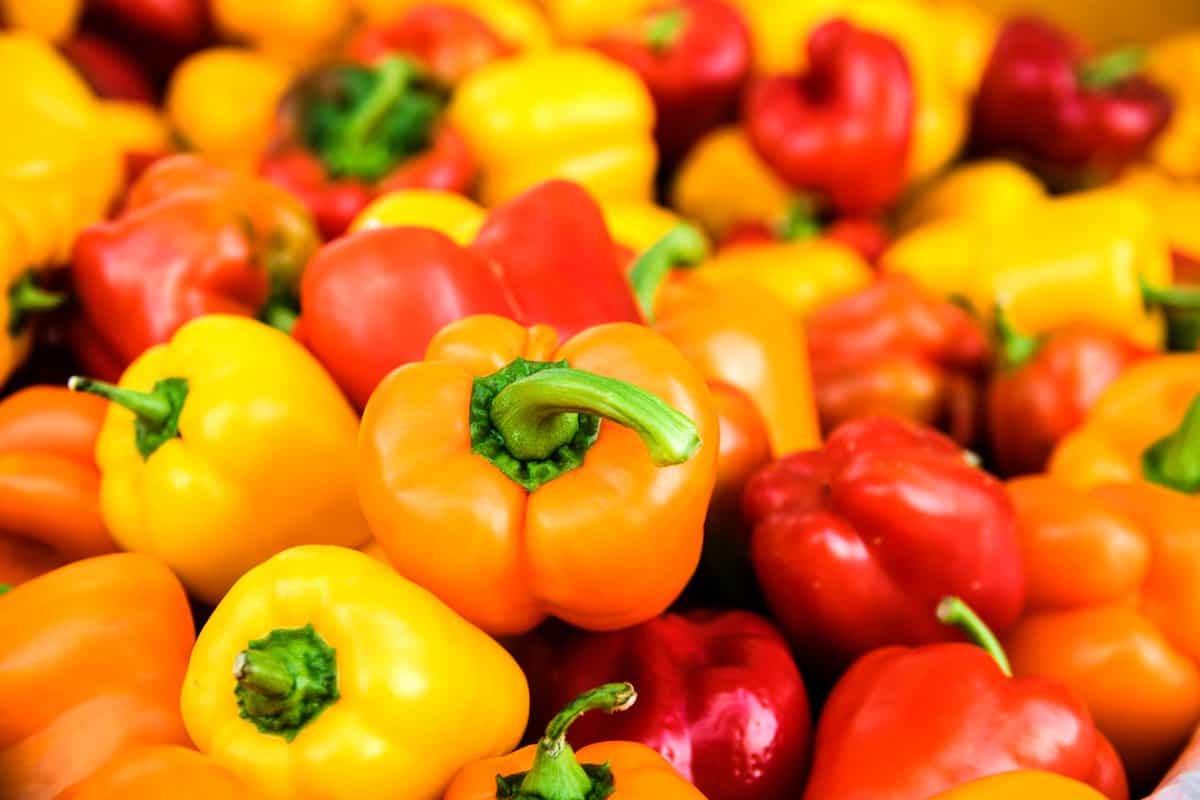
Red, orange and yellow bell peppers as part of the best foods for heart health.

Between the berries, the spinach and now the red and orange veg, I think you’re maybe getting the point that colour is king. There are a number of important antioxidants that can be derived from brightly coloured veggies. Lycopene in tomatoes, for example, has been linked to a reduced risk of heart disease and stroke, while alpha and beta-carotene in orange carrots or yellow beets have been shown to lower the risk of death from heart disease. There are so many ways to get your sunset-hue veggie fix- from peppers, to squash, to pumpkin, and beets – choose a favourite and get cooking!

Soy

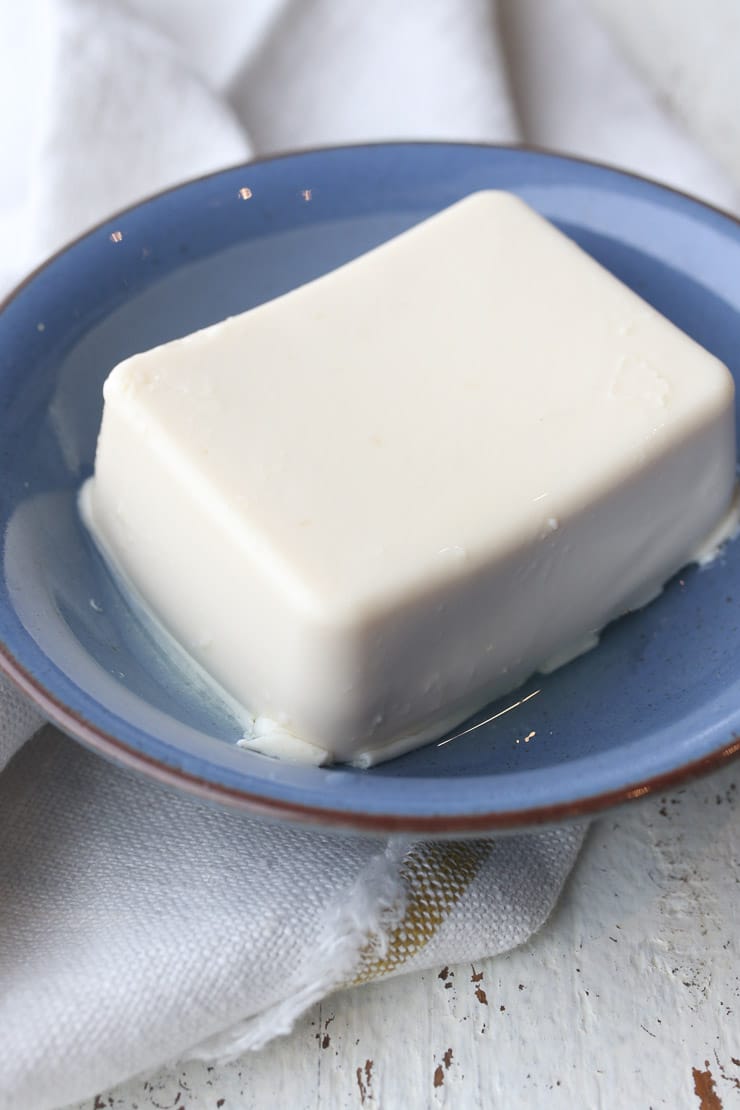
Tofu in a blue bowl representing soy as one of the best foods for heart health.

A staple in the plant-based diet, soy protein can be found in tofu, tempeh, edamame, and soy milk (among so many other plant-based options these days). One analysis found that soy isoflavones (that is a unique antioxidant found in soy) helped significantly reduce total cholesterol and bad LDL cholesterol. Try switching up your cream for soy in your coffee, throwing some tofu into a stir-fry, and adding edamame to your salads or soups.

Plant-Based Fats

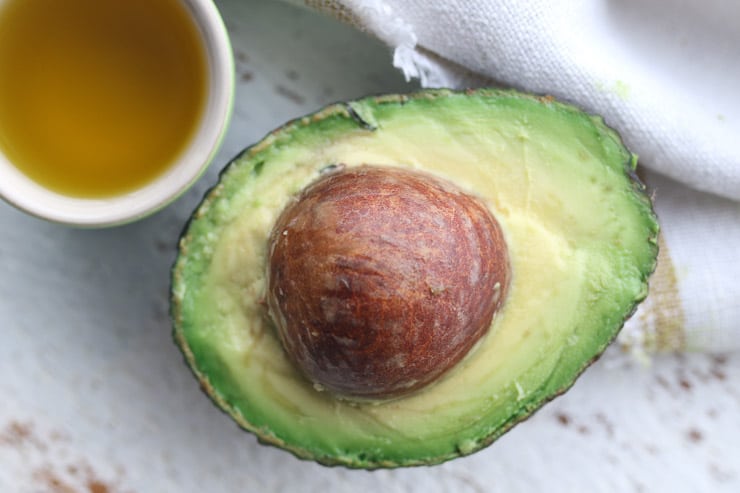
Avocado and oil as part of a heart healthy diet.

Thanks to the fascination with the heart healthy Mediterranean diet, we know that foods like extra virgin olive oil and avocados contain those really healthy monounsaturated fats we want to include in abundance. One study found that those who consumed the most olive oil, for example, were 35% less likely to develop heart disease. Another study found that those who ate avocados regularly were half as likely to develop metabolic syndrome (a cluster of conditions that increase your risk of heart disease, stroke and type 2 diabetes). Not a fan of avocados or olive oil? You can get your monounsaturated fat fix from sneaking in lots of nuts, olives, and seeds.

Green Tea

Birds eye view of a white mug containing green tea as one of the best foods for heart health.

Not only is matcha anything super trendy right now, but it’s a staple for a healthier heart. Thanks to its polyphenol and catechin antioxidants, higher intakes of green tea has been associated with significantly lower levels of LDL and total cholesterol. If you’re not into replacing your morning joe with tea, you can also mix matcha powder into oatmeal, smoothies, or desserts!

Bottom Line on the Best Foods for Heart Health

There’s nothing magic about keeping your heart healthy – it’s really all about getting lots of fibre rich whole grains, colourful veggies, lean (often plant based) proteins and healthy fats. Hopefully this post gave you a bit of inspiration that you can make real meaningful changes without needing to give up your favourite meals.

More Blog Posts You Might Like

Want to learn more about nutrition and heart health? Read these next:

  • Red Wine, Chocolate and Tea for Heart Health – Myth or Fact?
  • Quick Heartburn Relief | Tips to Avoid the Holiday Heartburn and Indigestion
  • Does Saturated Fat Cause Heart Disease and Is Coconut Oil Healthy?
  • Does Milk Cause Heart Disease? Truth About Dairy and Heart Health

Which of these heart healthy foods is your favourite? How do you like incorporating them into your day? Leave me a comment!

Disclaimer: This post was developed in paid partnership with General Mills, however, all opinions are genuine.

Abbey Sharp

Abbey Sharp is a Registered Dietitian (RD), regulated by the Ontario College of Dietitians. She is a mom, YouTuber, Blogger, award winning cookbook author, media coach specializing in food and nutrition influencers, and a frequent contributor to national publications like Healthline and on national broadcast TV shows.
www.abbeyskitchen.com/about-abbey/

Last Updated April 30, 2023. Published April 14, 2023 By Abbey Sharp 15 Comments

Best Apple Crisp Recipe with Ginger and Granola Crumble

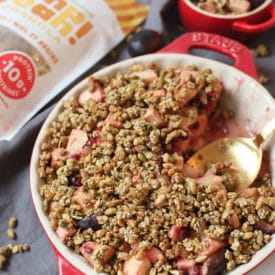
Granola fruit crisp in a red casserole dish.

DISCLAIMER: This post was developed in sponsored partnership with Manitoba Harvest , however, as always, all opinions are genuine.

This is the best apple crisp recipe that I make on repeat. Full of ginger and topped with a granola crumble, its an easy lower sugar, high protein breakfast your family is going to love.

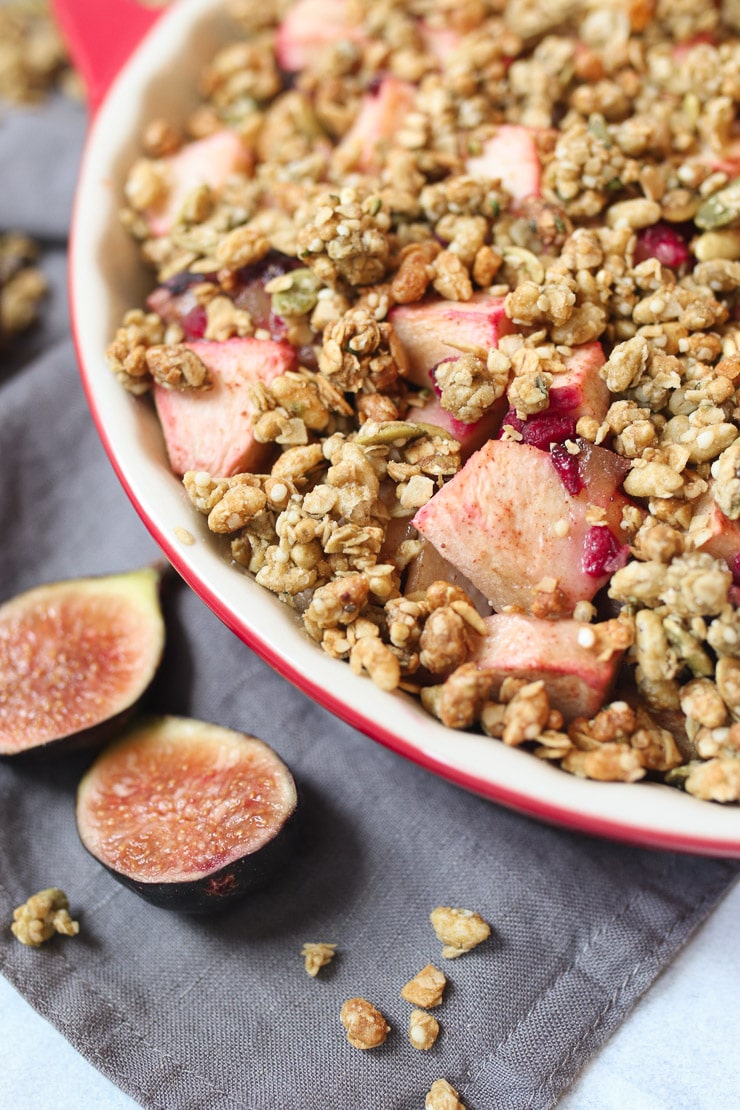
Close up of the best apple crisp recipe with ginger.

I don’t know about you, but I want to live in a world where I can have something that tastes like dessert for breakfast every day. I get that a lot of us are always in a rush in the morning, and so we often think that anything even remotely healthier than a donut is a win. I also understand that most people assume that baking something is a crazy time consuming task that should be relegated to our weekend to-do list. But I want to change that today because this tired mama needs something tasty to wake up to every day.

I guess my mom set the bar for breakfast pretty high. When I was a kid, my mom used to make mundane Monday’s extra special by baking us her famous baked apples for breakfast. It was super special to us at the time as we felt like we were getting to have dessert before noon, but I realize now that it was literally just a cored apple filled with store-bought granola, brown sugar and butter. It was a super fast, simple and healthy breakfast, but it made the whole house smell divine and we looked forward to getting through the weekends to have a taste.

This week I decided I would take a tip out of my mama’s book and whip up a plant-based version based on the same concept as my easy breakfast vegan ginger apple crisp with granola crumble. Looks impressive, tastes delish, but it’s actually surprisingly easy and nourishing. This is the best apple crisp recipe that perfect captures those slow weekend mornings.

Table of contents

  • Why This Recipe Works
  • Key Ingredients
  • How To Make This Recipe
  • Expert Tips
  • Recipe FAQs
  • More Recipes You Might Like

Why This Recipe Works

If you’ve never had apple crisp for breakfast before, maybe you need a little extra convincing. This is the best apple crisp recipe for a handful of reasons:

  • Filled with fruit to start your day
  • Omega-3 healthy fats
  • Warming and cozy
  • Plant-based

Key Ingredients

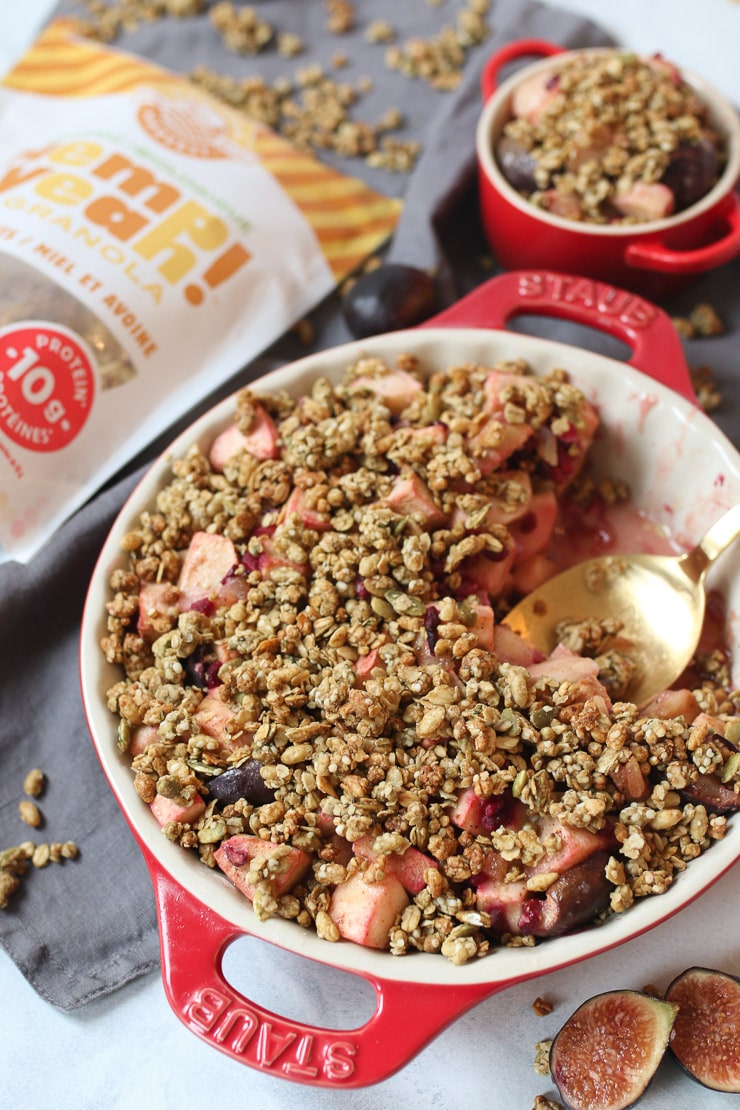
A gold spoon sitting in a red casserole dish of the best apple crisp recipe.
  • Apples and pears: These fruits make a great base for crisps because of their subtle sweetness and softer yet firm texture as they cook down. Of course, you can always use just one or the other if that’s what you have on hand.
  • Pomegranate arils: Otherwise known as pomegranate seeds, I love these little “jewels” of a fruit for the fresh pop of colour and flavour they bring. They’re also a great source of antioxidants.
  • Figs: Figs are one of my favourite fruits to jazz up a dish. I know they’re not traditionally in a typical apple crisp, but they seriously level it up.
  • Lemon juice: The acidity is key to really draw together all the fruits’ flavours and make them pop.
  • Tapioca starch: This ingredient is important for absorbing all of the juices as the fruits cook down. No one likes a soggy crisp. You can also swap for corn starch.
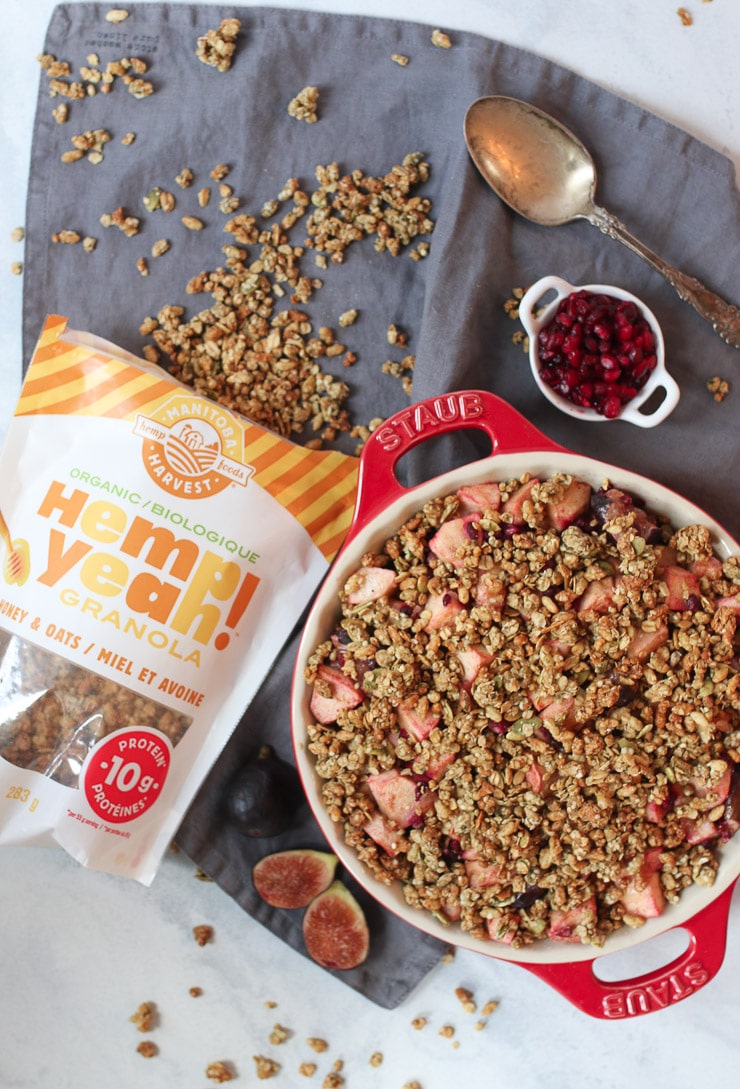
  • Manitoba Harvest Hemp Yeah! Honey & Oats Granola: . I am a huge fan of the New Manitoba Harvest Hemp Yeah! Granola because it packs 10 grams of protein and 3.5 grams of omega 3 and 6, but less than 10 grams of sugar per serving. It’s made with real, simple organic ingredients like pumpkin seeds, chia, quinoa and hemp so it will actually keep you satiated all morning long. If the thought of hemp has you wondering if this recipe is family-friendly, let me tell you, it’s not that kind of hemp. Hemp has been proven to be one of the most nutritionally dense foods on the planet with twice the protein and omegas and less carbs than chia or flax. It’s also super delish in this ginger apple crisp.

How To Make This Recipe

Birds eye view of ginger apple crisp next to a bag of Manitoba Hemp Foods Harvest granola.

Step One: Preheat oven to 350 F and lightly grease a 9” round pie dish or cast iron skillet.

Step Two: In a bowl, mix together the apples, pears, pomegranate arils, figs, ginger, butter, lemon, tapioca or corn starch, nutmeg, cinnamon, salt and maple syrup, if using. Pile into the dish, cover with foil and bake for 25 minutes.

Step Three: Remove the foil and allow to bake for an additional 10-15 minutes or until the fruit is very tender.

Step Four: Top with the Manitoba Harvest Hemp Yeah! Honey & Oats Granola and serve warm.

Expert Tips

Think you don’t have time to bake in the morning? Think again. This recipe throws together any fruit you have in the house (right now, in the dead of winter it’s apples and pears, but you can totally use frozen berries, too).

This recipe is also totally make ahead friendly. I bake up the fruit the night before, warm it up in the microwave, and then top it with the granola in the last minute so it stays nice and crisp. In my version, I use the Honey and Oats flavour, but the Blueberry or Dark Chocolate would be equally tasty. You can find them all in major grocery stores or on Amazon as I do (when you’re a Canadian mom in a terrible winter, you buy EVERYTHING online).

Recipe FAQs

Is this recipe gluten-free?

Unfortunately not, but you can easily make it gluten-free by using your favourite gluten-free granola.

How sweet is this apple crisp?

With the natural sweetness from the fruit and the sweetness from the granola, I think it’s just perfect without being too much. I personally like to keep this apple crisp breakfast appropriate so I actually don’t think it needs any extra sugar but if your apples aren’t super sweet and you want a little extra sweetness, then of course, add a little maple in there.

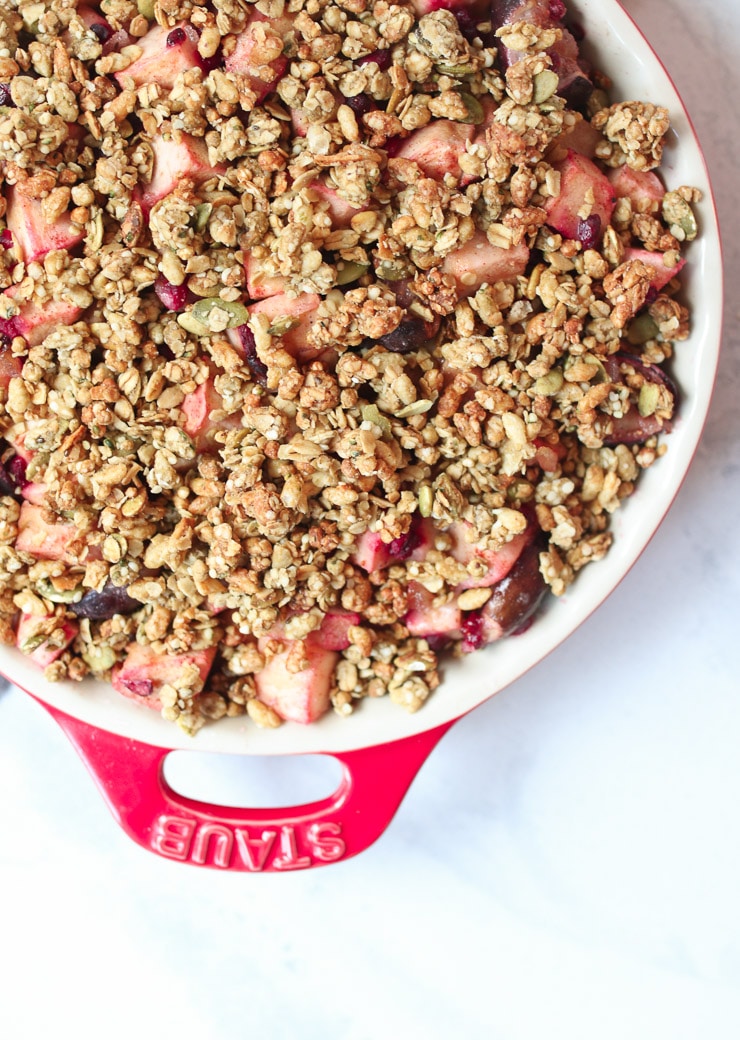
Close up of ginger apple crisp with apples and figs.

More Recipes You Might Like

If you liked this ginger apple crisp recipe, you’ll be sure to enjoy these others!

  • Vegan Sweet Potato Apple Crisp
  • Cherry Crisp Recipe with Chocolate Chips (Vegan and Gluten Free)
  • Pear Crisp with Oats and Ginger (Gluten Free)
  • Slow Cooker Vegan Blueberry Peach Crisp

Now lovelies, I want to know- what are your favourite weekend morning breakfasts? Have you tried my ginger apple crisp yet? Let me know!

A gold spoon sitting in a red casserole dish containing granola fruit crisp.
Print Recipe
5 from 2 votes

Best Apple Crisp Recipe with Ginger and Granola Crumble

This is the best apple crisp recipe that I make on repeat. Full of ginger and topped with a granola crumble, its an easy lower sugar, high protein breakfast your family is going to love.
Prep Time15 minutes mins
Cook Time40 minutes mins
Total Time55 minutes mins
Course: Breakfast
Cuisine: American, Canadian
Servings: 4 – 6 people
Calories: 411kcal
Author: Abbey Sharp

Ingredients

  • 3 apples peeled and diced
  • 2 pears peeled and diced
  • 1/3 cup pomegranate arils
  • 1 cup halved figs
  • 2 tbsp minced candied ginger
  • 2 tbsp vegan butter melted
  • 2 tsp lemon juice
  • 3 tbsp tapioca starch or corn starch
  • ¼ tsp ground nutmeg
  • ½ tsp ground cinnamon
  • ¼ tsp salt
  • Optional: 2 tbsp maple syrup
  • 1 ¼ cup Manitoba Harvest Hemp Yeah! Honey & Oats Granola

Instructions

  • Preheat oven to 350 F and lightly grease a 9” round pie dish or cast iron skillet.
  • In a bowl, mix together the apples, pears, pomegranate arils, figs, ginger, butter, lemon, tapioca or corn starch, nutmeg, cinnamon, salt and maple syrup, if using. Pile into the dish, cover with foil and bake for 25 minutes.
  • Remove the foil and allow to bake for an additional 10-15 minutes or until the fruit is very tender.
  • Top with the Manitoba Harvest Hemp Yeah! Honey & Oats Granola and serve warm.

Nutrition

Calories: 411kcal | Carbohydrates: 68g | Protein: 7g | Fat: 14g | Saturated Fat: 3g | Sodium: 204mg | Potassium: 516mg | Fiber: 11g | Sugar: 38g | Vitamin A: 380IU | Vitamin C: 13.2mg | Calcium: 54mg | Iron: 2mg
Abbey Sharp

Abbey Sharp is a Registered Dietitian (RD), regulated by the Ontario College of Dietitians. She is a mom, YouTuber, Blogger, award winning cookbook author, media coach specializing in food and nutrition influencers, and a frequent contributor to national publications like Healthline and on national broadcast TV shows.

www.abbeyskitchen.com/about-abbey/

Last Updated April 8, 2023. Published April 10, 2023 By Abbey Sharp 4 Comments

Vegan Oatmeal Cookies with Banana (Vegan, Healthy, Toddler Friendly)

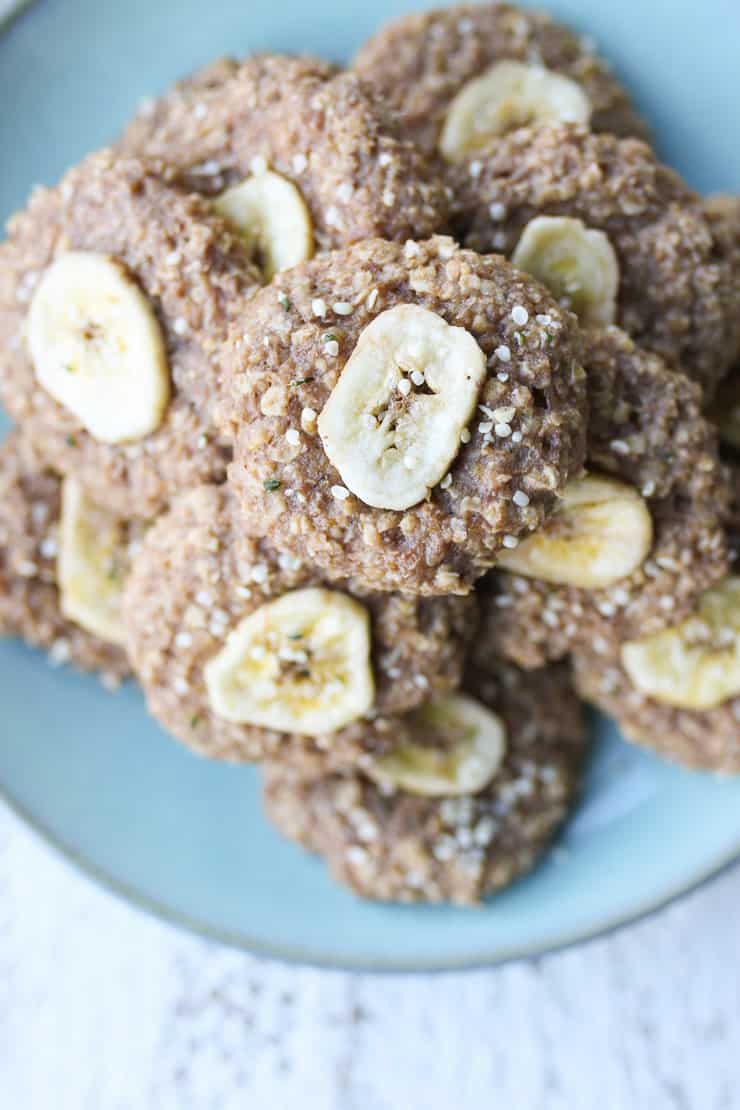
birds eye view of banana oatmeal cookies on a blue plate

These are the best vegan oatmeal cookies to use up ripe bananas! They are toddler friendly, and healthy enough to eat for breakfast! Make a batch and enjoy it throughout the week as an easy grab and go snack.

Birds eye view of banana vegan oatmeal cookies on a blue plate.

There’s nothing my son, E, loves more than a good cookie. To keep things on the healthier side and not deny him of cookies, I always offer him these easy homemade banana vegan oatmeal cookies. He loves these soft homemade ones! They don’t take long to make and I’ll pop them in the freezer so we’ll always have some on hand.

Table of contents

  • Why This Recipe Works
  • Key Ingredients
  • How to Make This Recipe
  • Expert Tips
  • Recipe FAQs
  • More Recipes You Might Like

Why This Recipe Works

While I have no qualms about offering a full on gourmet chocolate chip cookie made with white flour, white sugar, butter, and tons of chocolate, if I can throw some nutritious add-ins there, AMAZING. That’s where these banana oatmeal cookies come in. They are…

  • Made with less sugar
  • Chock full of nutritious ingredients
  • Easy to make
  • Dairy-free
  • Vegan
  • Totally big boy E approved!

Key Ingredients

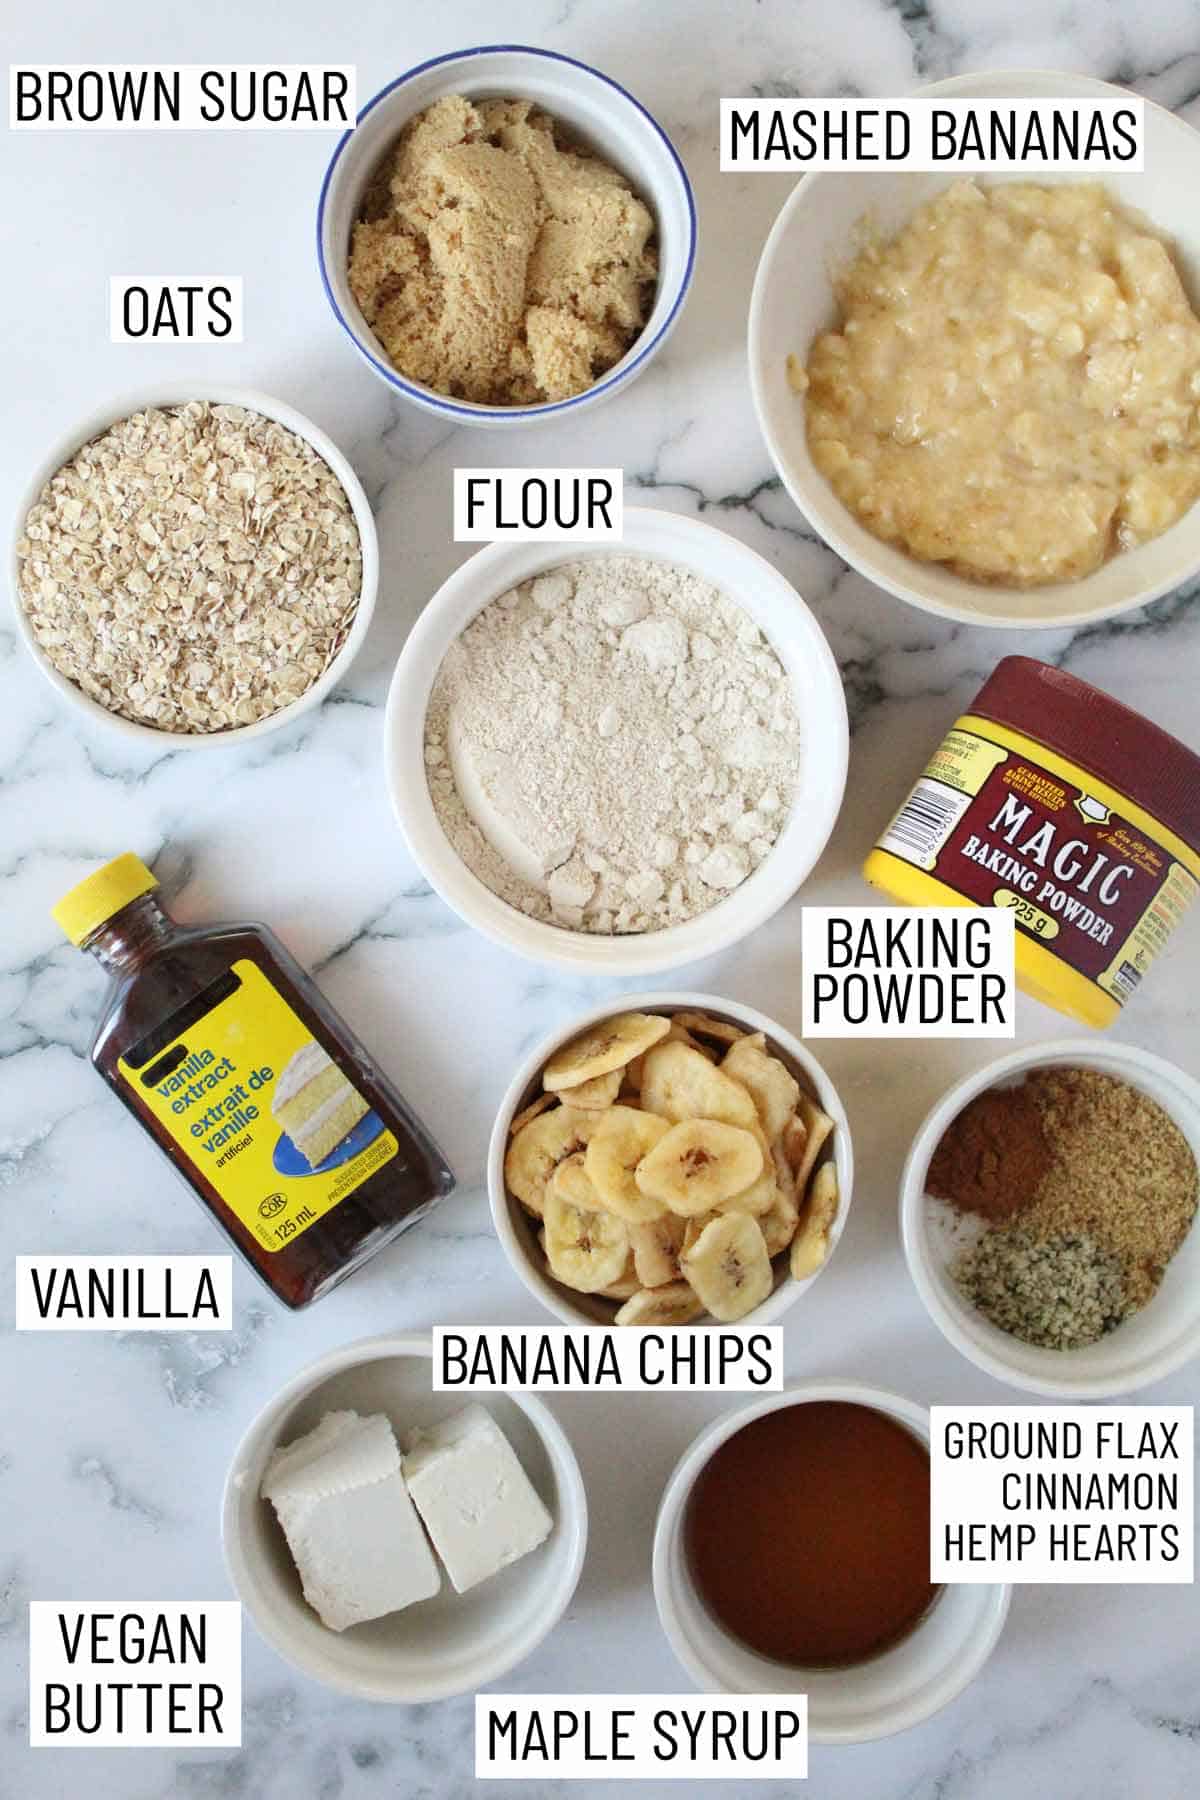
Ingredients needed to make banana vegan oatmeal cookies.

Ground flax — Loaded with omega 3s, protein and fibre, flax is a fantastic add-in for making baked goods more nutritious. In this recipe it is mixed with water to make a “flax egg” which is a vegan egg replacement.

Vegan butter — If you’re not vegan, feel free to use regular softened butter.

Brown sugar and maple syrup — I love the molasses like flavour of brown sugar and the aromatics of maple. These sweeteners are perfect in this recipe because they keep these cookies chewy and moist.

Mashed ripe banana — I love adding banana to baked goods because it’s like a natural sweetener so I can cut back on added sugar. I basically always buy extra bananas and as soon as they get really speckled, I chop them up and throw them into a freezer bag for recipes like this.

Oats — I adore a good oatmeal cookie and I find the quick cookie oats are tender enough but still give you that chewy texture. I also love that oats are loaded with soluble fibre and provide nutritious energizing carbs (there’s a reason I bake with them so much). If you’re gluten free, make sure to use gluten free oats.

Whole wheat flour — I prefer to use whole wheat all purpose flour for the extra fibre, but in a pinch you can totally use all purpose flour.

Hemp hearts — You know I love hemp hearts for the omega 3, fibre, and protein. They make perfect easy “sprinkles” for any cookie or muffin recipe.

How to Make This Recipe

Set of three photos showing how to mix the ingredients together.

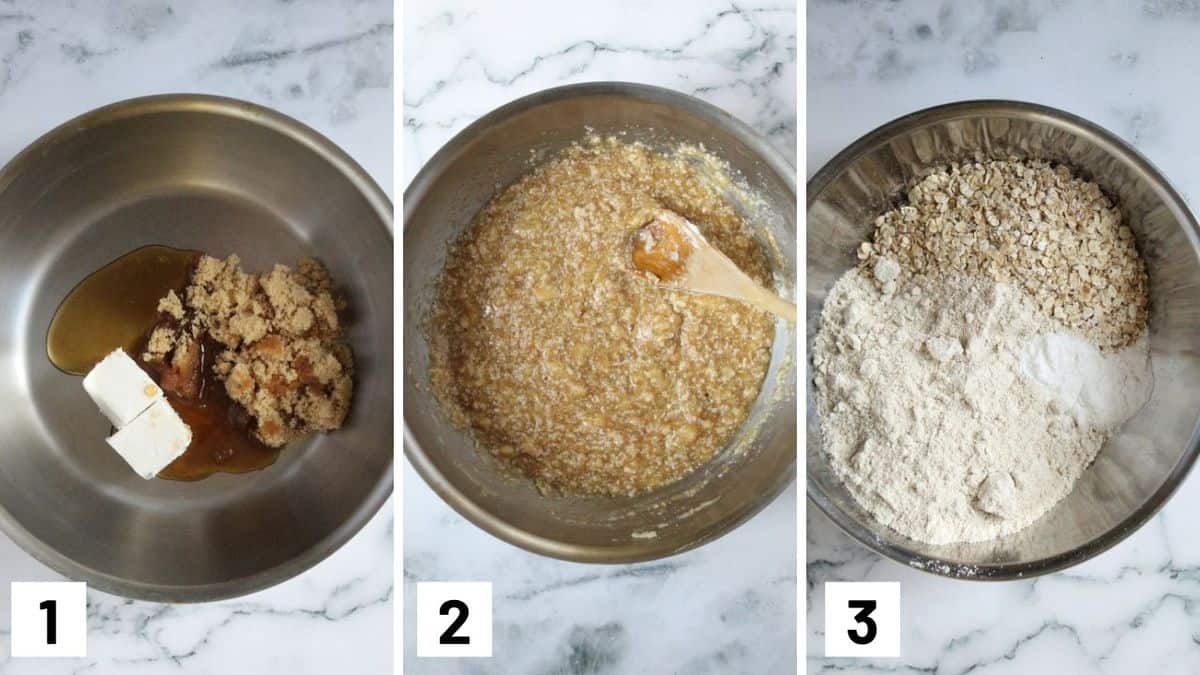
Step 1: Mix together the 1 tbsp flax with water in a small ramekin and sit in the fridge for 15 minutes to set as a flax egg. Then to a bowl, add the butter, brown sugar and maple to a medium bowl and beat until well combined.

Step 2: Add in the banana, vanilla, and flax egg and beat for another 30 seconds until combined.

Step 3: In another bowl, mix the oats, flour, baking powder, cinnamon and salt.

Set of two photos showing the cookie batter mixed and turned into cookies with a banana on top.

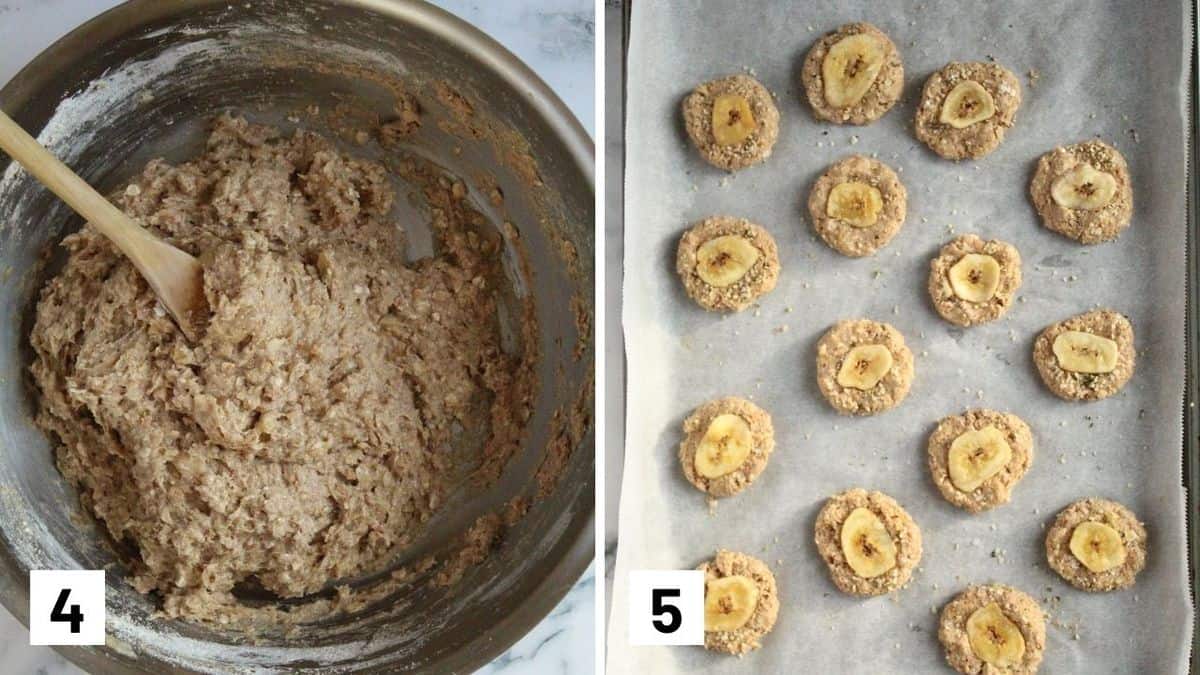
Step 4: Add the wet to the dry ingredients and stir to combine. Refrigerate the dough for 1 hour. Meanwhile, preheat the oven to 350 F and line a large baking sheet with parchment paper.

Step 5: Roll a heaping tablespoon into balls and flatten until they’re about 2 inches in diameter. Sprinkle with hemp hearts and press a banana chip in the centre (if using). Bake for 10-12 minutes until lightly browned on the bottom. Allow them to cool completely before transferring them to an air-tight container.

Expert Tips

If you do not have flax, you can try using a chia egg instead. I prefer flax because it doesn’t discolour the cookies but chia egg is a perfectly acceptable substitute.

To freeze these banana vegan oatmeal cookies, allow them to cool to room temperature first. Once your oatmeal cookies have fully cooled, transfer them on a baking sheet to the freezer to solidify for 30 minutes. Then you can transfer them to a freezer bag for up to 4 months. When you want to have a cookie, just pop it in the microwave for 15-20 seconds until thawed through.

For an easy grab and go breakfast, I would serve 1-2 cookies with some fruit and a hard-boiled egg.

If you are a huge fan of chocolate chips, you are more than welcomed to mix a handful in, or press 1 or 2 chips into each cookie!

Recipe FAQs

What is the texture and flavour of these cookies?

These are soft and chewy, with a delicate banana flavour that is not too sweet. Perfect for kids but also for adults who are looking for a mid-morning pick-me-up!

How do I prevent my toddler from being cookie obsessed?

I get this question often about toddlers and sweets, and how to balance these “fun foods” with other nutritious meals and snacks. The first step is to normalize them, and that means offering your toddler cookies and other desserts regularly. I know, that seems counterintuitive if the goal is to make sure they’re not eating ALL the cookies ALL the time. But it’s important that cookies don’t become such a novelty that they go hog wild the moment they get one. 

I also recommend offering a dessert like this at meal time and allowing your kid to eat their dessert and main meal in whatever order they want. The caveat to this is that there is only one portion of the dessert, while they can have more of the other items on the table. 
Another idea is to occasionally offer UNLIMITED cookies at a snack time. The important piece here is that the snack time is far enough away from the main meal that it doesn’t compete with other nutritious foods at the meal. 

If you want a little more information on these tactics, check out my post on sugar here, and my articles on the division of responsibility here and here. And don’t forget to join my mom and feeding Facebook group here.

Do I need to make these vegan?

If you are not vegan or dairy free, you can absolutely just use a regular egg or dairy butter. However, I do love using a flax egg for the extra omega 3s, fibre and protein.

Can I make these gluten-free for a child with a wheat allergy, or gluten intolerant?

I haven’t tried making these with gluten-free flour, but you could experiment with a gluten-free or wheat free flour and of course, use a gluten-free oat brand.

How should I store these so they don’t go stale?

These vegan oatmeal cookies will keep in an air tight container for about 4 days on the counter, but for longer storage, I do suggest freezing them.

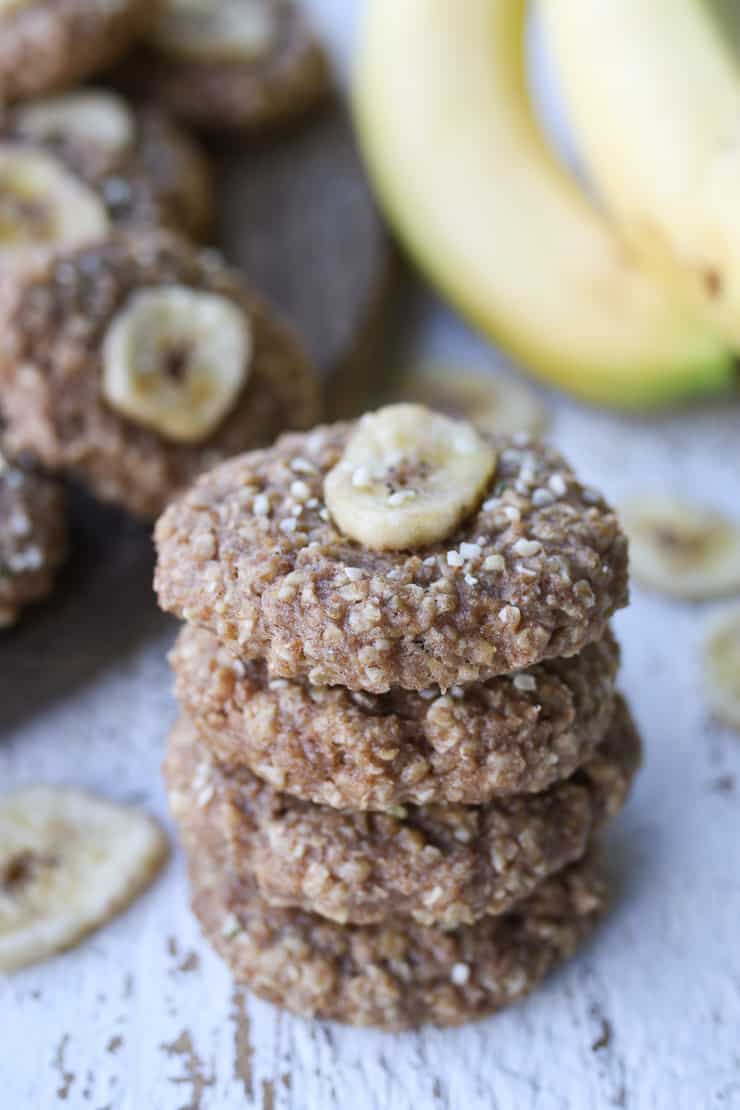
Several vegan oatmeal cookies stacked on top of one another.

More Recipes You Might Like

Want more easy cookie recipes like this banana oatmeal cookie recipe? Try these reader favourites:

  • Vegan Salted Toffee Cookies 
  • Healthy Peanut Butter Cookies (Vegan, GF)
  • Lemon Poppyseed Cookies (Vegan)
  • Carrot Cake Cookies (Vegan, GF)

What are your go-to healthy cookie recipes for your kids and toddlers? Leave me a comment below with your go-to toddler approved cookies.

birds eye view of banana oatmeal cookies on a blue plate
Print Recipe
5 from 6 votes

Vegan Oatmeal Cookies with Banana (Vegan, Healthy, Toddler Friendly)

These are the best vegan oatmeal cookies to use up ripe bananas! They are toddler friendly, and healthy enough to eat for breakfast! Make a batch and enjoy it throughout the week as an easy grab and go snack.
Prep Time1 hour hr
Cook Time15 minutes mins
Total Time1 hour hr 15 minutes mins
Course: Breakfast, Snack
Cuisine: American
Servings: 20 cookies
Calories: 80kcal
Author: Abbey Sharp

Ingredients

  • 1 tbsp ground flax
  • 2½ tbsp water
  • ¼ cup vegan butter softened
  • ¼ cup plus 1 tbsp brown sugar packed
  • 2 tbsp maple syrup
  • ½ cup mashed ripe banana about 1 large banana
  • 2 tsp vanilla extract
  • 1 cup quick cooking oats
  • ¾ cup whole wheat flour
  • 1½ tsp baking powder
  • 1 tsp cinnamon
  • ¼ tsp salt
  • 2 tsp hemp hearts
  • 20 banana chips optional

Instructions

  • Mix together the 1 tbsp flax with water in a small ramekin and sit in the fridge for 15 minutes to set as a flax egg.
  • Add the butter, brown sugar and maple to a medium bowl and beat until well combined. Add in the banana, vanilla and  flax egg and beat for another 30 seconds until combined.
  • In another bowl, mix the oats, flour, baking powder, cinnamon and salt. Add the wet to the dry ingredients and stir to combine.
  • Refrigerate the dough for 1 hour.
  • Preheat to 350 F and line a large baking sheet with parchment paper.
  • Roll a heaping tablespoon into balls and flatten until they’re about 2 inches in diameter.
  • Sprinkle with hemp hearts and press a banana chip in the centre (if using).
  • Bake for 10-12 minutes until lightly browned on the bottom. Allow them to cool completely before transferring them to an air-tight container.

Notes

  • If you do not have flax, you can try using a chia egg instead. I prefer flax because it doesn’t discolour the cookies but chia egg is a perfectly acceptable substitute.
  • To freeze these banana oatmeal cookies, allow them to cool to room temperature first. Once your oatmeal cookies have fully cooled, transfer them on a baking sheet to the freezer to solidify for 30 minutes. Then you can transfer them to a freezer bag for up to 4 months. When you want to have a cookie, just pop it in the microwave for 15-20 seconds until thawed through.
  • For an easy grab and go breakfast, I would serve 1-2 cookies with some fruit and a hard-boiled egg.
  • If you are a huge fan of chocolate chips, you are more than welcomed to mix a handful in, or press 1 or 2 chips into each cookie!

Nutrition

Calories: 80kcal | Carbohydrates: 12g | Protein: 2g | Fat: 3g | Saturated Fat: 1g | Sodium: 49mg | Potassium: 106mg | Fiber: 1g | Sugar: 5g | Vitamin A: 114IU | Vitamin C: 1mg | Calcium: 27mg | Iron: 1mg
Abbey Sharp

Abbey Sharp is a Registered Dietitian (RD), regulated by the Ontario College of Dietitians. She is a mom, YouTuber, Blogger, award winning cookbook author, media coach specializing in food and nutrition influencers, and a frequent contributor to national publications like Healthline and on national broadcast TV shows.
www.abbeyskitchen.com/about-abbey/

Last Updated April 2, 2023. Published April 7, 2023 By Abbey Sharp 2 Comments

Tofu Chicken Nuggets with Everything Bagel Spice (Vegan)

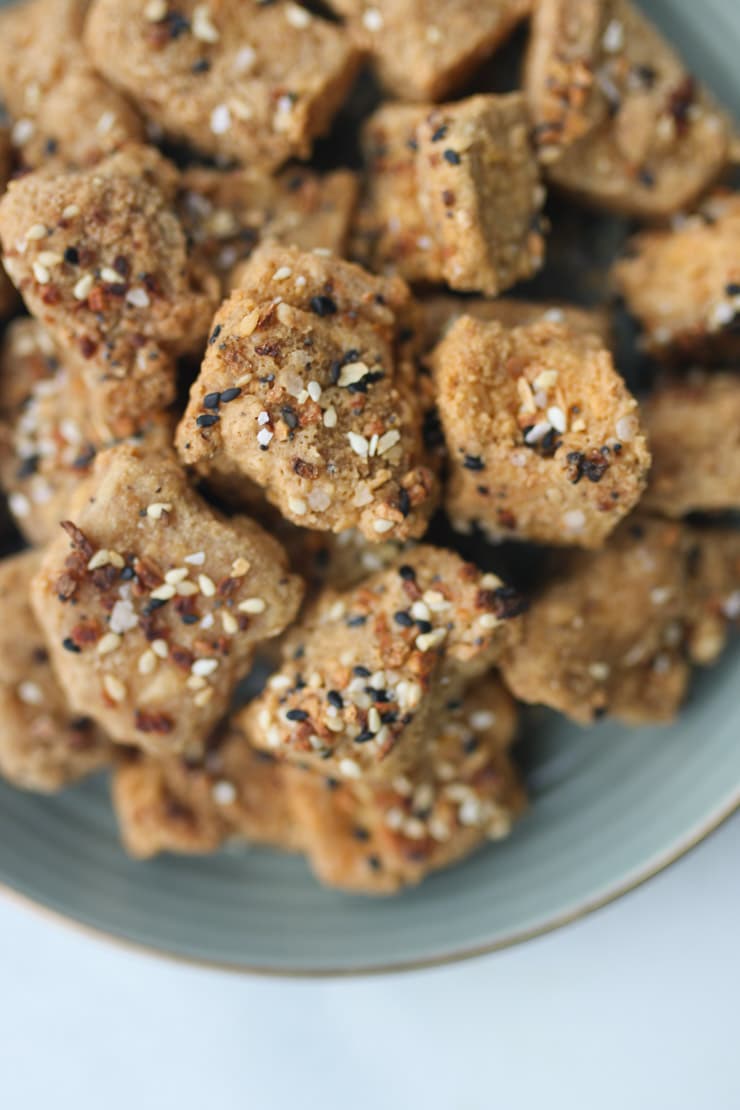
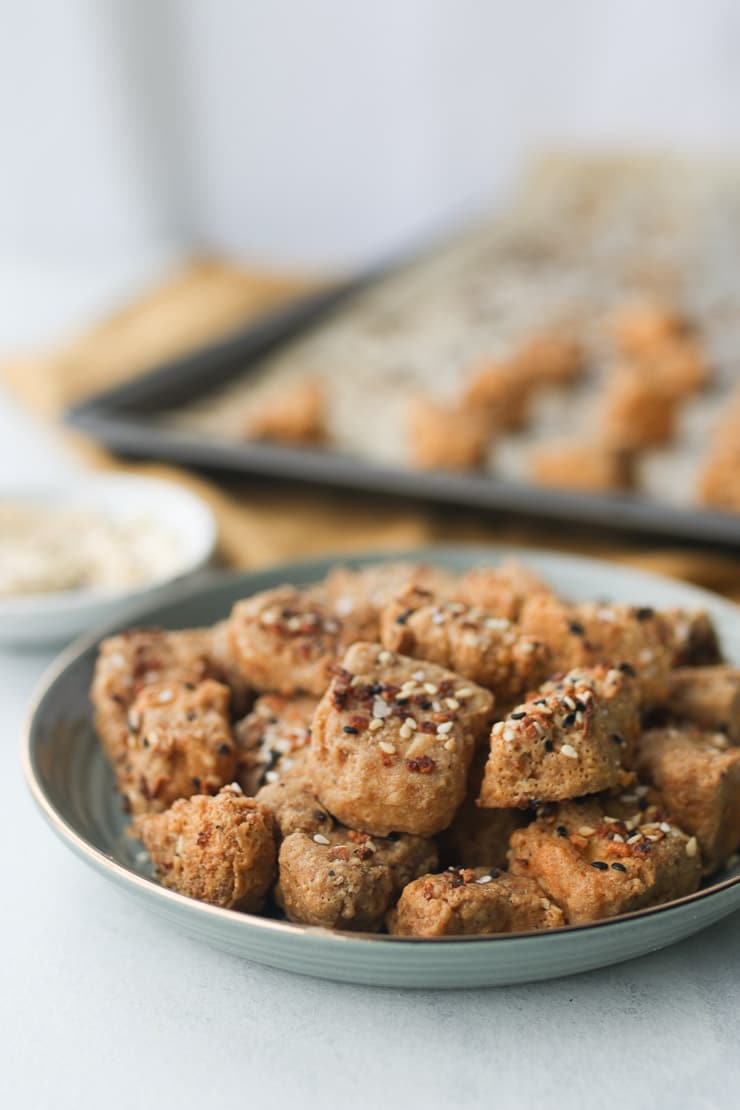
Tofu nuggets on a plate topped with everything bagel spice.

 These tofu chicken nuggets with Everything Bagel Spice are a delicious gluten free, vegetarian dinner that’s easy and perfect for kids and adults alike! Baked and not fried, they’re a great alternative to store-bought nuggets.

Plate filled with tofu nuggets.

A few weeks ago, I was posting Baby E’s dinner as per usual and it included an experimental batch of tofu chicken nuggets. I was shocked at how many people responded requesting the recipe so I thought I would perfect them, write them up, and of course make them extra delicious with everything bagel spice. I even added a tahini dip because my kid loves to dip. The result is a crispy baked vegan tofu nugget recipe that is brimming with everything bagel spice so they’re perfect for adults and kids!

Table of contents

  • Why This Recipe Works
  • Key Ingredients
  • How to Make This Recipe
  • Expert Tips
  • Recipe FAQs
  • More Recipes You Might Like

Why This Recipe Works

These tofu chicken nuggets are shockingly easy to make. On top of that, they’re:

  • gluten-free
  • vegan friendly
  • crispy and crunchy
  • super flavourful
  • no added sugar

Key Ingredients

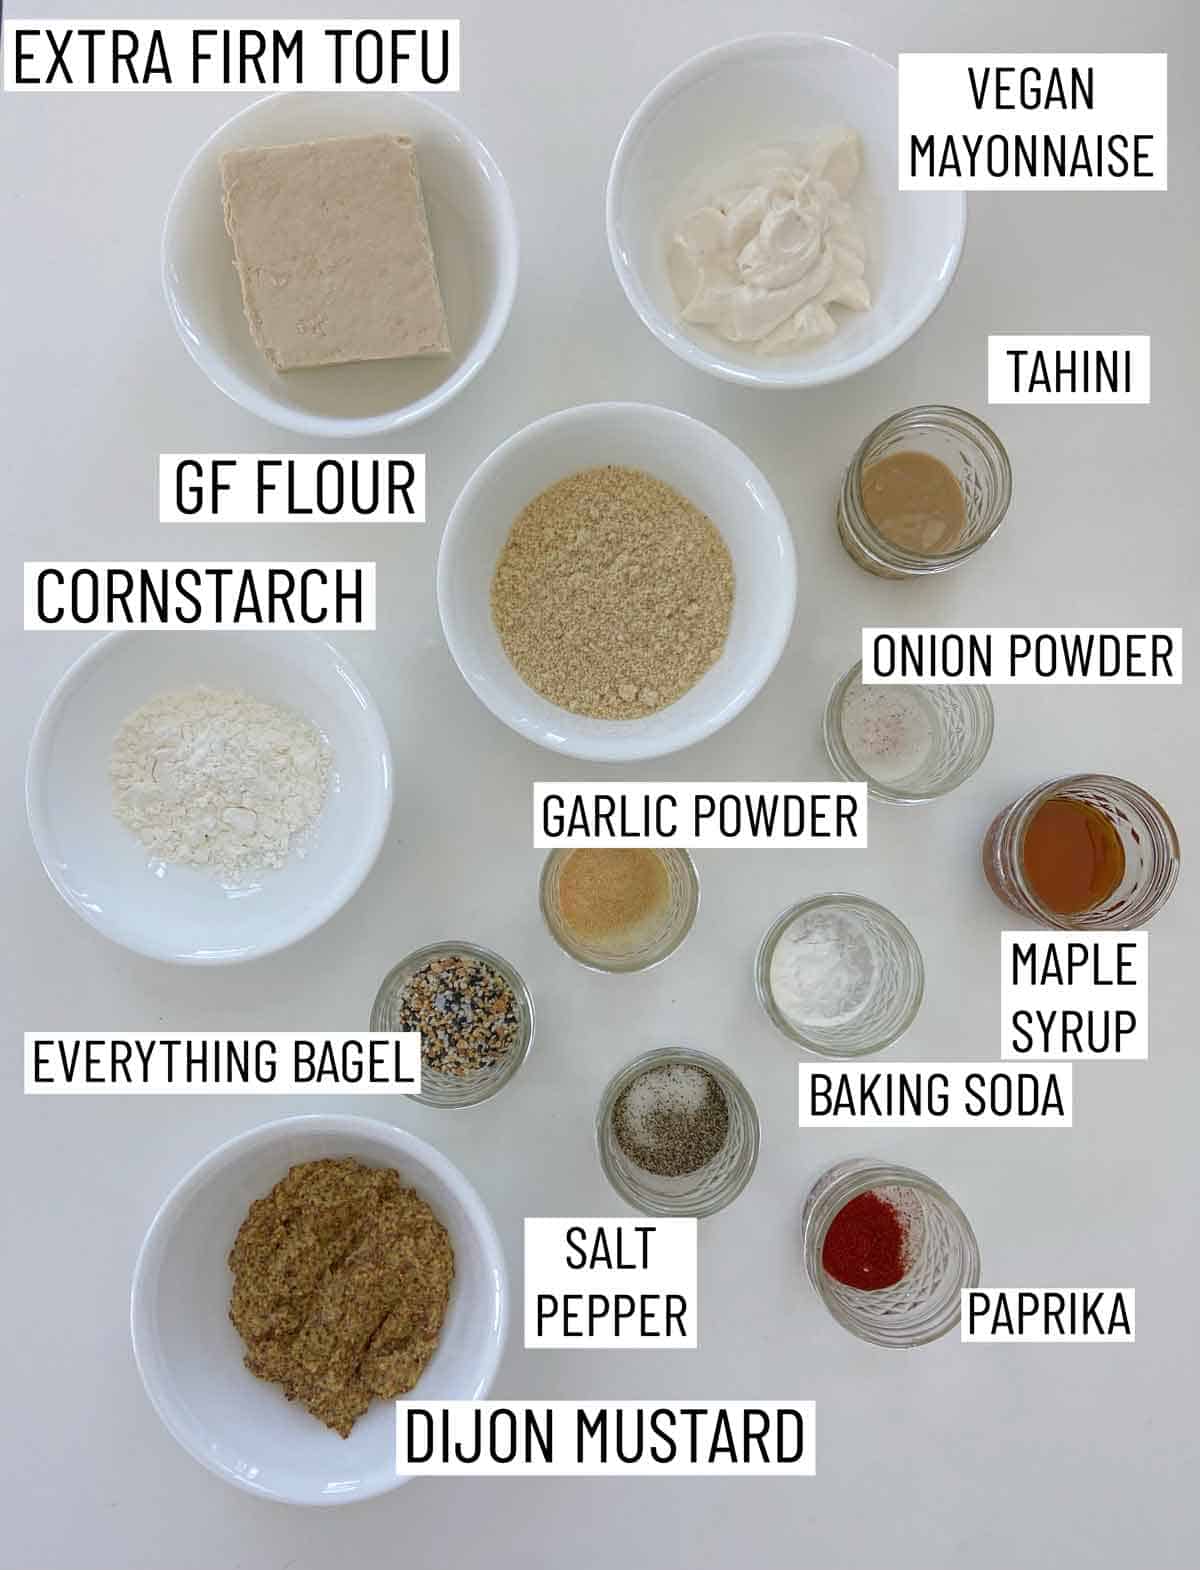
Ingredients needed to make Baked Tofu Nuggets.

Extra firm tofu — you’ll need extra firm tofu for this tofu chicken nuggets recipe. Anything else and it’ll fall apart bread you can bread and bake them!

Gluten free flour and cornstarch — to get out nuggets nice and crispy on the outside, we coat the tofu in gluten free flour and cornstarch. If you don’t need this recipe to be gluten free, you can use regular flour.

Dijon mustard — instead of using egg to get our coating to stick to the tofu, Dijon mustard is used instead. It adds so much flavour to the tofu nuggets.

Everything bagel spice — you can use a storebought mix or make your own! I’ll include a DIY version in the tips section if you don’t have any at home.

How to Make This Recipe

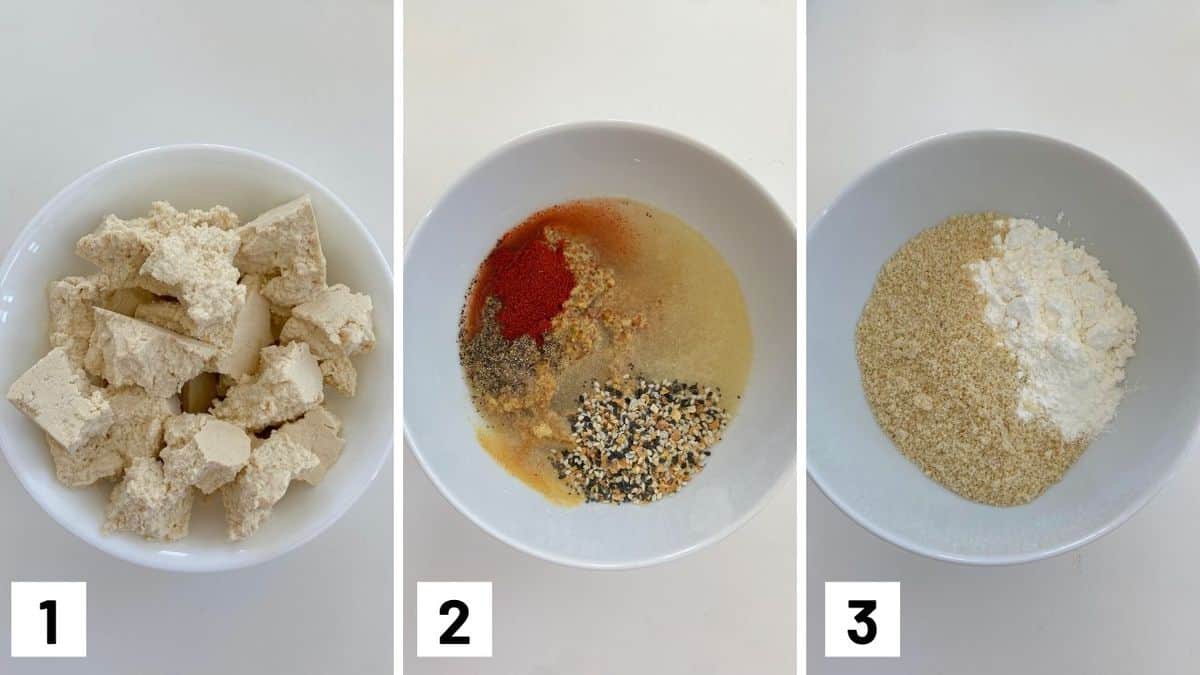
Set of three photos showing ripped tofu, seasoning mix, and flour mixture.

Step 1: Preheat oven to 425 F. Place a baking sheet in the oven to preheat for 10 minutes. Rip the tofu into cubes and then layer some paper towel onto a baking sheet, top with the tofu, add another layer of paper towel and press down with heavy items (books, pots etc.)

Step 2: Mix together the flour, cornstarch and baking soda in one bowl.

Step 3: In another bowl, mix together the mustard, water, garlic, onion, salt, pepper, paprika, and everything bagel spice.

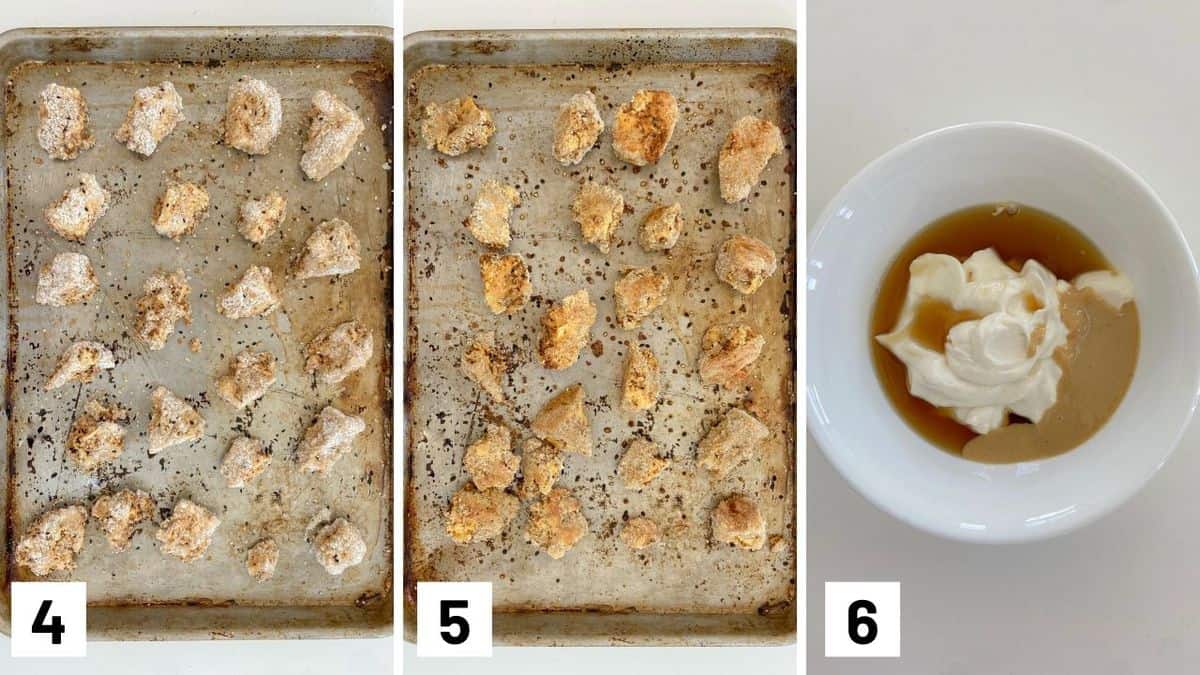
Set of three photos showing baked tofus before and after baking, and ingredients for the dipping sauce.

Step 4: Dip the tofu in the mustard mixture, then in the cornstarch. Remove the pan from the oven and spritz with olive oil. Add the tofu and spray the tofu nuggets generously with olive oil.

Step 5: Sprinkle with additional everything bagel spice and bake for 12 minutes, flipping (and spritzing) half way through until golden brown and crispy.

Step 6: To make the dip, mix together the mayonnaise, tahini, maple syrup and salt and pepper, to taste. Serve with the nuggets and enjoy!

Expert Tips

To get that authentic nugget like shape, I like to rip, not cut, my tofu into bite size pieces. If you prefer to cut them into equal cubes, you’re welcomed to do so.

To make your own everything bagel spice mix, simply combine:

  • 1 tbsp poppyseeds
  • 1 tbsp sesame seeds
  • 1 tbsp dried garlic flakes
  • 1 tbsp dried onion flakes
  • 1 tsp sea salt

Don’t want to bake these? You can air fry them as well! Air fry at 400F for 12 minutes instead, shaking the basket at the half way point.

Recipe FAQs

Can I make these everything bagel vegan nuggets in advance and rewarm them?

Yes, you can and then store them in the fridge between pieces of parchment paper and blast them in a 400 F oven for 10 minutes until golden brown and crispy again.

What if I want to make regular tofu chicken nuggets?

You can use regular all purpose flour in place of gluten free if you don’t want these vegan tofu nuggets to be fully gluten free.

Can I use this batter on chicken to make everything bagel chicken nuggets?

You can turn these into everything bagel chicken nuggets by using cubbed chicken breast, but you may need to keep them in the oven for a few extra minutes depending on their size just until the inside reaches 165 F.

Can I make these plain for kids who don’t like everything bagel spice?

Yes! If your kids are picky about spices like garlic, omit the everything bagel spice in these vegan tofu nuggets and just use the garlic powder, paprika, and onion powder for a more classic chicken nugget flavour.

Nuggets topped with seasoning on a teal plate.

More Recipes You Might Like

If you’re looking for more recipes to use your everything bagel seasoning in, try these recipes!

  • EVERYTHING BAGEL TOFU NUGGETS 
  • VEGAN EVERYTHING BAGEL AVOCADO BEAN SANDWICH 
  • EVERYTHING BAGEL SALAD
  • BREAKFAST KETO BAGELS WITH EGGS WITH EVERYTHING BAGEL SEASONING

Tell me, are your kids nugget fans? If you’ve made these tofu chicken nuggets before, let me know in a comment down below!

Print Recipe
4.84 from 6 votes

Tofu Chicken Nuggets with Everything Bagel Spice (Vegan)

 These tofu chicken nuggets with Everything Bagel Spice are a delicious gluten free, vegetarian dinner that's easy and perfect for kids and adults alike! Baked and not fried, they're a great alternative to store-bought nuggets.
Prep Time20 minutes mins
Cook Time12 minutes mins
Total Time32 minutes mins
Course: Dinner, Lunch
Cuisine: American
Servings: 15 – 17 nuggets
Calories: 89kcal
Author: Abbey Sharp

Ingredients

  • 350 g extra firm tofu
  • ½ cup gluten free flour
  • ¼ cup cornstarch
  • ½ tsp baking soda
  • ½ cup dijon grainy mustard
  • ¼ cup water
  • ½ tsp garlic powder
  • ½ tsp onion powder
  • ¼ tsp salt
  • ¼ tsp pepper
  • ½ tsp paprika
  • 2 tbsp everything bagel spice plus extra for sprinkling

Dipping Sauce

  • 6 tbsp vegan mayonnaise
  • 1 tbsp tahini
  • 2 tsp maple syrup or to taste
  • Salt and pepper to taste

Instructions

  • Preheat oven to 425 F. Place a baking sheet in the oven to preheat for 10 minutes.
  • Rip the tofu into cubes.
  • Layer some paper towel onto a baking sheet, top with the tofu, add another layer of paper towel and press down with heavy items (books, pots etc.)
  • Mix together the flour, cornstarch and baking soda in one bowl.
  • In another bowl, mix together the mustard, water, garlic, onion, salt, pepper, paprika, and everything bagel spice.
  • Dip the tofu in the mustard mixture, then in the cornstarch.
  • Remove the pan from the oven and spritz with olive oil. Add the tofu and spray the tofu nuggets generously with olive oil. Sprinkle with additional everything bagel spice and bake for 12 minutes, flipping (and spritzing) half way through until golden brown and crispy.
  • To make the dip, mix together the mayonnaise, tahini, maple syrup and salt and pepper, to taste. Serve with the nuggets and enjoy!

Video

Notes

  • To get that authentic nugget like shape, I like to rip, not cut, my tofu into bite size pieces. If you prefer to cut them into equal cubes, you’re welcomed to do so.
  • To make your own everything bagel spice mix, simply combine: 1 tbsp poppyseeds, 1 tbsp sesame seeds, 1 tbsp dried garlic flakes, 1 tbsp dried onion flakes, and1 tsp sea salt
  • Don’t want to bake these? You can air fry them as well! Air fry at 400F for 12 minutes instead, shaking the basket at the half way point.

Nutrition

Calories: 89kcal | Carbohydrates: 8g | Protein: 3g | Fat: 5g | Saturated Fat: 1g | Sodium: 218mg | Potassium: 65mg | Fiber: 1g | Sugar: 1g | Vitamin A: 39IU | Vitamin C: 1mg | Calcium: 18mg | Iron: 1mg
Abbey Sharp

Abbey Sharp is a Registered Dietitian (RD), regulated by the Ontario College of Dietitians. She is a mom, YouTuber, Blogger, award winning cookbook author, media coach specializing in food and nutrition influencers, and a frequent contributor to national publications like Healthline and on national broadcast TV shows.

www.abbeyskitchen.com/about-abbey/

Last Updated April 3, 2023. Published April 3, 2023 By Abbey Sharp 9 Comments

Easter Morning Breakfast Pancakes with Mini Eggs (Gluten-Free)

These Mini Eggs Gluten Free Protein Pancakes will become a hit for Easter brunch and every day after that!

These Mini Eggs Protein Pancakes are gluten-free and healthy. Top it with chocolate mousse for the best healthy Easter morning breakfast!

A stack of mini egg pancakes for Easter morning breakfast.

Guys, let’s talk about EVERYONE’S official guilty pleasure- Cadbury Mini Eggs. NO, this post is not sponsored, and YES, I wish it was so that I could have a stockpile of Mini Eggs in my pantry right now. Seriously, I decided to make this recipe just so that I would have a legit excuse to expense a family sized bag of these bad boys. And while I have no qualms about popping these back by the handful a la carte, I figured they would be even more appreciated in these wickedly delicious Mini Eggs Gluten Free Protein Pancakes. Delicious for a healthy Easter morning breakfast option, but honestly, delicious any day of the year when you can find those eggs!!

So as you guys know, I’m kinda obsessed with better for you protein pancakes.  I’ve made ones for St. Paddy’s Day and Valentine’s Day and so much more. I HAD to whip out my base recipe for Easter too!

Table of contents

  • Why This Recipe Works
  • Key Ingredients
  • How To Make This Recipe
  • Expert Tips
  • Recipe FAQs
  • More Recipes You Might Like

Why This Recipe Works

I make these mini egg protein pancakes every year for a couple of reasons:

  • Gluten-free
  • High in protein (37g/serving!)
  • Chocolatey and decadent
  • Loved by my whole family

If your kids are anything like mine, they’ll be looking forward to Easter morning breakfast every year, just for a taste of this recipe!

Key Ingredients

An image of a cut open stack of mini egg pancakes with raspberries and blueberries in between.

These Mini Eggs Gluten Free Protein Pancakes essentially start with a combination of oats, cottage cheese and egg whites. I guess this is what fitness models and people like that would call “clean eats”. I call it a great base for Mini Eggs!!

  • Oats: Use rolled, quick or minute. Make sure they are certified gluten-free if you have Celiac disease or another gluten intolerance.
  • Cottage cheese: Not only is cottage cheese packed with protein, it also makes for the fluffiest pancakes. No cheesy flavour either!
  • Egg whites: These also give our pancakes a nice protein boost.
  • Mini Eggs: These are Mini Egg pancakes, so don’t forget them! Of course, you can always swap them for another Easter chocolate.
  • Cashews: Cashews are the base for the creamiest, dreamiest mousse that I layer between the pancakes. They are a great source of healthy fats and have a bit of protein too.
  • Dates: I like using dates as a sweetener! They have a caramel flavour that pairs well with the rich cashews.
  • Cocoa powder: Chocolate mousse? Sign me up!

How To Make This Recipe

A stack of mini egg pancakes with maple syrup being poured over top for Easter morning breakfast.

Step One: In a blender or food processor, puree the oats, cottage cheese and vanilla. Mix in the egg whites, salt, and baking powder. Fold in the crushed mini eggs.

Step Two: Heat a large non-stick skillet over medium heat, spray with a spritz of vegetable oil and add 1/4 cup of batter at a time.

Step Three: Meanwhile, add the cashews (drained), almond milk, vanilla, dates and cocoa powder to a high power blender. Puree until very smooth.

Step Four: Layer the pancakes with the cashew cream, Mini Eggs, and berries, and serve with maple syrup, if desired.

Expert Tips

Flipping pancakes can be a bit of a mess sometimes! Don’t worry if you end up with some ugly ones- it happens to the best of us. But my top tip for making pretty pancakes is waiting until there are plenty of air bubbles. That’s when you know it’s ready to flip! Having a great non-stick pan also helps.

Recipe FAQs

Are these pancakes Celiac-friendly?

They are gluten-free, so yes! Just make sure your oats are certified gluten-free to avoid risks of cross-contamination.

What makes these pancakes high protein?

The cottage cheese and egg whites add tons of protein.

Can you taste the cottage cheese?

Nope! Cottage cheese has a very mild flavour. Once you factor in the toppings, chocolate mousse and Mini Eggs, you can’t taste the cottage cheese at all.

Close up of mini egg protein pancakes with chocolate mousse and berries.

More Recipes You Might Like

Need more Easter recipes? Give these a try:

  • Rice Krispies Easter Eggs
  • Vegan Lemon Mousse Parfait | Gluten Free Easter Recipe with Aquafaba
  • Mini Egg Granola Cups | No Bake Pantry Staples Recipe for Easter
  • The Best Vegan Easter Recipes

What is your go-to Easter morning breakfast? Have you tried these Mini Egg protein pancakes? Let me know!

These Mini Eggs Gluten Free Protein Pancakes will become a hit for Easter brunch and every day after that!
Print Recipe
5 from 1 vote

Easter Morning Breakfast Pancakes with Mini Eggs (Gluten-Free)

These Mini Eggs Protein Pancakes are gluten-free and healthy. Top it with chocolate mousse for the best healthy Easter morning breakfast!
Prep Time15 minutes mins
Cook Time5 minutes mins
Total Time20 minutes mins
Course: Breakfast
Cuisine: American
Servings: 4 people
Calories: 688kcal
Author: Abbey Sharp

Ingredients

Pancakes:

  • 1 1/2 cups gluten free oats
  • 1 1/2 cups cottage cheese
  • 1 tbsp vanilla extract
  • 1 1/2 cups egg whites
  • Pinch of salt
  • 2 1/2 tsp baking powder
  • 2/3 cup mini eggs crushed

Chocolate Mousse:

  • 2 cups cashews soaked in water overnight
  • 3/4 cup unsweetened vanilla almond milk
  • 2 tsp vanilla
  • ½ cup dates soaked in hot water
  • 3 tbsp cocoa powder

To serve:

  • Mini eggs
  • Fresh berries
  • Maple syrup if desired

Instructions

  • In a blender or food processor, puree the oats, cottage cheese and vanilla. Mix in the egg whites, salt, and baking powder. Fold in the crushed mini eggs.
  • Heat a large non-stick skillet over medium heat, spray with a spritz of vegetable oil and add 1/4 cup of batter at a time.
  • Meanwhile, add the cashews (drained), almond milk, vanilla, dates and cocoa powder to a high power blender. Puree until very smooth.
  • Layer the pancakes with the cashew cream, mini eggs, and berries, and serve with maple syrup, if desired.

Nutrition

Calories: 688kcal | Carbohydrates: 62g | Protein: 37g | Fat: 35g | Saturated Fat: 7g | Cholesterol: 14mg | Sodium: 535mg | Potassium: 1270mg | Fiber: 8g | Sugar: 19g | Vitamin A: 120IU | Vitamin C: 0.3mg | Calcium: 320mg | Iron: 6.7mg
Abbey Sharp

Abbey Sharp is a Registered Dietitian (RD), regulated by the Ontario College of Dietitians. She is a mom, YouTuber, Blogger, award winning cookbook author, media coach specializing in food and nutrition influencers, and a frequent contributor to national publications like Healthline and on national broadcast TV shows.
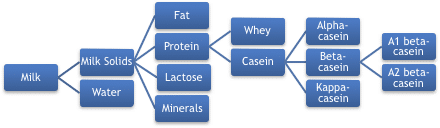
www.abbeyskitchen.com/about-abbey/

Last Updated March 12, 2023. Published March 31, 2023 By Abbey Sharp 35 Comments

Vegan Sloppy Joe Recipe with Roasted Portobello Mushrooms

This vegan Sloppy Joe recipe with Roasted Portobello Mushrooms is a healthy alternative to everyone’s favourite childhood comfort food.  

Close up of vegan sloppy joe on a white plate with a glass of water in the background.

I don’t know about your childhood comfort staples but for me, it was all about sloppy joes. I think my love affair with sloppy joes started with my mother’s love for stress-free weeknight dinners (hello MANWICH), and only grew with the crazy cafeteria lady from Billy Madison (c’mon, I know you know that scene). But fast forward to today, and I’m still totally enamoured by sloppy joes.

I mean who doesn’t like the idea of tucking into a massive sloppy sandwich filled with saucy meaty sweet-savoury goodness? Now, you all know I’m not strictly plant-based, but I do try to incorporate a few meatless meals into my diet every week. And if it means I can still indulge in my favourite comfort foods, then SIGN ME UP. Say hello to this AH-MAZ-ING vegan sloppy joe recipe – aka your new plant-based staple meal.

Table of contents

  • Why This Recipe Works
  • Key Ingredients
  • How to Make This Recipe
  • Expert Tips
  • Recipe FAQs
  • More Recipes You Might Like

Why This Recipe Works

This vegan sloppy joe recipe is perfect for anyone who is trying to eat a little more plant-based but doesn’t want to sacrifice their favs (I hear ya!). Here are a few more reasons why this recipe is a total winner!

  • Plant-based
  • High protein (24 grams per serving)
  • High fibre (10 grams per serving)
  • Veggie packed
  • Family friendly
  • Comforting and nostalgic AF

Key Ingredients

Flat lay image of portioned recipe ingredients including red pepper, onion, veggie meat, tomato sauce, mushrooms, tomato paste, jalapeno, olive oil, garlic, red wine vinegar, HP sauce, and maple syrup.

Veggie Ground “Meat” – Instead of the traditional ground beef, we are using some veggie ground “meat” as a substitute to make this vegan sloppy joe. I personally love to use the Yves veggie ground round, but you can use whatever imitation veggie meat you can find at your local grocery store.

Mushrooms – We are using two kinds of mushrooms to make these vegan sloppy joes and that includes – cremini and portobello. The portobello mushroom caps will serve as a sort of bun for the filling, while the cremini mushroom adds an amazing texture to the sloppy joe mixture.

Veggies – When I make my recipes plant-based, I make sure to do it right by loading up on veggies! In this case, we are adding carrots, red pepper, and onion to the sloppy joe filling.

Sauce – No good sloppy joe is made without a delicious sweet tomatoey sauce. To achieve this we combine maple syrup, HP sauce, tomato paste, tomato sauce, and red wine vinegar. So. Fricking. Delish.

How to Make This Recipe

Three side by side images showing how to prepare the sandwich mixture by pulsing the mushrooms in a food processor and sauteeing ingredients in a pan.

Step 1: Pulse cremini mushrooms in a food processor to reach a ground meat consistency.

Step 2: Heat the olive oil in a medium skillet over medium high heat. Add in the onion, and carrots, and cook until the onion and carrots has softened, about 5 minutes. Add in the mushrooms, bell pepper, jalapeno, and garlic and saute until softened, about 4 minutes.

Step 3: Stir in the tomato paste and stir until fragrant, then add in the HP sauce, tomato sauce, red wine vinegar and maple syrup. Reduce the heat to low and simmer for about 5-7 minutes.

Three side by side images showing the prepared mixture along with the cooked portabello mushroom caps.

Step 4: Right before serving, stir in the veggie meat and season with salt and pepper, to taste.

Step 5: Meanwhile, preheat the broiler. Brush the mushroom caps with olive oil and season with salt and pepper on both sides. Place the caps on a baking tray and broil until it soft, about 5-7 minutes, turning once half way through.

Step 6: When ready to serve, place the mushroom cap top side down on the bottom bun. Fill the cavity with lots of the sloppy joe mix then finish with the top bun. Enjoy!

Expert Tips

Okay so there are a few different ways to make this vegan sloppy joe recipe.

One: Use just mushrooms, but I prefer to mix mushrooms into meat so they don’t just fall apart.

Two: Go the bean route (i.e. lentils), which is awesome, but doesn’t really have the same texture as meat.

Three: Use veggie ground meat (which is arguably the best option out all three).

So if for whatever reason you can’t find any veggie ground meat are your local grocery store, these vegan sloppy joes are super flexible as you can substitute either mushrooms or lentils for the “meat” instead.

Recipe FAQs

Is this recipe gluten-free?

If you want to make this recipe gluten-free you can use gluten-free buns. Also, make sure to check the labels of whatever veggie meat you use to ensure that it is totally gluten-free.

What can I serve with this?

I love to make things super easy and serve with a beautiful side salad. This vegan sloppy joe recipe is also perfect to enjoy in the summer time so they would pair deliciously with a side of roasted veggies on the bbq. Yum!

How can I make this low carb?

You can make this low carb by swapping out the buns for some lettuce “buns”. Otherwise, you can use the portobello mushroom caps as the buns instead but you’ll have to let them cool down before using.

Is this recipe kid-friendly?

Totally! What kid doesn’t like a sloppy joe?! I would suggest holding back on the jalapeno though so that it is not too spicy for your little one.

How long will this keep in the fridge?

The sloppy joe mixture should keep in the fridge for about 3-4 days.

Close up of vegan sloppy joe on a white plate with a glass of water and pan in the background.

More Recipes You Might Like

If you are into these vegan sloppy joes, then you are definitely going to want to check out these sandwich and wrap recipes on the blog!

  • Everything Bagel Sandwich with Avocado
  • Avocado Chickpea Salad Sandwich
  • Moroccan Chickpea Salad Wrap
  • Collard Green Wraps (3 Ways!)

I want to know – what are some of your childhood favourite recipes? Let me know in the comments!

Print Recipe
4.72 from 7 votes

Vegan Sloppy Joes with Roasted Portobello Mushroom

This vegan Sloppy Joe recipe with Roasted Portobello Mushrooms is a healthy alternative to everyone’s favourite childhood comfort food.  
Prep Time10 minutes mins
Cook Time20 minutes mins
Total Time30 minutes mins
Course: Sandwiches
Cuisine: American
Servings: 4 people
Calories: 368kcal
Author: Abbey Sharp

Ingredients

  • 2 tsp extra virgin olive oil
  • ½ cup onion minced
  • 1 carrot finely minced
  • 1 cup cremini mushrooms
  • 2 cloves garlic finely minced
  • 1 red bell pepper minced
  • 1 jalapeno seeds and veins removed, finely minced
  • 2 tbsp tomato paste
  • 1/2 tbsp HP Sauce
  • 1 cup tomato sauce
  • 1/2 tbsp red wine vinegar
  • 1/2 tbsp maple syrup
  • 340 g package of veggie ground "meat"
  • Salt and pepper to taste

Mushrooms & Assembly:

  • 1 tbsp extra virgin olive oil
  • 4 portobello mushrooms scrubbed clean
  • 4 whole grain buns

Instructions

  • Pulse cremini mushrooms in a food processor to reach a ground meat consistency.
  • Heat the olive oil in a medium skillet over medium high heat. Add in the onion, and carrots, and cook until the onion and carrots has softened, about 5 minutes. Add in the mushrooms, bell pepper, jalapeno, and garlic and saute until softened, about 4 minutes.
  • Stir in the tomato paste and stir until fragrant, then add in the HP sauce, tomato sauce, red wine vinegar and maple syrup. Reduce the heat to low and simmer for about 5-7 minutes. Right before serving, stir in the veggie meat and season with salt and pepper, to taste.
  • Meanwhile, preheat the broiler. Brush the mushroom caps with olive oil and season with salt and pepper on both sides. Place the caps on a baking tray and broil until it soft, about 5-7 minutes, turning once half way through.
  • When ready to serve, place the mushroom cap top side down on the bottom bun. Fill the cavity with lots of the sloppy joe mix then finish with the top bun. Enjoy!

Video

Nutrition

Calories: 368kcal | Carbohydrates: 44g | Protein: 24g | Fat: 13g | Saturated Fat: 2g | Trans Fat: 1g | Cholesterol: 1mg | Sodium: 1007mg | Potassium: 1067mg | Fiber: 10g | Sugar: 15g | Vitamin A: 3905IU | Vitamin C: 51mg | Calcium: 78mg | Iron: 8mg
Abbey Sharp

Abbey Sharp is a Registered Dietitian (RD), regulated by the Ontario College of Dietitians. She is a mom, YouTuber, Blogger, award winning cookbook author, media coach specializing in food and nutrition influencers, and a frequent contributor to national publications like Healthline and on national broadcast TV shows.
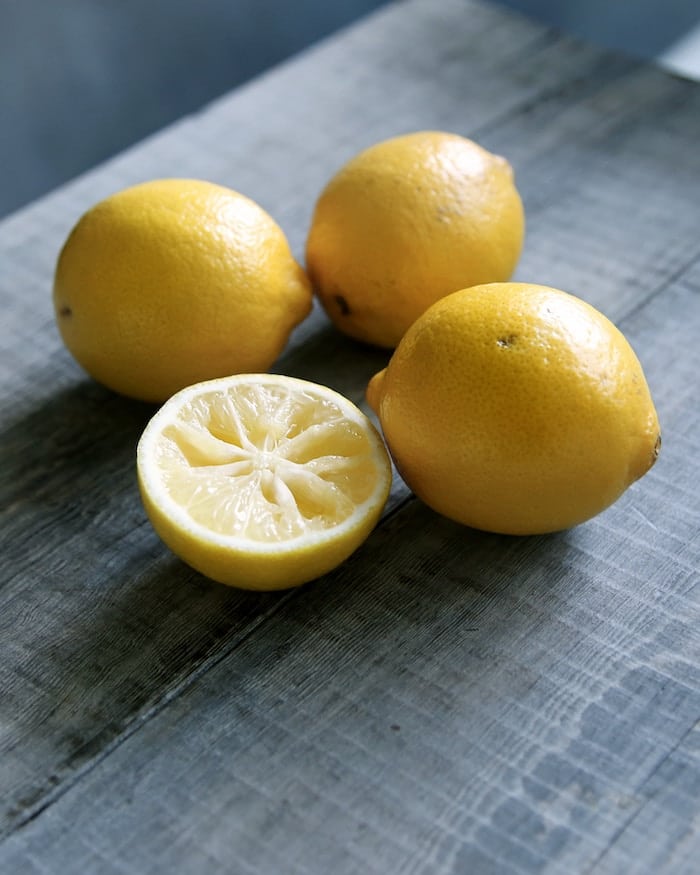
www.abbeyskitchen.com/about-abbey/
  • Previous Page
  • Go to page 1
  • Interim pages omitted …
  • Go to page 19
  • Go to page 20
  • Go to page 21
  • Go to page 22
  • Go to page 23
  • Interim pages omitted …
  • Go to page 89
  • Next Page

Get started with

Eight Free Recipe Books

From the co-founder of Neue Theory and creator of the Hunger Crushing Combo

Sign me up!
Abbey smiling at table
Abbey Sharp

“Foods may never be nutritionally equal. But we can make them morally equal by recognizing that our worth is never determined by what's on our plate.”

— Abbey Sharp, RD About Abbey ◥

Books

  • HCC™
  • Mindful Glow
  • Free E-Books

Blog

  • Nutrition
  • Recipes
  • Motherhood
  • Life

Explore

  • Neue Theory™
  • Bite Back
  • YouTube

Abbey

  • About
  • Coaching
YouTube TikTok Instagram Facebook X Pinterest
Abbey Sharp - The No BS Dietitian From Abbeys Kitchen

© Abbey's Kitchen 2026  All Rights Reserved •  ACCESSIBILITY STATEMENT •  Privacy Policy

This site uses cookies. By continuing to browse the site, you are agreeing to the use of cookies Accept Privacy Policy
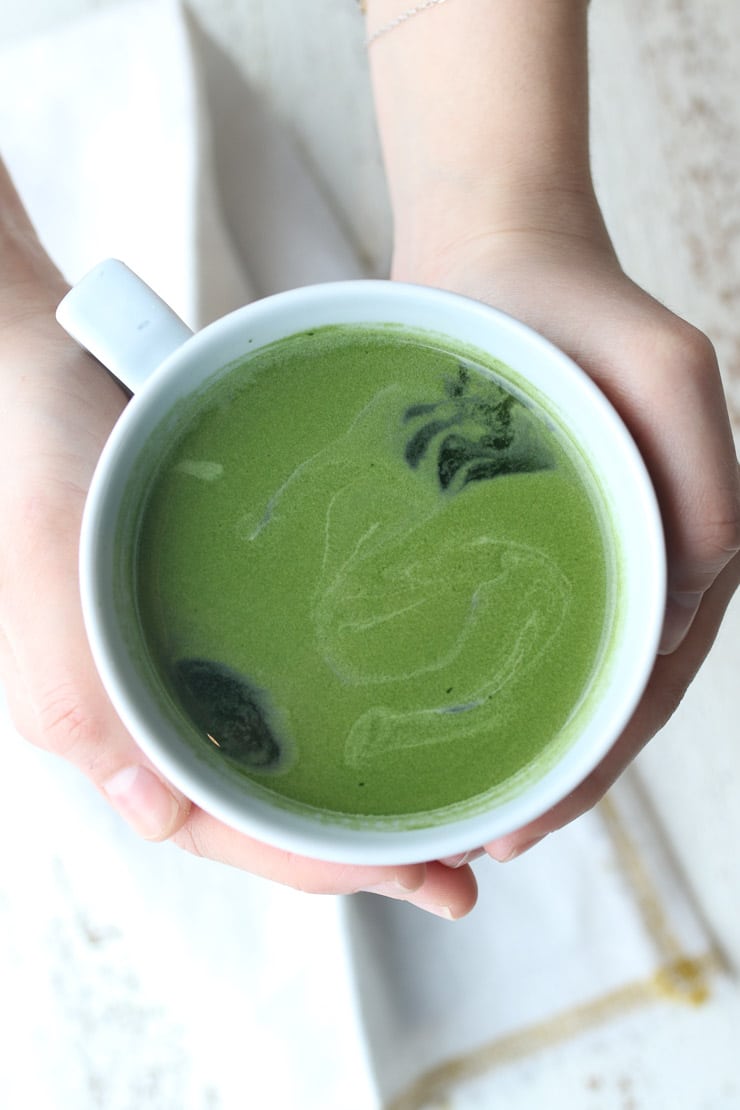
Privacy & Cookies Policy

Privacy Overview

This website uses cookies to improve your experience while you navigate through the website. Out of these, the cookies that are categorized as necessary are stored on your browser as they are essential for the working of basic functionalities of the website. We also use third-party cookies that help us analyze and understand how you use this website. These cookies will be stored in your browser only with your consent. You also have the option to opt-out of these cookies. But opting out of some of these cookies may affect your browsing experience.
Necessary
Always Enabled
Necessary cookies are absolutely essential for the website to function properly. This category only includes cookies that ensures basic functionalities and security features of the website. These cookies do not store any personal information.
Non-necessary
Any cookies that may not be particularly necessary for the website to function and is used specifically to collect user personal data via analytics, ads, other embedded contents are termed as non-necessary cookies. It is mandatory to procure user consent prior to running these cookies on your website.
SAVE & ACCEPT

Rate This Recipe

Your vote:


A rating is required
A name is required
An email is required