• Skip to main content

Abbey's Kitchen

Healthy Recipes, Nutrition Myth Busting, Healthy Eating Tips

  • Books
    • HCC™
    • The Mindful Glow Cookbook
    • Recipe eBooks
      • Family
      • Hypothyroidism
      • BLW
      • Vegan Week 1
      • Vegan Week 2
      • Vegan Week 3
      • Keto
      • Gluten Free Week 1
      • Gluten Free Week 2
      • Fitness
      • Paleo
  • Blog
    • Nutrition
    • Recipes
    • Motherhood
    • Life
  • Explore
    • Neue Theory™
    • Bite Back With Abbey Sharp
      • Apple Music
      • Spotify
      • Amazon Music
    • YouTube
  • Abbey
    • About
    • Coaching
    • Contact

Abbey Sharp

Last Updated October 14, 2022. Published October 14, 2022 By Abbey Sharp 3 Comments

Enchilada Bowl (Easy Vegan One Pot Meal)

Made with pantry staples, this Enchilada Bowl is such an easy one pot meal! It’s packed with protein thanks to the black beans and it’s also vegan friendly. This is your perfect last minute dinner!
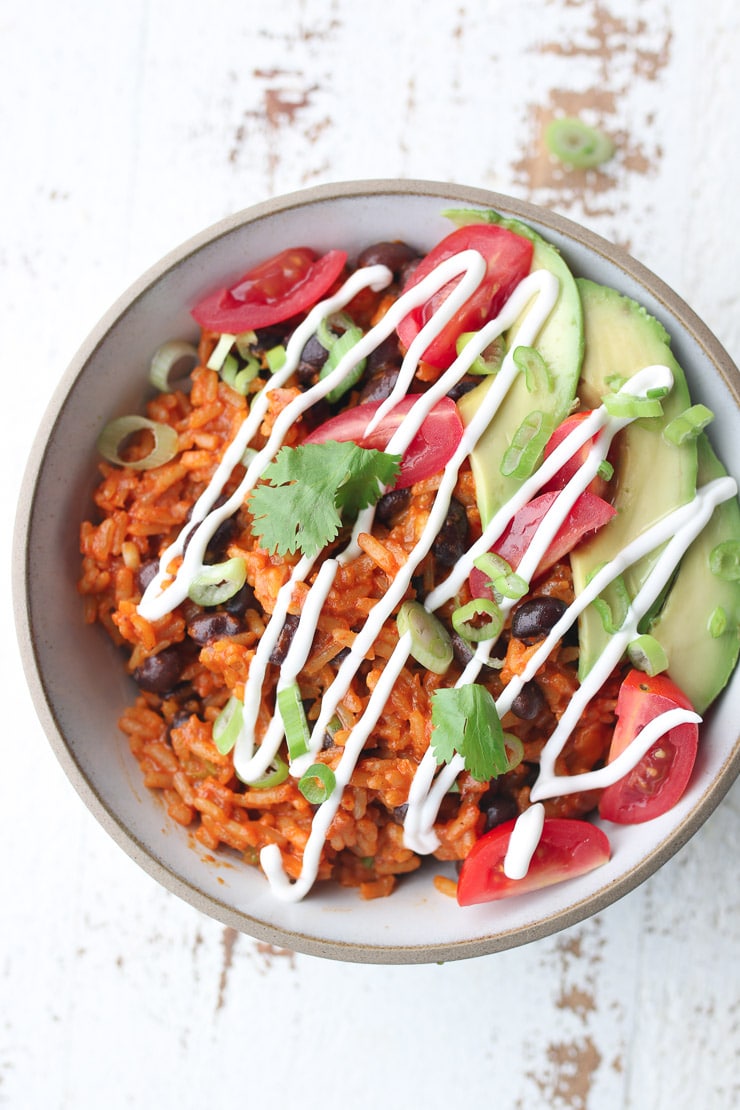
Birds eye view of enchilada bowl drizzled with sour cream.

This one pot enchilada bowl recipe is so simple, it hurts. It relies on a lot of your pantry staples, plus some store-bought short cuts to help you get a meal on the table with just one pan to clean. It is a great last minute recipe for those days where you didn’t have anything planned and need to get dinner on the table asap. But don’t be fooled: we aren’t sacrificing any flavour here!

Table of contents

  • Why This Recipe Works
  • Key Ingredients
  • How to Make This Recipe
  • Expert Tips
  • Recipe FAQs
  • More Recipes You Might Like

Why This Recipe Works

We love this enchilada bowl because not only does it put a delicious spin on the classic rice and beans combo, but it’s also:

  • Budget friendly
  • Vegan friendly
  • Made in just one pot
  • Meal prep friendly
  • Protein packed

Key Ingredients

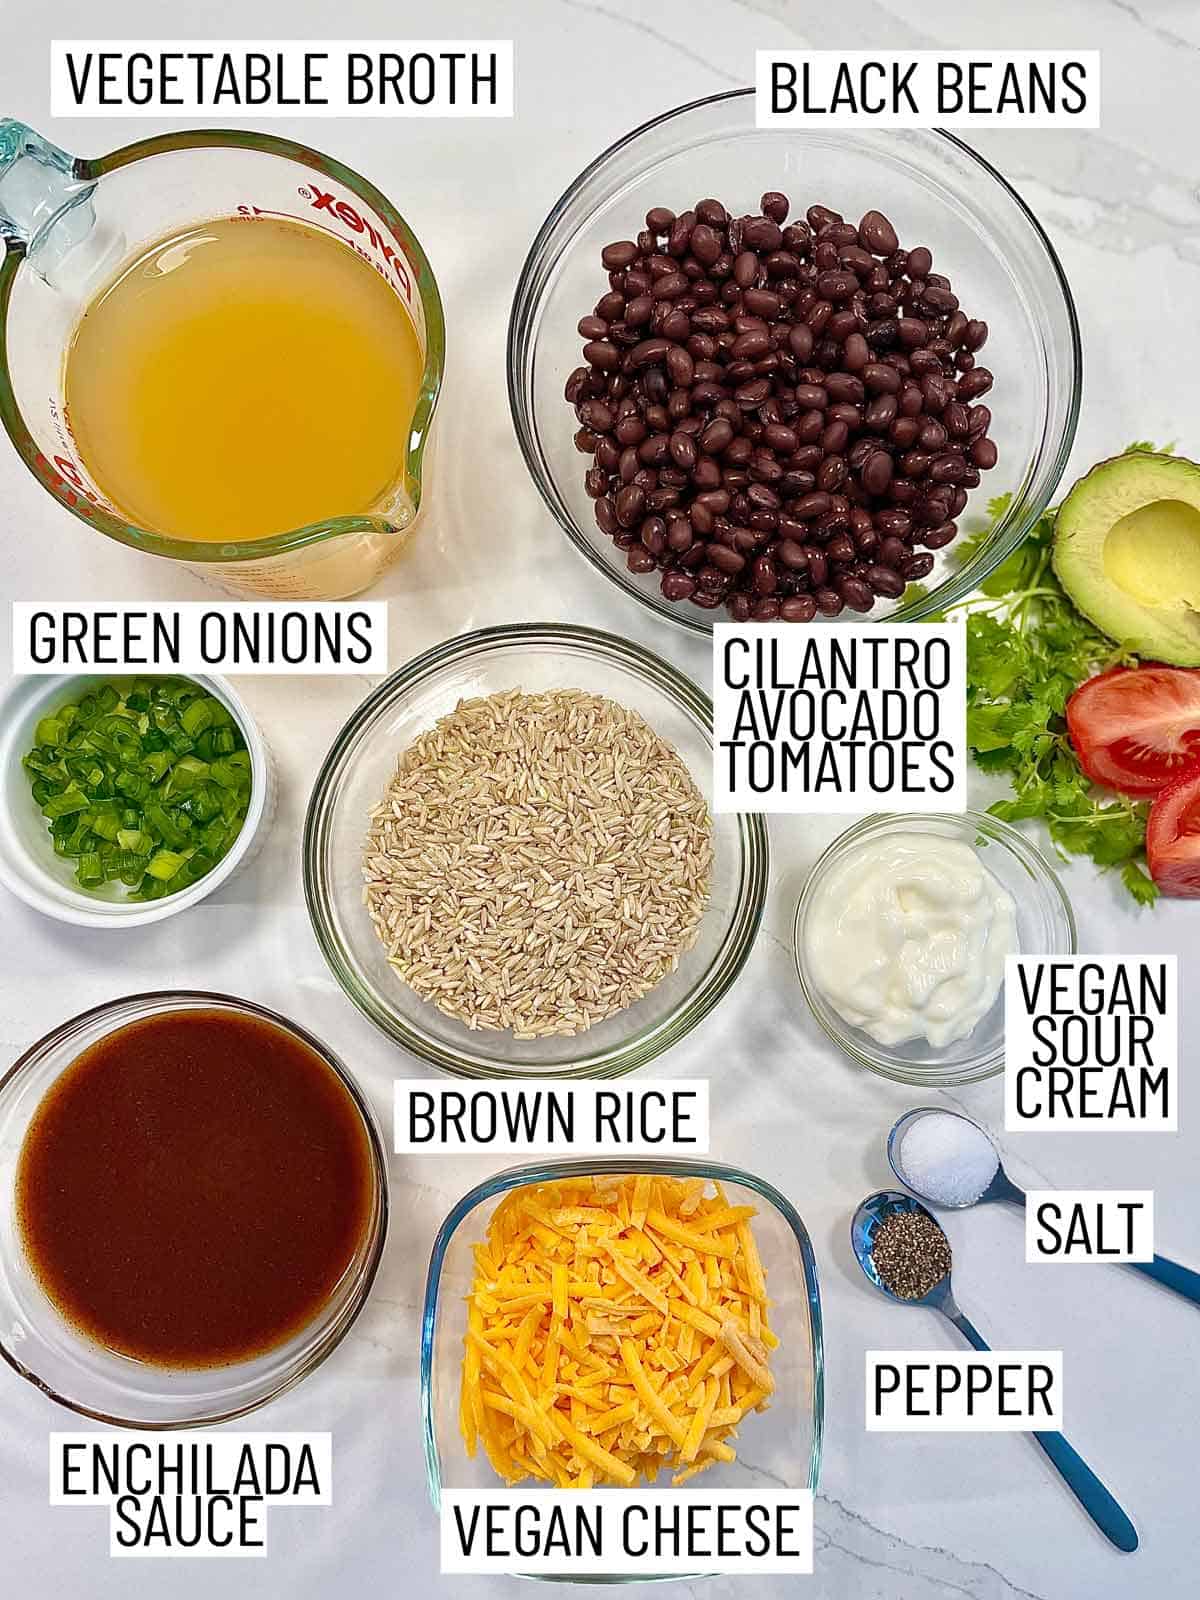
Ingredients needed to make an enchilada bowl, including vegetable broth, black beans, green onions, cilantro, avocado, tomatoes, brown rice, vegan sour cream, salt, pepper, vegan cheese, and sauce.

Brown Rice — To make this enchilada bowl, I use long grain brown rice, but if you’re using another variety you may need to adjust the cooking time and/or the liquid. I also make sure to rinse it my rice to note only improve texture but it also helps to remove some of the anti-nutrients for easier digestion.

Enchilada Sauce — If you want to make your own enchilada sauce, I have an AMAZING recipe here that has a lot less sugar than most of the store-bought options. Otherwise, a pack or bottle of red enchilada sauce will do.

Black Beans — to make this enchilada bowl vegetarian friendly we are using beans as our main protein source (it also gives it a mega fiber boost). But if you don’t need to make this vegetarian, feel free to add chicken or any meat of your choosing.

Cheese — to keep this recipe vegan friendly we are using vegan cheese, but obviously you can go with the OG cheddar if you do not need to keep it vegan. I personally love a mild cheddar for this enchilada bowl to give it more bold flavour.

Your Favourite Fixin’s — This is where you can empty out the contents of your fridge for the toppings for the enchilada bowl. I love sour cream (can be vegan) and lots of avocados, plus some extra veggies like tomatoes.

How to Make This Recipe
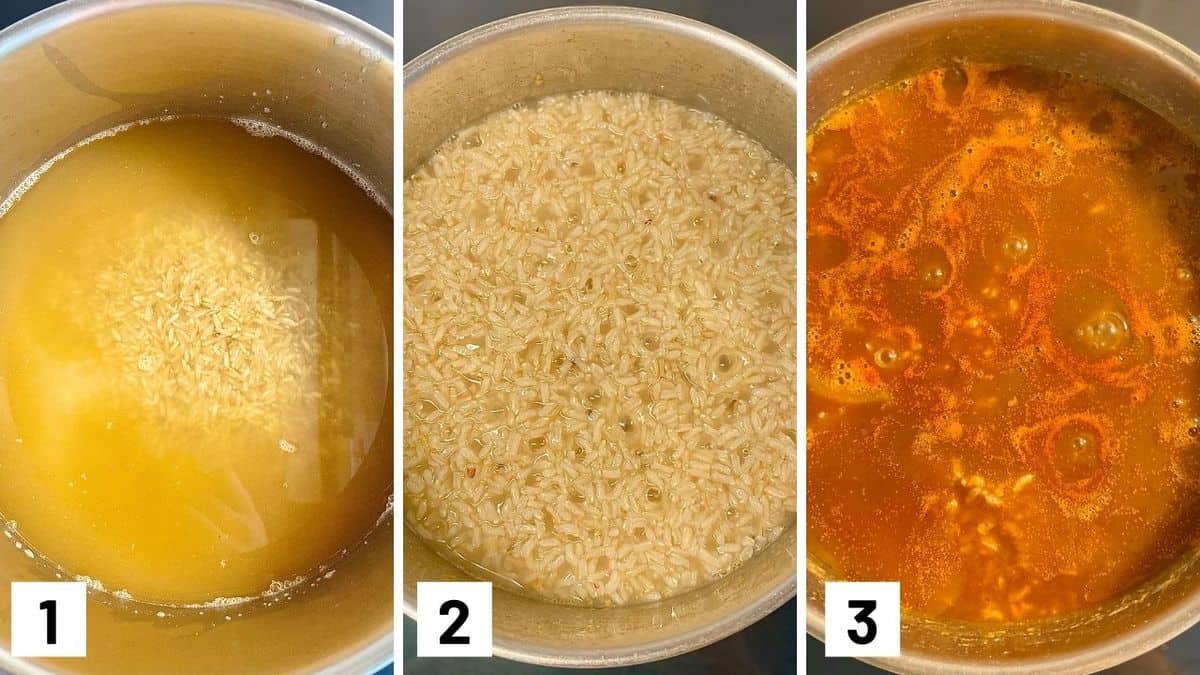
Set of three photos showing rice being cooked in broth then enchilada sauce added.

Step 1: In a medium saucepot, combine the brown rice and the broth.

Step 2: Cover and bring to a boil, then reduce heat to simmer on medium low with the lid on. Cook for about 25 minutes.

Step 3: Then, add in the enchilada sauce.
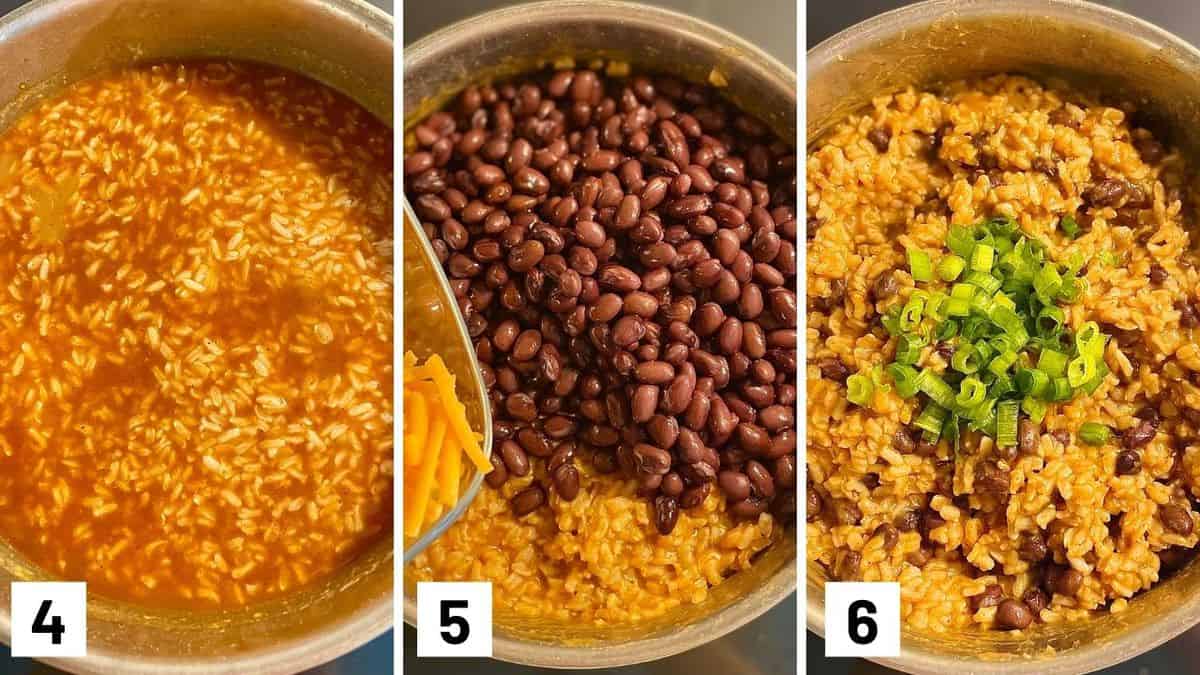
Set of three photos showing cooked rice mixed with beans, cheese, and green onions.

Step 4: Continue to cook with the lid on until the moisture is removed, about another 10-15 minutes. You should see crater-like steam holes on the surface. If you taste it and it’s still crunchy, add a splash more liquid and cook for another 5 minutes (with the lid on).

Step 5: While still hot, fold in the cheese, green onions and beans, season with salt and pepper to taste.

Step 6: Serve the enchilada bowl hot, garnished with vegan sour cream, cilantro, green onions tomatoes and avocado.

Expert Tips

So I have made this vegan enchilada bowl a bunch of times because it’s so easy, and what I’ve learned is that the amounts here will vary depending on the type of rice you use. If you’re soaking your grains first, you’ll need about 1/2 cup less liquid. If you’re using a brown short grain like Basmati or jasmine, you may need a little less time. And if you’re using white rice, it will take less time than brown rice.

Feel free to change things up! If you don’t have black beans, you can try pinto beans, navy beans, etc. You can also adjust the spice level by adding some chile powder as well.

Adding tortilla chips on top adds a great crunch to the enchilada bowls! Texture can be a great way of increasing the satisfaction factor in your meal.

Not vegan? Shredded leftover chicken makes for a great addition to this. Want to keep this vegan? Try some chick’n or crispy tofu.

Recipe FAQs

Is this recipe too spicy for kids?

It depends on your enchilada sauce and your kid’s tolerance. I would try the enchilada sauce on its own first and decide if your kid will be able to handle it. If not, you can always take a portion out first before you add it.

Can I use white rice instead of brown?

Yes, but it will likely cook in a shorter amount of time, so always check the package to adjust the cooking and liquid.

Can I add an egg if i’m not vegan?

OMG yes. A little fried or poached egg on top of this rice and beans is super delicious. Like, REALLY good.

Can I cook in regular water if I don’t have stock?

Of course. It won’t make that much of a difference since most of the flavour is coming from the enchilada mix.

How long will this last in the fridge?

You should aim to eat this within 3-4 days after it’s been prepared, but it does reheat REALLY well!

Can I freeze this?

Yes! You can definitely freeze rice and beans. This enchilada bowl is super freezer friendly. Just be sure to store it in an airtight freezer-safe container.
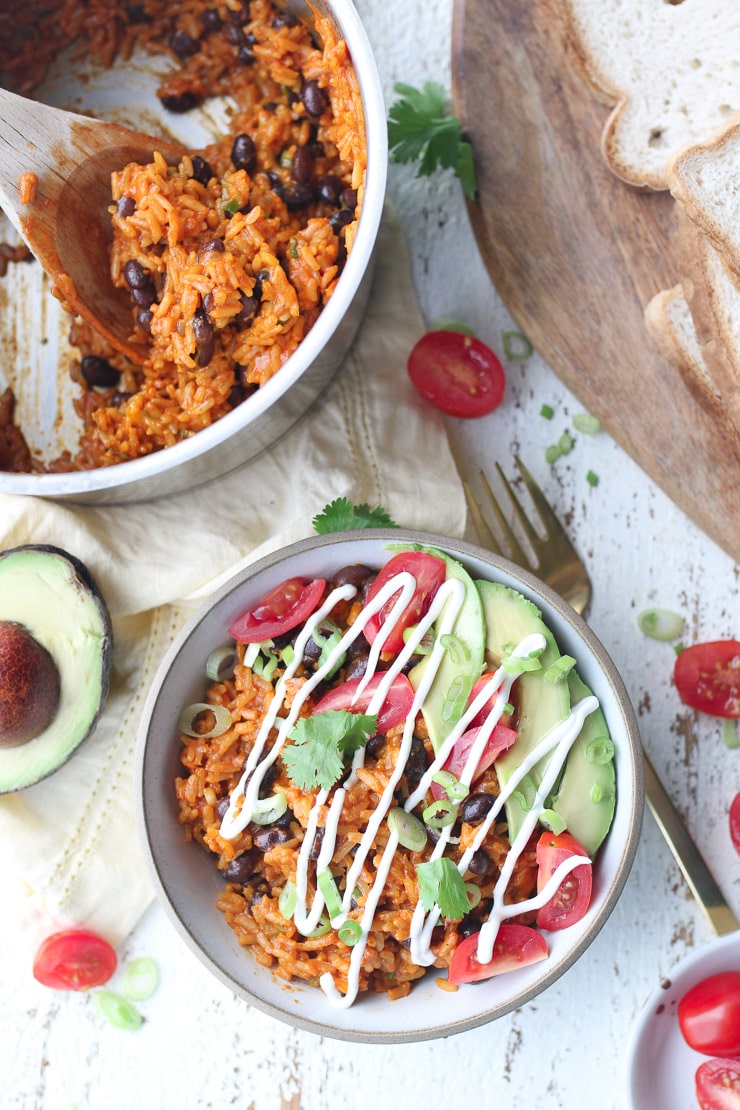
Birds eye view of vegan rice and beans enchilada bowl garnished with cherry tomatoes, fresh herbs, avocado and vegan sour cream against a white background.

More Recipes You Might Like

Want more recipes like this enchilada bowl that use your pantry staples? Here are some more to give a try:

  • Vegan Lentil Butternut Squash Soup
  • Vegan Pasta Bake with Sausage, White Bean & Kale 
  • Unstuffed Cabbage Roll in a Bowl
  • Tomato Avocado Tuna Melt

What toppings do you add on your enchilada bowls? Leave me a comment below!
Print Recipe
4.75 from 4 votes

Enchilada Bowl (Easy Vegan One Pot Meal)

Made with pantry staples, this Enchilada Bowl is such an easy one pot meal! It's packed with protein thanks to the black beans and it vegan friendly. It's perfect as a last minute dinner.
Prep Time10 minutes mins
Cook Time45 minutes mins
Total Time55 minutes mins
Course: Main Course
Cuisine: American
Servings: 4 servings
Calories: 327kcal
Author: Abbey Sharp

Ingredients

  • 1 cup long grain brown rice rinsed
  • 2 cups low sodium vegetable broth
  • ¾ cup red enchilada sauce
  • 1 cup shredded vegan cheddar cheese or regular cheddar!
  • 1 cup canned black beans drained and rinsed
  • 2 tbsp green onions finely sliced
  • salt and pepper to taste

Garnish:

  • Vegan sour cream
  • Cilantro
  • Green onions thinly sliced
  • Chopped tomatoes
  • Avocado

Instructions

  • In a medium saucepot, combine the brown rice and the broth. Cover and bring to a boil, then reduce heat to simmer on medium low with the lid on. Cook for about 25 minutes, and add in the enchilada sauce. Continue to cook with the lid on until the moisture is removed, about another 10-15 minutes. You should see crater-like steam holes on the surface. If you taste it and it’s still crunchy, add a splash more liquid and cook for another 5 minutes (with the lid on).
  • While still hot, fold in the cheese, green onions and beans, season with salt and pepper to taste.
  • Serve hot garnished with vegan sour cream, cilantro, green onions tomatoes and avocado.

Notes

  • So I have made this vegan enchilada bowl a bunch of times because it’s so easy, and what I’ve learned is that the amounts here will vary depending on the type of rice you use. If you’re soaking your grains first, you’ll need about 1/2 cup less liquid. If you’re using a brown short grain like Basmati or jasmine, you may need a little less time. And if you’re using white rice, it will take less time than brown rice.
  • Feel free to change things up! If you don’t have black beans, you can try pinto beans, navy beans, etc. You can also adjust the spice level by adding some chile powder as well.
  • Adding tortilla chips on top adds a great crunch to the enchilada bowls as well!
  • Not vegan? Shredded leftover chicken makes for a great addition to this. Want to keep this vegan? Try some chick’n or crispy tofu.

Nutrition
Calories: 327kcal | Carbohydrates: 55g | Protein: 9g | Fat: 7g | Saturated Fat: 2g | Polyunsaturated Fat: 1g | Monounsaturated Fat: 1g | Sodium: 839mg | Potassium: 244mg | Fiber: 7g | Sugar: 4g | Vitamin A: 332IU | Vitamin C: 3mg | Calcium: 48mg | Iron: 2mg
Abbey Sharp

Abbey Sharp is a Registered Dietitian (RD), regulated by the Ontario College of Dietitians. She is a mom, YouTuber, Blogger, award winning cookbook author, media coach specializing in food and nutrition influencers, and a frequent contributor to national publications like Healthline and on national broadcast TV shows.
www.abbeyskitchen.com/about-abbey/

Last Updated October 20, 2022. Published October 11, 2022 By Abbey Sharp 2 Comments

Vegan Broccoli Soup with White Beans | Vegan, High Protein, and Gluten Free

This flavour packed Creamy (No Cream!) Vegan Broccoli Soup with White Beans is High Protein & High Fibre, and a perfect vegetarian lunch that you can meal prep in advance.

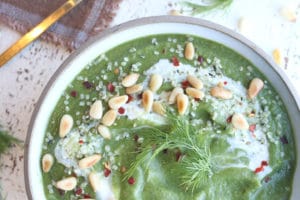
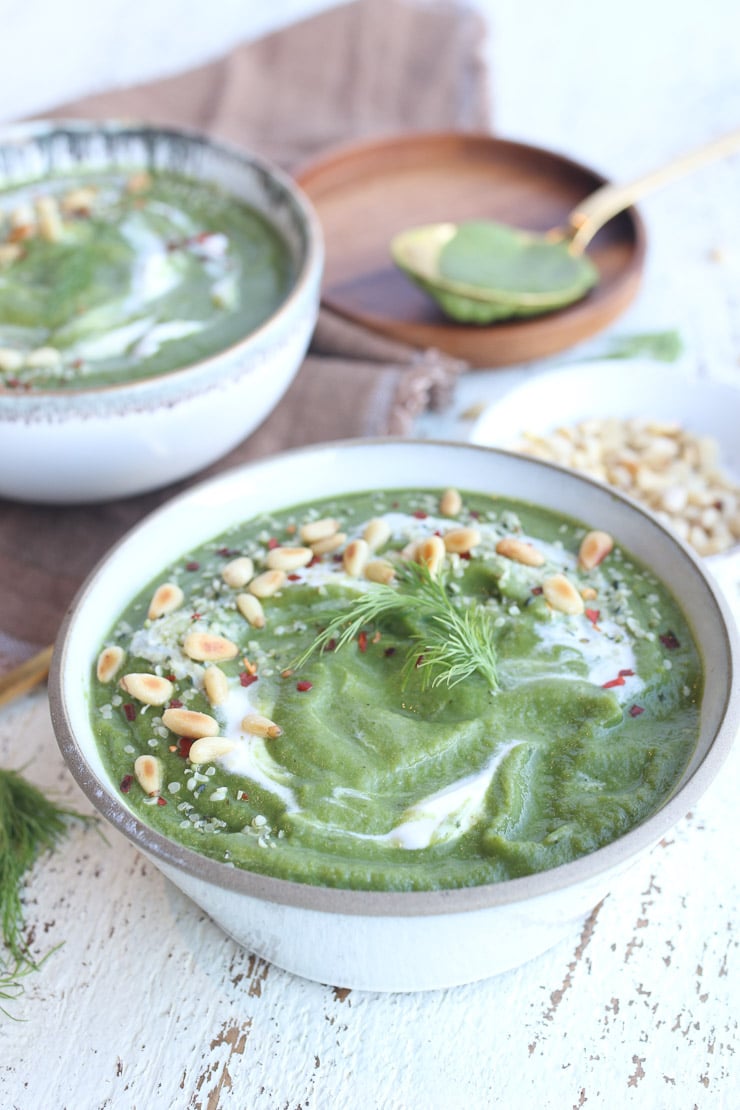
Vegan broccoli soup in a bowl garnished with pine nuts and dill .

If you haven’t noticed, lately I’ve been on a soup kick. It started with a slight chill in the air, and then we got hit hard with a cold Canadian fall. The answer: warming veggie soup! At least, that was the idea behind this vegan broccoli soup. I wanted to sneak in some protein to increase the satiety factor, and I wanted to use up the broccoli that was sitting in my fridge looking sad and neglected. Well friends, I have now made three batches of this (and froze some) so that I will have lots for the months to come.

Table of contents

  • Why This Recipe Works
  • Key Ingredients
  • How To Make This Recipe
  • Expert Tips
  • Recipe FAQs
  • More Recipes You May Like

Why This Recipe Works

There’s no shortage of reasons as to why this vegan broccoli soup needs to be part of your fall meal rotation.

  • Plant-based
  • High protein
  • Gluten free
  • Creamy
  • One pot (who has time for dishes?)
  • Packed with vibrant, fibre-rich veggies
  • Warming and cozy for the fall

Key Ingredients

So much good stuff it hurts! To make this soup, you will need:

  • Onions, Celery, Garlic, Parsnips – These veggies will be our base aromatics for this soup, key for a good flavour base!
  • Broccoli – What’s a good broccoli soup without broccoli? Broccoli is a cruciferous vegetable rich in nutrients like vitamin K, vitamin C, and folate. It also provides a beautiful green colour from its chlorophyll pigment.
  • White Beans – Key for adding protein, fibre, and plant-based creaminess to this soup. They don’t have a strong flavour either, so you’ll hardly notice this nutritious addition.
  • Reduced Sodium Vegetable Broth – This can be bought as a premade stock, or made from bouillon cubes. Feel free to use chicken broth if you aren’t vegan!
  • Frozen Kale – Like broccoli, kale is a nutritional powerhouse. Frozen kale makes it even more convenient for tossing into soups.
  • Nutritional Yeast – An inactive yeast that has a cheesy flavour, similar to parmesan. Nutritional yeast is a good source of plant-based vitamin B12 and protein.
  • Fresh Dill, Basil, and Chives – Don’t neglect the power of fresh herbs in your soup! Of course, feel free to omit any you don’t have or use dried if that is most convenient to you.

How To Make This Recipe

Vegan broccoli soup in a bowl with pine nuts, herbs and golden spoon in the background.

This vegan broccoli soup is so easy to make, it only requires one pot! To a large soup pot, add the olive oil over medium heat and sauté the celery, onion, and parsnips for 5 minutes. Add the garlic, and sauté until fragrant, around another minute. Season with some salt and pepper. I like to layer my seasonings as I go!

Add the broccoli, white beans, and stock, cover and reduce heat to a simmer. Continue to cook until the parsnips and broccoli are soft. Next, add the kale, dill, basil, chives, juice, and nutritional yeast. Cook for another 3-5 minutes on medium low.

Add to a high speed blender and puree until very smooth. Season with salt and pepper to taste. Serve with toppings of choice. SO SO YUM.

Expert Tips

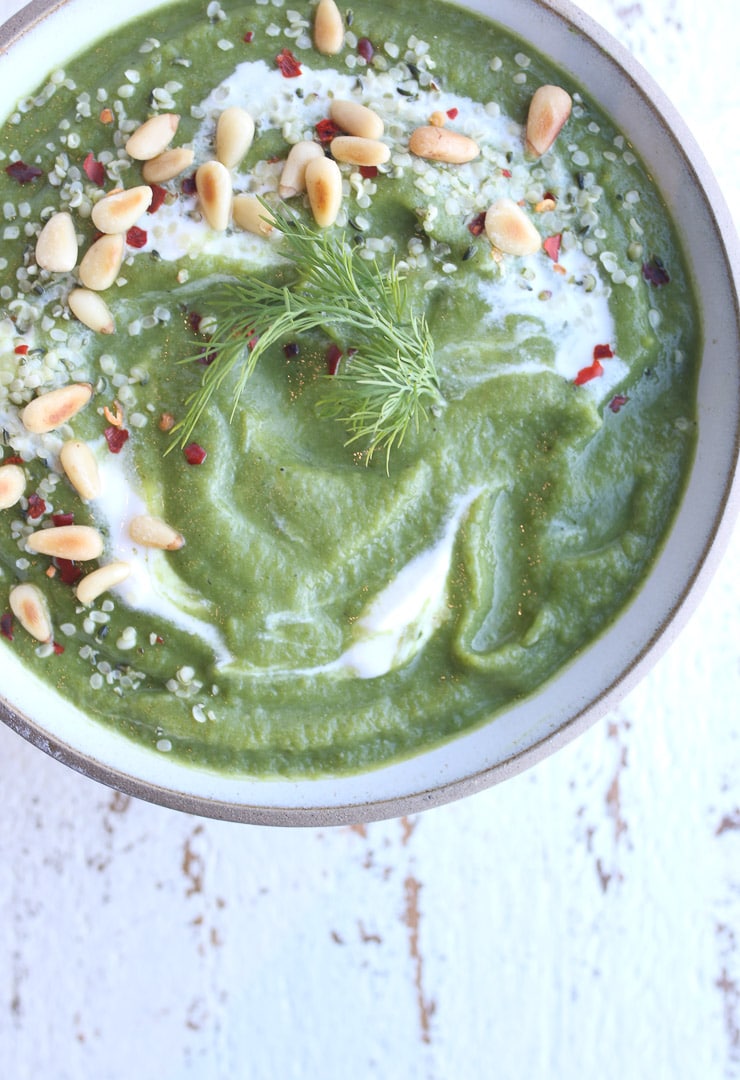
For those of you who prefer a richer feel, adding in coconut milk is another great option. Now, let’s talk toppings! I love topping my soup with coconut yogurt, hemp hearts, chili flakes, and pine nuts. If you aren’t plant-based, a dollop of sour cream or greek yogurt would also be delicious. The options are honestly endless here- let your pantry and fridge be your guide!

Last secret: this vegan broccoli soup is GREAT for batch prepping. In fact, I’m banking on having some leftover for those busy days I don’t want to cook dinner. I simply transfer the soup to a freezer bag and lay it flat in my freezer, so it is easily stackable.

Recipe FAQs

How did you get this vegan broccoli soup creamy without cream?

I love pureeing beans into soup (I did it in this mushroom soup too!) It helps get the soup pretty creamy without any excess cream. I would recommend making sure your veggies are really soft before you puree and using a nice high power blender to get it crazy smooth.

Can I use other types of beans?

Yes! White beans are key in keeping the soup a vibrant green, but kidney beans would also work if you don’t mind a muddy colour. You can also try experimenting with softened lentils.

How long will this soup last in the fridge or freezer?

This soup should last about 5 days in the fridge or 6 months in the freezer.

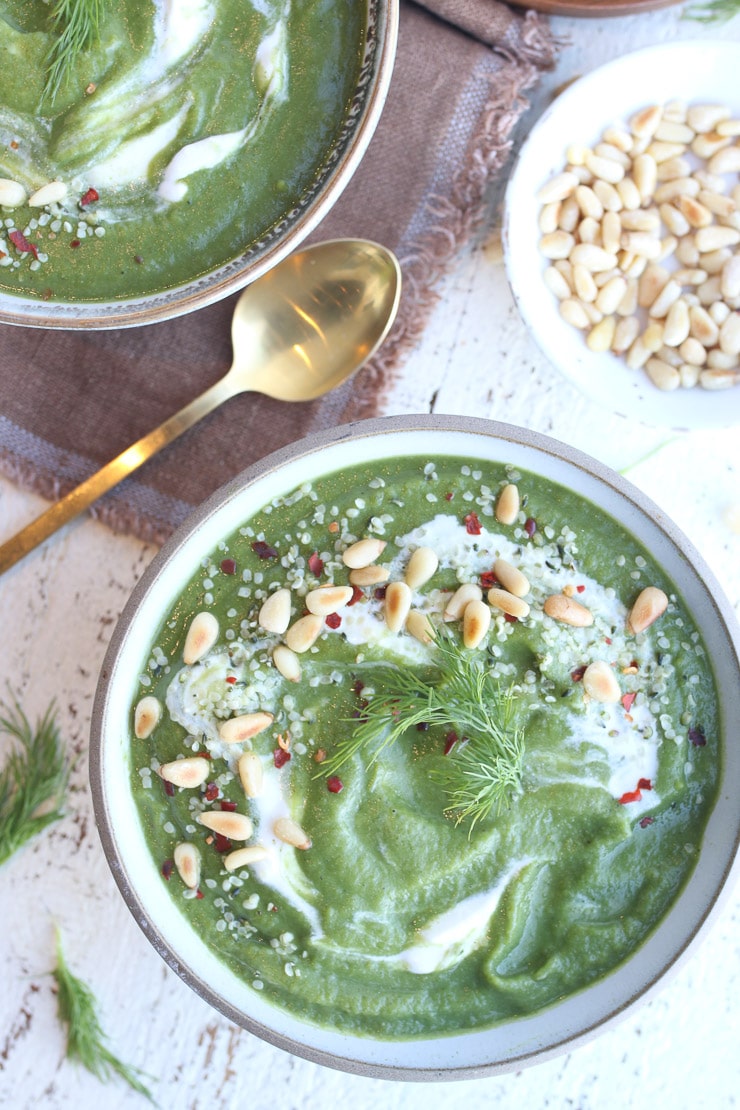
Birds eye view of broccoli white bean soup garnished with dill and pine nuts.

More Recipes You May Like

If you enjoyed this vegan broccoli soup, I have loads of other delicious plant-based soups on the blog!

  • Vegan Beet Soup with Apples & Ginger
  • Vegan Roasted Cauliflower Soup with Parsnips
  • Creamy Vegan Mushroom Soup with Rosemary 
  • Vegan Yellow Beet Coconut Curry Soup

What’s your favourite soup for the chilly weather? Let me know in the comments below!

Print Recipe
5 from 3 votes

Vegan Broccoli White Bean Soup (Vegan & Gluten Free)

This flavour packed Creamy (No Cream!) Vegan Broccoli White Bean Soup is High Protein & High Fibre, and a perfect vegetarian lunch that you can meal prep in advance.
Prep Time5 minutes mins
Cook Time15 minutes mins
Total Time20 minutes mins
Course: Soup
Cuisine: American
Servings: 5
Calories: 306kcal
Author: Abbey Sharp

Ingredients

  • 2 tbsp olive oil
  • 1 onion diced
  • 2 stalks celery diced
  • 2 large parsnips peeled and finely diced
  • 3 cloves garlic minced
  • 1 lb head broccoli florets finely diced (about 6 cups)
  • 2 x 19 oz can white beans drained and rinsed
  • 5 cups reduced sodium vegetable broth or chicken stock if not vegan
  • 3 cups frozen kale
  • 1 -2 tbsp fresh lemon juice to taste
  • 10 tbsp Nutritional yeast
  • 6 tbsp dill
  • 6 tbsp fresh basil
  • 1/4 cup fresh chives
  • Generous salt and pepper to taste

For topping:

  • Red chilli flakes
  • Pine nuts toasted
  • Coconut yogurt
  • Fresh dill
  • Hemp hearts

Instructions

  • To a large soup pot, add the olive oil over medium heat. Add in the celery, onion, and parsnips and saute for 5 minutes.
  • Add the garlic, and saute until fragrant, another minute. Season with some salt and pepper.
  • Add the broccoli, white beans, and stock. Cover and reduce heat to a simmer. Continue to cook until the parsnips and broccoli are soft.
  • Add the kale, dill, basil, chives, juice, and nutritional yeast. Cook for another 3-5 minutes on medium low.
  • Add to a high speed blender and puree until very smooth. Season with salt and pepper to taste.
  • Serve topped with a swirl of vegan yogurt, dill, hemp hearts, toasted pine nuts and chilli flakes.

Nutrition

Calories: 306kcal | Carbohydrates: 56g | Protein: 21g | Fat: 2g | Saturated Fat: 1g | Sodium: 1049mg | Potassium: 1552mg | Fiber: 15g | Sugar: 8g | Vitamin A: 5345IU | Vitamin C: 145mg | Calcium: 216mg | Iron: 6mg
Abbey Sharp

Abbey Sharp is a Registered Dietitian (RD), regulated by the Ontario College of Dietitians. She is a mom, YouTuber, Blogger, award winning cookbook author, media coach specializing in food and nutrition influencers, and a frequent contributor to national publications like Healthline and on national broadcast TV shows.
www.abbeyskitchen.com/about-abbey/

Last Updated September 30, 2022. Published September 30, 2022 By Abbey Sharp 7 Comments

Dairy Free Banana Bread with Cherries & Chocolate Chips

This Dairy Free Banana Bread with Chocolate Chips and Cherries is healthy and loaded with natural sweetness. It is also a super moist, kid friendly snack that the whole family will love!

Birds eye view of banana bread loaf with banana coins, chocolate chips, cherries, and hemp seeds.

I grew up eating A LOT of banana bread! My mom was not a stellar cook or baker, but she knew how to make a really good chocolate chip banana bread. I’m not sure how much sugar was in her version, but since becoming a mom of sweet-loving kiddos, I have been on a mission to cut back on the added sugar in a lot of my family recipes.

Luckily with banana bread, cutting back on added sugar is actually really easy! Bananas are so naturally sweet that you really don’t need much, and the addition of sweet cherries and dark chocolate chips in there totally levels up the taste profile, without a lot of sugar. With that said, this dairy free banana bread with chocolate chips AND cherries is a MUST for any banana bread fan!

Table of contents

  • Why This Recipe Works
  • Key Ingredients
  • How to Make This Recipe
  • Expert Tips
  • Recipe FAQs
  • More Recipes You Might Like

Why This Recipe Works

This is not your mama’s banana bread. Here are a few reasons why you need this banana bread in your life!

  • Dairy free
  • Moist
  • Kid friendly
  • High protein (6 grams per slice)
  • High Fibre (4 grams per slice)
  • Naturally sweetened

Key Ingredients

Flat lay image of portioned recipe ingredients including chocolate chips, cherries, eggs, butter, vanilla, honey, baking soda, salt, cinnamon, yogurt, banana and flour.

Bananas– Obviously. You need to let them get SUPER ripe and speckly, almost going black (but like, not quite). I also add more bananas than most banana bread recipes call for, simply because I find that is what keeps the bread most.

Vegan Yogurt – This keeps the bread super moist without a ton of added fat!

Eggs- Ditto for the moist factor.

Cherries- I use frozen cherries. This not only adds moisture and sweetness, but also makes this bread taste like a banana split!

Dark chocolate chips – I mean, it wouldn’t be chocolate chip banana bread without chocolate!

How to Make This Recipe

Two side by side images showing how to make the dry and wet batter.

Step 1: In a large bowl, whisk together the whole wheat flour, brown sugar, baking soda, cinnamon and salt.

Step 2: In a separate medium bowl, whisk together the mashed bananas, honey, eggs, Greek yogurt, melted butter, and vanilla extract.

Three side by side images showing how to combine the wet and dry batter, adding in cherries and dark chocolate, and pouring into prepared loaf pan.

Step 3: Add the wet ingredients to the dry ingredients and stir until well combined.

Step 4: Stir in the cherries and chocolate chips.

Step 5: Transfer mixture to the prepared loaf pan. Top with extra cherries, sliced banana, chocolate chips and hemp hearts, then bake for about 60-75 minutes on the middle rack.

Expert Tips

My best tip for ensuring a super moist dairy free banana bread is to use lots and lots of ripe bananas! The riper the better. The eggs, yogurt and honey also contribute moisture, so they are definitely important to include in the recipe.

Recipe FAQs

What else can I put in this recipe if I don’t want chocolate chips or cherries?

Honestly, any fruit you like! Blueberries, strawberries, raspberries, mango, or even pineapple! You just need the bananas in there and the rest is up to you.

Can I make this with dairy if we’re not dairy free?

Totally. Go ahead and use regular butter and regular yogurt!

Can I make this loaf vegan?

You can try, but admittedly I have never tested it. I expect it will definitely work, but won’t be as moist without the eggs. Flax eggs however are a great source of omega-3 fats, which I love! Give it a go and comment below the results!

How would I adjust the baking time to make these into muffins?

You can make these into muffins and bake them for about 25-30 minutes for full muffins and 15-17 minutes for minis.

Can this recipe be frozen?

Yes! I often do make a double batch of this dairy free banana bread, wrap one in foil and then in a freezer bag. They can be stored for up to 6 months, and simply thawed and enjoyed on demand.

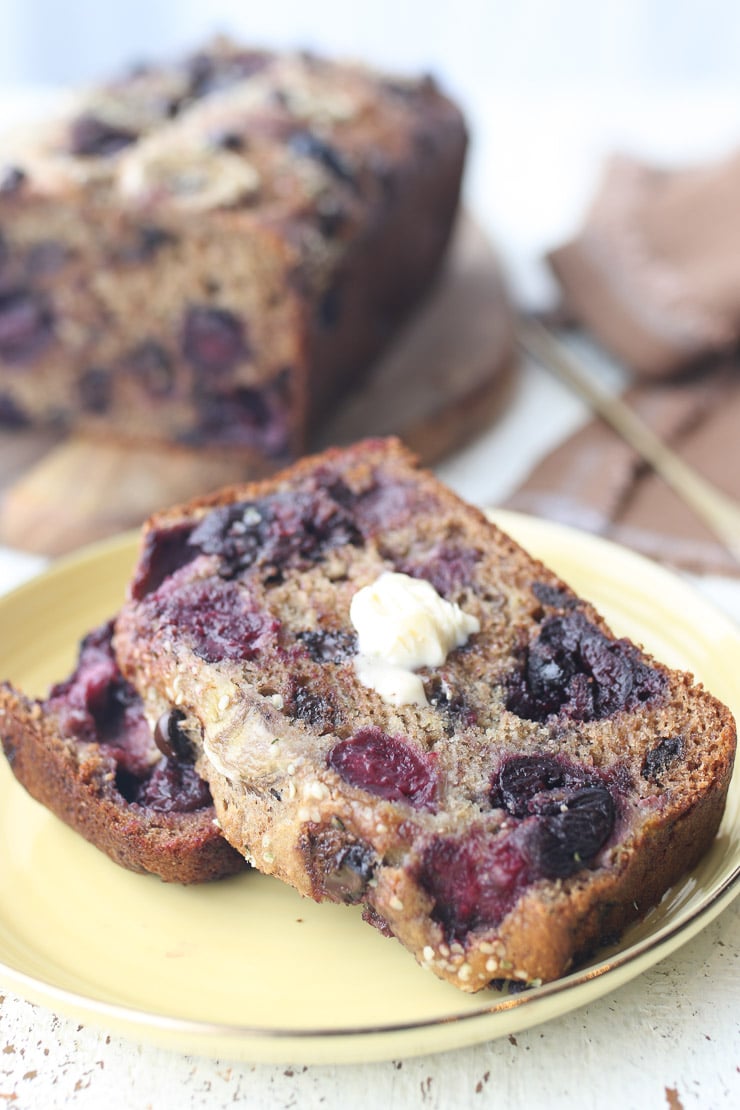
Two slices of dairy free banana bread on a yellow plate topped with butter with remainder of loaf on a wooden plate in the background.

More Recipes You Might Like

If you enjoyed this dairy free banana bread, I have a ton of other yummy banana recipes! You’re never going to have bananas going to waste now!

  • GLUTEN FREE CHOCOLATE CHIP BANANA BREAD 
  • PEANUT BUTTER BANANA MINI MUFFINS
  • PB & J BANANA MINI MUFFINS 
  • BANANA PEANUT BUTTER CHOCOLATE MUFFINS 

What other add ins do you like in your banana bread? What are your thoughts on this dairy free banana bread? Leave me a comment below with your thoughts!

Print Recipe
4.72 from 7 votes

Healthy Banana Split Bread with Chocolate Chips (Dairy Free)

This Healthy Banana Split Bread with Chocolate Chips is dairy free, healthy and loaded with natural sweetness. It is also super moist for a healthy kid friendly snack that the whole family will love!
Prep Time10 minutes mins
Cook Time1 hour hr
Total Time1 hour hr 10 minutes mins
Course: Dessert
Cuisine: American
Servings: 10
Calories: 313kcal
Author: Abbey Sharp

Ingredients

  • 2 cups whole wheat flour
  • 1/2 cup light brown sugar packed
  • 1 tsp baking soda
  • 1/2 tsp cinnamon
  • 1/2 tsp salt
  • 1 1/2 cup very ripe bananas mashed (about 3 medium)
  • 1/4 cup plain non-dairy yogurt
  • 1/4 cup honey
  • 2 large eggs beaten
  • 1/4 cup melted vegan butter
  • 1 tbsp vanilla extract
  • 2 cups frozen cherries
  • 1/2 cup dark chocolate chips dairy free

For topping:

  • 4-5 frozen cherries
  • 2 tbsp dark chocolate chips dairy free
  • 2 tsp hemp hearts

Instructions

  • Preheat the oven to 350°F and line a 9 inch loaf pan with parchment paper (hanging over the longer sides.  Grease the parchment paper and the pan on the short sides with nonstick cooking spray.
  • In a large bowl, whisk together the whole wheat flour, brown sugar, baking soda, cinnamon and salt.
  • In a separate medium bowl, whisk together the mashed bananas, honey, eggs, Greek yogurt, melted butter, and vanilla extract. Add the wet ingredients to the dry ingredients and stir until well combined.
  • Stir in the cherries and chocolate chips then transfer to the loaf pan.
  • Top with extra cherries, sliced banana, chocolate chips and hemp hearts, then bake for about 60-75 minutes on the middle rack or until a toothpick inserted into the middle comes out relatively clean and the sides are well browned. Allow to cool fully on a cooling rack before carefully removing (using the parchment paper), then slicing and eating.

Video

Nutrition

Calories: 313kcal | Carbohydrates: 53g | Protein: 6g | Fat: 10g | Saturated Fat: 5g | Cholesterol: 33mg | Sodium: 293mg | Potassium: 343mg | Fiber: 4g | Sugar: 29g | Vitamin A: 301IU | Vitamin C: 5mg | Calcium: 73mg | Iron: 2mg
Abbey Sharp

Abbey Sharp is a Registered Dietitian (RD), regulated by the Ontario College of Dietitians. She is a mom, YouTuber, Blogger, award winning cookbook author, media coach specializing in food and nutrition influencers, and a frequent contributor to national publications like Healthline and on national broadcast TV shows.
www.abbeyskitchen.com/about-abbey/

Last Updated September 30, 2022. Published September 30, 2022 By Abbey Sharp 1 Comment

Intuitive Eating Principles | How to Reject the Diet Mentality

Blue plate with the words burn fat.

In this blog post, we will be exploring the intuitive eating principles & how to reject the diet mentality plus answering reader questions about whether or not intuitive eating is for everyone.

If you’ve been following along in this intuitive eating principles learning journey, I kicked things off by discussing what the intuitive eating principles are, what HAES (Health at Every Size) entails, and the non-diet movement. It has 10 important principles that build upon each other and we’re going to be going through them all one by one in this blog and YouTube series.

Before I start, I want to be clear that I am not a HAES expert and am not the best representative to speak on behalf of people in larger bodies. I’m still learning a lot about this topic myself so together we can work towards a more accepting, diet-free culture.

I also want to flag that this intuitive eating principles content may not be for all of my followers right now. Everyone is welcome to learn how to be more intuitive in their eating. I am in no way prescribing this way of eating or thinking. I simply want to share what research suggests may help, and what I’ve seen work for a lot of people in practice- including myself. If it’s not for you, right now, know that there’s lots of other great content coming that hopefully is.

So, with that being said, let’s get started!

As part of this series, I wanted to answer a viewer question about intuitive eating principles, HAES or body positivity and associated concepts. Submit yours below because I will be doing this in each of these episodes.

Are Intuitive Eating Principles for Everyone Regardless of Size?

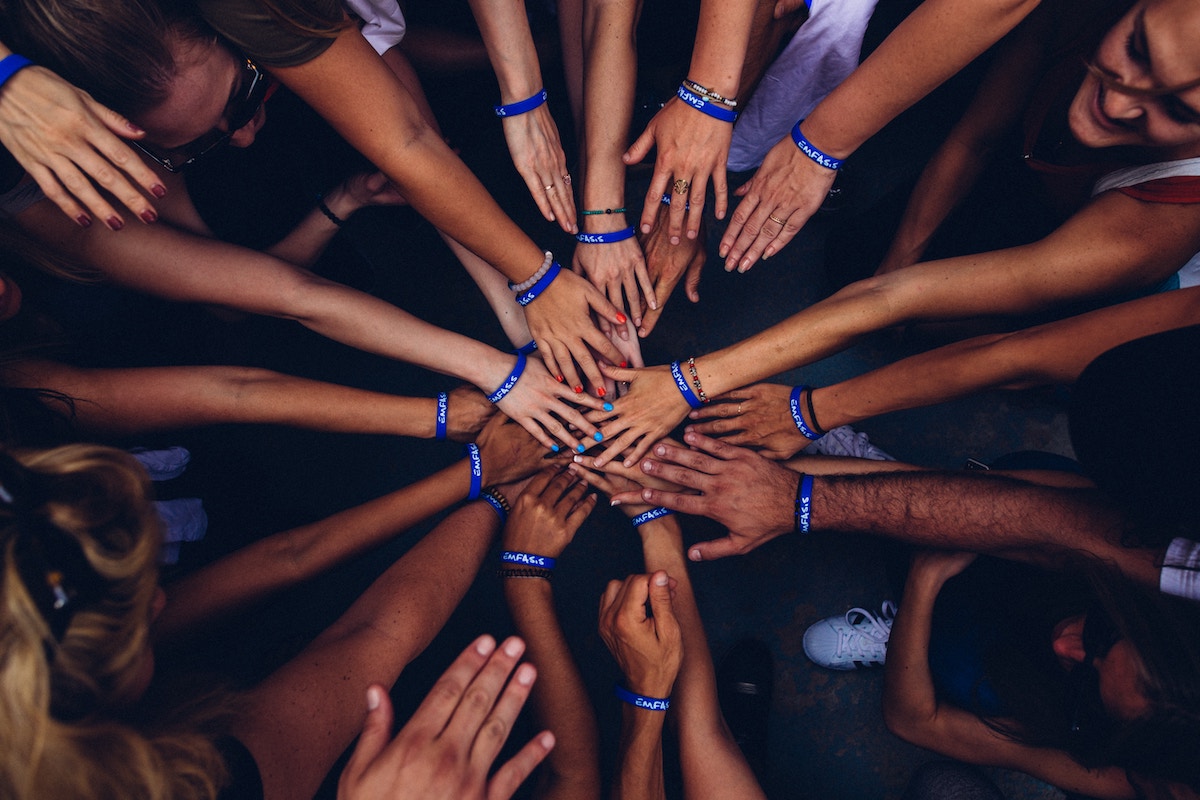
A bunch of people's hands meeting in a circle.

Dear Abbey,

I am “overweight” and my weight is impacting my health. It is very hard on my joints and I also have Diabetes, so of course my doctors all want me to lose weight. Isn’t it irresponsible to be promoting intuitive eating principles and health at every size to people like me who are clearly NOT healthy at my current size?

This is a very common criticism of HAES and intuitive eating principles. Here’s the truth. Weight loss MAY improve some chronic health problems. There’s a lot of correlational research linking weight loss and improved health outcomes, and in some cases, I can’t deny that it won’t play a role. There are even a lot of reasons to suggest that modest weight loss may improve some health outcomes for people living with type 2 Diabetes or at risk of heart disease. It’s virtually impossible to tease weight loss apart from lifestyle behaviours though so we really don’t know the magnitude of these factors. Even with something like joint pain, which seems like a reasonable assumption that weight loss will improve outcomes, we don’t know how much of those improvements are from physical activity vs the weight loss itself. So of course, it’s complicated, and I cannot say for certain that weight is NOT involved as one of MANY factors.

The challenge with the recommendation to just go lose weight, however, is that we know from very strong evidence that restrictive intentional weight loss diets do not work. For the vast majority of the population, any sustained weight loss is next to impossible, and in fact, they often may do more harm than good and cause more weight gain. So some may say this is a bit of a risk and benefit analysis that you have to make with your practitioner and dietitian.

I believe that the goal should be to find a way of eating that you can comfortably and pleasurably sustain for the rest of your life. This is really where intuitive eating principles come into play. Weight is often something we can’t just magically change or fix, but behaviours we can. Behaviours we have control over. So I would rather support someone to find healthful behaviours that feel sustainable because they’re not repressive, then attempt to lose weight, inevitably gain it back, and repeat this cycle their entire lives.

Before we get into it, I want to add that I support you no matter where your journey is. I don’t expect you EVER to give up the pursuit of weight loss if that’s what brings you health and happiness. Also, I don’t want to put weight limitations on who can and cannot pursue intuitive eating principles. I just know what the science says about restrictive fad diets in the long term and I will always think the better way to approach health is through behaviour modification. Think of weight changes as a side effect.

Okay now let’s get into the meat and potatoes of this lesson.

How to Reject the Diet Mentality

The idea of rejecting the diet mentality is principal one of Elyse Resch and Evelyn Tribole’s book, Intuitive Eating. I highly recommend getting the book and you can do so in my amazon affiliate store here.

Diet culture is all around us and has affected virtually everyone at some point in their lives. Your hair dresser is talking about Keto. Your mom is trying to cut back on carbs. Every influencer on Instagram is touting the benefits of intermittent fasting. And now even kids are not safe (see my post about the WW Kurbo app for kids). My point is, no matter where you look, diet culture is right up in your business.

It’s really no wonder that upwards of 50% of US adults try to diet and lose weight every year. And trust me, the weight loss industry takes full advantage of this with keto fat bombs, whole 30 branded snacks, and weight watchers points on packaging. We’re spending more money, on fewer calories every day.

But like I said, restrictive weight loss diets rarely actually “work”.

Up to 95% of people that go on a diet “fail”, or more realistically, their diet fail THEM. Diets aren’t designed for long-term success and they’re rarely designed to help you make useful, long-term behaviour changes. Instead, they’re focused on an endless cycle of diet, weight loss, rebound, weight gain, and repeat, also known as the Dieter’s Dilemma. You want to be thin, you diet, you begin to crave “forbidden” foods, you eventually “cave” into your cravings, you regain the weight you lost, and you’re back to feeling like shit and wanting to be thin again. These companies know that their diet plans are faulty, that’s literally built into their business model. And it’s a really good model.

But if you actually look at the research, the majority of people on diets rebound in weight and sometimes gain even more thanks to the impact on their metabolism, and their relationship with food..

I’m not saying this to discourage, but I do want to point out why this frame of mind isn’t working. Wanting to lose weight is fine, and normal, and I support you here, but coming at it from a diet culture framework just doesn’t work.

So, what should we do? Ditch the diet mentality. And that takes us into principle 1 of Intuitive eating.

How to Start to Ditch the Diet Mentality

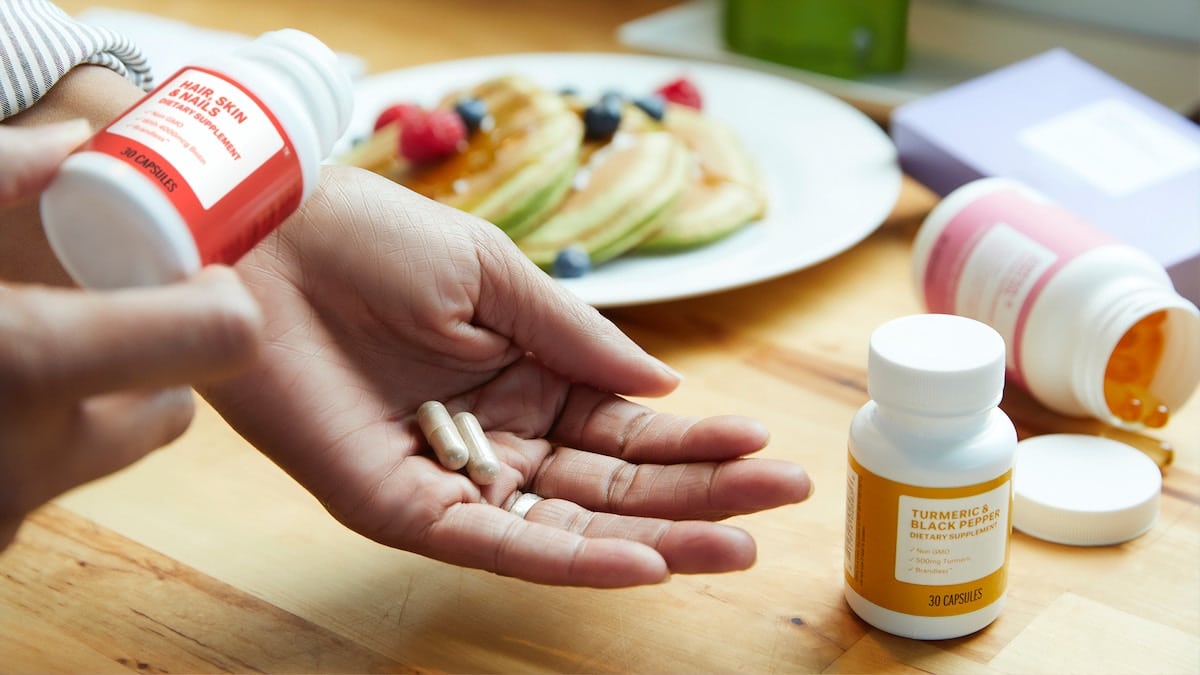
Hand taking diet supplements.

First and foremost, one of the most important things to remember is that your happiness and health are not correlated to the size of your body. Being smaller doesn’t necessarily mean you’re healthier and being larger doesn’t necessarily mean you’re less healthy. Research tells us that our behaviours are better correlated with health than our weight.

To start to ditch the diet mentality, there are 4 main steps you can take.

Step 1: Recognize and acknowledge the damage that dieting causes

Sometimes it’s hard to see the potential damage of dieting when the diet industry has rebranded itself to be about health. In today’s age, diet has become a bad word, and has been replaced with the virtuous persuit of wellness or clean eating. Do not be fooled. This is the same restrictive shit that forces us to distrust our bodies needs, repackaged with a shiny new bow. No matter what we call them, restrictive weight loss diets rarely promote good health.

First there’s the physical harms of chronic dieting including:

  • More intense binges and cravings
  • Increase risk of premature death and heart disease
    • Research tells us that those who weight cycle or “yo-yo” diet have an increased risk of death and/or heart disease compared to those who didn’t diet regardless of their body size
  • Decreased satiety cues
  • Slower metabolism
  • Changing body composition with increases in belly fat as a result of yo-yo dieting
    • When a person goes up and down in weight, they tend to regain it in their stomach area, even if that’s not where they stored it before.

Of course there are also the psychological harms including:

  • Increased risk of disordered eating
  • Increased stress and anxiety
  • Vulnerable to loss of control surrounding “forbidden” foods
  • Decreased self-confidence
  • Belief that weight gain is associated with a flaw in one’s character

If someone were to read these side effects out to you in a drug pamphlet you would absolutely refuse to take it. But yet, we pay the diet industry A LOT OF MONEY to try it.

Step 2: Become aware of diet mentality language and thoughts

Blue plate with the words burn fat.

Remember that diet culture is everywhere and its so pervasive we often don’t even see it there.

But start to really take the time to pay attention to words, thoughts and behaviours. When you approach eating, exercise, or any other lifestyle habit, you’re going to want to approach it gently and with compassion for yourself. Thinking about eating in terms of “willpower”, “discipline”, and “self-control” may sound innocent and virtuous, but using these terms often reemphasize diet mentality. Thinking you must have self-control in order to succeed is essentially a diet in disguise. Think to yourself: “Why do I feel I need to have self-control over eating? What is it that makes me feel that I can’t have certain foods?”

When you try to have self-control and you “fail” because you ate a donut, you’re characterizing yourself as a failure for simply enjoying delicious food. The foods we eat or don’t eat do not define our character or self-worth. While diet culture may try to convince you otherwise, you can be the nicest person on earth and never eat a salad and you can also be the worst person on earth and drink kale smoothies every day. Trust me, I know a lot of these people.

Another thing to keep in mind is the idea of obedience. The thing about diets is that they provide a strict list of rules and list of foods to avoid. Naturally, just like any person, if someone tells us we can’t do something, we’re way more likely to do it out of pure rebellion. And sure, you’re probably going to be able to follow the rules for some time, but naturally, you’re eventually going to rebel against them and likely overdo it.

One of the big problems with diets is that they notoriously generalize people. They assume that everyone is hungry at the same time, likes eating the same amount of food, and enjoys the same tastes and flavours. But actually, we are all different. Some people are hungry first thing in the morning while others can’t stand the thought of eating as soon as they wake up. Some people like having large meals while others may want smaller, more frequent meals. My husband and I fit those dichotomy and we eat under the same roof. But by assuming we’re all the same, diets inherently fail us. So, trying to “obey” rules that aren’t designed for you makes it really easy to fight them when they inevitably don’t work for us.

And what happens when you fight? Well you may feel good at first, but soon comes feelings of shame and guilt. With intuitive eating principles, the goal is to take charge of your life and your decisions. You decide what tastes good. You decide what and when you want to eat based on what your body truly needs. By sitting in the driver’s seat, you’re less likely to rebel against rules that make you feel happy.

What’s great about intuitive eating principles is that you can’t “fail”. Even if a meal or snack doesn’t go so well, or you eat more or less then you think you probably needed. Those experiences are banking really important information that will help help guide your eating as you move forward. It’s a long learning process that naturally changes as your life changes.

Step 3: Get rid of the dieter’s tools

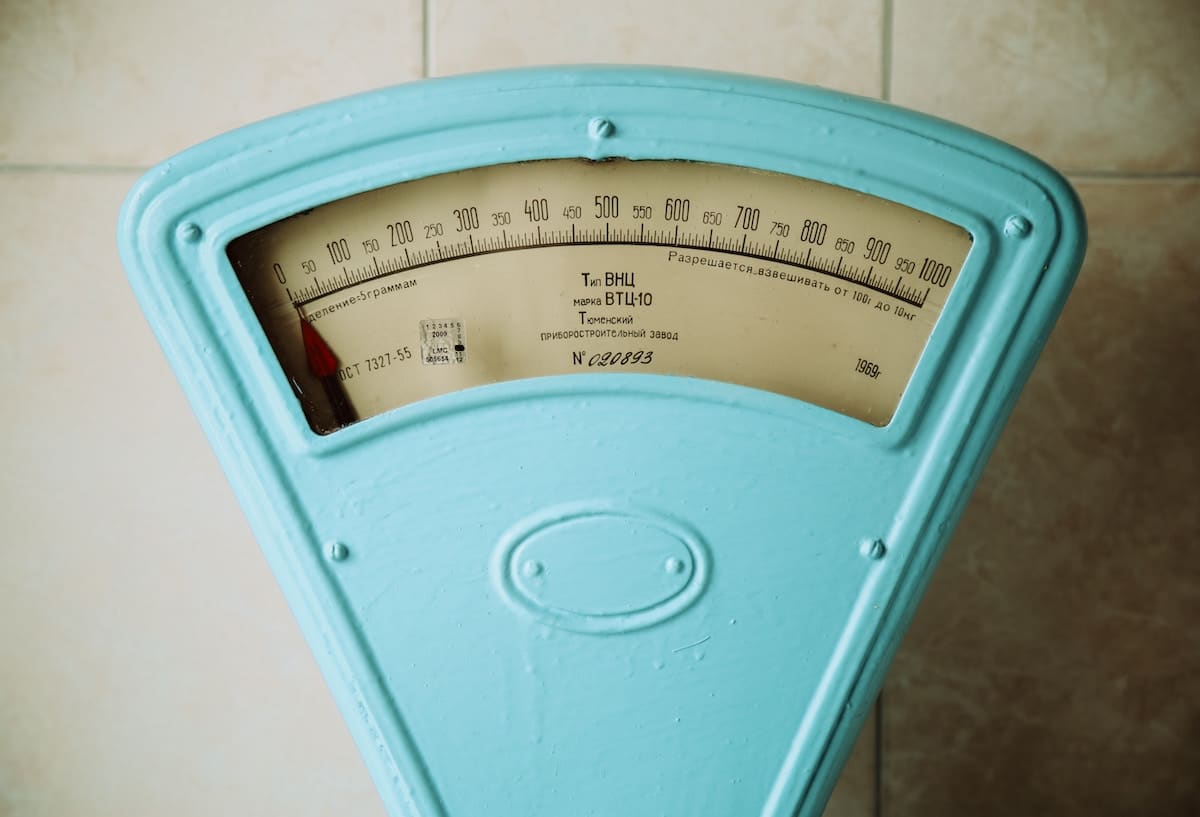
Birds eye view of a blue human scale.

Dieting tools are things that get in the way of real progress in your relationship with food because they blind us from important body cues. They’re used as external validation for doing something “right”. For example, a scale is used to tell a person how much they weigh. If they like the number they see, then the person usually feels a sense of accomplishment. But if they don’t, it reinforces every bad feeling that comes with dieting and pushes self-doubt, low self-esteem, a preoccupation with food and body, and eventually kick starts the diet cycle all over again. I mean, raise your hand if your day has gone well or poorly just because of the number you saw when you hopped on. We’ve all been there.

So in step 3, it’s all about getting rid of these tools, at least for now. Strict meal plans, scales, calorie tracking apps, fitbits, and anything that serves little purpose in your relationship with food should be thrown out.

I want to note that I am open to the possibility that there may be a place for these for certain populations or specific times. In the past, I know I have been critical of calorie counting. I am open to your feedback that it may have helped you learn about nutrition or keep tabs on what foods feel best. I respect that and I am not resisting that possibility. But for the purposes of this exercise, and the intuitive eating process, we need to put this on the back burner. We can revisit it when we get to discussing nutrition as that is also part of the intuitive eating principles, but it needs to be put aside to help us rebuild a relationship with food.

If you still feel weird about temporarily giving these up, I also wanted to share some insights into why these tools aren’t even the best measurements of health.

Why Dieting Tools are Not the Best Measurements of Health

If no longer weighing yourself makes you feel like you will lose tabs on progress, consider that weighing yourself daily is not even that telling.  For example, two cups of water equals one pound. So, if you eat some salty chips and start to bloat, you could easily “put on” a few pounds in a single day. Food also has weight, so that’s why you usually weigh more later in the day. Muscle weighs much more than fat, which means if you carry a lot of muscle, you’re going to weigh more.

And what about those diets that cause you to lose 10 pounds in a single week? It’s mostly water weight you’re losing as well as muscle loss. Drinking juice cleanses all week leads to a severe calorie deficit which leads to the body cannibalising muscle to use as energy. When the muscle breaks down, it produces water as a by-product, and we excrete this through our urine. So, any weight you’re losing is usually just water and muscle, which we really don’t want to lose.

As for calorie trackers and apps, they aren’t totally accurate. FitBits and other trackers have been found to overestimate your energy expenditure of the day. What’s more, research is starting to show that these fitness and calorie trackers can be detrimental to your mental health. One research study found an association between use of calorie trackers and eating disorder symptoms, such as anxiety surrounding food and eating.

What’s even more interesting is that they found a higher correlation between fitness trackers and eating disorder symptoms. I’ve even talked about how this impacted my fitness (and it wasn’t for the better). Fitness and calorie trackers are very objective in that they only track what you’ve done. They don’t take into consideration that you’re taking a rest day or it’s your birthday. They also don’t take into consideration your muscle mass and metabolism, which will have a huge effect on your daily energy expenditure and energy needs. All you see is whether you “succeeded” or “failed”, which is arbitrary at best, and counterproductive at worst.

So to summarize, I’m not saying you should never hop on a scale again if that feels empowering to you. I’m also not saying you can’t hope that the intuitive eating principles will help you lose weight. I’m just suggesting for this process to work, and it’s a process, the weight loss tools need to be put aside so we can regain our relationship with ourselves and food.

Step 4: Be compassionate to yourself

Women on her cellphone.

The final step of principle 1 is to be nicer to yourself.

As you go through the intuitive eating principles and really learn how to live life diet-free, you’re going to be tempted and pulled back into diet culture. Remember, it’s everywhere!

So, if you’re scrolling through Instagram and feel like you need to get on a diet, don’t beat yourself up about it. Take a second to think about why a photo or program incited this thought.

Also think about if you’re ready to put the restrictive diets on the back burner right now and if that is the best think you can do for your own physical and mental health. Remember, no judgement, we all have to come into this when we’re ready.

Learning to eat intuitively takes time and patience. You’re going to feel like you have set backs, but again, take these set backs as learning opportunities rather than failures.

If you’re having trouble wondering if you’re following diet mentality, here are some useful comparisons from the Intuitive Eating book that I wanted to share.

For eating and food choices, diet talk sounds like this:
  • Do I deserve it?
  • Eating that is going to make me feel bad.
  • That food is bad for me.
  • That food is good for me.
  • I’m eating clean.
In comparison, non-diet talk sounds like this:
  • Am I hungry?
  • Do I want to eat that? Am I in the mood for it?
  • Will I be deprived if I don’t have?
  • Will it taste good?
  • I deserve to enjoy eating food without feeling any guilt
When it comes to exercise, diet talk sounds like this:
  • I want to burn as many calories as possible
  • If I miss a workout, I feel bad
  • If I work out for another hour, then I can work off that donut I ate earlier
Comparatively, non-diet talk sounds like this:
  • Exercising makes me feel happy
  • I feel strong and energized after my workouts
  • I’m less stressed after working out

Your Intuitive Eating Exercise

Diet supplements on a table.

Go through the people you subscribe to or follow and flag or pay extra attention to diet mentality language. Words like “clean” or “good and bad” food comparisons or “earning” meals, or “cheat days”. Start to really tune into this language and ask yourself how it feels to see this now that you’re trying to think more morally neutral about food. If it doesn’t feel like it works for you anymore, unfollow or unsubscribe. Fill your feed with people who have more supportive relationships with food.

Remember that eating intuitively is about respecting your body’s natural signals and desires. This concept does fall short on acknowledging how trauma may impact our ability to feel safe and connected to our body. If this is an issue for you, it may be a good idea to seek support from a licensed therapist. In the meanwhile, I’ll be continuing this series and return with Principle 2: Honour Your Hunger so stay tuned.

Become an Abbey’s Kitchen Subscriber

What are some of your questions as it pertains to intuitive or mindful eating?
Leave me a comment below!

Contribution by Katey Davidson, RD

Abbey Sharp

Abbey Sharp is a Registered Dietitian (RD), regulated by the Ontario College of Dietitians. She is a mom, YouTuber, Blogger, award winning cookbook author, media coach specializing in food and nutrition influencers, and a frequent contributor to national publications like Healthline and on national broadcast TV shows.
www.abbeyskitchen.com/about-abbey/

Last Updated September 26, 2022. Published September 26, 2022 By Abbey Sharp Leave a Comment

Beet Chips Recipe | Easy Vegan Appetizer

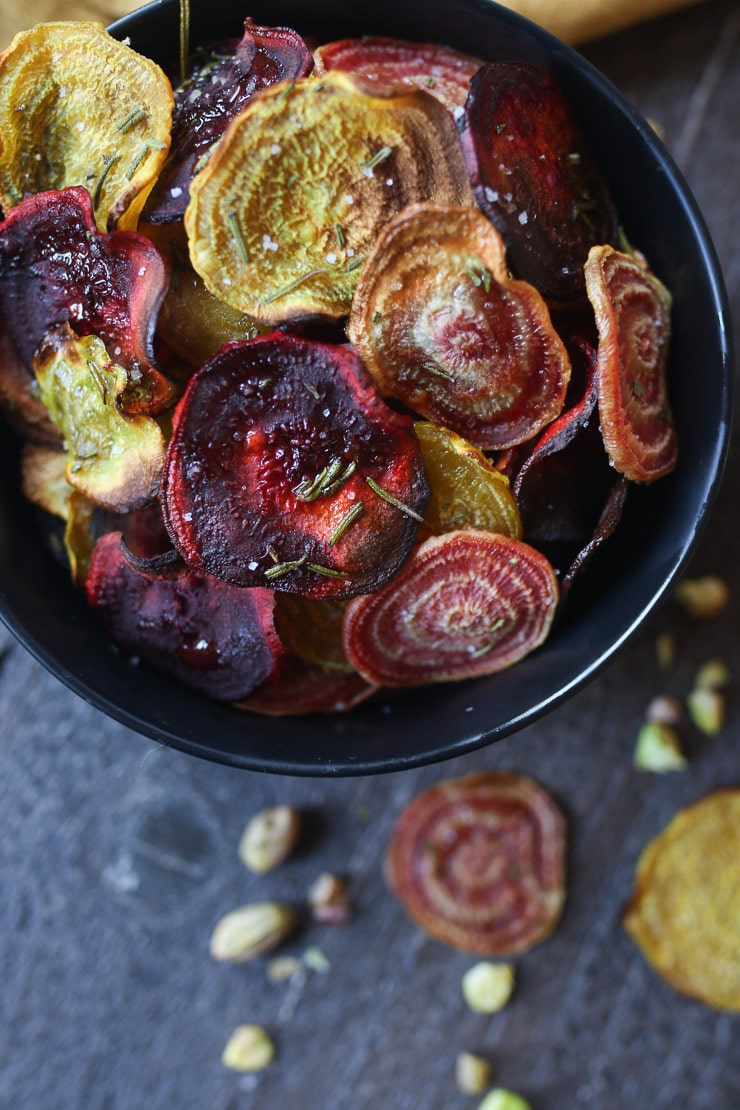
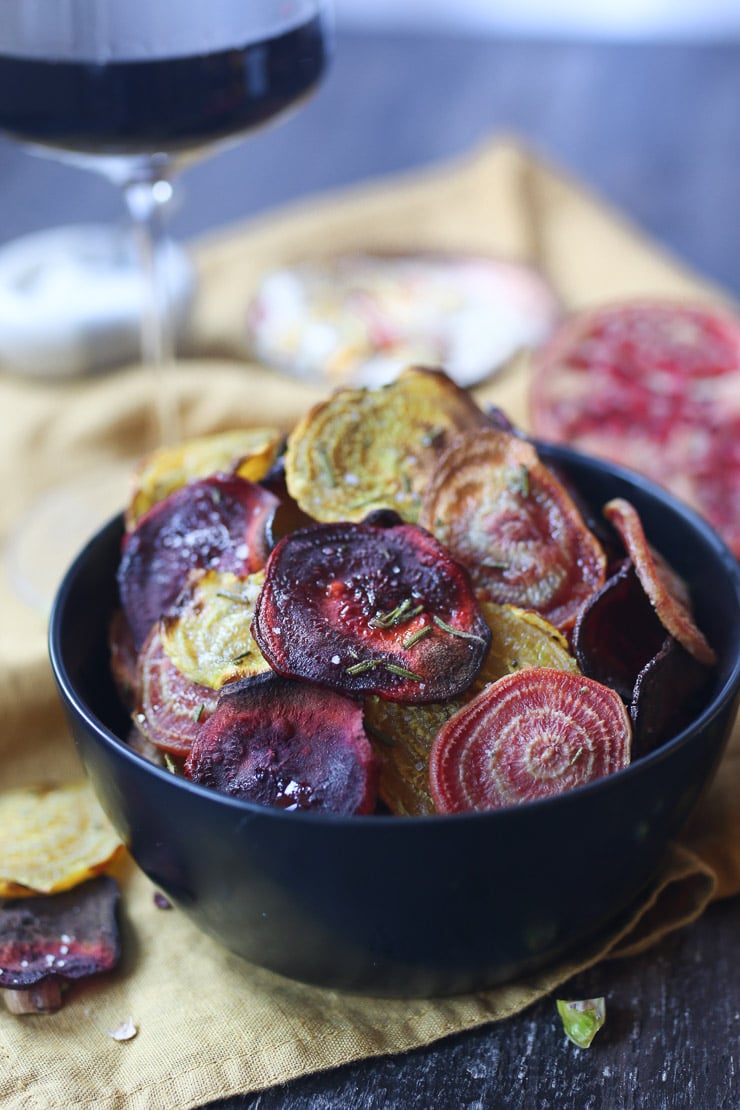
Crispy colourful beet chips in a black bowl.

These Vegan Baked Beet Chips with Creamy Orange Dip are an easy crowd pleasing appetizer that are plant-based, gluten-free, and all natural.

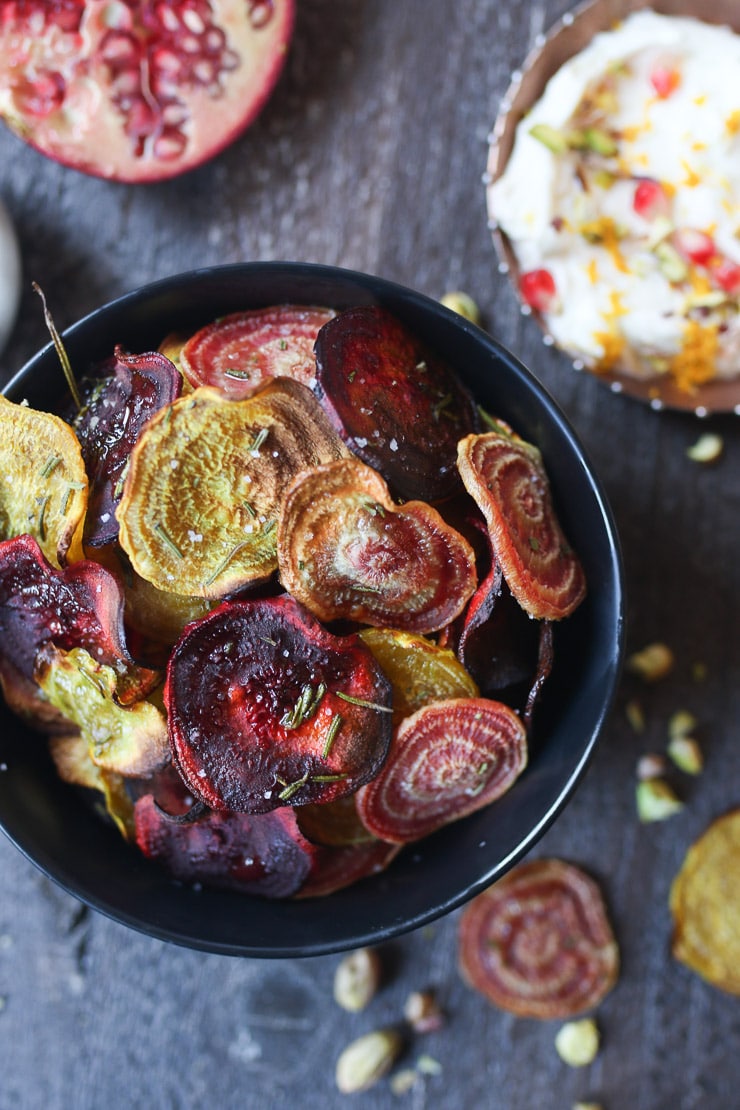
Birds eye view of colourful beet chips in a black bowl.

Not only are these beet chips super aesthetically pleasing for the fall season, but they’re also a great nutrient-packed, vegan option to offer to guests. They have the perfect crunch factor everyone looks for in a chip and by pairing it with a creamy orange dip, it’s a guaranteed way to earn bragging rights for bringing the best appetizer this Thanksgiving.

Table of contents

  • Key Ingredients
  • How to Make This Recipe
  • Expert Tips
  • Recipe FAQs
  • More Recipes You Might Like

Why This Recipe Works

These beet chips are the perfect appetizer to add to your Thanksgiving menu. I love them because are:

  • Easy to prepare
  • Plant-based
  • Gluten-free
  • Colorful and appealing to the eye!

Key Ingredients

  • Beets – For this recipe, I use an assortment of beets including golden, candy cane beets, and regular red beets. But you can use whatever beets are available to you!
  • Rosemary – I use fresh rosemary for topping and additional depth of flavour, but dried rosemary will also work.
  • Creamy Orange Dip – to make the creamy orange dip I combine soft cheese and yogurt (both vegan, of course) for creaminess as well as orange juice and orange zest for citrusy flavour. The maple syrup and cumin is added for an extra flavour boost to make this beet chips recipe extra festive.

How to Make This Recipe

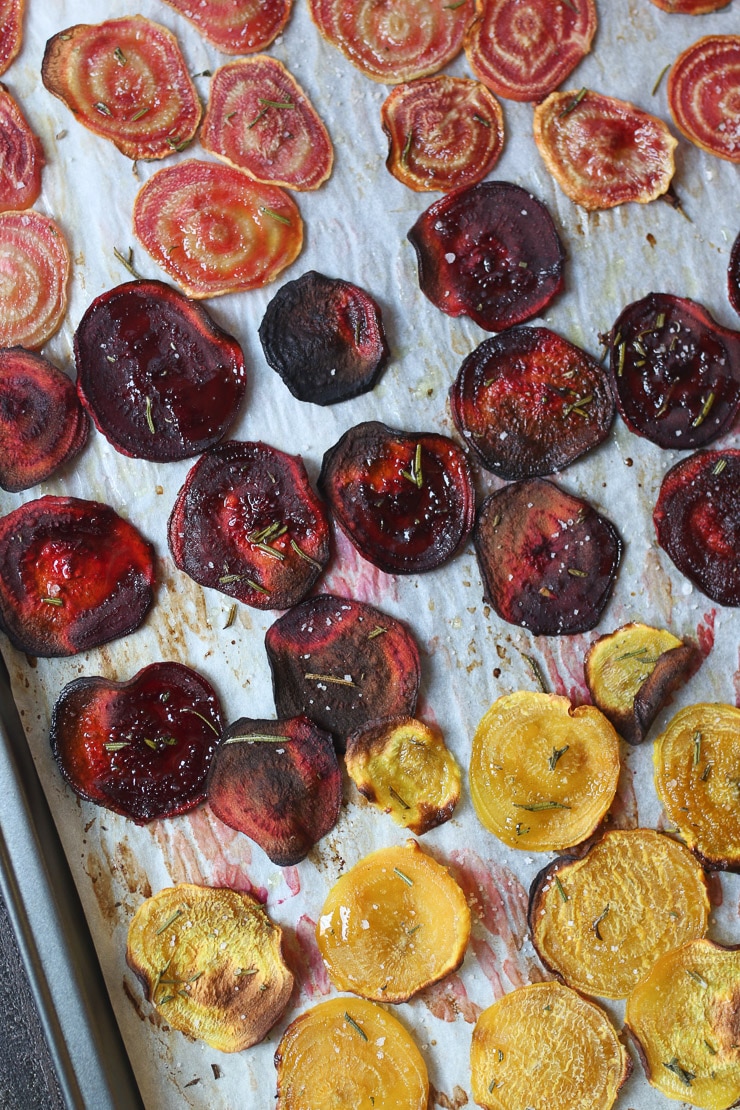
Birds eye view of roasted beet slices on a sheet pan.

Step 1: In a small food processor, puree together the vegan cheese, yogurt, orange juice, zest, cumin, maple and a pinch each of salt and pepper, to taste.

Step 2: Divide the different coloured beets into bowls and add the oil and a generous pinch of salt. Allow them to sit for 15 minutes to draw out the moisture, then spin them in a salad spinner to remove the excess moisture.

Step 3: Lay the chips on a baking sheets prepared with a piece of parchment paper. Sprinkle with rosemary and bake for about 50-65 minutes on the middle rack or until crisp. It’s best to move the baking sheet around for even cooking half way through. Remove from the oven and sprinkle with fleur de sel while still hot.

Step4: Allow to cool completely on a cooling rack before transferring to an air tight container. These will store in at room temperature for up to 2 weeks. Serve with a ramekin of the vegan dipping sauce.

Expert Tips

Bake these beet chips at a low heat so they don’t burn (those sugars are delicate!), and then let them cool.

I would also recommend using a mandoline which will help you get the beet slices super thin so the chips crisp up. However, if you don’t have one and don’t want to buy one, you can also use a really sharp knife.

When and if they are available, I like to make this recipe using assorted beets like golden, candy cane, and red beets for extra colour and fun. But if they aren’t available and you only have access to one or the other, then use what you can.

Crispy colourful beet chips in a black bowl.

Recipe FAQs

How do you make the creamy orange dip without dairy?


I used a dairy free creamy chevre-like cheese and a soy based yogurt, but any vegan yogurt and soft cheese will work. This would also be delicious with a vegan cream cheese! I love the combination of chevre, orange, and beets, so this dip pairs beautifully. Of course, you can also always serve the chips with whatever dip you like!

How do I make the chips thin and crispy?

I add a little bit of salt to the thinly sliced beets (along with the oil), the excess moisture in the beets get drawn out so that your beet chips can crisp up before their sugars burn. I use the same technique when I make zucchini noodle recipes and butternut squash noodle recipes. I also have used it for my zucchini lasagna pinwheels which are the bomb dot com.

Are these chips gluten-free?

Yes! Making beet chips is a great alternative to pita chips or other snacks which may contain gluten for your holiday guests who are gluten free.

Can these chips made ahead of time for the holidays?

These beet chips can last in an air tight container (once they are FULLY cool) for about 2 weeks. The creamy orange dip will last about 4 days in the fridge. YAY for make-ahead holiday recipes!

Baked beet chips in a black bowl.

More Recipes You Might Like

If you liked these beet chips, then you might also like these recipes on the blog.

  • Holiday Dippers for Hummus
  • Holiday Cranberry Meatballs with Gravy
  • Crispy Tofu with Orange Sauce
  • Vegan Sweet Potato & Cranberry Mousse Bites
  • Healthy Holiday Appetizer Round Up

Have you tried making these beet chips for the fall season? Let me know your thoughts down in the comments!

Crispy colourful beet chips in a black bowl.
Print Recipe
5 from 1 vote

Beet Chips (Easy Vegan Appetizer)

These Vegan Baked Beet Chips with Creamy Orange Dip are an easy Holiday appetizer that are plant based, gluten free, and all natural! Perfect for Thanksgiving or Christmas!
Prep Time15 minutes mins
Cook Time1 hour hr 5 minutes mins
Total Time1 hour hr 20 minutes mins
Course: Appetizer, Snack
Cuisine: American
Servings: 4 people
Calories: 178kcal
Author: Abbey Sharp

Ingredients

Dip

  • 3 tbsp vegan soft “chevre” like cheese
  • 1/4 cup vegan plain yogurt
  • 1 tbsp orange juice
  • 2 tsp orange zest
  • 1 tsp maple syrup or to taste
  • 1/4 tsp cumin
  • salt and pepper to taste

Beet Chips

  • 1 lb assorted beets thinly sliced on a madolline 1/16″ each
  • Sea salt
  • 3 tbsp extra virgin olive oil
  • 2 tsp finely minced fresh rosemary
  • Fleur de sel

Instructions

  • In a small food processor, puree together the vegan cheese, yogurt, orange juice, zest, cumin, maple and a pinch each of salt and pepper, to taste.
  • Preheat oven to 300 F and prepare two baking sheets lined with parchment paper.
  • Divide the different coloured beets into bowls and add the oil and a generous pinch of salt. Allow them to sit for 15 minutes to draw out the moisture, then spin them in a salad spinner to remove the excess moisture.
  • Lay the chips on a baking sheets prepared with a piece of parchment paper. Sprinkle with rosemary and bake for about 50-65 minutes on the middle rack or until crisp. It’s best to move the baking sheet around for even cooking half way through. Remove from the oven and sprinkle with fleur de sel while still hot.
  • Allow to cool completely on a cooling rack before transferring to an air tight container. These will store in at room temperature for up to 2 weeks.
  • Serve with a ramekin of the vegan dipping sauce.

Nutrition

Calories: 178kcal | Carbohydrates: 16g | Protein: 2g | Fat: 12g | Saturated Fat: 2g | Polyunsaturated Fat: 1g | Monounsaturated Fat: 8g | Sodium: 151mg | Potassium: 386mg | Fiber: 4g | Sugar: 10g | Vitamin A: 53IU | Vitamin C: 11mg | Calcium: 47mg | Iron: 1mg

Abbey Sharp

Abbey Sharp is a Registered Dietitian (RD), regulated by the Ontario College of Dietitians. She is a mom, YouTuber, Blogger, award winning cookbook author, media coach specializing in food and nutrition influencers, and a frequent contributor to national publications like Healthline and on national broadcast TV shows.
www.abbeyskitchen.com/about-abbey/

Last Updated September 23, 2022. Published September 23, 2022 By Abbey Sharp 6 Comments

Female Bodybuilder Diet & Supplements | Is It Safe?

We go through the safety and risks for a standard female bodybuilder and fitness competition prep with regards to diet and supplements.

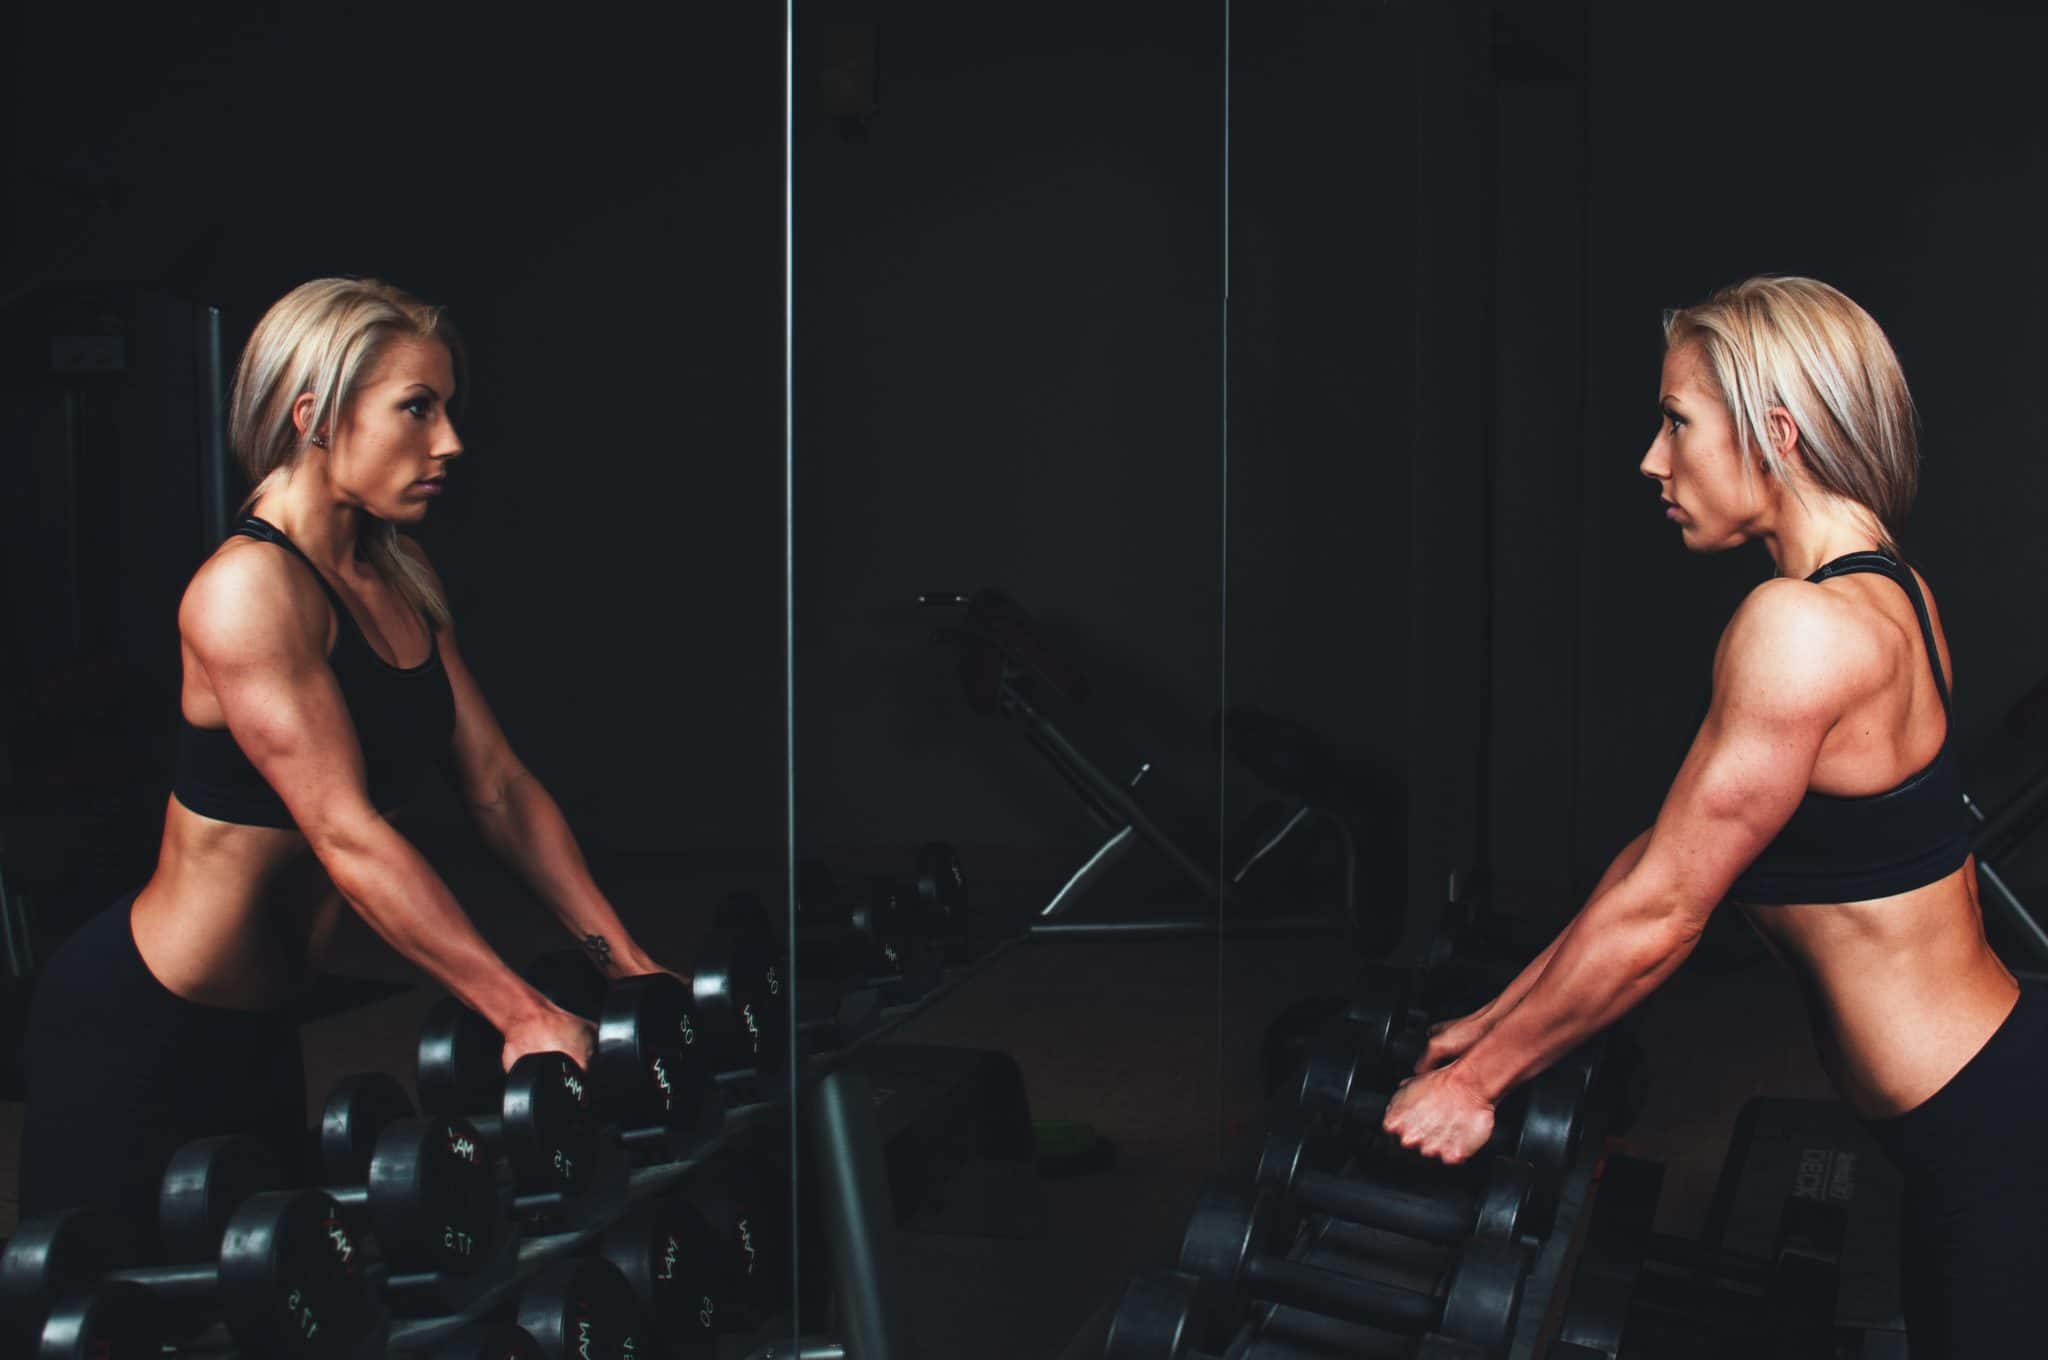
Female body builder standing in front of mirror holding weights.

I’ll be totally transparent – the whole bodybuilding and fitness competition world for women has always kinda made me anxious. Not because I think it’s inherently unhealthy necessarily, but rather that there are a lot of coaches who promote behaviours that are inherently unhealthy. Having said that, there are a lot of reputable sports dietitians who are able to make evidence based recommendations and assess a potential competitor for their ability to follow their recommendations safely. So in today’s post (and part one of my series), I wanted to give an introduction to some of the most common recommendations for a female bodybuilder in the fitness competition world from a neutral perspective and then in part two we will really dive into some of the major concerns.

What is a Female Bodybuilder?

Bodybuilding is defined as the “use of progressive resistance exercise to control and develop one’s musculature for aesthetic purposes”. Not all bodybuilders compete, but if they do, they are judged on their muscularity and leanness rather than their athletic performance. The goal of a female bodybuilder is to achieve fat loss, while also maintaining lean muscle mass.

Female Bodybuilding vs Weight Lifting

Weightlifting has been an Olympic sport since 1896 while bodybuilding is not (it was petitioned to the IOC to make it an Olympic sport, but it was since denied). Weightlifting is the act of lifting a significant amount of weight in the form of barbell loaded with weight plates. While bodybuilders do weightlifting to increase muscle size, the sport focuses on aesthetics and appearance and they are judged based on specific levels of their muscularity.

Divisions for a Female Bodybuilder

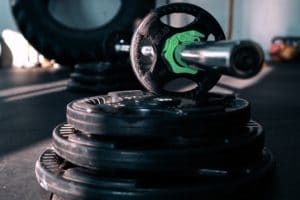
Stacked weights for female bodybuilding.

There are a few different categories or bodybuilding classes for female fitness competitions.

Bikini is the most popular, with women aspiring to a more hourglass physique (small waist, larger breasts and glutes). The body fat percentage is usually 10-14% with less muscle mass than other divisions.

Figure competitors have more muscle and are judged on muscle separation and development. They usually rate in body fat from 8-12%.

Physique competitors have even more muscle mass with a more athletic build and a fat percentage of between 8-10%. While pretty lean, women in this category should not technically look “shredded”.

Bodybuilding is for women who are very muscular and must perform a ride range of bodybuilding poses. Their body fat mass is also significantly lower, always in the single digits below 10%.

Diet Phases of Female Bodybuilding Competition Prep

Let’s discuss the two important phases of bodybuilding that are typically followed to prepare for a competition.

Female body builder using a tape measurer to measure her waist.

Bulking Phase

The bulking phase can last anywhere between a few months to a year. During the bulking phase, the goal is to build as much muscle as possible through intense weightlifting and a high calorie, protein rich diet. During the bulking phase, caloric intake is typically increased by around 15%.

As an example, if you’re normally eating a 2,000 calories a day, you should eat 2,300 calories a day during the bulking phase.

Most “coaches” would aim for their clients not to gain more than 0.5-1% of their body weight per week.

Cutting Phase

The cutting phase happens after the bulking phase and can last anywhere between three to six months. This phase prepares you for competitions. The goal is to lose as much fat as possible while also maintaining muscle mass (from the bulking phase). This phase is done through specific changes in diet and exercise with caloric intake being reduced by approximately 15% (on average).

As an example, if you’re eating a 2,000 calories a day, a female bodybuilder may eat 1,700 calories a day during the cutting phase.

Most “coaches” would aim for their clients not to lose more than 0.5-1% of their body weight per week. This is recommended because weight loss rates that are more gradual may help preserve lean body mass.

Macronutrient Distribution for a Female Bodybuilder

This is roughly what a common macronutrient distribution of a female bodybuilder will look like (based on a 2,000 calories/day diet). Keep in mind that a good coach will adjust these macros to fit the individual, but these are just average common baseline recommendations we’ve seen.

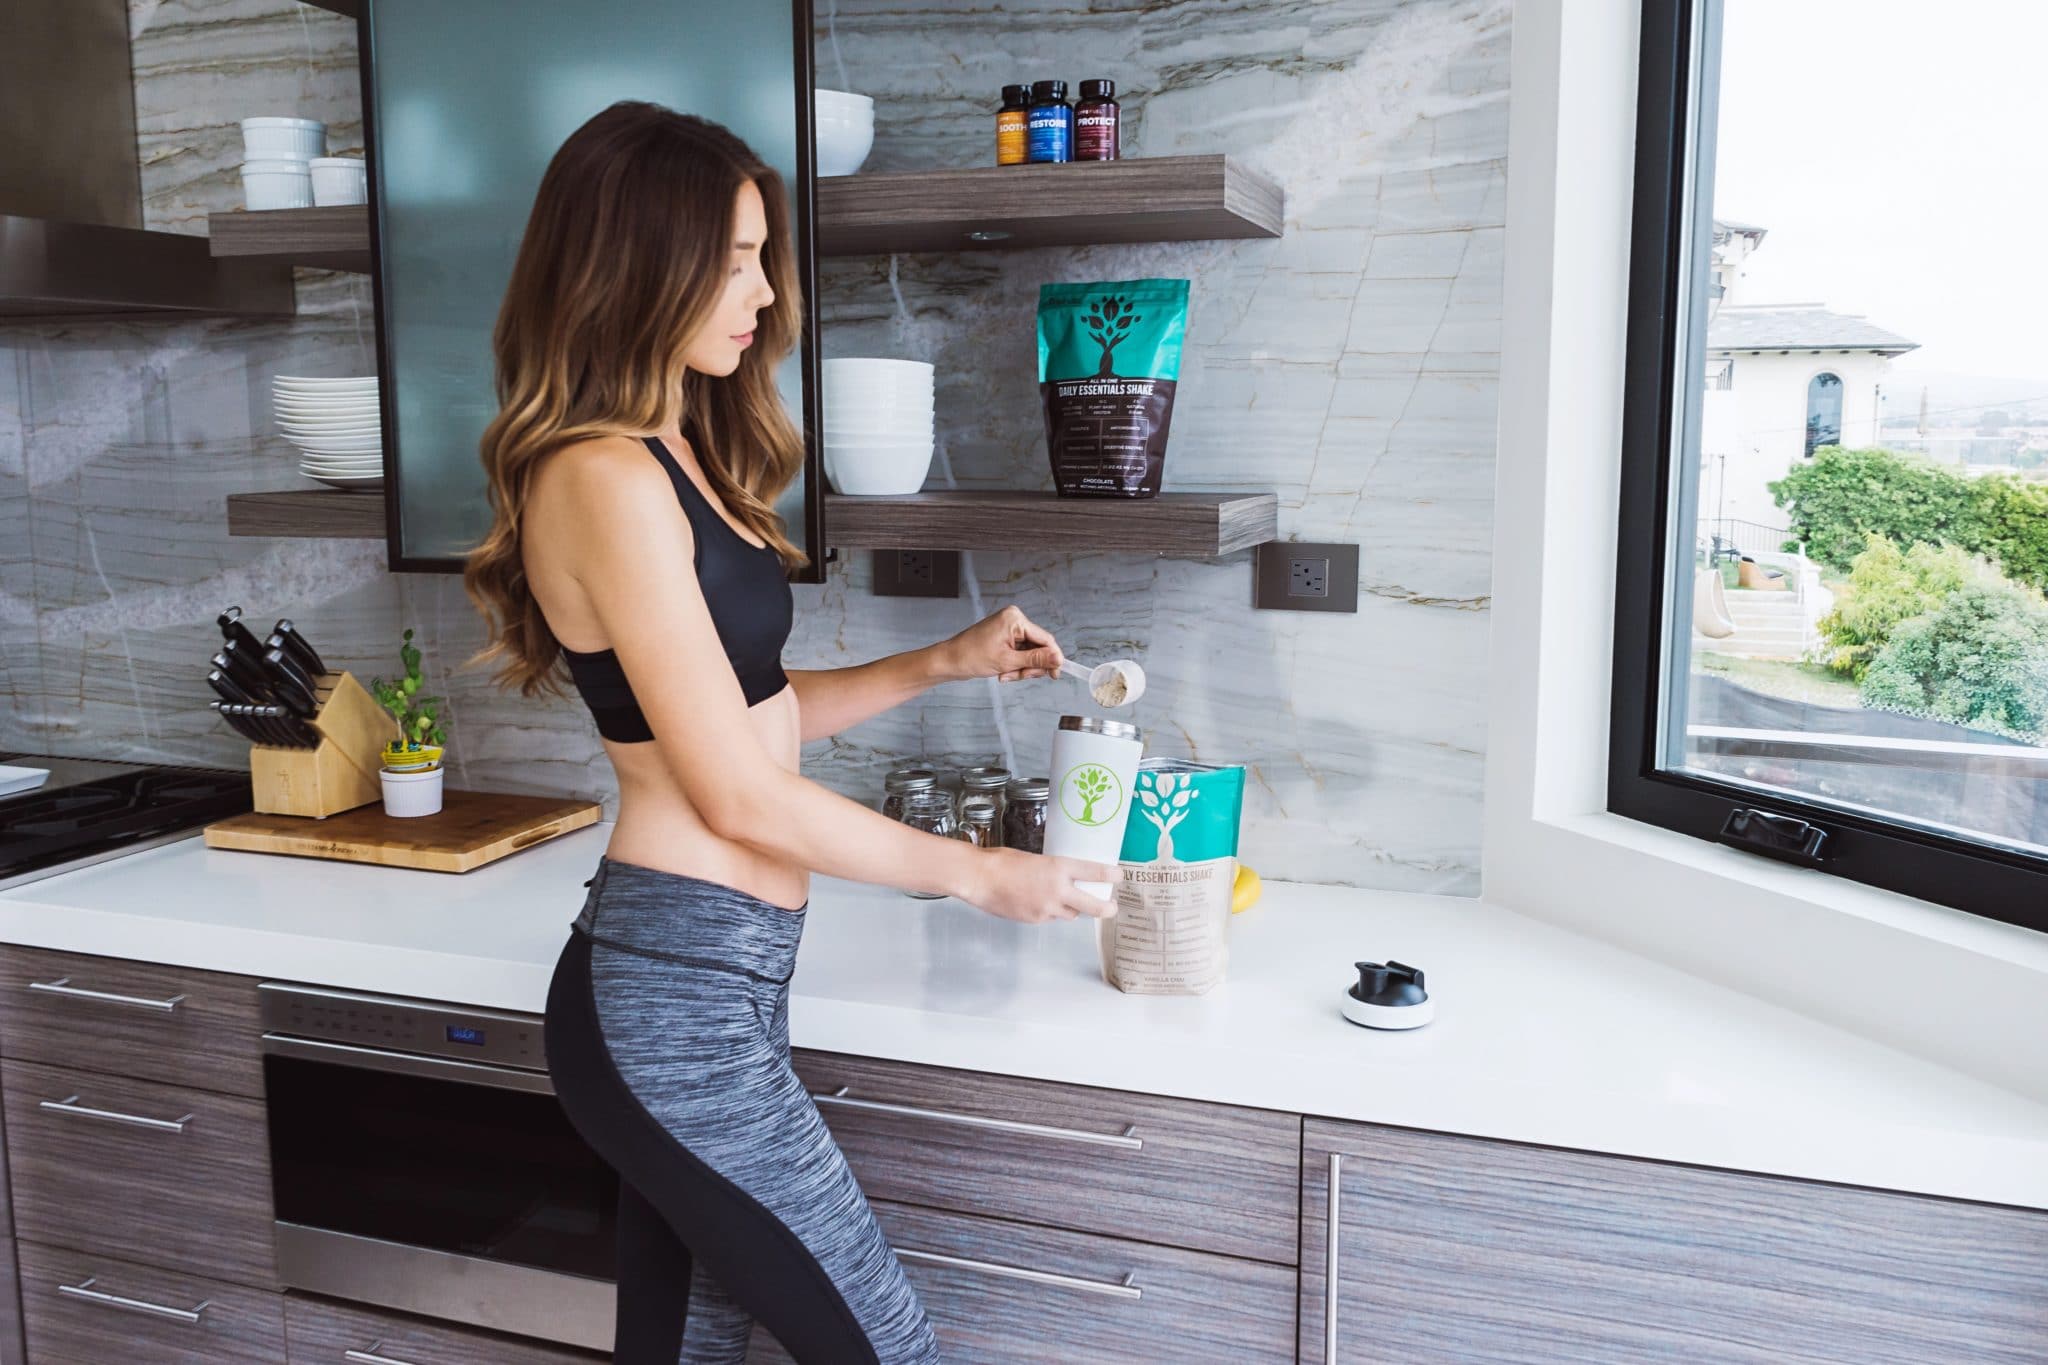
Female body builder preparing a protein shake in her kitchen.

Protein

It is recommended that a female bodybuilder or fitness competitor aim to get 30-35% of their energy from protein which is approximately 150-175 grams per day. Protein requirements are higher than the traditional recommendations of a non-bodybuilder because of the excessive resistance training exercises. Researchers have found that protein intake of 2-2.2g/kg of protein may be optimal for a female bodybuilder to prepare for competition before nitrogen losses occur. To give you a comparison, it is recommended that a healthy active non-bodybuilding individual get 0.8g/kg of protein. Common “ideal” protein sources include: lean cuts of poultry, meat, fish, Greek yogurt, protein powder, and cottage cheese.

Carbohydrates

It is recommended that a female bodybuilder or fitness competitor get 55-60% of their energy from carbohydrates. Common “ideal” carbohydrate sources include: quinoa, rice, crackers, oatmeal, and sweet potatoes.

Fat

It is recommended that a female bodybuilder or fitness competitor get 15-20% of their energy from fat. A bodybuilder’s fat needs are on the lower end because the goal is to achieve optimal fat loss, and fat is not recommended before a workout (it can cause bloating) or after a workout (it can slow down glucose and protein utilization). Common “ideal” fat sources include: nuts and seeds, olive oil, avocado, avocado oil and flaxseed.

The main pre and post workout nutrients of concern are getting enough protein for muscle repair and synthesis and enough carbohydrates to replenish glycogen stores and trigger an insulin response for building muscle.

Foods to Limit on Fitness competition prep

In order to achieve their desired physique goals and promote quick fat loss, a female bodybuilder or fitness competitor may be told to completely eliminate certain high sugar, high fat foods from their diet. Some of these foods include alcohol, added sugars like candy, cookies, donuts, sugar sweetened beverages and deep fried foods. Other coaches allow “cheat days” to help promote diet adherence and metabolic preservation. Again, the recommendations around diets and meal plans are typically very specific between client and coach.

Birds eye view of a blue plate with a single orange slice on it against a light background.

Common Female Bodybuilder Supplements Risks vs Benefits

Whey Protein

Whey protein is one of the most popular and safest protein supplements for muscle building. One study found that 21 weeks of supplementing with whey protein before and after resistance training increased the muscle size. The study also found that whey protein supplementation altered gene expression to favour muscle anabolism specifically in the vastus lateralis (largest muscle in the thigh).

Risks with Whey Protein Bodybuilding Supplements

In some people, whey protein may be difficult to digest and may cause unpleasant symptoms like bloating, gas, stomach cramps and diarrhea. There is some evidence that a high protein diet may put pressure on the kidneys, so for people that already have an existing kidney condition, whey protein may not be recommended. There is also the concern that some whey protein products on the market are not always regulated and may be contaminated with toxic substances like arsenic and lead, according to this Consumer Report.

If you’re worried about some of these concerns or have experienced bloating from whey protein, there are a ton of other great protein supplements for bodybuilding like hemp protein, pea protein, brown rice protein and plant protein blends.

Creatine

Creatine is also considered another generally safe supplement that is legally available. Studies have shown that it can significantly increase muscle size and strength with one study suggesting creatine resulted in 1-2 kg increases in total body mass.

Risks with Creatine Bodybuilding Supplements

Creatine has been associated with some side effects like kidney damage, kidney stones, bloating, dehydration, muscle cramps and digestive problems. The research still considers creatinine one of the safest supplements out there but if creatinine is used incorrectly (not following the recommended dosages), then there is higher risk that these side effects may occur. It is also recommended to avoid creatine if you’re also taking medications that affect the liver or kidney.

Beta-Alanine

Beta-alanine (BA) is a non-essential amino acid that is produced naturally in the body, but is commonly offered in supplement form to aid in muscle endurance in high intensity exercise. BA works by entering the blood stream, where it is taken up by the skeletal muscle and used to synthesize carnosine. Carnosine is a pH buffer in the muscle that is especially important during anaerobic exercise like weightlifting or sprinting.

One study found that consuming 6.4g of BA daily for four weeks increased muscle carnosine levels by 64.2%., while another study found that BA supplementation for 4-10 weeks increased knee extension torque by up to 6%, improved muscle resistance to fatigue during strength training and increased lean mass by 1 kg.

Concerns with Beta-Alanine Bodybuilding Supplements

Variety of supplements for a female bodybuilder in a cup.

Some research has found that taking high dosages of beta-alanine supplementation can cause paresthesia (skin tingling) on the face, abdomen, chest and extremities. However, this can be prevented by taking a smaller dose. In one study on rats, a high intake of beta-alanine led to a taurine deficiency (because taurine and beta-alanine share the same transporter) which potentially could cause alcohol-induced liver fat buildup.

Beta-hydroxy-beta-methylbutyrate

Also known as HMB, beta-hydroxy-beta-methylbutyrate is a metabolite of one of the nine essential amino acids: leucine. One study found that 0.125g/kg of HMB decreased muscle protein breakdown and increased muscle protein synthesis. Meanwhile, in a review on popular bodybuilding supplements, researchers cautioned the use and efficacy of HMB on maintaining lean mass in dieting athletes because we don’t have any evidence on the long term effects.

Concerns with HMB Bodybuilding Supplements

According to the most recent research, HMB supplementation at up to 3g daily has been demonstrated to be very well tolerated and that even higher dosages are equally safe. There doesn’t seem to be any safety concerns in the general healthy population with HMB supplementation.

Branched Chain Amino Acids

Also known as BCAA, these amino acids make up 14-18% of amino acids in skeletal muscle proteins and are one of the most widely used supplements among natural bodybuilders and fitness competitors. Leucine is one of the BCAA that is of particular interest because of its promising research with one study suggesting that leucine may stimulate protein synthesis when in combination with other amino acids.

Concerns with BCAAs supplements

BCAAs are considered safe and there doesn’t seem to be any major side effects in young healthy individuals. The tolerable upper intake of leucine is set at 500mg/kg bodyweight but consumption greater than that may increase levels of serum ammonia above the tolerated safety limit.

Citrulline Malate

Citrulline Malate (aka CitM) is a new supplement that has become quite popular among bodybuilders hypothesized to improve performance through ammonia clearance, reduce lactic acid accumulation and arginine conversion, however very little scientific research supports its use in healthy humans. While its proposed that arginine is effective for muscle growth, some research to date actually has found the opposite.

While the findings of one study suggested that CitM supplementation for 15 days increased ATP production by 34% during exercise and reduced perception of fatigue, another study found that arginine did not have any ergogenic effects in young healthy athletes.

Concerns with CitM Bodybuilding Supplements

In large dosages (10g or more), CitM may cause diarrhea or intestinal upset. CitM appears to be well tolerated by rats in doses up to 3g/kg bodyweight.

Glutamine

Glutamine is a non-essential amino acid in the muscle and is another common nutritional supplement that fitness competitors and female bodybuilders often take. There is, however, very little scientific evidence to support its use in healthy athletes. While a long term study looking at various types of supplements found that glutamine in combination with creatine, whey protein, BCAA and CitM increased lean mass by 1.5-2 kg, it’s unclear whether glutamine was responsible for that increase, or the combination of other more effective protein synthesis supplements. In contrast, another study found that glutamine supplementation did not significantly improve exercise performance.

Concerns with Glutamine Bodybuilding Supplements

Some doses of glutamine (0.75g/kg bodyweight) have been associated with increasing plasma ammonia above the tolerated safety limit. That being said, it is recommended that 14 g/d of glutamine is the highest amount one can take without any side effects.

Caffeine

Hands down, caffeine is one of the most readily available pre-workout stimulants consumed by a female bodybuilder and fitness competitor. While most research has found that caffeine may be an effective preworkout supplement to boost energy and performance, taking large amounts of caffeine is also not without its risks.

Concerns with Caffeine Bodybuilding Supplements

Excess caffeine intake has been associated with an increase in blood pressure, anxiety, infertility, diarrhea, and insomnia, while also contributing withdrawal symptoms including headache, fatigue, drowsiness, and difficulty concentrating. A toxic dose of caffeine is in the range of 20-40mg/kg body weight, which is much easier to reach through pills and supplements compared with a drink. Furthermore, since a lot of these caffeine pills are unregulated, you can’t always be 100% sure of the dosage amounts and the quality of the ingredients.

Dangerous Supplements for a Female Bodybuilder

Supplements for female body building pouring out of container.

Anytime there are legal supplements, you’re bound to come across illegal supplements. There are a ton of “fat burning” bodybuilding supplements illegally sold on the market that are specifically targeted to the bodybuilding and fitness competitor community because of their desire to meet goal weights and physique goals, typically in a dangerously short period of time. That’s why these products are labelled with claims like: “cut fat fast”, “burn fat” or “get shred NOW”. However, whether these products work, or are safe is often unclear and a lot of the time, these products are unregulated and typically aren’t FDA approved. Which means, half the time, you might not know what you’re buying and putting into your body.

Anabolic Steroid Use

Some elite female bodybuilders may not be meeting their goal weight or physique expectations and eventually turn to steroids to get faster results. While anabolic steroids are effective, they are illegal without a prescription and the long term side effects definitely are worrying. Long term steroid use has been linked to an increase in heart disease, decrease in fertility, and psychiatric and behavioral disorders like depression. Although illegal, many of these supplements are sold in stores and in the past people been responsible for death, kidney failure, seizures and heart issues. In a female bodybuilder, the use of steroids is particularly worrying because they can have a significant impact on hormone balance which may impact long term fertility and hormonal health. Research has shown that high rates of testosterone from anabolic steroids may have a negative effect on the female reproduction system and fertility.

DNP (2,4-Dinitrophenol)

DNP is an industrial chemical traditionally used as a pesticide, dye and wood preserver that is highly toxic and has significant side effects. While it was never designed for human consumption, it’s become very popular among female bodybuilders and fitness competitors because it accelerates a person’s basal metabolic rate, leading to quick weight loss. Some short term health risks of DNP include: lethargy, nausea, vomiting and increased pulse rate, while some of the long term health risks include: cataracts, liver damage and even death. Sadly, there have been several cases of DNP killing young people.

Bottom Line on the Safety and Risks of Female Bodybuilding and Fitness Competition Prep Diet & Supplements

I hope you now have a better understanding of how a female bodybuilder prepares for a competition through diet, exercise and supplements. Stay tuned for part two of this post where we explore the psychological, physical and metabolic effects of bodybuilding before and after a competition.

More Blog Posts You Might Like

  • Female Bodybuilding Competition Prep Dangers (Part 2)
  • What To Look For In A Protein Powder
  • Intermittent Fasting and Working Out: Will It Help Or Hinder Your Performance?
  • Best Metabolism Booster | Can Food And Exercise Boost Our Metabolism?
  • Sports & Energy Drinks | The Best Drinks For During Exercise

Contribution By:

Sofia Tsalamlal, RD

Abbey Sharp

Abbey Sharp is a Registered Dietitian (RD), regulated by the Ontario College of Dietitians. She is a mom, YouTuber, Blogger, award winning cookbook author, media coach specializing in food and nutrition influencers, and a frequent contributor to national publications like Healthline and on national broadcast TV shows.
www.abbeyskitchen.com/about-abbey/

Last Updated September 26, 2022. Published September 23, 2022 By Abbey Sharp Leave a Comment

Unstuffed Cabbage Roll Soup (Vegan & Gluten Free)

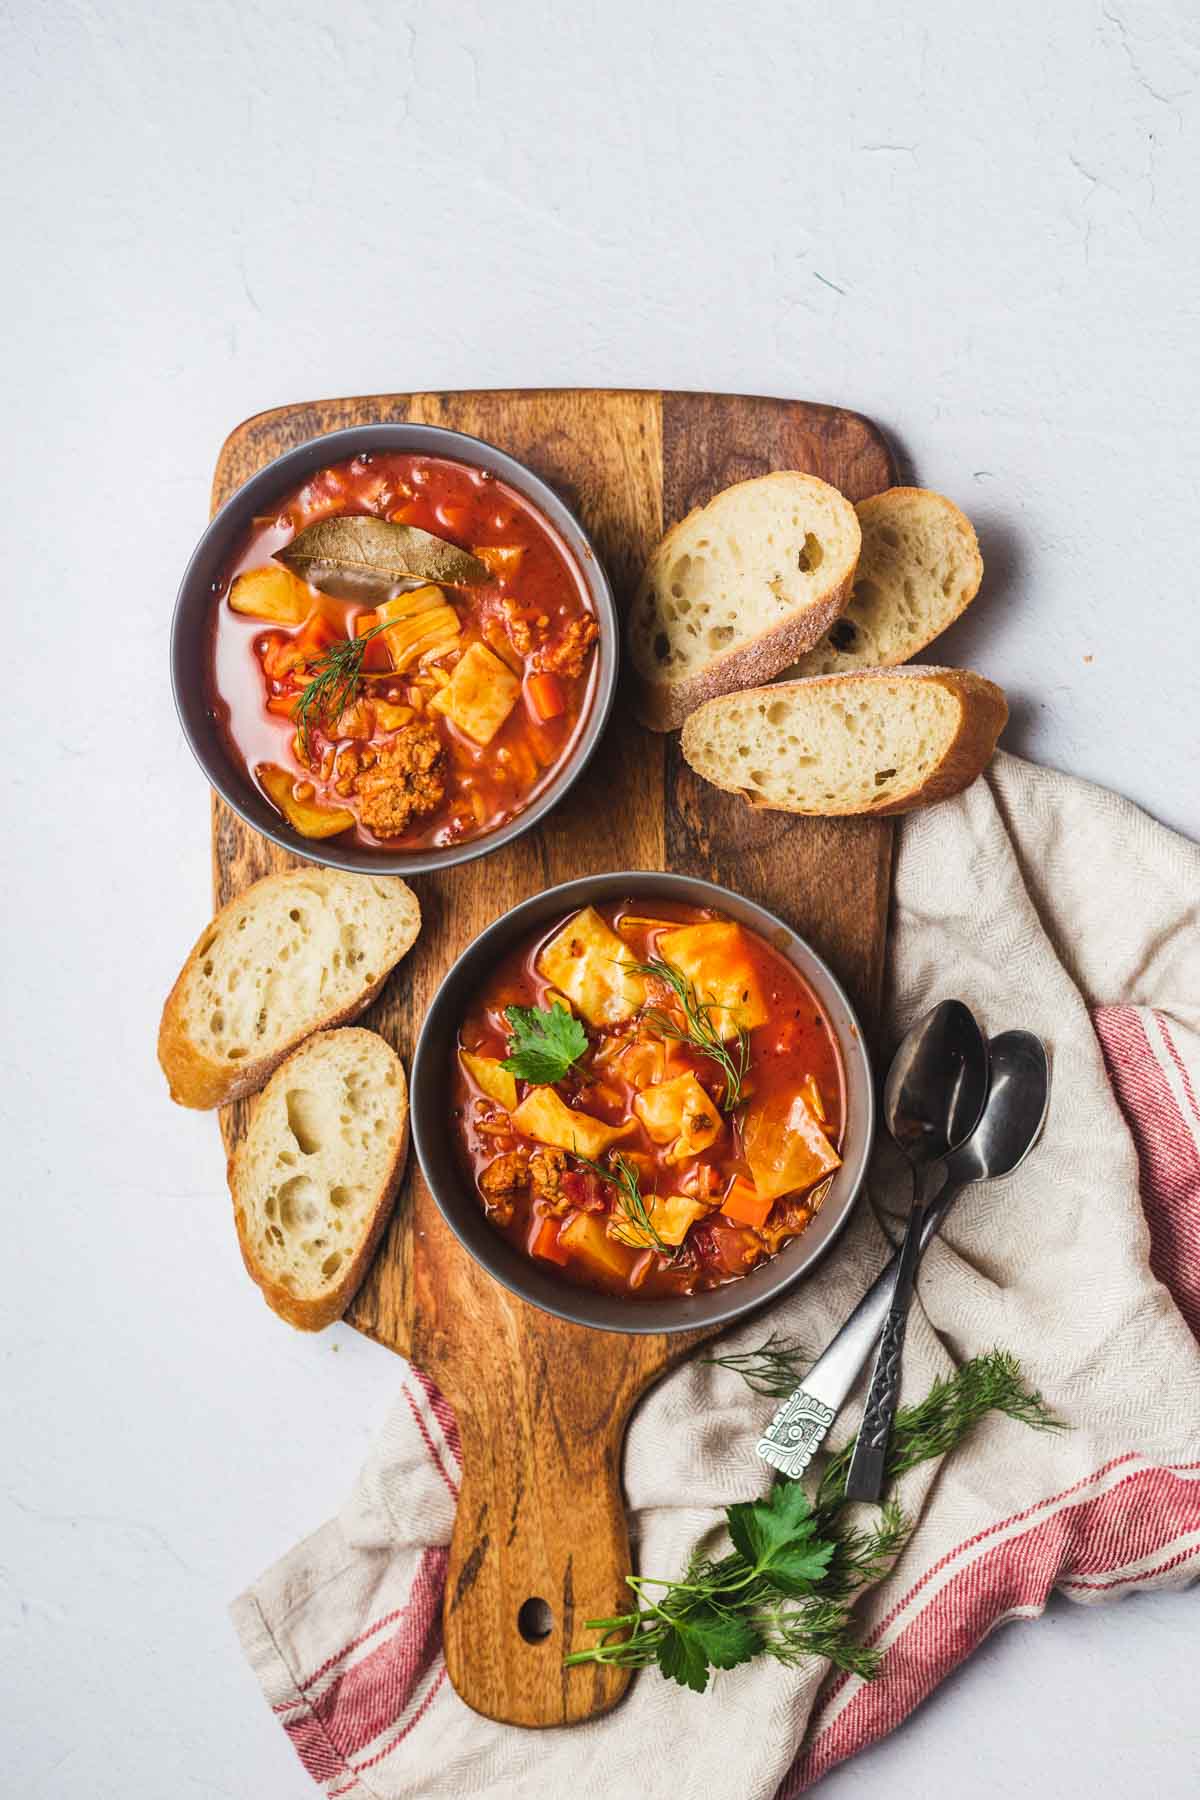
This Unstuffed cabbage roll soup makes for the perfect plant-based dinner that is ready in only 30 minutes!

Birds eye view image of two bowls with unstuffed cabbage roll soup on a wooden board served with bread.

Picture this: it’s dinner time January, you’re probably cold (definitely cold if you live in Canada), you’re hungry and you can’t really be bothered to make a meal that is going to take you a while. Enter the perfect recipe: unstuffed cabbage roll soup.

Not only is this soup super easy to whip up, it’s also tasty, filling, packing with nutrition and contains a bunch of ingredients that you probably already have in your pantry. Need I say more?

Table of Contents

  • Why This Recipe Works
  • Key Ingredients
  • How to Make This Recipe
  • Expert Tips
  • Recipe FAQs
  • More Recipes You May Like

Why This Recipe Works

I’m going to be honest, I don’t usually love it when I’m super hungry and someone suggests having soup for a meal. Vegetables and broth to fill me up? No thank you! Not that soup isn’t delicious, but it’s usually not quite satiating enough.

However, that’s what I love about this soup recipe: it comes together to create a complete balanced meal. Protein? Check. Healthy fat? Check. Fibre? Check. Dinner served in a single bowl? Check!

Not to mention, this soup is reminiscent of those delicious flavours found in a traditional cabbage roll, except it’s completely plant-based and gluten free, meaning that everyone at the table can enjoy a serving.

Key Ingredients

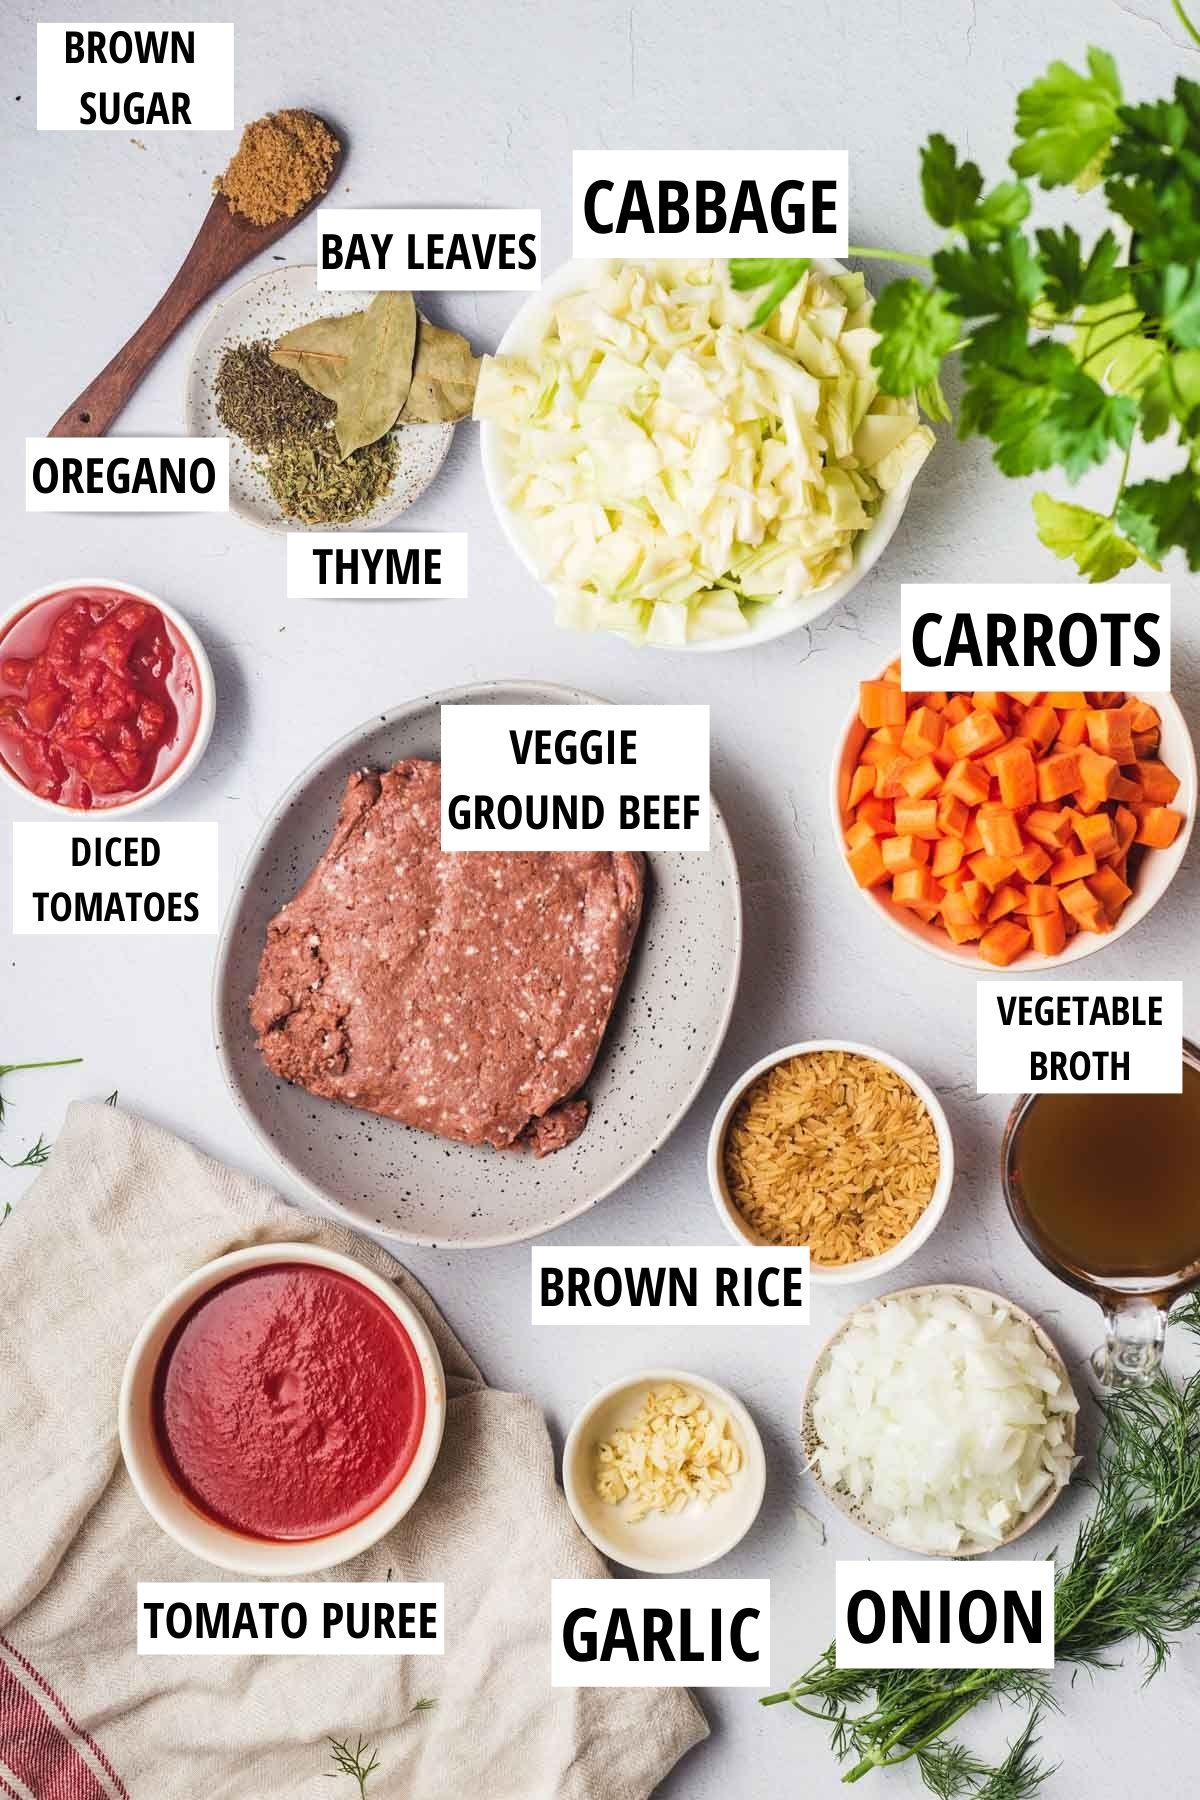
Picture of ingredients with labels for soup recipe.

Veggie Ground Beef – This ingredient is what gives the soup it’s hearty flavour and texture, minus having to use actual meat. I promise that any meat lover who tries this recipe will not be able to notice a difference!

Green Cabbage – I mean, what’s a recipe for unstuffed cabbage roll soup without cabbage? Not only is cabbage a nutritious cruciferous vegetable (hello, Vitamin K), it also holds up really well compared to other vegetables that often become mushy when cooked down in soups.

Brown Rice – If you know me, you know I love my carbs. The complex carbs in the brown rice, combined with the veggie ground beef, really gives this soup it’s staying power that is going to keep you full and satisfied until your next meal.

Tomato Puree and Diced Tomatoes – Another staple ingredient of a classic cabbage roll, the tomato broth really ties all of the elements of this recipe together so that it truly tastes like a cabbage roll in soup form. Plus, tomatoes are packed with the antioxidant lycopene, which becomes much easier for the body to absorb when cooked. It’s a win-win.

How to Make This Recipe

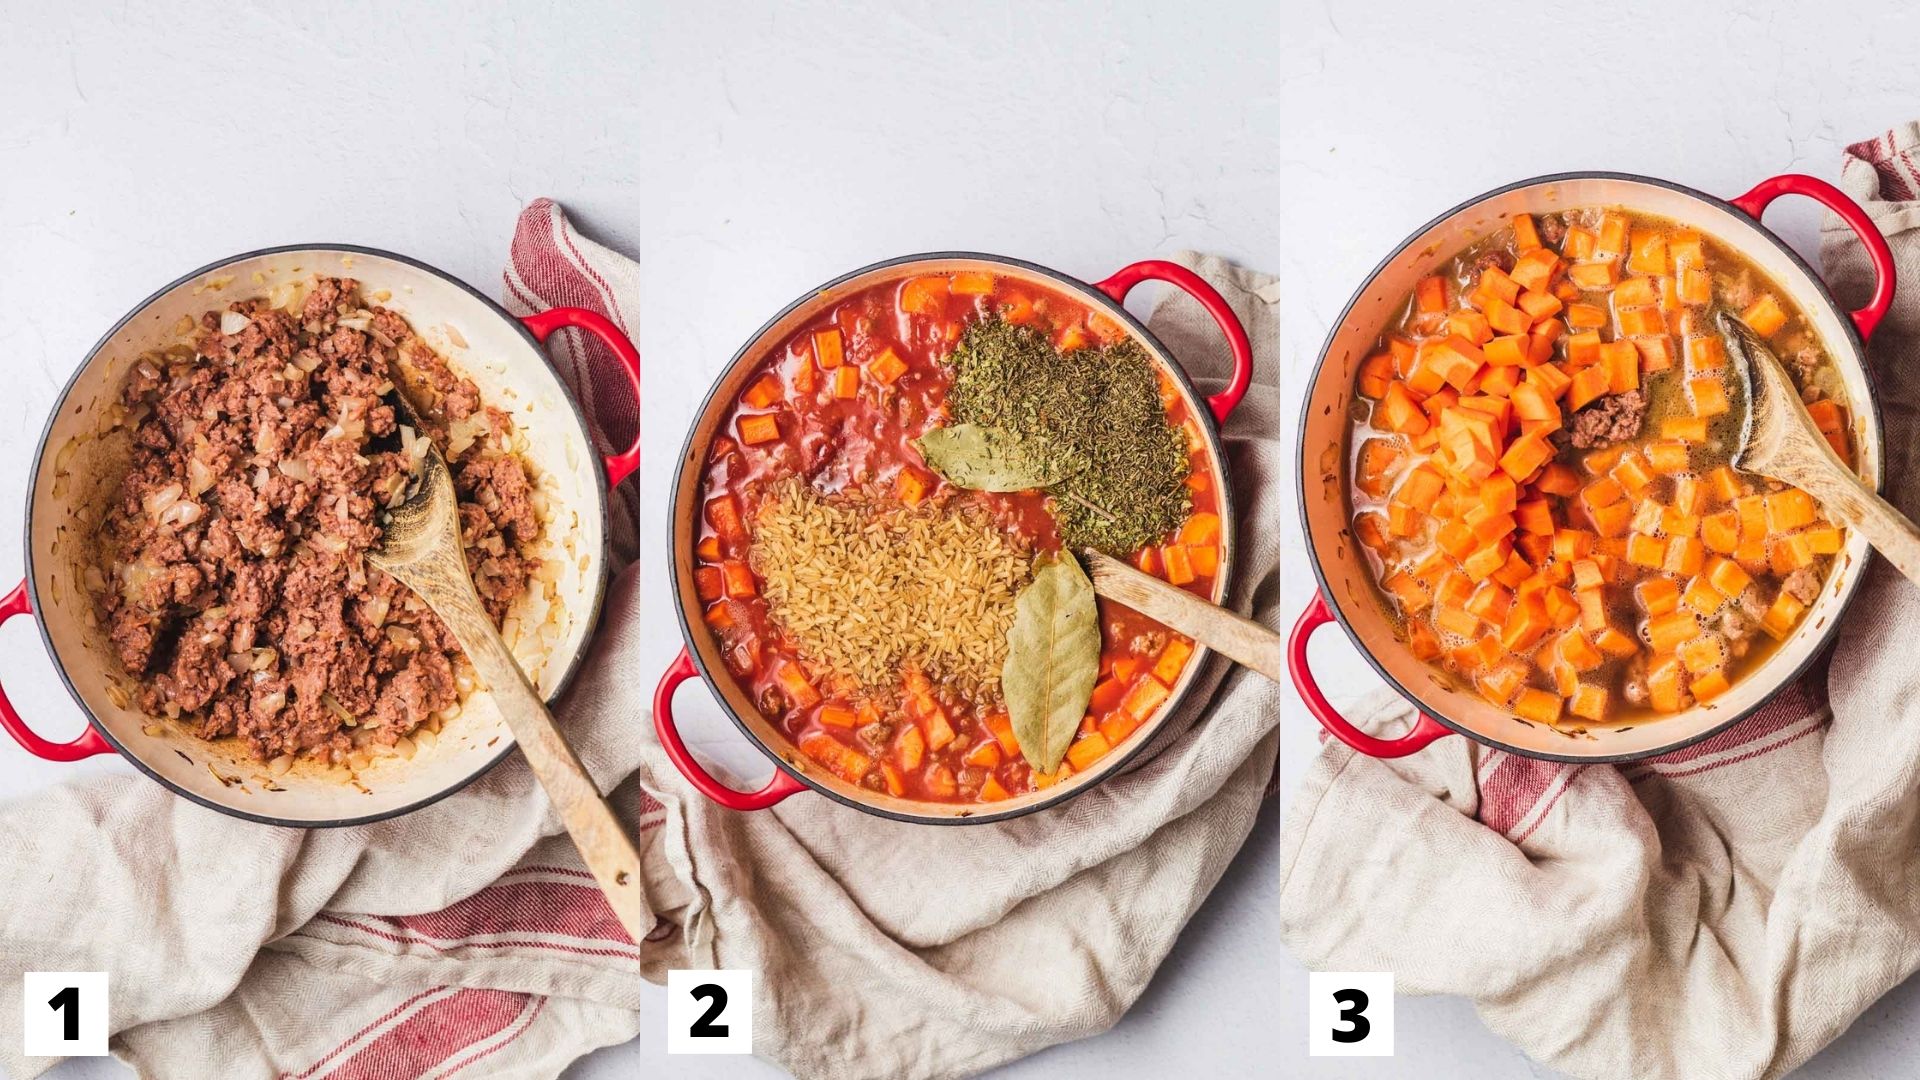
Step 1: Add olive oil to a soup pot on medium heat. Once the oil is heated, add the onion and garlic. Sauté until soft and fragrant.

Step 2: Add veggie ground beef, cabbage, carrots, vegetable broth, tomato puree, diced tomatoes, brown rice, brown sugar, oregano, thyme, bay leaves, and a pinch of salt and pepper.

Step 3: Bring to a boil. Once boiling, reduce heat to a simmer and cook for 25 minutes.

Picture of steps one to three for making soup recipe.

Step 4: Once rice is tender, remove from heat. Remove the bay leaves.

Step 5: Ladle into a bowl and serve!

Picture of steps four and five for making soup recipe.

Expert Tips

Any of veggie ground will work, although I used the Lightlife brand because I love the way it tastes. However, feel free to experiment and let me know what your favourite meat replacement is in the comments below!

If you prefer a thicker soup, I suggest leaving the soup pot uncovered while simmering. For a lighter soup, cover for the first 10-15 minutes of simmering. I would also recommend having extra stock on hand that way you can thin it out (if necessary) when you are ready to serve. BTW, this soup makes for incredible leftovers.

Recipe FAQs

Can I use real meat in this recipe instead of the veggie ground beef?

Absolutely! If you want to swap the veggie ground beef for a ground meat, such as beef, chicken, or turkey, then go for it! However, be careful to ensure that you cook the meat all the way through before serving, as this is not a concern when using veggie ground beef.

Is this unstuffed cabbage roll soup gluten free?

Indeed it is! Thanks to the brown rice in this recipe, which is a naturally gluten free grain, this soup is 100% gluten free. If you are extra sensitive to gluten or you have celiac disease, make sure you’re buying rice that is 100% certified gluten free.

Can I add and/or substitute any of the vegetables?

Go for it! I am always a fan of using what you have on hand or what is in season. I think that squash, sweet potato and celery would all be a delicious additions. However, I would not suggest omitting the cabbage in this recipe, as this will likely impact the result of the overall dish.

What are some toppings I can put on this soup?

I personally think this soup would taste even more amazing garnished with fresh herbs, such as parsley or chives. Feel free to experiment and add whatever toppings you like to make this recipe your own!

Can I make this recipe ahead of time and eat it throughout the week?

The great thing about most soup recipes is that they actually taste better overtime, as this allows for all the flavours to come together even more. Just remember that the brown rice will likely absorb a lot of liquid as this soup sits in the fridge, so make sure to keep some stock or water handy in case you want to thin it out!

Two bowls of soup on a wooden board served with bread, next to a large pot filled with cabbage soup.

More Recipes You May Like

If you liked this recipe for unstuffed cabbage roll soup, then you might also enjoy the other vegan soup recipes on the blog:

  • Best Vegan Potato Soup
  • Easy Sweet Potato Curry Soup
  • Butternut Squash Lentil Soup
  • Roasted Cauliflower Soup with Parsnips
  • Creamy Tomato Soup
  • Sweet Potato Peanut Soup

What is your favourite soup recipe for wintertime? Let me know in the comments below!

Print Recipe
5 from 2 votes

Unstuffed Cabbage Roll Soup

This Unstuffed cabbage roll soup makes for the perfect plant-based dinner that is ready in only 30 minutes!
Prep Time5 minutes mins
Cook Time25 minutes mins
Total Time30 minutes mins
Course: Soup, Main Course
Cuisine: American
Diet: Vegan
Servings: 4
Calories: 419kcal
Author: Abbey Sharp

Ingredients

  • 1 tbsp olive oil
  • 1 Clove garlic minced
  • 1 Onion diced
  • 1 12 oz Package veggie ground beef
  • 4 Cups green cabbage chopped
  • 2 Whole carrots peeled and chopped
  • 4 Cups vegetable broth
  • 24 oz Tomato puree
  • 1 14.5 oz Can diced tomatoes
  • ½ Cup dry brown rice gluten free
  • 3 Tbsp brown sugar
  • 1 tsp oregano
  • 1 tsp thyme
  • 2 bay leaves
  • Salt and pepper to taste

Instructions

  • Add olive oil to a soup pot on medium heat. Once the oil is heated, add the onion and garlic. Sautee until soft and fragrant
  • Add veggie ground beef, cabbage, carrots, vegetable broth, tomato puree, diced tomatoes, brown rice, brown sugar, oregano, thyme, bay leaves, and a pinch of salt and pepper.
  • Bring to a boil. Once boiling, reduce heat to a simmer and cook for 25 minutes (rice will be tender).
  • Once rice is tender, remove from heat. Remove the bay leaves.
  • Ladle into a bowl and serve.

Nutrition

Calories: 419kcal | Carbohydrates: 68g | Protein: 23g | Fat: 9g | Saturated Fat: 1g | Polyunsaturated Fat: 4g | Monounsaturated Fat: 4g | Trans Fat: 1g | Sodium: 1577mg | Potassium: 1472mg | Fiber: 13g | Sugar: 27g | Vitamin A: 6696IU | Vitamin C: 59mg | Calcium: 136mg | Iron: 10mg
Abbey Sharp

Abbey Sharp is a Registered Dietitian (RD), regulated by the Ontario College of Dietitians. She is a mom, YouTuber, Blogger, award winning cookbook author, media coach specializing in food and nutrition influencers, and a frequent contributor to national publications like Healthline and on national broadcast TV shows.
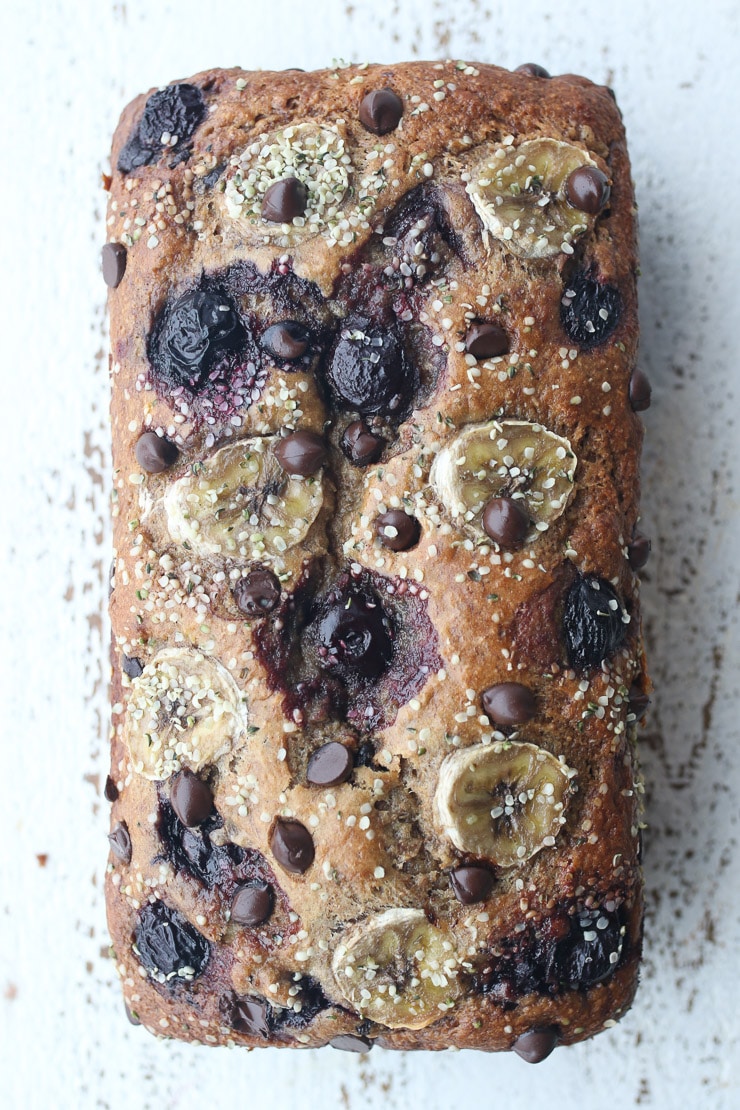
www.abbeyskitchen.com/about-abbey/

Last Updated August 12, 2020. Published September 15, 2022 By Abbey Sharp 2 Comments

Dietitian’s Feeding Tips for Picky Eaters

a mother feeding her picky toddler

We share my top tips for how to get your toddler to eat new foods and the top tips for feeding picky eaters from a dietitian mom.

GET THE TODDLER FEEDING CHEATSHEET
 

In my previous post on the Division of Responsibility, I broke down what this popular feeding structure means and how we can be used to reduce picky eating and help raise a competent intuitive eater.

Division of Responsibility

As a refresher, as parents, our job is to determine:

  • What foods are served at a meal or snack
  • Where that meal occurs
  • When that meal occurs

As children, they’re job is to determine:

  • What they eat of the foods that are served
  • How much they eat, or if they eat at all

Now let’s break down the facts on how you can get your picky toddler to eat as informed by the division of responsibility with some easy steps and tips. 

Dietitian’s Feeding Tips for Picky Eaters

Model Eating Competence.

I don’t think it’s reasonable to expect a child to eat something if their role model is not eating it. And if we go even further back to when children are starting solids, I also don’t even think it’s reasonable to expect a child can even learn how to eat solids without a model. Research also suggests that eating together as a family is linked to better academic performance, higher self-esteem and resilience, and lower risk of depression, substance abuse, teen pregnancy, eating disorders and obesity. For these reasons, I strongly suggest always eating as a family at the dinner table. Start with 2 minutes for really little ones, and work your way up to 15 to 20 minutes at the table. What if your kid eats at 5 pm and you and your husband prefer to eat at 7? Move the family schedule around to make meals a priority. I cannot stress how important this one step is, so if you get nothing else out of these recommendations make it be this. If you absolutely can’t make schedules work between you and your partner and the kids, then I suggest switching off with your partner or caregiver to ensure at least one person can eat with children at almost every meal. There will always be instances when you are going out for an event, or dinner and have to let the kid eat alone, and in those situations I suggest at least having a snack with the child (like a mini meal of the same meal components) and then you can finish your meal with your partner or wherever you go.

Eat Family Style

Children like autonomy, and serving a meal family style is a great way to reduce waste and also give your kiddo the opportunity to choose what they want out of what you have offered. If you pre-plate a child’s food, you risk: A) Overwhelming them with too much on their plate which often can result in them not eating at all. B) Putting “unsafe” or “fear foods” on their plate which may upset them and freak them out of eating anything at all. C) Increase the likelihood of waste. Under the recommendations of the division of responsibility, it is imperative that we give our children that control.

a family eating family style to help picky eaters

Be respectful but don’t cater

Remember, you decide what you’re going to make for dinner, when it’s going to be served, and where it will be served. Not your toddler. You do not need to ever cater to a picky eater, but the suggestion is to build a balanced meal that you enjoy making and eating as a family, and to ensure there is always ONE “safe food” or “fall back food” on the table. A safe food is something that assuming your child is hungry, that they can reliably fill their belly with even if they’re not up for trying something new or eating a food they’re learning to like. Serving a safe food helps our kids trust that we can help satisfy their hunger in a way that makes them feel safe. For a lot of kids, let’s be real, this is the carb food – bread, rice, pasta, fruit, milk etc. But you know your kid best. Make sure there is a lot of this food to go around in case it’s all your picky eater eats.

Aim to Offer Variety

Satter would suggest always making sure that there is some kind of carb, protein, vegetable and fat. I would agree, we want to offer variety of food groups, and let the kids choose from those offerings. As for the meals themselves, you can of course have your family staples and favourites, but I do recommend switching things up and offering a variety of different carbs, proteins, veggies and fruit, so that your kid gets exposure to a variety of foods and you don’t get stuck in a food rut.

Make Food taste good

a spice rack to flavour food for picky eaters

This is so important in this day and age since it feels like a lot of mommy bloggers and wellness influencers are constantly pushing a no sugar, no fat, no salt, no fun lifestyle and extending it onto their kids. Poor kids. Do not be afraid to make your kid’s food (and your food) taste good- and that means adding fat, some salt and sugar. These are just tools in the chef’s toolbox, so do not feel guilty about smart use of any or all of them. While of course, I allow my kid “fun foods” that are packed with sugar and salt and are easy to like regardless, I do try to focus my use of these “add-ins” to what I call more “challenging foods”. So for example, I want my kid to like oatmeal, so I am going to put a little maple syrup on top. I want my kid to like salmon, so I’m going to add a soy brown sugar glaze. I want my kid to like broccoli so I’ll serve it with a cheese sauce on top. Kids crackers and sweet berries are easier for my kid to enjoy as is, so there’s no need for me to doctor them up with more sugar or a fatty dip. Use salt, sugar and fat smartly and your kids will be much more likely to eat and enjoy these naturally nourishing foods.

Stop Pressuring

Remember the division of responsibility rules. You did your part by choosing the foods that would be served, they now have to decide what they eat and how much of it they eat. If they just eat their safe food, and try nothing else, you need to just zip your mouth for now and don’t try to get in there to make it more “healthy” or “balanced”. If something is on the table that they don’t yet “like” or are learning to like, you can simply say, “you don’t have to eat it.” No pressure, no games. Over time, they will let their defence down and be more willing to try something new if the meal-time experience is more pleasant. And the more times they see it, the more likely they are to touch it. The more they touch it, the more likely they are to put it on their plate. The more they put it on their plate, the more likely they are to put it in their mouth. And the more often they put it in their mouth, the more likely they are to eat it and enjoy it. This can be a long game as it can typically take between 8-15 exposures of a food for a child to accept it, but it is absolutely worth the wait. If we pressure, we ruin our chances (potentially for life), so keep the learning experience positive and pressure-free.

Do not praise or react

This is a really tricky one but it’s really really important that we stop making a big deal out of meal-time when your kid does or doesn’t eat something we want them to eat or not eat. If we gasp and cheer the moment our kid puts the carrot in their mouth, they will get suspicious that a carrot is something unusual for them to like. They might not do it again. If we get make a big fuss over them eating “too much” of the cookies on the table, they might recognize that cookies are a big deal and they better eat as many as they can in case mom doesn’t serve them again. Keep your cool. If there is no pressure, we also have to ensure there is no praise. If you must say something when they eat something you’re proud of, try something like: “I love this family time”, or ask them a neutral question about the food like: “what does the tofu taste like to you? Is it crispy, is it soft?” Just don’t make a scene.

Build a Schedule and Reliable Routine (and Stick to it!)

If you have a kid who refuses lunch and 30 minutes later, they are begging for a “snack”, then they get to the dinner table and push their food away, you likely need a more reliable meal and snack schedule. If we want our kids to try something new or eat something other than their “safe food”, they need to get to that meal or snack with an appetite. I recommend ensuring that there are at least a few hours between each meal and snack. If your kid is whining right before a meal because they’re hungry,  you can ask them if they’re able to wait 15-20 minutes until dinner is ready. If they cannot, then now is a good time to sit them down for a little appetizer, something that is part of the meal but ready. Cut up veggies and dip is always a really easy option.

Thou Shalt Not Lie (or Hide Vegetables).

a variety of vegetables for picky eaters

There are a lot of books, blogs and suggestions on mommy groups about how to trick your kids into eating their vegetables by hiding them in sauces, muffins, smoothies etc. I am not a fan of this technique. While I am all for making food more nutritious, so of course that means I add vegetables, nut butter and whole grains to my recipes whenever I possibly can, if a child is old enough to ask what is in something, it’s very important that you are transparent and tell them. Children are incredibly smart when it comes to picking out food they don’t like, and by lying to them about the fact that there is spinach in their smoothie, it communicates to them that spinach is something that is so bad, it needs to be hidden. It needs to be lied about. It also makes our children distrust us when it comes to food, and the division of responsibility is all about fostering trust. If a young child asks, tell them what’s in it and why. You can say that the spinach gives it a lovely green colour, or the yogurt makes it creamy and thick. You don’t have to get into the fact that it adds iron, or vitamin C. Communicate in language your kids will understand, but communicate honestly.

Get them Involved.

Kids love control and a lot of picky eating is about control, especially in those early toddler years. When kids are given some autonomy to help out in some way, they’re more likely to want to try. So again, we don’t want to become short order cooks, but we could give a child the choice between two vegetables for dinner. We could also take them grocery shopping and allow them to choose one new fruit to try that week. And there are a lot of tasks you can get them involved in when it comes to meal prep like washing produce, adding ingredients, or stirring things together. You are still creating the boundaries, but you’re giving them the autonomy to safely work within them.

Say Goodbye to Dichotomous Language and Get Descriptive.

We don’t have really any food rules in my house but we do not use the word t-r-e-a-t. Why? What’s so bad about that? Well, just like words like “junk food” vs “healthy food”, children are quick to associate foods like treat and junk with things they’re not supposed to have and that are limited but highly valuable. Meanwhile, they see foods that are called “healthy” as the ones mom and dad really want them to eat. If my son asks for a treat, I don’t repeat the word back, I simply call it what it is – it’s cake, it’s a cookie, it’s ice cream. Yes, of course, foods are not all nutritionally equal but we can make them morally equal by neutralizing our language. A lot of parents also find themselves describing a sweet food or junk food as “yucky” to try to discourage their kid to eat it, and “yummy” when they’re trying to push a green bean on the kid. Kids quickly figure this little game out and again, they learn to distrust us. So instead, describe foods in neutral, but descriptive language. Talk about the broccoli looking like a tree, and the asparagus as snappy, and the strawberry as juicy. Talk about the cupcake as colourful, the ice cream and creamy, and the cookie as chewy. Just don’t call it good and bad.

Do Sit Down Snacks.

a little girl eating a donut

Snacks have become basically synonymous with treats or easy foods in toddler speak, but really, we need to think of snacks as mini meals that offer as much balance and nutrition as a meal. I recommend sitting down to eat a snack, just like you would a meal, and including at least 2 or 3 different foods in a smaller serving. Ideally, you’re aiming to get 2 or more of what I call hunger crushing foods – sources of fibre rich carbs, healthy fats and protein. This may also be your time to offer a food that your child hasn’t eaten much of that day. So if your kid ate a lot of fruit at breakfast, offer some crackers and cheese. If they ate a lot of meat at lunch, offer veggies or fruit at snack. Just do it sitting down.

Make Bedtime Snacks Filling, not Thrilling.

There will be days when your kiddo just decides they don’t want to eat anything at meal-time. If this happens at breakfast or lunch, and they ask for a “snack” immediately after they get down from the table, you can remind them that we just had a meal but snack will be happening soon. If this happens at dinner, I know a lot of parents will be worried about sending their kid to bed with no food at all. I know I was the first time I did it because this mama did NOT want a 2 AM wake up. In this case, you can do a bedtime snack but as Satter says, make it filling, not thrilling. So rather than an exciting fun food that your kid might learn to “hold out for” every night like cookies or a popsicle, you can do a mini version of the meal they missed (including the safe food), or something simple and not exciting like milk, peanut butter on bread, pita bread and guacamole, yogurt parfait, veggies and dip etc.

Serve Dessert WITH the Meal.

birds eye view of a small child eating dessert with their meal

Alright, now let’s talk about something you’re probably really wondering about – sweets. How do you get your child to stop obsessing over dessert? Well, there are two ways to do this. The first is to put the dessert on the same playing field as the rest of the meal and that means serving it WITH their meal. But unlike the rest of the family style meal which kids should have access to on demand in whatever amounts they are hungry for, the dessert is one portion only. They can eat it first, last, or sometime in the middle of their meal, but once it’s gone, they have to move onto other options on the table. We use this technique for a few reasons. One is that it doesn’t teach them to eat until they have filled up on their meal, only to be served dessert and then eat past fullness in sweets. A competent intuitive eater would ideally eat their meal until satiety and be too full for dessert (and I’ve seen my son do this so I know it’s possible). The other is that we don’t want them putting dessert up on a pedestal and that they must drag themselves through the “yucky” food before they get the gold. It gives dessert far too much power. Now, this approach does not work for all children at all stages of life. I found it worked great with my son up until maybe 18 months, and then the toddler years brought on the tantrums. Some parents in this stage between 2 and 3 find they can’t explain to their toddler that there is only one portion, so they eat their dessert and cry for the rest of the meal-time. Let’s be honest, it’s hard for anyone to feel hunger cues when they’re hysterically crying. So if you’re struggling with meal-time tantrums, maybe try picking this technique up again later on when a child is old enough to understand the one portion rule.

Offer Unlimited Sweets as a Snack.

This is the alternative method for dealing with sweets, and the one I’ve been using now that I’m in the throes of the terrible twos. Once a week or so offer dessert at a snack in an unlimited amount. This could be putting out a plate of cookies or letting your kids eat as much of their Halloween candy as they want. The key here is that this unlimited sweet sesh is far enough away from the meal that it doesn’t compete with nutritious foods. But it gives the child the message that these foods are no big deal and there is no need to hoard or obsess over them when they’re clearly allowed to eat as much as they want. A child that is allowed fun foods throughout the week will be less likely to obsess over sweets and eat a reasonable amount when they are available. This is a really important skill for life.

Balance Fun Foods with Nutrition.

If you are giving dessert or a snack that is less nutritious more often, you can balance out that fun food with something more nourishing. For example, serving milk with cookies, or yogurt with pie, or cheese with crackers. This will encourage your child to put the fun food and the nutritious food on the same playing field, and also will give you the satisfaction of ensuring there is some kind of nutrition going in throughout the day. 

child reaching for strawberries over a kitchen counter

Trust your child to grow into their healthiest, happiest weight.

This is a big topic so I’ll keep it top level. It’s very important to trust this process as it pertains to your child and their weight. Don’t be freaked out if your child eats a lot less or a lot more than other children in his cohort. Children do not need to be put on diets, restricted or force fed. If you are not employing tricks, bribes and pressure, a healthy child WILL eat the right amount of food for their body. You need to trust that. Often a very small child will make parents nervous so parents interfere with eating, which only perpetuates their disinterest in food. And often a very large child will make parents nervous, so they restrict, and the child eats as much as they can when they get the chance. If you are not doing these things and they are still not eating, then it may be worth speaking to your pediatrician about other possible feeding issues including oral motor development, tongue ties, behavioural concerns and developmental delays.

 Trouble Shooting Tips For Picky Eaters 

What happens if they only eat their safe food?

If you’ve been pressuring your kid to eat “healthy foods” or restricting fun foods in the past, it’s very likely that your kid is going to only eat their safe food or eat dessert first. It’s natural for a child to see the forbidden food be served and try to get as much as they can before you go back to your old pressuring ways. Give it time. Your child will need to learn how to trust that you’re not going to cut them off and you’re not going to force them to try something they’re not yet comfortable with. Remember, keep your cool. Keep putting the vegetables (or whatever food they’re learning to like) on the table but not expecting or insisting they eat it. Keep being neutral when they pick it up, put it on their plate, or put it in their mouth. Keep trying to make the food taste good with salt, sugar, fat- whatever. And expose, expose, expose.

What if I run out of the safe food?

Ideally, try to ensure there is enough of that safe food to go around. But of course, our fridges and pantries are not magically replenishing. I often run out of fruit because my family eats so much of it. So if a safe food is in limited quantity, you may want to offer two safe foods on the table (this could be fruit and cheese, for example).

a mother feeding her picky toddler

What if they eat nothing at all?

 Don’t panic. It happens. See my tips on offering a filling, not thrilling bedtime snack. And for younger toddlers, this might be the time for their milk. Hunger is naturally suppressed by melatonin, so in my experience, even the nights my kid eats nothing at all, he drinks his milk, sleeps through the night, wakes up at the normal time and just eats a bigger breakfast. You will be surprised how resilient they are.

What if dessert is their “safe” food and they just want more?

If you choose to serve dessert with the meal, keep in mind that this should not be the safe food since we need to stick to the one serving of dessert rule so it doesn’t crowd out other nutritious foods.

Shouldn’t we teach our kids that sugar is bad for them?

a toddler getting spoonfed by their mother

Children are born with a neutral attitude towards food. If we start saying things like “sugar is poison” or “candy is bad for you”, kids will start thinking that all foods that are “bad” actually taste really good, and they develop a skewed relationship with food. Keep language neutral and just call a food what it is. It’s not a treat, it’s not bad, it’s a cookie, it’s a lollipop, it’s cake. Next.

How much should my kid eat?

 However much they need to eat for their unique needs. A lot of people will give you specifics about how many tablespoons of food per month or year of life. But how much your child needs is so highly variable between children and within children (between days) that I find these guidelines just stress parents out more and force them into restriction or pressuring behaviours. I prefer to serve food family style so that kids can therefore choose what they want to put on their plate and you can limit waste. If you’re pre-portioning your child’s meal, give the child one or two pieces of each thing, and let them ask or motion for more.

What if my child is overweight or underweight?

 It does not matter the current size of your child, the recommendations here are the same. Do not pressure the child to eat or restrict foods, and their weight will fall where it’s supposed to. And yes, even overweight children should have access to fun foods and desserts a few times a week without it being used as a bribe. Restriction and pressure will do the opposite of what you intend and will only make a smaller child eat less and a larger child eat more than what their body actually needs.

What about the “no thank you bite” or “one polite bite”?

 I get why parents use this but it’s actually against the tenets of the division of responsibility. It teaches children that they are not allowed to trust their body when it says “no” because they have to do something for an adult. We want to teach our kids to be able to trust their inner gage when it tells them something isn’t right, and this extends beyond food to other areas of life. Instead of the one bite rule, teach your kids you respect them to listen and trust their body. You can teach them if they do not want to eat something to say, “no thank you, I’m still learning to like beans”.

a picky eater being fed watermelon in the bathtub

If they don’t eat anything I offered, should I make them a separate meal?

 If you have offered the safe food and they still are not interested in eating, consider that they may genuinely not be hungry and you can try again at snack time. You don’t want to “cater” to each child by making separate meals when they don’t eat what is originally served, or they may learn that they just have to hold out on dinner to get the mac and cheese or pizza they really want. Stay strong and trust that if you did your part (offered the food), you have to let them do theirs.

What if my kid sees a favourite food on the table while they’re having lunch and he starts screaming that he just wants the banana?

I put this question in there because this is what my kid does all the time so I figure I’m not alone. Remember, you are the adult, you decide what foods are being served and if you didn’t choose banana as the “safe food” or as an option for that particular meal, you don’t have to give in. I don’t. You can simply say: “We can have the banana for snack this afternoon/ tomorrow, but right now, we’re having cherries and you’ve still got lots of foods on the table to choose from.” Whatever it is that they’re crying about, make sure that you do put it into the rotation often enough that it doesn’t become a novelty. So for example, my son knows there are rainbow sprinkles in the cupboard and sometimes he will ask for sprinkles on his food. I know he likes sprinkles, so a few times a week I will pre-emptively add them to his meal. You want to be pre-emptive about these things so they don’t get into the habit of having to throw a tantrum to get foods they like, then you give in, and then they learn that screaming at the table is how you get what you want.

Any other non pressure tips to get my toddler to eat new foods?

 There are a lot of fun ways to encourage kids to try new foods without having to resort to food rules and pressure.

  • New fun utensils
  • Cutting food into fun shapes with a cookie cutter
  • Serve it in a fun bento box, or in a colourful container they like
  • Talking about the food on the table without pressure like, “show me which food is green?”
  • Just keep putting it on the table- period!

Do you have specific questions about how to get your toddler to eat? Any other picky eating dilemmas you want addressed? Leave me a comment below and let me know if you try these tips and how they work for you!

Don’t forget to subscribe to the blog to get your own Division of Responsibility Picky Eaters “Cheat Sheet”!

pinterest image of dietitian tips for picky eaters

Abbey Sharp

Abbey Sharp is a Registered Dietitian (RD), regulated by the Ontario College of Dietitians. She is a mom, YouTuber, Blogger, award winning cookbook author, media coach specializing in food and nutrition influencers, and a frequent contributor to national publications like Healthline and on national broadcast TV shows.
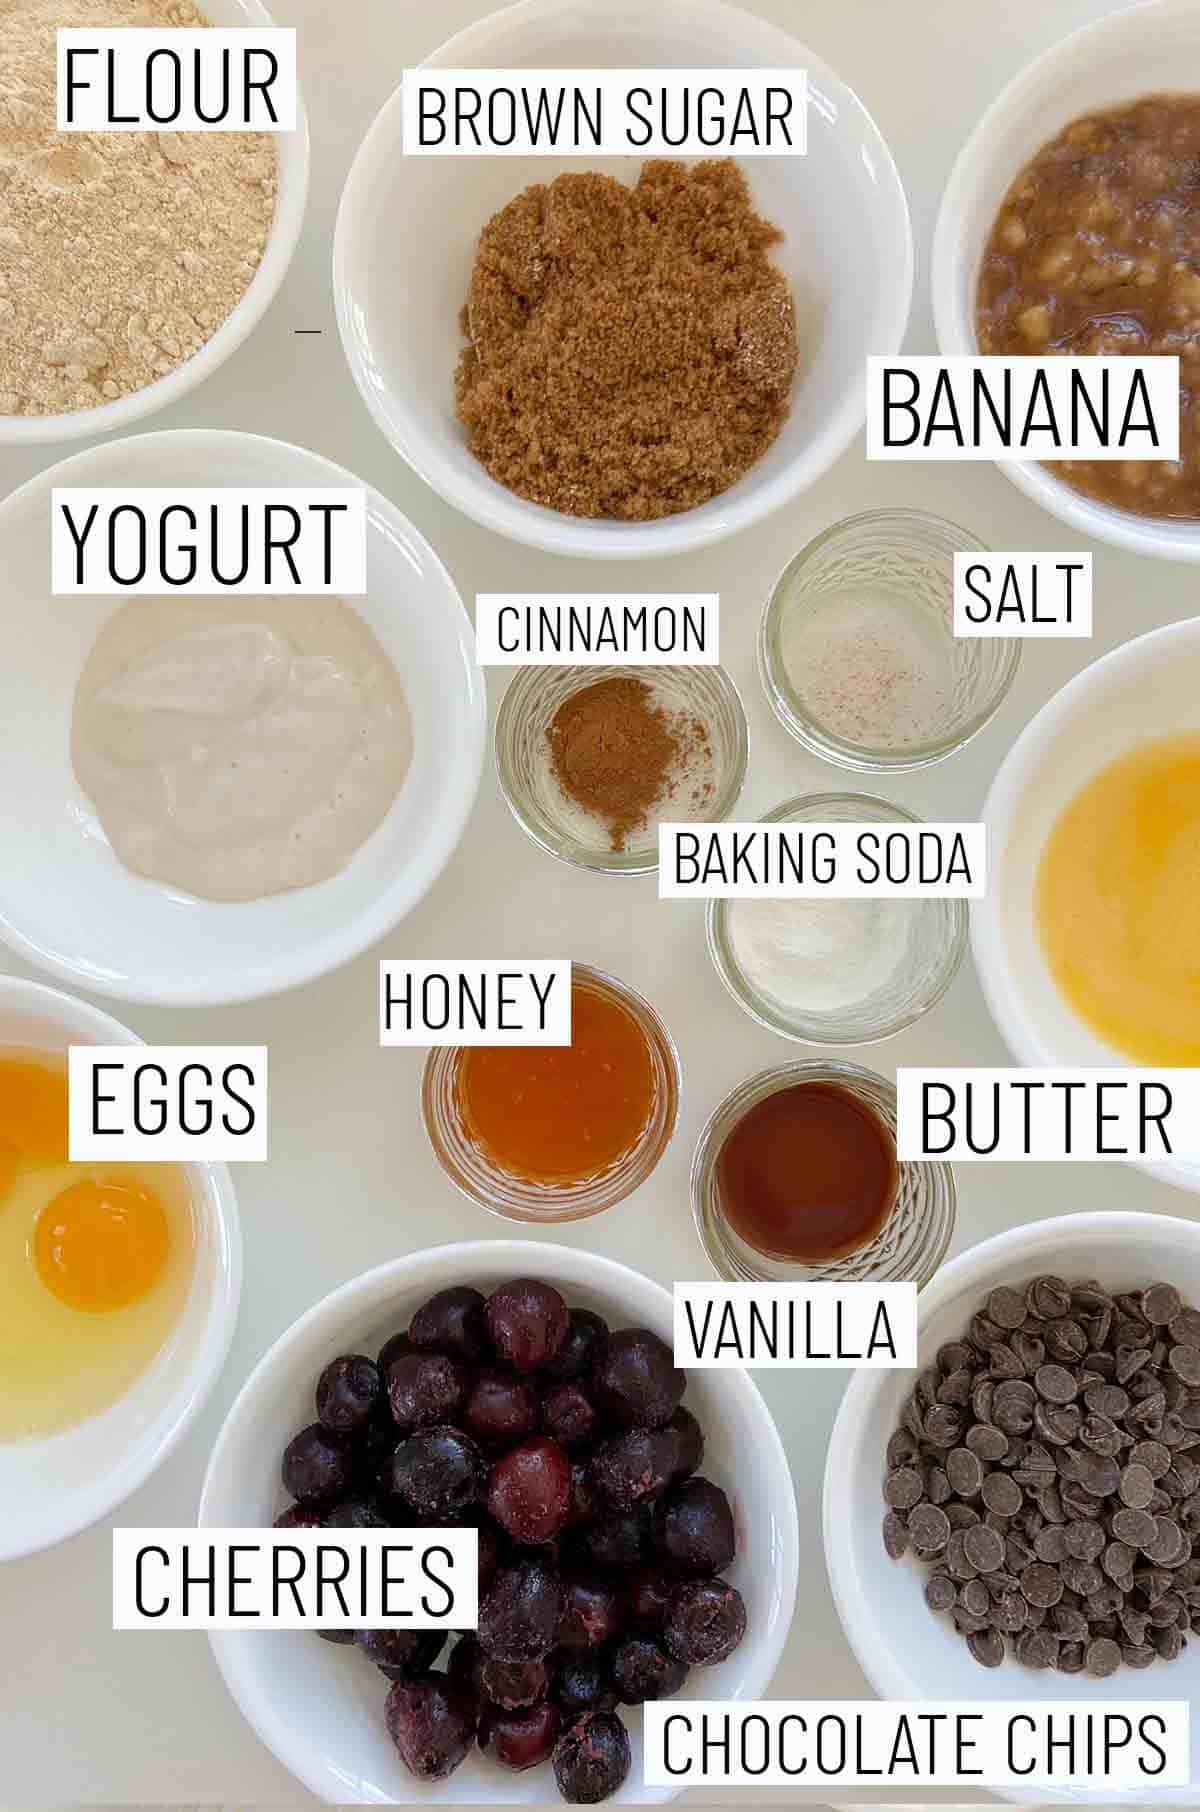
www.abbeyskitchen.com/about-abbey/

Last Updated September 1, 2022. Published September 1, 2022 By Abbey Sharp 9 Comments

Baby Led Weaning Recipes | Finger Food Ideas For Pincer Grasp Practice 9-12 Months +

DISCLAIMER: This post was developed in sponsored partnership with Cheerios, however, as always, all opinions are genuine.

I discuss the best baby led weaning recipes and finger food ideas for pincer grasp practice for children 9-12 months or older.

Baby's hand reaching for vegetables to discuss baby led weaning recipes.

Starting solids can be nerve wracking, exciting, fun, and totally scary. There is so much information, misinformation and straight up opinions out there about how, when, and what to feed baby, that I get that you might feel like holding onto the simplicity of exclusively bottle or breastfeeding for life. Ha. Cute thought, but alas, babies grow into toddlers and toddlers need to EAT real, wholesome finger foods just like you and I!

If you’ve been following along on the Abbey’s Kitchen blog and my Facebook group, the Millennial Mom’s Guide to Mindful Meal Planning, you’ll know that I am a big fan of Baby Led Weaning (BLW) because it means skipping purees and going straight to finger foods. To make it easy for you to get started, I even developed an awesome meal plan full of ideas for introducing solids and allergens the BLW way in the first 30 days.

But while we want to maintain the safety rules for choking prevention until 4 years old, the appropriate shape for baby finger foods change a baby hits a new developmental milestone – the development of pincer grasp.

What is the Pincer Grasp?

Pincer grasp involves the coordination of the index finger and the thumb to hold onto an item. When you or I button up our pants, pick up a lipstick, or grab a sheet of paper, we are exercising our pincer grasp.

In babies, pincer grasp develops around 9 to 10 months old as they improve their strength, hand-eye coordination and other fine motor skills. Before pincer grasp is developed, babies typically will pick things up with their whole hand (palmer grasp).

How Does Pincer Grasp Determine the Best Baby Finger Foods?

How babies interact with their hands plays a really important role in their nutrition and eating skills. When choosing foods for baby before 9 months (before pincer grasp is matured), it’s best to cut and prepare them into shapes that are easy for baby to pick up with their whole hand. In other words, even though your baby is small and it may seem intuitive to cut food into super small pieces, bigger is actually better (and safer).

After 9 months, you can start to serve baby finger foods in smaller pieces to develop their pincer grasp so they can practice picking up foods between two fingers. You still want to avoid any of the common choking shapes (that is, whole tomatoes, whole grapes, round hot dog pieces, hard vegetables etc.) but we don’t have to cut everything into strips.

The Safe Size to Avoid Choking Risk and Improve Pincer Grasp

While the recommendations for this vary, and honestly, you kind of have to use your judgement, the analogy I see from authorities most often is to half or squish any round foods that are larger than a small English pea.

The Best Baby Led Weaning Recipes & Finger Foods to Develop Pincer Grasp

Baby's hand reaching for cereal.

Aside from our staple Cheerios, there are a number of awesome baby finger foods that I recommend putting in regular rotation by the time your baby reaches that 9 to 10 month mark. Here are some of our go-tos!

Grains

Baby's hand reaching for cereal, macaroni and bread to discuss baby led weaning recipes.
  • Original Cheerios – Cheerios are a simple and easy snack my kid loves any time of day. I love that Cheerios has just 1 gram of sugar per serving, is made with whole grain oats, and has no artificial colours or flavours. They also an awesome O shape so they are the perfect safe shape for developing baby’s pincer grasp. There are also tons of delicious baby led weaning recipes with cheerios, such as these no bake cheerio bars.
  • Cooked short cut pasta – elbow macaroni or shells work great.
  • Toast spread – one of my favourite ideas is to cut into squares with crust removed and spread with peanut butter (thinly), butter or another spread so it’s not dry.

Protein

Baby's hand reaching for eggs, kidney beans and meatballs.
  • Cooked kidney beans – depending on the size, you may want to lightly smash them
  • Cubes of cooked tofu
  • Hard-boiled egg – you can chop these into pieces
  • Cooked ground beef – you can give them little bits or clumps the size of a pea and I recommend a higher fat meat to keep it moist
  • Shred of pulled pork or brisket – be sure to give short shreds for all baby leaning recipes, because if it’s too long, it could get stuck in baby’s throat

Fruit and Veggies

Baby's hand reaching for watermelon and tomatoes.
  • Zucchini – roasted and chopped
  • Sweet potato – baked and diced
  • Cauliflower florets – while we like the stalk as a handle in earlier BLW before 9 months, once baby has pincer grasp, you can just serve the florets
  • Broccoli florets – ditto for the broccoli
  • Blueberries – smashed or halved if large, wild blueberries may be fine whole if soft, and frozen thawed blueberries are very safe (but messy)
  • Cooked baby peas – again, use small, you can serve as is, but if they’re a bigger pea, you may want to lightly smash it
  • Raspberries – these are generally soft enough to collapse without concern
  • Bananas – cut into chunks
  • Kiwi – peeled and diced into pea like shape
  • Strawberries – diced into pea like shape
  • Corn kernel – well steamed
  • Grapes – quartered or diced
  • Grape or cherry tomatoes – quartered or diced
  • Avocado – diced
  • Watermelon – peeled and diced

Dairy

Baby's hand reaching for halloumi and cheese to discuss baby led weaning recipes.
  • Cheddar or mozzarella cheese, grated on the largest shred size
  • Cubes of pan-fried haloumi

I hope this article was helpful, and gave parents some insight into the best BLW foods for introducing your little one to the pincer grasp!

Now parents, let me know – what are your kids favourite baby led weaning recipes and baby finger foods for improving their pincer grasp? Leave me a comment below with your family’s go-tos!

Disclaimer: This was developed in paid partnership with Cheerios, however, all opinions are genuine.

MORE BLOG POSTS YOU MIGHT LIKE

If you liked this blog post baby led weaning recipes, then you might also enjoy more blog posts on feeding infants:

  • Is Soy Formula Bad for Babies that are Vegan or Allergic to Dairy?
  • Why Are Food Allergies in Kids on the Rise? | Allergy Prevention Tips
  • Are Food Sensitivity Tests BS or Legit? A Dietitian’s Perspective
  • How and When to Introduce Food Allergens to Babies with Baby Led Weaning or Spoon-Feeding
  • Do Babies Need Cow’s Milk? | Is Raising an Infant Vegan Safe and Healthy?
Abbey Sharp

Abbey Sharp is a Registered Dietitian (RD), regulated by the Ontario College of Dietitians. She is a mom, YouTuber, Blogger, award winning cookbook author, media coach specializing in food and nutrition influencers, and a frequent contributor to national publications like Healthline and on national broadcast TV shows.
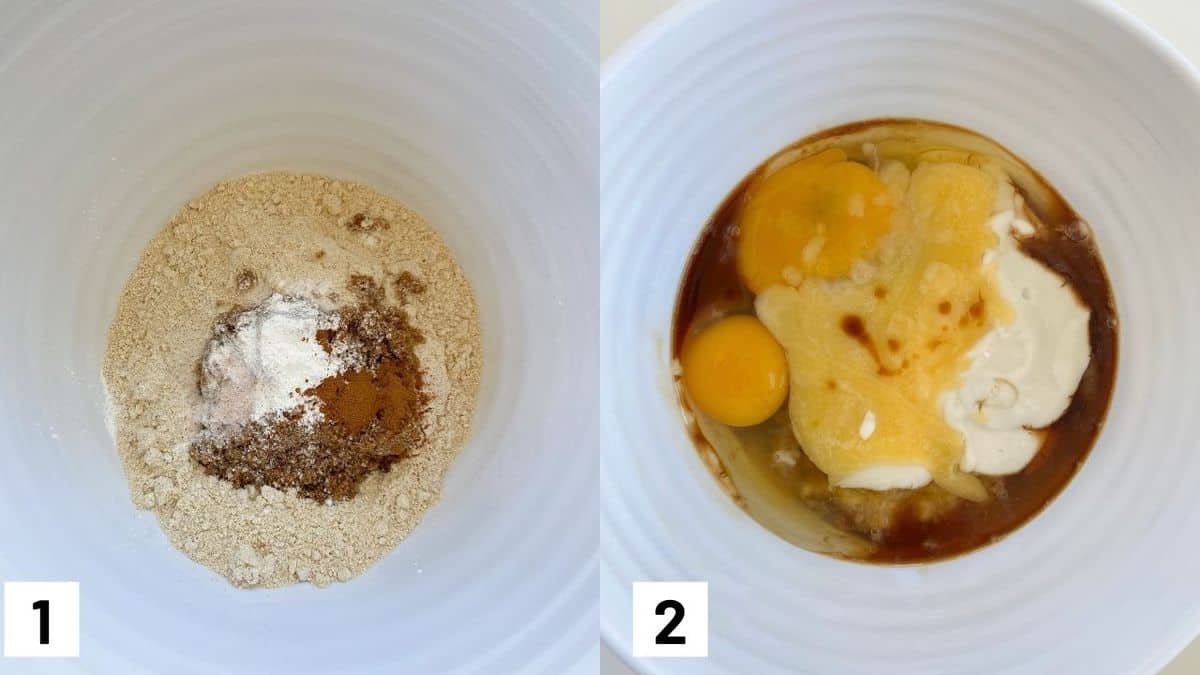
www.abbeyskitchen.com/about-abbey/

Last Updated August 30, 2022. Published August 30, 2022 By Abbey Sharp 12 Comments

Chicken Satay with Peanut Sauce & Sweet Potatoes (Easy Gluten Free Recipe)

This Paleo Peanut Satay Stuffed Sweet Potatoes with Chicken is an easy gluten free dinner idea to get good food on the table fast!

This chicken satay with peanut sauce sweet potatoes is an easy gluten free dinner idea to get good food on the table fast!

Up close view of Chicken Satay with Peanut Sauce & Sweet Potatoes on a colorful patterned plate.

Confession: I was having a serious chicken satay cravings this week. I just wanted to eat/drink peanut sauce all day ERR day. I was thinking about ordering UBER eats, but had to reign myself in. Man, am I the only one that gets a bill for like $60 for two people?! I guess I’m a sucker for adding on a bunch of things I don’t really need/can’t finish myself so when I can, I make the effort to cook from home and save the difference. Case in point, these chicken satay with peanut sauce & sweet potatoes. OMG. I’m a genius.

Table of contents

  • Why This Recipe Works
  • Key Ingredients
  • How To Make This Recipe
  • Expert Tips
  • Recipe FAQs
  • Other Recipes You Might Like

Why This Recipe Works

I always have sweet potatoes lying around the house (usually totally forgotten about), so this is an absolutely delicious way to use them up. The combination of a simple homemade peanut sauce, leftover chicken, and easy microwave “baked” sweet potatoes is a hearty and satisfying meal to pull off. I also love this recipe because it’s

  • Quick to make: only 35 minutes total!
  • High in protein (~23 g per serving)
  • Relatively inexpensive to make
  • Gluten Free & Paleo

Key Ingredients

Sweet Potatoes- I love using sweet potatoes as the base of this recipe. They make for the perfect little “boat” to hold the ingredients in while incorporating healthy carbohydrates, vitamins, and minerals.

Natural Peanut Butter- I prefer natual peanut butter as it has a more creamy/runny texture, making it perfect to mix in and drizzle over this chicken satay with peanut sauce & sweet potatoes recipe.

Boneless Chicken Breast- Chicken breast is one of my favorite ways to reach my daily protein needs! Chicken breast has roughly 27 g of lean protein per 100 grams!

Birds eye view of 4 Chicken Satay with Peanut Sauce & Sweet Potatoes. 3 on the top plate and 1 on the bottom plate.

How To Make This Recipe

Step 1: Preheat oven to 350 F. Place the sweet potatoes in the microwave on a heat proof dish on high for about 8-10 minutes, or until very tender when pricked with a fork. Once cool enough to touch, cut in half lengthwise and scoop out the insides into a bowl, leaving a thin shell around the edges.

Step 2: In a small saucepan heat the coconut oil over medium heat. Add in the garlic and ginger and stir until fragrant, about 1 minute. Add in the peanut butter, broth, tamari, coconut sugar, lime and sesame oil and reduce the heat to low. Stir until very smooth then remove from the heat.

Step 3: Add the chicken, broccoli, snap peas and ¾ of the sauce to the sweet potato flesh, along with a generous pinch each of salt and pepper, to taste.

Step 4: Stuff the sweet potato shells with the mixture, then place them in the oven for about 15 minutes until the skin gets lightly crispy and the mixture warms through.

Step 5: To serve, drizzle with the remaining peanut sauce, add sriracha to taste, and garnish with green onions and crushed peanuts.

Expert Tips

Don’t think you need to be limited to what I used. This recipe is a fantastic way to use up any random little leftovers you’ve got in the house. If you don’t have (or like) chicken, use leftover tofu, beans, beef or pork. If you don’t have broccoli and peas, go with carrots, bell peppers or spinach. If you’re really in a pinch you can even skip the whole homemade sauce step and just use the bottled stuff. Hey, I don’t judge. The important thing is really that you’re getting a balanced meal on the table that you can enjoy with family and friends.

Recipe FAQs

How do I store this recipe?

If you are wanting to prep this recipe in advance, I recommend keeping them unassembled in the refrigerator then heating/assembling when ready to eat!

Can I use another type of nut butter?

Sure! I personally haven’t tried using another nut butter, but if you have another kind on hand – go for it!

Can I make this recipe vegan/vegetarian?

Absolutely. Just sub the chicken for a plant-based protein like chickpeas or your favorite alternative chicken and then sub chicken broth for vegetable broth.

Picture of chicken satay with peanut sauce & sweet potatoes on colorful patterned plate with a bottle of sriracha in the background.

Other Recipes You Might Like

Looking for more delicious gluten free dinner recipes like this chicken satay with peanut sauce & sweet potatoes? Check out some of my favorites below!

  • TOFU TACOS WITH PEANUT SAUCE
  • PERSIMMON GINGER CHICKEN ONE POT DINNER
  • GLUTEN FREE VEGAN CHICKPEA AND CAULIFLOWER SHEET PAN DINNER WITH POMEGRANATE HARISSA GLAZE
  • GLUTEN FREE CHICKEN AND BUTTERNUT SQUASH ENCHILADAS

Now, I want to know, what are some of your go-to take out meals that you’d like to see used as inspiration for a healthy homemade dish? What are some of your favourite fast weeknight meals for using up bits and pieces around the kitchen?

A plate with a stuffed sweet potato peanut satay.
Print Recipe
5 from 3 votes

Paleo Peanut Satay Stuffed Sweet Potatoes with Chicken

This Paleo Peanut Satay Stuffed Sweet Potatoes with Chicken is an easy gluten free dinner idea to get good food on the table fast!
Prep Time15 minutes mins
Cook Time20 minutes mins
Total Time35 minutes mins
Course: Dinner
Cuisine: Thai
Servings: 4 people
Calories: 306kcal
Author: Abbey Sharp

Ingredients

  • 2 large sweet potatoes pricked with a fork
  • 1 tsp coconut oil
  • 1 clove garlic grated
  • 1 tbsp ginger grated
  • ½ cup natural peanut butter
  • ½ cup chicken broth
  • 1 ½ tbsp reduced sodium tamari
  • 1 tsp coconut sugar
  • 2 tbsp fresh lime juice
  • 1 tsp toasted sesame oil
  • 1 cooked skinless boneless chicken breast shredded
  • 1 cup broccoli finely diced
  • ½ cup snap peas thinly sliced

Garnich

  • Sriracha for garnish
  • 2 green onions light green and white parts only, thinly sliced
  • ¼ cup unsalted peanuts crushed

Instructions

  • Preheat oven to 350 F.
  • Place the sweet potatoes in the microwave on a heat proof dish on high for about 8-10 minutes, or until very tender when pricked with a fork. Once cool enough to touch, cut in half lengthwise and scoop out the insides into a bowl, leaving a thin shell around the edges.
  • In a small saucepan heat the coconut oil over medium heat. Add in the garlic and ginger and stir until fragrant, about 1 minute. Add in the peanut butter, broth, tamari, coconut sugar, lime and sesame oil and reduce the heat to low. Stir until very smooth then remove from the heat.
  • Add the chicken, broccoli, snap peas and ¾ of the sauce to the sweet potato flesh, along with a generous pinch each of salt and pepper, to taste.
  • Stuff the sweet potato shells with the mixture, then place them in the oven for about 15 minutes until the skin gets lightly crispy and the mixture warms through.
  • To serve, drizzle with the remaining peanut sauce, add sriracha to taste, and garnish with green onions and crushed peanuts.

Nutrition

Calories: 306kcal | Carbohydrates: 35g | Protein: 23g | Fat: 10g | Saturated Fat: 2g | Polyunsaturated Fat: 2g | Monounsaturated Fat: 3g | Trans Fat: 0.01g | Cholesterol: 37mg | Sodium: 720mg | Potassium: 799mg | Fiber: 7g | Sugar: 8g | Vitamin A: 16437IU | Vitamin C: 35mg | Calcium: 78mg | Iron: 2mg
Abbey Sharp

Abbey Sharp is a Registered Dietitian (RD), regulated by the Ontario College of Dietitians. She is a mom, YouTuber, Blogger, award winning cookbook author, media coach specializing in food and nutrition influencers, and a frequent contributor to national publications like Healthline and on national broadcast TV shows.
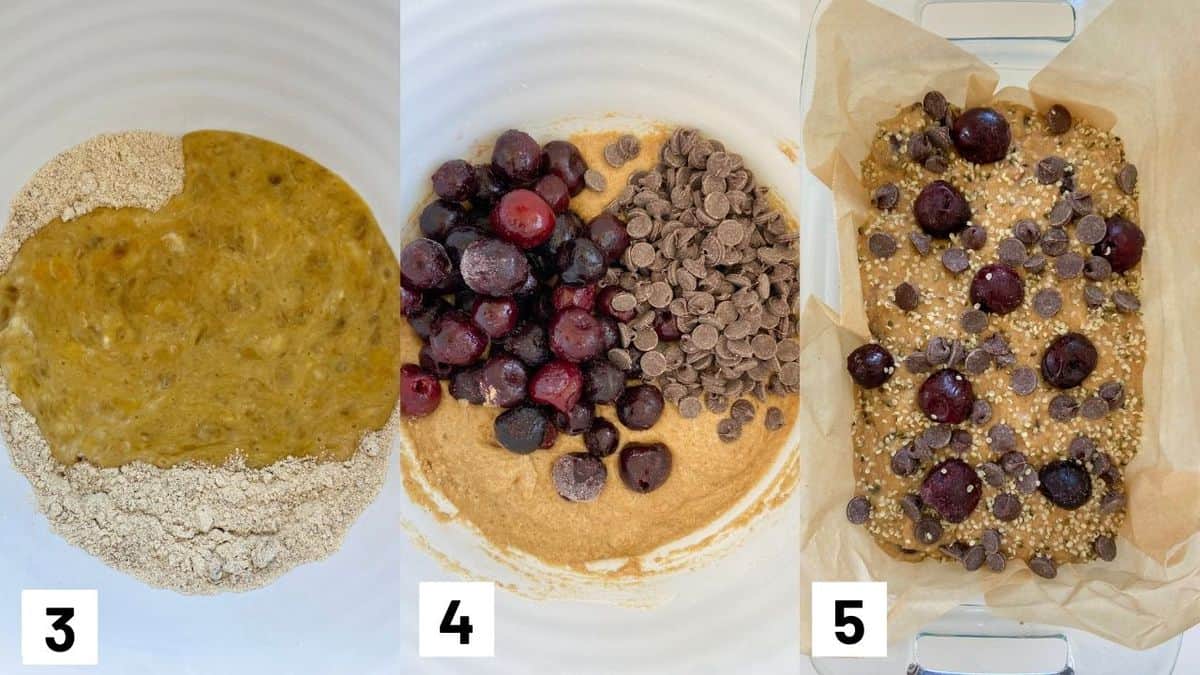
www.abbeyskitchen.com/about-abbey/
  • Previous Page
  • Go to page 1
  • Interim pages omitted …
  • Go to page 24
  • Go to page 25
  • Go to page 26
  • Go to page 27
  • Go to page 28
  • Interim pages omitted …
  • Go to page 89
  • Next Page

Get started with

Eight Free Recipe Books

From the co-founder of Neue Theory and creator of the Hunger Crushing Combo

Sign me up!
Abbey smiling at table
Abbey Sharp

“Foods may never be nutritionally equal. But we can make them morally equal by recognizing that our worth is never determined by what's on our plate.”

— Abbey Sharp, RD About Abbey ◥

Books

  • HCC™
  • Mindful Glow
  • Free E-Books

Blog

  • Nutrition
  • Recipes
  • Motherhood
  • Life

Explore

  • Neue Theory™
  • Bite Back
  • YouTube

Abbey

  • About
  • Coaching
YouTube TikTok Instagram Facebook X Pinterest
Abbey Sharp - The No BS Dietitian From Abbeys Kitchen

© Abbey's Kitchen 2026  All Rights Reserved •  ACCESSIBILITY STATEMENT •  Privacy Policy

This site uses cookies. By continuing to browse the site, you are agreeing to the use of cookies Accept Privacy Policy
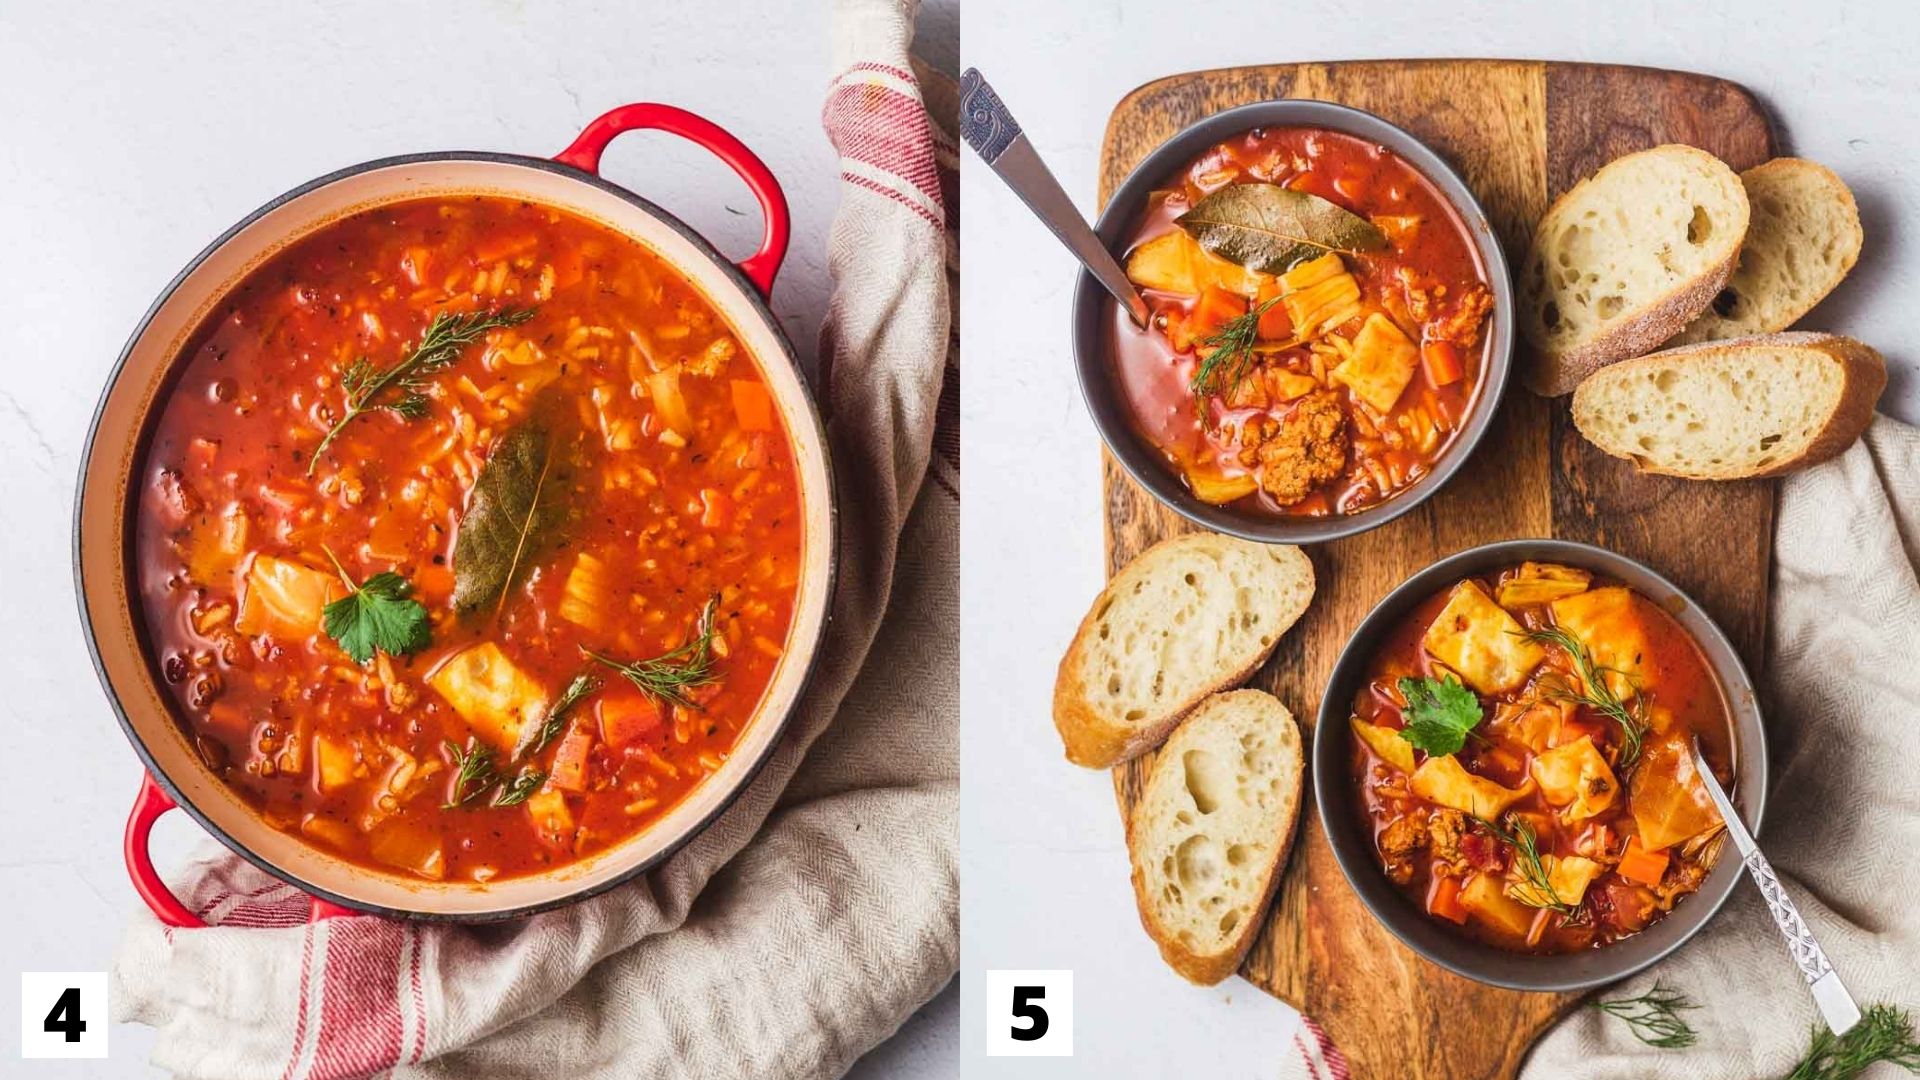
Privacy & Cookies Policy

Privacy Overview

This website uses cookies to improve your experience while you navigate through the website. Out of these, the cookies that are categorized as necessary are stored on your browser as they are essential for the working of basic functionalities of the website. We also use third-party cookies that help us analyze and understand how you use this website. These cookies will be stored in your browser only with your consent. You also have the option to opt-out of these cookies. But opting out of some of these cookies may affect your browsing experience.
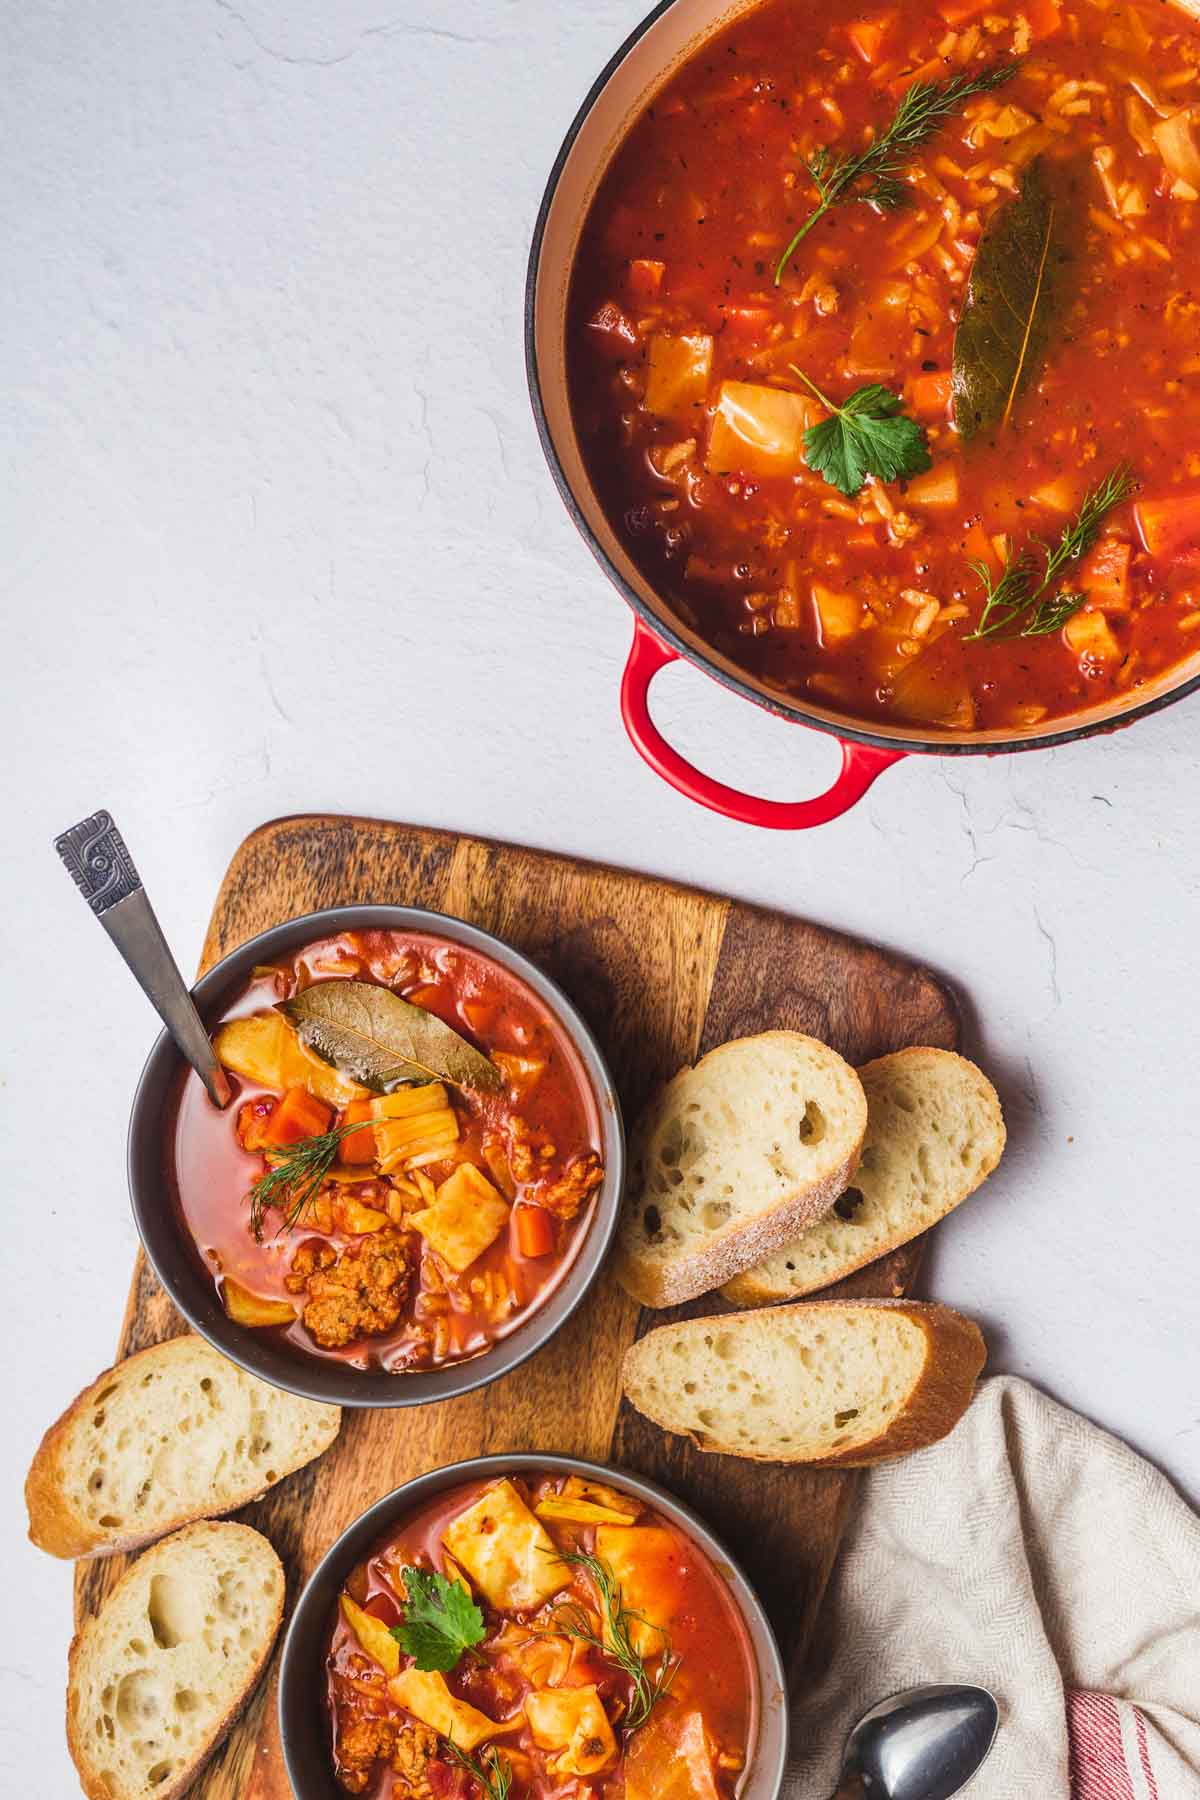
Necessary
Always Enabled
Necessary cookies are absolutely essential for the website to function properly. This category only includes cookies that ensures basic functionalities and security features of the website. These cookies do not store any personal information.
Non-necessary
Any cookies that may not be particularly necessary for the website to function and is used specifically to collect user personal data via analytics, ads, other embedded contents are termed as non-necessary cookies. It is mandatory to procure user consent prior to running these cookies on your website.
SAVE & ACCEPT

Rate This Recipe

Your vote:


A rating is required
A name is required
An email is required