• Skip to main content

Abbey's Kitchen

Healthy Recipes, Nutrition Myth Busting, Healthy Eating Tips

  • Books
    • HCC™
    • The Mindful Glow Cookbook
    • Recipe eBooks
      • Family
      • Hypothyroidism
      • BLW
      • Vegan Week 1
      • Vegan Week 2
      • Vegan Week 3
      • Keto
      • Gluten Free Week 1
      • Gluten Free Week 2
      • Fitness
      • Paleo
  • Blog
    • Nutrition
    • Recipes
    • Motherhood
    • Life
  • Explore
    • Neue Theory™
    • Bite Back With Abbey Sharp
      • Apple Music
      • Spotify
      • Amazon Music
    • YouTube
  • Abbey
    • About
    • Coaching
    • Contact

Abbey Sharp

Last Updated August 18, 2022. Published August 22, 2022 By Abbey Sharp 9 Comments

Fish Cakes With Quinoa | Gluten Free BLW Recipe

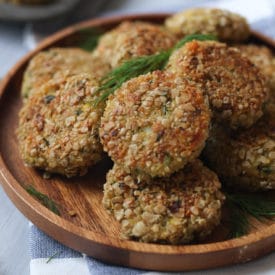
Fish cakes served on a wooden plate.

These gluten free quinoa fish cakes can be made with salmon or tuna and are the perfect baby, toddler and kid-friendly recipe for baby led weaning (BLW).
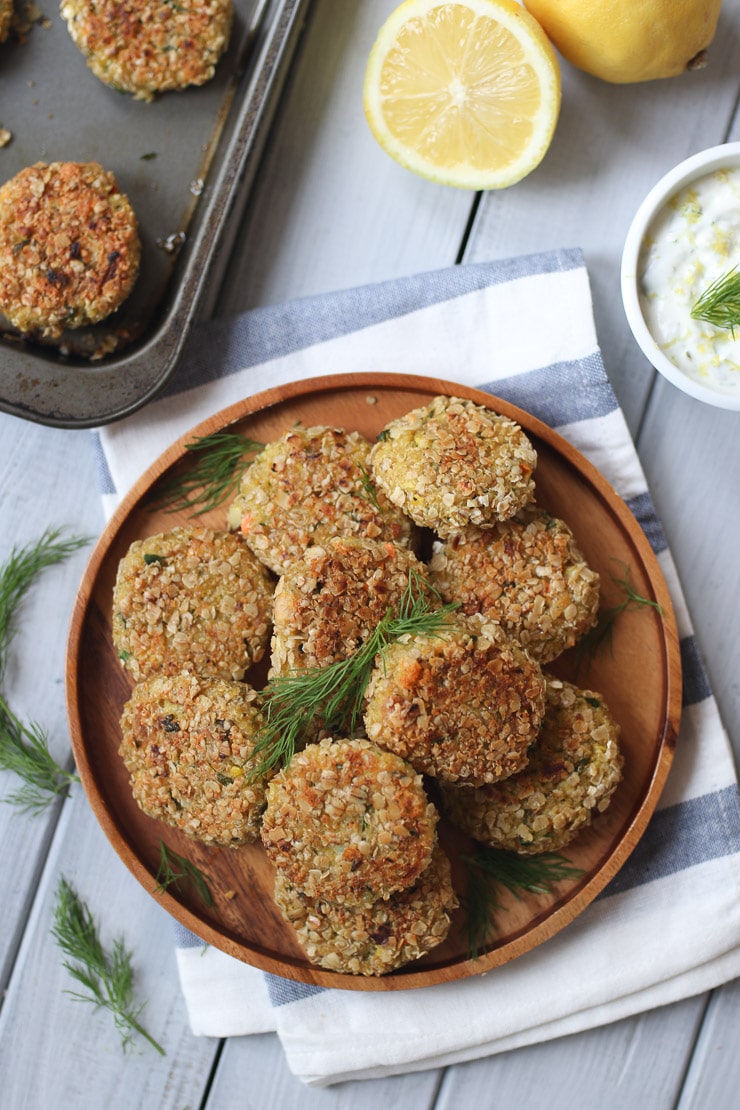
Fish cakes served on a wooden plate garnished with dill.

If you follow my BLW baby meal planner for reducing allergens and introducing foods, you know that I am a big fan of fish cakes for babies. Not only are they easy to pick up, and they’re pretty safe as far as fish goes (because you can pick through it to remove any bones), but because you can sneak in lots of healthy ingredients.

Table of contents

  • Why This Recipe Works
  • Key Ingredients
  • How to Make This Recipe
  • Expert Tips
  • More Recipes You Might Like

Why This Recipe Works

These gluten free quinoa tuna fish cakes are no exception to a delicious meal that is also packed with nutrition. They are full of nourishing ingredients like whole grains from the quinoa and oat flour, protein and iron in the canned fish, riced veggies full of fibre and flavour introduction, and some cheese to seal the deal. I mean, I don’t know about your kid, but mine will eat most things pretty quickly if there’s cheese involved.

Key Ingredients

Quinoa – Fun fact, quinoa is a “pseudo-grain”, meaning that it’s actually a seed! This is why it’s a naturally gluten free food, that is also packed with complex carbohydrates, plant-based protein, plus tons of vitamins and minerals.

Canned Light Tuna or Canned Salmon – Canned fish is a nutritious and affordable source of protein, making it perfect for this fish cakes recipe.

Oat Flour – You can purchase pre-made oat flour, or process oats into flour using a food processor or blender!

Old Cheddar Cheese – I suggest a nice flavourful cheese here for a truly robust flavour.

Frozen Riced Veggies – I like sweet potato and cauliflower for sweetness, but plain frozen riced cauliflower works too!

Shallots and Garlic – Classic aromatics to give these fish cakes tons of flavour.

Dill and Parsley – More flavour and a fresh taste!
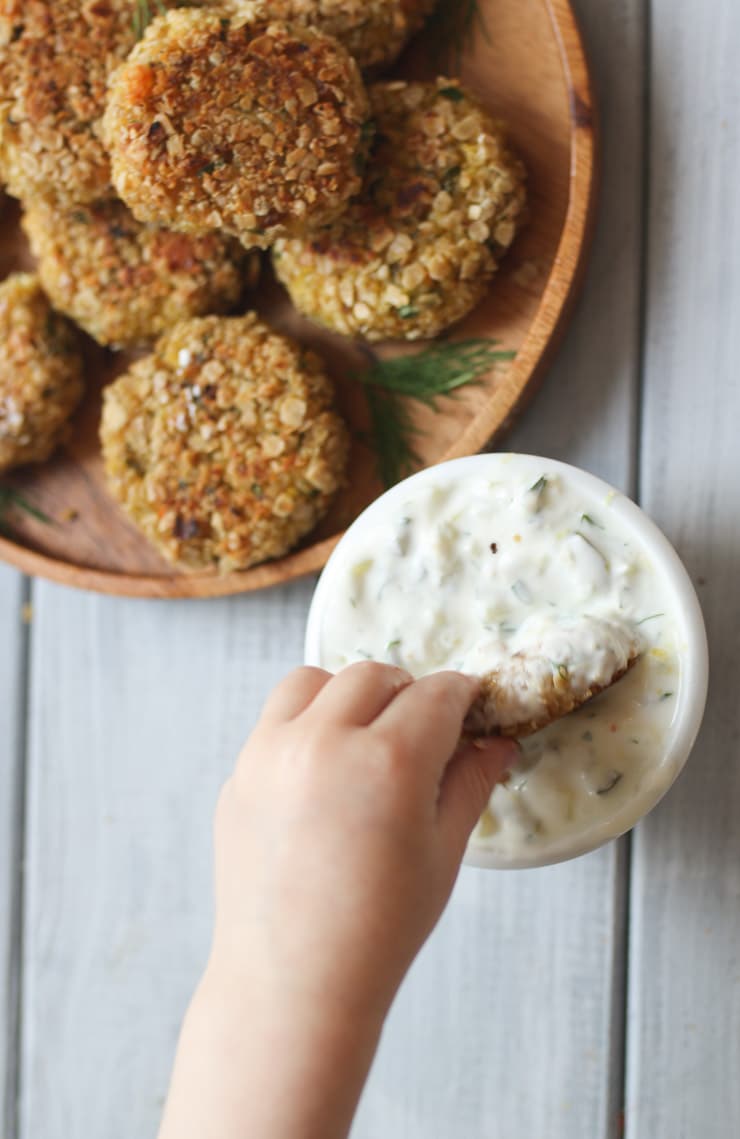
Toddler dipping fish cake into dip.

How to Make This Recipe

Step 1: Preheat oven to 425 F and grease a nonstick baking sheet. Allow the baking sheet to preheat for 5 minutes in the oven.

Step 2: Mix together the quick cooking oats with half of the finely grated cheese and set aside.

Step 3: In a large bowl, mix the cooked, cooled and dry quinoa (prepared according to the package), the frozen veggies, half the cheddar cheese, canned fish, oat flour, parsley, dill, eggs, shallots, garlic, lemon zest and a pinch each of salt and pepper. Mix thoroughly.

Step 4: Form them into small 2 tablespoon patties and coat in the oat cheese mixture. Spritz them generously with olive oil in an oil atomizer and bake, flipping and spritzing with olive oil half way through until golden brown. 10 to 15 minutes.

Step 5: Serve with your favourite dip!

Expert Tips

So, is canned tuna too high in mercury? Is it safe for babies? When making these tuna cakes for babies (or pregnant women), I suggest using LIGHT or SKIPJACK tuna which is low in mercury. Albacore tuna has a moderate amount of mercury so it should be enjoyed in moderation. Here are some facts about tuna fish and mercury.

  • Canned white, or albacore (0.32 parts per million of mercury). Children under six can eat up to one 3-ounce portion a month; children from 6-12, two 4.5-ounce portions a month. Adults, including pregnant women, can safely eat this kind of tuna up to three times a month (women, 6-ounce portions; men, 8-ounce portions).
  • Canned light or skipjack, the safer choice (0.12 parts per million of mercury). Children under six can eat up to three 3-ounce portions per month. Older children and adults can safely eat it once a week. But look out for “gourmet” or “tonno” labels. They are made with bigger yellowfin tuna and can contain mercury levels comparable to canned white.

If you’re concerned about the mercury in canned tuna, you can also use canned salmon. I prefer CHUNK canned fish, and also one that is low in sodium and a sustainable fish brand (check out this list of sustainable canned fish here).
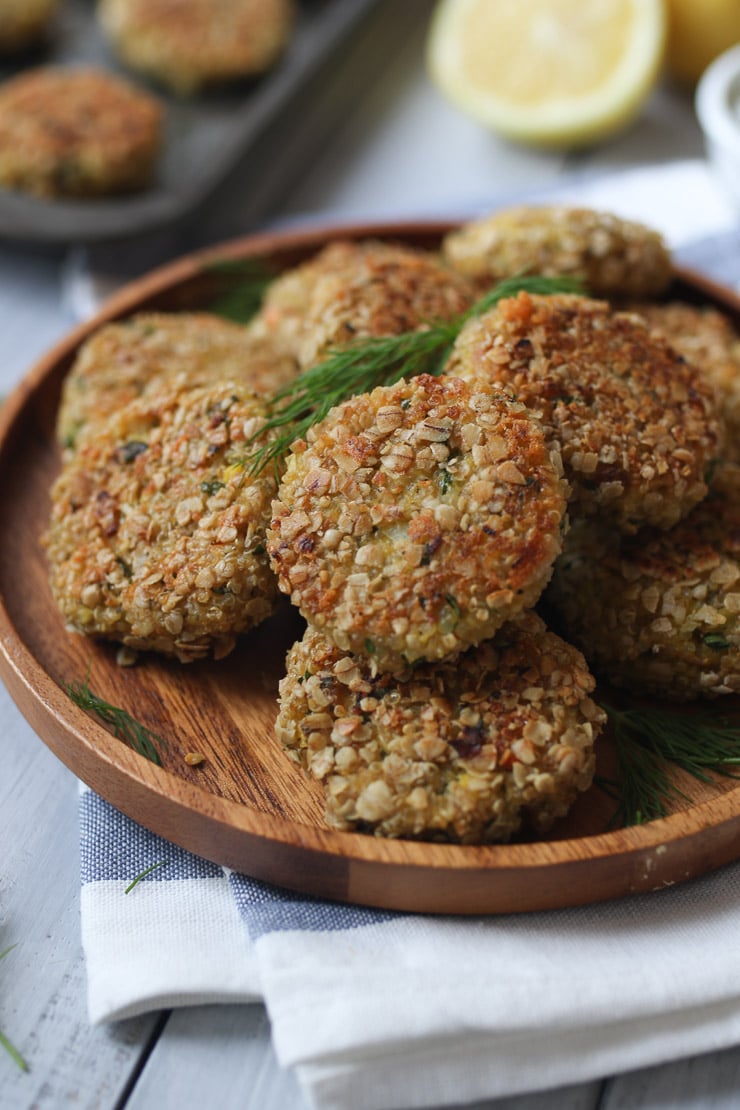
Fish cakes served on a wooden plate.

Recipe FAQs

Are these BLW friendly fish cakes high in iron?

Yes! Canned fish is a great source of iron plus omega 3 fats which are incredibly important for baby’s and toddler’s brain development. There’s also some iron in eggs, quinoa and oats, making these baked quinoa fish cakes ideal for young kids.

What dip should I serve with these quinoa tuna or salmon fish cakes?

I find that young kids enjoy everything more with dip, and so that’s why I created a whole post of some of my go-to toddler friendly baby led weaning safe dips! These are perfect for encouraging even picky eaters to try something new. If you don’t want to create a dip from scratch, a nice plain yogurt or sour cream with a little lemon zest and dill is great, or tartare sauce is also always a hit!

Can these baked fish cakes be made in advance and frozen for batch meal prep?

I batch prep these fish cakes and then let them freeze for an hour on a lined baking sheet before transferring them over to a freezer bag for up to 3 months. Then, when I’m having a week that’s low on food, I simply pop a few in the fridge to thaw, then throw them in the microwave for 20 seconds to warm through. Cheesy and delicious!

Now loves, tell me – what are some of your kids favourite high iron meals? Do your kids and toddlers like fish? Have they tried these baked quinoa fish cakes?

Leave me a message below with your thoughts!
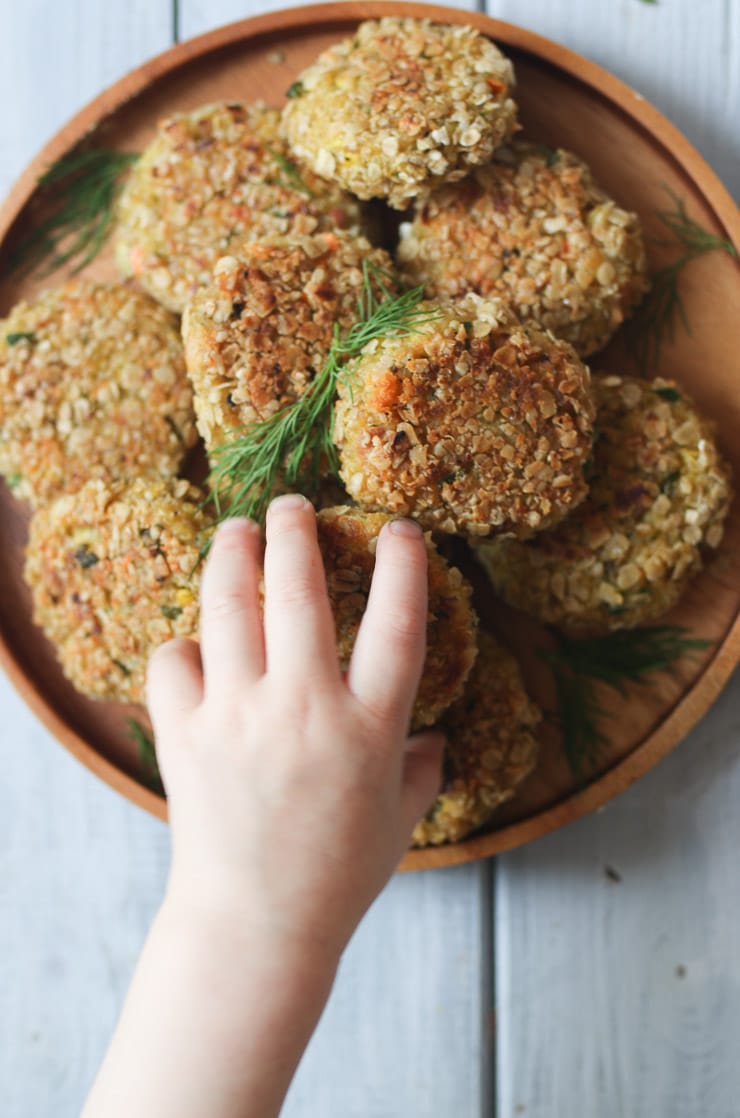
Toddler reaching for a fish cake on a wooden plate.

More Recipes You Might Like

If you liked this post for fish cakes with quinoa, you might enjoy some of the other BLW recipes on the blog:

  • BLW Spinach Chicken Protein Muffins
  • Salmon Sweet Potato Fritters
  • Lentil Vegan Meatloaf Muffins
  • Sweet Potato Lentil Baby Fritters
  • Chickpea Peanut Butter Biscuits
  • Banana and Cherry Oatmeal Fingers
Fish cakes served on a wooden plate.
Print Recipe
4.67 from 6 votes

Fish Cakes With Quinoa | Gluten Free BLW Recipe

These gluten free quinoa fish cakes can be made with salmon or tuna and are the perfect baby, toddler and kid-friendly recipe for baby led weaning (BLW).
Prep Time20 minutes mins
Cook Time15 minutes mins
Total Time35 minutes mins
Course: Snack, Dinner, Lunch
Cuisine: American
Servings: 24 fish cakes
Calories: 84kcal
Author: Abbey Sharp

Ingredients

  • 1 cup quick cooking oats gluten free if needed
  • 2 cups old cheddar cheese finely grated and divided
  • 1 ½ cups cooked and cooled quinoa
  • 1  x 5 oz can salmon or light/ skipack tuna preferably chunk, drained really well
  • ¼ cup oat flour or oats processed into a flour, gluten free if desired
  • 1 cup frozen riced veggies I like sweet potato cauliflower, kept frozen until time to use
  • 4 large omega 3 eggs
  • 2 shallots minced
  • 2 cloves garlic minced
  • Zest of 1 lemon
  • ¼ cup Dill minced
  • 6 tbsp Parsley minced
  • Olive oil in an oil atomizer
  • Salt and pepper to taste

Instructions

  • Preheat oven to 425 F and grease a nonstick baking sheet. Allow the baking sheet to preheat for 5 minutes in the oven.
  • Mix together the quick cooking oats with half of the finely grated cheese and set aside.
  • In a large bowl, mix the cooked, cooled and dry quinoa (prepared according to the package), the frozen veggies, half the cheddar cheese, canned fish, oat flour, parsley, dill, eggs, shallots, garlic, lemon zest and a pinch each of salt and pepper. Mix thoroughly.
  • Form them into small 2 tablespoon patties and coat in the oat cheese mixture. Spritz them generously with olive oil in an oil atomizer and bake, flipping and spritzing with olive oil half way through until golden brown. 10 to 15 minutes.
  • Serve with your favourite dip!

Notes

So, is canned tuna too high in mercury? Is it safe for babies? When making these tuna cakes for babies (or pregnant women), I suggest using LIGHT or SKIPJACK tuna which is low in mercury. Albacore tuna has a moderate amount of mercury so it should be enjoyed in moderation. Here are some facts about tuna fish and mercury.
  • Canned white, or albacore (0.32 parts per million of mercury). Children under six can eat up to one 3-ounce portion a month; children from 6-12, two 4.5-ounce portions a month. Adults, including pregnant women, can safely eat this kind of tuna up to three times a month (women, 6-ounce portions; men, 8-ounce portions).
  • Canned light or skipjack, the safer choice (0.12 parts per million of mercury). Children under six can eat up to three 3-ounce portions per month. Older children and adults can safely eat it once a week. But look out for “gourmet” or “tonno” labels. They are made with bigger yellowfin tuna and can contain mercury levels comparable to canned white.
If you’re concerned about the mercury in canned tuna, you can also use canned salmon. I prefer CHUNK canned fish, and also one that is low in sodium and a sustainable fish brand (check out this list of sustainable canned fish here).

Nutrition

Calories: 84kcal | Carbohydrates: 7g | Protein: 5g | Fat: 4g | Saturated Fat: 2g | Cholesterol: 37mg | Sodium: 73mg | Potassium: 92mg | Fiber: 1g | Sugar: 1g | Vitamin A: 256IU | Vitamin C: 5mg | Calcium: 81mg | Iron: 1mg
Abbey Sharp

Abbey Sharp is a Registered Dietitian (RD), regulated by the Ontario College of Dietitians. She is a mom, YouTuber, Blogger, award winning cookbook author, media coach specializing in food and nutrition influencers, and a frequent contributor to national publications like Healthline and on national broadcast TV shows.
www.abbeyskitchen.com/about-abbey/

Last Updated August 19, 2022. Published August 19, 2022 By Abbey Sharp 15 Comments

Homemade Twinkies | High Protein & Gluten Free (+ Rainbow!)

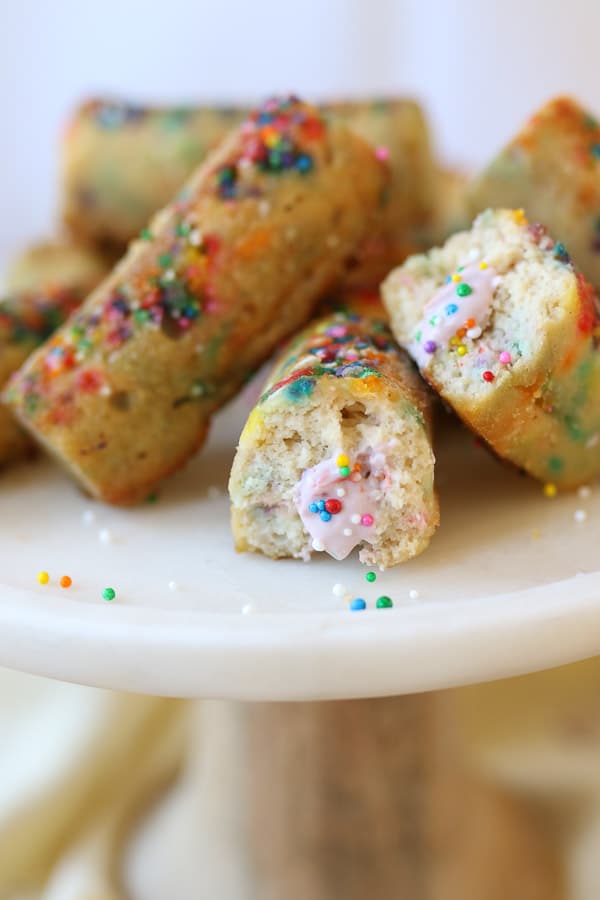
These Gluten Free Rainbow Twinkies with Strawberry Protein Cream Filling are the better-for-you version of everyones beloved childhood treat!

These Homemade Twinkies with Strawberry Protein Cream Filling are the better-for-you version of everyones beloved childhood treat!

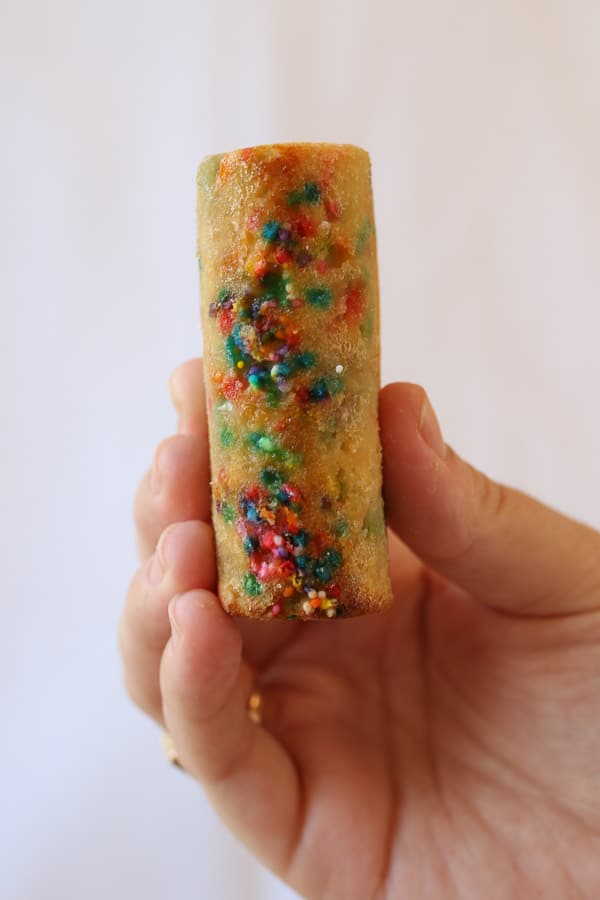
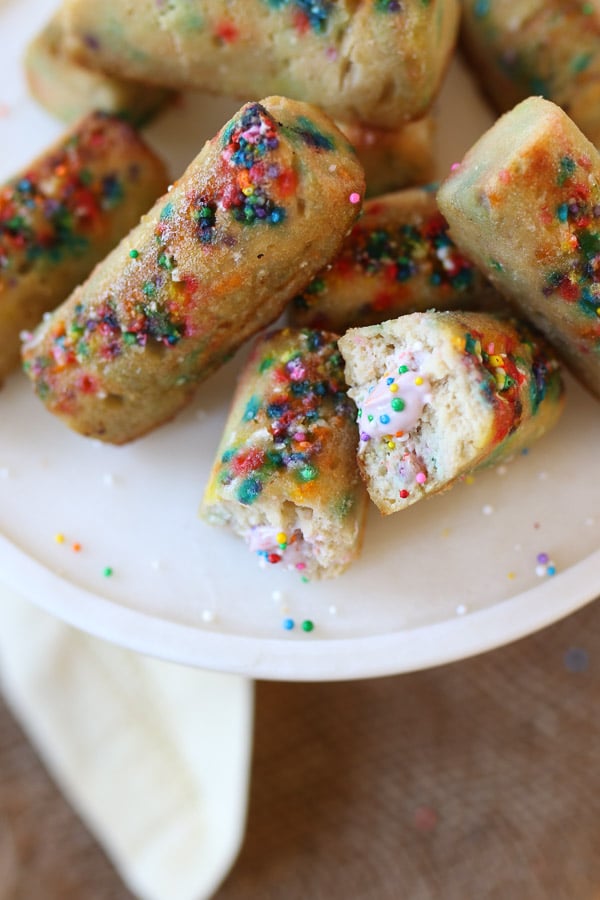
close up image of gluten free rainbow twinkies filled with strawberry protein cream on a white plate

Okay, raise your hand if your parents had no qualms about putting a daily pack of Twinkies in your lunch? I feel like parents today are so anxious about food and nutrition they wouldn’t DREAM of sending any of that “toxic” “garbage” to school with their kids, but HEY, we all turned out pretty okay. Any treat in moderation is A-OK, but why not make them at home so you can control the quality of the ingredients AND add sprinkles?! Sprinkles make EVERYTHING better. Hello, my beloved Homemade Twinkies with Strawberry Protein Cream Filling. I definitely don’t have to be a kid to want to inhale you.

Table of contents

  • Why This Recipe Works
  • Key Ingredients
  • How To Make This Recipe
  • Expert Tips
  • Recipe FAQs
  • More Recipes You Might Like

Why This Recipe Works

I love how these homemade twinkies are still sweet, flavorful, and delicious, just like the original Twinkies. I also love this recipe because it’s

  • High in protein- 4 grams per Twinkie
  • Family friendly – easy way to get kids to help out in the kitchen too!
  • Gluten Free – perfect for those with dietary restrictions
  • Super easy to make – less than 10 steps!

Key Ingredients

Greek Yogurt- greek yogurt is PACKED with protein, which what makes these homemade twinkies protein rich. Greek yogurt on it’s own has a pretty sour taste, but with all the ingredients combined it tastes just like regular yogurt.

Coconut Flour – The batter is completely gluten free so I use coconut flour as my base for these homemade twinkies. While it can be a bit tempermental, and requires more eggs and moisture to make it work, I like it because it’s really rich in satiating fibre. To lighten mine up without too much sugar or fat, I add unsweetened apple sauce and protein-rich Greek yogurt.

Strawberry Cream Cheese – This is used for the yummy filling of our homemade twinkies. You can also play around with other sweet flavors to used as filling if you can find it at your local grocery store.

birds eye view of a hand holding a gluten free rainbow twinkie

How To Make This Recipe

Step 1: Preheat oven to 350 F and spritz two twinkie silicon pans with cooking spray. Set them on top of baking sheets.

Step 2: In a medium bowl, mix together the coconut flour, baking powder and salt. In another bowl, mix together the honey, apple sauce, almond milk, yogurt, whole eggs and vanilla. Finally, in one more bowl, beat the egg whites until they reach a soft peak consistency.

Step 3: Add the wet to the dry, then once combined, fold a bit of the whipped egg whites to the mixture to just incorporate. Then fold the rest of the egg whites in, along with 1 teaspoon of the sprinkles.

Step 4: Sprinkle the remaining sprinkles onto the bottom of the twinkie molds, then fill about 2/3 of the way with the batter. Bake for 30 minutes.

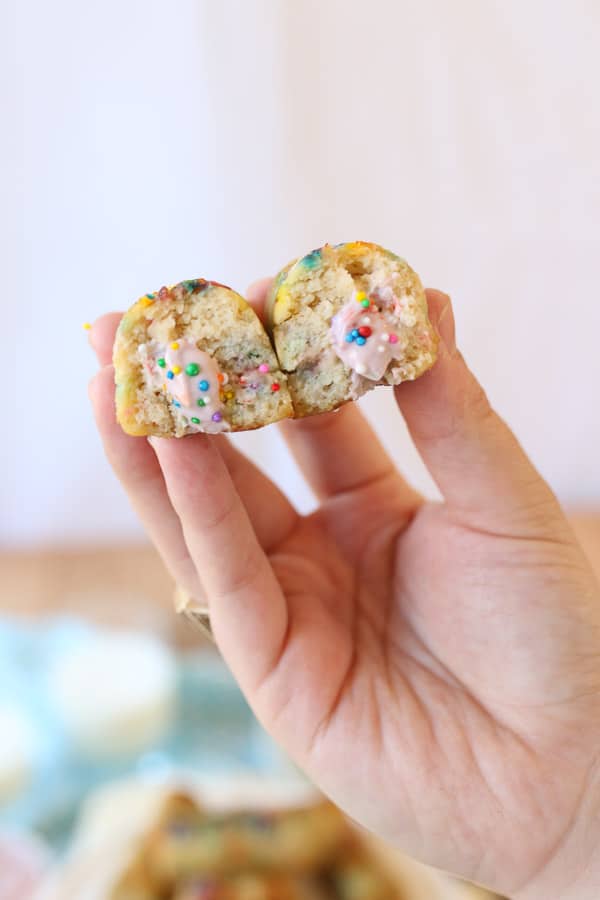
Step 5: Grease the baking sheets and then carefully unmold the twinkies onto the baking sheets, rounded side up. Bake for an additional 7-10 minutes until just lightly golden brown. Cool completely. Meanwhile, mix together the yogurt, cream cheese and sprinkles and transfer to a piping bag with a star tip.

Step 6: Once the homemade twinkies are cool, carefully insert the tip into the bottom of the twinkies in a few places and fill with the yogurt cream cheese. Enjoy!

Expert Tips

As mentioned above, these homemade twinkies are surprisingly easy but it does require you to have a Twinkies silicon pan. I ordered mine on Amazon for legit like $12 but if you don’t have one, you can easily use a mini muffin tin. No biggie.

Oh and we can’t forget our RAINBOW factor!! You have two options. You can fold them in if you like a streaky rainbow look, or you can sprinkle the bottom of the twinkies pan with sprinkles before you add your batter so you get a big rainbow patch at the top. Either way, it’s colourful and fun and that’s what we all love about these Homemade Twinkies.

birds eye view of rainbow twinkies with strawberries protein cream filling on a white plate

Recipe FAQs

Can I turn these Rainbow Homemade Twinkies into regular twinkies?

Of course! One thing I love about this recipe is how versitile it is. You can customize your own flavors to make them perfect for you and your families taste buds. I’m already thinking about making a “pumpkin spice” verstion when Fall comes around!

Can I prep these homemade twinkies ahead of time?

Yes! Even though they are best served fresh, you can store these in an airtight container in the fridge for an easy go to snack to grab throughout thes week.

What makes these homemade twinkies high in protein?

Mostly the greek yogurt! There’s actually 17 grams of proetin in only 1 cup of plain greek yogurt.

hand holding two rainbow twinkies filled with strawberry protein cream


More Recipes You Might Like

Looking for other family friendly snack/dessert ideas like these homemade twinkies? Definitely check out some of my favorites below!

  • BANANA AND PEANUT BUTTER CHOCOLATE BARS (VEGAN & GLUTEN FREE)
  • HEALTHY TWIX BARS
  • HOMEMADE SNICKERS BARS
  • HEALTHY DIRT CUPS

So, mommas, tell me- would you put THESE Homemade Twinkies in your kids lunches without a worry? Did you grow up eating twinkies? Leave me a comment below about your twinkie memories!!

These Gluten Free Rainbow Twinkies with Strawberry Protein Cream Filling are the better-for-you version of everyones beloved childhood treat!
Print Recipe
4.84 from 6 votes

Homemade Twinkies | High Protein & Gluten Free (+ Rainbow!)

These Homemade Twinkies with Strawberry Protein Cream Filling are the better-for-you version of everyones beloved childhood treat!
Prep Time15 minutes mins
Cook Time40 minutes mins
Total Time55 minutes mins
Course: Dessert
Cuisine: American
Servings: 18 twinkies
Calories: 86kcal
Author: Abbey Sharp

Ingredients

  • 1 cup coconut flour
  • 2 tsp gluten free baking powder
  • 1/8 tsp salt
  • 1/4 cup honey
  • 3/4 cup unsweetened apple sauce
  • 1/2 cup plain 2-4% Greek yogurt
  • 1/2 cup plus 2 tbsp unsweetened vanilla almond milk
  • 2 tsp vanilla
  • 3 whole eggs
  • 4 egg whites
  • 2 tsp rainbow sprinkles

Filling:

  • 1/2 cup  plain 2-4% Greek yogurt
  • 6 tbsp light strawberry cream cheese
  • 2 tsp rainbow sprinkles

Instructions

  • Preheat oven to 350 F and spritz two twinkie silicon pans with cooking spray. Set them on top of baking sheets.
  • In a medium bowl, mix together the coconut flour, baking powder and salt.
  • In another bowl, mix together the honey, apple sauce, almond milk, yogurt, whole eggs and vanilla.
  • Finally, in one more bowl, beat the egg whites until they reach a soft peak consistency.
  • Add the wet to the dry, then once combined, fold a bit of the whipped egg whites to the mixture to just incorporate. Then fold the rest of the egg whites in, along with 1 teaspoon of the sprinkles.
  • Sprinkle the remaining sprinkles onto the bottom of the twinkie molds, then fill about 2/3 of the way with the batter. Bake for 30 minutes.
  • Grease the baking sheets and then carefully unmold the twinkies onto the baking sheets, rounded side up. Bake for an additional 7-10 minutes until just lightly golden brown. Cool completely.
  • Meanwhile, mix together the yogurt, cream cheese and sprinkles and transfer to a piping bag with a star tip.
  • Once the twinkies are cool, carefully insert the tip into the bottom of the twinkies in a few places and fill with the yogurt cream cheese. Enjoy!

Nutrition

Calories: 86kcal | Carbohydrates: 11g | Protein: 4g | Fat: 3g | Saturated Fat: 2g | Polyunsaturated Fat: 0.2g | Monounsaturated Fat: 1g | Trans Fat: 0.004g | Cholesterol: 31mg | Sodium: 84mg | Potassium: 106mg | Fiber: 2g | Sugar: 7g | Vitamin A: 71IU | Vitamin C: 0.1mg | Calcium: 54mg | Iron: 0.4mg
Abbey Sharp

Abbey Sharp is a Registered Dietitian (RD), regulated by the Ontario College of Dietitians. She is a mom, YouTuber, Blogger, award winning cookbook author, media coach specializing in food and nutrition influencers, and a frequent contributor to national publications like Healthline and on national broadcast TV shows.
www.abbeyskitchen.com/about-abbey/

Last Updated August 18, 2022. Published August 18, 2022 By Abbey Sharp 46 Comments

Intermittent Fasting and Working Out | The Pros and Cons for Weight Loss

Curious about intermittent fasting and working out for weight loss? We go through the evidence based pros and cons of this popular eating pattern.

Intermittent fasting is among a variety of diets right now that has stood the test of time. Even though intermittent fasting has been around for a while, it has gained some momentum within the last few years for its potential health benefits, including weight loss. We set out to review the most recent evidence on the topic and discuss whether intermittent fasting and working out will yield the best results for weight loss and your health.

Person measuring their waist with measuring tape to discuss intermittent fasting and working out.

What is Intermittent Fasting?

Intermittent Fasting involves a temporary period of fasting followed by a designated eating window. The duration of both the fasting and eating window will depend on the type of fast being practiced. But typically, intermittent fasting promotes an eating window that is no longer than 8 hours in duration. This is followed by a fasting period that ranges from 16 hours to a maximum of 1.5 days and are usually no longer than 24 hours.

Compared to the typical “Continuous Energy Restriction” diets that promote a caloric deficit, intermittent fasting does not explicitly restrict food intake or total calories consumed. Instead, intermittent fasting determines WHEN you eat, not WHAT or HOW MUCH. With that said, during your eating window you have the freedom and flexibility to eat without a caloric restriction.

Types of Intermittent Fasting

1. Alternate-day fasting

This type of fasting alternates between feeding and fasting days, with the option for “modified” fasting days. Meaning, that fasting days can either be be a full fast, or 25% of usual caloric intake.

2. Whole-day Fasting

Also known as the 5:2 method, whole-day fasting involves fasting for 1 to 2 days of the week and eating normally for the remaining 5-6 days. Fasting days can be a full fast or eating very low calorie (around 500-600 calories a day).

3. Time-Restricted Feeding

This type of fasting is also known as the 16:8 method, and is arguably the most popular type of intermittent fasting as of late. It involves eating for 8 hours of the day and fasting for 16 hours of the day.

Does Intermittent Fasting Have Any Health Benefits?

Proponents of intermittent fasting and working out have suggested that fasting can have a multitude of health benefits, including:

  • Improving glucose homeostasis
  • Boosting energy
  • Increasing growth hormone (GH) production
  • Reducing inflammation by decreasing oxidative stress
  • Lowering triglyceride (TG) levels
  • Lowering blood pressure
  • Increasing and protecting brain function
  • Promoting longevity
  • Increasing resistance to age-related diseases
Measuring tape wrapped around a silver fork for weight loss.

However, are these health claims on intermittent fasting true?

While there does exist promising research on the potential benefits of intermittent fasting and working out, unfortunately a lot of the health claims are based on animal studies. While there are some limited human studies that exist on intermittent fasting, many of these studies have mixed results. With that said, we need more extensive research on humans to get a clear picture of the potential health benefit of intermittent fasting.

With this in mind, what exactly DOES the research say about intermittent fasting and its effects on health? Let’s take a look at the PROS and CONS of intermittent fasting.

Pros of Intermittent Fasting

1. Weight Loss

Several human studies have found that fasting has been associated with a significant DECREASE in body weight, body fat, and waist circumference. Similarly, a recent 2020 study found that using intermittent fasting to treat obesity was highly effective, resulting in a 8-13% decrease in body weight among participants.

In addition, a 2019 systematic review and meta-analysis found that intermittent fasting was just as effective as Continuous Energy Restriction (CER) for weight loss. Which means that a more flexible diet like intermittent fasting can yield the same weight loss results as a restrictive diet.

2. Fat Loss

Studies have shown that with sufficient protein intake and resistance training, intermittent fasting and working out may help improve fat loss while RETAINING fat free mass (aka muscle mass) compared to daily calorie restriction-type diets.

3. Blood Sugar

Animal studies suggest that intermittent fasting may improve insulin sensitivity and glucose homeostasis. A 2017 systematic review reported that intermittent fasting resulting in a reduction in HbA1C (long-term blood sugar levels) compared to a continuous energy restriction diet.

4. Cholesterol & Blood Pressure

Intermittent fasting may help to improve LDL and total cholesterol levels. Some research has also shown that it may reduce blood pressure and triglyceride levels. These measures are all important for preventing and reducing the risk of various diseases – notably, cardiovascular disease.

5. Inflammation

Additionally, intermittent fasting has been linked to a reduction of inflammation in the body. It was demonstrated that intermittent fasting can promote an increase in adiponectin, which can help to decrease inflammation by inhibiting inflammation causing monocytes.

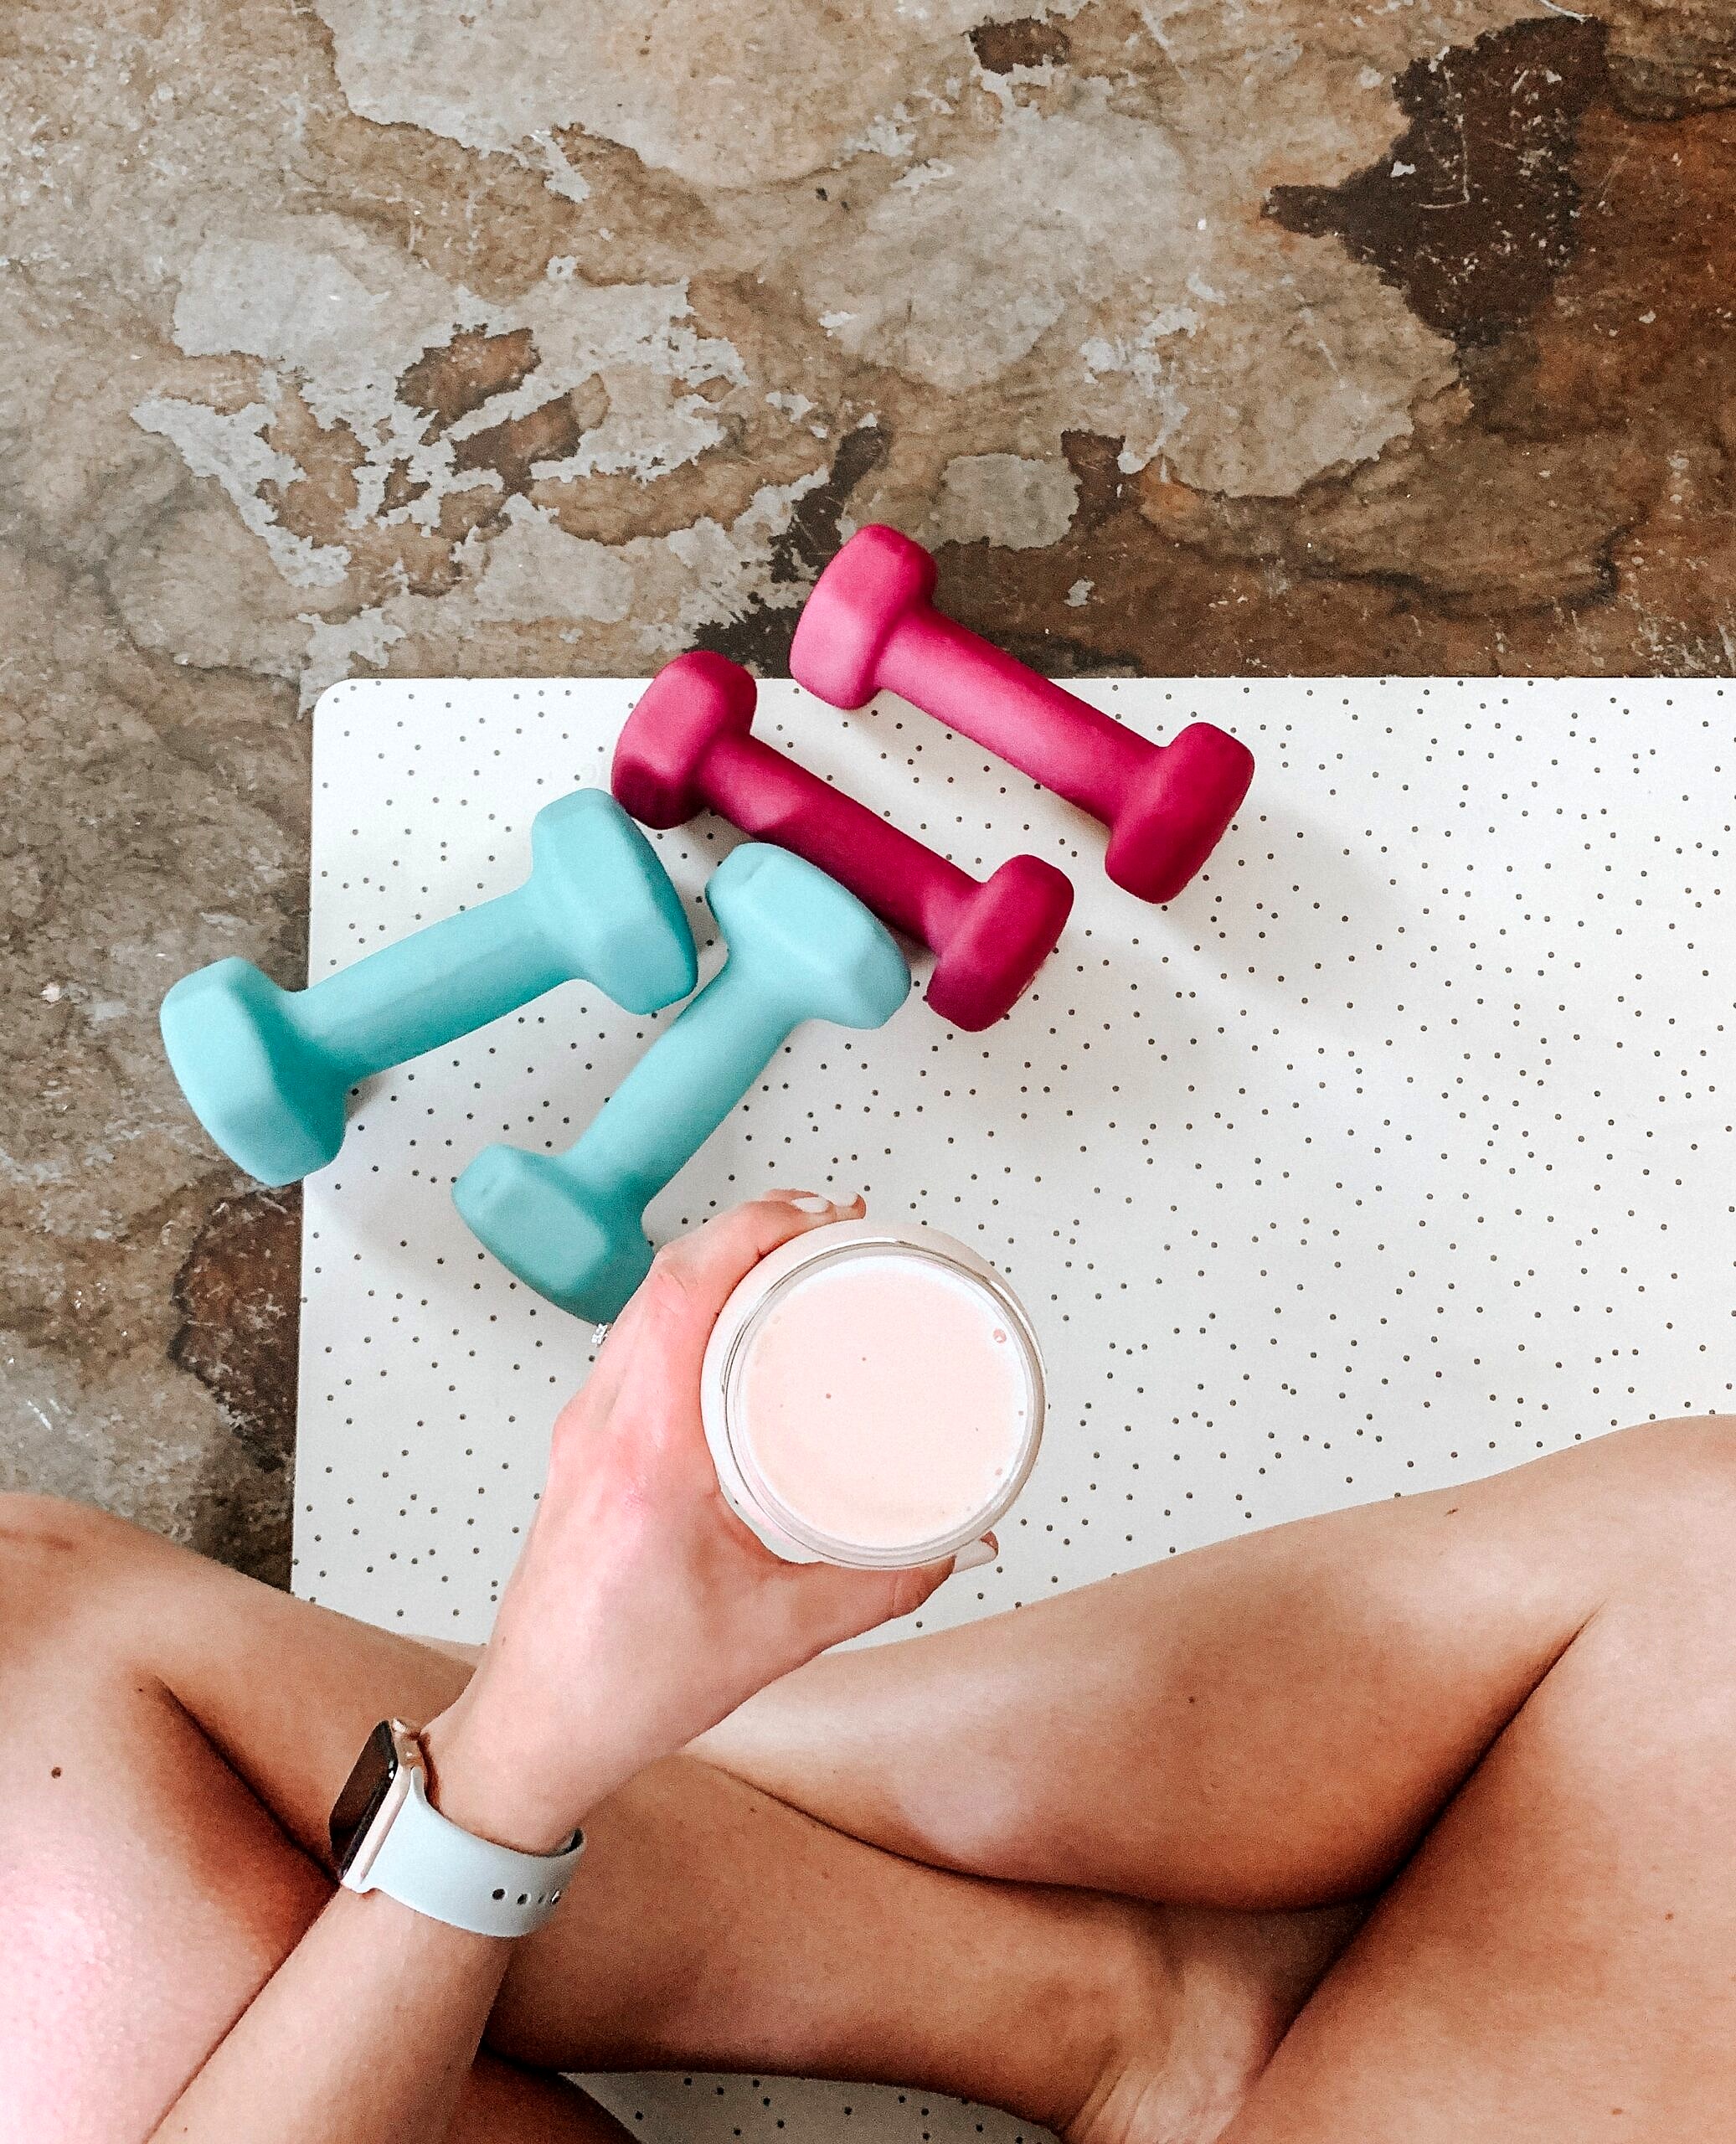
Two blue dumbells.

5. Brain Functioning

A 2018 review found that intermittent fasting was associated with reduced oxidative stress and better memory. It also suggested that intermittent fasting was associated with an increased lifespan and a reduction in age-related diseases. However, all studies in the review were conducted on animals.

4. No calorie restriction

That’s right! You can still eat the same number of daily calories and don’t have to take away or change the type of foods you eat. Studies have even found that there is no huge difference between continuous calorie restriction and fasting in terms of short term weight loss.

5. Larger portions in a shorter period of time

Some people may prefer the shorter eating window during intermittent fasting because consuming larger portions of food in one sitting might better align with your natural hunger and fullness cues. On the contrary, some individuals who prefer to eat smaller more frequent meals throughout the day may find intermittent fasting more difficult to adhere to.

Cons of Intermittent Fasting

1. Interferes with the Social Aspect of Eating

Eating is very much a social activity. When you think about it, all of our celebrations, milestones and special occasions revolve around food. However, the shortened eating window during intermittent fasting may present a challenge when it comes to social gatherings around food.

Not to mention, you might be missing out on those late night romantic dinners, home-made family suppers, birthday dinners, lunch meetings with your boss and co-workers, and maybe even sharing a meal with your spouse and kids. Not so fun.

Cartoon of a woman walking by a sign that reads "do not feed" to demonstrate whether intermittent fasting for weight loss works.

2. Low Energy Levels

A 2016 systematic review found that some intermittent fasting participants experienced minor adverse physical ailments including: feeling cold, constipation, headaches, lack of energy, bad temper and lack of concentration. Under these circumstances, it would be difficult to have the energy or motivation to be active and do your daily activities.

Getting enough fuel throughout the day is important in order to maintain our energy levels. With that in mind, intermittent fasting may present a challenge to some people if following a time restricted eating schedule impedes upon their daily activities and hunger levels. Which brings us to our next point…

3. Increased Hunger

If intermittent fasting and working out results in an uncomfortable hunger level, this might prompt some individuals to consume more than what they would normally eat when their eating window finally opens up. While intermittent fasting can certainly work for some people without resulting in increased hunger, it really comes down to your unique hunger and fullness cues.

If you are someone who feels hungry later on in the day and feels more satisfied with 3 larger meals, then intermittent fasting may be a better fit. However, if you are someone who likes to consume smaller more frequent meals throughout the day and feels hungry in the morning and at night, then practicing intermittent fasting may cause you to feel more hungry during the fasting windows.

Sad face on a plate with a pink background.

4. Digestion Issues

Some individuals may experience digestive discomfort after consuming large volumes of food in one sitting during their eating windows. This can include digestive symptoms such as gas, cramping, abdominal pain, indigestion and bloating. However, everyones body is unique so whether or not you experience digestive symptoms from intermittent fasting is highly individualized, but is something to keep in mind if intermittent fasting drastically alters your eating pattern or the amount of food you eat in one sitting.

With that said, intermittent fasting may not be a good fit for individuals with IBS as their gut tends to be more sensitive and prone to inflammation. Therefore, these individuals are more susceptible to cramping, abdominal pain and bloating.

5. Unclear Impact on Heart Health

For cardiovascular markers such as total cholesterol, some mixed results were also observed in alternate-day intermittent fasting. In this study, both LDL (BAD cholesterol) and HDL (GOOD cholesterol) increased, while triglyceride levels decreased. However, other studies show that total cholesterol and LDL decreased or HDL remained the same. Considering these mixed results, clearly we need more human studies on intermittent fasting to get a clear picture on its impact on heart health.

Berries in a heart-shaped bowl.

6. May Trigger Disordered Eating

If you are someone with a history of disordered eating or an eating disordered, intermittent fasting may be triggering and not recommended for you. Rather than listening to your internal hunger cues, following a set of “rules” while intermittent fasting (i.e. when to eat and when not to eat) might interfere with your relationship with food.

As discussed, it may also lead to increased hunger which can potentially lead to a binge which may exacerbate existing eating disorder symptoms or the “binge-restrict” mentality. In addition, a 2016 review found that some intermittent fasting participants experienced a preoccupation with food.

7. Potential Long-term Health Consequences (Especially for Women!)

While intermittent fasting does not explicitly involve caloric restriction (as there is no caloric limit during eating windows), it may still result in consuming less calories.

With that in mind, excessively restricting energy and protein can increase the risk of nutrient deficiencies which can potentially lead to fertility and reproductive issues in women.

Some animal studies have shown that fasting led to decreases in body weight, blood glucose levels and more shockingly, reduced ovary size – which significantly impacting fertility in rats. A 2017 review on women found that three consecutive days of a total fast during the mid-follicular phases affected the luteinising hormone which controls ovulation. However, it did not interfere with follicle development or menstrual cycle length.

Although there are limited human studies on intermittent fasting’s effects on fertility, these significant results suggest that there may be similar effects on human females as well.

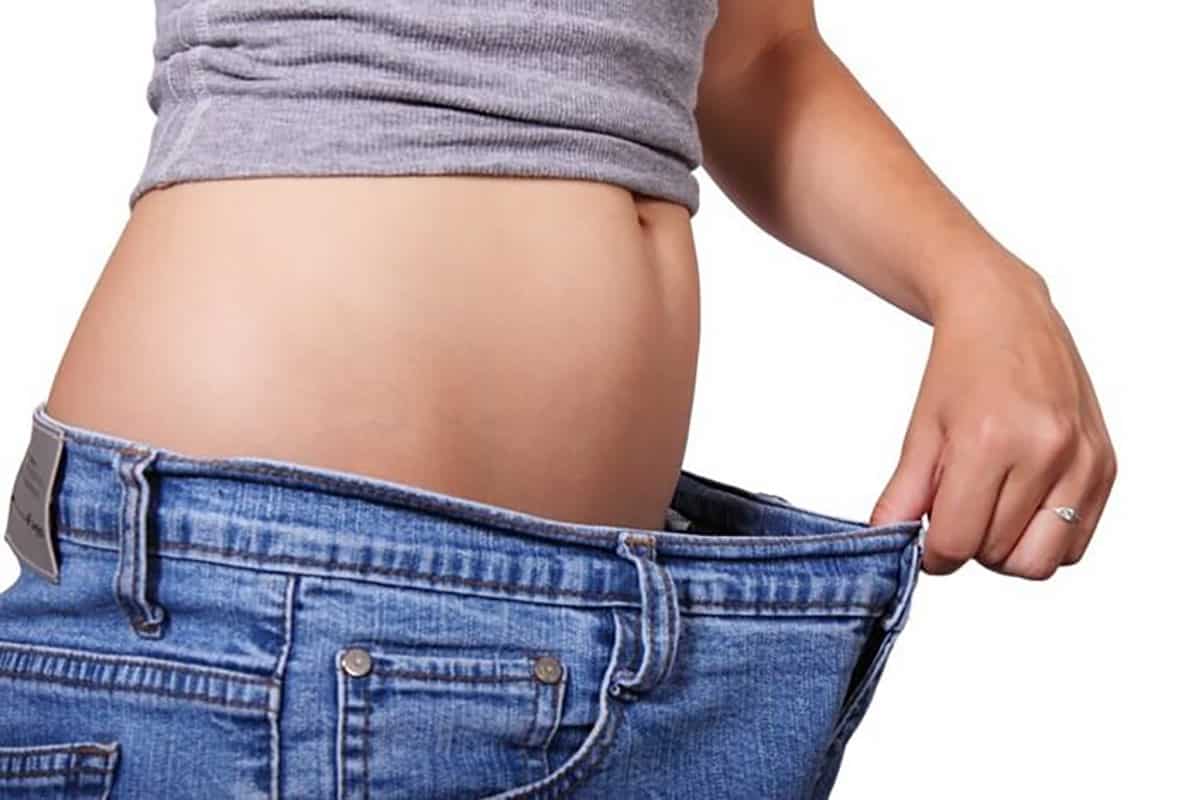
Woman wearing loose pants after losing weight from intermittent fasting.

8. Potential Weight GAIN!  

Reducing energy intake too severely can lead to the body responding with physiological adaptations. While intermittent fasting and working out does not explicitly restrict total calories, it can very often lead to weight gain due to the time restricted eating windows.

With that said, any extreme weight loss (whether it be from intermittent fasting or any other restrictive diet) can potentially cause weight regain shortly – also known as weight cycling.

In any case, it is difficult to assess whether intermittent fasting, specifically, results in weight regain as there have not been any long term studies testing the sustainability of the diet.

9. Slower Metabolism

Fasting for prolonged periods too frequently and without adequate caloric intake causes the body to go into starvation mode. When in starvation mode, metabolism slows down as a way to conserve energy and the body begins to use your muscle protein as a source of fuel. Even a short 24 hour fast can lower your BMR (Basal Metabolic Rate).

Is Intermittent Fasting Right For You?

While there may be many potential health benefits to intermittent fasting and working out, the research is highly mixed and limited. Although intermittent fasting is a more flexible alternative to a calorie restricted diets, it may not be a good fit for everything – especially those who struggle with disordered eating or have an eating disorder. However, it may be more suitable to those who thrive and feel their best eating larger meals later on in the day, rather than those who prefer smaller more frequent meals. It really depends on an individuals unique needs and hunger cues.

Orange slice on a blue plate.

Personally, I’m not convinced by the research. I believe that any “diet” that requires you to disregard your body’s innate hunger and satiety cues is not likely to be sustained. But if you do decide to try intermittent fasting and working out, always speak with a Registered Dietitian for personalized advice and supervision. Ultimately, the goal here is not to cause your body to go under any sort of chronic stress. Instead, to nurture and show it some love by taking care of it, starting with a foundation of a nutritious diet.

What do you think of the intermittent fasting pros and cons? Have you tried intermittent fasting and working out? Did you see any health benefits? Let me know below! 

Research by Rachel Shim and Sofia Tsalamlal, RD, MHSc 

More Blog Posts You Might Like:

If you liked this blog post discussing intermittent fasting and working out, then you might also enjoy more blog posts on diet myths:

  • The Best Pre and Post Workout Meals
  • Intermittent Fasting For Weight Loss: The Evidence Based Pros and Cons
  • Can You Drink Coffee While Intermittent Fasting
  • What Is The Best Beverage To Drink During Exercise?
  • Exercise for Weight Loss Mistakes & Myths
  • Protein for Weight Loss and Metabolism
Abbey Sharp

Abbey Sharp is a Registered Dietitian (RD), regulated by the Ontario College of Dietitians. She is a mom, YouTuber, Blogger, award winning cookbook author, media coach specializing in food and nutrition influencers, and a frequent contributor to national publications like Healthline and on national broadcast TV shows.
www.abbeyskitchen.com/about-abbey/

Last Updated August 15, 2022. Published August 15, 2022 By Abbey Sharp 2 Comments

Best Peanut Butter Cookie Recipe (Vegan & Gluten Free)

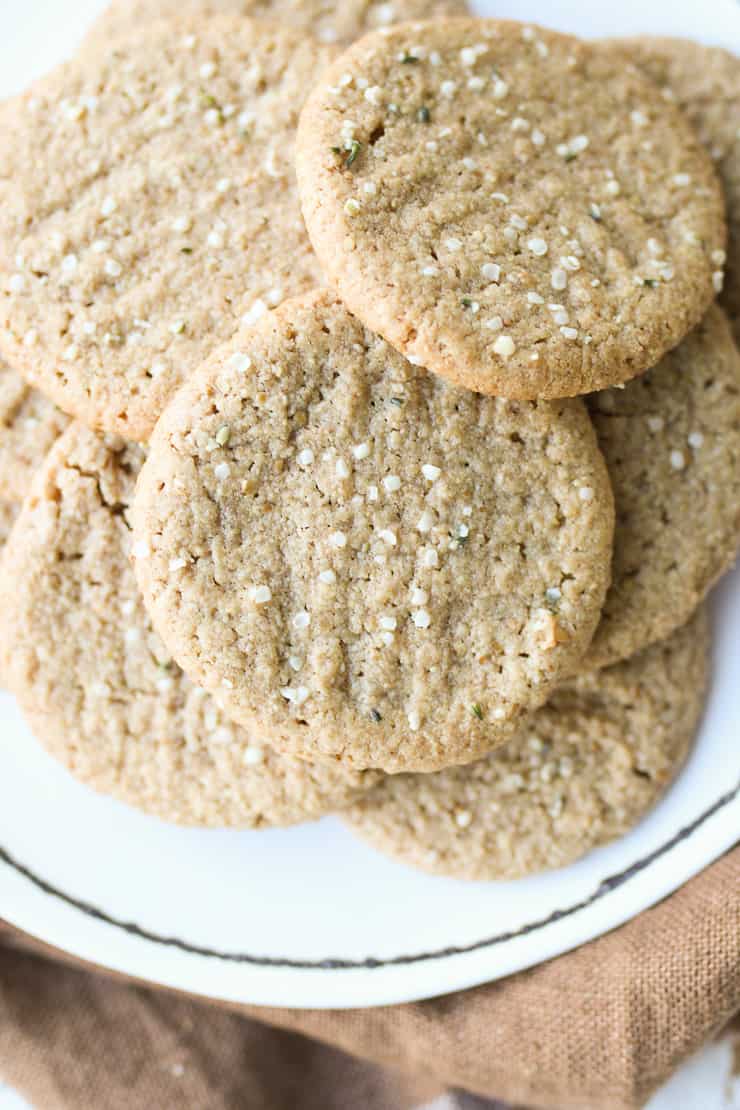
birds eye view of healthy peanut butter cookies

The best peanut butter cookie recipe is super easy to make! They are so chewy on the inside and crispy on the outside, this is the perfect snack to enjoy any day of the week.

Birds eye view of the best peanut butter cookie recipe.

When the fall weather hits, theres nothing I love more than filling my house with the smell of freshly baked cookies. And getting the first bite of a chewy cookie fresh out the oven? Legit heaven! So because I am totally obsessed with peanut butter (I literally eat the stuff every day), and I have copious amounts of it in the house, right before baby came I made a big batch of toddler friendly peanut butter cookies to freeze. Let’s just say this is best peanut butter cookie recipe and they’ve come in handy as breastfeeding fuel.

Table of contents

  • Why This Recipe Works
  • Key Ingredients
  • How to Make This Recipe
  • Expert Tips
  • Recipe FAQs
  • More Recipes You Might Like

Why This Recipe Works

I love how these vegan peanut butter cookies are perfectly crispy while still being chewy. Need more convincing? Here’s more reasons why this recipe works:

  • Kid-friendly (always a win!!)
  • Loaded with healthy fats (flax, almond flour, peanut butter, and hemp seeds)
  • Freezer friendly
  • Super tasty

Key Ingredients

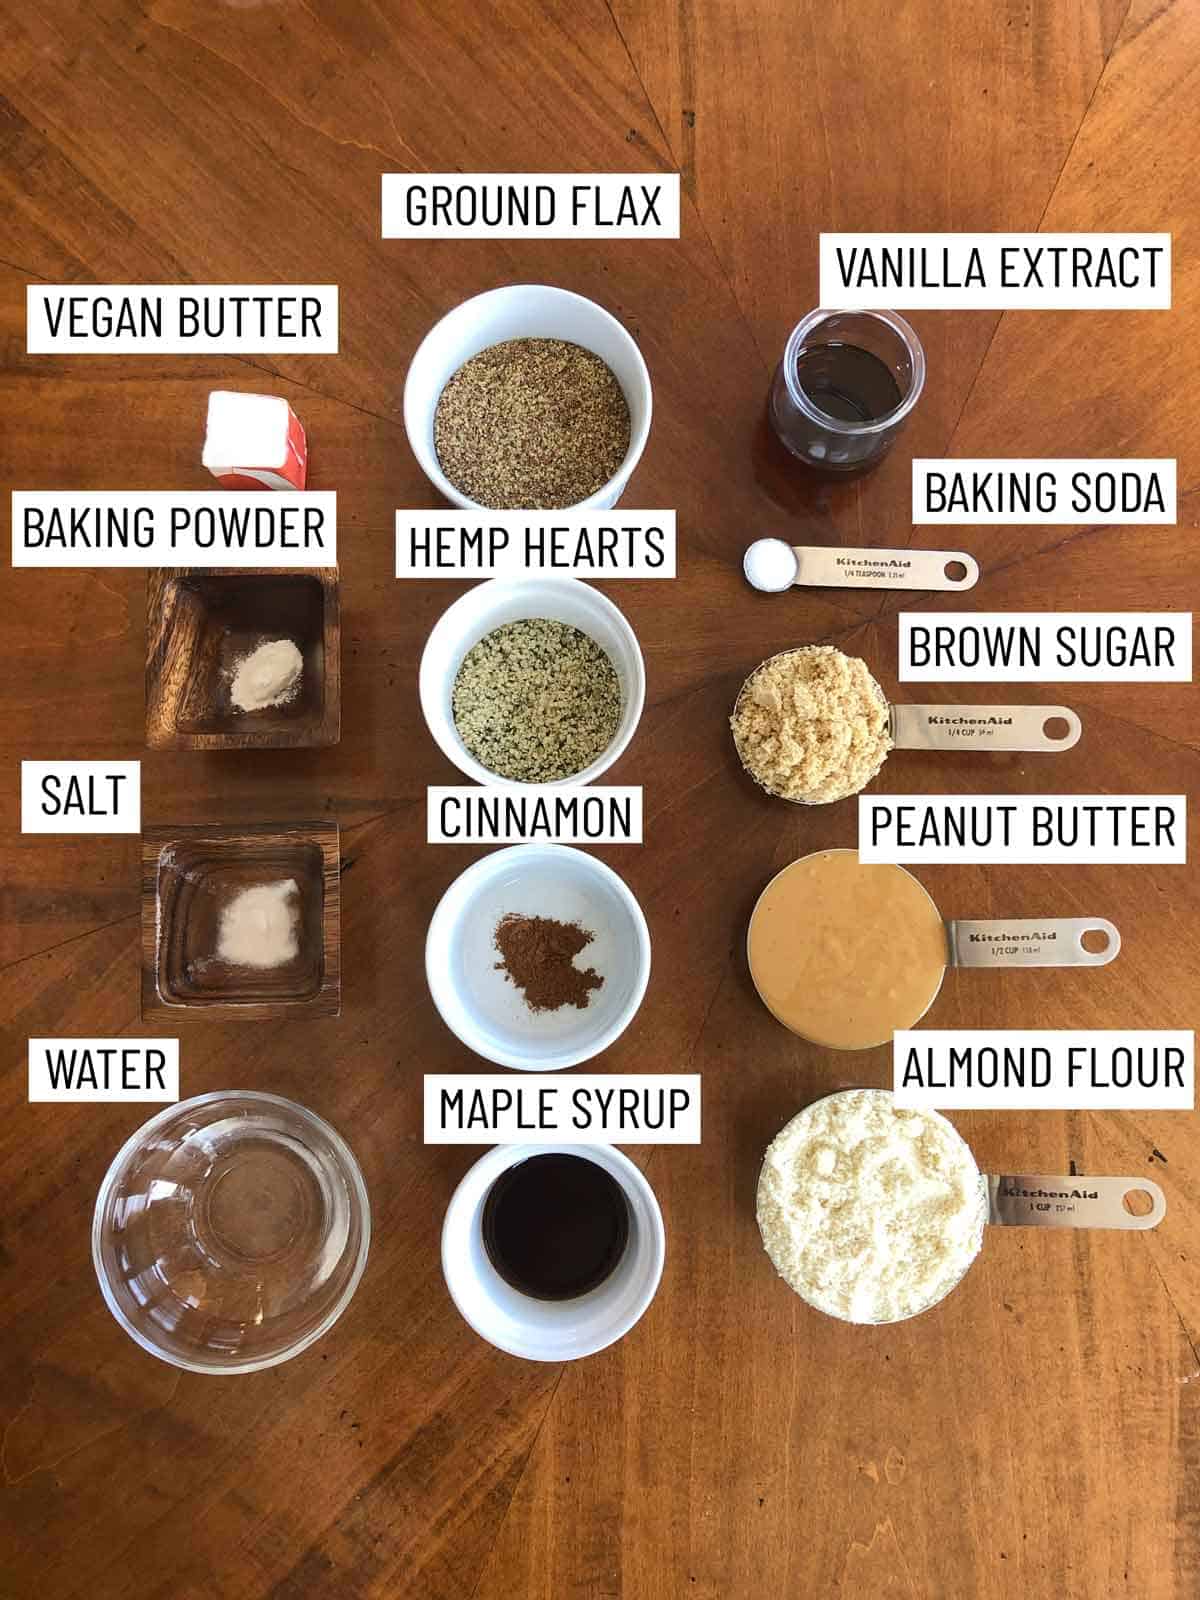
Ingredients needed to make the best peanut butter cookie recipe.

Ground flax — To make this peanut butter cookies recipe vegan, I use a flax egg instead of a regular egg. All you need to do is mix 1 tablespoon of flax with some water and let it sit in the fridge until it thickens.  This adds a ton of healthy omega 3s, protein and fibre, and requires no eggs.

Natural Peanut Butter — Make sure to look for peanut butter that only lists “peanuts” in the ingredient list to ensure that its natural and doesn’t contain any hydrogenated oils and added sugar. If you’re making these for babies under 1, also choose one without salt.

Vegan Butter — This will make the cookies extra tender. Feel free to substitute for regular butter if you don’t need to make these cookies vegan or dairy free. 

Maple Syrup & Brown Sugar  — You know, for sweetness and texture. These are cookies, after all.

Vanilla Extract, Salt & Cinnamon — All the fixings for enhancing the flavour of the best peanut butter cookie recipe. 

Almond Flour — Almond flour is basically just finely ground up almonds. I love it for making these peanut butter cookies gluten free, while also adding in some healthy fats, protein and fibre. It’s a great way to slow down the absorption of sugar in baked goods so you don’t get a sugar spike. 

Hemp Hearts — Y’all know I put hemp hearts on everything because they’re an easy way to boost up the protein, fibre and healthy omega 3 fats in my kiddo’s (and my) snacks.

How to Make This Recipe

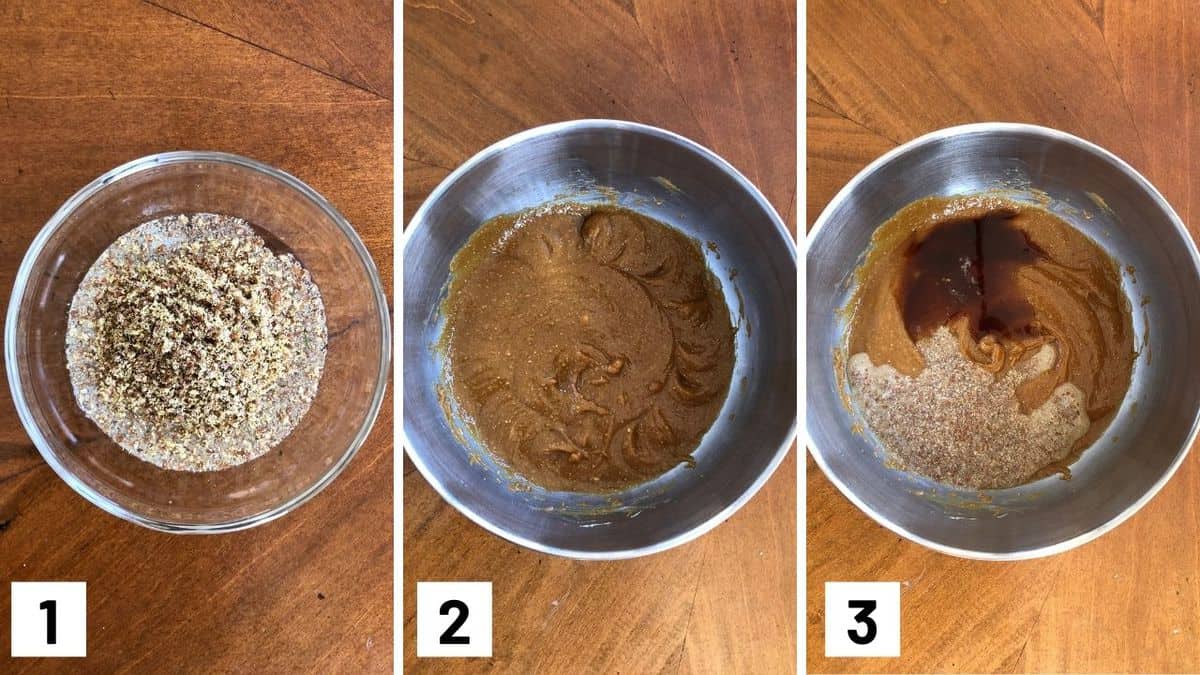
Set of three photos showing flax egg being made, vegan butter being creamed, and flax egg and vanilla added to the butter.

Step 1: Mix together the 1 tbsp flax with water in a small ramekin and sit in the fridge for 15 minutes to set as a flax egg.

Step 2: In a medium bowl, mix the peanut butter, butter, maple, and sugar. Beat using electric beaters until fluffy and combined.

Step 3: Add the flax egg and vanilla and beat until combined.

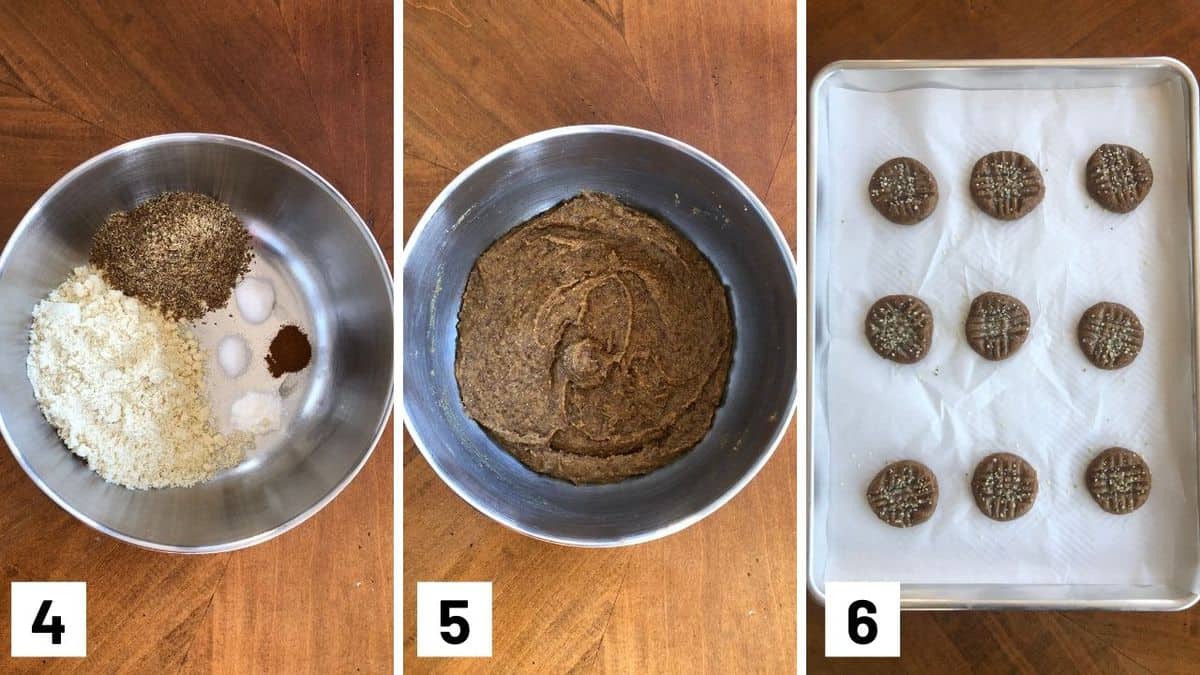
Set of three photos showing the dry ingredients added to a bowl, then mixing dry with wet ingredients, and the cookies baked on a sheet pan.

Step 4: In another large bowl, mix together the almond flour, flax, baking soda, baking powder, cinnamon and salt. Add the wet to the dry ingredients. Refrigerate the batter for 1 hour.

Step 5: Preheat to 350 F and line two baking sheets with parchment paper.
Roll a heaping tablespoon into balls and flatten until they’re about 2 inches in diameter.

Step 6: Lightly press your fork into them to make a cross hatch and sprinkle with hemp hearts. Make sure there is at least an inch between the cookies.
Bake for 12-14 minutes or until lightly browned on the bottom. These vegan peanut butter cookies are very delicate so allow them to cool completely before transferring them to an air-tight container.

Expert Tips

To make the best peanut butter cookie recipe, always use room temperature butter, vegan or non-vegan. It makes it much easier to cream with sugar. Otherwise you won’t get a uniform consistency. You also need to make sure to refrigerate the batter. This will make it way easier to scoop the cookies. It also helps prevents the cookies from spreading a ton while it bakes.

To make these cookies gluten free, I use almond flour instead of a wheat based flour which is made from ground almonds. I love using almond flour because not only is it naturally gluten free, but it is also more nutrient-dense and lower in carbs than most flours – like wheat flour or coconut flour. Keep in mind that almond flour and almond meal are not the same. Almond meal is such coarser. This was not tested with almond meal but if you try it, please let me know how it goes in the comments down below!

As these vegan peanut butter cookies are gluten free and vegan, they’re admittedly delicate cookies. They don’t have as much structure as a typical cookie because the almond flour doesn’t have any gluten in it. But I actually really prefer that texture because it means they’re SUPER chewy and not dry. It does mean you need to allow the cookies to fully cool before you transfer them to a storage container.

Recipe FAQs

Are the best peanut butter cookie recipe toddler and kid friendly?

Yes absolutely! They’re especially a hit with kiddos who LOVE peanut butter (like my Big Boy E). They’re also lower in sugar and higher in healthy fats, protein and fibre compared to store-bought peanut butter cookies, so you can feel good about giving them to your toddler and kids. They’re also really soft and chewy so they’re safe for younger new eaters as well (just note that there is some added sugar).

They are not, however, allergy friendly because of the peanut butter, so I wouldn’t recommend sending these in your kiddos lunch box to school. But if peanut allergies aren’t an issue for your child, then these cookies would be great to enjoy at home as an after school snack. 

How can I make these cookies allergy friendly if my child has a peanut allergy?

If you or your little one have a peanut allergy, you can substitute the peanut butter for almond butter instead. You can also use Sun Butter (made from sunflower seeds) or Wow Butter (made from soy) as safe alternatives, especially if you or your child are allergic to all nuts. 

How do I freeze these cookies?

Before freezing these cookies, FULLY allow them to cool on the baking tray (I don’t recommend transferring them to a cooling rack because they are very delicate). You can transfer the baking sheet to the freezer and allow them to freeze without touching for an hour. Then you can transfer them to a freezer bag. When you want to enjoy a peanut butter cookie, you can take it out of the freezer and let it sit at room temperature until thawed (they’re thin so they really won’t take long), or you can microwave them in 10 second intervals. These peanut butter cookies will keep in the freezer for about 3-4 months.

How long do these cookies last?

If left unsupervised? Not long! If you keep an eye on them and pack them up, these cookies are good for a week stored in an airtight container.

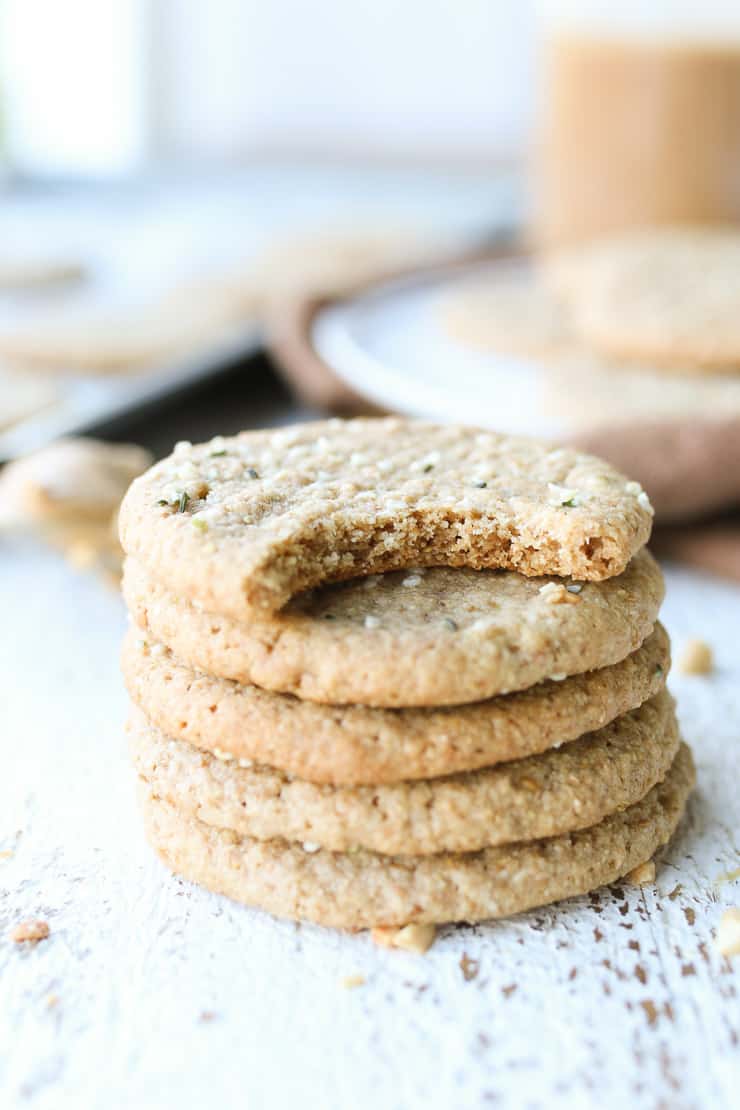
Five peanut butter cookies stacked on top of on another.

Now loves tell me, do you love the nostalgia of peanut butter cookies? Leave me a comment below with your thoughts.

More Recipes You Might Like

If you liked this post for the best peanut butter cookie recipe, you might enjoy some of the other cookie recipes on the blog:

  • Chai Cookies
  • Lemon Poppyseed Cookies
  • Salted Tahini Cookies
  • Carrot Cake Cookies
  • Peanut Butter & Jelly Breakfast Cookies
  • Salted Chocolate Almond Cookies
birds eye view of healthy peanut butter cookies
Print Recipe
5 from 3 votes

Best Peanut Butter Cookie Recipe (Vegan & Gluten Free)

The best peanut butter cookie recipe is super easy to make! They are so chewy on the inside and crispy on the outside, this is the perfect snack to enjoy any day of the week.
Prep Time1 hour hr 15 minutes mins
Cook Time15 minutes mins
Total Time1 hour hr 30 minutes mins
Course: Snack, snacks
Cuisine: American
Servings: 18 Cookies
Calories: 107kcal
Author: Abbey Sharp

Ingredients

Flax Egg

  • 1 tbsp ground flax
  • 2 1/2 tbsp water

Everything Else

  • ½ cup natural peanut butter
  • ¼ cup vegan butter softened
  • ¼ cup maple syrup
  • ¼ cup brown sugar
  • 2 tsp vanilla extract
  • 1 cup almond flour
  • ¼ cup ground flax
  • ¼ tsp baking soda
  • ¼ tsp baking powder
  • ¼ tsp ground cinnamon
  • ¼ tsp salt
  • 2 tsp hemp hearts

Instructions

  • Mix together the 1 tbsp flax with water in a small ramekin and sit in the fridge for 15 minutes to set as a flax egg.
  • In a medium bowl, mix the peanut butter, butter, maple, and sugar. Beat using electric beaters until fluffy and combined.
  • Add the flax egg and vanilla and beat until combined.
  • In another large bowl, mix together the almond flour, flax, baking soda, baking powder, cinnamon and salt. Add the wet to the dry ingredients.
  • Refrigerate the batter for 1 hour.
  • Preheat to 350 F and line two baking sheets with parchment paper.
  • Roll a heaping tablespoon into balls and flatten until they’re about 2 inches in diameter.
  • Lightly press your fork into them to make a cross hatch and sprinkle with hemp hearts. Make sure there is at least an inch between the cookies.
  • Bake for 12-14 minutes or until lightly browned on the bottom. These are very delicate cookies so allow them to cool completely before transferring them to an air-tight container.

Notes

  • Always use room temperature butter, vegan or non-vegan. It makes it much easier to cream with sugar. Otherwise you won’t get a uniform consistency.
  • You need to make sure to refrigerate the batter. This will make it way easier to scoop the cookies. It also helps prevents the cookies from spreading a ton while it bakes.
  • To make these cookies gluten free, I use almond flour instead of a wheat based flour which is made from ground almonds. I love using almond flour because not only is it naturally gluten free, but it is also more nutrient-dense and lower in carbs than most flours – like wheat flour or coconut flour. Keep in mind that almond flour and almond meal are not the same. Almond meal is such coarser. This was not tested with almond meal but if you try it, please let me know how it goes in the comments down below!
  • As these are gluten free and vegan, they’re admittedly delicate cookies. They don’t have as much structure as a typical cookie because the almond flour doesn’t have any gluten in it. But I actually really prefer that texture because it means they’re SUPER chewy and not dry. It does mean you need to allow the cookies to fully cool before you transfer them to a storage container.

Nutrition

Calories: 107kcal | Carbohydrates: 9g | Protein: 3g | Fat: 7g | Saturated Fat: 1g | Cholesterol: 1mg | Sodium: 93mg | Potassium: 44mg | Fiber: 2g | Sugar: 6g | Vitamin A: 134IU | Calcium: 34mg | Iron: 1mg
Abbey Sharp

Abbey Sharp is a Registered Dietitian (RD), regulated by the Ontario College of Dietitians. She is a mom, YouTuber, Blogger, award winning cookbook author, media coach specializing in food and nutrition influencers, and a frequent contributor to national publications like Healthline and on national broadcast TV shows.
www.abbeyskitchen.com/about-abbey/

Last Updated August 8, 2022. Published August 8, 2022 By Abbey Sharp 4 Comments

Spicy Tofu Sticks with Buffalo Sauce (Easy & Baked)

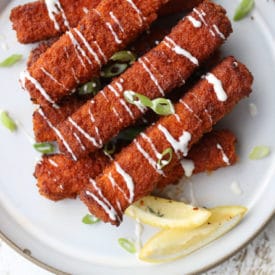
 These spicy tofu sticks with buffalo sauce vegan ranch dip are both crunchy and spicy while reminding you of a pub experience but is totally a healthier plant-based option.

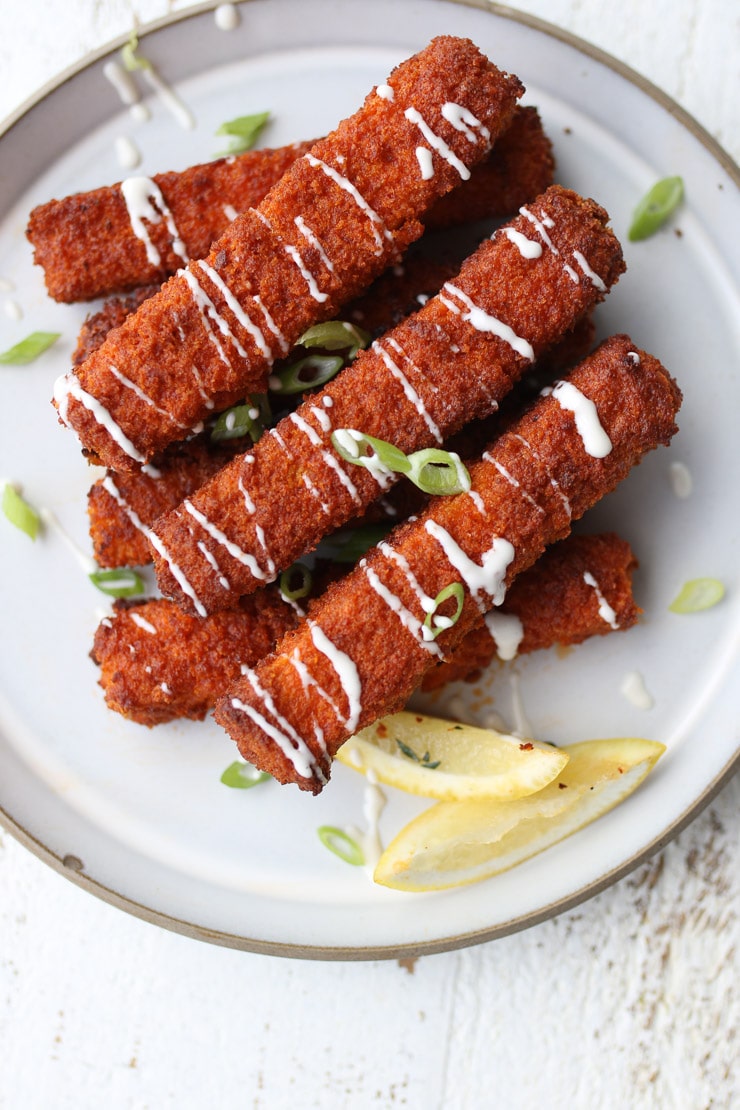
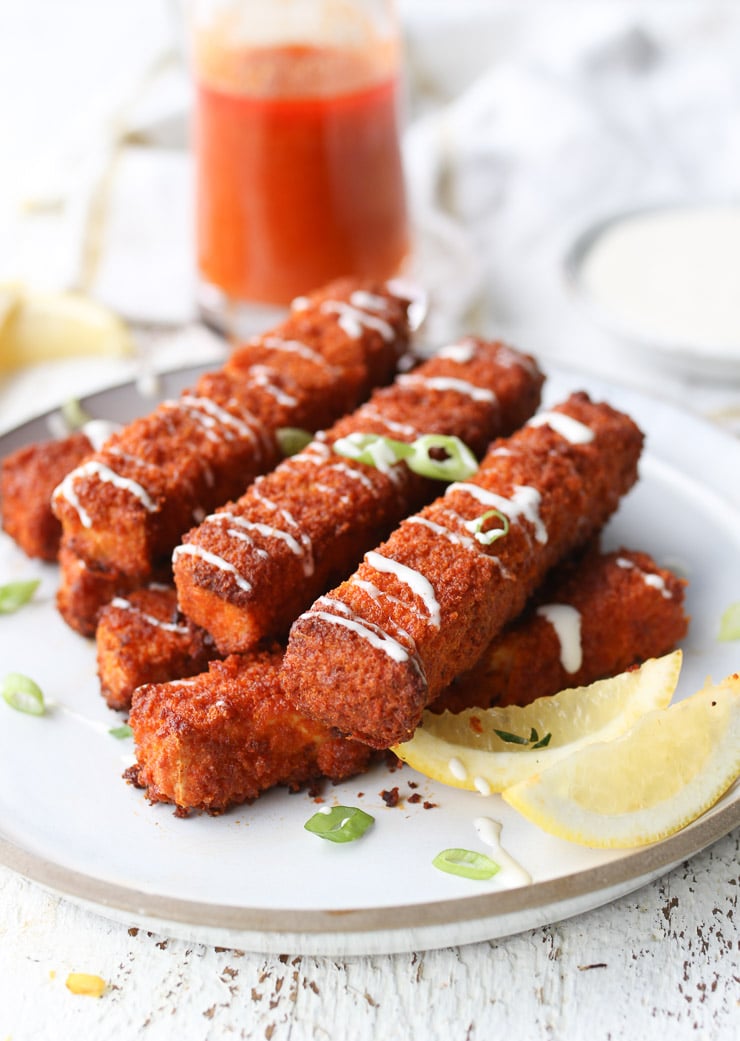
Birds eye view of tofu sticks with lemon wedges drizzled with white sauce.

I grew up in a British food household and if we ever did go out for a meal, it was usually to some kind of gastropub for wings, a burger, or a Sunday night prime rib roast supper. These spicy tofu buffalo sticks are inspired by the crispy deep-fried finger-licking pub food, even down to the ranch dip staple!

Table of contents

  • Why This Recipe Works
  • Key Ingredients
  • How to Make This Recipe
  • Expert Tips
  • Recipe FAQs
  • More Recipes You Might Like

Why This Recipe Works

These spicy tofu buffalo sticks are so unbelievably addictive and crunchy that even the biggest wing lover will totally fall for them.

  • They’re plant-based
  • Meal prep friendly
  • Healthier as they’re baked, not fried
  • The perfect appetizer or meal

Key Ingredients

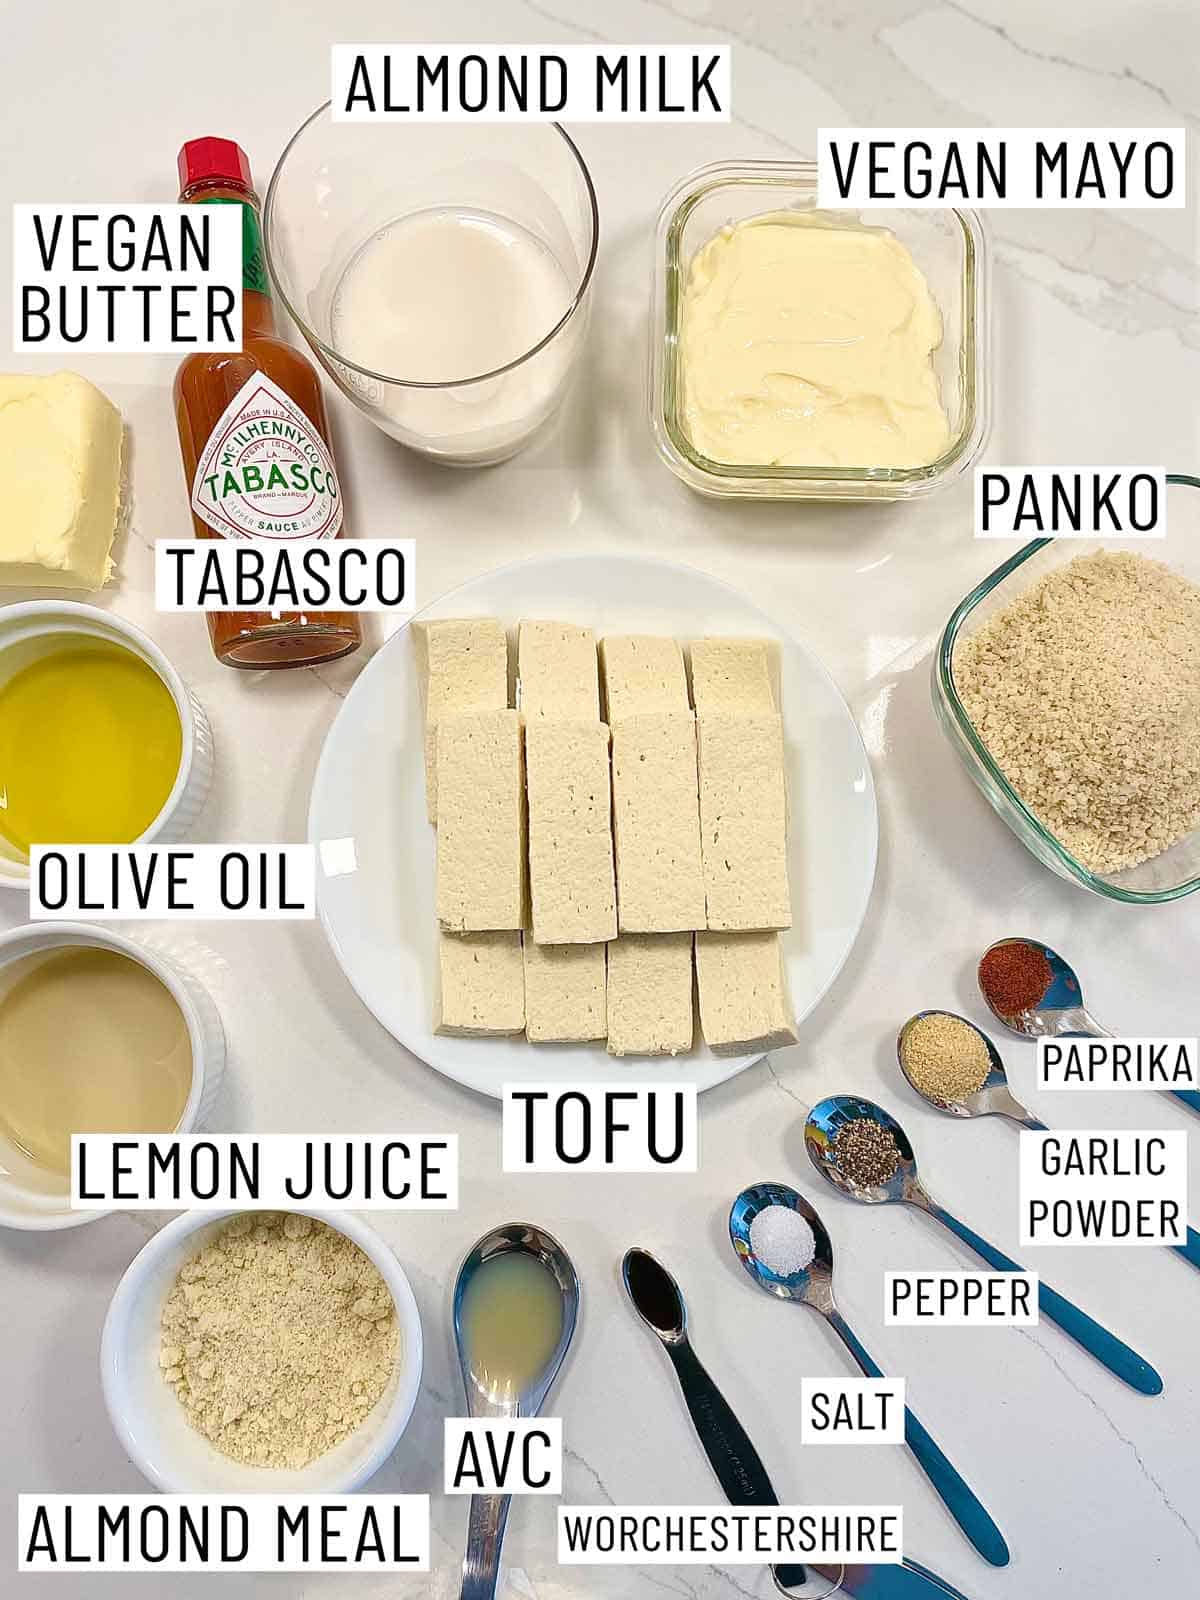
Ingredients needed to make baked buffalo tofu sticks.

Extra-firm tofu – I do suggest using extra firm tofu in this spicy tofu recipe so that the sticks are solid enough to pick up and dip. There’s also less moisture in extra firm tofu so these get really crispy.

Hot pepper sauce – I always have used tabasco in this. I think it has the most characteristic buffalo sauce flavour. But feel free to have fun and experiment with other hot sauces you might have!

Apple cider vinegar – I like a little tang to balance out the crazy heat in the sauce for these spicy tofu sticks.

Vegan Worcestershire sauce – You can buy Worcestershire sauce online that is vegan, or you can use coconut aminos which are a lot easier to find. Keep in mind that regular Worchestershire sauce is not naturally vegan so you’ll have to find a vegan version.

Almond meal- This is for making a nice dry nutrient-rich breading that you’ll next use to adhere your panko on with. I love almond meal because it’s a great source of fibre, protein, and healthy fats.

Unsweetened almond milk – This is the wet ingredient to get those panko breadcrumbs to stick. Any type of nondairy milk will work! Try cashew milk or soy milk. It also helps thin out the ranch dip.

Whole wheat panko breadcrumbs- I love the crispiness that the panko gives the buffalo tofu, but you can use any kind of breadcrumb for this spicy tofu recipe (including gluten free ones if you want to make this gluten free).

Vegan mayo – You can use regular mayo or light mayo if you’re not vegan.

Spices, herbs, and seasoning – Onion powder, garlic powder, lemon juice, and parsley are all great additions to ranch dip. If you’re short on time you can totally use a pack of ranch spice mix but just note that these do tend to be high in salt.

How to Make This Recipe

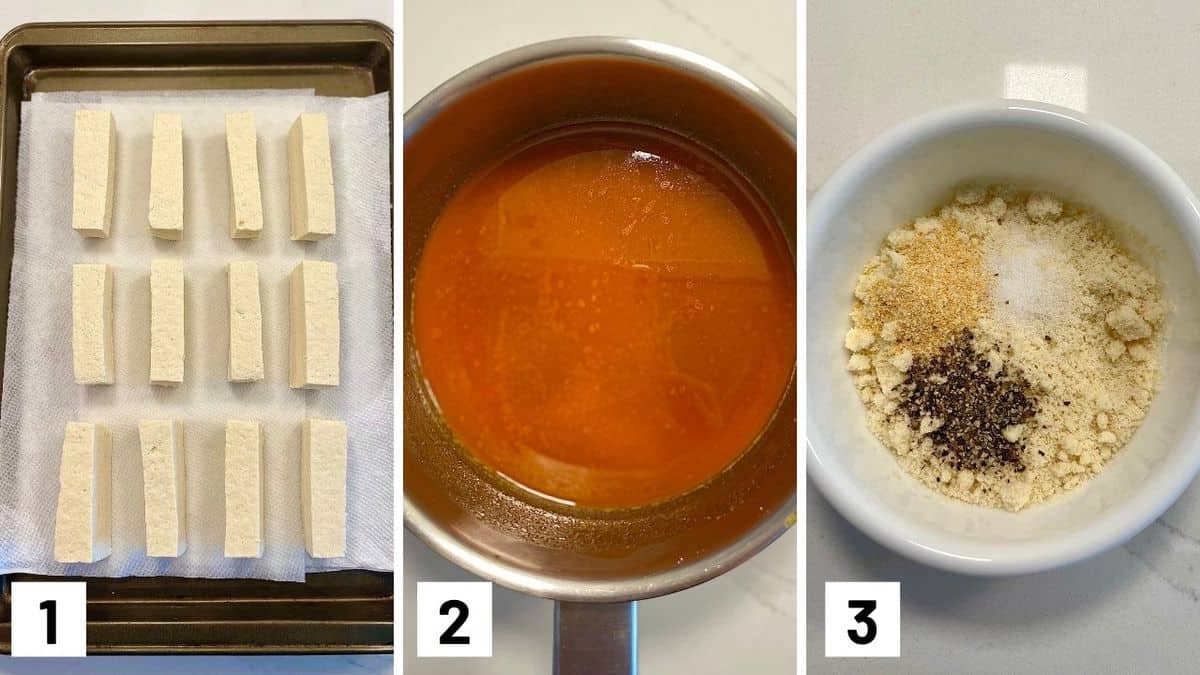
Set of three photos showing cut tofu, buffalo sauce, and dry seasoning.

Step 1: Cut the tofu into 12 strips (3 layers width wise of 4 strips lengthwise). Place the tofu on a baking sheet lined with paper towel or a clean kitchen towel. Top with more towel (paper or kitchen), another baking sheet and a few heavy pots or pans. Allow to sit for 30 minutes.

Step 2: Combine the hot sauce, vegan butter, vinegar, Worcestershire sauce, garlic powder, and salt in a pot and place over medium heat. Bring the mixture to a simmer and whisk gently. Once you see some bubbling and most of the butter melted, remove the pot and whisk until fully melted. Set aside to cool.

Step 3: In one bowl, mix together the almond flour and garlic powder, salt and pepper.

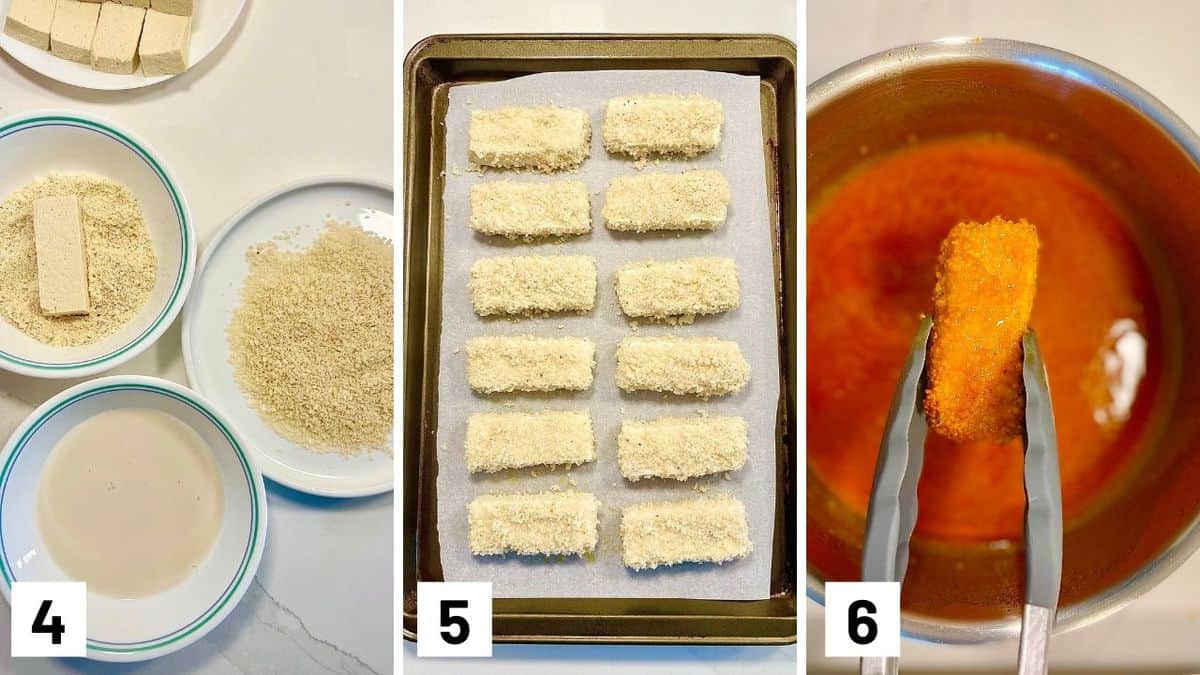
Set of three photos showing tofu breaded in bowls, placed on a sheet pan, and dipped in buffalo sauce to make spicy tofu sauce.

Step 4: Put the almond milk in another bowl. Place 2-3 tablespoons of the breadcrumbs on a plate.

Step 5: Dip the tofu stick delicately into the almond flour, then into the almond milk, then into the breadcrumbs. Place on a lined baking sheet and repeat with the remaining tofu strips. Spritz the tofu sticks with oil in the oil atomizer and bake for 15 minutes at 425°F. Flip them so they now are on their side. Bake for another 15 minutes.

Step 6: Remove from the oven and give them a quick dip in the buffalo sauce.

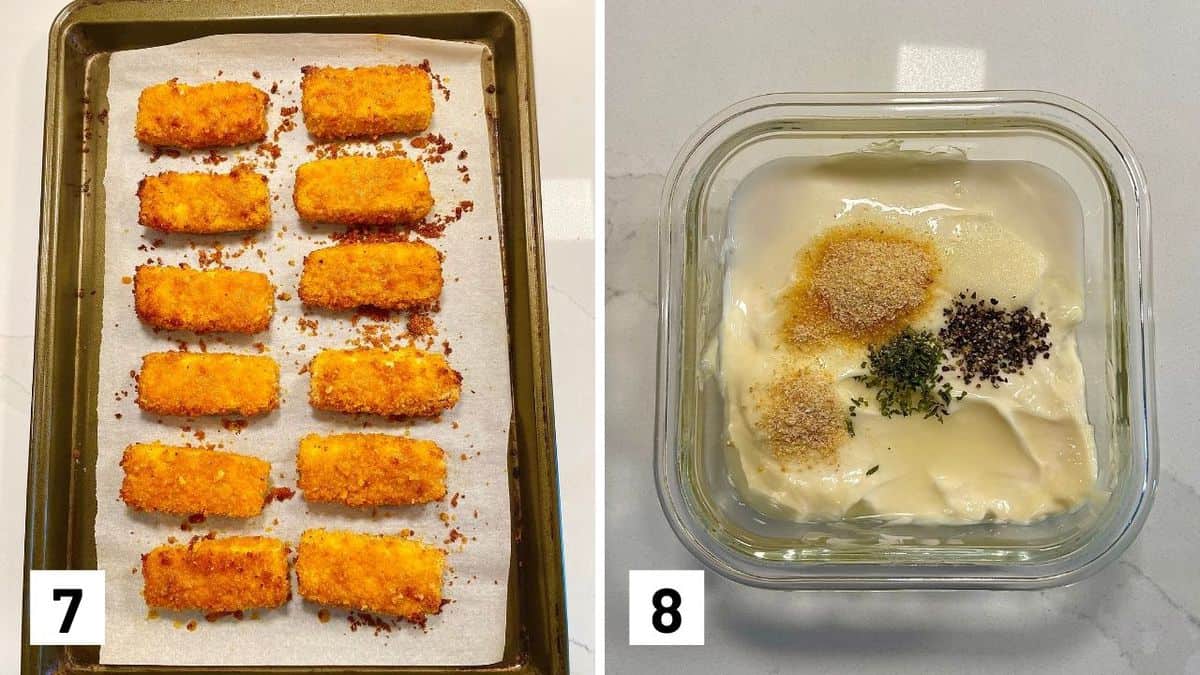
Set of two photos showing the buffalo tofu sticks firming up on a sheet pan and ranch dip being mixed.

Step 7: Return to the oven for another 10 minutes, then flip and let them finish for 10 more minutes. They should be browned. Allow them to sit for 3-5 minutes just to firm up a bit.

Step 8: To make the ranch dip, mix together the dip ingredients. Serve with the spicy tofu buffalo sticks.

Expert Tips

The key to non-soggy tofu is to first make sure you squeeze out a lot of the moisture in that tofu by pressing it with a paper towel/ regular towels and heavy items. This is step one and integral to a good crispy finish.

I also suggest using an oil atomizer to get a nice even light layer of oil on the buffalo tofu sticks to help them crisp up in the oven, flipping regularly so they get evenly browned.

Allowing the spicy tofu buffalo sticks to sit on the baking sheet for just a few minutes will really help everything firm up nicely.

Recipe FAQs

What is buffalo sauce traditionally made out of?

It’s usually mainly just tabasco and butter, and sometimes a few other spices, and honey to sweeten. So if you’re buying a storebought buffalo sauce, it probably is not vegan.

Are these spicy tofu buffalo sticks kid friendly?

It depends how sensitive your kiddos are to heat. These are moderately spicy so I do know that my 2.5 year old would probably not like them.

Can I shape these spicy tofu sticks into nuggets instead of sticks?

Absolutely. I like to rip the tofu into pieces rather than cut it into squares if you’re looking for more of a nugget shape.

Can I serve these as an appetizer or party snack?

Absolutely- these vegan buffalo sticks are a great party snack alternative to hummus and veggies for your plant-based guests and friends.

Can I use soft tofu instead of extra firm?

I don’t recommend using softer tofu because it will too easily fall apart when you try to bread it and put it into the oven. Extra firm, or at least firm, will work best!

Can I batch prep these buffalo sticks and if so, how do i store them and reheat them?

Yes! You can make a huge batch of these, bake them as instructed and let them cool. Then transfer them to a baking sheet in the freezer to freeze individually (not in a big clump) for at least an hour before transferring to a freezer bag for up to 4 months. When you’re ready to eat, heat them in a 400 F oven from frozen.

What can I serve with these spicy tofu buffalo sticks?

These would be great with some celery and carrots for dipping, but also a simple salad for some green would be delicious. Here are some favourites:
Tuna Avocado Salad
Grilled Watermelon Avocado Salad
Grilled Broccoli, Carrot and Avocado Salad

several vegan buffalo sticks on a plate drizzled with sauce

More Recipes You Might Like

If you liked this recipe for spicy tofu sticks with buffalo sauce vegan ranch dip, then you might also enjoy some of the other easy dinner recipes on the blog:

  • Vegetarian Gluten Free Buffalo Cauliflower Steaks
  • Vegan Buffalo Cauliflower Pasta Salad
  • Vegan Buffalo Cauliflower and Chickpea Tacos 
  • Gluten Free Buffalo Chicken Fingers Sheet Pan Meal
  • Baked Tofu Nuggets with Everything Bagel Spice
  • Tofu Fried Rice Mini Snack Cups (Toddler Friendly)

What’s your favourite healthier buffalo wing inspired recipe? Leave me a comment below if you try these spicy tofu sticks with ranch dip out!

Print Recipe
5 from 2 votes

Crispy Baked Buffalo Tofu Sticks with Vegan Ranch Dip

These crispy baked buffalo tofu sticks with a vegan ranch dip are both crunchy and spicy while reminding you of a pub experience but is totally a healthier plant-based option.
Prep Time30 minutes mins
Cook Time40 minutes mins
Total Time1 hour hr 10 minutes mins
Course: Appetizer, snacks
Cuisine: American
Servings: 4
Calories: 515kcal
Author: Abbey Sharp

Ingredients

  • 350 g package extra firm tofu

Sauce:

  • ⅓ cup tabasco or other hot pepper sauce
  • ¼ cup cold vegan butter
  • 2 tsp apple cider vinegar
  • 1 ½ tsp sweet paprika
  • ¼ tsp vegan worchestershire sauce or coconut aminos
  • ⅛ tsp garlic powder
  • Salt to taste
  • Extra virgin olive oil in an oil atomizer

Breading:

  • ¼ cup almond meal
  • ¼ tsp garlic powder
  • ¼ tsp salt
  • ¼ tsp pepper
  • ½ cup unsweetened almond milk
  • 1 cup whole wheat panko breadcrumbs

Vegan Ranch Dip:

  • ¾ cup vegan mayo
  • 1 ½ tbsp unsweetened almond milk
  • ½ tsp onion powder
  • 1 tsp garlic powder
  • 2 tsp lemon juice
  • 1 tsp minced fresh parsley
  • Salt and pepper to taste

Instructions

  • Cut the tofu into 12 strips (3 layers width wise of 4 strips lengthwise).
  • Place the tofu on a baking sheet lined with paper towel or a clean kitchen towel. Top with more towel (paper or kitchen), another baking sheet and a few heavy pots or pans. Allow to sit for 30 minutes.
  • Combine the hot sauce, vegan butter, vinegar, Worcestershire sauce, garlic powder, and salt in a pot and place over medium heat. Bring the mixture to a simmer and whisk gently. Once you see some bubbling and most of the butter melted, remove the pot and whisk until fully melted. Set aside to cool.
  • In one bowl, mix together the almond flour and garlic powder, salt and pepper. Put the almond milk in another bowl.
  • Place 2-3 tablespoons of the breadcrumbs on a plate.
  • Prepare a baking sheet with parchment paper, and a spritz of the oil, and preheat oven to 425 F.
  • Dip the tofu stick delicately into the almond flour, then into the almond milk, then into the breadcrumbs. Place on the baking sheet and repeat with the remaining tofu strips.
  • Spritz the tofu sticks with oil in the oil atomizer and bake for 15 minutes. Flip them so they now are on their side. Bake for another 15 minutes.
  • Remove from the oven and give them a quick dip in the buffalo sauce. Return to the oven for another 10 minutes, then flip and let them finish for 10 more minutes. They should be browned.
  • Allow them to sit for 3-5 minutes just to firm up a bit.
  • To make the ranch dip, mix together the dip ingredients. Serve with the tofu sticks.

Video

Notes

  • The key to non-soggy tofu is to first make sure you squeeze out a lot of the moisture in that tofu by pressing it with a paper towel/ regular towels and heavy items. This is step one and integral to a good crispy finish.
  • I also suggest using an oil atomizer to get a nice even light layer of oil on the buffalo tofu sticks to help them crisp up in the oven, flipping regularly so they get evenly browned.
  • Allowing the buffo tofu sticks to sit on the baking sheet for just a few minutes will really help everything firm up nicely.

Nutrition

Calories: 515kcal | Carbohydrates: 19g | Protein: 11g | Fat: 43g | Saturated Fat: 6g | Sodium: 1223mg | Potassium: 219mg | Fiber: 2g | Sugar: 3g | Vitamin A: 941IU | Vitamin C: 16mg | Calcium: 114mg | Iron: 2mg
Abbey Sharp

Abbey Sharp is a Registered Dietitian (RD), regulated by the Ontario College of Dietitians. She is a mom, YouTuber, Blogger, award winning cookbook author, media coach specializing in food and nutrition influencers, and a frequent contributor to national publications like Healthline and on national broadcast TV shows.
www.abbeyskitchen.com/about-abbey/

Last Updated August 5, 2022. Published August 5, 2022 By Abbey Sharp 8 Comments

Pizza Chicken Bake (Easy Foil Pack Dinner)

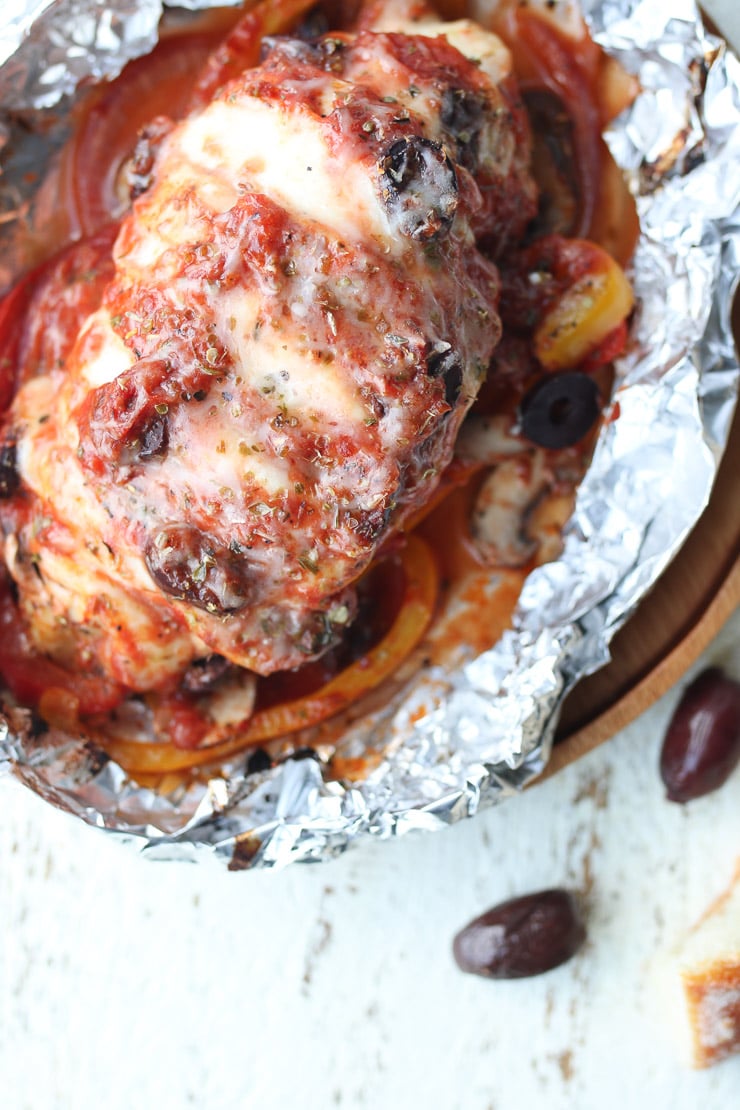
Chicken in foil pack.

This Pizza Chicken Bake is a super easy gluten free and keto friendly meal that is super quick to put together! Everything is made in a simple foil pack for easy clean up.

Birds eye view of pizza chicken bake in a foil pack topped with sauce and cheese.

Okay guys, you need to know that I LOVE all things pizza. I love pizza casserole, pizza soup, pizza fondue, pizza bagel bites! If it tastes like pizza, I want it. Kids also tend to love all things that taste like pizza, so if we can sneak lots of healthy ingredients into dinner and call it a pizza flavoured XYZ, there’s usually a better chance of them at least trying it.

Well, since so many of you (and let’s be real, me too) are always looking for new and fun ways to get out of our chicken rut, I thought I would share my new go-to recipe, my pizza chicken bake foil pack dinner!

Table of contents

  • Why This Recipe Works
  • Key Ingredients
  • How to Make This Recipe
  • Expert Tips
  • Recipe FAQs
  • More Recipes You Might Like

Why This Recipe Works

We love a good foil pack dinners because they’re a great way to quickly cook food without the need for a lot of added oil, while ensuring everything stays super moist and juicy. Here are some more great reasons as to why this recipe works for us!

  • Packed with veggies
  • Quick and easy
  • Full of gooey cheese
  • Low carb
  • Camping friendly!

Key Ingredients

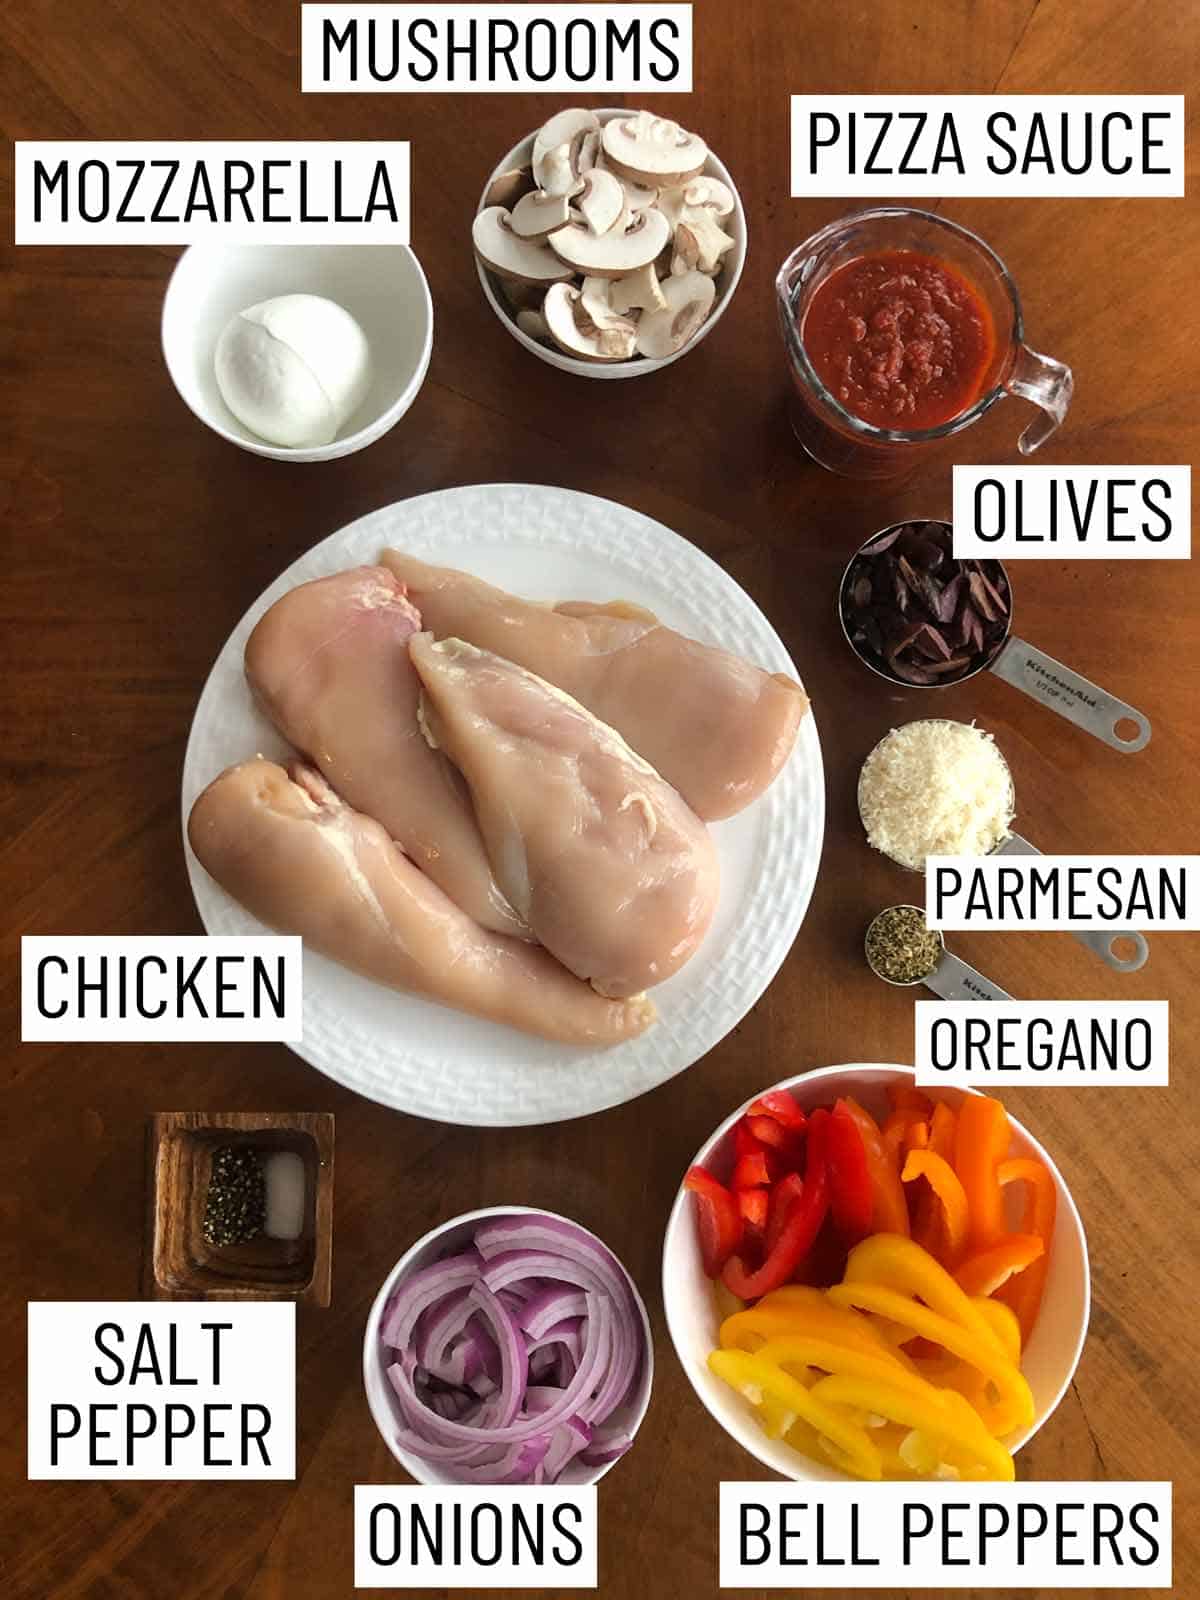
Overhead image of ingredients: mozzarella, mushrooms, pizza sauce, olives, parmesan, oregano, bell peppers, onions, salt and pepper, chicken.

Chicken breasts — We love chicken breasts for this since you can fit more cheese into it and who doesn’t love more cheese?!

Pizza sauce — While you can make your own, a jar from the store is just as good. However, I suggest you use a low sodium one if you’re using store-bought.

Buffalo mozzarella cheese ball — One of my favourite cheeses to stuff chicken with!

Vegetables — We use cremini mushrooms, red onions, bell peppers, and olives for this pizza chicken bake.

Flavour boosters — We season with dried oregano, salt, and pepper and add a nice handful of parmesan to boost the flavours of this pizza chicken bake.

How to Make This Recipe

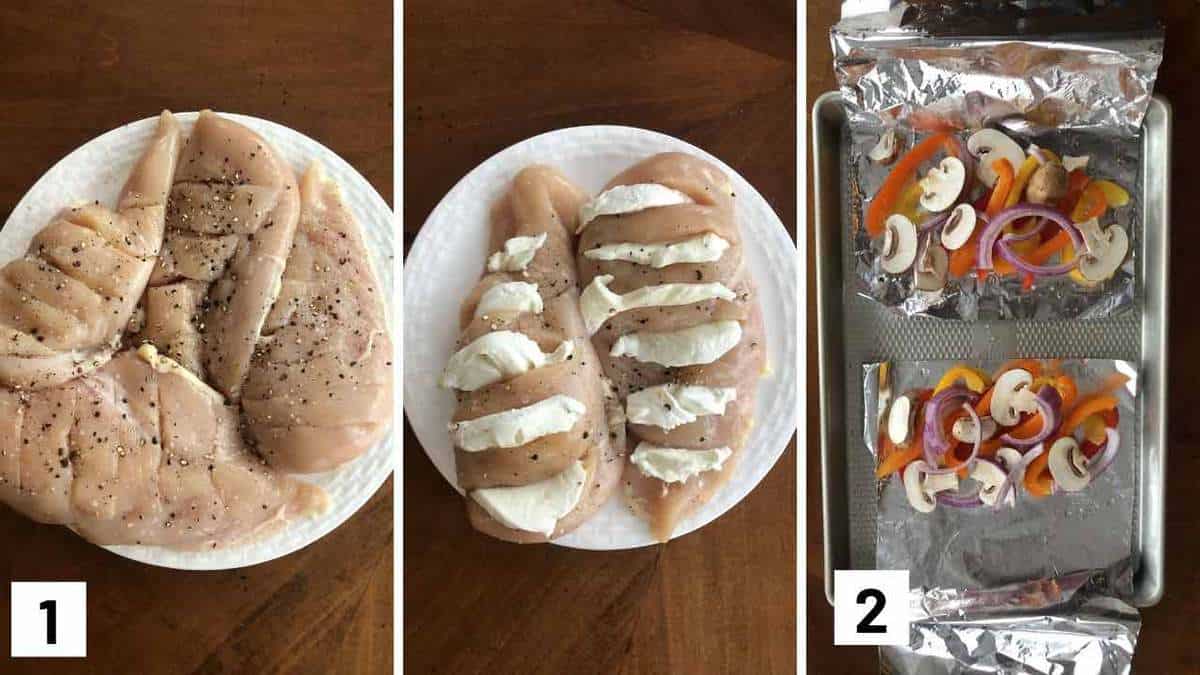
Set of three photos showing sliced and seasoned chicken breasts, stuffed with cheese, and veggies on foil on a sheet pan.

Step 1: Preheat oven to 400 F. Start by making tiny slits down each chicken breast, about 1/4″ from the bottom. Season with some salt and pepper, then insert the thinly sliced pieces of the mozzarella cheese.

Step 2: Spritz a rectangular piece of foil with oil, add a variety of veggies and a pinch of salt and pepper.

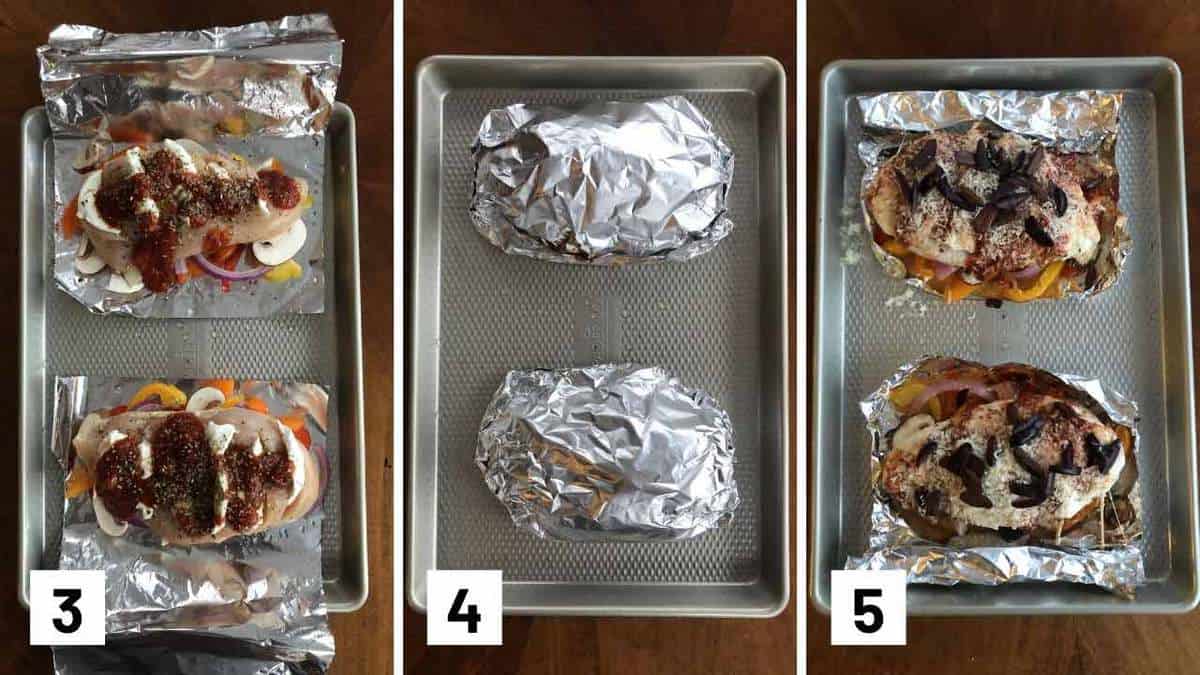
Set of three photos showing chicken placed on top of foil, wrapped up, and how it looks after it's been baked.

Step 3: Place the chicken on top. Smear with the pizza sauce, olives, oregano and salt and pepper to taste.

Step 4: Fold the foil over to make a book and seal it until all of the openings are closed. Repeat with the remaining three chicken breasts and place on a baking sheet.

Step 5: Bake at 400 F for 20 minutes, then open up the foil (very carefully), sprinkle your pizza chicken bake with the parmesan and broil for 5 minutes. Enjoy.

Expert Tips

When opening the foil packet for this pizza chicken bake, I suggest carefully slicing part of it opened so the steam can release before opening it. It’ll be quite hot straight from the oven and you don’t want the steam to be trapped to continue (over) baking your chicken.

Change up the flavours by drizzling some bbq sauce on top as well. BBQ chicken pizza anyone?!

Make sure your chicken breasts are all the same size so that cook time is the same. Also, avoid thinly sliced chicken breasts for this as you want them to be able to hold up the sliced mozzarella.

In a similar vein, it’d be hard to make this with chicken thighs as they tend to be thinner than breasts so the cheese won’t hold up in-between the slices.

Recipe FAQs

Can I make this pizza chicken dairy free?

You can absolutely use a dairy free cheese to make your pizza chicken bake if you want to get your pizza fix without dairy!

Can I make this pizza chicken bake if I’m keto?

Yes! This chicken recipe is low carb, keto friendly, and also gluten-free. You can also ensure it’s keto friendly by choosing a pizza sauce with no sugar, or making your own low sugar pizza sauce.

Can I make this ahead of time?

You can definitely meal prep this pizza chicken bake. Once the chicken is cooled, transfer the contents of each foil pack into an airtight container and store in the first for up to 4 days. Reheat in the microwave.

What other vegetables can I use?

Feel free to substitute with other vegetables like zucchini, carrots, broccoli, corn, cauliflower, and more! Just be sure that they are not so large that they don’t cook through at the same time as the chicken.

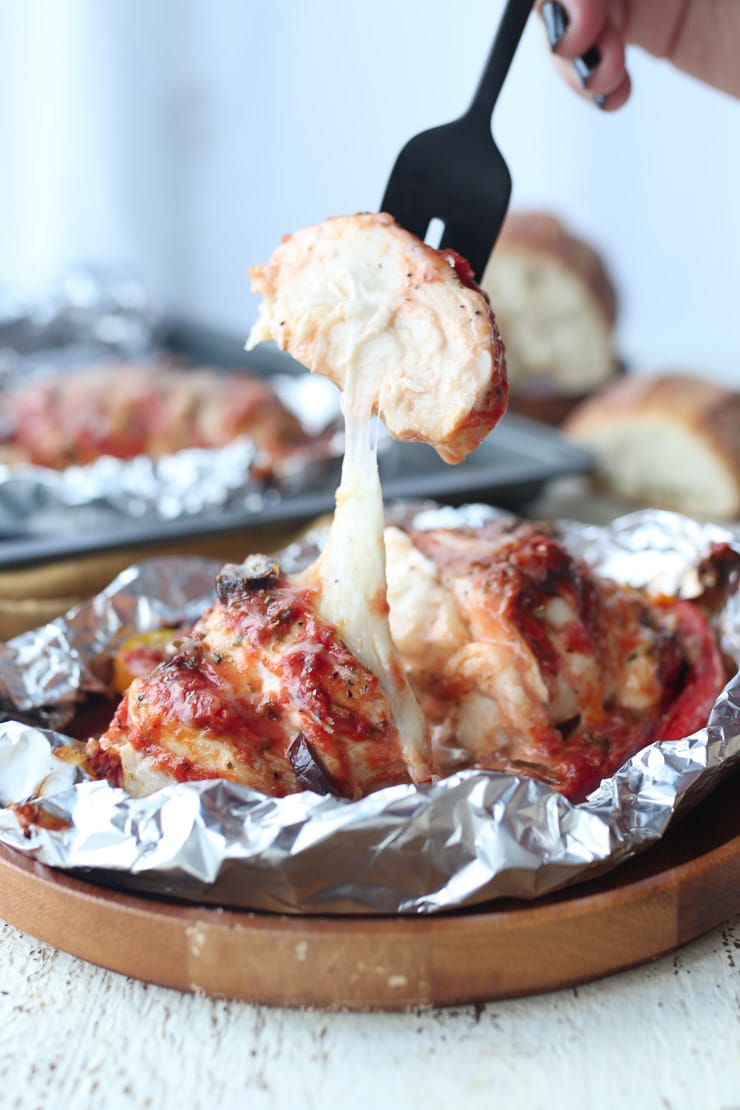
Cheese pull from pizza chicken bake in a foil pack.

More Recipes You Might Like

Want more easy chicken dinners? Try a few of my favourites down below!

  • French Onion Chicken Breasts
  • Sticky Chicken Sheet Pan Dinner
  • Greek Chicken Sheet Pan Dinner
  • Rosemary Chicken Sheet Pan Dinner
  • Baked Chicken Parmesan Foil Pack Dinner

Tell me lovelies, what is your favourite way to make chicken fun and exciting for your family?

Chicken in foil pack.
Print Recipe
5 from 7 votes

Pizza Chicken Bake (Easy Foil Pack Dinner)

This Pizza Chicken Bake is a super easy gluten free and keto friendly meal that is super quick to put together! Everything is made in a simple foil pack for easy clean up.
Prep Time10 minutes mins
Cook Time25 minutes mins
Total Time35 minutes mins
Course: Dinner
Cuisine: American
Servings: 4 people
Calories: 266kcal
Author: Abbey Sharp

Ingredients

  • 1 tbsp olive oil
  • 4 skinless boneless chicken breasts
  • 1 cup pizza sauce
  • 1 large buffalo mozzarella cheese ball
  • 1 1/2 cups sliced cremini mushrooms
  • 1/2 Red Onion sliced
  • 1/2 orange bell pepper sliced
  • 1/2 yellow bell pepper sliced
  • 1/2 red bell pepper sliced
  • 1/3 cup sliced black olives
  • 1 tsp dried oregano
  • Pinch each of salt and pepper
  • 1/4 cup finely grated parmesan

Instructions

  • Preheat oven to 400 F.
  • Start by making tiny slits down each chicken breast, about 1/4″ from the bottom. Season with some salt and pepper, then insert the thinly sliced pieces of the mozzarella cheese.
  • Spritz a rectangular piece of foil with oil, add a variety of veggies and a pinch of salt and pepper.
  • Place the chicken on top. Smear with the pizza sauce, olives, oregano and salt and pepper to taste.
  • Fold the foil over to make a book and seal it until all of the openings are closed. Repeat with the remaining three chicken breasts and place on a baking sheet.
  • Bake at 400 F for 20 minutes, then open up the foil (very carefully), sprinkle with the parmesan and broil for 5 minutes. Enjoy.

Video

Notes

  • When opening the foil packet, I suggest carefully slicing part of it opened so the steam can release before opening it. It’ll be quite hot straight from the oven and you don’t want the steam to be trapped to continue (over) baking your chicken.
  • Change up the flavours by drizzle some bbq sauce on top as well. BBQ chicken pizza anyone?!
  • Make sure your chicken breasts are all the same size so that cook time is the same. Also, avoid thinly sliced chicken breasts for this as you want them to be able to hold up the sliced mozzarella.
  • In a similar vein, it’d be hard to make this with chicken thighs as they tend to be thinner than breasts so the cheese won’t hold up in-between the slices.

Nutrition

Calories: 266kcal | Carbohydrates: 9g | Protein: 28g | Fat: 13g | Saturated Fat: 3g | Trans Fat: 1g | Cholesterol: 115mg | Sodium: 701mg | Potassium: 731mg | Fiber: 3g | Sugar: 5g | Vitamin A: 1356IU | Vitamin C: 71mg | Calcium: 134mg | Iron: 2mg
Abbey Sharp

Abbey Sharp is a Registered Dietitian (RD), regulated by the Ontario College of Dietitians. She is a mom, YouTuber, Blogger, award winning cookbook author, media coach specializing in food and nutrition influencers, and a frequent contributor to national publications like Healthline and on national broadcast TV shows.
www.abbeyskitchen.com/about-abbey/

Last Updated August 2, 2022. Published August 2, 2022 By Abbey Sharp Leave a Comment

Pop Tarts Recipe (Homemade Toddler & Kid Friendly Snack)

This Low Sugar No Bake Pop Tarts Recipe is Toddler and Kid Friendly and makes an awesome kid-friendly activity to get them in the kitchen!

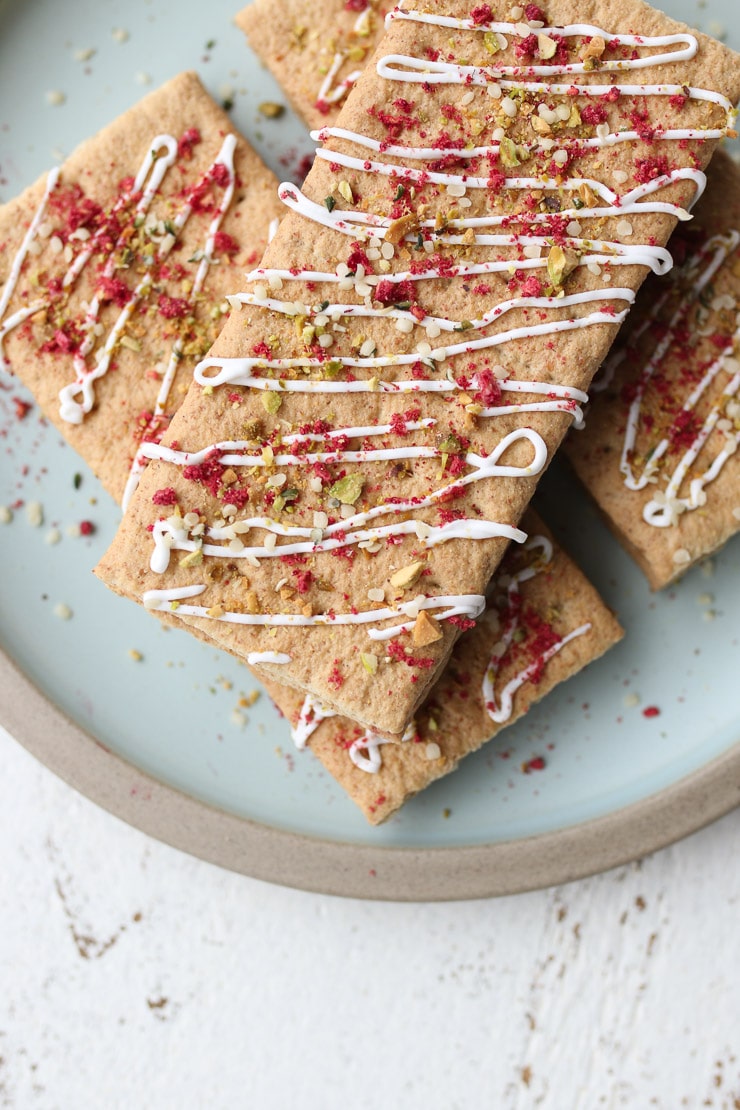
No bake pop tarts stacked on a blue plate.

Do you remember POP TARTS?! I’m not going to lie, I basically was raised on pop-tarts and not so much for dessert. I am pretty sure I had a pop tart for breakfast every day in highschool (and it was usually the one with lots of extra blue icing on top). No shame here. But now that I have a little one, I can appreciate that we may all want to make things a little bit lower in sugar for them, especially if they’re having this for breakfast! 

So I invented the DIY NO BAKE pop tarts recipe that is naturally low in sugar, and packed with some protein and healthy fats.

Table of contents

  • Why This Recipe Works
  • Key Ingredients
  • How To Make This Recipe
  • Expert Tips
  • Recipe FAQs
  • More Recipes You May Like

Why This Recipe Works

This easy & yummy recipe makes our mornings (and even afternoon snack times) run so much more smoothly. My boys absolutely LOVE this recipe and I love knowing that they’re getting some extra nutrients in compared to regular pop tarts. I also love this pop tarts recipe because they’re

  • Naturally low in sugar
  • Customizable – see below for alternate topping ideas!
  • No bake + only 2 easy steps
  • Budget friendly

Key Ingredients

Graham Crackers – Did you know that each graham cracker has just 1 gram of sugar each? Not joking. I’m literally obsessed.

Chia Jam – I make my own chia jam (it’s one of the most popular recipes on my blog) by mixing cooked down fresh or frozen fruit with chia seeds, a little lemon juice and if you want, you can add maple syrup. But honestly, it’s so flavourful, it’s not even necessary.

Toppings of your choice – Remember the frosting? I’ve been using some high protein greek yogurt for that! And remember the sprinkles? Well, my son calls hemp hearts sprinkles, so that was an easy addition, but for some pretty colour, I pulverized some freeze dried fruit and pistachios, too!

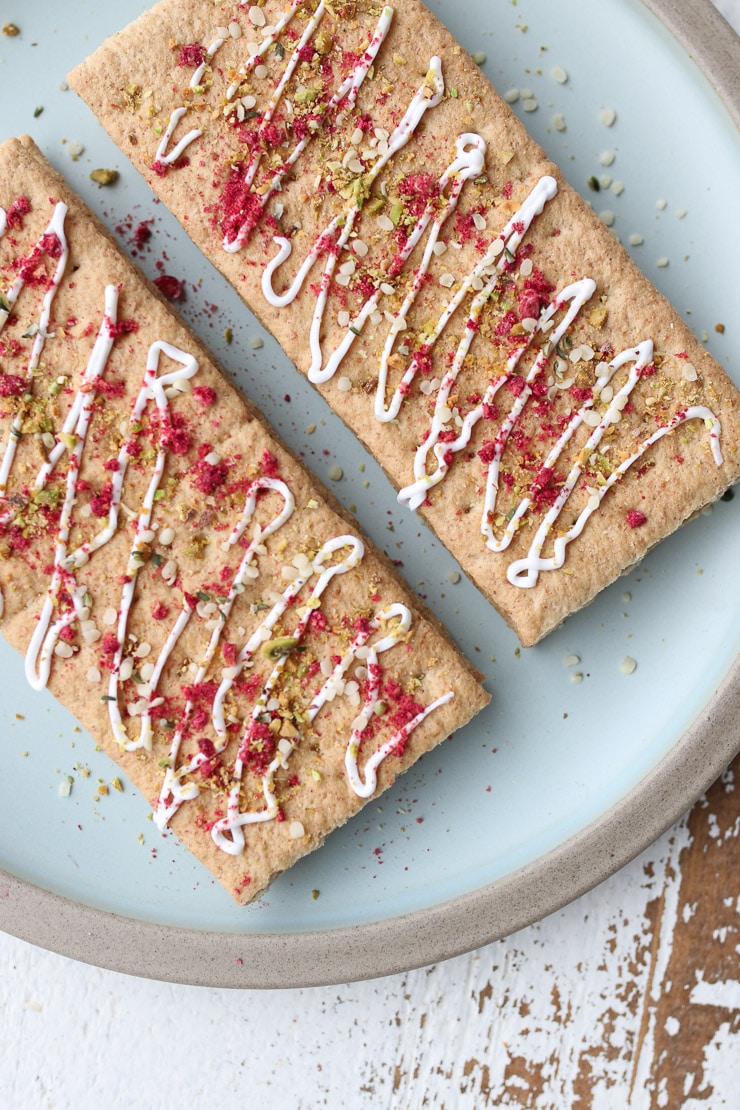
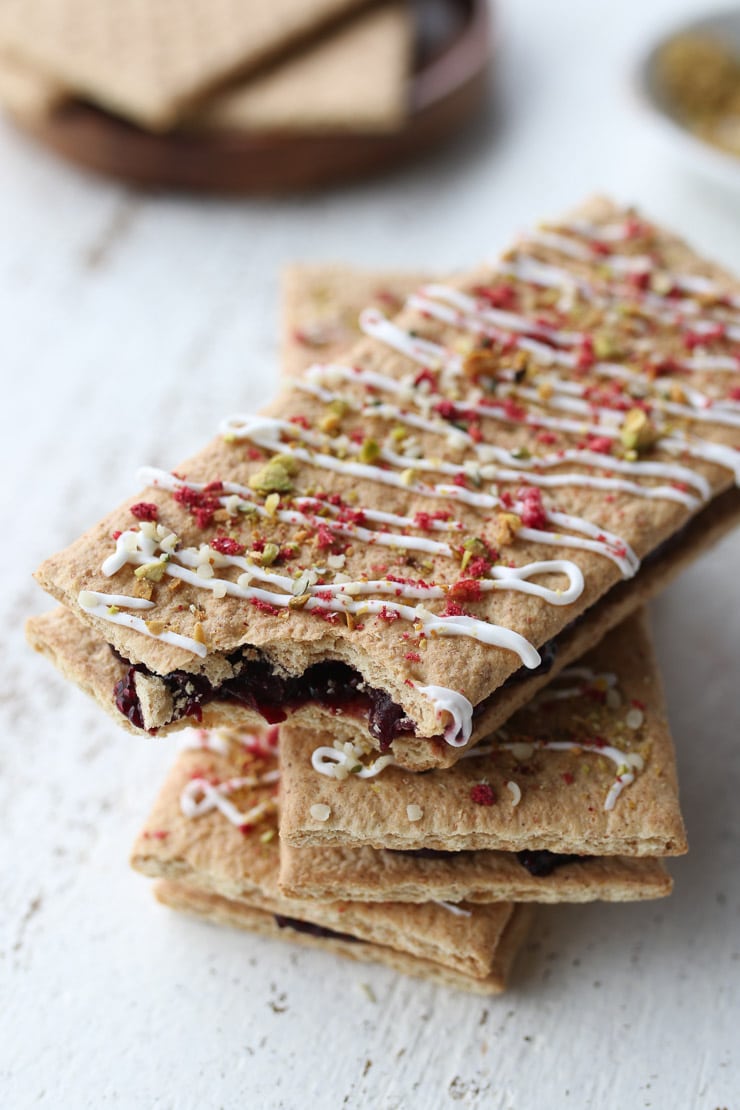
homemade pop tarts drizzled with yogurt and topped with pistachios and freeze dried fruit

How To Make This Recipe

Step 1: To assemble, spread two tablespoons of the chia jam onto 4 of the graham crackers.

Step 2: Top with the other graham cracker. Drizzle with yogurt and decorate with hemp hearts, freeze-dried berries, and pistachios.

Expert Tips

Chia jam is one of the most popular recipes on my blog for a reason. I cook down some frozen berries with a little lemon juice, and usually I find they’re sweet enough for my kiddo but if not, you can add a splash of maple syrup or honey, to taste. Then I just mix the smashed down berries with chia seeds (which add fibre, protein and omega 3 fats) and let it sit overnight. The chia seeds “bloom” in the moisture and thicken the berries to a jam-like consistency.

Looking for other ingredients to decorate these pop tarts? The sky is the limit! You can use:

  • Flavoured or plain yogurt
  • Fresh sliced fruit inside the pop tart
  • Pulverized seeds or nuts
  • Flax
  • Chia seeds
  • Spices
  • Grated chocolate
  • Actual candy sprinkles!
Birds eye view of pop tart swap on a blue plate.

Recipe FAQs

Is this recipe safe for BLW and babies?

There is honey in traditional storebought graham crackers, so you may want to wait until after 1 to serve them to your new eaters. 

How much added sugar are there in these pop tarts?

A traditional pop tart has about 200 calories and 16 grams of sugar. If you avoid adding sugar to the chia jam (and just rely on the natural sweetness of the fruit), you’re looking at just 2 grams of added sugar since each graham cracker has 1 gram each! Pretty amazing, really.

What are some things kids can do to help out with making this recipe?

Depending on their age, children should be able to help you decorate their own pop-tarts. If you’re afraid of mess (I mean, isn’t all of parenthood pretty messy?), you can put down a plastic tablecloth and just let the kids go to down with it.

Can I make these no bake pop tarts vegan?

You can use vegan graham crackers (I’ve seen them before online), and a plant based yogurt! The rest is inherently plant based.

How do you get the yogurt in a nice drizzle like that?

SO EASY! I just put the yogurt into a zip top plastic baggy and cut out a teeny hole in the corner. Then drizzle away!

close up of three pop tarts stacked on top of one another

More Recipes You May Like

Kid and toddler approved snacks, breakfasts and desserts are some of my favorite recipes to share! Check out my absolute favorites below!

  • SPINACH MUFFINS
  • BAKED TOFU NUGGETS 
  • HOMEMADE GRANOLA BARS 
  • CHICKPEA PEANUT BUTTER BISCUITS 
  • NO BAKE CHEERIO BARS 
  • TODDLER DIPS FOR PICKY EATERS 

What are some of your favourite kid and toddler friendly recipes? How did you like this pop tarts recipe? Leave me a comment below with your thoughts!

Print Recipe
5 from 2 votes

Pop Tarts Recipe (Homemade Toddler & Kid Friendly Snack)

This Low Sugar No Bake Pop Tarts Recipe is Toddler and Kid Friendly and makes an awesome kid-friendly activity to get them in the kitchen!
Prep Time5 minutes mins
Total Time5 minutes mins
Course: Snack
Cuisine: American
Servings: 4
Calories: 104kcal
Author: Abbey Sharp

Ingredients

  • 8 graham cracker squares
  • 1/2 cup homemade chia jam

Toppings:

  • 1/4 cup plain Greek yogurt
  • Hemp hearts
  • Freeze dried berries pulverized into a powder
  • Pistachios minced

Instructions

  • To assemble “Pop Tarts”, spread two tablespoons of the chia jam onto 4 of the graham crackers.
  • Top with the other graham cracker. Drizzle with yogurt and decorate with hemp hearts, freeze dried berries and pistachios.

Nutrition

Calories: 104kcal | Carbohydrates: 26g | Protein: 2g | Fat: 2g | Saturated Fat: 1g | Cholesterol: 1mg | Sodium: 97mg | Potassium: 62mg | Fiber: 1g | Sugar: 14g | Calcium: 27mg | Iron: 1mg
Abbey Sharp

Abbey Sharp is a Registered Dietitian (RD), regulated by the Ontario College of Dietitians. She is a mom, YouTuber, Blogger, award winning cookbook author, media coach specializing in food and nutrition influencers, and a frequent contributor to national publications like Healthline and on national broadcast TV shows.
www.abbeyskitchen.com/about-abbey/

Last Updated July 29, 2022. Published July 29, 2022 By Abbey Sharp Leave a Comment

Vegan Jambalaya Recipe (Gluten Free)

This gluten free and vegan jambalaya recipe is inspired by the classic cajun-creole comfort dish and is the perfect way to spice up dinner for the family.

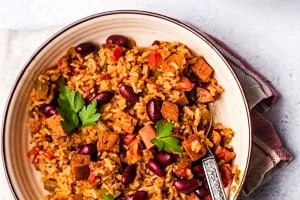
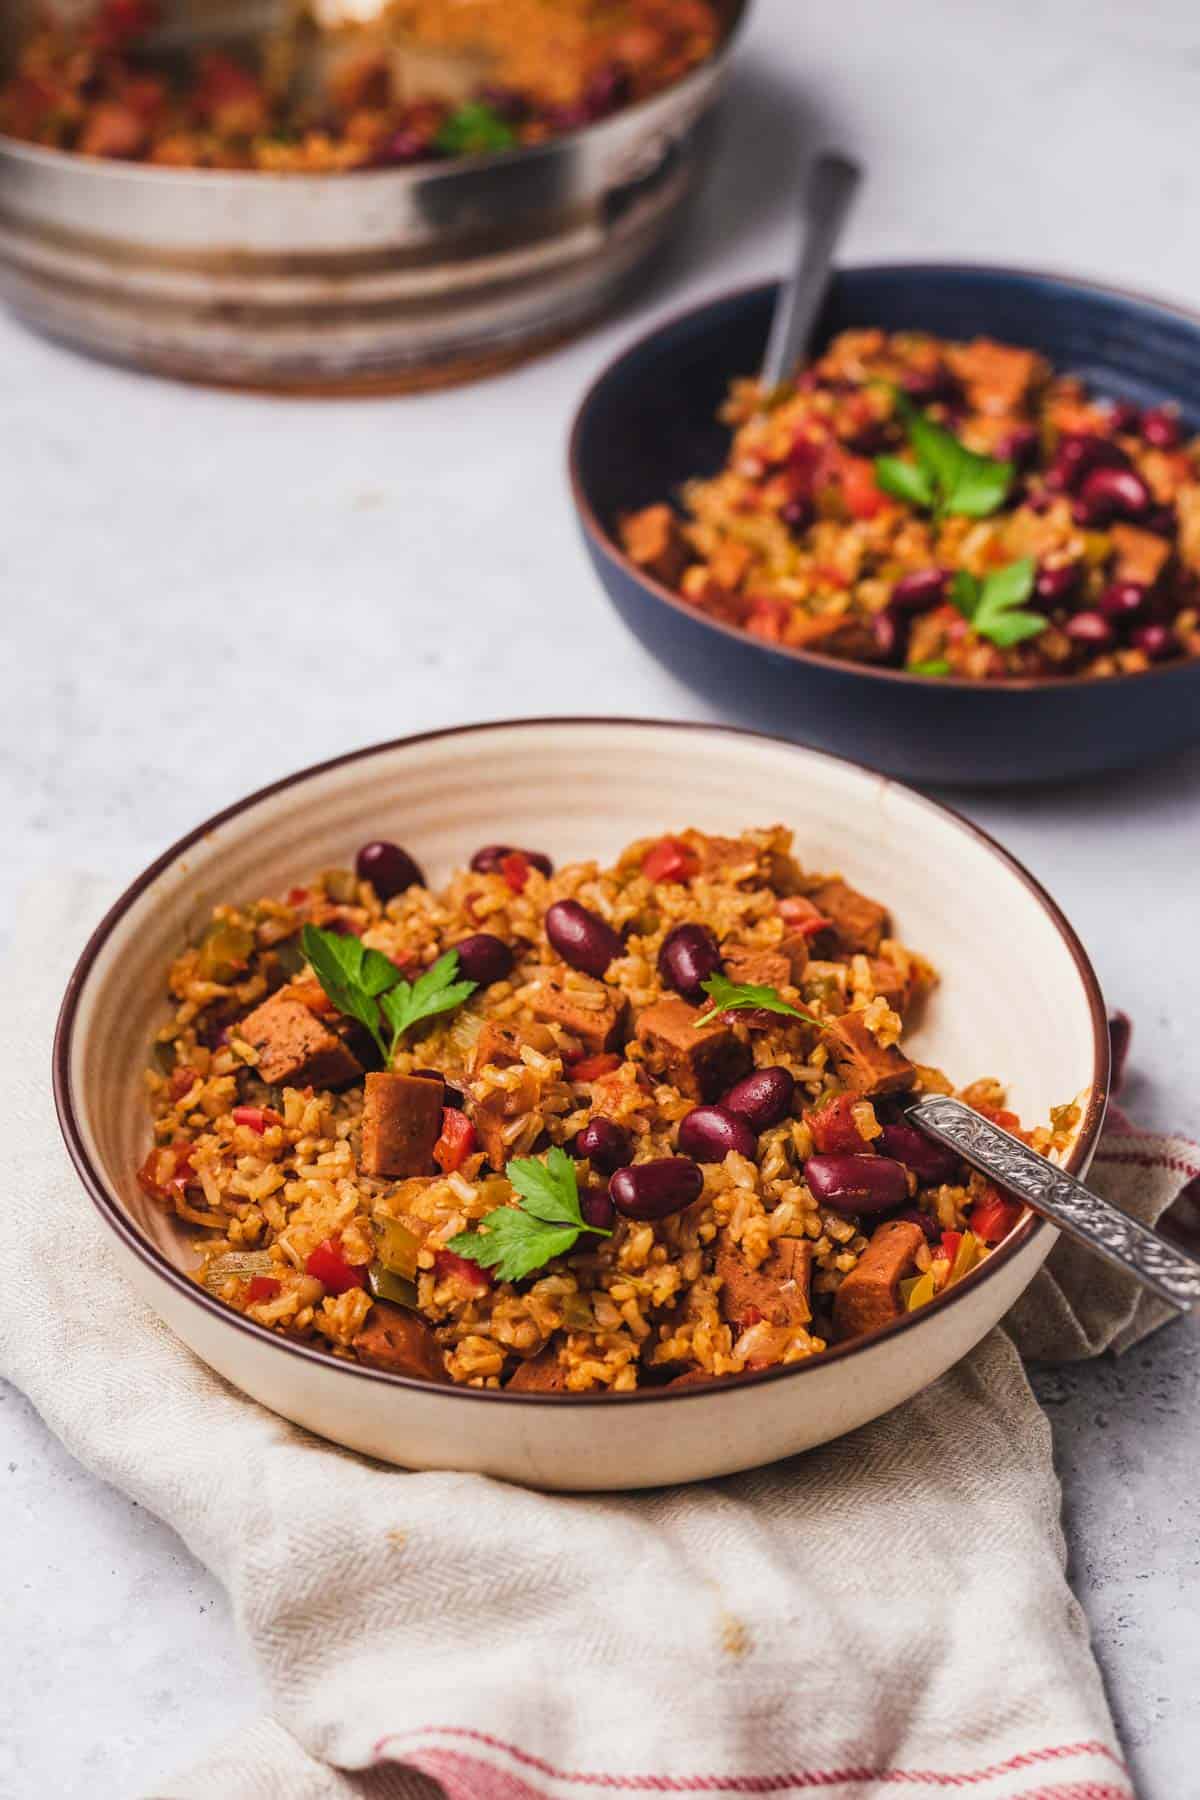
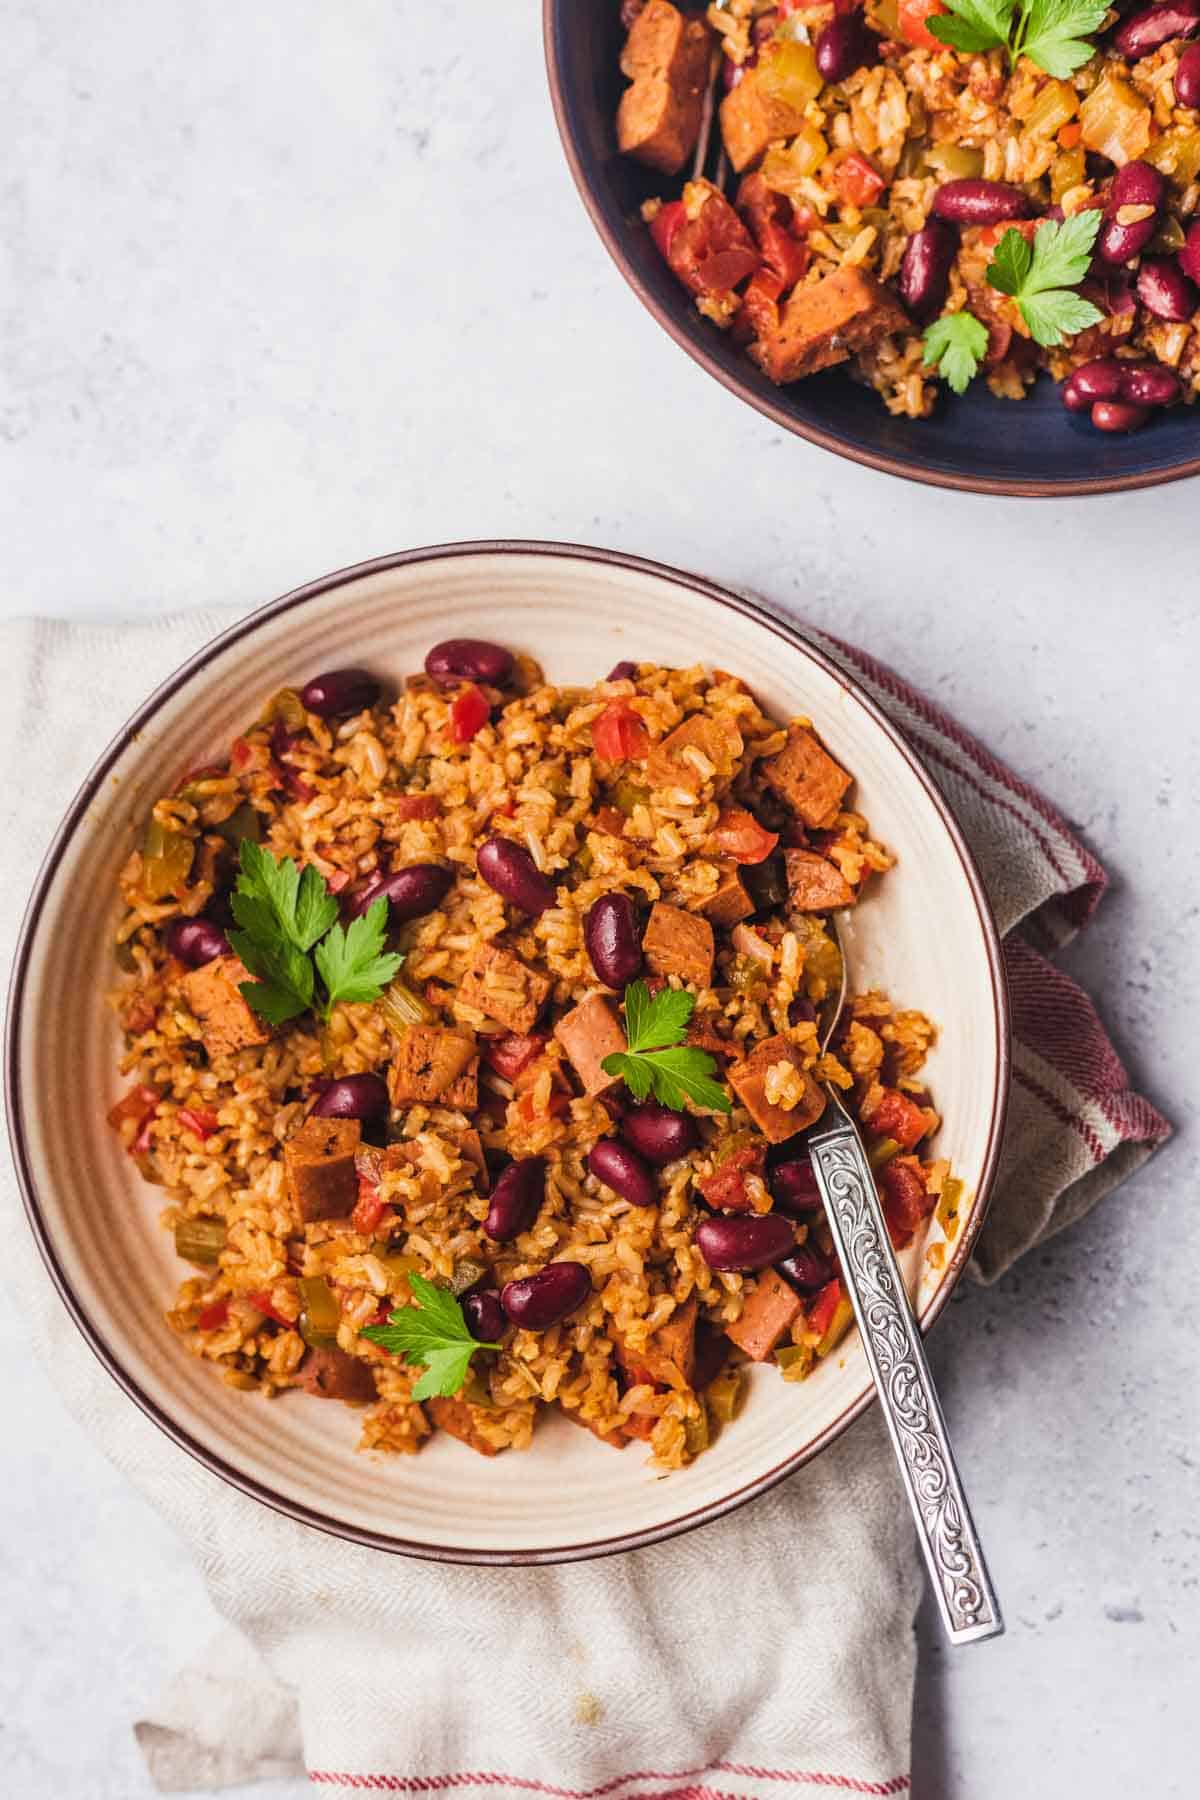
Picture of 2 bowls of vegan jambalaya, the closer bowl is white bowl and the further bowl is blue.

There is nothing that screams comfort food like a savory bowl of homemade jambalaya. The way that all of the meat, seafood, rice, and seasonings blend together to create the most delicious dish is something you can’t beat! Don’t get me wrong – I love traditional jambalaya. However, as I’m trying to eat more plant-based meals, I was inspired to make this vegan jambalaya recipe that everyone can enjoy.

Table of contents

  • Why This Recipe Works
  • Key Ingredients
  • How To Make This Recipe
  • Expert Tips
  • Recipe FAQs
  • More Recipes You May Like

Why This Recipe Works

Whether you’re looking for a new meal to add to your weekly rotation at home or entertaining friends, this vegan jambalaya recipe is guaranteed to be a hit. Traditional jambalaya is typically already gluten-free, which is a win for those with dietary restrictions but here are a few more reasons why we are lovin’ this recipe right now

  • Vegan & high in plant-based protein (~12 grams per serving)
  • Easy to make – only 5 simple steps!
  • Budget-friendly
  • The perfect meal prep dish

Key Ingredients

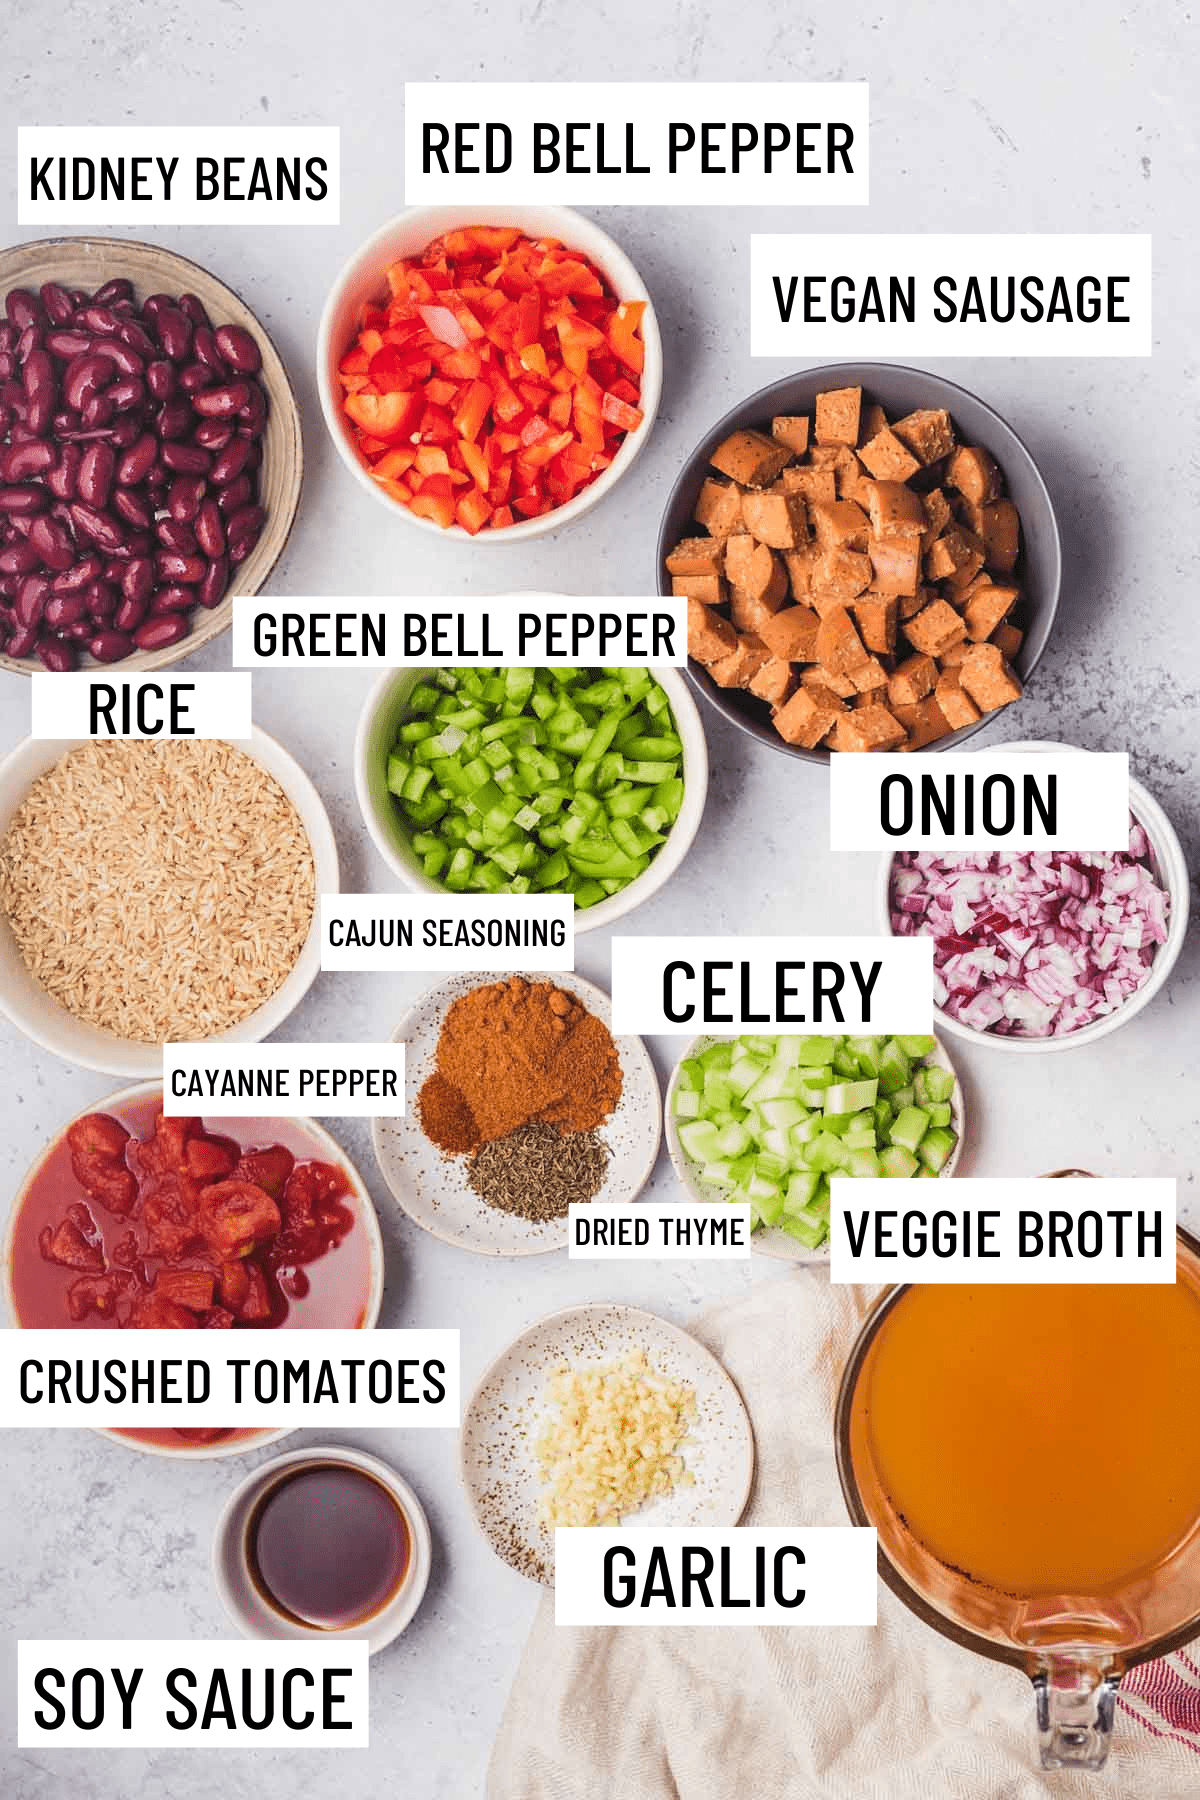
Birds eye view of the ingredients to make the vegan jambalaya.

Spicy Vegan Sausage – it’s not jambalaya without sausage! Many people don’t realize that vegan sausage can contain almost as much protein as regular sausage. This brand has 16 grams of protein per link! It’s typically made with pea protein + seasonings.

Kidney Beans – Kidney beans are another great addition to add some plant-based protein and fiber to the mix.

Cajun or Creole Seasoning – This seasoning is vital in making this dish taste just like traditional jambalaya. You can totally make your own cajun seasoning or you can buy it from any local grocery store!

Uncooked Rice – What makes this recipe even easier to make is that the rice will cook itself while simmering with the other ingredients. Meaning less dishes and mess to clean up!

How To Make This Recipe

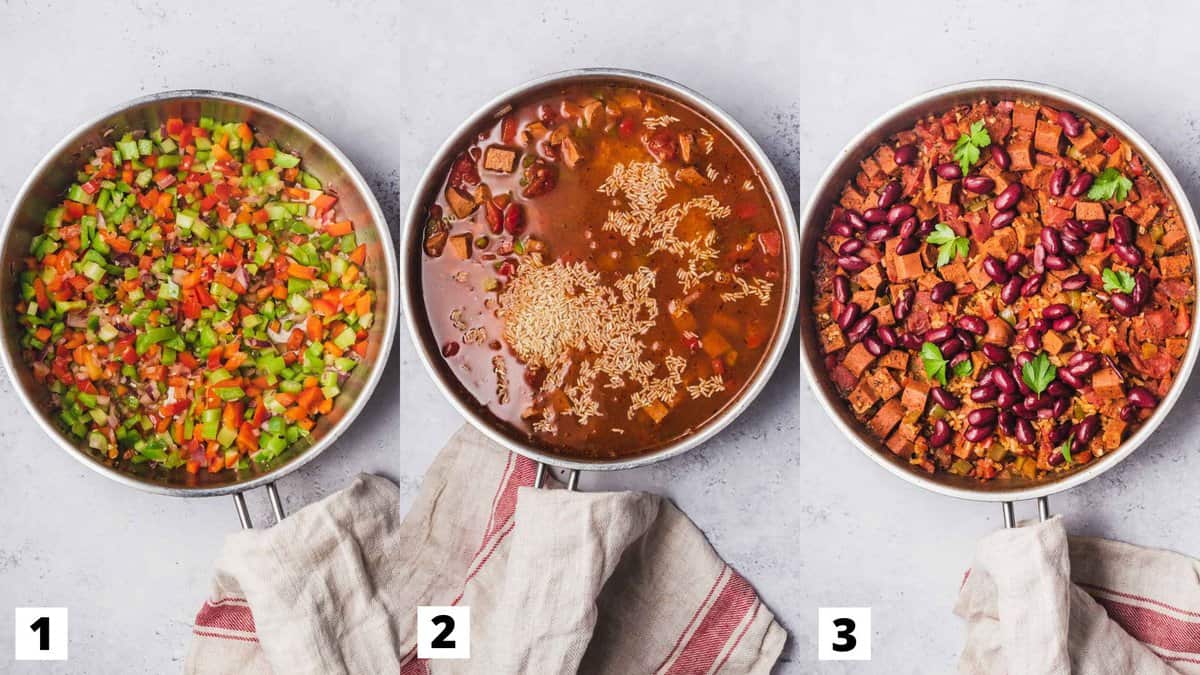
Birds eye view of 3 different steps to make the vegan jambalaya. Each picture is the recipe in a silver pot with a tan and red striped cloth on the handle.

Step 1: Sautee onion, garlic, bell peppers, and celery until soft. Stir in crushed tomatoes and add seasonings – tamari, cajun seasoning, thyme, cayenne pepper, thyme, salt, and pepper. Then, stir in vegan sausage.

Step 2: Add the uncooked rice and veggie broth. Bring to a boil and reduce heat to a simmer for 20-25 minutes or until liquid is fully absorbed and rice is fully cooked.

Step 3: Add kidney beans and stir to combine. Cook for an extra 1-2 minutes.

Expert Tips

You can use any type of rice you like in this recipe – I recommend trying this vegan jambalaya using brown rice for some extra added fiber and micronutrients.

If you need to ensure this recipe stays gluten-free for those with dietary restrictions, make sure to check the nutrition label on packaged ingredients.

Customize your spice! In the recipe card, we measured out 2 tbsp on cajun/creole seasoning, but feel free to adjust based on preferences!

Birds eye view of a bowl of vegan jambalaya in a white bowl on top of a red and white striped dish towel. There is a quarter of another bowl of jambalaya in a blue bowl in the top right corner.

Recipe FAQs

How do I meal prep this recipe?

This vegan jambalaya recipe is the perfect meal prep dish to pull from throughout the week. Just make sure to store it in an airtight container and use within 3-4 days.

Can I freeze this recipe?

Surprisingly, yes!! This recipe stays good in the freezer for up to 6 months. When ready to eat, place in the fridge the night before then microwave when ready.

What makes this recipe vegan compared to traditional jambalaya?

Traditional jambalaya typically contains andouille sausage, shrimp, and/or chicken. In this recipe we added our own vegan sausage + kidney beans for plant-based protein.

More Recipes You May Like

Feeling inspired after making this delicious vegan jambalaya? Check out some of my favorite vegan and gluten-free lunch/dinner recipes below!

  • TOFU TACOS WITH PEANUT SAUCE (VEGAN & GLUTEN FREE SUMMER DINNER)
  • VEGAN BURRITO BOWL WITH SPAGHETTI SQUASH (GLUTEN FREE)
  • UNSTUFFED CABBAGE ROLL SOUP (VEGAN & GLUTEN FREE)
  • QUINOA BURGER WITH WALNUTS (VEGAN & GLUTEN FREE)

Have you tried this gluten-free & vegan jambalaya recipe? What are some of your other favorite cajun/creole recipes? Leave me a comment below with your thoughts!

Print Recipe
5 from 3 votes

Vegan Jambalaya Recipe (Gluten Free)

This gluten free and vegan jambalaya recipe is inspired by the classic cajun-creole comfort dish and is the perfect way to spice up dinner for the family.
Prep Time25 minutes mins
Cook Time35 minutes mins
Total Time1 hour hr
Course: Dinner, Lunch
Cuisine: American, Cajun, Creole
Diet: Gluten Free, Vegan
Servings: 6 servings
Calories: 244kcal
Author: Abbey Sharp

Ingredients

Vegan Jambalaya

  • 1 onion diced
  • 3 cloves garlic minced
  • 1 red bell pepper chopped
  • 1 green bell pepper chopped
  • 2 stalks celery chopped
  • 1 can crushed tomatoes
  • 1 pack spicy vegan sausage diced
  • 1 cup uncooked rice
  • 3 cups vegetable broth
  • 1 cup kidney beans
  • 1 tbsp soy sauce or tamari
  • 2 tbsp cajun or creole seasoning
  • 1 tsp dried thyme
  • 1/4 tsp cayenne pepper
  • salt and pepper

Garnish

  • sliced green onion
  • parsley

Instructions

  • Add oil to skillet or large pot. Sautee the onion, garlic, bell peppers and celery until soft. (about 5 minutes).
  • Stir in the crushed tomatoes and add seasonings –tamari, cajun seasoning, thyme, cayenne pepper, thyme, salt, and pepper.
  • Stir in the vegan sausage.
  • Add in the uncooked rice and veggie broth. Bring to a boil and reduce heat to a simmer. Let simmer for 20-25 minutes or untilliquid is fully absorbed and rice is fully cooked.
  • Add kidney beans and stir to combine. Cook for an extra 1-2 minutes.
  • Serve with sliced green onion and parsley.

Nutrition

Serving: 1serving | Calories: 244kcal | Carbohydrates: 45g | Protein: 12g | Fat: 2g | Saturated Fat: 0.4g | Polyunsaturated Fat: 1g | Monounsaturated Fat: 0.4g | Sodium: 786mg | Potassium: 663mg | Fiber: 6g | Sugar: 7g | Vitamin A: 2343IU | Vitamin C: 50mg | Calcium: 85mg | Iron: 4mg
Abbey Sharp

Abbey Sharp is a Registered Dietitian (RD), regulated by the Ontario College of Dietitians. She is a mom, YouTuber, Blogger, award winning cookbook author, media coach specializing in food and nutrition influencers, and a frequent contributor to national publications like Healthline and on national broadcast TV shows.
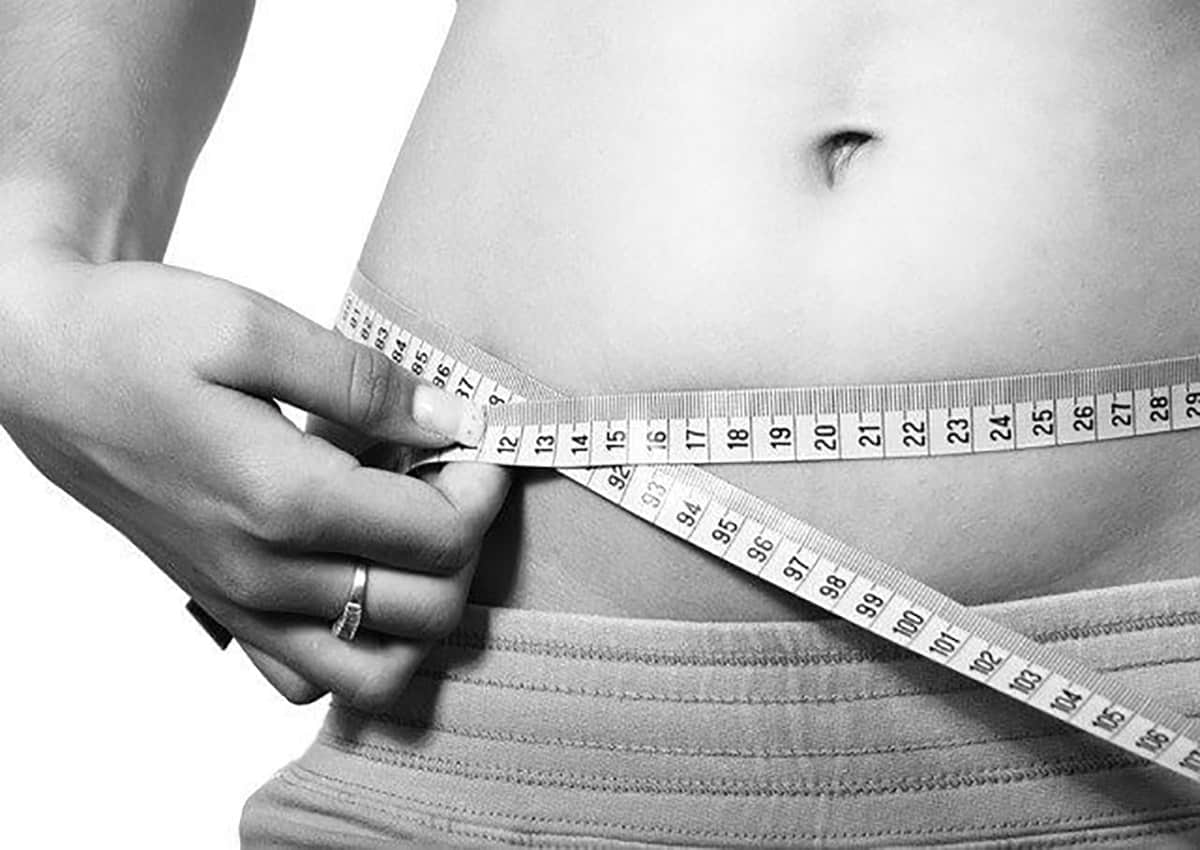
www.abbeyskitchen.com/about-abbey/

Last Updated July 25, 2022. Published June 30, 2022 By Abbey Sharp 14 Comments

Sports & Energy Drinks | The Best Drinks for During Exercise

Person holding a sports drink during exercise on a mat with dumbbells.

Curious about sports & energy drinks? Let’s discuss if coconut water, sports drinks, milk and energy drinks are really going to make a difference to your workout.

Person holding a drink on an exercise mat with weights to discuss sports & energy drinks.

So, you’ve worked up a sweat, need to hydrate, and you’re thinking about sports & energy drinks. What do you grab? Gatorade? Coconut water? Milk? There are tons of drinks available on the market that claim to be the best of the best for athletes and active individuals alike, but do they really reign better than plain old water?

What’s the Best Thing to Drink During Exercise?

Woman stretching outside.

First, let’s get nerdy for a second. When you exercise, you’re sweating out your body’s water and electrolytes, namely sodium and potassium, making it important to hydrate before, during, and after exercising to prevent dehydration. This is why, when it comes to sports & energy drinks, many sports drinks on the market are advertised as being jam packed with electrolytes and a better hydration source than bottled water. The key ingredients for many sports drinks are water, carbohydrate (usually a sugar), and sodium – all of which are aimed at maintaining optimal performance during exercise and replenishing the body post-exercise by maintaining hydration, energy, and electrolyte levels.

But what does the evidence say about whether these drinks really do hydrate us better than water?

Coconut Water

Women holding a coconut with a straw sticking out.

A new competitor, coconut water, has stepped into the exercise hydration game. It is known to be a natural alternative to manufactured sports drinks as it is naturally occurring and rich in potassium in addition to containing sodium, chloride, and some carbs as well, making it an appealing go-to exercise drink. Let’s also not ignore the fact that coconut water has become SUPER trendy thanks to celebrities like Rihanna, Madonna and Courteney Cox. Clinically, it may be used to replenish fluid levels for those experiencing dehydration from diarrhea. In the world of sports nutrition, coconut water is seen as having similar hydration effects as an electrolyte-packed sports drinks. However, a study about spors & energy drinks that compared VitaCoco, a sport drink coconut water, and bottled water, found that there was no statistically significant difference in fluid retention and body mass before and after a dehydrating exercise. So, is coconut water bad when it comes to sports & energy? Not necessarily; both plain ol’ tap water and coconut water are capable of providing well-needed hydration to the body but for most of us, the former is just fine.

Caffeinated Energy Drinks

Person holding a can.

There are some claims about sports & energy drinks that drinking caffeinated energy drinks (Redbull, Monster, etc.) can enhance overall performance due to its sugar content in combination with stimulants, such as taurine, guarana, and caffeine. How so? The caffeine causes an increase in heart rate and induces glycogen sparing, thereby enhancing available energy stores to keep you energized longer, which may be particularly useful for endurance activities. However, higher-quality studies are needed to determine without or not caffeinated energy drinks are all that beneficial to performance and hydration during exercise, especially because caffeine does have its own side effects and impacts on the body. Not to mention, energy drinks are usually super high in sugar and fatigue can occur once the sugar and caffeine leaves the body (aka the dreaded sugar crash).

Energy drinks on a green table.

Milk and Milk-Based Drinks

Milk in a bottle next to a bowl of strawberries.

Milk? Yes, you read that right! Although not as popular, some have suggested drinking milk is the best thing to drink during exercise as the proteins in milk, whey and casein, can help enhance fluid absorption and retention the same way that sports drinks or foods and fluids with carbs and sodium do. This opens up the consideration for milk-based protein shakes and drinks post-exercise, although it is a personal choice as not everyone can tolerate milk. One study did find that soy milk can be equally effective so that’s good news for my lactose-free friends. Having said that, I would say that more studies are needed before conclusive conclusions can be drawn. I also wouldn’t suggest completely replacing all water with milk since you’re looking at adding at least 100 calories per cup.

Sports Drinks

Alright, here’s the big kahuna: sports drinks. Is this really the best thing to drink during exercise? Whether you’re on team blue Powerade or purple Gatorade (or something organic and natural you found at Whole Foods), sports drinks have long existed in the sports world as a hydrating alternative to plain water due to its carbohydrate and electrolyte content. A few sources have suggested that sports drinks or other fluids with the appropriate ratios of carbohydrates and sodium may be more helpful for prolonged and/or short, high-intensity workouts rather than for low-intensity workouts to maintain hydration during and after exercise. Why? Simply because the sugar in these drinks help provide energy to the working muscles that are needed for long workouts (60+ minutes) and the electrolytes help maintain optimal performance.

Row of drinks on a shelf to discuss sports & energy drinks.

But here are a few things to consider. Sports drinks for endurance exercises can improve performance, but if the amount of carbohydrates in the drink is too high, it can restrict the amount of water available for the body. Not to mention, if the source of carbohydrate is mainly fructose, it may cause stomach upset and no one likes to be running to the loo while they’re trying to just run. Even though sugar provides energy to your working muscles, the sugar in sports drinks can add excess calories to your day. If your goal is weight loss, and you’re downing these bad boys like they’re, well, water, and you aren’t partaking in high-intensity activities, you’re probably going to gain weight. Oh and the sodium? It’s definitely helpful for higher levels of activity or in really hot environments as you’re losing more electrolytes through your sweat which can interfere with your ability to push yourself. For most of us doing our lunch-hour workout, there’s really no need to load up on excess sodium as our salt intakes are high enough on a daily basis already.

The Bottom Line

Woman exercising outside.

You may have seen this coming, but in most cases, water is the best thing to drink during exercise. It’s just as good as any other sports drinks and coconut water for post-exercise hydration for your day-to-day workouts. It’s not to say that one is more superior than the other. At the end of the day, it’s a personal choice if you prefer one over the other, but keep in mind that for low-intensity workouts, hydration with water and a well-balanced diet is just as effective in keeping your fluid and electrolytes in check. When it comes to sports & energy drinks, sports drinks and coconut water are recommended for prolonged and/or high-intensity exercises or exercising in hotter climates when you’re sweating like mad, but if these are what you prefer, choose ones that are non-carbonated, non-caffeinated, contain a small amount of sodium, and aren’t sweetened with fructose alone. And think about these as a supplement to the pure unadulterated water, don’t forget about the goodness of a nice cold glass of H2O.

So tell me what do you think is best to drink during exercise for hydration? Have you noticed a difference in your performance using one drink over another? What’s your favourite drink (okay not going to lie, I LOVE blue gatorade).

Leave me a comment below with your thoughts!

Contribution By:

RD2B Amy Choi

MORE BLOG POST YOU MIGHT LIKE

If you enjoyed this blog post discussing sports & energy drinks, you might enjoy some more posts discussing exercise, health and wellness:

  • Are Supplements Safe? | How to Choose the Right Supplement For You
  • Can Collagen Supplements Tighten Skin?
  • Fertility Supplements and Foods for Getting Pregnant
  • What to Look for in a Protein Powder
  • Intermittent Fasting and Working Out: Will it Help or Hinder Your Performance?
  • Calorie Counter Watch | Why I Broke Up With My Fitbit


Abbey Sharp

Abbey Sharp is a Registered Dietitian (RD), regulated by the Ontario College of Dietitians. She is a mom, YouTuber, Blogger, award winning cookbook author, media coach specializing in food and nutrition influencers, and a frequent contributor to national publications like Healthline and on national broadcast TV shows.
www.abbeyskitchen.com/about-abbey/

Last Updated June 22, 2022. Published June 23, 2022 By Abbey Sharp 108 Comments

Pregnant with Thin Uterine Lining | How I Got Pregnant & My Miscarriage Story

I share everything I did to get pregnant with thin uterine lining and recurrent miscarriage history in this detailed outline of my supplements, diet, lifestyle, procedures and drugs.

pregnant abbey in floral dress cradling baby bump conceived with thin uterine lining

First of all, thank you soooo much for the overwhelming support I received in response to my pregnancy announcement on my Youtube channel. It was so reassuring to hear from all of you, especially considering the challenge I’ve had on this road. I got a lot of questions about my protocol, and everything I did to get pregnant for those who are struggling with infertility or are just worried about the process. So today I wanted to share, in detail, everything I did to get pregnant with thin uterine lining and recurrent miscarriage history.

Huge disclosure, that I do not recommend anyone follow this protocol. This is for education and entertainment purposes only, and the fertility protocol for you would be highly dependant on your unique blood work and diagnosis. In some cases, taking one of these supplements may actually reduce your chances of pregnancy, so always make sure you’re working with your fertility team to ensure you have the safest protocol for you.

My Infertility Journey and Diagnosis

Okay so a quick recap if you’re just catching up. This was not a “natural” conception. I went through IVF or invitro fertilization to conceive because I don’t naturally ovulate with a diagnosis of PCOS. Ha, I don’t even ovulate with drugs but that’s a whole other blog post I guess. My main struggle with my previous embryo transfers and losses was that I have a thin uterine lining, and the uterine lining is important for an embryo to stick to to maintain a pregnancy. Generally speaking, they want your lining to be at least 8 mm before they transfer an embryo in to give you the best chance of pregnancy and mine just always struggled to get past 6 mm. As a result, I was suffering from recurrent miscarriages and chemical pregnancies with IVF (and definitely wasn’t even ovulating without it).

Okay so first let’s talk about what I did before I did my embryo transfer in preparation for pregnancy with thin uterine lining.

Everything I did pre-IVF transfer to get pregnant with thin uterine lining and recurrent miscarriage History

Supplements

Prenatal (3 x day) – This one is mainly for both me and for baby’s health like preventing neural tube defects, and I do prefer to choose a prenatal with methyl folate instead of folic acid. Most supplements will have folic acid because it’s more stable, but your body has to then covert it to active methyl folate, and it’s estimated that up to 60% of women have gene variant that hinder this conversion. This gene is also linked to PCOS and miscarriage, so just to be safe, I always would choose a supplement with methyl folate if you have that option.

NAC (n-acetyl cysteine) (1500 mg) –There is some evidence for the use of NAC aka n-acetyl cysteine for recurrent miscarriage so that was a must for me.

L-arginine (6 grams aka 12 pills a day) – This is an amino acid that works through the nitrous oxide pathway to promote blood vessel dilation and improve blood flow. The hope was that this would help thicken my thin uterine lining. There is also some evidence that it helps poor responders in IVF, particularly those who struggle to get pregnant with thin uterine lining.

Wild yam complex (6 pills) – Wild yams contain a chemical called diosgenin which is thought to have estrogenic effects. Since my estrogen was chronically low, and this seemed to be my issue in general with my fertility, my naturopath suggested I take this supplement to see if it might help. Honestly, I haven’t been able to find a lot of research to back it up, but you know, I was kinda willing to do and try anything my team suggested.

Vitamin E (400 IU) – This was an important one since one research study found that Vitamin E supplementation helped increase the endometrial thickness of half of the women who took it.

Vitamin D (1000 IU) – There’s a lot of good evidence to support vitamin D supplementation in general, but particularly for IVF. It seems to benefit metabolic parameters in PCOS, but having optimal blood levels of between 5-70 ng/ml also can increase IVF success rates and pregnancy in general.

Omega 3 (2 x day) – I think most people can stand to take an omega 3 supplement, especially if you don’t eat a ton of fish. But there is some early evidence that omega 3 supplementation may help increase the likelihood of a successful pregnancy for women undergoing IVF.

Melatonin (3 mg)- So not only did I enjoy using melatonin for sleep, but there is also some benefits for fertility as well. Research has found that the implantation rates for people with PCOS is higher when supplementing with melatonin.

Magnesium (100-200 mg) – So this was solely for sleep and not so much for fertility, but of course, I do believe that better sleep was essential to my successful cycle, as all of the ones that ended in miscarriage took place while I was in the deep dark pits of insomnia. So magnesium activates the parasympathetic nervous system which is responsible for making you calm and relaxed. It also binds GABA receptors which helps to quiet down nerve activity.

Lifestyle

pregnant abbey in green dress lifting baby E

Acupuncture twice weekly – Since my main fertility issue was that my lining didn’t seem to thicken, there is some evidence that acupuncture can help improve pregnancy rates, embryo transfer rates, and endometrium thickness. It also is kind of like forced meditation for an hour, so if for no other reason, it did help me relax throughout an otherwise stressful process.

Sleep and stress management- My doctor told me millions of times that stress doesn’t negatively impact my chances of getting pregnant, probably as a way to help me feel less stressed. But honestly, I intuitively knew that my stress and anxiety wasn’t helping the cause. Research has found that stress does decrease your chances of a successful pregnancy, but strangely that this doesn’t happen with men, just women. Of course. So I made an extra effort to improve my insomnia this last round. I have a whole video on my strategies to battle my insomnia here, so you can check that out, but in general, that meant limiting screen time or stressful work before bed, taking on fewer projects, taking a little more downtime, and lots of therapy.

Gentle exercise – For this cycle, I really toned down my exercise routine. I stopped any cardio, and dropped the weights down. So if I was used to bench pressing 25 lb weights, I went down to 15 lbs. Now I’m up to 20 lbs, and I’ll probably stick here for the duration of my pregnancy and pick it back up when I feel I’m ready postpartum. I really didn’t want to increase my heart rate too much and I didn’t want to spike my cortisol as high cortisol has been associated with infertility.

Diet For thin uterine lining

birds eye view of coffee as part of elimination diet for thin uterine lining

There are Chinese medicine recommendations for diet for getting pregnant with thin uterine lining like eating red foods for blood flow but honestly, I haven’t been able to find any strong evidence for that. I did however completely cut out caffeine, I didn’t even have any chocolate. Okay so sometimes I would have a bite, but not much more than that. While a lot of women can continue their coffee drinking habits with no problem, there is evidence that women who consume more than 200 mg of caffeine per day doubled their miscarriage risk. Also, one of the drugs I was on, prednisone, caused anxiety and insomnia, so I didn’t want to perpetuate the side effects.

I also made an effort to just eat extra calories. I didn’t want my cortisol to increase and we know that underfueling can cause an uptick in cortisol. So lots of snacks, lots of healthy fats, and lots of nourishing meals.

Drugs

Estrogen patches and injections (4 patches a day plus injections every 3 days) – It’s standard protocol to do either estrogen patches or suppositories as a way to thicken the uterine lining. But because my lining was so tempermental and my estrogen was so resistant to thickening, I had to also do injections every three days.

Progesterone suppositories and injections (suppositories 3 x day, injections every 2 days) – Progesterone is another non negotiable drug for IVF. You start the progesterone once your lining reaches the desirable thickness and it helps to maintain the lining and prevent miscarriage. In fact, a lot of women who are not doing IVF but who have a history of miscarriage will take progesterone in the first trimester to help stabilize things.

birds eye view of supplements for thin uterine lining on a grey backdrop

Vaginal Viagra (1 pill 2 x / day) – I remember when I went to the pharmacy to pick up Viagara and the pharmacist looked at the instructions that they were to be inserted vaginally and he was like, “I’m really sorry but can you tell me what this is for? I’ve never seen an order like this.” Basically Viagra increases blood flow to the nether regions, and since uterine lining requires good blood flow to thicken, the idea is that delivering the drug vaginally will help thicken the lining. There is also pretty good evidence that it can work for some women. Even though my super long drawn out cancelled cycle used Viagra with no success, I still wanted to use the kitchen sink approach and try everything I could. The one thing I want to mention about the Viagra is that with my failed cycle, I picked up the drug at the regular pharmacy and they gave me the usual blue pills. Well not only were they like $100 / day or something crazy, but I just never felt like they were dissolving. This is going to be TMI but any time I would insert a pill, would feel like a collection of pills inside me. With the cycle that did work, I went to the compounding pharmacy and they compounded the drug into an easy to dissolve clear suppository that completely dissolved. So part of me wonders if I was wasting my money the first time on a drug that wasn’t even dissolving or absorbing.

Low dose Aspirin (1 pill/day) – Aspirin is a vasodilator so it increases blood flow to the uterus which in turn helps the uterine lining thicken. Research has shown that adding the low dose aspirin can significantly increase the thickness of uterine lining and pregnancy rates.

Antihistamine CPP protocol (10 mg Prednisone daily, 10 mg Claritin and 20 mg Pepcid daily) – There is a theory that one of the reasons for recurrent pregnancy loss is that the “natural killer cells” in the immune system attacks the foreign fetus. So these drugs work to down-regulate the immune system, in the hopes that the fetus will be spared. There is some medium quality evidence that the protocol works, and a lot of fertility clinics do state that anecdotally it does sometimes help.

Procedures

Intralipid infusions (once before transfer, and once after a positive pregnancy test)- So in this procedure, I was hooked up to an IVF for about 3 hours as a solution made up of legitimate mayonnaise was infused into my vein. Seriously though, the ingredients are the same as mayo – it’s like soy oil, egg yolk, glycerine and water. So no, it’s not vegan. This procedure is also based on the theory of the body’s natural killer cells attacking the fetus, and that the fatty acids in the solution help to stave off natural killer cell activity. There aren’t really any large randomized control trials using this treatment unfortunately, but early trials have been encouraging. Having said that, not everyone benefits from this but we do know that women with auto immune disorders, rheumatoid arthritis, endometriosis or a history of recurrent miscarriage tend to be those who can potentially benefit the most.

image of surgery room for procedure for thin uterine lining

Uterine dilation (1 time the cycle before transfer cycle)- And here’s the voodoo mama magic that I believe made the greatest impact in getting me pregnant with thin uterine lining. My doctor asked me if I wanted to go to uncharted, non-evidence based territory and honestly, I was so desperate I was willing to try anything. He explained to me that when women have been on the pill for a long time or breastfed for an extended period of time, their “uterus kind of shrivels up and hardens up” (I’m sure this is not the technical process, but this is how he was explaining it in layman terms to me). He likened it to having a “egg shell” like coating on the uterus that makes it difficult for any estrogen (like the synthetic estrogen I was taking) to penetrate the uterus to thicken the thin uterine lining. So he was thinking about the experience one has when they have a muscle knot and they need to get a deep tissue massage to stimulate blood flow to that region. He thought, hey, what if I could massage the uterus to stimulate blood flow there to thicken the lining? Obviously he wasn’t going to stick his hand up me and manually massage my uterus (OUCH), but instead, he inserted a balloon into the uterus, and blew it up to “break the shell”. We then went on with a normal typical transfer cycle, taking estrogen to thicken my lining. Without any actual research on this, my doctor had performed this procedure on 8 women before me, all of which had similar difficulties getting pregnant with thin uterine lining stories and multiple pregnancy losses. It worked for 7 out of the 8 so I signed up to be number 9.

Well guess what, it worked. It actually f*cking worked. My thin uterine lining, which would never get past 6 mm before, got to 8 mm without any extended drug protocol and THAT was the cycle that got me pregnant and kept me pregnant. It felt like a miracle.

How was the uterine dilation? Well the worst part honestly was that I had to take antibiotics for two weeks before the procedure and they made me super sick. The procedure itself, I was completely asleep for, so I didn’t feel a thing, and I only had mild cramping and discomfort afterwards. It also cost me only $500, which I get may seem like $500 too much, but in the grand scheme of IVF drugs and procedures, that is like a few days of medication.

What did I do after transfer to stay pregnant with thin uterine lining?

So after the embryo transfer, as I awaited my first pregnancy test, we had to eliminate a lot of the supplements and herbs just because they’re not tested in pregnancy. So at that point, this is what I was doing and taking.

Supplements

  • Prenatal
  • NAC – at a reduced the dose of 500 mg/d
  • Vitamin D
  • Omega 3
  • Magnesium

Drugs

  • Continued my progesterone and estrogen injections until I was 8 weeks pregnant
  • Took my progesterone suppositories and estrogen patches until week 10 and then slowly weened off
  • Continued my low dose aspirin until 7 weeks- which would normally be continued but I had a subchorionic hemorrhage so it was important to stop any blood thinners to reduce the bleeding
  • Cut my prednisone dose in half to 5 mg and continued that until I was 8 weeks pregnant. I was so happy to get off that because it made me feel super loopy and bloated.
  • Continued my Pepcid twice a day until 12 weeks pregnant
  • Continued the Claritin once a day until 12 weeks pregnant.

Lifestyle

Well, this was game time so I tried really hard to focus on stress reduction and sleep. I did meditations daily, continued to avoid any heavy exercise, and went to therapy pretty much every week.

I continued my acupuncture once a week, though the pressure points were a bit different than they had been when I was trying to conceive.

And finally, I made a huge effort to just eating whatever I could tolerate, as much as I could, because to be honest as I had bad morning / day sickness all first trimester so it was a struggle at first. I quickly learned what I could tolerate and really just had to listen to my body.

Final thoughts on my IVF protocol

image of beige tiles spelling "we are having a baby" on a white background

Bottom line, I know if you’re reading this and haven’t struggled with infertility you might be thinking, wha?? I thought you just have to have unprotected sex to have a baby?! I wish it was that easy for me. Nothing about motherhood was easy for me, including getting to motherhood. I also acknowledge that my road is not the hardest it could be. There are so many blessings I have had in this journey – I have a supportive partner, I am able to access and afford infertility treatments, I am relatively young, and I actually have a child. I know so many women and couples who have struggled for years, mortgaged their homes, gotten divorced out of stress and are still without a child. I know I have a lot to be grateful for.

But my purpose with this blog is not to get any kind of sympathy, but rather, to open up a conversation for parents and intended parents to participate in. No one ever talks about infertility, and it makes us all feel so much more isolated and alone. So if you’re struggling, know you’re not alone, you can reach out any time if you want to chat about my experience or yours. I am happy to be a sounding board, a source of solicited advice, or just a supportive ear.

Infertility sucks and parenthood is hard, let’s build a better village.

Become an Abbey’s Kitchen Subscriber


Are you struggling with trying to get pregnant with thin uterine lining or recurrent miscarriage or chemical pregnancies? Are you embarking on an IVF journey? Leave a comment if this was helpful!

Abbey Sharp

Abbey Sharp is a Registered Dietitian (RD), regulated by the Ontario College of Dietitians. She is a mom, YouTuber, Blogger, award winning cookbook author, media coach specializing in food and nutrition influencers, and a frequent contributor to national publications like Healthline and on national broadcast TV shows.
www.abbeyskitchen.com/about-abbey/
  • Previous Page
  • Go to page 1
  • Interim pages omitted …
  • Go to page 25
  • Go to page 26
  • Go to page 27
  • Go to page 28
  • Go to page 29
  • Interim pages omitted …
  • Go to page 89
  • Next Page

Get started with

Eight Free Recipe Books

From the co-founder of Neue Theory and creator of the Hunger Crushing Combo

Sign me up!
Abbey smiling at table
Abbey Sharp

“Foods may never be nutritionally equal. But we can make them morally equal by recognizing that our worth is never determined by what's on our plate.”

— Abbey Sharp, RD About Abbey ◥

Books

  • HCC™
  • Mindful Glow
  • Free E-Books

Blog

  • Nutrition
  • Recipes
  • Motherhood
  • Life

Explore

  • Neue Theory™
  • Bite Back
  • YouTube

Abbey

  • About
  • Coaching
YouTube TikTok Instagram Facebook X Pinterest
Abbey Sharp - The No BS Dietitian From Abbeys Kitchen

© Abbey's Kitchen 2026  All Rights Reserved •  ACCESSIBILITY STATEMENT •  Privacy Policy

This site uses cookies. By continuing to browse the site, you are agreeing to the use of cookies Accept Privacy Policy
Privacy & Cookies Policy

Privacy Overview

This website uses cookies to improve your experience while you navigate through the website. Out of these, the cookies that are categorized as necessary are stored on your browser as they are essential for the working of basic functionalities of the website. We also use third-party cookies that help us analyze and understand how you use this website. These cookies will be stored in your browser only with your consent. You also have the option to opt-out of these cookies. But opting out of some of these cookies may affect your browsing experience.
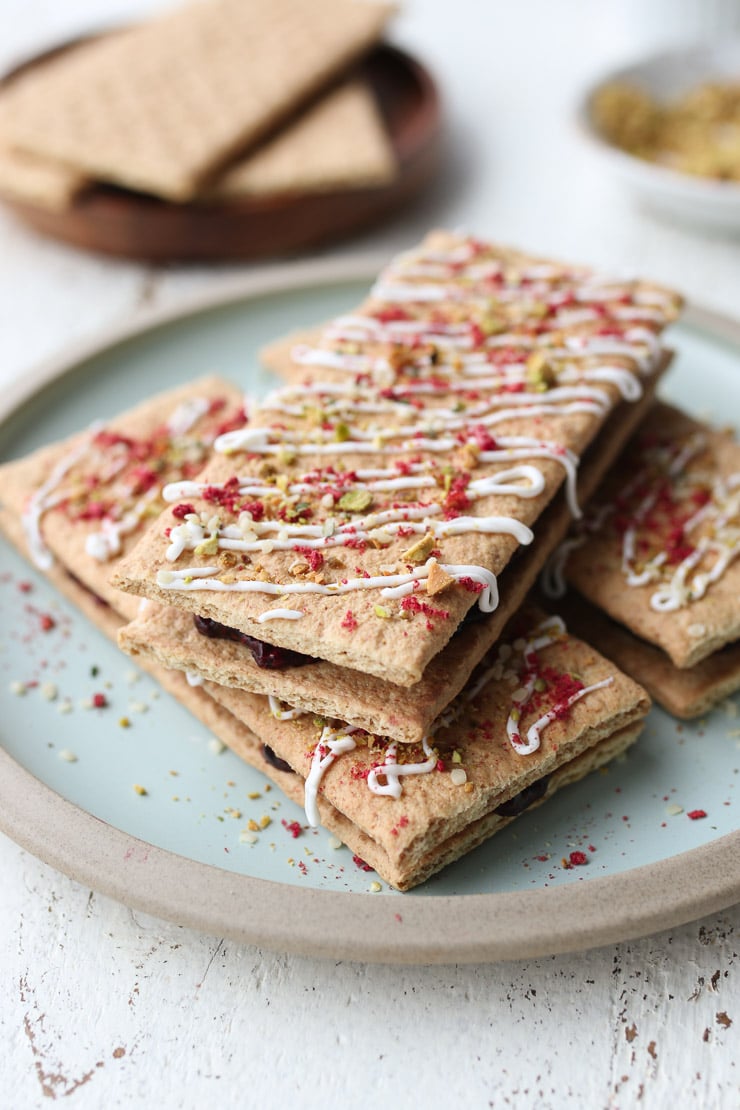
Necessary
Always Enabled
Necessary cookies are absolutely essential for the website to function properly. This category only includes cookies that ensures basic functionalities and security features of the website. These cookies do not store any personal information.
Non-necessary
Any cookies that may not be particularly necessary for the website to function and is used specifically to collect user personal data via analytics, ads, other embedded contents are termed as non-necessary cookies. It is mandatory to procure user consent prior to running these cookies on your website.
SAVE & ACCEPT

Rate This Recipe

Your vote:


A rating is required
A name is required
An email is required