• Skip to main content

Abbey's Kitchen

Healthy Recipes, Nutrition Myth Busting, Healthy Eating Tips

  • Books
    • HCC™
    • The Mindful Glow Cookbook
    • Recipe eBooks
      • Family
      • Hypothyroidism
      • BLW
      • Vegan Week 1
      • Vegan Week 2
      • Vegan Week 3
      • Keto
      • Gluten Free Week 1
      • Gluten Free Week 2
      • Fitness
      • Paleo
  • Blog
    • Nutrition
    • Recipes
    • Motherhood
    • Life
  • Explore
    • Neue Theory™
    • Bite Back With Abbey Sharp
      • Apple Music
      • Spotify
      • Amazon Music
    • YouTube
  • Abbey
    • About
    • Coaching
    • Contact

Abbey Sharp

Last Updated August 25, 2024. Published August 26, 2024 By Abbey Sharp Leave a Comment

Insulin and Weight Gain | Is Insulin a Fat Storage Hormone?

Blue plate with letters spelling "weight gain".

Is insulin truly a fat storage hormone? We breakdown the research on the link between insulin and weight gain.

Blue plate with text saying "weight gain".

Before I dive into the crux of insulin and weight gain, let’s understand how food affects blood sugar levels and where insulin fits into the picture. When you eat any kind of carb, your body breaks this food down into glucose (aka sugar). The glucose gets absorbed into your bloodstream where it becomes known as blood sugar and your blood ships the sugar to your cells to be used for energy or stored for later on.

How Does Insulin Affect Blood Sugar?

Insulin is the hormone that allows the glucose to get into your cells, and when it gets inside, naturally your blood sugar levels drop. Think of insulin as the key that unlocks the door to let glucose do its job. Without insulin, your body wouldn’t be able to use or store glucose and you’d be walking around with high blood sugar all day long. And thats bad news bears because if untreated, high blood sugar can cause organ damage over time. But back to our frenemy- insulin.

Insulin is made in the pancreas and is secreted in bursts about every 5 minutes. If you haven’t eaten, the levels are relatively low so this is called your “baseline level”. When you eat, your insulin levels rise to deal with the sugars now in your bloodstream. And in a healthy individual, insulin comes right back down to their normal steady state once its dealt with the sugar. Note that our discussions today are going to be for the general population aka folks who have healthy working pancreases.

Sugar in being poured into a bowl.

Okay so insulin also buddies up with the hormone glucagon which tells the liver to release glucose when the blood sugar levels get too low. It can either access glycogen which is the stored version of glucose in the liver or muscles, OR the liver can convert any extra protein to glucose through a process called gluconeogenesis. This dream team works together to keep your blood sugar levels tightly controlled because again, high blood sugar levels are dangerous as f*ck. 

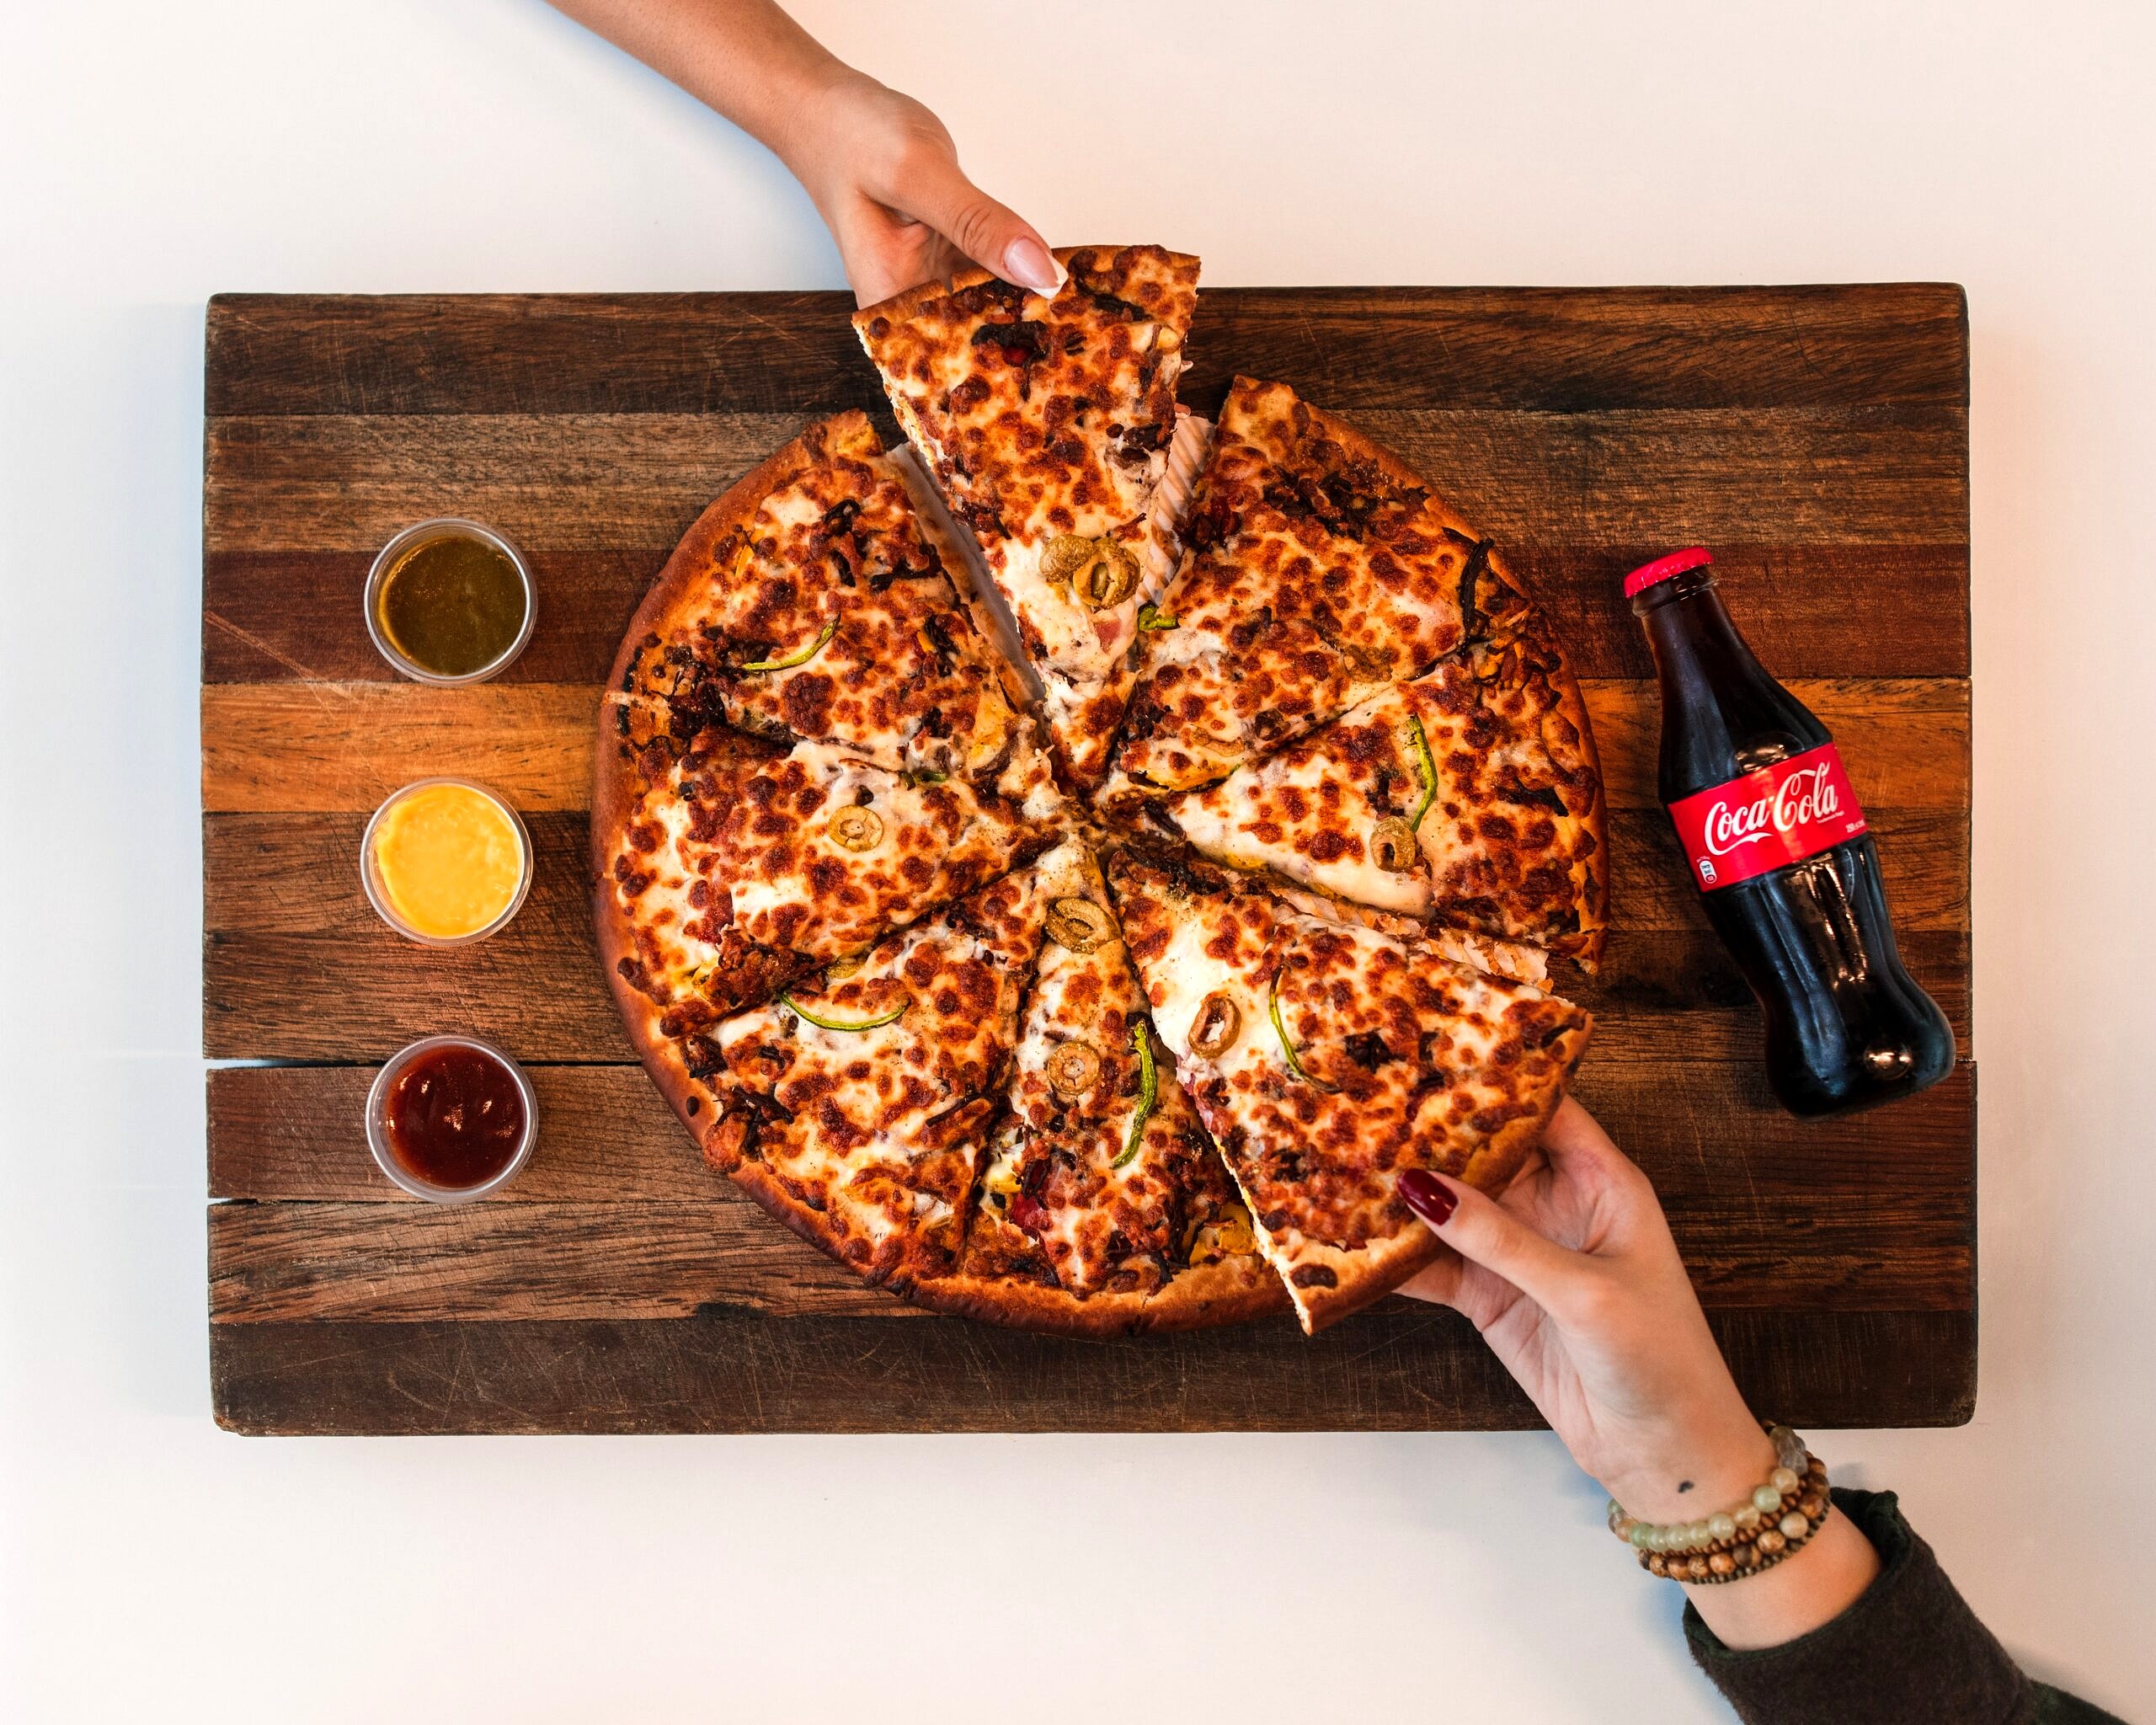
The “All You Can Eat Pizza” Study

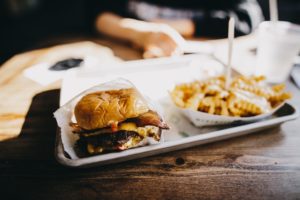
So we can see this amazing control in action in a 2020 study thats been affectionately known as the ‘all you can eat pizza’ study. They basically offered a group of healthy men pizza and first asked them to eat till they were comfortably full, and then again until they literally couldn’t take another bite without bursting. They really could have just studied youtube mukbangers and saved a shit ton in research dollars.

Birds eye view of a pizza being shared.

Anyway, the first conclusion they found from this study about insulin and weight gain was that these healthy men could eat twice as much as what made them feel comfortably full, so not exactly intuitive eating experts. But im more interested in what happened to their blood sugar and insulin levels after all those carbs. Basically, insulin understood the assignment. The pancreas pumped that shit out in a linear fashion the whole time that they were eating pizza. The more pizza they ate, the more insulin their bodies produced. And because insulin is such a bad ass, the blood sugar levels rose up to a certain point then just levelled off. In fact, their blood sugar levels were the same whether they ate 187g or 367g of carbs. Conclusion? In healthy folks without diabetes, our blood sugar levels are tightly regulated regardless of how much or what we eat.  

What’s the Point of Eating Healthy Foods?

So the question now becomes – whats the point of eating healthy foods if insulin is always just going to “correct” our dietary shortcomings? This is where intuition comes into play. That is, focusing on how foods make you feel. Even though the participants blood sugar levels remained normal, albeit at the higher end of normal, they experienced lethargy and poor energy levels. So physically, they were fine, but they maybe weren’t FEELING their BEST. So thanks to this research, we now know that in healthy individuals, eating carbs are not going to cause uncontrolled blood sugar spikes.

Birds eye view image of multiple salads in white bowls.

What About Insulin’s Role in Storing Fat?

Insulin helps glucose get stored as glycogen but it also helps to store anything extra in your fat cells as a long-term back up plan. And this is likely where it gets it’s reputation as a big bad fat storage hormone. Because as long as there’s ample glucose hanging around, and therefore insulin is out and about doing its job, there’s no real need to break down fat. It’s also true that fat breakdown is greater 2-4 hours after you eat, which is when insulin would naturally be at its lowest. If insulin levels never go down, then fat will never be broken down. And when I spoke to my colleague Eric Williamson, he reminded me that these mechanisms are not on and off switches – but rather, they’re actually more like dials. And getting those dials to work depends on a few things.

Metabolic Flexibility

One, to a small extent, is metabolic flexibility. Folks who are more “metabolically flexible” are better able to switch from using glucose to fat for fuel. In short, we know that ones flexibility is related to their insulin sensitivity, body fat percentage and aerobic fitness level. We also know that it’s the leanness and aerobic fitness that increase your insulin sensitivity and thus better equip the body for fat breakdown, not the other way around.

But even with that potential “leg up” in the game, it doesn’t guarantee weight loss without a solid calorie deficit. In other words, regardless of fasting insulin levels, you’re still going to add to your fat reserves if you eat more calories than you need. So when an influencer tells you to can just cut out carbs and eat as many calories as you want because its the carbs “spike your insulin” and insulin stores fat, it’s missing the forest from the trees. And that forest is just excess calories. A number of studies have found that it doesn’t matter how macros are split, insulin and weight gain is primarily influenced by the amount of energy the person consumes.

For example, one small metabolic lab study divided participants into a low carb and high carb diet and told them to eat as much as they wanted. While the high carb group had substantially higher insulin levels they ended up eating about 700kCal less and actually lost weight in comparison to the low carb group.  Likewise, long term research also suggests that it doesn’t matter if you’re on low carb or high carb diet, weight loss is identical when calories are the same. We can also look at the other side of the coin to study insulin and weight loss on a LOW carb diet. One 2015 experimental study found that while a low-carb diet did lower insulin levels, it didn’t result in more weight lost. In fact, in this case, the folks on the low fat diet lost more than the low carb.  And to bring it all together, a large systematic review also found little to no difference between diets too, so that puts the diet wars piece to bed. 

Fork and tape measure against a yellow background.

As for the impact of insulin as a ‘fat storage hormone’, it really doesn’t appear to have any measurable impact on weight gain or loss. We know this because when calories are the same, folks with and without diabetes or insulin resistance will lose the same amount of weight. So to summarize, while a higher carb diet does transiently increase insulin levels, it doesn’t affect weight in the short or long term. The bottom line remains that calories are king.

How Does All This Play Into the Claims Made by Folks Who Intermittent Fast?

Well a lot of intermittent fasting groupies insist that it has magical weight loss powers because it reduces the number of insulin “episodes” in the day and keeps insulin levels low as often as possible, thus increasing metabolic flexibility. And in a vacuum, that might be true. However, the primary mechanism for why intermittent fasting “works” is NOT because of insulin or metabolic flexibility, it’s because we’re just kinda bad at making up for calories missed when we skip a meal. Once again, it boils down to the calories, insulin is just the convenient scapegoat.

Does That Mean There Are No Benefits to Fasting?

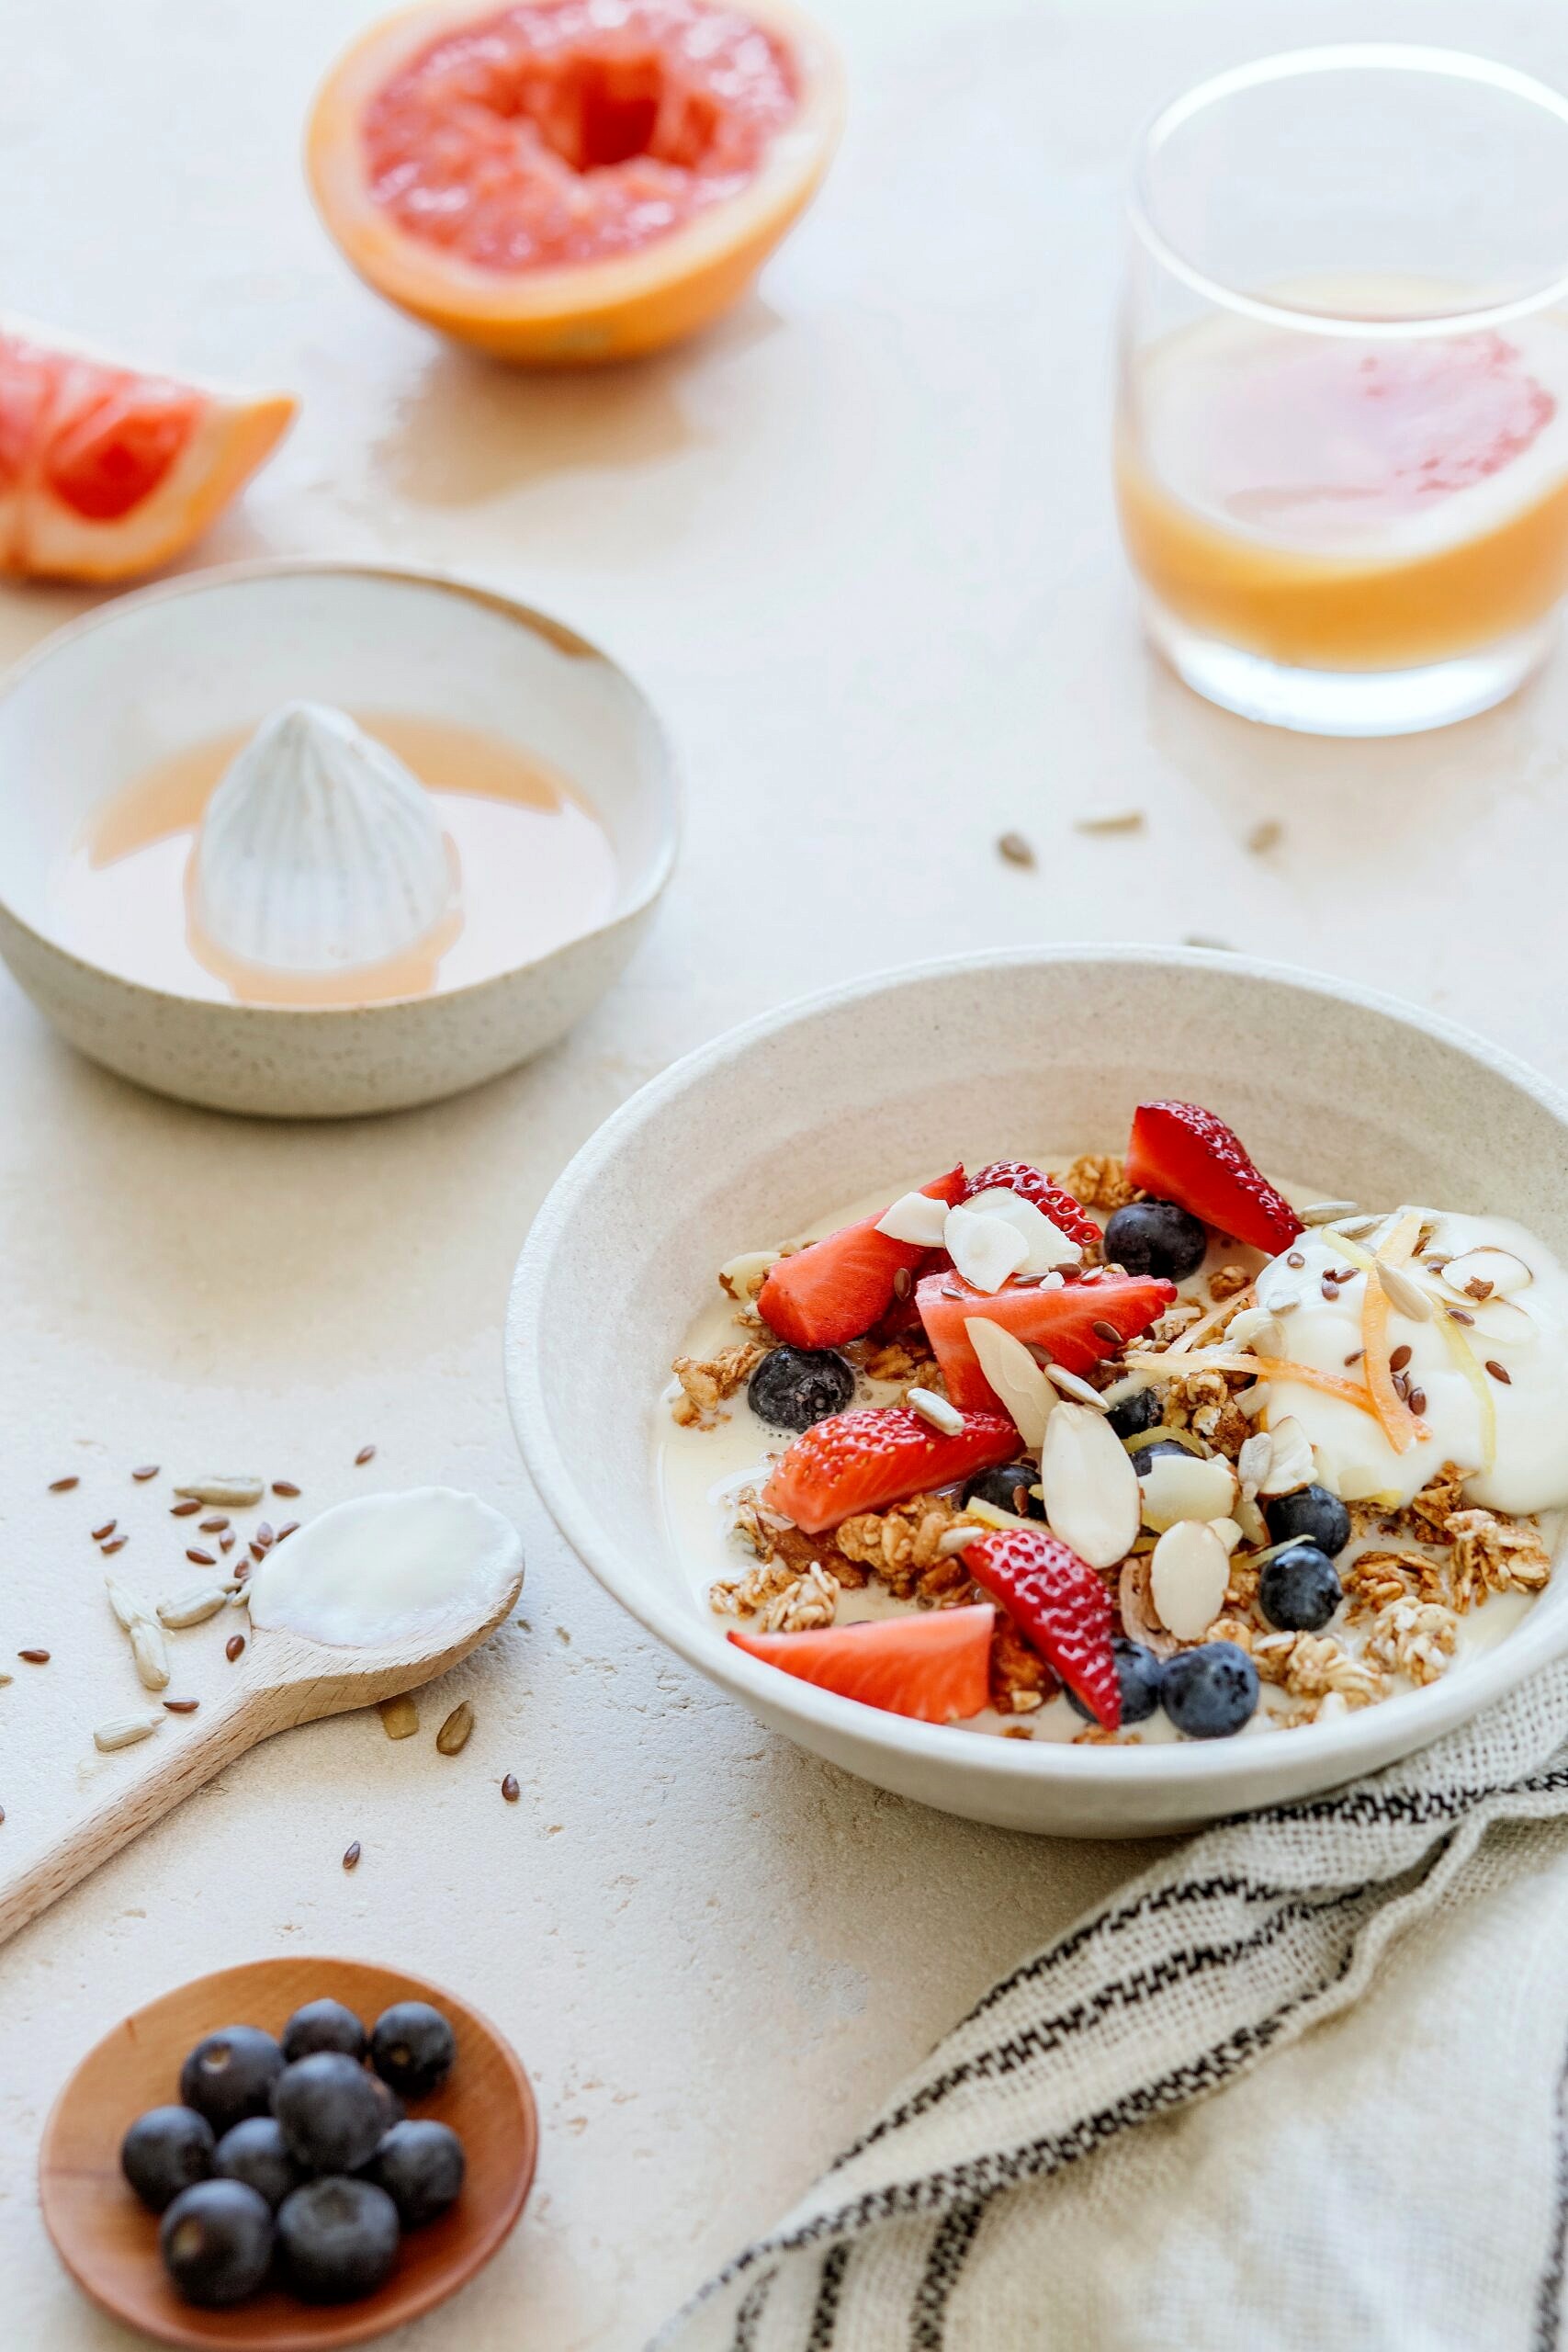
Definitely not. In addition to potentially promoting weight loss, largely via caloric deficit from skipped meals, fasting may positively affect insulin sensitivity. A higher insulin sensitivity means that your cells are able to use glucose more effectively, to help bring down those blood sugar levels while low insulin sensitivity aka insulin resistance is a precursor to diabetes. Research suggests that those practicing early time restricted eating, eating earlier in the day and stopping earlier in the day, tend to have better insulin sensitivity than those eating late at night. This has a lot to do with our circadian alignment, or our sleep-wake cycles as it seems that aligning our food intake with daylight hours can benefit our metabolism and glucose response. Strangely, most people who swear they’re doing intermittent fasting have an opposite eating schedule, skipping breakfast and eating from noon until night. So they might be missing out on one of these unique perks and instead just kinda skipping a meal.

Picture of oatmeal bowl with nuts and fruit as a hunger crushing snack to help manage insulin and weight gain.

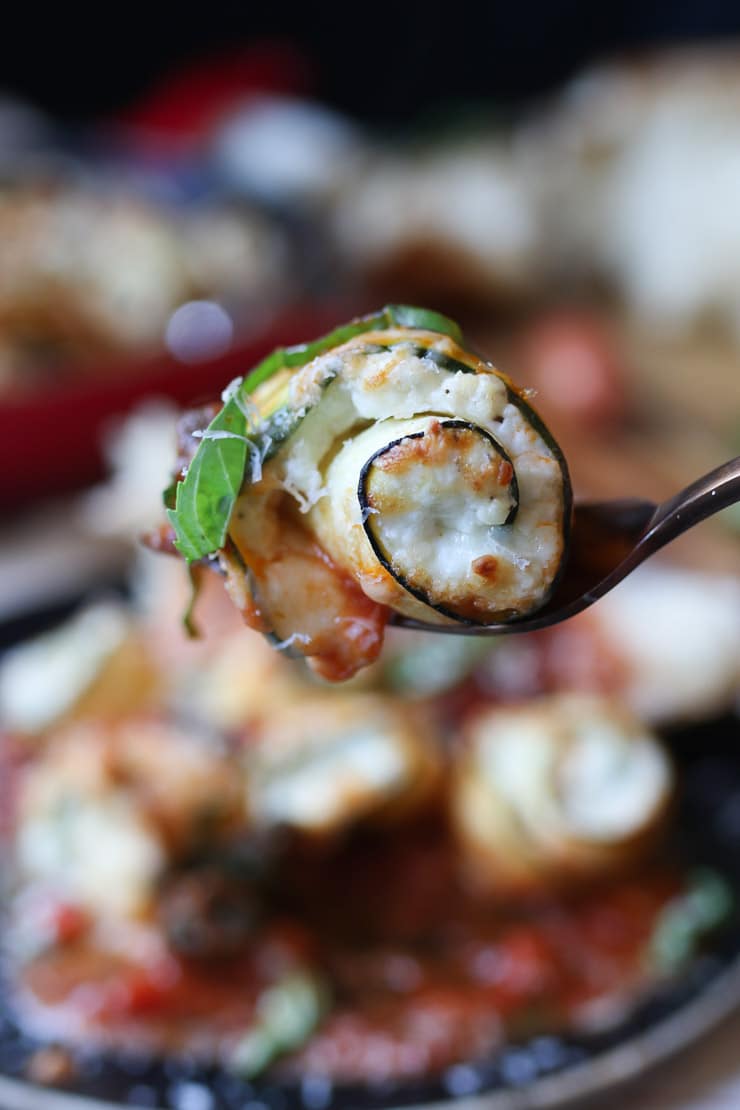
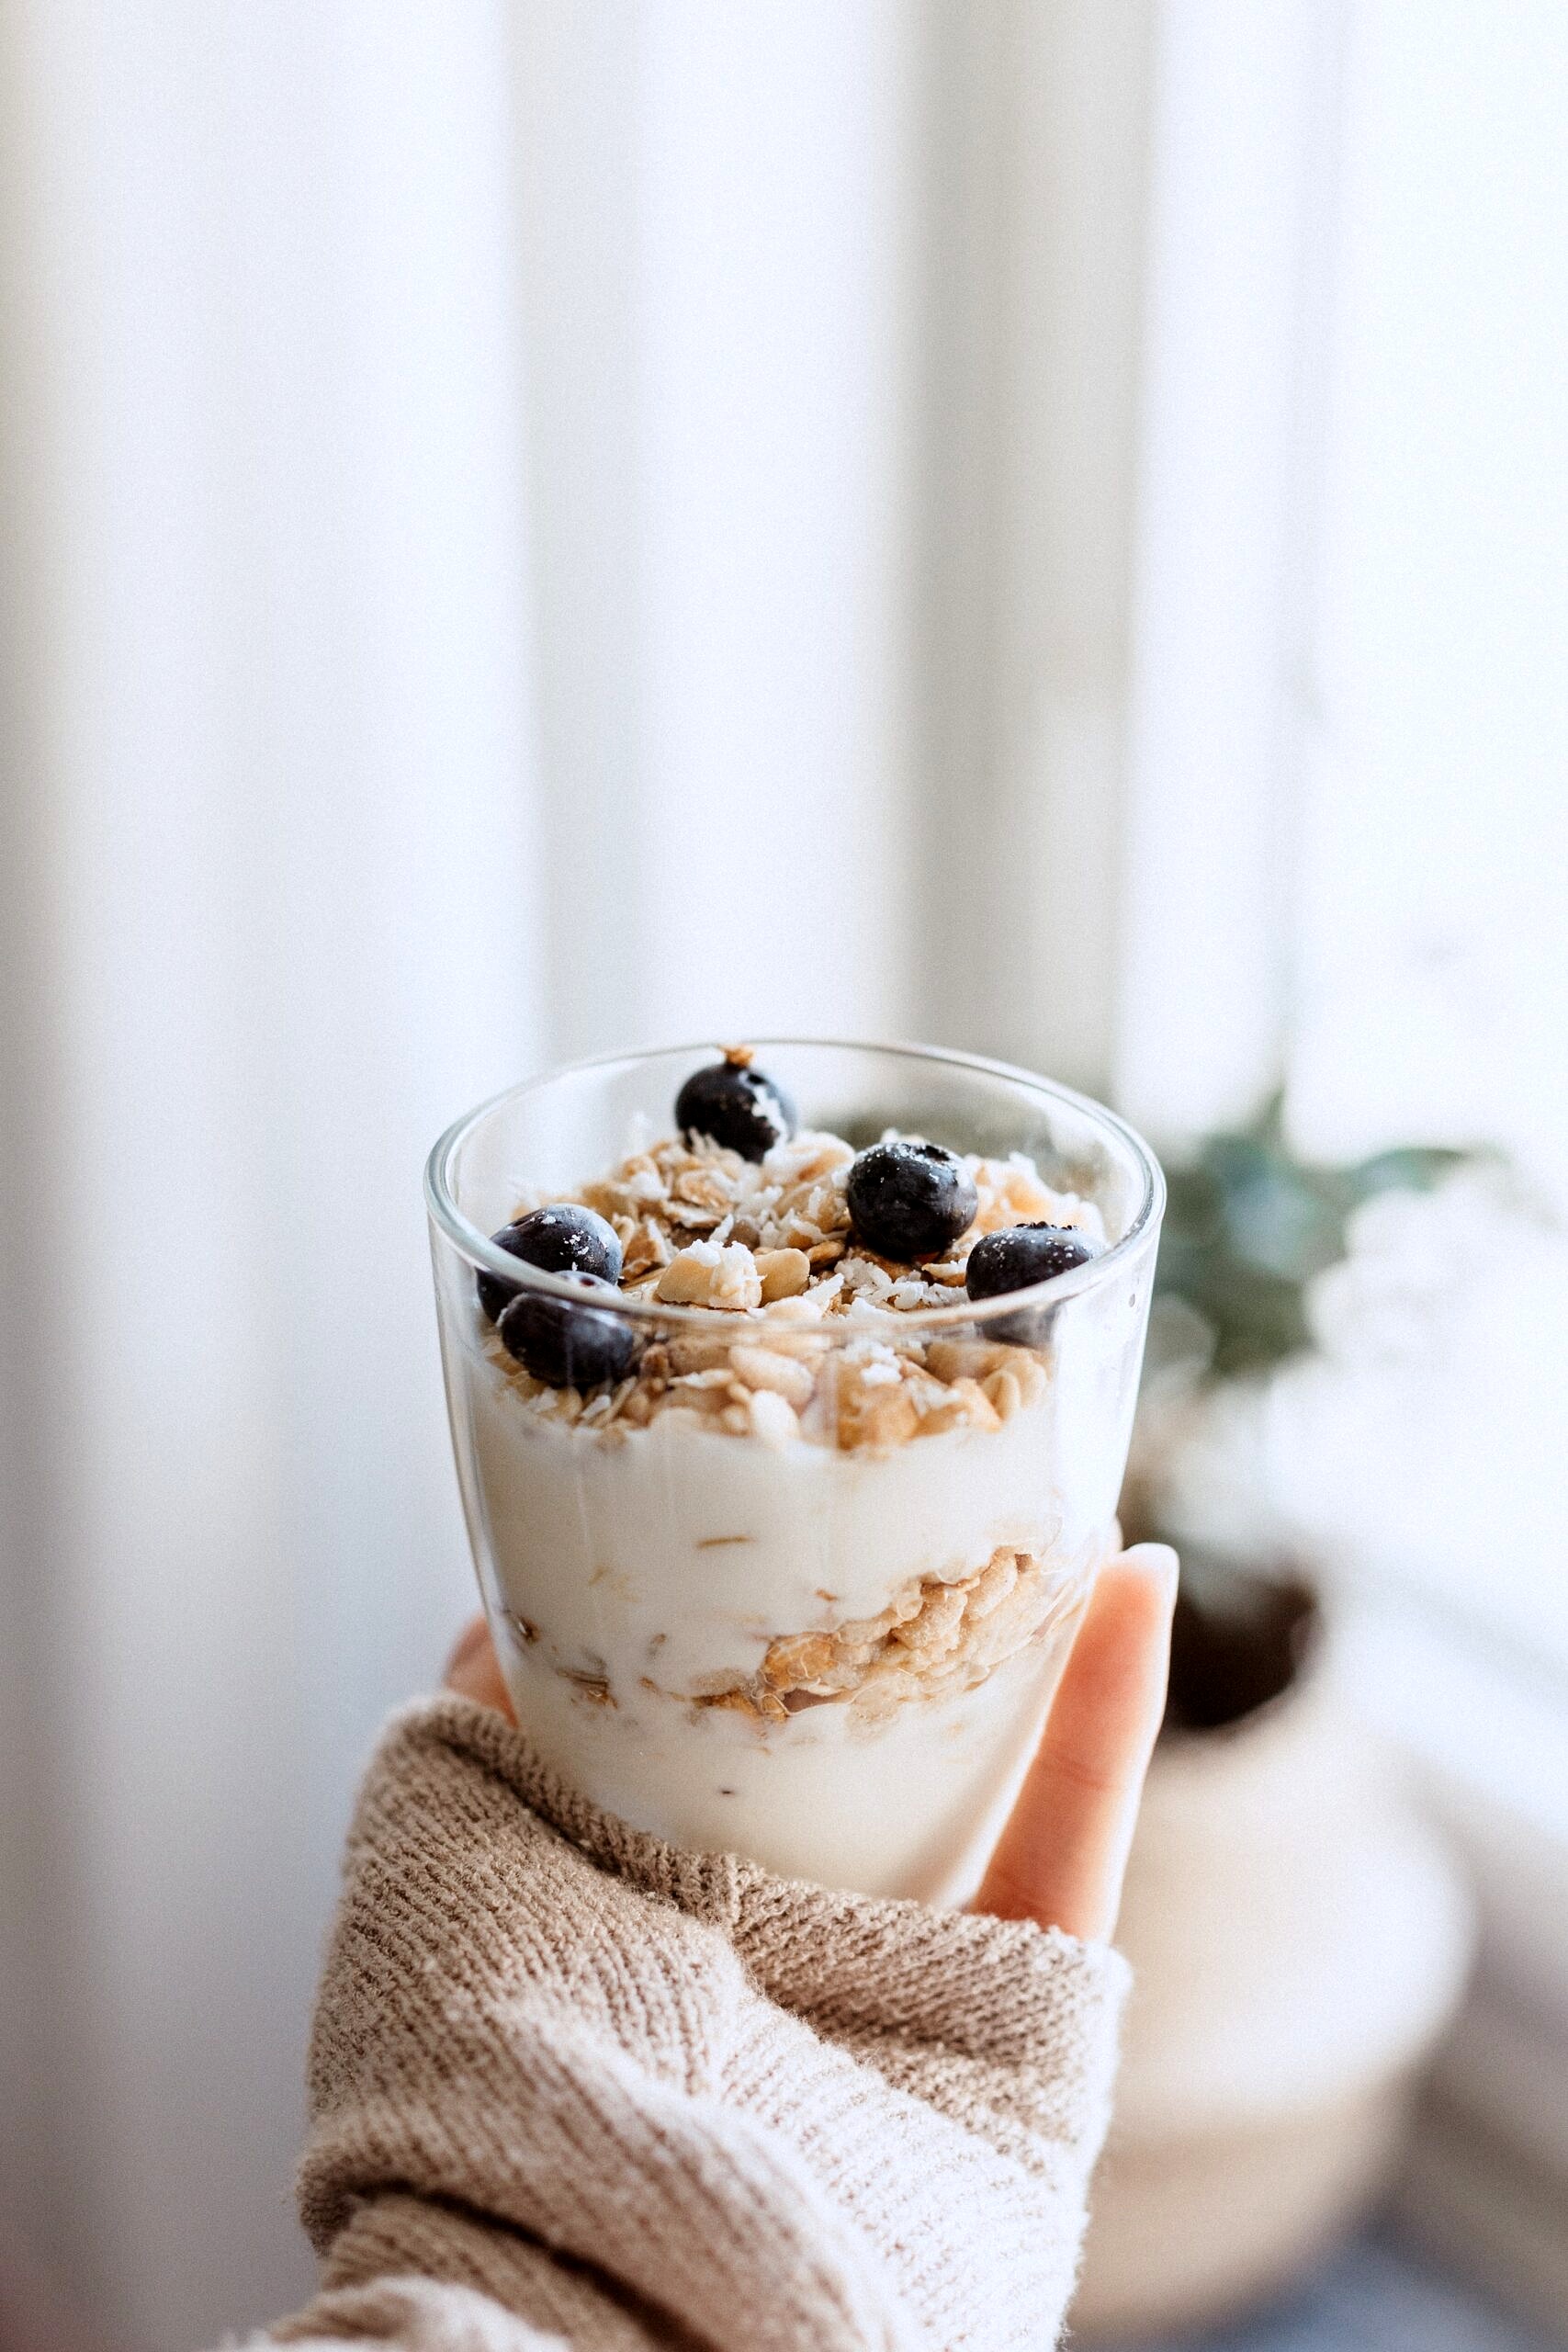
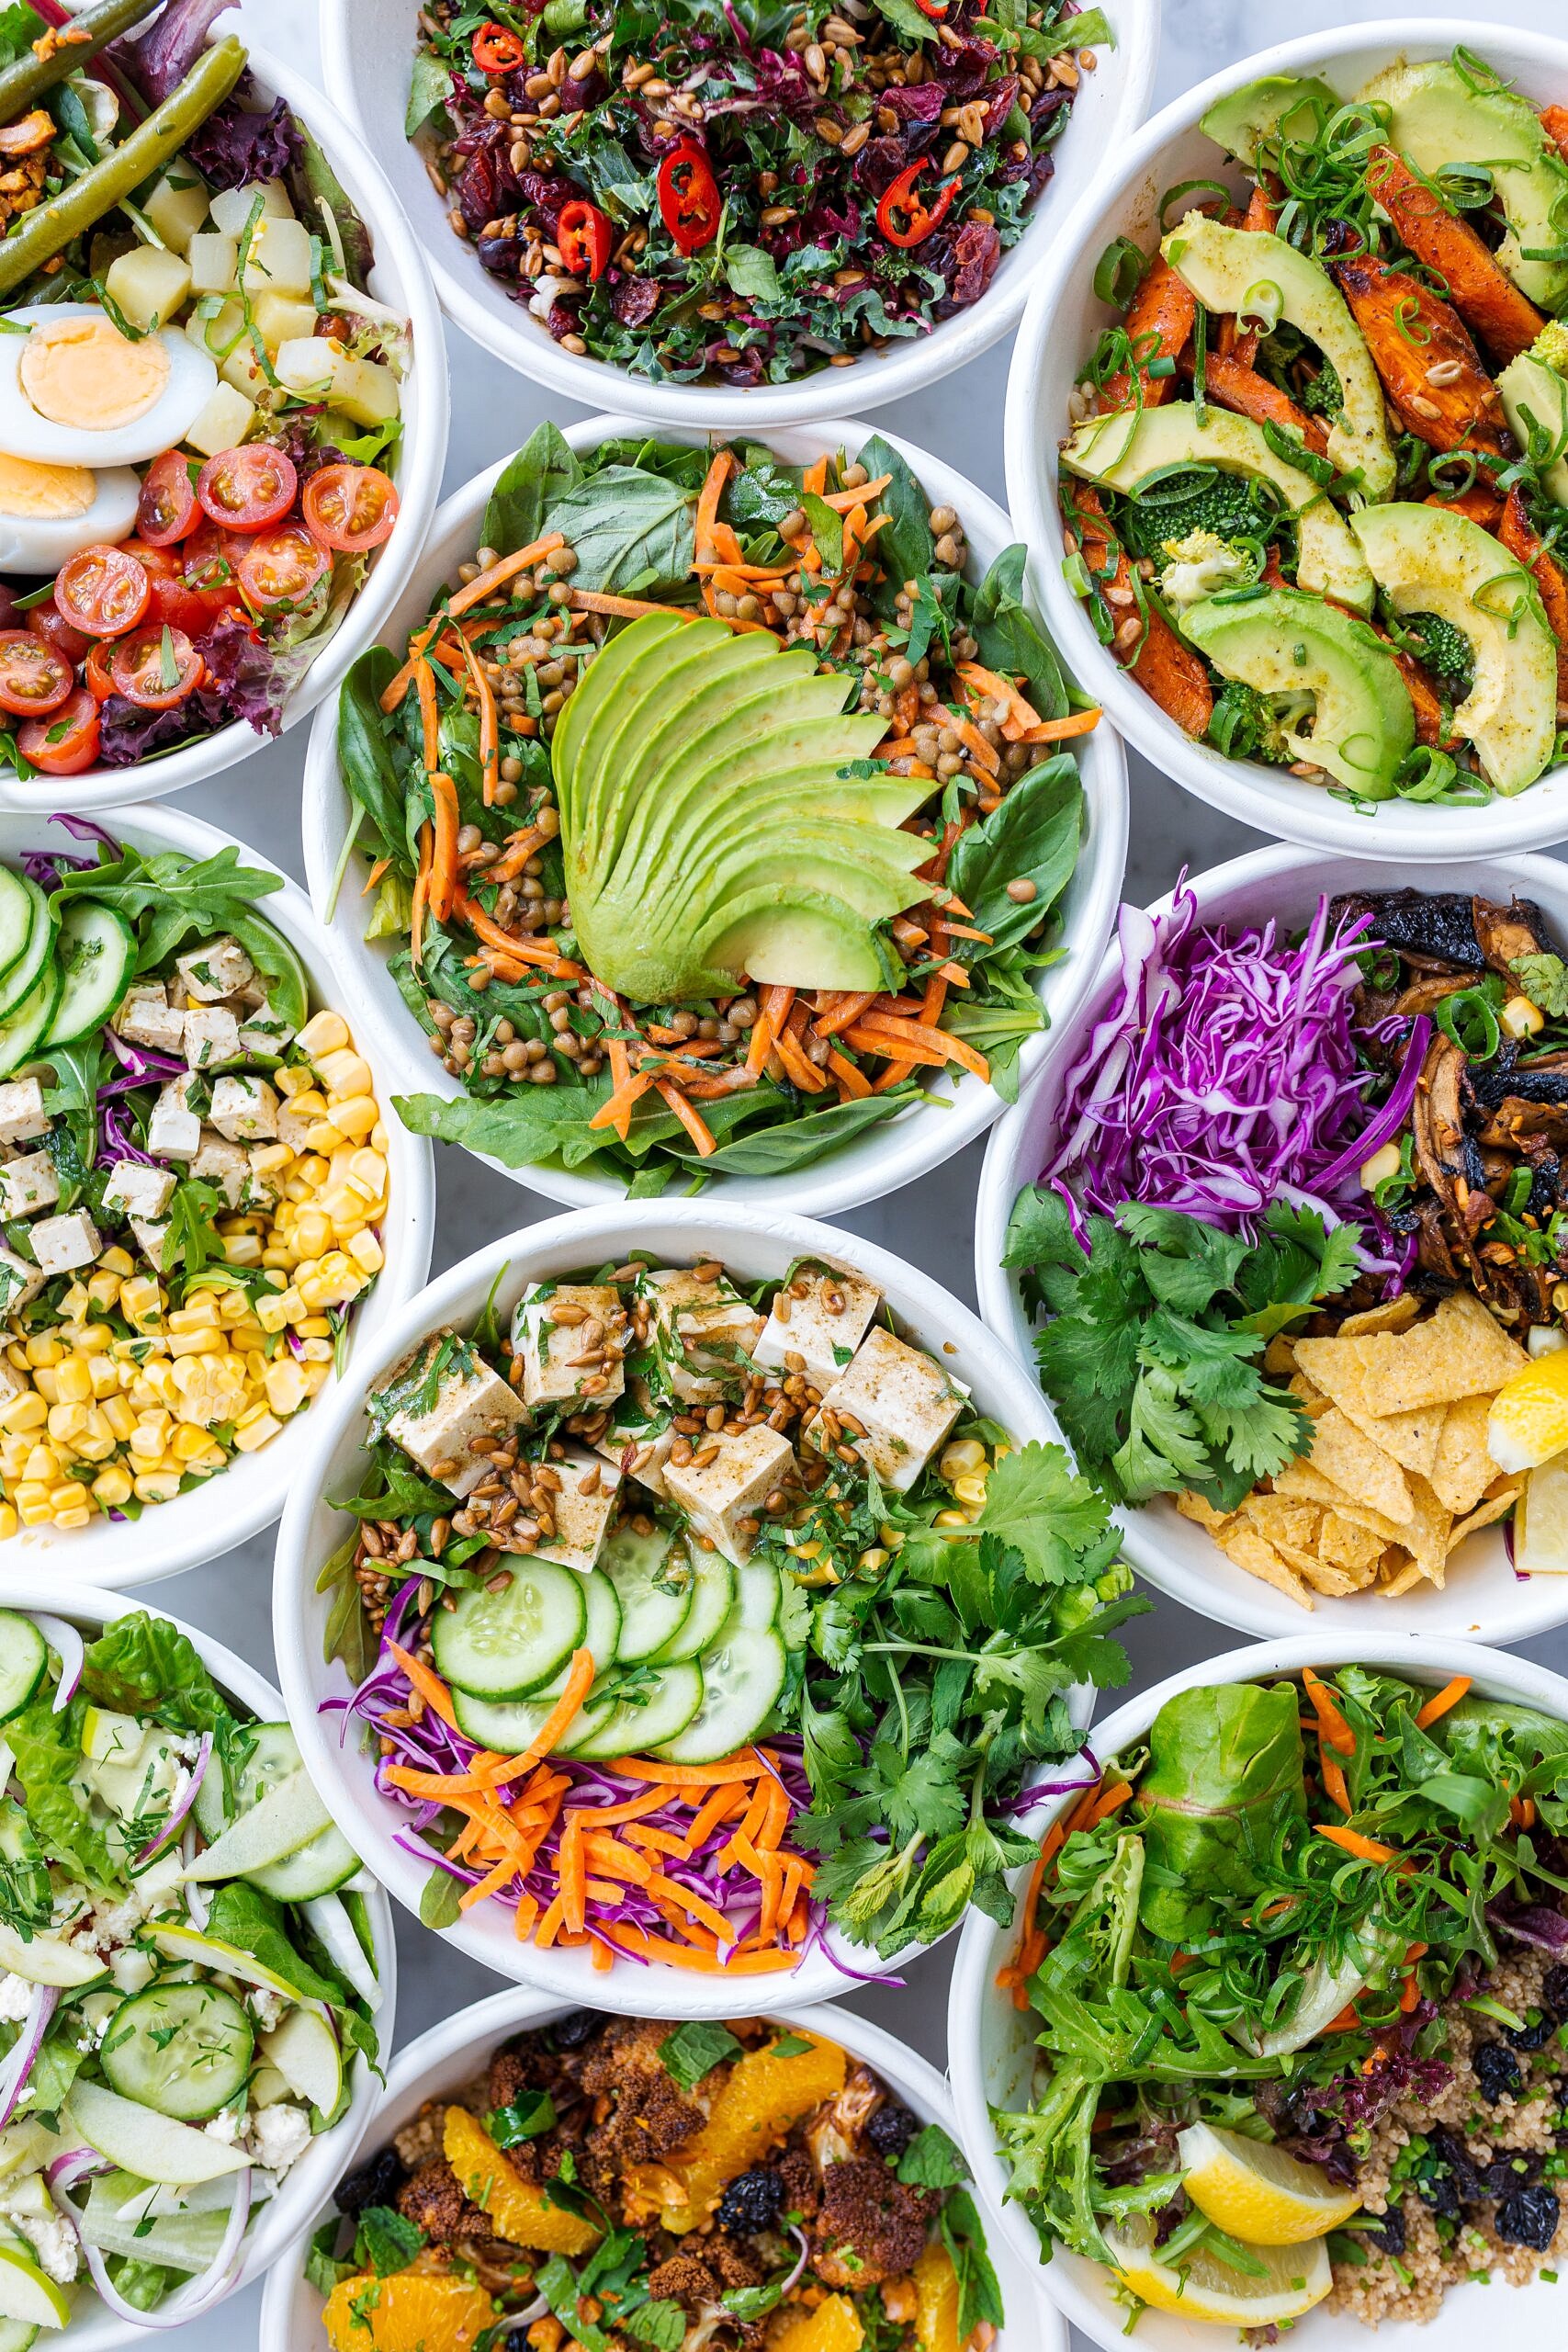
How Can We Use All of This Information in Real Life if Weight Loss is The Goal?

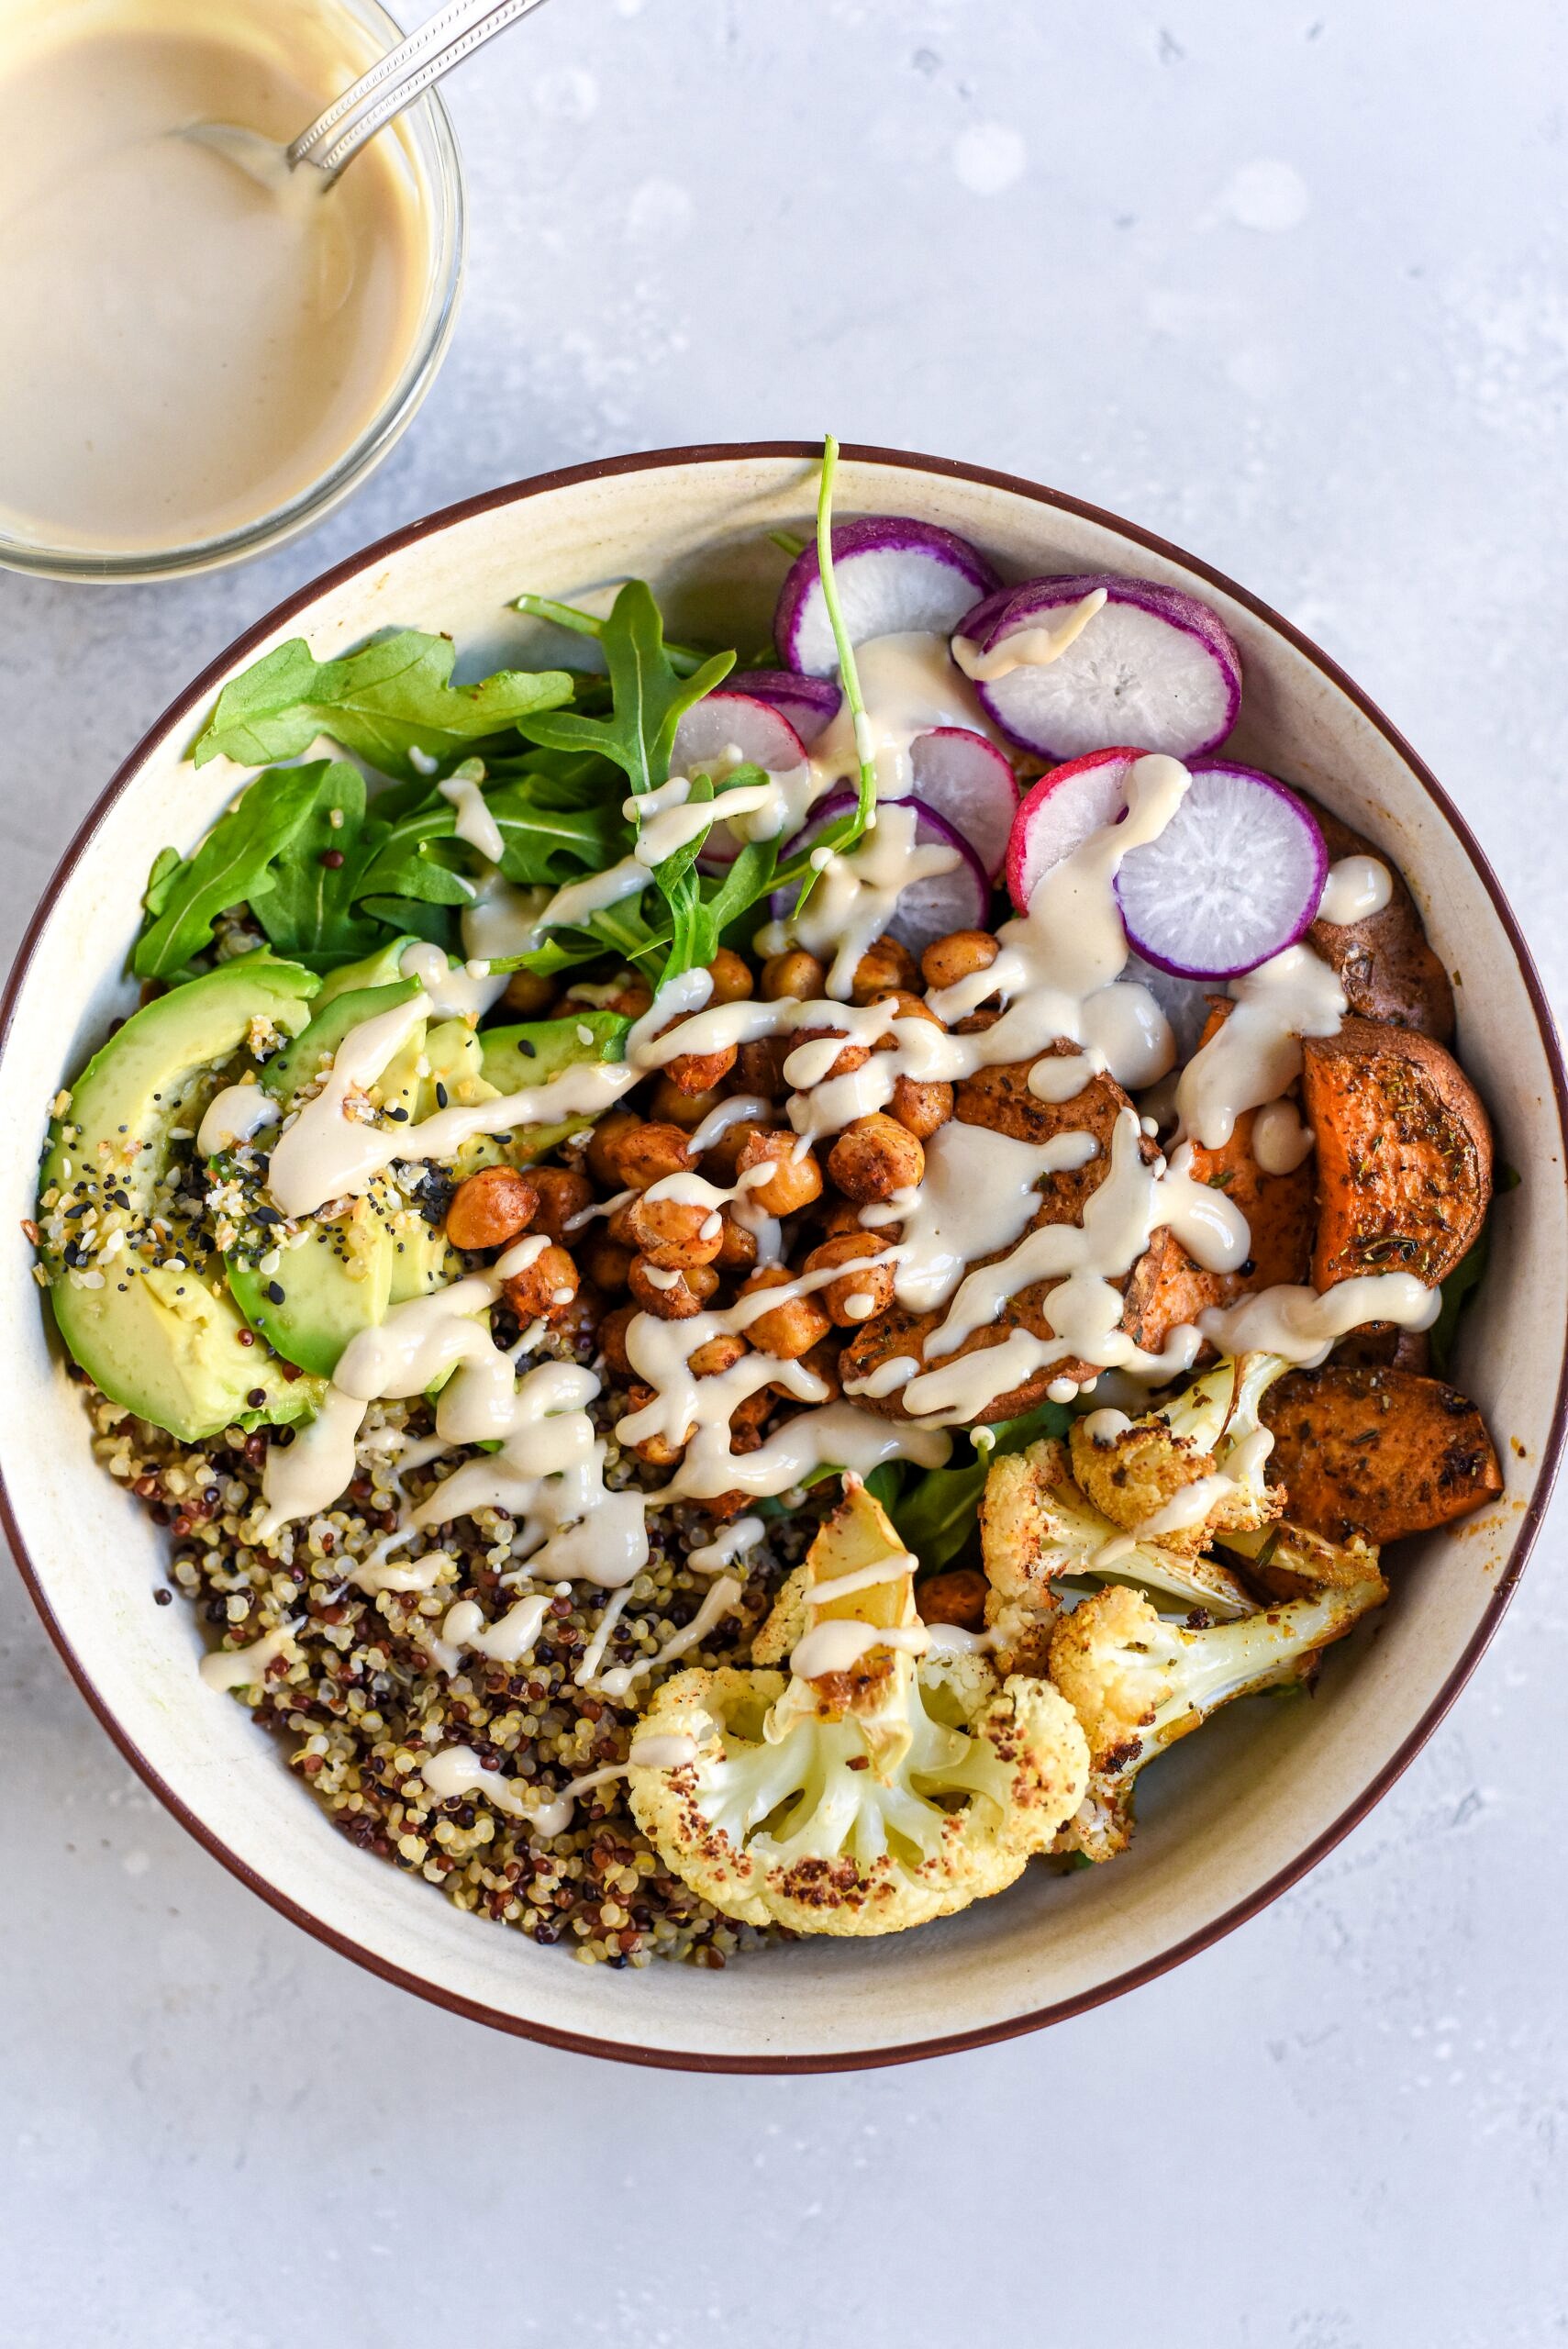
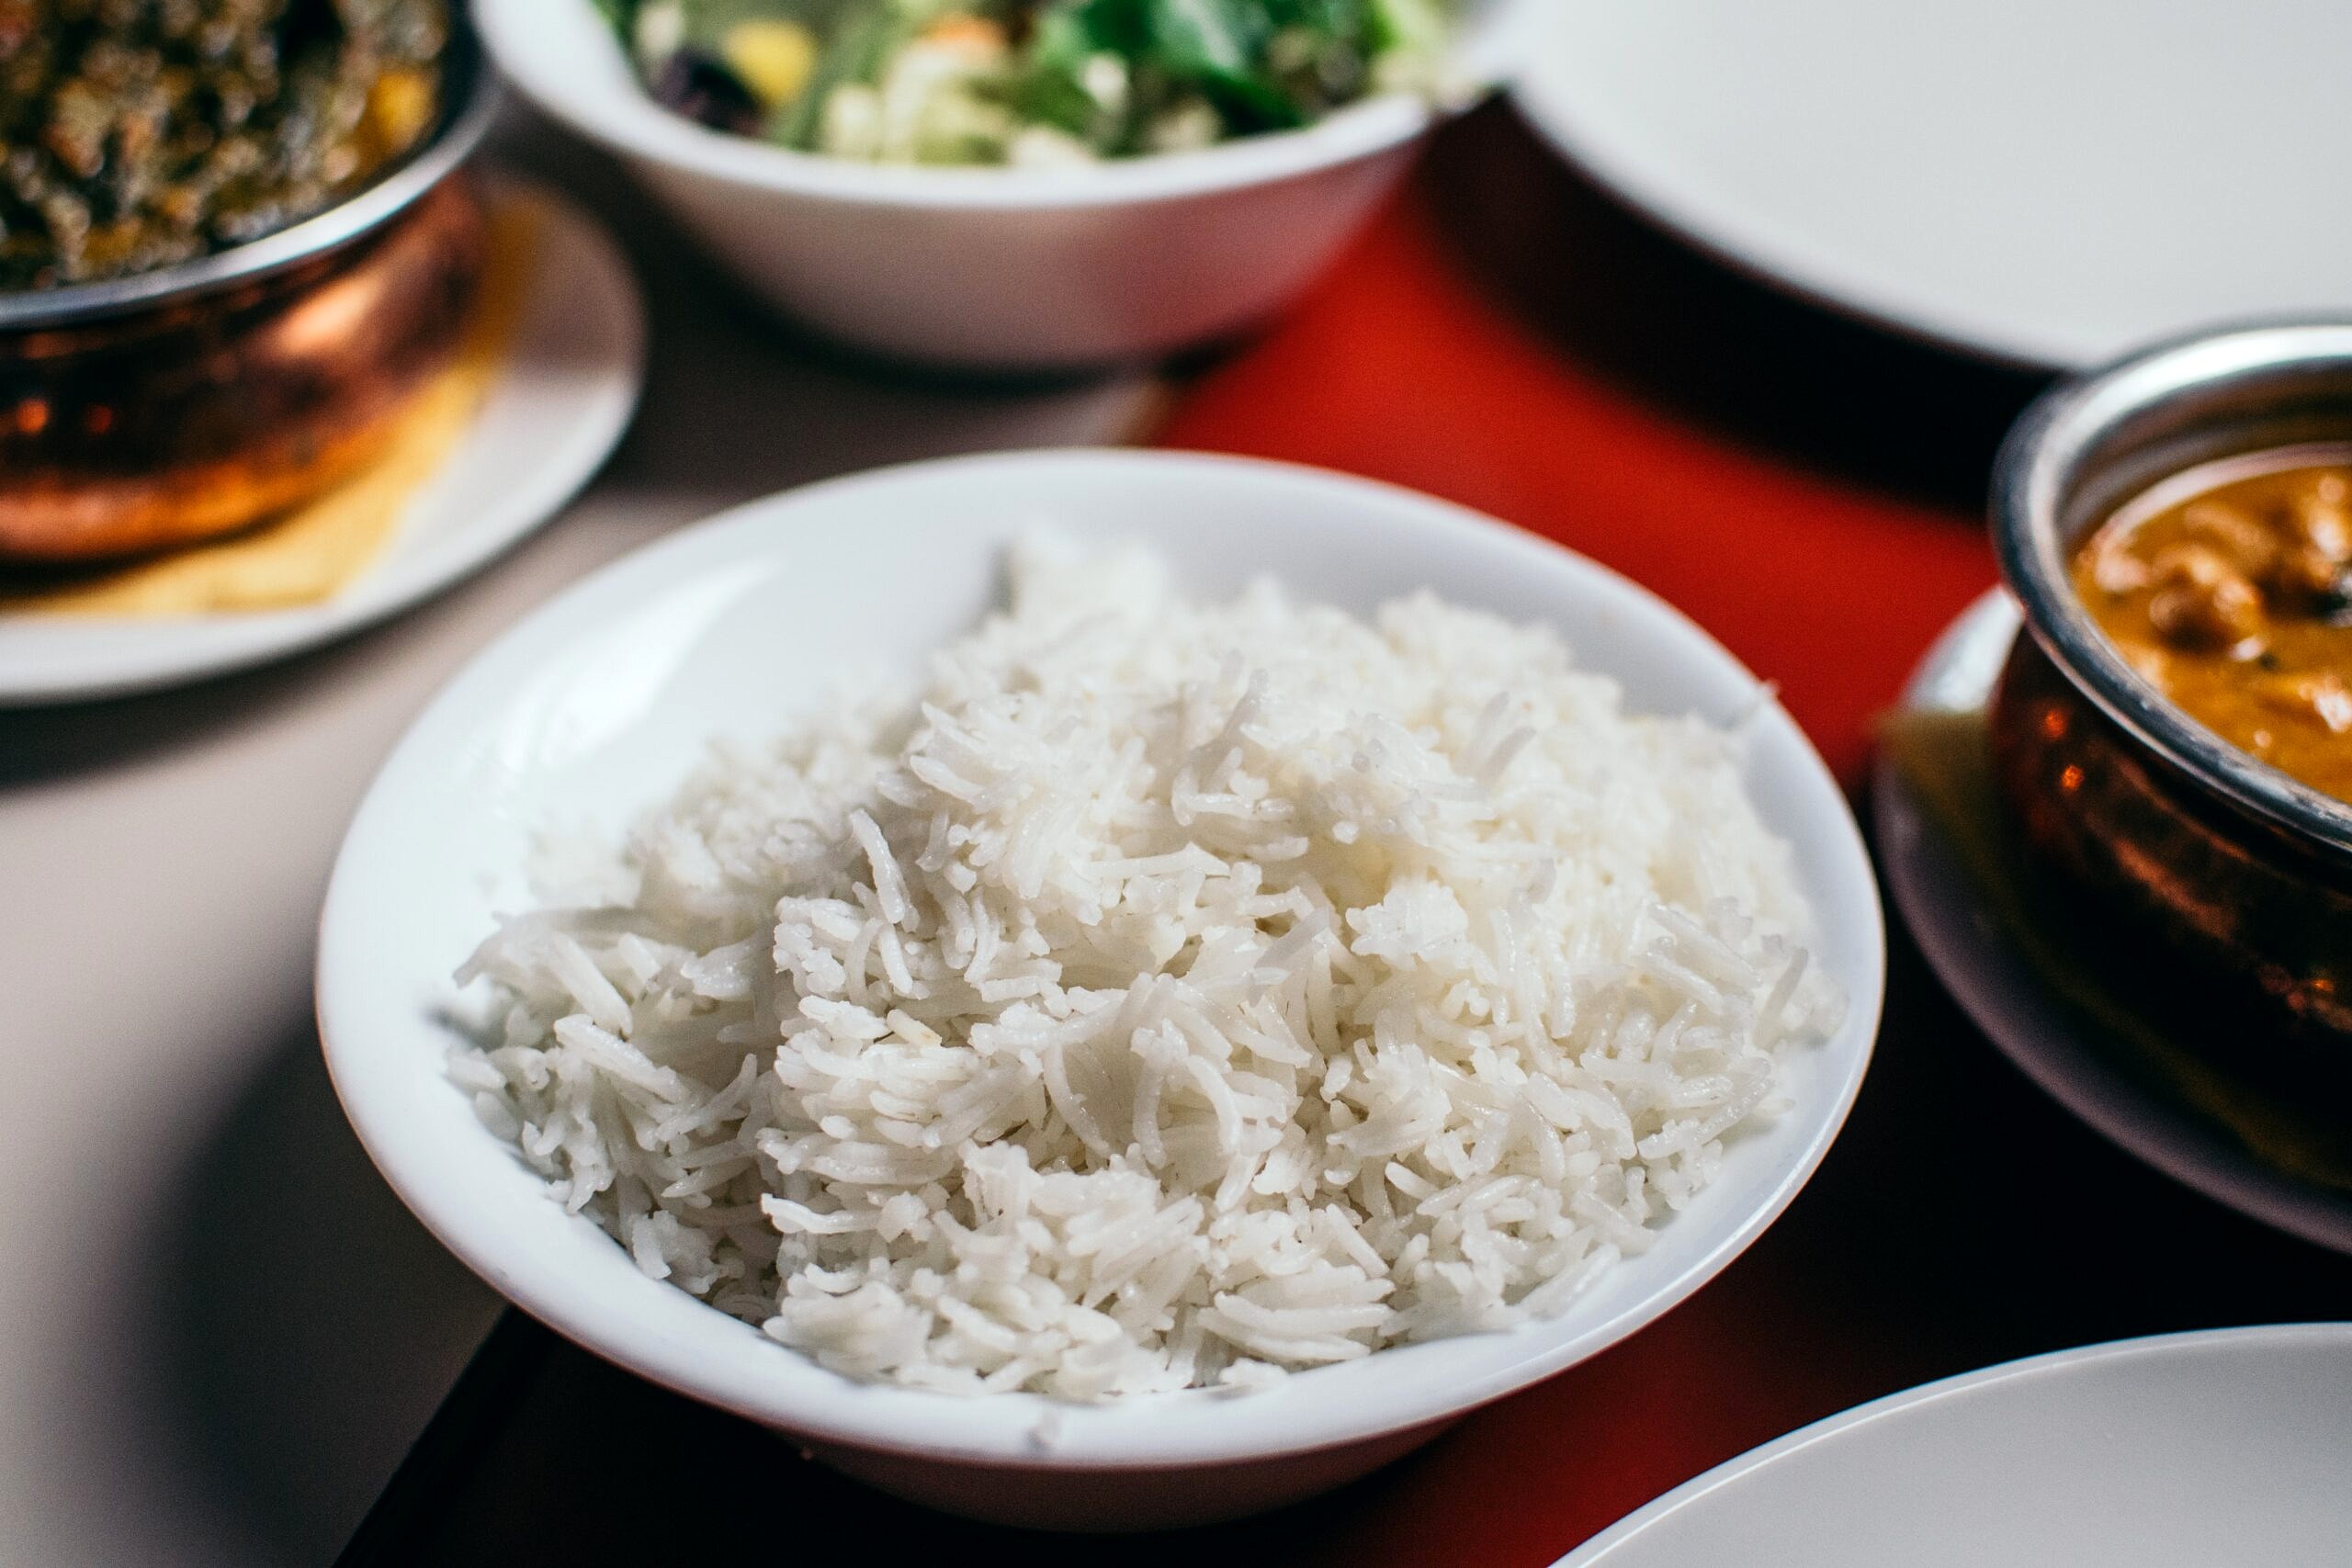
My suggestion is to take the focus off of specific hormones like insulin, and to choose foods that keep us feeling fuller for longer, while making a caloric deficit easier to maintain.  And this is where my Hunger Crushing Combo comes in. By combining high fiber carbs, protein and healthy fats together, it helps promote long term fullness, and the more satiated and satisfied you are, the less likely you are to eat in a caloric surplus. If we break this down further, there are unique benefits to all three of these components. High fiber carb based foods generally have a lower glycemic response even on their own when compared to refined carbohydrates, but their absorption is slowed down even more by adding protein and/or fats. This combo leads to a lower, more sustained rise in both blood sugar and insulin which may keep you feeling fuller for a longer period of time and keep energy levels even keeled. Even if you have a hankering for a low fiber carb like white rice, you can still lower the glycemic response by simply adding some chicken, avocado and veg. My hunger crushing combo also works because the addition of fibre, protein and fats helps to delay gastric emptying, keeping you feeling fuller longer between meals, therefore reducing the need to mindlessly snack.

Bowl of white rice to represent carbs that raise insulin and weight gain.

Is There Any Truth to “Coating” the Stomach?

Now, I have seen some influencers post about the need to have your first bite of a meal be a non-carb food to help “coat” the stomach before the carbs hit to reduce the glycemic response. And while i know it sounds like total BS, there is some merit to this with some small studies and research in the diabetes population showing benefits to consuming the veggies and protein before the carbs. But you don’t need to separate out your food unnaturally. If you’re eating a mixed meal lets say a pasta with a veggie and meat bolognese sauce, then you’re going to get those insulin stabilizing benefits even if you’re first bite doesn’t *gasp* contain a honking piece of veg.

However, when I spoke to Glucose Goddess about this on Instagram, she suggested just doing it when it makes sense in that meal. So if you are serving a salad with your pasta, start with a bit of salad if you can. But you don’t need to be obsessive about this. My colleagues like Eric agreed that being more intentional may be more helpful for folks with existing insulin resistance or diabetes, but it isn’t as important a tool as more basic strategies like choosing whole foods over refined. Dressing up naked carbs with hunger crushing compounds is something we can aim to do more often, but freaking out if you accidentally eat a bite of pasta before your broccoli is likely to do more harm than good.

Jug of olive oil next to olives.

The Bottom Line

To wrap up this discussion on the relationship between insulin and weight gain, yes insulin has a role in fat storage, but controlling it is not the magic bullet to weight loss so many “wellness influencers” insist it to be. So i say focus on eating balanced meals using whole foods regularly throughout the day, and the minute details tend to work themselves out.

More Blog Posts You Might Like

If you liked this blog post discussing the relationship between insulin and weight gain, you might enjoy more blog posts discussing diet myths:

  • 411 on Intermittent Fasting for Athletes and Exercise: Will It Help or Hinder Your Performance?
  • Intermittent Fasting for Weight Loss? The Evidence Based Pros and Cons
  • Caffeine and Breastfeeding – Is It Safe?
  • Can You Drink Coffee While Intermittent Fasting?
  • Teen Weight Loss – Are Diets Safe for Growing Kids?
  • Is Lemon Water Good For You?
Abbey Sharp

Abbey Sharp is a Registered Dietitian (RD), regulated by the Ontario College of Dietitians. She is a mom, YouTuber, Blogger, award winning cookbook author, media coach specializing in food and nutrition influencers, and a frequent contributor to national publications like Healthline and on national broadcast TV shows.

www.abbeyskitchen.com/about-abbey/

Last Updated August 18, 2024. Published August 19, 2024 By Abbey Sharp 4 Comments

Easy Bread Pudding Muffins with Berries | Family-Friendly Breakfast

Overhead photo of multiple berry bread pudding cooling on a wire rack.

Got some extra bread lying around? Repurpose your bread into these warm and Easy Bread Pudding Muffins with Berries! An easy recipe for breakfast, brunch, or as a snack!

Overhead photo of multiple berry bread pudding cooling on a wire rack.

Do you enjoy dessert for breakfast? It always gets everyone excited whenever I whip up a batch of these easy breakfast bread pudding muffins because who isn’t a fan of dessert for breakfast! Traditionally, bread pudding is made by soaking leftover bread in a custard and then baking it up in a casserole dish. However, by making them in a muffin tin, everyone gets their own individual serving as well as making it the perfect grab and go snack!

Table of contents

  • Why This Recipe Works
  • Key Ingredients
  • How to Make This Recipe
  • Expert Tips
  • Recipe FAQs
  • More Recipes You Might Like

Why This Recipe Works

Being made in a muffin tin instead of a casserole dish means that these easy breakfast bread pudding muffins have way more crispy surface area and are still warm and gooey on the inside.

We use super simple ingredients but the end result is so delicious. Those enjoying it will assume you used a ton of fancy ingredients and spent ages making this when it’s just quite the opposite!

This recipe is perfect if you have a ton of leftover bread (who else is having fun baking a ton of bread right now and always have a loaf on hand?). Usually, during the holidays, we have a few loaves around to make stuffing and this is a great recipe to repurpose it.

Key Ingredients

Overhead image of ingredients: soy milk, eggs, vanilla, salt, cinnamon, creamer, brown sugar, bread, berries.

Bread — We can’t have bread pudding muffins without bread! You can use whatever bread you have on hand. Some people like to use stale bread for bread pudding so it’s more dry and can soak up more of the custard but it’s up to you.

Custard — To make the custard that your bread soaks in, we use eggs, brown sugar, vanilla, soy milk, creamer, cinnamon and salt.

Berries — I like to use a mix of berries to top off my bread pudding but if you only have one type on hand, that’s perfectly fine!

How to Make This Recipe

Step by step instructions of making the egg mixture, soaking the bread in it, adding berries on top, and mixing them together.

Step 1: Preheat oven to 325 F. Line 12 muffin cups with paper liners. Then, whisk the eggs with the brown sugar, vanilla, soy milk, creamer, cinnamon and salt.

Step 2 and 3: Add the bread cubes and let sit in the custard for 15 minutes until well soaked. Add in the berries and mix well.

Step by step photo of a muffin tin of bread puddings to be baked and then dusting with sugar.

Step 4: Scoop about ½ cup into each of the muffin cups. Press the pieces down so it’s very compact. Bake for 20- 27 minutes or until golden brown on top and a toothpick comes out clean.

Step 5: Allow to cool. Dust with powdered sugar and enjoy.

Expert Tips

For extra sweetness, brioche bread is a rich and decadent bread that can be swapped for your regular loaf of bread.

If you want to have a more caramelized taste to your bread pudding muffins, you can use dark brown sugar instead.

Try to cut your bread to the same size so they can easily and evening be scooped into your muffin tins.

Soak your bread for as long as you need to make sure your bread has absorbed all the tasty custard flavours!

Recipe FAQs

How Can I Quickly Dry My Bread?

Up above, I mentioned that “stale” bread is popular as it can soak up more custard. If you have fresh bread and don’t want to wait a few days and don’t want to wait for the bread to soak up all the custard, you can place your diced bread on a sheet pan and bake it at 350F for 5-10 minutes ahead of time.

What Other Toppings Can I Add?

You can add toasted pecans, almonds, raisins, chocolate chips, and more! Whatever you feel like adding to your easy breakfast bread pudding muffins recipe, you can!

How Do I Store Leftovers?

Store leftover bread pudding in an airtight container inside of a fridge for up to 4 days.

Can I Freeze Bread Pudding?

You can definitely freeze bread pudding. Simply wrap it up in plastic and store it in a freezer safe container or bag. Thaw overnight in the fridge and then reheat in the microwave or oven when you’d like to enjoy it.

Bread pudding muffins on a cooling rack with powdered sugar being dusted on.

More Recipes You Might Like

Want more recipes you can make for breakfast or brunch like my easy breakfast bread pudding muffins?

  • Best Vegan Breakfast Bars (Kid Friendly)
  • Cheesy Spinach Egg Waffles | BLW & Toddler Breakfast
  • Pizza Egg Muffins | Keto Gluten Free Meal Prep Breakfast
  • Baby Cereal Protein Pancakes | BLW High Iron Breakfast

Have you tried breakfast bread pudding muffins before? Let me know how you like to make it down below!

Overhead photo of multiple berry bread pudding cooling on a wire rack.
Print Recipe
5 from 2 votes

Easy Bread Pudding Muffins with Berries | Family-Friendly Breakfast

Got some extra bread lying around? Repurpose your bread into these warm and cozy Breakfast Bread Pudding Muffins with Berries! An easy recipe for breakfast, brunch, or as a snack!
Prep Time20 minutes mins
Cook Time27 minutes mins
Total Time47 minutes mins
Course: Breakfast
Servings: 12 muffins
Calories: 389kcal
Author: Abbey Sharp

Ingredients

  • 3 eggs
  • ⅔ cup brown sugar
  • 1 tsp vanilla extract
  • ¾ cup unsweetened vanilla soy milk
  • ¾ cup unsweetened vanilla non-dairy creamer
  • ¼ tsp cinnamon
  • ¼ tsp salt
  • 6 cups diced whole grain bread 8 oz
  • ½ cup blueberries
  • ½ cup raspberries halved
  • ½ cup strawberries finely diced

Instructions

  • Preheat oven to 325 F. Line 12 muffin cups with paper liners.
  • Whisk the eggs with the brown sugar, vanilla, soy milk, creamer, cinnamon and salt. Add the bread cubes and let sit in the custard for 15 minutes until well soaked.
  • Mix in the berries.
  • Scoop about ½ cup into each of the muffin cups. Press the pieces down so it’s very compact. Bake for 20- 27 minutes or until golden brown on top and a toothpick comes out clean.
  • Allow to cool. Dust with powdered sugar and enjoy.

Notes

  • For extra sweetness, brioche bread is a rich and decadent bread that can be swapped for your regular loaf of bread.
  • If you want to have a more caramelized taste to your bread pudding muffins, you can use dark brown sugar instead.
  • Try to cut your bread to the same size so they can easily and evening be scooped into your muffin tins.
  • Soak your bread for as long as you need to make sure your bread has absorbed all the tasty custard flavours!

Nutrition

Serving: 12servings | Calories: 389kcal | Carbohydrates: 65g | Protein: 17g | Fat: 7g | Saturated Fat: 2g | Cholesterol: 41mg | Sodium: 558mg | Potassium: 393mg | Fiber: 9g | Sugar: 21g | Vitamin A: 91IU | Vitamin C: 5mg | Calcium: 165mg | Iron: 3mg
Abbey Sharp

Abbey Sharp is a Registered Dietitian (RD), regulated by the Ontario College of Dietitians. She is a mom, YouTuber, Blogger, award winning cookbook author, media coach specializing in food and nutrition influencers, and a frequent contributor to national publications like Healthline and on national broadcast TV shows.

www.abbeyskitchen.com/about-abbey/

Last Updated August 11, 2024. Published August 12, 2024 By Abbey Sharp 17 Comments

Chickpea Vegan Wrap | Easy Lunch Idea

Hands holding moroccan wrap.

Upgrade your lunch game with these chickpea vegan wraps. Pack your lunch with this nutritious and flavourful wrap to properly fuel your day! No need to find a microwave.

Hands holding moroccan chickpea salad wraps

Lunches in my house HAVE to be fast, and wraps are one of my favourite fast ways to use up random ingredients in the house. But obviously, we don’t make boring wraps here at Abbey’s Kitchen, so I’m pulling all the stops and packing these chickpea salad wraps with ALL OF THE THINGS.

I don’t know about you, but I love a good chickpea salad. It’s nutritious, satiating and is so inexpensive (and easy) to make a HUGE batch of it for the week. If you haven’t already, you must try my Avocado Chickpea Salad Sandwich which is another great healthy lunch option. This time, I’m adding some delicious Moroccan flavours and turning my chickpea vegan wrap into a super easy, fast, and family friendly plant-based wrap.

Table of contents

  • Why This Recipe Works
  • Key Ingredients
  • How to Make This Recipe
  • Expert Tips
  • Recipe FAQs
  • More Recipes You Might Like

Why This Recipe Works

You will absolutely love this chickpea vegan wrap. They’re such an easy lunch recipe that everyone will love. Need some more convincing?

  • Meal prep friendly.
  • No need to microwave lunch.
  • Full of healthy goodness.
  • Easily customized to your liking.

Key Ingredients

Ingredients needed to make vegan chickpea salad wraps.

Spices — I use a combination of smoked paprika, harissa, turmeric, salt, and pepper to season my chickpea vegan wrap.

Chickpeas — This is another great way to add some extra fibre and protein, but you could also omit these or use a different canned bean.

Olives — I love the salty kick from the green onions.

Pistachios — Not only are pistachios healthy, but they also add a nice crunch to the wraps.

Couscous — If you’re able to find whole grain couscous, they are an amazing source of fibre.

Spinach — Spinach is a nutritious, leafy green vegetable that is an excellent source of vitamin K as well as being a source of magnesium, calcium and phosphorus.

How to Make This Recipe

Set of two photos showing chickpeas being mashed and mayo being seasoned.

Step 1: To a bowl, lightly mash the chickpeas and remove any excess skins that fall off.

Step 2: Add the mayonnaise, harissa, paprika, turmeric, and a pinch each of salt and pepper to taste.

Set of two photos that show the couscous seasoned then the filling added to the wrap.

Step 3: Season the couscous with paprika, salt, and pepper.

Step 4: To a wrap, combine the chickpea mixture, couscous, spinach, olives, apricots, and pistachios. Roll up the chickpea vegan wrap, cut it in half, and enjoy.

Expert Tips

Other wraps you can try are spinach wraps or swap the wrap entirely for collared greens, lettuce, or pita bread.

Add more heat to this chickpea vegan wrap with the addition of some hot sauce to the mayo.

Make these a bit cheesy with the addition of nutritional yeast!

Recipe FAQs

Can you make this chickpea vegan wrap ahead of time?

I recommend making these vegan chickpea salad wrap the night before or the day you’re eating them, but you can make all of the components 3-5 days ahead and just assemble them at the last minute.

Can I add chicken or shrimp or tofu to these wraps?

Of course! Make them your own! Legit use whatever you have leftover in the fridge.

What else can I add to these?

You can swap the couscous for quinoa. You can even swap apricot for dried cranberries or dried mangos. Feel free to add whatever you have. Bell peppers, broccoli, and carrots make for a great addition as well. You can also try using pecans or walnuts in place of pistachios.

Moroccan chickpea salad wraps served on a wooden plate.

More Recipes You Might Like

Want more easy vegan lunch ideas like this chickpea vegan wrap? Try these reader favourites:

  • Collard Wraps (3 Ways)
  • Vegan Avocado Chickpea Salad Sandwich 
  • Vegan Quesadilla 
  • Everything Bagel White Bean Sandwich 

Now I want to hear from you!  What would you add to your vegan wrap? Let me know by leaving me a comment below!

Moroccan wraps served on a wooden plate.
Print Recipe
4.78 from 9 votes

Chickpea Vegan Wrap | Easy Lunch Idea

Upgrade your lunch game with these Moroccan vegan chickpea salad wraps. Pack your lunch with this nutritious and flavourful wrap to properly fuel your day! No need to find a microwave.
Prep Time10 minutes mins
Total Time10 minutes mins
Course: Lunch
Cuisine: American, Moroccan
Servings: 4 people
Calories: 375kcal
Author: Abbey Sharp

Ingredients

  • 3 tbsp vegan mayonnaise
  • 1 tsp harissa or to taste
  • 1/2 tsp turmeric
  • 1/2 tsp smoked paprika
  • 1 can no salt added chickpeas drained and rinsed
  • salt and pepper to taste

For the Wrap

  • 1/2 cup cooked whole wheat couscous
  • 1/4 tsp smoked paprika
  • salt and pepper to taste
  • 4 large whole wheat wraps
  • 1 cup spinach shredded
  • 1/4 cup green olives sliced
  • 1/4 cup apricots sliced
  • 1/4 cup pistachios minced

Instructions

  • To a bowl, lightly mash the chickpeas and remove any excess skins that fall off.
  • Add the mayonnaise, harissa, paprika, turmeric and a pinch each of salt and pepper to taste.
  • Season the couscous with the paprika, salt and pepper.
  • To a wrap, combine the chickpea mixture, couscous, spinach, olives, apricots, and pistachios. Roll up, cut in half and enjoy.

Notes

  • Other wraps you can try are spinach wraps or swap the wrap entirely for collared greens, lettuce, or pita bread.
  • Add more heat to these vegan chickpea salad wraps with the addition of some hot sauce to the mayo.
  • Make these a bit cheesy with the addition of nutritional yeast!

Nutrition

Calories: 375kcal | Carbohydrates: 52g | Protein: 10g | Fat: 15g | Saturated Fat: 2g | Sodium: 501mg | Potassium: 146mg | Fiber: 7g | Sugar: 4g | Vitamin A: 1140IU | Vitamin C: 4mg | Calcium: 112mg | Iron: 3mg
Abbey Sharp

Abbey Sharp is a Registered Dietitian (RD), regulated by the Ontario College of Dietitians. She is a mom, YouTuber, Blogger, award winning cookbook author, media coach specializing in food and nutrition influencers, and a frequent contributor to national publications like Healthline and on national broadcast TV shows.

www.abbeyskitchen.com/about-abbey/

Last Updated July 21, 2024. Published August 5, 2024 By Abbey Sharp 8 Comments

No Bake Cheerio Bars | Kid Friendly, Whole Grain School Snack

These no bake Cheerios bars are the perfect fun kid-friendly whole grain easy school snack idea for busy active kids on the go.

No bake cheerios bars on a white plate drizzled with chocolate.

Like most families, the summer time is very go-go-go for my little family of four. Whether it’s packing up for a weekend at the cottage, a playdate, the playground – you name it. Which means that I need to have easy nutritious snacks at the ready any time I hear “mommmm I’m hungry”. So when I have a surplus of Cheerios hanging around the house and the boys are over the milk and Cheerios combo, I make these no bake Cheerios bars. These bars are easily one of my favourite balanced whole grain snacks to have in the house because they are no bake and made perfectly handheld in little silicon muffin cups.

Table of contents

  • Why This Recipe Works
  • Key Ingredients
  • How To Make this Recipe
  • Expert Tips
  • Recipe FAQs
  • Other Recipes You May Like

Why This Recipe Works

Plain and simple – whole grains. I’m a big fan of getting whole grains for everyone in the family since consuming more whole grains helps promote heart health, regularity, satiety and blood sugar management. Canada’s Food Guide also recognizes whole grains as one of the four essential parts of a balanced diet, and recommends choosing whole grains first before other types of grains and starches. These no bake cheerio bars are also a perfect snack because they

  • Require no baking
  • Are a great way for kids to get involved in the kitchen
  • Super customizable for different flavor pairings
  • Double as a balanced snack for both kids AND adults

Key Ingredients

Cheerios (original yellow box): when you’re looking at an ingredient list, always look for the words “whole grain” at the top of the list. Cheerios, for example, is made with “whole grain oats”, making it one of my family’s go-to breakfasts and snacks.

Freeze dried banana chips: The perfect way to sneak in some extra nutrients is to make your own banana “flour” for this recipe by pulverizing the freeze-dried bananas until they turn into a powder.

Hemp hearts: My holy grail. I swear I add hemp hearts to almost every recipe, including these no bake cheerio bars. It’s the perfect way to add in healthy fats, fiber, and some plant-based protein into your snack or meal.

Agave or Honey: Either ingredient makes for the perfect sweetener to make these cheerio bars even more delicious.

Birds eye view of no bake Cheerios bars with blue background.

How To Make this Recipe

Step 1: In a small food processor, pulverize the banana chips until they reach a powder-like consistency. Transfer to a bowl and add in the Cheerios, and hemp hearts.

Step 2: In a small sauce pot, heat the honey and sunflower seed butter until its gently simmering and bubbling, stirring constantly. Remove from the heat and transfer to the bowl with the Cheerios. Stir until all of the cereal is well coated and mixed.

Step 3: At this point you can add in the sunflower seeds if using. Take a small handful and stuff it into a muffin mold. Repeat with the remaining cereal. Allow to cool completely.

Step 4: Once cool, carefully remove from the muffin mold and drizzle with chocolate, if using. And enjoy!

Expert Tips

I like using silicon muffin holders for this so I make these no bake cheerio bars into easy to transport cups, so I pack them in tight and let cool. If you want to make them extra fun, you can finish them off with a little drizzle of dark chocolate on top.

Curious about whole grains? Grains are made up of three distinct parts – the bran, the endosperm and the germ. The germ and bran are where the fibre, B vitamins and minerals (like iron) are often living. Refined grains, in contrast, generally have the germ and bran removed so they’re lower in these beneficial nutrients. Whenever possible, I try to choose foods, like these cheerio bars, made with whole grains for myself and my sons to ensure we’re getting the full health benefits of the food.

No bake cheerios bars on white plate with cheerios box in background.

Recipe FAQs

How far ahead can I prepare these no bake cheerio bars?

These bars will last on the counter in an air-tight container for about 5 days so you can easily prepare them on a weekend for the week ahead. Trust me, though, they won’t last that long.

What if I don’t have silicon muffin molds to make these no bake Cheerios bars?

No problem! You can easily make cereal snacks these either in regular muffin liners in a muffin tin (until set) OR, you can press the mixture into an 8×8 square tin lined both ways with parchment paper and then cut into squares.

Are these cheerio bars safe for toddlers?

My toddlers loved them! I would suggest for new eaters that you avoid adding the chocolate or sunflower seeds, and just remember that babies under 1 year should not have honey or a lot of added sugar.

Would these no bake cheerios bars be good for a pot luck or school bake sale?

I think these easy no bake Cheerios bars would be a fun, colourful, and balanced treat for bringing to a kid-friendly bake sale or potluck!

Other Recipes You May Like

If you’re looking for other great kid-friendly snack and treat ideas like these no bake cheerio bars, heck out some of the following links for some other great ideas!

  • VEGAN RAINBOW CAKE POPS
  • VEGAN BANANA PEANUT BUTTER CHOCOLATE BARS
  • SWEET POTATO APPLE MUFFINS
  • PEPPERONI PIZZA BAGEL BITES

Now tell me, what are some of your family’s go-to kid-friendly no bake snack and dessert recipes? What are some of your favourite ways to make sure you’re getting enough whole grains? Have you tried these delicious no bake cheerio bars yet? Leave me a comment below!

Print Recipe
4.67 from 3 votes

No Bake Cheerio Bars

These no bake Cheerios bars are the perfect fun kid-friendly whole grain easy school snack idea for busy active kids on the go.
Total Time30 minutes mins
Course: Snack
Cuisine: American
Servings: 12
Calories: 205kcal
Author: Abbey Sharp

Ingredients

  • 1/2 cup freeze dried banana chips
  • 3 cups Original Cheerios
  • ¼ cup hemp hearts
  • 1/3 cup honey or agave
  • 2/3 cup Sunflower seed butter
  • ¼ cup Colourful candied sunflower seeds optional
  • 1 oz dark chocolate melted

Instructions

  • In a small food processor, pulverize the banana chips until they reach a powder like consistency. Transfer to a bowl and add in the Cheerios, and hemp hearts.
  • In a small sauce pot, heat the honey and sunflower seed butter until its gently simmering and bubbling, stirring constantly. Remove from the heat and transfer to the bowl with the Cheerios. Stir until all of the cereal is well coated and mixed.
  • At this point you can add in the sunflower seeds if using. Take a small handful and stuff it into a muffin mold. Repeat with the remaining cereal. Allow to cool completely.
  • Once cool, carefully remove from the muffin mold and drizzle with chocolate, if using.

Nutrition

Calories: 205kcal | Carbohydrates: 20g | Protein: 6g | Fat: 13g | Saturated Fat: 3g | Cholesterol: 1mg | Sodium: 32mg | Potassium: 103mg | Fiber: 1g | Sugar: 10g | Vitamin A: 202IU | Vitamin C: 2mg | Calcium: 48mg | Iron: 4mg
Abbey Sharp

Abbey Sharp is a Registered Dietitian (RD), regulated by the Ontario College of Dietitians. She is a mom, YouTuber, Blogger, award winning cookbook author, media coach specializing in food and nutrition influencers, and a frequent contributor to national publications like Healthline and on national broadcast TV shows.

www.abbeyskitchen.com/about-abbey/

Last Updated July 21, 2024. Published August 2, 2024 By Abbey Sharp 28 Comments

Vegetarian Zucchini Lasagna | Low Carb, Keto Friendly

This easy vegetarian zucchini lasagna recipe is a simple version of lasagna that you can make for your family! Gluten free, high fibre, and packed with veggies- it will definitely become a family favourite!

Zucchini lasagna recipe in a large red skillet.

When I think of the classic family meal, lasagna usually comes to mind. Only, that’s kind of strange because I never EVER had lasagna growing up. The reason for my deprivation was two-fold. One, my mom just really REALLY didn’t like cheese and therefore, we rarely got meals that were cheese-centric (I know, tough childhood)). And two, making lasagna is a marathon. That’s why I came up with this super simple take on lasagna that your whole family will love!

Table of contents

  • Why This Recipe Works
  • Key Ingredients
  • How to Make This Recipe
  • Expert Tips
  • Recipe FAQs
  • More Recipes You Might Like

Why This Recipe Works

This vegetarian zucchini lasagna recipe is definitely going to be a household favourite. They’re quick, tasty and cheese AF, these will totally satisfy your lasagna craving with half the effort it takes to make a full lasagna. Here are a couple more reasons why you’ll love them.

  • Lower carb (if that’s what you prefer)
  • Packed with veggies
  • Gluten free
  • High in fibre
  • Kid friendly

Key Ingredients

Overhead image of ingredients: zucchini, parmesan cheese, ricotta cheese, salt, oil, basil, egg, marinara sauce, mozzarella, spinach, and garlic.

Zucchini — Zucchini is the star of this low carb vegetarian zucchini lasagna roll ups recipe and packs a nutrition punch! For this recipe, I recommend about 3 large zucchini’s to make the pinwheels.

Cheese — Because what is a lasagna without cheese? Like any standard lasagna recipe, you’ll need ricotta cheese, mozzarella, and parmesan.

Marinara Sauce — I recommend using a low sugar low sodium variety for this recipe.

Spinach — I love adding spinach anywhere I can because it wilts down to basically nothing, meaning you can add in a bunch of nutrient packed spinach to this recipe.

How to Make This Recipe

Set of three photos showing zucchini slices on a sheet pan, mixing cheese with egg, and sauteing spinach and garlic.

Step 1: Preheat oven to 400F. Lay a few pieces of paper towel down on two baking sheets and lay the zucchini slices on top. Salt them and top with another few pieces of paper towel. Top with another baking sheet and press down. Let sit for 10 minutes. Wipe the salt and water off of the zucchini when done.

Step 2: In a bowl, mix together the ricotta, and 1/2 cup each of parmesan and mozzarella cheese. Season with salt and pepper, to taste, then mix in the egg.

Step 3: Meanwhile, heat the oil in a large cast iron skillet. Add the garlic and saute until fragrant. Add in the spinach and allow to wilt. Season with a pinch each of salt and pepper.

Set of 3 photos showing marinara added to the pan of spinach, spreading the cheese mixture onto zucchini slices, and then rolling them up into a pan.

Step 4: Pour in the marinara sauce and give everything a stir. Reduce the sauce over the heat for 7-8 minutes until very thick.

Step 5: Spread about 1 1/2 tbsp of the cheese mixture onto the slice of zucchini and roll into a pinwheel.

Step 6: Ladle a few spoonfuls of the marinara sauce into the casserole dish and spread out so it covers the whole bottom of the dish.

Set of 3 photos showing cheese added to a pan of rolled up zucchini, baked, then topped with basil.

Step 7: Position all of the pinwheels into the casserole dish and top with the remaining cheese.

Step 8: Place the lasagna into the oven for 15 minutes, then change the oven setting to broil. Broil for 3-5 minutes or until golden brown.

Step 9: Top with the basil and enjoy!

Expert Tips

Be sure to keep an eye on the zucchini lasagna roll ups while broiling as it can easily go from golden to burnt under a broiler.

To keep this vegetarian zucchini lasagna recipe flavourful and not watery, it’s important to not skip salting the sliced zucchinis. When you salt the zucchini, it draws excess moisture from it so they don’t get soggy.

I also recommend cooking down your marinara sauce so that any excess moisture will be pumped BACK into it while the zucchini lasagna cooks.

The last hack I use to keep the sauce from getting too watery is that I finish these bad boys on broil. This also does double duty in getting some serious golden brown cheese action and GOLDEN CHEESE IS LIFE.

Recipe FAQs

How do I cut the zucchini into thin slices?

You’ll need a really sharp knife if you want to hand slice the zucchini into thin strips. I highly recommend using a mandolin to easily get slices that are even and thin.

What can I serve as a side dish if I’m not keto or low carb?

You can totally make things simple and serve this with a side of sourdough bread for convenience’s sake. But you could also serve it with a nice grain salad like this pesto pasta salad.

Is this recipe kid friendly?

For sure! Baby E has never met a lasagna he didn’t like and this vegetairan zucchini lasagna recipe is no exception. You can also have your kids help roll up the zucchini slices to get them familiar with cooking in the kitchen!

Can I make this without the egg?

The egg acts as binder to make the ricotta firmer but if you do not want to use egg, you can substitute with flax egg made with ground flaxseed.

Can I make this ahead of time?

You can assemble the entire zucchini lasagna recipe a day before and store it covered in the fridge before baking. Bake when ready to enjoy. You can also freeze it before baking and bake directly from frozen or thawed. Just make sure you are using a freezer friendly pan if you’re doing this as you don’t want your pan to crack in the freezer or oven.

How do I reheat leftovers?

To reheat leftover this lasagna, simply heat your oven up to 350F and bake until heated through.

Zucchini lasagna roll ups on a fork.

More Recipes You Might Like

For more family friendly meals, try these ones!

  • VEGAN MEXICAN PASTA CASSEROLE 
  • GREEK SHEET PAN CHICKEN BREASTS
  • VEGAN TACO CASSEROLE
  • EASY VEGAN MINESTRONE SKILLET PASTA

Now lovelies, let me know, what recipes do you think of when you think about the classic family meal? Leave me a comment below with your thoughts!

This EASY keto zucchini lasagna pinwheels is the fastest lasagna you can make for your family! Gluten free, low carb, high fibre and healthy, it will definitely become a family favourite!
Print Recipe
4.36 from 14 votes

Vegetairan Zucchini Lasagna Recipe (Low Carb & Keto Friendly)

This easy vegetarian zucchini lasagna recipe is gluten free, high fibre, and packed with veggies- it will definitely become a family favourite!
Prep Time20 minutes mins
Cook Time28 minutes mins
Total Time48 minutes mins
Course: Dinner
Cuisine: Italian
Servings: 5 people
Calories: 394kcal
Author: Abbey Sharp

Ingredients

  • 3 large zucchini thinly sliced length-wise on a mandoline
  • 1/2 tsp kosher salt
  • 2 1/2 cups ricotta cheese
  • 3/4 cup mozzarella cheese grated and divided
  • 1/2 cup plus 2 tbsp parmesan cheese grated and divided
  • 1 egg
  • Salt and pepper
  • 2 tsp extra virgin olive oil
  • 2 cloves garlic minced
  • 3 cups spinach finely chopped
  • 3 cups low-sugar marinara sauce
  • 2 tbsp basil chiffonade

Instructions

  • Preheat oven to 400 F.
  • Lay a few pieces of paper towel down on two baking sheets and lay the zucchini slices on top. Salt them and top with another few pieces of paper towel. Top with another baking sheet and press down. Let sit for 10 minutes. Wipe the salt and water off of the zucchini.
  • In a bowl, mix together the ricotta, and 1/2 cup each of parmesan and mozzarella cheese. Season with salt and pepper, to taste, then mix in the egg.
  • Meanwhile, heat the oil in a large cast iron skillet. Add the garlic and saute until fragrant. Add in the spinach and allow to wilt. Season with a pinch each of salt and pepper.
  • Pour in the marinara sauce and give everything a stir. Reduce the sauce over the heat for 7-8 minutes until very thick.
  • Spread about 1 1/2 tbsp of the cheese mixture onto the slice of zucchini and roll into a pinwheel.
  • Ladle a few spoonfuls of the marinara sauce into the casserole dish and spread out so it covers the whole bottom of the dish. 
  • Position all of the pinwheels into the casserole dish and top with the remaining cheese.
  • Place the lasagna into the oven for 15 minutes, then change the oven setting to broil.
  • Broil for 3-5 minutes or until golden brown.
  • Top with basil and enjoy!

Notes

  • Be sure to keep an eye on the zucchini lasagna roll ups while broiling as it can easily go from golden to burnt under a broiler.
  • To keep these zucchini lasagna roll ups flavourful and not watery, it’s important to not skip salting the sliced zucchinis. When you salt the zucchini, it draws excess moisture from it so they don’t get soggy.
  • I also recommend cooking down your marinara sauce so that any excess moisture will be pumped BACK into it while the zucchini lasagna cooks.

Nutrition

Calories: 394kcal | Carbohydrates: 17g | Protein: 26g | Fat: 26g | Saturated Fat: 15g | Cholesterol: 116mg | Sodium: 1408mg | Potassium: 1065mg | Fiber: 4g | Sugar: 10g | Vitamin A: 3479IU | Vitamin C: 37mg | Calcium: 525mg | Iron: 3mg
Abbey Sharp

Abbey Sharp is a Registered Dietitian (RD), regulated by the Ontario College of Dietitians. She is a mom, YouTuber, Blogger, award winning cookbook author, media coach specializing in food and nutrition influencers, and a frequent contributor to national publications like Healthline and on national broadcast TV shows.

www.abbeyskitchen.com/about-abbey/

Last Updated July 26, 2024. Published July 31, 2024 By Abbey Sharp Leave a Comment

How to Lose Baby Weight While Breastfeeding | Sustainable Nutrition Tips

Person breastfeeding a baby.

Not sure how to lose baby weight while breastfeeding? We provide 7 gentle and sustainable weight loss tips that won’t impact milk supply. 

Person breastfeeding a baby.

When it comes to losing baby weight postpartum, one of the first pieces of advice you’ll often hear is that breastfeeding is the easiest way to shed those extra baby pounds. Whether or not you can actually lose weight while breastfeeding is a controversial hot topic that I have covered in depth in my blog post on whether breastfeeding causes weight loss or weight GAIN.

However, if you have landed here because your weight loss expectations have not been met, and you want to know how to lose baby weight while breastfeeding without going on a fad diet and impacting your milk supply, then you have come to the right place. We break down everything you need to know about how to lose baby weight while breastfeeding and provide 7 dietitian approved gentle nutrition tips that support sustainable weight loss.

Do All Women Lose Weight Breastfeeding?

Breastfeeding has been positioned as a postpartum weight loss hack for generations and you have probably heard said “success stories” somewhere down the pipeline. Perhaps so and so’s neighbour lost all her baby weight from breastfeeding and your cousin Karen is thinner than she was BEFORE she became pregnant. They didn’t even have to set foot in the gym or go on a fad diet. This was all apparently achieved just through the magic of breastfeeding. But do ALL women across the board lose weight while breastfeeding? 

Well, unfortunately the evidence isn’t that cut and dry. While some research suggests that women who breastfeed lose more weight compared to non-breastfeeding mothers, other research found no clear association with breastfeeding and weight loss. There is even some research to suggest that some women might GAIN weight from breastfeeding. Confusing plot twist, I know. So to cut through the clutter behind why some women lose weight breastfeeding while others don’t, let’s break down the 2 common factors that impact postpartum weight loss – hormones and lifestyle.

Pregnant person with their hands on their stomach.

Hormones 

Cortisol (Stress Hormone)

Research suggests that most postpartum women will experience increases in cortisol levels after giving birth. We also know that high cortisol levels for prolonged periods is associated with weight retention.  In fact, one study found that those who experienced postpartum depression retained anywhere from 1-11 lbs. So if you are struggling to get a hold on your mental health while adjusting to the ups and downs of motherhood, 1) know that you are not alone in the struggle, and 2) consider putting your weight loss goals on the back burner for now and focus on behaviours that can support your mental wellbeing. 

Prolactin 

Prolactin hormone is increased during pregnancy to help stimulate milk production after giving birth. Some research suggests that increases in this hormone might also be responsible for stimulating appetite and slowing down fat metabolism. While this doesn’t necessarily mean that weight loss is impossible, there is some animal research showing that reduced prolactin levels was associated with 25-49% reduced fat stores. This may evolutionarily be as a “safe guard” to ensure baby has enough nourishment to thrive.

Lifestyle Factors 

Diet

The general dietary recommendation for pregnant folks is to eat an additional 350-450 calories to support the development of their growing bump. This is equivalent to two extra snacks or an additional meal. But if you are taking the saying  “eating for two” in the literal sense and doubling your calories while pregnant, it would naturally translate into increased weight gain beyond what is needed to support baby’s growth. In fact, research suggests that pregnant women who gained weight beyond what is recommended during pregnancy retained an additional seven pounds after three years postpartum. 

Hand holding yogurt and granola parfait.

Physical Activity 

Research suggests that rates of physical activity are often lower in new moms, likely because of the increased demands of motherhood and lack of energy as a result. But can exercise help to lower cortisol levels which, as we discussed, can promote weight retention and physical activity may also support weight loss efforts. Since a lot of women are less active postpartum, it can explain our propensity to hold onto extra weight gained in pregnancy.

Sleep 

Any new mom will tell you that the luxury of an 8 hour sleep is hardly within reach when you’re up in the middle of the night for a feed. But, it’s still worth noting that, in general, sleep deprivation is associated with increased appetite and cortisol levels. In fact, one study found that the hunger hormone, ghrelin, was 15% higher in those who were sleep deprived compared to those who got enough sleep. Which explains why there exists an association between sleep deprivation and weight gain. So while you can breastfeed with all your might at the expense of sleep, the lack of sleep may be the very thing that is halting your weight loss.

Person sleeping in a bed.

How Many Calories Does Breastfeeding Burn?

Just like any metabolic mechanism, breastfeeding requires energy (aka calories) to get the milk flowing. To put it in perspective, pumping only 1 ounce of breast milk burns around 20 calories. With that in mind, on average, this translates to roughly 500 calories burned from breastfeeding alone.  But of course, the total calories burned from breastfeeding is highly dependent on the frequency and duration of feeds. 

How Many Calories Do You Need While Breastfeeding?

Due to the increased energy demands of breastfeeding, it is recommended that folks increase their calories by approximately 450-500 calories a day. However, these are rough guidelines and caloric intake will fluctuate based on frequency and duration of feeds, age, and activity level. For example, someone who is breastfeeding a 2 month old would burn more calories compared to someone breastfeeding and weaning their 7 month old. As a result, their total energy needs would differ.

Does Dieting & Exercising Reduce Breast Milk Supply?

In terms of how to lose baby weight while breastfeeding, trying to lose too much weight too soon may jeopardize milk supply in a lot of moms. In fact, one study found that breastfeeding mothers who consumed 68% of their caloric needs for 7 days saw decreases in milk volume the following week. However, most research suggests that folks who are underweight at baseline (aka were underweight pre-pregnancy) are more at risk of reduced milk supply from following a calorically restricted diet compared to women of “normal weight”. That is – women who have adequate fat stores to support breast milk production. 

Feet wearing running shoes on steps to help lose baby weight while breastfeeding.

The negative impact on milk supply appears to be mostly associated with caloric restriction more so than physical activity as most research suggests that moderate exercise does not impact supply. In fact, regular physical activity may increase beneficial health compounds present in the breastmilk and increase postpartum mood, so weight loss goals or not, we encourage trying to sneak some activity into your day. However, It is worth noting that engaging in more strenuous physical activity may increase the presence of lactic acid in breast milk. While this is not inherently unsafe for baby, it may impact the palatability of the milk and result in a fussy baby. So if you do happen to engage in more intense exercise, it may be best to wait 30 mins before a feed. 

Should You Attempt Weight Loss While Breastfeeding?

A lot of experts recommend waiting at least 2-4 months after initiating breastfeeding before attempting intentional weight loss in order to establish a steady milk flow. Personally, I do not advocate for moms to attempt weight loss at all in this “fourth trimester” while nursing if they can avoid it. The demands of early motherhood are so intense, I worry that stressing about how to lose baby weight doesn’t support postpartum mental health or recovery.

However, I also believe in body autonomy and I get questions every week about when and how to lose baby weight while breastfeeding. My approach here is to take the pressure off the number on the scale, and to focus on gentle nutrition tips that feel good to you and give you the mental and physical energy to bond with your babe. If weight loss occurs, then it is meant to occur. And if not, then keep it up and your body will find its natural happy weight set point when it’s time.

How to Lose Baby Weight: Gentle Nutrition Tips that Won’t Impact Milk Supply

Turn Meals & Snacks Into Hunger Crushing Combos™ 

What if I told you that you can enjoy the foods that you love while breastfeeding without feeling deprived or having to count, track, or restrict calories? By incorporating hunger crushing compounds like fibre, protein and healthy fats at every meal and snack, it not only makes you feel satisfied but also helps you feel fuller for longer. Protein helps to reduce our hunger hormone, grehlin, while fibre and fat help to slow down how quickly food moves through the digestive tract, thereby helping you to feel full and stay full. So contrary to any diet that restricts calories and consequently makes you crave all of the things, balancing the foods you already enjoy by turning them into hunger crushing combos™ not only helps to support milk supply but also supports your overall health and wellbeing. 

Bowl with vegetables, grains and dressing as a healthy meal option for how to lose baby weight.

Focus on Foods to ADD, not take away

Try this as a mindset shift – instead of focusing on foods to restrict, think about what you can add. If you’re craving pasta, rather than deny yourself because it isn’t “diet-friendly” think about ways you can nutritionally optimize this meal. For example, as per tip #1, perhaps you can throw in some chicken for protein, some veggies for fiber, and a pesto-based sauce for healthy fats. By thinking of ways to bump up the nutrition of your meals without depriving yourself of the foods you love, you can (quite literally) have your cake and eat it too. This also takes you out of the “scarcity mindset” that dieting can often perpetuate, and instead gives you permission to eat meals that are satisfying both physically and emotionally. 

Make Meal Prep Shortcuts Your BFF

In the weeks before giving birth, I was batch cooking like a mad woman so that I would have something ready to go for days when I could barely fit in a shower. So if you have the time and energy to batch cook, I would highly recommend it. But if not, don’t sweat it. Lean on easy cooking short cuts like rotisserie chicken, pre-shredded veg, canned goods, or pre-made sauce (look to these lettuce wraps,  chicken casserole, or tortilla soup for recipe ideas). If you have a bit of extra time at your disposal, try prepping easy staples that you can combine to make a variety of different meals.

For example, I’ll cook some chicken or beef, prep a large batch of rice, then bake a variety of vegetables that I can pull from throughout the week. That way you can make a ton of different bowls, salads, wraps, or even sandwiches. But if  you are really struggling to even go to the grocery store and put together a balanced meal, you can always think about using a grocery service or meal kit to make your life a little easier. 

Make Water Your Beverage of Choice

The benefit to drinking more water while breastfeeding is two fold. For one, it can help to replenish fluids lost to breastfeeding. And two, research suggests that drinking water before a meal can help to support modest weight loss, which is helpful when thinking about how to lose baby weight. While we don’t necessarily want water to displace calories from food, but by choosing water more often it can help to edge out more calorie-laden beverages like juice and soda. 

Glass with water as a tip for how to lose baby weight while breastfeeding.

Sleep When You Can, As Much As You Can 

As mentioned earlier, sleep deprivation is associated with an increase in appetite and the stress hormone, cortisol, which can result in weight gain and retention. While it is easier said than done, try catching up on your Zzz’s by sleeping when the baby is sleeping. It may seem like the perfect time to do dishes or laundry, but allow your mental health to take precedence over daily chores. This may also be a good time to revisit your sleep hygiene and establish a healthy nighttime routine. Perhaps that means reducing screen time before bed, doing a nightime meditation, doing some light stretches etc. 

Practice Joyful Exercise

As discussed, engaging in moderate-to-intense exercise is safe while breastfeeding and is unlikely to impact milk supply. But before you go ham at the gym in an effort to hit your weight loss target, I encourage you to shift your mindset from being goal-driven to purpose-driven. In other words, enjoying the act of movement as a form of self-care, rather than the outcome (i.e weight loss). I actually think it’s really helpful to decouple your association of exercise for the sole purpose of weight loss, and to instead reframe it as a way to support your physical and mental health. In doing so, you are also helping to support other factors associated with weight retention like decreasing stress levels and supporting sleep. 

Person doing yoga.

So my suggestion is to think about movement that  you actually enjoy and will help you to reap both the physical and mental benefits. Plus, the more you actually enjoy your workout the more likely you will stick to it. It is also important to ease into exercise slowly and gradually. Maybe start with a brisk walk, try some light stretches or a gentle yoga flow, and eventually work your way up to higher intensity activities if this is what you enjoy. Joyful movement can be a really helpful tool for sustainable weight loss!

Be Compassionate and Gentle With Yourself

If there is one takeaway from this post, let it be this – be gentle and compassionate with yourself. Remember that your body is an incredible vessel that brought LIFE into the world. That’s freaking badass! So no matter what your weight loss goals are, whether you achieve them, or how long they take, remember that re-establishing a healthy routine should be about self-care, not self-control or punishment. Focus on healthy behaviours that you can sustain and can benefit both your physical and mental health. Let go of any fixation on a specific number, and focus on other markers of health like energy levels, sleep, digestion, mood, and reduced stress. 

Bottom Line on How to Lose Baby Weight While Breastfeeding

I totally understand the social pressure to “bounce back” to your pre-pregnancy weight. In fact, I wrote a whole blog post about my personal experience on navigating the social pressure of getting my “body back”. I also understand that there is a ton of misinformation around weight-loss expectations and how to lose baby weight.

So if you are struggling with the weight of it all, while also trying to stay afloat in the crazy world of new motherhood, just know that you are NOT a failure. You are literally a SUPERWOMAN who brought life into this world. That is so beautiful and your body is something to be celebrated at any size! So give yourself and your body some grace, and the TLC that it deserves by getting back to basic self-care – sleep, nourishment, movement, and self-love. You got this mama! 

Contribution by Ashlyn Ellis, RD MS and Giselle Segovia, RD MHSc

More Blog Posts You Might Like:

If you liked this blog post discussing how to lose baby weight while breastfeeding, then you might also enjoy more blog posts on breastfeeding:

  • Mom Guilt | My Breastfeeding Failure Story
  • How Much Caffeine Can You Have While Breastfeeding?
  • Cow’s Milk Protein Allergy in Infants | Should Breastfeeding Moms Go Dairy Free? 
  • The Truth About Drinking Alcohol While Breastfeeding: Will it Harm My Baby?
  • The Ultimate Exclusively Pumping & Breastfeeding Essentials Guide
  • Is Soy Formula Bad for Babies That Are Vegan or Allergic to Dairy?
  • Do Certain Foods Really Help Morning Sickness

Mamas, I want to hear from you: What has your experience been like postpartum? Leave me a comment!

Abbey Sharp

Abbey Sharp is a Registered Dietitian (RD), regulated by the Ontario College of Dietitians. She is a mom, YouTuber, Blogger, award winning cookbook author, media coach specializing in food and nutrition influencers, and a frequent contributor to national publications like Healthline and on national broadcast TV shows.

www.abbeyskitchen.com/about-abbey/

Last Updated July 21, 2024. Published July 29, 2024 By Abbey Sharp 10 Comments

Cauliflower Tater Tots | Easy Air Fryer Recipe

These cauliflower tater tots are an easy family friendly side-dish or snack that you can easily whip up in the air fryer. It also only takes 7 ingredients and 20 minutes to prepare!

Birds eye view of cauliflower tater tots in a bowl with a side of ketchup and honey mustard sauce.

I love a good tater tot any day of the week, but if I can up the veggie factor in a big way – you KNOW this dietitian mama will jump at the opportunity. Which is why these cauliflower tater tots are my latest obsession.

Made in the air fryer with just a few simple ingredients, these tots are the easiest side dish or snack for when you are craving something on the savoury side. Pair it with your favourite dipping sauce, and I am in tater tot HEAVEN (if such a thing exists).

Table of contents

  • Why This Recipe Works
  • Key Ingredients
  • How to Make This Recipe
  • Expert Tips
  • Recipe FAQs
  • More Recipes You Might Like

Why This Recipe Works

If the words “cauliflower tater tots” weren’t enough to convince you that this recipe is worth trying, then here are a few more reasons why you need to try this recipe ASAP!

  • Only takes 20 minutes to prepares
  • Requires less than 10 ingredients
  • Perfect as an easy side-dish or snack
  • Gluten free optional
  • High fibre (1 gram per a single tot!)

Key Ingredients

Flat lay image of recipe portioned ingredients including cauliflower, flour, egg, cheese, and seasonings.

Cauliflower – I am all for sneaking in a little cauliflower action where there is usually carbs – whether its cauliflower rice, cauliflower pizza, cauliflower oats etc. etc., the list goes on! Cauliflower-based recipes don’t have to be “diet-y”, but rather a fun way to up your veggie and fibre intake.

Cheese – If the tots ain’t cheesy, I don’t want ’em. So we are opting for a sharp cheddar cheese here to make these cauliflower tots extra flavourful!

Flour – we are using a regular all purpose flour, but you can totally experiment with what you have on hand or use a gluten free flour if you need to make these cauliflower tater tots gluten free.

Flavourings – We are keeping it super simple by seasoning with an easy combo of salt, pepper, and onion powder. If you want to bump up the spice factor you can also add in some paprika or cayenne.

How to Make This Recipe

Three side by side images showing how to prepare cauliflower.

Step 1: Steam cauliflower florets in a steamer or in a covered skillet with a tablespoon of water. Steam until soft, about 5-7 minutes.

Step 2: Add cauliflower florets to a high-speed blender or food processor. Blend until smooth.

Step 3: Strain the excess liquid with a cheese cloth or a clean kitchen towel. Allow cauliflower to cool in a bowl (about 5 minutes).

Three side by side images showing how to combine remainder of ingredients, forming into shape on a baking sheet, and frying in an air fryer.

Step 4: Add whisked egg, cheese, and flour to the cauliflower. Mix until combined. Add salt, pepper, and onion powder and mix well.

Step 5: Heat air fryer to 400 F. Scoop about 1 tablespoon of cauliflower mixture and, using your hands, form into a tot shape.

Step 6: Place tots in the air fryer for about 8-10 minutes or until golden brown and crispy on the outside.

Expert Tips

Use a small ice cream scoop or table spoon to form your tots so that they are uniform in shape. I would also suggest flattening them slightly so that they cook evenly.

If you are having a hard time extracting extra moisture from the cauliflower or you don’t have access to a cheesecloth, you can also spread the riced cauliflower in a single layer between two kitchen towels. Similar to how you would press tofu, you can add heavy items on top of the paper towel to help to really squeeze out any excess liquid.

Recipe FAQs

Can I make these in the oven if I don’t have an air fryer?

Absolutely! I’d suggest baking at 375 for about 15-20 minutes or until golden.

Are these low carb or keto friendly?

Each cauliflower tot provides 2 grams of net carbs, so it can certainly be included as part of a low carb or keto diet. You can also try experimenting with other low carb flour options if you want to lower the carb content even further.

Can I batch prep these and freeze them?

For sure. I would suggest arranging in a single layer on a baking sheet and freeze before transferring them to a freezer bag. When you are ready to eat, you can reheat them in the microwave or
reheat for a few minutes in the oven.

What can I dip these in?

You can dip them in regular ketchup or my homemade no-sugar added ketchup recipe. I also love to whip up an easy sriracha mayo if I am in the mood for something on the zesty side.

Can I use pre-packaged cauliflower rice?

I think this is a great idea although I have admittedly never tried. I would suggest heating the riced cauliflower rice (either in the microwave or frying pan), and removing any excess moisture using the cheesecloth method. Otherwise, your cauliflower tater tots won’t crisp up as nicely and will yield a mushier texture.

Close up of a hand dipping cauliflower tater tot in ketchup.

More Recipes You Might Like

If you loved these tots, then you are going to love more of our favourite cauliflower recipes on the blog!

  • Buffalo Pasta Salad with Cauliflower
  • Cauliflower Rice Casserole with Chicken and Broccoli
  • Orange Chicken and Cauliflower (Instant Pot Recipe)
  • Walnut Tacos with Cauliflower and Beets

Have you made these air fryer cauliflower tater tots? Let me know your thoughts down in the comments below!

Print Recipe
4.86 from 7 votes

Cauliflower Tater Tots (Easy Air Fryer Recipe)

These cauliflower tater tots are an easy family friendly side-dish or snack that you can easily whip up in the air fryer. It also only takes 7 ingredients and 20 minutes to prepare!
Prep Time10 minutes mins
Cook Time10 minutes mins
Total Time20 minutes mins
Course: Appetizer, Side Dish
Cuisine: American
Diet: Vegetarian
Servings: 20 tots
Calories: 22kcal
Author: Abbey Sharp

Ingredients

  • 1 head of cauliflower chopped into florets
  • ¼ cup cheddar cheese shredded
  • 1 egg
  • ¼ cup flour gluten free if preferred
  • 1 tsp salt
  • 1 tsp pepper
  • 1 tsp onion powder

Instructions

  • Steam cauliflower florets in a steamer or in a covered skillet with a tablespoon of water. Steam until soft, about 5 minutes.
  • Add cauliflower florets to a high-speed blender or food processor. Blend until smooth.
  • Strain the excess liquid with a cheese cloth or a clean cloth. Allow cauliflower to cool in a bowl (about 5 minutes).
  • In a separate bowl, whisk the egg. Add whisked egg, cheese, and flour to the cauliflower. Mix until combined.
  • Add salt, pepper, and onion powder and mix well.
  • Heat air fryer to 400 F.
  • Scoop about 1 tablespoon of cauliflower mixture and using your hands form into a tot shape.
  • Place tots in the air fryer for about 8-10 minutes or until golden brown and crispy on the outside.
  • Serve with ketchup or condiment of choice.

Nutrition

Calories: 22kcal | Carbohydrates: 3g | Protein: 1g | Fat: 1g | Saturated Fat: 1g | Trans Fat: 1g | Cholesterol: 10mg | Sodium: 137mg | Potassium: 94mg | Fiber: 1g | Sugar: 1g | Vitamin A: 27IU | Vitamin C: 14mg | Calcium: 19mg | Iron: 1mg
Abbey Sharp

Abbey Sharp is a Registered Dietitian (RD), regulated by the Ontario College of Dietitians. She is a mom, YouTuber, Blogger, award winning cookbook author, media coach specializing in food and nutrition influencers, and a frequent contributor to national publications like Healthline and on national broadcast TV shows.

www.abbeyskitchen.com/about-abbey/

Last Updated July 19, 2024. Published July 26, 2024 By Abbey Sharp 2 Comments

Mango Avocado Salad with Shrimp | 5 Minute, No Cook Meal!

This mango avocado salad with shrimp is the perfect no cook meal for these hot summer days when you just CAN’T heat up an oven or stove.

Mango avocado salad on a white plate garnished with shrimp.

Whenever summer rolls around, the heat is absolutely unbearable. Seriously, I know some people think Canada is an ice-box, but the heat waves are awful. This mango avocado salad was developed when I was pregnant and was in absolutely no mood to keep up the kitchen when it was already hot and I felt like I was practically on fire. So these days, no-cook meals are KEY to beating the heat and still getting a healthy lunch or dinner on the table.

Table of contents

  • Why This Recipe Works
  • Key Ingredients
  • How to Make This Recipe
  • Expert Tips
  • Recipe FAQs
  • More Recipes You Might Like

Why This Recipe Works

There’s nothing better than having a meal ready in less than 5 minutes. Need more convincing for why this mango avocado salad is the bomb dot com?

  • Healthy
  • Refreshing
  • Flavourful
  • Easily customizable
  • So easy than you can have your kids help put it together

Key Ingredients

Ingredients needed to make Mango Avocado Salad.

Cooked Frozen Shrimp – You know what is the easiest ingredient of life? Frozen cooked shrimp. My kid loves them to bits, and we do too because they’re so so easy to throw in salads or stir fries.

Mangos– Mangos give this avocado salad a nice sweetness and acidity.

Avocados- Shrimp and avocado are a natural pairing because we have a very lean protein with a nice rich fatty fruit.

Bell Pepper – I like the colour, crunch and its more veg!

Jalapeno Pepper – For a little heat!

Lime – Lime not only prevents the avocado from browning, but it also adds a delicious acidity to bring out the flavour of the shrimp. Avoid using bottled lime juice!

Tajin –Have you had tajin? I became obsessed when my Watermelon Fries with tajin went viral, and it’s still a huge favourite. It’s spicy, limey, sweet and salty and brings out the flavour in this salad SO well.

Boston Lettuce Leaves – This is great for wrapping the shrimp and mango salad but you can also use whole grain or corn tortillas.

How to Make This Recipe

Set of two photos showing ingredients being combined for shrimp avocado salad and then served with lettuce, tajin seasoning, and cilantro.

Step 1: To a bowl, mix the shrimp, mango, avocado, bell pepper, jalapeno pepper, lime juice, and salt. Be sure not to add the lime until you’re ready to serve because if you let it sit too long the shrimp will get a bit tough.

Step 2: Serve in lettuce cups and top with a sprinkle of tajin and cilantro.

Expert Tips

This is so easy, it can be made in 5 minutes and anyone in the family can pull it off. All you need to remember is not to add the lime juice until you’re basically ready to eat because it can turn the already cooked shrimp rubbery and tough. 

You can use fresh shrimp but you’ll either want to poach them in some water to cook them or you can treat this as a ceviche and allow the shrimp to marinate in the lime juice until they are opaque and cooked through. Shrimp doesn’t take a lot of time to cook, once it is opaque, the shrimp is done.

You can turn this into a more traditional salad if you prefer by adding greens to it such as arugula, spinach, or spring mix.

Recipe FAQs

What should I serve with this mango avocado salad?

You could serve this mango avocado salad as-is for a simple easy lunch or dinner, or to beef it up a bit while still keeping it no-cook, I would serve with pita and dip. If you had a bit more time, you could do some rice and beans on the side as a light and easy side dish.

Can I make a big batch of this?

You can make a big batch, however, I do recommend waiting to add the lime juice until you’re ready to eat because it can make the already cooked shrimp a little tough and rubbery since the lime juice essentially can “cook” protein.

Is this not the same as ceviche?

Ceviche is made using raw seafood or fish that gets “cooked” by using an acid like lime juice. This salad is even faster because the shrimp is already cooked and frozen.

Is this spicy?

I don’t find this too spicy with just the jalapenos and the tajin but if you’re super sensitive, then of course, you can omit the spice.

Is this salad kid friendly?

My son adored this but it also contains all of his favourite foods (shrimp, avocado, mango). If your kid is heat sensitive, then of course omit the jalapeños and tajin.

Are there other fruits or veggies you could add in?

You can add in pineapple, papaya, edamame, zucchini, carrots, celery, green beans (cut up), red onions, corn – lots of options!

Is this gluten free?

Yes, this is a completely gluten free recipe so it is safe for those with celiac or gluten intolerance.

Could I make this with chicken?

You absolutely could, but of course, make sure the chicken is fully cooked through since the lime will not be enough to cook the chicken safely. You can simply add some leftover shredded chicken as well.

Plate of mango avocado salad cups.

More Recipes You Might Like

Want some more summer recipes like this mango avocado salad? Here are some super delish ones!

  • Tuna Avocado Panzanella Salad 
  • Grilled Avocado Bruschetta 
  • Buffalo Cauliflower Pasta Salad 
  • Chicken Satay with Thai Almond Sauce 

What are your favourite summer no cook recipes? Leave me a comment below with your thoughts on this one!

Print Recipe
5 from 3 votes

Shrimp and Mango Salad with Avocado (5 Minute No Cook Meal!)

This shrimp and mango salad with avocado is the perfect no cook meal for these hot summer days when you just CAN'T heat up an oven or stove.
Prep Time5 minutes mins
Total Time10 minutes mins
Course: Main Course, Salad, Lunch
Cuisine: American
Servings: 4
Calories: 296kcal
Author: Abbey Sharp

Ingredients

  • 250 g cooked frozen shrimp thawed and cut into small bites
  • 2 alphonso mangos diced
  • 2 avocado diced
  • ½ red bell pepper minced
  • ¼ jalapeno ribs and seeds removed, minced
  • Juice of 1 1/2 limes or to taste
  • Pinch of salt
  • 1 head Boston lettuce separated into cups
  • Tajin seasoning for serving
  • Cilantro for serving

Instructions

  • To a bowl, mix the shrimp, mango, avocado, bell pepper, jalapeno pepper, lime juice, and salt.  Be sure not to add the lime until you’re ready to serve because if you let it sit too long the shrimp will get a bit tough.
  • Serve in lettuce cups and top with a sprinkle of tajin and cilantro.

Notes

  • This is so easy, it can be made in 5 minutes and anyone in the family can pull it off. All you need to remember is not to add the lime juice until you’re basically ready to eat because it can turn the already cooked shrimp rubbery and tough. 
  • If you only have raw shrimp and don’t want to cook it with lime juice, you can quickly saute the shrimp, steam the shrimp, or bake the shrimp. Shrimp doesn’t take a lot of time to cook, once it is opaque, the shrimp is done.
  • You can turn this into a more traditional salad if you prefer by adding greens to it such as arugula, spinach, or spring mix.

Nutrition

Calories: 296kcal | Carbohydrates: 26g | Protein: 16g | Fat: 16g | Saturated Fat: 2g | Cholesterol: 158mg | Sodium: 496mg | Potassium: 840mg | Fiber: 9g | Sugar: 16g | Vitamin A: 3082IU | Vitamin C: 72mg | Calcium: 128mg | Iron: 3mg
Abbey Sharp

Abbey Sharp is a Registered Dietitian (RD), regulated by the Ontario College of Dietitians. She is a mom, YouTuber, Blogger, award winning cookbook author, media coach specializing in food and nutrition influencers, and a frequent contributor to national publications like Healthline and on national broadcast TV shows.

www.abbeyskitchen.com/about-abbey/

Last Updated July 21, 2024. Published July 24, 2024 By Abbey Sharp 2 Comments

Is Obsession with Food Real? How to Stop a Sugar Addiction

We dive into the research to discuss sugar addiction and how to stop food addiction or obsession with food behaviours.

Woah. This is a big topic and let me tell you- it’s a heated one for sure. I’ve had so many specific questions about obsession with food and sugar addiction, I HAD to look into the evidence. I want to start by saying that I have a ton of empathy if you feel like you’re struggling with food obsession, or specifically sugar addiction. I know that a lot of you describe feeling out of control around certain foods and can only associate it with an addictive like experience, and that complete abstinence feels required to feel in control. I’m not discounting your lived experience- this is so real for so many of you. I want to give you some guidance and tools on this based on the literature.

What is Addiction?

Pile of cigarette butts.

According to the Society of Addiction Management, “addiction is a primary, chronic disease of brain reward, motivation, memory, and related circuitry”.  Essentially, it’s a change in the brain that results in a person continuously seeking reward and relief by using a certain substance, such as drugs, or engaging in a specific behaviour, such as sex.

Addiction is diagnosed using the friendly mnemonic ‘ABCDE’:

  • “Inability to consistently Abstain
  • Impairment in Behavioural control
  • Craving; or increased “hunger” for drugs or rewarding experiences;
  • Diminished recognition of significant problems with one’s behaviours and interpersonal relationships; and
  • A dysfunctional Emotional response.”

Furthermore, the DSM (Diagnostic and Statistical Manual of Mental Disorders) criteria for a substance abuse disorder also includes behaviours such as: spending a large amount of time finding and using the substance, inability to cut down despite trying to, and continuing to use the substance even though they and others know how harmful it is. Finally, addiction usually includes a cycle of relapse and remission.

What is Obsession with Food?

The theory of food obsession (aka food addiction) entails similar symptoms to that of drug abuse, such as loss of control and cravings for “problem foods”. It suggests that people with an obsession with food have an inability to abstain from certain foods, crave them, and cannot control their intake.

The term ‘food addiction’ can partially be attributed to the development of a tool called the “Yale Food Addiction Scale”. This scale is a self-reported tool measures addictive-like habits related to food. It has 35 questions about certain eating behaviours and is based off of the DSM criteria for substance addiction. It also asks if the person experiences significant distress related to food.

Once completed, answers that meet the criteria for 11 different addictive food behaviours are tallied. If the person has at least three of the addictive behaviours AND indicated they experience stress related to food, then they are diagnosed with a “food addiction”.

While the Yale Food Addiction Scale may be useful in some settings, it doesn’t tell us much. This scale is based on peoples lived experience, not actual data about addiction, so it really only reflects perception or feelings.

It also doesn’t include any questions that pertain to dieting or restriction. When someone is “diagnosed” with food addiction, they aren’t even screened for disordered eating behaviours. Despite the fact that research has shown time and time again that they are strongly related. That’s a problem. So we don’t actually know that it’s measuring anything different than an eating disorder.

Meanwhile, one study using the Yale Food Addiction Scale found that a “persistent desire or repeated and unsuccessful attempts to quit” a particular food was the only symptom of an obsession with food. This means that other characteristics of addiction weren’t common in relation to food.

Even if this official tool is not perfect, there is still a lot of reasons why this concept prevails. Lets look at the evidence.

Evidence Suggesting an Obsession with Food (Or Specifically Sugar Addiction) is Real

Dopamine Response to Sugar

Large sundae in a glass.

Dopamine is one of the major neurochemicals released from the brain when someone does drugs. From smoking a cigarette to injecting heroin, dopamine levels rise. One of the big arguments for the idea of food as an addictive substance is that studies have shown a dopamine response from food that is similar to the brain’s dopamine response to drugs.

In a small human study, healthy volunteers were given either a tasty milkshake or a tasteless solution and their brains were analyzed. Researchers discovered that the tasty milkshake stimulated the release of dopamine at two different times. It was released when the food was first eaten and again once the food reached their stomach. This dopamine release occurs in the dorsal striatum part of the brain, and that same location of the brain releases dopamine during cocaine use.

A very famous 2005 study gave one group of rats a sugar solution for only 12 hours a day, one was given it twice, and another rat group was given a sugar solution ad libitum (meaning for all hours of the day whenever they wanted). Researchers looked at the rat’s brains and found that on the first day, both rat groups released dopamine. This is because dopamine is always released in response to a new novel food as a way to help keep tabs on it in case it turns out to be poison or something.

Interestingly, they found that the rats given sugar for only 12 hours of the day binged on that sugar. They also found their dopamine levels continued to increase over the course of a month as they eat progressively need to eat more and more each day. The other rat group given sugar all the time did not demonstrate binge like tendencies. I will talk more about later, and following day 1, their dopamine levels stabilized. In other words, the binging on sugar produced a similar dopamine pattern response as what we see when we take hard drugs.

Withdrawal Symptoms from Removal of Sugar

Another one of the reasons people believe sugar to be an addictive substance is thanks to the evidence on withdrawal symptoms. Evidence from rat studies has found that when animals were used to eating sugar and then that sugar was taken away, the rats exhibited signs of depression and anxiety. They even exhibited physical symptoms like a change in blood pressure and heart rate. When researchers looked at the brains of these rats experiencing withdrawal, they found that their dopamine levels dropped. This is also seen in individuals experiencing a withdrawal from drugs. They also noted a rise in the neurotransmitter, acetylcholine, which also tends to rise during withdrawal periods in individuals suffering from substance abuse.

Sugar vs Healthy Foods on Response

Finally, the other popular argument about why sugar is unique in its addictive qualities is from that 2005 study we already discussed. Another phase of the study aimed to determine if animals would become obsessed and overeat healthy foods the same way they do sugar. So they gave rats healthy foods for 12 hours in a day (aka intermittently) and found that they did not binge within the first hour and did not increase their intake over time. The opposite was found when they intermittently fed the animals sugar. There is the argument that there is something specifically in sugar that is producing a desire to binge.

That all sounds really convincing but let’s first consider that these studies are largely rodent based and we can also view this from the opposing side.

Arguments Against Food Obsession

Dopamine Response to Pleasure

The inside of a plastic model of a brain.

In contrast a 2014 Neuroscience & Biobehavioral Reviews found no evidence to support the same brain reaction to sugar that is experienced from cocaine and did not have the same neural “hijacking” on the brain that cocaine does. A more accurate description is that the natural pleasure centers in the brain are fired when we eat and that this is a natural normal reaction but that drugs are actually hijacking these natural pathways.

At the same time, we also see that same dopamine response to positive, non-addictive behaviours and stimulus like music, humour, seeing a loved one, smiling, holding your baby etc. Arguably, music and humour aren’t addicting, and neither is smiling. They are, however, pleasurable – much like food. To call sugar or any food addictive would mean you also have to call cuddling your baby addictive or giving a loved one a gift addictive.

Normal Evolutionary Response

Evolutionary, it only makes sense for us to attain some pleasure from food. Otherwise we would not have enough drive to obtain it in dangerous circumstances and therefore, we probably wouldn’t survive. When it comes to sugar, which is glucose, our body and brain depend on it as they’re preferred source of fuel and energy. Furthermore, in the study I previously mentioned, researchers found that people had a harder time handling high sugar AND fat foods. This makes complete sense from an evolutionary perspective. Fat is the most calorie-dense macronutrient, meaning we get the most energy in the smallest amount. Sugar is immediately absorbed into the body and gives us fast energy. So, if the food is calorie-dense AND has immediate energy, our body is going to want to eat this over other foods.

Burger and fries on a tray.

Now, in periods of deprivation and starvation, our body works in overdrive to force us to eat. This can include sending extreme hunger cues that lead to a bingeing-like episode. While one may view this as “relapsing” or giving into one’s sugar “addiction”, it’s really just the body demonstrating a deep-rooted biological survival mechanism. This is in no way a “failure” to control withdrawal symptoms. What’s more, our body is very smart. It’s going to look for the best option available that involves little energy. What does that mean? It’s going to search for sugar, because it’s easily absorbed into the blood stream with little to no digestion required.

Result of Restriction

Sample in a microscope.

Back to that famous research on rats relating sugar to cocaine. Despite seeing a drug-like response in rat brains to sugar, researchers have found that this only occurred when the rats had previously been restricted from sugar. This means that when rats were able to have sugar when desired, their brains did not light up the same way as opioids. In fact, they responded to sugar like they would to any other type of food.

The authors say it beautifully: “Intermittent access is critical to the development of binging…this paradigm promotes a form of eating under uncertainty because food availability is unpredictable.”

This binging effect was also seen in the animal study I mentioned earlier with the binging rats. The rat group given sugar for only 12 hours binged when they finally got access, and over the 21 days, consistently increased their sugar intake with every binge. Rats given access to sugar whenever they wanted, did not binge, and their total sugar intake was significantly lower. There wasn’t the same desire to overeat the health foods. This suggests there may be something unique about sugar or sweet foods. This effect can be potentially mitigated by simply removing that novel or off limits experience. This is basically why I hate the idea of cheat days.

What About Human Studies?

But that’s just rats, so let’s also consider the effect in humans. In humans, research suggests that those who feel they have an obsession with food tend to have a long, complicated history with disordered eating and dieting. So, when we finally allow ourselves to eat a forbidden food, our brain naturally will get “excited” and cause us to feel out of control.

In fact, research has shown that when we go through long periods of restriction, our brains react differently to food cues. In one research study in a journal called Neuroimage, researchers found that those who restricted food had increased reaction in their brain to food cues. The researchers believe this may lead to greater desire to obtain these foods. Regions in their brain associated with “reward” were much more active as well, suggesting that these people view restricted foods as rewards. The result? They get more desire in eating the food, which may lead to overeating and less control.

If we can learn anything from diet culture, it’s that when we restrict food, we are very likely to binge on the “forbidden” food at some point. In our eyes, these foods are so novel, special, and restricted that eventually we crack and go overboard. Instead, if we were to enjoy foods in moderation and remove the negative labels, we’re more likely to stay in control and not go into a vicious cycle of eat, repent, restrict, repeat.

So Does Sugar Addiction or Food Obsession Actually Exist?

We really don’t know. Sugar addiction may or may not be technically real, but there’s no denying that it feels overwhelmingly real and I think that’s all that ultimately matters.

How to “Cure” an Obsession with Food

Girl with food obsession staring at a cone of ice cream.

When a person is trying to recover from an addiction, it almost always involves abstaining from the substance or behaviour. For a food obsession, this would mean abstaining from “problem” foods such as those with sugar and fat. This is essentially a diet in disguise and can be detrimental to those suffering from disordered eating. In fact, it is likely going to exacerbate the binging behaviours as the evidence all suggests.

In fact, one study in the European Eating Disorders Review, found that 96% of those with self-reported bulimia nervosa met the criteria for “food addiction” or sugar addiction. Only 14% of without disordered eating met the criteria. A Journal of Clinical Psychology showed that 30% of people who meet the Yale Food Addiction Scale’s criteria have binge eating disorder. Coincidence? I think not.

Instead, for disordered eating recovery, we focus on normalizing intake of all kinds of food and never stop eliminating foods from the diet. So, incorrectly suggesting to a person to never have sugar again can further exacerbate disordered eating patterns and these “food addiction” beliefs.

Types of Hunger

When it comes to our extreme addiction-like cravings, it’s really useful to take a moment to consider where it’s coming from. There are three main types of hunger: taste, stomach, and emotional.

Taste/Mouth Hunger

Taste/mouth hunger refers to the desire to eat a particular food. For example, have you ever noticed that you can eat endless amounts of chips when watching TV? Or you specifically need a piece of chocolate after dinner before bed? We usually want to keep our hands and mouths busy and sometimes we really desire a specific flavour or taste experience.

Stomach Hunger

Stomach hunger is the real physical primal hunger we experience when we haven’t eaten in a while. Your stomach is growling and you feel those stomach pangs, your body telling you that it needs some fuel.

Emotional Hunger

Emotional hunger is exactly as it sounds, emotion-based. Whenever we’re upset, happy, or stressed, we tend to turn to food. The classic example is eating a tub of ice cream when you’re sad. Or when you’re happy, you may go out for a celebratory meal. It’s not that you need eat from a physiological standpoint, it’s that you are associate certain foods with certain emotions.

All of these types of hunger are legitimate reasons to eat, so I’m not saying you should never have a celebratory meal. But if you think you’re hungry, take a second to identify which type it is. If it’s stomach hunger, then by all means go have something to eat. However, if it’s emotional hunger or taste hunger, and this seems to happen constantly, think about whether or not eating is going to solve the issue. Will eating the ice cream make you feel better or would talking with a loved one be better? Hey, sometimes the ice cream wins! So if it does, go for it!

Food is not just nutrients, it’s pleasure, memories, culture, and so much more. Trying to restrict food and carrying guilt for occasionally ignoring physical hunger and fullness cues only reinforces dieting and restrictive eating cycles.

Bottom Line on Food Addiction

Listen, we may not be able to change the fact that sugar tastes good, and sometimes, our body might just physiologically crave it on a physiological primal level. But the biggest thing we can do to stop the feeling of “sugar addiction” or food obsession is actually to quit the diet mentality. I know I make this sound easier than it is, which is why we’re working through the steps in my IE series Enlightened. I do want you to know that this is the ONLY way to neutralize their power. It’s not about restricting these addictive foods more rigorously. It’s actually less about anything inherent in “forbidden” food, and more about your mindset.

Trust me, we got this.

Become an Abbey’s Kitchen Subscriber

Research by Katey Davidson, RD

More Blog Posts You Might Like

Interesting in more nutrition blog posts? Here are some more to check out:

  • Best Health Snacks and Foods to Balance Blood Sugar
  • Should You Quit Sugar? Is Sugar Making You Fat and Sick?
  • Sugar and Cancer – The Sugar Feeds Cancer Myths and Facts
  • Stop Binge Snack Attacks with These 5 Tips

What have you heard on food obsession? Let me know in the comments!

Abbey Sharp

Abbey Sharp is a Registered Dietitian (RD), regulated by the Ontario College of Dietitians. She is a mom, YouTuber, Blogger, award winning cookbook author, media coach specializing in food and nutrition influencers, and a frequent contributor to national publications like Healthline and on national broadcast TV shows.

www.abbeyskitchen.com/about-abbey/

Last Updated July 11, 2024. Published July 22, 2024 By Abbey Sharp Leave a Comment

Vegan Tacos with Walnut Taco Meat, Cauliflower, & Pickled Onions

Three tacos on a wooden plate.

A delicious alternative to traditional beef tacos, these Cauliflower Tacos with Walnut Taco Meat and Pickled Beets taste SO good!

Three cauliflower and walnut tacos on a wooden plate.

We love taco night in my house because it’s super fun to assemble your own little meal and make every bite different and unique. But when my family is tiring of the classic ground meat mixture, or pulled chicken (which is DELICIOUS too btw), and I’m looking for some ways to sneak more plant based meals into my family’s day, I go STRAIGHT for these this walnut taco meat. Paired with cauliflower and pickled beets, it’s the best vegan taco combo you’ll try.

Table of contents

  • Why This Recipe Works
  • Key Ingredients
  • How to Make This Recipe
  • Expert Tips
  • Recipe FAQs
  • More Recipes You Might Like

Why This Recipe Works

Did you know that WALNUTS can taste like MEAT? If you haven’t tried this vegan hack, get ready to have your MIND. BLOWN. Other than this tasting ah-mazing, here are some more reasons to make this walnut taco meat tonight!

  • Kids love it
  • Make the pickled beets the night before and you can have dinner ready in TEN minutes!
  • Freezer friendly
  • Packed with Omega-3s

Key Ingredients

Ingredients needed to make Walnut Tacos.

Walnuts — Walnuts are a great ingredients to add to your regular meals as they are packed with healthy fats, fiber, vitamins and mineral. Did you know that walnuts provides 2.5 grams of Omega-3s per 1-ounce serving?

Cauliflower Rice — You can find cauliflower rice at mosy major grocery stores now in the freezer aisle. If you cannot find any, I explain how to DIY in the tips section.

Flavour bombs — We pack these walnut tacos with flavour with all the seasoning we use. We have chili, tamari, chipotle in adobo, and cumin in the filling!

Pickled Beets — I used raw beets and a simple pickling solution that is both sweet and spicy and sits in the fridge overnight to take on flavour. If you’re making this right before you want to serve dinner (which, let’s be real, you PROBABLY ARE), I would suggest using the cooked beets you can now find in a lot of grocery store produce aisles and following the quick pickle instructions below.

How to Make This Recipe

Set of three photos showing how to quickly pickle ingredients, sauteing the walnut filling, and assembling the tacos.

Step 1: To a sauce pot, heat the water, sugar, salt, and cumin until the sugar and salt dissolve. Add the vinegar, jalapenos and beets. Place in a sealed mason jar, and let sit in the fridge for 3-6 hours, or overnight.

Alternative, the quick version: Cook the beets first, then spiralize the beets. Place in a jar with the brine for 30 minutes.

Step 2: To a large nonstick skillet, heat the oil over medium heat. Add the garlic and saute for 30 seconds. Add in the walnuts, frozen cauliflower rice, cumin, chili, tamari, chipotle, lime and maple syrup. Saute and mix until everything is well combined and the cauliflower rice is warmed through, about 5-7 minutes. Season with salt and pepper, to taste.

Step 3: To serve, add the walnut meat to the tacos along with the avocado, radish, pickled beets, sour cream and cheese. Enjoy.

Expert Tips

Since this walnut taco meat recipe is so easy to make, I love making extra of the filling to freeze for later. Once your filling has cooled, you can transfer the walnut cauliflower filling into single or family sized servings freezer bags. Freeze for up to 3 months. When you’re ready to enjoy, you don’t even have to thaw it! Simply add it to a skillet to crisp it back up.

Be sure to not over-pulse the walnuts in the food processor as you want there to be some texture to it and not be a puree.

If you cannot find cauliflower rice for these walnut tacos, you can make your own by putting a head of cauliflower into a food processor or finely dicing the florets by hand. You can also run the head of cauliflower through a box grater to rice it.

Recipe FAQs

Are these walnut tacos gluten-free?

Yes! As long as you use corn tortillas, these vegan walnut meat cauliflower tacos are totally vegan.

Will kids like walnut taco meat?

This recipe does have a kick to it, but you could tone it down to make it more kid friendly. I suggest omitting the chipotle in adobo in the walnut meat cauliflower taco mixture, and then omitting the jalapeno in the pickled beets. If you want to serve this to young toddlers, just make extra sure there is no large pieces of walnuts left in the mixture and that everything is minced very fine.

Can these plant based faux meat tacos be made low carb or keto friendly?

Absolutely! The walnut meat mixture itself (the combination of walnuts and cauliflower is low in carbs), so if you replace the tortilla with a lettuce wrap, you would have a low carb meal.

How long does the walnut taco meat mixture and pickled beets last in the fridge?

The walnut taco meat mixture will last for about 3 days and the beets can last a few weeks in the fridge as they are pickled. To check if your pickled beets are still good, check if the beets have developed an off odour or appearance.

What else can I use the walnut taco meat for?

The filling for these walnut tacos are a really versatile mixture that can also be put on taco salads or in burritos or wraps. You can even throw it over a bowl of rice or quinoa.

Birds eye view of multiple tacos on two wooden plates, filled with walnut taco meat and garnished with cilantro and pickled beets.

More Recipes You Might Like

Want more taco recipes for Taco Tuesday that are just as delicious as my walnut tacos? Try these ones!

  • Peach BBQ Slow Cooker Chicken Tacos
  • Vegan Buffalo Cauliflower & Chickpeas Tacos
  • Tofu Tacos with Vegan Peanut Sauce (Grilled)
  • Vegan Buffalo Cauliflower and Chickpea Hard Tacos | Healthy, High Protein Tacos!

What are you serving for meatless Monday or taco Tuesday this week? Leave me a comment below and send this to a friend who needs some weeknight inspiration!

 
Three tacos on a wooden plate.
Print Recipe
5 from 1 vote

Walnut Tacos with Cauliflower and Pickled Beets (Vegan)

A delicious alternative to traditional beef tacos, these Walnut Tacos with Cauliflower and Pickled Beets are packed with flavour and taste SO good! No one will even notice that it's vegan!
Prep Time30 minutes mins
Cook Time8 minutes mins
Total Time38 minutes mins
Course: Dinner
Cuisine: American, Mexican
Servings: 4 people
Calories: 432kcal
Author: Abbey Sharp

Ingredients

Spiralized Pickled Beets

  • ½ cup water
  • 2 tbsp sugar
  • 1 tbsp salt
  • 1 tbsp ground cumin
  • ½ cup apple cider vinegar
  • ½ jalapeno sliced (omit if you don’t like heat)
  • 1½ cups spiralized beets

For the Walnut Tacos

  • 1 tbsp extra virgin olive oil
  • 2 cloves garlic minced
  • 1½ cups walnuts pulsed in a food processor to a minced consistency
  • 400 grams bag frozen cauliflower rice about 2 cups
  • 1 tsp cumin
  • 2 tsp chili powder
  • 2 tbsp low sodium tamari
  • 2 chipotle in adobo peppers minced
  • 1 tbsp maple syrup
  • Juice of ½ lime
  • Salt and pepper to taste

To Serve:

  • Toasted corn tortillas
  • Avocado sliced
  • Radishes thinly sliced
  • Vegan crumbled cheese
  • Vegan sour cream

Instructions

  • To a sauce pot, heat the water, sugar, salt, and cumin until the sugar and salt dissolve. Add the vinegar, jalapenos and beets. Place in a sealed mason jar, and let sit in the fridge for 3-6 hours, or overnight.
  • Quickle version: Cook the beets first, then spiralize the beets. Place in a jar with the brine for 30 minutes.
  • To a large nonstick skillet, heat the oil over medium heat. Add the garlic and saute for 30 seconds. Add in the walnuts, frozen cauliflower rice, cumin, chili, tamari, chipotle, lime and maple syrup. Saute and mix until everything is well combined and the cauliflower rice is warmed through, about 5-7 minutes. Season with salt and pepper, to taste.
  • To serve, add the walnut meat to the tacos along with the avocado, radish, pickled beets, sour cream and cheese. Enjoy.

Video

Notes

  • Since this walnut taco recipe is so easy to make, I love making extra of the filling to freeze for later. Once your filling has cooled, you can transfer the walnut cauliflower filling into single or family sized servings freezer bags. Freeze for up to 3 months. When you’re ready to enjoy, you don’t even have to thaw it! Simply add it to a skillet to crisp it back up.
  • Be sure to not over-pulse the walnuts in the food processor as you want there to be some texture to it and not be a puree.
  • If you cannot find cauliflower rice for these walnut tacos, you can make your own by putting a head of cauliflower into a food processor or finely dicing the florets by hand. You can also run the head of cauliflower through a cheese grater to rice it.

Nutrition

Calories: 432kcal | Carbohydrates: 29g | Protein: 11g | Fat: 33g | Saturated Fat: 3g | Sodium: 2442mg | Potassium: 772mg | Fiber: 8g | Sugar: 16g | Vitamin A: 830IU | Vitamin C: 54mg | Calcium: 104mg | Iron: 4mg
Abbey Sharp

Abbey Sharp is a Registered Dietitian (RD), regulated by the Ontario College of Dietitians. She is a mom, YouTuber, Blogger, award winning cookbook author, media coach specializing in food and nutrition influencers, and a frequent contributor to national publications like Healthline and on national broadcast TV shows.

www.abbeyskitchen.com/about-abbey/
  • Previous Page
  • Go to page 1
  • Go to page 2
  • Go to page 3
  • Go to page 4
  • Go to page 5
  • Go to page 6
  • Interim pages omitted …
  • Go to page 89
  • Next Page

Get started with

Eight Free Recipe Books

From the co-founder of Neue Theory and creator of the Hunger Crushing Combo

Sign me up!
Abbey smiling at table
Abbey Sharp

“Foods may never be nutritionally equal. But we can make them morally equal by recognizing that our worth is never determined by what's on our plate.”

— Abbey Sharp, RD About Abbey ◥

Books

  • HCC™
  • Mindful Glow
  • Free E-Books

Blog

  • Nutrition
  • Recipes
  • Motherhood
  • Life

Explore

  • Neue Theory™
  • Bite Back
  • YouTube

Abbey

  • About
  • Coaching
YouTube TikTok Instagram Facebook X Pinterest
Abbey Sharp - The No BS Dietitian From Abbeys Kitchen

© Abbey's Kitchen 2026  All Rights Reserved •  ACCESSIBILITY STATEMENT •  Privacy Policy

This site uses cookies. By continuing to browse the site, you are agreeing to the use of cookies Accept Privacy Policy
Privacy & Cookies Policy

Privacy Overview

This website uses cookies to improve your experience while you navigate through the website. Out of these, the cookies that are categorized as necessary are stored on your browser as they are essential for the working of basic functionalities of the website. We also use third-party cookies that help us analyze and understand how you use this website. These cookies will be stored in your browser only with your consent. You also have the option to opt-out of these cookies. But opting out of some of these cookies may affect your browsing experience.
Necessary
Always Enabled
Necessary cookies are absolutely essential for the website to function properly. This category only includes cookies that ensures basic functionalities and security features of the website. These cookies do not store any personal information.
Non-necessary
Any cookies that may not be particularly necessary for the website to function and is used specifically to collect user personal data via analytics, ads, other embedded contents are termed as non-necessary cookies. It is mandatory to procure user consent prior to running these cookies on your website.
SAVE & ACCEPT

Rate This Recipe

Your vote:


A rating is required
A name is required
An email is required