• Skip to main content

Abbey's Kitchen

Healthy Recipes, Nutrition Myth Busting, Healthy Eating Tips

  • Books
    • HCC™
    • The Mindful Glow Cookbook
    • Recipe eBooks
      • Family
      • Hypothyroidism
      • BLW
      • Vegan Week 1
      • Vegan Week 2
      • Vegan Week 3
      • Keto
      • Gluten Free Week 1
      • Gluten Free Week 2
      • Fitness
      • Paleo
  • Blog
    • Nutrition
    • Recipes
    • Motherhood
    • Life
  • Explore
    • Neue Theory™
    • Bite Back With Abbey Sharp
      • Apple Music
      • Spotify
      • Amazon Music
    • YouTube
  • Abbey
    • About
    • Coaching
    • Contact

Abbey Sharp

Last Updated February 12, 2023. Published February 20, 2023 By Abbey Sharp 11 Comments

Greek Sheet Pan Dinner (Easy Family Friendly Recipe)

Greek chicken on a sheet pan with roasted veggies

When life gets busy, this Greek Sheet Pan Dinner do all the work for you and gets dinner on the table fast. This Greek chicken breast recipe is the perfect low carb family friendly dinner that won’t disappoint you or your kiddos!
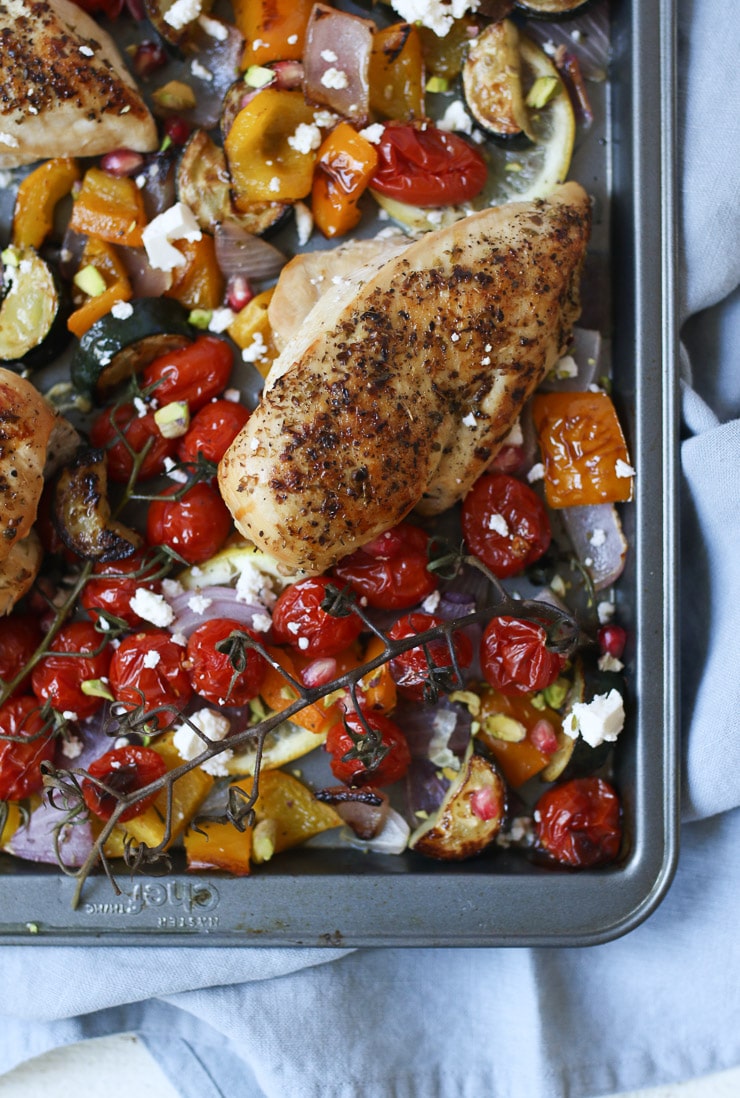
Greek chicken on a sheet pan with roasted vegetables

Sheet pan dinners are the hero of the night on busy nights because they’re easy to put together, fast and don’t leave a messy clean up. This Greek sheet pan dinner recipe is also amazing for speedy meal prep. Double the recipe by using a second sheet pan, and then add straight to meal prep containers for a healthy lunch the next day. Ready to put this Greek sheet pan dinner on rotation this week? Here’s to make it.

Table of contents

  • Why This Recipe Works
  • Key Ingredients
  • How to Make This Recipe
  • Expert Tips
  • Recipe FAQs
  • More Recipes You Might Like

Why This Recipe Works

I think we all know just how amazing a sheet pan dinner is but if you need a little more convincing, here are a few more reasons to make this Greek sheet pan dinner recipe.

  • Gluten free
  • Low carb
  • Family friendly
  • Super easy to prepare
  • Easy to meal prep
  • Packed with flavour

Key Ingredients

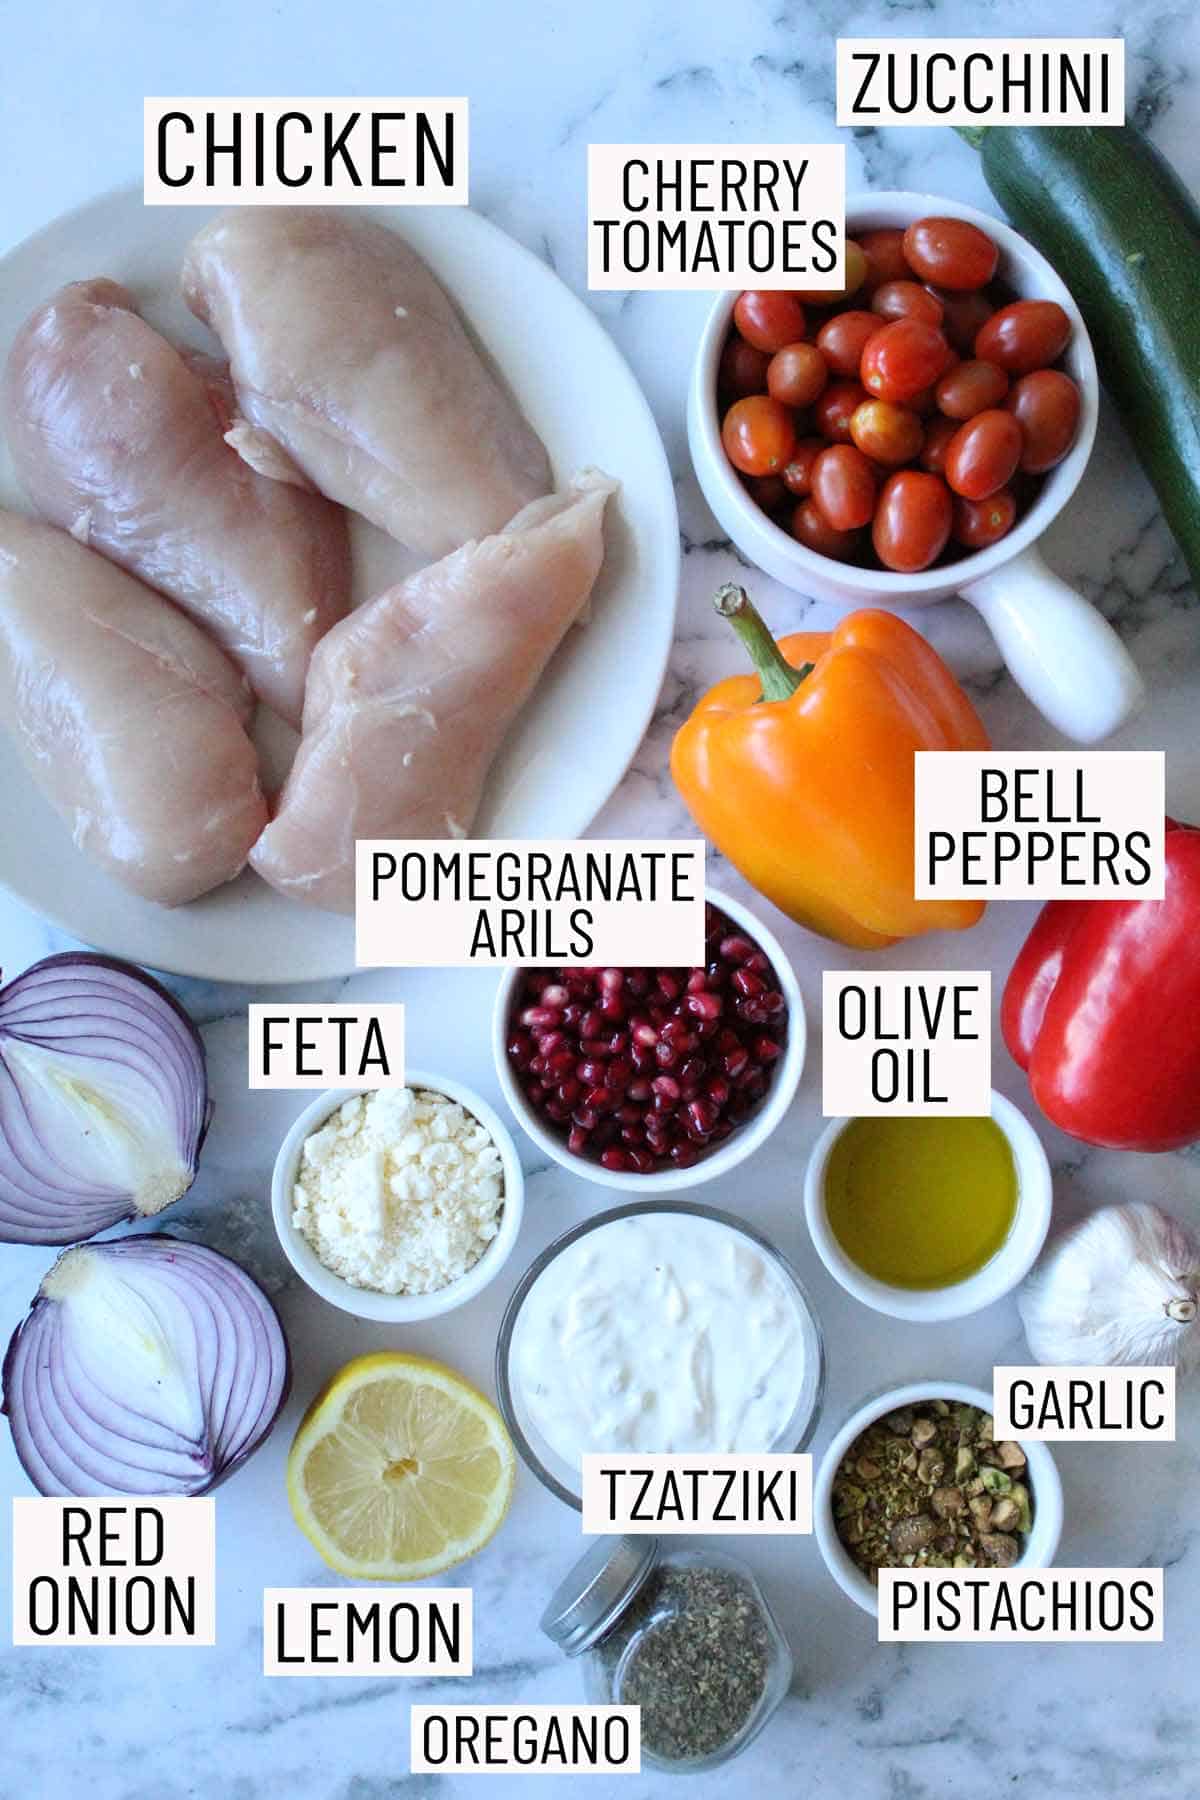
Overhead image for ingredients for a sheet pan dinner.

Chicken Breasts — I used chicken breast for this recipe, but it can TOTALLY work for chicken thighs, salmon or tofu! I encourage you to experiment with whatever you have on hand. 

Veggies — My favourite grilled veggie combo are zucchini, cherry tomato, bell peppers, and red onion! But honestly, you can totally use up whatever veggies you have in your fridge and this recipe would still be super flavourful and nutrient packed. My one rule – the more colour, the better!

Lemon Juice — Lemon juice is so important for this recipe to really bring out the aromatic flavours! If you don’t have any lemon juice around, you can always substitute it for some lime juice. 

Herbs — In addition to a bit of salt and pepper, oregano is a MUST for this recipe. 

Garnishes — In my books, Greek food just ain’t Greek food without a generous topping of Tzatziki, feta cheese, and parsley! For this Greek sheet pan dinner recipe, I took things up a notch by adding pomegranate arils and crushed pistachios. 

How to Make This Recipe
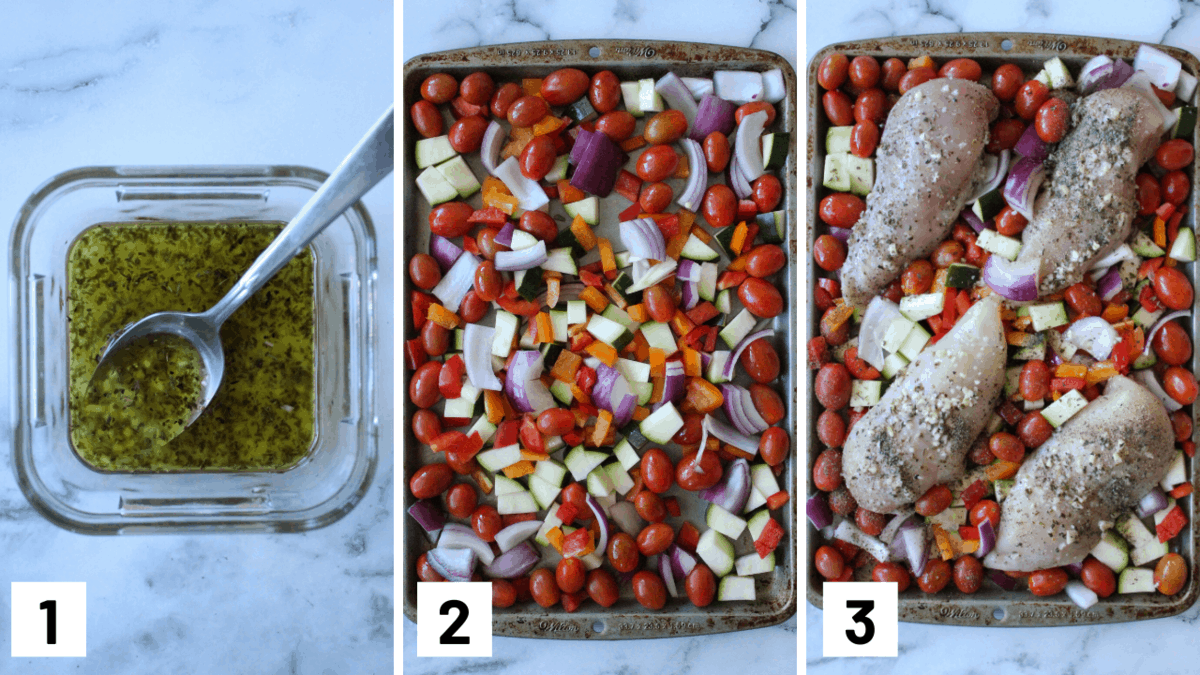
Set of three photos showing making a marinade, placing vegetables on a baking tray, and then adding chicken to it.

Step 1: In a plastic bag or container, mix together the olive oil, garlic, lemon, oregano, salt and pepper. Add the chicken and allow to marinate for 4-8 hours in the refrigerator.

Step 2: Preheat oven to 450F. Arrange the vegetables onto a large greased baking tray and drizzle with a few spoonfuls of the marinade.

Step 3: Nestle the chicken breasts in and bake for 20-25 minutes or until the chicken reaches an internal temperature of 165F. To serve, garnish with pomegranate arils, pistachios, tzatziki, feta and parsley. Serve the Greek sheet pan dinner with pita, if desired.

Expert Tips

For faster clean up, you can line your sheet pan with tin foil or parchment paper.

The best way to determine the internal temperature for your chicken is by using an instant read thermometer.

Be sure to let the Greek sheet pan chicken breasts rest for 5 to 10 minutes before cutting. This helps keep the chicken breasts moist! Plus it needs to cool before you eat it anyways!

This recipe will require you to plan ahead as the chicken has to be marinaded. If you want to prepare this ahead of time, you can marinade the chicken breasts immediately after purchasing it and store it in your freezer until you’d like to make this sheet pan dinner. Simply allow the chicken to thaw in the fridge overnight and it can marinate as it thaws!

Recipe FAQs

Is this Greek chicken recipe kid-friendly?

Chicken breasts are “safe” for most kids, and this version is flavourful with the addition of cheese and tzatziki on top (and kids love dip). While as is, it is an awesome low carb main dish (and with enough veggies to satisfy), if you’re serving these sheet pan chicken breasts to the kiddos, add in pita bread, rice or quick-cooking orzo. It’s a fast and simple meal solution I know you and the family are going to love.

What can I use instead of chicken breasts?

This recipe works well with any protein you have on hand. Whether it’s chicken thighs, shrimp, salmon or steak, or plant-based protein like tofu or falafel balls. You really can’t go wrong!

What can I serve as a side dish for this Greek sheet pan dinner recipe?

This recipe can certainly hold its own if you’re looking for a low carb meal. But if you need some more carbs to round out this recipe, it would pair really nicely with a side of orzo, couscous, quinoa or pita bread. It would also be super dreamy with a veggie loaded pasta salad like my vegan pesto salad or my pistachio parsley pasta salad. 

How do I meal prep this?

Simply divide up the sheet pan meal into airtight containers. Avoid cutting the chicken up as it helps keep your chicken moist when you reheat the Greek chicken and vegetables.

Do I need fresh lemon juice? Can I use bottled?

While I suggest you to use what you have, I suggest avoiding the bottled lemon juice. Bottled lemon tend to not take as bright and fresh and sometimes have a bitter aftertaste to it. Use fresh lemon juice whenever possible!
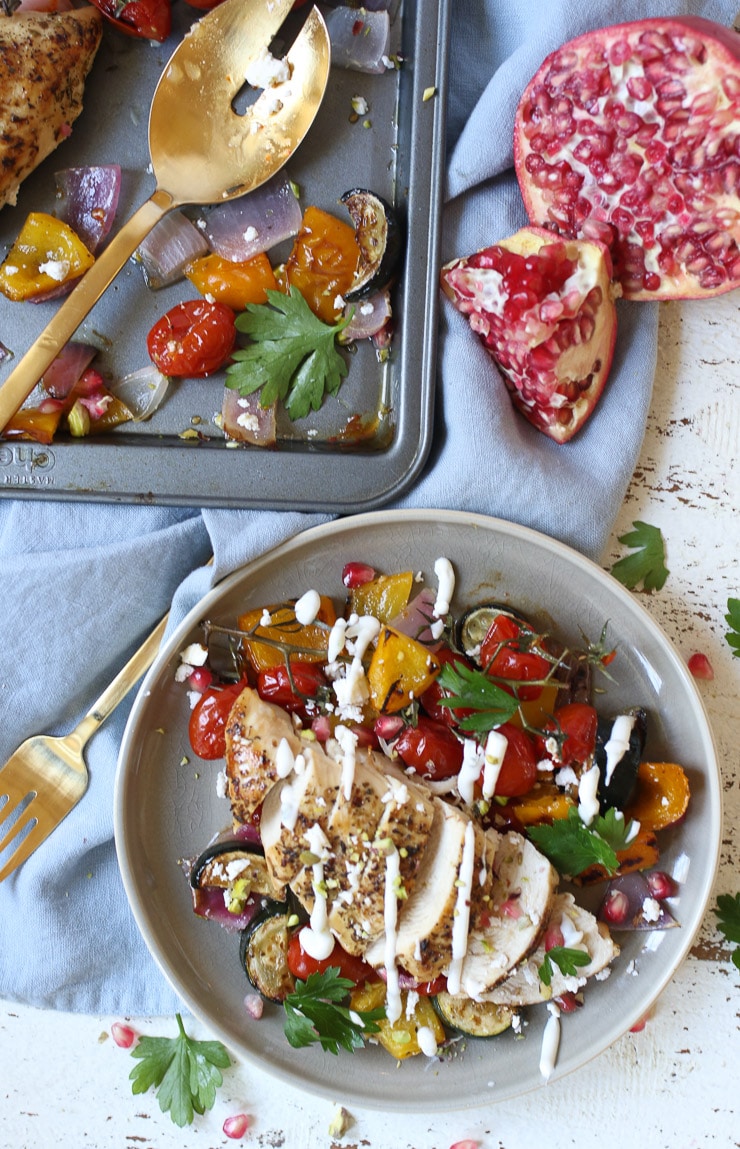
Greek chicken served on a plate with veggies and tzaziki drizzle.

More Recipes You Might Like

If you’re looking for more sheet pan meals like this Greek sheet pan dinner, try these reader favourites!

  • Rosemary Chicken Breast Sheet Pan Dinner
  • Vegan Chickpea & Cauliflower Sheet Pan Dinner
  • Sticky Chicken Breast Sheet Pan Dinner
  • Buffalo Chicken Fingers Sheet Pan Dinner
  • Chinese Five Spice Shrimp Stir Fry

Now tell me, are you a sheet pan dinner fan? What are your tips and tricks on getting dinner on the table fast for your family? Let me know in the comments below.
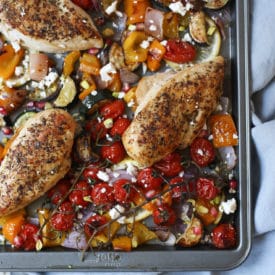
Greek chicken on a sheet pan with roasted veggies
Print Recipe
4.93 from 13 votes

Greek Sheet Pan Chicken (Easy Family Friendly Recipe)

When life gets busy, this Greek Sheet Pan Chicken do all the work for you and gets dinner on the table fast. This Greek chicken breast recipe is the perfect low carb family friendly dinner that won't disappoint you or your kiddos!
Prep Time8 hours hrs
Cook Time25 minutes mins
Total Time8 hours hrs 25 minutes mins
Course: Dinner
Cuisine: American, Greek
Servings: 4 people
Calories: 288kcal
Author: Abbey Sharp

Ingredients

  • 3 tbsp extra virgin olive oil
  • 4 skinless boneless chicken breasts
  • 2 tbsp lemon juice
  • 1 tsp dried oregano
  • 2 Cloves Garlic Minced
  • ½ tsp salt
  • ½ tsp pepper
  • 1 zucchini diced
  • 1 pint cherry tomatoes
  • 1 orange bell pepper diced
  • 1 yellow bell pepper diced
  • 1 red onion diced

Garnish Options

  • Pomegranate arils
  • Pistachios crushed
  • Tzatziki for drizzling
  • Feta cheese crumbled
  • Parsley leaves

Instructions

  • In a plastic bag, mix together the olive oil, garlic, lemon, oregano, salt and pepper. Add the chicken and allow to marinate for 4-8 hours in the refrigerator.
  • Preheat oven to 450 F.
  • Arrange the vegetables onto a large greased baking tray and drizzle with a few spoonfuls of the marinade. Nestle the chicken breasts in and bake for 20-25 minutes or until the chicken reaches an internal temperature of 165 F.
  • To serve, garnish with pomegranate arils, pistachios, tzatziki, feta and parsley. Serve with pita, if desired.

Notes

  • For faster clean up, you can line your sheet pan with tin foil or parchment paper.
  • The best way to determine the internal temperature for your chicken is by using an instant read thermometer.
  • Be sure to let the Greek sheet pan chicken breasts rest for 5 to 10 minutes before cutting. This helps keep the chicken breasts moist! Plus it needs to cool before you eat it anyways!
  • This recipe will require you to plan ahead as the chicken has to be marinaded. If you want to prepare this ahead of time, you can marinade the chicken breasts immediately after purchasing it and store it in your freezer until you’d like to make this sheet pan dinner. Simply allow the chicken to thaw in the fridge overnight and it can marinate as it thaws!

Nutrition

Calories: 288kcal | Carbohydrates: 13g | Protein: 24g | Fat: 16g | Saturated Fat: 3g | Cholesterol: 107mg | Sodium: 411mg | Potassium: 829mg | Fiber: 3g | Sugar: 7g | Vitamin A: 1695IU | Vitamin C: 133.2mg | Calcium: 45mg | Iron: 2.4mg
Abbey Sharp

Abbey Sharp is a Registered Dietitian (RD), regulated by the Ontario College of Dietitians. She is a mom, YouTuber, Blogger, award winning cookbook author, media coach specializing in food and nutrition influencers, and a frequent contributor to national publications like Healthline and on national broadcast TV shows.
www.abbeyskitchen.com/about-abbey/

Last Updated December 7, 2020. Published February 17, 2023 By Abbey Sharp 29 Comments

Vegan Brownie Recipe | No Bake and Gluten Free!

These Rainbow No Bake Brownies are perfect Vegan and Gluten Free Desserts for getting your chocolate fix any night of the week.

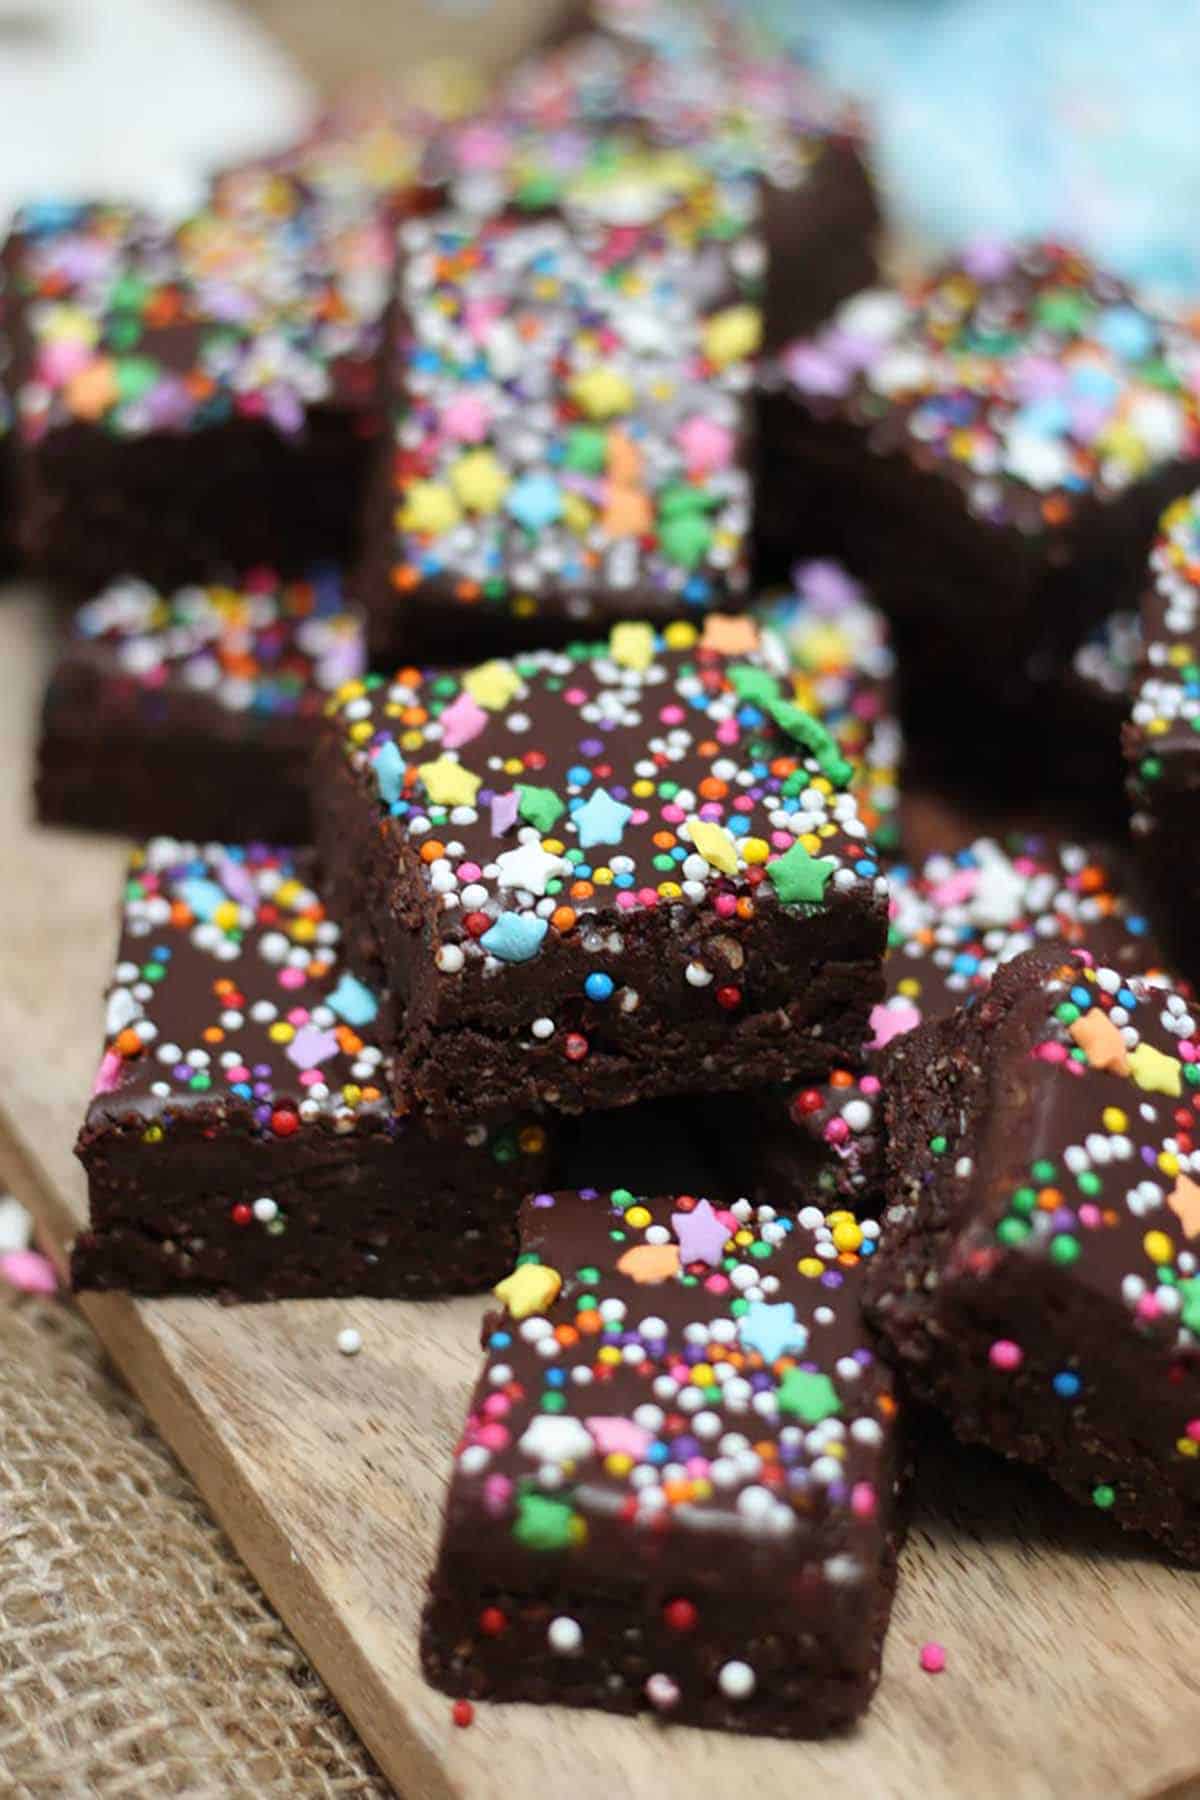
 These Rainbow No Bake Brownies are the perfect vegan brownie recipe for getting your chocolate fix any night of the week.

A finished vegan brownie recipe on a wooden cutting board.

Weren’t the 90’s the best time for treats? From Dunkaroos to Gushers to Twinkies – there was always something fun to look forward to in my 90’s retro lunch box.

So I’ve decided to bring back a little taste of the 90’s with this vegan brownie recipe, full of nostalgic rainbow sprinkles that are reminiscent of the classic cosmic brownies we millennials know and love from our childhood.

Table of contents

  • Why This Recipe Works
  • Key Ingredients
  • How to Make This Recipe
  • Expert Tips
  • Recipe FAQs
  • More Recipes You Might Like

Why This Recipe Works

I don’t know about you, but I truly believe that anything rainbow tastes better – rainbow ice cream, rainbow candy, rainbow cake, you name it! So I knew I couldn’t go wrong with these rainbow no bake brownies.

This vegan brownie recipe is also perfect for celebrations, and considering my birthday is coming up real soon, I thought why not celebrate with a bit of nostalgia? This recipe is not only easy as pie and made with nutrient-dense ingredients, but it can satisfy the sweet tooth of all of my vegan and gluten free friends.

Key Ingredients

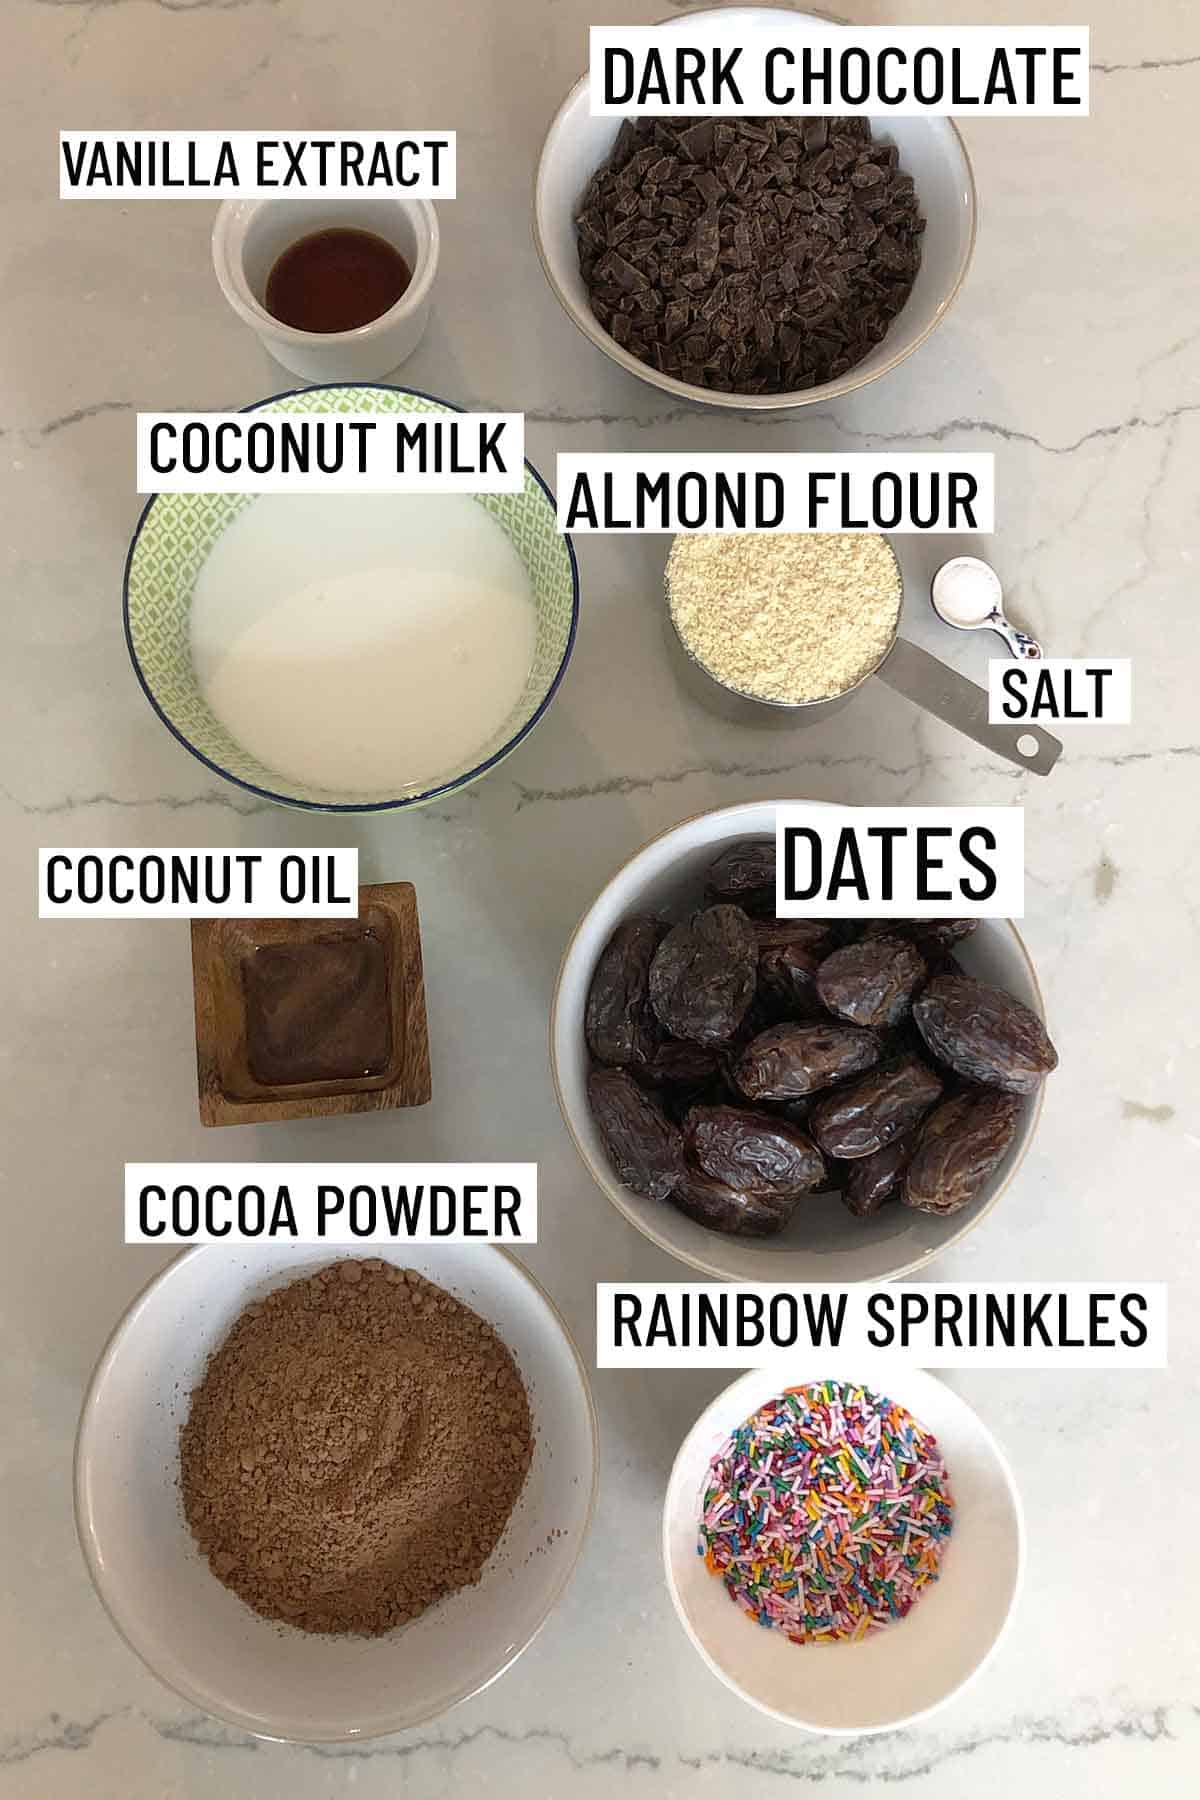
Birds eye view of portioned ingredients for this vegan brownie recipe, including as rainbow sprinkles, coconut milk, coconut oil, cocoa powder, almond flour, salt, vanilla extract, and dark chocolate.

Brownie Base – to make the brownie base, we combine dates for some natural sweetness, cocoa powder for chocolate flavour, as well as almond flour, coconut oil, vanilla, and a little salt.

Ganache – the simpler the better when it comes to the two ingredient ganache for these no bake brownies which includes a mixture of coconut milk and dark chocolate

How to Make This Recipe

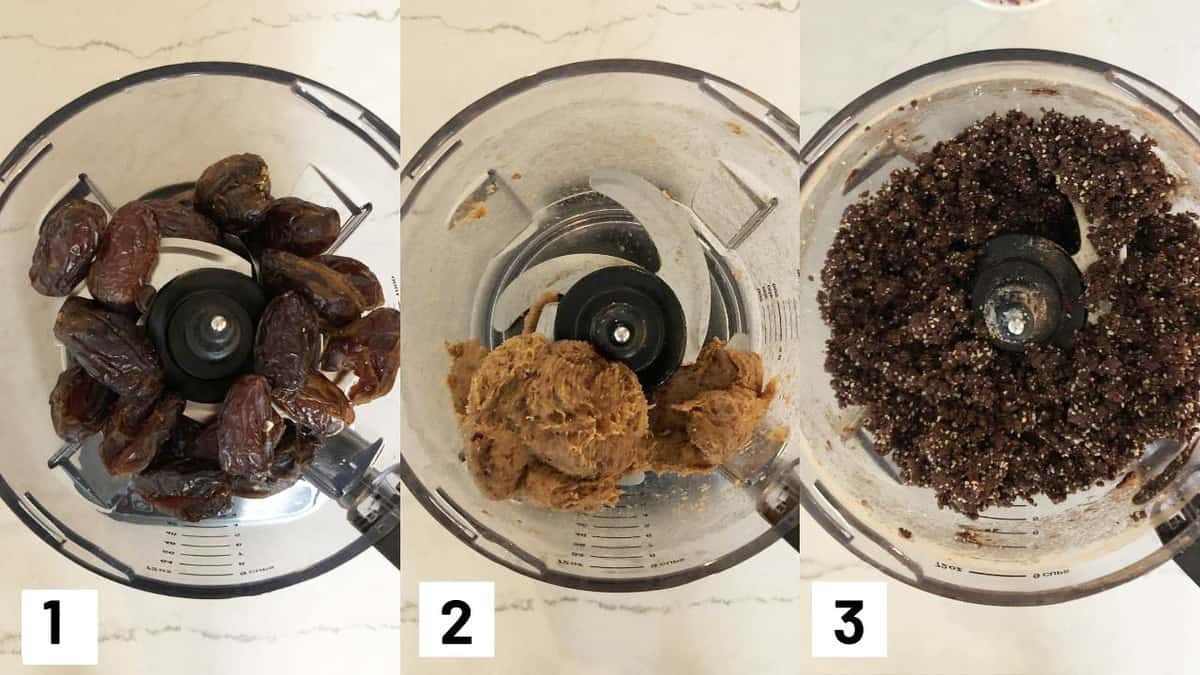
Three side by side images showing how to make the recipe including pureeing the dates and making the brownie base with almond flour, cocoa powder, coconut oil, salt, and vanilla.

Step 1: Add dates to food processor.

Step 2: Puree the dates until they reach a thick paste.

Step 3: Add in the almond flour, cocoa powder, coconut oil, salt, and vanilla. Process until well combined.

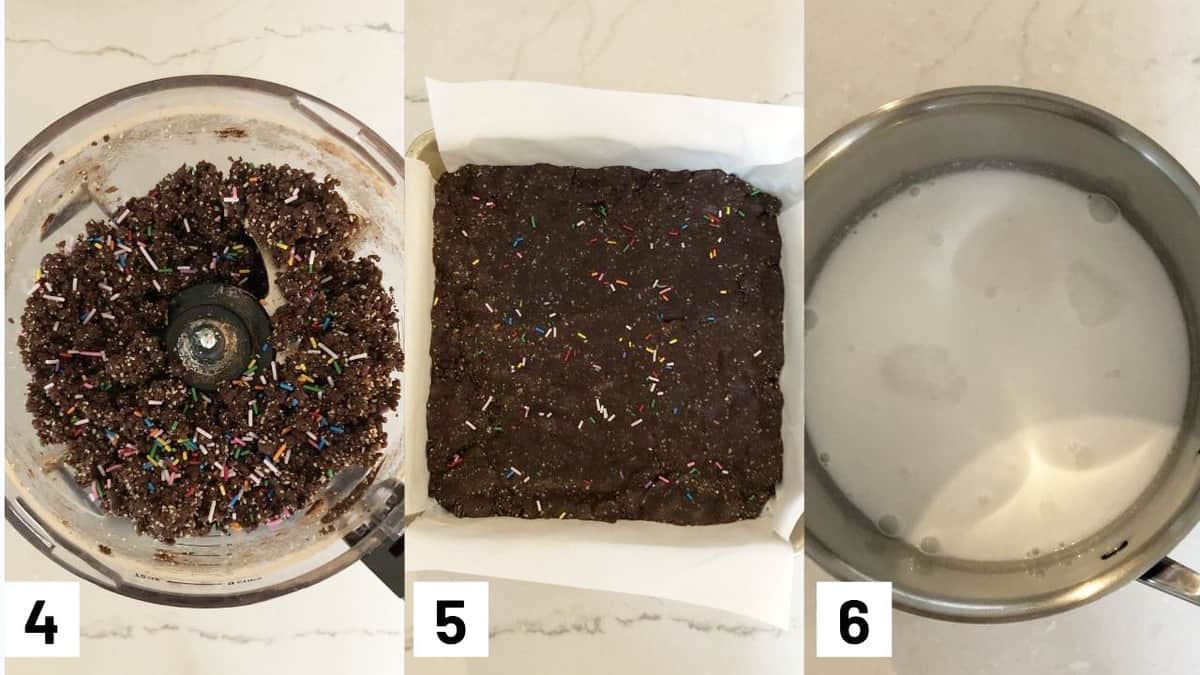
Three side by side images showing how to make recipe including adding in the sprinkles to the brownie mixture, pressing brownie mixture into a pan, and heading up coconut milk in a sauce pot.

Step 4: Add rainbow sprinkles to brownie mixture.

Step 5: Line a 9″ square baking dish with parchment paper and press brownie mixture firmly into the bottom. Place in the fridge.

Step 6: Meanwhile, heat the coconut milk in a saucepan over medium high until boiling.

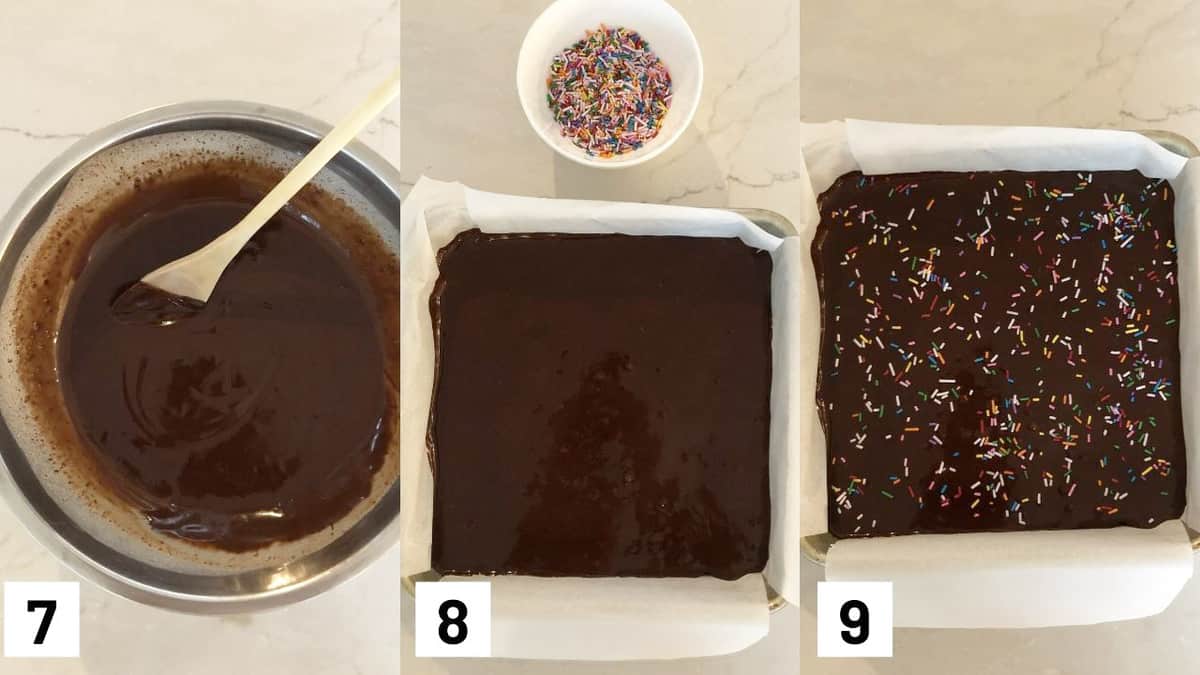
Three side by side images showing how to melt the chocolate with the coconut milk, pouring over top of the brownie base, and add sprinkles.

Step 7: Remove coconut milk from the heat and add the dark chocolate. Stir until the chocolate has melted.

Step 8: Remove the brownie base from the fridge and pour melted chocolate on top.

Step 9: Sprinkle liberally with sprinkles. Refrigerate for at least an hour to set.

Expert Tips

To make the base in this vegan brownie recipe, it’s basically just a combination of sweet dates, almonds and cocoa powder. There’s no need to add extra sugar as they are naturally pretty sweet and rich. Plus the sprinkles will add their own little touch of sweetness.

The ganache in these is also super easy and requires only two ingredients – coconut milk and dark chocolate. We also want to set these in the fridge to harden, so there is no need to bake them through.

I recommend cutting these brownies into small squares because a little bit goes a long way. Despite all those healthy ingredients, they’re remarkably rich and satisfying. You can also freeze them so that you have a little something-something to get you through any tough day.

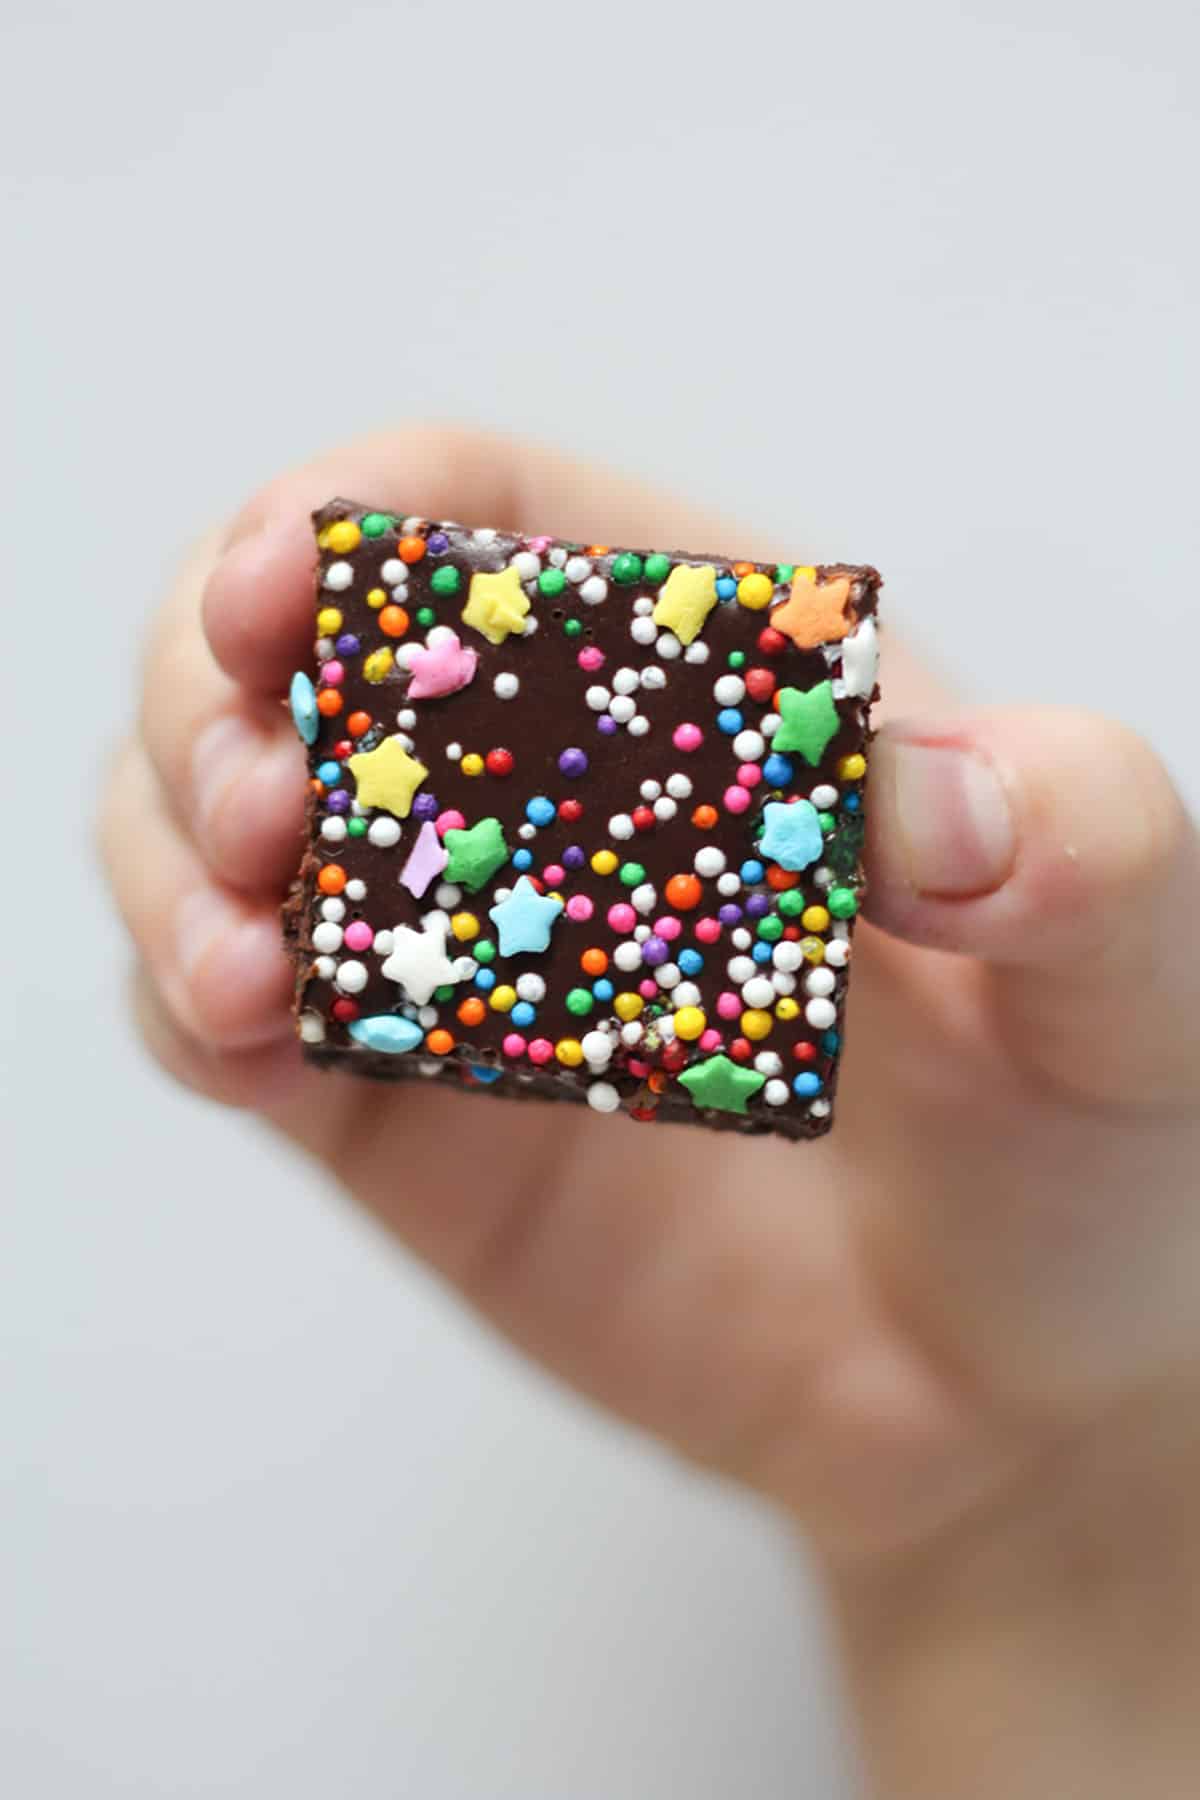
Hand holding up a no bake brownie square with rainbow sprinkles.

Recipe FAQs

How can I store these brownies?

You can store these brownies in an air tight container in the fridge. They will keep for about 2 weeks. They are also freezer friendly and you can freeze them to enjoy at later times. Wrap the brownies in parchment paper, and place them in a shallow container or ziplock bag. 

Can I freeze these brownies?

Yes! This vegan brownie recipe is totally freezer friendly. Simply wrap them in parchment paper and place them in a container or freezer bag. To thaw, let sit at room temperature until soft enough to eat. They should keep in the freezer for about 6 months.

More Recipes You Might Like

  • Peanut Butter Chocolate Protein Balls
  • Gluten Free Vegan Protein Bars Three Ways
  • Frozen Vegan Peanut Butter Pie
  • Gluten Free No Bake Granola Bars with Peanut Butter and Apricot
  • No Bake Vegan Peanut Butter Blondies

Have you tried making this vegan brownie recipe? Leave me a comment below with your thoughts!

These Rainbow No Bake Brownies are perfect Vegan and Gluten Free Desserts for getting your chocolate fix any night of the week.
Print Recipe
4.72 from 14 votes

Vegan Brownie Recipe | No Bake and Gluten Free!

These Rainbow No Bake Brownies are the perfect vegan brownie recipe for getting your chocolate fix any night of the week.
Prep Time1 hour hr
Cook Time10 minutes mins
Total Time1 hour hr 10 minutes mins
Course: Dessert
Cuisine: American
Diet: Gluten Free, Vegan
Servings: 16 bars
Calories: 265kcal
Author: Abbey Sharp

Ingredients

  • 3 cups soft dates pitted and diced
  • 1 cup almond flour
  • 3/4 cup unsweetened cocoa powder
  • 2 tbsp melted coconut oil
  • 1/2 tsp salt
  • 2 tsp vanilla extract
  • 1/4 cup rainbow sprinkles

Ganache:

  • 1 1/2 cups dairy free dark chocolate finely chopped
  • 1/2 cup + 1/3 cup full-fat coconut milk can shaken
  • Rainbow Sprinkles

Instructions

  • In a food processor, puree the dates until they reach a thick paste. Add in the almond flour, cocoa powder, coconut oil, salt, and vanilla. Process until well combined then mix in the sprinkles.
  • Line a 9″ square baking dish with parchment paper and press it firmly into the bottom. Place in the fridge.
  • Meanwhile, heat the coconut milk in a saucepan over medium high until boiling. Remove from the heat and pour over the chocolate. Stir until the chocolate has melted.
  • Remove the brownie base and pour chocolate all over the brownies. Sprinkle liberally with sprinkles. Refrigerate for at least an hour to set.
  • Cut into 16 bars and enjoy!

Video

Notes

To make the brownie base, it’s basically just a combination of sweet dates, almonds and cocoa powder. There’s no need to add extra sugar as they are naturally pretty sweet and rich. Plus the sprinkles will add their own little touch of sweetness.
The ganache in these is also super easy and requires only two ingredients – coconut milk and dark chocolate. We also want to set these in the fridge to harden, so there is no need to bake them through.
I recommend cutting these no bake brownies into small squares because a little bit goes a long way. Despite all those healthy ingredients, they’re remarkably rich and satisfying. You can also freeze them so that you have a little something-something to get you through any tough day.

Nutrition

Calories: 265kcal | Carbohydrates: 35g | Protein: 4g | Fat: 14g | Saturated Fat: 8g | Cholesterol: 1mg | Sodium: 78mg | Potassium: 375mg | Fiber: 6g | Sugar: 24g | Vitamin A: 5IU | Vitamin C: 0.2mg | Calcium: 44mg | Iron: 3.3mg

Abbey Sharp

Abbey Sharp is a Registered Dietitian (RD), regulated by the Ontario College of Dietitians. She is a mom, YouTuber, Blogger, award winning cookbook author, media coach specializing in food and nutrition influencers, and a frequent contributor to national publications like Healthline and on national broadcast TV shows.
www.abbeyskitchen.com/about-abbey/

Last Updated February 12, 2023. Published February 15, 2023 By Abbey Sharp Leave a Comment

Ways to Cook Eggs – The Ultimate Guide to this Nutritious Staple

Everything you wanted to know about ways to cook eggs including egg nutrition, how much cholesterol is in an egg (and why this matters), and the best healthy egg recipes.

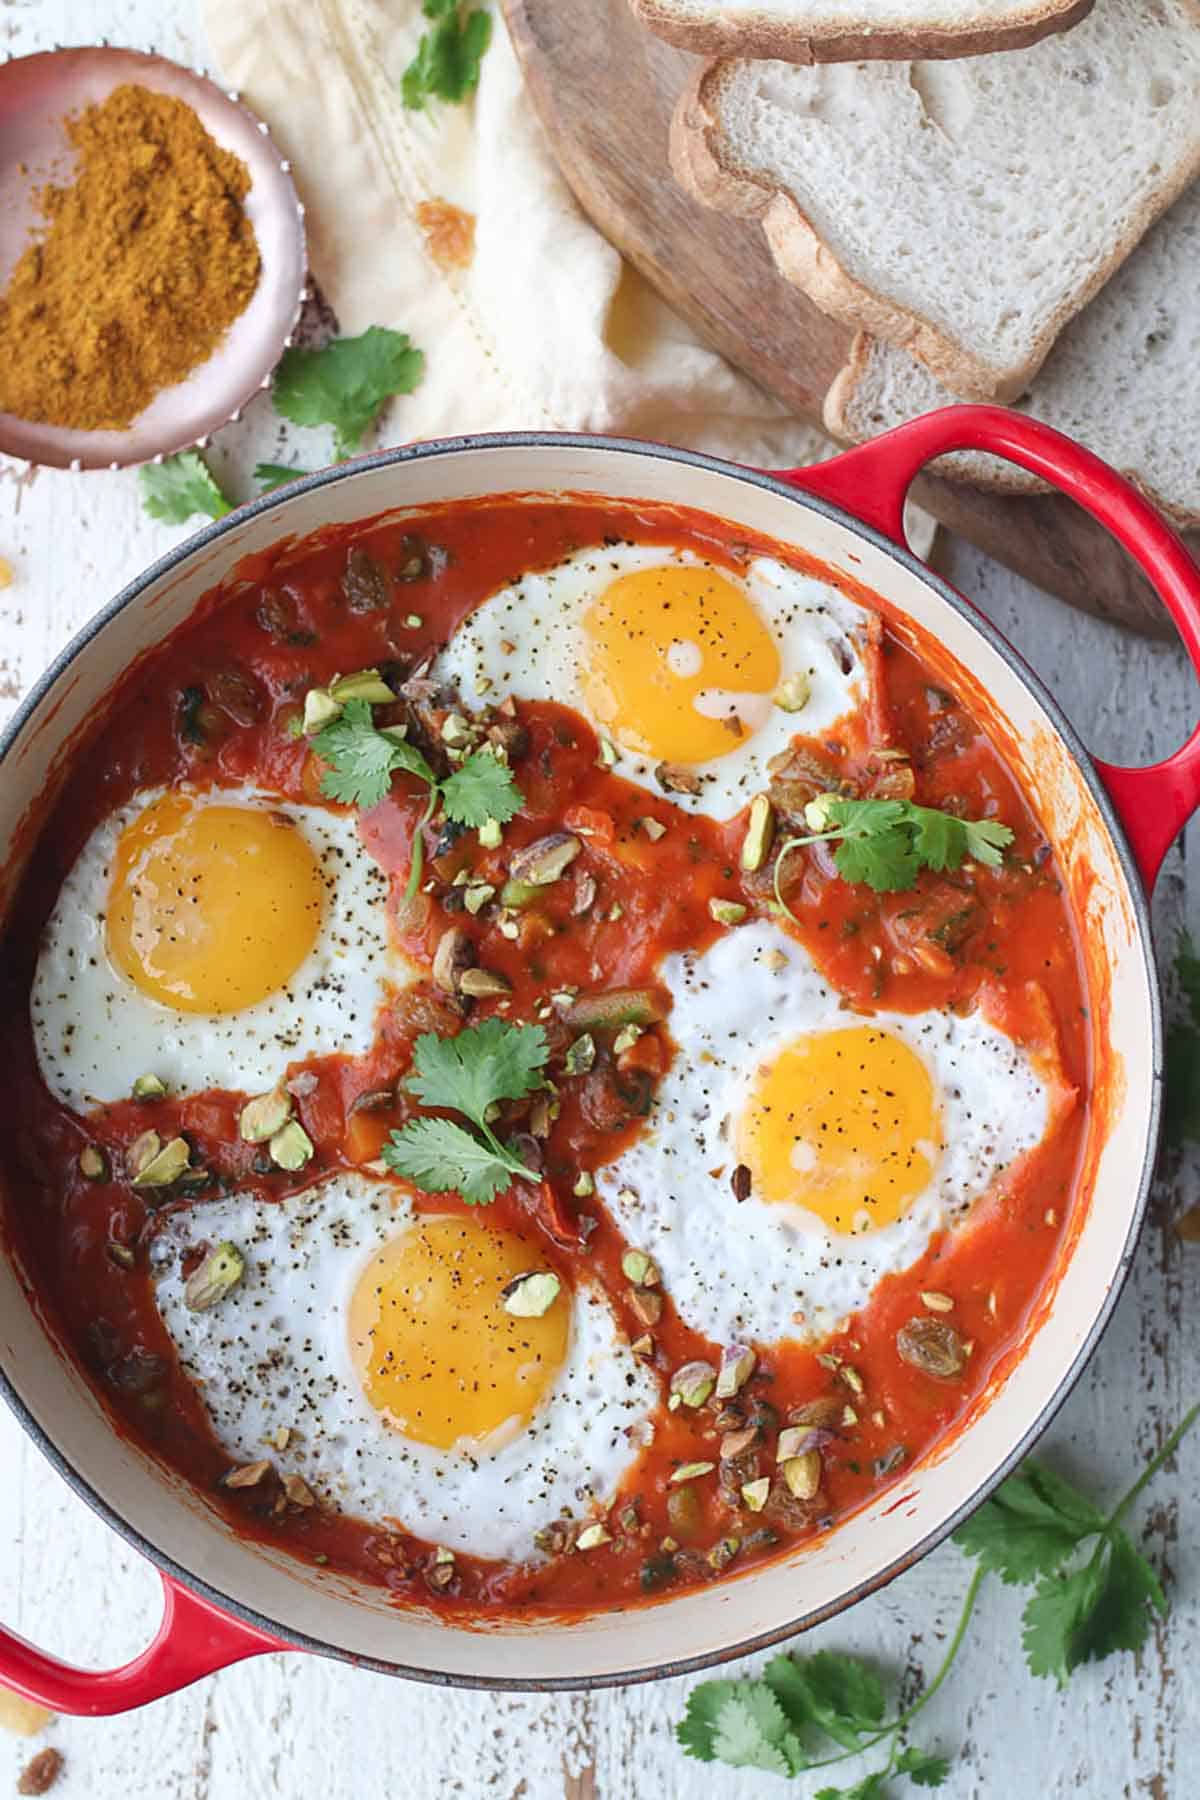
Birds eye view of shakshuka in a bowl with cilantro garnished on top.

I don’t like labeling foods as “superfoods”, but there are a lot of reasons why I love eggs. They’re protein-dense, packed with nutrients to support eyes, muscles, and gestational health, are affordable and super versatile. They also taste delicious no matter how they’re cooked.

Eggs are a staple food in a lot of our fridges for good reason with the Canadian egg industry producing more than 595 million dozen eggs each year! That is why I wanted to crack down (*no pun intended*) on all the tips, tricks, and myths related to eggs to help you cook eggs like a pro.

Egg Nutrition 101

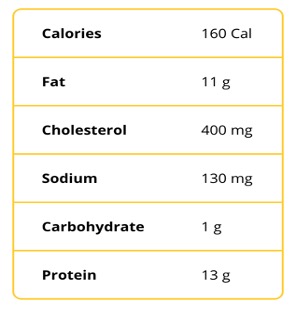
That little egg is packed with tons of nutrition. This is a standard nutrient label for one serving of eggs (Two large eggs):

A chart indicating the nutritional information of eggs including 160 calories, 11 grams of fat, 400 milligrams of cholesterol, 130 milligrams sodium, 1 gram of carbohydrate, and 13 grams of protein.

What does this mean for your health?

Eggs are Packed with Protein

Eggs are a quick and easy way to get our protein in for the day. Just one large egg contains 6.5 g of protein and it is one of the least expensive sources of high quality protein. Also, eggs are one of the few foods that contain all 9 of the essential amino acids. An essential amino acid cannot be made in the body and must be obtained through our diet. There is almost as much protein in the egg yolk as there is in the egg white, so eat the whole egg for all of its protein benefits!

Eggs are Packed with Protein

Eggs contain so many amazing nutrients that we need to stay healthy. Most of the nutrients are actually found in the yolk so it is important to eat the entire egg.

Here are five of the many nutrients found in eggs:

Vitamin A– Helps maintain healthy skin and eye tissue and assists in night vision. It also helps the immune system, lungs, kidneys, and heart work properly. 

Vitamin D– Strengthens bones and teeth and may help protect against certain cancers and auto-immune diseases.

Choline- Supports the development of children and plays a strong role in development, function, and memory.

Iron- Iron carries oxygen in red blood cells to the brain, so they can produce energy. If we did not have an adequate amount of iron we may feel tired.

Lutein and Zeaxanthin- Maintains good vision and helps reduce the risk of age-related eye diseases, such as cataracts, which cloud vision. The human body does not produce lutein and zeaxanthin naturally, therefore it is key to eat foods that contain these antioxidants.

Do Eggs Increase Cholesterol?

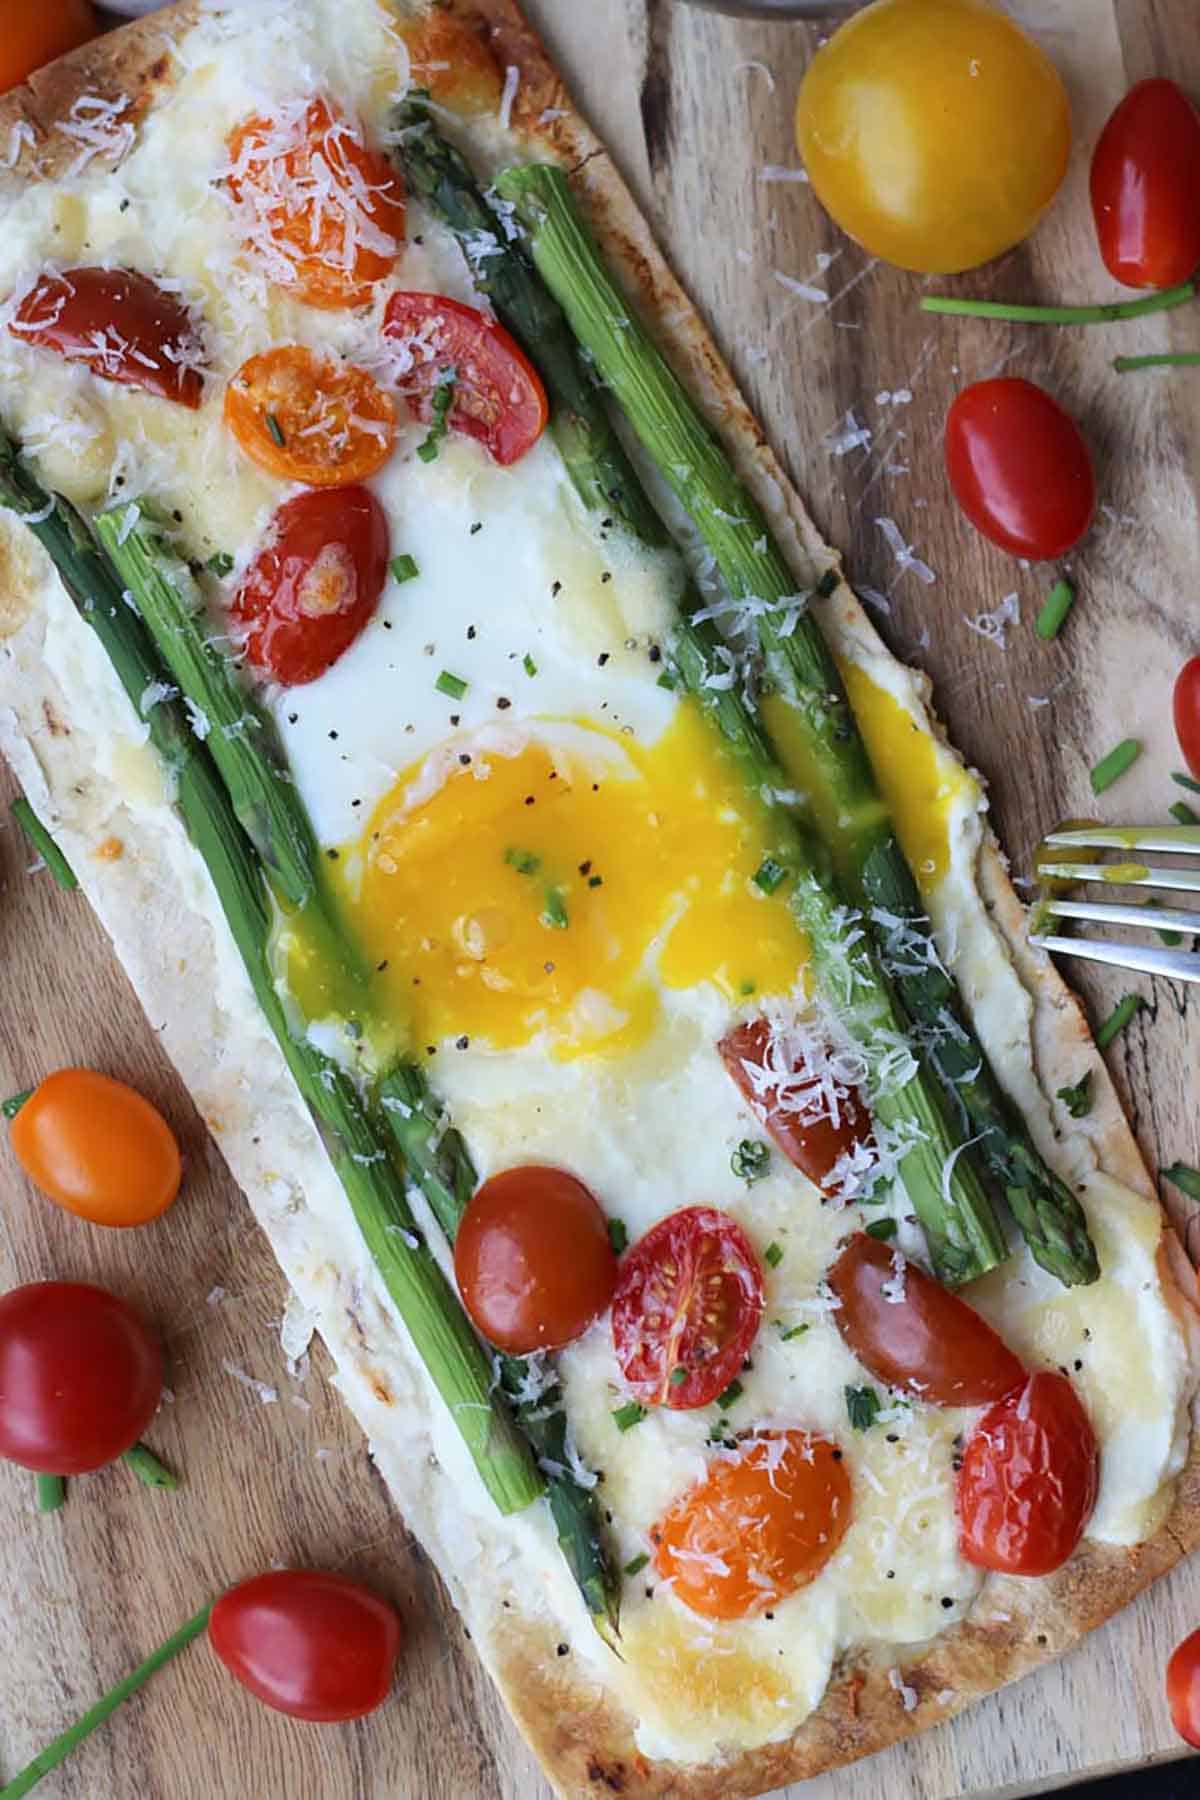
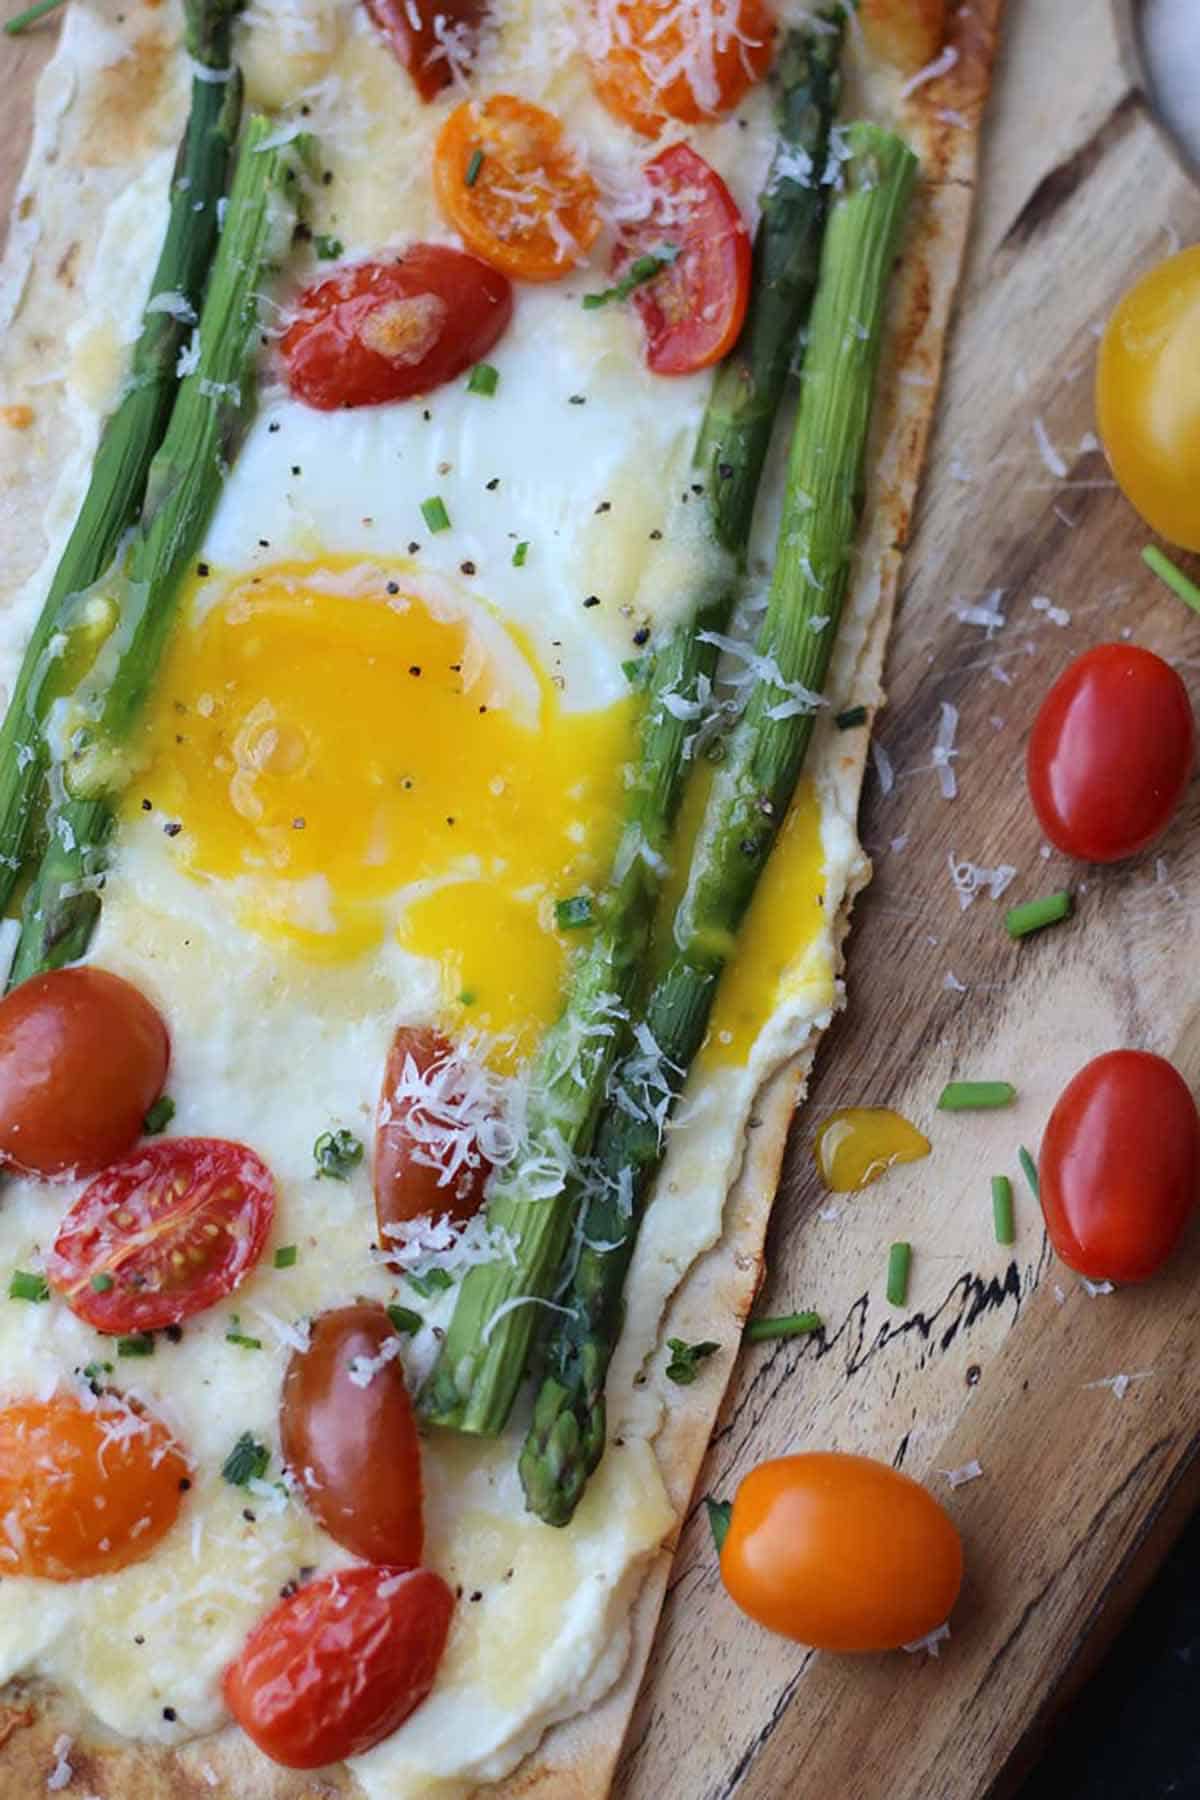
A vegetable pizza with an egg on top, asparagus, cherry tomatoes, and parmesan.

For many years we were taught that all cholesterol is bad for us because it increases blood pressure, clogs our arteries, and can cause cardiovascular disease. But new evidence suggests this is NOT true!

First we need to understand what cholesterol is.

Cholesterol is a soft, waxy substance that comes from two places: it can be produced naturally in our bodies, or it is found in the food we eat. Our bodies actually need cholesterol for many important functions like:

  • Building the structure of cell membranes
  • Creates hormones such as testosterone, estrogen, and adrenal hormones
  • Help your metabolism work properly
  • Produces bile acids, which helps our bodies digest fat and absorb essential nutrients

The body does a fantastic job at regulating the amount of cholesterol that circulates in the blood when it receives dietary cholesterol from food. If we eat something that has a higher amount of cholesterol, our bodies produce less cholesterol to compensate. The same is true if you eat less food that contains cholesterol, our bodies produce more cholesterol to compensate. This is the explanation as to why when we eat food that contains cholesterol (that is, dietary cholesterol found in foods like eggs, meat, dairy and seafood) it has a minimal impact on our blood cholesterol levels for most people.

Of course, there is a small percentage of people that are more sensitive to dietary cholesterol and they should contact a Registered Dietitian to get proper advice.

Current dietary guidelines from the Canadian Cardiovascular Society, Diabetes Canada, and the Heart and Stroke Foundation do not give a maximum amount of dietary cholesterol that a healthy adult should have per day. Instead, the focus should be on improving our overall eating patterns to promote heart health and include a variety of whole food in one’s diet and that can include whole eggs.

Now that the nutritional benefits of eggs are crystal clear, let’s dive into cooking tips and recipes!

Tips On Cooking the Perfect Egg

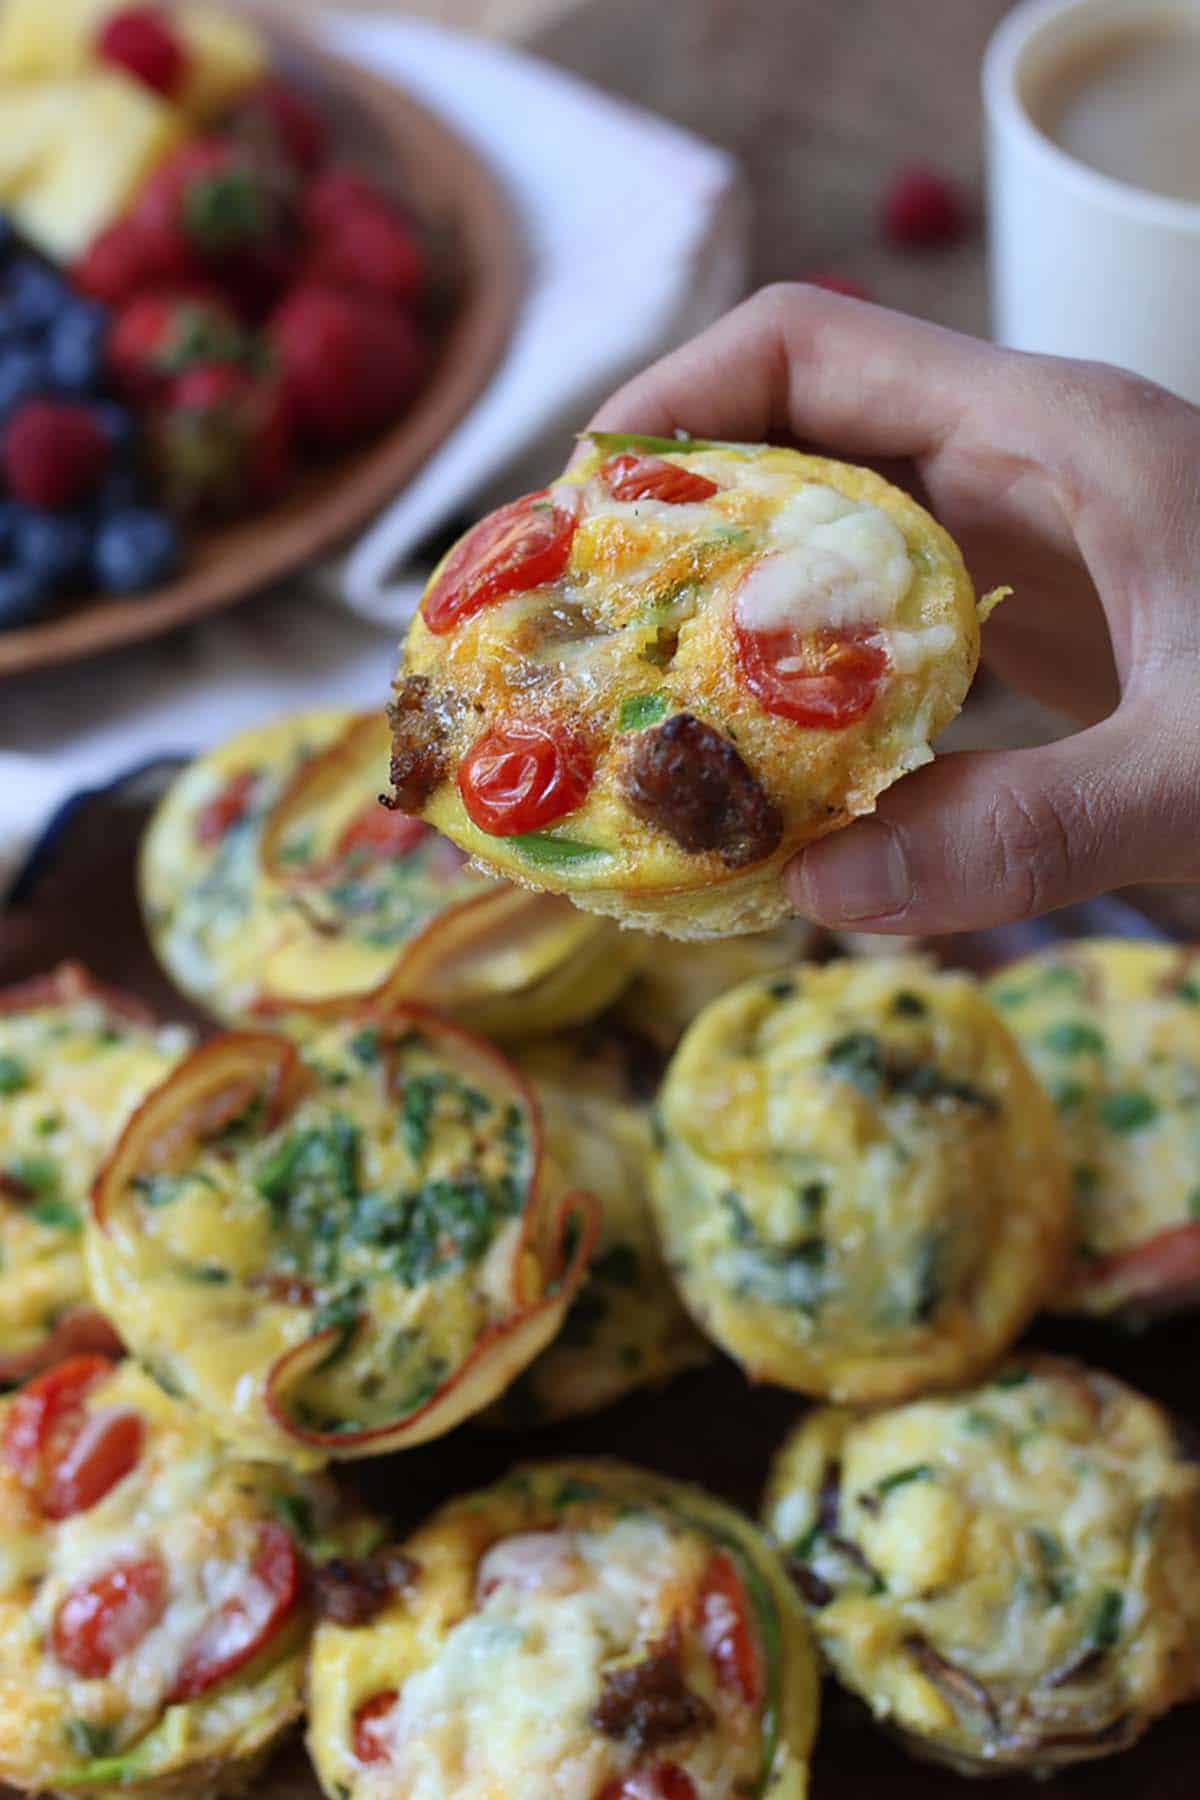
A hand picking up an egg cup with tomatoes and cheese, with a plate of egg cups in the background.

Does size matter?

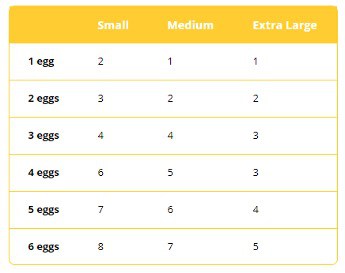
When you go to the grocery store you may have noticed that eggs come in a variety of sizes from small to jumbo. It is important to know the differences in egg sizes when cooking and baking with eggs. Without making the proper adjustments, the texture, flavour, and consistency will be affected. Most recipes are written using large eggs. Everyday dishes can substitute 1:1, but for baking purposes, use the following conversions:

A chart indicating egg conversions for small, medium, and extra large eggs.

When Should Eggs be Room Temperature?

Some recipes specifically tell you that the eggs or egg whites should be room temperature when added. When it comes to cheesecake or other high fat content batters, adding cold eggs could re-harden the fat and make the batter appear lumpy and curdled. To prevent this from happening, take your eggs out of the fridge 30 minutes before you begin the recipe.

Tip: If you forget to take your eggs out 30 minutes before, you can place them in a bowl with warm water to warm them up.

Recipes that involve beating eggs or egg whites into a stable foam, such as meringues, sponge cakes, and soufflés, also specify room temperature eggs. If you take the eggs out of the fridge 20 to 30 minutes before you begin baking, then the eggs will whip up better and increase in volume when they have had a chance to warm up.

Tip: It is easier to separate the yolks from the whites when the eggs are cold right out of the fridge so you should separate the egg before starting the recipe, then let it sit at room temperature.

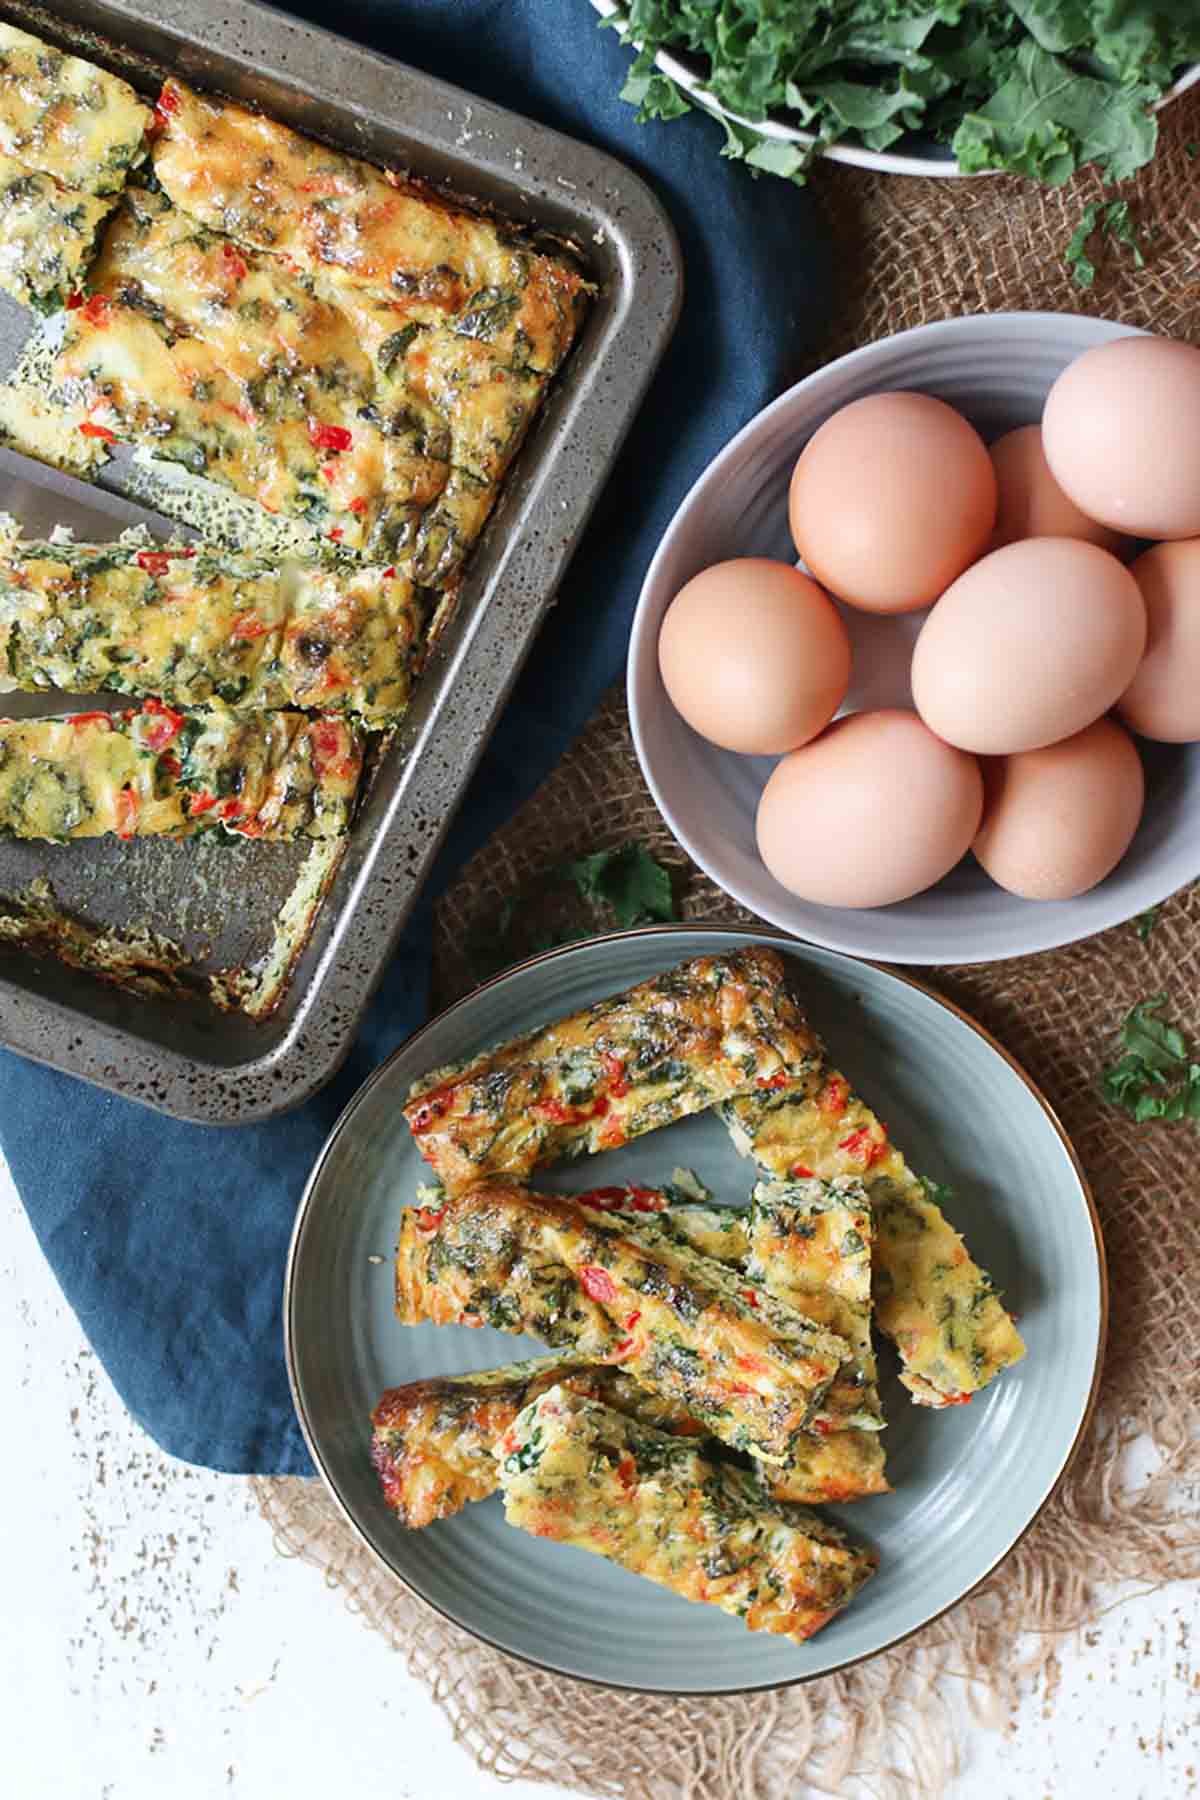
Birds eye view of a frittata cut up into slices on a plate, whole eggs in a bowl, and the remaining frittata on a baking tray.

Brown Eggs vs. White Eggs

Aside from the difference in the eggshell colour, there is no nutritional value, quality, or flavour difference between brown and white eggs. The reason why the shells are different colours depends on the breed of the hen. Usually, brown shell eggs are produced by hens with brown feathers and white shell eggs are produced from hens with white feathers.

Best Pan For Cooking Eggs

While you can use any pan for cooking your eggs, we think that one of the best ways to cook eggs is by using a nonstick frying pan. It is simple to use and very easy to clean up. It also requires you to use less fat because you don’t need to add anything to the bottom of the pan before cooking.

How to Crack an Egg

Cracking an egg might be a bit challenging for some, but it doesn’t have to be! There are just two easy steps to follow to ensure you have the perfect cracked egg.

Tip: Instead of cracking your egg on the rim of a bowl try cracking it on a flat surface. This will prevent you from getting egg shells to fall into the mixture. If you do get a shell piece, use a larger piece of shell to fish it out.

Let’s get cracking!

Step 1– Using a clean, flat surface, hold the egg in your hand in one motion, tap the egg on the surface. Make sure not to be too aggressive!

Step 2– Use your thumbs to separate the egg shell where it’s cracked over a bowl.

It’s as simple as that!

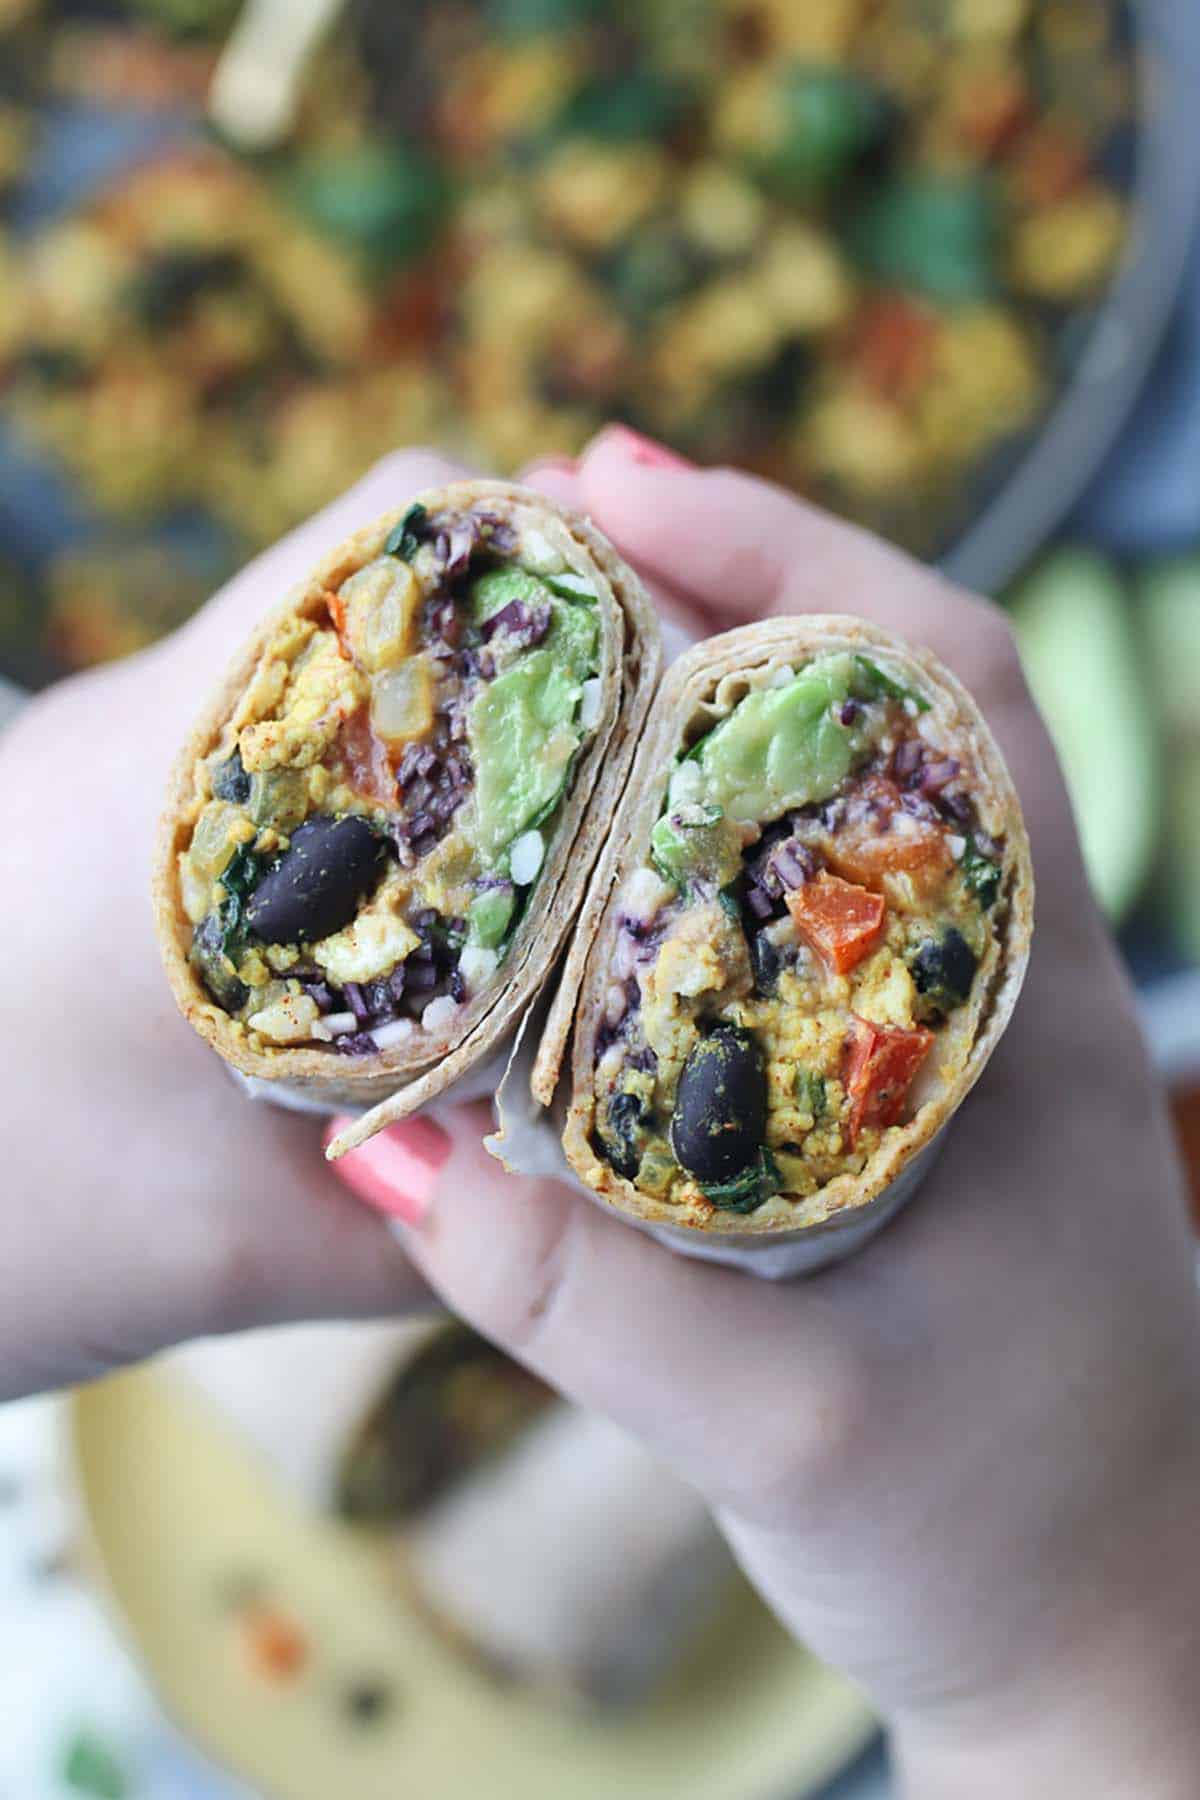
A person holding up a breakfast burrito with eggs.

Ways to Cook Eggs

There are so many ways to cook eggs for breakfast, lunch and dinner!

Scrambled Eggs

Let’s first talk about of of the simplest and most versatile ways to cook eggs…scrambled eggs!

Scrambled eggs are the perfect meal and you can add almost anything to it and it will always taste delicious. Some of our favourite add-ins are mushrooms, spinach, onion, mozzarella cheese, feta cheese, and don’t forget the salt and pepper.

What are your favourite add-ins?

Here’s how you can make the most delicious scrambled eggs:

Step 1– Crack 2 or 3 eggs into a bowl and whisk it together with some salt and pepper.

Step 2– Add a bit of oil or butter to the pan. Heat up the pan to a medium heat and pour in your egg mixture.

Step 3– Gently move the eggs around with a spatula, forming soft curds. If you want your curds to be larger, let the eggs sit in the pan for a bit before you start moving them around and if you want your curds smaller, stir more frequently.

Step 4– Now is a good time to place your add-ins to the eggs if you want to.

Step 5– Stir the eggs around till there is no more liquid in the pan, but before the eggs turn dry. Turn the heat off and go enjoy your delicious eggs. 

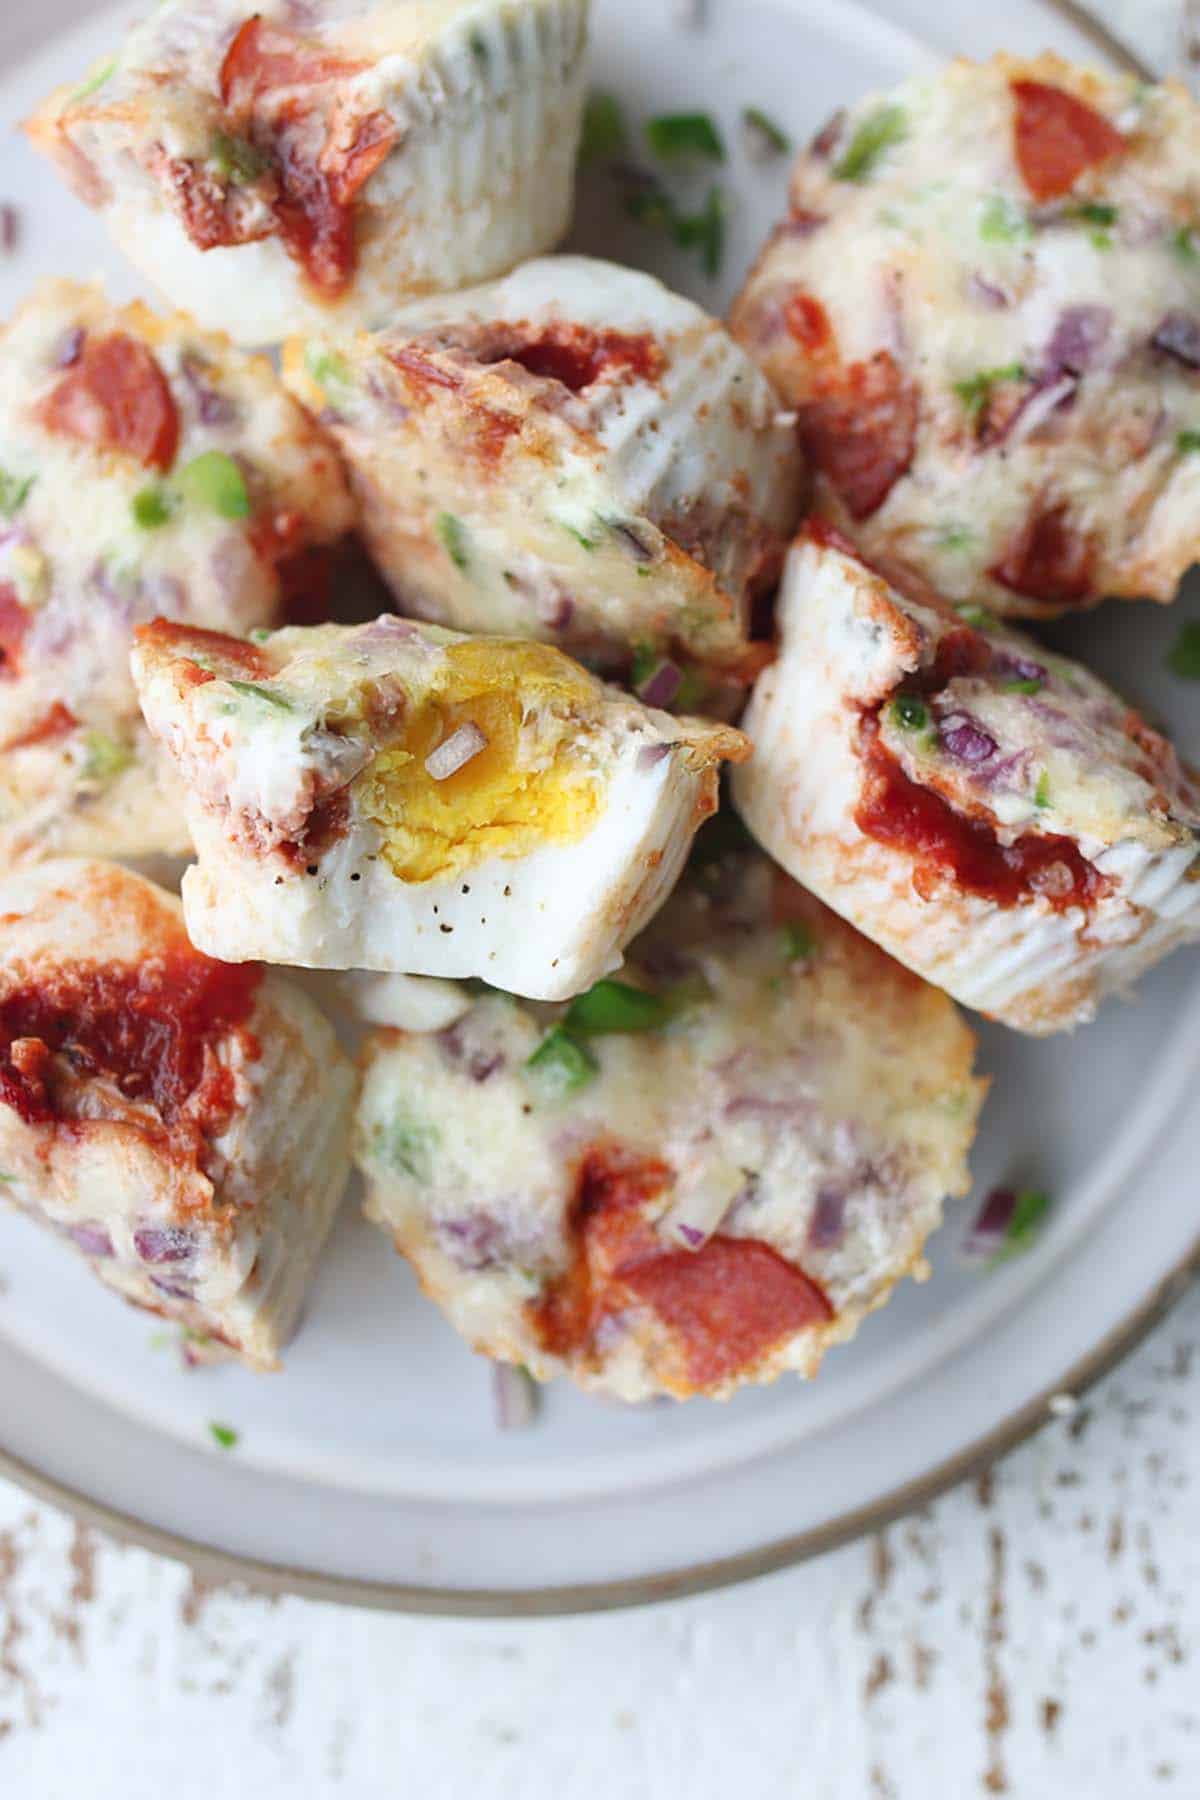
Several pizza egg cups on a white plate.

Fried Egg

Next let’s discuss the fried egg. There are four basic styles of fried eggs; sunny side up, over easy, over medium, and over well. The difference is the level of doneness.

Sunny side up: The egg is fried with yolk on top and not flipped.

Over easy: The egg is flipped and the yolk is still runny.

Over medium: The egg is flipped and yolk is slightly runny.

Over well: The egg is flipped and the yolk is cooked fully.

How to cook a fried egg:

Step 1– Heat up your pan on medium heat and place a bit of butter or oil in the pan.

Step 2– Crack your egg in a separate bowl and then place it in the warm pan.

Step 3– Let the egg cook until the corners start to curl up a bit (about 3-4 min). It’s better not to touch them while they are cooking and you’ll get a crispier egg. Check out more information on how long to fry eggs to varying levels of doneness.

Hard Boiled Egg

When you are on the go and you don’t have time to start cooking, hard boiled eggs are your new best friend. Hard boiled eggs are great to prepare in advance and eat them plain, on a sandwich, in a salad, or you can elevate them into deviled eggs.

The trick to preparing the best hard boiled egg is to not overcook them. This can cause the yolk to get a grey rim around it and the texture might be a bit rubbery.

How to Cook: 

Step 1– Place your egg in the bottom of the pot and cover with cold water that is just an inch or so higher than the eggs. Cover the pot with a lid.

Step 2– Turn your heat to high and let the water come to a boil.

Step 3– Remove from heat and let the eggs sit in the pot for 10-12 minutes.

Step 4– Drain the water from the pot and pour cold water over the eggs. This will prevent the grey rim from appearing. Peel the eggs and enjoy!

Poached Egg

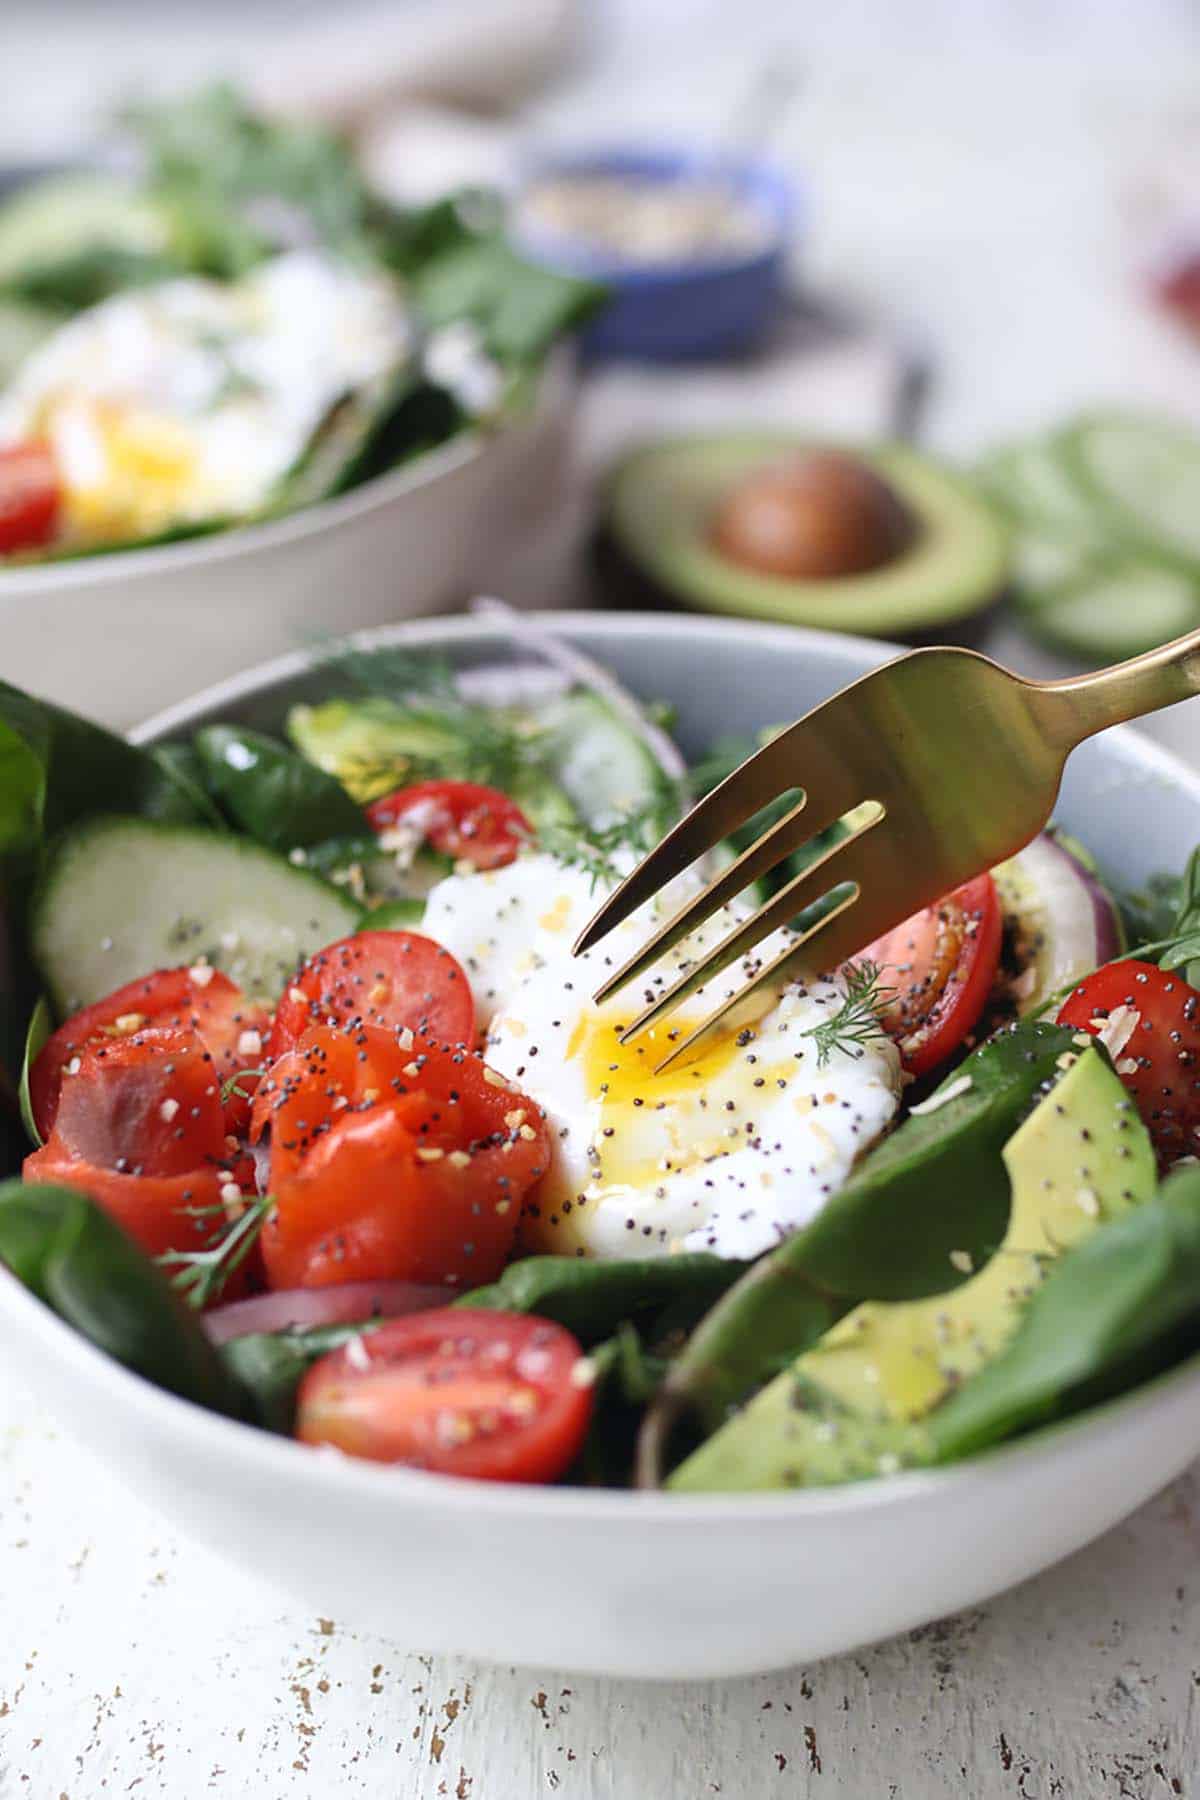
A fork cutting into a poached egg on a salad.

Another one of the ways to cook eggs that might seem a bit difficult is a poached egg. However, with practice and proper techniques, poaching an egg is easy.

Follow these steps to get the perfectly cooked poached egg.

Step 1– Boil a pot of water and add a tablespoon of vinegar. In the meantime, crack your egg into a small cup so they’re ready to go.

Step 2– When the water reaches a boil, reduce it to a gentle simmer. Gently place the egg into the water, and let the water cook the egg.

Step 3– Carefully keep the water moving with a spoon while the egg cooks. Take the egg out after 3 minutes for a soft poached, or leave it in for 5 minutes for a more firm yolk. Remove the egg with a slotted spoon and drain as much water as you can. Place the cooked egg on a paper towel and season with salt and pepper.

See it’s not as difficult as you might have thought!

Omelette

Lastly, let’s talk about the beautiful omelette that we all love having for a nice Sunday brunch.

The version we are most familiar with is the French omelette, which is slightly brown on the outside and creamy and moist on the inside, filled with delicious vegetables, herbs, or cheese.

How to Make:

Step 1– Decide what you want to add inside your omelette and have it ready.

Step 2– Whisk in a bowl 2 to 3 eggs, milk, salt, and pepper until everything is combined.

Step 3– Coat your pan with cooking spray or butter and heat the pan to medium heat. Once the pan is hot add your egg mixture. Make sure the eggs evenly cover the bottom of the pan and run your spatula around the outer edge of the eggs to prevent the eggs from sticking.

Step 4– When the surface of the egg looks moist and does not jiggle when you shake the pan add your filings. Fold the omelette in half with a spatula and let the bottom brown slightly.

Step 5– Use your spatula and gently place the omelette onto your plate and enjoy!

How to Store Eggs

Eggs should be stored in the fridge until they are needed to maintain the freshness. A lot of people tend to store their eggs in the little egg organizer that comes with your fridge and throw the egg carton out, but it’s best to store your eggs in the original carton. The carton protects the eggs and prevents them from absorbing odours and flavours from other food in the fridge. Also, the best before date is always visible so you know how fresh your eggs are. Lastly, eggs should be stored with the large end up, which helps the yolk remain in the center.

Tip– Eggs shouldn’t be stored in the fridge door, but in the main part of the fridge to make sure they keep a consistent and cool temperature.

Can you freeze eggs?

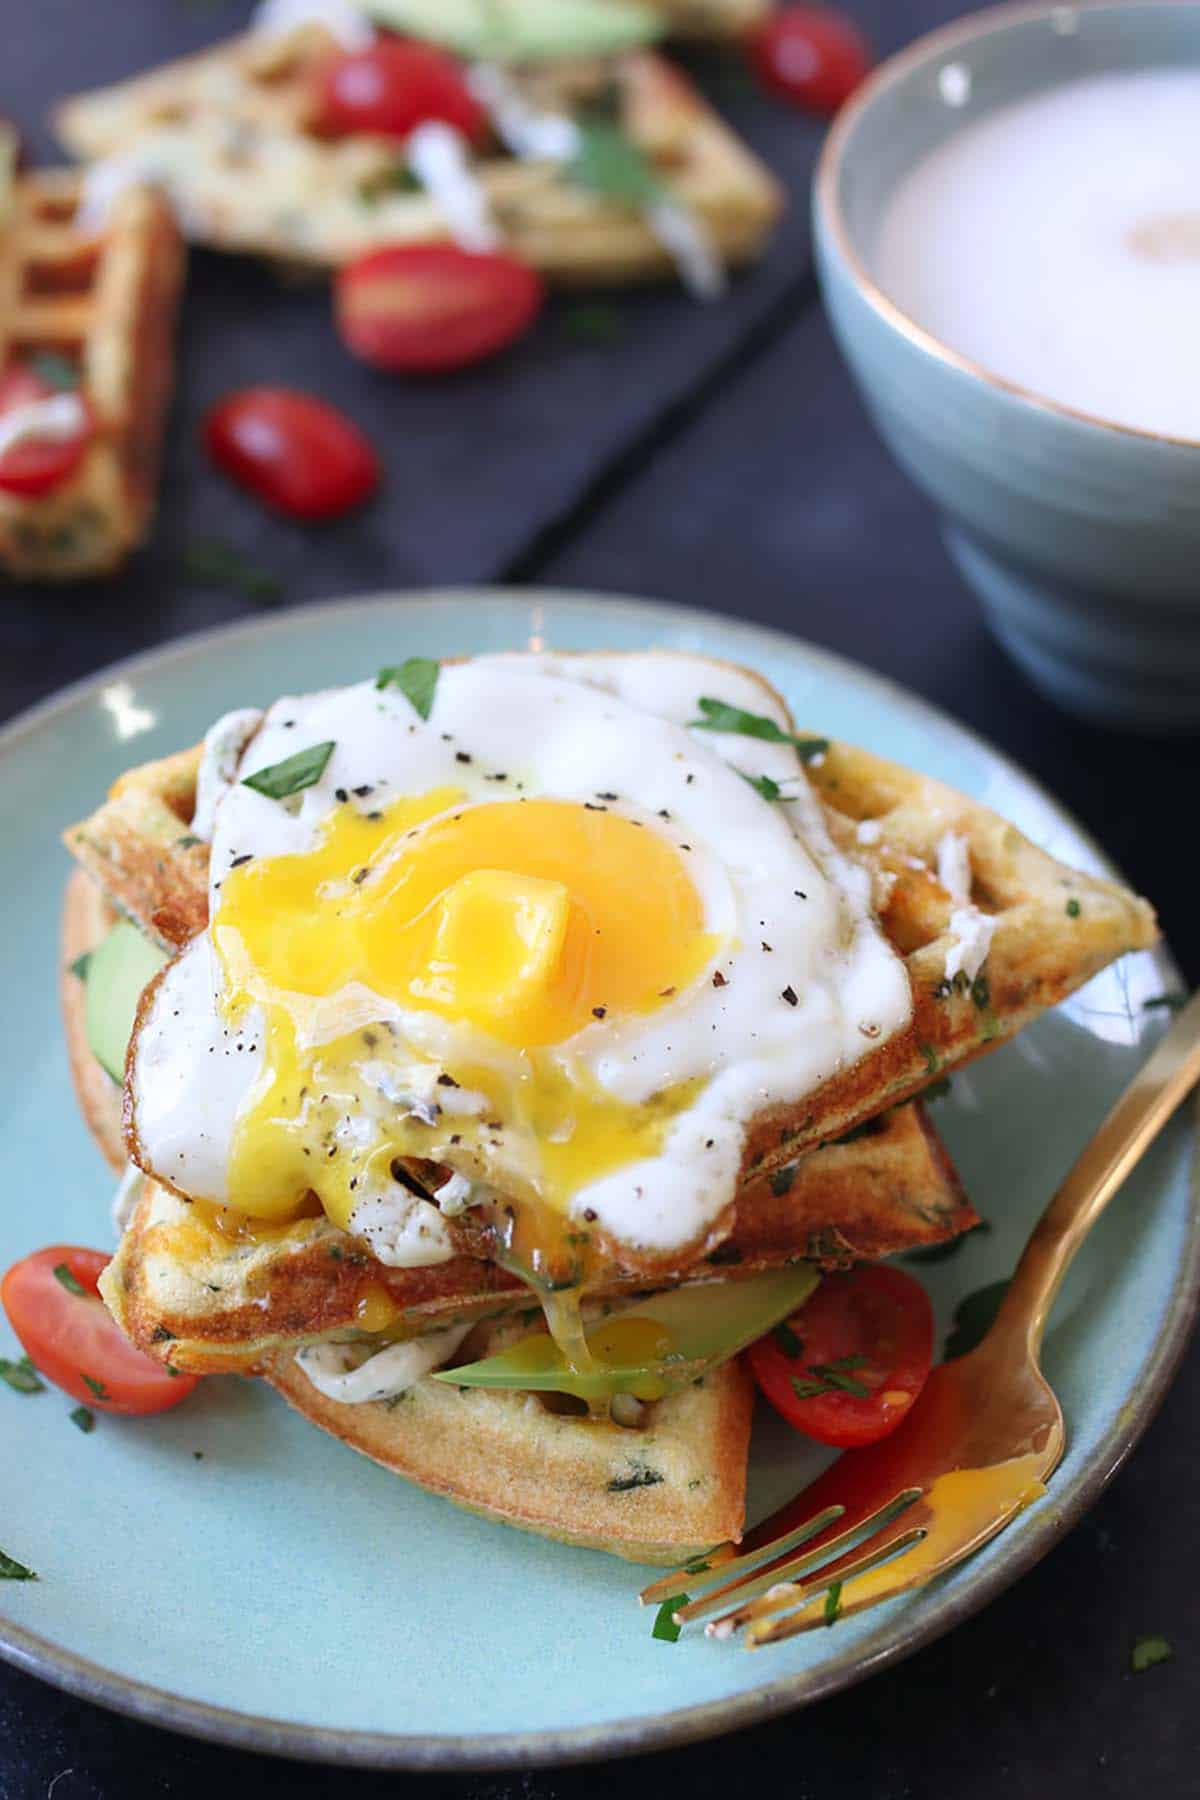
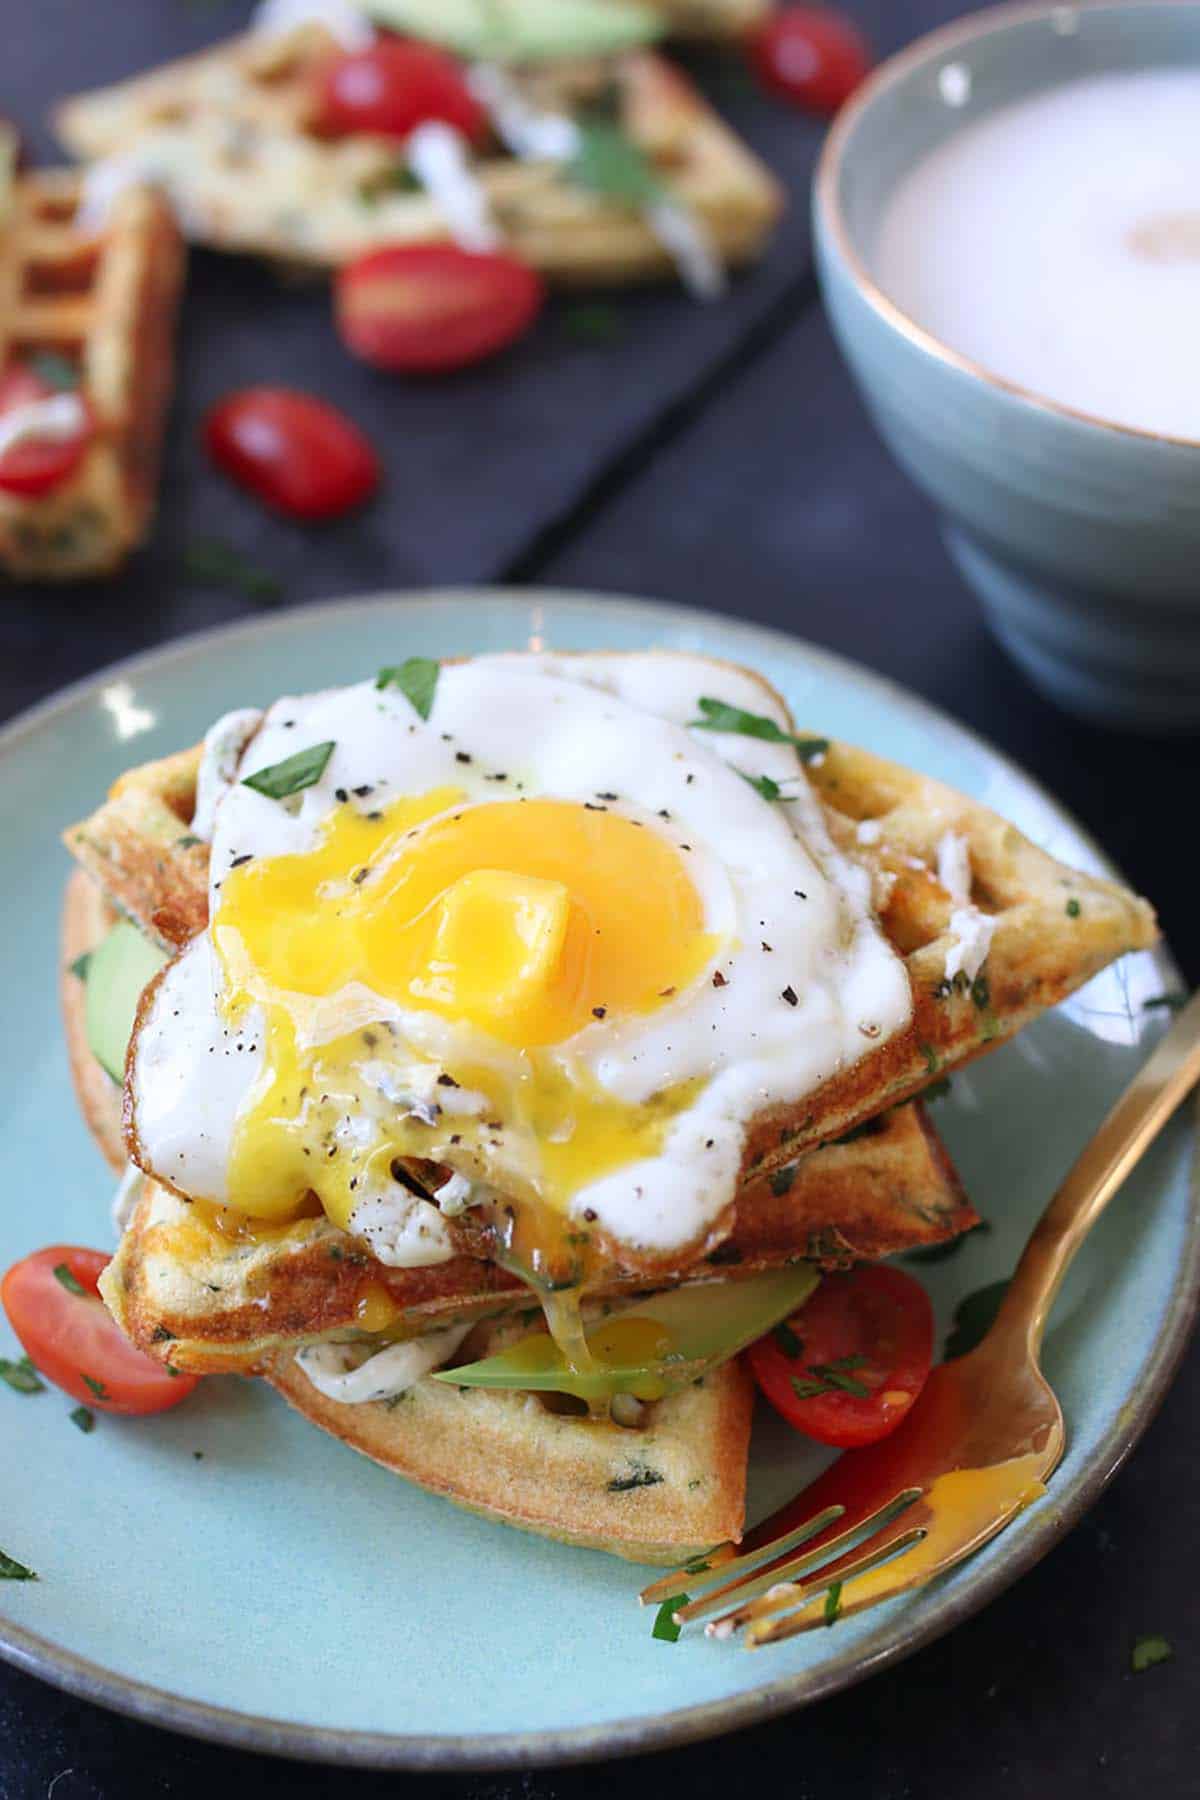
A fried egg on top of three waffles sitting on a blue plate with a fork on the side.

Yes you can! Certain types of raw and prepared eggs that are not in their shells can easily be frozen. If you are a bit confused on how to do that just follow these simple instructions:

Whole eggs– Beat eggs until blended, pour into a freezer container and make sure you seal it tightly. Label the container with the date.

Whites– Break and separate the eggs one at a time, and make sure no yolk is mixed in. pour the whites in a freezer container and seal tightly. Label the container with the date.

Yolks– Egg yolks need a bit more treatment. The yolks will gelatinize and thicken when frozen. If the yolk is frozen as-is, it will become too gelatinous; they will not be possible to use for recipes. To slow this process, add in either ⅛ tsp salt, or 1 ½ tsp sugar. Label the container with the date and whether you’ve added salt or sugar to the yolk.

Hard boiled- Hard boiled whole eggs and whites become tough and watery when frozen, so we suggest to not freeze them and just prepare what you can eat within a few days. 

How long will eggs last in the fridge?

EggsRefrigerator (35°F to 40°F)
Raw whole eggs (in shell)4 to 5 weeks
Raw whole eggs (slightly beaten)Up to 2 days
Raw egg whitesUp to 4 days
Raw egg yolksUp to 2 days
Hard-cooked eggs (in shell)Up to 1 week
Hard-cooked eggs (peeled)Use the same day for best quality

Best Egg Recipes

Here are some of my personal favourite recipes to get you inspired in the kitchen cooking with eggs, for any time of day.

A breakfast pizza on a wooden board with cherry tomatoes on the side.

Spring Vegetarian Breakfast Pizza with Asparagus, Tomatoes, and Runny Eggs

Birds eye view of a curry shakshuka in a sauce pan.

Curry Shakshuka

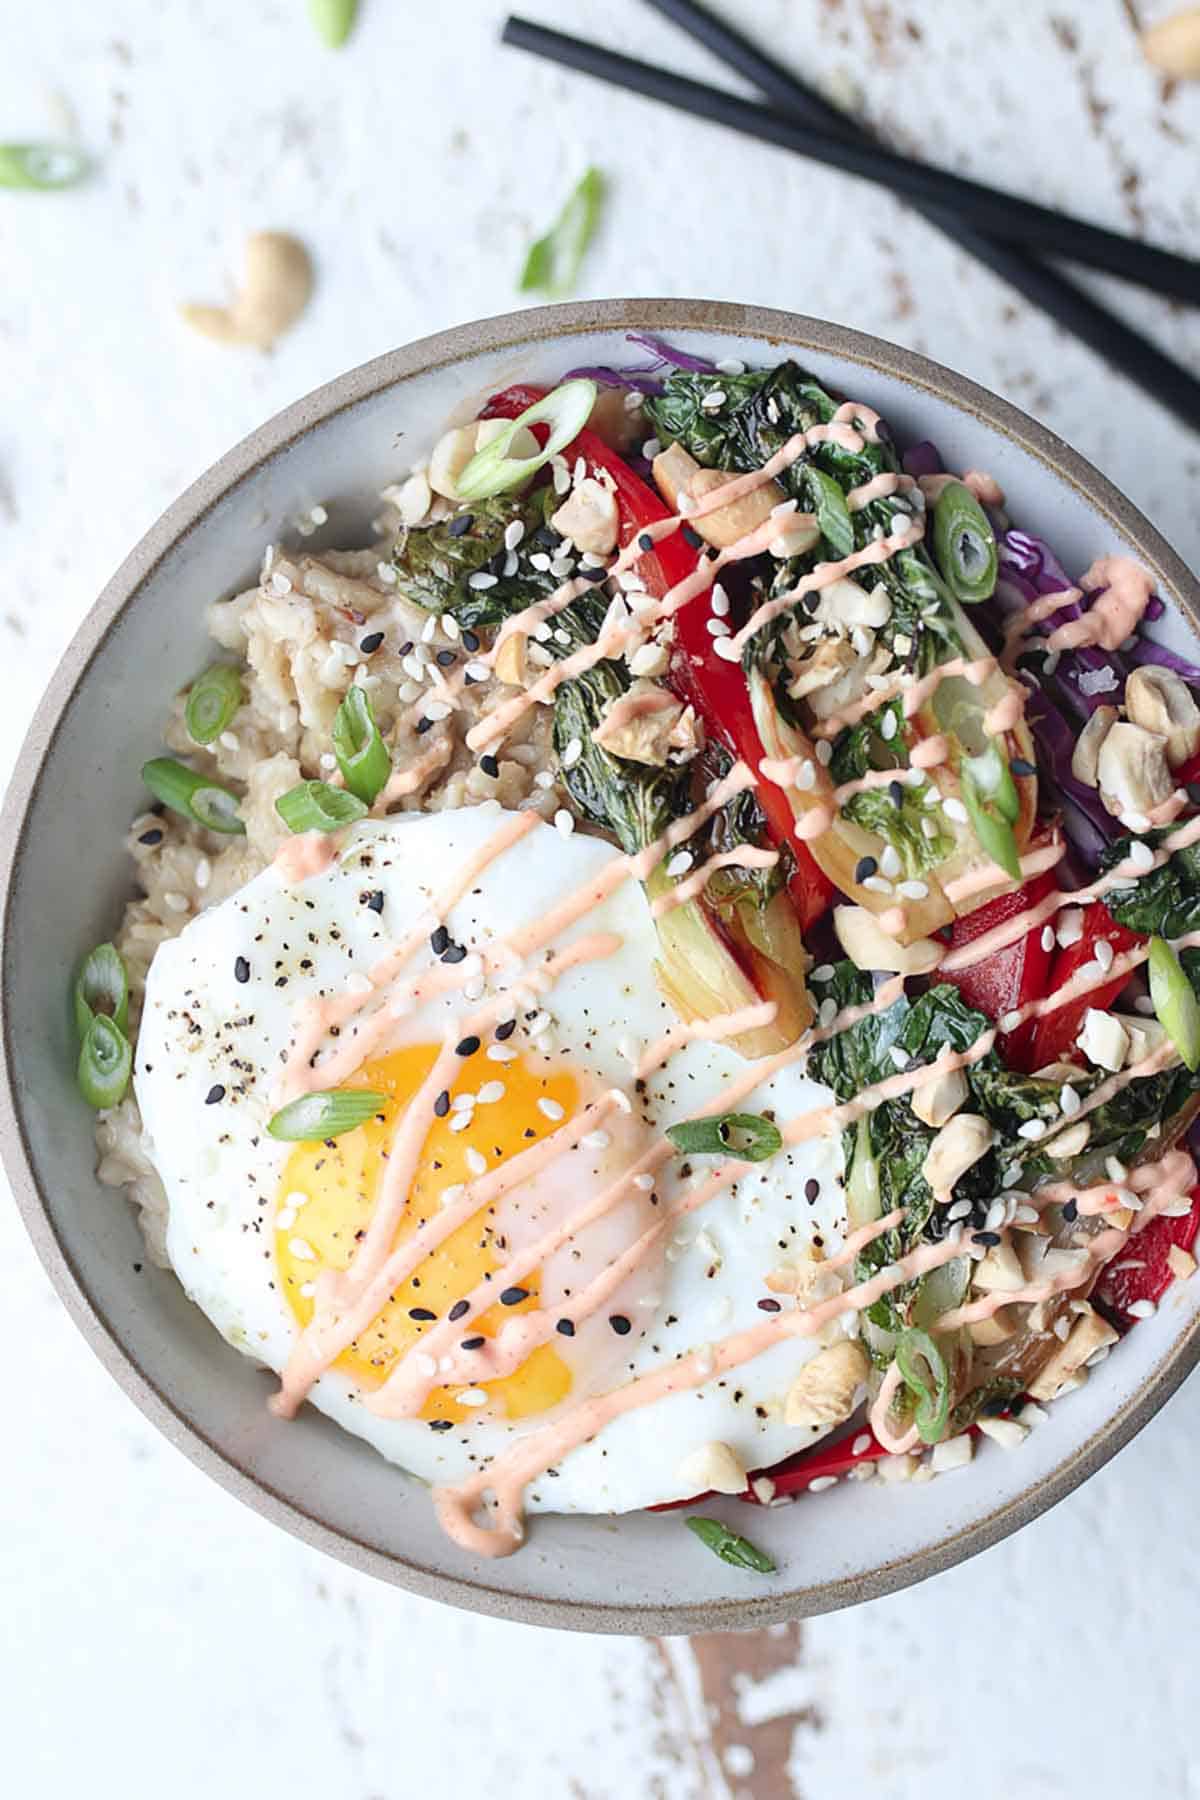
Birds eye view of a korean oatmeal bowl with an egg on top and sauteed veggies on the side and dirzzled with sauce.

Korean Savoury Oatmeal with Runny Eggs

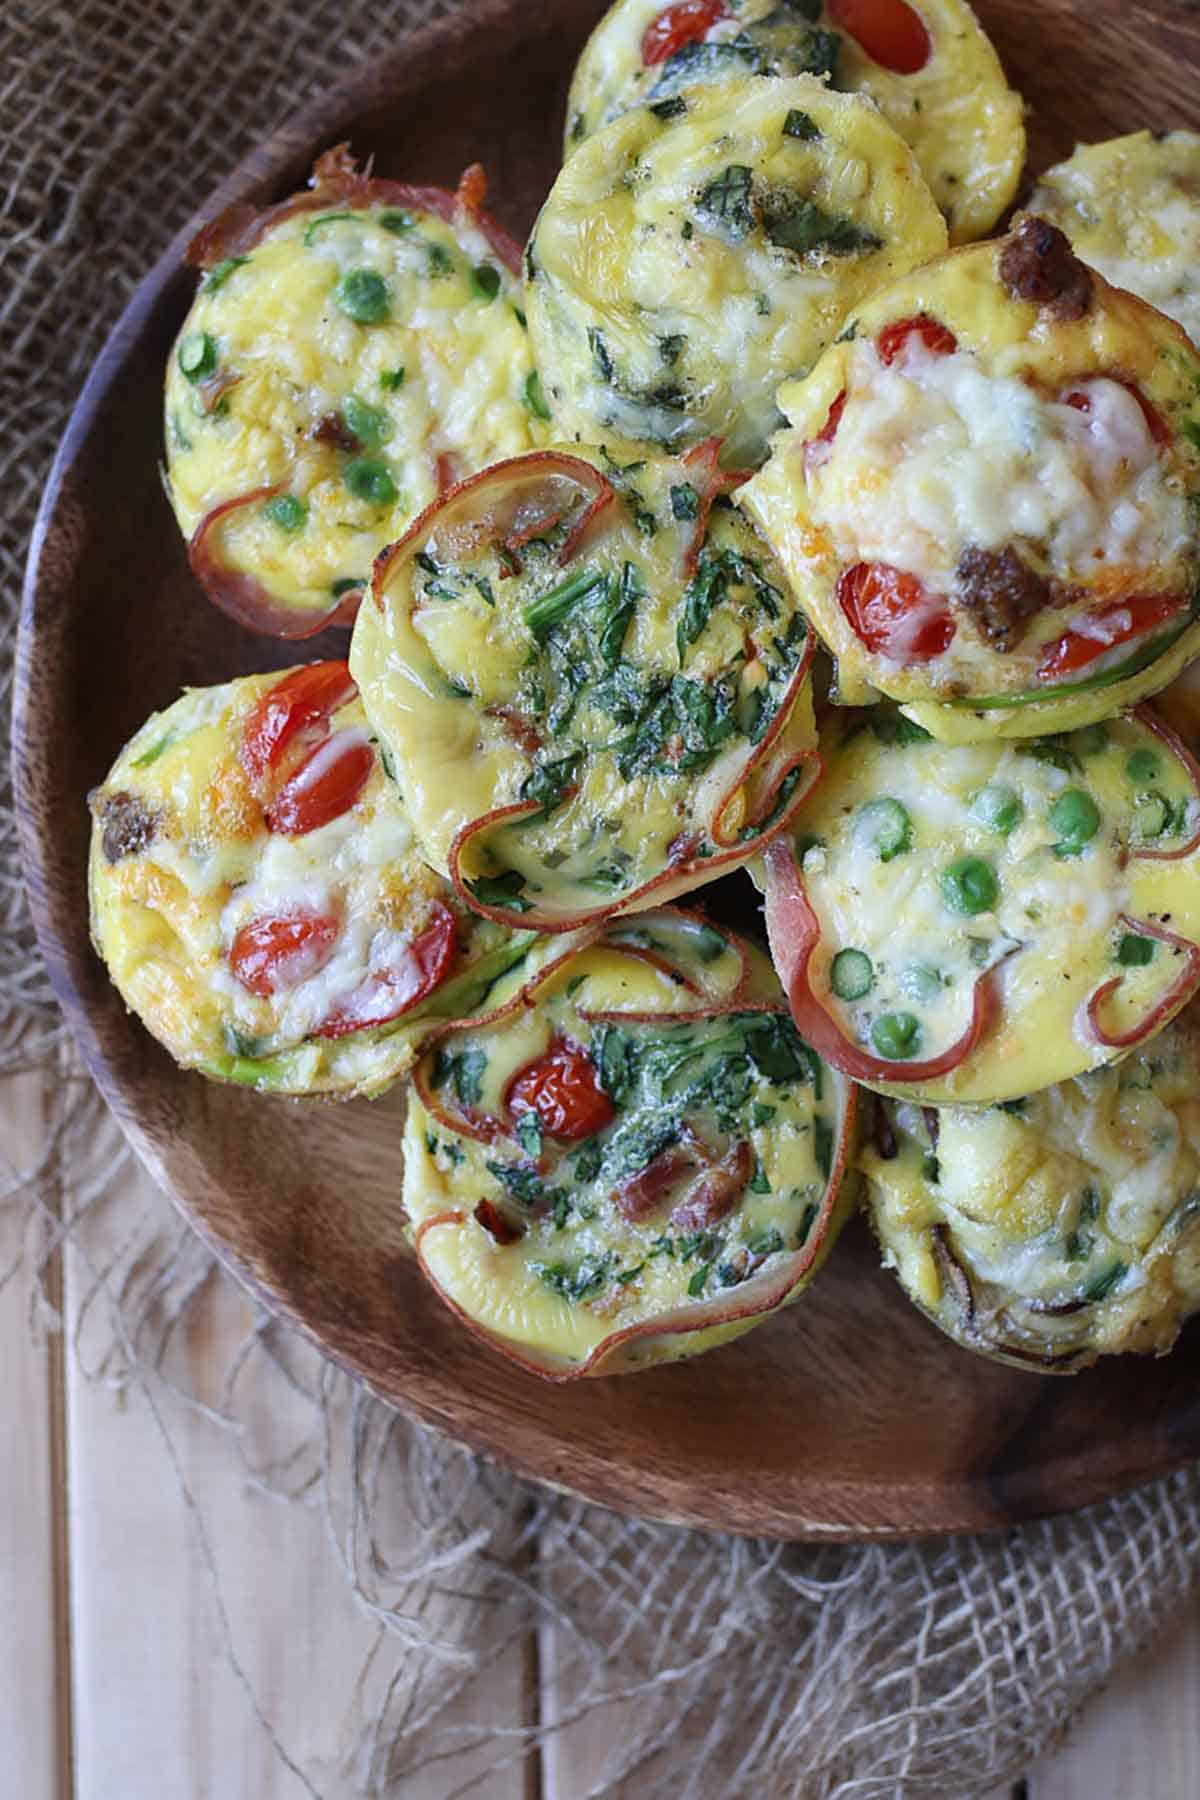
Several egg cups on a wooden plate.

Keto Egg Cups 5 Ways

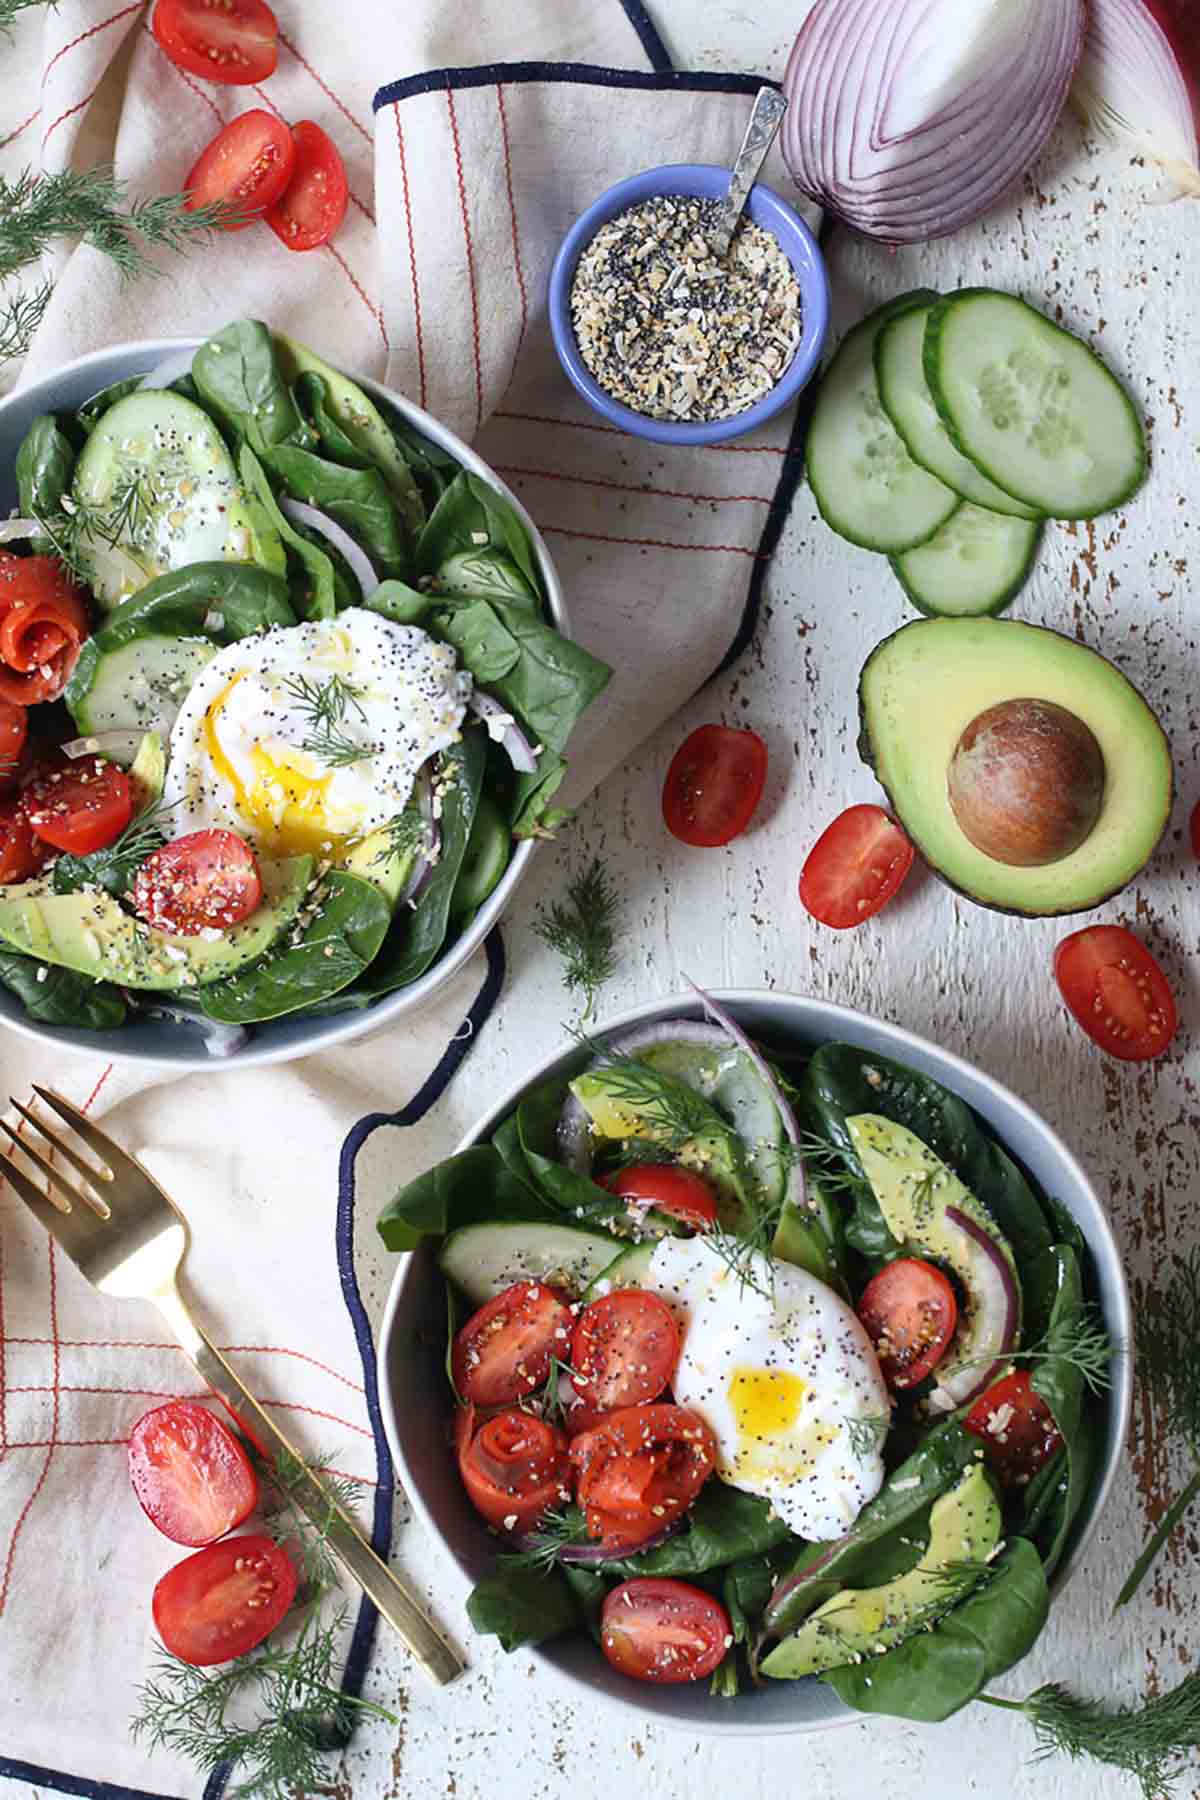
Birds eye view of two bowls of salad with a poached egg on top.

Everything Bagel Keto Salad for Breakfast and Brunch

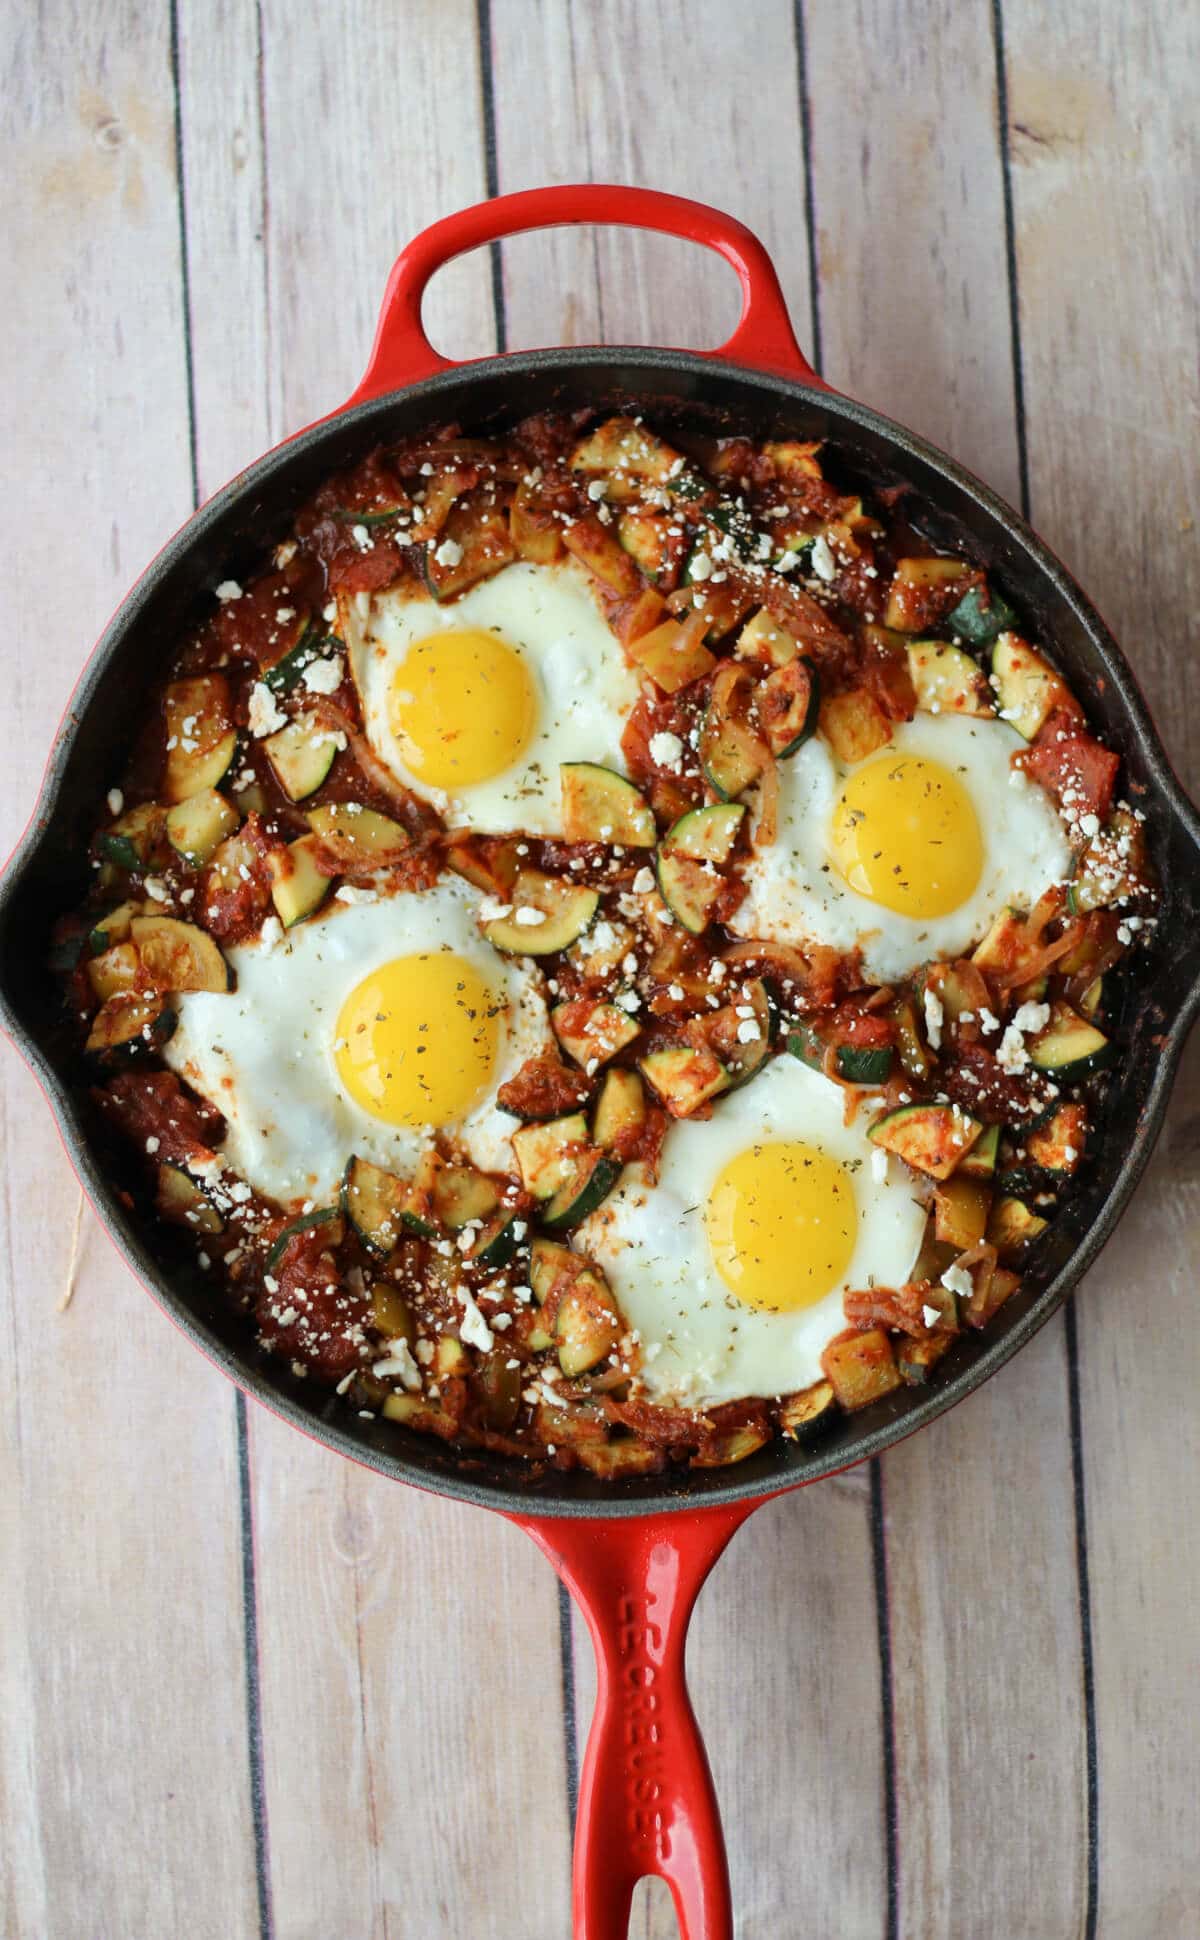
A shakshuka in a frying pan.

Gluten Free Shakshuka Recipe with Zucchini and Feta

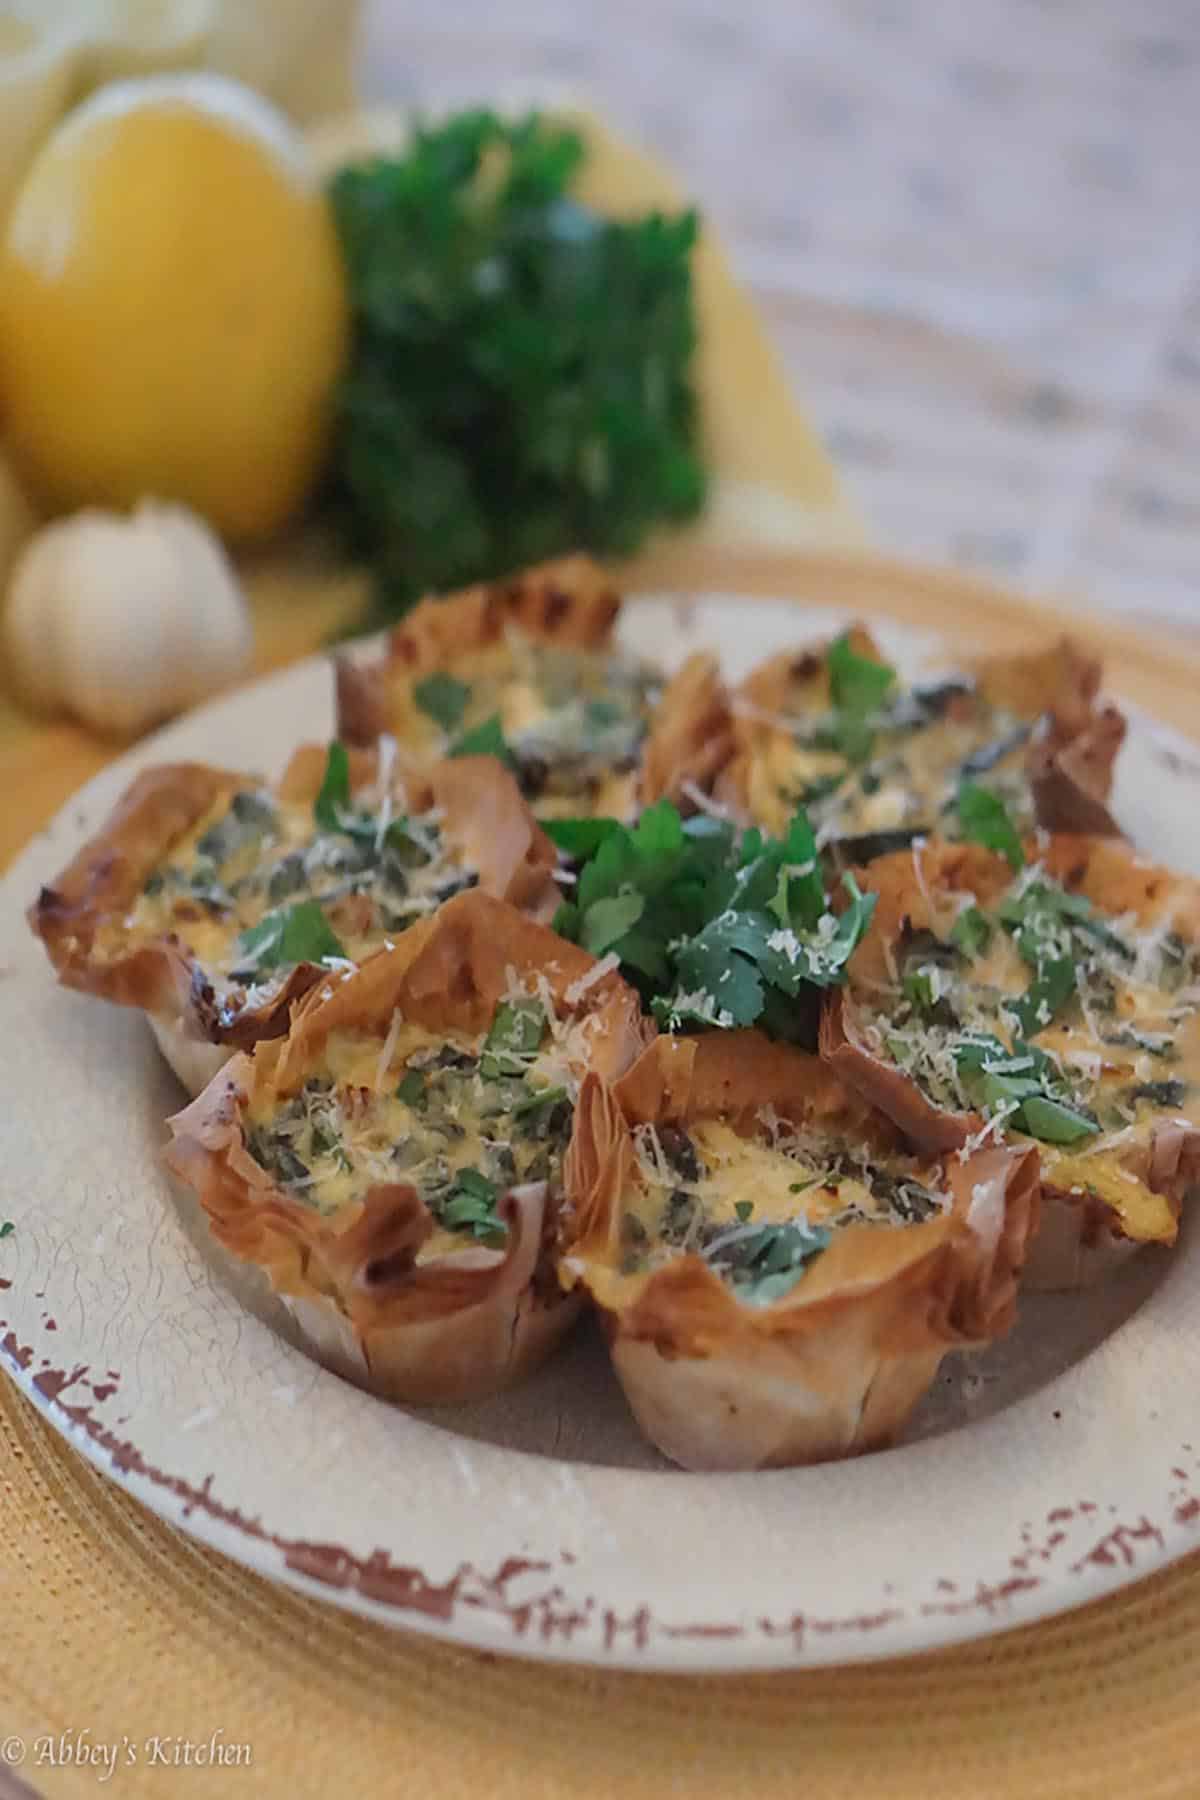
Several mini quiche's on a white plate.

Low Carb Quiche with Cheesy Swiic Chard & Phyllo Crust

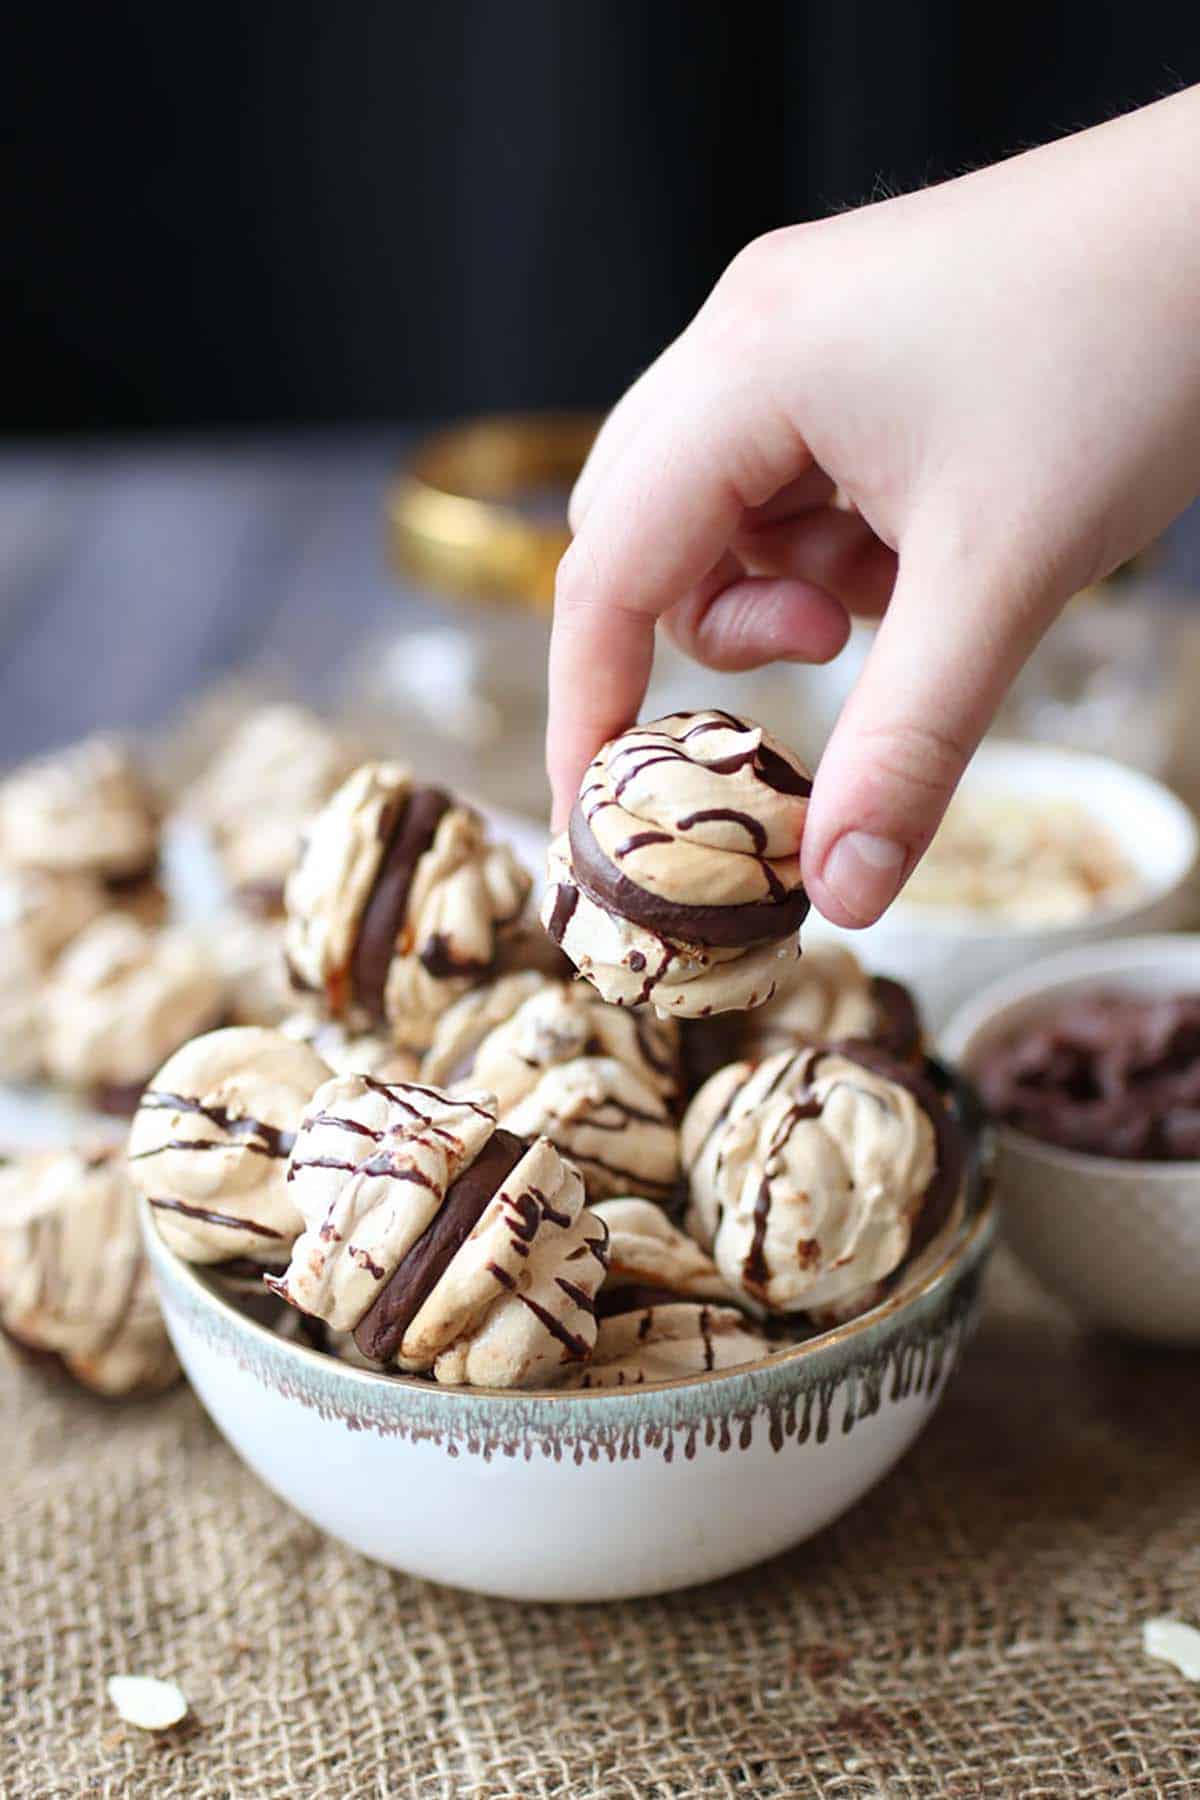
A hand picking up a chocolate meringue cookie from a bowl.

Gluten Free Almond Cherry Chocolate Meringue Cookies with Dairy Free Chocolate Ganache for Passover

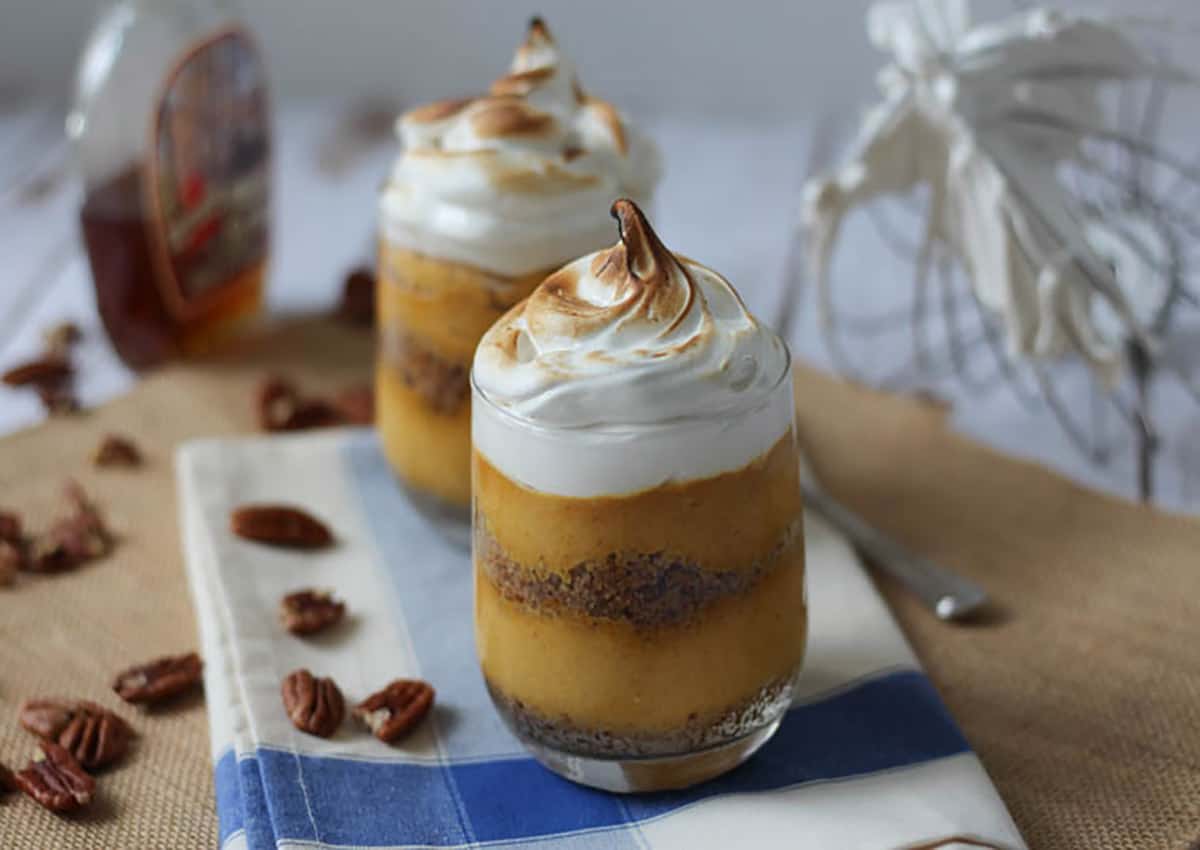
Two pumpkin meringue parfaits in a glass.

Pumpkin Meringue Parfait 3 Ways

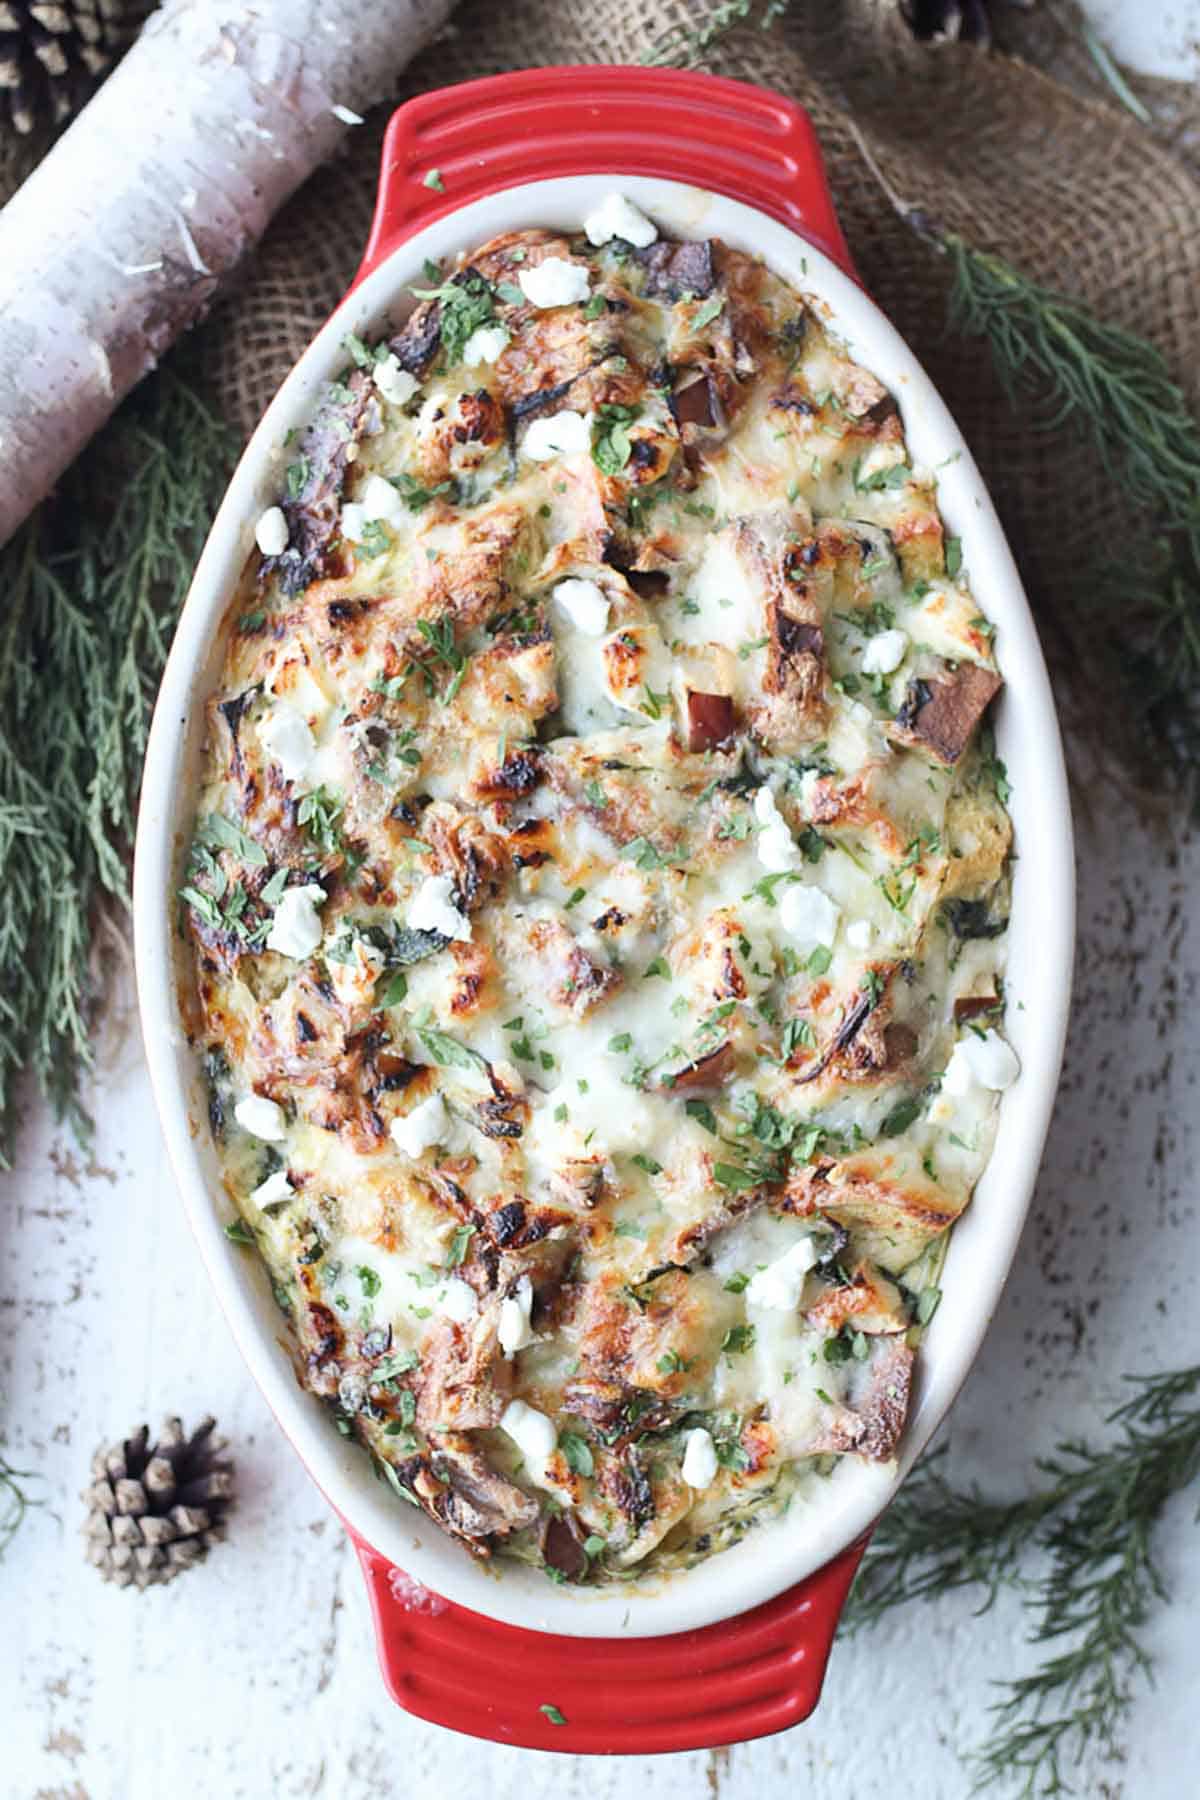
Birds eye view of a strata in a casserole dish.

Vegetarian Apple Caramelized Onion Gluten Free Strata

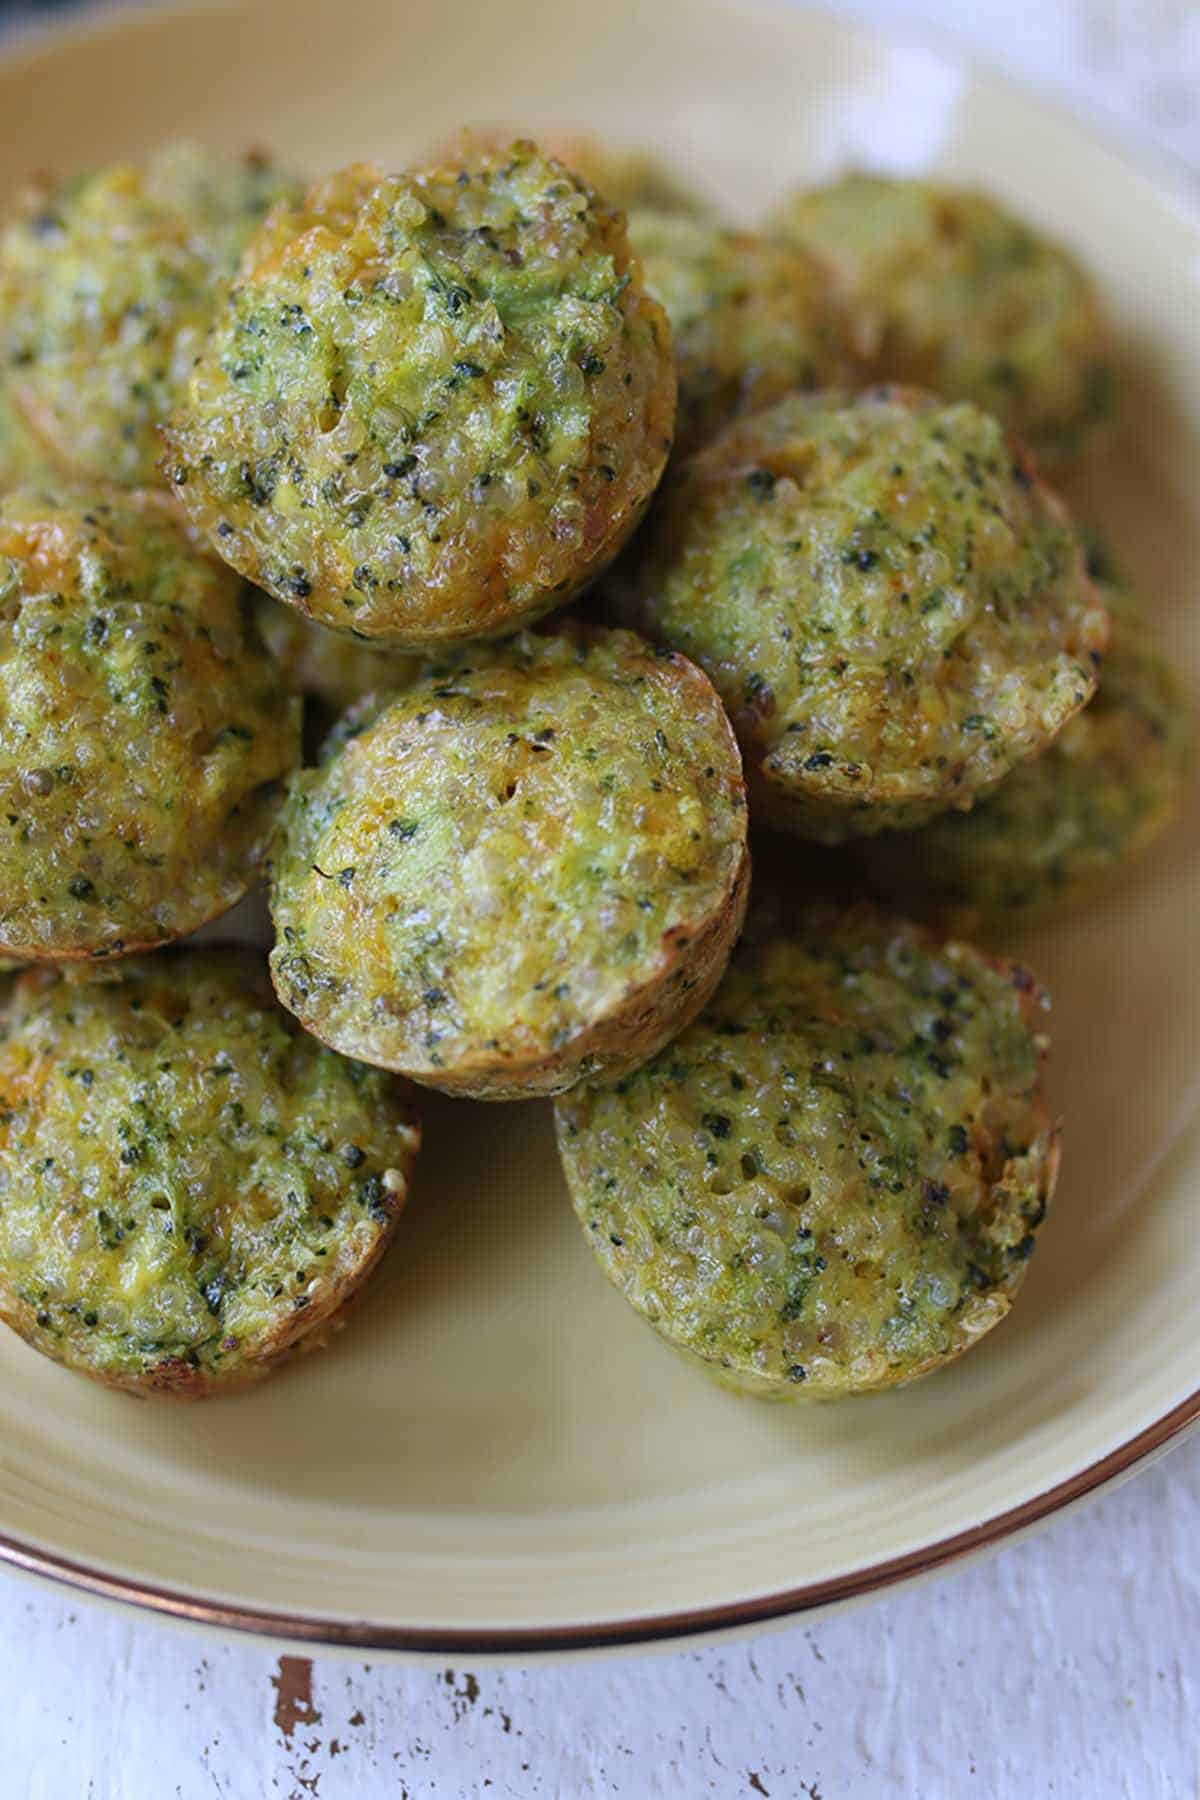
Several mini broccoli and cheese egg muffins on a yellow plate.

Baby Led Weaning Mini Broccoli and Cheese Egg Muffins

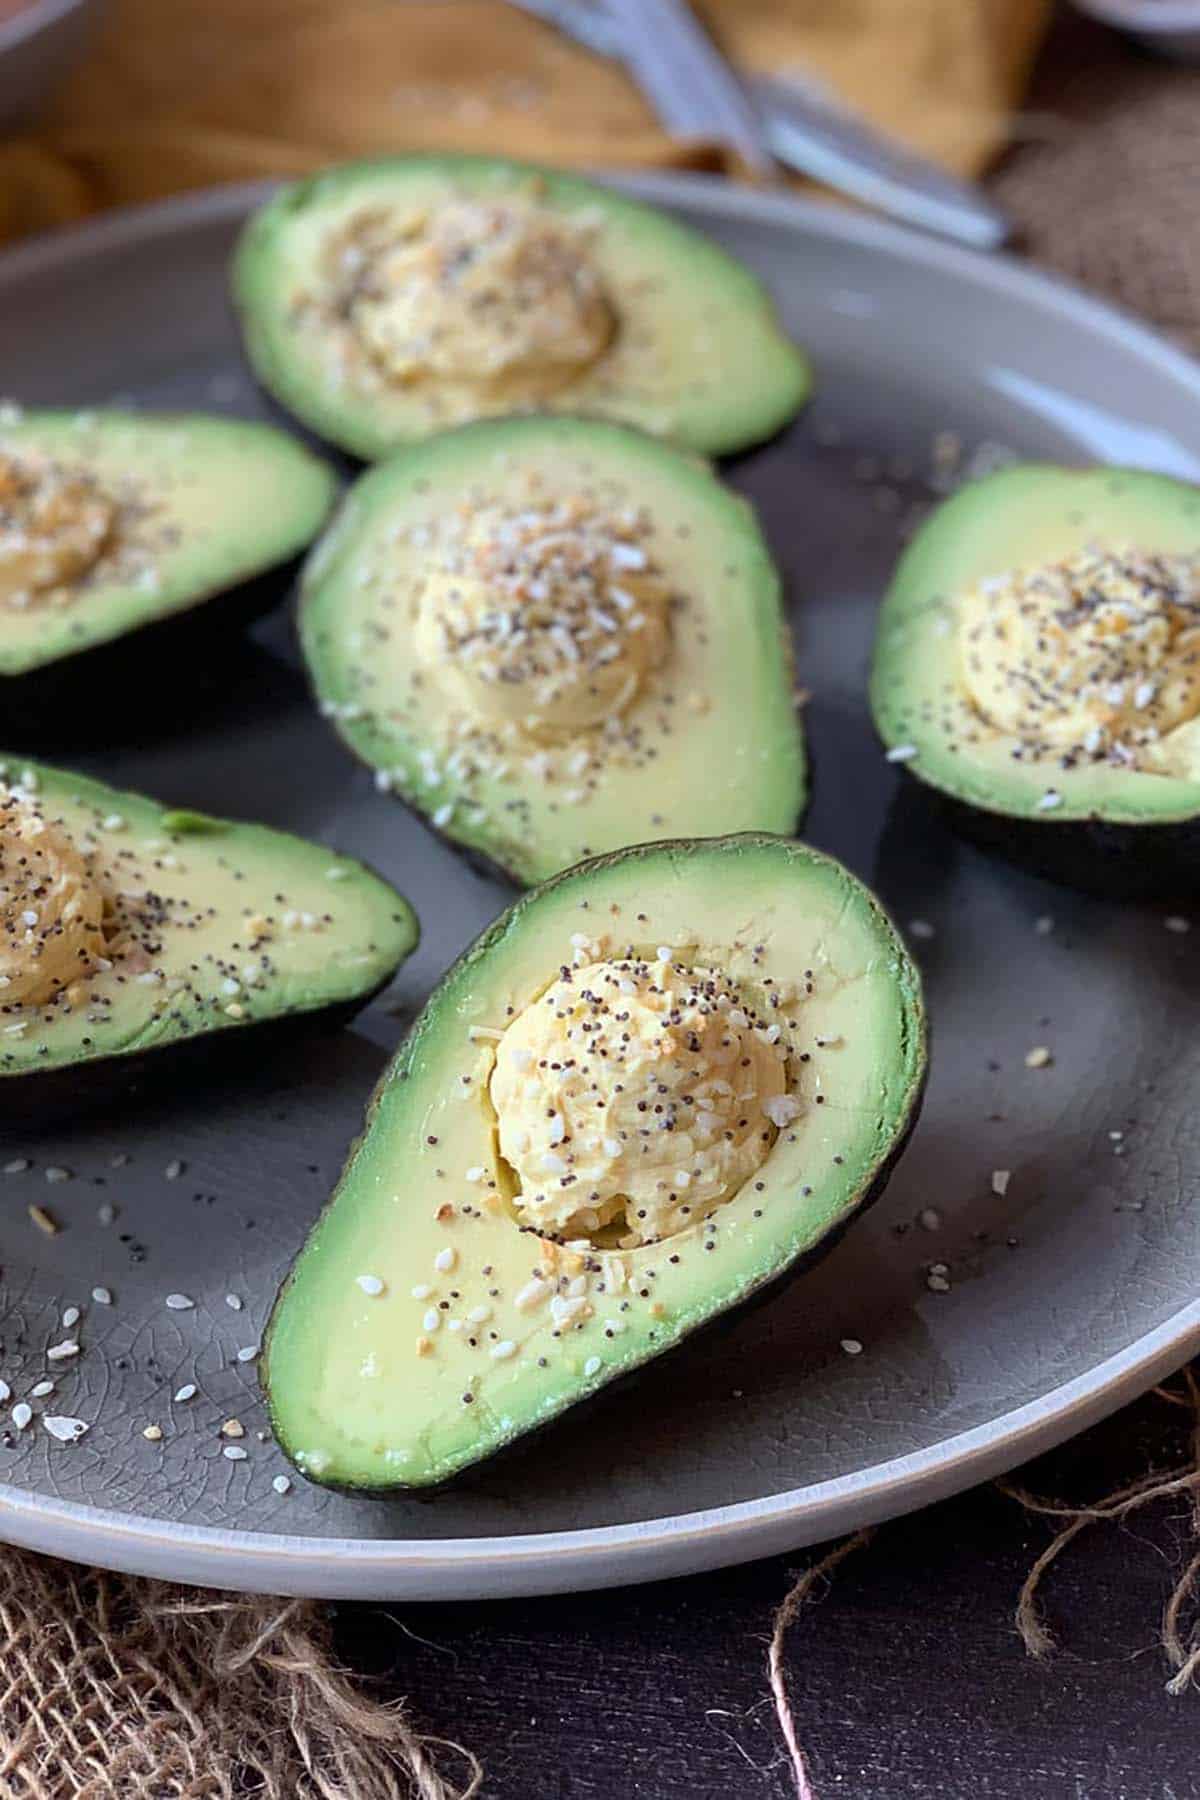
Several avocados stuffed with eggs and everything bagel seasoning sprinkled on top.

Avocado Devilled Egg with Everything Bagel Spice

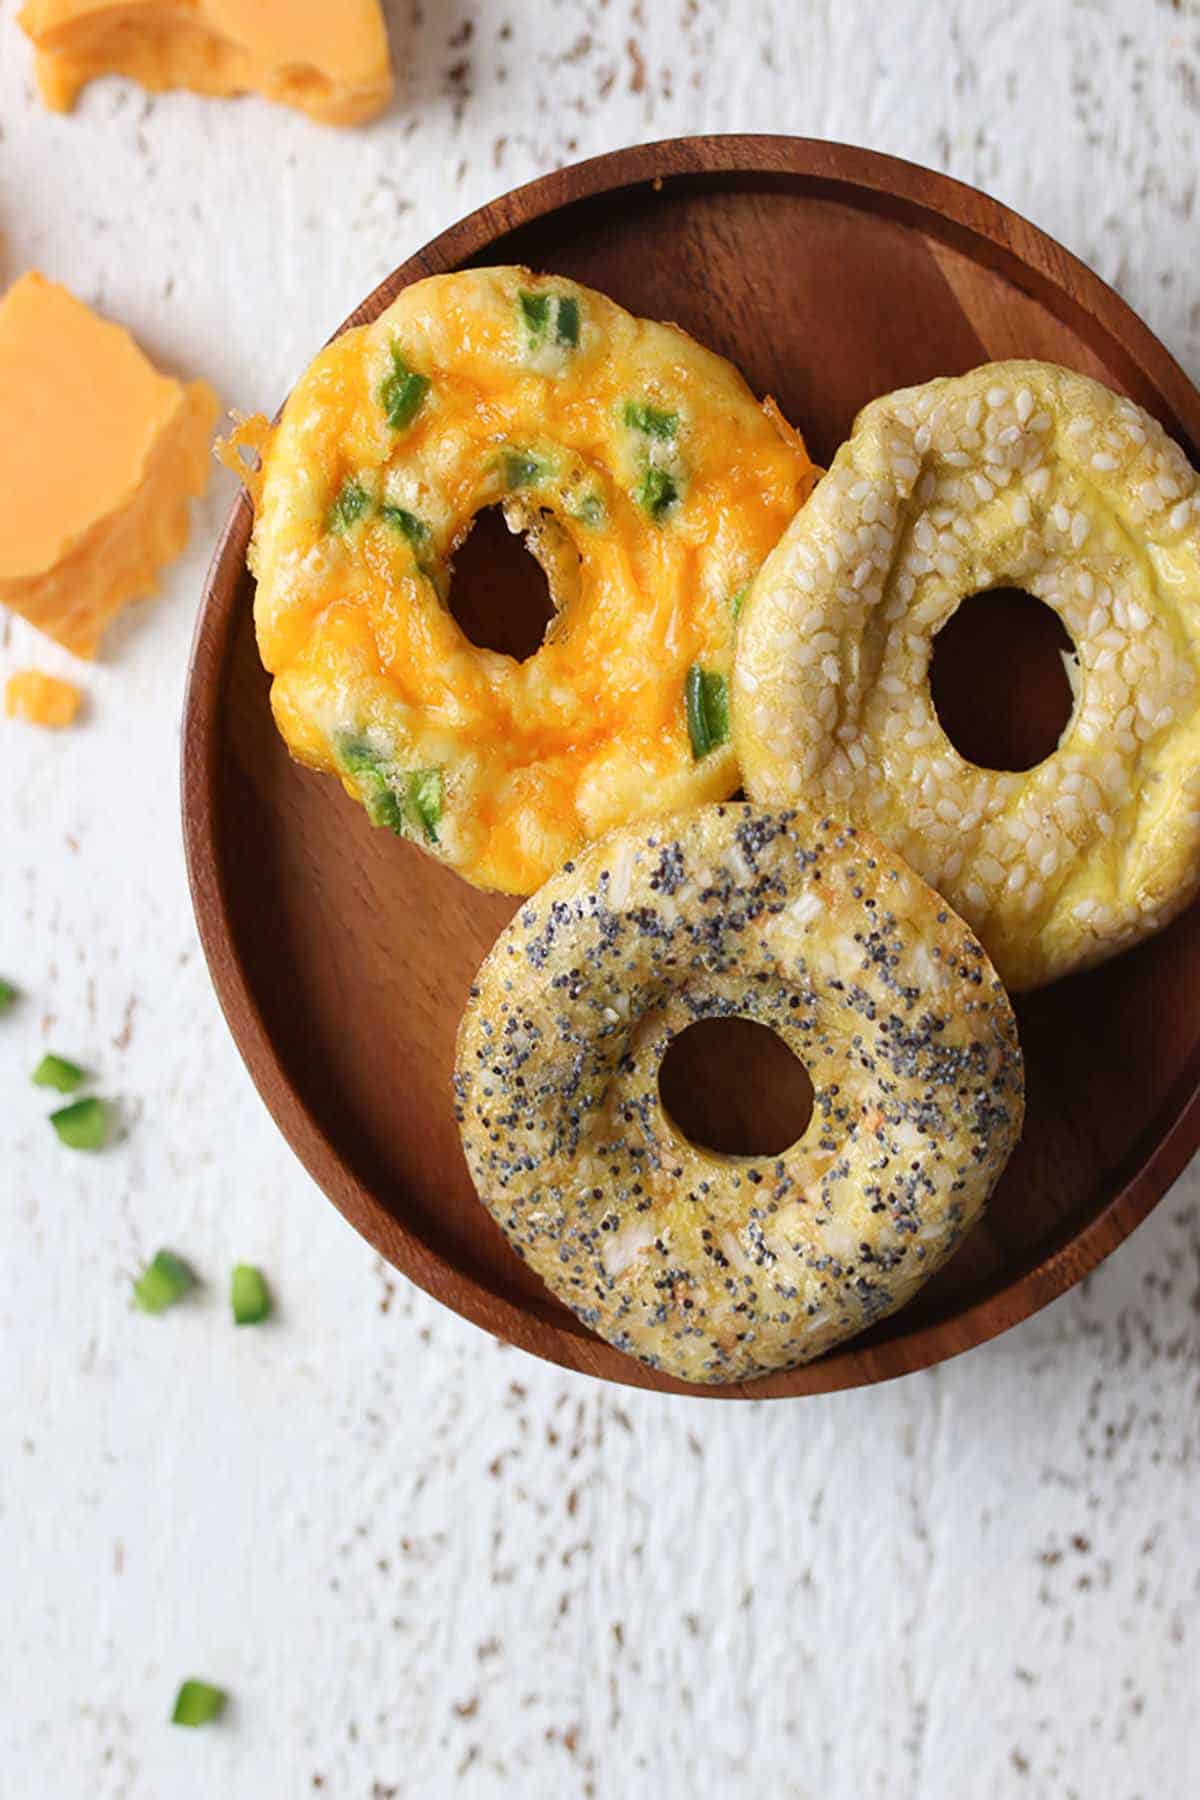
Three egg bagels on a wooden plate.

Breakfast Keto Bagels with Eggs| Everything Bagel, Sesame, Cheese, and Poppyseed

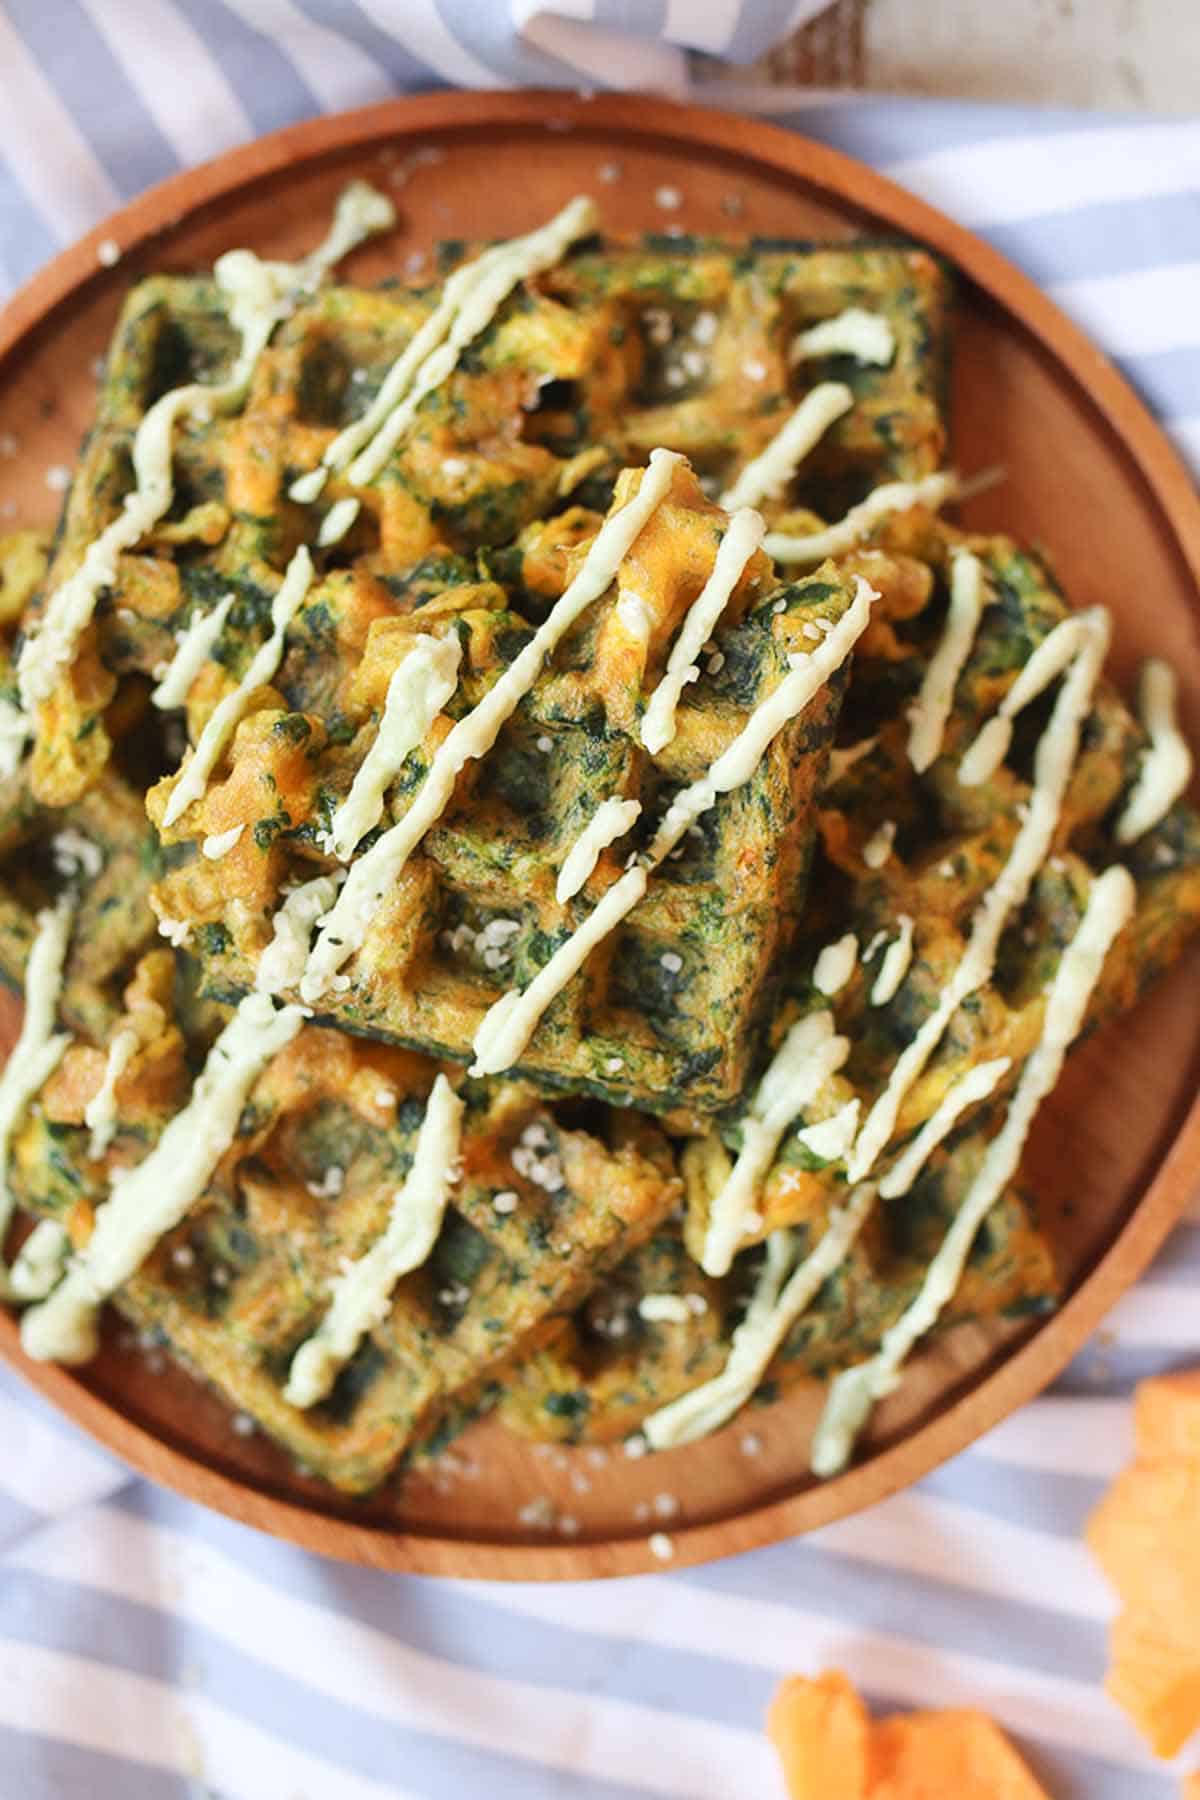
Several savory waffles on a wooden plate drizzled with white sauce.

Cheesy Spinach Egg Waffles

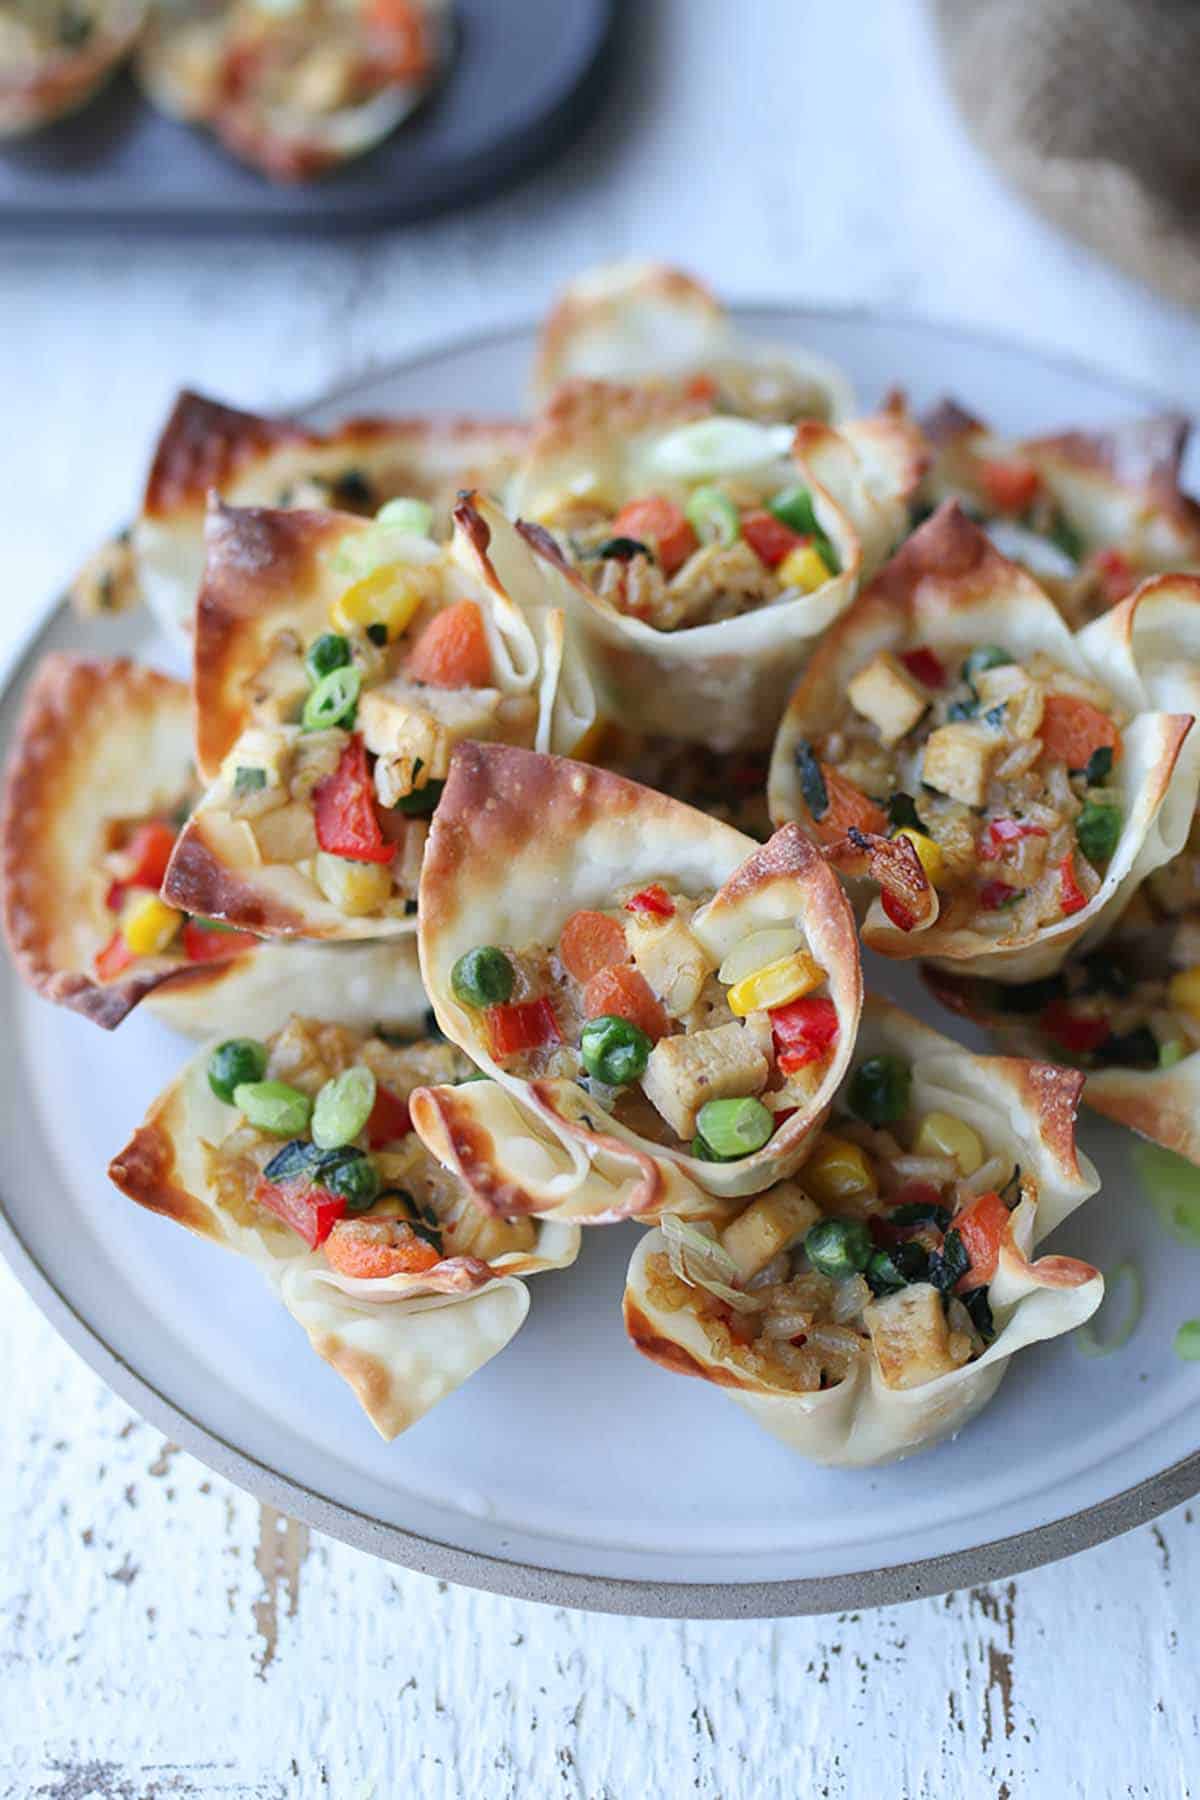
Fried rice cups on a white plate.

Mini Fried Rice Cups

A fried egg on top of three waffles.

Egg and Cheese Savoury Waffles

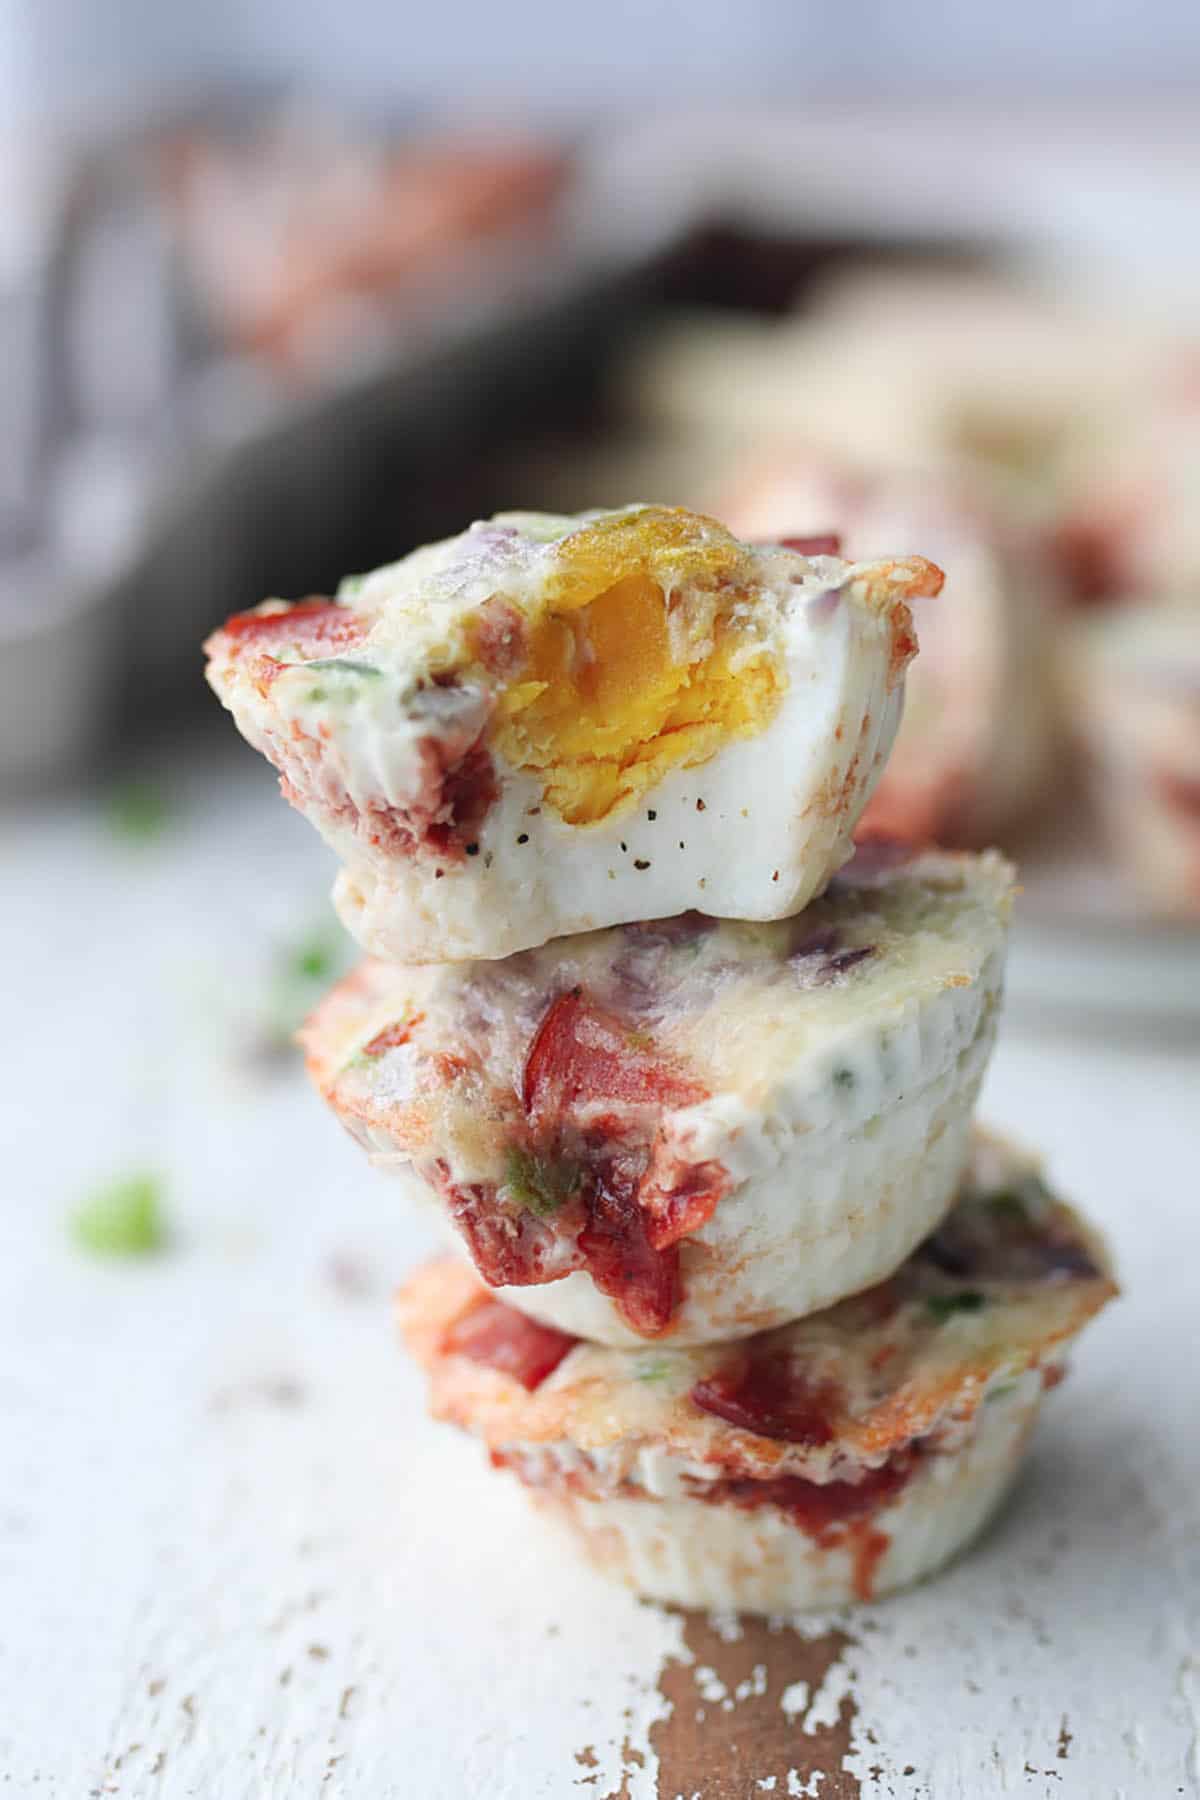
Three pizza egg muffins stacked on top of one another.

Pizza Egg Muffins

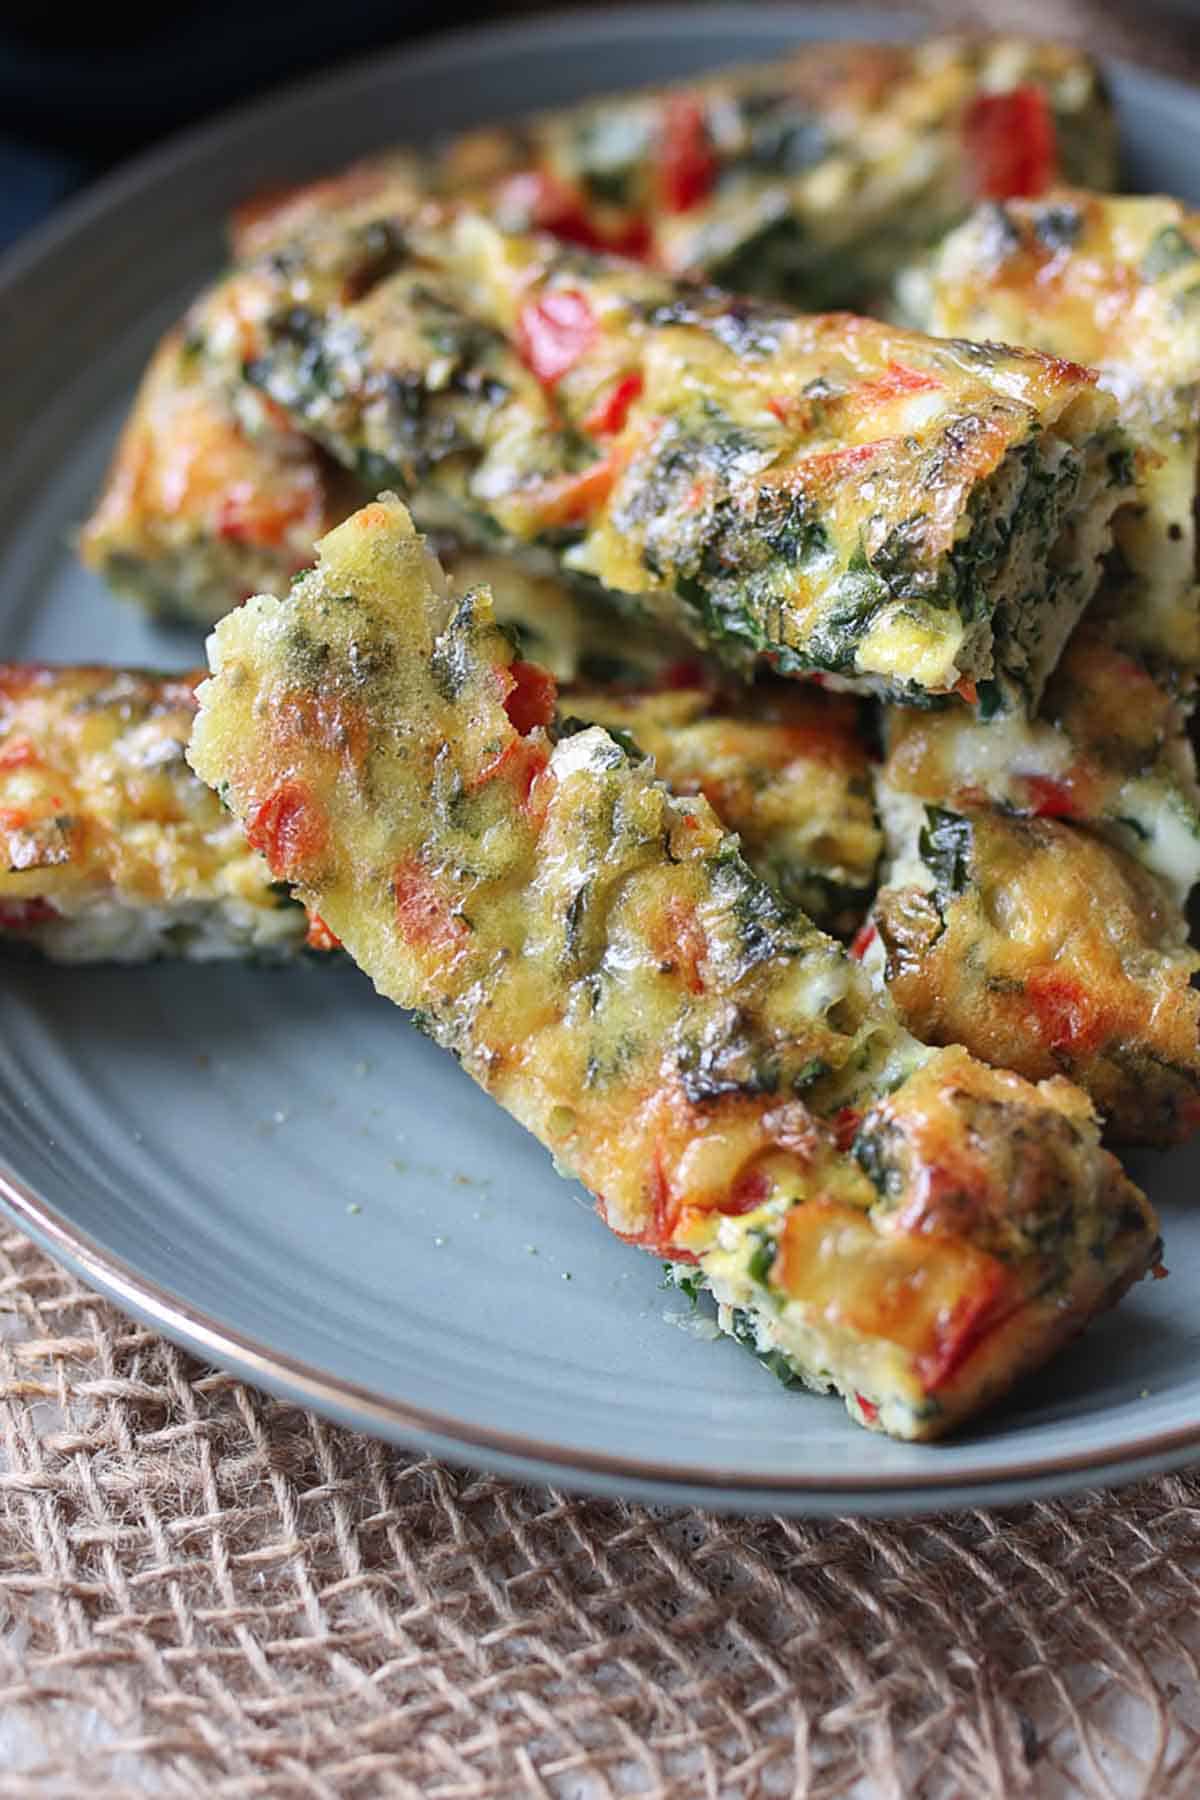
Several frittata fingers on a blue plate.

Baby Frittata Fingers with Kale and Pepper

Looking for more recipe inspiration? Check out these great recipes from eggs.ca!

And there you have it! Everything you need to know about ways to cook eggs like a pro and reap all of their nutritional rewards. Of course, we are always posting new and unique ways to cook and bake with eggs, so be sure to stay up to date on the blog. And don’t forget to tag @abbeyskitchen and @eggsoeufs if you make any of the recipes from the post. We always love seeing your creations!

Abbey Sharp

Abbey Sharp is a Registered Dietitian (RD), regulated by the Ontario College of Dietitians. She is a mom, YouTuber, Blogger, award winning cookbook author, media coach specializing in food and nutrition influencers, and a frequent contributor to national publications like Healthline and on national broadcast TV shows.
www.abbeyskitchen.com/about-abbey/

Last Updated January 18, 2021. Published February 13, 2023 By Abbey Sharp 7 Comments

Vegan Oreo Cheesecake (Gluten Free)

This vegan Oreo cheesecake is a decadent plant-based dessert that is no-bake, super easy to prepare, and will satisfy your sweet tooth!

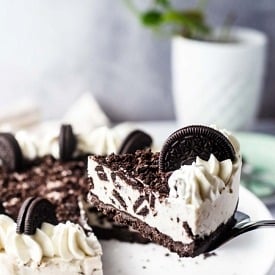
Close up of a slice of vegan Oreo cheesecake.

I gotta admit, I am such a sucker for a good cheesecake. It’s rich, creamy, decadent, and made all the more delicious with a yummy crust. But in an effort to offer you more plant-based friendly dessert options, we put our thinking caps on to develop a dairy free cheesecake that doesn’t suck, still tastes like cheesecake, and isn’t a royal pain to prepare.

So I am happy to share this vegan Oreo cheesecake with ya’ll because let me tell you – it’s a SERVE. Not only is it easy to whip up but it will be guaranteed to impress any and all cheesecake lovers in your life! Get ready to be wowed.

Table of contents

  • Why This Recipe Works
  • Key Ingredients
  • How to Make This Recipe
  • Expert Tips
  • Recipe FAQs
  • More Recipes You Might Like

Why This Recipe Works

This recipe is hands down one of my new favourites and I see myself preparing it for many gatherings and special occasions to come! Here are just a few reasons why I am in love with this vegan Oreo cheesecake:

  • It’s no-bake
  • It’s sweet and crunchy
  • Uses less than 10 ingredients
  • High protein (7 grams per slice)
  • High Fibre (5 grams per slice)
  • Gluten free
  • 100% plant-based

Need I say more?

Key Ingredients

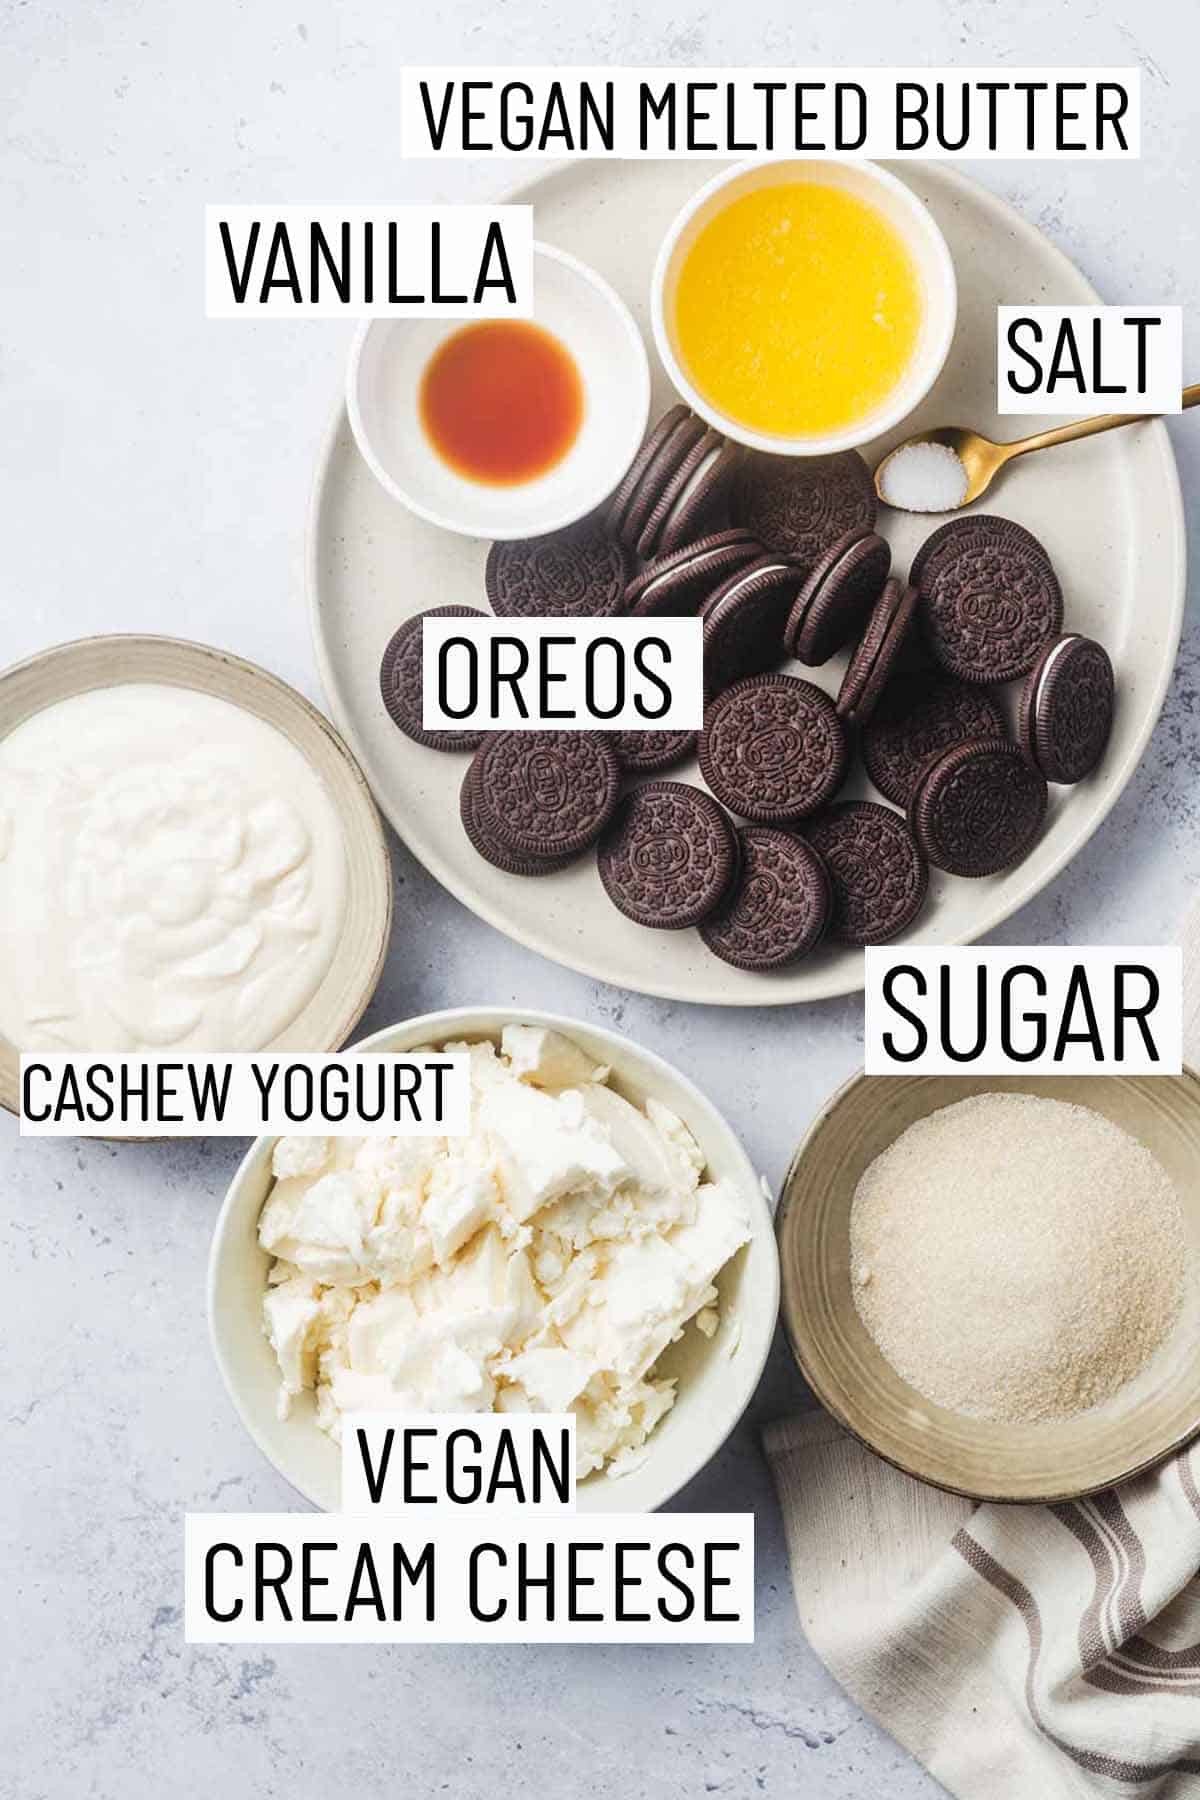
Flat lay image of recipe ingredients including sugar, cream cheese, cashew yogurt, Oreos, salt, melted butter, and maple syrup.

Crust – To make the crust we use three simple ingredients – Oreos, melted butter, salt. That’s it! We simply pulse these ingredients in the food processor and freeze until its hardened and voila! Couldn’t be easier than that.

Filling – Here’s where the magic happens. To make this cheesecake vegan, we use vegan cream cheese, and combine it with cashew yogurt, sugar, vanilla, and crushed Oreos. Depending on where you live, vegan cream cheese may or may not be tough to track down. If you’re lucky, you may find some in the health food section at your grocery store. Otherwise, you can order some online (this one here is one of my favourites). If you don’t need to make this recipe vegan, you can of course use regular cream cheese instead.

Frosting – If you wanted to add a little somethin’ somethin’ to decorate this Oreo cheesecake, we suggest adding some frosting and a few extra Oreos for good measure.

How to Make This Recipe

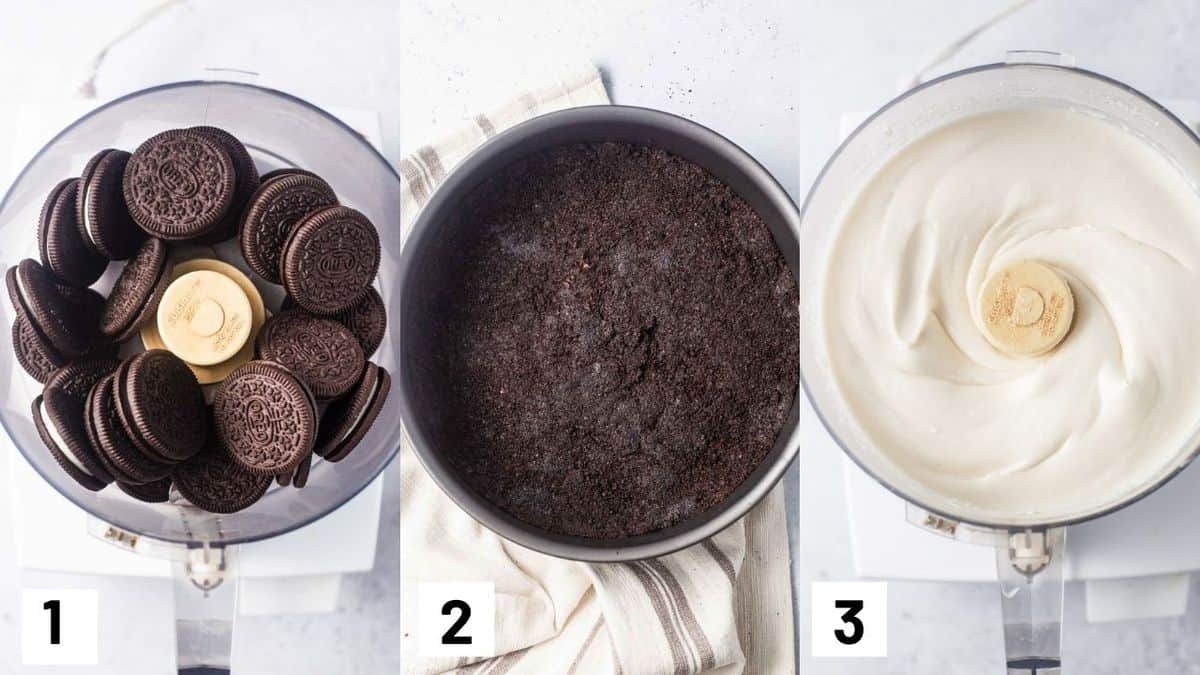
Three side by side images showing how to make the Oreo crust as well as the cheesecake filling.

Step 1: Place Oreos in a food processor and pulse till it is crushed. Add in the melted butter and salt and pulse till it forms a crumb.

Step 2: Transfer the crumbs to a prepared springform pan and spread it evenly with a spatula.

Step 3: To a food processor, add the cream cheese, cashew yogurt, sugar, vanilla and pulse until it is well combined, smooth and luscious.

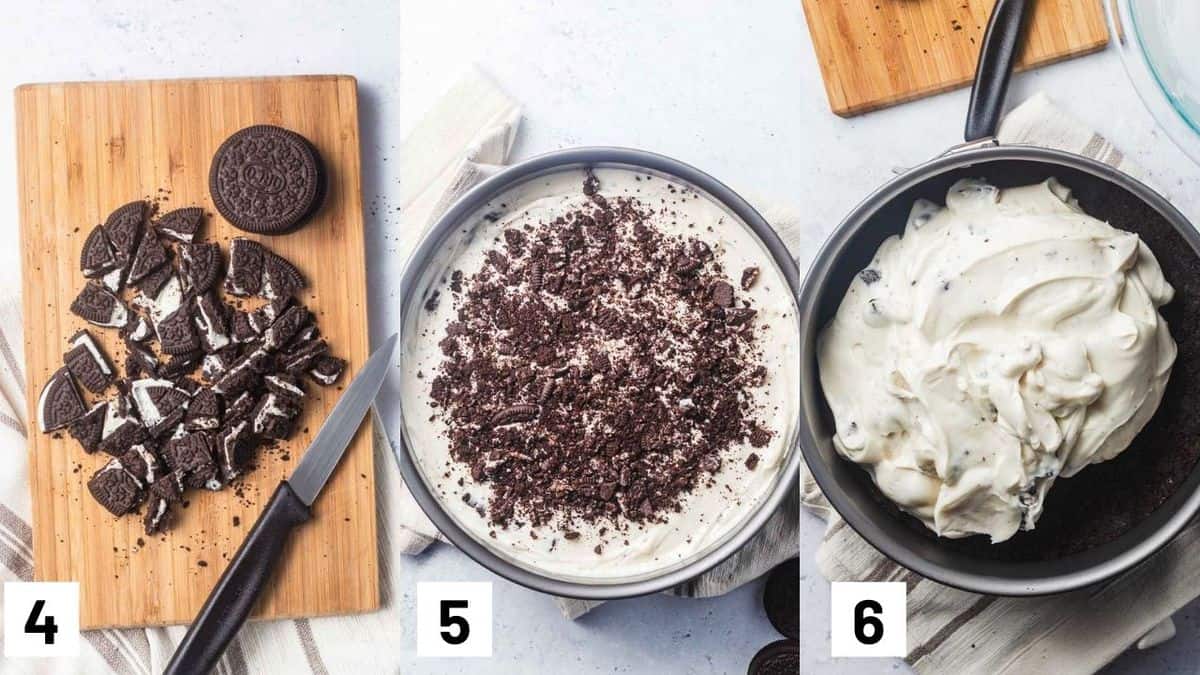
Three side by side images showing how to crush Oreos and adding to the cheesecake mixture, as well as layering cheesecake layer to the Oreo crust.

Step 4: Crush or chop 8 – 10 Oreo cookies.

Step 5: Add it to the cream cheese, mix till well combined. 

Step 6: Remove the springform pan from the fridge and add the cream cheese mixture to it. Spread evenly with a spatula and decorate with crushed Oreos, if desired. Cover the springform pan with plastic and store in the freezer for 4 hours or overnight until the cream cheese mixture is set. 

Expert Tips

To make this vegan Oreo cheesecake you will need two key pieces of equipment:

  1. 8-inch springform pan
  2. High-speed blender or food processor

To keep things simple, we used the same food processor to make the crust and filling and washing in between uses. But you can totally switch it up depending what equipment you have available – i.e. you can use an immersion blender for the filling and make the crust in a food processor or high speed blender. Your call!

Be mindful to not over stir the crushed Oreos to the cheesecake mixture as it can very easily turn the mixture brown. Simply fold them gently just enough so that everything is combined.

This recipe also takes about 4-5 hours to prepare so be sure to plan ahead if you are making this for a special occasion. The more time it has to set the better, so give yourself ample time.

Recipe FAQs

Where can I find gluten free Oreos?

Some of my favourite gluten free sandwich cookies to use for this recipe include Glutino and Kinnikinnick. If you don’t need to make this recipe gluten free, you can use regular Oreos.

How long will these keep in the fridge?

This cheesecake will keep in the fridge for 5-7 days. You can also store the leftovers in the freezer by carefully wrapping each individual slice with plastic wrap and putting them in a freezer bag or container. They should keep in the fridge for about 2 months.

Is this recipe allergy friendly?

Yes 100%! It’s nut-free, egg-free, and dairy-free so its perfect to bring to birthday celebrations for the kiddos. Also what kid doesn’t love Oreos?

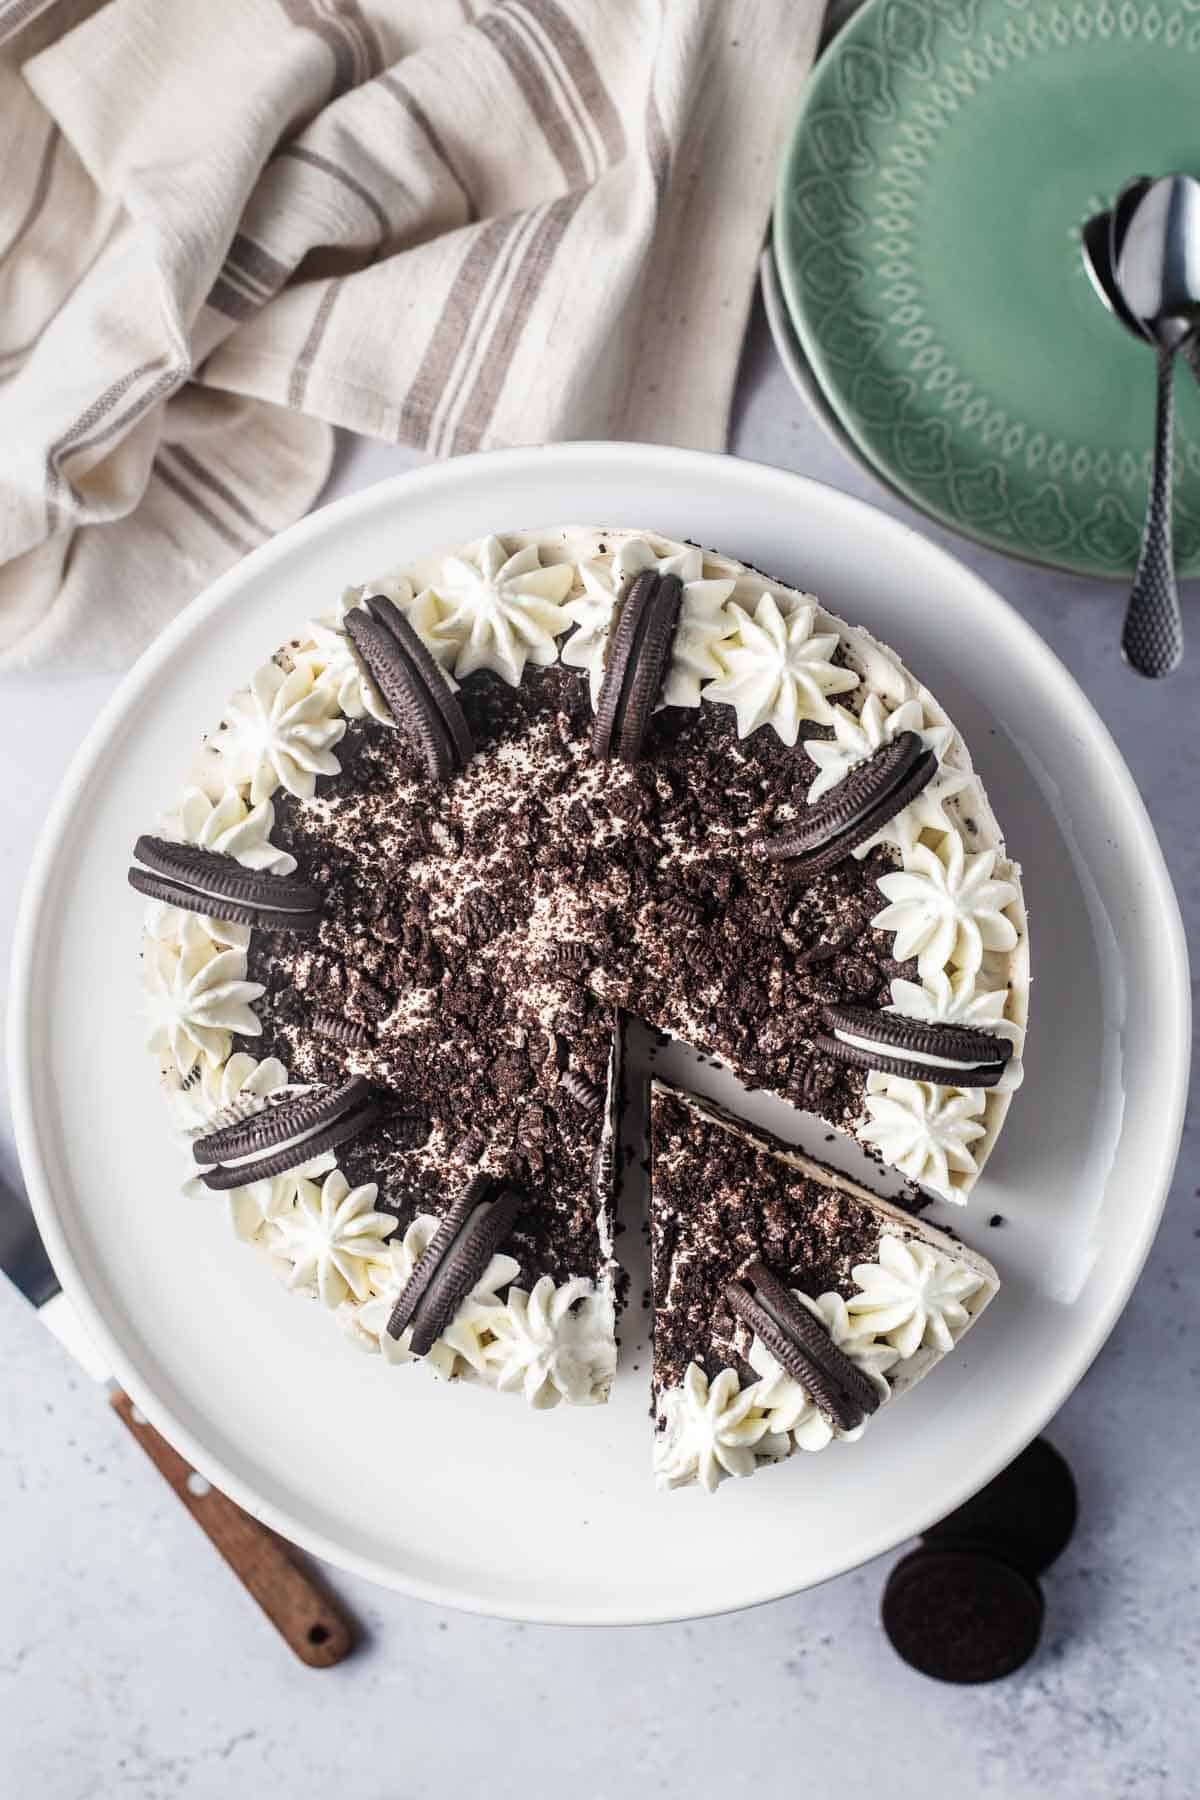
Birds eye view of vegan Oreo cheesecake on a white plate.

More Recipes You Might Like

We love a good cheesecake any day of the week! Here are some of our favourite vegan cheesecakes inspired recipes and frostings.

  • Raw Vegan Cheesecake with Caramel Apples
  • Easy No Bake Matcha Cheesecake (Vegan)
  • Nutella Cheesecake Chocolate Cups (Vegan)
  • Carrot and Banana Cake (wth Cream Cheese Frosting)

What is your favourite type of cheesecake? Would you try this Oreo version? Leave me a comment below!

Print Recipe
4.84 from 6 votes

Vegan Oreo Cheesecake (Gluten Free)

This vegan Oreo cheesecake is a decadent plant-based dessert that is no-bake, super easy to prepare, and will satisfy your sweet tooth!
Prep Time20 minutes mins
Cook Time4 hours hrs
Total Time4 hours hrs 20 minutes mins
Course: Dessert
Cuisine: American
Diet: Gluten Free, Vegan
Servings: 10
Calories: 537kcal
Author: Abbey Sharp

Ingredients

For the Crust

  • 22 gluten free Oreos
  • ¼ or 4 tbsp cup vegan butter melted (about 55g)
  • ¼ teaspoon sea salt

For the Filling

  • 2 cups vegan cream cheese
  • 1 cup vegan cashew yogurt
  • ½ cup granulated sugar
  • 2 teaspoon vanilla
  • 8-10 gluten free oreos crushed

For the frosting

  • 1 cup vegan frosting
  • 6 – 8 Oreo Cookies

Instructions

Prepare the crust

  • Line the bottom of an 8 inch springform pan with parchment. This will help ensure you can remove your cheesecake with ease.
  • Place Oreos in a food processor and pulse till it is crushed. Add in the melted butter and salt and pulse till it forms a crumb. You can also make the crumbs by placing the Oreos in a bag and hitting it with a rolling pin till it is crushed.
  • Transfer the crumbs to your prepared springform pan and spread it evenly with a spatula. Press into a flat layer using the back of a cup or a tall glass. Ensure it is nice and compact that way it keeps its shape after cutting. Keep it in the fridge to chill while you prepare the filling.

Prepare the cream cheese filling

  • Give the food processor a quick rinse. Add the cream cheese, cashew yogurt, sugar, vanilla and pulse until it is well combined, smooth and luscious. Remove this into a bowl.
  • Crush or chop 8 – 10 Oreo cookies and add it to the cream cheese, mix till well combined.
  • Remove the springform pan from the fridge and add the cream cheese mixture to it. Spread evenly with a spatula. You can decorate it with crushed Oreos if desired. Cover the springform pan with plastic and store in the freezer for 4 hours or overnight until the cream cheese mixture is set.
  • Remove the cheesecake from the freezer and let it sit at room temperature for 1 hour before serving. Gently ease it out of the springform pan with a knife or an offset spatula.
  • Decorate with vegan frosting and a few more Oreo cookies.
  • Leftovers can be stored in the refrigerator, it does not have to be kept in the freezer.

Video

Notes

To make this vegan Oreo cheesecake you will need two key pieces of equipment:
  1. 8-inch springform pan
  2. High-speed blender or food processor
To keep things simple, we used the same food processor to make the crust and filling and washing in between uses. But you can totally switch it up depending what equipment you have available – i.e. you can use an immersion blender for the filling and make the crust in a food processor or high speed blender. Your call!
Be mindful to not over stir the crushed Oreos to the cheesecake mixture as it can very easily turn the mixture brown. Simply fold them gently just enough so that everything is combined.
This recipe also takes about 4-5 hours to prepare so be sure to plan ahead if you are making this for a special occasion. The more time it has to set the better, so give yourself ample time.

Nutrition

Calories: 537kcal | Carbohydrates: 66g | Protein: 7g | Fat: 30g | Saturated Fat: 10g | Sodium: 525mg | Potassium: 158mg | Fiber: 5g | Sugar: 44g | Vitamin C: 3mg | Calcium: 74mg | Iron: 5mg

If you tried making this vegan Oreo cheesecake, let me know your thoughts down in the comments below!

Abbey Sharp

Abbey Sharp is a Registered Dietitian (RD), regulated by the Ontario College of Dietitians. She is a mom, YouTuber, Blogger, award winning cookbook author, media coach specializing in food and nutrition influencers, and a frequent contributor to national publications like Healthline and on national broadcast TV shows.
www.abbeyskitchen.com/about-abbey/

Last Updated February 12, 2023. Published February 10, 2023 By Abbey Sharp 29 Comments

Gluten Free Sugar Cookies | Healthy Valentine’s Day Dessert

These Gluten Free Sugar Cookies are perfect for a healthy Valentine’s Day (or any fun holiday) dessert! They’re high in fibre, protein, and healthy fats AND much better for you than typical sugar cookies!

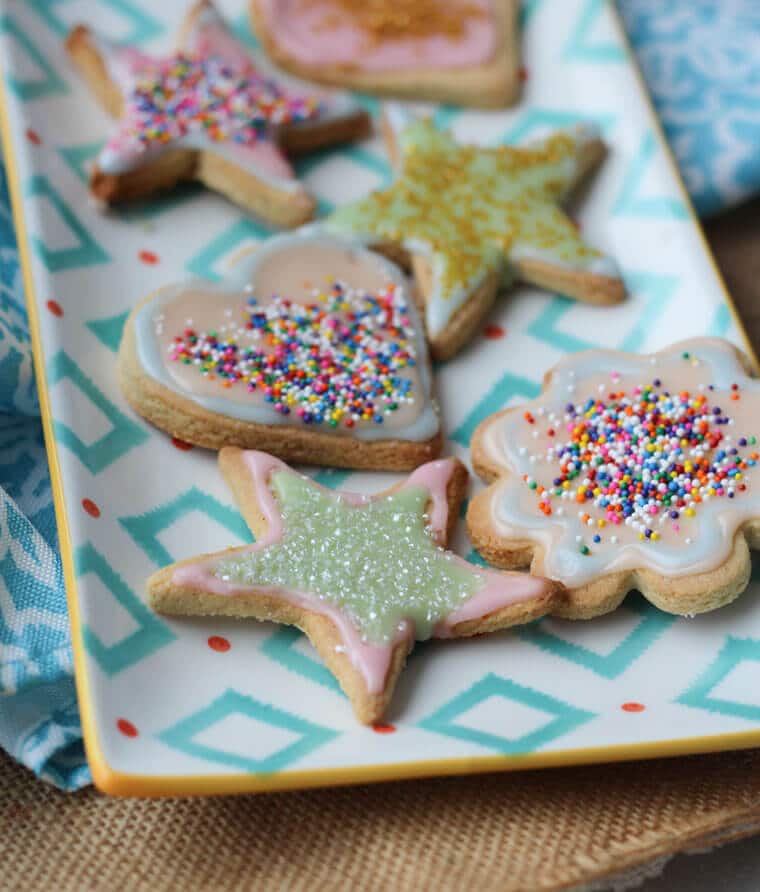
A plate of multiple almond sugar cookies in different shapes.

 Confession time: I don’t like sugar cookies. My sister used to always be obsessed with simple sugar cookies and shortbread cookies, and honestly, I could do without them all. That was all until I met these Gluten Free Sugar Cookies. As Valentine’s Day is approaching, I’m always looking for fun recipes I can incorporate for my family and for my husband of course! I decided to make these Gluten Free Sugar Cookies with the girls of one of my favourite people, Abby Langer (because Galentine’s is important too!!).

Table of contents

  • Why This Recipe Works
  • Key Ingredients
  • How To Make This Recipe
  • Expert Tips
  • Recipe FAQs
  • More Recipes You May Like

Why This Recipe Works

This is my favourite recipe for gluten free sugar cookies because they are so versatile! Whether you’re trying to impress a date for Valentine’s or just make a batch for yourself for the week, these cookies are the best! I also love this recipe because it’s

  • Higher in fiber than traditional sugar cookies! (~2 grams per cookie)
  • Perfect for those who are gluten intolerant
  • Easy to make (only 4 steps!)
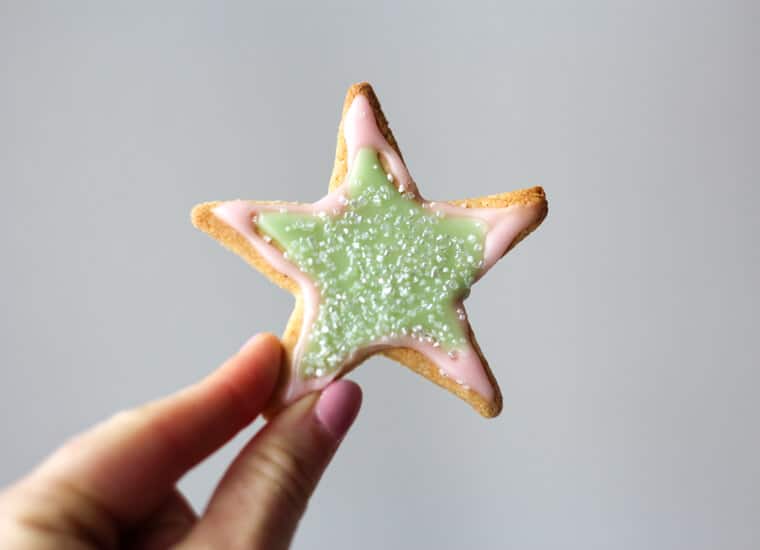
A hand holding a star shaped almond sugar cookies.

Key Ingredients

Blanched Almond Flour- Instead of your typical white refined flour, I use all natural almond flour, packed with protein, fibre and healthy fats. It’s a little more sticky to work with because of the extra fat, but as long as you keep your rolling pin and surface well-floured, you should be good to go. Plus, the almond flour makes for a naturally gluten free, and more tender sweet cookie, rather than a dry flavourless one, so they’re delicious even without the fun icing or sprinkles on top.

Confectioners Sugar- Also known as “powdered sugar”, this sugar is the perfect sugar for icing for these gluten free sugar cookies due to it’s dissolvability and smooth texture.

Food Coloring/Sprinkles – This is where YOU get to be creative!! For whatever holiday you’re celebrating have fun with colors and decorations using food coloring or natural dye if you wish!

How To Make This Recipe

Step 1: Preheat oven to 350 F. In a medium bowl, cream the butter, maple syrup and brown sugar together until smooth. Then add in the almond flour, vanilla, almond extract, egg, cinnamon and salt. Roll the batter into a ball and chill for 30 minutes.

Step 2: Flour your surface and rolling pin and roll out small balls (about 2 – 3 tablespoons each). Roll the batter out to ¼” thick and cut into shapes with a cookie cutter. Place the cookies on a silpat on a baking sheet 1/2 inch apart and bake for about 10 minutes until golden brown. Allow to fully cool.

Step 3: Meanwhile, sugar, almond milk and almond extract. Mix until combined then divide between a few bowls and colour, as desired. Transfer to piping bags (or plastic baggies).

Step 4: When ready to ice the cookies, start by making a “border” with the icing with one colour. Then either using the same colour or a different one, “fill” in the rest of the cookie. Finish with whatever sprinkles or sugars you would like and allow them to fully set.


Expert Tips

Some key items I would recommend to ease the process of making these gluten free cookies are: a Kitchenaid Standmixer (a key tool for any baker), baking sheets, and a vacuum sealer to make a double batch of the dough to bake off later when I need another cookie fix. Side note: those vacuum sealers are key to making sure I don’t have an excuse to just eat ALL the cookies in one go.

This is a great activity to do with the kids so that they can all decorate their own cookies for Mom however they want (and have their own treat in the process). Also, if you’re worried about food colouring, there are now lots of organic natural food colours you can buy and use for dying your icing, or you can just leave the cookies plain white for a simpler look!

Recipe FAQs

What holidays can I make these gluten free sguar cookies for?

For sure Valentine’s Day!! I also recommend for Mother’s Day, Christmas, Birthdays, or honestly any holiday/party!

Do I have to use almond flour for this recipe?

You can use any gluten free flour you want! I personally haven’t tried any other flours, but feel free to experiment! You can also use regular flour if you don’t care to make these gluten free.

How can I store this dough in the freezer?

As mentioned above, I highly recommend a vacuum sealer to help keep the dough fresh! Then store in freezer for up to 3 months.

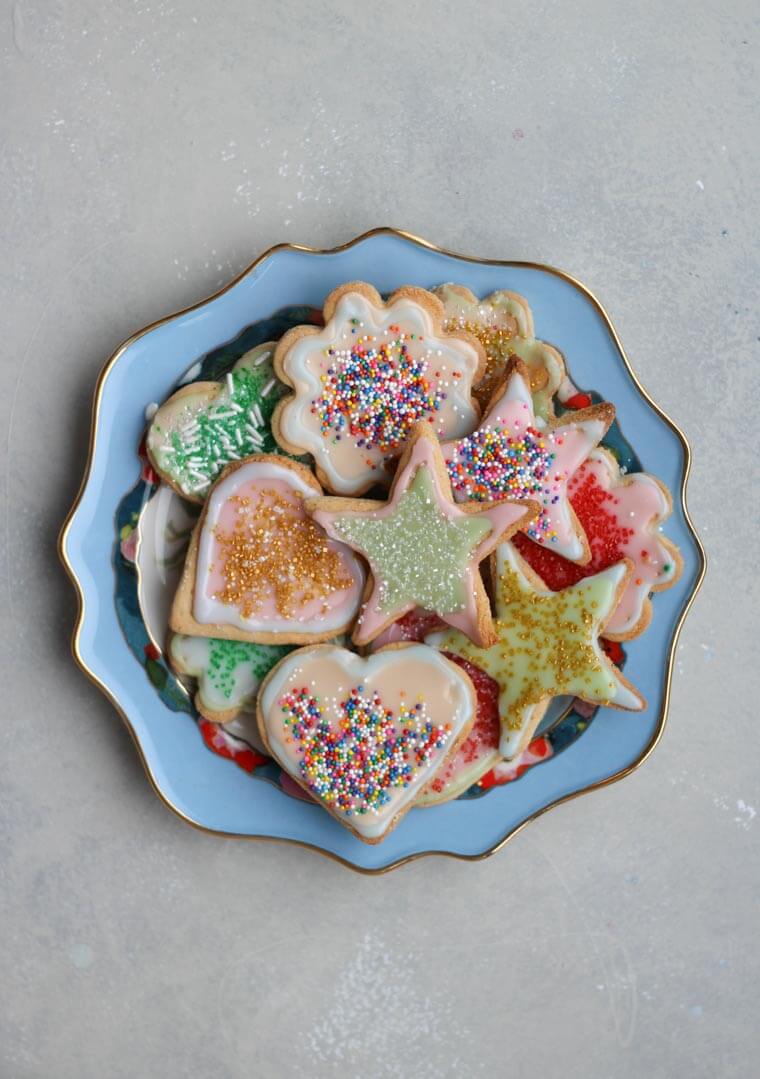
An overhead photo of a plate of multiple sugar cookies.

More Recipes You May Like

Love these gluten free sugar cookies and looking for more gluten free dessert ideas? Check out some of my favorites below!

  • CHICKPEA COOKIE DOUGH 4 WAYS (VEGAN & GLUTEN FREE SNACK)
  • HOMEMADE TWINKIES | HIGH PROTEIN & GLUTEN FREE
  • BEST PEANUT BUTTER COOKIE RECIPE (VEGAN & GLUTEN FREE)
  • SAMOA COOKIES BROWNIE RECIPE (VEGAN & GLUTEN FREE)

Now I want to know, what do you plan to make for the moms in your life for mother’s day? Have you tried these Gluten Free Sugar Cookies? Are you making these cookies for Valentine’s Day? Leave me a comment below!

These Gluten Free Almond Sugar Cookies are perfect for a healthy Mother’s Day dessert- they’re high in fibre, protein and healthy fats and much better for you than typical sugar cookies!
Print Recipe
4.45 from 9 votes

Gluten Free Almond Sugar Cookies

These Gluten Free Almond Sugar Cookies are perfect for a healthy Mother’s Day dessert- they’re high in fibre, protein and healthy fats and much better for you than typical sugar cookies!
Prep Time40 minutes mins
Cook Time10 minutes mins
Total Time50 minutes mins
Course: Dessert
Cuisine: American
Servings: 16 cookies
Calories: 260kcal
Author: Abbey Sharp

Ingredients

Almond Sugar Cookies:

  • ¼ cup unsalted butter softened
  • 2 tbsp pure maple syrup
  • 2 tbsp light brown sugar
  • 2 1/2 cups blanched almond flour
  • ½ tsp vanilla extract
  • ½ tsp almond extract
  • 1 egg
  • ¼ tsp cinnamon
  • ¼ tsp salt
  • Flour (gluten free if desired) for rolling

Icing:

  • 4 cups sifted confectioners sugar
  • 1/2 cup unsweetened vanilla almond milk
  • 1 tsp almond extract
  • Food colouring (natural, if desired)
  • Sprinkles candies and coloured sugar for decorating

Instructions

  • Preheat oven to 350 F. In a medium bowl, cream the butter, maple syrup and brown sugar together until smooth. Then add in the almond flour, vanilla, almond extract, egg, cinnamon and salt. Roll the batter into a ball and chill for 30 minutes.
  • Flour your surface and rolling pin and roll out small balls (about 2 – 3 tablespoons each). Roll the batter out to ¼” thick and cut into shapes with a cookie cutter. Place the cookies on a silpat on a baking sheet 1/2 inch apart and bake for about 10 minutes until golden brown. Allow to fully cool.
  • Meanwhile, sugar, almond milk and almond extract. Mix until combined then divide between a few bowls and colour, as desired. Transfer to piping bags (or plastic baggies).
  • When ready to ice the cookies, start by making a “border” with the icing with one colour. Then either using the same colour or a different one, “fill” in the rest of the cookie. Finish with whatever sprinkles or sugars you would like and allow them to fully set.

Video

Nutrition

Calories: 260kcal | Carbohydrates: 37g | Protein: 4g | Fat: 12g | Saturated Fat: 3g | Cholesterol: 18mg | Sodium: 52mg | Potassium: 9mg | Fiber: 2g | Sugar: 33g | Vitamin A: 105IU | Calcium: 52mg | Iron: 0.7mg
Abbey Sharp

Abbey Sharp is a Registered Dietitian (RD), regulated by the Ontario College of Dietitians. She is a mom, YouTuber, Blogger, award winning cookbook author, media coach specializing in food and nutrition influencers, and a frequent contributor to national publications like Healthline and on national broadcast TV shows.
www.abbeyskitchen.com/about-abbey/

Last Updated February 7, 2023. Published February 8, 2023 By Abbey Sharp 40 Comments

Wellness Tips + Mistakes to Avoid from a Registered Dietitian | Should You Weigh Yourself Daily?

I share the worst weight loss new year's resolutions that I hear daily as a dietitian and how to fix them so that you can actually meet your goals!

Today I’m sharing the best wellness tips and mistakes to avoid. We dive into the research to determine how water retention, hormones, diet and other scale tipping factors play into your daily weight.

In an increasingly wired world, we have become obsessed with the need for self-knowledge, especially when it comes to our personal health. But even as technology becomes increasingly sophisticated, there are some “wellness tips” that remain decidedly basic: the original self-metric, weighing ourselves.

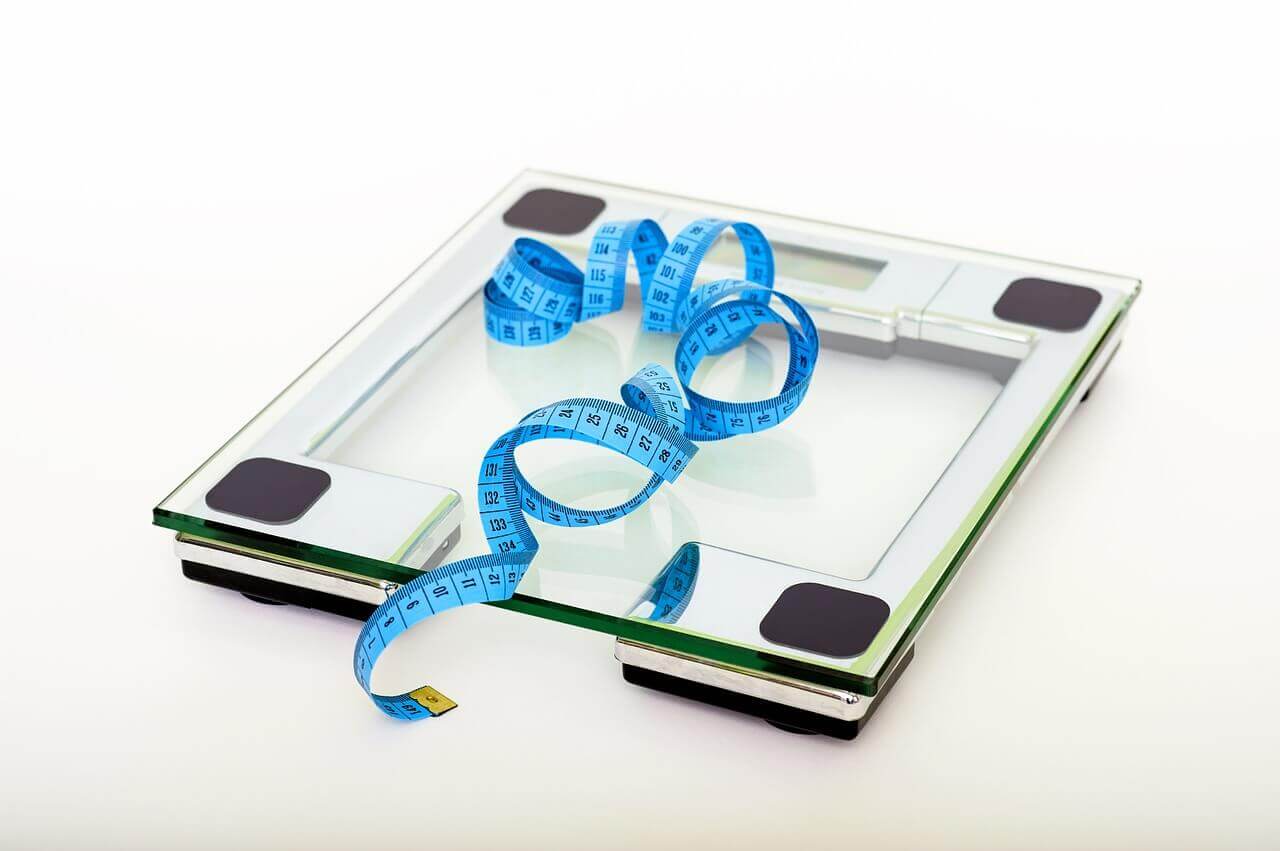
Measuring tape on a human scale.

When you weigh yourself, the number on the scale often becomes a statement of self-worth- a badge of honour for some, and a symbol of self-loathing for others. Even with a greater understanding of whole-body health, with a strong focus on fitness and nutrition, how much weight we give our weight remains a point of contention.

The Big Question: Should you weigh yourself daily?

One of my top wellness tips is knowing that weight alone is not an indicator of health and fitness. A single number does not reflect your body composition- how much lean muscle you have or how much fat you have. It doesn’t reflect your new squat max (and how good your booty looks in those jeans), or how many seconds you crushed off your 5K this morning. It doesn’t reflect how many flights of stairs you can carry five bags of groceries with a kid on your back. It also definitely does not reflect your self worth.

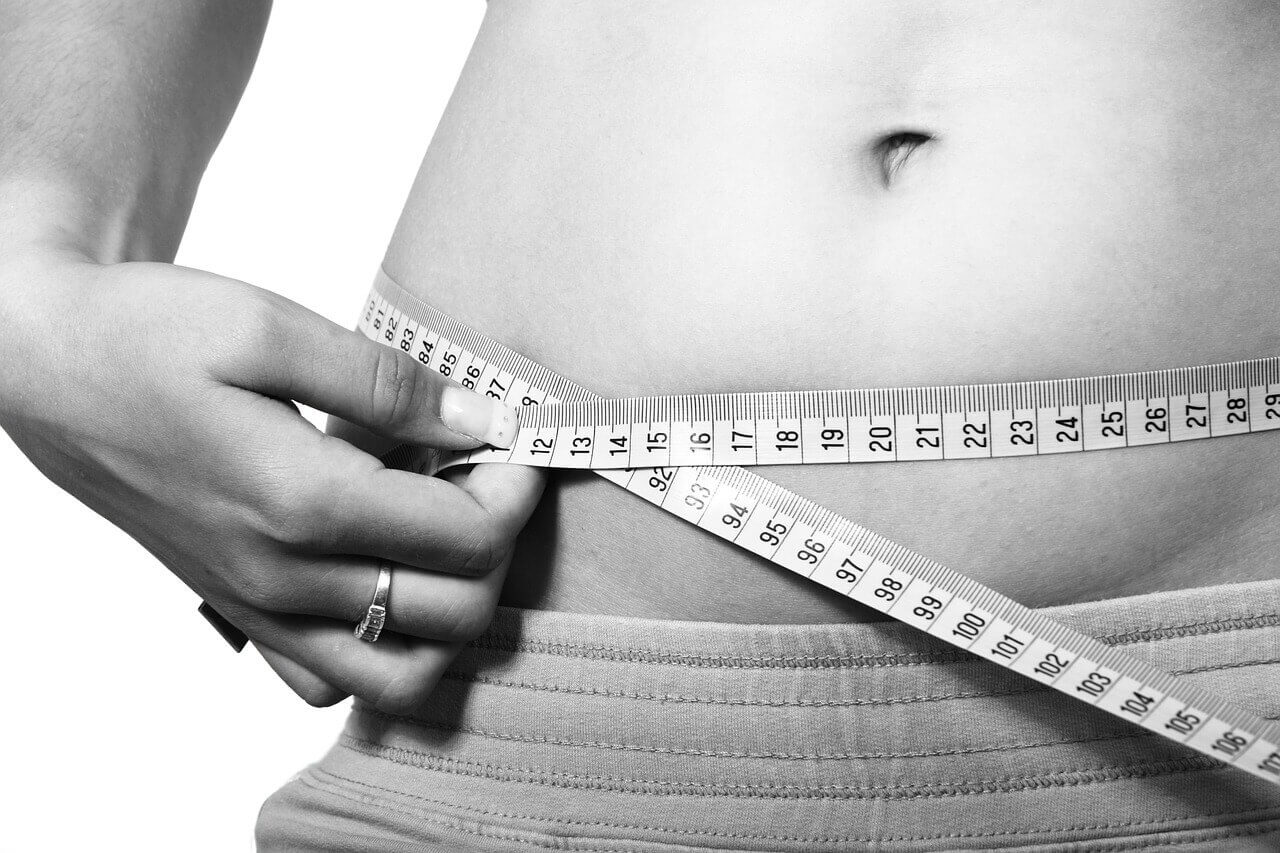
Person following wellness tips by measuring their waist with measuring tape.

Muscle Causes Weight Gain

A better indicator of health than just weight alone is body composition. Body composition can be described as the amount of lean muscle mass compared to the amount of body fat you have, and how it is distributed. It tends to be a much better predictor of your health status compared to weight alone. Increasing your lean muscle mass, while also reducing the amount of fat in your body (especially around your mid-section) has a number of well-studied benefits: better weight maintenance due to more calories burned to maintain muscle, increased strength, and less risk of injury. Just remember, gaining muscle is going to show on the scale too, as muscle weighs more than fat mass.

Another measurement you may of heard of is BMI or Body Mass Index. BMI compares your weight to your height, and then categorizes that value between underweight and severely obese. Even this method for predicting health can be misleading, as only overall weight is considered, and not lean muscle mass. Based on BMI alone, many athletes are deemed to be “obese”, despite being metabolically healthy. If that doesn’t convince you not to weigh yourself daily, keep reading on.

Water Causes Weight Gain

Despite what most fitness magazines will tell you, your body composition doesn’t change overnight. So no, that decadent dinner (with the drinks and dessert) doesn’t immediately convert itself to fat on your thighs. Repeat with me: fat loss and fluid loss are not the same. It turns out your weight fluctuates frequently over the period of a day, which is why we don’t recommend you weigh yourself daily. Your eating habits, exercise regime, fluid intake, bathroom regimen, hormone balance and medication list will influence how your body retains fluid. Let’s look at how all of these factors influence the number on the scale.

Carbs

Carbohydrate intake can have a two-fold effect on water retention, which you would see if you weighed yourself daily. Carbs are stored in our muscles as a special form called glycogen, where for every 1g of glycogen you store 2-3g of water along with it- weight you will definitely see on the scale. The reversal of this is common with low carb diets, which wellness tips seem to recommend frequently. As your body uses up all the carbohydrate reserves in your muscles, all the water bound along with it is also released. Voila, quick weight loss overnight! But is that weight loss fat loss? Nope- it takes more than that.

Salt

When you eat a meal high in salt (sodium), the sodium in your blood temporarily increases too. Water is pulled into your blood from your cells to balance the excess salt, and your cells become slightly dehydrated. Now that you’re thirsty, any water you drink will be retained to help reestablish a normal blood balance. You may see physical symptoms, like swollen hands and feet, and bloating. And you will definitely see a difference on the scale if you weigh yourself daily.

Exercise

Ever wonder why lots of people love to weight themselves right after a workout? As you sweat, you’re losing lots of fluids through sweat. But the minute you start to rehydrate yourself, you’ll see that number jump back up if you weigh yourself daily.

Hydration

How hydrated you stay during the day will also reflect the number on the scale. If you are quickly increasing the amount of fluids you are consuming, it may take your kidneys a little while to catch up and you may see a temporarily higher number on the scale if you weigh yourself daily. After time, however, your kidneys will adjust and you will just start peeing more often to accommodate the excess water.

Hormones

Estrogen levels during your menstrual cycle may elevate fluid retention in some women. Have you every weighed yourself the day during and after your period and seen a huge discrepancy? Unless you ate more than 3500 calories more than you usually would, those numbers are reflecting water retention, not fat.

Medications

Certain medications (Oral contraceptives, some NSAIDs (non-steroidal anti-inflammatory drugs) like aspirin, and ibuprofen, as well as beta-blockers) may cause water retention that you will see if you weigh yourself daily. NEVER stop taking any medications without speaking to your doctor, but if it’s bothering you, ask if there’s an option that causes less water retention.

Other Reasons You Gained Weight Fast

Constipation

If you haven’t been able to poop in a while, it will definitely show up on the scale. Depending on how long it has been, you could be carrying a couple pounds of extra weight (I know, that’s kind of gross). Not to mention, pooping will help with the bloated feeling you may be having. If you want to know more on relieving constipation, check out this post.

Clothing

What you weigh yourself in can also impact the number on the scale. Wearing heavy layers and thicker fabrics, or chunky accessories will add extra pounds that just aren’t there. If you are going to weigh yourself, make it a habit of weighing yourself in the same clothing (or none at all).

Self Reflection Questions

One of my best wellness tips is to reflect on your intentions and practices to assess next steps. So to answer the question “Should you weigh yourself daily?” you need to ask yourself a few more questions.

“Why am I weighing myself?”

Despite the numerical accuracy and inconsistency of weighing yourself on a bathroom scale, the practice itself has been proven effective as a weight loss aid. For those trying to lose weight or maintain weight-loss, keeping an eye on the scale can provide motivation and accountability. However, that same motivation and accountability can develop into obsession and self-punishment when combined with strict and impractical goals.

“How often am I weighing myself?”

Remember, your weight can fluctuate daily. It’s likely what your weight in the morning will be different than how much you weigh in the afternoon due to that water retention we discussed. Weighing yourself day-to-day will not reflect any changes in your actual body composition, which ultimately more important than absolute weight. If you absolutely NEED to keep daily tabs in order to stay on track, it’s better to use a weekly average than to punish yourself over day-to-day changes.

“How does the number influence my behaviour?”

This question is probably the most important. What kind of emotional response do you have to the number on the scale when you weigh yourself daily? If the number is higher than expected, are you likely to become upset? Will you punish yourself and restrict your food intake in response? Will you reward and over-indulge as a reward for your weight loss? If the potential outcome is unhealthy and upsetting, it’s not a helpful practice. Remember that emotional health is just as important as physical health to overall well-being, and isn’t that the ultimate goal anyway?

Wellness Tips: Alternatives to the Scale

If you need a bit of reassurance that you’re on track with your health goals, here are some wellness tips and alternatives to weighing yourself daily.

Tune Into Your Body

Ask yourself how you feel after you eat. Are you satisfied or full? Are you still hungry and irritable? Does food give you energy to move and go about your daily activities or does it make you more tired? Ideally, your eating routine should leave you satisfied (not stuffed and never hungry), enjoying foods and with enough energy to get through your day.

Examine Your Strength

As mentioned, weight gain is often a result of muscle gain and since muscle weighs more than fat, the number you see on the scale may be from a boost in strength. Without needing to invest in expensive body fat composition tests, reflect on your strength changes. Is the 20 lb chest press suddenly feeling easier or harder? Are you more tired after your usual set of 15 reps or could you push out an extra 5?

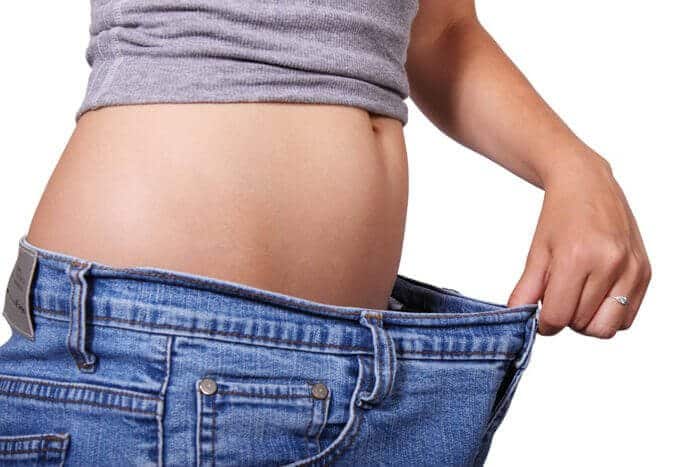
Person showing weight loss in jeans.

More Blog Posts You Might Like

If you liked this post, check out these for more wellness tips!

  • Weight Loss for Teens — Are Diets Safe for Growing Kids?
  • Intuitive Eating Weight Loss? | Sustainable Gentle Nutrition Tips
  • Is Tea for Bloating Relief, Detox & Weight Loss Healthy or Hype?
  • The Unsettling Role of Sleep and Weight Loss — Are You Getting Enough

Do you weigh yourself daily? What alternatives to weighing yourself have you found help you stay on track with your health without getting yourself into a cycle of guilt? Leave me a comment below!

Contribution by RD2B Kourtney Gordon

Abbey Sharp

Abbey Sharp is a Registered Dietitian (RD), regulated by the Ontario College of Dietitians. She is a mom, YouTuber, Blogger, award winning cookbook author, media coach specializing in food and nutrition influencers, and a frequent contributor to national publications like Healthline and on national broadcast TV shows.
www.abbeyskitchen.com/about-abbey/

Last Updated January 26, 2023. Published February 3, 2023 By Abbey Sharp 22 Comments

Everything Bagel Sandwich with Avocado (Vegan & High Protein)

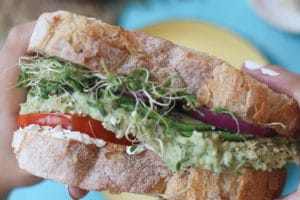
Hand holding large vegan sandwich.

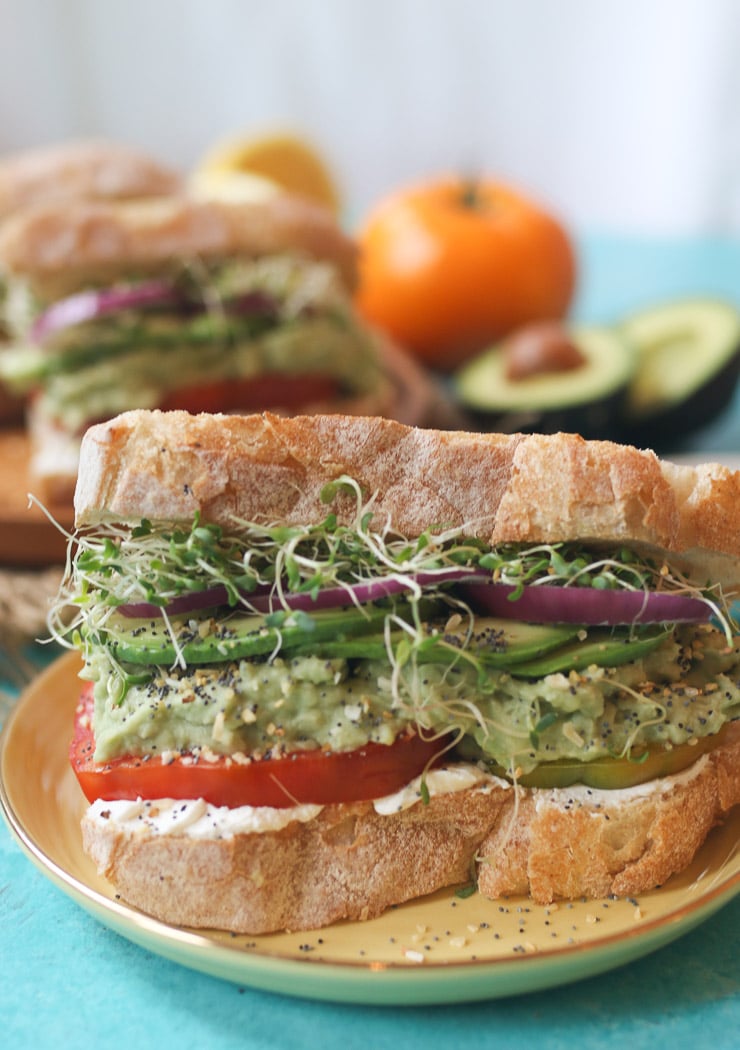
This Vegan Everything Bagel Sandwich with Avocado and White Beans is a great back to school or college dorm room lunch that’s packed with plant based protein! Made in only a couple of minutes with pantry staples!

vegan sandwich on a yellow plate.

Guys. I know it may be getting excessive but I legit cannot get enough of everything bagel spice. The other day at the cottage I had a PERFECTLY toasted everything bagel. This reignited with passion for the stuff. You’ve seen me throw everything bagel onto chicken breasts, devilled egg/ avocados, mac and cheese, egg bakes and salad. This week I thought I would whip up this amazing everything bagel sandwich to help break up a long work day with a tasty lunch!

Table of contents

  • Why This Recipe Works
  • Key Ingredients
  • How to Make This Recipe
  • Expert Tips
  • Recipe FAQs
  • More Recipes You Might Like

Why This Recipe Works

What’s not to love about this everything bagel sandwich? Other than being a fun and delicious way to change up your typical sandwich, here are some more reasons to love this sandwich!

  • High in protein
  • Takes minutes to put together
  • Full of flavour
  • Easy to make
  • Kitchen staples

Key Ingredients

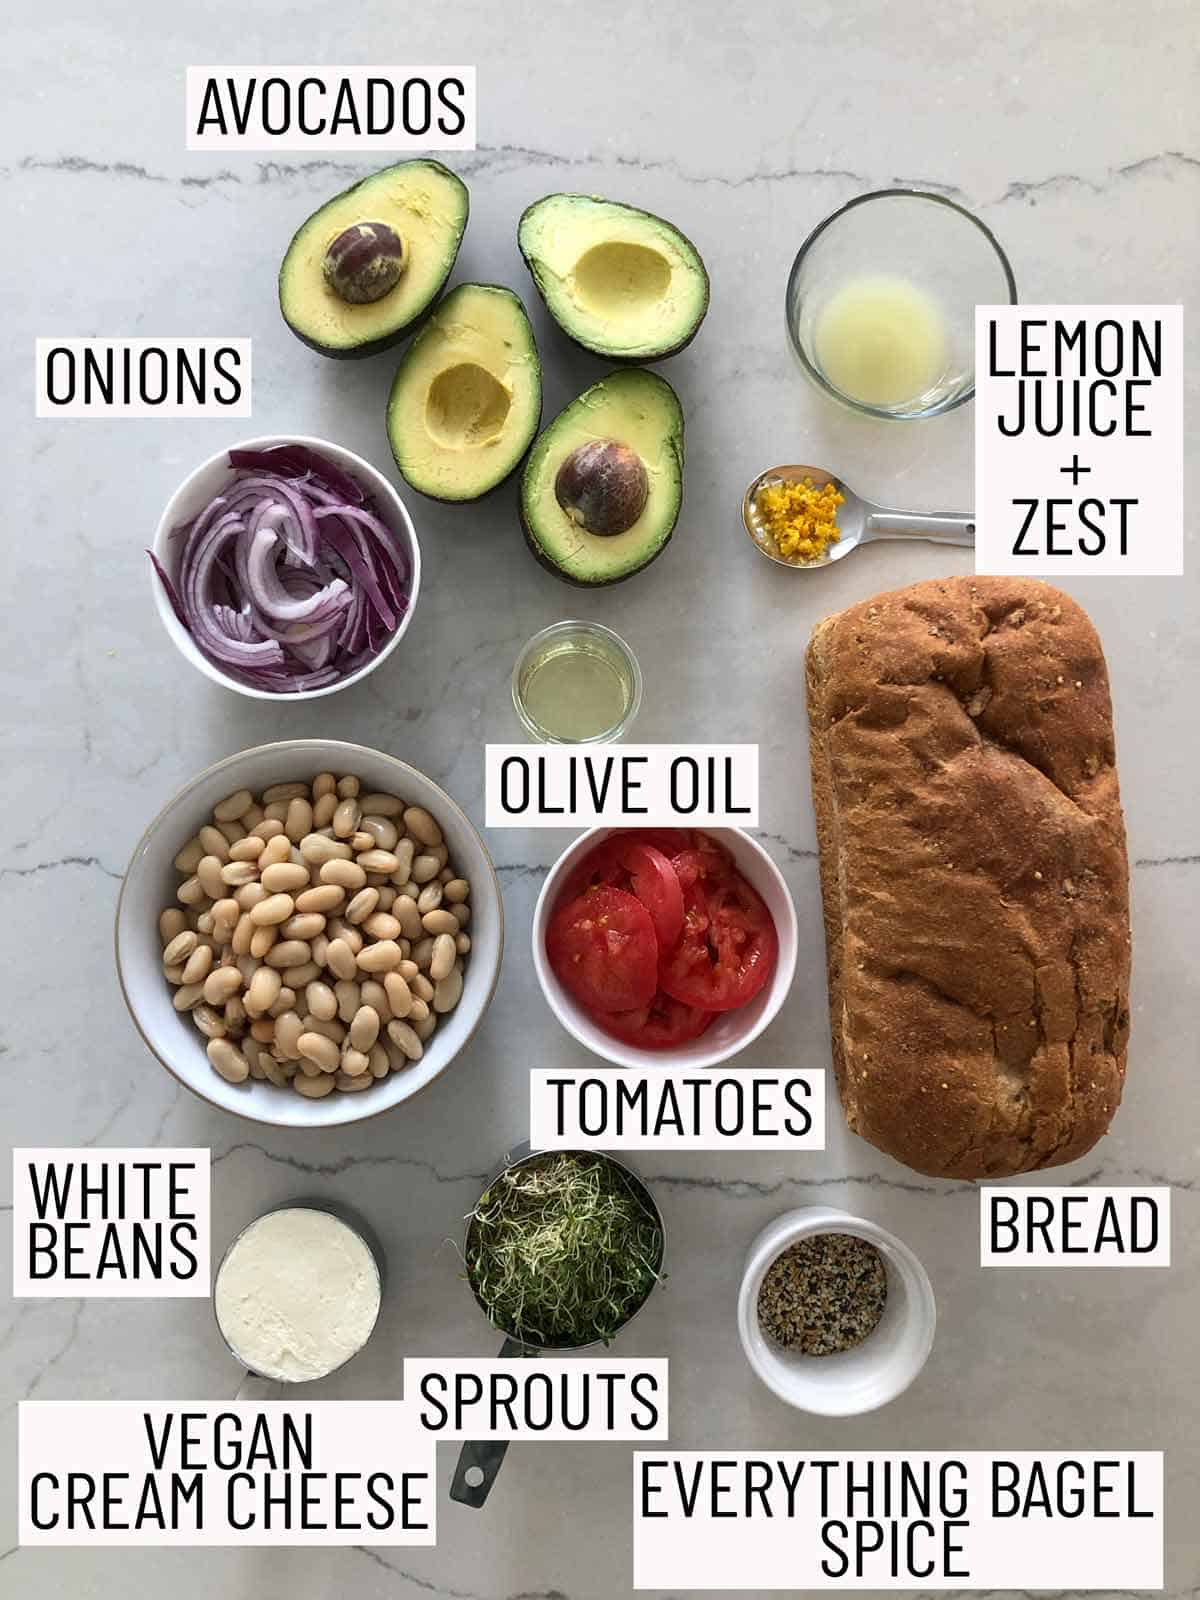
Ingredients required for a vegan bean sandwich.

White Beans — The white beans are full of protein and have such a long shelf life so they can always be found in my pantry.

Avocado — Who doesn’t like avocados?! Get some healthy fats package in along with that extra creaminess.

Bread — Use your bread of choice. Whatever you have on hand is perfect.

Everything bagel spice — The star of this everything spice sandwich! Make your own or use a store-bought one.

How to Make This Recipe

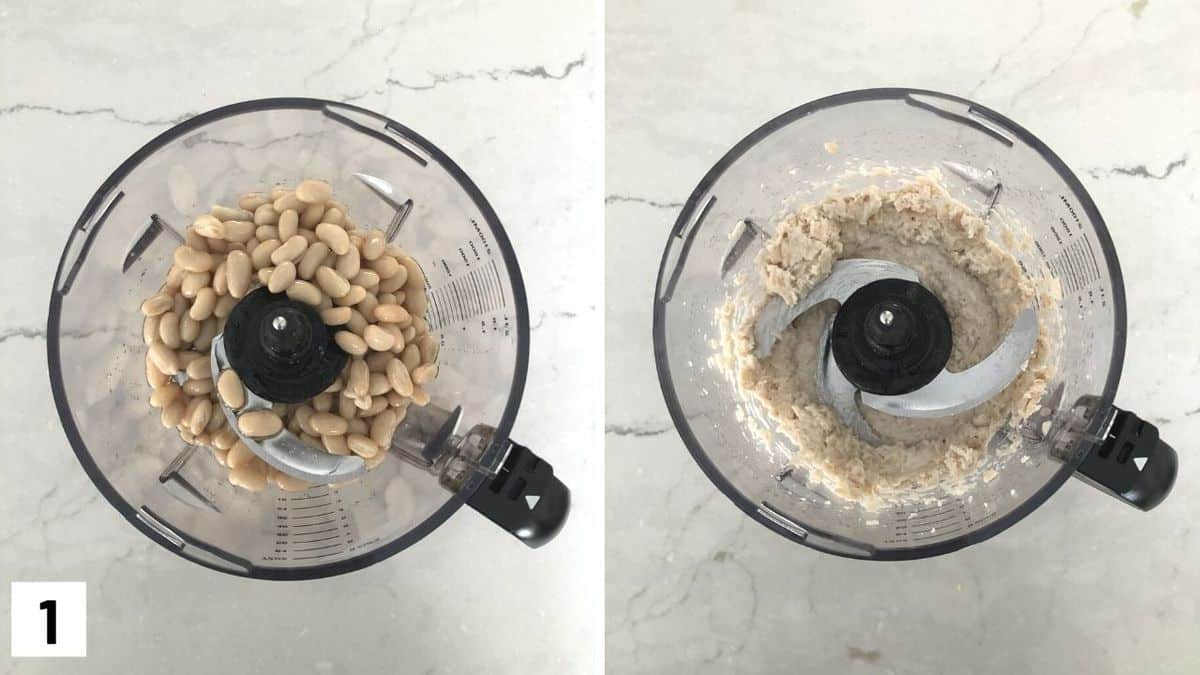
Set of two photos showing beans being pureed.

Step 1: To a food processor puree the white beans with the olive oil until they are fairly well mashed.

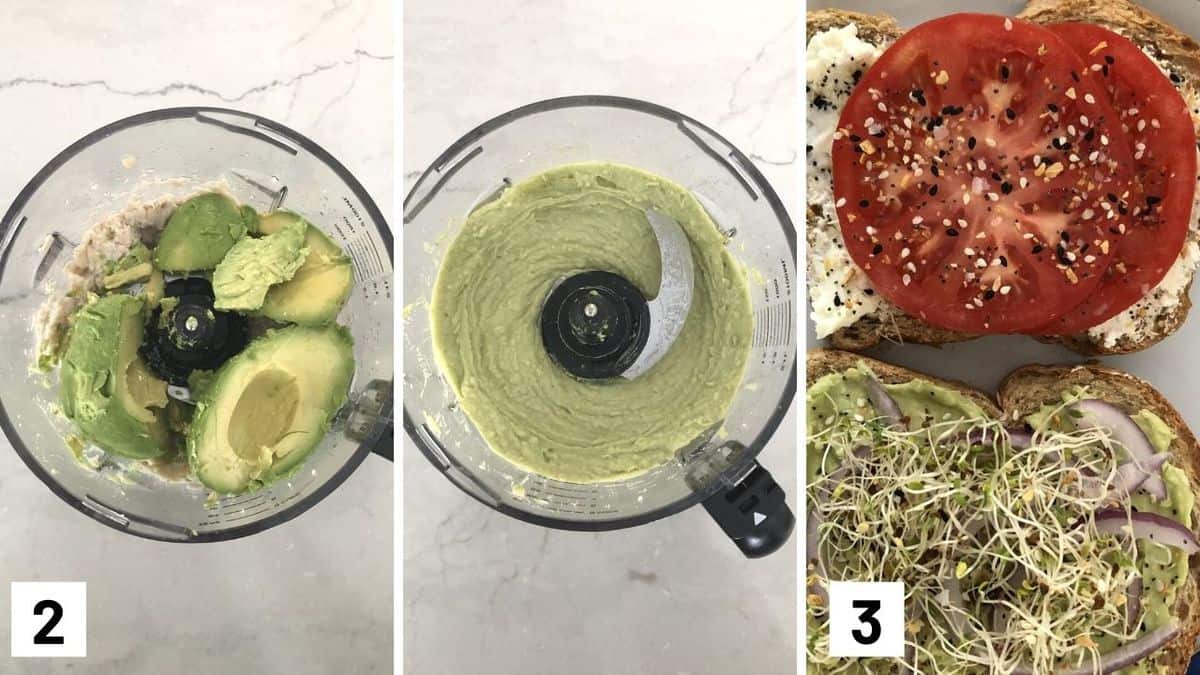
Set of three photos showing avocado added to the food processor and then assembling.

Step 2: Add in the avocado, lemon juice, zest, and salt and pepper to taste and pulse until combined.

Step 3: Spread the vegan cream cheese on the bottom of one piece of bread. Layer the everything bagel spice, tomato, the avocado mixture, more everything bagel mix, red onion, sprouts, and whatever everything bagel spice is left. Enjoy your everything bagel sandwich!

Expert Tips

Feel free to give the bread a little toast so it’s easier to spread your puree onto the bread.

Don’t have bread for this everything bagel sandwich? Try this on a bagel or even a tortilla wrap.

Your sprouts can be swapped for any microgreens or even baby spinach. This sandwich is very easy to customize to whatever you have on hand.

Did you know you can freeze bread? If you can’t finish a whole loaf of bread in time, you can freeze the rest!

Recipe FAQs

What if I don’t have a food processor?

It’ll be a little chunkier but you can use a fork to mash up your beans and avocados instead of a food processor.

Can I make this everything spice bagel gluten-free?

You bet! Just use a gluten free bread!

Can I make this sandwich NOT Vegan?

Why not! Just use regular cream cheese and if you’re feeling fancy, throw on some smoked salmon! Or even top it with a fried egg.

Can I make this everything bagel sandwich in advance?

To make this sandwich more back to school friendly or dorm room friendly, I recommend assembling the day you plan to eat it. You can also make the avocado white bean mixture a day ahead and place plastic wrap right on top of the mixture in the fridge to prevent browning.

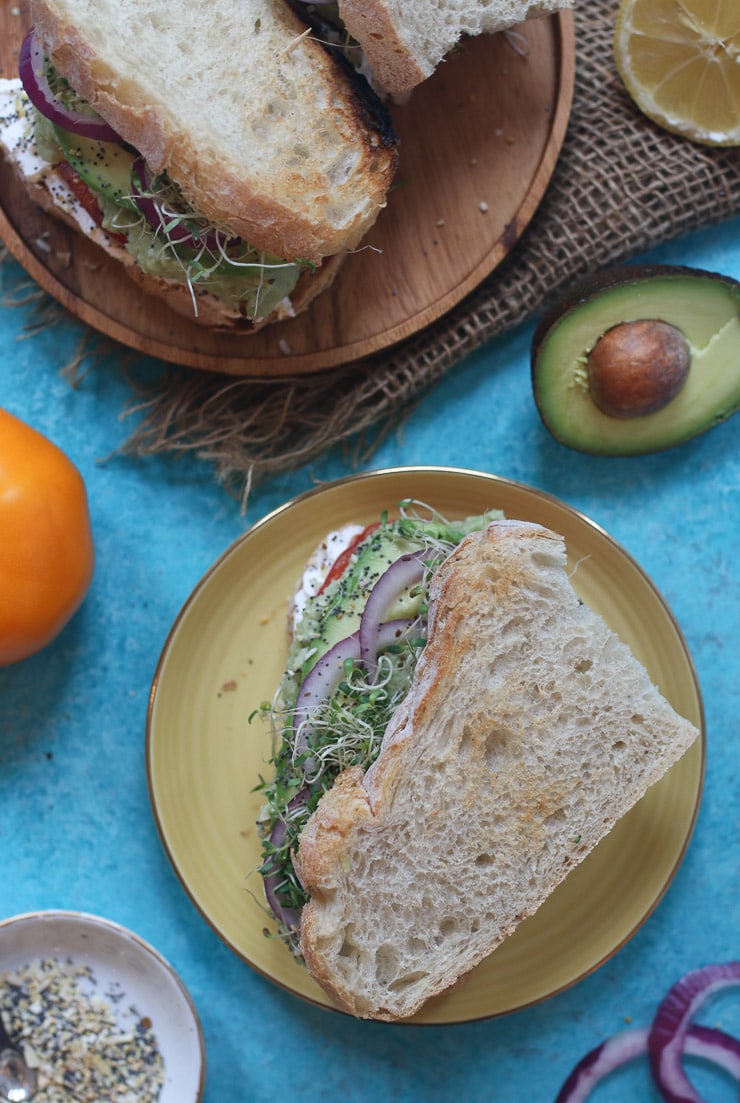
Two sandwiches on a yellow plate and brown plate.

More Recipes You Might Like

Want more recipes using everything bagel spice like this everything bagel sandwich? Check these out!

  • Keto Salad with Everything Bagel
  • Chicken Breasts Topped with Everything Bagel
  • Everything Bagel Avocado Devilled Eggs
  • Vegan Mac and Cheese with Everything Bagel
  • Everything Bagel Keto Egg Bagels

Now friends, tell me what are some of your go to back to school or college dorm room favourites? Leave me a comment below!

vegan sandwich on a yellow plate.
Print Recipe
5 from 10 votes

Vegan Everything Bagel Avocado White Bean Sandwich

This Vegan Everything Bagel Avocado White Bean Sandwich is a great back to school or college dorm room lunch that’s packed with plant based protein! Made in only a couple of minutes with pantry staples!
Prep Time10 minutes mins
Total Time10 minutes mins
Course: Lunch
Cuisine: American
Servings: 4 people
Calories: 549kcal
Author: Abbey Sharp

Ingredients

Avocado White Bean Puree:

  • 1 can no salt added white beans drained and rinsed
  • 2 tbsp extra virgin olive oil
  • 3 small or 2 large ripe avocados
  • Juice and zest of 1 lemon
  • Salt and pepper to taste
  • 2 tbsp Homemade Everything Bagel Spice or 2 tbsp Trader Joes Everything But the Bagel Spice

Sandwich:

  • 8 slices bread
  • 1/2 cup vegan cream cheese
  • 1 large heirloom tomato sliced
  • 1/2 red onion thinly sliced
  • 1 cup sprouts

Instructions

  • To a food processor puree the white beans with the olive oil until they are fairly well mashed.
  • Add in the avocado, lemon juice, zest, and salt and pepper to taste and pulse until combined.
  • Spread the vegan cream cheese on the bottom of one piece of bread. Layer the everything bagel spice, tomato, the avocado mixture, more everything bagel mix, red onion, sprouts, and whatever everything bagel spice is left.

Video

Notes

  • Feel free to give the bread a little toast so it’s easier to spread your puree onto the bread.
  • Don’t have bread? Try this on a bagel or even a tortilla wrap.
  • Your sprouts can be swapped for any microgreens or even baby spinach. This sandwich is very easy to customize to whatever you have on hand.
  • Did you know you can freeze bread? If you can’t finish a whole loaf of bread in time, you can freeze the rest!

Nutrition

Calories: 549kcal | Carbohydrates: 46g | Protein: 11g | Fat: 39g | Saturated Fat: 7g | Sodium: 413mg | Potassium: 926mg | Fiber: 15g | Sugar: 7g | Vitamin A: 489IU | Vitamin C: 21mg | Calcium: 122mg | Iron: 3mg
Abbey Sharp

Abbey Sharp is a Registered Dietitian (RD), regulated by the Ontario College of Dietitians. She is a mom, YouTuber, Blogger, award winning cookbook author, media coach specializing in food and nutrition influencers, and a frequent contributor to national publications like Healthline and on national broadcast TV shows.
www.abbeyskitchen.com/about-abbey/

Last Updated January 29, 2023. Published February 1, 2023 By Abbey Sharp 6 Comments

Weight Loss for Teens ━ Are Diets Safe for Growing Kids?

We look at concerns around weight loss for teens, teenage nutrition, risks, and whether or not diets are safe for growing kids.

In the age of fitspo, selfies, social media and comparison culture, being a teenager is undoubtedly really tough. Everywhere teens look, there seems to be an overwhelming pressure to have their body look a certain way, along with dangerous “wellness” strategies on how to achieve it. Considering “influencer” is a real job title these days, it’s no surprise that more teens are being influenced by the health and wellness information they see online. Since social media is unregulated territory, diet culture is free to run rampant and spread misinformation to anyone who will lend an ear. So, what does this mean for our teens?

Several teen girls standing in a field making heart signs with their hands.

Well according to research, about 1 in 2 teenage girls and 1 in 4 teenage boys have tried dieting in an attempt to change their bodies or lose weight. Children as young as the age of seven start to worry about their weight and begin weight loss diets. A teen may seek dieting for weight loss for a multitude of reasons, but the most common factors that influence weight loss for teens include – low self-esteem, body image issues, parents dieting or encouraging their teens to diet, peer pressure, weight-related teasing, and involvement in weight-related sports. 

With that said, is weight loss for teens safe and does it pose any risks to their growth and development? And should weight loss diets even be recommended for teens who are overweight? Let’s look at the research to find out.

What are the nutritional needs of teens?

First, let’s go over the nutritional needs of teens at this life stage, and how they may differ from that of adults. Adequate nutrition is of critical importance during these years in order to support important growth and development, which is why macronutrients and micronutrients needs are higher for a teen’s growing body. 

Calories

Teens require increased energy needs and nutrition to support their growth and development into adulthood. This would explain why teens often experience an increased appetite at this age and/or eat more frequently. On average, active teen boys require anywhere from 2200-3200 calories a day depending on their age (with energy needs increasing to the upper range as they turn 16-19 years old). Active teen girls on the other hand require 2000-2400 calories a day. When compared to adult requirements, adult men require approximately 2400-2600 calories a day and adult women require approximately 1800-2000 calories a day. These amounts may vary depending on activity level, but on average, adult needs are roughly 200-600 calories LESS than that of the energy needs of growing teens. 

Severel teens having fun together.

Macronutrients

Carbohydrates

Carbohydrates are the body’s main energy source and can be obtained from a variety of different sources like fruit, starchy vegetables, whole grains, and dairy products. The American Academy of Pediatrics recommends that teens obtain 50-60% of their calories from carbohydrates which would be around 130 g of carbs per day.

 Protein

 Protein is important for muscle building, tissue repair, and is also involved in making enzymes, hormones, and antibodies. Teens require between 10-30% of their daily calories from protein with differences in needs dependent on age, sex, body weight, and stage of development. So a teen girl consuming 2200 calories a day would need between 55-165 grams of protein daily, depending on her activity level. Protein can be obtained from a variety of animal-based sources (such as meat, poultry, fish, and dairy) as well as plant-based sources (such as tofu, nuts, beans and legumes).

Fats

Dietary fats provide the body with an alternative source of energy and help to support cell growth. They also facilitate the absorption of fat-soluble vitamins like vitamin A, D, E, and K. It is recommended that teens obtain approximately  25-35% of calories from fat per day from healthy sources such as fatty fish, nuts, seeds, avocado, and olive oil. 

Micronutrients

Calcium

Calcium is important for the development of strong bones and normal muscle function. In fact, at least 90% of peak bone mass is acquired during our teenage years which is why teens require about 1,300 mg of calcium per day compared to adults who require 1,000 mg of calcium. Most dietary calcium comes from dairy products like milk, cheese, and yogurt. Other non-dairy sources include leafy greens, tofu, almonds, calcium-fortified juices and plant-based milks.

Vitamin D

Similar to calcium, vitamin D is an important nutrient for bone-health as it promotes calcium absorption. In addition, vitamin D also plays a role in cell growth and immune function. Teens and adults require at least 600 IU of Vitamin D per day. The best way to meet vitamin D needs is through sun exposure and supplements. However, you can also obtain vitamin D from food sources such as fatty fish and eggs, as well as fortified foods like milk (dairy and non-dairy), yogurt, cereal, and juice.

Nutritious foods for teens including bananas, raspberries, oranges and a smoothie.

Iron 

Iron is involved in making hemoglobin, which is a protein in red blood cells that transports oxygen throughout the body. Females require more iron in the diet due to losses during menstruation which is why teen girls require 15 mg of iron a day compared to teen boys who require 11 mg of iron a day. Foods that are rich in heme-iron (more bioavailable) include meat, poultry, and seafood. Sources of non-heme iron (less bioavailable) include tofu, beans, dark green leafy vegetables, dark chocolate, and fortified cereals.

Zinc

Zinc is an important mineral involved in immune function, wound healing, and cellular metabolism. It also supports growth and development during childhood and adolescence. Teens boys require 11 mg of zinc a day and teen girls require 9 mg  (which is the same requirement for adult males and females, respectively). Zinc is found in a variety of protein-rich foods (both animal and plant-based) including meat, poultry, seafood, beans, nuts, seeds and dairy products.

Potassium 

Potassium helps regulate fluid balance, muscle contractions, and nerve signals. Teen boys require 3,000 mg of potassium and teen girls should be getting 2,300 mg. These recommendations are slightly lower than adult needs, as male adults require 3,400 mg and adult females require 2,600 mg . Some excellent sources of potassium include foods like fruit (bananas, prunes, kiwi), vegetables (squash, spinach, tomatoes, broccoli), lentils, kidney beans, soybeans, nuts, milk, and yogurt.

Fibre

Fibre plays a major role in digestive health as it helps to keep bowel movements regular. Teen boys and adult males require 31 grams of fibre per day while teen girls and adult females require 25 g per day. Sources of fibre include fruits, vegetables, beans, whole grains, nuts and seeds. 

Is weight loss for teens safe?

Teenage girl stepping on a scale to check weight loss.

Similar to adults, a teen’s body weight may naturally fluctuate due to growth spurts, hormone shifts and body adjustments. With that said, weight gain is a normal part of healthy growth and development. On average, adolescent girls may gain roughly 40-50 pounds or so during puberty, while boys may gain upwards of 50-60 pounds. However, intentional weight loss through dieting is potentially a slippery slope for teens that may not only lead to nutritional deficiencies, but may also impact growth, development, emotional health and a teen’s future relationship with food. It’s also important to note that lifestyle habits established during this time can carry into adulthood and have lifelong implications, which we will discuss in further detail below. 

Nutritional Deficiencies 

Considering the nutritional needs of teens are higher than that of adults to support growth and development, dieting can very often lead to nutritional deficiencies, which in turn can have a number of physical and psychological health consequences. For example, research suggests that even a minor reduction in energy intake can slow down growth and development in teens. Dieting can also put teen girls at risk for menstrual irregularity or amenorrhea (the absence of their menstrual period) which can impact long-term fertility outcomes. Amenorrhea can also lead to the thinning of bones (aka osteoporosis) due to the lack of estrogen which is important for bone health. Dieting and restricting food can also put a teen at a greater risk for Osteoporosis (regardless if they are menstruating or not) because it may increase the likelihood of insufficient calcium and vitamin D intake. This is especially true for teens who may follow specific diets, like a vegan or vegetarian diet, while not paying attention to getting enough non-animal-based calcium and vitamin D foods. Moreover, dieting can also put a teen at risk for iron deficiency anemia which can impact physical and cognitive growth and impair a teens capacity for learning.

Growth & Development 

During the teenage years, it’s natural for teens to hit a growth spurt and gain weight as a normal part of healthy growth and development. However, poor nutrition through caloric restriction and dieting can stunt a teen’s growth and prevent them from reaching their growth potential. Under-nutrition can also delay puberty and the onset of a teen girls’ menstrual period which can further delay a teen’s linear growth trajectory. The good news is that it is possible for “catch up” growth to occur once normal eating resumes, which can return a teen to their genetic growth trajectory.

Teen brains also undergo significant growth and development during this period, and without proper nutrition the brain’s ability to learn new tasks and skills decreases, which can impact learning and academic performance. In addition, research suggests that caloric restriction through weight loss diets can also make teens more susceptible to becoming irritable, depressed, and anxious.

Disordered Eating 

Girl holding out a plate of food for weight loss.

The early teenage years are an important time for an individual to establish healthy eating habits and develop their relationship with food. Studies have shown that dieting during the adolescent years can potentially have lifelong implications for disordered eating as young teens who diet are more likely to diet in adulthood. Other studies have shown that dieting in young people can lead to disordered eating behaviours like binging and purging, and these individuals are 6 times more likely to develop an eating disorder. However, it is important to note that not all young people (or adults) who go on a diet will develop an eating disorder. But what we do know, is that weight loss for teens IS considered a risk factor for developing disordered eating or an eating disorder. In addition, research has shown that similar to dieting adults, teens who diet are more likely to regain the weight lost. One  study found that teens who engaged in dieting were 2-3 times more at risk for being overweight, compared to teens who did not engage in dieting behaviours. 

Psychosocial Impacts

The psychosocial impact from diets encouraging weight loss for teens is also important to mention because it can impact how teens feel about themselves and how they relate to the world around them. Teens with lower self-esteem are especially susceptible to dieting as they may perceive dieting and weight loss as a means to feel good about themselves and their bodies and/or be accepted by their peers and society. However, dieting is associated with a number of psychological implications including depression, mood swings, irritability, poor concentration, and body image issues. Studies have also shown that food deprivation can lead to food preoccupation and a tendency to overeat after a period of restriction (aka the binge restrict cycle).

When is dieting and weight loss for teens more common?

There are a number of scenarios where teens are more likely to engage in risky weight loss or dieting behaviour. These include participating in aesthetic sports, experiencing peer pressure or being the victims of bullying.

Aesthetic Sports

Four girls doing handstands against a wall.

One of the major reasons why a teen may engage in risky weight loss behaviours is for aesthetic or weight class sports. Some teens may feel pressure, either directly or indirectly to lose weight or change their body by their coaches, teams and sport culture. Teens who participate in weight-class sports, such as wrestling and boxing, may feel there is a competitive advantage to losing weight quickly to qualify for the lowest weight class. Teens who are involved in aesthetic sports, including dance and gymnastics, also may think that weight loss will increase their success in the sport. Therefore, these athletes may restrict calories, take supplements, or excessively exercise to lose weight. However, weight loss for teens can quickly become a problem for young athletes if their nutritional needs are not met, they are not adequately hydrated, or they are engaging in unhealthy weight loss behaviours (like laxatives use, purging, diet pills) which can further their health risks. Unhealthy weight loss in these instances also has the potential to impair athletic performance, increase injury risk, reduce muscle strength, as well as decrease mental and cognitive performance. 

Peer Pressure/Bullying 

Engaging in extreme dieting and weight loss methods may negatively impact anyone at any point in the life cycle, but particularly for those in the peak for physical and emotional development. Teens are highly susceptible to peer pressure and bullying to look or behave a certain way in order to feel accepted by their peers. The ‘pressure to be thin’ can be felt by not only weight loss messaging in the media, but it can also be conveyed by parents and peers. This pressure to be thin can often lead to increased body dissatisfaction, disordered eating, and other unhealthy weight control practices. 

Should an overweight teen try to diet and lose weight?

We live in an inherently fatphobic society so it’s understandable that any teen may want to lose weight. It’s also common for adults and health care providers around them to suggest weight loss. However, it is very important that parents not shame their child about their weight, or withhold experiences or even food in an attempt to shrink their body. Not only can this have major physical health implications, but it can also set them up for long term emotional struggles as well. 

If your goal is to help without harm and allow your child to grow into their healthiest happiest weight, the gold standard of feeding is Ellyn Satter’s Division of Responsibility (sDOR). I’ve broken down the feeding principles of the Division of Responsibility for picky eating which you can read all about right here and here. While at this age, teens can be given a bit more freedom in choosing and preparing their meals, the parent is still ultimately responsible for what is served, and often, where and when it’s served, and the teen is responsible for what they decide to eat, and how much. The parents’ job is to ensure regular meals are available, make eating times pleasant, and the teen’s job to eat the amount they need, and grow predictably. It is all about trusting your child to make the right decisions in determining what and how much food they want to eat from what they are provided. 

Bottom Line on Weight Loss for Teens

Several teens sitting together on a bridge.

Being a teen isn’t easy by any means, especially with diet culture messaging constantly bombarding their newsfeeds. What diet culture won’t tell teens is the negative impact that dieting can have on this important period of growth and development. Obtaining adequate nutrition, linear growth, and pubertal development are of critical importance during these years and dieting for weight loss can potentially delay teens from reaching their health potential. This is why developing a healthy relationship with food early on through structured meal times and variety can help to set teens on a path towards a healthy relationship with food and their bodies.

Research by RD Student Gila Gross
Edited by Giselle Segovia RD MHSc 

More Blog Posts You Might Like

If you enjoyed this post, check out these others on the blog!

  • Intermittent Fasting and Working Out | The Pros and Cons for Weight Loss
  • Intuitive Eating Weight Loss? | Sustainable Gentle Nutrition Tips
  • Why the WW Kurbo App for Children & Teens Will do More Harm than Good
  • Dietitian’s Feeding Tips for Picky Eaters

What were you told about weight loss as a teen? Leave me a comment below!

Abbey Sharp

Abbey Sharp is a Registered Dietitian (RD), regulated by the Ontario College of Dietitians. She is a mom, YouTuber, Blogger, award winning cookbook author, media coach specializing in food and nutrition influencers, and a frequent contributor to national publications like Healthline and on national broadcast TV shows.
www.abbeyskitchen.com/about-abbey/

Last Updated January 26, 2023. Published January 30, 2023 By Abbey Sharp 32 Comments

Apple Chutney with Beets & Ginger

  This apple chutney with beets & ginger is a perfect accompaniment to meat, cheese, sandwiches and more.

Close up of apple chutney in a jar with a spoon on the side.

Whenever I go out for Indian food, I can’t help but fill up on the naan bread and chutney spread. Honestly, I could just eat chutney by the spoonful until I’m stuffed to the brim and tbh – I ain’t mad about it.

I mean, one one end its a bit of a shame because I’m honestly obsessed with curry and biryani, and I hate to spoil my dinner but I am just such a sucker for a good chutney!

While most chutneys are made with mango and red onion, I wanted to switch it up and make it a bit more “Canadian” with beets and apples. After all, they are in season right now and I always love to dream up new ways to use up seasonal produce. And OMG, is this apple chutney with beets ever delicious!

Table of contents

  • Why This Recipe Works
  • Key Ingredients
  • How to Make This Recipe
  • Expert Tips
  • Recipe FAQs
  • More Recipes You Might Like

Why This Recipe Works

While most chutneys are made with mango and red onion, I wanted to switch it up and make it a bit more “Canadian” with beets and apples. And OMG, is this apple chutney with beets ever delicious! I also love this recipe because its

  • SO easy to make: only 2 steps!
  • Completely plant-based & vegan
  • Easy to pair with a variety of dishes

Key Ingredients

To make this apple chutney you’ll need –

Birds eye view of portioned ingredients needed to make apple chutney including beets, red onion, cumin seeds, mustard seeds, maple syrup, green apples, ginger, balsamic vinegar, and raisins.

Beets – who doesn’t love a good beet this time of year? Not only are beets excellent for pickling, but the strong pigment will add the most beautiful deep purple pink colour to this apple chutney! As well as a healthy dose of fibre and antioxidants, of course.

Green Apples – I like to use green apple in this chutney because it gives the chutney a more tart flavour. Other tart apple varieties that would work great with this apple chutney include Fuji, Golden Delicious, and McIntosh.

Seeds – to make this apple chutney on the spicy side I use mustard and cumin seeds. You can also experiment with other aromatic seed varieties like whole peppercorns, coriander seeds, chili peppers, mint etc! The possibilities are endless but I personally like to keep it simple.

Balsamic Vinegar – this will give the apple chutney some acidity which helps to balance out the sweetness from the apple and raisins. If you don’t have balsamic vinegar on hand, you can use apple cider vinegar or white vinegar instead.

How to Make This Recipe

Images of the three steps required for making the apple chutney including grating the beets, combining all ingredients in to a sauce pot, and boiling until cooked.

Step 1: Peel and grate beets.

Step 2: Add in the grated beets, green apples, onion, vinegar, ginger, maple, raisins and seeds to a pot and reduce the heat to medium.

Step 3: Cook for about 5-10 minutes until the liquid has evaporated. Season with salt and pepper, to taste.

Expert Tips

Okay so as long as you can get the beets peeled without totally wrecking your manicure, this apple chutney with beets is pretty easy to pull off! Just boil down some finely diced beets and apples with spicy ginger, mustard seed, tangy balsamic and sweet maple and mash it down to a thick, chutney spread.

If you want to play around with the colour of this apple chutney, you can also use golden or candy cane beets instead.

Birds eye view of apply chutney on a wooden board accompanied by cheese, slices red apple, and crackers.

Recipe FAQs

What can I pair this chutney with?

Oh boy, what can’t you do? This apple chutney is super tasty on crackers with soft cheese, naan bread, as an accompaniment to protein like pork tenderloin, chicken and salmon. I also love it smeared on sandwiches with roast turkey, especially around the holidays. 

How long does this chutney keep in the fridge?

This recipe stays fresh for about a month in the fridge.

How can I preserve this apple chutney?

You can use the water bath method by following these easy steps.

What can I use instead of apples?

Mango is one of the most common fruits used to make chutney but you can also try persimmons, peaches, or tomatoes. The combinations are endless!

More Recipes You Might Like

  • The Best Avocado Salad Dressing
  • Cherry Strawberry Chia Jam
  • Salted Caramel Almond Butter

So now, tell me, friends – what are your favourite ways to use chutney?

Print Recipe
4.60 from 5 votes

Apple Chutney with Beets & Ginger

  This apple chutney with beets & ginger is a perfect accompaniment to meat, cheese, sandwiches and more.
Prep Time10 minutes mins
Cook Time25 minutes mins
Total Time35 minutes mins
Course: Appetizer
Cuisine: French
Diet: Vegan, Vegetarian
Servings: 16 people
Calories: 69kcal
Author: Abbey Sharp

Ingredients

  • 3 cups golden or red beets (about 6 small) peeled and grated
  • 2 1/2 cups green apples (about 2 large) peeled and finely diced
  • 1 red onion finely diced
  • 1/2 cup balsamic vinegar
  • 1 tbsp ginger finely grated
  • 1/2 cup maple syrup
  • ¼ cup raisins
  • 1 tbsp mustard seeds
  • ½ tsp cumin seeds
  • Pinch each of salt and pepper to taste

Instructions

  • Add in the grated beets, green apples, onion, vinegar, ginger, maple, raisins and seeds to a pot and reduce the heat to medium.
  • Cook for about 5-10 minutes until the liquid has evaporated. Season with salt and pepper, to taste.

Video

Nutrition

Calories: 69kcal | Carbohydrates: 16g | Protein: 1g | Fat: 1g | Saturated Fat: 1g | Sodium: 24mg | Potassium: 169mg | Fiber: 2g | Sugar: 11g | Vitamin A: 19IU | Vitamin C: 3mg | Calcium: 22mg | Iron: 1mg

Have you tried this apple chutney with beets? Let me know down in the comments below!

Abbey Sharp

Abbey Sharp is a Registered Dietitian (RD), regulated by the Ontario College of Dietitians. She is a mom, YouTuber, Blogger, award winning cookbook author, media coach specializing in food and nutrition influencers, and a frequent contributor to national publications like Healthline and on national broadcast TV shows.
www.abbeyskitchen.com/about-abbey/

Last Updated January 26, 2023. Published January 26, 2023 By Abbey Sharp 40 Comments

Birth Control Infertility | Risks and Effects of Birth Control on Future Fertility

A bunch of small round pills on a white surface.

We look into the research on the risks and effects of birth control infertility and if taking oral contraceptives causes permanent infertility.

Multiple packages of birth control pills.

For those following my infertility journey, you know that I am one of the 1 in 8 who struggle trying to conceive. I was originally diagnosed with polycystic ovary syndrome (PCOS) by a reproductive endocrinologist (who later would be the doctor to retrieve eggs, fertilize eggs, and implant eggs via IVF in what would soon become Baby E), and it was explained that it was this PCOS that caused my apparent infertility.

However, upon reflection and some digging, I started to question whether I had been misdiagnosed. I mean, I don’t really meet any of the criteria for PCOS other than the fact that I wasn’t ovulating, and I had slightly polycystic ovaries. Yes, I met the diagnostic criteria, but I didn’t exhibit any of the other symptoms typical in women with PCOS. I wasn’t gaining weight, my blood sugars and testosterone levels were normal, I wasn’t growing facial hair etc. My family doctor said he was SURE I didn’t have PCOS and that what I was actually experiencing with my infertility issues was something he called Post-Pill Amenorrhea. This is a phenomenon where women who have been on the birth control pill for a long time suddenly cannot get pregnant or ovulate even after they come off. It made somewhat sense considering I had been using hormones to artificially simulate something my body should be doing naturally for 14 whole years and all of a sudden I was hoping it would just figure it out. I started asking more and more questions.

I began to quiz my fellow IVF mamas and infertility warriors, and many of them told me that they too had been on the pill for many years, and when they came off, they just didn’t get a period.

So why do some women get pregnant as soon as they come off the birth control pill and other women struggle to ovulate? Is this birth control infertility? What is the real risk of birth control infertility? Let’s look at what the research says!

Post Pill Amenorrhea and Birth Control Infertility

Research suggests that using birth control over a long period of time may cause a delay in fertility. A systematic literature review looked at women who discontinued oral contraceptives (aka. the birth control pill) in order to get pregnant and found that women who had been on the pill had a delay in getting pregnant – for some it may have taken a year, for others even more. Because they didn’t really compare this with a proper control, it’s hard to know if this is a normal amount of time for couples who are trying to conceive, or if the pill played a role at the delay.

But let’s start by talking about the absence of ovulation and menstruation – amenorrhea. There are a number of common reasons why some women experience amenorrhea and infertility, some of which include polycystic ovary syndrome (PCOS), hypothalamic amenorrhea, ovarian failure and hyperprolactinemia. Interestingly, a lot of these fertility issues are treated with… you guessed… the pill!

With PCOS, the pill is used to suppress the androgen hormone (the hormone that gives individuals male characterizes) and to stimulate or “regulate” a menstrual cycle (even though a period on the pill is not really a true menstrual cycle). Many women with PCOS otherwise do not have a regular cycle, and may ovulate sporadically or not really at all. So when a woman with PCOS comes off the pill, and doesn’t get their period, it’s not hard to see that as an effect of birth control. But is this really the case?

What is really to blame for the post pill amenorrhea? The primary cause of infertility (the PCOS or other hormonal disorders), or is birth control infertility to blame?

The Birth Control Pill and Uterine Lining

Package of birth control pill.

Let’s now talk about the role of the pill and pregnancy. Obviously, the birth control pill’s job is to prevent unwanted pregnancy. One of the ways it does this is by thinning out the uterine lining. If you’ve gone through fertility treatments like me, you know WAY too much about a uterine lining, but let’s go over a little anatomy 101 to catch you up.

A thick sticky uterine lining is where conception happens – not where it begins, but it is a crucial step. In a normal menstrual cycle, your uterine lining thickens as it prepares to “catch” and hold onto the fertilized egg. If the egg doesn’t successfully “implant”, the woman’s body sheds the egg and this causes a menstrual period. So bottom line, the thickness of your uterine lining is integral to a successful full term pregnancy.

When I was going through IVF, I was told that most reproductive endocrinologists won’t implant an embryo unless the woman’s uterine lining was 8 mm or thicker. Some women in my Facebook support groups said their doctors wanted 12-15 mm linings. My lining, no matter how many drugs and cocktails of hormones I was given, would not exceed 4 mm in thickness. It was devastating. I knew the research. I knew that the literature supports the idea that thicker linings mean better chances of conception. One study found that a uterine lining of 6mm or higher was associated with greater success rates in IVF. Another study that looked at uterine lining thickness and fertility found that a uterine lining thickness of 7mm or more predicted successful pregnancy outcomes. A study that looked at uterine thickness for women in general using IVF treatment to conceive, found that pregnancy rates were significantly lower in people with thin uterine lining, which is defined as less than 8mm. The odds were very much stacked against me and I was playing a very expensive (and emotional) game of Russian Roulette, but I chose to take a chance. It worked. But I know I’m one of the lucky ones.

My story aside, let’s get back to business. We know that the birth control pill, while being used, may thin the uterine lining, but are those effects long lasting? While we don’t have a ton of great research, there are some emerging answers. One study found that long-term use of the pill causes the uterine lining to become thin. This study looked at 137 patients with a history of using oral contraceptives, and divided these patients into two groups – one group was of people who had a uterine lining of less than 7mm, and the other group who had women who had a uterine lining of 7mm or thicker. The study defined 10 years use of oral contraceptives to be long-term (FYI, I was on for 14!!). The researchers found that there was a higher percent of women who had been using oral contraceptives long-term in the group of women who had a uterine lining of less than 7mm than in the group of women with a uterine lining of 7mm or more. Could this be what happened to me? What exactly is going on that may prevent a thick lining?

It’s possible to comes down to the woman’s hormone ratio. Women with a uterine lining of less than 7mm tend to present with a lower ratio of estrogen to progesterone than women with linings greater than 7 mm. This is why typically women who are struggling with a thin uterine lining are given estrogen hormones (like Estrace) to boost that ratio. A study analyzing the effectiveness of estrogen treatment in patients with thin uterine lining found that it was generally successful in increasing the thickness of the lining. This doesn’t work for everyone (oh HI THERE), it also turns your underwear blue because some idiot (likely male) drug manufacturer decided that a vaginal suppository should be smurf blue. But I digress, it is an option to discuss with your doctor or reproductive endocrinologist if you suspect a thin uterine lining is interfering with your conception success.

While we have little bits of information, we still don’t know for sure if the pill causes this hormonal imbalance, or how many months or years of birth control pill use has this negative outcome on uterine lining. It’s very likely to be an individual case.

Vitamins and Minerals of Consideration on the Birth Control Pill

Close up of a variety of pills.

Let’s consider a different angle that’s maybe a little more in our control – nutrition. Does taking the pill impact our nutrition status in a way that might be inadvertently affecting our fertility causing birth control infertility? It’s a bit of a leap, but totally possible, too. One study looked at healthy women on the pill who were not on any other medications, and found that long-term use of the pill lowed their levels of Vitamin B6, B12, and folate levels. Vitamin B12 and Folate, specifically are two really important fertility nutrients, so here’s an interesting piece of the puzzle to explore.

Research has identified a link between low folic acid and Vitamin B12 levels and female infertility. So could it be possible that the pill is causing a nutritional deficiency that is linked with infertility and post pill amenorrhea? Do the type of people who are taking the pill also just happen to be nutritionally deficient in key nutrients? Or is there another confounding variable all together? A study found that nutrition is one important factor post pill amenorrhea to improve fertility in women because malnutrition is also associated with amenorrhea. So ladies, let’s eat up!

Tips to Add Vitamin B12 and Folate into Your Fertility Diet

A pile of fresh asparagus on a cutting board.

While we don’t have definitive answers, let’s look at some ways we can add these important fertility nutrients to our diets that may be depleted by the pill.

Folate is important for increasing the fertility of women but also to decrease the risk of birth defects like spina bifida. It’s often found in a variety of foods such as beans, lentils, spinach, asparagus, broccoli, enriched grain products, peanut butter and sunflower seeds.

Vitamin B12 is important for fertility in women but also helps us make healthy cells and keep our nerves working properly. It can be found in foods such as organ meats, salmon, tuna, cottage cheese and in fortified products such as in fortified almond milk. For vegans, Vitamin B12 can be consumed through supplements or fortified plant-based products.

Bottom Line on the Risks and Effects of Birth Control Infertility

A bunch of small round pills on a white surface.

There is a lot of unanswered questions here, and to be honest, it might take a LONG TIME before we have answers. The medical community is not exactly amazing at staying on top of female health problems, and not to get all conspiracy theorist here, but I do think they tend to swipe a lot of these side effects under the rug when prescribing or developing female birth control options.

What we do know is that post pill amenorrhea may play a role in future fertility, and that this may be related to either the effect on the uterine lining, nutrition status, or a combination of these things.

This is not a reason to not use birth control, but like all things, it’s important to be as informed as possible when making decisions that affect your health. Especially when they may have long term repercussions.

Other Blog Posts You May Like

  • SEED CYCLING FOR FERTILITY | DOES IT ACTUALLY WORK?
  • DOES ALCOHOL & CAFFEINE AFFECT FERTILITY OR CAUSE MISCARRIAGE?
  • FERTILITY SUPPLEMENTS & FOODS FOR GETTING PREGNANT

For now I would love to hear from you: Do you think birth control infertility is real? Did you have a hard time getting pregnant after coming off the pill? Have you struggled with thin uterine lining after being on the birth control pill? Leave me a comment, let’s talk!

Research by Intern Preveena Manisekaren


Abbey Sharp

Abbey Sharp is a Registered Dietitian (RD), regulated by the Ontario College of Dietitians. She is a mom, YouTuber, Blogger, award winning cookbook author, media coach specializing in food and nutrition influencers, and a frequent contributor to national publications like Healthline and on national broadcast TV shows.
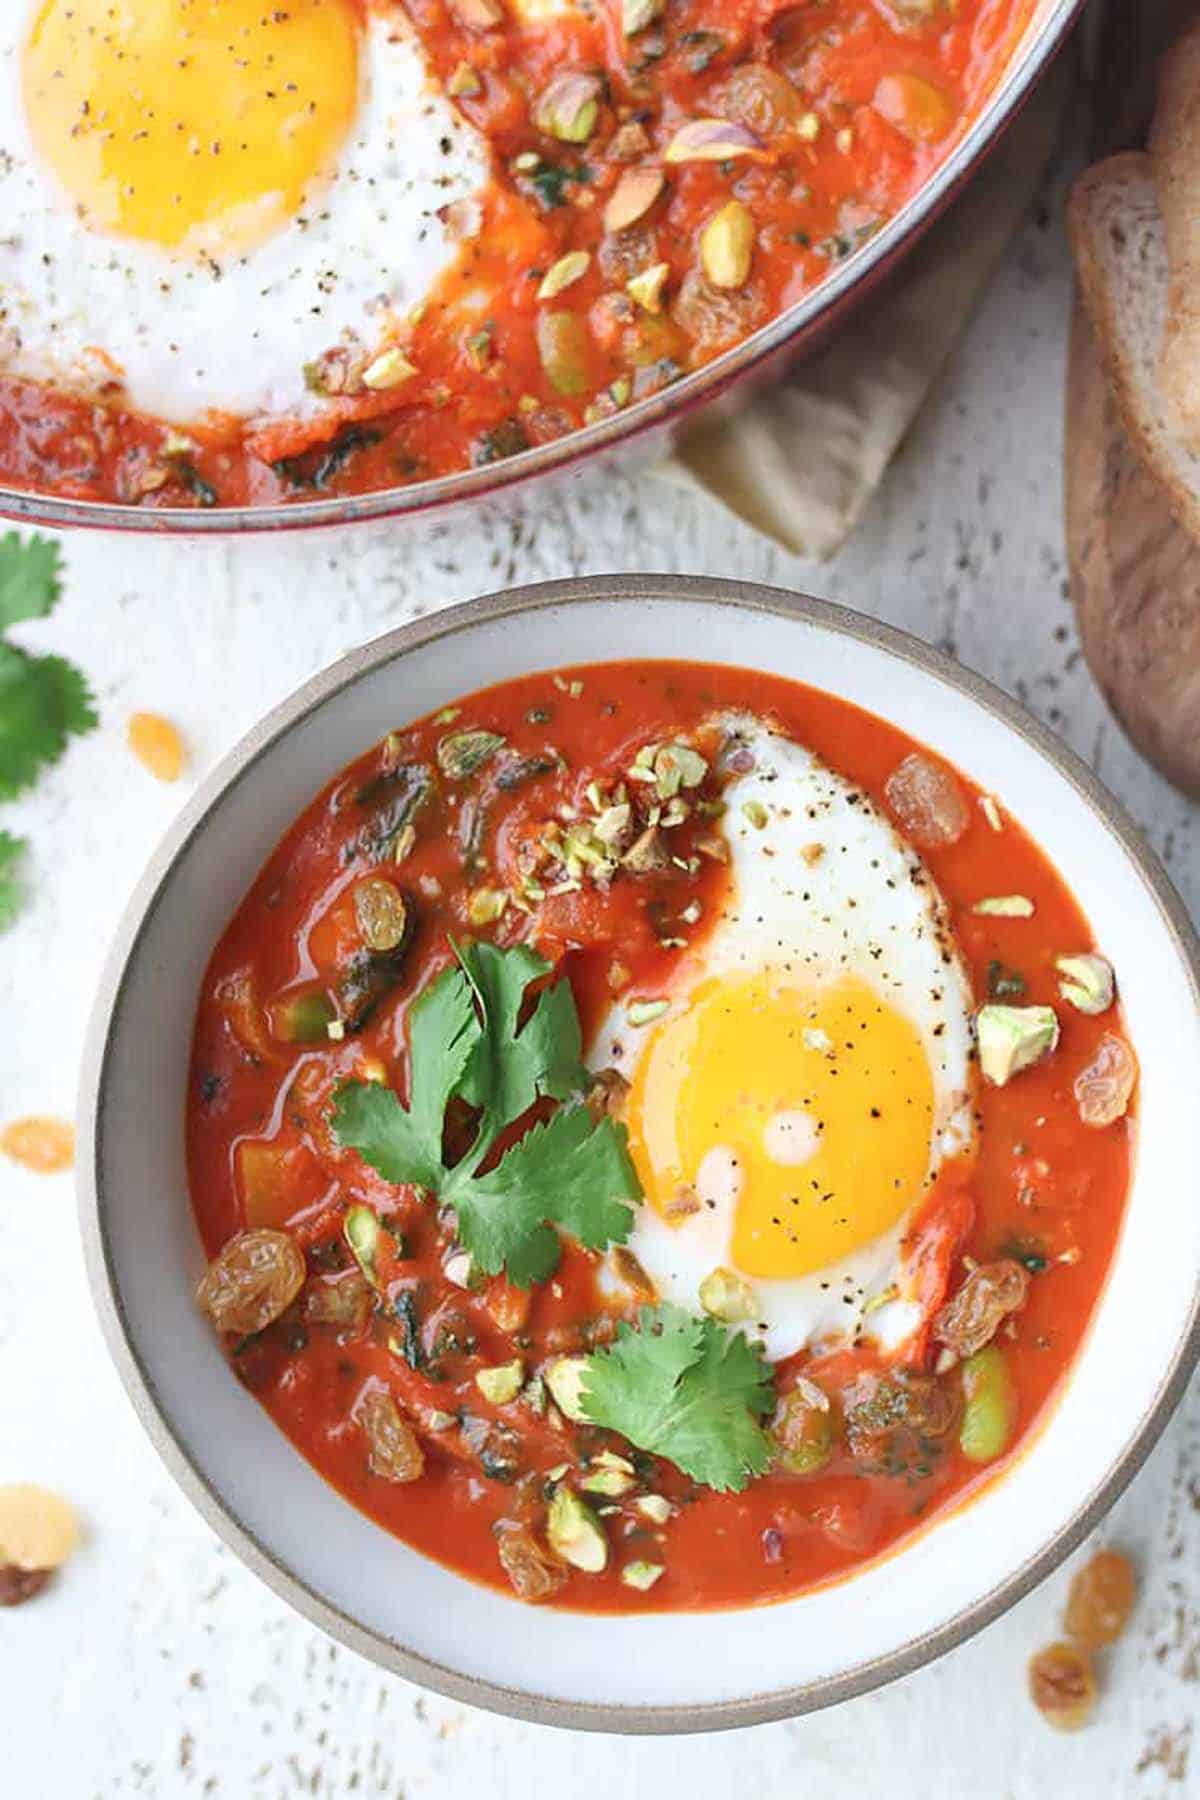
www.abbeyskitchen.com/about-abbey/
  • Previous Page
  • Go to page 1
  • Interim pages omitted …
  • Go to page 21
  • Go to page 22
  • Go to page 23
  • Go to page 24
  • Go to page 25
  • Interim pages omitted …
  • Go to page 89
  • Next Page

Get started with

Eight Free Recipe Books

From the co-founder of Neue Theory and creator of the Hunger Crushing Combo

Sign me up!
Abbey smiling at table
Abbey Sharp

“Foods may never be nutritionally equal. But we can make them morally equal by recognizing that our worth is never determined by what's on our plate.”

— Abbey Sharp, RD About Abbey ◥

Books

  • HCC™
  • Mindful Glow
  • Free E-Books

Blog

  • Nutrition
  • Recipes
  • Motherhood
  • Life

Explore

  • Neue Theory™
  • Bite Back
  • YouTube

Abbey

  • About
  • Coaching
YouTube TikTok Instagram Facebook X Pinterest
Abbey Sharp - The No BS Dietitian From Abbeys Kitchen

© Abbey's Kitchen 2026  All Rights Reserved •  ACCESSIBILITY STATEMENT •  Privacy Policy

This site uses cookies. By continuing to browse the site, you are agreeing to the use of cookies Accept Privacy Policy
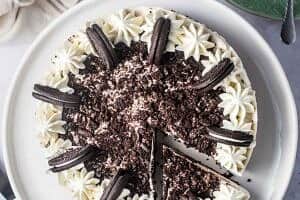
Privacy & Cookies Policy

Privacy Overview

This website uses cookies to improve your experience while you navigate through the website. Out of these, the cookies that are categorized as necessary are stored on your browser as they are essential for the working of basic functionalities of the website. We also use third-party cookies that help us analyze and understand how you use this website. These cookies will be stored in your browser only with your consent. You also have the option to opt-out of these cookies. But opting out of some of these cookies may affect your browsing experience.
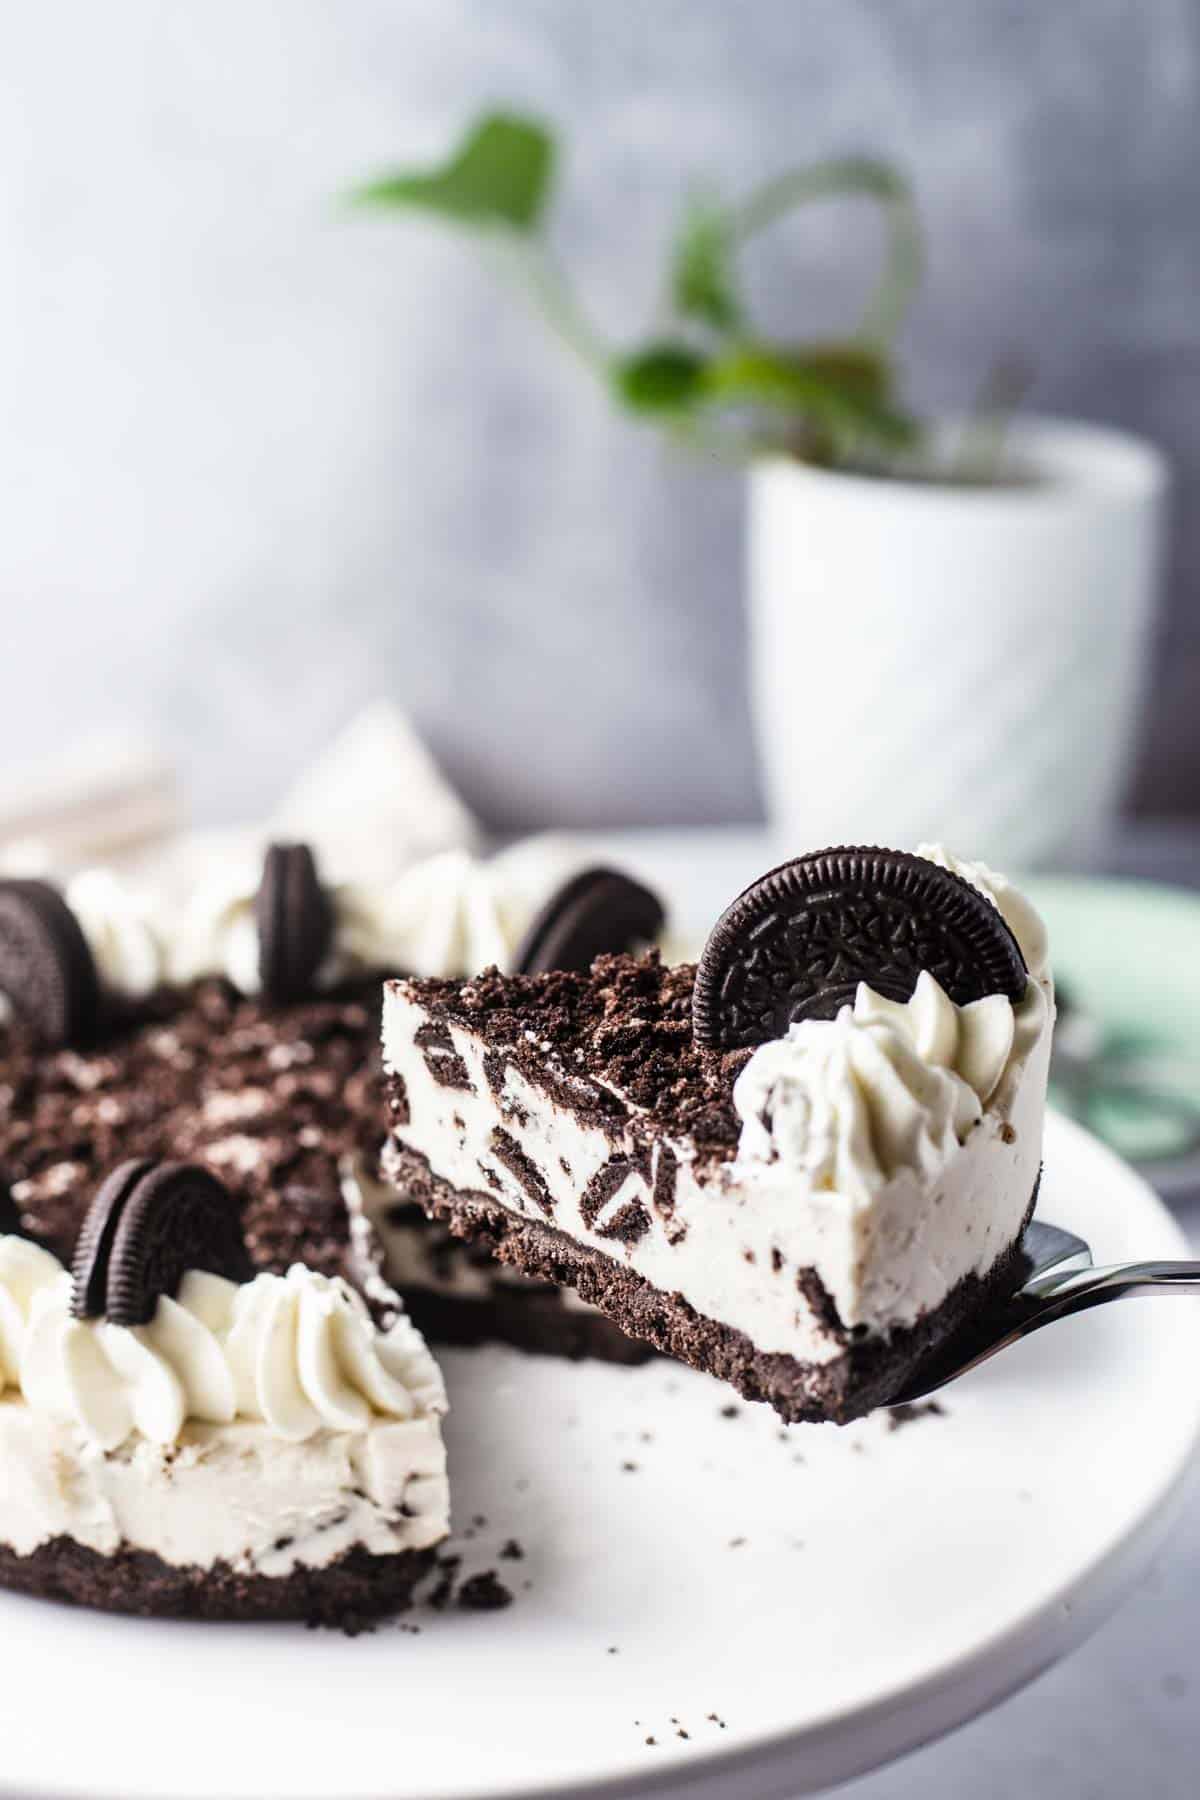
Necessary
Always Enabled
Necessary cookies are absolutely essential for the website to function properly. This category only includes cookies that ensures basic functionalities and security features of the website. These cookies do not store any personal information.
Non-necessary
Any cookies that may not be particularly necessary for the website to function and is used specifically to collect user personal data via analytics, ads, other embedded contents are termed as non-necessary cookies. It is mandatory to procure user consent prior to running these cookies on your website.
SAVE & ACCEPT

Rate This Recipe

Your vote:


A rating is required
A name is required
An email is required